Stampin’ Up Ride With Me Birthday Card

Good Monday morning my fellow stampers and Happy Labor Day to you all.  Hope you are getting to enjoy a day off.

For today’s card I played with a new set to me called Ride With Me.  I had to make a card for a little boy turning 2 who loves trucks.  Here’s my card.

My card joined in with Cardz 4 Guys Challenge #227  Their theme is ‘CELEBRATE’

I started by cutting out the rainbow frame using my Stitched Rectangle Dies.  I cut  the Pumpkin Pie frame using the 3rd & 4th die (starting from the largest and counting down).  I cut the Pineapple Punch frame using the 4th & 5th die.  I cut the Granny Apple Green frame using the 5th & 6th die and I cut the Blueberry Bushel rectangle using the 6th die.  I arranged them all together and adhered them to a Real Red card base using Multipurpose Liquid Glue.  On a small piece of Whisper White cardstock I stamped the truck image from the Stampin’ Up Ride With Me Photopolymer Stamp Set in Tuxedo Black Memento Ink.  I colored the truck in using my Light Basic Black, Gray Granite, Pineapple Punch and Real Red Stampin’ Blends Markers.  I fussy cut the truck out using my Paper Snips.  I stamped the balloon image from the Ride With Me stamp set on a small piece of Whisper White cardstock using my Tuxedo Black Memento Ink and colored them in using my Balmy Blue, Granny Apple Green, Pineapple Punch and Pumpkin Pie Stampin’ Blends Markers.  I cut them out using the Truck Ride Dies.

I adhered the truck and the balloons to the bottom of the card front using Stampin’ Dimensionals.  Using my Hand-Lettered Prose Dies, I cut out the letters in Whisper White cardstock.  I adhered them above the truck using Multipurpose Liquid Glue.
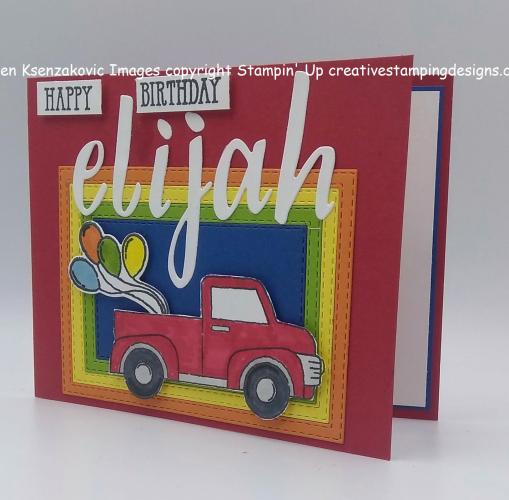
On a thin strip of Whisper White cardstock I stamped the Happy Birthday from the Stampin’ Up Well Said Cling Stamp Set in Tuxedo Black Memento Ink.  I adhered to the top of the card front using Stampin’ Dimensionals.

On the inside I stamped the truck image from the Ride With Me stamp set in Real Red Ink in the center of a Whisper White panel stamping off once.  I stamped the sentiment from the Stampin’ Up Itty Bitty Birthdays Photopolymer Stamp Set in Tuxedo Black Memento Ink over the truck image.  I adhered the Whisper White panel to a Blueberry Bushel mat using Snail and then to the inside of the Real Red card base using Multipurpose Liquid Glue.

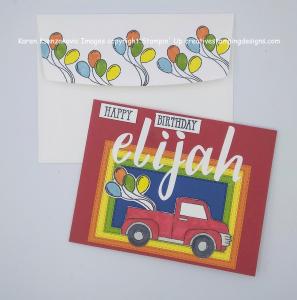
To finish my card I decorated a Medium Whisper White Envelope.  I stamped the truck image from the Ride With Me stamp set in Tuxedo Black Memento Ink and colored it in the same as I did for the card front.  I stamped the balloon image from the Ride With Me stamp set in Tuxedo Black Memento Ink across the envelope flap and colored them in the same as I did for the card front.

Thank you for taking the time today to stop by my blog today.  I hope you liked my card and will give it a try.  Enjoy your day off.  Happy Stamping!!

****************************************************************************************************

If you need any stamping supplies, I’d be very happy to be your Demonstrator. Just click HERE to go directly to my online store or drop me an email if you have any questions. 

MY CURRENT HOST CODE IS: ADFAXYQE

For any orders $50 or more I will send you my monthly class tutorials.  Click HERE or go to my Customer Rewards to see what this months tutorials are.

Click HERE to shop the clearance rack.

Happy Stamping, Karen!

***************************************************************************************************

ONLY 1 DAYS LEFT TO GET IN ON MY SHARE

I’m doing a 2019 Holiday Catalog Designer Series Paper share.  Click here for more information and if you’d like to get in on it.

****************************************************************************************************

BONE APPETIT PAPER PUMPKIN

SUBSCRIBE TO PAPER PUMPKIN BY SEPTEMBER 10TH TO GET IN ON THE FUN
Halloween is nearly here, which means that Paper Pumpkin has been busy, busy, busy. We thought you might like “a hand” with their frightful festivities, so we designed September’s kit, Bone Appétit, with them in mind.

This kit includes 20 food-safe treat boxes, a unique and exclusive Halloween stamp set, and a spooky, special-edition box. September’s kit also gives new meaning to the word “handmade.” (Cue the scary laughter!)

This kit includes 20 food-safe treat boxes, a unique and exclusive Halloween stamp set, and a spooky, special-edition box. September’s kit also gives new meaning to the word “handmade.” (Cue the scary laughter!)

September Kit Information:
The September kit makes 20 Halloween-themed, food-safe treat boxes
Coordinating colors: Basic Black, Gorgeous Grape, Pumpkin Pie, and Whisper White
Subscribe for the September kit at paperpumpkin.com from August 11–September 10.
Supplies may be limited toward the end of the subscription period.

If you’re interested in subscribing to Paper Pumpkin, you can either sign up for a subscription where you are billed monthly for your kit or you can purchase a prepaid subscription in my online store. To see more information and to sign up for the monthly subscription, click HERE To see the options for prepaid subscriptions in my online store click HERE

****************************************************************************************************

BUY 3 GET 1 FREE DESIGNER SERIES PAPER IS BACK BY POPULAR DEMAND

SEPTEMBER 4, 2019 THROUGH SEPTEMBER 30, 2019

By popular demand, Stampin’ Up! is bringing back the Designer Series Paper Sale! During September (4TH–30TH), you can buy three packages of select Designer Series Paper, and get one FREE!

Here are the details:

  • Sale Dates:  September 4–30
    • Order Deadline:  September 30, 2019; 11:50 pm (MT)
  • Only Designer Series Papers listed in the table below qualify for this promotion. You may mix and match papers from any of the listed papers.
  • There is no limit to how many times participants can buy three packages of Designer Series Paper, and get one free during this sale.
  • In the online ordering system, when three qualifying Designer Series Paper packs are entered, a prompt to add a free Designer Series Paper will appear.
  • In the online store, if a you order four packages of the same qualifying Designer Series Paper, you will need to enter three together and then order the fourth free item separately.
  • Designer Series Paper ordered as part of a Starter Kit does not qualify for this sale.
  • Designer Series Paper ordered with Stampin’ Rewards does not qualify for this sale.

Here are the Designer Series Paper Packs included in the sale:

ITEM PAGE DESCRIPTION PRICE
149100 166 PERENNIAL ESSENCE DESIGNER SERIES PAPER $11.50
149443 166 SEE A SILHOUETTE DESIGNER SERIES PAPER $11.50
149481 167 COME SAIL AWAY DESIGNER SERIES PAPER $11.50
149484 165 MAGNOLIA LANE DESIGNER SERIES PAPER $11.50
149488 165 GARDEN LANE DESIGNER SERIES PAPER $11.50
149489 165 FOLLOW YOUR ART DESIGNER SERIES PAPER $11.50
149497 165 WOVEN THREADS DESIGNER SERIES PAPER $11.50
149589 166 DINOROAR DESIGNER SERIES PAPER $11.50
149592 166 BIRD BALLAD DESIGNER SERIES PAPER $11.50
149500 167 PRESSED PETALS SPECIALTY DESIGNER SERIES PAPER $14.50

GET YOUR LIST READY TO ORDER ON SEPTEMBER 4TH


****************************************************************************************************

I have gathered up a lot of retired Stamp Sets, Embossing Folders & Dies  and put a list together for anyone interested.  I have single Stamp Sets along with Stamp Sets bundled with Dies or Punches.  Take a look and see if there is anything that you missed out on getting and would still like.  Click Here to go to my list.

****************************************************************************************************

Card stock cuts for this project:

  • Blueberry Bushel Cardstock 2 1/4″ X 3 1/2″ (card front), 4″ X 5 1/4″ (inner liner mat)
  • Granny Apple Green Cardstock 2 3/4″ X 4″ (card front)
  • Pineapple Punch Cardstock 3″ X 4 1/4″ (card front)
  • Pumpkin Pie Cardstock 3 1/2″ X 4 3/4″ (card front)
  • Real Red Cardstock 4 1/4″ X 11″ (card base)
  • Whisepr White Cardstock 3 7/8″ X 5 1/8″ (inner liner)

****************************************************************************************************

Product List

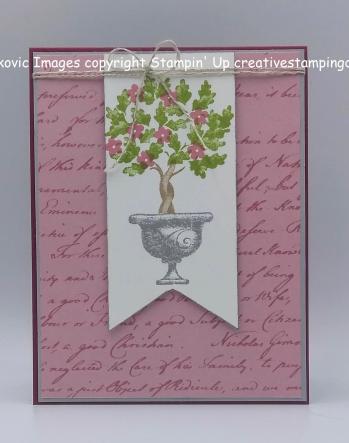
Stampin’ Up Beauty and Joy Birthday Card

Good Tuesday morning my fellow stampers.  How has your week started off?  We have had beautiful weather here.  I hate going into work when it’s this nice.

Today’s card is another one that we made at my last Stamp Camp.  I just wasn’t ready to make any fall cards, but I wanted to share one of my new stamp sets with the ladies.  Here’s my card.

I started by adhering a panel of the Pressed Petals Specialty Designer Series Paper on a Smoky Slate mat using Snail.

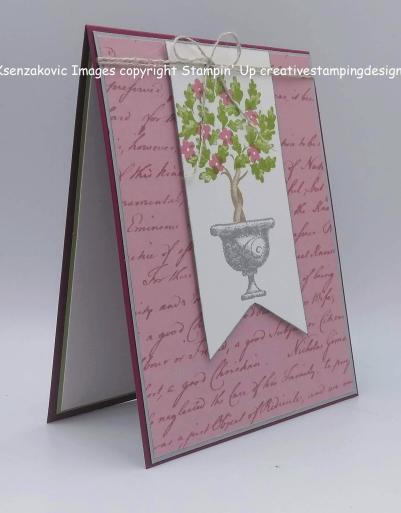
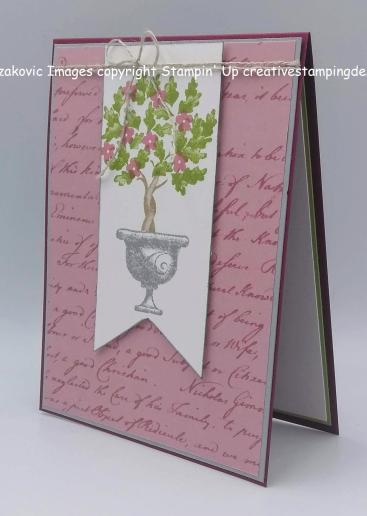
On a small panel of Whisper White cardstock I stamped the flower pot image from the  Stampin’ Up Beauty & Joy Photopolymer Stamp Set (available Sept 4th)in Smoky Slate Ink.  I stamped the tree trunk image from the Beauty & Joy stamp set in Crumb Cake Ink above the flower pot.  I stamped the leaves from the Beauty & Joy stamp set in Pear Pizzazz Ink on the tree trunk.  I randomly stamped the tiny flower image from the Beauty & Joy stamp set in Rococo Rose Ink  on the leaves.

Using my Banner Triple Punch, I punched the bottom of the cardstock to make a banner.  I adhered the banner to the card front using Stampin’ Dimensionals.  I wrapped a piece of Linen Thread around the top of the card front twice and tied a bow.  I adhered the card front to a Merry Merlot card base using Multipurpose Liquid Glue.

On the inside I stamped the sentiment from the Beauty & Joy stamp set in Pear Pizzazz Ink in the center of a Whisper White panel.  I stamped the tiny flower image from the Beauty & Joy stamp set in Rococo Rose Ink around the sentiment.  I adhered the Whisper White panel to a Pear Pizzazz mat using Snail and then to the inside of the Merry Merlot card base using Multipurpose Liquid Glue.

To finish my card I decorated a Medium Whisper White Envelope.  I stamped the flower pot with tree images from the Beauty & Joy stamp set on the envelope front the same way that I did on the card front.  I adhered a panel of the Pressed Petals Specialty DSP to the envelope flap.

Thank you for stopping by my blog today.  I hope you liked my card and will give it a try.  The stamp set I used will be available for purchase September 4th.                        Happy Stamping!!

****************************************************************************************************

If you need any stamping supplies, I’d be very happy to be your Demonstrator. Just click HERE to go directly to my online store or drop me an email if you have any questions. 

MY CURRENT HOST CODE IS: 66KPP6BN

For any orders $50 or more I will send you my monthly class tutorials.  Click HERE or go to my Customer Rewards to see what this months tutorials are.

Click HERE to shop the clearance rack.

Happy Stamping, Karen!

***************************************************************************************************

I’m doing a 2019 Holiday Catalog Designer Series Paper share.  Click here for more information and if you’d like to get in on it.

****************************************************************************************************

STAMPIN’ UP BONUS DAYS – COUPON REDEMTION GOING ON NOW!!

IF YOU HAVE QUESTIONS ON HOW TO REDEEM THEM, PLEASE CONTACT ME.

****************************************************************************************************

EXTRA, EXTRA!!  JOINING PROMOTION JULY 1, 2019 – AUGUST 31, 2019

From July 1 until August 31, new demonstrators will receive an additional $30 to put toward bonus products in their Starter Kit (for a total of $155 in merchandise for $99)!!  THEN, they’ll receive a $10 coupon code the following month.  Are you interested?  Keep reading to learn more!

Dates:  July 1 – August 31 at 11:50 PM MT

Details:

  • The bonus at initial sign up allows demonstrators to pick $30 more than usual.  You will pay $99 to sign up and choose $155 worth of Stampin’ Up! products in your Starter Kit.
  • Coupon codes will be sent between the fifth and seventh business day of the following month the new demonstrator signs up.
  • The email address listed in a new demonstrator’s profile will be used to send the $10 coupon code.
  • Coupon codes may be redeemed only once.
  • Coupon codes expire October 31, 2019; after this date, they will no longer be valid.
  • New demonstrators who submit their Independent Demonstrator Agreement (IDA) before July 1 or after August 31 will not be eligible for this promotion.

If you’ve ever considered purchasing that Starter Kit, now is a great time!  We’d love to have you join and get that discount for yourself or start your own business!!

If you are interested in joining my team click HERE for details or email me.  I’d love to have you on my team.

***************************************************************************************************

BONE APPETIT PAPER PUMPKIN

SUBSCRIBE TO PAPER PUMPKIN BY SEPTEMBER 10TH TO GET IN ON THE FUN

Halloween is nearly here, which means that Paper Pumpkin has been busy, busy, busy. We thought you might like “a hand” with their frightful festivities, so we designed September’s kit, Bone Appétit, with them in mind.

This kit includes 20 food-safe treat boxes, a unique and exclusive Halloween stamp set, and a spooky, special-edition box. September’s kit also gives new meaning to the word “handmade.” (Cue the scary laughter!)

This kit includes 20 food-safe treat boxes, a unique and exclusive Halloween stamp set, and a spooky, special-edition box. September’s kit also gives new meaning to the word “handmade.” (Cue the scary laughter!)

September Kit Information:
The September kit makes 20 Halloween-themed, food-safe treat boxes
Coordinating colors: Basic Black, Gorgeous Grape, Pumpkin Pie, and Whisper White
Subscribe for the September kit at paperpumpkin.com from August 11–September 10.
Supplies may be limited toward the end of the subscription period.

If you’re interested in subscribing to Paper Pumpkin, you can either sign up for a subscription where you are billed monthly for your kit or you can purchase a prepaid subscription in my online store. To see more information and to sign up for the monthly subscription, click HERE To see the options for prepaid subscriptions in my online store click HERE

****************************************************************************************************

I have gathered up a lot of retired Stamp Sets, Embossing Folders & Dies  and put a list together for anyone interested.  I have single Stamp Sets along with Stamp Sets bundled with Dies or Punches.  Take a look and see if there is anything that you missed out on getting and would still like.  Click Here to go to my list.

****************************************************************************************************

Card stock cuts for this project:

  • Merry Merlot Cardstock 4 1/4″ X 11″ (card base scored and folded at 5 1/2″)
  • Pear Pizzazz Cardstock 4″ X 5 1/4″(inner liner mat)
  • Smoky Slate Cardstock 4 1/8″ X 5 3/8″ (card front mat)
  • Whisper White Cardstock 3 7/8″ X 5 1/8″ (inner liner), 2″ X 4 1/4″(card front banner)
  • Pressed Petals Specialty Designer Series Paper 4″ X 5 1/4″ (card front), piece for envelope flap

****************************************************************************************************

Product List

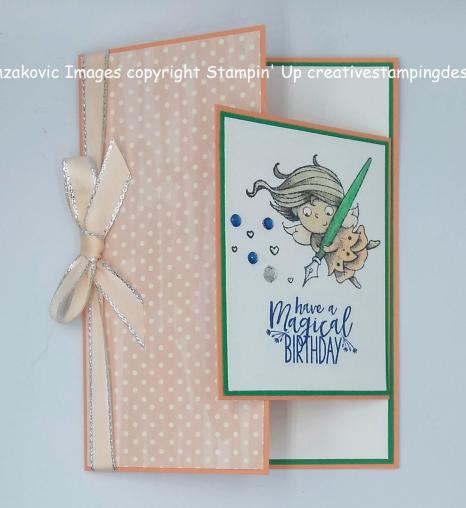
Stampin’ Up New Wonders for Fun Fold Friday

Good Friday morning my fellow stampers and welcome to Fun Fold Friday.  Hope you are all ready for the weekend, it’s suppose to be beautiful weather this weekend here.

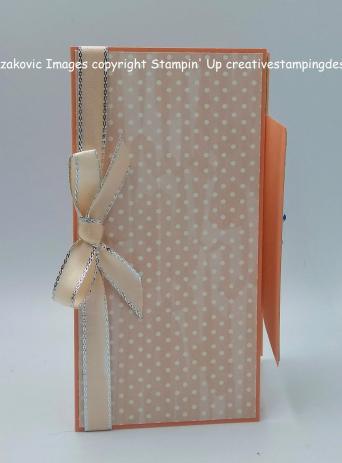
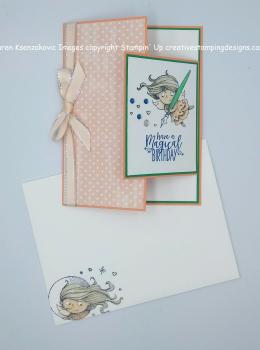
I needed a card for a sweet little girls birthday and I though I would try a new fun fold today that I’ve never made before.  I’m really having fun playing around with new folds for my cards.  I hope you are trying them along with me. I thought I would use one of my favorite Host sets for my card which I think is perfect for a little girl.  Here’s my card for today.

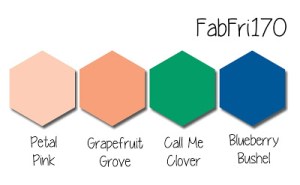
The colors for my card were inspired by Fab Friday Challenge #170.  Here are their colors.

I started by adhering a panel of the Bird Ballad Designer Series Paper to the folded side of my Grapefruit Grove card front using Multipurpose Liquid Glue.  I colored a piece of the Silver 3/8″ Metallic Edged Ribbon using my Light Petal Pink Stampin’ Blends Marker.  I wrapped the ribbon around the left side of the card front and tied a bow.

On a small panel of Whisper White cardstock I stamped the fairy image from the Stampin’ Up Host Exclusive New Wonders Cling Stamp Set in Tuxedo Black Memento Ink.  I stamped the sentiment from the Stampin’ Up Magical Mermaid Cling Stamp Set in Blueberry Bushel Ink under the fairy image.  I colored the fairy image in using my Call Me Clover, Crumb Cake, Ivory and Petal Pink Stampin’ Blends Markers.  I adhered the artwork to a Call Me Clover mat using Snail.  I then adhered the matted artwork to the small Grapefruit Grove card front panel using Multipurpose Liquid Glue.  I adhered a few of the Blueberry Bushel Noble Peacock Rhinestones to the artwork along with a Clear Rhinestone Basic Jewel.

On the inside I stamped the sentiments from the Stampin’ Up Itty Bitty Birthdays Cling Stamp Set in Blueberry Bushel Ink to the center of a Whisper White panel.  I stamped another one of the fairy images from the New Wonders stamp set in Tuxedo Black Memento Ink above the sentiment on the Whisper White panel.  I colored the fairy image in using my Crumb Cake, Ivory and Petal Pink Stampin’ Blends Markers.  Now to assemble.  I adhered the 3/4″ folded edge to the back of the Whisper White panel so that the artwork folded over the inside of my card, using Multipurpose Liquid Glue.  I adhered the Whisper White panel to a Call Me Clover mat using Snail and then to the inside of the Grapefruit Grove card base using Multipurpose Liquid Glue.

To finish my card off, I decorated a Medium Whisper White Envelope.  I stamped a fairy image from the New Wonders stamp set in Tuxedo Black Memento Ink on the envelope front and colored it in the same as I did for the card.  I adhered a panel of the Bird Ballad DSP to the envelope flap.

Thank you for stopping by my blog today.  I hope you liked my card and will give it a try.  Happy Stamping!!

****************************************************************************************************

If you need any stamping supplies, I’d be very happy to be your Demonstrator. Just click HERE to go directly to my online store or drop me an email if you have any questions. 

MY CURRENT HOST CODE IS: 66KPP6BN

For any orders $50 or more I will send you my monthly class tutorials.  Click HERE or go to my Customer Rewards to see what this months tutorials are.

Click HERE to shop the clearance rack.

Happy Stamping, Karen!

***************************************************************************************************

I’m doing a 2019 Holiday Catalog Designer Series Paper share.  Click here for more information and if you’d like to get in on it.

****************************************************************************************************

STAMPIN’ UP BONUS DAYS – COUPON REDEMTION GOING ON NOW!!

IF YOU HAVE QUESTIONS ON HOW TO REDEEM THEM, PLEASE CONTACT ME.

****************************************************************************************************

EXTRA, EXTRA!!  JOINING PROMOTION JULY 1, 2019 – AUGUST 31, 2019

From July 1 until August 31, new demonstrators will receive an additional $30 to put toward bonus products in their Starter Kit (for a total of $155 in merchandise for $99)!!  THEN, they’ll receive a $10 coupon code the following month.  Are you interested?  Keep reading to learn more!

Dates:  July 1 – August 31 at 11:50 PM MT

Details:

  • The bonus at initial sign up allows demonstrators to pick $30 more than usual.  You will pay $99 to sign up and choose $155 worth of Stampin’ Up! products in your Starter Kit.
  • Coupon codes will be sent between the fifth and seventh business day of the following month the new demonstrator signs up.
  • The email address listed in a new demonstrator’s profile will be used to send the $10 coupon code.
  • Coupon codes may be redeemed only once.
  • Coupon codes expire October 31, 2019; after this date, they will no longer be valid.
  • New demonstrators who submit their Independent Demonstrator Agreement (IDA) before July 1 or after August 31 will not be eligible for this promotion.

If you’ve ever considered purchasing that Starter Kit, now is a great time!  We’d love to have you join and get that discount for yourself or start your own business!!

If you are interested in joining my team click HERE for details or email me.  I’d love to have you on my team.

***************************************************************************************************

BONE APPETIT PAPER PUMPKIN

SUBSCRIBE TO PAPER PUMPKIN BY SEPTEMBER 10TH TO GET IN ON THE FUN

Halloween is nearly here, which means that Paper Pumpkin has been busy, busy, busy. We thought you might like “a hand” with their frightful festivities, so we designed September’s kit, Bone Appétit, with them in mind.

This kit includes 20 food-safe treat boxes, a unique and exclusive Halloween stamp set, and a spooky, special-edition box. September’s kit also gives new meaning to the word “handmade.” (Cue the scary laughter!)

This kit includes 20 food-safe treat boxes, a unique and exclusive Halloween stamp set, and a spooky, special-edition box. September’s kit also gives new meaning to the word “handmade.” (Cue the scary laughter!)

September Kit Information:
The September kit makes 20 Halloween-themed, food-safe treat boxes
Coordinating colors: Basic Black, Gorgeous Grape, Pumpkin Pie, and Whisper White
Subscribe for the September kit at paperpumpkin.com from August 11–September 10.
Supplies may be limited toward the end of the subscription period.

If you’re interested in subscribing to Paper Pumpkin, you can either sign up for a subscription where you are billed monthly for your kit or you can purchase a prepaid subscription in my online store. To see more information and to sign up for the monthly subscription, click HERE To see the options for prepaid subscriptions in my online store click HERE

****************************************************************************************************

I have gathered up a lot of retired Stamp Sets, Embossing Folders & Dies  and put a list together for anyone interested.  I have single Stamp Sets along with Stamp Sets bundled with Dies or Punches.  Take a look and see if there is anything that you missed out on getting and would still like.  Click Here to go to my list.

****************************************************************************************************

Card stock cuts for this project:

  • Call Me Clover Cardstock 4 1/8″ X 5 3/8″ (Inner liner mat), 3 3/8″ X 2 5/8″ (artwork mat)
  • Grapefruit Grove Cardstock 5 1/2″ X 7″ (card base scored and folded at 4 1/4″), 3 1/2″ X 3 1/2″ (small card front scored and folded at 3/4″)
  • Whisper White Cardstock 4″ X 5 1/4″ (inner liner), 3 1/4″ X 2 1/2″(artwork)
  • Bird Ballad Designer Series Paper 2 5/8″ X 5 3/8″ (small panel card front)

****************************************************************************************************

Product List

Stampin’ Up Seasonal Wreaths Sneak Peek Birthday Card

Good Thursday morning my fellow stampers.  The weekend is just about here.  Is anyone starting to make plans?  I’ll be working all weekend, but today I’ll be having fun walking around the Philadelphia Zoo.  Hopefully it won’t be too hot for the animals to be out.

For today’s card I used a new set in the up coming 2019 Holiday Catalog.  Take a look.

My colors were inspired by The Color Throwdown Challenge #557.  Here are their colors.

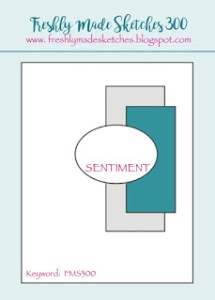
My sketch is from the Freshly Made Sketches Challenge #400.  Here is their sketch.

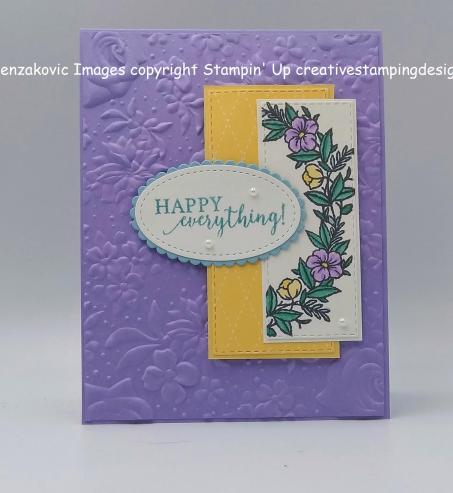
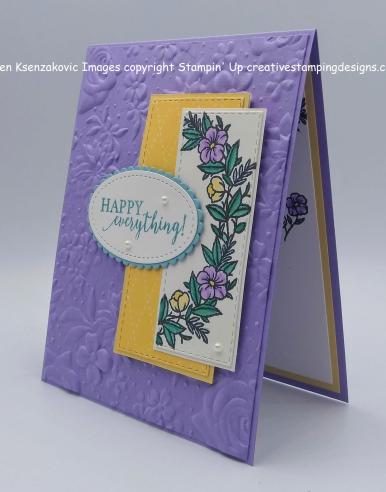
I started by embossing a Highland Heather card front using the Country Floral 3D Embossing Folder.  I adhered the embossed panel to a Highland Heather card front using Multipurpose Liquid Glue.

On a small panel of Whisper White cardstock I stamped the floral image from the Stampin’ Up Seasonal Wreaths Photopolymer Stamp Set twice in Tuxedo Black Memento Ink.  I colored the image in using my Balmy Blue, Bermuda Bay, Highland Heather and So Saffron Stampin’ Blends Markers.  I cut the image out using the Stitched Rectangle Dies and adhered it to a Whisper White mat using Snail.  Using the next size up Stitched Rectangle Die I cut a piece of So Saffron Subtle 6″ X 6″ Designer Series Paper and adhered it onto a So Saffron mat using Snail.  I adhered the artwork to the top of the matted DSP hanging off the right side using Snail and then adhered it to my card front using Stampin’ Dimensionals.

On a small piece of Whisper White cardstock I stamped the sentiment from the Seasonal Wreaths stamp set in Balmy Blue Ink.  I cut the sentiment out using the oval from my Stitched Shapes Dies.  I cut the scalloped Balmy Blue mat out using my Layering Ovals Dies and adhered the sentiment to the mat using Snail.  I adhered the matted sentiment to the card front using Stampin’ Dimensionals and a Glue Dot.  I added a few Pearl Basic Jewels to the card front.

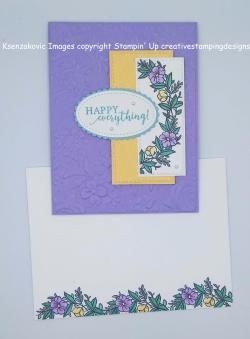
On the inside I stamped the sentiment from the Seasonal Wreaths stamp set in Balmy Blue Ink in the center of a Whisper White panel.  I stamped the larger floral image from the Seasonal Wreaths stamp set in Tuxedo Black Memento Ink in the 2 corners.  I stamped the smaller flower from the Seasonal Wreaths stamp set in Tuxedo Black Memento Ink on either side of the sentiment.  I colored all the flowers in using my Balmy Blue, Bermuda Bay, Highland Heather and So Saffron Stampin’ Blends Markers.  I adhered the Whisper White panel to a So Saffron mat using Snail and then to the inside of my Highland Heather card base using Multipurpose Liquid Glue.

To finish my card I decorated a Medium Whisper White Envelope.  I stamped the floral image from the Seasonal Wreaths stamp set in Tuxedo Black Memento Ink on the envelope front and colored it in the same as I did for my card.  I adhered a panel of the So Saffron Subtle 6″ X 6″ DSP to the envelope flap.

Thank you for visiting my blog today.  I hope you liked my card.  This stamp set will be available on September 4th for purchase.

Happy Stamping!!

****************************************************************************************************

If you need any stamping supplies, I’d be very happy to be your Demonstrator. Just click HERE to go directly to my online store or drop me an email if you have any questions. 

MY CURRENT HOST CODE IS: 66KPP6BN

For any orders $50 or more I will send you my monthly class tutorials.  Click HERE or go to my Customer Rewards to see what this months tutorials are.

Click HERE to shop the clearance rack.

Happy Stamping, Karen!

***************************************************************************************************

I’m doing a 2019 Holiday Catalog Designer Series Paper share.  Click here for more information and if you’d like to get in on it.

****************************************************************************************************

STAMPIN’ UP BONUS DAYS – COUPON REDEMTION GOING ON NOW!!

IF YOU HAVE QUESTIONS ON HOW TO REDEEM THEM, PLEASE CONTACT ME.

****************************************************************************************************

EXTRA, EXTRA!!  JOINING PROMOTION JULY 1, 2019 – AUGUST 31, 2019

From July 1 until August 31, new demonstrators will receive an additional $30 to put toward bonus products in their Starter Kit (for a total of $155 in merchandise for $99)!!  THEN, they’ll receive a $10 coupon code the following month.  Are you interested?  Keep reading to learn more!

Dates:  July 1 – August 31 at 11:50 PM MT

Details:

  • The bonus at initial sign up allows demonstrators to pick $30 more than usual.  You will pay $99 to sign up and choose $155 worth of Stampin’ Up! products in your Starter Kit.
  • Coupon codes will be sent between the fifth and seventh business day of the following month the new demonstrator signs up.
  • The email address listed in a new demonstrator’s profile will be used to send the $10 coupon code.
  • Coupon codes may be redeemed only once.
  • Coupon codes expire October 31, 2019; after this date, they will no longer be valid.
  • New demonstrators who submit their Independent Demonstrator Agreement (IDA) before July 1 or after August 31 will not be eligible for this promotion.

If you’ve ever considered purchasing that Starter Kit, now is a great time!  We’d love to have you join and get that discount for yourself or start your own business!!

If you are interested in joining my team click HERE for details or email me.  I’d love to have you on my team.

***************************************************************************************************

BONE APPETIT PAPER PUMPKIN

SUBSCRIBE TO PAPER PUMPKIN BY SEPTEMBER 10TH TO GET IN ON THE FUN

Halloween is nearly here, which means that Paper Pumpkin has been busy, busy, busy. We thought you might like “a hand” with their frightful festivities, so we designed September’s kit, Bone Appétit, with them in mind.

This kit includes 20 food-safe treat boxes, a unique and exclusive Halloween stamp set, and a spooky, special-edition box. September’s kit also gives new meaning to the word “handmade.” (Cue the scary laughter!)

This kit includes 20 food-safe treat boxes, a unique and exclusive Halloween stamp set, and a spooky, special-edition box. September’s kit also gives new meaning to the word “handmade.” (Cue the scary laughter!)

September Kit Information:
The September kit makes 20 Halloween-themed, food-safe treat boxes
Coordinating colors: Basic Black, Gorgeous Grape, Pumpkin Pie, and Whisper White
Subscribe for the September kit at paperpumpkin.com from August 11–September 10.
Supplies may be limited toward the end of the subscription period.

If you’re interested in subscribing to Paper Pumpkin, you can either sign up for a subscription where you are billed monthly for your kit or you can purchase a prepaid subscription in my online store. To see more information and to sign up for the monthly subscription, click HERE To see the options for prepaid subscriptions in my online store click HERE

****************************************************************************************************

I have gathered up a lot of retired Stamp Sets, Embossing Folders & Dies  and put a list together for anyone interested.  I have single Stamp Sets along with Stamp Sets bundled with Dies or Punches.  Take a look and see if there is anything that you missed out on getting and would still like.  Click Here to go to my list.

****************************************************************************************************

Card stock cuts for this project:

  • Balmy Blue Cardstock 2″ X 3″ (scalloped oval sentiment mat)
  • Highland Heather Cardstock 4 1/4″ X 11″ (card base scored and folded at 5 1/2″), 4 1/8″ X 5 3/8″ (card front)
  • So Saffron Cardstock 3 13/16″ X 1 13/16″ (card front DSP mat), 4″ X 5 1/4″ (inner liner mat)
  • Whisper White Cardstock 3 3/8″ X 1 3/8″ (artwork mat), 2″ X 3″ (sentiment), 4″ X 2″ (artwork)
  • Subtle 6″ X 6″ Designer Series Paper 2″ X 4″ (card front stitched rectangle), piece for envelope flap

****************************************************************************************************

Product List

Stampin’ Up Mosaic Mood Bloom and Grow Birthday

Good Wednesday morning my fellow stampers.  We’re halfway through the week already.  Yesterday was a vey exciting day, we got to register for OnStatge in November.  I can’t wait to go and meet up with my team members and see what’s new..

For today’s card I didn’t do any stamping, except for the inside.  I really put my fussy cutting to the test with this one.  This was also one of the cards we made at my Stamp Camp last night.  I had the ladies doing a lot of fussy cutting too.  Here’s my card.

I joined in today with Seize The Birthday Challenge #172.  Their Theme is Butterflies.

I also played along with Cardz 4 Galz Challenge #103. Their Theme is ‘WINGS’.

I played along with The Flower Challenge #35.  Here is their theme. My favorite flower is a rose.

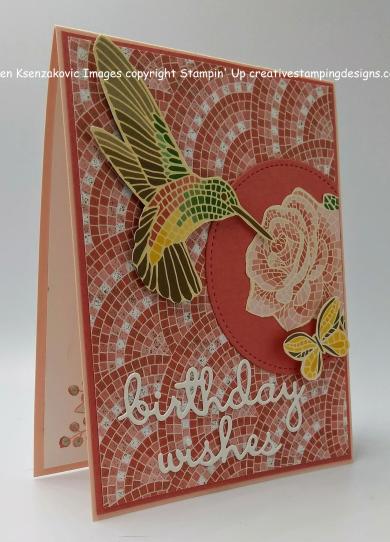
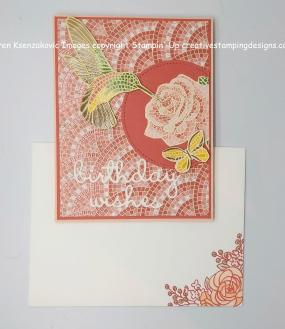
I started out by fussy cutting a butterfly, humming bird and rose from the Mosaic Mood Specialty Designer Series Paper using my Paper Snips.   I cut the larges circle from the Stitched Shapes Dies in Terracotta Tile cardstock.  I adhered the fussy cut rose to the circle using Multipurpose Liquid Glue.  I adhered the stitched circle to a the panel of Mosaic Mood Specialty DSP using Multipurpose Liquid Glue hanging off the right edge a bit.  I cut the circle even with the DSP.  I adhered the DSP to a Terracotta Tile mat using Multipurpose Liquid Glue.

I adhered the humming bird and butterfly to the card front using Stampin’ Dimensionals having them both touch the rose.

I cut the ‘birthday wishes’ sentiment out of Shimmery White cardstock using the Well Written Dies.  I adhered the sentiment to the card front using my Fine Tip Glue Pen.  I adhered the card front to a Petal Pink card base using Multipurpose Liquid Glue.

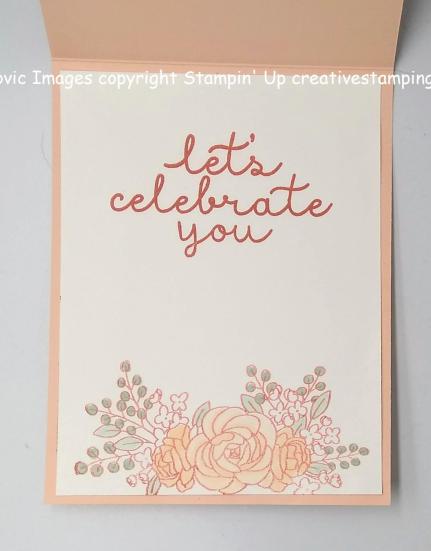
On the inside I stamped the sentiment from the Stampin’ Up Bloom & Grow Photopolymer Stamp Set in Terracotta Tile Ink in the center of a Whisper White panel.  I stamped the rose image from the Bloom & Grow stamp set in Terracotta Tile Ink on the bottom of the panel and colored only part of it in using my Mint Macaron and Petal Pink Stampin’ Blends Markers.  I adhered the Whisper White panel to the inside of the Petal Pink card base using Multipurpose Liquid Glue.

To finish my card I decorated a Medium Whisper White Envelope.  I stamped the rose image from the Bloom & Grow stamp set in Terracotta Tile Ink on the front corner of the envelope.  I adhered a piece of the Mosaic Mood Specialty DSP to the envelope flap.

Thank you for stopping by my blog today.  I hope you liked my card and will give it a try. Happy Stamping!!

****************************************************************************************************

If you need any stamping supplies, I’d be very happy to be your Demonstrator. Just click HERE to go directly to my online store or drop me an email if you have any questions. 

MY CURRENT HOST CODE IS: 66KPP6BN

For any orders $50 or more I will send you my monthly class tutorials.  Click HERE or go to my Customer Rewards to see what this months tutorials are.

Click HERE to shop the clearance rack.

Happy Stamping, Karen!

***************************************************************************************************

I’m doing a 2019 Holiday Catalog Designer Series Paper share.  Click here for more information and if you’d like to get in on it.

****************************************************************************************************

STAMPIN’ UP BONUS DAYS – COUPON REDEMTION GOING ON NOW!!

IF YOU HAVE QUESTIONS ON HOW TO REDEEM THEM, PLEASE CONTACT ME.

****************************************************************************************************

EXTRA, EXTRA!!  JOINING PROMOTION JULY 1, 2019 – AUGUST 31, 2019

From July 1 until August 31, new demonstrators will receive an additional $30 to put toward bonus products in their Starter Kit (for a total of $155 in merchandise for $99)!!  THEN, they’ll receive a $10 coupon code the following month.  Are you interested?  Keep reading to learn more!

Dates:  July 1 – August 31 at 11:50 PM MT

Details:

  • The bonus at initial sign up allows demonstrators to pick $30 more than usual.  You will pay $99 to sign up and choose $155 worth of Stampin’ Up! products in your Starter Kit.
  • Coupon codes will be sent between the fifth and seventh business day of the following month the new demonstrator signs up.
  • The email address listed in a new demonstrator’s profile will be used to send the $10 coupon code.
  • Coupon codes may be redeemed only once.
  • Coupon codes expire October 31, 2019; after this date, they will no longer be valid.
  • New demonstrators who submit their Independent Demonstrator Agreement (IDA) before July 1 or after August 31 will not be eligible for this promotion.

If you’ve ever considered purchasing that Starter Kit, now is a great time!  We’d love to have you join and get that discount for yourself or start your own business!!

If you are interested in joining my team click HERE for details or email me.  I’d love to have you on my team.

***************************************************************************************************

BONE APPETIT PAPER PUMPKIN

SUBSCRIBE TO PAPER PUMPKIN BY SEPTEMBER 10TH TO GET IN ON THE FUN

Halloween is nearly here, which means that Paper Pumpkin has been busy, busy, busy. We thought you might like “a hand” with their frightful festivities, so we designed September’s kit, Bone Appétit, with them in mind.

This kit includes 20 food-safe treat boxes, a unique and exclusive Halloween stamp set, and a spooky, special-edition box. September’s kit also gives new meaning to the word “handmade.” (Cue the scary laughter!)

This kit includes 20 food-safe treat boxes, a unique and exclusive Halloween stamp set, and a spooky, special-edition box. September’s kit also gives new meaning to the word “handmade.” (Cue the scary laughter!)

September Kit Information:
The September kit makes 20 Halloween-themed, food-safe treat boxes
Coordinating colors: Basic Black, Gorgeous Grape, Pumpkin Pie, and Whisper White
Subscribe for the September kit at paperpumpkin.com from August 11–September 10.
Supplies may be limited toward the end of the subscription period.

If you’re interested in subscribing to Paper Pumpkin, you can either sign up for a subscription where you are billed monthly for your kit or you can purchase a prepaid subscription in my online store. To see more information and to sign up for the monthly subscription, click HERE To see the options for prepaid subscriptions in my online store click HERE

****************************************************************************************************

I have gathered up a lot of retired Stamp Sets, Embossing Folders & Dies  and put a list together for anyone interested.  I have single Stamp Sets along with Stamp Sets bundled with Dies or Punches.  Take a look and see if there is anything that you missed out on getting and would still like.  Click Here to go to my list.

****************************************************************************************************

Card stock cuts for this project:

  • Petal Pink Cardstock 4 1/4″ X 11″ (card base scored and folded at 5 1/2″)
  • Terracotta Tile Cardstock 4 1/8″ X 5 3/8″ (card front mat)
  • Whisper White Cardstock 4″ X 5 1/4″ (inner liner)
  • Mosaid Mood Specialty Designer Series Paper 4″ X 5 1/4″ (card front), pieces to fussy cut and for envelope flap

****************************************************************************************************

Product List

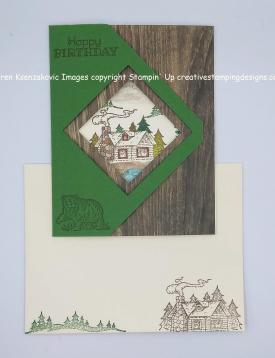
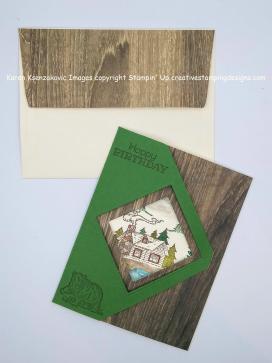
Stampin’ Up Rustic Retreat Waterfront Fun Fold Card

Good Friday morning my fellow stampers and welcome to Fun Fold Friday.  How was everyone’s week?  Are you ready for the weekend?   I hope so because it’s here.

I have another fun fold card for you today that I’ve never done before.  I’ve seen this fold, but never attempted it.  I would love to hear from you if you’d like me to continue with my Fun Fold Fridays. Please leave a comment or you can email me at creativestampingdesigns@gmail.com.

Have you ever had one of those stamp sets that you just always seem to have trouble with?  Mine is the Stampin’ Up Waterfront Photopolymer Stamp Set.  I don’t know why I have so much trouble making cards with it.  Well I decided that today was the day to conquer that.  This artwork of my card took me 6 tries before I got it the way I liked it, but I refused to give up.  I was determined to make the scene on my card the way I pictured it.  You can be sure this card is going to someone special that saves my cards.  Here’s my card.

I joined in with Watercooler Wednesday Challenge #234.  Here is their theme.

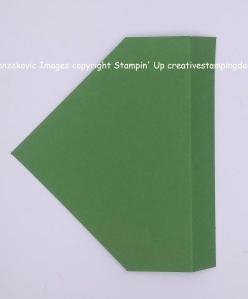
I started with a Garden Green panel and scored it at 3/4″ along the 5 1/2″ side.  When you fold the panel you should have a 4 1/4″ X 5 1/2″ panel.  With the scored edge to the left and the paper lined up on my Grid Paper, I made tiny marks at the 2 3/4″ marks on the 3 sides.

I cut from the sides 2 3/4″ marks to the edge across from the scored edge 2 3/4″ mark as shown below.

Using my Layering Squares Dies I placed the die so that there was equal space from both edges to the die on my Garden Green panel and ran it through my die cutting machine.  I stamped the sentiment from the Stampin’ Up Rustic Retreat Cling Stamp Set on the top of the Garden Green panel in Soft Suede Ink.  I stamped the bear image from the Rustic Retreat stamp set in Soft Suede Ink on the bottom of the Garden Green panel.

I adhered the cut Garden Green panel to a Thick Very Vanilla card base, on the back of the opening edge, using Tear & Tape Adhesive.

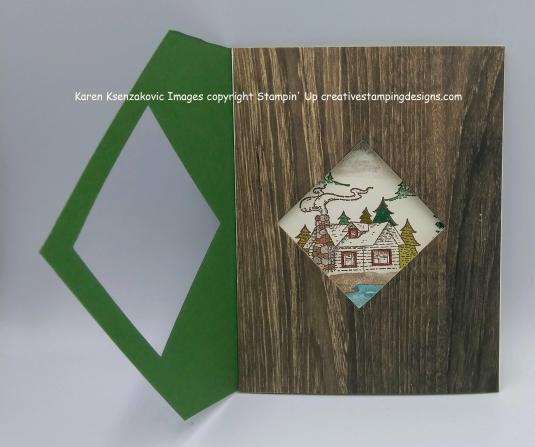
I adhered a panel of the woodgrain paper from the Pressed Petals Specialty Designer Series Paper on the Thick Very Vanilla card base using Multipurpose Liquid Glue.  I closed the Garden Green panel over the card front and placed the smaller square die from the Layering Squares Dies centered inside the die cut making sure it was equal all the way around and used a Post-It not to hold it in place.  Opening the card up, I ran it through my die cutting machine to cut out the smaller square.  I made a tiny slit in the card front so that the corner of the Garden Green panel could slip in to stay closed.

This is where I had fun doing all the artwork that took me multiple tries because of my OCD.  I stamped the cabin image from the Rustic Retreat stamp set in Soft Suede Ink in the center of a Very Vanilla panel.  I colored the cabin in using my Cajun Craze, Crumb Cake, Gray Granite, Old Olive and Shaded Spruce Stampin’ Blends Markers.  I stamped the mountain images from the Waterfront stamp set behind the cabin in Gray Granite and Smoky Slate Inks stamping off once.  I stamped the small trees from the Rustic Retreat stamp set in Garden Green Ink in front of the mountains.  I stamped the water image from the Waterfront stamp set in Balmy Blue Ink below the cabin.  I stamped the sand image from the Waterfront stamp set between the water and cabin in Crumb Cake Ink.  I stamped the taller trees from the Waterfront stamp set on either side of the cabin in Shaded Spruce Ink.  I stamped the sentiment from the Stampin’ Up Itty Bitty Birthday’s Cling Stamp Set in Soft Suede Ink below the artwork.   I adhered the Very Vanilla panel to a Garden Green mat using Snail and then to the inside of the Thick Very Vanilla card base using Multipurpose Liquid Glue.

To finish my card I decorated a Medium Very Vanilla Envelope.  I stamped the cabin image from the Rustic Retreat stamp set in Soft Suede Ink on the envelope front.  I stamped the tree image from the Rustic Retreat stamp set in Garden Green Ink on the envelope front also.  I adhered a panel of the Pressed Petals Specialty DSP to the envelope flap.

Thank you for stopping by my blog today.  I hope you liked my Fun Fold card. I tried my best to explain what I did, please feel free to contact me if you have any questions. Happy Stamping!!

****************************************************************************************************

If you need any stamping supplies, I’d be very happy to be your Demonstrator. Just click HERE to go directly to my online store or drop me an email if you have any questions. 

MY CURRENT HOST CODE IS: 66KPP6BN

For any orders $50 or more I will send you my monthly class tutorials.  Click HERE or go to my Customer Rewards to see what this months tutorials are.

Click HERE to shop the clearance rack.

Happy Stamping, Karen!

***************************************************************************************************

I’m doing a 2019 Holiday Catalog Designer Series Paper share.  Click here for more information.

****************************************************************************************************

STAMPIN’ UP BONUS DAYS – COUPON REDEMTION GOING ON NOW!!

IF YOU HAVE QUESTIONS ON HOW TO REDEEM THEM, PLEASE CONTACT ME.

****************************************************************************************************

EXTRA, EXTRA!!  JOINING PROMOTION JULY 1, 2019 – AUGUST 31, 2019

From July 1 until August 31, new demonstrators will receive an additional $30 to put toward bonus products in their Starter Kit (for a total of $155 in merchandise for $99)!!  THEN, they’ll receive a $10 coupon code the following month.  Are you interested?  Keep reading to learn more!

Dates:  July 1 – August 31 at 11:50 PM MT

Details:

  • The bonus at initial sign up allows demonstrators to pick $30 more than usual.  You will pay $99 to sign up and choose $155 worth of Stampin’ Up! products in your Starter Kit.
  • Coupon codes will be sent between the fifth and seventh business day of the following month the new demonstrator signs up.
  • The email address listed in a new demonstrator’s profile will be used to send the $10 coupon code.
  • Coupon codes may be redeemed only once.
  • Coupon codes expire October 31, 2019; after this date, they will no longer be valid.
  • New demonstrators who submit their Independent Demonstrator Agreement (IDA) before July 1 or after August 31 will not be eligible for this promotion.

If you’ve ever considered purchasing that Starter Kit, now is a great time!  We’d love to have you join and get that discount for yourself or start your own business!!

If you are interested in joining my team click HERE for details or email me.  I’d love to have you on my team.

***************************************************************************************************

BONE APPETIT PAPER PUMPKIN

SUBSCRIBE TO PAPER PUMPKIN BY SEPTEMBER 10TH TO GET IN ON THE FUN

Halloween is nearly here, which means that Paper Pumpkin has been busy, busy, busy. We thought you might like “a hand” with their frightful festivities, so we designed September’s kit, Bone Appétit, with them in mind.

This kit includes 20 food-safe treat boxes, a unique and exclusive Halloween stamp set, and a spooky, special-edition box. September’s kit also gives new meaning to the word “handmade.” (Cue the scary laughter!)

This kit includes 20 food-safe treat boxes, a unique and exclusive Halloween stamp set, and a spooky, special-edition box. September’s kit also gives new meaning to the word “handmade.” (Cue the scary laughter!)

September Kit Information:
The September kit makes 20 Halloween-themed, food-safe treat boxes
Coordinating colors: Basic Black, Gorgeous Grape, Pumpkin Pie, and Whisper White
Subscribe for the September kit at paperpumpkin.com from August 11–September 10.
Supplies may be limited toward the end of the subscription period.

If you’re interested in subscribing to Paper Pumpkin, you can either sign up for a subscription where you are billed monthly for your kit or you can purchase a prepaid subscription in my online store. To see more information and to sign up for the monthly subscription, click HERE To see the options for prepaid subscriptions in my online store click HERE

****************************************************************************************************

I have gathered up a lot of retired Stamp Sets, Embossing Folders & Dies  and put a list together for anyone interested.  I have single Stamp Sets along with Stamp Sets bundled with Dies or Punches.  Take a look and see if there is anything that you missed out on getting and would still like.  Click Here to go to my list.

****************************************************************************************************

Card stock cuts for this project:

  • Garden Green Cardstock 5 1/2″ X 5″ (card front flap), 5 3/8″ X 4 1/8″ (inner liner mat)
  • Very Vanilla Cardstock 4″ X 5 1/4″ (inner liner)
  • Thick Very Vanilla Cardstock 8 1/2″ X 5 1/2″ (card base scored and folded at 4 1/4″)
  • Pressed Petals Specialty Designer Series Paper 5 1/2″ X 4 1/4″ (card front), piece for envelope flap

****************************************************************************************************

Product List

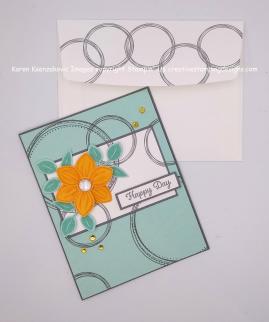
Stampin’ Up Floral Essence Swirly Frames Birthday Card

Good Thursday morning my fellow stampers.  How is everyone doing today? Hope everyone’s week is moving along smoothly.

I have a pretty easy card for you today, though it does look a little involved, it’s not.  I’ve used a few different stamp sets for you today.  Here’s my card.

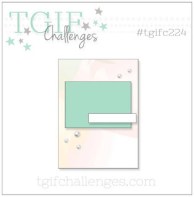
To my surprise, my card played along with a few different challenges today.  First off is TGIF Sketch Challenge #224.  Here is their sketch.

Next is Inspire. Create Colour Challenge #049.  Here are their colors.

I was also able to join in with “Just Us Girls” Trend Week Challenge #500.  Here is their theme.

I started by adhering the small Whisper White panel to the Pool Party card front with the tiniest amount of Snail just to hold it in place.  I then randomly stamped the large and small circle images from the Stampin’ Up Swirly Frames Photopolymer Stamp Set in Basic Gray Ink on the 2 panels overlapping some of the circles.  I adhered the Whisper White panel to a Basic Gray mat using Snail.  I then adhered the matted panel to the card front using Multipurpose Liquid glue matching the circles.

On a scrap of Mango Melody cardstock I stamped the flower image from the Stampin’ Up Floral Essence Photopolymer Stamp Set in Mango Melody Ink twice.  I punched the flowers out using the Perennial Flower Punch.  I adhered the flowers together using a Glue Dot and adhered it to the artwork panel using a Stampin’ Dimensional.  I stamped the leaf image from the Floral Essence stamp set 3 times in Pool Party Ink on a scrap of Pool Party cardstock and punched them out using the Leaf Punch.  I adhered the leaves under the flower using Glue Dots.

On a small strip of Whisper White cardstock I stamped the sentiment from the Stampin’ Up Itty Bitty Birthdays Stamp Set in Basic Gray Ink.  I adhered the sentiment strip to a Basic Gray mat using Snail.  I adhered the sentiment to the card front using Stampin’ Dimensionals.  I adhered the card front to a Basic Gray card base using Stampin’ Dimensionals.  I colored a few Clear Rhinestone Basic Jewels using my Mango Melody Stampin’ Blends Markers.  I adhered the colored rhinestones to the card front.

On the inside I stamped another flower image from the Floral Essence stamp set in Basic Gray Ink on the top and bottom of a Whisper White panel.  I stamped the leaf image from the Floral Essence stamp set in Pool Party Ink around the flowers.  I colored the flowers in using my Mango Melody Stampin’ Blends Markers.  I stamped the inside of the flowers with the flower center image from the Floral Essence stamp set in Basic Gray Ink stamping off once.  I stamped the sentiment from the Floral Essence stamp set in Basic Gray Ink in the center of the panel.  I adhered the Whisper White panel to the inside of the Basic Gray card base using Multipurpose Liquid Glue.

To finish my card I decorated a Medium Whisper White Envelope.  I stamped the flower image from the Floral Essence stamp set in Basic Gray Ink on the envelope front.  I stamped the leaves from the Floral Essence stamp set in Pool Party Ink around the flowers.  I colored the flowers in the same as I did for the card.  I stamped the small circle image from the Swirly Frames stamp set in Basic Gray Ink on the envelope flap.

Thank you for stopping by my blog today.  I hope you liked my card and will give it a try. Happy Stamping!!

****************************************************************************************************

If you need any stamping supplies, I’d be very happy to be your Demonstrator. Just click HERE to go directly to my online store or drop me an email if you have any questions. 

MY CURRENT HOST CODE IS: 66KPP6BN

For any orders $50 or more I will send you my monthly class tutorials.  Click HERE or go to my Customer Rewards to see what this months tutorials are.

Click HERE to shop the clearance rack.

Happy Stamping, Karen!

***************************************************************************************************

I’m doing a 2019 Holiday Catalog Designer Series Paper share.  Click here for more information.

****************************************************************************************************

STAMPIN’ UP BONUS DAYS – COUPON REDEMTION GOING ON NOW!!

IF YOU HAVE QUESTIONS ON HOW TO REDEEM THEM, PLEASE CONTACT ME.

****************************************************************************************************

EXTRA, EXTRA!!  JOINING PROMOTION JULY 1, 2019 – AUGUST 31, 2019

From July 1 until August 31, new demonstrators will receive an additional $30 to put toward bonus products in their Starter Kit (for a total of $155 in merchandise for $99)!!  THEN, they’ll receive a $10 coupon code the following month.  Are you interested?  Keep reading to learn more!

Dates:  July 1 – August 31 at 11:50 PM MT

Details:

  • The bonus at initial sign up allows demonstrators to pick $30 more than usual.  You will pay $99 to sign up and choose $155 worth of Stampin’ Up! products in your Starter Kit.
  • Coupon codes will be sent between the fifth and seventh business day of the following month the new demonstrator signs up.
  • The email address listed in a new demonstrator’s profile will be used to send the $10 coupon code.
  • Coupon codes may be redeemed only once.
  • Coupon codes expire October 31, 2019; after this date, they will no longer be valid.
  • New demonstrators who submit their Independent Demonstrator Agreement (IDA) before July 1 or after August 31 will not be eligible for this promotion.

If you’ve ever considered purchasing that Starter Kit, now is a great time!  We’d love to have you join and get that discount for yourself or start your own business!!

If you are interested in joining my team click HERE for details or email me.  I’d love to have you on my team.

****************************************************************************************************

I have gathered up a lot of retired Stamp Sets, Embossing Folders & Dies  and put a list together for anyone interested.  I have single Stamp Sets along with Stamp Sets bundled with Dies or Punches.  Take a look and see if there is anything that you missed out on getting and would still like.  Click Here to go to my list.

****************************************************************************************************

Card stock cuts for this project:

  • Basic GrayCardstock 8 1/2″ X 5 1/2″ (card base scored and folded at 4 1/4″), 2 3/8″ X 3 3/4″ (artwork mat), 1/2″ X 2″ (sentiment mat)
  • Mango Melody Cardstock scraps for flowers
  • Pool Party Cardstock 4 1/8″ X 5 3/8″ (card front), scraps for leaves
  • Whisper White Cardstock 2 1/4″ X 3 1/2″ (artwork), 11 7/8″ X 7/16″ (sentiment strip), 4″ X 5 1/4″ (inner liner)

****************************************************************************************************

Product List

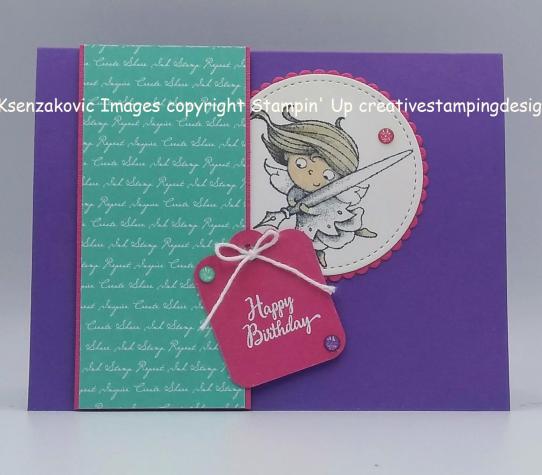
Stampin’ Up New Wonders Birthday Card

Good Thursday morning my fellow stampers.  Are you almost ready for the weekend?  It’s coming up really quick now.  I never made it to the 4-H Fair yesterday.  We had bad thunder storms and a lot of rain.  I feel bad for all those kids that worked so hard on their projects and with their animals to have the 1st day be rained out.  Today and tomorrow are suppose to be beautiful so hopefully they will have a good turn out.

For today’s card I used a Host Exclusive set.  There are a few sets in the catalogs that are set aside just for hosts to earn.  I used one of my favorites, the Stampin’ Up New Wonders Cling Stamp Set.  I just love the fairy images in this set.  Here’s my card.

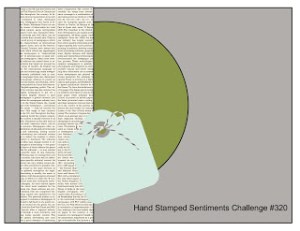
I joined in with Hand Stamped Sentiments Challenge #320 today.  Here’s their sketch.

I also played along with TGIF Challenge #223.  Here are their colors.

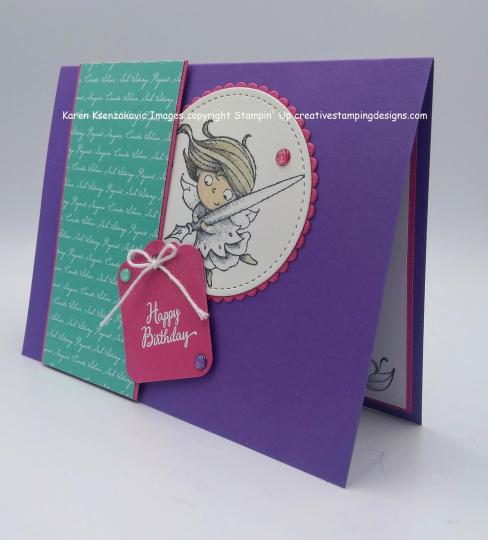
I started by adhering a Coastal Cabana panel of the Brights 6 X 6 Designer Series Paper to a Melon Mambo mat using Snail.  I adhered the matted panel to a Gorgeous Grape card base using Stampin’ Dimensionals.

On a panel of Whisper White cardstock I stamped one of the fairy images from the New Wonders stamp set in Tuxedo Black Memento Ink.  I only colored the hair and skin of the fairy in using my Crumb Cake and Ivory Stampin’ Blends Markers.  I cut the image out using the 2nd largest circle from the Stitched Shapes Dies.  I adhered it to a Melon Mambo scalloped circle mat, which I cut out using my Layering Circles Dies, using Snail.  I adhered the artwork just under the DSP strip using Multipurpose Liquid Glue.

I stamped the sentiment from the New Wonders stamp set on a strip of Melon Mambo cardstock in VersaMark Ink.  I immediately sprinkled it with White Stampin’ Emboss Powder and set it using my Heat Tool.  I punched the top of the strip using the  Delightful Tag Topper Punch.  I adhered the tag to the card front using a Glue Dot and Stampin’ Dimensional.  I added a small bow that I had made from my Whisper White Solid Bakers Twine and adhered it using a Glue Dot.  I added a few Glitter Enamel Dots to the tag and the card front.

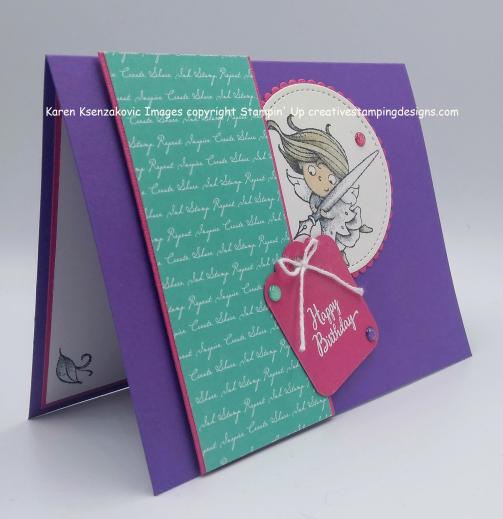
On the inside I stamped another one of the fairy images from the New Wonders stamp set in Tuxedo Black Memento Ink, stamping off twice, on a Whisper White panel.  I stamped the leaf image from the New Wonders stamp set in all 4 corners in Tuxedo Black Memento Ink.  I stamped the sentiment from the New Wonders stamp set in Tuxedo Black Memento Ink on top of the fairy image.  I adhered the Whisper White panel to a Melon Mambo mat using Snail and then to the inside of the Gorgeous Grape card base using Multipurpose Liquid Glue.

To finish my card I decorated a Medium Whisper White Envelope.  I stamped the fairy image from the New Wonders stamp set in Tuxedo Black Memento Ink on the envelope front.  I adhered a panel of the Brights 6 X 6 DSP to the envelope flap.

Thank you for stopping by my blog today.  I hope you liked my card and will give it a try. Happy Stamping!!

****************************************************************************************************

If you need any stamping supplies, I’d be very happy to be your Demonstrator. Just click HERE to go directly to my online store or drop me an email if you have any questions. 

MY CURRENT HOST CODE IS: 66KPP6BN

For any orders $50 or more I will send you my monthly class tutorials.  Click HERE or go to my Customer Rewards to see what this months tutorials are.

Click HERE to shop the clearance rack.

Happy Stamping, Karen!

****************************************************************************************************

IT’S TIME TO REDEEM THOSE COUPONS YOU RECEIVED IN JULY.  IF YOU HAVE QUESTIONS ON HOW TO REDEEM THEM, PLEASE CONTACT ME.

****************************************************************************************************

EXTRA, EXTRA!!  JOINING PROMOTION JULY 1, 2019 – AUGUST 31, 2019

From July 1 until August 31, new demonstrators will receive an additional $30 to put toward bonus products in their Starter Kit (for a total of $155 in merchandise for $99)!!  THEN, they’ll receive a $10 coupon code the following month.  Are you interested?  Keep reading to learn more!

Dates:  July 1 – August 31 at 11:50 PM MT

Details:

  • The bonus at initial sign up allows demonstrators to pick $30 more than usual.  You will pay $99 to sign up and choose $155 worth of Stampin’ Up! products in your Starter Kit.
  • Coupon codes will be sent between the fifth and seventh business day of the following month the new demonstrator signs up.
  • The email address listed in a new demonstrator’s profile will be used to send the $10 coupon code.
  • Coupon codes may be redeemed only once.
  • Coupon codes expire October 31, 2019; after this date, they will no longer be valid.
  • New demonstrators who submit their Independent Demonstrator Agreement (IDA) before July 1 or after August 31 will not be eligible for this promotion.

If you’ve ever considered purchasing that Starter Kit, now is a great time!  We’d love to have you join and get that discount for yourself or start your own business!!

If you are interested in joining my team click HERE for details or email me.  I’d love to have you on my team.

****************************************************************************************************

Subscribe for the August kit from July 11–August 10

ONLY 3 DAYS LEFT TO SUBSCRIBE

What’s the old saying? Variety is the spice of life? At Paper Pumpkin, we like to mix things up and keep our customer’s crafting experience fresh and fun. We plan each kit carefully, allowing them to check as many creative boxes as possible while keeping our projects simple—so they can explore the world of paper crafting with confidence. With this in mind, we are bringing an elegant fall gift packaging kit to Paper Pumpkin fans this August.
Now, it’s no secret that our subscribers love cardmaking. So when we offer treat or gift packaging, you generally like to make a few card alternates with the kit. That’s why THIS month we decided to bring you the best of both worlds with the Gift of Fall Add-On Bundle. This coordinating product will allow you to turn your Gift of Fall gift packaging into cards in an easy and inexpensive way.

  • The August kit includes 6 gift bags and 12 gift tags. To receive this kit you must subscribe by August 10.
  • The Gift of Fall Add-On Bundle is a separate purchase for those who would like to convert their August Paper Pumpkin kit into cards.
  • The Gift of Fall Add-On Bundle card designs offer a great sneak of the designs and elements to come in the August kit.
  • Once you have completed the August kit, you will have extra kit components so you can easily combine them with the add-on without having to purchase additional kits.
  • Just as you would with any other Stampin’ Up! product, you will need to purchase the add-on bundle via OEX or the online store. You will not be able to add it to a Paper Pumpkin subscription purchase.
  • The price for the add-on bundle is $10.00 usd/$13.00 cad and is available for Paper Pumpkin subscribers only. This add-on is available beginning August 1, while supplies last!
  • The add-on bundle is a cash and carry item
  • Click Here to subscribe. Supplies may be limited toward the end of the subscription period.  

Click HERE for a sneak peek of the August Paper Pumpkin Kit.

August Kit Information

Makes 6 fall-themed gift bags
Makes 12 fall-themed gift tags
Coordinating colors: Blackberry Bliss, Calypso Coral, Crumb Cake, Crushed Curry, Merry Merlot, Mint Macaron, Old Olive, Pretty Peacock, and Soft Suede

Add-On Information

Gift of Fall Add-On Bundle (item 152885)
Price: $10.00 usd/$13.00 cad
Includes 24 card bases of 2 different designs with coordinating envelopes (note card size)
Available August 1, while supplies last
Purchase via my online store
Not included with an August Paper Pumpkin subscription
Important note: The Gift of Fall Add-On Bundle is not needed to complete the August kit projects.

****************************************************************************************************

I have gathered up a lot of retired Stamp Sets, Embossing Folders & Dies  and put a list together for anyone interested.  I have single Stamp Sets along with Stamp Sets bundled with Dies or Punches.  Take a look and see if there is anything that you missed out on getting and would still like.  Click Here to go to my list.

****************************************************************************************************

Card stock cuts for this project:

  • Gorgeous Grape Cardstock 8 1/2″ X 5 1/2″ (card base scored and folded at 4 1/4″)
  • Melon Mambo Cardstock 4″ X 5 1/4″ (inner liner mat), 2″ X 4 1/4″ (DSP mat), 3″ X 3″ (scalloped circle), 1 1/2″ X 2″ (card front tag)
  • Whisper White Cardstock 3 7/8″ X 5 1/8″ (inner liner), 3″ X 3″ (artwork)
  • Brights 6 X 6 Designer Series Paper 1 7/8″ X 4 1/4″ (card front strip), piece for envelope flap

****************************************************************************************************
Product List

Stampin’ Up Above The Clouds Birthday Card

Good Wednesday morning my fellow stampers.  How is everyone doing today?  We’re halfway through the week already.  I’ll be making my annual visit to the 4-H fair with my niece and 2 little nephews today.  She loves bringing the boys to see the animals and the train tent along with other tents.  Hopefully the weather will hold off, we’re expecting thunder storms today.  I always feel bad when it rains on the fair.  All the work those kids do and then to get stormed on is horrible.

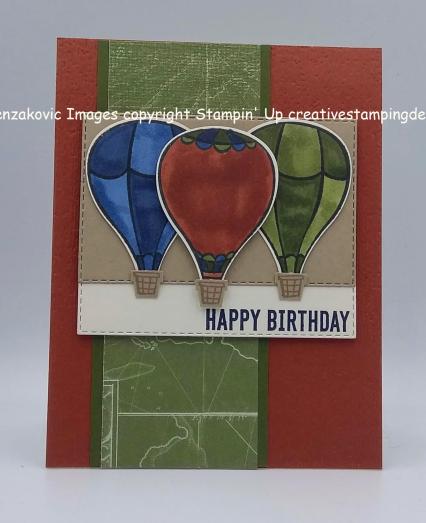
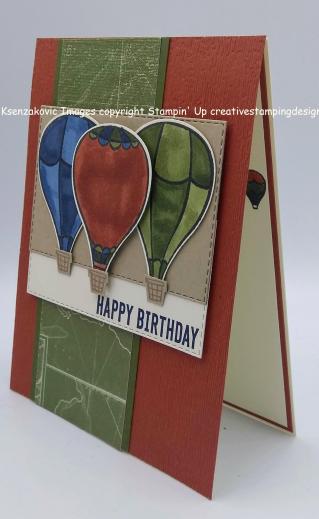
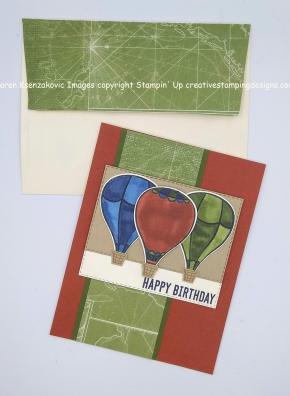
Onto today’s card.  For today I made you a masculine card.  They are always cards I struggle with.  After the Balloon Festival here in NJ last week I was inspired to make a hot air balloon card.  Here’s my card.

My card joined in with Sunday Stamps Triple The Fun Challenge #210.  Here is their sketch.

I started with a Cajun Craze card front and embossed it using my Subtle 3D Embossing Folder.  I adhered the card front to a Thick Very Vanilla card base using Multipurpose Liquid Glue.  I adhered a panel of Come Sail Away Designer Series Paper to a mat of Mossy Meadow cardstock using Snail and then adhered it to the card front using Multipurpose Liquid Glue.

On a scrap of Very Vanilla cardstock I stamped 3 of the hot air balloons from the Stampin’ Up Above The Clouds Photopolymer Stamp Set in Tuxedo Black Memento Ink.  I stamped 2 of the same and 1 of the other.  I colored the balloons in using my Cajun Craze, Mossy Meadow and Night of Navy Stampin’ Blends Markers.  I punched the balloons out using my Hot Air Balloon Punch.  On a scrap of Crumb Cake cardstock I stamped the balloon basket from the Above The Clouds stamp set 3 times in Crumb Cake Ink.  I punched the baskets out using the Hot Air Balloon Punch.  I cut out 2 of the same size rectangles from the Stitched Rectangles Dies in Crumb Cake cardstock and Very Vanilla cardstock.

On the bottom of the Very Vanilla stitched rectangle I stamped the sentiment from the Stampin’ Up Itty Bitty Birthday’s Cling Stamp Set in Night of Navy Ink.  I adhered the Crumb Cake stitched rectangle to the top of the Very Vanilla stitched rectangle using Snail.  I adhered the baskets to the bottom of the hot air balloons using Glue Dots.  I adhered the 2 similar hot air balloons to the Crumb Cake rectangle using Glue Dots.  I adhered the 3rd hot air balloon in front of the other 2 using Stampin’ Dimensionals.  I adhered the artwork panel to the card front using Stampin’ Dimensionals.

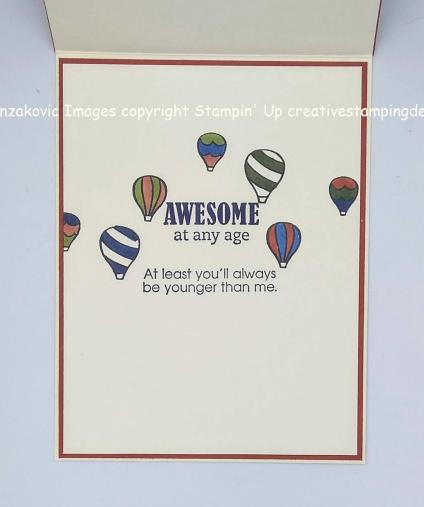
On the inside I stamped the sentiments from the Itty Bitty Birthday’s stamp set in Night of Navy Ink in the center of a Very Vanilla panel.  I stamped the smaller balloon image from the Above The Clouds stamp set in Tuxedo Black Memento Ink around the sentiment.  I colored the balloons in using my Cajun Craze, Mossy Meadow and Night of Navy Stampin’ Blends Markers.  I adhered the Very Vanilla panel to a Cajun Craze mat using Snail and then to the inside of the Thick Very Vanilla card base using Multipurpose Liquid Glue.

To finish my card off I decorated a Medium Very Vanilla Envelope.  I stamped the smaller balloon image from the Above The Clouds stamp set in Tuxedo Black Memento Ink and colored them in the same as I did for the card.  I adhered a panel of Come Sail Away DSP to the envelope flap.

Thank you for stopping by my blog today.  I hope you liked my card and will give it a try. Happy Stamping!!

****************************************************************************************************

If you need any stamping supplies, I’d be very happy to be your Demonstrator. Just click HERE to go directly to my online store or drop me an email if you have any questions. 

MY CURRENT HOST CODE IS: 66KPP6BN

For any orders $50 or more I will send you my monthly class tutorials.  Click HERE or go to my Customer Rewards to see what this months tutorials are.

Click HERE to shop the clearance rack.

Happy Stamping, Karen!

****************************************************************************************************

IT’S TIME TO REDEEM THOSE COUPONS YOU RECEIVED IN JULY.  IF YOU HAVE QUESTIONS ON HOW TO REDEEM THEM, PLEASE CONTACT ME.

****************************************************************************************************

EXTRA, EXTRA!!  JOINING PROMOTION JULY 1, 2019 – AUGUST 31, 2019

From July 1 until August 31, new demonstrators will receive an additional $30 to put toward bonus products in their Starter Kit (for a total of $155 in merchandise for $99)!!  THEN, they’ll receive a $10 coupon code the following month.  Are you interested?  Keep reading to learn more!

Dates:  July 1 – August 31 at 11:50 PM MT

Details:

  • The bonus at initial sign up allows demonstrators to pick $30 more than usual.  You will pay $99 to sign up and choose $155 worth of Stampin’ Up! products in your Starter Kit.
  • Coupon codes will be sent between the fifth and seventh business day of the following month the new demonstrator signs up.
  • The email address listed in a new demonstrator’s profile will be used to send the $10 coupon code.
  • Coupon codes may be redeemed only once.
  • Coupon codes expire October 31, 2019; after this date, they will no longer be valid.
  • New demonstrators who submit their Independent Demonstrator Agreement (IDA) before July 1 or after August 31 will not be eligible for this promotion.

If you’ve ever considered purchasing that Starter Kit, now is a great time!  We’d love to have you join and get that discount for yourself or start your own business!!

If you are interested in joining my team click HERE for details or email me.  I’d love to have you on my team.

****************************************************************************************************

Subscribe for the August kit from July 11–August 10

What’s the old saying? Variety is the spice of life? At Paper Pumpkin, we like to mix things up and keep our customer’s crafting experience fresh and fun. We plan each kit carefully, allowing them to check as many creative boxes as possible while keeping our projects simple—so they can explore the world of paper crafting with confidence. With this in mind, we are bringing an elegant fall gift packaging kit to Paper Pumpkin fans this August.
Now, it’s no secret that our subscribers love cardmaking. So when we offer treat or gift packaging, you generally like to make a few card alternates with the kit. That’s why THIS month we decided to bring you the best of both worlds with the Gift of Fall Add-On Bundle. This coordinating product will allow you to turn your Gift of Fall gift packaging into cards in an easy and inexpensive way.

  • The August kit includes 6 gift bags and 12 gift tags. To receive this kit you must subscribe by August 10.
  • The Gift of Fall Add-On Bundle is a separate purchase for those who would like to convert their August Paper Pumpkin kit into cards.
  • The Gift of Fall Add-On Bundle card designs offer a great sneak of the designs and elements to come in the August kit.
  • Once you have completed the August kit, you will have extra kit components so you can easily combine them with the add-on without having to purchase additional kits.
  • Just as you would with any other Stampin’ Up! product, you will need to purchase the add-on bundle via OEX or the online store. You will not be able to add it to a Paper Pumpkin subscription purchase.
  • The price for the add-on bundle is $10.00 usd/$13.00 cad and is available for Paper Pumpkin subscribers only. This add-on is available beginning August 1, while supplies last!
  • The add-on bundle is a cash and carry item
  • Click Here to subscribe. Supplies may be limited toward the end of the subscription period.  

Click HERE for a sneak peek of the August Paper Pumpkin Kit.

August Kit Information

Makes 6 fall-themed gift bags
Makes 12 fall-themed gift tags
Coordinating colors: Blackberry Bliss, Calypso Coral, Crumb Cake, Crushed Curry, Merry Merlot, Mint Macaron, Old Olive, Pretty Peacock, and Soft Suede

Add-On Information

Gift of Fall Add-On Bundle (item 152885)
Price: $10.00 usd/$13.00 cad
Includes 24 card bases of 2 different designs with coordinating envelopes (note card size)
Available August 1, while supplies last
Purchase via my online store
Not included with an August Paper Pumpkin subscription
Important note: The Gift of Fall Add-On Bundle is not needed to complete the August kit projects.

****************************************************************************************************

I have gathered up a lot of retired Stamp Sets, Embossing Folders & Dies  and put a list together for anyone interested.  I have single Stamp Sets along with Stamp Sets bundled with Dies or Punches.  Take a look and see if there is anything that you missed out on getting and would still like.  Click Here to go to my list.

****************************************************************************************************

Card stock cuts for this project:

  • Cajun Craze Cardstock 4 1/4″ X 5 1/2″ (card front), 4 1/8″ X 5 3/8″ (inner liner mat)
  • Crumb Cake Cardstock 4″ X 2 1/2″ (stitched rectangle)
  • Mossy Meadow Cardstock 2 1/4″ X 5 1/2″ (DSP mat on card front)
  • Very Vanilla Cardstock 4″ X 5 1/4″ (inner liner) 4″ X 2 1/2″ (stitched rectangle)
  • Thick Very Vanilla Cardstock 4 1/4″ X 11″ (card base scored and folded at 5 1/2″)
  • Come Sail Away Designer Series Paper 2″ X 5 1/2″(card front strip), piece for envelope flap

****************************************************************************************************

Product List

Stampin’ Up We’ll Walrus Be Friends Birthday Card

Good Tuesday morning my fellow stampers.  How has everyone’s week started out? I can’t believe that August is here already.  This summer is flying by way too fast for me.

For today I have  a cute birthday card for you using the Stampin’ Up We’ll Walrus Be Friends Cling Stamp Set.  Here’s my card

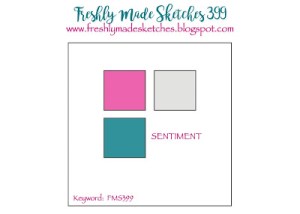
My card played along with Freshly Made Sketches Challenge #399.  Here is their sketch.

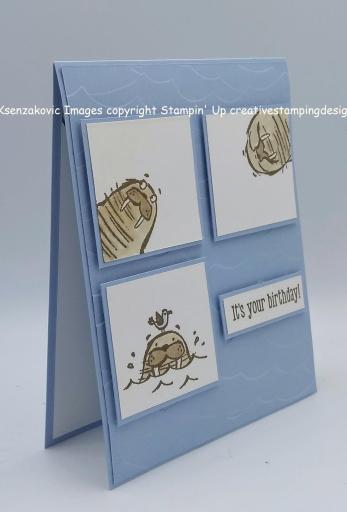
I started by embossing a Seaside Spray card front using the High Seas 3D Embossing Folder.  I adhered the card front to a Seaside Spray card base using Multipurpose Liquid Glue.

I stamped 3 different walrus images from the We’ll Walrus Be Friends stamp set in Soft Suede Ink on 3 squares of Whisper White cardstock.  I colored them all in using my Curmb Cake and Seaside Spray Stampin’ Blends Markers.  I adhered the 3 pieces of artwork to 3 Seaside Spray mats using Snail.  I adhered the 3 matted artwork squares to the card front using Stampin’ Dimensionals.

I stamped the sentiment from the We’ll Walrus Be Friends stamp set in Soft Suede Ink on a small strip of Whisper White cardstock.  I adhered the sentiment strip to a Seaside Spray mat using snail and then to the card front using Stampin’ Dimensionals.

On the inside I stamped another one of the walrus images from the We’ll Walrus Be Friends stamp set in the center of a Whisper White panel in Crumb Cake Ink stamping off twice.  I stamped the sentiment from Stampin’ Up Itty Bitty Birthday’s Cling Stamp Set in Soft Suede Ink on top of the stamped off image.  I stamped a couple of the walrus images from We’ll Walrus Be Friends stamp set in Soft Suede Ink on the top 2 corners of the Whisper White panel and colored them in using my Crumb Cake Stampin’ Blends Markers.  I adhered the Whisper White panel to the inside of the Seaside Spray card base using Multipurpose Liquid Glue.

To finish my card I decorated a Medium Whisper White Envelope.  I stamped one of the walrus images from the We’ll Walrus Be Friends stamp set in Soft Suede Ink on the envelope front and colored it in the same as I did for the card.  I stamped 3 of the walrus images from the We’ll Walrus Be Friends stamp set in Soft Suede Ink on the envelope flap and colored them in the same as I did for the card.

Thank you for visiting my blog today.  I hope you liked my card and will give it a try.  Happy Stamping!!

****************************************************************************************************

If you need any stamping supplies, I’d be very happy to be your Demonstrator. Just click HERE to go directly to my online store or drop me an email if you have any questions. 

MY CURRENT HOST CODE IS: 66KPP6BN

For any orders $50 or more I will send you my monthly class tutorials.  Click HERE or go to my Customer Rewards to see what this months tutorials are.

Click HERE to shop the clearance rack.

Happy Stamping, Karen!

****************************************************************************************************

IT’S TIME TO REDEEM THOSE COUPONS YOU RECEIVED IN JULY.  IF YOU HAVE QUESTIONS ON HOW TO REDEEM THEM, PLEASE CONTACT ME.

****************************************************************************************************

EXTRA, EXTRA!!  JOINING PROMOTION JULY 1, 2019 – AUGUST 31, 2019

From July 1 until August 31, new demonstrators will receive an additional $30 to put toward bonus products in their Starter Kit (for a total of $155 in merchandise for $99)!!  THEN, they’ll receive a $10 coupon code the following month.  Are you interested?  Keep reading to learn more!

Dates:  July 1 – August 31 at 11:50 PM MT

Details:

  • The bonus at initial sign up allows demonstrators to pick $30 more than usual.  You will pay $99 to sign up and choose $155 worth of Stampin’ Up! products in your Starter Kit.
  • Coupon codes will be sent between the fifth and seventh business day of the following month the new demonstrator signs up.
  • The email address listed in a new demonstrator’s profile will be used to send the $10 coupon code.
  • Coupon codes may be redeemed only once.
  • Coupon codes expire October 31, 2019; after this date, they will no longer be valid.
  • New demonstrators who submit their Independent Demonstrator Agreement (IDA) before July 1 or after August 31 will not be eligible for this promotion.

If you’ve ever considered purchasing that Starter Kit, now is a great time!  We’d love to have you join and get that discount for yourself or start your own business!!

If you are interested in joining my team click HERE for details or email me.  I’d love to have you on my team.

****************************************************************************************************

Subscribe for the August kit from July 11–August 10

What’s the old saying? Variety is the spice of life? At Paper Pumpkin, we like to mix things up and keep our customer’s crafting experience fresh and fun. We plan each kit carefully, allowing them to check as many creative boxes as possible while keeping our projects simple—so they can explore the world of paper crafting with confidence. With this in mind, we are bringing an elegant fall gift packaging kit to Paper Pumpkin fans this August.
Now, it’s no secret that our subscribers love cardmaking. So when we offer treat or gift packaging, you generally like to make a few card alternates with the kit. That’s why THIS month we decided to bring you the best of both worlds with the Gift of Fall Add-On Bundle. This coordinating product will allow you to turn your Gift of Fall gift packaging into cards in an easy and inexpensive way.

  • The August kit includes 6 gift bags and 12 gift tags. To receive this kit you must subscribe by August 10.
  • The Gift of Fall Add-On Bundle is a separate purchase for those who would like to convert their August Paper Pumpkin kit into cards.
  • The Gift of Fall Add-On Bundle card designs offer a great sneak of the designs and elements to come in the August kit.
  • Once you have completed the August kit, you will have extra kit components so you can easily combine them with the add-on without having to purchase additional kits.
  • Just as you would with any other Stampin’ Up! product, you will need to purchase the add-on bundle via OEX or the online store. You will not be able to add it to a Paper Pumpkin subscription purchase.
  • The price for the add-on bundle is $10.00 usd/$13.00 cad and is available for Paper Pumpkin subscribers only. This add-on is available beginning August 1, while supplies last!
  • The add-on bundle is a cash and carry item
  • Click Here to subscribe. Supplies may be limited toward the end of the subscription period.  

Click HERE for a sneak peek of the August Paper Pumpkin Kit.

August Kit Information

Makes 6 fall-themed gift bags
Makes 12 fall-themed gift tags
Coordinating colors: Blackberry Bliss, Calypso Coral, Crumb Cake, Crushed Curry, Merry Merlot, Mint Macaron, Old Olive, Pretty Peacock, and Soft Suede

Add-On Information

Gift of Fall Add-On Bundle (item 152885)
Price: $10.00 usd/$13.00 cad
Includes 24 card bases of 2 different designs with coordinating envelopes (note card size)
Available August 1, while supplies last
Purchase via my online store
Not included with an August Paper Pumpkin subscription
Important note: The Gift of Fall Add-On Bundle is not needed to complete the August kit projects.

****************************************************************************************************

I have gathered up a lot of retired Stamp Sets, Embossing Folders & Dies  and put a list together for anyone interested.  I have single Stamp Sets along with Stamp Sets bundled with Dies or Punches.  Take a look and see if there is anything that you missed out on getting and would still like.  Click Here to go to my list.
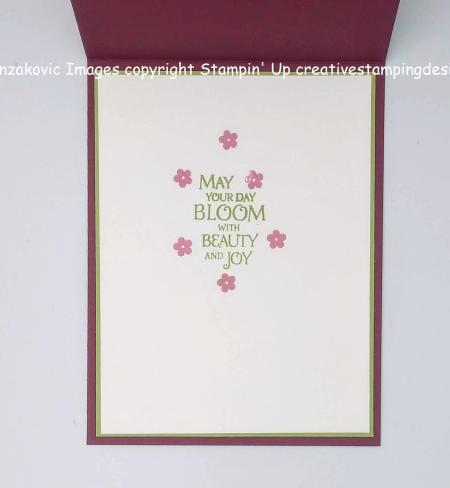
****************************************************************************************************

Card stock cuts for this project:

  • Seaside Spray Cardstock 4 1/4″ X 11″ (card base scored and folded at 5 1/2″), 4 1/8″ X 5 3/8″ (card front), 3 – 1 7/8″ X 1 7/8″ (artwork mats), 5/8″ X 1 7/8″ (sentiment mat)
  • Wisper White Cardstock 3 – 1 3/4″ X 1 3/4″ (artwork), 1/2″ X 1 3/4″ (sentiment), 4″ X 5 1/4″ (inner liner)

****************************************************************************************************

Product List