Stampin’ Up! Forever Blossoms Easter for Amy’s Inkin’ Krew Blog Hop

Good Tuesday morning my fellow stampers. Welcome to Amy’s Inkin’ Krew Team Blog Hop. It’s the 2nd Tuesday of the month and you know what that means, Blog Hop Day!! If you are starting with me, be sure to hop around to see everyone’s beautiful projects. If you’ve hopped over from Karen Finkle’s blog, welcome to my blog and thank you for stopping by. The theme this month is “Spring”. We can interpret this any way that we’d like.

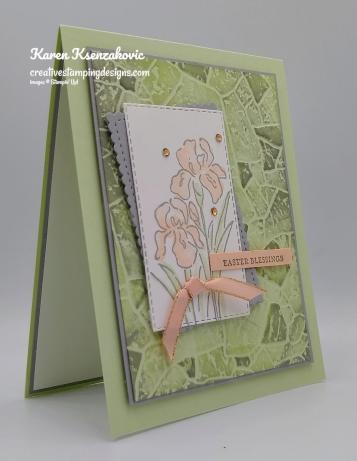
For my card today I combined 2 stamp sets.  One from the 2020 January-June Mini Catalog and the other from the Annual Catalog along with a new Sale-A-Bration item. Here’s my card.

I started by adhering a panel of Soft Sea Foam So Very Vellum Specialty Designer Series Paper to a Soft Sea Foam card base using Snail.  I put the Snail under my artwork so that you couldn’t see the lines.  Using the Cherry Blossoms Dies, I cut all the flowers from a panel of Petal Pink cardstock.  I cut all the leaves from a panel of Soft Sea Foam cardstock.  I cut the branch and flower centers from a panel of Soft Suede cardstock.  I sponged the edges of all the flowers using my Stamping Sponges and Petal Pink Ink.  I sponged all the leaves using my Stamping Sponges and Soft Sea Foam Ink.  I adhered all the leaves to the back of the flowers using Snail.

On a panel of Whisper White cardstock I stamped the sentiment from the Stampin’ Up! Easter Promise Cling Stamp Set in Soft Suede Ink.  I cut the sentiment out using my Stitched So Sweetly Dies making sure the sentiment was towards the bottom right of the die.
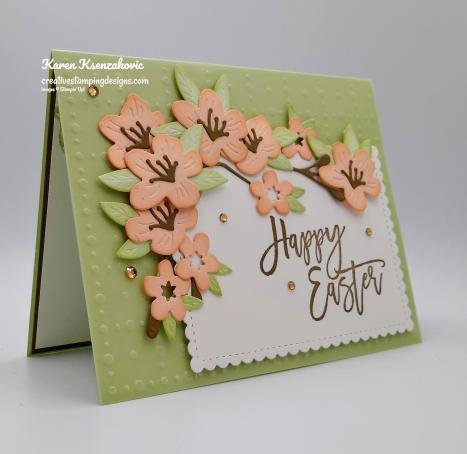
I arranged the branch and the flowers on the top left corner of the die cut sentiment.  I adhered them, once I had them where I wanted them, using Multipurpose Liquid Glue, Stampin’ Dimensionals and Glue Dots.  I adhered the artwork to the card front using Stampin’ Dimensionals.  I added a few Champagne Rhinestone Basic Jewels to the card front.
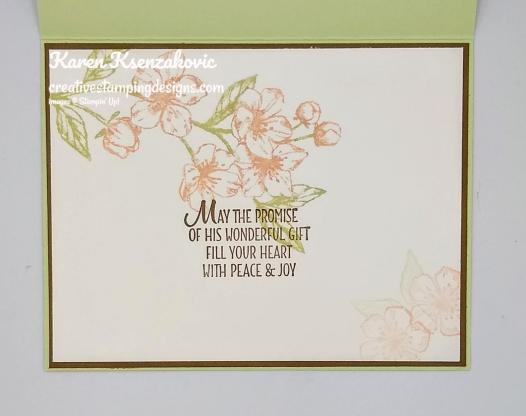
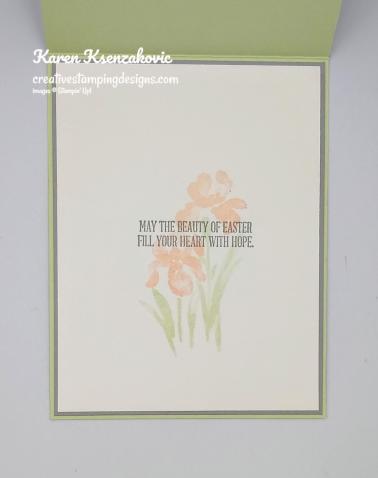
On the inside I stamped the sentiment from the Easter Promise stamp set in Soft Suede Ink in the center of a Whisper White panel.  I stamped the large floral branch image from the Stampin’ Up! Forever Blossoms Cling Stamp Set, which I colored using my Petal Pink and Soft Sea Foam Stampin’ Write Markers, on the top of the panel.  I stamped 2 small flower images from the Forever Blossoms stamp set in Petal Pink Ink on the bottom of the panel and stamped a double leaf image from the Forever Blossoms stamp set in Soft Sea Foam Ink.  I adhered the Whisper White panel to a Soft Suede mat using Snail and then to the inside of the Soft Sea Foam card base using Multipurpose Liquid Glue.

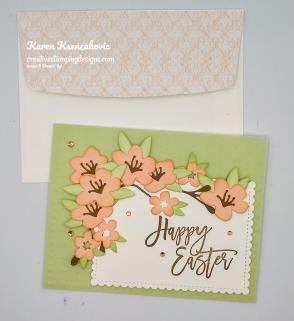
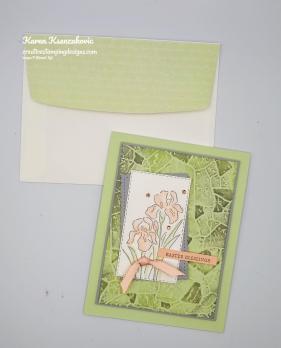
To finish my card I decorated a Medium Whisper White Envelope.  I stamped the large floral branch image from the Forever Blossoms stamp set, which I colored using my Petal Pink and Soft Sea Foam Stampin’ Write Markers, on the envelope front.  I adhered a panel of Parisian Blossoms Specialty Designer Series Paper to the envelope flap.

Thank you for visiting by my blog today. I hope you liked my card and will give it a try. Now that you’ve seen my card, be sure to hop around to see everyone’s beautiful projects. Hit Previous to hop back to Karen Finkle’s blog or hit Next to head over to Mary Deatherage’s blog. You can also click on each of the names and hop around that way. Happy Hopping!!
  1. Karen Finkle
  2. Karen Ksenzakovic  (you are here)
  3. Mary Deatherage
  4. Shirley Gentry
  5. Jaimie Babarczy
  6. Sue Prather
  7. Akiko Sudano
  8. Leslie Larkin
  9. Amy Koenders

****************************************************************************************************

If you need any stamping supplies, I’d love to be your Demonstrator. Just click HERE to go directly to my online store or drop me an email if you have any questions. 

MY CURRENT HOST CODE IS: 4UXRJREH

Use this host code when you order $50 or greater and receive a free gift from me! If your order is over $150, please do not use this code, but you’ll still get the free gift. The free gift is your choice of any item valued up to $10.00 in either the 2019-2020 Annual Catalog or the 2020 January-June Mini Catalog!   For any orders $50 or more I will also send you my monthly class tutorials.  Click HERE or go to my Customer Rewards for more details and to see what this months tutorials are.

Click HERE to shop the clearance rack.

Happy Stamping, Karen!

****************************************************************************************************

BRINGING THE JOYS OF SPRING MARCH PAPER PUMPKIN KIT

Paper Pumpkin March 2020: No Matter the Weather

LAST DAY TO SUBSCRIBE TO GET YOUR FREE STAMP SET!!

Cheers to seven years! This March, Paper Pumpkin has reached another exciting milestone: our seventh year of delivering fun, easy, creative projects to you. To thank everyone who has helped us along the way, we’re including an additional FREE stamp set with every March kit. This means that every subscriber will receive two stamp sets!
The March 2020 kit will arrive in an exclusive, specially-designed box that you will love! Think daffodils, raindrops, and a fresh spring vibe.

About the March Kit

  • Kit contains supplies for 12 cards and envelopes (4 cards of 3 designs)
  • Notecard size: 5″ x 3-1/2″ (12.7 x 8.9 cm)
  • Envelope size: 5-1/8″ x 3-5/8″ (13 x 9.2 cm)

Coordinating Colors: Balmy Blue, Basic Gray, Calypso Coral, Grapefruit Grove, Gray Granite, Pear Pizzazz, Petal Pink, Shaded Spruce, and So Saffron

About the FREE Stamp Set

  • The additional stamp set is a great value and coordinates with the March kit design; however, you do not need it to complete the March cards.
  • The additional stamp set is a 4×6 footprint, which is larger than most Paper Pumpkin sets and is designed for use on a variety of crafting projects.

Subscription Information

  • Subscribe for the March kit at paperpumpkin.com from February 11–March 10.
  • Supplies may be limited toward the end of each subscription period.

****************************************************************************************************

Card stock cuts for this project:

  • Petal Pink Cardstock 2 1/2″ X 5″ (die cut flowers)
  • Soft Sea Foam Cardstock 8 1/2″ X 11″ (card base scored and folded at 5 1/2″), 2″ X 5″ (die cut leaves)
  • Soft Suede Cardstock 2″ X 5″ (branch and flower centers), 4 1/8″ X 5 3/8″ (inner liner mat)
  • Whisper White Cardstock 4 1/2″ X 3 1/2″ (artwork), 4″ X 5 1/4″ (inner liner)
  • So Very Vellum Specialty Designer Series Paper 4 1/4″ X 5 1/2″ (card front)
  • Parisian Blossoms Specialty Designer Series Paper 2 1/4″ X 6″ (piece for envelope flap)

****************************************************************************************************
Product List

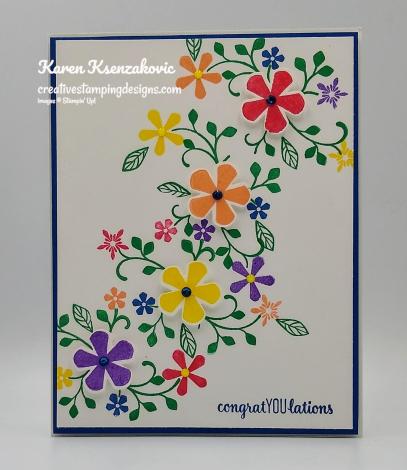
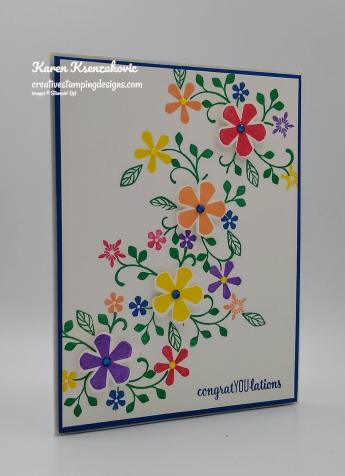
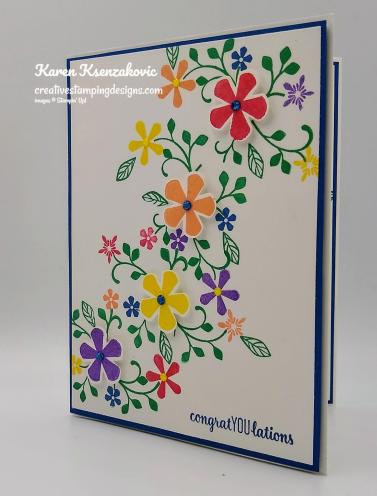
Stampin’ Up! Rainbow Thoughtful Blooms

Good Monday morning my fellow stampers. How was everyone’s weekend?  Did anyone do anything fun?  It was a nice sunny weekend here for a change.  Saturday was a little windy and chilly, but Sunday felt like a spring day.  It’s suppose to be even warmer here today, 69 I think.  Spring’s on it’s way.

For today’s card I used a FREE stamp set from Sale-A-Bration and a FREE punch from Sale-A- Bration, with qualifying orders.  I also used 4 of the 5 2018-2020 In-Colors which will be retiring in June.  If you are loving any of these colors, grab them while you still can.  I believe this is the most colors I’ve ever used on one card.   Here’s my card.

I played along with Just Add Ink Challenge #495.  Their colors are Add A Rainbow.  I believe I have a rainbow with this card for sure.

I also played along with Watercooler Wednesday Challenge #261.  Here is their theme.

I started by stamping the large flower image from the Stampin’ Up! Thoughtful Blooms Photopolymer Stamp Set, which is a FREE item with a qualifying purchase from Sale-A-Bration, in Poppy Parade, Grapefruit Grove, Pineapple Punch and Gorgeous Grape Inks on a panel of Whisper White cardstock.  I cut the rainbow of flowers out using my Small Blooms Punch which is another FREE item with a qualifying purchase from Sale-A- Bration.

On a panel of Whisper White cardstock I stamped the large leafy image from the Thoughtful Blooms stamp set in Call Me Clover Ink across the panel.  I stamped the small leaf image from the Thoughtful Blooms stamp set in Call Me Clover Ink randomly around.  I randomly stamped the medium and small flower images from the Thoughtful Blooms stamp set in Blueberry Bushel, Gorgeous Grape, Grapefruit Grove, Pineapple Punch and Poppy Parade Inks around the leafy image.

I stamped the sentiment from the Thoughtful Blooms stamp set in Blueberry Bushel Ink on the bottom right corner of the panel.  I adhered the Whisper White panel to a Blueberry Bushel mat using Snail and then to a Thick Whisper White card base using Stampin’ Dimensionals.  I adhered the large punched flowers to the card front using Stampin’ Dimensionals.  I added Blueberry Bushel Rhinestones from the Noble Peacock Rhinestones to the large flower centers.  I added Pineapple Punch Happiness Blooms Enamel Dots to the medium flower centers.

On the inside I stamped the sentiment from the Stampin’ Up! Band Together Cling Stamp Set in Blueberry Bushel Ink in the center of a Whisper White panel.  I stamped the large flower image from the Thoughtful Blooms stamp set in Gorgeous Grape and Poppy Parade Inks on either side of the sentiment.  I stamped the greens and leaf image from the Thoughtful Blooms stamp set in Call Me Clover Ink around the flowers.  I stamped the small dot flower image from the Thoughtful Blooms stamp set in Grapefruit Grove and Pineapple Punch Inks on the greens.  I adhered the Whisper White panel to a Blueberry Bushel mat using Snail and then to the inside of the Thick Whisper White card base using Multipurpose Liquid Glue.

To finish my card I decorated a Medium Whisper White Envelope.   I stamped the large flower image from the Thoughtful Blooms stamp set in Poppy Parade Ink on the bottom front of the envelope.  I stamped the greens and leaves image from the Thoughtful Blooms stamp set around the flower in Call Me Clover Ink.  I stamped the dot flower image from the Thoughtful Blooms stamp set in Gorgeous Grape, Grapefruit Grove and Pineapple Punch Inks on the greens.  I adhered a panel of Poppy Parade Brights 6 X 6 Designer Series Paper to the envelope flap.

Thank you for stopping by my blog today.  I hope you liked my card and will give it a try. Happy Stamping!!

****************************************************************************************************

If you need any stamping supplies, I’d love to be your Demonstrator. Just click HERE to go directly to my online store or drop me an email if you have any questions. 

MY CURRENT HOST CODE IS: QCX43K4E

Use this host code when you order $50 or greater and receive a free gift from me! If your order is over $150, please do not use this code, but you’ll still get the free gift. The free gift is your choice of any item valued up to $10.00 in either the 2019-2020 Annual Catalog or the 2020 January-June Mini Catalog!   For any orders $50 or more I will also send you my monthly class tutorials.  Click HERE or go to my Customer Rewards for more details and to see what this months tutorials are.

Click HERE to shop the clearance rack.

Happy Stamping, Karen!

****************************************************************************************************

BRINGING THE JOYS OF SPRING MARCH PAPER PUMPKIN KIT

Paper Pumpkin March 2020: No Matter the Weather

Tomorrow is the last day to subscribe so that you get your free stamp set, you don’t want to miss out!!

Cheers to seven years! This March, Paper Pumpkin has reached another exciting milestone: our seventh year of delivering fun, easy, creative projects to you. To thank everyone who has helped us along the way, we’re including an additional FREE stamp set with every March kit. This means that every subscriber will receive two stamp sets!
The March 2020 kit will arrive in an exclusive, specially-designed box that you will love! Think daffodils, raindrops, and a fresh spring vibe.

About the March Kit

  • Kit contains supplies for 12 cards and envelopes (4 cards of 3 designs)
  • Notecard size: 5″ x 3-1/2″ (12.7 x 8.9 cm)
  • Envelope size: 5-1/8″ x 3-5/8″ (13 x 9.2 cm)

Coordinating Colors: Balmy Blue, Basic Gray, Calypso Coral, Grapefruit Grove, Gray Granite, Pear Pizzazz, Petal Pink, Shaded Spruce, and So Saffron

About the FREE Stamp Set

  • The additional stamp set is a great value and coordinates with the March kit design; however, you do not need it to complete the March cards.
  • The additional stamp set is a 4×6 footprint, which is larger than most Paper Pumpkin sets and is designed for use on a variety of crafting projects.

Subscription Information

  • Subscribe for the March kit at paperpumpkin.com from February 11–March 10.
  • Supplies may be limited toward the end of each subscription period.

****************************************************************************************************

Card stock cuts for this project:

  • Blueberry Bushel Cardstock 2 – 4 1/8″ X 5 3/8″ (card front mat and inner liner mat)
  • Whisper White Cardstock 2 – 4″ X 5 1/4″ (card front and inner liner)
  • Thick Whisper White Cardstock 8 1/2″ X 5 1/2″ (card base scored and folded at 4 1/4″)
  • Brights 6 X 6 Designer Series Paper 2 1/4″ X 6″ (piece for envelope flap)

****************************************************************************************************

Product List

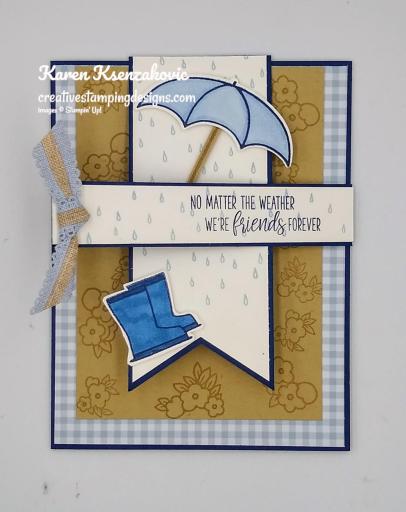
Stampin’ Up! Under My Umbrella for Fun Fold Friday

Good Friday morning my stamping friends and welcome to my Fun Fold Friday.  How was everyone’s week?  Hopefully your work week is over and you are ready to start the weekend.  I’m actually only working 1 day this weekend for a change.

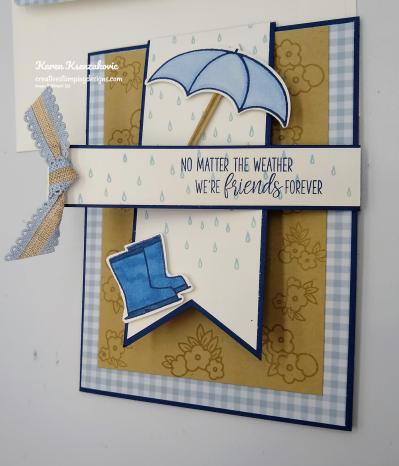
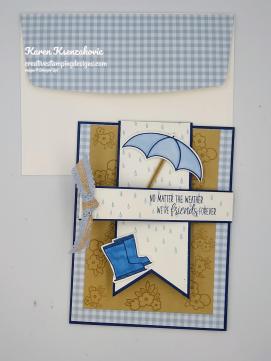
For today’s card I used another one of my favorite stamp sets from the 2020 January-June Mini Catalog.  I played along with a few challenges and made it into a fun fold.  Here’s my card.

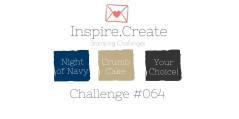
My colors are from Inspire. Create Challenge #064.  Here are their colors.

My sketch is from Atlantic Hearts Sketch Challenge #358.  Here is their sketch.

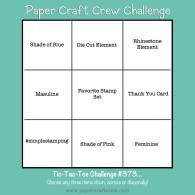
I also played along with Paper Craft Crew Tic Tac Toe Challenge # 373. I went diagonally down from the top left to bottom right.

I started by stamping a Crumb Cake panel using the flower images from the Stampin’ Up! Under My Umbrella Photopolymer Stamp Set in Crumb Cake Ink randomly around.  I adhered a panel of 2019-2021 In- Color 6 X 6 Designer Series Paper to a Night of Navy card base using Snail.  I adhered the stamped crumb cake panel on top of the DSP using Multipurpose Liquid Glue.

I stamped a strip of Whisper White cardstock using the rain drop image from the Under My Umbrella stamp set in Seaside Spray Ink.  I made a banner using my Banner Triple Punch.  I made another banner slightly larger in Night of Navy cardstock using my Banner Triple Punch.  I adhered the Whisper White banner to the Night of Navy banner leaving equal amounts on the 3 sides.  On a small piece of Whisper White cardstock I stamped the umbrella and boots image from the Under My Umbrella stamp set in Night of Navy Ink.  I colored the umbrella in using my Seaside Spray Stampin’ Blends Markers.  I colored the boots in using my Night of Navy Stampin’ Blends Markers.  I punched the umbrella top out using my Umbrella Builder Punch and I fussy cut the boots using my Paper Snips.  On a scrap piece of Crumb Cake cardstock I stamped the umbrella handle image from the Under My Umbrella stamp set in Crumb Cake Ink and punched it out using my Umbrella Builder Punch.  I adhered the umbrella handle to the umbrella top using a Glue Dot.  I adhered the umbrella and boots to the matted banner using Stampin’ Dimensionals.

On a strip of Whisper White cardstock I stamped the sentiment from the Under My Umbrella stamp set in Night of Navy Ink.  I stamped the raindrop image from the Under My Umbrella stamp set in Seaside Spray Ink  I adhered the Whisper White strip to a Night of Navy mat using Snail and added a piece of Seaside Spray Scalloped Lined Ribbon which I tied in a knot to the end using a Glue Dot.

On the inside I stamped the sentiment from the Under My Umbrella stamp set in Night of Navy Ink in the center of a Whisper White panel.  I stamped the flower images from the Under My Umbrella stamp set in Seaside Spray Ink around the sentiment.  I stamped the closed umbrella image from the Under My Umbrella stamp set in Night of Navy Ink and colored it in using my Seaside Spray Stampin’ Blends Markers.  I stamped the handle image from the Under My Umbrella stamp set in Crumb Cake Ink on the umbrella.  I adhered the Whisper White panel to a Seaside Spray mat using Snail.  I adhered the banner to the top back of the mat so that it folded over the front using Tear & Tape Adhesive.  I adhered the sentiment strip to the right back of the mat so that it folded across over the banner using Tear & Tape Adhesive.  I adhered the matted panel to the inside of the Night of Navy card base using Multipurpose Liquid Glue.

To finish my card I decorated a Medium Whisper White Envelope.  I stamped the closed umbrella image from the Under My Umbrella stamp set in Night of Navy Ink on the envelope front and colored it in using my Seaside Spray Stampin’ Blends Markers.  I stamped the umbrella handle image in Crumb Cake Ink on the umbrella.  I stamped the flower images from the Under My Umbrella stamp set in Seaside Spray Ink to the right of the umbrella.  I adhered a panel of 2019-2021 In-Color 6 X 6 DSP to the envelope flap.

Thank you for stopping by my blog today.  I hope you liked my card and will give it a try. Happy Stamping!!

****************************************************************************************************

If you need any stamping supplies, I’d love to be your Demonstrator. Just click HERE to go directly to my online store or drop me an email if you have any questions. 

MY CURRENT HOST CODE IS: 4UXRJREH

Use this host code when you order $50 or greater and receive a free gift from me! If your order is over $150, please do not use this code, but you’ll still get the free gift. The free gift is your choice of any item valued up to $10.00 in either the 2019-2020 Annual Catalog or the 2020 January-June Mini Catalog!   For any orders $50 or more I will also send you my monthly class tutorials.  Click HERE or go to my Customer Rewards for more details and to see what this months tutorials are.

Click HERE to shop the clearance rack.

Happy Stamping, Karen!

****************************************************************************************************

BRINGING THE JOYS OF SPRING MARCH PAPER PUMPKIN KIT

Paper Pumpkin March 2020: No Matter the Weather

Cheers to seven years! This March, Paper Pumpkin has reached another exciting milestone: our seventh year of delivering fun, easy, creative projects to you. To thank everyone who has helped us along the way, we’re including an additional FREE stamp set with every March kit. This means that every subscriber will receive two stamp sets!
The March 2020 kit will arrive in an exclusive, specially-designed box that you will love! Think daffodils, raindrops, and a fresh spring vibe.

About the March Kit

  • Kit contains supplies for 12 cards and envelopes (4 cards of 3 designs)
  • Notecard size: 5″ x 3-1/2″ (12.7 x 8.9 cm)
  • Envelope size: 5-1/8″ x 3-5/8″ (13 x 9.2 cm)

Coordinating Colors: Balmy Blue, Basic Gray, Calypso Coral, Grapefruit Grove, Gray Granite, Pear Pizzazz, Petal Pink, Shaded Spruce, and So Saffron

About the FREE Stamp Set

  • The additional stamp set is a great value and coordinates with the March kit design; however, you do not need it to complete the March cards.
  • The additional stamp set is a 4×6 footprint, which is larger than most Paper Pumpkin sets and is designed for use on a variety of crafting projects.

Subscription Information

  • Subscribe for the March kit at paperpumpkin.com from February 11–March 10.
  • Supplies may be limited toward the end of each subscription period.

****************************************************************************************************

Card stock cuts for this project:

  • Crumb Cake Cardstock 5″ X 3 1/2″ (card front)
  • Night of Navy Cardstock 8 1/2″ X 5 1/2″ (card base scored and folded at 4 1/4″), 2″ X 5 1/2″ (banner mat), 7/8″ X 5 1/4″ (sentiment mat)
  • Seaside Spray Cardstock 4 1/8″ X 5 3/8″ (inner liner mat)
  • Whisper White Cardstock 1 7/8″ X 4 3/4″ (banner), 3/4″ X 4 1/4″ (sentiment), 1 1/2″ X 5″ (artwork), 4″ X 5 1/4″ (inner liner)
  • 2019-2021 In-Color 6 X 6 Designer Series Paper

****************************************************************************************************

Product List

Stampin’ Up! Easter Promise for Happy Inkin Thursday Blog Hop

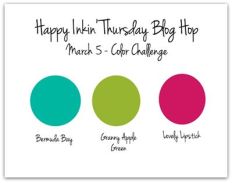
Good Thursday morning my fellow stampers and welcome to the Happy Inkin’ Thursday Blog Hop. How is everyone doing today? If you are hopping over from Akiko, thank you for stopping by. Be sure to take a moment to hop around to see everyone’s beautiful projects today. This week we had a Color Challenge, here are the colors we got to work with.

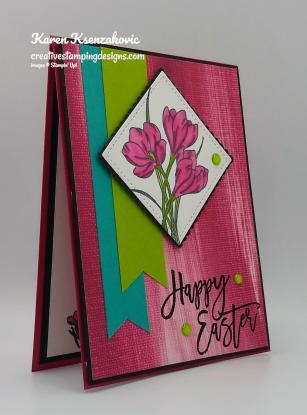
Here’s what I came up with for these colors.

I started by stamping the sentiment from the Stampin’ Up! Easter Promise Cling Stamp Set in Versamark Ink on the bottom right of a panel of Lily Impressions Designer Series Paper (which is a Sale-A-Bration item).  I immediately sprinkled it with my Black Stampin’ Emboss Powder and set it using my Heat Tool.  I adhered the Lily Impressions DSP to a Basic Black mat using Snail and then to a Lovely Lipstick card base using Stampin’ Dimensionals.

I cut 2 strips of cardstock, one in Bermuda Bay and the other in Granny Apple Green, into banners using the Banner Triple Punch.  I adhered the banners to the left side of the card front using Multipurpose Liquid Glue.

On a small panel of Whisper White cardstock, I stamped the large flower image from the Easter Promise stamp set in Tuxedo Black Memento Ink.  I colored the image in using my Granny Apple Green and Lovely Lipstick Stampin’ Blends Markers.  I cut the image out using the 2nd largest square from the Stitched Shapes Dies.  Using the Layering Squares Dies, I cut the scallop square that was slightly larger that the stitched square in Basic Black cardstock.  I adhered the artwork to the Basic Black scalloped mat using Snail and then to the card front using Stampin’ Dimensionals.  I added a few Granny Apple Green Glitter Enamel Dots to the card front.

On the inside I stamped the sentiment from the Easter Promise stamp set in Tuxedo Black Memento Ink in the center of a Whisper White panel.  I stamped the small flower image from the Easter Promise stamp set in Tuxedo Black Memento Ink on the bottom of the panel.  I colored the image in using my Granny Apple Green and Lovely Lipstick Stampin’ Blends Markers.  I adhered the Whisper White panel to a Basic Black mat using Snail and then to the inside of the Lovely Lipstick card base using Multipurpose Liquid Glue.

To finish my card I decorated a Medium Whisper White Envelope.  I stamped the large flower image from the Easter Promise stamp set in Tuxedo Black Memento Ink on the front of the envelope.  I colored the image in using my Granny Apple Green and Lovely Lipstick Stampin’ Blends Markers.  I adhered a panel of the Lily Impressions DSP to the envelope flap.

Thank you for visiting my blog today. I hope you liked my card and will give it a try. Now that you’ve seen my card, hop around to see everyone else’s projects. You can hit the next button to hop over to Amy Koenders blog or you can just click on the names below. Happy Hopping!!

Amy Koenders:
Mary Deatherage:
Kristi Gray:
Jaimie Babarczy:
Sue Prather:
Karen Finkle:
Eva Dobilas:
Akiko Sudano:
Karen Ksenzakovic: You Are Here

****************************************************************************************************

If you need any stamping supplies, I’d love to be your Demonstrator. Just click HERE to go directly to my online store or drop me an email if you have any questions. 

MY CURRENT HOST CODE IS: 4UXRJREH

Use this host code when you order $50 or greater and receive a free gift from me! If your order is over $150, please do not use this code, but you’ll still get the free gift. The free gift is your choice of any item valued up to $10.00 in either the 2019-2020 Annual Catalog or the 2020 January-June Mini Catalog!   For any orders $50 or more I will also send you my monthly class tutorials.  Click HERE or go to my Customer Rewards for more details and to see what this months tutorials are.

Click HERE to shop the clearance rack.

Happy Stamping, Karen!

****************************************************************************************************

BRINGING THE JOYS OF SPRING MARCH PAPER PUMPKIN KIT

Paper Pumpkin March 2020: No Matter the Weather

Cheers to seven years! This March, Paper Pumpkin has reached another exciting milestone: our seventh year of delivering fun, easy, creative projects to you. To thank everyone who has helped us along the way, we’re including an additional FREE stamp set with every March kit. This means that every subscriber will receive two stamp sets!
The March 2020 kit will arrive in an exclusive, specially-designed box that you will love! Think daffodils, raindrops, and a fresh spring vibe.

About the March Kit

  • Kit contains supplies for 12 cards and envelopes (4 cards of 3 designs)
  • Notecard size: 5″ x 3-1/2″ (12.7 x 8.9 cm)
  • Envelope size: 5-1/8″ x 3-5/8″ (13 x 9.2 cm)

Coordinating Colors: Balmy Blue, Basic Gray, Calypso Coral, Grapefruit Grove, Gray Granite, Pear Pizzazz, Petal Pink, Shaded Spruce, and So Saffron

About the FREE Stamp Set

  • The additional stamp set is a great value and coordinates with the March kit design; however, you do not need it to complete the March cards.
  • The additional stamp set is a 4×6 footprint, which is larger than most Paper Pumpkin sets and is designed for use on a variety of crafting projects.

Subscription Information

  • Subscribe for the March kit at paperpumpkin.com from February 11–March 10.
  • Supplies may be limited toward the end of each subscription period.

****************************************************************************************************

Card stock cuts for this project:

  • Basic Black Cardstock 4 1/8″ X 5 3/8″ (card front mat), 2 1/2″ X 2 1/2″ (artwork mat), 4″ X 5 1/4″ (inner liner mat)
  • Bermuda Bay Cardstock 7/8″ X 4 3/4″ (card front banner)
  • Granny Apple Green Cardstock 1″ X 3 7/8″ (card front banner
  • Lovely Lipstick Cardstock 4 1/4″ X 11″ (card base scored and folded at 5 1/2″)
  • Whisper White Cardstock 2 1/2″ X 2 1/2″ (artwork), 3 3/4″ X 5″ (inner liner)
  • Lily Impressions Designer Series Paper 4″ X 5 1/4″ (card front), 2 1/4″ X 6″ (piece for envelope flap)

****************************************************************************************************

Product List

Stampin’ Up! Hello Sunshine Inspiring Iris

Good Wednesday morning my fellow stampers. We’re halfway through the week already. Hope you are having a productive week.

I have another card from our card class last night that we made.  The ladies were busy making all the cards.  It was another fun night stamping with friends.  Here’s my card.

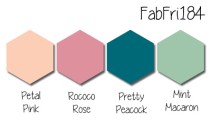
My colors were inspired by Fab Friday Challenge #184.  Here are their colors.

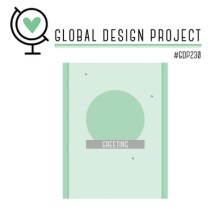
My design is from Global Design Project Challenge #230.  Here is their sketch.

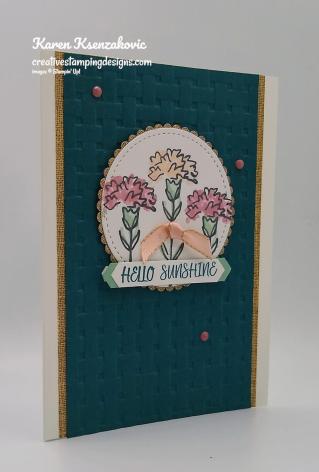
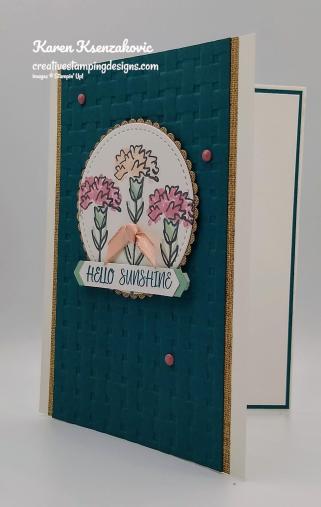
I started by embossing a panel of Pretty Peacock cardstock using the Basket Weave 3D Embossing Folder.  I adhered the embossed panel to a panel of Pressed Petals Specialty Designer Series Paper using Multipurpose Liquid Glue.  I adhered the matted panel to a Thick Whisper White card base using Multipurpose Liquid Glue.

On a panel of Whisper White cardstock I stamped the outlined flower image from the Stampin’ Up! Inspiring Iris Photopolymer Stamp Set in Tuxedo Black Memento Ink 3 times.  I stamped the stem fill image from the Inspiring Iris stamp set in Mint Macaron Ink on all 3 flower stems over the outlined image.  I stamped the flower fill image from the Inspiring Iris stamp set 2 times with Rococo Rose Ink and once with Petal Pink Ink over the outlined image.  I cut the flowers out using the 2nd largest circle from the Stitched Shapes Dies.  Using the Layering Circle Dies, I cut the scallop circle that fit the stitched circle from a panel of Pressed Petals Specialty DSP.  I adhered the artwork to the scalloped mat using Snail and I adhered the matted artwork to the card front using Stampin’ Dimensionals.

On a small strip of Whisper White cardstock I stamped the sentiment from the Stampin’ Up! Under My Umbrella Photopolymer Stamp Set in Pretty Peacock Ink.  I punched the sentiment out using the Classic Label Punch.  I punched out another label  from Mint Macaron cardstock using the Classic Label Punch.  I cut the Mint Macaron label in half and adhered it to the sentiment label on each side using Snail  I adhered the sentiment to the card front using Stampin’ Dimensionals.  I added a small piece of Petal Pink 1/4″ Metallic Edged Ribbon, which I tied into a knot, to the artwork using a Glue Dot.  I added a few Rococo Rose 2019-2021 In-Color Faceted Dots to the card front.

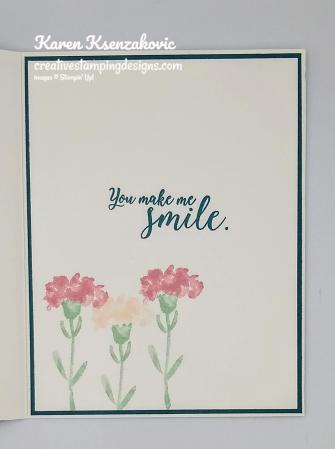
On the inside I stamped the sentiment from the Stampin’ Up! Colorful Seasons Photopolymer Stamp Set in Pretty Peacock Ink in the center of a Whisper White panel.  I stamped the flower fill images from the Inspiring Iris stamp set 3 times on the bottom of the panel, once in Petal Pink Ink and 2 times in Rococo Rose Ink.  I stamped the stem fill image from the Inspiring Iris stamp set 3 times in Mint Macaron Ink below the flower images.  I adhered the Whisper White panel to a Pretty Peacock mat using Snail and then to the inside of the Thick Whisper White card base using Multipurpose Liquid Glue.

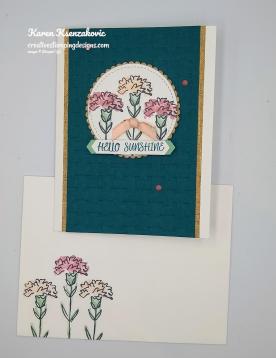
To finish my card I decorated a Medium Whisper White Envelope.  I stamped the flower outline image from the Inspiring Iris stamp set 3 times on the card front using Tuxedo Black Memento Ink.  I stamped the stem fill image from the Inspiring Iris stamps set over the outlined images in Mint Macaron Ink and stamped the flower fill image from the Inspiring Iris stamp set twice in Petal Pink Ink and once in Rococo Rose Ink over the outlined images.  I adhered a panel of Pressed Petals Specialty DSP to the envelope flap.

Thank you for stopping by my blog today.  I hope you liked my card and will give it a try. Happy Stamping!!

****************************************************************************************************

If you need any stamping supplies, I’d love to be your Demonstrator. Just click HERE to go directly to my online store or drop me an email if you have any questions. 

MY CURRENT HOST CODE IS: 4UXRJREH

Use this host code when you order $50 or greater and receive a free gift from me! If your order is over $150, please do not use this code, but you’ll still get the free gift. The free gift is your choice of any item valued up to $10.00 in either the 2019-2020 Annual Catalog or the 2020 January-June Mini Catalog!   For any orders $50 or more I will also send you my monthly class tutorials.  Click HERE or go to my Customer Rewards for more details and to see what this months tutorials are.

Click HERE to shop the clearance rack.

Happy Stamping, Karen!

****************************************************************************************************

BRINGING THE JOYS OF SPRING MARCH PAPER PUMPKIN KIT

Paper Pumpkin March 2020: No Matter the Weather

Cheers to seven years! This March, Paper Pumpkin has reached another exciting milestone: our seventh year of delivering fun, easy, creative projects to you. To thank everyone who has helped us along the way, we’re including an additional FREE stamp set with every March kit. This means that every subscriber will receive two stamp sets!
The March 2020 kit will arrive in an exclusive, specially-designed box that you will love! Think daffodils, raindrops, and a fresh spring vibe.

About the March Kit

  • Kit contains supplies for 12 cards and envelopes (4 cards of 3 designs)
  • Notecard size: 5″ x 3-1/2″ (12.7 x 8.9 cm)
  • Envelope size: 5-1/8″ x 3-5/8″ (13 x 9.2 cm)

Coordinating Colors: Balmy Blue, Basic Gray, Calypso Coral, Grapefruit Grove, Gray Granite, Pear Pizzazz, Petal Pink, Shaded Spruce, and So Saffron

About the FREE Stamp Set

  • The additional stamp set is a great value and coordinates with the March kit design; however, you do not need it to complete the March cards.
  • The additional stamp set is a 4×6 footprint, which is larger than most Paper Pumpkin sets and is designed for use on a variety of crafting projects.

Subscription Information

  • Subscribe for the March kit at paperpumpkin.com from February 11–March 10.
  • Supplies may be limited toward the end of each subscription period.

****************************************************************************************************

Card stock cuts for this project:

  • Mint Macaron Cardstock 1″ X 2 1/2″ (sentiment mat)
  • Pretty Peacock Cardstock 3 1/2″ X 5 1/2″ (card front), 4 1/8″ X 5 3/8″ (inner liner mat)
  • Whisper White Cardstock 3″ X 3″ (artwork), 1″ X 2 1/2″ (sentiment), 4″ X 5 1/4″ (inner liner)
  • Thick Whisper White Cardstock 8 1/2″ X 5 1/2″ (card base scored and folded at 4 1/4″)
  • Pressed Petals Specialty Designer Series Paper 3 34/” X 5 1/2″ (card front mat), 3″ X 3″ (artwork mat), 2 1/4″ X 6″ (piece for envelope flap)

****************************************************************************************************

Product List

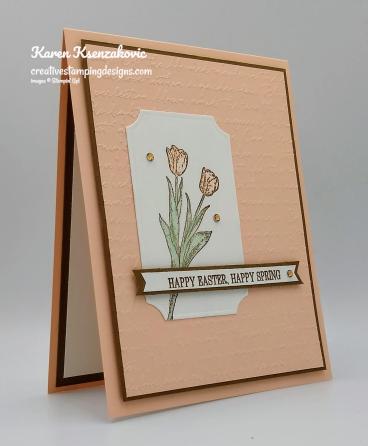
Stampin’ Up! Winds of Change Easter Card

Good Tuesday morning my stamping friends.  How has everyone’s week started off.  It’s starting to feel a lot like spring here.  This is one of the mildest winters I remember in a long time.  I blame it on my Team Leader moving to NJ from GA.  I think she brought the mild winter with her.

Today’s card is another one we are doing tonight at our card class.  My design was inspired by one of my team members Akiko Sudano.  You can see her card here. Here is my take on her card.

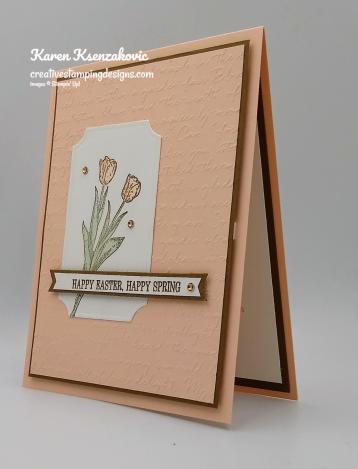
I started by embossing a panel of Petal Pink cardstock using the Scripty 3D Embossing Folder.  I adhered the embossed panel to a Soft Suede mat using Multipurpose Liquid Glue.  I adhered the matted panel to a Petal Pink card base using Stampin’ Dimensionals.

On a small panel of Whisper White cardstock I stamped the tulip image from the Stampin’ Up! Winds of Change Cling Stamp Set in Soft Suede Ink.  I colored the image in using my Mint Macaron and Petal Pink Stampin’ Blends Markers.  I cut the image out using my Painted Labels Dies.  I adhered the artwork to the Petal Pink card front using Multipurpose Liquid Glue.

On a thin strip of Whisper White cardstock I stamped the sentiment from the Stampin’ Up! Timeless Tulips Photopolymer Stamp Set in Soft Suede Ink.  I made the strip into a banner using my Paper Snips.  I adhered the sentiment to a  strip of Soft Suede cardstock, which I made into a banner using my Paper Snips, using Snail.  I adhered the matted banner to the card front using Mini Stampin’ Dimensionals.  I added a few Champagne Rhinestone Basic Jewels.

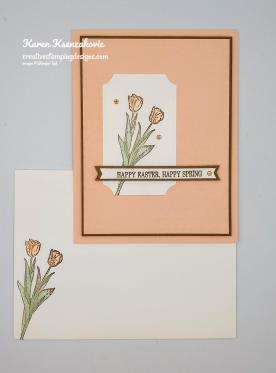
On the inside I stamped the sentiment from the Timeless Tulips stamp set in Soft Suede Ink in the center of a Whisper White panel.  I stamped the tulip image from the Winds of Change stamp set in Petal Pink Ink over the sentiment.  I adhered the Whisper White panel to a Soft Suede mat using Snail and then to the inside of the Petal Pink card base using Multipurpose Liquid Glue.

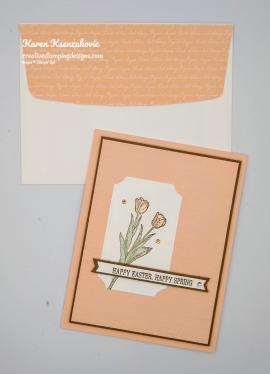
To finish my card I decorated a Medium Whisper White Envelope.  I stamped the tulip image from the Winds of Change stamp set in Soft Suede Ink on the envelope front.  I colored the image in using my Mint Macaron and Petal Pink Stampin’ Blends Markers.  I adhered a Petal Pink panel of the Subtle 6 X 6 Designer Series Paper to the envelope flap.

Thank you for stopping by my blog today.  I hope you liked my card and will give it a try. Happy Stamping!!

****************************************************************************************************

If you need any stamping supplies, I’d love to be your Demonstrator. Just click HERE to go directly to my online store or drop me an email if you have any questions. 

MY CURRENT HOST CODE IS: 4UXRJREH

Use this host code when you order $50 or greater and receive a free gift from me! If your order is over $150, please do not use this code, but you’ll still get the free gift. The free gift is your choice of any item valued up to $10.00 in either the 2019-2020 Annual Catalog or the 2020 January-June Mini Catalog!   For any orders $50 or more I will also send you my monthly class tutorials.  Click HERE or go to my Customer Rewards for more details and to see what this months tutorials are.

Click HERE to shop the clearance rack.

Happy Stamping, Karen!

****************************************************************************************************

BRINGING THE JOYS OF SPRING MARCH PAPER PUMPKIN KIT

Paper Pumpkin March 2020: No Matter the Weather

Cheers to seven years! This March, Paper Pumpkin has reached another exciting milestone: our seventh year of delivering fun, easy, creative projects to you. To thank everyone who has helped us along the way, we’re including an additional FREE stamp set with every March kit. This means that every subscriber will receive two stamp sets!
The March 2020 kit will arrive in an exclusive, specially-designed box that you will love! Think daffodils, raindrops, and a fresh spring vibe.

About the March Kit

  • Kit contains supplies for 12 cards and envelopes (4 cards of 3 designs)
  • Notecard size: 5″ x 3-1/2″ (12.7 x 8.9 cm)
  • Envelope size: 5-1/8″ x 3-5/8″ (13 x 9.2 cm)

Coordinating Colors: Balmy Blue, Basic Gray, Calypso Coral, Grapefruit Grove, Gray Granite, Pear Pizzazz, Petal Pink, Shaded Spruce, and So Saffron

About the FREE Stamp Set

  • The additional stamp set is a great value and coordinates with the March kit design; however, you do not need it to complete the March cards.
  • The additional stamp set is a 4×6 footprint, which is larger than most Paper Pumpkin sets and is designed for use on a variety of crafting projects.

Subscription Information

  • Subscribe for the March kit at paperpumpkin.com from February 11–March 10.
  • Supplies may be limited toward the end of each subscription period.

****************************************************************************************************

Card stock cuts for this project:

  • Petal Pink Cardstock 4 1/4″ X 11″ (card base scored and folded at 5 1/2″), 3 3/4″ X 5″ (card front)
  • Soft Suede Cardstock 3 7/8″ X 5 1/8″ (card front mat), 3/8″ X 3 1/2″ (sentiment mat), 4″ X 5 1/4″ (inner liner mat)
  • Whisper White Cardstock 2 1/2″ X 3 1/2″ (artwork), 1/4″ X 3 1/2″ (sentiment),  3 3/4″ X 5″ (inner liner)
  • Subtle 6 X 6 Designer Series Paper 2 1/4″ X 6″ (piece for envelope flap)

****************************************************************************************************

Product List

Stampin’ Up! Inspiring Iris

Good Monday morning my fellow stampers.  How was everyone’s weekend?  I had to work both days, but I have today off, YAY!!  Today is my fur babies birthday, she turned 12.  I thought I’d share a couple pictures of her with you.  She was my mother’s day gift 12 years ago, and the best gift I ever received.  Her name is Jasmine. The 1st one is the day I got her, she was about 10 weeks old and the last one is recent.  She’s gotten a little grey, but still acts like a puppy at times.  She is definitely a mommy’s girl.  Thanks for letting me share.

Onto today’s card.  Tomorrow night we’re having our monthly card class.  We’re planning on making 4 Easter/Spring cards.  Here is one of the cards we’re going to make.

The colors in my card were inspired by Just Add Ink Challenge #494.  Here are their color.  I absolutely love these colors together, so soft and springy.

I also played along with Watercooler Wednesday Challenge #260.  Here is their theme.

I started by embossing a panel of Soft Sea Foam cardstock using the Stone 3D Embossing Folder which you can earn as a bundle with a qualifying order from Sale-A-Bration.   This embossing folder is one I’m really hoping carries over to the next Annual Catalog, it’s one of my favorites.  I took my Soft Sea Foam stamp pad and gently wiped it across the embossed panel shading the raised parts.  I then took my Smoky Slate stamp pad and gently wiped that across the panel.  I adhered the embossed panel to a Smoky Slate mat using Multipurpose Liquid Glue and adhered it to a Soft Sea Foam card base using Stampin’ Dimensionals.

On a small panel of Whisper White cardstock I stamped the large outline flower image from the Stampin’ Up! Inspiring Iris Photopolymer Stamp Set in Smoky Slate Ink.  I stamped the flower fill image from the Inspiring Iris stamp set in Petal Pink Ink over the outlined image.  I stamped the leaf fill image from the Inspiring Iris stamp set in Soft Sea Foam Ink over the outlined image.  I was able to get everything lined up so perfectly using my Stamparatus.  I cut the image out using my Stitched Rectangle Dies.  I cut a small panel of Smoky Slate cardstock using the Stitched So Sweetly Dies that was the same size as my rectangle.  I adhered the artwork to the Smoky Slate mat on an angle using Glue Dots and adhered it to my card front using Stampin’ Dimensionals.  I added a small piece of Petal Pink 1/4″ Metallic Edge Ribbon which I tied in a knot to the artwork using a Glue Dot.  I added a few Champagne Rhinestone Basic Jewels to the artwork.

On a thin strip of Petal Pink cardstock I stamped the sentiment from the Stampin’ Up! Itty Bitty Greetings Cling Stamp Set in Smoky Slate Ink.  I adhered the sentiment to the card front using Mini Stampin’ Dimensionals.

On the inside I stamped the sentiment from the Stampin’ Up! A Wish For Everything Cling Stamp Set in Smoky Slate Ink in the center of a Whisper White panel.  I stamped the flower fill image from the Inspiring Iris stamp set in Petal Pink Ink over the sentiment.  I stamped the leaf fill image from the Inspiring Iris stamp set in Soft Sea Foam Ink below the flower image.  I adhered the Whisper White panel to a Smoky Slate mat using Snail and then to the inside of the Soft Sea Foam card base using Multipurpose Liquid Glue.

To finish my card I decorated a Medium Whisper White Envelope.  I stamped the outline flower image from the Inspiring Iris stamp set on the envelope front in Smoky Slate Ink.  I stamped the flower fill image from the Inspiring Iris stamp set in Petal Pink Ink over the outlined image.  I stamped the leaf fill image from the Inspiring Iris stamp set in Soft Sea Foam Ink over the outlined image.  I adhered a Soft Sea Foam panel of Subtle 6 X 6 Designer Series Paper to the envelope flap.

Thank you for stopping by my blog today.  I hope you liked my card and will give it a try. Happy Stamping!!

****************************************************************************************************

If you need any stamping supplies, I’d love to be your Demonstrator. Just click HERE to go directly to my online store or drop me an email if you have any questions. 

MY CURRENT HOST CODE IS: 4UXRJREH

Use this host code when you order $50 or greater and receive a free gift from me! If your order is over $150, please do not use this code, but you’ll still get the free gift. The free gift is your choice of any item valued up to $10.00 in either the 2019-2020 Annual Catalog or the 2020 January-June Mini Catalog!   For any orders $50 or more I will also send you my monthly class tutorials.  Click HERE or go to my Customer Rewards for more details and to see what this months tutorials are.

Click HERE to shop the clearance rack.

Happy Stamping, Karen!

****************************************************************************************************

BRINGING THE JOYS OF SPRING MARCH PAPER PUMPKIN KIT

Paper Pumpkin March 2020: No Matter the Weather

Cheers to seven years! This March, Paper Pumpkin has reached another exciting milestone: our seventh year of delivering fun, easy, creative projects to you. To thank everyone who has helped us along the way, we’re including an additional FREE stamp set with every March kit. This means that every subscriber will receive two stamp sets!
The March 2020 kit will arrive in an exclusive, specially-designed box that you will love! Think daffodils, raindrops, and a fresh spring vibe.

About the March Kit

  • Kit contains supplies for 12 cards and envelopes (4 cards of 3 designs)
  • Notecard size: 5″ x 3-1/2″ (12.7 x 8.9 cm)
  • Envelope size: 5-1/8″ x 3-5/8″ (13 x 9.2 cm)

Coordinating Colors: Balmy Blue, Basic Gray, Calypso Coral, Grapefruit Grove, Gray Granite, Pear Pizzazz, Petal Pink, Shaded Spruce, and So Saffron

About the FREE Stamp Set

  • The additional stamp set is a great value and coordinates with the March kit design; however, you do not need it to complete the March cards.
  • The additional stamp set is a 4×6 footprint, which is larger than most Paper Pumpkin sets and is designed for use on a variety of crafting projects.

Subscription Information

  • Subscribe for the March kit at paperpumpkin.com from February 11–March 10.
  • Supplies may be limited toward the end of each subscription period.

****************************************************************************************************

Card stock cuts for this project:

  • Petal Pink Cardstock 1/4″ X 1 3/4″ (sentiment)
  • Smoky Slate Cardstock 3 1/2″ X 2 1/2″ (artwork mat), 3 5/8″ X 4 7/8″ (card front mat), 4 1/8″ X 5 3/8″ (inner liner mat)
  • Soft Seafoam Cardstock 4 1/4″ X 11″ (card base scored and folded at 5 1/2″), 3 1/2″ X 4 3/4″ (card front)
  • Whisper White Cardstock 3 1/2″ X 2 1/2″ (artwork), 4″ X 5 1/4″ (inner liner)
  • Subtle 6 X 6 Designer Series Paper 2 1/4″ X 6″ (piece for envelope flap)

****************************************************************************************************

Product List

Stampin’ Up! Timeless Tropical Oasis for Fun Fold Friday

Good Friday morning my fellow stampers and welcome to my Fun Fold Friday.  How was everyone’s week? The weekend is here already, have you made any plans?  I’ll be at work all weekend, end of the month and 1st of the month.  The good news is I get to take Monday off, YAY!!

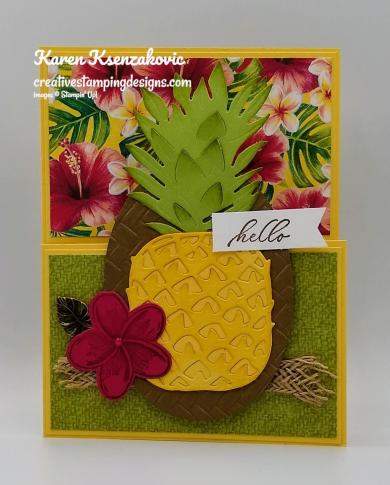
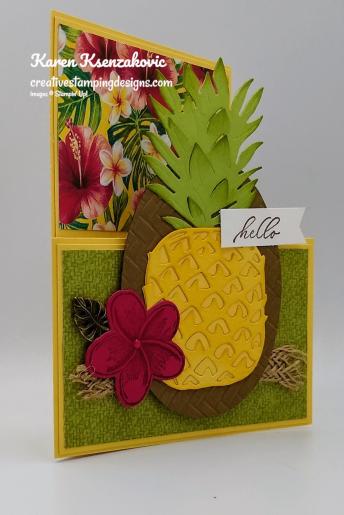
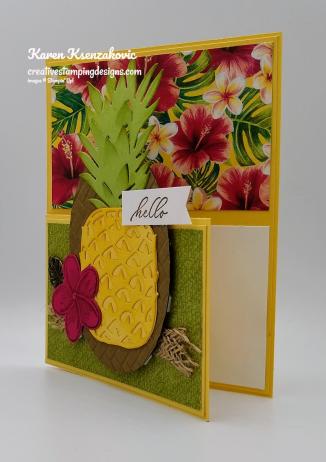
Today’s fun fold card is a pretty quick one.  My daughter has been asking me to make a card using the pineapple from the In The Tropics Dies. Here’s my card.

I started by cutting 2 of the pineapples out using the In The Tropics Dies from So Saffron cardstock.  One of them I poked all the little pieces out and sponged it using my Sponge Dauber and So Saffron Ink.  I focused on sponging only the pointy pieces of the pineapple.  I then adhered the cut out piece to the pineapple that I didn’t punch the little pieces out of using Multipurpose Liquid Glue.  I cut the pineapple top out of Pear Pizzazz cardstock using the In The Tropics Dies.  I sponged the edges and points of the leaves using Pear Pizzazz Ink and my Sponge Dauber.  I adhered the pineapple top to the pineapple base using Multipurpose Liquid Glue.  I cut the largest oval from the Layering Ovals Dies out of a panel of Soft Suede cardstock.  I embossed it using my Coastal Weave 3D Embossing Folder.  I adhered the pineapple to the embossed oval using Multipurpose Liquid Glue.

For the card base I started with an 8 1/2″ X 5 1/2″ piece of So Saffron scored and folded at 4 1/4″.  I then cut the front of the card base at 2 3/4″ to the center fold and then up to the top along the center fold.  I adhered a panel of So Saffron to the front piece using Multipurpose Liquid Glue.  I adhered a panel of Tropical Oasis Designer Series Paper to the card front using Snail.

I adhered a strip of the 5/16″ Braided Burlap Trim to the card front using Snail.  I adhered the matted pineapple to the card front over the trim using Stampin’ Dimensionals.  On a small piece of Lovely Lipstick cardstock I stamped the small flower from the Stampin’ Up! Timeless Tropical Cling Stamp Set in Soft Suede Ink.  I cut the image out using my In The Tropics Dies and adhered it to the left of the pineapple using Stampin’ Dimensionals.  I added a leaf from the Tropical Oasis Trinkets using a Glue Dot, tucked just under the flower.  I added a Lovely Lipstick Happiness Blooms Enamel Dot to the center of the flower.  On a thin strip of Whisper White cardstock I stamped the sentiment from the Timeless Tropical stamp set in Soft Suede Ink and made it into a banner using my Paper Snips.  I adhered the sentiment to the top of the pineapple using Glue Dots.

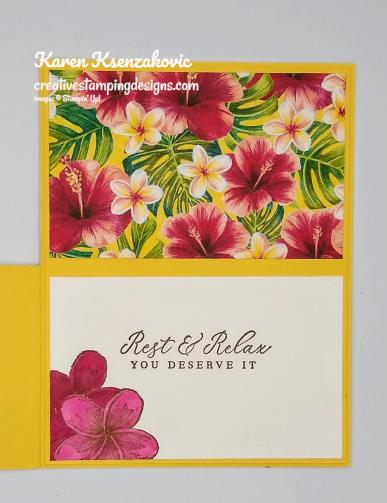
On the inside I stamped the sentiment from the Timeless Tropical stamp set in Soft Suede Ink in the center of the Whisper White panel.  I stamped the small flower image from the Timeless Tropical stamp set in Soft Suede Ink on the bottom corner of the panel.  I colored the flowers in using my Lovely Lipstick Stampin’ Blends Markers.  I adhered the Whisper White panel to the bottom of a So Saffron panel using Snail.   I adhered a panel of the Tropical Oasis DSP to the top of the So Saffron panel using Snail.  I adhered the panel to the inside of the card base using Multipurpose Liquid Glue.

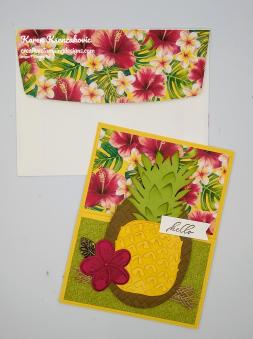
To finish my card I decorated  Medium Whisper White Envelope.  I stamped the small flower image from the Timeless Tropical stamp set in Soft Suede Ink on the bottom front of the envelope.  I stamped the pineapple image from the Timeless Tropical stamp set in Soft Suede Ink on the bottom front of the envelope.  I colored the flowers in using my Lovely Lipstick Stampin’ Blends Markers.  I adhered a panel of the Tropical Oasis DSP to the envelope flap.

Thank you for stopping by my blog today.  I hope you liked my card and will give it a try. Happy Stamping!!

****************************************************************************************************

If you need any stamping supplies, I’d love to be your Demonstrator. Just click HERE to go directly to my online store or drop me an email if you have any questions. 

MY CURRENT HOST CODE IS: QCX43K4E

Use this host code when you order $50 or greater and receive a free gift from me! If your order is over $150, please do not use this code, but you’ll still get the free gift. The free gift is your choice of any item valued up to $10.00 in either the 2019-2020 Annual Catalog or the 2020 January-June Mini Catalog!   For any orders $50 or more I will also send you my monthly class tutorials.  Click HERE or go to my Customer Rewards for more details and to see what this months tutorials are.

Click HERE to shop the clearance rack.

Happy Stamping, Karen!

****************************************************************************************************

BRINGING THE JOYS OF SPRING MARCH PAPER PUMPKIN KIT

Paper Pumpkin March 2020: No Matter the Weather

Cheers to seven years! This March, Paper Pumpkin has reached another exciting milestone: our seventh year of delivering fun, easy, creative projects to you. To thank everyone who has helped us along the way, we’re including an additional FREE stamp set with every March kit. This means that every subscriber will receive two stamp sets!
The March 2020 kit will arrive in an exclusive, specially-designed box that you will love! Think daffodils, raindrops, and a fresh spring vibe.

About the March Kit

  • Kit contains supplies for 12 cards and envelopes (4 cards of 3 designs)
  • Notecard size: 5″ x 3-1/2″ (12.7 x 8.9 cm)
  • Envelope size: 5-1/8″ x 3-5/8″ (13 x 9.2 cm)

Coordinating Colors: Balmy Blue, Basic Gray, Calypso Coral, Grapefruit Grove, Gray Granite, Pear Pizzazz, Petal Pink, Shaded Spruce, and So Saffron

About the FREE Stamp Set

  • The additional stamp set is a great value and coordinates with the March kit design; however, you do not need it to complete the March cards.
  • The additional stamp set is a 4×6 footprint, which is larger than most Paper Pumpkin sets and is designed for use on a variety of crafting projects.

Subscription Information

  • Subscribe for the March kit at paperpumpkin.com from February 11–March 10.
  • Supplies may be limited toward the end of each subscription period.

****************************************************************************************************

Card stock cuts for this project:

  • Lovely Lipstick Cardstock 2″ X 2″ (flower)
  • Pear Pizzazz Cardstock 3″ X 3″ (pineapple top)
  • So Saffron Cardstock 8 1/2″ X 5 1/2″ (card base scored and folded at 4 1/4″), 4 1/8″ X 5 3/8″ (inner liner mat), 4 1/8″ X 2 5/8″ (card front mat), 5″ X 2 1/2″ (pineapple)
  • Soft Suede Cardstock 3 1/2″ X 4 1/2″ (mat for pineapple)
  • Whisper White Cardstock 4″ X 2 1/2″ (inner liner), 1/2″ X 1 1/2″ (sentiment)
  • Tropical Oasis Designer Series Paper 2 – 4″ X 2 1/2″ (card front and inner panel), 2 1/4″ X 6″ (piece for envelope flap)

****************************************************************************************************

Product List

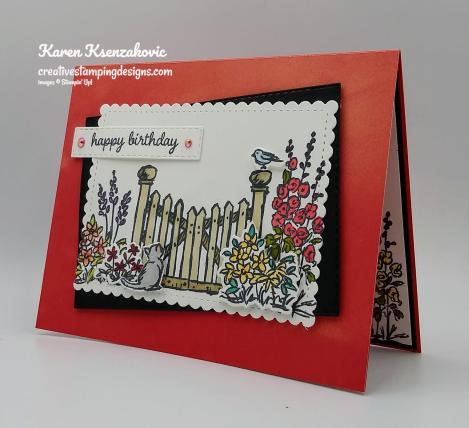
Stampin’ Up! Grace’s Garden Birthday for Happy Inkin’ Thursday Blog Hop

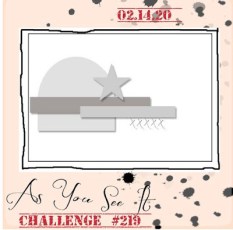
Good Thursday morning my stamping friends. Welcome to the Happy Inkin’ Thursday Blog Hop. If you are hopping over from Akiko, thank you for stopping by. This week we had a Sketch Challenge. Be sure to hop around to see everyone’s beautiful projects.
Here is the sketch we had to work from.

Here’s my card using this weeks sketch.

I started by adhering a panel of Peaceful Poppies Designer Series Paper to a Poppy Parade card base using Snail.

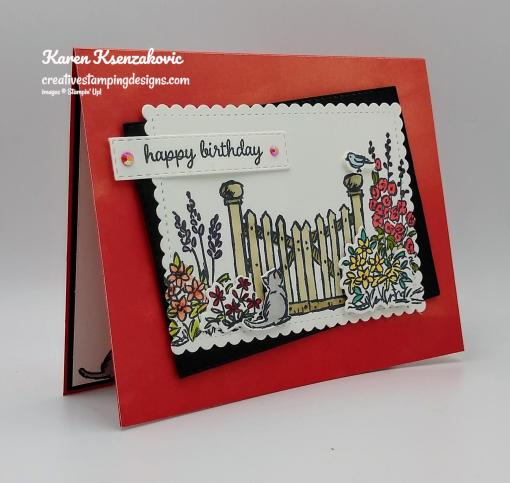
On a panel of Whisper White cardstock I stamped the fence image and flower image from the Stampin’ Up! Grace’s Garden Photopolymer Stamp Set in Tuxedo Black Memento Ink.  I colored the images in using my Calypso Coral, Crumb Cake, Old Olive, Poppy Parade and Rich Razzleberry Stampin’ Blends Markers.  I cut the panel using the largest scalloped rectangle from the Stitched So Sweetly Dies.  On a scrap piece of Whisper White cardstock I stamped the flower images, cat and bird images from the Grace’s Garden stamp set in Tuxedo Black Memento Ink.  I colored the images in using my Balmy Blue, Old Olive, Poppy Parade, Smoky Slate and So Saffron Stampin’ Blends Markers.  I cut the images out using my Garden Gateway Dies.  I adhered the die cut images to my artwork using Glue Dots and Stampin’ Dimensionals.

I cut a panel of Basic Black cardstock using my Stitched Rectangle Dies.  I adhered the artwork on an angle to the Basic Black rectangle using Multipurpose Liquid Glue.  I adhered the matted artwork to the card front using Stampin’ Dimensionals.  On a scrap of Whisper White cardstock I stamped the sentiment from the Stampin’ Up! Timeless Tulips Photopolymer Stamp Set in Tuxedo Black Memento Ink.  I cut the sentiment out using the Stitched Rectangle Dies.  I adhered the sentiment to the card front using Stampin’ Dimensionals.  I added a couple From The Heart Faceted Gems to the sentiment strip using a tiny dot of Multipurpose Liquid Glue.

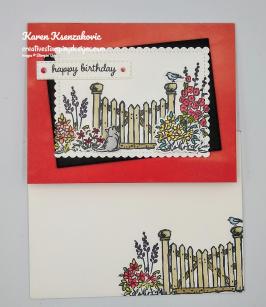
On the inside I stamped the sentiment from the Timeless Tulips stamp set in Tuxedo Black Memento Ink in the center of a Whisper White panel.  I stamped the flower images and the cat image from the Grace’s Garden stamp set in Tuxedo Black Memento Ink on the bottom of the panel.  I colored the images in using my Old Olive, Poppy Parade, Rich Razzleberry, Smoky Slate and So Saffron Stampin’ Blends Markers.  I adhered the Whisper White panel to a Basic Black mat using Snail and then to the inside of the Poppy Parade card base using Multipurpose Liquid Glue.

To finish my card I decorated a Medium Whisper White Envelope.  I stamped the fence, flower and bird images from the Grace’s Garden stamp set in Tuxedo Black Memento Ink on the envelope front. I colored the images in using my Balmy Blue, Crumb Cake, Old Olive, Poppy Parade and Rich Razzleberry Stampin’ Blends Markers.  I adhered a panel of the Peaceful Poppies DSP to the envelope flap.

Thank you for visiting my blog today. I hope you liked my card and will give it a try. Now that you’ve seen my card, take a minute to hop through all our projects today. If you click on the Next Blog button, you’ll go to Amy’s page. Or you can just click on the names below to go directly to all the blogs! Happy Hopping!!

Amy Koenders:
Mary Deatherage:
Kristi Gray:
Jaimie Babarczy:
Sue Prather:
Karen Finkle:
Eva Dobilas: Not participating this week
Akiko Sudano:
Karen Ksenzakovic:

****************************************************************************************************

If you need any stamping supplies, I’d love to be your Demonstrator. Just click HERE to go directly to my online store or drop me an email if you have any questions. 

MY CURRENT HOST CODE IS: QCX43K4E

Use this host code when you order $50 or greater and receive a free gift from me! If your order is over $150, please do not use this code, but you’ll still get the free gift. The free gift is your choice of any item valued up to $10.00 in either the 2019-2020 Annual Catalog or the 2020 January-June Mini Catalog!   For any orders $50 or more I will also send you my monthly class tutorials.  Click HERE or go to my Customer Rewards for more details and to see what this months tutorials are.

Click HERE to shop the clearance rack.

Happy Stamping, Karen!

****************************************************************************************************

BRINGING THE JOYS OF SPRING MARCH PAPER PUMPKIN KIT

Paper Pumpkin March 2020: No Matter the Weather

Cheers to seven years! This March, Paper Pumpkin has reached another exciting milestone: our seventh year of delivering fun, easy, creative projects to you. To thank everyone who has helped us along the way, we’re including an additional FREE stamp set with every March kit. This means that every subscriber will receive two stamp sets!
The March 2020 kit will arrive in an exclusive, specially-designed box that you will love! Think daffodils, raindrops, and a fresh spring vibe.

About the March Kit

  • Kit contains supplies for 12 cards and envelopes (4 cards of 3 designs)
  • Notecard size: 5″ x 3-1/2″ (12.7 x 8.9 cm)
  • Envelope size: 5-1/8″ x 3-5/8″ (13 x 9.2 cm)

Coordinating Colors: Balmy Blue, Basic Gray, Calypso Coral, Grapefruit Grove, Gray Granite, Pear Pizzazz, Petal Pink, Shaded Spruce, and So Saffron

About the FREE Stamp Set

  • The additional stamp set is a great value and coordinates with the March kit design; however, you do not need it to complete the March cards.
  • The additional stamp set is a 4×6 footprint, which is larger than most Paper Pumpkin sets and is designed for use on a variety of crafting projects.

Subscription Information

  • Subscribe for the March kit at paperpumpkin.com from February 11–March 10.
  • Supplies may be limited toward the end of each subscription period.

****************************************************************************************************

Card stock cuts for this project:

  • Basic Black Cardstock 5″ X 4″ (card front), 4 1/8″ X 5 3/8″ (inner liner mat)
  • Poppy Parade Cardstock 8 1/2″ X 5 1/2″ (card base scored and folded at 4 1/4″)
  • Whisper White Cardstock 4 1/2″ X 3 1/2″ (artwork), 4″ X 5 1/4″ (inner liner)
  • Peaceful Poppies Designer Series Paper 4 1/4″ X 5 1/2″ (card front), 2 1/4″ X 6″ (piece for envelope flap)

****************************************************************************************************

Product List

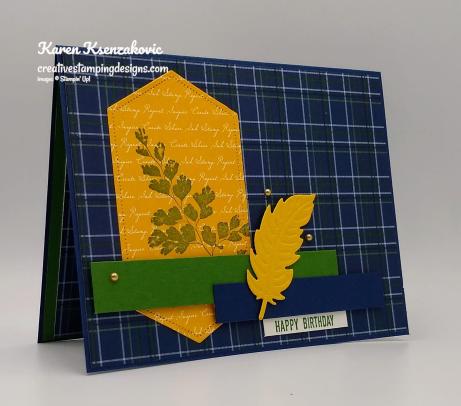
Stampin’ Up! Positive Thoughts Masculine Birthday

Good Wednesday morning my stamping friends.  How is everyone doing today?   We’re half way through the week already and heading to the weekend.  We’re expecting another rainy day here.  I’m not sure if Mother Nature knows it or not, but it’s winter.  We’re supposed to get snow in the winter not rain.  I really need a snow day to be able to craft all day while my family is shoveling the snow.

Onto my card for today.  I’ve got a masculine card for you using one of my favorite sets from the 2020 January-June Mini Catalog.  Here’s my card.

My colors are from the Global Design Project Challenge #229.  Here are their colors.

My design is from the As You See It Challenge #219.  Here is their sketch.

I started by adhering a panel of Country Club Designer Series Paper to a Night of Navy card base using Snail.  I absolutely love these plaids in this DSP pack.  Perfect for masculine cards.

I stamped the fern image from the Stampin’ Up! Positive Thoughts Cling Stamp Set in Garden Green Ink on a panel of Crushed Curry Regals 6 X 6 Designer Series Paper.  I cut the image out using my Stitched Nested Dies.  I adhered the die cut to the card front using Multipurpose Liquid Glue.  I adhered a strip of Garden Green cardstock across the artwork using Stampin’ Dimensionals I adhered the strip of Night of Navy cardstock along the bottom of the Garden Green strip using Stampin’ Dimensionals.

On a small strip of Whisper White cardstock I stamped the sentiment from the Stampin’ Up! Itty Bitty Greetings Cling Stamp Set in Garden Green Ink.  I adhered the sentiment strip below the Night of Navy strip using Glue Dots.  Using the Coordination Nature’s Thoughts Dies I cut the feather  out of a scrap of Crushed Curry cardstock and adhered it to the card front using a Stampin’ Dimensional and Glue Dot.  I added a few gold Metallic Pearls to the card front.

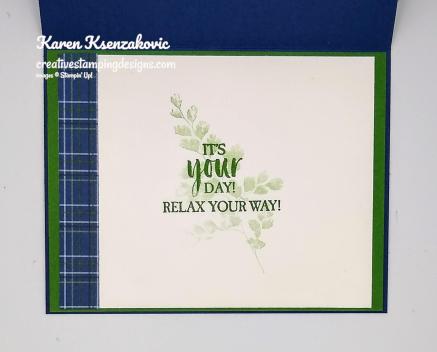
On the inside I stamped the sentiments from the Stampin’ Up! A Good Man Cling Stamp Set in Garden Green Ink in the center of a Whisper White panel. I stamped the fern image from the Positive Thoughts stamp set in Garden Green Ink, stamping off 3 times, across the sentiment.  I adhered a strip of the Country Club DSP to the side of the panel using Snail.  I adhered the Whisper White panel to a Garden Green mat using Snail and then to the inside of the Night of Navy card base using Multipurpose Liquid Glue.

To finish my card I decorated a Medium Whisper White Envelope.  I stamped the fern image from the Positive Thoughts stamp set in Garden Green Ink on the envelope front 3 times without re-inking.  I adhered a panel of the Country Club DSP to the envelope flap.

Thank you for stopping by my blog today.  I hope you liked my card and will give it a try. Happy Stamping!!

****************************************************************************************************

If you need any stamping supplies, I’d love to be your Demonstrator. Just click HERE to go directly to my online store or drop me an email if you have any questions. 

MY CURRENT HOST CODE IS: QCX43K4E

Use this host code when you order $50 or greater and receive a free gift from me! If your order is over $150, please do not use this code, but you’ll still get the free gift. The free gift is your choice of any item valued up to $10.00 in either the 2019-2020 Annual Catalog or the 2020 January-June Mini Catalog!   For any orders $50 or more I will also send you my monthly class tutorials.  Click HERE or go to my Customer Rewards for more details and to see what this months tutorials are.

Click HERE to shop the clearance rack.

Happy Stamping, Karen!

****************************************************************************************************

BRINGING THE JOYS OF SPRING MARCH PAPER PUMPKIN KIT

Paper Pumpkin March 2020: No Matter the Weather

Cheers to seven years! This March, Paper Pumpkin has reached another exciting milestone: our seventh year of delivering fun, easy, creative projects to you. To thank everyone who has helped us along the way, we’re including an additional FREE stamp set with every March kit. This means that every subscriber will receive two stamp sets!
The March 2020 kit will arrive in an exclusive, specially-designed box that you will love! Think daffodils, raindrops, and a fresh spring vibe.

About the March Kit

  • Kit contains supplies for 12 cards and envelopes (4 cards of 3 designs)
  • Notecard size: 5″ x 3-1/2″ (12.7 x 8.9 cm)
  • Envelope size: 5-1/8″ x 3-5/8″ (13 x 9.2 cm)

Coordinating Colors: Balmy Blue, Basic Gray, Calypso Coral, Grapefruit Grove, Gray Granite, Pear Pizzazz, Petal Pink, Shaded Spruce, and So Saffron

About the FREE Stamp Set

  • The additional stamp set is a great value and coordinates with the March kit design; however, you do not need it to complete the March cards.
  • The additional stamp set is a 4×6 footprint, which is larger than most Paper Pumpkin sets and is designed for use on a variety of crafting projects.

Subscription Information

  • Subscribe for the March kit at paperpumpkin.com from February 11–March 10.
  • Supplies may be limited toward the end of each subscription period.

****************************************************************************************************

Card stock cuts for this project:

  • Crushed Curry Cardstock scrap for feather
  • Garden Green Cardstock 5/8″ X 4″ (card front strip), 4 1/8″ X 5 3/8″ (inner liner mat)
  • Night of Navy Cardstock 8 1/2″ X 5 1/2″ (card base scored and folded at 4 1/4″), 1/2″ X 3″ (card front strip)
  • Whisper White Cardstock 1/4″ X 1 1/2″ (sentiment strip), 4″ X 5″ (inner liner)
  • Country Club Designer Series Paper 4 1/8″ X 5 3/8″ (card front), 1/2″ X 4″ (inner liner strip), 2 1/4″ X 6″ (piece for envelope flap)
  • Regals 6 X 6 Designer Series Paper 4 1/2″ X 2 1/2″ (artwork)

****************************************************************************************************

Product List