
Good Monday morning my stamping friends. How was everyone’s weekend? Mine was fantastic!! I got to spend 2 days in Hartford, CT with my team members at OnStage. It was a PERFECT way to spend my birthday weekend.

This is most of my group that I was with. Penny, Christy, Julie, Kim, Jaimie, me, Akiko and Amy. We had a great time catching up, stamping together and seeing the new Mini Catalog. It’s always a great time when we get together.

My awesome Upline, Jaimie, got to go to CenterStage for the 1st time.


Our amazing leader Amy got to walk across the stage as a Top Performer.


We received this beautiful backpack filled with some gifts as soon as we arrived.

Kim, Julie, Akiko and Terry Lynn are showing off their Prize Patrol stamp sets.

This was my Prize Patrol, Stampin’ Up! Breathtaking Bouquet Cling Background Stamp Set. I can’t wait to play with this one! I received 2 stamp sets and had to give one away to a random person that I never met within 10 seconds as a Random Gift of Kindness.

This was one of the first cards we made using the new Stampin’ Up! Peaceful Moments Cling and Painted Poppies Cling Stamp Sets along with the new Peaceful Poppies DSP.


The next card we made used the new Stampin’ Up! Timeless Tulips Photopolymer Stamp Set and the new Tulip Builder Punch.


One of my favorite new sets coming is the Stampin’ Up Forever Blossoms Cling Stamp Set that has matching Cherry Blossoms Dies.


We made these 3 adorable 3″ note cards using the Stampin’ Up! Dressed To Impress Photopolymer Stamp Set that has All Dressed Up Dies to match.

Here are some more goodies that I came home with at the end of our convention.


These were all items that we used for our cards and at the end we were allowed to divide them up between us. The ribbon is the new Petal Pink 1/4″ Metallic-Edge Ribbon, it’s ana absolutely gorgeous glossy satin ribbon with champagne metallic edges. The paper is the New Country Club Designer Series Paper.


Here is the new 2020 Mini Catalog and Sale-A-Bration Catalog. You will be able to purchase from this catalog starting January 3, 2020 and earn FREE Sale-A- Bration items from January 3, 2020 – March 31, 2020. If you have placed an order with me and you are a customer of mine, I will be sending you your free catalog as soon as I get them Mid-December. If you would like to receive a catalog feel free to contact me.
I will be doing a paper share again for the new catalog. More information to follow in the next couple weeks.
For more sneak peeks and to see project board pictures, please visit my business Facebook page, Creative Stamping Designs.
****************************************************************************************************
If you need any stamping supplies, I’d be very happy to be your Demonstrator. Just click HERE to go directly to my online store or drop me an email if you have any questions.
MY CURRENT HOST CODE IS: DDDXNW6A
For any orders $50 or more I will send you my monthly class tutorials. Click HERE or go to my Customer Rewards to see what this months tutorials are.
Click HERE to shop the clearance rack.
Happy Stamping, Karen!
****************************************************************************************************
AVAILABLE NOW WHILE SUPPLIES LAST ONLY
DON’T MISS OUT ON THIS BEAUTIFUL SUITE
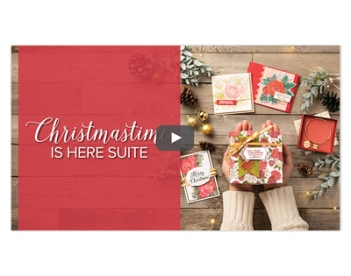
THE NEW CHRISTMASTIME IS HERE SUITE

We hope you’re ready to make this holiday season magical, because the Christmastime Is Here Suite is! This exclusive, limited-time collection of festive, floral coordinating products has everything you need to share love, joy, and creativity this holiday season.
Here’s a video of what’s included in the suite.
 ****************************************************************************************************


")
")


")


 On the inside I stamped the cabin image from the Rustic Retreat stamp set in Early Espresso Ink in the center of a Whisper White panel stamping off 3 times. I stamped the sentiment from the Stampin’ Up! Peaceful Boughs Cling Stamp Set in Early Espresso Ink over the cabin image. I stamped the bear and deer image from the Rustic Retreat stamp set in Early Espresso Ink on the bottom of the panel stamping off once. I adhered the Whisper White panel to an Early Espresso mat using Snail and then to the inside of the Cherry Cobbler card base using Multipurpose Liquid Glue.


")


")
")


")
")

")

 Cardstock")


 Shimmer Ribbon")


 Specialty Designer Series Paper")


 Designer Series Paper")

 Reversible Ribbon")


")
")


