Good Saturday morning my stamping friends. How has everyone’s weekend started off? I’ll be at work all day today, but surprisingly I have off tomorrow. Looking forward to a day off.
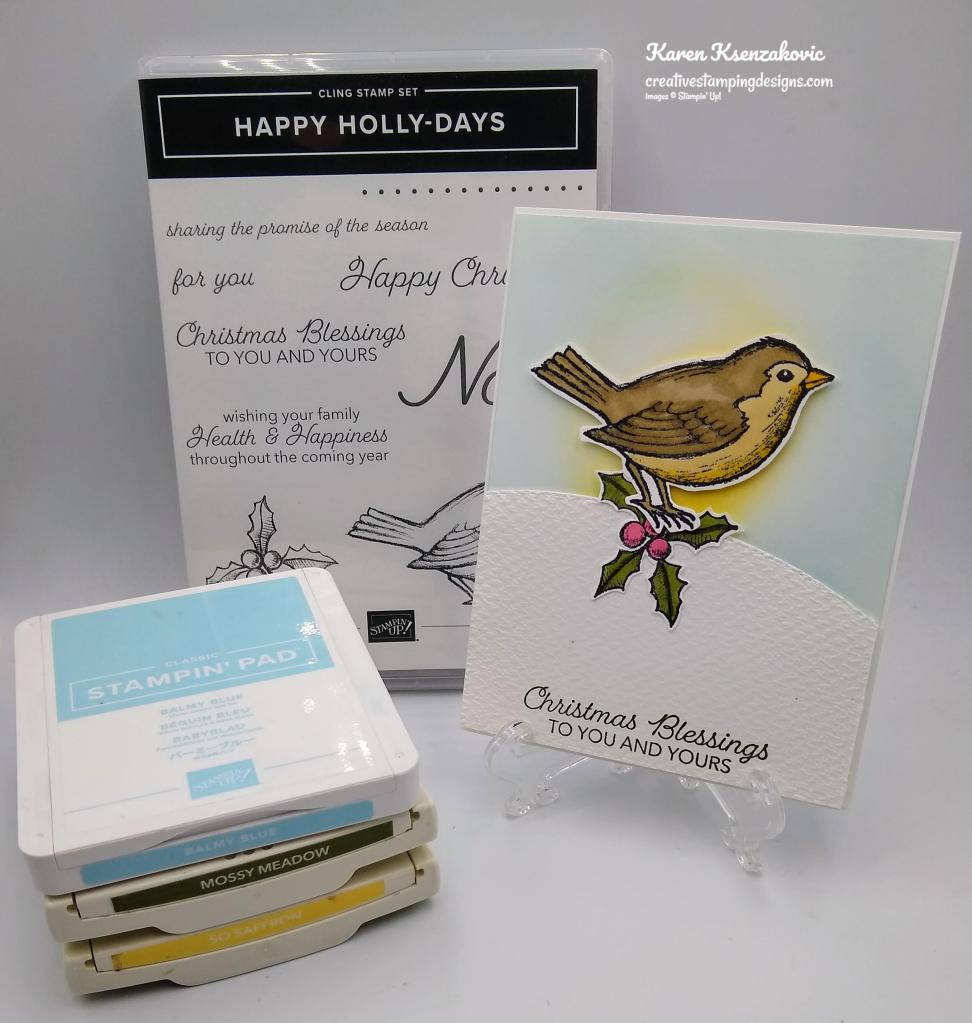
If you saw my Facebook live on Wednesday you saw that I stamped and cut out 2 different holly leaves. I had embossed 1 with Silver Embossing Powder and stamped the other with Tuxedo Black Ink. I asked those that were watching which one I should use. The majority picked the silver, but I had the black one and wanted to use it. So, today’s card is another version of yesterday’s.
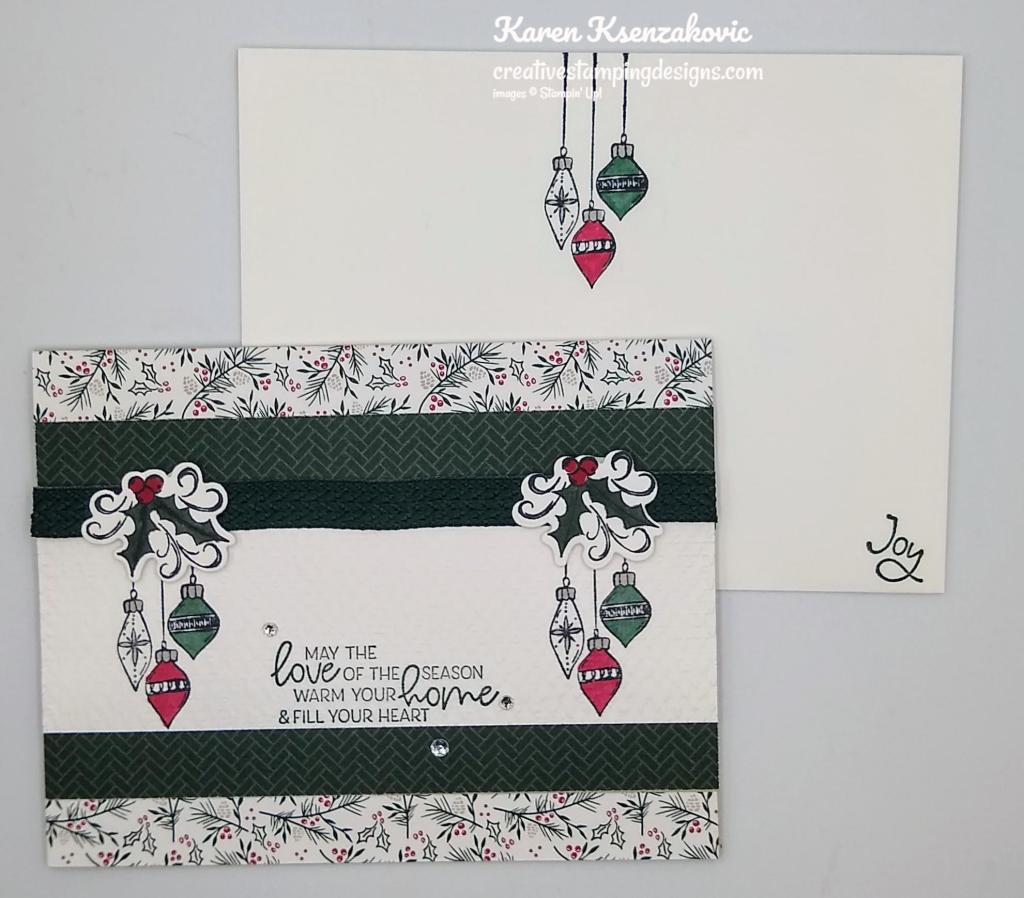
I used the Stampin’ Up! Happy Holly-Days Cling Stamp Set along with my Blending Brushes for my card today.
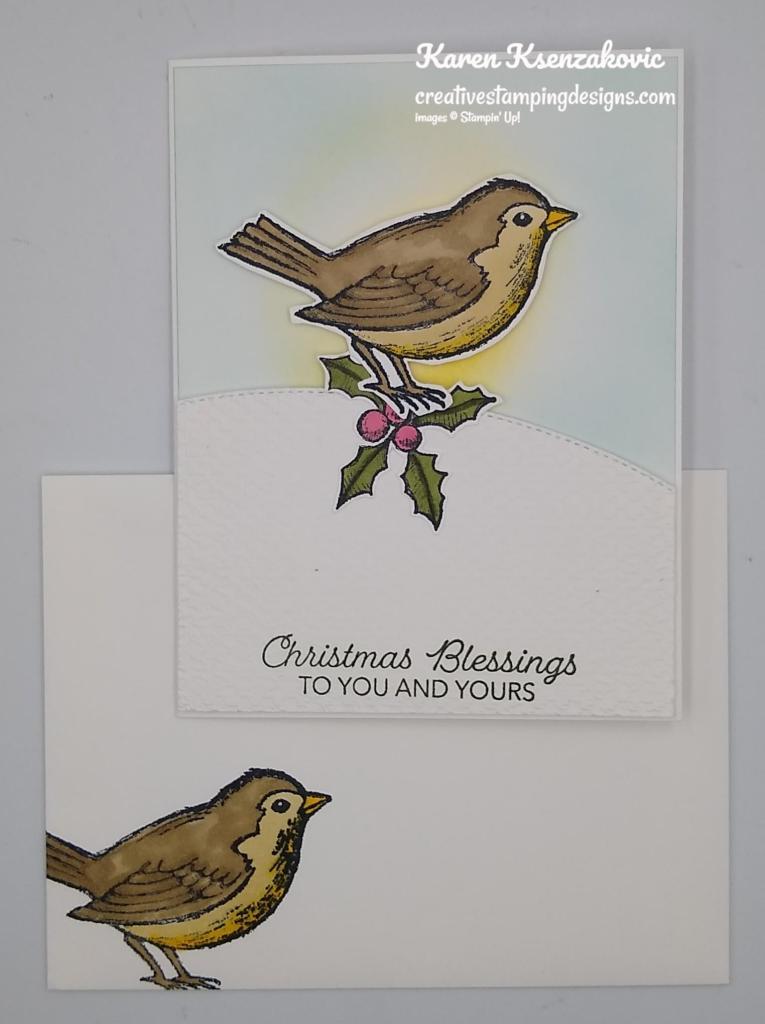
I started by using my Blending Brushes and my Balmy Blue and Daffodil Delight Inks and colored a Basic White card front. I adhered the panel to a Thick Basic White card front.
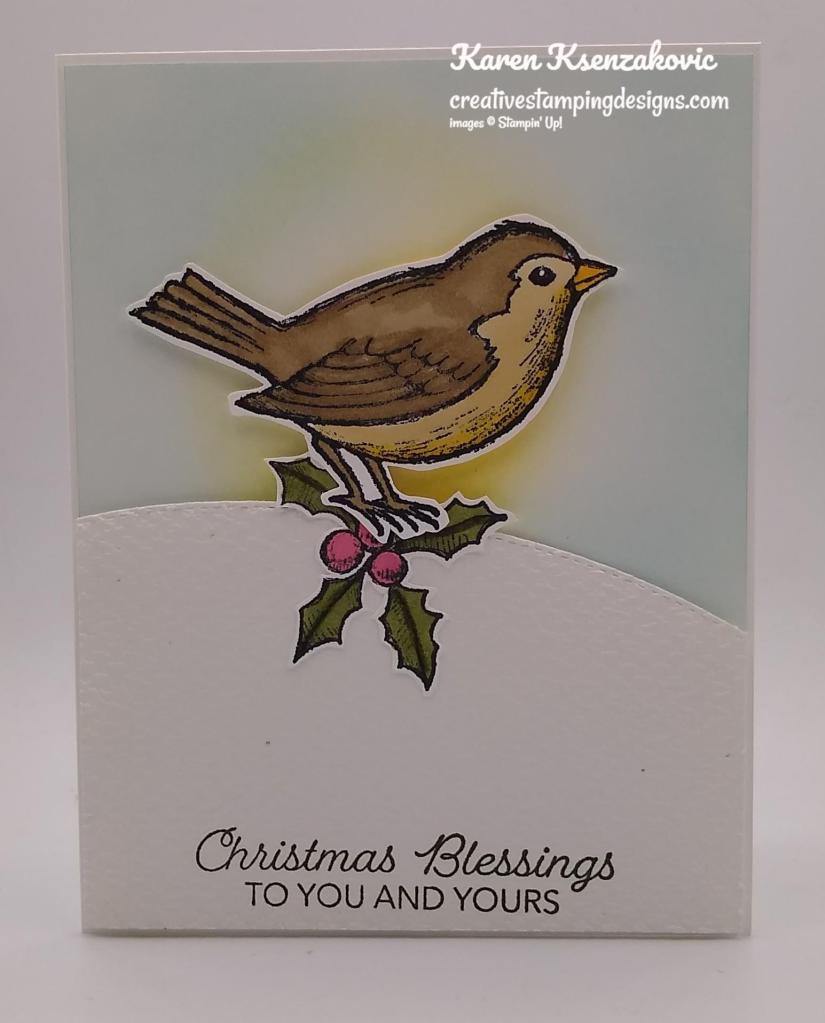
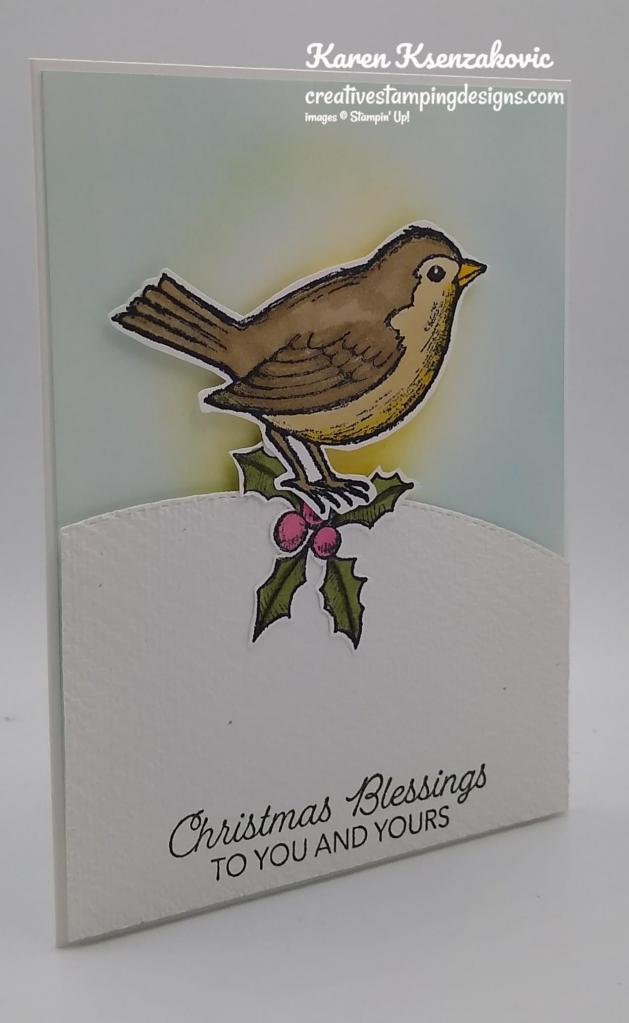
I cut a panel of Basic White cardstock using my Basic Borders Dies. I stamped the sentiment from the Happy Holly-Days stamp set in Mossy Meadow Ink on the bottom of the cut panel. I embossed the panel using my Tasteful Textile 3D Embossing Folder and adhered it to the card front using Stampin’ Dimensionals.
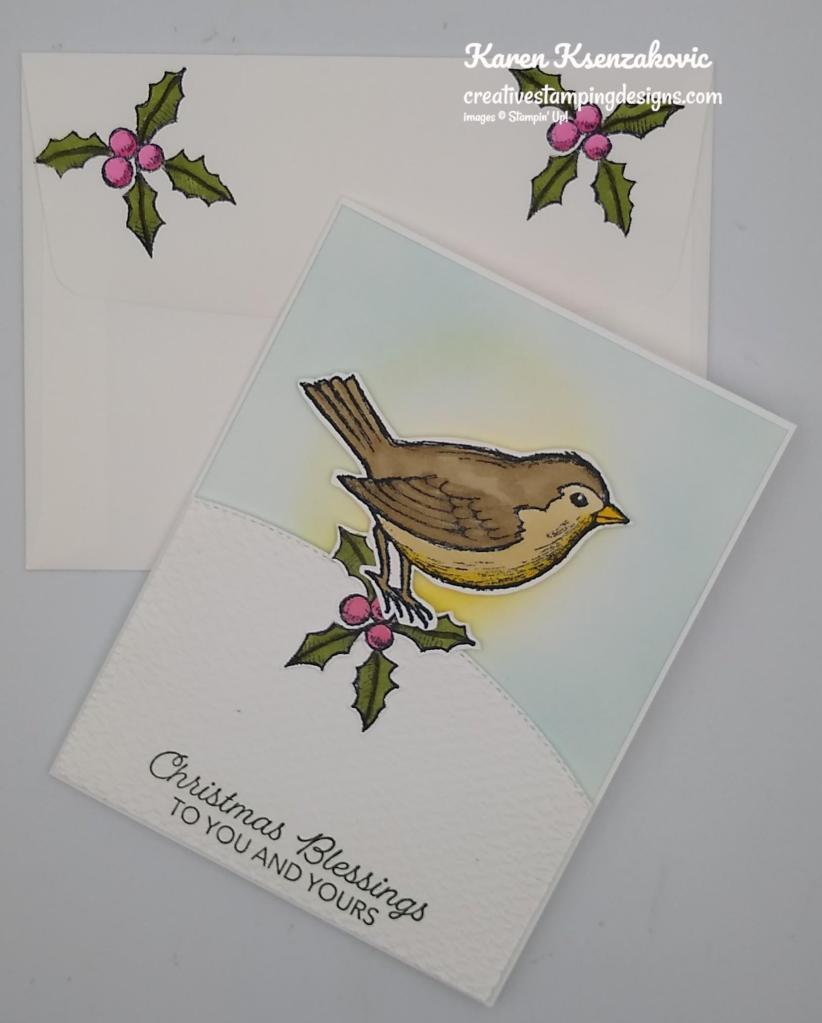
On a panel of Basic White cardstock I stamped the bird and holly images from the Happy Holly-Days stamp set in Tuxedo Black Ink. I colored the images in using my Crumb Cake, Daffodil Delight, Mossy Meadow and Polished Pink Stampin’ Blends Markers. I fussy cut the images using my Paper Snips and adhered them to the card front.
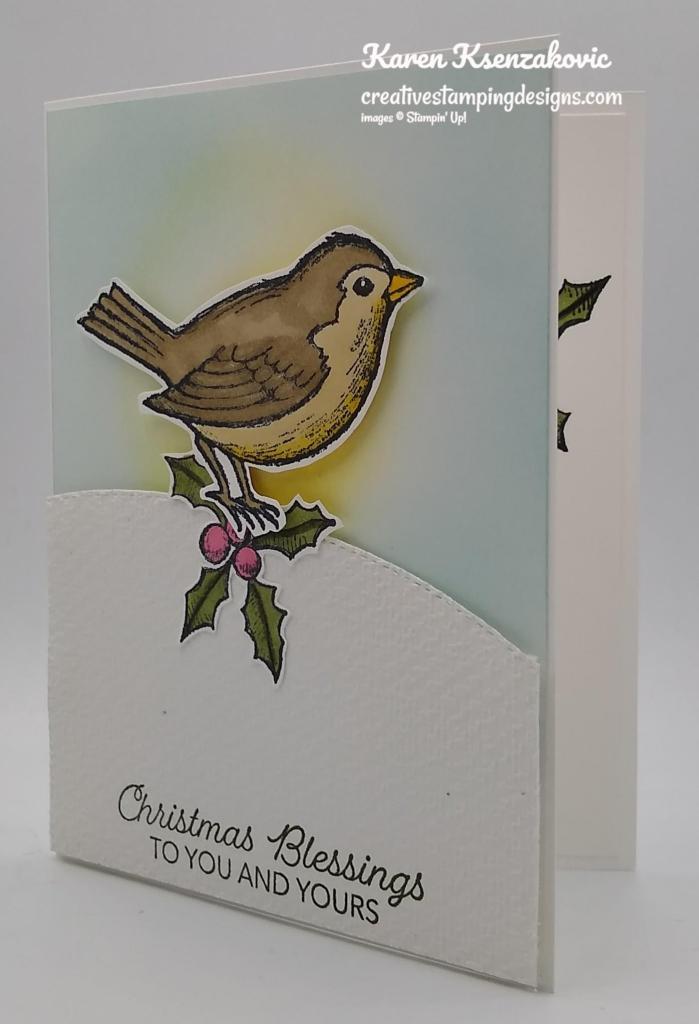
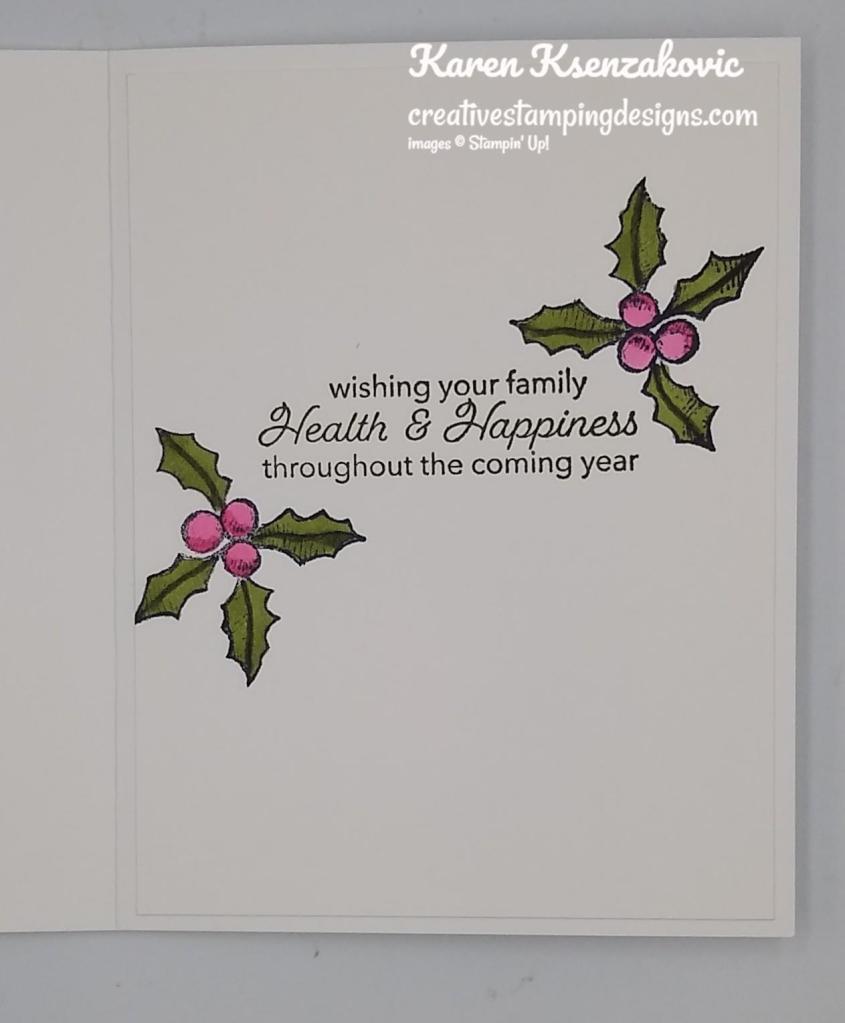
On the inside I stamped the sentiment from the Happy Holly-Days stamp set in Mossy Meadow Ink and the holly in Tuxedo Black Ink. I colored the holly in using my Mossy Meadow and Polished Pink Stampin’ Blends Markers. I adhered the Basic White panel to the inside of the Thick Basic White card base.
To finish my card I decorated a Basic White Medium Envelope. I stamped the bird and holly images from the Happy Holly-Days stamp set in Tuxedo Black Ink on the envelope front and envelope flap and colored them in the same as I did for the card.
Thank you for stopping by my blog today. I hope you liked today’s card and will try it out. Happy Stamping!!
If you need any stamping supplies, I’d love to be your Demonstrator. Just click HERE to go directly to my online store or drop me an email if you have any questions.
MY CURRENT HOST CODE IS: BM9R7DQX
Use this host code when you order $50 or greater and receive a free gift from me! If your order is over $150, please do not use this code, but you’ll still get the free gift. The free gift is your choice of any 1 item valued up to $10.00 from the 2020-2021 Annual Catalog or the January-June 2021 Mini Catalog!For any orders $50 or more I will also send you my monthly class tutorials. Click HERE or go to my Customer Rewards for more details and to see what this months tutorials are.
Please remember to use my current Host Code and make sure that you can see my name on the final checkout page listed as your Demonstrator when you order so that you know that you’re ordering with me and you’ll get my rewards!
Stampin’ Up! has added more items to their Clearance Rack. All items are **While Supplies Last**. So don’t wait if there is something you’ve been wanting, grab it while you can.
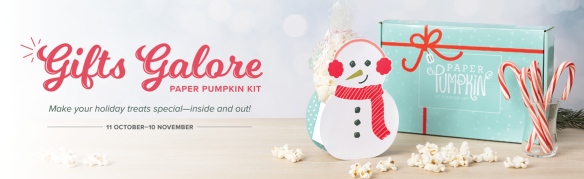
We all love to see piles of presents on Christmas morning. Make that your reality with the Gifts Galore Paper Pumpkin Kit! With classic Christmas sentiments, bright and festive colors, a sweet snowman, a tree with all the trimmings, or a playful pile of presents, you’ll have everything you need to make eye-catching treat packages that are sure to spread Christmas cheer. Each Gifts Galore box contains enough supplies to create nine treat packages—three each of three designs—and nine food-safe bags that are adorably styled for easy Christmas gifting. There’s plenty of joy to share with Gifts Galore!
Kit contains enough supplies to create nine treat packages—three each of three designs—and nine food-safe bags.
This all-inclusive kit includes printed die cuts, die-cut boxes, cellophane treat bags, adhesive, and more!
Includes an exclusive stamp set and a Classic Stampin’ Spot
Coordinating colors: Evening Evergreen, Flirty Flamingo, Old Olive, Pool Party, Poppy Parade
Subscribe to the November 2021 Paper Pumpkin Kit between 11 October and 10 November at paperpumpkin.com!
Note: Supplies may be limited toward the end of the subscription period.
Good Sunday morning my stamping friends. How is your weekend going? Is anyone doing anything adventurous and fun?
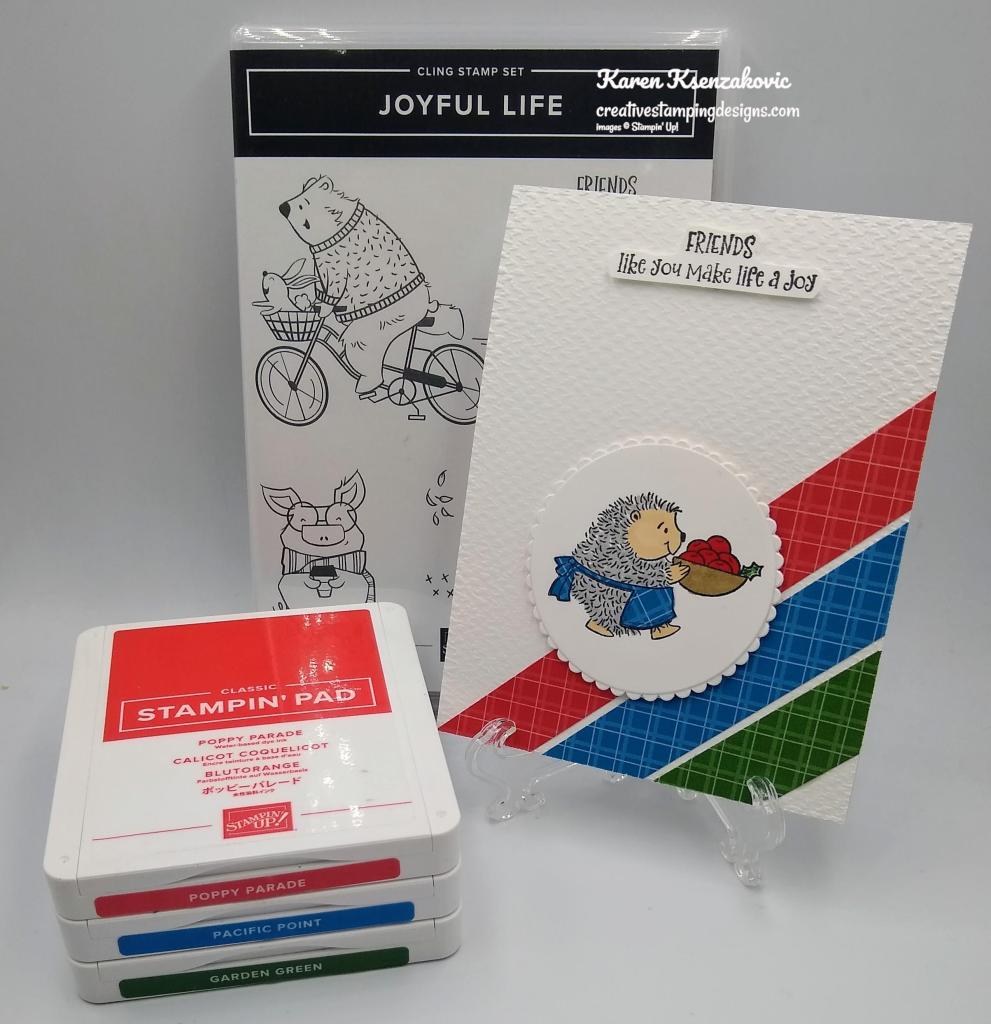
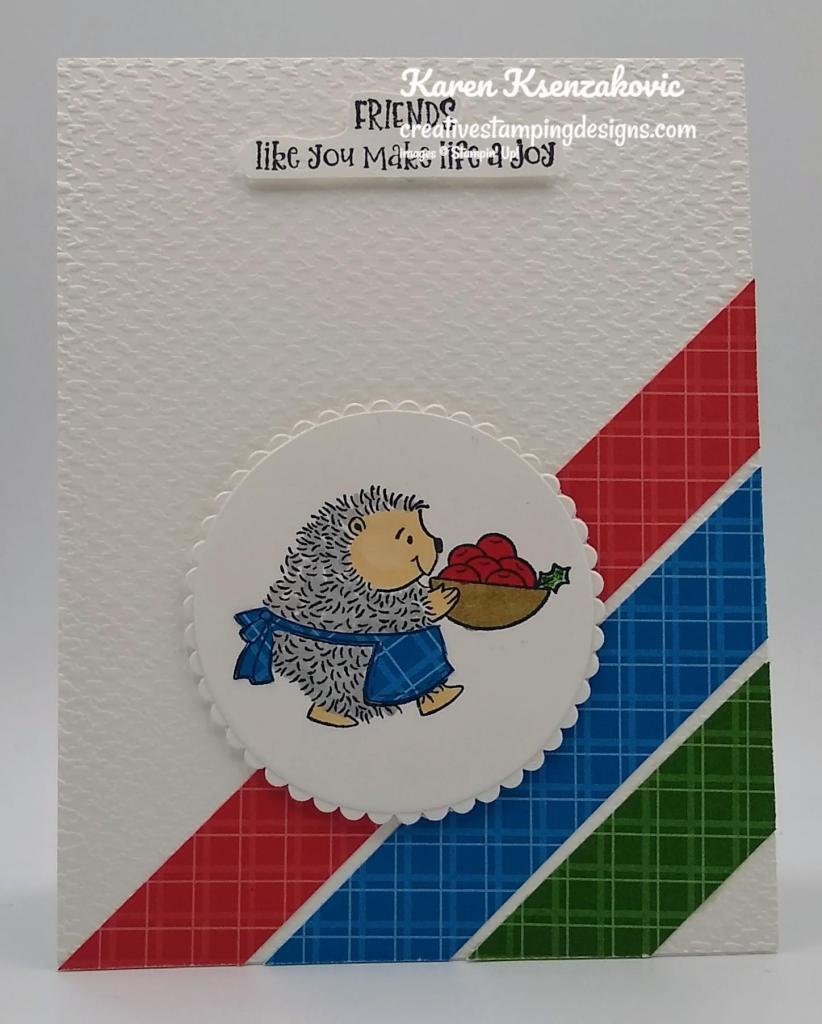
I used another one of my favorite sets today for a CAS card. Here’s my card for today.
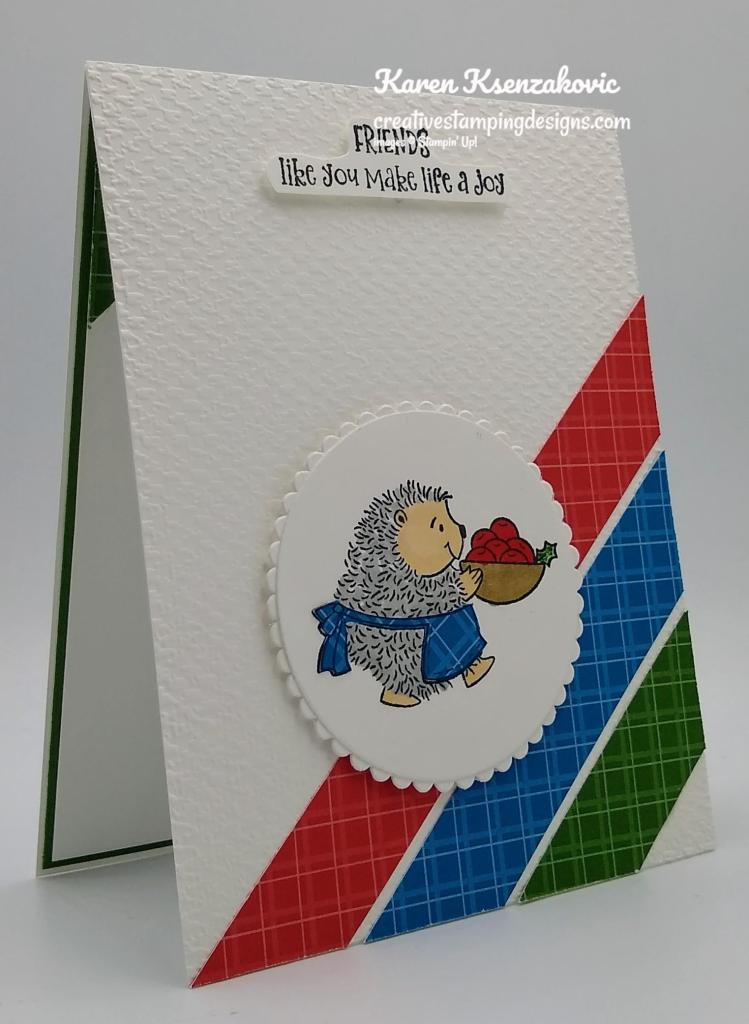
I used the Stampin’ Up! Joyful Life Cling Stamp Set along with the Brights 6 X 6 Designer Series Paper and the Regals 6 X 6 Designer Series Paper for my card today.
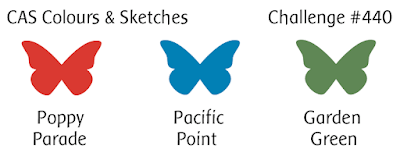
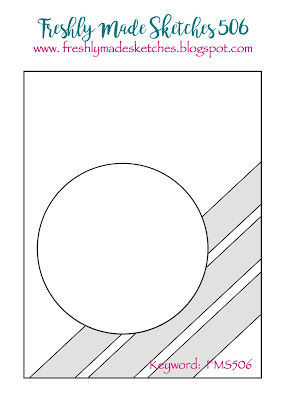
I started by embossing a Basic White card front using the Tasteful Textile 3D Embossing Folder. I adhered 2 strips of the Brights DSP in Poppy Parade and Pacific Point and 1 strip of the Garden Green Regals DSP to the card front on an angle. I adhered the card front to a Thick Basic White card base.
Using my Layering Circle Dies I cut the 3rd largest circle and the coordinating scallop circle from a panel of Basic White cardstock. I stamped the image from the Joyful Life stamp set in Tuxedo Black Ink on the circle. I colored the image in using my Crumb Cake, Ivory, Poppy Parade and Smoky Slate Stampin’ Blends Markers and my Garden Green Stampin’ Write Marker. On a scrap of the Pacific Point Brights DSP I stamped the same image from the Joyful Life stamp set in Tuxedo Black Ink and fussy cut the apron out using my Paper Snips and adhered it to the stamped image. I adhered the circle to the scalloped circle and then to the card front.
On a scrap of Basic White cardstock I stamped the sentiment from the Joyful Life stamp set in Tuxedo Black Ink and fussy cut it using my Paper Snips. I adhered the sentiment to the top of the card front.
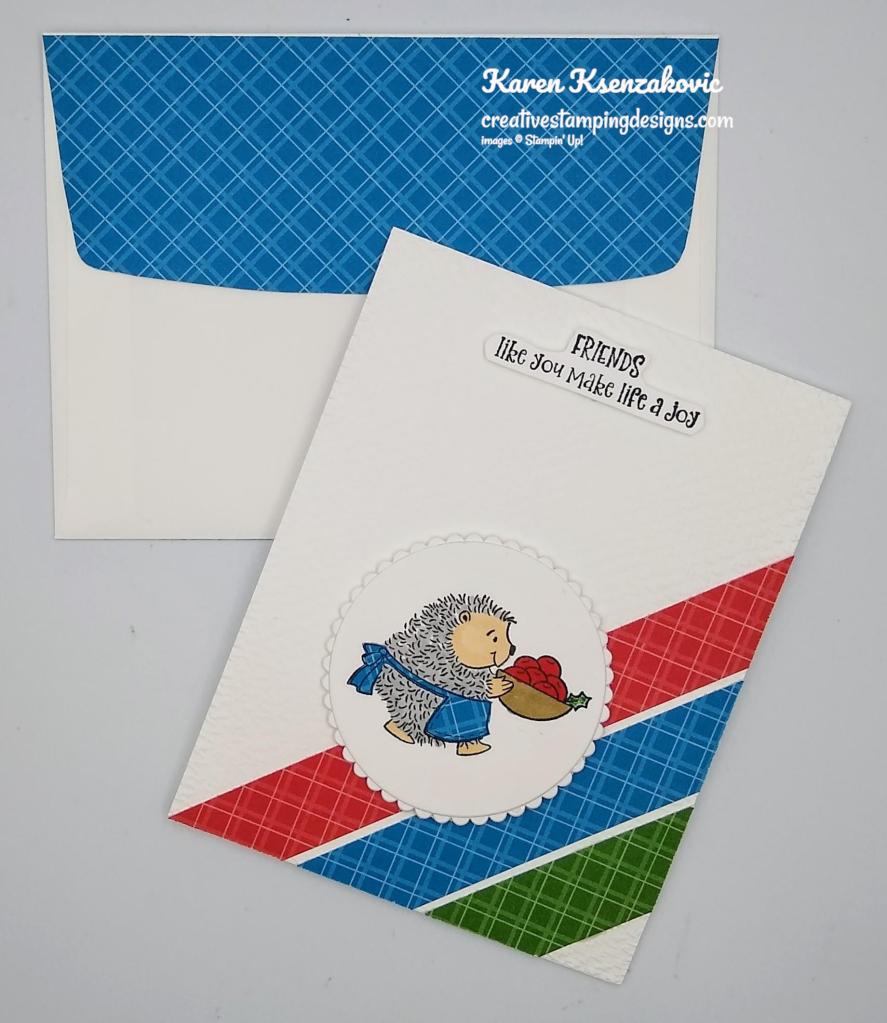
On the inside I stamped the sentiment from the Stampin‘ Up! Sunny Sentiments Cling Stamp Set in Tuxedo Black Ink on a Basic White panel. I adhered 2 strips of the Garden Green Regals DSP to the corners of the panel. I adhered the Basic White panel to a Garden Green mat and then to the inside of the Thick Basic White card base.
To finish my card I decorated a Basic White Medium Envelope. I adhered a strip of the Brights DSP to the envelope front and a panel to the envelope flap.
Thank you for stopping by my blog today. I hope you liked my card and will give it a try. Happy Stamping!!
If you need any stamping supplies, I’d love to be your Demonstrator. Just click HERE to go directly to my online store or drop me an email if you have any questions.
MY CURRENT HOST CODE IS: BM9R7DQX
Use this host code when you order $50 or greater and receive a free gift from me! If your order is over $150, please do not use this code, but you’ll still get the free gift. The free gift is your choice of any 1 item valued up to $10.00 from the 2020-2021 Annual Catalog or the January-June 2021 Mini Catalog!For any orders $50 or more I will also send you my monthly class tutorials. Click HERE or go to my Customer Rewards for more details and to see what this months tutorials are.
Please remember to use my current Host Code and make sure that you can see my name on the final checkout page listed as your Demonstrator when you order so that you know that you’re ordering with me and you’ll get my rewards!
Stampin’ Up! has added more items to their Clearance Rack. All items are **While Supplies Last**. So don’t wait if there is something you’ve been wanting, grab it while you can.
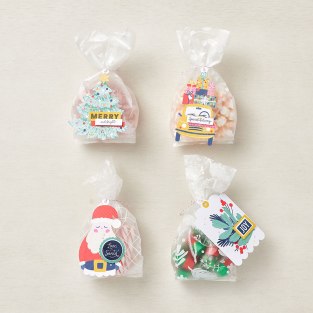
Santa’s back in a fun and easy tag kit to spruce up your Christmas gifting! The Love, Santa Tag Kit has everything you need to create 12 whimsically designed tags.
That means you’ll find printed die-cut tags and labels, sequin embellishments, pink and white baker’s twine, an exclusive stamp set, a Night of Navy Classic Stampin’ Spot, and more in this all-inclusive kit! You can sleigh ride right in without the prep work.
This is the kit exclusive photopolymer stamp set called Love, Santa!
Kit contains enough supplies to create 12 tags—3 each of 4 designs.
Includes printed die-cut tags, decorative die cuts, adhesive, embellishments, and pink baker’s twine.
Features an exclusive stamp set and a Night of Navy Classic Stampin’ Spot.
Finished tag size: approximately 2-1/2″ x 4-3/4″ (6.4 x 12.1 cm)
Coordinating colors: Bumblebee, Just Jade, Night of Navy, Polished Pink, Poppy Parade
158375 LOVE, SANTA TAG KIT $19.00 USD | $26.00 CAD
Available in English (158375) and French (158376).
Love, Santa Treat Bags – Also Available
And to make Christmas gifting even easier, the Love, Santa Treat Bags (available for purchase separately) are food-safe cellophane bags that coordinate with the Love, Santa tags! The treat bags come in a pack of 12—3 each of 4 festive designs.
That’s right—figuring out how to dress up your gifts this year is no longer a “Claus” for concern! But don’t relax too soon as these products are based on availability!
12 treat bags
3 each of 4 designs
4″ x 9-1/2″ (10.2 x 24.1 cm)
Food safe
158381 LOVE, SANTA TREAT BAGS $7.00 USD | $9.50https://www.youtube.com/embed/p6QuK9rDDSY?version=3&rel=1&showsearch=0&showinfo=1&iv_load_policy=1&fs=1&hl=en&autohide=2&wmode=transparent
Watch this video for more details about the new Christmas Whimsy Kit!
Click on the image for a flyer of all the items coming November 2nd. Want to get it early??? Demonstrators can preorder the items. Contact me at creativestampingdesigns@gmail.com and I’d be happy to talk to you about joining.
When you picture a peaceful Christmas, what comes to mind? Do you see snow outside your window, softly swirling through the sky? A tree trimmed with tinsel, a fire crackling nearby? Maybe you’re dreaming of decorating a holly jolly gingerbread house. Can you catch a whiff of Christmas cookies wafting through the air?
Whatever it is you think about when Christmas comes to town, picture a peaceful Christmas with the Peaceful Christmas Paper Pumpkin Kit! This glimmering and gleaming kit is your creative kickstart to Christmas cardmaking. With sprinkles of snow, shimmering silver skies, and heartwarming holiday wishes, you’ll have enough elements and embellishments to create 10 Christmas cards and coordinating envelopes.
Speaking of coordination, make even more Christmas magic with Peaceful Place products! Our stunning Peaceful Place Suite Collection (item 156277) pairs perfectly with the kit’s components. Brew a cup of cocoa, snuggle up with a soft blanket, and prepare for a cozy craft night in!
Details:
The kit contains enough elements to create 10 Christmas cards—5 each of 2 designs—and coordinating envelopes. This all-inclusive kit includes printed card bases, die-cut paper pieces, embellishments, adhesive, and more!
October’s kit arrives in a cute collectible box covered with enchanting evergreen trees. Use this special, limited-edition box to store your holiday handicrafts, or transform it into a well-wrapped package for a present!
The kit’s contents pair perfectly with the Peaceful Place Suite Collection (item 156277). To continue your Christmas crafting, combine the kit’s components with the suite’s patterned paper, shimmery sequins, and more!
Card size: 4-1/4″ x 5-1/2″ (10.8 x 14 cm)
Envelope size: 4-1/2″ x 5-3/4″ (11.4 x 14.6 cm)
Coordinating colors: Basic Gray, Real Red, Shaded Spruce, silver foil
Subscribe to the October 2021 Paper Pumpkin Kit between 11 September and 10 October at paperpumpkin.com!
Note: Supplies may be limited toward the end of the subscription period.
Good Wednesday morning my stamping friends. How is everyone doing today? We’re halfway through the week and the weekend is right around the corner.
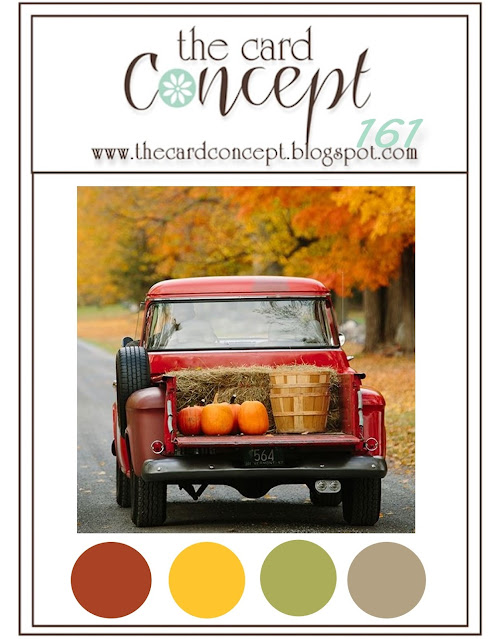
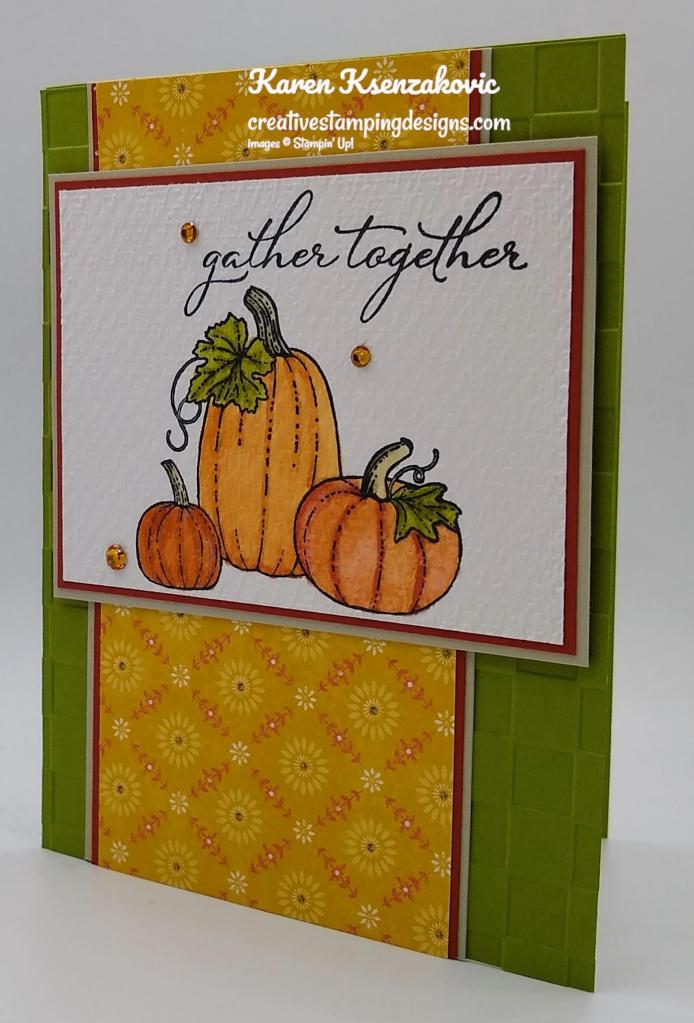
It’s time for another inspiration challenge for The Card Concepts. The inspiration photo is Harvest Adventures. This was one of the first layered designs I made when I first started making cards 16+ years ago and I still love it. Here is my card that was inspired from the challenge photo.
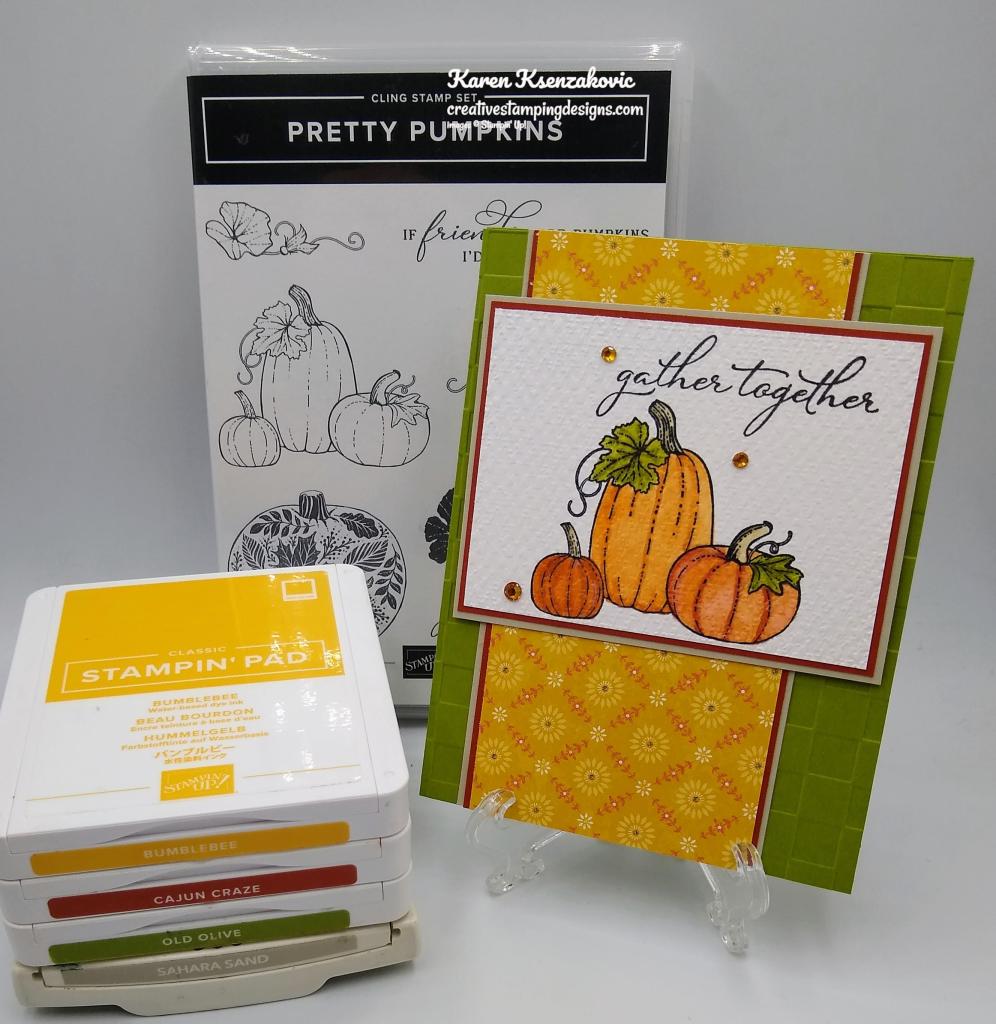
I used the Stampin’ Up! Pretty Pumpkins Cling Stamp Set along with the Harvest Meadow Designer Series Paper for my Clean and Layered card. I was inspired by the colors, pumpkins and the baskets for my card.
I hope you will take a moment to visit The Card Concepts and join us for our challenge #160. How are you inspired by this photo?
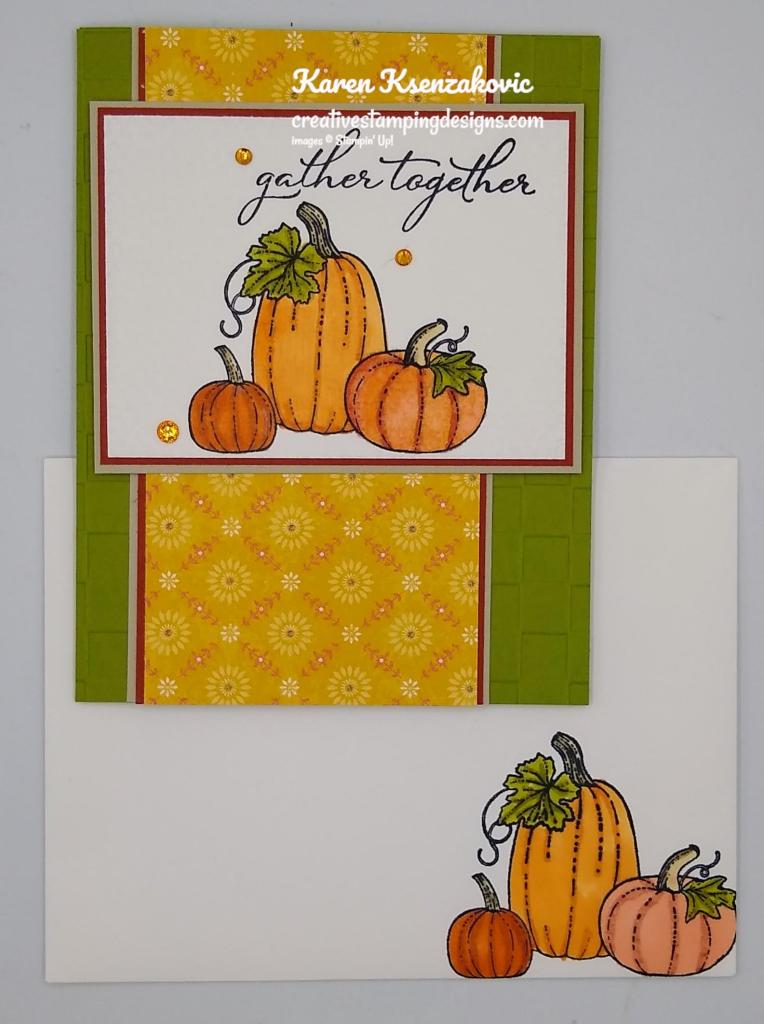
I started by embossing an Old Olive card front using the Checks & Dots Embossing Folder. I adhered the panel to the front of an Old Olive card base using Multipurpose Liquid Glue.
I adhered a panel of Harvest Meadow DSP to a Cajun Craze mat using Stampin’ Seal and then to a Sahara Sand mat using Stampin’ Seal. I adhered the layered panel to the card front using Multipurpose Liquid Glue.
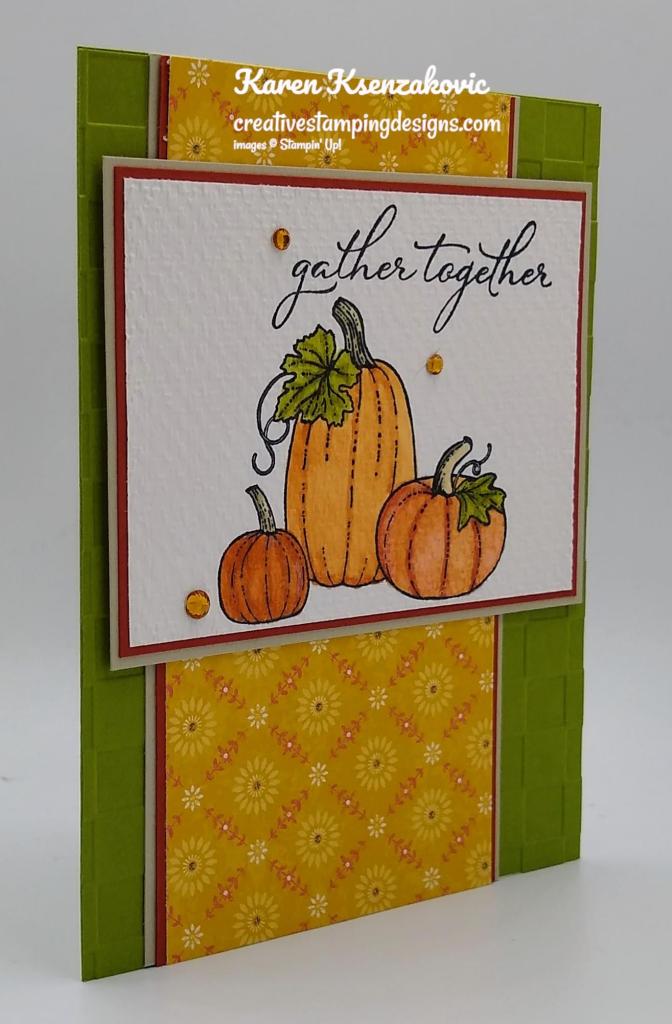
On a panel of Basic White cardstock I stamped the trio pumpkin image from the Pretty Pumpkins stamp set in Tuxedo Black Ink. I stamped the sentiment from the Pretty Pumpkins stamp set above the image in Tuxedo Black Ink. I colored the image in using my Cajun Craze, Crumb Cake, Daffodil Delight, Old Olive and Pumpkin Pie Stampin’ Blends Markers. I embossed the panel using my Tasteful Textile 3D Embossing Folder. I adhered the artwork to a Cajun Craze mat using Multipurpose Liquid Glue and then to a Sahara Sand mat using Stampin’ Seal. I adhered the layered artwork to the card front using Stampin’ Dimensionals. I added a few Pumpkin Pie Holiday Rhinestone Basic Jewels to the card front.
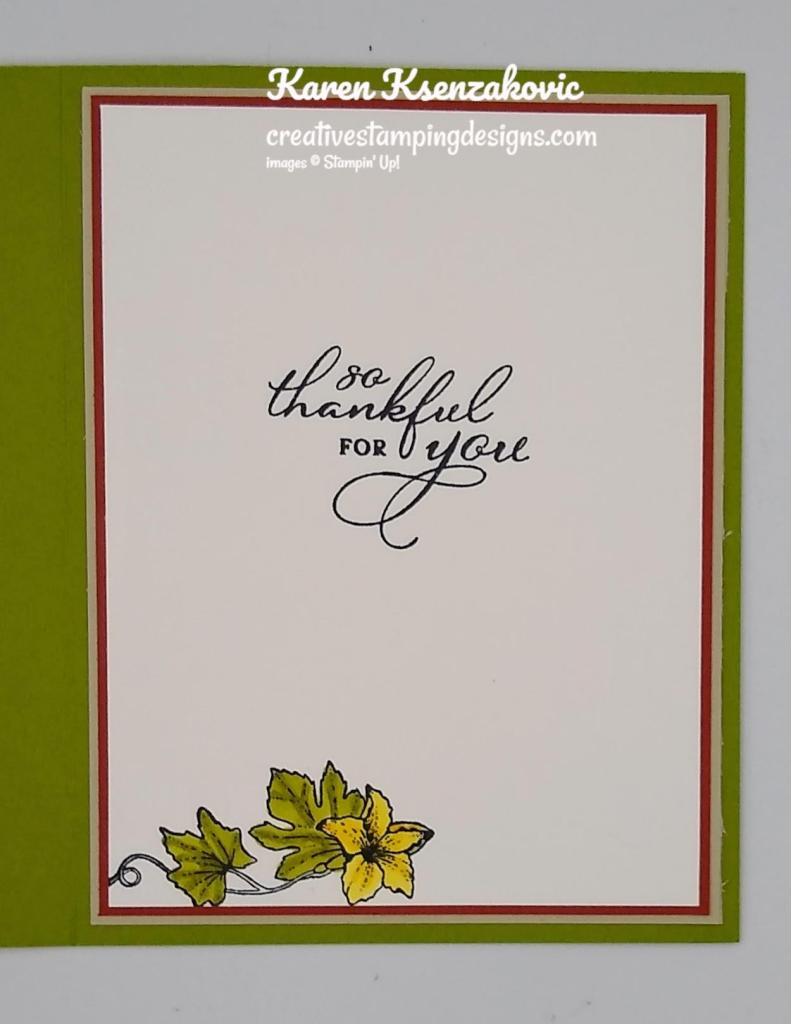
On the inside I stamped the sentiment from the Pretty Pumpkins stamp set in Tuxedo Black Ink on a Basic White panel. I stamped the pumpkin vine image from the Pretty Pumpkins stamp set in Tuxedo Black Ink on the bottom of the panel and colored it in using my Daffodil Delight and Old Olive Stampin’ Blends Markers. I adhered the Basic White panel to a Cajun Craze mat using Stampin’ Seal and then to a Sahara Sand mat using Stampin’ Seal. I adhered the layered panel to the inside of the Old Olive card base using Multipurpose Liquid Glue.
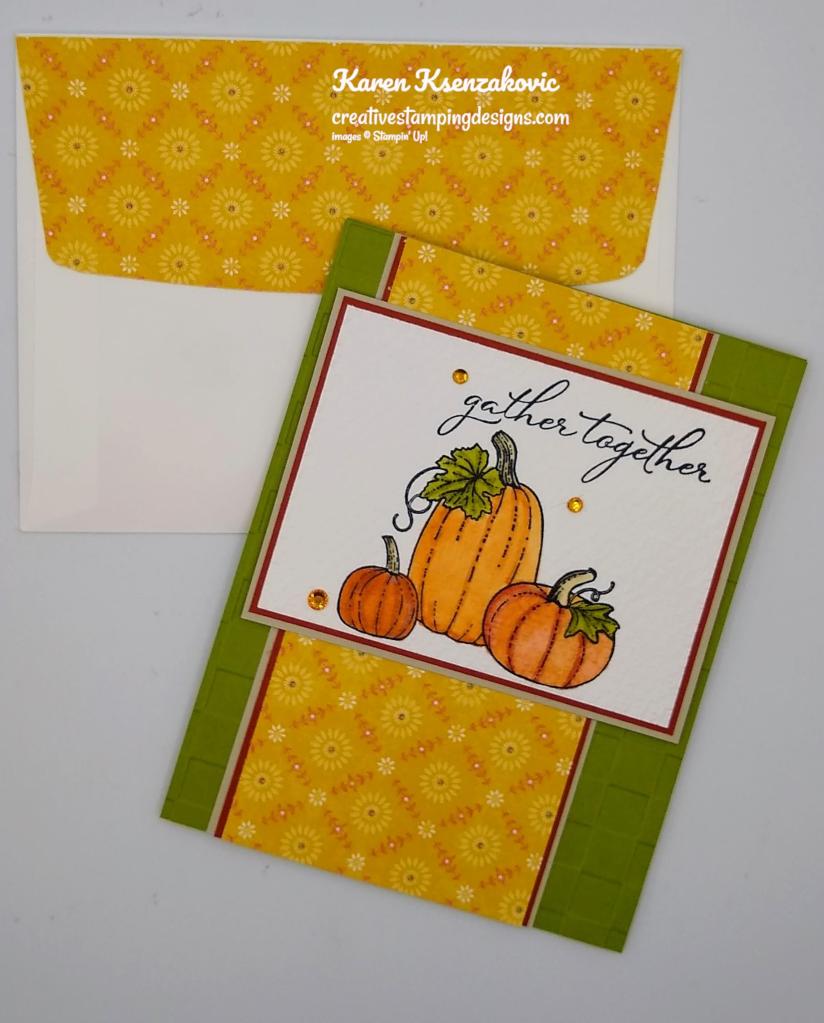
To complete my card I decorated a Basic White Medium Envelope. I stamped the trio of pumpkins image from the Pretty Pumpkins stamp set on the envelope front in Tuxedo Black Ink and colored them in the same as I did for the card. I adhered a panel of Harvest Meadow DSP to the envelope flap.
Thank you for stopping by my blog today. I hope you liked my card and will give it a try. Happy Stamping!!
If you need any stamping supplies, I’d love to be your Demonstrator. Just click HERE to go directly to my online store or drop me an email if you have any questions.
MY CURRENT HOST CODE IS: BM9R7DQX
Use this host code when you order $50 or greater and receive a free gift from me! If your order is over $150, please do not use this code, but you’ll still get the free gift. The free gift is your choice of any 1 item valued up to $10.00 from the 2020-2021 Annual Catalog or the January-June 2021 Mini Catalog!For any orders $50 or more I will also send you my monthly class tutorials. Click HERE or go to my Customer Rewards for more details and to see what this months tutorials are.
Please remember to use my current Host Code and make sure that you can see my name on the final checkout page listed as your Demonstrator when you order so that you know that you’re ordering with me and you’ll get my rewards!
Stampin’ Up! has added more items to their Clearance Rack. All items are **While Supplies Last**. So don’t wait if there is something you’ve been wanting, grab it while you can.
Santa’s back in a fun and easy tag kit to spruce up your Christmas gifting! The Love, Santa Tag Kit has everything you need to create 12 whimsically designed tags.
That means you’ll find printed die-cut tags and labels, sequin embellishments, pink and white baker’s twine, an exclusive stamp set, a Night of Navy Classic Stampin’ Spot, and more in this all-inclusive kit! You can sleigh ride right in without the prep work.
This is the kit exclusive photopolymer stamp set called Love, Santa!
Kit contains enough supplies to create 12 tags—3 each of 4 designs.
Includes printed die-cut tags, decorative die cuts, adhesive, embellishments, and pink baker’s twine.
Features an exclusive stamp set and a Night of Navy Classic Stampin’ Spot.
Finished tag size: approximately 2-1/2″ x 4-3/4″ (6.4 x 12.1 cm)
Coordinating colors: Bumblebee, Just Jade, Night of Navy, Polished Pink, Poppy Parade
158375 LOVE, SANTA TAG KIT $19.00 USD | $26.00 CAD
Available in English (158375) and French (158376).
Love, Santa Treat Bags – Also Available
And to make Christmas gifting even easier, the Love, Santa Treat Bags (available for purchase separately) are food-safe cellophane bags that coordinate with the Love, Santa tags! The treat bags come in a pack of 12—3 each of 4 festive designs.
That’s right—figuring out how to dress up your gifts this year is no longer a “Claus” for concern! But don’t relax too soon as these products are based on availability!
12 treat bags
3 each of 4 designs
4″ x 9-1/2″ (10.2 x 24.1 cm)
Food safe
158381 LOVE, SANTA TREAT BAGS $7.00 USD | $9.50
Watch this Love, Santa Tag Kit video for more details. Head over to my Online Store Here to get yours today!!
When you picture a peaceful Christmas, what comes to mind? Do you see snow outside your window, softly swirling through the sky? A tree trimmed with tinsel, a fire crackling nearby? Maybe you’re dreaming of decorating a holly jolly gingerbread house. Can you catch a whiff of Christmas cookies wafting through the air?
Whatever it is you think about when Christmas comes to town, picture a peaceful Christmas with the Peaceful Christmas Paper Pumpkin Kit! This glimmering and gleaming kit is your creative kickstart to Christmas cardmaking. With sprinkles of snow, shimmering silver skies, and heartwarming holiday wishes, you’ll have enough elements and embellishments to create 10 Christmas cards and coordinating envelopes.
Speaking of coordination, make even more Christmas magic with Peaceful Place products! Our stunning Peaceful Place Suite Collection (item 156277) pairs perfectly with the kit’s components. Brew a cup of cocoa, snuggle up with a soft blanket, and prepare for a cozy craft night in!
Details:
The kit contains enough elements to create 10 Christmas cards—5 each of 2 designs—and coordinating envelopes. This all-inclusive kit includes printed card bases, die-cut paper pieces, embellishments, adhesive, and more!
October’s kit arrives in a cute collectible box covered with enchanting evergreen trees. Use this special, limited-edition box to store your holiday handicrafts, or transform it into a well-wrapped package for a present!
The kit’s contents pair perfectly with the Peaceful Place Suite Collection (item 156277). To continue your Christmas crafting, combine the kit’s components with the suite’s patterned paper, shimmery sequins, and more!
Card size: 4-1/4″ x 5-1/2″ (10.8 x 14 cm)
Envelope size: 4-1/2″ x 5-3/4″ (11.4 x 14.6 cm)
Coordinating colors: Basic Gray, Real Red, Shaded Spruce, silver foil
Subscribe to the October 2021 Paper Pumpkin Kit between 11 September and 10 October at paperpumpkin.com!
Note: Supplies may be limited toward the end of the subscription period.
Good Monday morning my stamping friends. How was everyone’s weekend? It was a gorgeous fall weekend here, unfortunately I spent most of it inside working.
I used another one of my favorite sets from the July-December 2021 Mini Catalog for my card today. Here’s my card for today.
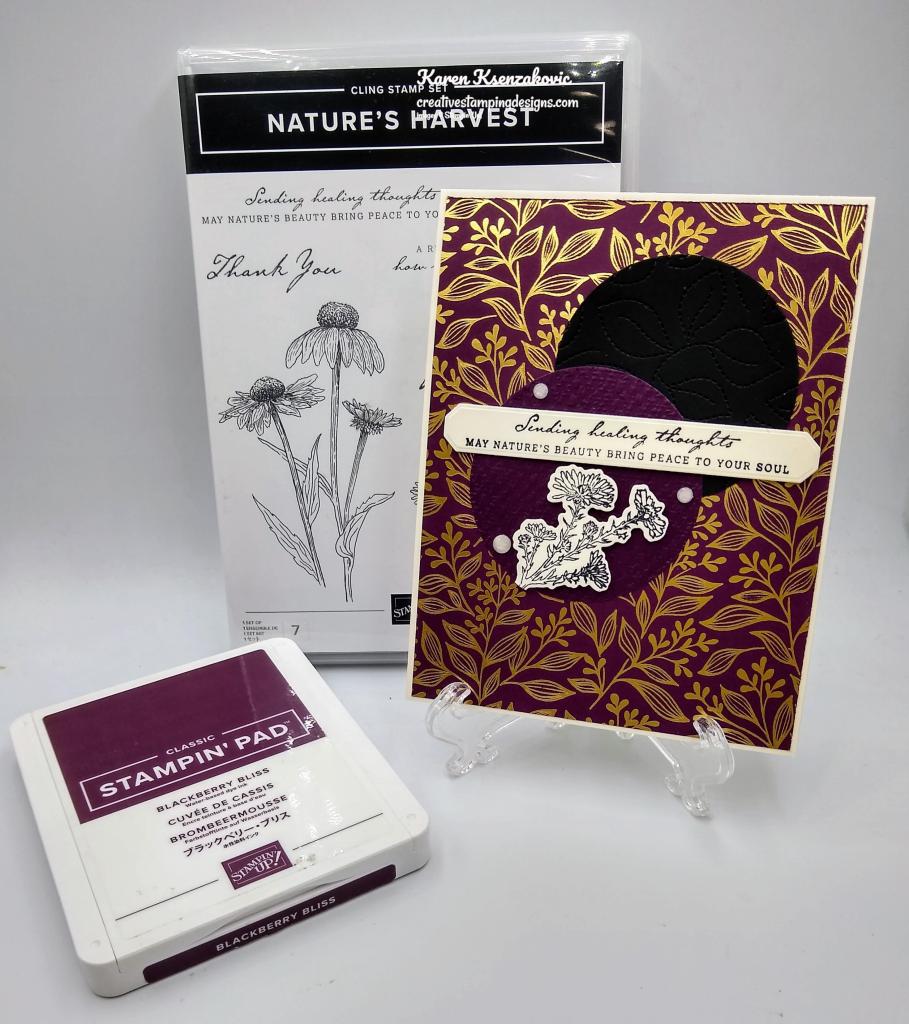
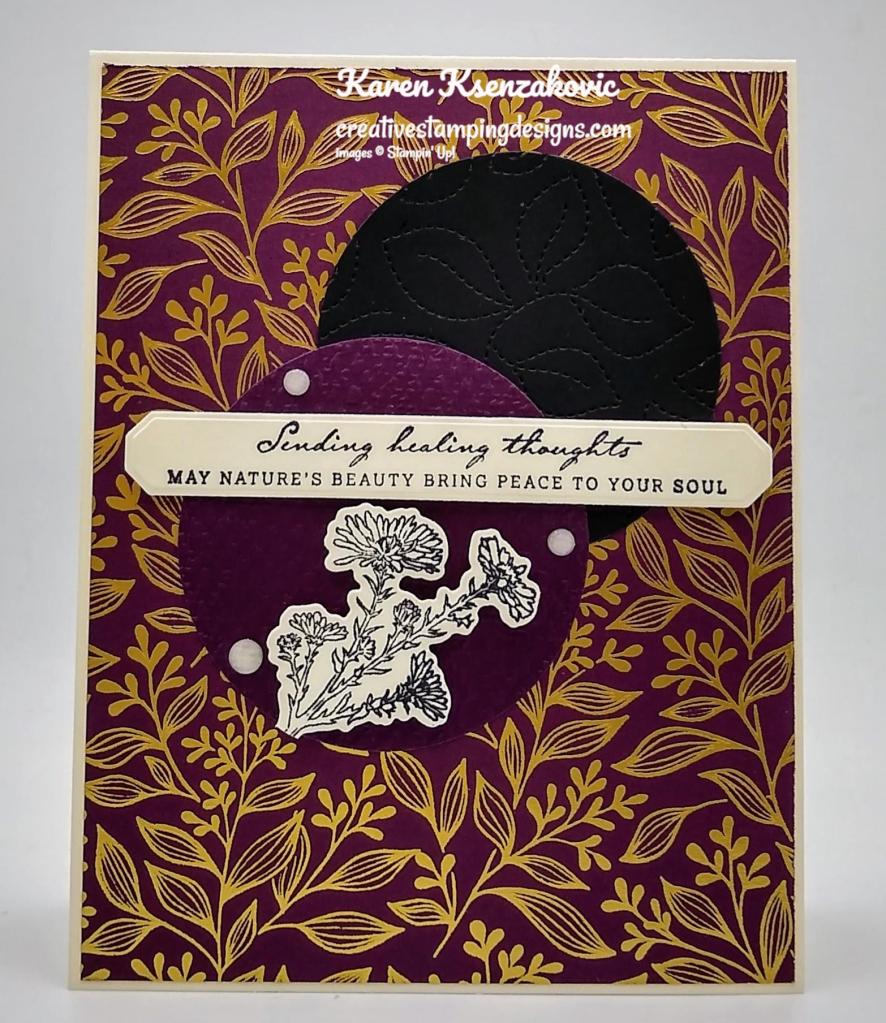
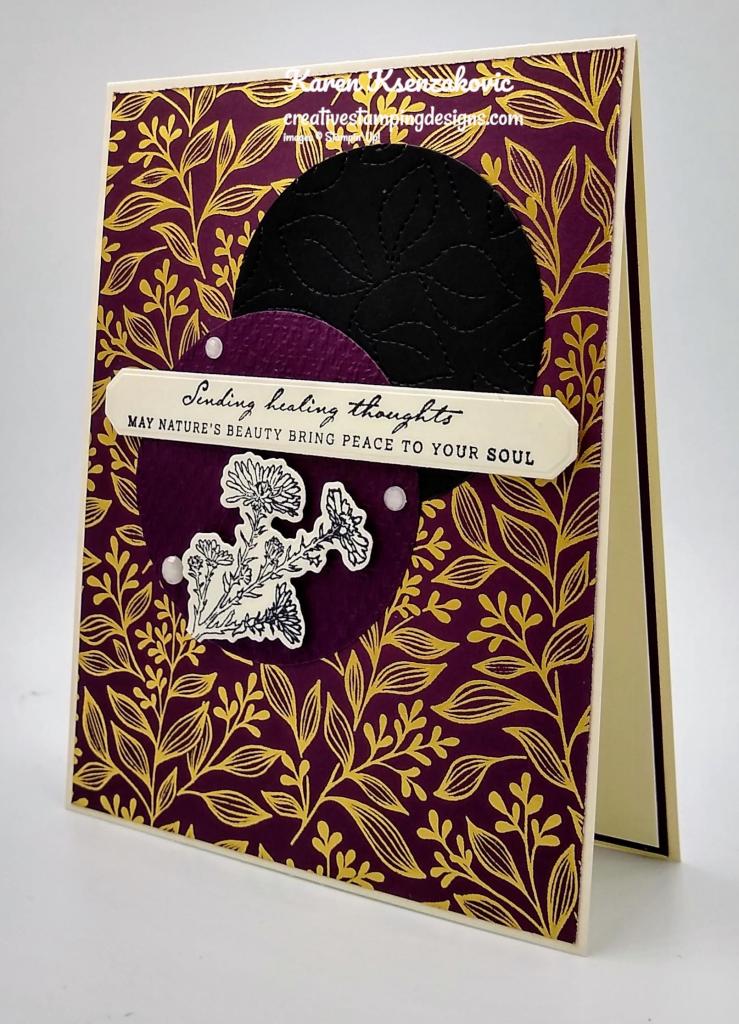
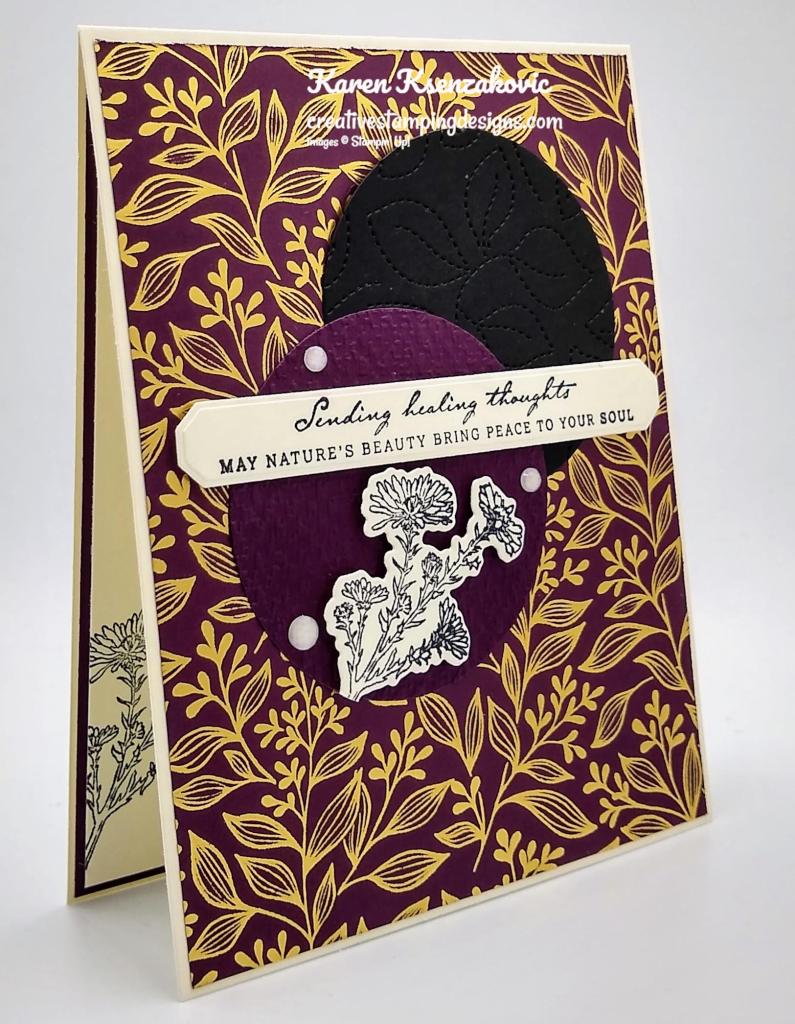
I used the Stampin’ Up! Nature’s Harvest Bundle along with the Blackberry Beauty Specialty Designer Series Paper for my card today.
I started by adhering a panel of Blackberry Beauty DSP to a Thick Very Vanilla card base using Multipurpose Liquid Glue.
Using my Layering Circles Dies, I cut 2 circles the same size, 1 in Basic Black cardstock and 1 in Blackberry Bliss cardstock. I embossed the Basic Black circle using my Stitched Greenery Die and I embossed the Blackberry Bliss circle using my Tasteful Textile 3D Embossing Folder. I adhered them to the card front using Multipurpose Liquid Glue.
On a panel of Very Vanilla cardstock I stamped the small floral image from the Stampin’ Up!Nature’s Harvest Cling Stamp Set in Tuxedo Black Ink and cut the image out using my Harvest Dies. I adhered the floral image to the Blackberry Bliss circle using Stampin’ Dimensionals. On a strip of Very Vanilla cardstock I stamped the sentiment from the Nature’s Harvest stamp set in Tuxedo Black Ink and cut it out using my Harvest Dies. I adhered the sentiment to the card front over the circles using Stampin’ Dimensionals. I added a few Elegant Faceted Gems to the card front.
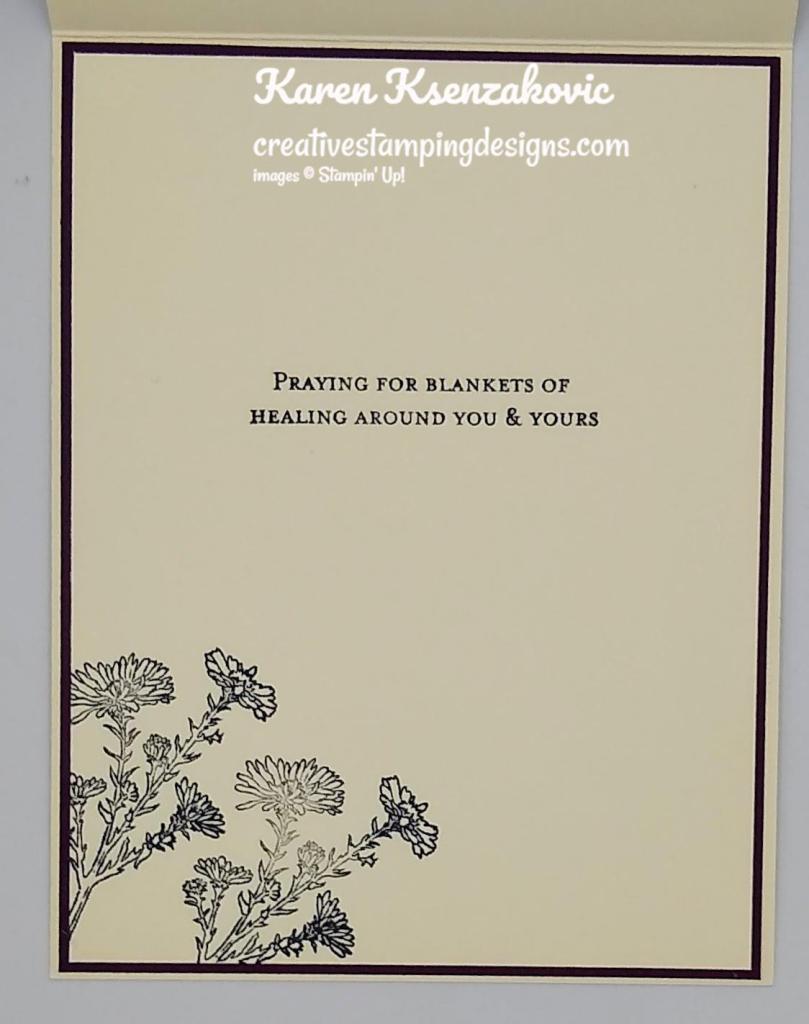
On the inside I stamped the sentiment from the Stampin’ Up! Through It Together Cling Stamp Set in Tuxedo Black Ink on a Very Vanilla panel. I stamped the small floral image from the Nature’s Harvest stamp set in Tuxedo Black Ink on the bottom of the panel twice. I adhered the Very Vanilla panel to a Blackberry Bliss mat using Stampin’ Seal and then to the inside of the Thick Very Vanilla card base using Stampin’ Seal.
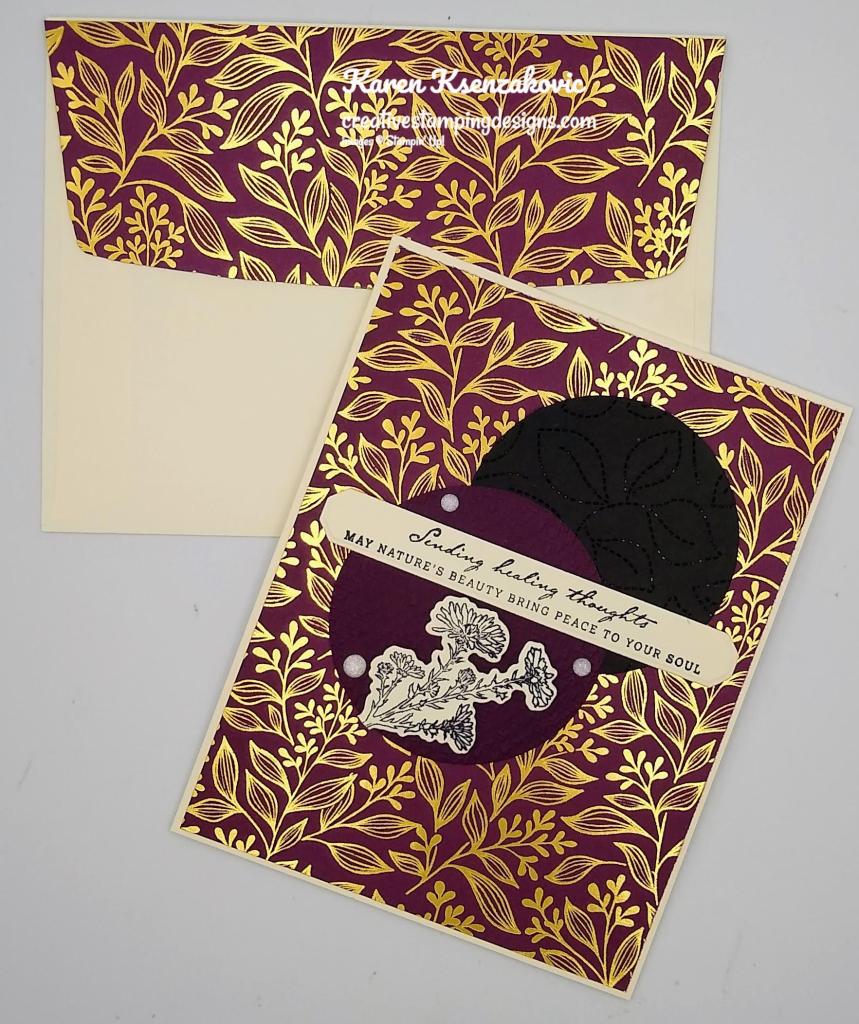
To finish my card I decorated a Very Vanilla Medium Envelope. I stamped the small floral image from the Nature’s Harvest stamp set on the envelope front twice in Tuxedo Black Ink. I adhered a panel of Blackberry Beauty DSP to the envelope flap.
Thank you for stopping by my blog today. I hope you liked my card and will give it a try. Happy Stamping!!
If you need any stamping supplies, I’d love to be your Demonstrator. Just click HERE to go directly to my online store or drop me an email if you have any questions.
MY CURRENT HOST CODE IS: BM9R7DQX
Use this host code when you order $50 or greater and receive a free gift from me! If your order is over $150, please do not use this code, but you’ll still get the free gift. The free gift is your choice of any 1 item valued up to $10.00 from the 2020-2021 Annual Catalog or the January-June 2021 Mini Catalog!For any orders $50 or more I will also send you my monthly class tutorials. Click HERE or go to my Customer Rewards for more details and to see what this months tutorials are.
Please remember to use my current Host Code and make sure that you can see my name on the final checkout page listed as your Demonstrator when you order so that you know that you’re ordering with me and you’ll get my rewards!
When you picture a peaceful Christmas, what comes to mind? Do you see snow outside your window, softly swirling through the sky? A tree trimmed with tinsel, a fire crackling nearby? Maybe you’re dreaming of decorating a holly jolly gingerbread house. Can you catch a whiff of Christmas cookies wafting through the air?
Whatever it is you think about when Christmas comes to town, picture a peaceful Christmas with the Peaceful Christmas Paper Pumpkin Kit! This glimmering and gleaming kit is your creative kickstart to Christmas cardmaking. With sprinkles of snow, shimmering silver skies, and heartwarming holiday wishes, you’ll have enough elements and embellishments to create 10 Christmas cards and coordinating envelopes.
Speaking of coordination, make even more Christmas magic with Peaceful Place products! Our stunning Peaceful Place Suite Collection (item 156277) pairs perfectly with the kit’s components. Brew a cup of cocoa, snuggle up with a soft blanket, and prepare for a cozy craft night in!
Details:
The kit contains enough elements to create 10 Christmas cards—5 each of 2 designs—and coordinating envelopes. This all-inclusive kit includes printed card bases, die-cut paper pieces, embellishments, adhesive, and more!
October’s kit arrives in a cute collectible box covered with enchanting evergreen trees. Use this special, limited-edition box to store your holiday handicrafts, or transform it into a well-wrapped package for a present!
The kit’s contents pair perfectly with the Peaceful Place Suite Collection (item 156277). To continue your Christmas crafting, combine the kit’s components with the suite’s patterned paper, shimmery sequins, and more!
Card size: 4-1/4″ x 5-1/2″ (10.8 x 14 cm)
Envelope size: 4-1/2″ x 5-3/4″ (11.4 x 14.6 cm)
Coordinating colors: Basic Gray, Real Red, Shaded Spruce, silver foil
Subscribe to the October 2021 Paper Pumpkin Kit between 11 September and 10 October at paperpumpkin.com!
Note: Supplies may be limited toward the end of the subscription period.
Good Monday morning my stamping friends. How was everyone’s weekend? I hope you were able to do something fun.
I have a quick Christmas card for you today. I used this design for my class last week, but they used the other side of the DSP and a different stamp set. Here’s my card for today.
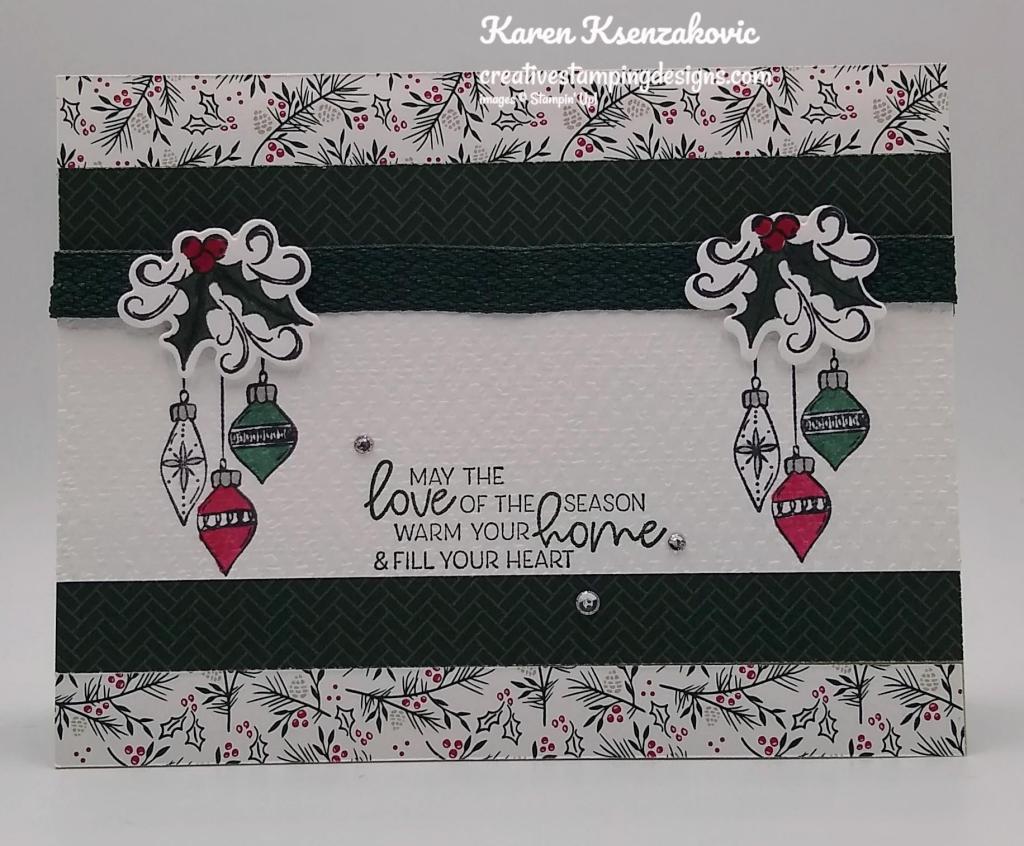
I used the Stampin’ Up! Whimsical Trees Bundle along with the Tidings of Christmas 6 X 6 Designer Series Paper for my card today.
I started by adhering 4 strips of the Tidings of Christmas DSP to a Sahara Sand card base using Multipurpose Liquid Glue. I adhered 2 on the top and 2 on the bottom.
On a panel of Basic White cardstock I stamped the sentiment from the Stampin’ Up! Whimsical Trees Cling Stamp Set in Evening Evergreen Ink on the bottom of the panel. I stamped the ornament image from the Whimsical Trees stamp set on the top of the panel in Tuxedo Black Ink. I colored the ornaments in using my Cherry Cobbler, Smoky Slate and Soft Succulent Stampin’ Blends Markers. I embossed the panel using the Tasteful Textile 3D Embossing Folder.
I wrapped a length of the Evening Evergreen 3/8″ Chevron Weave Ribbon around the top of the panel and adhered it on the back using Stampin’ Seal. I adhered the panel to the card front using Multipurpose Liquid Glue. On a small panel of Basic White cardstock I stamped the holly and berry image from the Whimsical Trees stamp set in Tuxedo Black Ink. I colored the images in using my Cherry Cobbler and Evening Evergreen Stampin’ Blends Markers. I cut the images out using my Christmas Trees Dies and adhered them to the top of the ornaments using Stampin’ Dimensionals.
On the inside I stamped the sentiment from the Whimsical Trees stamp set in Evening Evergreen Ink on a Basic White panel. I stamped the ornament image from the Whimsical Trees stamp set in Tuxedo Black Ink 3 times across the top of the panel. I colored the images in using my Cherry Cobbler, Smoky Slate and Soft Succulent Stampin’ Blends Markers. I adhered the Basic White panel to an Evening Evergreen mat using Stampin’ Seal and then to the inside of the Sahara Sand card base using Multipurpose Liquid Glue.
To complete my card I decorated a Basic White Medium Envelope. I stamped the ornament image from the Whimsical Trees stamp set on the center top of the envelope front and colored it the same as I did for the card. I adhered a panel of the Tidings of Christmas DSP to the envelope flap.
Thank you for stopping by my blog today. I hope you liked my card and will give it a try. Happy Stamping!!
If you need any stamping supplies, I’d love to be your Demonstrator. Just click HERE to go directly to my online store or drop me an email if you have any questions.
MY CURRENT HOST CODE IS: JAK446GF
Use this host code when you order $50 or greater and receive a free gift from me! If your order is over $150, please do not use this code, but you’ll still get the free gift. The free gift is your choice of any 1 item valued up to $10.00 from the 2020-2021 Annual Catalog or the January-June 2021 Mini Catalog!For any orders $50 or more I will also send you my monthly class tutorials. Click HERE or go to my Customer Rewards for more details and to see what this months tutorials are.
Please remember to use my current Host Code and make sure that you can see my name on the final checkout page listed as your Demonstrator when you order so that you know that you’re ordering with me and you’ll get my rewards!
Awesome Joining Promotions Until September 30, 2021
There is an AWESOME joining promotion happening! If you purchase the Starter Kit between August 3 and September 30, you’ll get to pick a FREE bundle from this list!
Frosted Gingerbread
Christmas Season
Christmas To Remember
Whimsical Trees
Peaceful Deer
Sweet Little Stockings
Penguin Place
Peaceful Cabin
Arctic Bears
Beauty Of Tomorrow
Gorgeous Leaves
Nature’s Harvest
When you purchase the Starter Kit for $99 + taxes (if applicable), the kit ships for FREE and YOU get to pick $125 in Stampin’ Up! merchandise OF YOUR CHOICE. If you purchase the kit during Sale-a-bration, you’ll get an additional FREE bundle from the select twelve listed above (with a value up to $60.25!!) with your kit! A free bundle in addition to $125 in merchandise for $99, YES PLEASE!!You will also get a past Paper Pumpkin Kit and other supplies free in your kit.
If you are planning on placing an order of $100, you might really want to consider joining. This is such an awesome joining deal, you don’t want to pass it up. There is no obligation to sell, have workshops or do Facebook lives. You can join strictly to be a ‘hobby demonstrator’ and enjoy the 20% discount. I would love to have you on my team!!!You also get to enjoy all the demonstrator perks like early ordering, sneak peeks at what’s coming and best of all the events. Why wait, this is such a great sign up promotions, join now and be a part of our awesome Stampin’ Up! family!!!
If you have any questions about joining, please drop me a note at creativestampingdesigns@gmail.com, I’d love to talk with you about it! You can find more information about joining on my blog @ creativestampingdesigns.com
When you picture a peaceful Christmas, what comes to mind? Do you see snow outside your window, softly swirling through the sky? A tree trimmed with tinsel, a fire crackling nearby? Maybe you’re dreaming of decorating a holly jolly gingerbread house. Can you catch a whiff of Christmas cookies wafting through the air?
Whatever it is you think about when Christmas comes to town, picture a peaceful Christmas with the Peaceful Christmas Paper Pumpkin Kit! This glimmering and gleaming kit is your creative kickstart to Christmas cardmaking. With sprinkles of snow, shimmering silver skies, and heartwarming holiday wishes, you’ll have enough elements and embellishments to create 10 Christmas cards and coordinating envelopes.
Speaking of coordination, make even more Christmas magic with Peaceful Place products! Our stunning Peaceful Place Suite Collection (item 156277) pairs perfectly with the kit’s components. Brew a cup of cocoa, snuggle up with a soft blanket, and prepare for a cozy craft night in!
Details:
The kit contains enough elements to create 10 Christmas cards—5 each of 2 designs—and coordinating envelopes. This all-inclusive kit includes printed card bases, die-cut paper pieces, embellishments, adhesive, and more!
October’s kit arrives in a cute collectible box covered with enchanting evergreen trees. Use this special, limited-edition box to store your holiday handicrafts, or transform it into a well-wrapped package for a present!
The kit’s contents pair perfectly with the Peaceful Place Suite Collection (item 156277). To continue your Christmas crafting, combine the kit’s components with the suite’s patterned paper, shimmery sequins, and more!
Card size: 4-1/4″ x 5-1/2″ (10.8 x 14 cm)
Envelope size: 4-1/2″ x 5-3/4″ (11.4 x 14.6 cm)
Coordinating colors: Basic Gray, Real Red, Shaded Spruce, silver foil
Subscribe to the October 2021 Paper Pumpkin Kit between 11 September and 10 October at paperpumpkin.com!
Note: Supplies may be limited toward the end of the subscription period.
Good Friday the 13th morning my stamping friends and welcome to my Fun Fold Friday. Is anyone superstitious out there? I’m not. My daughter and I along with my nephew, niece and her 2 boys, spent all day yesterday on the beach. I took the day off from my daily life and went and sat, walked swam and jumped waves for 8 hours yesterday. It was AMAZING. We had such a beautiful HOT day, but on the beach you don’t even feel the heat, especially when your in the water as much as we were. The sunburn today is telling me a little different. How was everyone’s week? Does anyone have any plans for the weekend yet? I’ll be working all day Saturday and attending my virtual team meeting on Sunday. We have a lot of fun even at our virtual meetings.
Today’s card I made on my Facebook Live video on Wednesday. If you were able to join me or watched the replay, thank you. If you were able to watch me, you were able to see what not to do when making this card. Luckily I was able to fix it without having to redo too much. If you’d like to watch my video and stamp along, the measurements are below along with the links to my Facebook page and my YouTube channel. Here’s my card for today.
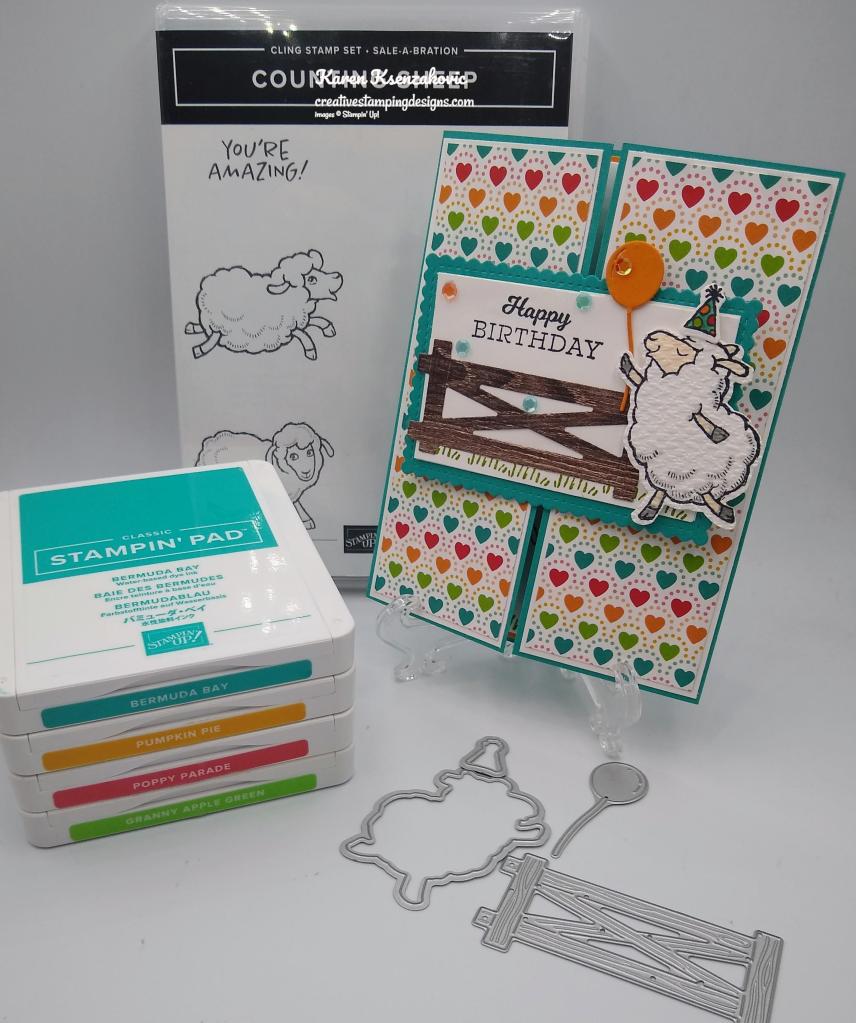
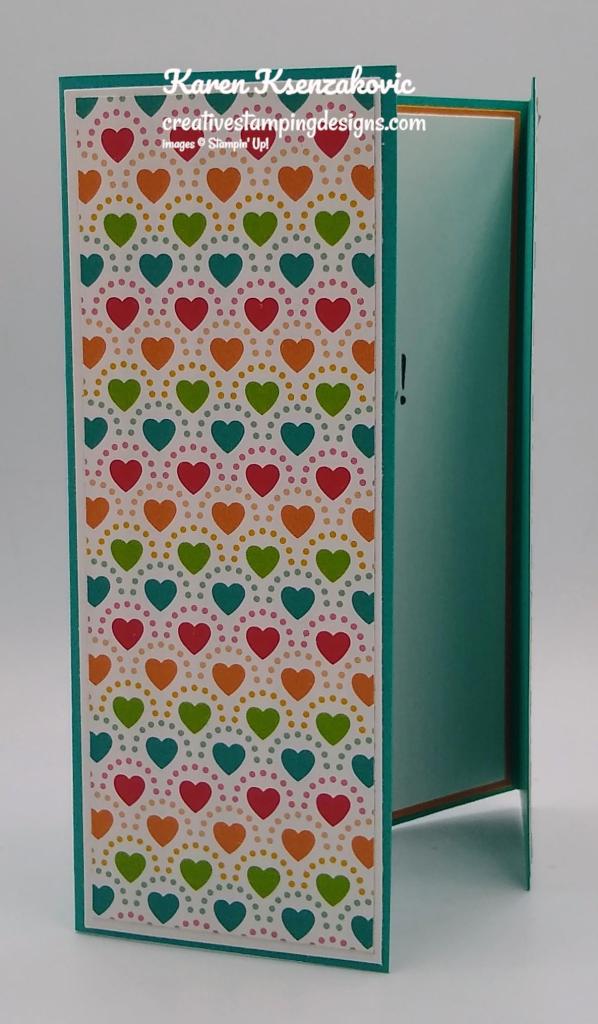
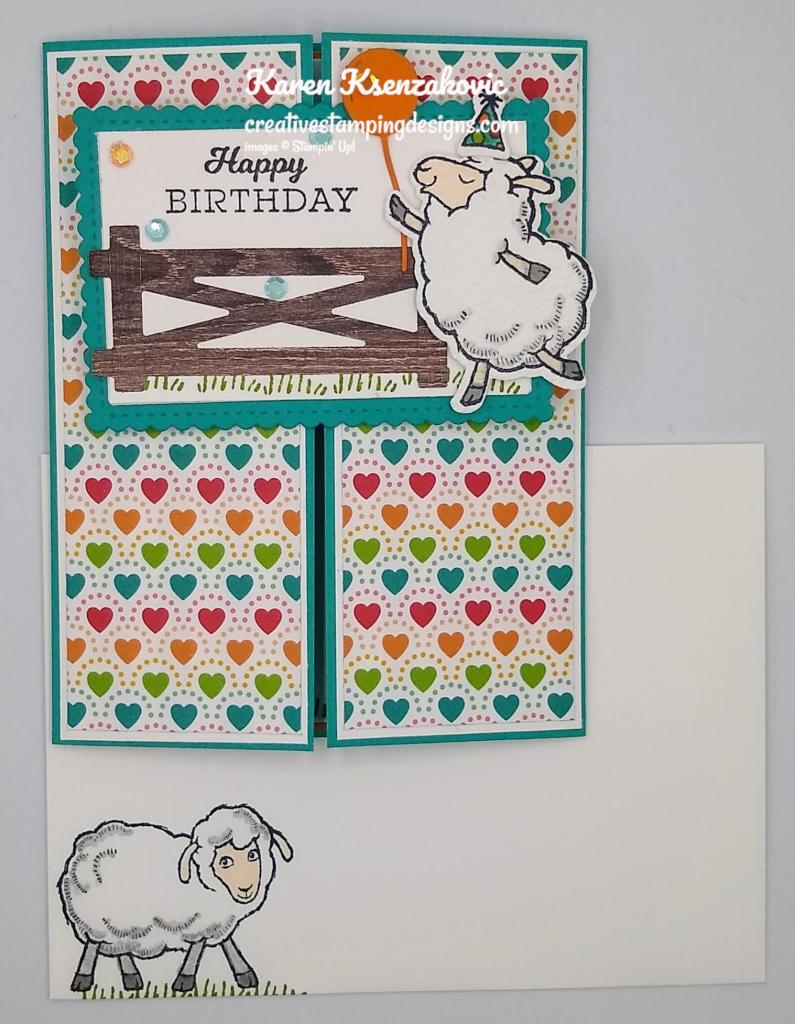
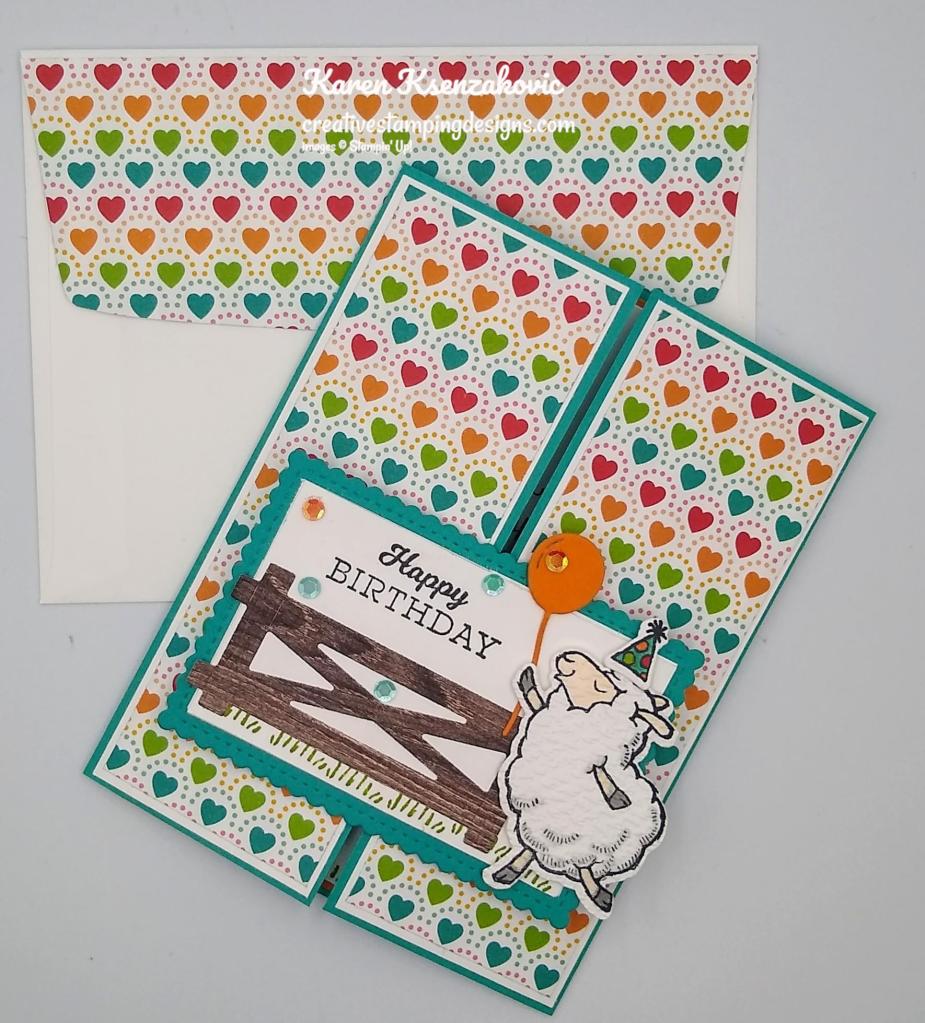
I used the Stampin’ Up! Counting Sheep Cling Stamp Set along with the Sheep Dies for my card today. I also used the Stampin’ Up! In Your Words Cling Stamp Set for the sentiments. All 3 of these items are from the August-September Sale-a-bration Catalog and are free with qualifying orders.
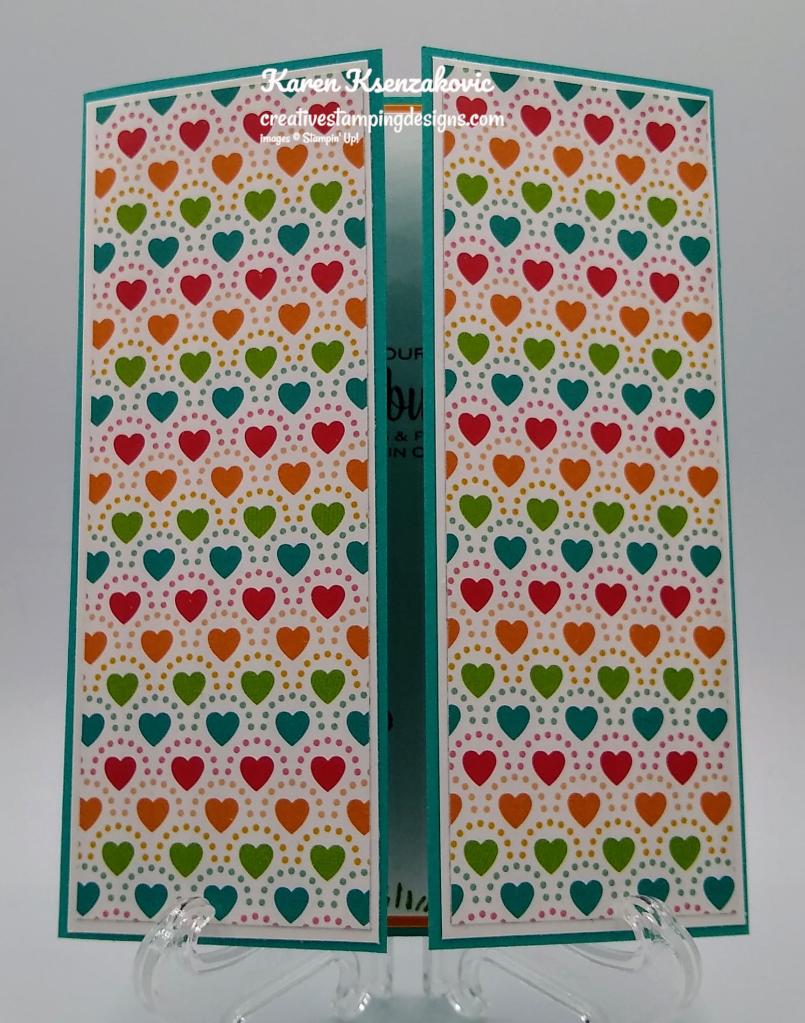
I started by adhering 2 panels of Pattern Party Host Designer Series Paper to Basic White mats using Multipurpose Liquid Glue.
I adhered the 2 layered panels to the front of a Bermuda Bay card base using Multipurpose Liquid Glue.
For the sliding mechanism I started by cutting a Bermuda Bay panel with the Stitched So Sweetly Dies. I adhered a small panel of the Basic White cardstock to the back of the scalloped rectangle using Stampin’ Seal. I scored 2 of the Basic White panels and folded them in half. I adhered the 2 folded panels folded edge in on the back of the scalloped rectangle. I adhered another one of the small Basic White panels on top of the folded panels using Stampn’ Seal. On the last small Basic White panel I stamped the grass image from the Counting Sheep stamp set in Granny Apple Green Ink on the bottom of the panel. I stamped the sentiment from the In Your Words stamp set in Tuxedo Black Ink on the top of the panel. I cut a panel of In Good Taste Designer Series Paper using the fence die from the Sheep Dies and adhered it to the Basic White panel using Multipurpose Liquid Glue. On a panel of Basic White cardstock I stamped the sheep image from the Counting Sheep stamp set in Tuxedo Black Ink. I colored the image in using my Petal Pink and Smoky Slate Stampin’ Blends Markers. I removed some of the ink using my Color Lifter to lighten the color. I cut the sheep out using my Sheep Dies and embossed the sheep using my Tasteful Textile 3D Embossing Folder. I stamped the party hat image from the Counting Sheep stamp set in Tuxedo Black Ink and cut the image out using my Sheep Die. I colored the hat in using my Bermuda Bay, Granny Apple Green, Poppy Parade and Pumpkin Pie Stampin’ Blends Markers. I adhered the hat to the sheep using Multipurpose Liquid Glue. I adhered the sheep to the Basic White panel using Stampin’ Dimensionals. I cut the balloon from a scrap of Pumpkin Pie cardstock and adhered it to the sheep. I adhered the artwork to the scalloped rectangle using Multipurpose Liquid Glue. I added a few Artistry Bloom Adhesive-Backed Sequins to the artwork
On the inside I stamped the sentiment from the In Your Words stamp set in Tuxedo Black Ink on a Basic White panel. I stamped the sheep image from the Counting Sheep stamp set in Tuxedo Black Ink and colored the image in using my Petal Pink and Smoky Slate Stampin’ Blends Markers. I stamped the grass image below the sheep in Granny Apple Green Ink. I adhered the Basic White panel to a Pumpkin Pie mat using Stampin’ Seal and then to the inside of the Bermuda Bay card base using Multipurpose Liquid Glue.
To finish my card I decorated a Basic White Medium Envelope. I stamped the sheep image from the Counting Sheep stamp set on the envelope front and colored it in using my Petal Pink and Smoky Slate Stampin’ Blends Markers. I stamped the grass image from the Counting Sheep stamp set below the sheep in Granny Apple Green Ink. I adhered a panel of Pattern Party Hose DSP to the envelope flap.
Thank you for stopping by my blog today. I hope you liked my card and will give it a try. If you do CASE this card, please feel free to post it in the comments of my Facebook page under the post. I’d love to see your take on the card. The list of measurements are below if you’d like to stamp along while watching the video. You can watch my video on my Facebook page Here.
You can also view the video on my YouTube channel Here. Happy Stamping!!
If you need any stamping supplies, I’d love to be your Demonstrator. Just click HERE to go directly to my online store or drop me an email if you have any questions.
MY CURRENT HOST CODE IS: US3JFJ62
Use this host code when you order $50 or greater and receive a free gift from me! If your order is over $150, please do not use this code, but you’ll still get the free gift. The free gift is your choice of any 1 item valued up to $10.00 from the 2020-2021 Annual Catalog or the January-June 2021 Mini Catalog!For any orders $50 or more I will also send you my monthly class tutorials. Click HERE or go to my Customer Rewards for more details and to see what this months tutorials are.
Please remember to use my current Host Code and make sure that you can see my name on the final checkout page listed as your Demonstrator when you order so that you know that you’re ordering with me and you’ll get my rewards!
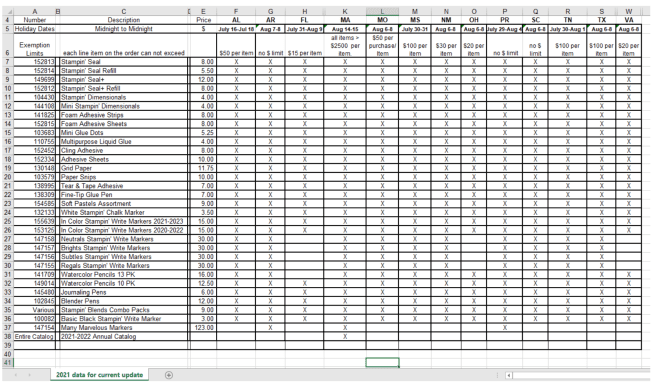
For those of you living in Massachusetts …you’ve got sales tax holiday coming up this weekend!!
The good news is that some items in the Stampin’ Up! Catalogs qualify for the sales tax holidays! The list of sales tax holidays by state and items in that state that qualify are listed below (click on the image to open up a full-size printable document):
Please note that you must place your order with Stampin’ Up! during the tax holiday period in order to receive these items tax-free (which is midnight on the first day to midnight on the last day of the tax holiday). Also, keep in mind that this is a state sales tax holiday; the state statute may not apply to county, city, and special jurisdiction taxes.
If you live in one of those states, YAY! Have fun shopping tax free during your holiday!
Hay, there! Experience everything the autumn season has to offer with the Haunts & Harvest Paper Pumpkin Kit! This month’s kit includes enough supplies to create 12 treat boxes—4 each of 3 designs. That means you can take your pick of apple, pumpkins, or jack-o-lantern treat boxes! Plus, the Paper Pumpkin box is designed to easily transform into a vintage wheelbarrow for you to display your harvest!
Whether you’re thinking about crisp red apples or you’re ready to carve some spooky jack-o-lanterns (or both!), the Haunts & Harvest Paper Pumpkin Kit—designed in a vivid fall palette—is a hands-on crafting experience for all autumn lovers!
Details:
Kit contains enough supplies to create 12 treat packages—4 each of 3 designs. The all-inclusive kit includes printed die-cut boxes, die-cut sheets, adhesive, and more!
Finished treat box size: 2-1/2″ x 2″ (6.4 x 5.1 cm)
Includes an exclusive stamp set and a Classic Stampin’ Spot
Good Sunday morning my stamping friends. How is everyone’s weekend going? Our weather man got it wrong again. Yesterday turned out to be a beautiful day here.
Today’s card is a step up from yesterday’s. I’m really loving this new set. Here’s my card for today.
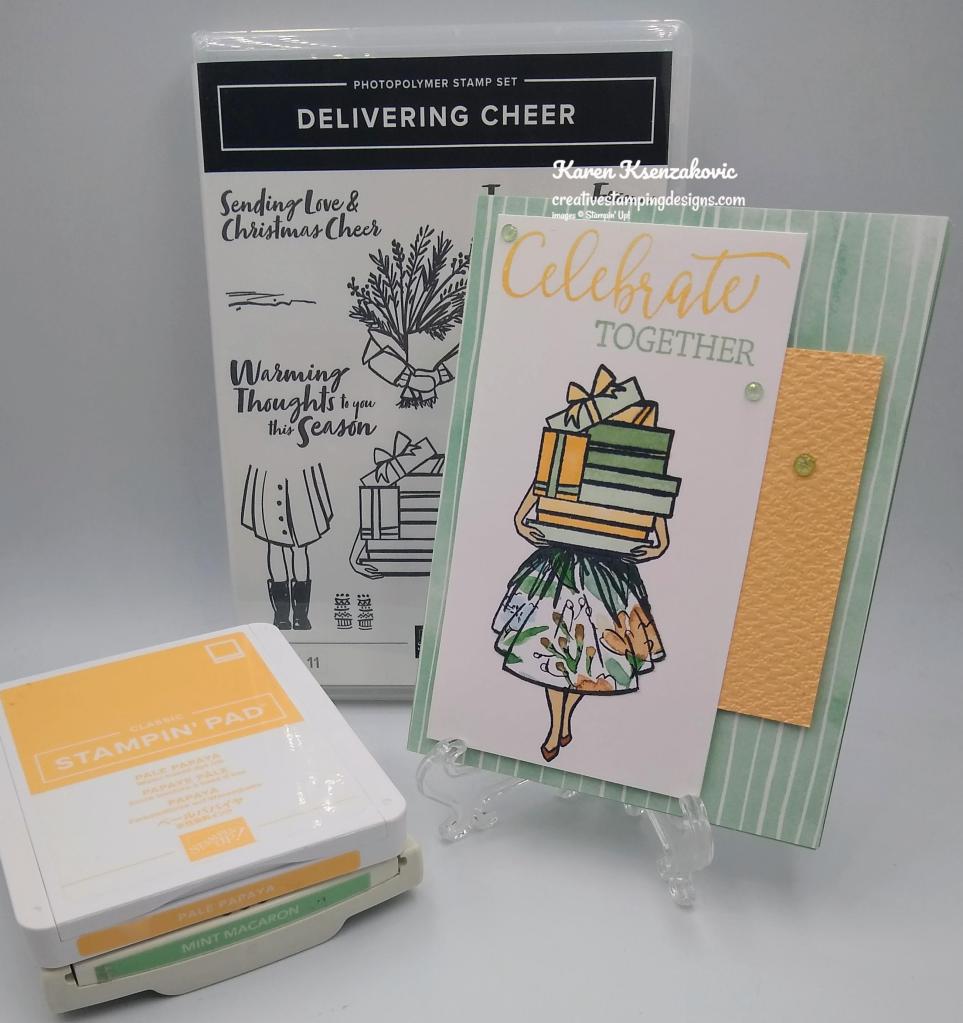
I used the Stampin’ Up! Delivering Cheer Photopolymer Stamp Set along with the Hand-Penned Designer Series Paper for my card.
I started by adhering a panel of the Hand-Penned DSP to a Mint Macaron card base using Multipurpose Liquid Glue. On a panel of Basic White cardstock I stamped the top and bottom images from the Delivering Cheer stamp set in Tuxedo Black Ink. I colored the image in using my Cinnamon Cider, Ivory, Mint Macaron and Pale Papaya Stampin’ Blends Markers.
I stamped the sentiments from the Stampin’ Up! Create With Friends Photopolymer Stamp Set in Pale Papaya and Mint Macaron Inks on the top of the Basic White panel. On a small panel of Hand-Penned DSP I stamped the skirt from the bottom image Delivering Cheer stamp set in Tuxedo Black Ink. I fussy cut the skirt using my Paper Snips and adhered it to the stamped image using Multipurpose Liquid Glue.
I embossed a small panel of Pale Papaya cardstock using the Tasteful Textile 3D Embossing Folder. I adhered the panel to the back of the artwork using Multipurpose Liquid Glue. I adhered the layered panel to the card front using Stampin’ Dimensionals. I added a few Genial Gems to the card front.
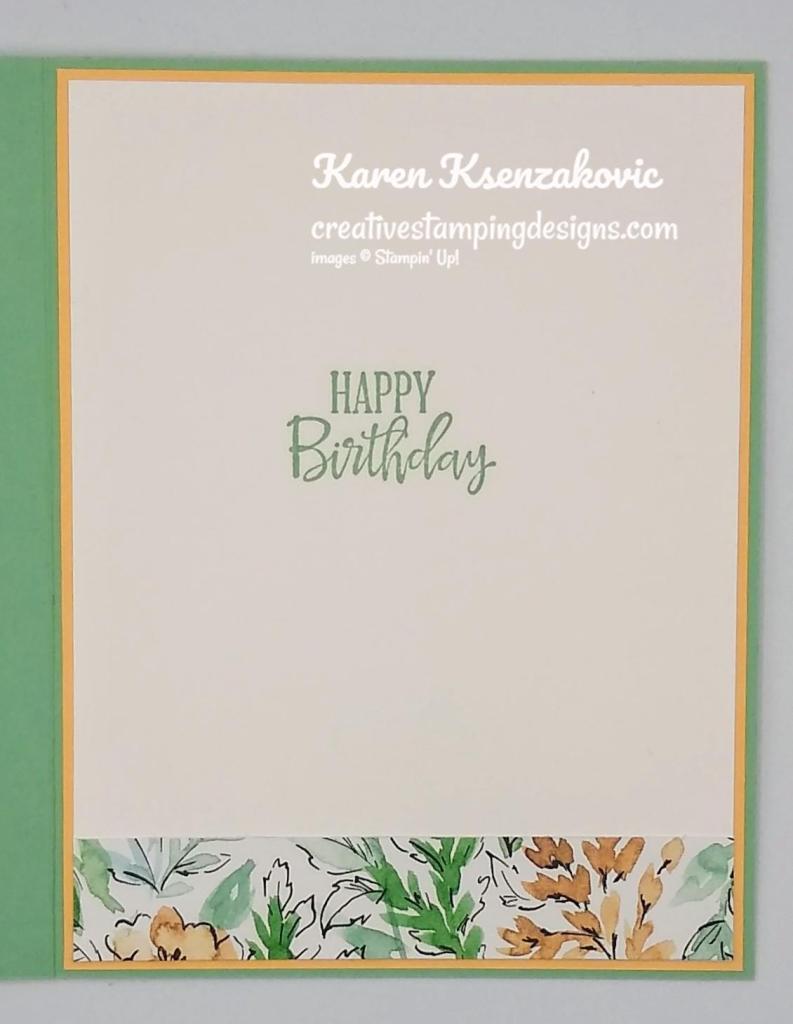
On the inside I stamped the sentiment from the Stampin’ Up! Peaceful Moments Cling Stamp Set in Mint Macaron Ink on a Basic White panel. I adhered a strip of the Hand-Penned DSP to the bottom of the panel using Stampin’ Seal. I adhered the Basic White panel to a Pale Papaya mat using Stampin’ Seal and then to the inside of the Mint Macaron card base using Multipurpose Liquid Glue.
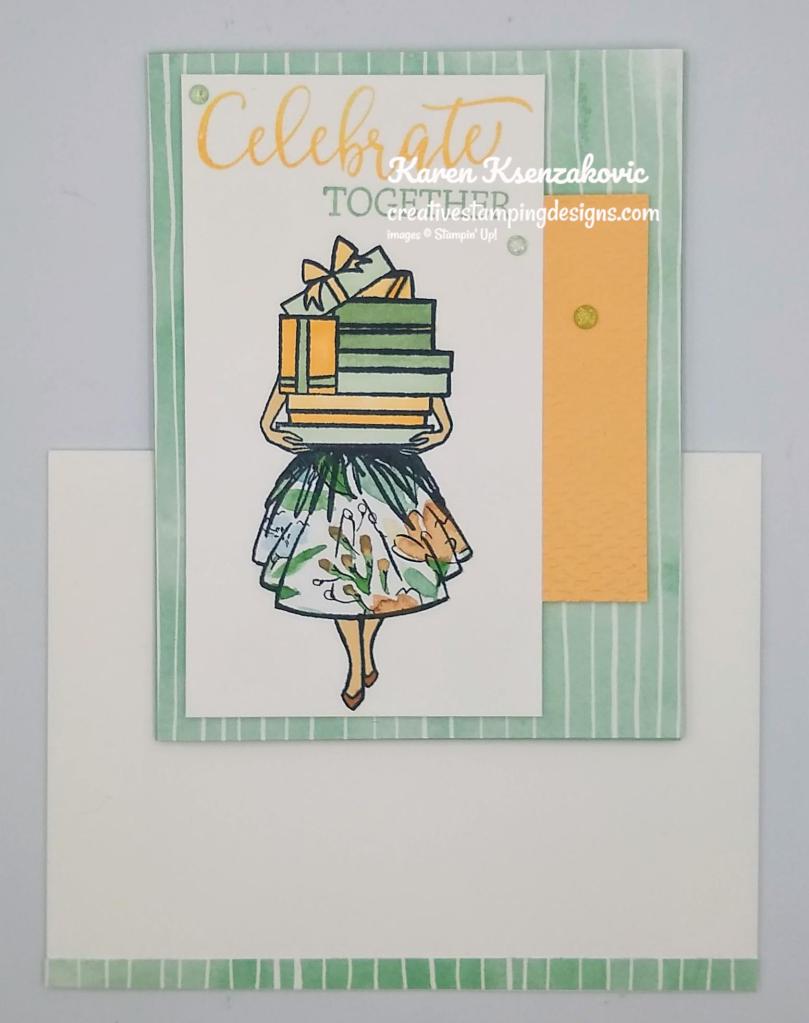
To finish my card I decorated a Basic White Medium Envelope. I adhered a strip of the Hand-Penned DSP to the envelope front and a panel to the envelope flap.
Thank you for stopping by my blog today. I hope you liked my card. This stamp set will be available starting August 3rd from the July-December 2021 Mini Catalog. Happy Stamping!!
If you need any stamping supplies, I’d love to be your Demonstrator. Just click HERE to go directly to my online store or drop me an email if you have any questions.
MY CURRENT HOST CODE IS: CEWAN9UD
Use this host code when you order $50 or greater and receive a free gift from me! If your order is over $150, please do not use this code, but you’ll still get the free gift. The free gift is your choice of any 1 item valued up to $10.00 from the 2020-2021 Annual Catalog or the January-June 2021 Mini Catalog!For any orders $50 or more I will also send you my monthly class tutorials. Click HERE or go to my Customer Rewards for more details and to see what this months tutorials are.
Please remember to use my current Host Code and make sure that you can see my name on the final checkout page listed as your Demonstrator when you order so that you know that you’re ordering with me and you’ll get my rewards!
SAVE 15% ON DESIGNER SERIES PAPER JULY 1 – AUGUST 2!
We all love gorgeous Designer Series Paper, and during this incredible sale, you can enjoy a 15% discount on select papers from the 2021–2022 Annual Catalog! July is a great time to stock up and save on some of Stampin’ Up!’s most popular paper designs!
PROMOTION DETAILS:
Sales Period: July 1 – August 2
All order types qualify for this promotion.
There is no limit to how many packages of Designer Series Paper may be purchased during this promotion.
Only select Designer Series Papers are available at a 15% discount during this promotion.
Orders must be placed—and closed—during the promotion period for the 15% discount to apply.
Designer Series Paper ordered as part of a Starter Kit or with Stampin’ Rewards qualify for the 15% discount.
Order Deadline: August 2, 2021 at 11:59 PM (MT)
Click on image below for a printable PDF of the Sale Designer Series Papers
Good Saturday morning my stamping friends. Most of you have a nice long weekend (which I personally think we should have all the time). Hope you have some fun things planned.
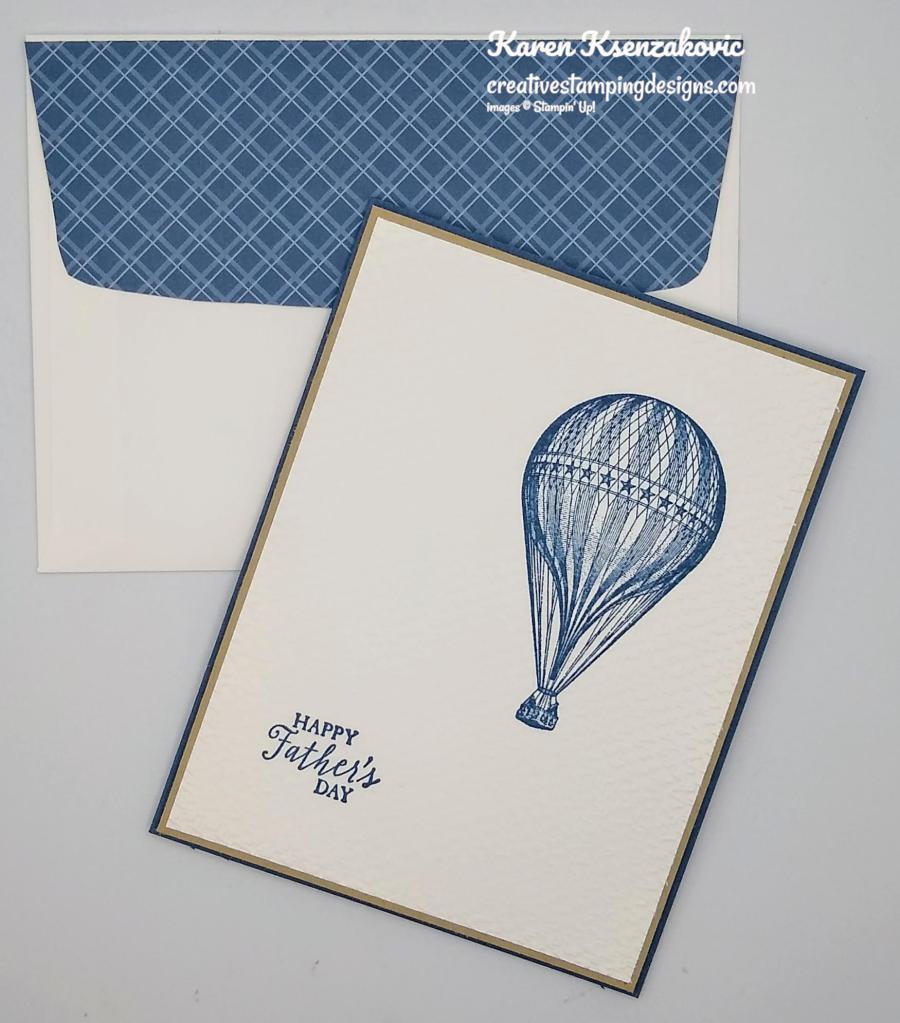
Next week I’m having another Stamp Camp card making class and I have another new stamper coming. I’m really trying to think clean and simple, but I always have to add that little extra. Here’s one of the cards we will be making. It’s similar to one I made a couple months ago.
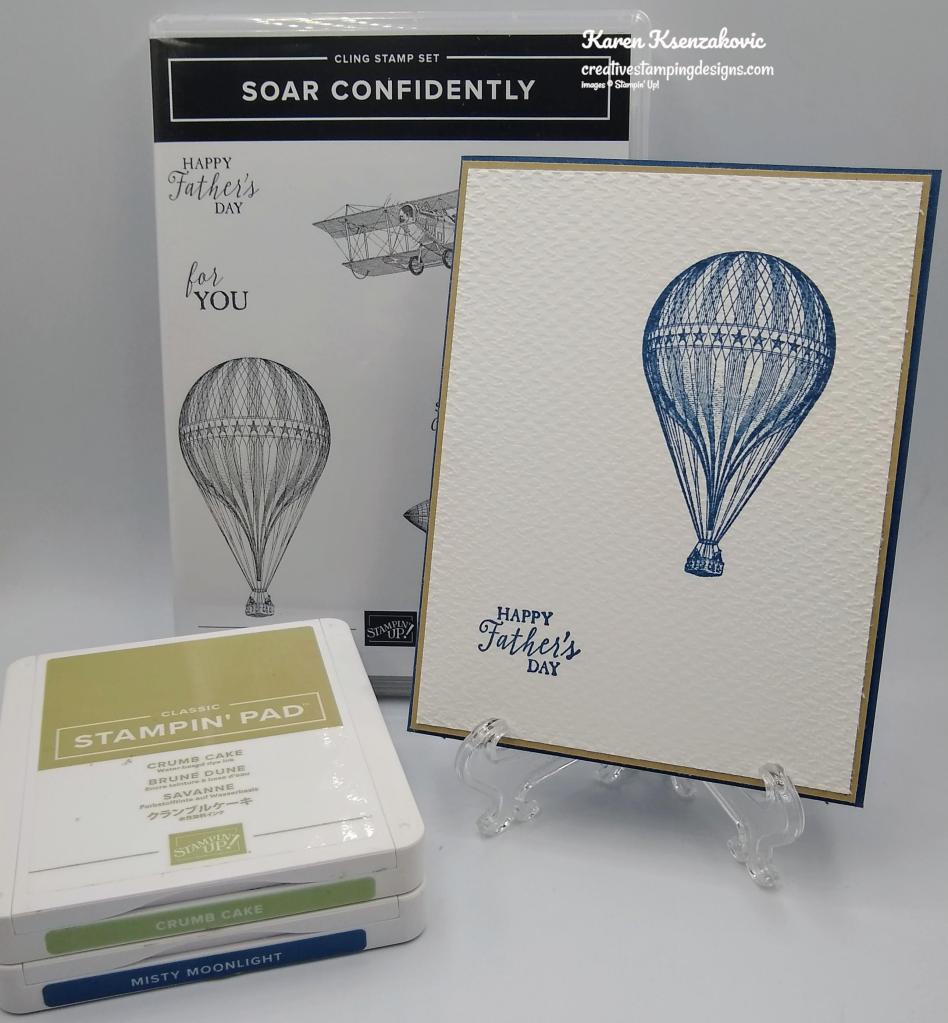
I used the Stampin’ Up! Soar Confidently Cling Stamp Set for my card. This set will be retiring at the end of June, so if it’s one that you really like, I’d grab it now before it’s gone.
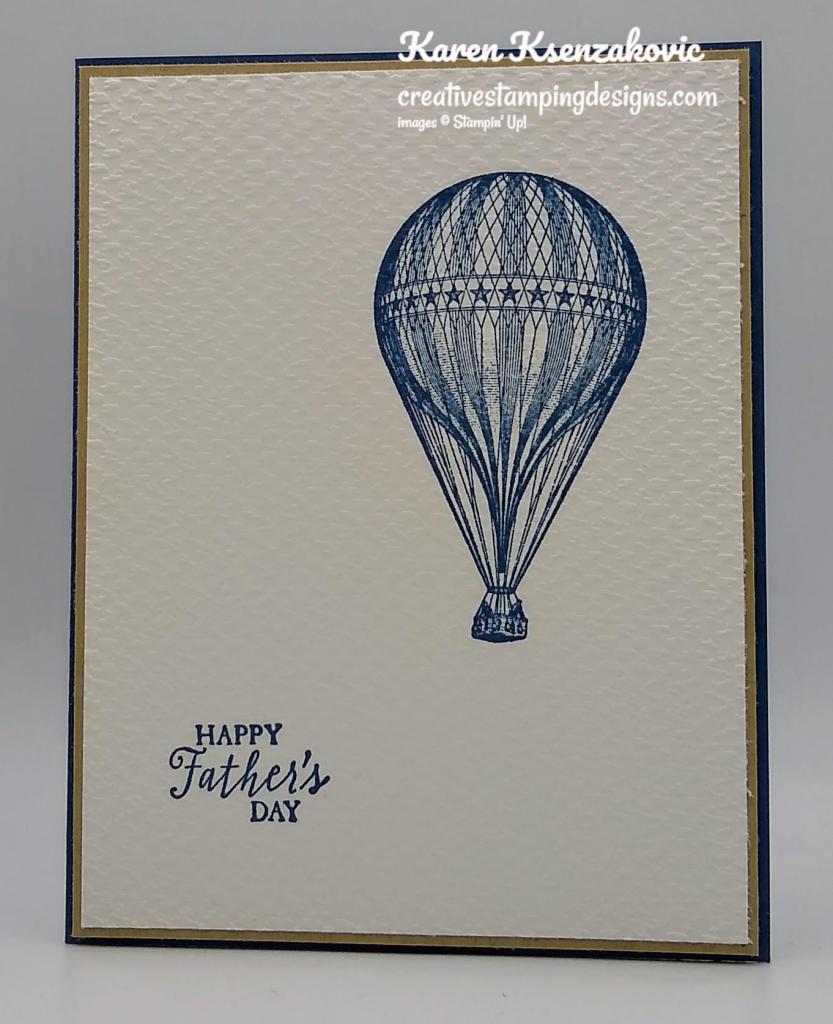
I started by stamping the hot air balloon image from the Soar Confidently stamp set in Misty Moonlight Ink on a Basic White card front.
I stamped the sentiment from the Soar Confidently stamp set in Misty Moonlight Ink on the opposite side of the card front. I embossed the card front using the Tasteful Textile 3D Embossing Folder. On of my new stampers that came to my class last month just loved the whole embossing technique, so I thought I’d do it again just for her.
I adhered the card front to a Crumb Cake mat using Multipurpose Liquid Glue and then to a Misty Moonlight card base using Stampin’ Dimensionals.
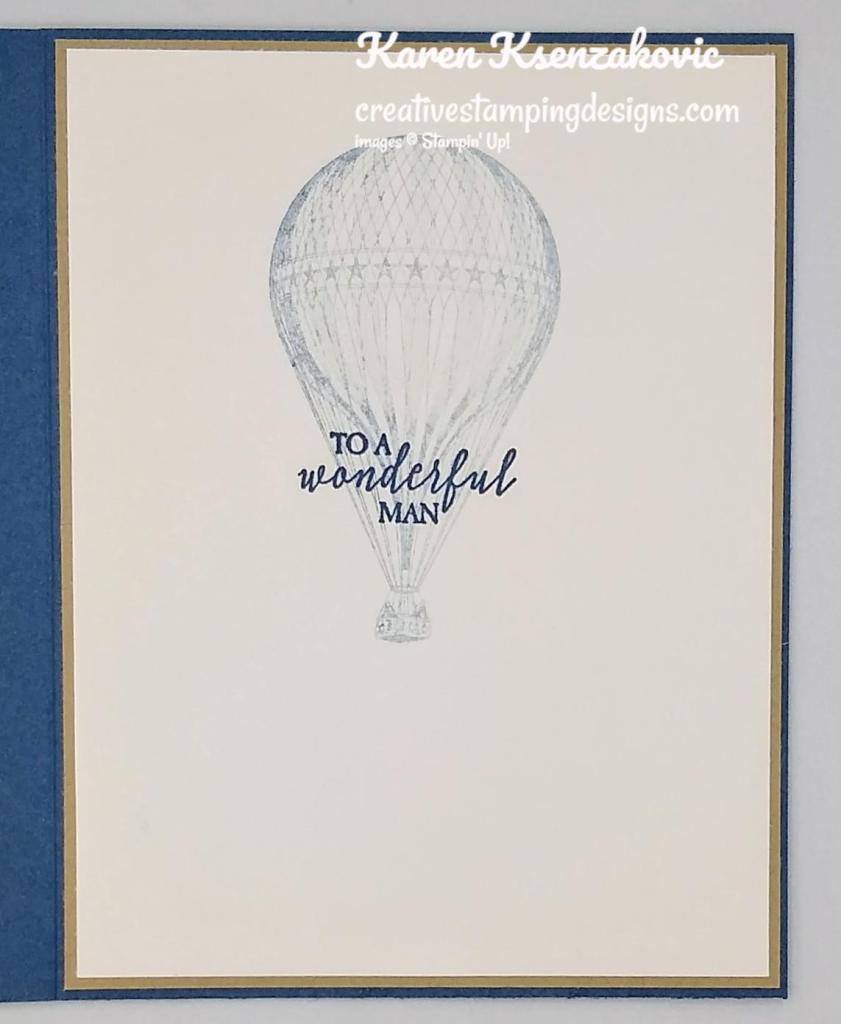
On the inside I stamped the sentiment from Soar Confidently stamp set in Misty Moonlight Ink in the center of a Basic White panel. I stamped the hot air balloon image from the Soar Confidently stamp set in Misty Moonlight Ink, stamping off 3 times on scrap paper, over the sentiment. I adhered the Basic White panel to a Crumb Cake mat using Stampin’ Seal and then to the inside of the Misty Moonlight card base using Multipurpose Liquid Glue.
To finish my card I decorated a Basic White Medium Envelope. I stamped the hot air balloon image from the Soar Confidently stamp set in Misty Moonlight Ink on the envelope front. I adhered a panel of the 2020-2022 In-Color Designer Series Paper to the envelope flap.
Thank you for stopping by my blog today. I hope you liked my CAS card and will give it a try. Happy Stamping!!
If you need any stamping supplies, I’d love to be your Demonstrator. Just click HERE to go directly to my online store or drop me an email if you have any questions.
MY CURRENT HOST CODE IS: QH7JDXHB
Use this host code when you order $50 or greater and receive a free gift from me! If your order is over $150, please do not use this code, but you’ll still get the free gift. The free gift is your choice of any 1 item valued up to $10.00 from the 2020-2021 Annual Catalog or the January-June 2021 Mini Catalog!For any orders $50 or more I will also send you my monthly class tutorials. Click HERE or go to my Customer Rewards for more details and to see what this months tutorials are.
Please remember to use my current Host Code and make sure that you can see my name on the final checkout page listed as your Demonstrator when you order so that you know that you’re ordering with me and you’ll get my rewards!
The first Stampin’ Up! value statement is this: we care about people first. What does that look like? Caring about people first means treating others with kindness, respect, and equal consideration. It means working together towards a common goal, helping each other through life’s challenges, and celebrating one another’s accomplishments. It means including others, even when we disagree, have contrasting life experiences, or simply see things differently. Caring about people first is our greatest strength!
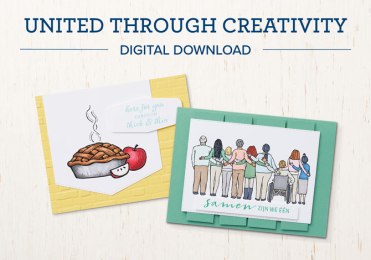
In honor of this value—and in the spirit of World Diversity Day—we’d like to celebrate what makes us unique through what brings us together: creativity! The United Through Creativity Digital Download features inclusive, multicultural, and multilingual sentiments and illustrations that represent the multiple markets Stampin’ Up! engages with. And, it’s FREE for all!
We hope you’ll join us in celebrating our one-of-a-kind community through the unifying force of creativity!
The elements featured in the United Through Creativity Digital Download were created in the spirit of World Diversity Day—a day for each of us to join together and understand the value of cultural diversity throughout the world. And, to celebrate our unique community of crafters!
We celebrate the diversity of the Stampin’ Up! family every day! In the United Through Creativity Digital Download, you’ll see a variety of illustrations, sentiments, and other elements that represent each of our marvelous markets and more.
Print your favorite pieces and use them to create cards, scrapbook pages, and other paper projects! We hope you’ll enjoy celebrating diversity, connection, community, and creativity with this sweet selection of inclusive, multicultural, and multilingual elements.
Don’t be shy—share what you’ve made! When sharing to social media, use the hashtags #UnitedThroughCreativity and #DiversityDay. We can’t wait to see your creations!
Speaking of sharing, spread the word! Let’s celebrate what makes us unique through what brings us together: creativity!
Click on the image below for your free Digital Download
Stampin’ Up! Join + Promotion May 4-31 ENDING SOON!!!
May is a fabulous time to join Stampin’ Up! because you’ll get even MORE FREE products in your customizable Starter Kit! From May 4–31, you will get $125 USD $155 worth of products for only $99 + free business supplies + free shipping + all the fun being a part of Stampin’ Up!!
PROMOTION DATES: 4–31 MAY 2021
New demonstrators who purchase their Starter Kit between May 4 and May 31 will be able to redeem $155 of Starter Kit eligible products for $99.
New demonstrators who submit their Independent Demonstrator Agreement (IDA) before May 4 or after May 31 will not be eligible for this offer.
A new demonstrator can select any eligible Stampin’ Up! products up to the stated value.
The Starter Kit also includes business resources like catalogs, brochures, order forms, and postcards at no additional charge.
The Starter Kit also includes a FREE past Paper Pumpkin kit.
The Starter Kit promotion begins May 4.
Deadline to purchase the Starter Kit and receive the extra $30 in free products: May 31, 2021 at 11:50 PM (MT).
In addition to the amazing added value to the Starter Kit, when you join Stampin’ Up! you get to be a part of our amazing community of crafters! Plus, you get to enjoy sharing simple and fun crafting experiences with others, early access to products, and exclusive access to training events! Demonstrators also get at least a 20% discount on all of the products that they purchase and there is no requirement to sell to anyone. There is no risk and no penalty if you decide that being a Demonstrator isn’t right for you. With this great deal, there is no reason not to join in May!!
If you have any questions about joining or being a Stampin’ Up! Demonstrator, please drop me a note at creativestampingdesigns@gmail.com. If you want to read more about becoming a Demonstrator and the benefits of joining, head over to my Stampin’ Up! page HERE. I’d LOVE to have you on my team!!
The January–June 2021 Mini Catalog will be retiring soon! It’s always bittersweet to see a classic Stampin’ Up! catalog take a trip to retirement. But, we’re looking forward to all the new products on their way—and we hope you are, too!
Stock up on your favorite products before they’re gone for good! Save up to 50% on essential craft supplies. What are you waiting for? Start shopping! After all, this selection of Last Chance Products is only available while supplies last.
Click Here to view the PDF of the LAST CHANCE retiring items from the January -June 2021 Mini Catalog.
DETAILS
Each Last Chance Products promotion typically includes a Retiring List (products that will no longer be available once the catalog retires) and a Carryover List (products that will still be available once the catalog retires). For this catalog’s Last Chance Products promotion, a Carryover List will not be provided; carryover products can be viewed in the 2021–2022 Annual Catalog.
Discounts are not always available with the Retiring List. When they are, they will vary from one market to another depending on product performance.
All products are available while supplies last, and there are no purchase limits.
SALES PERIOD
Starts: 1 June 2021 at 1:00 PM (MT)
Ends: 30 June 2021 at 11:59 PM (MT)
DON’T MISS OUT ON THESE GREAT DEALS!! GET THOSE SHOPPING LISTS READY TO GO!! STOCK UP ON YOUR FAVORITE PRODUCTS BEFORE THEY’RE GONE!! Don’t forget, the last chance items are available while supplies last so shop early for the best selection!
Dream and discover In Color! With the Expressions In Color Paper Pumpkin Kit, you’ll be introduced to our intriguing collection of In Colors for 2021–2023—and, you’ll find a familiar shade from our 2020–2022 In Color selection. This month’s ink-credible kit contains enough elements to create nine cards—and coordinating envelopes—including ink-stained paper pieces, an exclusive stamp set, and not one, but two Classic Stampin’ Spots! And, it all comes in a cute, colorful, and collectible box.
What are In Colors, anyway? In Colors consist of a limited-edition collection of colors. We come up with a new collection every year, and we release it around the same time as the release of our annual catalog! In each In Color collection, we’ll offer ink, paper, markers, and more. The catch? They’re only available to purchase for a period of two years, so stock up on your favorite In Color supplies while you can!
With the Expressions In Color kit, you can explore and experiment with our 2020–2022 and 2021–2023 In Color collections. Make a splash with awe-inspiring, ink-stained artistry!
Details
Kit contains enough supplies to create 9 cards—3 each of 3 designs—and coordinating envelopes. This all-inclusive kit includes printed card bases, die-cut paper pieces, embellishments, adhesive, and more!
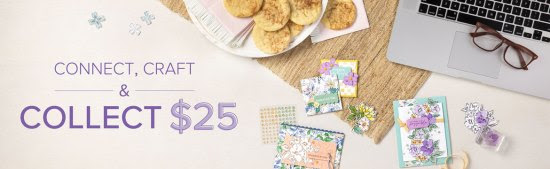
Stampin’ Up! Connect, Craft & Collect $25 Stampin’ Rewards Bonus May 4 – June 14!!
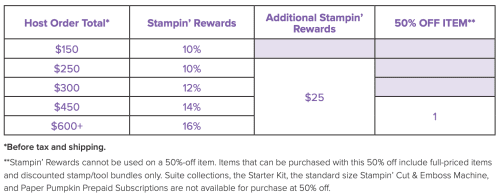
From May 4 – June 14, 2021, qualifying Stampin’ Up! orders and parties over $250 will receive $25 in BONUS Stampin’ Rewards! YAY for more free goodies to kick off a new catalog!!
Stampin’ Rewards can be spent on any merchandise in either of the current catalogs, including the host exclusive items on pages 170-171 in the new Annual Catalog and page 88 in the January-June Mini Catalog!
PROMOTION DATES: MAY 4 – JUNE 14, 2021
Workshop orders, customer orders, and online orders all qualify for the extra $25 in Stampin’ Rewards if they reach the $250 level.
The order must reach the qualifying amount of $250 in merchandise prior to shipping and tax.
The extra $25 rewards are only valid once per order no matter how high the order total.
Starter Kit orders do not qualify for this promotion.
Stampin’ Rewards can not be used on a 50% off item.
Deadline to submit an order and receive the extra $25 in free Stampin’ Rewards: June 14, 2021 at 11:50 PM (MT).
If you have any questions or would like me to set up a host code for you to see if you can collect $250 in orders for yourself, please drop me a note at creativestampingdesigns@gmail.com. I’ll be happy to do that for you!
Looking For The BEST Deal???
Join during May AND then place an order of $250+!! You can “double dip” and get $30 additional free merchandise with your Starter Kit AND $25 extra in host cash to spend when you place orders of $250+ before June 14!!
If you have any questions, drop me a note at creativestampingdesigns@gmail.com.
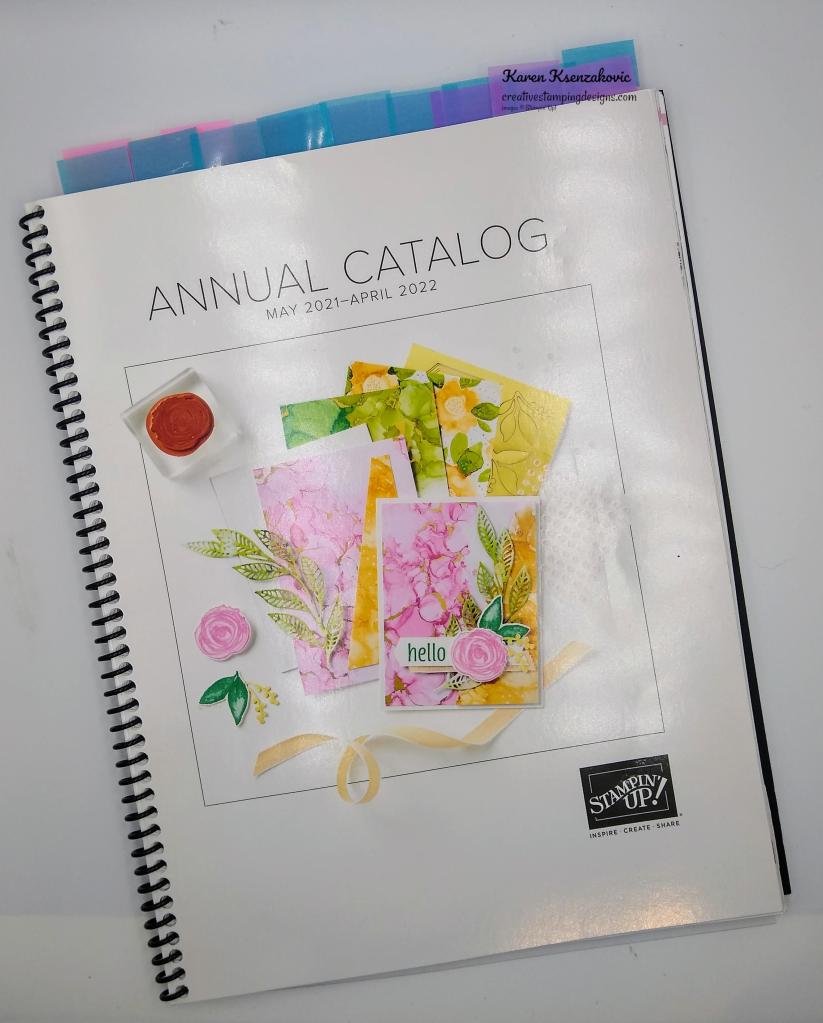
Good Monday morning my stamping friends. How was everyone’s weekend. Today is the last day to get your hands on the retiring items. If there are things that you have been wanting, grab them while you still can. Then, tomorrow the 2021-2022 Annual Catalog goes LIVE YAY!!! I’ve got my list ready to go, how about you?
Today’s card is another one we will be making at my class tomorrow night. All the cards we will be making tomorrow are Mother’s Day/Female cards. This card is stepped up a little, but if they don’t want to add the extra they don’t have to, it looks just a pretty without. Here’s my card for today.
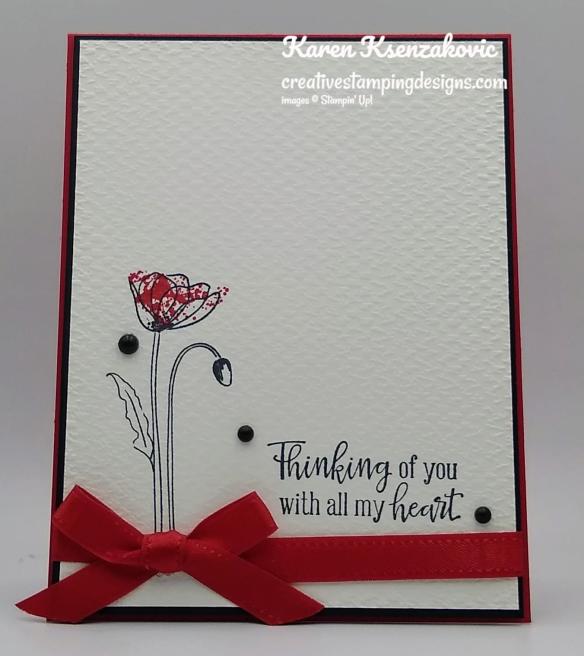
I used the Stampin’ Up! Painted Poppies Cling Stamp Set for my card along with the Tasteful Textile 3d Embossing Folder.
I started by stamped the single poppy image from the Painted Poppies stamp set in Tuxedo Black Ink on a Basic White card front. I stamped the sentiment from the Stampin’ Up! Peaceful Moments Cling Stamp Set in Tuxedo Black Ink next to the poppy image. I stamped the small splotch image from the Painted Poppies stamp set in Real Red Ink on the flower.
I embossed the card front using my Tasteful Textile 3D Embossing Folder and adhered it to a Basic Black mat using Multipurpose Liquid Glue. I wrapped a piece of Real Red 3/8″ Double-Stitched Satin Ribbon around the matted panel and tied a bow.
I adhered the card front to a Real Red card base using Stampin’ Dimensionals. I added a few Matte Black Dots to the card front.
On the inside I stamped the sentiment from the Peaceful Moments stamp set in Tuxedo Black Ink in the center of a Basic White panel. I stamped the single poppy image from the Painted Poppies stamp set in Tuxedo Black Ink on the bottom of the panel. I stamped the small splotch image from the Painted Poppies stamp set in Real Red Ink on the flower. I adhered the Basic White panel to a Basic Black mat using Stampin’ Seal and then to the inside of the Real Red card base using Multipurpose Liquid Glue.
To finish my card I decorated a Basic White Medium Envelope. I stamped the single poppy image from the Painted Poppies stamp set in Tuxedo Black Ink on the envelope front. I stamped the small splotch image from the Painted Poppies stamp set in Real Red Ink on the flower. I adhered a panel of the Regals 6 X 6 Designer Series Paper (retiring today) to the envelope flap.
Thank you for stopping by my blog today. I hope you liked my card and will give it a try. Happy Stamping!!
If you need any stamping supplies, I’d love to be your Demonstrator. Just click HERE to go directly to my online store or drop me an email if you have any questions.
MY CURRENT HOST CODE IS: QH7JDXHB
Use this host code when you order $50 or greater and receive a free gift from me! If your order is over $150, please do not use this code, but you’ll still get the free gift. The free gift is your choice of any 1 item valued up to $10.00 from the 2020-2021 Annual Catalog or the January-June 2021 Mini Catalog!For any orders $50 or more I will also send you my monthly class tutorials. Click HERE or go to my Customer Rewards for more details and to see what this months tutorials are.
Please remember to use my current Host Code and make sure that you can see my name on the final checkout page listed as your Demonstrator when you order so that you know that you’re ordering with me and you’ll get my rewards!
Does your Wish List and 2021-2022 Annual Catalog look like mine that just about every page is marked? Do you want it all and don’t want to spend a lot of money all at once? An Online Host Club might just be the perfect solution for you. This is the perfect way to build up your Stampin’ Up! supplies a little at a time and receive host benefits too. Click Here for details on joining my Online Host Club.
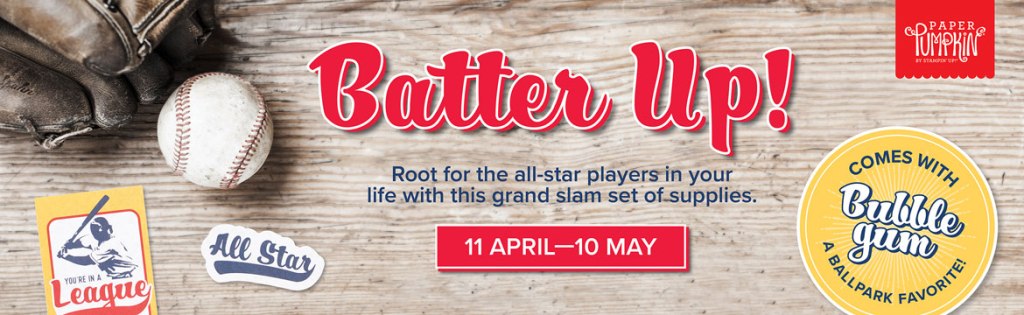
Whether you’re crafting for a father, grandfather, nephew, or brother, we’ve got all your bases covered with the Batter Up! Paper Pumpkin Kit! This month’s kit is the perfect pick for making masculine masterpieces.
Then again, we know that grass-stained pants and sliding into home aren’t just for the boys—this month’s kit is a triple threat! Designed with men, sport-lovin’ ladies, and baseball fanatics in mind, anyone would bounce from their spot in the bleachers if they received a classic card from the Batter Up! kit. After all, this month’s kit was made for celebrating the all-stars, MVPs, and the greats—no matter what team they play on!
Step up to the plate, take a swing, and knock it out of the park! With the Batter Up! Paper Pumpkin Kit, it’s your turn to go to bat for all the people who’ve gone to bat for you. This month’s timeless kit with a “throwback” theme contains enough grand slam supplies to create nine cards—and coordinating envelopes—featuring classic colors, pinwheel and pinstripe patterns, and vintage-washed paper pieces. There’s no “batter” way to root, root, root for your home team and honor the all-stars in your life!
A beloved baseball-themed kit would be incomplete without the sport’s signature, sticky snack—the official bubble gum of the MLB! A favorite in the field, the Batter Up! Paper Pumpkin Kit contains a couple sticks of the chewy staple; chew while you craft, slide a piece into a card, or save it for later.
Send a seventh-inning stretch in a classic card with all-star stripes, a nostalgic nod, and a stamp set fit for an MVP! But, before you give it all you’ve got, give this month’s promotional video a watch. See what the Batter Up! kit is all about! Play ball!
Details
Kit contains enough supplies to create 9 cards—3 each of 3 designs—and coordinating envelopes. The all-inclusive kit includes printed card bases, die-cut paper pieces, embellishments, adhesive, and more!
Card size: 4-1/4″ x 5-1/2″ (10.8 x 14 cm)
Envelope size: 4-1/2″ x 5-3/4″ (11.4 x 14.6 cm)
Coordinating colors: Basic White, Bumblebee, Night of Navy, Pacific Point, Real Red, Smoky Slate, Soft Suede
Comes with the official bubble gum of the MLB—a ballpark favorite! Chew while you craft, slide a piece into a card, or save it for later.
Subscribe to the May 2021 Paper Pumpkin Kit between 11 April and 10 May at paperpumpkin.com!
Note: Supplies may be limited toward the end of the subscription period.
Good Thursday morning my stamping friends! Welcome to our Happy Inkin’ Thursday Blog Hop. I hope everyone is doing well today. If you are hopping over from Akiko, thank you for stopping by my blog. This week we have a Theme Challenge. Be sure to take a moment to hop around to see everyone’s amazing projects. Here is my card using this weeks theme.
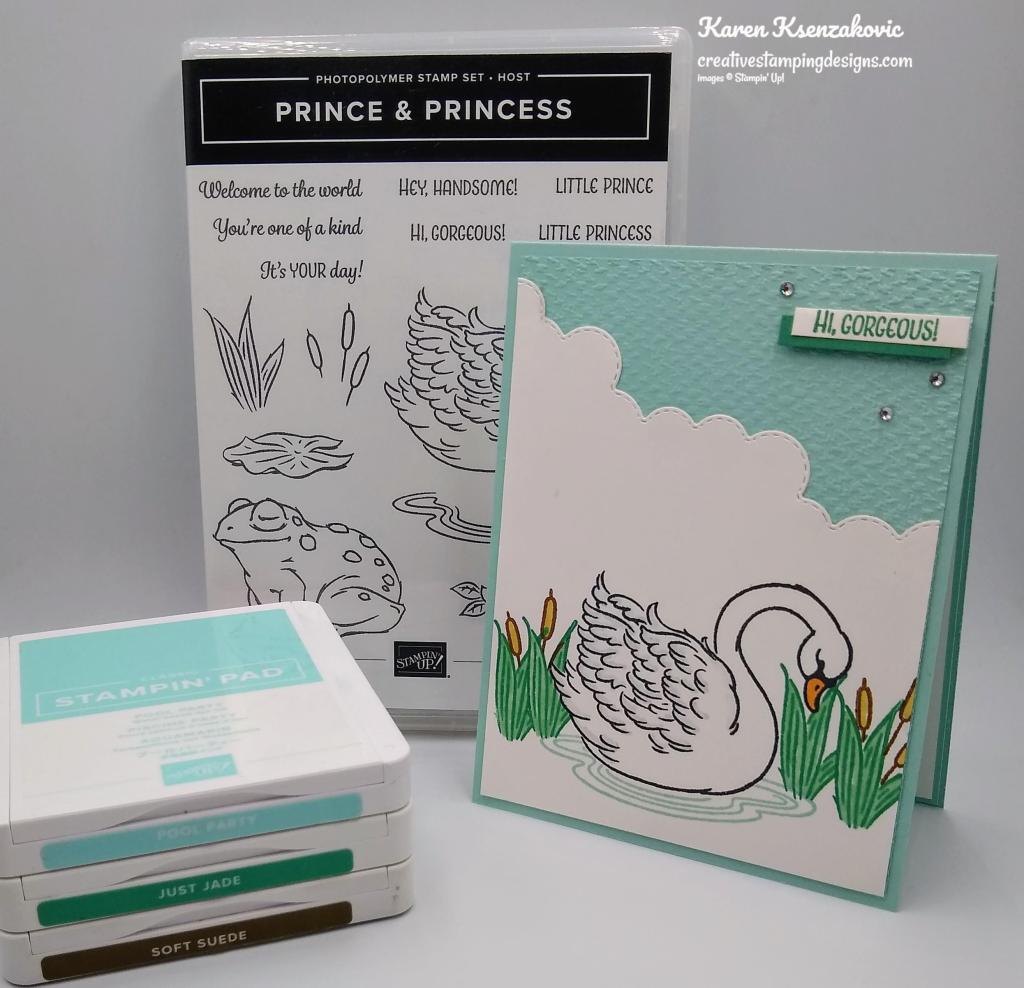
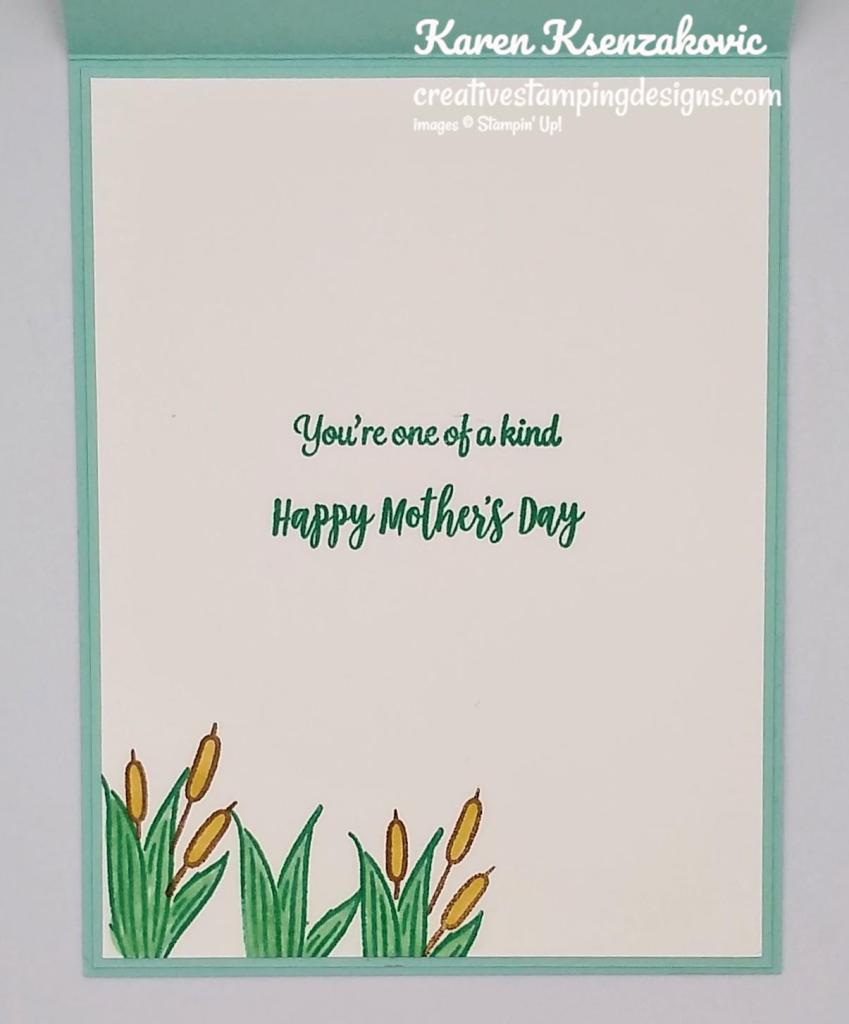
I used the Stampin’ Up! Prince & Princess Photopolymer Host Stamp Set for my card today along with the new Basic Borders Dies.
Our theme is Things With Wings. Swans have wings, right?
I started by embossing a panel of Pool Party cardstock using the Tasteful Textile 3D Embossing Folder. On a panel of Basic White cardstock I stamped the swan image from the Prince & Princess host stamp set in Tuxedo Black Ink. I colored the beak using my Pumpkin Pie Stampin’ Blends Markers and added a little color to the feathers using my Smoky Slate Stampin’ Blends Markers. I stamped the water image below the swan in Pool Party Ink. I stamped the leaf image from the Prince & Princess stamp set in Just Jade Ink on either side of the swan image and colored them in using my Just Jade Stampin’ Blends Markers. I stamped the cattails image on the leaves in Soft Suede Ink and colored them in using my Soft Suede Stampin’ Blends Markers.
Using my new Basic Borders Dies, I cut the Basic White panel on an angle using the cloud looking die. I adhered the artwork to the embossed panel using Multipurpose Liquid Glue.
On a strip of Basic White cardstock I stamped the sentiment from the Prince & Princess stamp set in Just Jade Ink and adhered it to a strip of Just Jade cardstock using Stampin’ Seal. I adhered the sentiment stamp set to the card front using Stampin’ Dimensionals. I added a few Rhinestone Basic Jewels to the card front. I adhered the card front to a Pool Party card base using Multipurpose Liquid Glue.
On the inside I stamped the sentiment from the Prince & Princess stamp set in the center of a Basic White panel in Just Jade Ink. I stamped the sentiment from the Stampin’ Up! Dressed To Impress Photopolymer Stamp Set below the sentiment in Just Jade Ink. I stamped the leaf image from the Prince & Princess stamp set in Just Jade Ink on the bottom of the panel and colored it using my Just Jade Stampin’ Blends Markers. I added the cattails to the leaf image stamping them in Soft Suede Ink and coloring them with my Soft Suede Stampin’ Blends Markers. I adhered the Basic White panel to a Pool Party mat using Stampin’ Seal and then to the inside of the Pool Party card base using Multipurpose Liquid Glue
To complete my card I decorated a Basic White Medium Envelope. I stamped the swan image from the Prince & Princess stamp set in Tuxedo Black Ink on the envelope front. I stamped the water image below the swan in Pool Party Ink. I colored the beak using my Pumpkin Pie Stampin’ Blends Markers and added a little color to the swans feathers using my Smoky Slate Stampin’ Blends Markers. I stamped and colored the envelope flap using the leaf and cattails images from the Prince & Princess stamp set.
Thank you for visiting my blog today. I hope you liked my card and will give it a try. Now that you’ve seen my card, take a minute to hop through all our projects today. If you click on the Next Blog button, you’ll go to Amy’s page. Or you can just click on the names below to go directly to all their blogs! Happy Hopping!!
If you need any stamping supplies, I’d love to be your Demonstrator. Just click HERE to go directly to my online store or drop me an email if you have any questions.
MY CURRENT HOST CODE IS: 9R4BQD64
Use this host code when you order $50 or greater and receive a free gift from me! If your order is over $150, please do not use this code, but you’ll still get the free gift. The free gift is your choice of any 1 item valued up to $10.00 from the 2020-2021 Annual Catalog or the January-June 2021 Mini Catalog!For any orders $50 or more I will also send you my monthly class tutorials. Click HERE or go to my Customer Rewards for more details and to see what this months tutorials are.
Please remember to use my current Host Code and make sure that you can see my name on the final checkout page listed as your Demonstrator when you order so that you know that you’re ordering with me and you’ll get my rewards!
Stampin’ Up! has updating the Clearance Rack with some new goodies over night! Head over there quickly to get your hands on some great deals. But hurry!! Clearance Rack deals are only while supplies last!
CLICK HERE to head over to my online store to shop those great deals, but it must be after midnight MOUNTAIN TIME tonight!! Have fun shopping!
Whether you’re crafting for a father, grandfather, nephew, or brother, we’ve got all your bases covered with the Batter Up! Paper Pumpkin Kit! This month’s kit is the perfect pick for making masculine masterpieces.
Then again, we know that grass-stained pants and sliding into home aren’t just for the boys—this month’s kit is a triple threat! Designed with men, sport-lovin’ ladies, and baseball fanatics in mind, anyone would bounce from their spot in the bleachers if they received a classic card from the Batter Up! kit. After all, this month’s kit was made for celebrating the all-stars, MVPs, and the greats—no matter what team they play on!
Step up to the plate, take a swing, and knock it out of the park! With the Batter Up! Paper Pumpkin Kit, it’s your turn to go to bat for all the people who’ve gone to bat for you. This month’s timeless kit with a “throwback” theme contains enough grand slam supplies to create nine cards—and coordinating envelopes—featuring classic colors, pinwheel and pinstripe patterns, and vintage-washed paper pieces. There’s no “batter” way to root, root, root for your home team and honor the all-stars in your life!
A beloved baseball-themed kit would be incomplete without the sport’s signature, sticky snack—the official bubble gum of the MLB! A favorite in the field, the Batter Up! Paper Pumpkin Kit contains a couple sticks of the chewy staple; chew while you craft, slide a piece into a card, or save it for later.
Send a seventh-inning stretch in a classic card with all-star stripes, a nostalgic nod, and a stamp set fit for an MVP! But, before you give it all you’ve got, give this month’s promotional video a watch. See what the Batter Up! kit is all about! Play ball!
Details
Kit contains enough supplies to create 9 cards—3 each of 3 designs—and coordinating envelopes. The all-inclusive kit includes printed card bases, die-cut paper pieces, embellishments, adhesive, and more!
Card size: 4-1/4″ x 5-1/2″ (10.8 x 14 cm)
Envelope size: 4-1/2″ x 5-3/4″ (11.4 x 14.6 cm)
Coordinating colors: Basic White, Bumblebee, Night of Navy, Pacific Point, Real Red, Smoky Slate, Soft Suede
Comes with the official bubble gum of the MLB—a ballpark favorite! Chew while you craft, slide a piece into a card, or save it for later.
Subscribe to the May 2021 Paper Pumpkin Kit between 11 April and 10 May at paperpumpkin.com!
Note: Supplies may be limited toward the end of the subscription period.

")


")


 Designer Series Paper")
 Designer Series Paper")


 Designer Series Paper")


")
")

")


 Specialty Designer Series Paper")


")
")


 Designer Series Paper")


 Chevron Weave Ribbon")


")

")


 Host Designer Series Paper")


")


 Designer Series Paper")


 Designer Series Paper")


 Double-Stitched Satin Ribbon")


")


