
Good Wednesday morning stamping friends. I hope you are all having a wonderful week. We’re halfway through and on our way to the weekend. We made it home safely from the Incentive trip, now to get back to normal life.
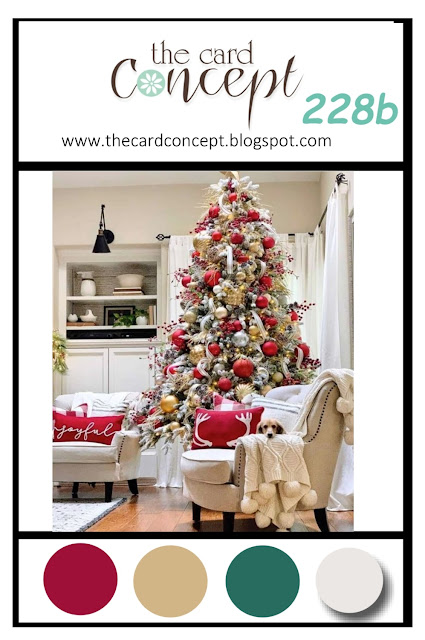
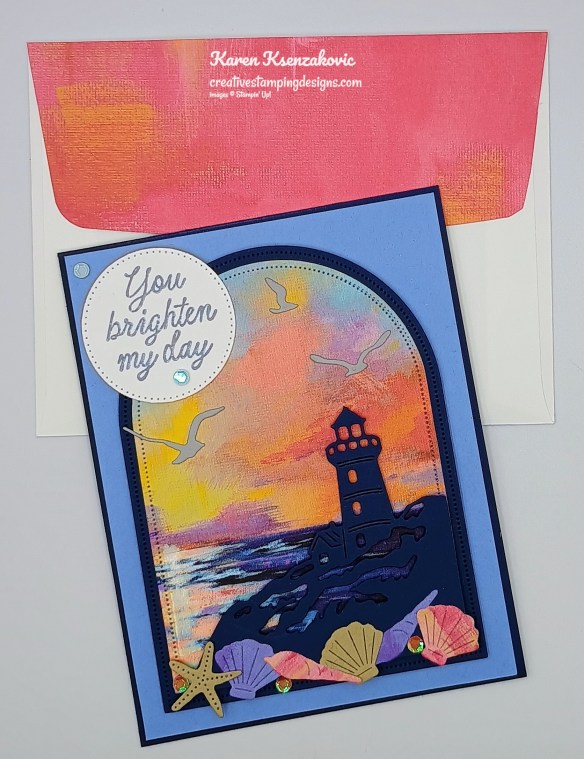
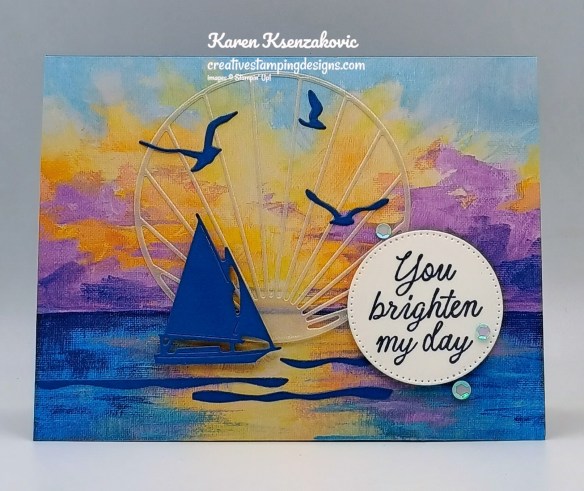
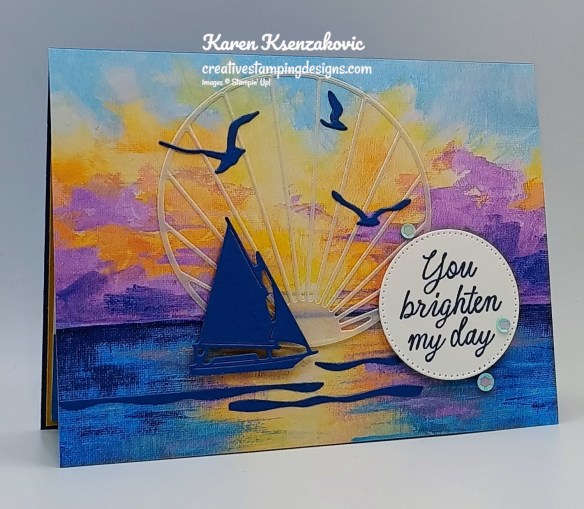
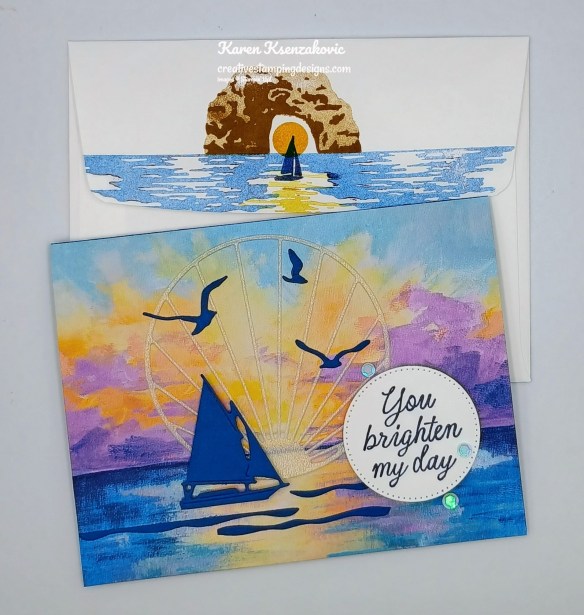
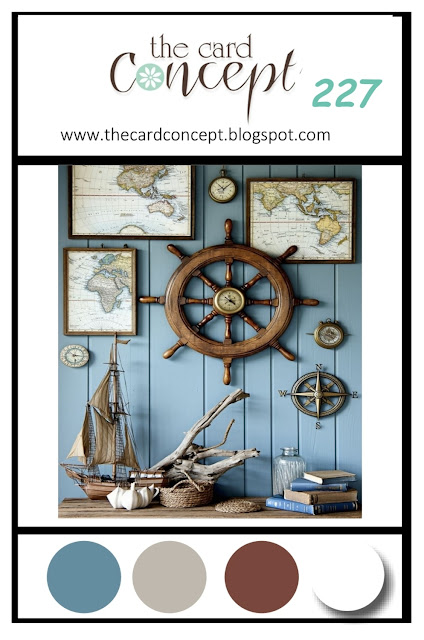
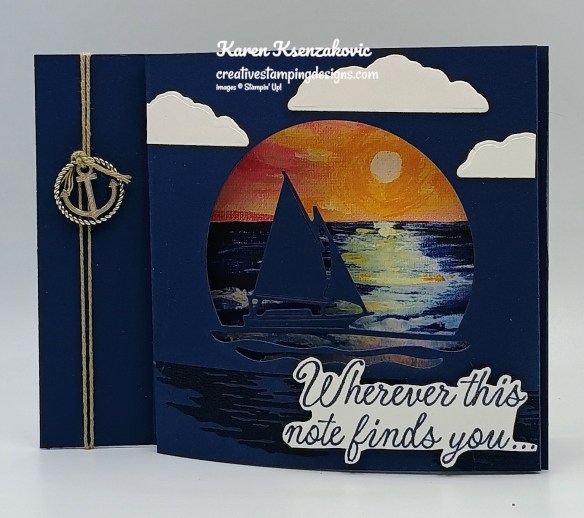
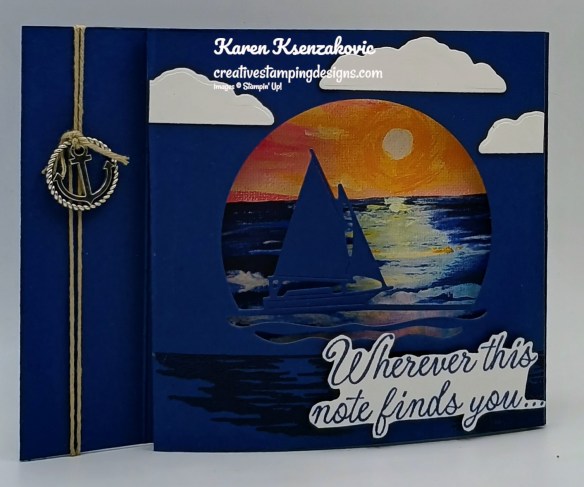
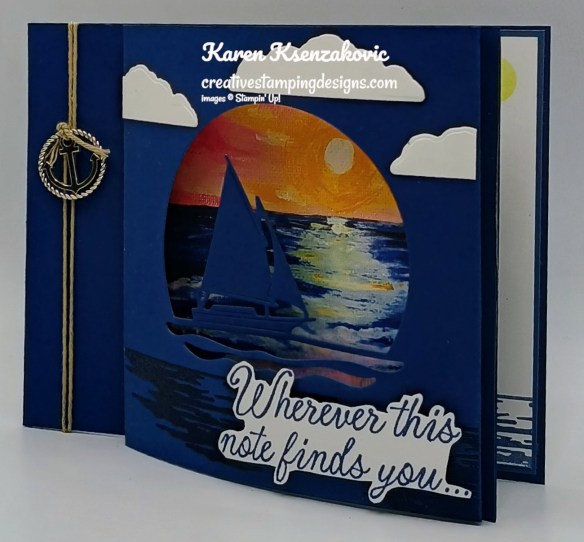
Today’s card is for the inspiration challenge from The Card Concepts. The inspiration photo #228a is Summer By The Sea. There are 2 Inspiration Photos this month, the other is #228b Christmas in July. Here’s my card for today.
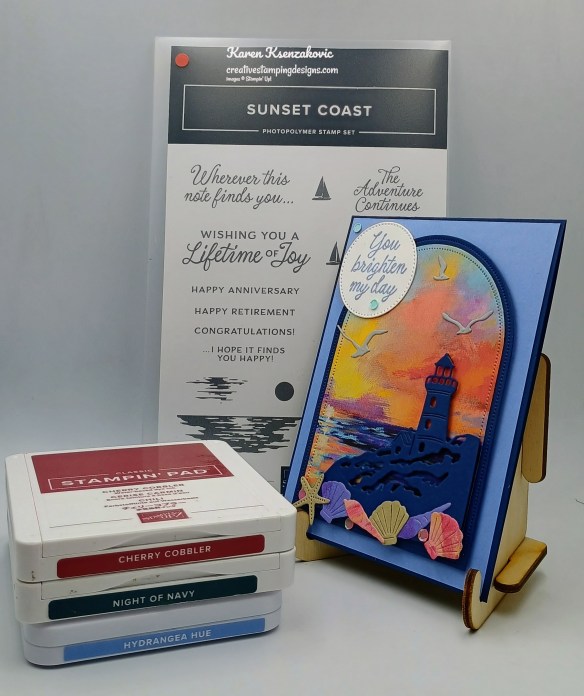
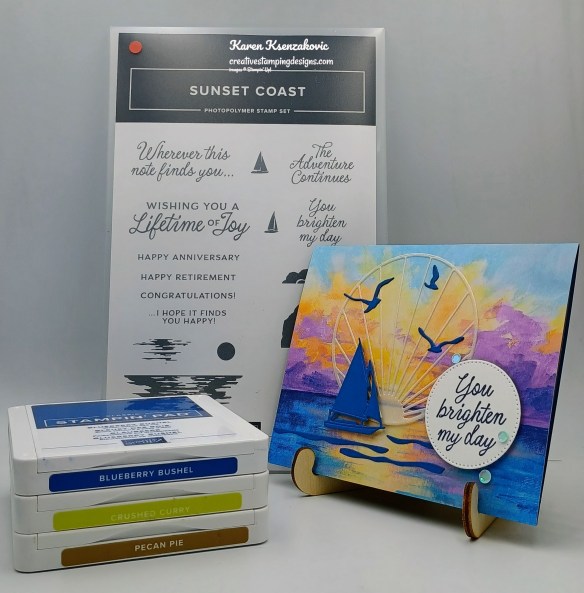
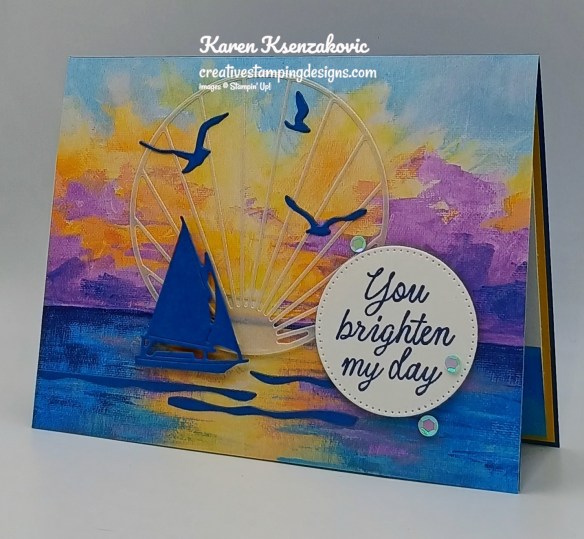
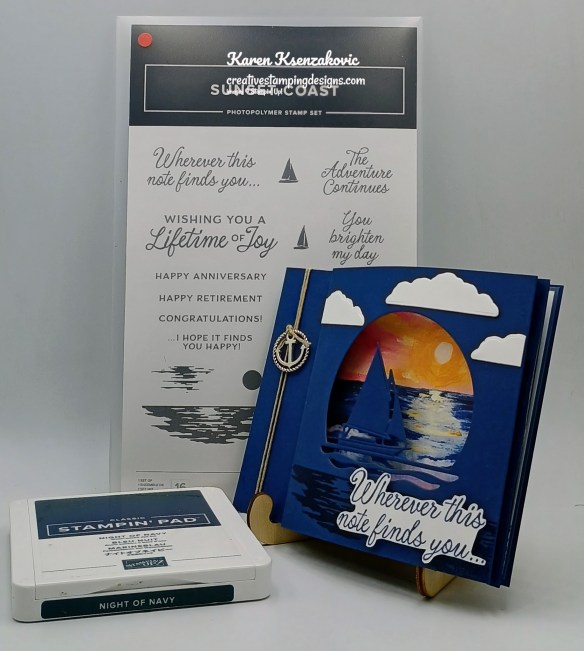
I used the Stampin’ Up! Sunset Coast Bundle and the Scenic Coast 6 x 6 Specialty Designer Series Paper for my card today. I was inspired by the overall theme along with the lighthouses and colors in the photo for my Clean & Layered Card.
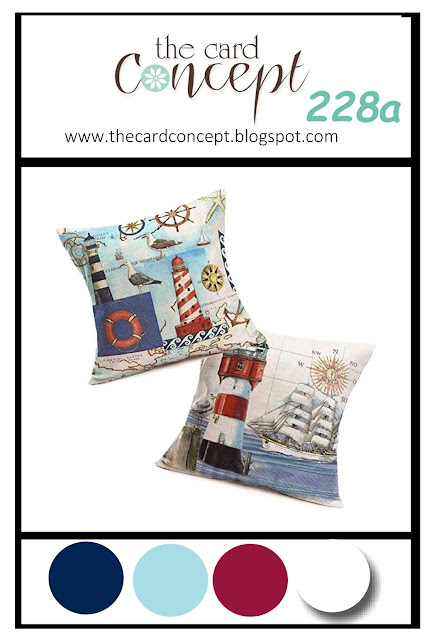
I hope you will take a moment to visit The Card Concepts and join us for our challenge 228a & 228b. How are you inspired by the photos?
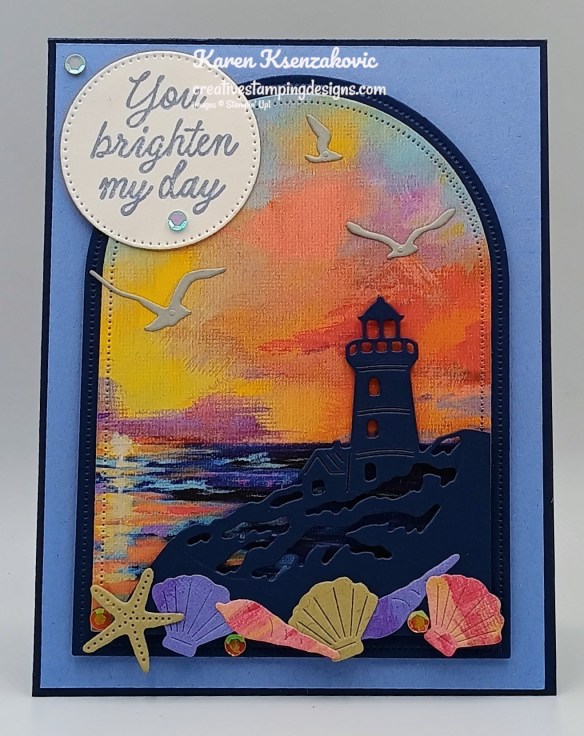
Adhere a panel of Hydrangea Hue to the Night of Navy card base. Using the Everyday Arches Dies, cut a panel of Night of Navy with the 2nd largest die and a panel of Scenic Coast DSP with the 3rd largest die. Adhere the die cut DSP panel to the Night of Navy die cut panel. Adhere the layered panel to the card front with Stampin’ Dimensionals.
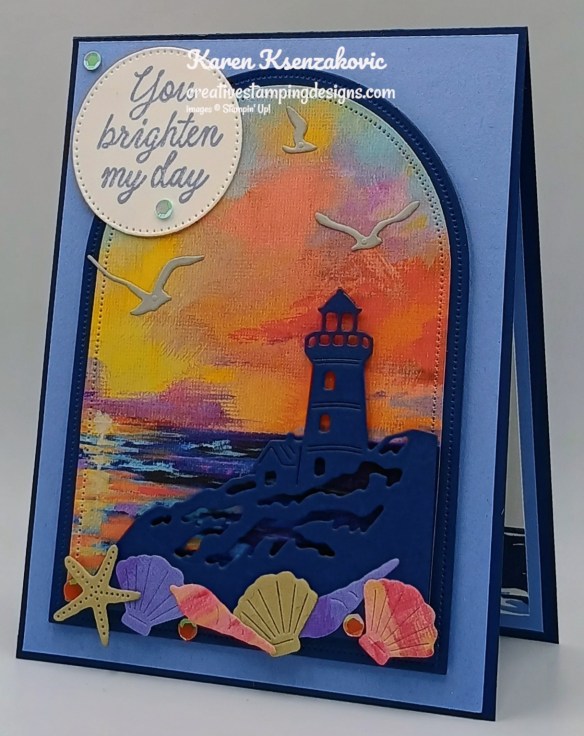
Using the Sunset Coast Dies, cut the lighthouse from a panel of Night of Navy, the birds from a panel of Smoky Slate and the seashells from a panel of Crumb Cake and scraps of Scenic Coast DSP. Trim the lighthouse from the circle. Adhere the lighthouse to the bottom of the die cut DSP so the bottom edges are even, with Stampin’ Dimensionals. Adhere the starfish and shells along the bottom of the die cut arches. Adhere the birds in the sky.
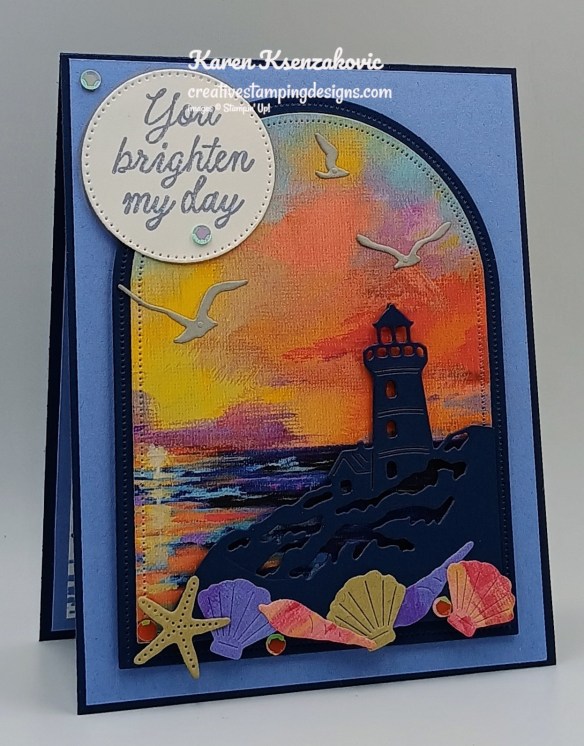
Stamp the sentiment from Sunset Coast stamp set in Hydrangea Hue Ink on a panel of Basic White. Cut the sentiment out using the Stylish Shapes Dies. Adhere the sentiment to the card front with Stampin’ Dimensionals and Glue Dots. Add Sunset Sparkle Sequins to the card front.
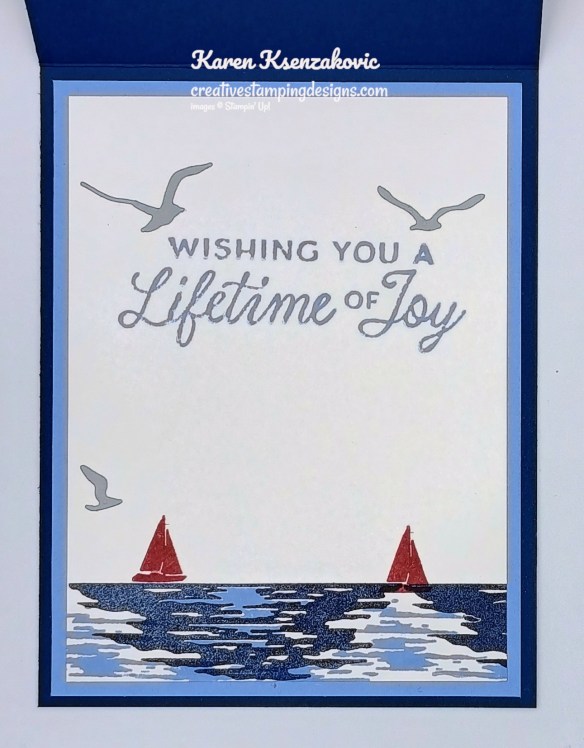
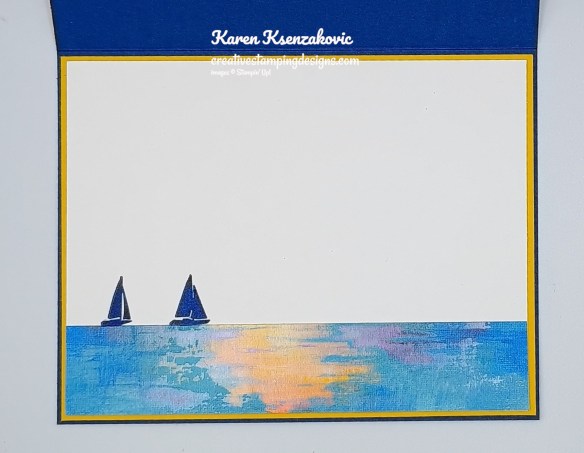
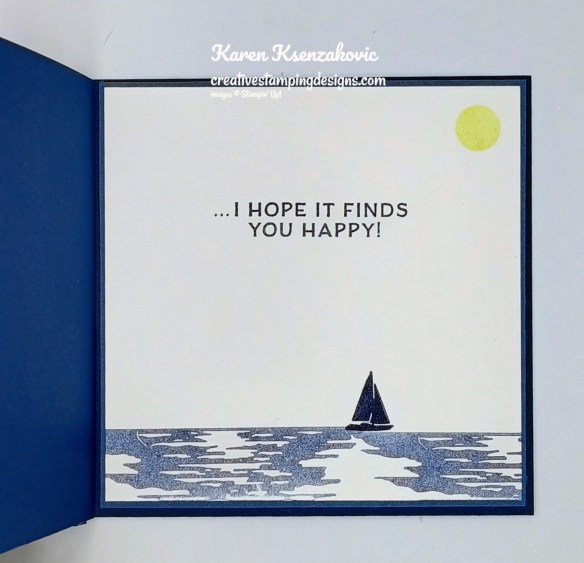
Stamp the sentiment from the Sunset Coast stamp set in Hydrangea Hue Ink on a panel of Basic White. Stamp the water images from the Sunset Coast stamp set in Night of Navy and Hydrangea Hue Inks on the bottom of the panel. Stamp the sailboat images from the Sunset Coast stamp set in Cherry Cobbler Ink on the water. Adhere the birds around the sentiment. Adhere the Basic White panel to a Hydrangea Hue mat then to the inside of the Night of Navy card base
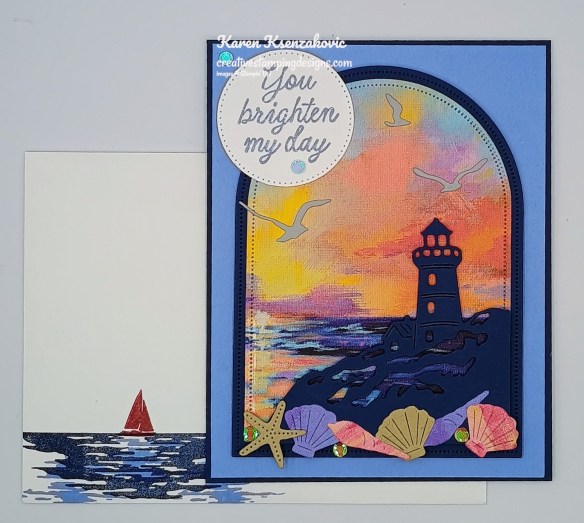
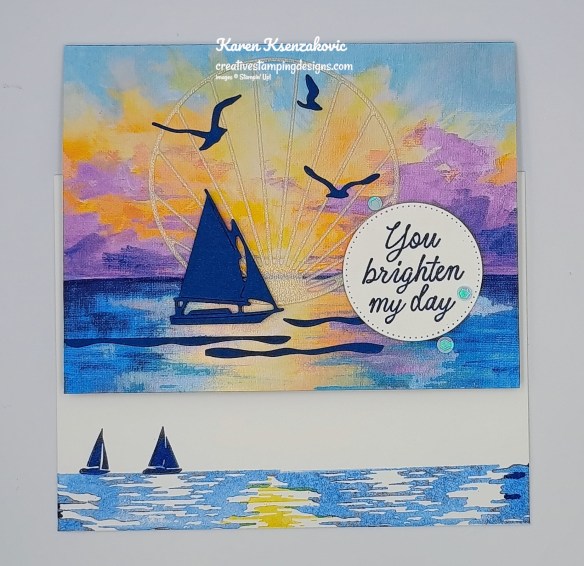
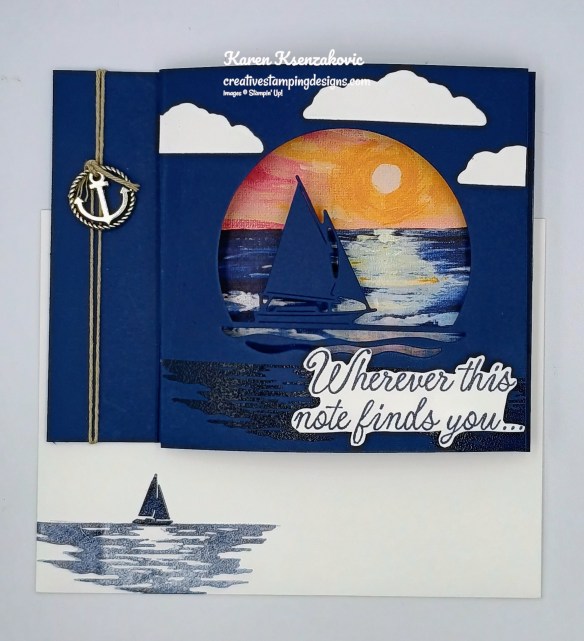
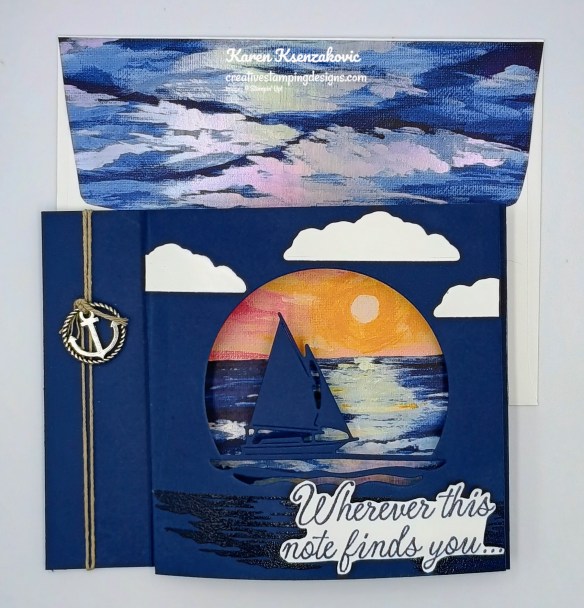
Decorate a Basic Whtie Medium Envelope to finish your card. Stamp the water image from the Sunset Coast stamp set in Night of Navy and Hydrangea Hue Inks on the envelope front. Stamp the sailboat in Cherry Cobbler Ink on the water. Adhere a panel of Scenic Coast DSP to the envelope flap.
Thank you for stopping by my blog today. I hope you like the card and will give it a try. Happy Stamping!!
*********************************************************************************************************
If you need any stamping supplies, I’d love to be your Demonstrator. Just click HERE to go directly to my online store or drop me an email if you have any questions.
*********************************************************************************************************
FREE SHIPPING from Stampin’ Up! June 11-13
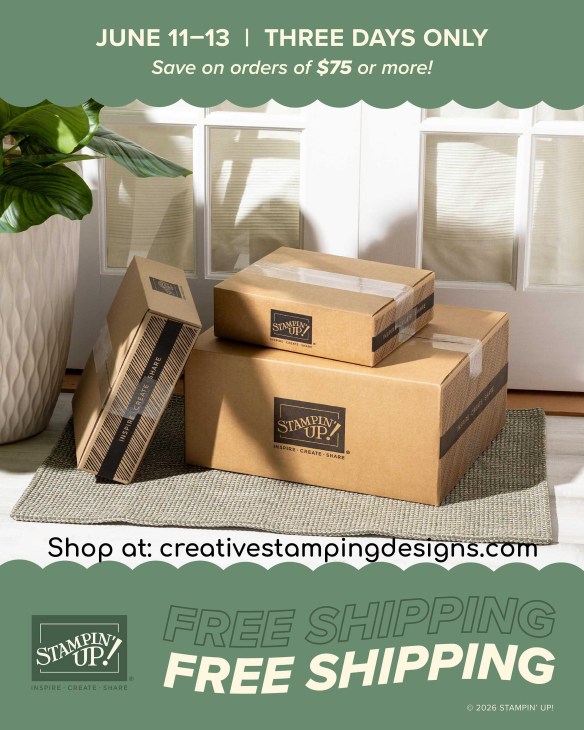
Here are the free shipping details:
- Sales Period: June 11–13
- Ordering Deadline: June 13 at 11:59 p.m. (MT)
- All order types qualify for this promotion.
- Free shipping is for three days only. You must place your orders between June 11 and 13 to qualify.
- Free shipping automatically applies to the shopper’s cart after the qualifying amount has been met, which is $75 (before tax).
- All orders must meet the qualifying amount to be eligible for free shipping. Coupon codes and Stampin’ Rewards will lower the total amount of an order.
- Craft Classes do not have shipping charges. Purchasing a Craft Class will increase the total cart amount but will not contribute to the free shipping qualifying amount.
- The additional cost for expedited shipping is NOT covered by this promotion.
- Prepaid 3-, 6-, and 12-month Paper Pumpkin subscriptions and month-to-month subscriptions do not qualify for free shipping. Refills, past kits, and add-ons do qualify toward free shipping, but you must be a subscriber to purchase. Subscriptions billed and shipped this month will be charged for the normal amount + tax.
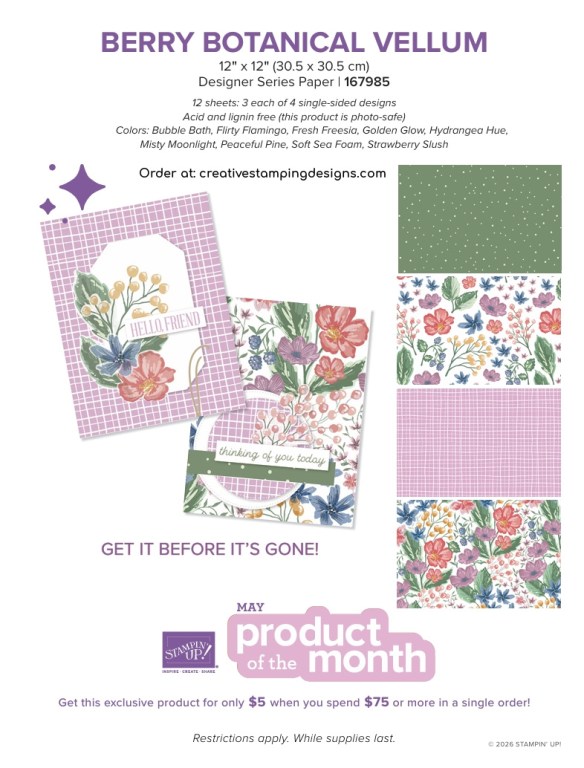
- Don’t forget that you can add the product of the month to your cart with an order of $75+ too!
YAY for free shipping!! Get your orders ready and get them placed through my online store between June 11-13!! Happy shopping!!
*********************************************************************************************************
Sign up for our Velvet Meadow Online Class is Open for Registration
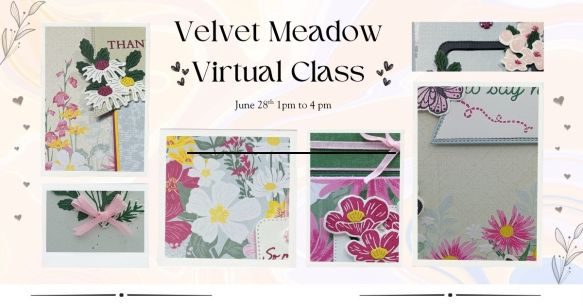
Tara and I are teaming up to offer a fun Online Class using most of the Stampin’ Up! Velvet Meadow Suite. We will be creating 6 different cards during the class including 2 Fun Fold cards. Click Here to register.
The class fee includes:
- Stampin’ Up! Moody Palette Glossy Dots (full pack)
- Stampin’ Up! Bubble Bath 1/8″ Faux Linen Ribbon (full pack)
- Peaceful Pine Simmer Brush
- Pre-cut card kits to complete each card
- Zoom class with complete instructions to complete each card
During sign up you will have the option to add additional items to your order that you can take advantage of at no additional shipping cost. These items are optional, however if you want to recreate the cards you will need them. If you’ve attended a previous class, you were given a discount code, there is a spot to put that code on the form and the discount only applies to the products that you check off that you wish to purchase, not the class. Since the Flowering Meadow Bundle is already discounted, the discount does not apply to that.
The class will be held Sunday June 28th from 1 to 4 pm Eastern Time via Zoom. This allows anyone in the United States to participate live! Can’t join us live… no worries, we will record the session so it can be replayed at any time.
I will email written directions that will include directions, cardstock cuts as well as photos to help you create each card.
Class Cost $45 + $10 (Shipping)
Additional purchased items will be included in the above shipping price. I will invoice you through PayPal and invoices must be paid by June 13th to insure I can get the products delivered, packaged up and out to you with enough time. Sign up by Clicking Here.
Deadline: Sunday June 13th
*********************************************************************************************************
July Online Exclusive Product Share
I’m offering a small product share from the upcoming July Online Exclusives. I’m offering a Paper Share and/or an Embellishment & Ribbon Share. If you click on the image below you can open the flyer with the products coming in July.
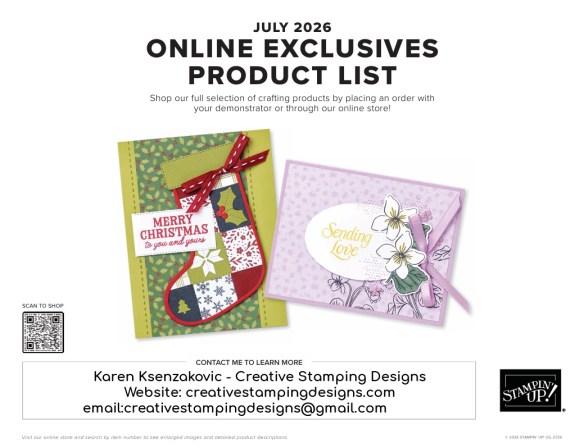
I’m offering a Paper Share and a Ribbon & Embellishment Share from the July 2026 Online Exclusives, and I’d love to have you join!! I’m placing my share order early on July 1st and I’m going to use the expedited shipping option so I should be able to have the shares cut, bundled and back out to you during the week of July 6th. Wouldn’t you love to have all of the gorgeous and fun new Papers in the upcoming July 2026 Online Exclusives? What is a Paper Share you ask? It’s a sample of each of the new Papers from the Online Exclusives. Shares give you a good working sample of all of the papers so that you can decide which ones to order in full packs! If you were to purchase all of the papers from the Online Exclusives, it would cost you over $90.00 plus shipping.
How my shares work: I order full packs of all of the Papers listed below, I cut them into 6″ X 6″ pieces (or 6″ X 12″ pieces for double shares) and give you one panel of each design from each pack on the list. I pack up the paper in a cellophane bag with labels listing the Name, Item # and Colors in the pack and mail it back out to you just as quickly as I can!
New Designer Series Paper Share – $10.50 plus $7.00 for shipping
You will receive one 6×6 sheet of each design from the following DSP packs (the number after the name indicates how many 6×6 sheets of that paper pack you will receive):
- Frightfully Fun (6)
- Frightfully Fun Two-Tone Cardstock (6)
- Spooktacular (6×6) (4)
- 2026-2028 In-Color Gingham (5)
- A Stitched Season (6)
- Violet Dreams Specialty (5)
If you’d like double shares of the paper, I’m offering those too! I’ll cut the 12″ x 12″ sheets into 6″ × 12″ so that you’ll be able to get 3 full A2 size card fronts from each sheet and you’ll get double sheets of the 6″ x 6″ since they’re already precut.
Double Paper Share – $21.00 Plus $7.00 Shipping
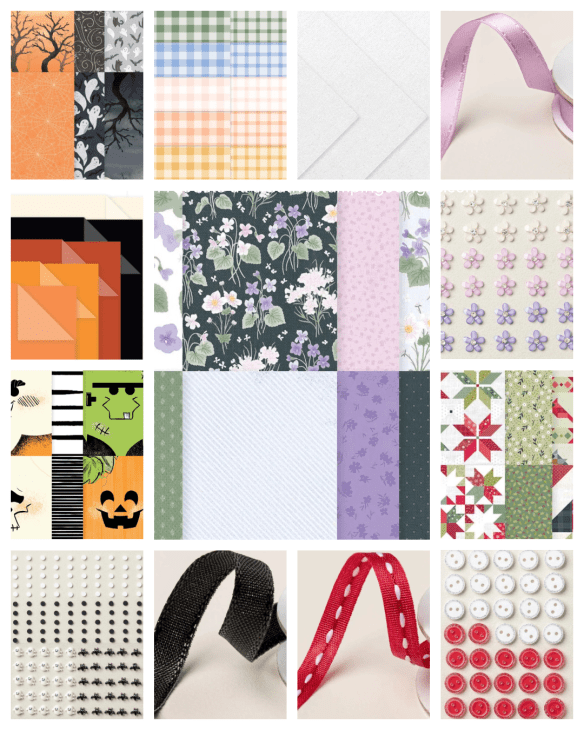
Ribbon/Embellishment Share – $12.50 plus $7.00 Shipping
All ribbons and Embellishments will come individually wrapped and labeled with the name and number of the product.
One-Fourth of a Roll of each:
- Black 3/8″ Iridescent Ribbon
- Fresh Freesia 1/4″ Satin Ribbon
- Real Red 1/4″ Stitched Ribbon
- Adhesive-Backed Bats Ghosts & Dots (30)
- Adhesive-Backed Blooms (15)
- Adhesive-Backed Mini Christmas Buttons (10)
Double Ribbon & Embellishment Share – $25.00 Plus $7.00 Shipping and you will be getting 1/2 of the roll of each ribbon.
Anyone is welcome to join in my shares (please note, I can only ship to addresses within the US). To make ordering the shares a little easier, I have created a form for you to submit, that way you can order any combination of shares you want. Click Here for the form. I will send out PayPal Invoices on or around June 27th with a due date by June 30th.
Deadline to sign up for my share is Saturday June 27th at 5:00 PM ET.
*********************************************************************************************************
Card stock cuts for this project:
- Basic White Cardstock 2″ x 2″(sentiment), 3 3/4″ x 5″(inner liner)
- Crumb Cake Cardstock 1 1/2″ x 1 1/2″(die cuts)
- Hydrangea Hue Cardstock 4 1/8″ x 5 3/8″(card front), 4: x 5 1/4″(mat)
- Night of Navy Cardstock 4 1/4″ x 11″(card base scored & folded at 5 1/2″), 3 3/4″ x 5″ (arch), 3 1/4″ x 3 1/4″(die cut)
- Smoky Slate Cardstock 1 12″ x 2″(die cuts)
- Scenic Coast 6 x 6 Designer Series Paper 3 3/4″ x 5″(die cut), 2 1/4″ x 6″(envelope flap)
*********************************************************************************************************
Product List
![Sunset Coast Bundle (English) [ 167781 ]](https://assets1.tamsnetwork.com/images/EC042017NF/167781s.jpg "Sunset Coast Bundle (English) [ 167781 ]")
![Sunset Coast Photopolymer Stamp Set (English) [ 167775 ]](https://assets1.tamsnetwork.com/images/EC042017NF/167775s.jpg "Sunset Coast Photopolymer Stamp Set (English) [ 167775 ]")
![Sunset Coast Dies [ 167780 ]](https://assets1.tamsnetwork.com/images/EC042017NF/167780s.jpg "Sunset Coast Dies [ 167780 ]")
![Basic White 8 1/2" X 11" Cardstock [ 166780 ]](https://assets1.tamsnetwork.com/images/EC042017NF/166780s.jpg "Basic White 8 1/2\" X 11\" Cardstock [ 166780 ]")
![Crumb Cake 8-1/2" X 11" Cardstock [ 120953 ]](https://assets1.tamsnetwork.com/images/EC042017NF/120953s.jpg "Crumb Cake 8-1/2\" X 11\" Cardstock [ 120953 ]")
![Hydrangea Hue 8 1/2" X 11" Cardstock [ 167687 ]](https://assets1.tamsnetwork.com/images/EC042017NF/167687s.jpg "Hydrangea Hue 8 1/2\" X 11\" Cardstock [ 167687 ]")
![Night Of Navy 8-1/2" X 11" Cardstock [ 100867 ]](https://assets1.tamsnetwork.com/images/EC042017NF/100867s.jpg "Night Of Navy 8-1/2\" X 11\" Cardstock [ 100867 ]")
![Smoky Slate 8-1/2" X 11" Cardstock [ 131202 ]](https://assets1.tamsnetwork.com/images/EC042017NF/131202s.jpg "Smoky Slate 8-1/2\" X 11\" Cardstock [ 131202 ]")
![Scenic Coast 6" X 6" (15.2 X 15.2 Cm) Specialty Designer Series Paper [ 167773 ]](https://assets1.tamsnetwork.com/images/EC042017NF/167773s.jpg "Scenic Coast 6\" X 6\" (15.2 X 15.2 Cm) Specialty Designer Series Paper [ 167773 ]")
![Cherry Cobbler Classic Stampin' Pad [ 147083 ]](https://assets1.tamsnetwork.com/images/EC042017NF/147083s.jpg "Cherry Cobbler Classic Stampin' Pad [ 147083 ]")
![Hydrangea Hue Classic Stampin' Pad [ 167677 ]](https://assets1.tamsnetwork.com/images/EC042017NF/167677s.jpg "Hydrangea Hue Classic Stampin' Pad [ 167677 ]")
![Night Of Navy Classic Stampin' Pad [ 147110 ]](https://assets1.tamsnetwork.com/images/EC042017NF/147110s.jpg "Night Of Navy Classic Stampin' Pad [ 147110 ]")
![Everyday Arches Dies [ 164629 ]](https://assets1.tamsnetwork.com/images/EC042017NF/164629s.jpg "Everyday Arches Dies [ 164629 ]")
![Stylish Shapes Dies [ 159183 ]](https://assets1.tamsnetwork.com/images/EC042017NF/159183s.jpg "Stylish Shapes Dies [ 159183 ]")
![Sunset Sparkle Sequins [ 167785 ]](https://assets1.tamsnetwork.com/images/EC042017NF/167785s.jpg "Sunset Sparkle Sequins [ 167785 ]")
![Basic White Medium Envelopes [ 159236 ]](https://assets1.tamsnetwork.com/images/EC042017NF/159236s.jpg "Basic White Medium Envelopes [ 159236 ]")
![Stampin' Cut & Emboss Machine [ 149653 ]](https://assets1.tamsnetwork.com/images/EC042017NF/149653s.jpg "Stampin' Cut & Emboss Machine [ 149653 ]")
![Mini Glue Dots [ 103683 ]](https://assets1.tamsnetwork.com/images/EC042017NF/103683s.jpg "Mini Glue Dots [ 103683 ]")
![Multipurpose Liquid Glue [ 110755 ]](https://assets1.tamsnetwork.com/images/EC042017NF/110755s.jpg "Multipurpose Liquid Glue [ 110755 ]")
![Stampin' Dimensionals [ 104430 ]](https://assets1.tamsnetwork.com/images/EC042017NF/104430s.jpg "Stampin' Dimensionals [ 104430 ]")
![Stampin' Seal [ 152813 ]](https://assets1.tamsnetwork.com/images/EC042017NF/152813s.jpg "Stampin' Seal [ 152813 ]")
![Paper Trimmer [ 152392 ]](https://assets1.tamsnetwork.com/images/EC042017NF/152392s.jpg "Paper Trimmer [ 152392 ]")
![Bone Folder [ 102300 ]](https://assets1.tamsnetwork.com/images/EC042017NF/102300s.jpg "Bone Folder [ 102300 ]")
![Take Your Pick [ 144107 ]](https://assets1.tamsnetwork.com/images/EC042017NF/144107s.jpg "Take Your Pick [ 144107 ]")


![Blueberry Bushel 8-1/2" X 11" Cardstock [ 146968 ]](https://assets1.tamsnetwork.com/images/EC042017NF/146968s.jpg "Blueberry Bushel 8-1/2\" X 11\" Cardstock [ 146968 ]")
![Crushed Curry 8-1/2" X 11" Cardstock [ 131199 ]](https://assets1.tamsnetwork.com/images/EC042017NF/131199s.jpg "Crushed Curry 8-1/2\" X 11\" Cardstock [ 131199 ]")
![Sunset Shimmer Vellum 12" X 12" (30.5 X 30.5 Cm) Specialty Paper [ 167784 ]](https://assets1.tamsnetwork.com/images/EC042017NF/167784s.jpg "Sunset Shimmer Vellum 12\" X 12\" (30.5 X 30.5 Cm) Specialty Paper [ 167784 ]")
![Blueberry Bushel Classic Stampin' Pad [ 147138 ]](https://assets1.tamsnetwork.com/images/EC042017NF/147138s.jpg "Blueberry Bushel Classic Stampin' Pad [ 147138 ]")
![Crushed Curry Classic Stampin' Pad [ 147087 ]](https://assets1.tamsnetwork.com/images/EC042017NF/147087s.jpg "Crushed Curry Classic Stampin' Pad [ 147087 ]")
![Pecan Pie Classic Stampin' Pad [ 161665 ]](https://assets1.tamsnetwork.com/images/EC042017NF/161665s.jpg "Pecan Pie Classic Stampin' Pad [ 161665 ]")


![Misty Moonlight 8-1/2" X 11" Cardstock [ 153081 ]](https://assets1.tamsnetwork.com/images/EC042017NF/153081s.jpg "Misty Moonlight 8-1/2\" X 11\" Cardstock [ 153081 ]")
![Versamark Pad [ 102283 ]](https://assets1.tamsnetwork.com/images/EC042017NF/102283s.jpg "Versamark Pad [ 102283 ]")
![Basics Wow! Embossing Powder [ 165679 ]](https://assets1.tamsnetwork.com/images/EC042017NF/165679s.jpg "Basics Wow! Embossing Powder [ 165679 ]")
![Heat Tool (Us And Canada) [ 129053 ]](https://assets1.tamsnetwork.com/images/EC042017NF/129053s.jpg "Heat Tool (Us And Canada) [ 129053 ]")
![Baker's Twine Essentials Pack [ 155475 ]](https://assets1.tamsnetwork.com/images/EC042017NF/155475s.jpg "Baker's Twine Essentials Pack [ 155475 ]")
![Loose Anchor Trinkets [ 167931 ]](https://assets1.tamsnetwork.com/images/EC042017NF/167931s.jpg "Loose Anchor Trinkets [ 167931 ]")


