
Good Wednesday morning my fellow stampers. How is everyone doing today? We’re halfway through the week already and only 2 more days and I leave for OnStage. I’m so looking forward to meeting up with my team members for some stamping time and socializing. I can’t wait to get my hands on the new Occasions Catalog and be able to share some new things with you.
Today’s card is one that we made at our last Stamp Camp last week. I wanted to have a variety of cards for the ladies to make. Here’s my card.

I started by adhering a panel of Let It Snow Specialty Designer Series paper to a Real Red Mat using Multipurpose Liquid Glue. I adhered the matted panel to a Real Red card base using Stampin’ Dimensionals.

On a small panel of Whisper White cardstock I stamped one of the penguin images from the Stampin’ Up! Playful Penguins Cling Stamp Set in Tuxedo Black Memento Ink. I cut the image out using the oval from the Stitched Shapes Dies. I adhered it to a Real Red Glimmer Paper scalloped mat which I cut out using the Layering Ovals Dies using Multipurpose Liquid Glue. On a scrap piece of Whisper White cardstock I stamped the bow tie image from the Playful Penguins stamp set in Real Red Ink. I fussy cut the bow tie using my Paper Snips and adhered it to the penguin using a Glue Dot. I adhered the matted artwork to the card front using Stampin’ Dimensionals.

I stamped the sentiment from the Playful Penguins stamp set in Real Red Ink on a strip of Whisper White cardstock. I cut the strip into a banner using the Banner Triple Punch. I adhered a strip of Shaded Spruce cardstock below the matted artwork using Snail and adhered the sentiment banner on the card front using Stampin’ Dimensionals. I added a Red Rhinestone Basic Jewel to the right of the sentiment.

On the inside I stamped the sentiment from the Playful Penguins stamp set in Real Red Ink in the center of a Whisper White panel. I stamped the penguin image from the Playful Penguins stamp set in Tuxedo Black Memento Ink on the bottom of the panel. I adhered the Whisper White panel to the inside of the Real Red card base using Multipurpose Liquid Glue.


To finish my card I decorated a Medium Whisper White Envelope. I stamped the penguin image from the Playful Penguins stamp set in Tuxedo Black Memento Ink on the envelope front. I adhered a piece of Let It Snow Specialty DSP to the envelope flap.
Thank you for stopping by my blog today. I hope you liked my card and will give it a try. Happy Stamping!!
****************************************************************************************************
If you need any stamping supplies, I’d be very happy to be your Demonstrator. Just click HERE to go directly to my online store or drop me an email if you have any questions.
MY CURRENT HOST CODE IS: DDDXNW6A
For any orders $50 or more I will send you my monthly class tutorials. Click HERE or go to my Customer Rewards to see what this months tutorials are.
Click HERE to shop the clearance rack.
Happy Stamping, Karen!
****************************************************************************************************
AVAILABLE NOW WHILE SUPPLIES LAST ONLY
DON’T MISS OUT ON THIS BEAUTIFUL SUITE
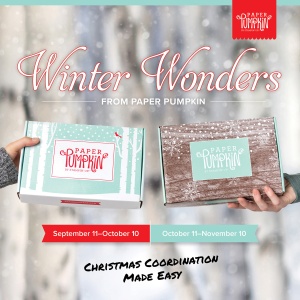
THE NEW CHRISTMASTIME IS HERE SUITE

We hope you’re ready to make this holiday season magical, because the Christmastime Is Here Suite is! This exclusive, limited-time collection of festive, floral coordinating products has everything you need to share love, joy, and creativity this holiday season.
Here’s a video of what’s included in the suite.
 ****************************************************************************************************
Card stock cuts for this project:
- Real Red Cardstock 8 1/2″ X 5 1/2″ (card base scored and folded at 4 1/4″), 4 1/8″ X 5 3/8″ (card front mat)
- Shaded Spruce Cardstock 3″ X 5/8″ (card front strip)
- Whisper White Cardstock 4″ X 5 1/4″ (inner liner), 1″ X 3″ (sentiment banner), 3 1/2″ X 2 1/2″ (artwork)
- Let It Snow Specialty Designer Series Paper 4″ X 5 1/4″ (card front), piece for envelope flap
- Real Red Glimmer Paper 3 1/2″ X 2 1/2″ (artwork mat)
****************************************************************************************************
Product List


")


")


 Shimmer Ribbon")


")


 Designer Series Paper")


")
")


 Specialty Designer Series Paper")


 Striped Ribbon")


 To assemble everything, I adhered the detailed skate to the solid skate using Multipurpose Liquid Glue. I adhered the blades to the bottom of the skates using Multipurpose Liquid Glue. I adhered the skates to the card front using Stampin’ Dimensionals and Multipurpose Liquid Glue. I adhered the Holly to the skate using Multipurpose Liquid Glue. I adhered the bow above the skates on the card front using Multipurpose Liquid Glue.


")
")


 Designer Series Paper")


 Designer Series Paper")


 Scalloped Linen Ribbon")


