Stampin’ Up! Ornate Tea Together for Happy Inkin’ Thursday Blog Hop

Good Thursday morning my stamping friends.  How is everyone doing today?  Welcome to the Happy Inkin’ Thursday Blog Hop. If you are hopping over from Akiko, thank you for stopping by. This week we had a Sketch Challenge. Be sure to hop around to see everyone’s beautiful projects.
Here is the sketch we had to work from.

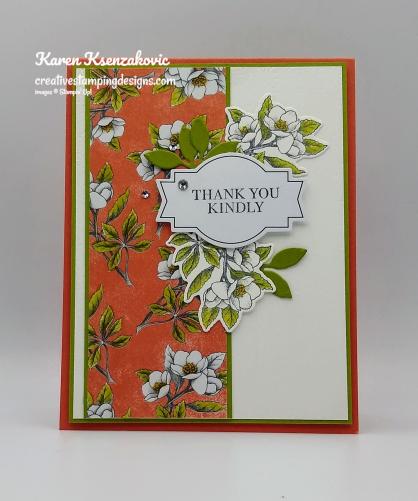
Here’s my card using this weeks sketch.

I started by adhering a panel of the Ornate Garden Specialty Designer Series Paper to an Early Espresso mat using Snail.  I added a strip of Blushing Bride cardstock to the bottom of the panel using Multipurpose Liquid Glue.  I wrapped a piece of Mint Macaron 1/8″ Sheer Linen Ribbon around the Blushing Bride strip and tied a small bow.  I adhered the card front to a Blushing Bride card base using Stampin’ Dimensionals.

I embossed a panel of Mint Macaron cardstock using the Ornate Floral 3D Embossing Folder.  I swiped my Mint Macaron stamp pad across the panel to highlight the raised parts.  I adhered the embossed panel to an Early Espresso mat using Multipurpose Liquid Glue.  On a small panel of Whisper White cardstock I stamped the tea cup image from the Stampin’ Up! Tea Together Cling Stamp Set in Early Espresso Ink.  I cut the image out using my Tea Time Dies.  I stamped the small flower image from the Stampin’ Up! Ornate Style  Cling Stamp Set in Early Espresso Ink in the center of the tea cup.  I colored the tea cup using my Mint Macaron Stampin’ Blends Markers and the flower image in using my Old Olive and So Saffron Stampin’ Blends Markers.  I adhered the tea cup to the embossed panel using Stampin’ Dimensionals.
On a scrap of Whisper White cardstock I stamped the sentiment from the Tea Together stamp set in Early Espresso Ink  I cut the image out using my Stitched So Sweetly Dies.  The sentiment fits perfectly with the smallest die.

I adhered the sentiment to the embossed panel using Stampin’ Dimensionals.  I adhered the artwork to the card front using Stampin’ Dimensionals.  I added a Pearl Basic Jewel in the center of the flower on the tea cup.
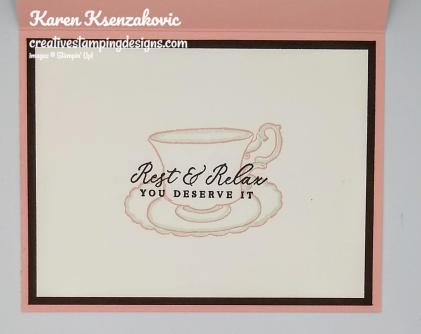
On the inside I stamped the sentiment from the Stampin’ Up! Timeless Tropical Cling Stamp Set in the center of a Whisper White panel.  I stamped the tea cup image from the Tea Together stamp set in Blushing Bride Ink over the sentiment.  I adhered the Whisper White panel to an Early Espresso mat using Snail and then to the inside of the Blushing Bride card base using Multipurpose Liquid Glue.

To finish my card I decorated a Medium Whisper White Envelope.  I stamped the teacup image from the Tea Together stamp set in Early Espresso Ink on the envelope front.  I stamped the sentiment from the Tea Together stamp set in Blushing Bride Ink inside the tea cup.  I adhered a panel of the Ornate Garden Specialty DSP to the envelope flap.

Thank you for visiting my blog today. I hope you liked my card and will give it a try. Now that you’ve seen my card, take a minute to hop through all our projects today. If you click on the Next Blog button, you’ll go to Amy’s page. Or you can just click on the names below to go directly to all the blogs! Happy Hopping!!

Amy Koenders:
Mary Deatherage:
Kristi Gray:
Jaimie Babarczy:
Sue Prather: Sitting out this week
Karen Finkle:
Eva Dobilas:
Akiko Sudano:
Karen Ksenzakovic: You Are Here

****************************************************************************************************

If you need any stamping supplies, I’d love to be your Demonstrator. Just click HERE to go directly to my online store or drop me an email if you have any questions. 

MY CURRENT HOST CODE IS: 6WETZ6WW

Use this host code when you order $50 or greater and receive a free gift from me! If your order is over $150, please do not use this code, but you’ll still get the free gift. The free gift is your choice of any item valued up to $10.00 in either the 2019-2020 Annual Catalog or the 2020 January-June Mini Catalog!   For any orders $50 or more I will also send you my monthly class tutorials.  Click HERE or go to my Customer Rewards for more details and to see what this months tutorials are.

Click HERE to shop the clearance rack.

Happy Stamping, Karen!

****************************************************************************************************

The Ornate Garden Suite will be available starting April 1st.  Don’t want to wait, you can get it now as a demonstrator.  If you are interested in joining my team, just email me at creativestampingdesigns@gmail.com and I’ll be happy to help you.  Click HERE or on the image below to see a printable PDF of all the fabulous items available in the suite.

****************************************************************************************************

APRIL 2020 PAPER PUMPKIN:  MY WONDERFUL FAMILY

SUBSCRIBE MARCH 11-APRIL 10

At Paper Pumpkin, we believe in making a difference—especially when it comes to helping you build relationships through papercrafting. For April, we created a fun, family appreciation themed card kit that would make it easy for you to share your hearts with those you love most: mom, dad, daughter, son, sister, and brother. April’s kit even includes Mother’s Day and Father’s Day sentiments, giving you the perfect way to show your appreciation for beloved parents on their special days with a beautiful, handmade card.
One more thing about this “fam-tastic” kit: The Paper Pumpkin team knows that everyone’s clan is unique. With that in mind, we provided sentiments that would include anyone in your life who feels like family; for instance, “brothers” and “sisters” who have helped you along the journey of life.

About the April Kit: 

  • Kit contains supplies for 8 cards and envelopes
  • Card size: 4-1/4″ x 5-1/2″ (10.8 x 14 cm)
  • Envelope size: 4-1/2″ x 5-3/4″ (11.4 x 14.6 cm)
  • Coordinating Colors: Crushed Curry, Early Espresso, Melon Mambo, Mint Macaron, Pear Pizzazz, Shaded Spruce, Soft Sea Foam

Subscribe for the April Paper Pumpkin kit from March 11–April 10 at paperpumpkin.com. Supplies may be limited toward the end of the subscription period

****************************************************************************************************

Card stock cuts for this project:

  • Blushing Bride Cardstock 8 1/2″ X 5 1/2″ (card base scored and folded at 4 1/4″), 1/2″ X 5 3/8″ (strip on bottom of card front)
  • Early Espresso Cardstock 4 1/8″ X 5 3/8″ (card front mat), 4 1/4″ X 3″ (artwork mat), 4″ X 5 1/5″ (inner liner mat)
  • Mint Macaron Cardstock 4 1/8″ X 2 7/8″ (artwork)
  • Whisper White Cardstock 2 1/2″ X 3 1/2″ (tea cup and sentiment), 3 3/4″ X 5″ (inner liner)
  • Ornate Garden Specialty Designer Series Paper 4″ X 5 1/4″ (card front), 2 1/4″ X 6″ (piece for envelope flap)

****************************************************************************************************

Product List

Stampin’ Up! Mountain Air CAS Birthday

Good Wednesday morning my stamping friends.  How is everyone doing today?  We’re halfway through the week already and the weekend is just around the corner.

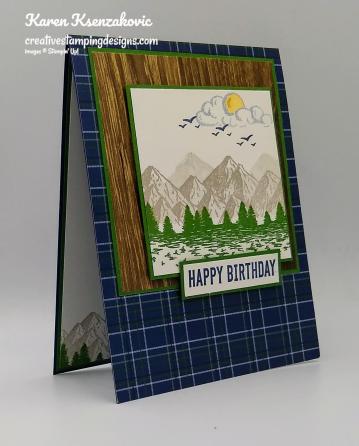
I have a CAS masculine birthday card for you today using another great set from the 2020 January – June Mini Catalog. I know how we all struggle with masculine cards and this set made it really easy for me.  Here’s my card for today.

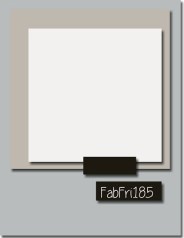
My design is from the Fab Friday Skitch Challenge #185.  Here is their sketch.

My colors were inspired from “Just Us Girls” Challenge #528.  Here are their colors.

I also played along with Always Fun Challenge #155.  Their theme is “Birthday Wishes”.

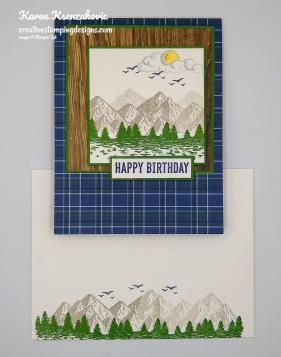
I started by adhering a panel of the Country Club Designer Series Paper to a Night of Navy card base using Snail.  I adhered a panel of the Pressed Petals Specialty Designer Series Paper to a Garden Green mat using Snail and then to the card base using Multipurpose Liquid Glue.

On a small panel of Whisper White cardstock I stamped the reverse mountain image from the Stampin’ Up! Mountain Air Photopolymer Stamp Set in Gray Granite Ink across the panel, stamping off once.  I turned the image around and stamped just below the  first image using Gray Granite Ink.  I stamped the landscape tree image from the Mountain Air stamp set in Garden Green Ink below the mountains.  I stamped the flying birds image from the Mountain Air stamp set 3 times in Night of Navy Ink above the mountains.

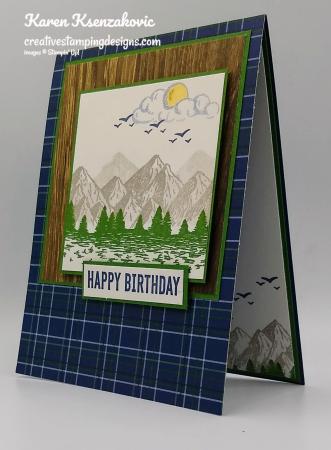
I stamped the cloud image from the Mountain Air stamp set on the top of the panel in Night of Navy Ink stamping off twice.  I colored the moon/sun in using my So Saffron Stampin’ Blends Markers.  I adhered the artwork to a Garden Green mat using Snail and then to the card front using Stampin’ Dimensionals.  I stamped the sentiment from the Stampin’ Up! Itty Bitty Birthdays Cling Stamp Set in Night of Navy Ink on a small panel of Whisper White cardstock.  I adhered the sentiment to a Garden Green mat using Snail and then to the bottom of the artwork using Stampin’ Dimensionals.

On the inside I stamped the sentiment from the Itty Bitty Birthdays stamp set in Night of Navy Ink in the center of a Whisper White panel.  I stamped the mountain image from the Mountain Air stamp set in Gray Granite Ink on the bottom of the panel.  I stamped the landscape tree image from the Mountain Air stamp set in Garden Green Ink below the mountains.  I stamped the bird image from the Mountain Air stamp set in Night of Navy Ink 3 times above the mountains.  I adhered the Whisper White panel to a Garden Green mat using Snail and then to the inside of the Night of Navy card base using Multipurpose Liquid Glue.

To finish my card I decorated a Medium Whisper White Envelope.  I stamped the mountain image from the Mountain Air stamp set in Gray Granite on the bottom of the envelope front.  I stamped the landscape tree image from the Mountain Air stamp set in Garden Green Ink below the mountain image.  I stamped the bird image from the Mountain Air stamp set in Night of Navy Ink 3 times above the mountains.  I adhered a panel of the Country Club DSP to the envelope flap.

Thank you for stopping by my blog today.  I hope you liked my card and will give it a try. Happy Stamping!!

****************************************************************************************************

If you need any stamping supplies, I’d love to be your Demonstrator. Just click HERE to go directly to my online store or drop me an email if you have any questions. 

MY CURRENT HOST CODE IS: 6WETZ6WW

Use this host code when you order $50 or greater and receive a free gift from me! If your order is over $150, please do not use this code, but you’ll still get the free gift. The free gift is your choice of any item valued up to $10.00 in either the 2019-2020 Annual Catalog or the 2020 January-June Mini Catalog!   For any orders $50 or more I will also send you my monthly class tutorials.  Click HERE or go to my Customer Rewards for more details and to see what this months tutorials are.

Click HERE to shop the clearance rack.

Happy Stamping, Karen!

****************************************************************************************************

The Ornate Garden Suite will be available starting April 1st.  Don’t want to wait, you can get it now as a demonstrator.  If you are interested in joining my team, just email me at creativestampingdesigns@gmail.com and I’ll be happy to help you.  Click HERE or on the image below to see a printable PDF of all the fabulous items available in the suite.

****************************************************************************************************

APRIL 2020 PAPER PUMPKIN:  MY WONDERFUL FAMILY

SUBSCRIBE MARCH 11-APRIL 10

At Paper Pumpkin, we believe in making a difference—especially when it comes to helping you build relationships through papercrafting. For April, we created a fun, family appreciation themed card kit that would make it easy for you to share your hearts with those you love most: mom, dad, daughter, son, sister, and brother. April’s kit even includes Mother’s Day and Father’s Day sentiments, giving you the perfect way to show your appreciation for beloved parents on their special days with a beautiful, handmade card.
One more thing about this “fam-tastic” kit: The Paper Pumpkin team knows that everyone’s clan is unique. With that in mind, we provided sentiments that would include anyone in your life who feels like family; for instance, “brothers” and “sisters” who have helped you along the journey of life.

About the April Kit: 

  • Kit contains supplies for 8 cards and envelopes
  • Card size: 4-1/4″ x 5-1/2″ (10.8 x 14 cm)
  • Envelope size: 4-1/2″ x 5-3/4″ (11.4 x 14.6 cm)
  • Coordinating Colors: Crushed Curry, Early Espresso, Melon Mambo, Mint Macaron, Pear Pizzazz, Shaded Spruce, Soft Sea Foam

Subscribe for the April Paper Pumpkin kit from March 11–April 10 at paperpumpkin.com. Supplies may be limited toward the end of the subscription period

****************************************************************************************************

Card stock cuts for this project:

  • Garden Green Cardstock 3 3/4″ X 3 3/4″ (card front mat), 3″ X 3″ (artwork mat), 5/8″ X 2 1/8″ (sentiment mat), 4 1/8″ X 5 3/8″ (inner liner mat)
  • Night of Navy Cardstock 4 1/4″ X 11″ (card base scored and folded at 5 1/2″)
  • Whisper White Cardstock 2 7/8″ X 2 7/8″ (artwork), 1/2″ X 2″ (sentiment), 4″ X 5 1/4″ (inner liner)
  • Country Club Designer Series Paper 4 1/4″ X 5 1/2″ (card front), 2 1/4″ X 6″ (piece for envelope flap)
  • Pressed Petals Specialty Designer Series Paper 3 5/8″ X 3 5/8″ (card front)

****************************************************************************************************

Product List

Stampin’ Up! Ornate Style Mother’s Day Card

Good Monday morning my fellow stampers.  How was everyone’s weekend?  Is everyone holding out ok with the social distancing?  Is anyone able to work from home?  Unfortunately both my jobs outside the house I can not work from home, so I’m taking all precautions necessary.

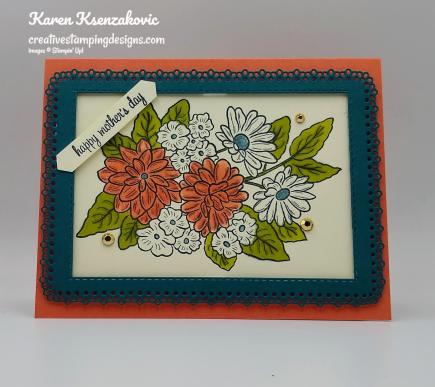
I have another card today using the Ornate Style Suite.  Take a look.

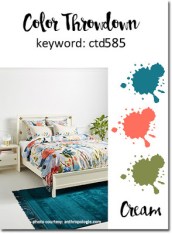
My colors were inspired by Color Throwdown Challenge #585.  Here are their colors.

I also played along with Cardz 4 Galz Challenge #117.  Their theme is ‘Spring Flowers’.

I started by stamping the large floral image from the Stampin’ Up! Ornate Style Cling Stamp Set in Tuxedo Black Memento Ink on a panel of Very Vanilla cardstock.  I colored only part of the image in using my Calypso Coral, Old Olive and Pretty Peacock Stampin’ Blends Markers.  I brushed the Calypso Coral flowers using my Clear Wink of Stella to give it a little shimmer.

I cut a Pretty Peacock frame using my Ornate Layers Dies and cut the center out using my Stitched Rectangle Dies.  I adhered the artwork to a Calypso Coral card base using Snail and the frame on top of the artwork using Stampin’ Dimensionals.

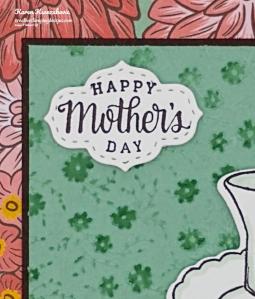
On a scrap of Very Vanilla cardstock I stamped the sentiment from the Stampin’ Up! Timeless Tulips Photopolymer Stamp Set in Tuxedo Black Memento Ink.  I cut the sentiment out using the Classic Label Punch and adhered it to the frame using Glue Dots.  I added a few Gilded Gems to the artwork.

On the inside I stamped the sentiment from the Timeless Tulips stamp set in Tuxedo Black Memento Ink in the center of a Very Vanilla panel.  I stamped the flower cluster image from the Ornate Style stamp set in Tuxedo Black Memento Ink in all 4 corners of the panel.  I colored just the leaves in using my Old Olive Stampin’ Blends Markers.  I adhered the Very Vanilla panel to a Pretty Peacock mat using Snail and then to the inside of the Calypso Coral card base using Multipurpose Liquid Glue.

To finish my card I decorated a Medium Very Vanilla Envelope.  I stamped the large floral image from the Ornate Style stamp set in Tuxedo Black Memento Ink on the bottom front of the envelope and the envelops flap.  I colored the images in using my Calypso Coral, Old Olive and Pretty Peacock Stampin’ Blends Markers.

Thank you for stopping by my blog today.  I hope you liked my card and will give it a try. Happy Stamping!!

****************************************************************************************************

If you need any stamping supplies, I’d love to be your Demonstrator. Just click HERE to go directly to my online store or drop me an email if you have any questions. 

MY CURRENT HOST CODE IS: 6WETZ6WW

Use this host code when you order $50 or greater and receive a free gift from me! If your order is over $150, please do not use this code, but you’ll still get the free gift. The free gift is your choice of any item valued up to $10.00 in either the 2019-2020 Annual Catalog or the 2020 January-June Mini Catalog!   For any orders $50 or more I will also send you my monthly class tutorials.  Click HERE or go to my Customer Rewards for more details and to see what this months tutorials are.

Click HERE to shop the clearance rack.

Happy Stamping, Karen!

****************************************************************************************************

The Ornate Garden Suite will be available starting April 1st.  Don’t want to wait, you can get it now as a demonstrator.  If you are interested in joining my team, just email me at creativestampingdesigns@gmail.com and I’ll be happy to help you.  Click HERE or on the image below to see a printable PDF of all the fabulous items available in the suite.

****************************************************************************************************

APRIL 2020 PAPER PUMPKIN:  MY WONDERFUL FAMILY

SUBSCRIBE MARCH 11-APRIL 10

At Paper Pumpkin, we believe in making a difference—especially when it comes to helping you build relationships through papercrafting. For April, we created a fun, family appreciation themed card kit that would make it easy for you to share your hearts with those you love most: mom, dad, daughter, son, sister, and brother. April’s kit even includes Mother’s Day and Father’s Day sentiments, giving you the perfect way to show your appreciation for beloved parents on their special days with a beautiful, handmade card.
One more thing about this “fam-tastic” kit: The Paper Pumpkin team knows that everyone’s clan is unique. With that in mind, we provided sentiments that would include anyone in your life who feels like family; for instance, “brothers” and “sisters” who have helped you along the journey of life.

About the April Kit: 

  • Kit contains supplies for 8 cards and envelopes
  • Card size: 4-1/4″ x 5-1/2″ (10.8 x 14 cm)
  • Envelope size: 4-1/2″ x 5-3/4″ (11.4 x 14.6 cm)
  • Coordinating Colors: Crushed Curry, Early Espresso, Melon Mambo, Mint Macaron, Pear Pizzazz, Shaded Spruce, Soft Sea Foam

Subscribe for the April Paper Pumpkin kit from March 11–April 10 at paperpumpkin.com. Supplies may be limited toward the end of the subscription period

****************************************************************************************************

Card stock cuts for this project:

  • Calypso Coral Cardstock 8 1/2″ X 5 1/2″ (card base scored and folded at 4 1/4″)
  • Pretty Peacock Cardstock 4 1/4″ X 5 1/4″ (card front frame), 4″ X 5 1/4″ (inner liner mat)
  • Very Vanilla Cardstock 4″ X 5 1/4″ (artwork), 3 7/8″ X 5 1/8″ (inner liner), scrap for sentiment

****************************************************************************************************

Product List

Stampin’ Up! Strong and Beautiful Wild Rose CAS Card

Good Saturday morning my fellow stampers.  How is everyone doing today with your social distancing?  Hope your weekend is starting off well and you are able to keep busy.  I’ve finally had extra time to spend at my craft table and I’ve been thrilled.  I know I don’t usually blog on the weekends, but I thought I’d start since we all have a little extra time lately.

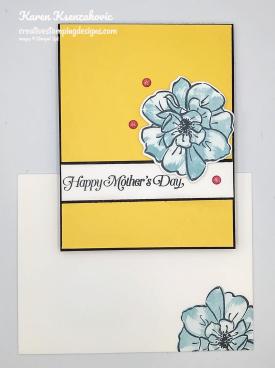
I have a Clean and Simple card for you today.  Take a look.

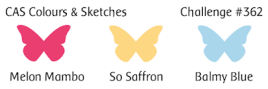
My colors were inspired by CAS Colours & Sketches Challenge #362.  Here are their colors.

My design is from Freshly Made Sketches Challenge #427.  Here is their sketch.

I started by stamping the sentiment from the Stampin’ Up! Strong & Beautiful Cling Stamp Set in Tuxedo Black Memento Ink on a strip of Whisper White cardstock.  I adhered the strip to a Basic Black mat using Snail and then to a So Saffron card front using Multipurpose Liquid Glue.

On a small panel of Whisper White cardstock, using my Stamparatus, I stamped the outlined rose image from the Stampin’ Up! To A Wild Rose Photopolymer Stamp Set in Tuxedo Black Memento Ink.  I stamped the 2nd part of the rose image from To A Wild Rose stamp set in Balmy Blue Ink over the outlined image.  I stamped the 3rd part of the rose image from To A Wild Rose stamp set in Balmy Blue Ink, stamping off once, over the stamped image.  I cut the rose out using my Wild Rose Dies.  I adhered the rose to the card front using Stampin’ Dimensionals.

I added a few Melon Mambo Glitter Enamel Dots to the card front.  I adhered the card front to a Basic Black card base using Stampin’ Dimensionals.

On the inside I stamped the sentiment from the Strong & Beautiful stamp set in Tuxedo Black Memento Ink in the center of a Whisper White panel.  I stamped the rose image from To A Wild Rose stamp set in Tuxedo Black Memento Ink on the bottom of the panel.  I stamped the 2nd rose image from To A Wild Rose stamp set over the outlined image in Balmy Blue Ink.  I stamped the 3rd image from To A Wild Rose stamp set over the stamped image in Balmy Blue Ink, stamping off once.  I adhered the Whisper White panel to a So Saffron mat using Snail and then to the inside of the Basic Black card base using Multipurpose Liquid Glue.

I finished my card by decorating a Medium Whisper White Envelope.  I stamped the outlined rose image from To A Wild Rose stamp set on the bottom front of the envelope and on the envelope flap.  I stamped the 2nd rose image from To A Wild Rose stamp set over the outlined image in Balmy Blue Ink.  I stamped the 3rd rose image from To A Wild Rose stamp set in Balmy Blue Ink over the stamped images, stamping off once.

Thank you for stopping by my blog today.  I hope you liked my card and will give it a try. Happy Stamping!!

****************************************************************************************************

If you need any stamping supplies, I’d love to be your Demonstrator. Just click HERE to go directly to my online store or drop me an email if you have any questions. 

MY CURRENT HOST CODE IS: 6WETZ6WW

Use this host code when you order $50 or greater and receive a free gift from me! If your order is over $150, please do not use this code, but you’ll still get the free gift. The free gift is your choice of any item valued up to $10.00 in either the 2019-2020 Annual Catalog or the 2020 January-June Mini Catalog!   For any orders $50 or more I will also send you my monthly class tutorials.  Click HERE or go to my Customer Rewards for more details and to see what this months tutorials are.

Click HERE to shop the clearance rack.

Happy Stamping, Karen!

****************************************************************************************************

APRIL 2020 PAPER PUMPKIN:  MY WONDERFUL FAMILY

SUBSCRIBE MARCH 11-APRIL 10

At Paper Pumpkin, we believe in making a difference—especially when it comes to helping you build relationships through papercrafting. For April, we created a fun, family appreciation themed card kit that would make it easy for you to share your hearts with those you love most: mom, dad, daughter, son, sister, and brother. April’s kit even includes Mother’s Day and Father’s Day sentiments, giving you the perfect way to show your appreciation for beloved parents on their special days with a beautiful, handmade card.
One more thing about this “fam-tastic” kit: The Paper Pumpkin team knows that everyone’s clan is unique. With that in mind, we provided sentiments that would include anyone in your life who feels like family; for instance, “brothers” and “sisters” who have helped you along the journey of life.

About the April Kit: 

  • Kit contains supplies for 8 cards and envelopes
  • Card size: 4-1/4″ x 5-1/2″ (10.8 x 14 cm)
  • Envelope size: 4-1/2″ x 5-3/4″ (11.4 x 14.6 cm)
  • Coordinating Colors: Crushed Curry, Early Espresso, Melon Mambo, Mint Macaron, Pear Pizzazz, Shaded Spruce, Soft Sea Foam

Subscribe for the April Paper Pumpkin kit from March 11–April 10 at paperpumpkin.com. Supplies may be limited toward the end of the subscription period

****************************************************************************************************

Card stock cuts for this project:

  • Basic Black Cardstock 4 1/4″ X 11″ (card base scored and folded at 5 1/2″), 1″ X 4 1/8″ (sentiment mat)
  • So Saffron Cardstock 2 – 4 1/8″ X 5 3/8″ (card front and inner liner mat)
  • Whisper White Cardstock 7/8″ X 4 1/8″ (sentiment), 3″ X 3″ (rose), 4″ X 5 1/4″ (inner liner)

****************************************************************************************************

Product List

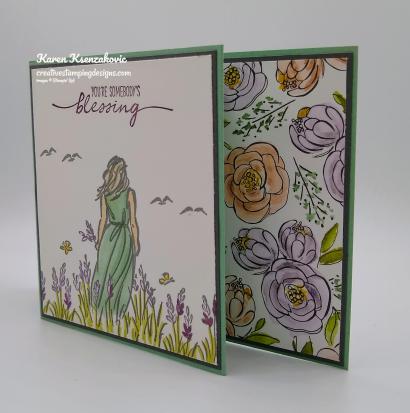
Stampin’ Up! Somebody’s Blessing for Fun Fold Friday

Good Friday morning my fellow stampers and welcome to my Fun Fold Friday.  The weekend is here once again.  How was everyone’s week?  Hope you had a productive one and are ready for some fun this weekend.

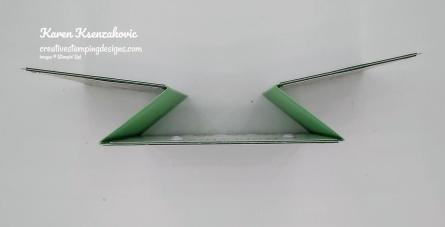
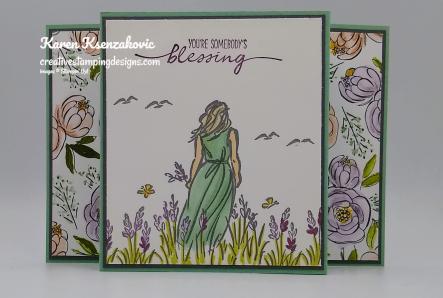
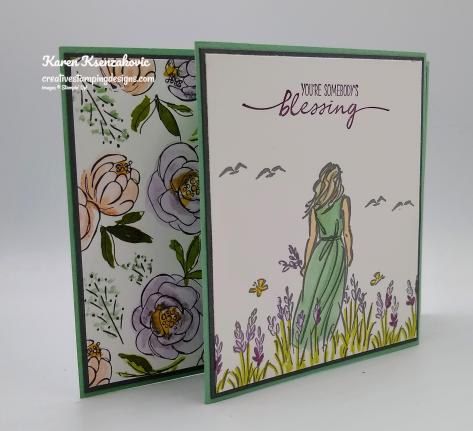
For today I have another new to me fun fold.  I really like this one and I can see a lot more cards like this in my future.  Here’s my card.

This card stands so nicely on it’s own.  I started with a Mint Macaron card base and scored it at 2 1/4″, 3 5/8″, 7 3/8″ and 8 3/4″.  Once you make the folds it will look like this.

Once I made the folds I adhered 2 panels of Best Dressed 6 X 6 Designer Series Paper to 2 Basic Gray mats using Snail.  I adhered the matted panels to the 2 sides of the card base using Multipurpose Liquid Glue.

On a panel of Whisper White cardstock I stamped the single woman image from the Stampin’ Up! Beautiful Moments Cling Stamp Set on the bottom of the panel in Basic Gray Ink.  I stamped the small flower image from the Beautiful Moments stamp set in Basic Gray Ink on either side of the larger image.  I stamped the bird image from the Beautiful Moments stamp set twice on either side of the woman image.  I stamped the 2 butterfly images from the Beautiful Moments stamp set in Basic Gray Ink just above the flower images. I colored the images in using my Blackberry Bliss, Crumb Cake, Ivory, Mint macaron, Old Olive, Purple Posy and So Saffron Stampin’ Blends Markers.  I stamped the sentiment from the Beautiful Moments stamp set in Blackberry Bliss Ink on the top of the panel.  I adhered the artwork to a Basic Gray mat using Snail and then to the card front using Multipurpose Liquid Glue.

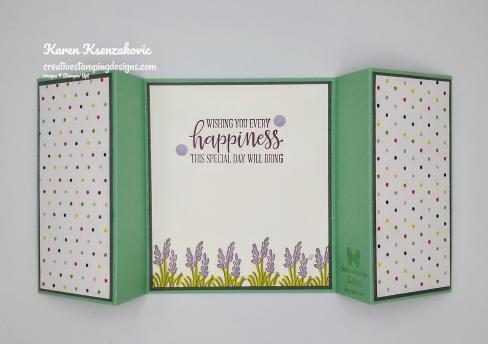
On the back of the card base I adhered 2 panels of Best Dressed 6 X 6 DSP to 2 Basic Gray mats using Snail and then to the back 2 sides of the card base using Multipurpose Liquid Glue.  On a Whisper White panel I stamped the sentiment from Stampin’ Up! Peaceful Moments Cling Stamp Set in Blackberry Bliss Ink towards the top of the panel.  I stamped the small floral image from the Beautiful Moments stamp set in Basic Gray Ink along the bottom of the panel going completely across.  I colored the images in using my Old Olive and Purple Posy Stampin’ Blends Markers.  I adhered the Whisper White panel to a Basic Gray mat using Snail and then to the backside of the card base using Multipurpose Liquid Glue.  I added a couple Purple Posy 2019-2021 In-Color Faceted Dots on either side of the sentiment.

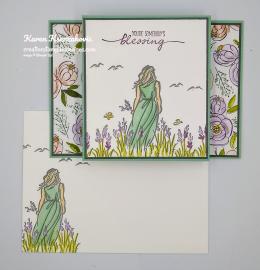
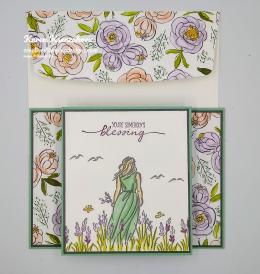
To finish my card I decorated a Medium Whisper White Envelope.  I stamped the single woman image from the Beautiful Moments stamp set in Basic Gray Ink on the envelope front.  I stamped the bird image from the Beautiful Moments stamp set in Basic Gray Ink above the woman image.  I colored the image in using my Crumb Cake, Ivory, Mint Macaron, Old Olive and Purple Posy Stampin’ Blends Markers.  I adhered a panel of Best Dressed 6 X 6 DSP to the envelope flap.  Although it doesn’t look it, this card fits perfectly in the standard A2 envelope once it is flattened.

Thank you for stopping by my blog today.  I  hope you liked my card and will give it a try. Happy Stamping!!

****************************************************************************************************

If you need any stamping supplies, I’d love to be your Demonstrator. Just click HERE to go directly to my online store or drop me an email if you have any questions. 

MY CURRENT HOST CODE IS: 6WETZ6WW

Use this host code when you order $50 or greater and receive a free gift from me! If your order is over $150, please do not use this code, but you’ll still get the free gift. The free gift is your choice of any item valued up to $10.00 in either the 2019-2020 Annual Catalog or the 2020 January-June Mini Catalog!   For any orders $50 or more I will also send you my monthly class tutorials.  Click HERE or go to my Customer Rewards for more details and to see what this months tutorials are.

Click HERE to shop the clearance rack.

Happy Stamping, Karen!

****************************************************************************************************

APRIL 2020 PAPER PUMPKIN:  MY WONDERFUL FAMILY

SUBSCRIBE MARCH 11-APRIL 10

At Paper Pumpkin, we believe in making a difference—especially when it comes to helping you build relationships through papercrafting. For April, we created a fun, family appreciation themed card kit that would make it easy for you to share your hearts with those you love most: mom, dad, daughter, son, sister, and brother. April’s kit even includes Mother’s Day and Father’s Day sentiments, giving you the perfect way to show your appreciation for beloved parents on their special days with a beautiful, handmade card.
One more thing about this “fam-tastic” kit: The Paper Pumpkin team knows that everyone’s clan is unique. With that in mind, we provided sentiments that would include anyone in your life who feels like family; for instance, “brothers” and “sisters” who have helped you along the journey of life.

About the April Kit: 

  • Kit contains supplies for 8 cards and envelopes
  • Card size: 4-1/4″ x 5-1/2″ (10.8 x 14 cm)
  • Envelope size: 4-1/2″ x 5-3/4″ (11.4 x 14.6 cm)
  • Coordinating Colors: Crushed Curry, Early Espresso, Melon Mambo, Mint Macaron, Pear Pizzazz, Shaded Spruce, Soft Sea Foam

Subscribe for the April Paper Pumpkin kit from March 11–April 10 at paperpumpkin.com. Supplies may be limited toward the end of the subscription period

****************************************************************************************************

Card stock cuts for this project:

  • Basic Gray Cardstock 4 – 2 1/8″ X 4 1/8″ (DSP mats), 2 – 3 5/8″ X 4 1/8″ (artwork and inner liner mats)
  • Mint Macaron Cardstock 4 1/4″ X 11″ (card base scored and folded at 2 1/4″, 3 5/8″, 7 3/8″ & 8 3/4″)
  • Whisper White Cardstock 2 – 3 1/3″ X 4″ (artwork and inner liner)
  • Best Dressed 6 X 6 Designer Series Paper 2 – 2″ X 4″ (card front and back panels), 2 1/4″ X 6″ (piece for envelope flap)

****************************************************************************************************

Product List

Stampin’ Up! Pressed Path of Petals CAS

Good Wednesday morning my fellow stampers. How is everyone’s week going?  We’re halfway through the week already and before you know it the weekend will be here.

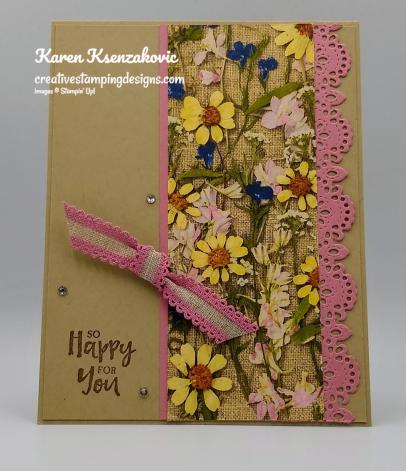
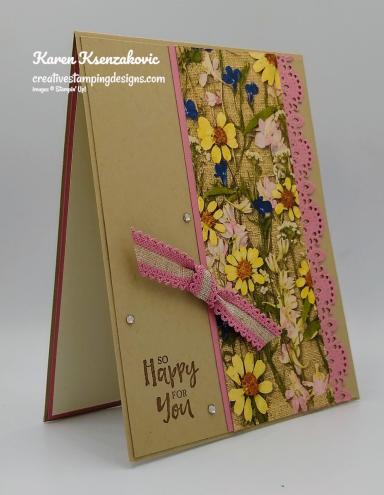
I have a quick and easy card for you today using the beautiful Pressed Petals Specialty Designer Series Paper.  Here’s my card.

I started by cutting a panel of Rococo Rose cardstock using the Stitched Lace Die.  I adhered it to the back right side of a panel of Pressed Petals Specialty Designer Series Paper using Snail.  On the back left side of the DSP I adhered a thin strip of Rococo Rose cardstock.  I adhered the panel to a Crumb Cake card front using Multipurpose Liquid Glue.

To the left of the artwork I stamped the sentiment from the Stampin’ Up! Beautiful You Cling Stamp Set in Soft Suede Ink.  I added a piece of Rococo Rose 5/8″ Scalloped Trim Ribbon which I tied in a knot and adhered it to the artwork using a Glue Dot.

I adhered the card front to a Crumb Cake card base using Multipurpose Liquid Glue.  I added a few Rhinestone Basic Jewels to the card front.

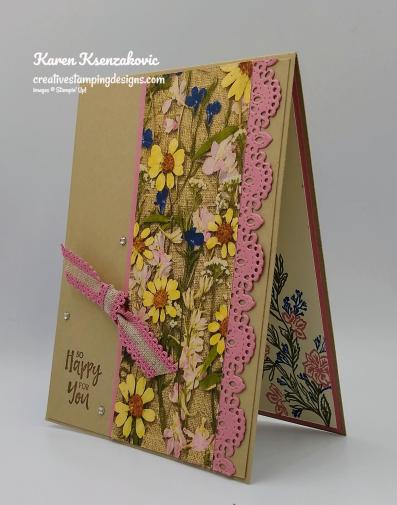
On the inside I stamped the sentiment from the Stampin’ Up! A Big Thank You Photopolymer Stamp Set in Soft Suede Ink in the center of a Very Vanilla panel.  I stamped the leaf image from the Stampin’ Up! Path of Petals Photopolymer Stamp Set in Mossy Meadow Ink on the bottom of the panel.  I stamped the flower image from the Path of Petals stamp set in Rococo Rose Ink on the leaf image.  I stamped the small flower image from the Path of Petals stamp set in Blueberry Bushel Ink on the leaf and flower image.  I adhered the Very Vanilla panel to a Rococo Rose mat using Snail and then to the inside of the Crumb Cake card base using Multipurpose Liquid Glue.

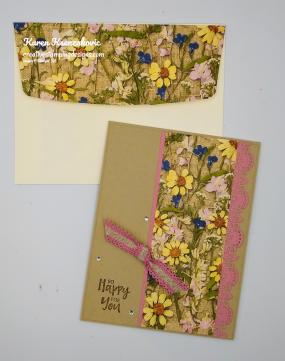
To finish my card I decorated a Medium Very Vanilla Envelope.  I stamped the leaf image from the Path of Petals stamp set in Mossy Meadow Ink on the bottom front of the envelope.  I stamped the larger flower image from the Path of Petals stamp set in Rococo Rose Ink over the leaf image.  I stamped the smaller flower image from the Path of Petals stamp set in Blueberry Bushel Ink over the leaf and flower images.  I adhered a panel of Pressed Petals Specialty DSP to the envelope flap.

Thank you for stopping by my blog today.  I hope you liked my card and will give it a try. Happy Stamping!!

****************************************************************************************************

If you need any stamping supplies, I’d love to be your Demonstrator. Just click HERE to go directly to my online store or drop me an email if you have any questions. 

MY CURRENT HOST CODE IS: 6WETZ6WW

Use this host code when you order $50 or greater and receive a free gift from me! If your order is over $150, please do not use this code, but you’ll still get the free gift. The free gift is your choice of any item valued up to $10.00 in either the 2019-2020 Annual Catalog or the 2020 January-June Mini Catalog!   For any orders $50 or more I will also send you my monthly class tutorials.  Click HERE or go to my Customer Rewards for more details and to see what this months tutorials are.

Click HERE to shop the clearance rack.

Happy Stamping, Karen!

****************************************************************************************************

APRIL 2020 PAPER PUMPKIN:  MY WONDERFUL FAMILY

SUBSCRIBE MARCH 11-APRIL 10

At Paper Pumpkin, we believe in making a difference—especially when it comes to helping you build relationships through papercrafting. For April, we created a fun, family appreciation themed card kit that would make it easy for you to share your hearts with those you love most: mom, dad, daughter, son, sister, and brother. April’s kit even includes Mother’s Day and Father’s Day sentiments, giving you the perfect way to show your appreciation for beloved parents on their special days with a beautiful, handmade card.
One more thing about this “fam-tastic” kit: The Paper Pumpkin team knows that everyone’s clan is unique. With that in mind, we provided sentiments that would include anyone in your life who feels like family; for instance, “brothers” and “sisters” who have helped you along the journey of life.

About the April Kit: 

  • Kit contains supplies for 8 cards and envelopes
  • Card size: 4-1/4″ x 5-1/2″ (10.8 x 14 cm)
  • Envelope size: 4-1/2″ x 5-3/4″ (11.4 x 14.6 cm)
  • Coordinating Colors: Crushed Curry, Early Espresso, Melon Mambo, Mint Macaron, Pear Pizzazz, Shaded Spruce, Soft Sea Foam

Subscribe for the April Paper Pumpkin kit from March 11–April 10 at paperpumpkin.com. Supplies may be limited toward the end of the subscription period

****************************************************************************************************

Card stock cuts for this project:

  • Crumb Cake Cardstock 4 1/4″ X 11″ (card base scored and folded at 5 1/2″), 4 1/8″ X5 3/8″ (card front)
  • Rococo Rose Cardstock 4 1/8″ X 5 3/8″ (inner liner mat), 1/4″ X 5 3/8″ (card front strip), 2″ X 5 1/2″ (card front lace strip)
  • Very Vanilla Cardstock 4″ X 5 1/4″ (inner liner)
  • Pressed Petals Specialty Designer Series Paper 2″ X5 3/8″(artwork), 2 1/4″ X6″ (piece for envelope flap)

****************************************************************************************************

Product List

Stampin’ Up! Botanical Prints Thank You in Highland Heather

Good Tuesday morning my fellow stampers and Happy St. Patrick’s Day.  How many of you are Irish out there?  I have no Irish in me at all, I’m all Italian, but my husband and children have a little.

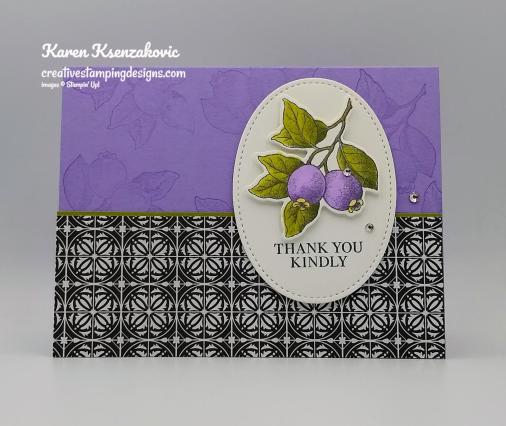
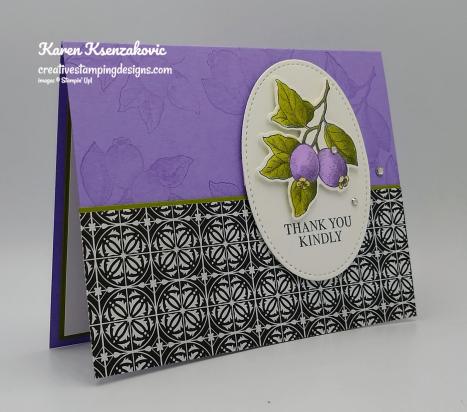
For today I have another card that we made at our team meeting on Sunday using the beautiful Stampin’ Up! Botanical Prints Product Medley.  I feel like this product medley does most of the work for you.  Here’s my card.

I started with a Highland Heather card base and stamped the leaf/berry image from the Botanical Prints stamp set in Highland Heather Ink randomly around.

I adhered a panel of the Botanical Prints Designer Series Paper to an Old Olive mat using Snail and then to the front of the card base using Snail.

On a panel of Whisper White cardstock I stamped the leaf/berry image and the sentiment from the Botanical Prints stamp set in Tuxedo Black Memento Ink.  I colored the image in using my Highland Heather, Old Olive and So Saffron Stampin’ Blends Markers.  I cut the image out using the Botanical Prints Dies.  I cut the sentiment out using the largest oval from the Stitched Shapes Dies making sure the sentiment was at the bottom of the oval.  I adhered the leaf/berry image to the oval, above the sentiment, using Stampin’ Dimensionals.  I adhered the oval to the card front using Stampin’ Dimensionals.  I added a few Rhinestone Basic Jewels to the card front.

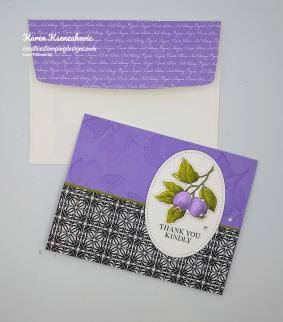
On the inside I stamped the leaf/berry image from the Botanical Prints stamp set in Highland Heather Ink on the bottom of a Whisper White panel.  I did not add a sentiment so that I could write my own thank you note.  I adhered the Whisper White panel to an Old Olive mat using Snail and then to the inside of the Highland Heather card base using Multipurpose Liquid Glue.

To finish my card I stamped the leaf/berry image from the Botanical Prints stamp set in Tuxedo Black Memento Ink on the bottom front of the envelope.  I colored the image in using my Highland Heather, Old Olive and So Saffron Stampin’ Blends Markers.  I adhered a panel of the Highland Heather Subtle 6 X 6 Designer Series Paper to the envelope flap.

Thank you for stopping by my blog today.  I hope you liked my card and will give it a try. Happy Stamping!!

****************************************************************************************************

If you need any stamping supplies, I’d love to be your Demonstrator. Just click HERE to go directly to my online store or drop me an email if you have any questions. 

MY CURRENT HOST CODE IS: QCX43K4E

Use this host code when you order $50 or greater and receive a free gift from me! If your order is over $150, please do not use this code, but you’ll still get the free gift. The free gift is your choice of any item valued up to $10.00 in either the 2019-2020 Annual Catalog or the 2020 January-June Mini Catalog!   For any orders $50 or more I will also send you my monthly class tutorials.  Click HERE or go to my Customer Rewards for more details and to see what this months tutorials are.

Click HERE to shop the clearance rack.

Happy Stamping, Karen!

****************************************************************************************************

APRIL 2020 PAPER PUMPKIN:  MY WONDERFUL FAMILY

SUBSCRIBE MARCH 11-APRIL 10

At Paper Pumpkin, we believe in making a difference—especially when it comes to helping you build relationships through papercrafting. For April, we created a fun, family appreciation themed card kit that would make it easy for you to share your hearts with those you love most: mom, dad, daughter, son, sister, and brother. April’s kit even includes Mother’s Day and Father’s Day sentiments, giving you the perfect way to show your appreciation for beloved parents on their special days with a beautiful, handmade card.
One more thing about this “fam-tastic” kit: The Paper Pumpkin team knows that everyone’s clan is unique. With that in mind, we provided sentiments that would include anyone in your life who feels like family; for instance, “brothers” and “sisters” who have helped you along the journey of life.

About the April Kit: 

  • Kit contains supplies for 8 cards and envelopes
  • Card size: 4-1/4″ x 5-1/2″ (10.8 x 14 cm)
  • Envelope size: 4-1/2″ x 5-3/4″ (11.4 x 14.6 cm)
  • Coordinating Colors: Crushed Curry, Early Espresso, Melon Mambo, Mint Macaron, Pear Pizzazz, Shaded Spruce, Soft Sea Foam

Subscribe for the April Paper Pumpkin kit from March 11–April 10 at paperpumpkin.com. Supplies may be limited toward the end of the subscription period

****************************************************************************************************

Card stock cuts for this project:

  • Highland Heather Cardstock 8 1/2″ X 5 1/2″ (card base scored and folded at 4 1/4″)
  • Old Olive Cardstock 2 1/8″ X 5 1/2″ (card front DSP mat), 4″ X 5 1/4″ (inner liner mat)
  • Whisper White Cardstock 4″ X 5″(artwork), 3 7/8″ X 5 1/8″ ( inner liner)
  • Botanical Prints Designer Series Paper 2″ X 5 1/2″ (card front)
  • Subtle 6 X 6 Designer Series Paper 2 1/4″ X 6″ (piece for envelope flap)

****************************************************************************************************

Product List

Stampin’ Up! Botanical Prints Terracotta Tile Thank You

Good Monday Morning my fellow stampers.  How was everyone’s weekend?  Is everyone staying healthy?  I went to our quarterly team meeting yesterday. Enjoyed lunch and stamping with my team leader Amy.  Unfortunately I was the only one who was able to make it due to the virus.  I did get to see everyone via Zoom meeting.  We made a couple cards and talked.  It was a very enjoyable afternoon.  Here  is one of the cards we made at the meeting.

We used the beautiful Stampin’ Up! Botanical Prints Product Medley that is in the 2020 January – June Mini Catalog on page 61.  Everything is included in this product medley except the cardstock and ink.  Amy always comes up with the most beautiful cards.  I embossed a panel of Whisper White cardstock using the Subtle 3D Embossing Folder and adhered it to an Old Olive mat using Multipurpose Liquid Glue.

Using my Light Old Olive and Dark Daffodil Delight Stampin’ Blends Markers, I colored the leaves and flower centers in on a panel of the Botanical Prints Designer Series Paper.  I adhered the DSP to an Old Olive mat using Snail and then to the card front using Multipurpose Liquid Glue.

On a scrap of Whisper White cardstock I stamped the flower image from the Botanical Prints stamp set in Tuxedo Black Memento Ink.  I colored the leaves and flower centers in using my Dark Daffodil Delight and Old Olive Stampin’ Blends Markers.  I cut the images out using the Botanical Prints Dies.  I adhered the die cut images to the card front using Glue Dots.  I stamped the sentiment from the Botanical Prints stamp set in Tuxedo Black Memento Ink in the center of one of the labels that comes with the product medley.  I adhered the label to the card front using Stampin’ Dimensionals.  I added a few die cut leaves, that were cut from Old Olive cardstock using the Botanical Prints Dies, under the label using Multipurpose Liquid Glue.  I added a few Rhinestone Basic Jewels to the card front.  I adhered the card front to a Terracotta Tile card base using Stampin’ Dimensionals.

On the inside I stamped the floral image from the Botanical Prints stamp set on the top and bottom corner of a Whisper White panel in Terracotta Tile Ink and adhered the panel to the inside of the Terracotta Tile card base using Snail.

To finish my card I decorated a Medium Whisper White Envelope.  I stamped the flower image from the Botanical Prints stamp set in Tuxedo Black Memento Ink on the bottom of the envelope front.  I colored the images in using my Daffodil Delight and Old Olive Stampin’ Blends Markers.  I adhered a panel of the 2019-2021 In-Colors 6 X 6 Designer Series Paper to the envelope flap.

Thank you for stopping by my blog today.  I hope you liked my card and will give it a try. Happy Stamping!!

****************************************************************************************************

If you need any stamping supplies, I’d love to be your Demonstrator. Just click HERE to go directly to my online store or drop me an email if you have any questions. 

MY CURRENT HOST CODE IS: QCX43K4E

Use this host code when you order $50 or greater and receive a free gift from me! If your order is over $150, please do not use this code, but you’ll still get the free gift. The free gift is your choice of any item valued up to $10.00 in either the 2019-2020 Annual Catalog or the 2020 January-June Mini Catalog!   For any orders $50 or more I will also send you my monthly class tutorials.  Click HERE or go to my Customer Rewards for more details and to see what this months tutorials are.

Click HERE to shop the clearance rack.

Happy Stamping, Karen!

****************************************************************************************************

APRIL 2020 PAPER PUMPKIN:  MY WONDERFUL FAMILY

SUBSCRIBE MARCH 11-APRIL 10

At Paper Pumpkin, we believe in making a difference—especially when it comes to helping you build relationships through papercrafting. For April, we created a fun, family appreciation themed card kit that would make it easy for you to share your hearts with those you love most: mom, dad, daughter, son, sister, and brother. April’s kit even includes Mother’s Day and Father’s Day sentiments, giving you the perfect way to show your appreciation for beloved parents on their special days with a beautiful, handmade card.
One more thing about this “fam-tastic” kit: The Paper Pumpkin team knows that everyone’s clan is unique. With that in mind, we provided sentiments that would include anyone in your life who feels like family; for instance, “brothers” and “sisters” who have helped you along the journey of life.

About the April Kit: 

  • Kit contains supplies for 8 cards and envelopes
  • Card size: 4-1/4″ x 5-1/2″ (10.8 x 14 cm)
  • Envelope size: 4-1/2″ x 5-3/4″ (11.4 x 14.6 cm)
  • Coordinating Colors: Crushed Curry, Early Espresso, Melon Mambo, Mint Macaron, Pear Pizzazz, Shaded Spruce, Soft Sea Foam

Subscribe for the April Paper Pumpkin kit from March 11–April 10 at paperpumpkin.com. Supplies may be limited toward the end of the subscription period

****************************************************************************************************

Card stock cuts for this project:

  • Old Olive Cardstock 4″ X 5 1/4″ (card front mat), 2 1/8″ X 5 1/8″ (DSP mat), scraps for leaves
  • Terracotta Tile Cardstock 4 1/4″ X 11″ (card base scored and folded at 5 1/2″)
  • Whisper White Cardstock 3 7/8″ X 5 1/8″ (card front), 4″ X 5 1/4″ (inner liner)
  • Botanical Prints Designer Series Paper 2″ X 6 1/8″ (card front)
  • 2019-2021 In-Color Designer Series Paper (2 1/4″ X 6″ (piece for envelope flap)

****************************************************************************************************

Product List

Stampin’ Up! Little Ladybug for Fun Fold Friday

Happy Friday the 13th my stamping friends.  I hope you’re not superstitious about the date, I’m not.  How was everyone’s week?  The weekend is here, hope you are all ready for it, I know I am.  I get to work Saturday at the dog bakery.  We’re having a party for the owners dog for her 1st gotcha day.  They are making a big cake and dogs are invited to the party for some yummy cake (owners too).  Sunday  I’m looking forward to attending our quarterly Team Meeting.  It’s always so much fun to get together with fellow team members to enjoy lunch and stamping together.

For today’s card I made a pretty easy fun fold for you using the Sale-A-Bration Host exclusive stamp set.  Take a look.

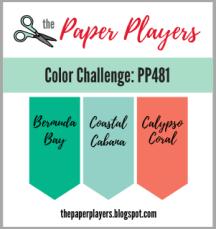
My colors were inspired by The Paper Players Challenge #481.  Their colors just screamed spring/summer to me.  Here are their colors.

I also joined in with Global Design Project Challenge #231.  Here is their theme.

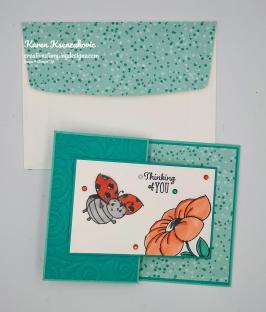
I started by embossing a small panel of Bermuda Bay cardstock using the Swirls & Curls Embossing Folder.  I adhered the panel to the front of the Z-Fold using Multipurpose Liquid Glue.

On a small panel of Whisper White cardstock, I stamped the flower image from the Stampin’ Up! Little Ladybug Cling Host Stamp Set in Tuxedo Black Memento Ink.  I stamped the flying ladybug on the panel in Tuxedo Black Memento Ink.  I colored the images in using my Bermuda Bay, Calypso Coral and Smoky Slate Stampin’ Blends Markers.  On a scrap piece of Whisper White cardstock I stamped the ladybug image again and just colored in the left wing with my dark Calypso Coral Stampin’ Blends Marker.  I fussy cut the wing and adhered it on top of the stamped ladybug using Stampin’ Dimensionals.  I stamped the sentiment from the Little Ladybug stamp set in Tuxedo Black Memento Ink on the top of the panel.  I adhered the artwork to a Bermuda Bay mat using Snail and then to the embossed card front using Stampin’ Dimensionals.  I added 3 Rhinestone Basic Jewels which I colored using my dark Calypso Coral Stampin’ Blends Marker.  I added a Rhinestone Basic Jewel which I colored using my dark Bermuda Bay Stampin’ Blends Marker by the sentiment and a Coastal Cabana rhinestone from the Holiday Rhinestones on the other side of the sentiment.

On the inside I adhered a panel of Birthday Bonanza Designer Series Paper to a Bermuda Bay mat using Snail and then to the inside of the Coastal Cabana card base using Multipurpose Liquid Glue.  On a small panel of Whisper White cardstock I stamped the sentiment from the Little Ladybug stamp set in Tuxedo Black Memento Ink.  I stamped another one of the ladybug images from the Little Ladybug stamp set in Tuxedo Black Memento Ink on the bottom of the panel.  I colored the image in using my Calypso Coral and Smoky Slate Stampin’ Blends Markers.  I adhered the panel to a Bermuda Bay mat using Snail and then to the inside of the card base using Multipurpose Liquid Glue making sure it was hidden under the card front panel.

To finish my card I decorated a Medium Whisper White Envelope.  I stamped the flower image from the Little Ladybug stamp set in Tuxedo Black Memento Ink on the envelope front.  I stamped another one of the ladybug images from the Little Ladybug stamp set in Tuxedo Black Memento Ink next to the flower.  I colored the images in using my Bermuda Bay, Calypso Coral and Smoky Slate Stampin’ Blends Markers.  I adhered a panel of the Birthday Bonanza DSP to the envelope flap.

Thank you for stopping by my blog today.  I hope you liked my card and will give it a try. Happy Stamping!!

****************************************************************************************************

If you need any stamping supplies, I’d love to be your Demonstrator. Just click HERE to go directly to my online store or drop me an email if you have any questions. 

MY CURRENT HOST CODE IS: QCX43K4E

Use this host code when you order $50 or greater and receive a free gift from me! If your order is over $150, please do not use this code, but you’ll still get the free gift. The free gift is your choice of any item valued up to $10.00 in either the 2019-2020 Annual Catalog or the 2020 January-June Mini Catalog!   For any orders $50 or more I will also send you my monthly class tutorials.  Click HERE or go to my Customer Rewards for more details and to see what this months tutorials are.

Click HERE to shop the clearance rack.

Happy Stamping, Karen!

****************************************************************************************************

APRIL 2020 PAPER PUMPKIN:  MY WONDERFUL FAMILY

SUBSCRIBE MARCH 11-APRIL 10

At Paper Pumpkin, we believe in making a difference—especially when it comes to helping you build relationships through papercrafting. For April, we created a fun, family appreciation themed card kit that would make it easy for you to share your hearts with those you love most: mom, dad, daughter, son, sister, and brother. April’s kit even includes Mother’s Day and Father’s Day sentiments, giving you the perfect way to show your appreciation for beloved parents on their special days with a beautiful, handmade card.
One more thing about this “fam-tastic” kit: The Paper Pumpkin team knows that everyone’s clan is unique. With that in mind, we provided sentiments that would include anyone in your life who feels like family; for instance, “brothers” and “sisters” who have helped you along the journey of life.

About the April Kit: 

  • Kit contains supplies for 8 cards and envelopes
  • Card size: 4-1/4″ x 5-1/2″ (10.8 x 14 cm)
  • Envelope size: 4-1/2″ x 5-3/4″ (11.4 x 14.6 cm)
  • Coordinating Colors: Crushed Curry, Early Espresso, Melon Mambo, Mint Macaron, Pear Pizzazz, Shaded Spruce, Soft Sea Foam

Subscribe for the April Paper Pumpkin kit from March 11–April 10 at paperpumpkin.com. Supplies may be limited toward the end of the subscription period

****************************************************************************************************

Card stock cuts for this project:

  • Bermuda Bay Cardstock 4 1/8″ X 5 3/8″ (inner liner DSP mat), 2 – 4 1/8″ X 2 5/8″ (card front embossed panel and inner liner mat), 4 1/4″ X 2 3/4″ (artwork mat)
  • Coastal Cabana Cardstock 4 1/4″ X 11″ (card base scored and folded at 5 1/2″ and 2 3/4″)
  • Whisper White Cardstock 4 1/8″ X 2 5/8″ (artwork), 4″ X 2 1/2″ (inner liner)
  • Birthday Bonanza Designer Series Paper 4″ X 5 1/4″ (inner liner), 2 1/4″ X6″ (piece for envelope flap)

****************************************************************************************************

Product List

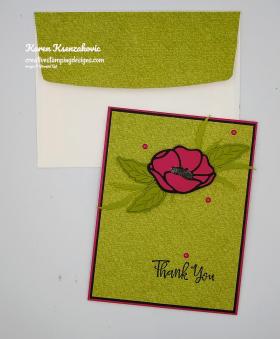
Stampin’ Up! Painted Poppies Thank You for Happy Inkin’ Thursday Blog Hop

Good Thursday morning my stamping friends. Welcome to the Happy Inkin’ Thursday Blog Hop. If you are hopping over from Akiko, thank you for stopping by. This week we had a Sketch Challenge. Be sure to hop around to see everyone’s beautiful projects.
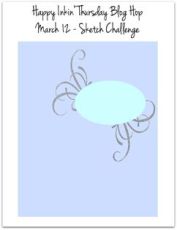
Here is the sketch we had to work from.

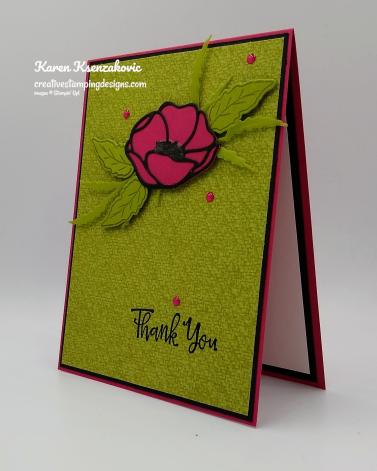
Here’s my card using this weeks sketch.

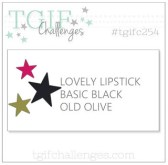
My colors are from TGIF Challenge #254.  Here are their colors.

I started by adhering a panel of Tropical Oasis Designer Series Paper to a Basic Black mat using Snail.  I stamped the sentiment from the Stampin’ Up! Peaceful Moments Cling Stamp Set in Versamark Ink on the bottom of the DSP panel.  I immediately sprinkled it with Black Stampin’ Emboss Powder and set it using my Heat Tool.

I cut out the small solid poppy using my Poppy Moments Dies from a panel of Lovely Lipstick cardstock.  I cut the outline of the poppy out from a panel of Basic Black cardstock.  I stamped the leaf image from the Stampin’ Up! Painted Poppies Cling Stamp Set in Old Olive Ink on a panel of Old Olive cardstock 3 times.  I cut the leaves out using my Painted Labels Dies.  I cut the vellum leaves out using my Poppy Moments Dies.  I adhered the outline of the poppy die to the solid die using Multipurpose Liquid Glue only in the center to hold it.  I adhered the leaves on the back of the poppy using Snail.  I adhered the poppy to the card front using Stampin’ Dimensionals.  I added  Clear Wink of Stella to the center of the poppy to give it a little sparkle.  I added s few Lovely Lipstick Happiness Blooms Enamel Dots to the card front.  I adhered the card front to a Lovely Lipstick card base using Stampin’ Dimensionals.

On the inside I stamped the sentiment from the Peaceful Moments stamp set in Tuxedo Black Memento Ink in the center of a Whisper White panel.  I stamped the smaller poppy image from the Painted Poppies stamp set in Tuxedo Black Memento Ink on the top and bottom corners of the panel.  I colored the images in using my Lovely Lipstick and Old Olive Stampin’ Blends Markers.  I adhered the Whisper White panel to a Basic Black mat using Snail and then to the inside of the Lovely Lipstick card base using Multipurpose Liquid Glue.

To finish my card I decorated a Medium Whisper White Envelope.  I stamped the poppy image from the Painted Poppies stamp set in Tuxedo Black Memento Ink on the bottom front of the envelope.  I stamped a couple leaves by the flower image.  I colored the images in using my Lovely Lipstick and Old Olive Stampin’ Blends Markers.  I adhered a panel of Tropical Oasis DSP to the envelope flap.

Thank you for visiting my blog today. I hope you liked my card and will give it a try. Now that you’ve seen my card, take a minute to hop through all our projects today. If you click on the Next Blog button, you’ll go to Amy’s page. Or you can just click on the names below to go directly to all the blogs! Happy Hopping!!
Amy Koenders:
Mary Deatherage:
Kristi Gray:
Jaimie Babarczy:
Sue Prather:
Karen Finkle:
Eva Dobilas:
Akiko Sudano:
Karen Ksenzakovic:

****************************************************************************************************

If you need any stamping supplies, I’d love to be your Demonstrator. Just click HERE to go directly to my online store or drop me an email if you have any questions. 

MY CURRENT HOST CODE IS: 4UXRJREH

Use this host code when you order $50 or greater and receive a free gift from me! If your order is over $150, please do not use this code, but you’ll still get the free gift. The free gift is your choice of any item valued up to $10.00 in either the 2019-2020 Annual Catalog or the 2020 January-June Mini Catalog!   For any orders $50 or more I will also send you my monthly class tutorials.  Click HERE or go to my Customer Rewards for more details and to see what this months tutorials are.
Click HERE to shop the clearance rack.

Happy Stamping, Karen!

****************************************************************************************************

APRIL 2020 PAPER PUMPKIN:  MY WONDERFUL FAMILY

SUBSCRIBE MARCH 11-APRIL 10

At Paper Pumpkin, we believe in making a difference—especially when it comes to helping you build relationships through papercrafting. For April, we created a fun, family appreciation themed card kit that would make it easy for you to share your hearts with those you love most: mom, dad, daughter, son, sister, and brother. April’s kit even includes Mother’s Day and Father’s Day sentiments, giving you the perfect way to show your appreciation for beloved parents on their special days with a beautiful, handmade card.
One more thing about this “fam-tastic” kit: The Paper Pumpkin team knows that everyone’s clan is unique. With that in mind, we provided sentiments that would include anyone in your life who feels like family; for instance, “brothers” and “sisters” who have helped you along the journey of life.

About the April Kit: 

  • Kit contains supplies for 8 cards and envelopes
  • Card size: 4-1/4″ x 5-1/2″ (10.8 x 14 cm)
  • Envelope size: 4-1/2″ x 5-3/4″ (11.4 x 14.6 cm)
  • Coordinating Colors: Crushed Curry, Early Espresso, Melon Mambo, Mint Macaron, Pear Pizzazz, Shaded Spruce, Soft Sea Foam

Subscribe for the April Paper Pumpkin kit from March 11–April 10 at paperpumpkin.com. Supplies may be limited toward the end of the subscription period

****************************************************************************************************

Card stock cuts for this project:

  • Basic Black Cardstock 4 1/8″ X 5 3/8″ (card front mat), 4″ X 5 1/4″ (inner liner mat), 1 3/4″ X 2 1/2″ (poppy outline)
  • Lovely Lipstick Cardstock 4 1/4″ X 11″ (card base scored and folded at 5 1/2″), 2 1/2″ X 2″ (poppy base)
  • Old Olive Cardstock 1″ X 5 1/4″ (leaves)
  • Whisper White Cardstock 3 3/4″ X 5″ (inner liner)
  • Tropical Oasis Designer Series Paper 4″ X 5 1/4″ (card front), 2 1/4″ X 6″ (piece for envelope flap)
  • Perennial Essence 12 X 12 Vellum 3″ X 3 1/2″ (leaves)

****************************************************************************************************

Product List