Stampin’ Up Shimmer Tea Together

Good Sunday morning my fellow stampers.  How is everyone doing today?  Is anyone doing anything this weekend?  I’m going to work and if today is like the past couple weekends, it’s going to be crazy busy.

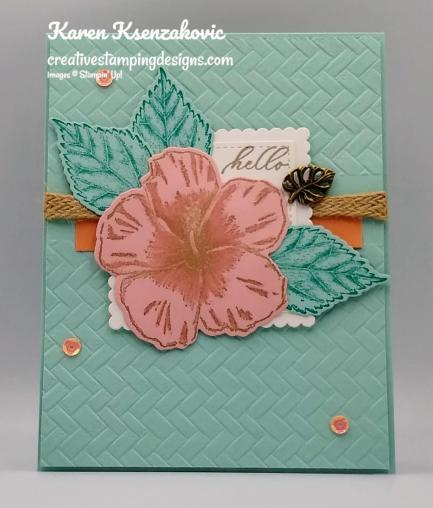
I have another clean and simple card for you today using one of my favorite stamp sets that’ll be retiring soon.  Here’s my card for today.

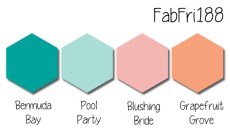
My design is from Inspire. Create. Challenge #068.  Here is their sketch.

I also joined in with Shopping Our Stash Challenge #419.  Their theme is ‘Mother’s Day’

I started by embossing a panel of Soft Sea Foam cardstock using the Subtle 3D Embossing Folder.  Using Multipurpose Liquid Glue, I adhered it to a Noble Peacock Specialty Designer Series Paper card front.

On a panel of Whisper White cardstock I stamped the tea cup from the Stampin’ Up! Tea Together Cling Stamp Set in Tuxedo Black Memento Ink.  I stamped the rose bud image from the Tea Together stamp set on the tea cup in Tuxedo Black Memento Ink.  I colored the rose bud images in using my Old Olive and So Saffron Stampin’ Blends markers.  I colored the edges of the tea cup in using my Soft Sea Foam Stampin’ Blends Markers.  I cut the image out using my Tea Time Dies.

I wrapped a piece of the Gold 1/4″ Shimmer Ribbon around the card front and tied a bow.  I adhered the teacup to the card front using Stampin’ Dimensionals.  I stamped the sentiment from the Stampin’ Up! Itty Bitty Greetings Cling Stamp Set in Old Olive Ink on a thin strip of Whisper White cardstock.  I adhered the sentiment to the tea cup using Snail.  I adhered the card front to a Soft Sea Foam card base using Stampin’ Dimensionals.  I added a few Gold Glitter Enamel Dots to the card front.

On the inside I stamped the tea pot image from the Tea Together stamp set in Soft Sea Foam Ink in the center of a Whisper White panel.  I stamped the sentiment from the Stampin’ Up! Friend Like You Photopolymer Stamp Set in the center of the tea pot in Old Olive Ink.  I added a little shading to the tea pot using my Soft Sea Foam Stampin’ Blends Markers.  I adhered the Whisper White panel to an Old Olive mat using Snail and then to the inside of the Soft Sea Foam card base using Multipurpose Liquid Glue.

To finish my card I decorated a Medium Whisper White Envelope.  I stamped the tea cup image from the Tea Together stamp set on the envelope front.  I stamped the sentiment from the Tea Together stamp set in Old Olive Ink in the center of the tea cup.  I colored the tea cup using my Soft Sea Foam Stampin’ Blends Markers.  I stamped the rose bud image from the Tea Together stamp set on the corners of the envelope flap and the larger rose image from the Tea Together stamp set in the center of the envelope flap all in Tuxedo Black Memento Ink.  I colored the images in using my Old Olive and So Saffron Stampin’ Blends Markers.

Thank you for stopping by my blog today.  I hope you liked my card and will give it a try. Happy Stamping!!

****************************************************************************************************

If you need any stamping supplies, I’d love to be your Demonstrator. Just click HERE to go directly to my online store or drop me an email if you have any questions. 

MY CURRENT HOST CODE IS: KBMV24AJ

Use this host code when you order $50 or greater and receive a free gift from me! If your order is over $150, please do not use this code, but you’ll still get the free gift. The free gift is your choice of any item valued up to $10.00 in either the 2019-2020 Annual Catalog or the 2020 January-June Mini Catalog!   For any orders $50 or more I will also send you my monthly class tutorials.  Click HERE or go to my Customer Rewards for more details and to see what this months tutorials are.

The Clearance Rack has been updated.  Click HERE to shop the clearance rack.

Happy Stamping, Karen!

****************************************************************************************************

THINGS ARE GOING FAST.  IF YOU ARE INTERESTED IN ANY OF THE RETIRING ITEMS, DON’T WALK, RUN OVER TO GRAB THEM WHILE YOU STILL CAN.

2019-2020 Annual Catalog and Mini Catalog Retiring List

Let me know if you have any questions about the retiring lists!  You can also download copies of the full retiring lists in PDF Form here:

  • Click here to get a copy of the full retiring list from the 2019-20 Annual Catalog.  The font is super tiny, so you’ll need to zoom out to read it!
  • Click here to get a copy of the full retiring list from the January-June 2020 Mini Catalog.  The font is super tiny, so you’ll need to zoom out to read it!

****************************************************************************************************

The Ornate Garden Suite available NOW.  Click HERE or on the image below to see a printable PDF of all the fabulous items available in the suite.

****************************************************************************************************

MAKING A DIFFERENCE: COVID-19 PRODUCT GIVEBACK

Stampin’ Up! is committed to making a difference in our global communities and caring about people first. As part of our Making a Difference program we’re offering a product giveback opportunity to support organizations that are helping COVID-19 frontline responders and communities vulnerable to the pandemic.

You can purchase the Share Sunshine PDF Download and we will donate 100% of the proceeds to COVID-19 efforts.

The Share Sunshine PDF Download is a digital stamp set that’s packed with both lighthearted and heartfelt sentiments and imagery relevant to the unique COVID-19 and social distancing situation we’re currently experiencing–including many ideas that came from you!  You can use the download in your cardmaking and papercrafting projects. Simply print the imagery on cardstock and cut it out using our Paper Trimmer, punches, or dies. Since we are physically distanced from each other, now is a perfect time to share sunshine with our friends and family by sending cards!

  • Product: Share Sunshine PDF Download. Buy it here!
  • Price: $12.00 USD
  • Dates: April 28 – June 2, 2020 or later; if the offer period extends beyond June 2, we’ll let you know

****************************************************************************************************

Card stock cuts for this project:

  • Old Olive Cardstock 4 1/8″ X 5 3/8″ (inner liner mat)
  • Soft Sea Foam Cardstock 4 1/4″ X 11″ (card base scored and folded at 5 1/2″), 3″ X 4 1/4″ (card front panel)
  • Whisper White Cardstock 2″ X 3″ (tea cup and sentiment), 4″ X 5 1/4″ (inner liner)
  • Noble Peacock Specialty Designer Series Paper 4 1/4″ X 5 1/2″ (card front)

****************************************************************************************************

Product List

Stampin’ Up! All Dressed To Impress CAS

Good Saturday morning my stamping friends.  How has everyone’s weekend started off?  We are having a beautiful spring day here.  They actually did open the parks today, but not the playgrounds.  I’m thinking since I have the day off and it’s so nice out, I may take my little fur baby and head out for a nice long walk.

For today I have a very quick and easy card for you using some retiring DSP and a stamp set and dies that are carrying over to the 2020-2021 Annual Catalog.  Here’s my card.

My design is from CAS Colour & Sketch Challenge #368.  Here is their sketch.

I adhered a 2 panels of Best Dressed Designer Series Paper to a panel of Whisper White cardstock using Snail.

I wrapped a piece of the Mint macaron 1/8″ Sheer Linen Ribbon around where the DSP meets in the middle and tied a bow.  I adhered the panel to a Whisper White card base using Multipurpose Liquid Glue.

On a small panel of Whisper White cardstock I stamped the sentiment from the Stampin’ Up! Dressed To Impress Photopolymer Stamp Set in Pretty Peacock Ink.  I cut the sentiment out using the All Dressed Up Dies and adhered it over the ribbon using Stampin’ Dimensionals.  Just a reminder that although this set is carrying over to the 2020-2021 Annual Catalog, the bundle price is not.  If you purchase this set now as a bundle you can save yourself 10%.   I added a couple Purple Posy 2019-2021 In-Color Faceted Dots on either side of the sentiment.

On the inside I stamped the sentiment from the Stampin’ Up! Peaceful Moments Cling Stamp Set in Pretty Peacock Ink in the center of a Whisper White panel.  I stamped the flower images from the Dressed To Impress stamp set in Tuxedo Black Memento Ink on 2 of the corners of the panel.  I colored the flowers in using my Mint Macaron and Purple Posy Stampin’ Blends Markers.  I adhered the Whisper White panel to a Mint Macaron mat using Snail and then to the inside of the Whisper White card base using Multipurpose Liquid Glue.

To finish my card I decorated a Medium Whisper White Envelope.  I stamped the flower image from the Dressed To Impress stamp set in Tuxedo Black Memento Ink on the bottom front of the envelope.  I colored the images in using my Mint Macaron and Purple Posy Stampin ‘ Blends Markers.  I adhered a panel of Best Dressed DSP to the envelope flap.

Thank you for stopping by my blog today.  I hope you liked my card and will give it a try. Happy Stamping!!

****************************************************************************************************

If you need any stamping supplies, I’d love to be your Demonstrator. Just click HERE to go directly to my online store or drop me an email if you have any questions. 

MY CURRENT HOST CODE IS: KBMV24AJ

Use this host code when you order $50 or greater and receive a free gift from me! If your order is over $150, please do not use this code, but you’ll still get the free gift. The free gift is your choice of any item valued up to $10.00 in either the 2019-2020 Annual Catalog or the 2020 January-June Mini Catalog!   For any orders $50 or more I will also send you my monthly class tutorials.  Click HERE or go to my Customer Rewards for more details and to see what this months tutorials are.

The Clearance Rack has been updated.  Click HERE to shop the clearance rack.

Happy Stamping, Karen!

****************************************************************************************************

THINGS ARE GOING FAST.  IF YOU ARE INTERESTED IN ANY OF THE RETIRING ITEMS, DON’T WALK, RUN OVER TO GRAB THEM WHILE YOU STILL CAN.

2019-2020 Annual Catalog and Mini Catalog Retiring List

Let me know if you have any questions about the retiring lists!  You can also download copies of the full retiring lists in PDF Form here:

  • Click here to get a copy of the full retiring list from the 2019-20 Annual Catalog.  The font is super tiny, so you’ll need to zoom out to read it!
  • Click here to get a copy of the full retiring list from the January-June 2020 Mini Catalog.  The font is super tiny, so you’ll need to zoom out to read it!

****************************************************************************************************

The Ornate Garden Suite available NOW.  Click HERE or on the image below to see a printable PDF of all the fabulous items available in the suite.

****************************************************************************************************

MAKING A DIFFERENCE: COVID-19 PRODUCT GIVEBACK

Stampin’ Up! is committed to making a difference in our global communities and caring about people first. As part of our Making a Difference program we’re offering a product giveback opportunity to support organizations that are helping COVID-19 frontline responders and communities vulnerable to the pandemic.

You can purchase the Share Sunshine PDF Download and we will donate 100% of the proceeds to COVID-19 efforts.

The Share Sunshine PDF Download is a digital stamp set that’s packed with both lighthearted and heartfelt sentiments and imagery relevant to the unique COVID-19 and social distancing situation we’re currently experiencing–including many ideas that came from you!  You can use the download in your cardmaking and papercrafting projects. Simply print the imagery on cardstock and cut it out using our Paper Trimmer, punches, or dies. Since we are physically distanced from each other, now is a perfect time to share sunshine with our friends and family by sending cards!

  • Product: Share Sunshine PDF Download. Buy it here!
  • Price: $12.00 USD
  • Dates: April 28 – June 2, 2020 or later; if the offer period extends beyond June 2, we’ll let you know

****************************************************************************************************

Card stock cuts for this project:

  • Mint Macaron Cardstock 4 1/8″ X 5 /3/8″ (inner liner mat)
  • Whisper White Cardstock 8 1/2″ X 5 1/2″ (card base scored and folded at 4 1/4″), 4 1/4″ X 5 1/2″ (card front), 4′ X 5 1/4″ (inner liner), 3″ X 1″ (sentiment)
  • Best Dressed Designer Series Paper 1 1/2″ X 5 1/2″ (bottom card front panel), 2 3/4″ X 5 1/2″ (top card front panel), 2 1/4″ X 6″ (piece for envelope flap)

****************************************************************************************************

Product List

Stampin’ Up! Happy Tails for Fun Fold Friday

Good Friday morning my fellow stampers and welcome to my Fun Fold Friday.  Happy May!!  Not sure where March and April went, but it’s May, which to me, means the warm weather should be here.  Hopefully it will get here soon.   How was everyone’s week?  The weekend is here again and we still can’t go out to do anything.  Parks are still closed along with a lot of other things.  I’ll be working on Sunday and hopefully doing a lot of card making tomorrow.

I have a card for you today that I don’t like to make, I don’t think any of us do.  One of my co-workers and friend lost her best fur friend this week.  Poor thing made it through his major surgery, when he was waking up went into cardiac arrest.  It was a real shock to her and her family.  I used the retiring stamp set for her card.  Here’s my card for today.

I started with a 4 1/4″ X 11″ Crumb Cake card base scored at 5 1/2″.  I made a little mark at 4 1/4″ on the top of the card front and scored from that mark down to the bottom  front corner.  I made 1/4″ score lines on the side and bottom of the triangle piece that folds down.

On a small panel of Whisper White cardstock I stamped the outline dog image from the Stampin’ Up! Happy Tails Photopolymer Stamp Set in Early Espresso Ink.  I stamped the spot image from the Happy Tails stamp set in Crumb Cake Ink, stamping off once, on top of the outline image. I stamped the collar image from the Happy Tails stamp set in Tuxedo Black Memento Ink.  I punched the dog out using my Dog Builder Punch.  The Dog Builder Punch, punches out a heart when you punch out the dog.  I colored the heart using my Dark Real Red Stampin’ Blends Marker and adhered it to the collar using a Glue Dot.  On a panel of Whisper White cardstock I stamped the outline of the dog house image from the Happy Tails stamp set in Crumb Cake Ink.  I stamped the fill dog house image from the Happy Tails stamp set in Crumb Cake Ink, stamping off once, on top of the outline.  I stamped the sentiment from the Happy Tails stamp set in Early Espresso Ink on the top right corner of the panel. I adhered the Whisper White panel to a Night of Navy mat using Snail.

I adhered the matted panel to the card front lining up the corners and centering it with the scored lines using Multipurpose Liquid Glue, only on the bottom left corner.  I adhered the punched out dog to the card front using Stampin’ Dimensionals.  I stamped the dog bone image from the Happy Tails stamp set in Crumb Cake Ink on a scrap of Crumb Cake cardstock and fussy cut it using my Paper Snips.  I adhered a small panel of Real Red Regals 6 X 6 Designer Series Paper to the left side of the card front using Snail.  I added the fussy cut bone using a Glue Dot.

You can see from the inside how I folded the card front panel down.  I adhered a panel of Real Red Regals 6 X 6 DSP to the inside back panel using Snail.  I stamped the sentiment from the Happy Tails stamp set in Early Espresso Ink in the center of a Whisper White panel.  I stamped the heart image from the Happy Tails stamp set in Real Red Ink in the 4 corners.  I adhered the Whisper White panel to a Night of Navy mat using Snail. I adhered the matted panel to the inside of the Crumb Cake card base using Multipurpose Liquid Glue, making sure it’s behind the card front panel.  I stamped the paw print image from the Happy Tails stamp set in Early Espresso Ink where you can see it when the card is closed.

To finish my card I decorated a Medium Whisper White Envelope.  I stamped the dog image from the Happy Tails stamp set in Early Espresso Ink on the bottom front of the envelope.  I stamped the spot image from the Happy Tails stamp set on the dog in Crumb Cake Ink, stamping off once.  I stamped the collar image from the Happy Tails stamp set in Tuxedo Black Memento Ink on the dog image.  I stamped the heart outline from the Happy Tails stamp set in Real Red Ink on the collar.  I stamped the pawprint image from the Happy Tails stamp set in Early Espresso Ink around the left side of the envelope front.  I adhered a panel of Real Red Regals 6 X 6 DSP to the envelope flap.

Thank you for stopping by today.  I hope you liked my fun fold and will give it a try. Happy Stamping!!

****************************************************************************************************

If you need any stamping supplies, I’d love to be your Demonstrator. Just click HERE to go directly to my online store or drop me an email if you have any questions. 

MY CURRENT HOST CODE IS: KBMV24AJ

Use this host code when you order $50 or greater and receive a free gift from me! If your order is over $150, please do not use this code, but you’ll still get the free gift. The free gift is your choice of any item valued up to $10.00 in either the 2019-2020 Annual Catalog or the 2020 January-June Mini Catalog!   For any orders $50 or more I will also send you my monthly class tutorials.  Click HERE or go to my Customer Rewards for more details and to see what this months tutorials are.

The Clearance Rack has been updated.  Click HERE to shop the clearance rack.

Happy Stamping, Karen!

****************************************************************************************************

THINGS ARE GOING FAST.  IF YOU ARE INTERESTED IN ANY OF THE RETIRING ITEMS, DON’T WALK, RUN OVER TO GRAB THEM WHILE YOU STILL CAN.

2019-2020 Annual Catalog and Mini Catalog Retiring List

Let me know if you have any questions about the retiring lists!  You can also download copies of the full retiring lists in PDF Form here:

  • Click here to get a copy of the full retiring list from the 2019-20 Annual Catalog.  The font is super tiny, so you’ll need to zoom out to read it!
  • Click here to get a copy of the full retiring list from the January-June 2020 Mini Catalog.  The font is super tiny, so you’ll need to zoom out to read it!

****************************************************************************************************

The Ornate Garden Suite available NOW.  Click HERE or on the image below to see a printable PDF of all the fabulous items available in the suite.

****************************************************************************************************

MAKING A DIFFERENCE: COVID-19 PRODUCT GIVEBACK

Stampin’ Up! is committed to making a difference in our global communities and caring about people first. As part of our Making a Difference program we’re offering a product giveback opportunity to support organizations that are helping COVID-19 frontline responders and communities vulnerable to the pandemic.

You can purchase the Share Sunshine PDF Download and we will donate 100% of the proceeds to COVID-19 efforts.

The Share Sunshine PDF Download is a digital stamp set that’s packed with both lighthearted and heartfelt sentiments and imagery relevant to the unique COVID-19 and social distancing situation we’re currently experiencing–including many ideas that came from you!  You can use the download in your cardmaking and papercrafting projects. Simply print the imagery on cardstock and cut it out using our Paper Trimmer, punches, or dies. Since we are physically distanced from each other, now is a perfect time to share sunshine with our friends and family by sending cards!

  • Product: Share Sunshine PDF Download. Buy it here!
  • Price: $12.00 USD
  • Dates: April 28 – June 2, 2020 or later; if the offer period extends beyond June 2, we’ll let you know

****************************************************************************************************

Card stock cuts for this project:

  • Crumb Cake Cardstock 4 1/4″ Z 11″ (card base scored and folded at 5 1/2″)
  • Night of Navy Cardstock 3″ X 3″ (artwork mat), 3 1/2″ X 3 1/2″ (inner liner mat)
  • Whisper White Cardstock 2 3/4″ X 2 3/4″ (artwork), 2″ X 2 1/2″ (dog), 3 1/4″ X 3 1/4″ (inner liner)
  • Regals 6 X 6 Designer Series Paper 1 1/8″ X 4 1/8″ (strip on card front), 5 3/8″ X 4 1/4″ (inside card base), 2 1/4″ X 6″ (piece for envelope flap)

****************************************************************************************************

Product List

Stampin’ Up! Amazing Birthday For The Happy Inkin’ Thursday Blog Hop

Good Thursday morning my stamping friends and welcome to the Happy Inkin’ Thursday Blog Hop. How is everyone doing today? Hope you are all staying healthy.  If you are hopping over from Akiko, thank you for stopping by my blog. Be sure to take a moment to hop around to see everyone’s beautiful projects today. This week we had a Color Challenge, here are the colors we got to work with.

Here’s what I came up with for these colors.

My design is from Try Stampin’ On Tuesday Challenge #454.  Here is their sketch.

I started by embossing a Bermuda Bay card front using the Coastal Weave 3D Embossing Folder.  I adhered a panel of Birthday Bonanza Designer Series Paper to the embossed panel using Multipurpose Liquid Glue and adhered the panel to a Bermuda Bay card base using Multipurpose Liquid Glue.

On a panel of Whisper White cardstock I stamped the large image from the Stampin’ Up! Everything Amazing Photopolymer Stamp Set in Bermuda Bay Ink.  I stamped the insert words from the Everything Amazing stamp set in Grapefruit Grove Ink.  I adhered the artwork to a Daffodil Delight mat using Snail.

Using the Ornate Borders Dies, I cut a strip of Whisper White cardstock.  I adhered a thin strip of the Birthday Bonanza DSP above the cut border using Multipurpose Liquid Glue.  I adhered the artwork to the card front using Stampin’ Dimensionals and the border just below the artwork using Stampin’ Dimensionals.  I added a few Gingham Gala Adhesive-Backed Sequins to the card front.

On the inside I stamped the sentiments from the Stampin’ Up! Itty Bitty Birthdays Cling Stamp Set in Bermuda Bay Ink in the center of a Whisper White panel.  I stamped the balloon image from the Everything Amazing stamp set in Daffodil Delight Ink on either side of the sentiment.  I stamped the streamer image from the Everything Amazing stamp set randomly in Bermuda Bay and Grapefruit Grove Ink on the panel.  I adhered the Whisper White panel to a Daffodil Delight mat using Snail and then to the inside of the Bermuda Bay card base using Multipurpose Liquid Glue.

To finish my card I decorated a Medium Whisper White Envelope.  I adhered a strip of the Birthday Bonanza DSP to the envelope front and a panel on the envelope flap.  I stamped the balloon and streamer images from the Everything Amazing stamp set in Bermuda Bay, Daffodil Delight and Grapefruit Grove Inks on the bottom front of the envelope.

Thank you for visiting my blog today. I hope you liked my card and will give it a try. Now that you’ve seen my card, take a minute to hop through all our projects today. If you click on the Next Blog button, you’ll go to Amy’s page. Or you can just click on the names below to go directly to all the blogs! Happy Hopping!!

Karen Ksenzakovic: You Are Here

****************************************************************************************************

If you need any stamping supplies, I’d love to be your Demonstrator. Just click HERE to go directly to my online store or drop me an email if you have any questions. 

MY CURRENT HOST CODE IS: KBMV24AJ

Use this host code when you order $50 or greater and receive a free gift from me! If your order is over $150, please do not use this code, but you’ll still get the free gift. The free gift is your choice of any item valued up to $10.00 in either the 2019-2020 Annual Catalog or the 2020 January-June Mini Catalog!   For any orders $50 or more I will also send you my monthly class tutorials.  Click HERE or go to my Customer Rewards for more details and to see what this months tutorials are.

The Clearance Rack has been updated.  Click HERE to shop the clearance rack.

Happy Stamping, Karen!

****************************************************************************************************

THINGS ARE GOING FAST.  IF YOU ARE INTERESTED IN ANY OF THE RETIRING ITEMS, DON’T WALK, RUN OVER TO GRAB THEM WHILE YOU STILL CAN.

2019-2020 Annual Catalog and Mini Catalog Retiring List

Let me know if you have any questions about the retiring lists!  You can also download copies of the full retiring lists in PDF Form here:

  • Click here to get a copy of the full retiring list from the 2019-20 Annual Catalog.  The font is super tiny, so you’ll need to zoom out to read it!
  • Click here to get a copy of the full retiring list from the January-June 2020 Mini Catalog.  The font is super tiny, so you’ll need to zoom out to read it!

****************************************************************************************************

The Ornate Garden Suite available NOW.  Click HERE or on the image below to see a printable PDF of all the fabulous items available in the suite.

****************************************************************************************************

MAKING A DIFFERENCE: COVID-19 PRODUCT GIVEBACK

Stampin’ Up! is committed to making a difference in our global communities and caring about people first. As part of our Making a Difference program we’re offering a product giveback opportunity to support organizations that are helping COVID-19 frontline responders and communities vulnerable to the pandemic.

You can purchase the Share Sunshine PDF Download and we will donate 100% of the proceeds to COVID-19 efforts.

The Share Sunshine PDF Download is a digital stamp set that’s packed with both lighthearted and heartfelt sentiments and imagery relevant to the unique COVID-19 and social distancing situation we’re currently experiencing–including many ideas that came from you!  You can use the download in your cardmaking and papercrafting projects. Simply print the imagery on cardstock and cut it out using our Paper Trimmer, punches, or dies. Since we are physically distanced from each other, now is a perfect time to share sunshine with our friends and family by sending cards!

  • Product: Share Sunshine PDF Download. Buy it here!
  • Price: $12.00 USD
  • Dates: April 28 – June 2, 2020 or later; if the offer period extends beyond June 2, we’ll let you know

****************************************************************************************************

Card stock cuts for this project:

  • Bermuda Bay Cardstock 8 1/2″ X 5 1/2″ (card base scored and folded at 4 1/4″), 4 1/4″ X 5 1/2″ (card front)
  • Daffodil Delight Cardstock 3 3/4″ X 2 1/2″ (artwork mat), 4 1/8″ X 5 3/8″ (inner liner mat)
  • Whisper White Cardstock 3 5/8″ X 2 3/8″ (artwork), 1/2″ X 4 1/2″(card front border)
  • Birthday Bonanza Designer Series Paper 3 1/2″ X 5 1/2″ (card front panel), 3/8″ X 4 1/2″ (border strip), 2 1/4″ X 6″ (piece for envelope flap)

****************************************************************************************************

Product List

Stampin’ Up! Grateful We Are Friends

Good Wednesday morning my stamping friends.  How is everyone’s week going?  We’re halfway through and almost to the weekend again.  We are still quarantined here in NJ, so I won’t be going anywhere except to work.

I’ve been making a lot of Mother’s Day cards lately, in case you haven’t noticed.  I like to send them out to my family and friends. Today I have another one for you using a set that will be carrying over to the new 2020-2021 Annual Catalog.  Here’s my card for today.

My colors were inspired by Sunday Stamps Color Challenge #229.  Here are their colors.

My design is from Paper Players Sketch Challenge #488.  Here is their sketch.

I started by cutting a panel of Peaceful Poppies Designer Series Paper using the largest Stitched Rectangle Die.  I adhered it to a Pretty Peacock mat using Snail and adhered it to a Pool Party card base using Multipurpose Liquid Glue.

On a panel of Whisper White cardstock I stamped the large flower image from the Stampin’ Up! Band Together Cling Stamp Set in Tuxedo Black Memento Ink.  I colored the image in using my Daffodil Delight, Granny Apple Green and Mango Melody Stampin’ Blends Markers.  The top flower is the Daffodil Delight and the bottom is the Mango Melody, but you can’t really see the difference in the photo.  I cut the image out using the 4th largest Stitched Rectangle Die and adhered it to a Pretty Peacock mat using Snail.  I adhered it to the card front using Stampin’ Dimensionals.

On a small panel of Whisper White cardstock, I stamped the butterfly image from the Stampin’ Up! Butterfly Gala Photopolymer Stamp Set, in Tuxedo Black Memento Ink.  I stamped the fill images from the Butterfly Gala stamp set in using Mango Melody Ink.  I punched the image out using my Butterfly Duet Punch.  I brushed the butterfly with my Clear Wink of Stella to give it a little shimmer.  I stamped the butterflies antenna on the flower in Tuxedo Black Memento Ink and adhered the butterfly to the artwork using Multipurpose Liquid Glue.  I stamped the sentiment from the Band Together stamp set in Tuxedo Black Memento Ink on a Whisper White panel and cut it out using the smallest oval from the Stitched Shapes Dies.  I adhered the sentiment to the bottom of the artwork using Glue Dots.  I tied a small bow using the Pretty Peacock/Old Olive 3/8″ Reversible Ribbon and adhered it to the sentiment using a Glue Dot.

On the inside I stamped the large flower image from the Band Together stamp set in Granny Apple Green Ink on a Whisper White panel, stamping off 3 times to get a very light image.  I stamped the sentiment from the Stampin’ Up! Strong & Beautiful Cling Stamp Set in Tuxedo Black Memento Ink in the center of the panel.  I adhered the Whisper White panel to a Pretty Peacock mat using Snail and then to the inside of the Pool Party card base using Multipurpose Liquid Glue.

To finish my card I decorated a Medium Whisper White Envelope.  I stamped the large flower image from the Band Together stamp set on either side of the envelope front.  I colored the images in using my Daffodil Delight, Granny Apple Green and Mango Melody Stampin’ Blends Markers.  I adhered a panel of Peaceful Poppies DSP to the envelope flap.

Thank you for stopping by my blog today.  I hope you liked my card and will give it a try. Happy Stamping!!

****************************************************************************************************

If you need any stamping supplies, I’d love to be your Demonstrator. Just click HERE to go directly to my online store or drop me an email if you have any questions. 

MY CURRENT HOST CODE IS: KBMV24AJ

Use this host code when you order $50 or greater and receive a free gift from me! If your order is over $150, please do not use this code, but you’ll still get the free gift. The free gift is your choice of any item valued up to $10.00 in either the 2019-2020 Annual Catalog or the 2020 January-June Mini Catalog!   For any orders $50 or more I will also send you my monthly class tutorials.  Click HERE or go to my Customer Rewards for more details and to see what this months tutorials are.

The Clearance Rack has been updated.  Click HERE to shop the clearance rack.

Happy Stamping, Karen!

****************************************************************************************************

THINGS ARE GOING FAST.  IF YOU ARE INTERESTED IN ANY OF THE RETIRING ITEMS, DON’T WALK, RUN OVER TO GRAB THEM WHILE YOU STILL CAN.

2019-2020 Annual Catalog and Mini Catalog Retiring List

Let me know if you have any questions about the retiring lists!  You can also download copies of the full retiring lists in PDF Form here:

  • Click here to get a copy of the full retiring list from the 2019-20 Annual Catalog.  The font is super tiny, so you’ll need to zoom out to read it!
  • Click here to get a copy of the full retiring list from the January-June 2020 Mini Catalog.  The font is super tiny, so you’ll need to zoom out to read it!

****************************************************************************************************

The Ornate Garden Suite available NOW.  Click HERE or on the image below to see a printable PDF of all the fabulous items available in the suite.

****************************************************************************************************

MAKING A DIFFERENCE: COVID-19 PRODUCT GIVEBACK

Stampin’ Up! is committed to making a difference in our global communities and caring about people first. As part of our Making a Difference program we’re offering a product giveback opportunity to support organizations that are helping COVID-19 frontline responders and communities vulnerable to the pandemic.

You can purchase the Share Sunshine PDF Download and we will donate 100% of the proceeds to COVID-19 efforts.

The Share Sunshine PDF Download is a digital stamp set that’s packed with both lighthearted and heartfelt sentiments and imagery relevant to the unique COVID-19 and social distancing situation we’re currently experiencing–including many ideas that came from you!  You can use the download in your cardmaking and papercrafting projects. Simply print the imagery on cardstock and cut it out using our Paper Trimmer, punches, or dies. Since we are physically distanced from each other, now is a perfect time to share sunshine with our friends and family by sending cards!

  • Product: Share Sunshine PDF Download. Buy it here!
  • Price: $12.00 USD
  • Dates: April 28 – June 2, 2020 or later; if the offer period extends beyond June 2, we’ll let you know

****************************************************************************************************

Card stock cuts for this project:

  • Pool Party Cardstock 4 1/4″ X 11″ (card base scored and folded at 5 1/2″)
  • Pretty Peacock Cardstock 3 7/8″ X 5 1/4″ (card front mat), 2 11/16″ X 4 1/16″ (artwork mat), 4 1/8″ X 5 3/8″ (inner liner mat)
  • Whisper White Cardstock 3″ X 4 1/4″ (artwork), 4″ X 5 1/4″(inner liner), 2″ X 1″ (sentiment), 2 1/4″ X 2 1/4″(butterfly)
  • Peaceful Poppies Designer Series Paper 4″ X 5 1/4″ (card front), 2 1/4″ X 6″ (piece for envelope flap)

****************************************************************************************************

Product List

Stampin’ Up! Tropical Hello

Good Tuesday morning my fellow stampers.  How has everyone’s week started off?  I’ve got a busy week ahead.  Today is my only day off 😦  Normally I only work on Monday’s and Wednesday’s, but it’s the end of the month and the 1st of May on Friday, so I have to work.  I don’t know about you, but April was a big blur to me.  When I was sitting at my desk yesterday I looked at the calendar and didn’t even realize that the month was just about over.  All my days are just blending together lately.

Today I used some more of the retiring items for my card.  I want to use them as much as possible because once they are gone, I won’t use them.  Here’s my card for today.

My colors were inspired by Fab Friday Color Challenge # 188.  Here are their colors.

My sketch is from Just Add Ink Challenge #502.  Here is their sketch.

I joined in with Always Fun Challenge #160 also.  There theme challenge is to use ‘Embossing Folders’.

I started by embossing a Pool Party card front using the Coastal Weave 3D Embossing Folder.  I embossed the top 1/3 then turned the cardstock around leaving about 3/4″ and embossed the bottom section.   I wrapped a piece of the 5/16″ Braided Burlap Trim around the un-embossed section and secured it on the back of the panel using Snail.  I adhered a strip of Grapefruit Grove cardstock just under the trim using Snail.

On a panel of Whisper White cardstock I stamped the sentiment from the Stampin’ Up! Timeless Tropical Cling Stamp Set in Crumb Cake Ink.  I cut the panel using the 2nd largest square from the Stitched Shapes Dies, making sure the sentiment was in the top right corner.  I cut a scalloped square from a panel of Whisper White cardstock using my Layering Squares Dies.  I adhered the stitched square to the scalloped square using Snail.

On a panel of Blushing Bride cardstock I stamped the hibiscus flower from the Timeless Tropical stamp set in Crumb Cake Ink.  I highlighted the center of the flower using my Blushing Bride Stampin’ Write Marker and added some Clear Wink of Stella to the center of the flower.  I cut the image out using my In The Tropics Dies.  On a panel of Pool Party cardstock I stamped the leaf image from the Timeless Tropical stamp set in Bermuda Bay Ink 3 times.  I cut the images out using my In The Tropics Dies.  I adhered the leaves to the back of the flower using Glue Dots and adhered the flower to the sentiment square using Multipurpose Liquid Glue.  I adhered the artwork to the card front using Stampin’ Dimensionals.  I added a Tropical Oasis Trinket just under the sentiment using a Glue Dot.  I adhered the card front to a Pool Party card base using Stampin’ Dimensionals.  I added a few Grapefruit Grove Gingham Gala Adhesive-Backed Sequins to the card front.

On the inside I stamped the sentiments from the Stampin’ Up! Strong & Beautiful Cling Stamp Set in Crumb Cake Ink in the center of a Whisper White panel.  I stamped the hibiscus image from the Timeless Tropical stamp set in Blushing Bride Ink on the bottom of the panel.  Using the masking technique, I stamped the leaves from the Timeless Tropical stamp set around the flower in Pool Party Ink.  I adhered the Whisper White panel to a Blushing Bride mat using Snail and then to the inside of the Pool Party card base using Multipurpose Liquid Glue.

To finish my card I decorated a Medium Whisper White Envelope.  I stamped the hibiscus from the Timeless Tropical stamp set in Blushing Bride Ink on the bottom front of the envelope.  I stamped the leaf image from the Timeless Tropical stamp set in Pool Party Ink around the flower and on the envelope flap.

Thank you for stopping by my blog today.  I hope you liked my card and will give it a try. Although the stamp set and dies will be carrying over to the new 2020-2021 Annual Catalog, the bundle pricing will not.  You can still save 10% by purchasing this bundle before June 2nd. Don’t forget, the Grapefruit Grove cardstock, Tropical Oasis Trinkets, Coastal Weave 3D Embossing Folder, the Braided Burlap Trim and the Gingham Gala Adhesive-Backed Sequins are all retiring.  Now’s the time to grab them before they’re gone.  Happy Stamping!!

****************************************************************************************************

If you need any stamping supplies, I’d love to be your Demonstrator. Just click HERE to go directly to my online store or drop me an email if you have any questions. 

MY CURRENT HOST CODE IS: KBMV24AJ

Use this host code when you order $50 or greater and receive a free gift from me! If your order is over $150, please do not use this code, but you’ll still get the free gift. The free gift is your choice of any item valued up to $10.00 in either the 2019-2020 Annual Catalog or the 2020 January-June Mini Catalog!   For any orders $50 or more I will also send you my monthly class tutorials.  Click HERE or go to my Customer Rewards for more details and to see what this months tutorials are.

The Clearance Rack has been updated.  Click HERE to shop the clearance rack.

Happy Stamping, Karen!

****************************************************************************************************

THINGS ARE GOING FAST.  IF YOU ARE INTERESTED IN ANY OF THE RETIRING ITEMS, DON’T WALK, RUN OVER TO GRAB THEM WHILE YOU STILL CAN.

2019-2020 Annual Catalog and Mini Catalog Retiring List

Let me know if you have any questions about the retiring lists!  You can also download copies of the full retiring lists in PDF Form here:

  • Click here to get a copy of the full retiring list from the 2019-20 Annual Catalog.  The font is super tiny, so you’ll need to zoom out to read it!
  • Click here to get a copy of the full retiring list from the January-June 2020 Mini Catalog.  The font is super tiny, so you’ll need to zoom out to read it!

****************************************************************************************************

The Ornate Garden Suite available NOW.  Click HERE or on the image below to see a printable PDF of all the fabulous items available in the suite.

****************************************************************************************************

Card stock cuts for this project:

  • Blushing Bride Cardstock 2 3/4″ X 2 3/4″ (flower), 4″ X 5 1/4″ (inner liner mat)
  • Grapefruit Grove Cardstock 1/2″ X 3 1/2″(strip on card front)
  • Pool Party Cardstock 4 1/4″ X 11″ (card base scored and folded at 5 1/2″), 4 1/8″ X 5 3/8″ (card front), 5 1/2″ X 1 3/4″ (leaves)
  • Whisper White Cardstock 3″ X 6″ (squares), 3 3/4″ X 5″ (inner liner)

****************************************************************************************************

Product List

Stampin’ Up! Friends Like You

Good Monday morning my stamping friends.  How was everyone’s weekend?  Saturday was a beautiful day here, but Sunday was rainy and chilly.  Sorry I missed yesterday posting.  I got a call at 6am from one of my cashiers telling me she was at the vet with her dog and wouldn’t be able to get in to work on time.  Of course I had to go in and cover for her, so I didn’t have time to get my post done for you.

Today’s card uses some of the 2018-2020 retiring colors, one of them is not my favorite.  My team leader, Amy, thinks she is going to get me to start liking yellow.  I don’t think it is going to happen, though I do like it in my card.  Here’s what I made for today.

My sketch is from Freshly Made Sketches Challenge #432.  Here is their sketch.

My colors are from CAS Colours & Sketch Challenge #367.  Here are their colors.

I started by stamping the rose bud image from the Stampin’ Up! Tea Together Cling Stamp Set in Tuxedo Black Memento Ink across a panel of Whisper White cardstock.  I am definitely going to miss this stamp set.  I colored the images in using my Call Me Clover and Pineapple Punch Stampin’ Blends Markers.

I stamped the sentiment from the Stampin’ Up! Positive Thoughts Cling Stamp Set in Blueberry Bushel Ink below the row of rose buds.  I adhered the Whisper White card front to a Pineapple Punch mat using Snail.

I cut a scalloped oval using my Layering Ovals Dies out of a panel of Blueberry Bushel cardstock.  I then cut the center out using a solid oval from the Layering Ovals Dies that was 2 sizes smaller.  I adhered the oval to the card front using Stampin’ Dimensionals.  On a panel of Whisper White cardstock I stamped the large rose image from the Tea Together stamp set in Tuxedo Black Memento Ink.  I colored the image in using my Call Me Clover and Pineapple Punch Stampin’ Blends Markers.  I cut the image out using my Tea Time Dies and adhered it to the oval using Glue Dots.  I adhered the card front to a Whisper White card base using Multipurpose Liquid Glue.  I added a few Happiness Blooms Enamel Dots to the card front.

On the inside I stamped the sentiment from the Tea Together stamp set in Blueberry Bushel Ink in the center of a Whisper White panel.  I adhered a strip of Call Me Clover cardstock to the bottom of the panel using Snail.  I adhered the Whisper White panel to a Pineapple Punch mat using Snail and then to the inside of the Whisper White card base using Multipurpose Liquid Glue.  On a panel of Whisper White cardstock I stamped the rose bud image from the Tea Together stamp set 5 times.  I colored the images in using my Call Me Clover and Pineapple Punch Stampin’ Blends Markers  and cut all the images out using my Tea Time Dies.  I adhered the rose buds to the bottom of the Whisper White panel just under the Call Me Clover strip Using Multipurpose Liquid Glue.

To finish my card I decorated a Medium Whisper White Envelope.  I stamped the large rose image from the Tea Together stamp set in Tuxedo Black Memento Ink on the bottom front and the envelope flap.  I colored the images in using my Call Me Clover and Pineapple Punch Stampin’ Blends Markers.

Thank you for stopping by my blog today.  I hope you liked my card and will give it a try.  The Tea Together stamp set, 2018-2020 In-Color cardstock, Ink, Stampin’ Blends Markers and the Happiness Blooms Enamel Dots are all retiring soon.  If you like these items, don’t wait. Grab them while they are still available.  These items are going fast.  Happy Stamping!!

****************************************************************************************************

If you need any stamping supplies, I’d love to be your Demonstrator. Just click HERE to go directly to my online store or drop me an email if you have any questions. 

MY CURRENT HOST CODE IS: KBMV24AJ

Use this host code when you order $50 or greater and receive a free gift from me! If your order is over $150, please do not use this code, but you’ll still get the free gift. The free gift is your choice of any item valued up to $10.00 in either the 2019-2020 Annual Catalog or the 2020 January-June Mini Catalog!   For any orders $50 or more I will also send you my monthly class tutorials.  Click HERE or go to my Customer Rewards for more details and to see what this months tutorials are.

The Clearance Rack has been updated.  Click HERE to shop the clearance rack.

Happy Stamping, Karen!

****************************************************************************************************

2019-2020 Annual Catalog and Mini Catalog Retiring List

Let me know if you have any questions about the retiring lists!  You can also download copies of the full retiring lists in PDF Form here:

  • Click here to get a copy of the full retiring list from the 2019-20 Annual Catalog.  The font is super tiny, so you’ll need to zoom out to read it!
  • Click here to get a copy of the full retiring list from the January-June 2020 Mini Catalog.  The font is super tiny, so you’ll need to zoom out to read it!

****************************************************************************************************

MAY 2020 PAPER PUMPKIN:

DESIGNED WITH (IN) COLOR IN MIND

SUBSCRIBE APRIL 11- MAY 10

The Paper Pumpkin team loves planning fun surprises, so we’ve been VERY excited to let you know what we have in store for the month of May: a fabulous kit featuring 2020–2022 In Colors, plus Purple Posy, an In Color from the 2019–2021 collection. This means that as Paper Pumpkin subscribers, you will be first to get your hands on new In Color products. And that’s just the beginning of things to love about this kit!

A Kit In Color

  • Kit contains supplies for 12 cards and envelopes
  • 8 cards are traditional size
    • Card size: 4-1/4″ x 5-1/2″ (10.8 x 14 cm)
    • Envelope size: 4-1/2″ x 5-3/4″ (11.4 x 14.6 cm)
  • 4 cards are note card size
    • Notecard size: 5″ x 3-1/2″ (12.7 x 8.9 cm)
    • Envelope size: 5-1/8″ x 3-5/8″ (13 x 9.2 cm)

Coordinating Colors: Bumblebee, Just Jade, Magenta Madness, Misty Moonlight, Pumpkin Pie, and Purple Posy

  • Subscribe for the May 2020 Paper Pumpkin kit from April 11–May 10 at paperpumpkin.com.
  • Supplies may be limited toward the end of the subscription period.
  • The In Color reveal happens April 24, so stay tuned!

****************************************************************************************************

The Ornate Garden Suite available NOW.  Click HERE or on the image below to see a printable PDF of all the fabulous items available in the suite.

****************************************************************************************************

Card stock cuts for this project:

  • Blueberry Bushel Cardstock 3″ X 2″ (oval)
  • Call Me Clover Cardstock 1/2″ X 4″ (inner strip)
  • Pineapple Punch Cardstock 2 – 4 1/8″ X 5 3/8″ (card front and inner liner mats)
  • Whisper White Cardstock 4 1/4″ X 11″ (card base scored and folded at 5 1/2″), 2 – 4″ X 5 1/4″ (card front and inner liner), 5′ X 2″ (rose and rose buds)

****************************************************************************************************

Product List

Stampin’ Up! Ornate Hello

Good Saturday morning my fellow stampers.  Does anyone have any plans for this weekend?  Maybe some gardening, spring cleaning, crafting, binge watching?  I’ll be working today, but I do have off tomorrow.  I’m hoping to start re-organizing my craft area to get ready for some of the new things that will be coming in the 2020-2021 Annual Catalog.  We got a sneak peek at it this week, I can’t wait till I can place my order.  That’s one of the best parts of being a demonstrator, you get to order early.  If anyone is interested in joining our team, drop me a line and I would be happy to help you sign up.

For today I have one more card using the Ornate Garden Suite.  This was another one I was playing around with doing for my video last Saturday, but decided on a different one.  I made it to use for an Anniversary, but it could easily be used for a birthday too.  Here’s my card for today.

I started by coloring a panel of the Ornate Garden Specialty Designer Series Paper using my Light Mint Macaron, Light Night of Navy, Light Pineapple Punch and Light So Saffron Stampin’ Blends Markers.  One of the great things about 2 of the designs from this DSP pack is that you can color them any colors and any way you want.

Using the beautiful Ornate Borders Dies, I cut a panel of Night of Navy cardstock using the flower border.  I adhered the colored DSP to the edge of the die cut border using Snail and then adhered it to a So Saffron card base using Multipurpose Liquid Glue.  I added 3 Pearl Basic Jewels in the center of the die cut flowers down the side.  I love the way the Night of Navy looks on top of the So Saffron.

To pick up the gold from the DSP, using the Ornate Layers Dies, I cut a Gold Foil Sheet using the small frame.  I stamped the sentiment from the Stampin’ Up! Timeless Tulips Photopolymer Stamp Set in Soft Suede Ink on a small panel of Whisper White cardstock.  I stamped the small flower image from the Stampin’ Up! Ornate Style Cling Stamp Set in Soft Suede Ink above and below the sentiment.  I colored the images in using my Light Mint Macaron and Light Pineapple Punch Stampin’ Blends Markers.  I adhered the Whisper White panel to the Gold Foil frame using Stampin’ Dimensionals and then to the card front using Stampin’ Dimensionals.

On the inside I stamped the sentiment from the Stampin’ Up! Well Said Cling Stamp Set in Soft Suede Ink in the center of a Whisper White panel .  I stamped the large floral image from the Ornate Style stamp set in So Saffron Ink over the sentiment, stamping off once.  I adhered the Whisper White panel to a Night of Navy mat using Snail and then to the inside of the So Saffron card base using Multipurpose Liquid Glue.

To finish my card I decorated a Medium Whisper White Envelope.  I stamped the small flower image from the Ornate Style stamp set across the bottom of the envelope front in Soft Suede Ink.  I colored the images in using my Light Mint Macaron and Light Pineapple Punch Stampin’ Blends Markers.  I adhered a panel of the Ornate Garden Specialty DSP, which I had colored using my Light Mint Macaron, Light Night of Navy, Light Pineapple Punch and Light So Saffron Stampin’ Blends Markers,  to the envelope flap.

Thank you for stopping by my blog today.  I hope you liked my card and will give it a try. Happy Stamping!!

****************************************************************************************************

If you need any stamping supplies, I’d love to be your Demonstrator. Just click HERE to go directly to my online store or drop me an email if you have any questions. 

MY CURRENT HOST CODE IS: KBMV24AJ

Use this host code when you order $50 or greater and receive a free gift from me! If your order is over $150, please do not use this code, but you’ll still get the free gift. The free gift is your choice of any item valued up to $10.00 in either the 2019-2020 Annual Catalog or the 2020 January-June Mini Catalog!   For any orders $50 or more I will also send you my monthly class tutorials.  Click HERE or go to my Customer Rewards for more details and to see what this months tutorials are.

The Clearance Rack has been updated.  Click HERE to shop the clearance rack.

Happy Stamping, Karen!

****************************************************************************************************

2019-2020 Annual Catalog and Mini Catalog Retiring List

Let me know if you have any questions about the retiring lists!  You can also download copies of the full retiring lists in PDF Form here:

  • Click here to get a copy of the full retiring list from the 2019-20 Annual Catalog.  The font is super tiny, so you’ll need to zoom out to read it!
  • Click here to get a copy of the full retiring list from the January-June 2020 Mini Catalog.  The font is super tiny, so you’ll need to zoom out to read it!

****************************************************************************************************

MAY 2020 PAPER PUMPKIN:

DESIGNED WITH (IN) COLOR IN MIND

SUBSCRIBE APRIL 11- MAY 10

The Paper Pumpkin team loves planning fun surprises, so we’ve been VERY excited to let you know what we have in store for the month of May: a fabulous kit featuring 2020–2022 In Colors, plus Purple Posy, an In Color from the 2019–2021 collection. This means that as Paper Pumpkin subscribers, you will be first to get your hands on new In Color products. And that’s just the beginning of things to love about this kit!

A Kit In Color

  • Kit contains supplies for 12 cards and envelopes
  • 8 cards are traditional size
    • Card size: 4-1/4″ x 5-1/2″ (10.8 x 14 cm)
    • Envelope size: 4-1/2″ x 5-3/4″ (11.4 x 14.6 cm)
  • 4 cards are note card size
    • Notecard size: 5″ x 3-1/2″ (12.7 x 8.9 cm)
    • Envelope size: 5-1/8″ x 3-5/8″ (13 x 9.2 cm)

Coordinating Colors: Bumblebee, Just Jade, Magenta Madness, Misty Moonlight, Pumpkin Pie, and Purple Posy

  • Subscribe for the May 2020 Paper Pumpkin kit from April 11–May 10 at paperpumpkin.com.
  • Supplies may be limited toward the end of the subscription period.
  • The In Color reveal happens April 24, so stay tuned!

****************************************************************************************************

The Ornate Garden Suite available NOW.  Click HERE or on the image below to see a printable PDF of all the fabulous items available in the suite.

****************************************************************************************************

Card stock cuts for this project:

  • Night of Navy Cardstock 1 1/4″ X 5 1/2″ (card front strip), 4 1/8″ X 5 3/8″ (inner liner mat)
  • So Saffron Cardstock 4 1/4″ X 11″ (card base scored and folded at 5 1/2″)
  • Whisper White Cardstock 1 1/8″ X 2 1/2″ (sentiment), 4″ X 5 1/4″ (inner liner)
  • Ornate Garden Specialty Designer Series Paper 3 3/8″ X 5 1/2″ (card front), 2 1/4″ X 6″ (piece for envelope flap)

****************************************************************************************************

Product List

Stampin’ Up! Special Someone for Happy Inkin’ Thursday Blog Hop

Good Thursday morning my stamping friends.  How is everyone doing today?  Welcome to the Happy Inkin’ Thursday Blog Hop. If you are hopping over from Akiko, thank you for stopping by my blog. This week we had a Sketch Challenge. Be sure to hop around to see everyone’s beautiful projects .
Here is the sketch we had to work from.

Here’s my card using this sketch.

My colors were inspired by Global Design Project Challenge #237.  Here are their colors.

I also played along with Hand Stamped Sentiments Challenge #337.  Here is their Inspiration.

I started by adhering a panel of Mint Macaron Subtle 6 X 6 Designer Series Paper to a Mint Macaron card base using Snail.

On a panel of Whisper White cardstock I stamped the racoon image from the Stampin’ Up! Special Someone Photopolymer Stamp Set first in Early Espresso for the outline then in Soft Suede for the fill color.  I stamped 2 round balloons and one heart balloon from the Special Someone stamp set on the same panel.  I stamped the round balloons first in Mint Macaron and Night of Navy for the outlines.  I then stamped the fill color in Mint Macaron and Night of Navy, stamping off once.  I did the same for the heart balloon, stamped the outline in Melon Mambo and the fill color in Melon Mambo stamping off once.  I cut the images out using the Special Day Dies and I also cut out the balloon strings and the bow.

I embossed a Melon Mambo panel using the Coastal Weave 3D Embossing Folder.  I adhered the embossed panel to the card front using Multipurpose Liquid Glue.  I adhered the racoon to the embossed panel using Stampin Dimensionals.  I adhered the balloon strings to the racoon using a Glue Dot and the bow to the strings using a tiny drop of Multipurpose Liquid Glue.  I adhered the balloons to the top of the strings on the embossed panel using Stampin’ Dimensionals.  On a strip of Night of Navy cardstock I stamped the sentiment from the Special Someone stamp set in Versamark Ink.  I immediately sprinkled it with my White Stampin’ Emboss Powder and set it using my Heat Tool.  I adhered the sentiment strip to the card front using Stampin’ Dimensionals.  I added a couple Melon Mango Glitter Enamel Dots to the sentiment strip.  I added a couple Night of Navy Happiness Blooms Enamel Dots to the card front and one to the center of the bow.

On the inside I stamped the sentiments from the Special Someone stamp set in Night of Navy Ink in the center of a Whisper White panel.  I stamped the racoon image from the Special Someone stamp set on the bottom of the panel, first in Early Espresso Ink for the outline then in Soft Suede Ink for the fill color.  I stamped the mouse image from the Special Someone stamp set on the bottom of the panel.  I stamped the outline image in Basic Gray Ink and the fill image in Smoky Slate Ink.  I adhered the Whisper White panel to a Night of Navy mat using Snail and then to the inside of the Mint Macaron card base using Multipurpose Liquid Glue.

To finish my card I decorated a Medium Whisper White Envelope.  I stamped the racoon image from the Special Someone stamp set on the bottom front of the envelope.  I stamped the outline image in Early Espresso Ink and the fill image in Soft Suede Ink.  I stamped the balloon string image from the Special Someone stamp set in Night of Navy Ink.  I stamped the balloon image from the Special Someone stamp set first the outline image in Mint Macaron Ink and the fill image in Mint Macaron Ink, stamping off once.  I adhered a panel of the Melon Mambo Brights 6 X 6 Designer Series Paper to the envelope flap.

Thank you for visiting my blog today. I hope you liked my card and will give it a try. Now that you’ve seen my card, take a minute to hop through all our projects today. If you click on the Next Blog button, you’ll go to Amy’s page. Or you can just click on the names below to go directly to all the blogs! Happy Hopping!!

Karen Ksenzakovic:  You Are Here

****************************************************************************************************

If you need any stamping supplies, I’d love to be your Demonstrator. Just click HERE to go directly to my online store or drop me an email if you have any questions. 

MY CURRENT HOST CODE IS: KBMV24AJ

Use this host code when you order $50 or greater and receive a free gift from me! If your order is over $150, please do not use this code, but you’ll still get the free gift. The free gift is your choice of any item valued up to $10.00 in either the 2019-2020 Annual Catalog or the 2020 January-June Mini Catalog!   For any orders $50 or more I will also send you my monthly class tutorials.  Click HERE or go to my Customer Rewards for more details and to see what this months tutorials are.

The Clearance Rack has been updated.  Click HERE to shop the clearance rack.

Happy Stamping, Karen!

****************************************************************************************************

2019-2020 Annual Catalog and Mini Catalog Retiring List

Let me know if you have any questions about the retiring lists!  You can also download copies of the full retiring lists in PDF Form here:

  • Click here to get a copy of the full retiring list from the 2019-20 Annual Catalog.  The font is super tiny, so you’ll need to zoom out to read it!
  • Click here to get a copy of the full retiring list from the January-June 2020 Mini Catalog.  The font is super tiny, so you’ll need to zoom out to read it!

****************************************************************************************************

MAY 2020 PAPER PUMPKIN:

DESIGNED WITH (IN) COLOR IN MIND

SUBSCRIBE APRIL 11- MAY 10

The Paper Pumpkin team loves planning fun surprises, so we’ve been VERY excited to let you know what we have in store for the month of May: a fabulous kit featuring 2020–2022 In Colors, plus Purple Posy, an In Color from the 2019–2021 collection. This means that as Paper Pumpkin subscribers, you will be first to get your hands on new In Color products. And that’s just the beginning of things to love about this kit!

A Kit In Color

  • Kit contains supplies for 12 cards and envelopes
  • 8 cards are traditional size
    • Card size: 4-1/4″ x 5-1/2″ (10.8 x 14 cm)
    • Envelope size: 4-1/2″ x 5-3/4″ (11.4 x 14.6 cm)
  • 4 cards are note card size
    • Notecard size: 5″ x 3-1/2″ (12.7 x 8.9 cm)
    • Envelope size: 5-1/8″ x 3-5/8″ (13 x 9.2 cm)

Coordinating Colors: Four NEW In Colors plus Purple Posy from the 2019–2021 In Color collection. (The new In Colors will be introduced on April 24.)

  • Subscribe for the May 2020 Paper Pumpkin kit from April 11–May 10 at paperpumpkin.com.
  • Supplies may be limited toward the end of the subscription period.
  • The In Color reveal happens April 24, so stay tuned!

****************************************************************************************************

The Ornate Garden Suite available NOW.  Click HERE or on the image below to see a printable PDF of all the fabulous items available in the suite.

****************************************************************************************************

Card stock cuts for this project:

  • Melon Mambo Cardstock 3″ X 4 1/4″ (card front panel)
  • Mint Macaron Cardstock 8 1/2″ X 5 1/2″ (card base scored and folded at 4 1/4″)
  • Night of Navy Cardstock 1/2″ X 3″ (sentiment), 4 1/8″ X 5 3/8″ (inner liner mat)
  • Whisper White Cardstock 5 1/4′ x 1 3/4″ (artwork), 4″ X 5 1/4″ (inner liner)
  • Subtle 6 X 6 Designer Series Paper (4 1/4″ X 5 1/2″ (card front)

****************************************************************************************************

Product List

Stampin’ Up! Kindness is Always in Style

Good Wednesday morning my stamping friends.  How is everyone doing today?  Has anyone been able to start gardening or getting yard work done with all this time being home?  It’s still a little early here to plant flowers, but we did have to start cutting our lawn already and I’ve done some clean up.  We had a couple nights that we got frost again and that damaged some of my plants.  I’m hoping they come back when it warms up.

Today’s card is another version of a card I did last Thursday.  You can see that card here.  That card was a portrait card and I had 2 pieces of DSP left over so I thought I’d use it up making a landscape card.  Here’s my card for today.

I started by very lightly tacking the 2 panels of Best Dressed Designer Series Paper to the Pretty Peacock cardstock with Snail.  Using my Paper Trimmer, I cut all the panels at the same time on a slight angle.  I adhered the 2 pieces of Best Dressed DSP that I wanted, to the Pretty Peacock mat using Snail.  I adhered the matted panels to a Petal Pink card front using Multipurpose Liquid Glue and then to a Thick Whisper White card base using Stampin’ Dimensionals.

On a small panel of Whisper White cardstock I stamped the perfume bottle image from the Stampin’ Up! Dressed To Impress Photopolymer Stamp Set, which I colored just the outline using my Pretty Peacock Stampin’ Write Marker.  I stamped the sentiment from the Dressed To Impress stamp set in Pretty Peacock Ink in the center of the bottle image.  I cut the image out using my All Dressed Up Dies.

I adhered the artwork to the card front using Stampin’ Dimensionals.  I tied a bow using the Old Olive/Pretty Peacock 3/8″ Reversible Ribbon and adhered it to the bottle using a Glue Dot.  I added a few Pearl Basic Jewels to the card front.

On the inside I stamped the sentiment from the Dressed To Impress stamp set in Pretty Peacock Ink in the center of a Whisper White panel.  I stamped the perfume bottle image from the Dressed To Impress stamp set, which I colored just the outline using my Pretty Peacock Stampin’ Write Marker, on the bottom of the panel.  I stamped the flower image from the Dressed To Impress stamp set in Pretty Peacock Ink inside the bottle image.  I stamped the color fill image from the Dressed To Impress stamp set in Petal Pink Ink over the flower image.  I stamped the small dot image from the Dressed To Impress stamp set on either side of the sentiment in Petal Pink Ink.  I adhered the Whisper White panel to a Petal Pink mat using Snail and then to the inside of the Thick Whisper White card base using Multipurpose Liquid Glue.

To finish my card I decorated a Medium Whisper White Envelope.  I stamped the perfume bottle image from the Dressed To Impress stamp set, which I colored just the outline using my Pretty Peacock Stampin’ Write Marker, on the envelope front.  I stamped the flower image from the Dressed To Impress stamp set inside the bottle image in Pretty Peacock Ink.  I stamped the color fill image from the Dressed To Impress stamp set in Petal Pink Ink on top of the flower.  I adhered a panel of Best Dressed DSP to the envelope flap.

Thank you for stopping by my blog today.  I hope you liked my card and will give it a try.  Enjoy the rest of your weekend.  Happy Stamping!!

****************************************************************************************************

If you need any stamping supplies, I’d love to be your Demonstrator. Just click HERE to go directly to my online store or drop me an email if you have any questions. 

MY CURRENT HOST CODE IS: 6WETZ6WW

Use this host code when you order $50 or greater and receive a free gift from me! If your order is over $150, please do not use this code, but you’ll still get the free gift. The free gift is your choice of any item valued up to $10.00 in either the 2019-2020 Annual Catalog or the 2020 January-June Mini Catalog!   For any orders $50 or more I will also send you my monthly class tutorials.  Click HERE or go to my Customer Rewards for more details and to see what this months tutorials are.

The Clearance Rack has been updated.  Click HERE to shop the clearance rack.

Happy Stamping, Karen!

****************************************************************************************************

MAY 2020 PAPER PUMPKIN:

DESIGNED WITH (IN) COLOR IN MIND

SUBSCRIBE APRIL 11- MAY 10

The Paper Pumpkin team loves planning fun surprises, so we’ve been VERY excited to let you know what we have in store for the month of May: a fabulous kit featuring 2020–2022 In Colors, plus Purple Posy, an In Color from the 2019–2021 collection. This means that as Paper Pumpkin subscribers, you will be first to get your hands on new In Color products. And that’s just the beginning of things to love about this kit!

A Kit In Color

  • Kit contains supplies for 12 cards and envelopes
  • 8 cards are traditional size
    • Card size: 4-1/4″ x 5-1/2″ (10.8 x 14 cm)
    • Envelope size: 4-1/2″ x 5-3/4″ (11.4 x 14.6 cm)
  • 4 cards are note card size
    • Notecard size: 5″ x 3-1/2″ (12.7 x 8.9 cm)
    • Envelope size: 5-1/8″ x 3-5/8″ (13 x 9.2 cm)

Coordinating Colors: Four NEW In Colors plus Purple Posy from the 2019–2021 In Color collection. (The new In Colors will be introduced on April 24.)

  • Subscribe for the May 2020 Paper Pumpkin kit from April 11–May 10 at paperpumpkin.com.
  • Supplies may be limited toward the end of the subscription period.
  • The In Color reveal happens April 24, so stay tuned!

****************************************************************************************************

The Ornate Garden Suite available NOW.  Click HERE or on the image below to see a printable PDF of all the fabulous items available in the suite.

****************************************************************************************************

Card stock cuts for this project:

  • Petal Pink Cardstock 2 – 4″ X 5 1/4″ (card front and inner liner mat)
  • Pretty Peacock Cardstock 3 3/4″ X 5″ (card front DSP mats)
  • Whisper White Cardstock 3 7/8″ x 5 1/8″ (inner liner), 2″ X 1 1/2″ (artwork)
  • Thick Whisper White Cardstock 4 1/4″ X 11″ (card base scored and folded at 5 1/2″)
  • Best Dressed Designer Series Paper 2 – 3 5/8″ X 4 3/4″ (card front), 2 1/4″ X 6″ (piece for envelope flap)

****************************************************************************************************

Product List