Good Sunday morning stamping friends. I hope you weekend is going well. Yesterday was a long day, but a very enjoyable one celebrating my son’s engagement. By the time I got home, I just wanted to crash.
Before I get started with my card, I want to thank all that participated in my fundraiser. Unfortunately, we did not make the goal of $500, but we did donate $235. Thank you so very much for being a part of raising money for the Texas flooding.
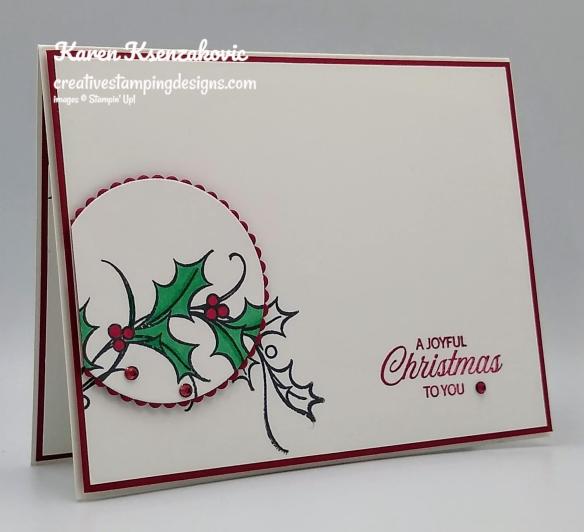
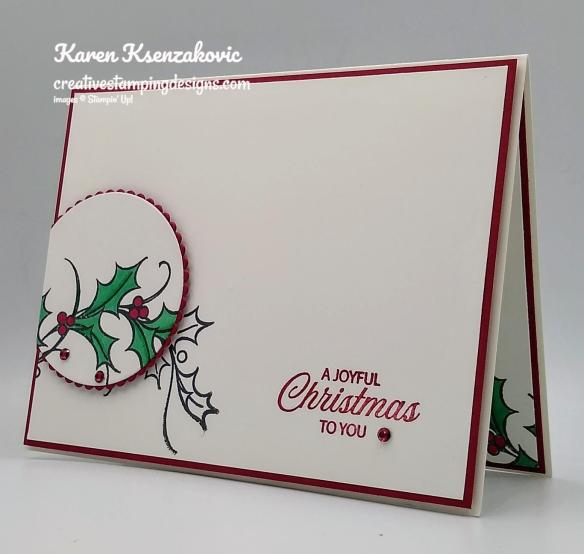
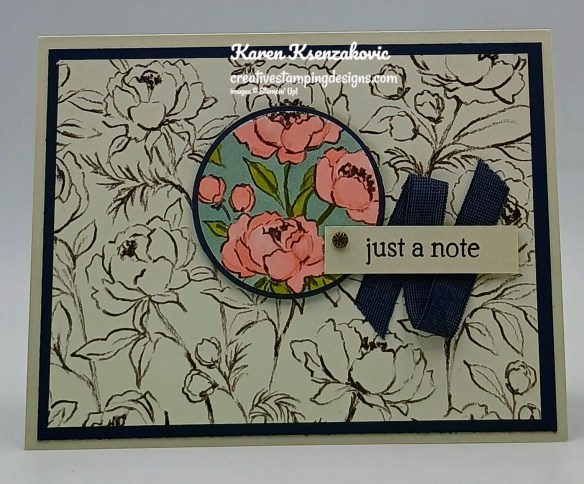
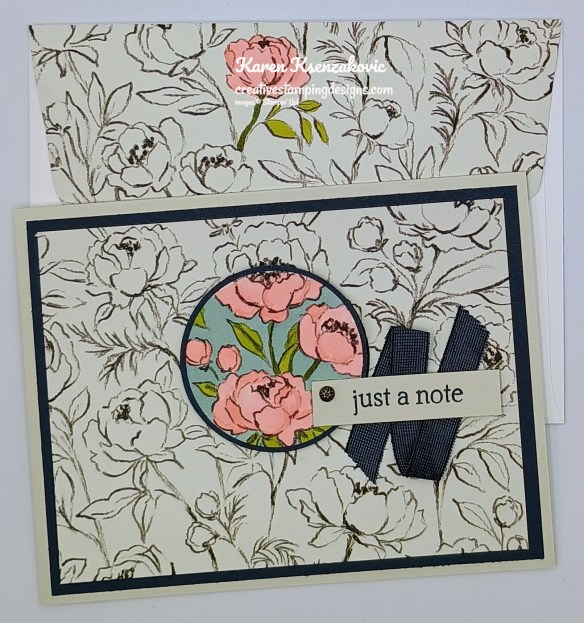
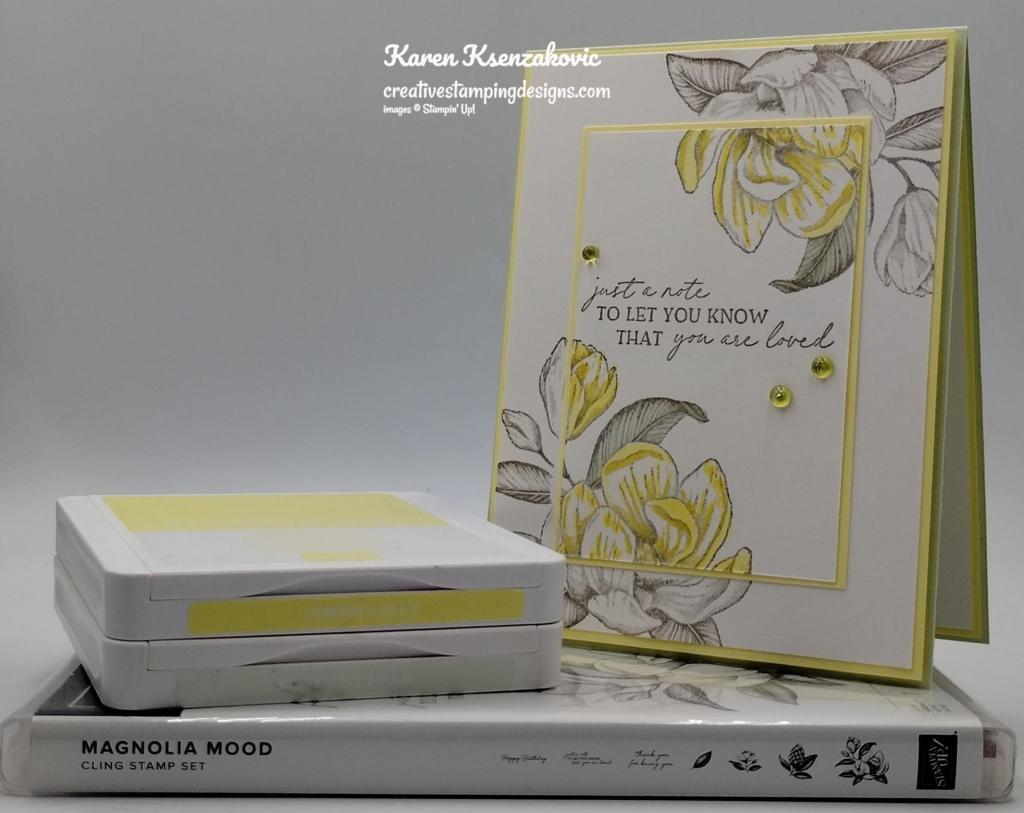
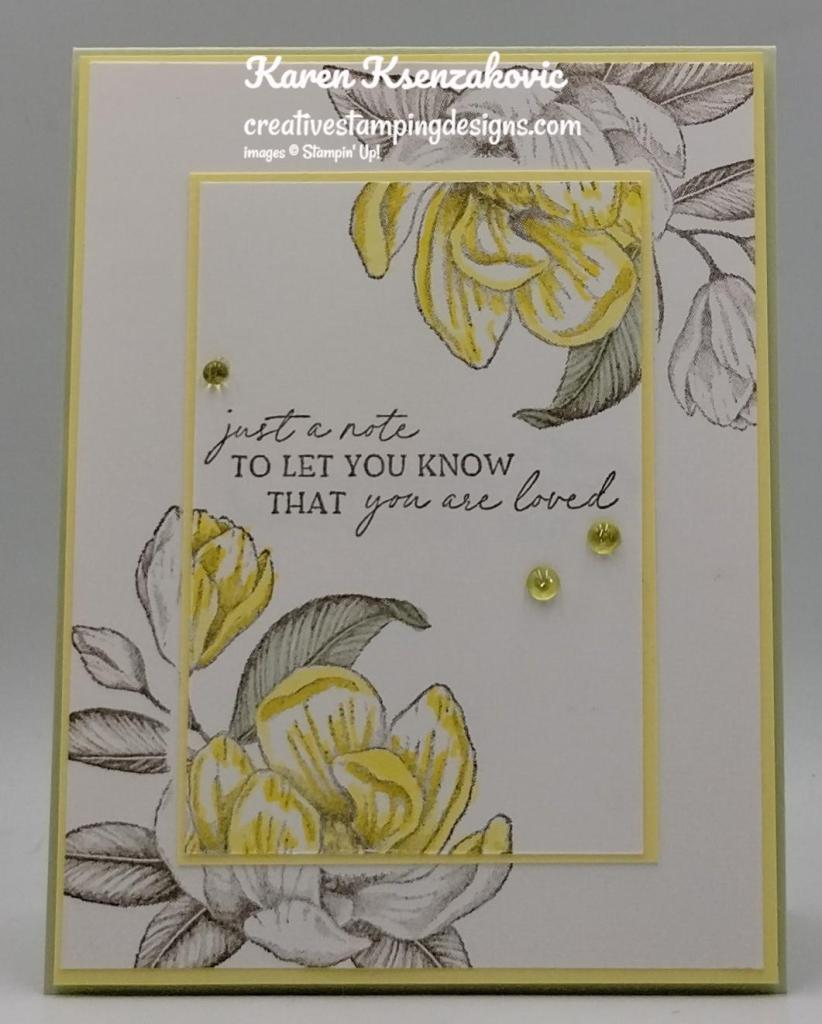
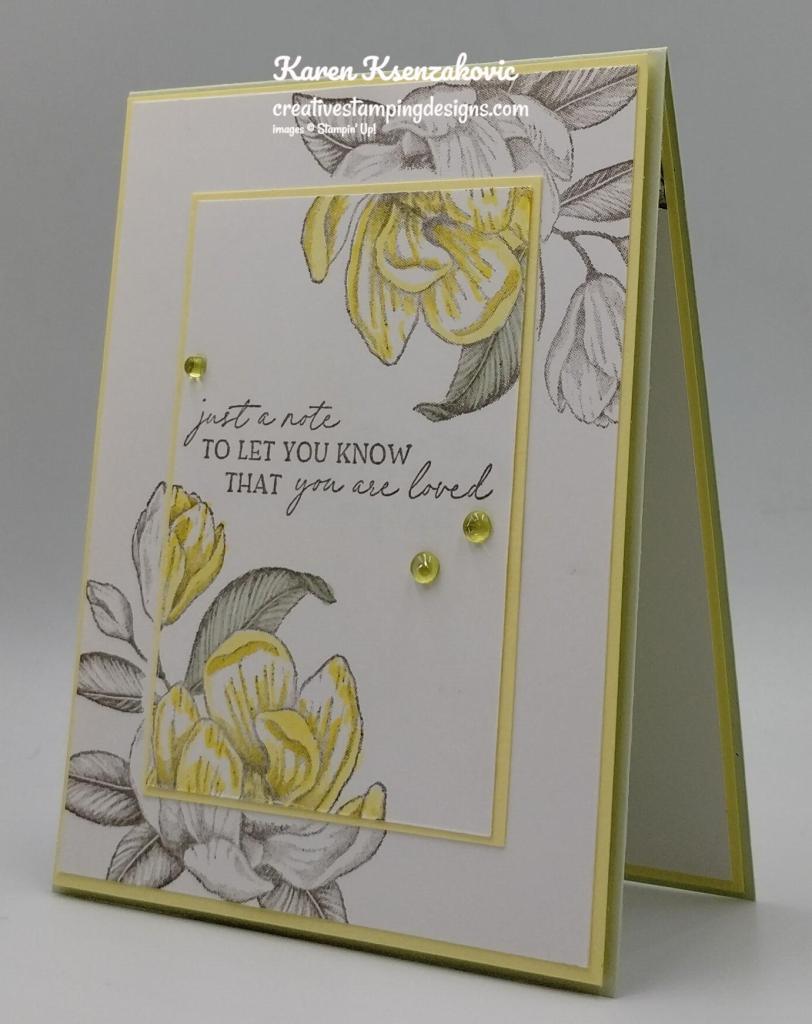
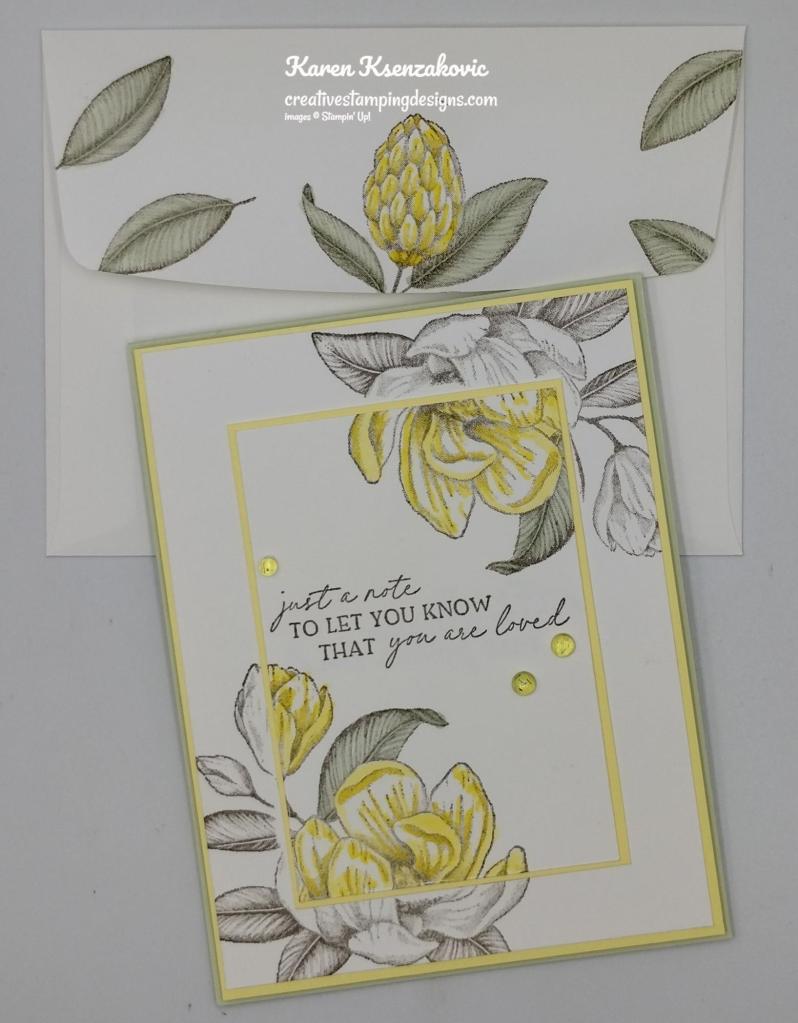
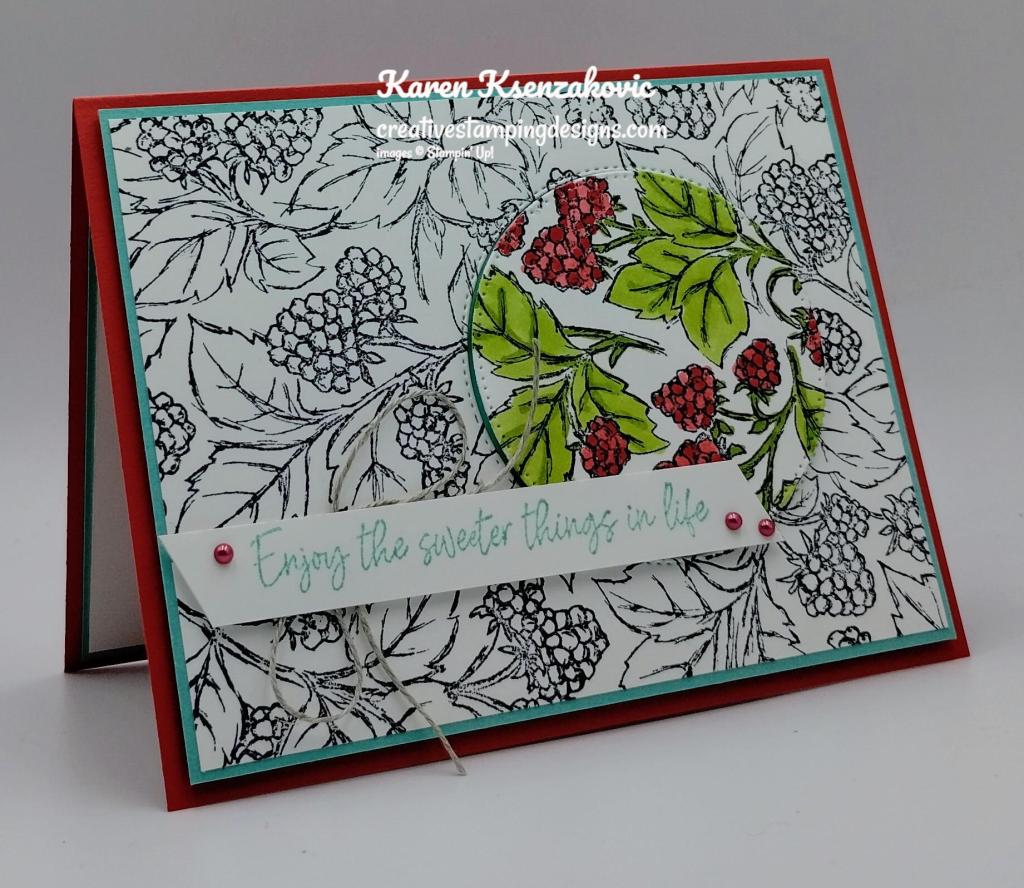
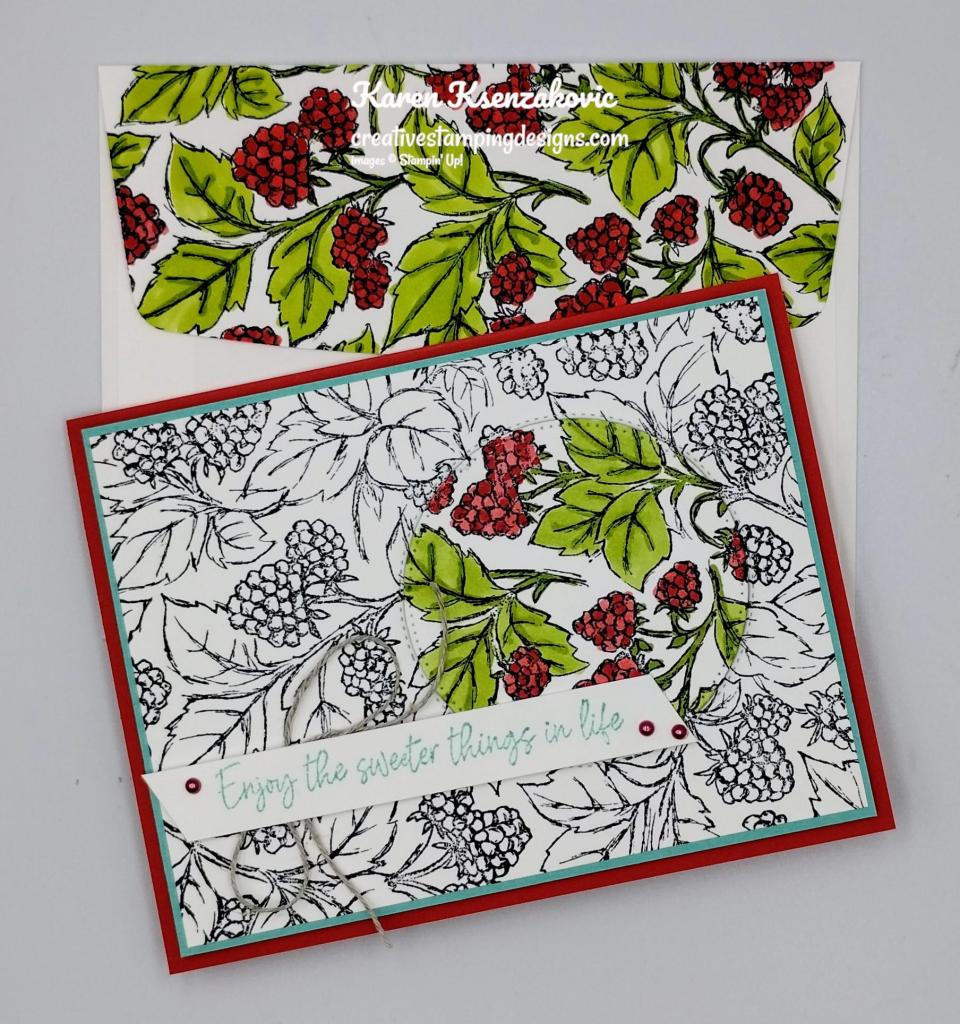
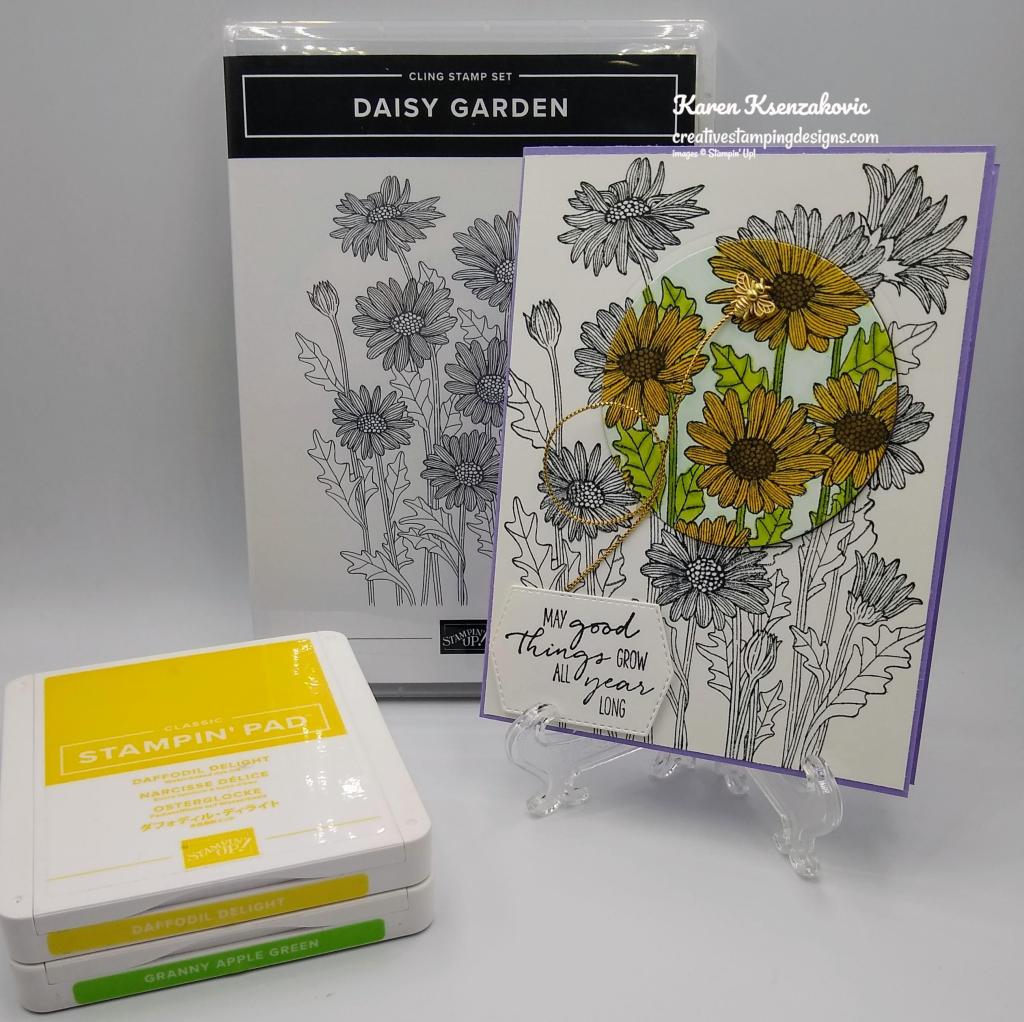
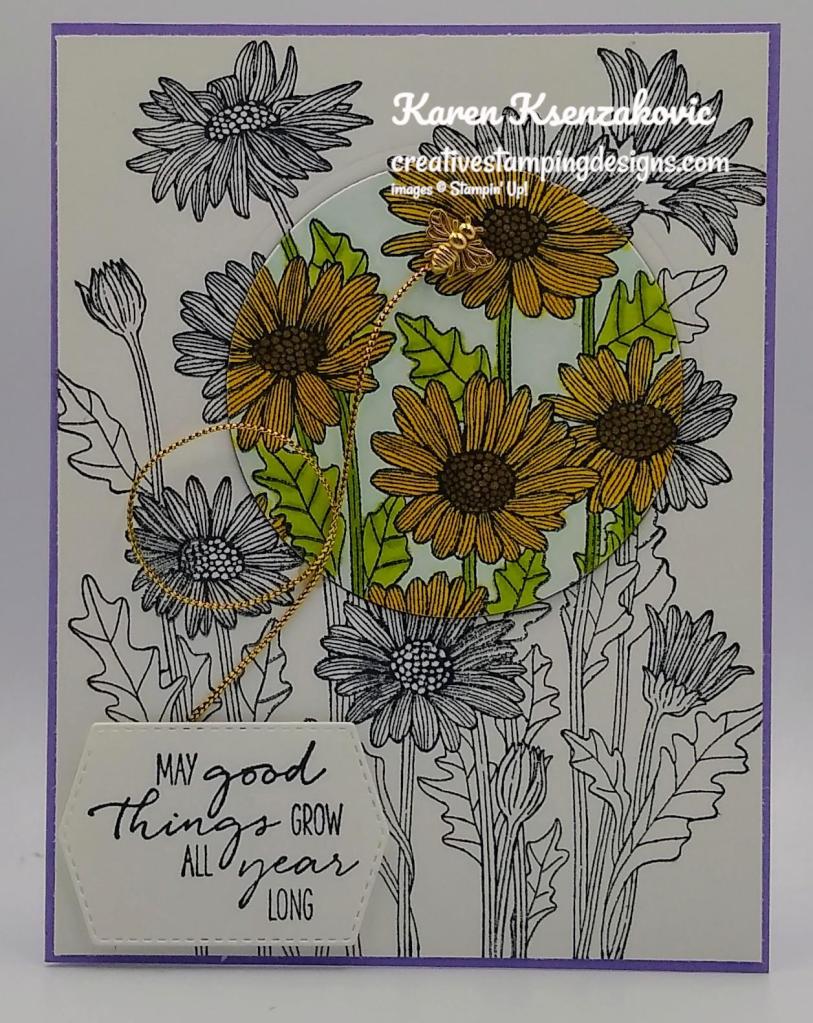
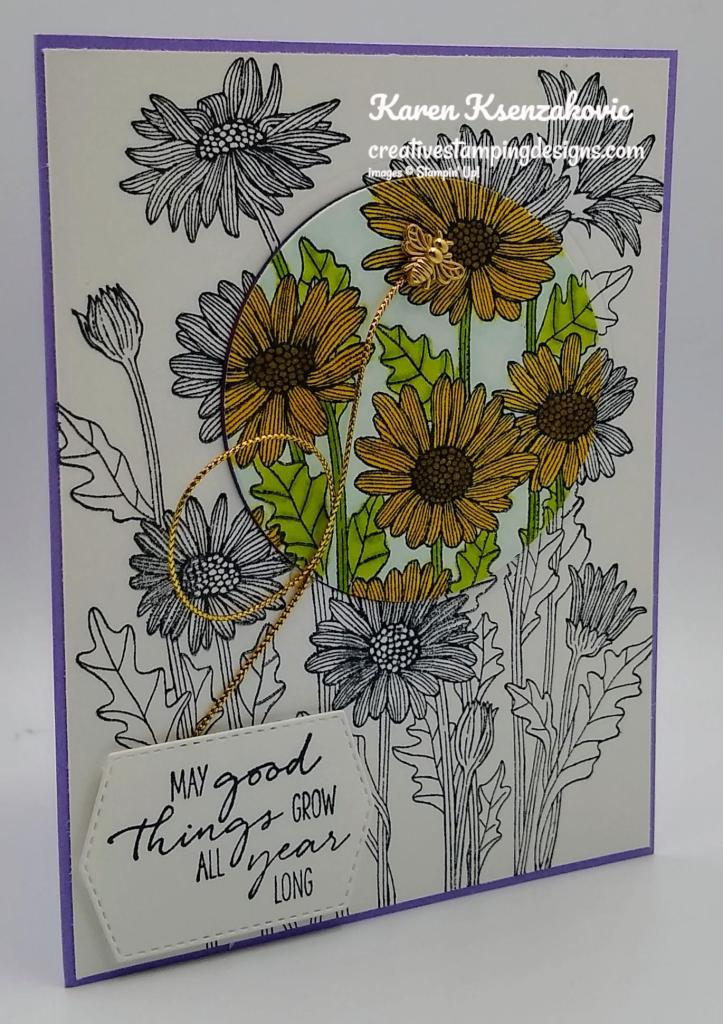
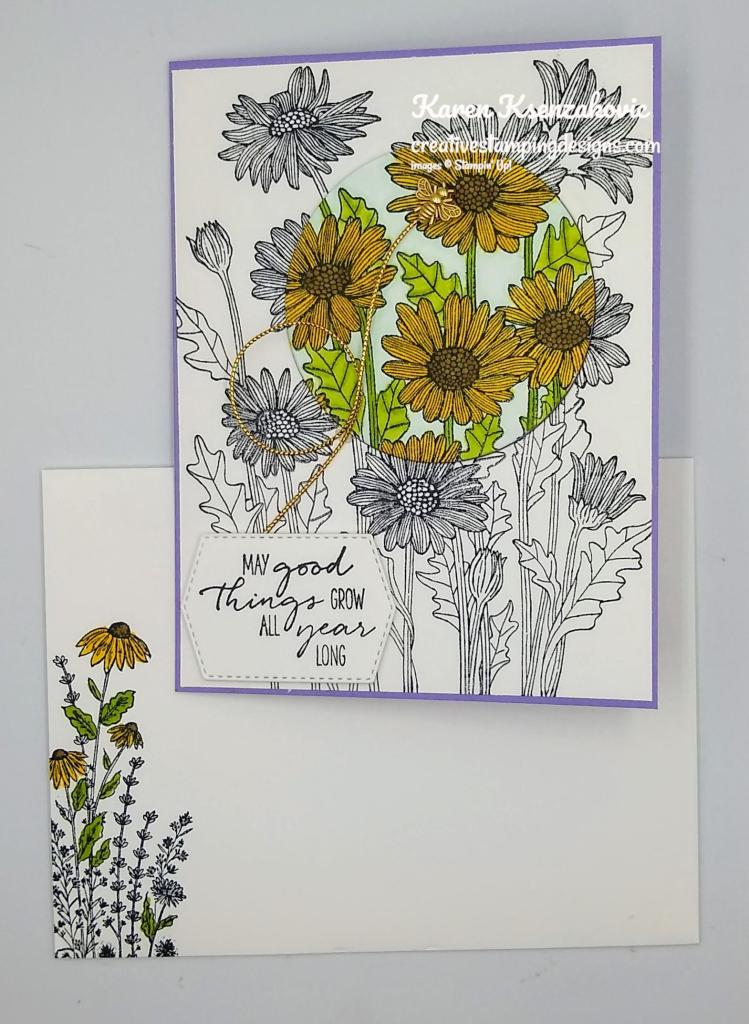
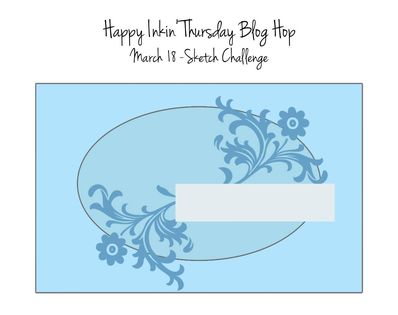
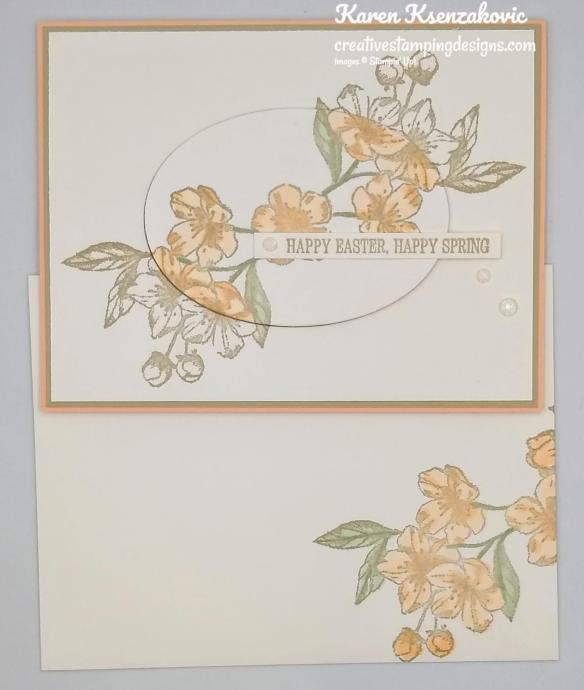
I did a fun technique for today’s card called the Spotlight Technique. I love doing this technique, it’s so easy and it brings your eye to one focal point. If you’d like to see a quick video of how I made this card, Click Here to go to my Instagram Reels. Here is my card for today.
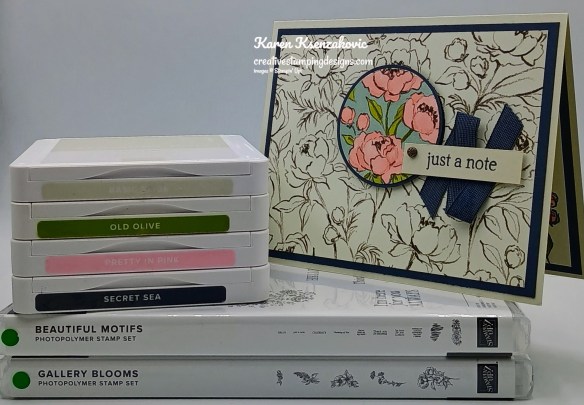
I used the Stampin’ Up! Beautiful Motifs Photopolymer Stamp Set along with the Stampin’ Up! Gallery Blooms Photopolymer Stamp Set, Beautiful Gallery 6 x 6 Designer Series Paper and the 1 7/8″ & 2″ Circle Punches for my card today.
Using the 1 7/8″ Circle Punch, punch out a section of the Beautiful Gallery DSP card front. Using the 2″ Circle Punch, punch out a section of the Secret Sea mat. Adhere the Beautiful Gallery DSP card front to the Secret Sea mat. Adhere the layered panel to the Basic Beige card base with Liquid glue.
Color the punched-out section of the Beautiful Gallery DSP with Cloud Cover, Old Olive and Pretty in Pink Stampin’ Blends Markers. Adhere the colored panel to the 2″ Secret Sea mat. Adhere the layered panel to the card front where you punched out the panel, lining up the flowers and stems, with Stampin’ Dimensionals.
On the pane of Basic Beige, stamp the sentiment from the Beautiful Motifs stamp set in Secret Sea Ink. Adhere a piece of Secret Sea 3/8″ Faux Linen Ribbon to the card front. Adhere the sentiment over the ribbon with Stampin’ Dimensionals. Add a Pressed Flower Motifs to the sentiment.
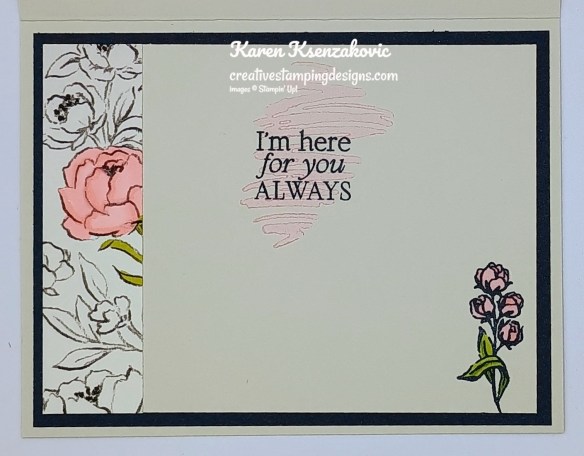
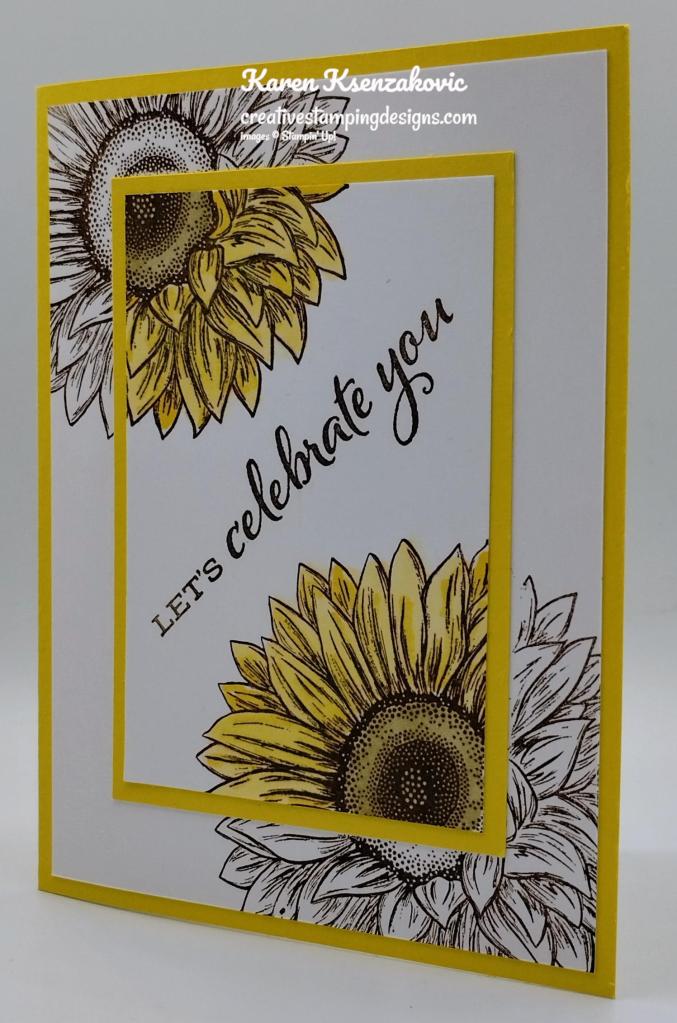
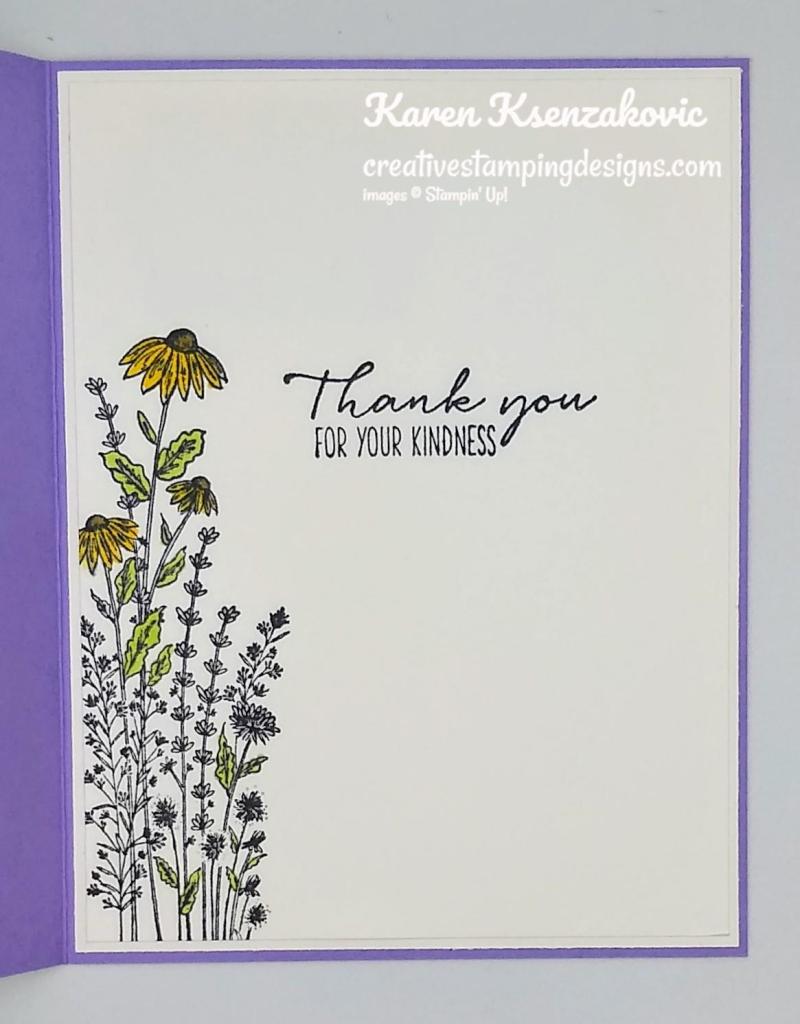
On a panel of Basic Beige, stamp the sentiment from Beautiful Motifs stamp set in Secret Sea Ink. Stamp the swish image from Beautiful Motifs stamp set in Pretty in Pink Ink, stamping off once on scrap paper, over the sentiment. Stamp the small flower image from Gallery Blooms stamp set in Secret Sea In on the bottom of the panel. Color the image with Old Olive and Pretty in Pink Stampin’ Blends Markers. Adhere a panel of Beautiful Gallery DSP to the side of the panel, coloring one of the flower images with Pretty in Pink Stampin’ Blends Markers. Adhere the Basic Beige panel to a Secret Sea mat then to the inside of the Basic Beige card base.

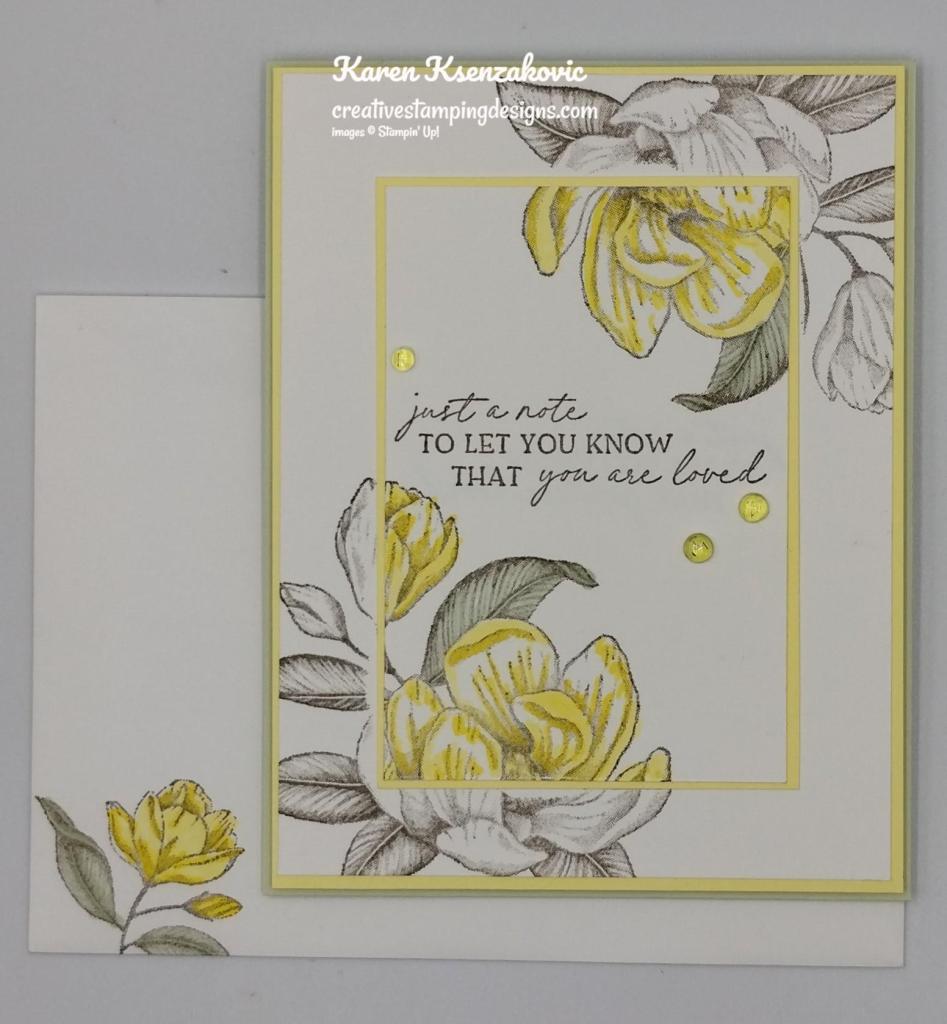
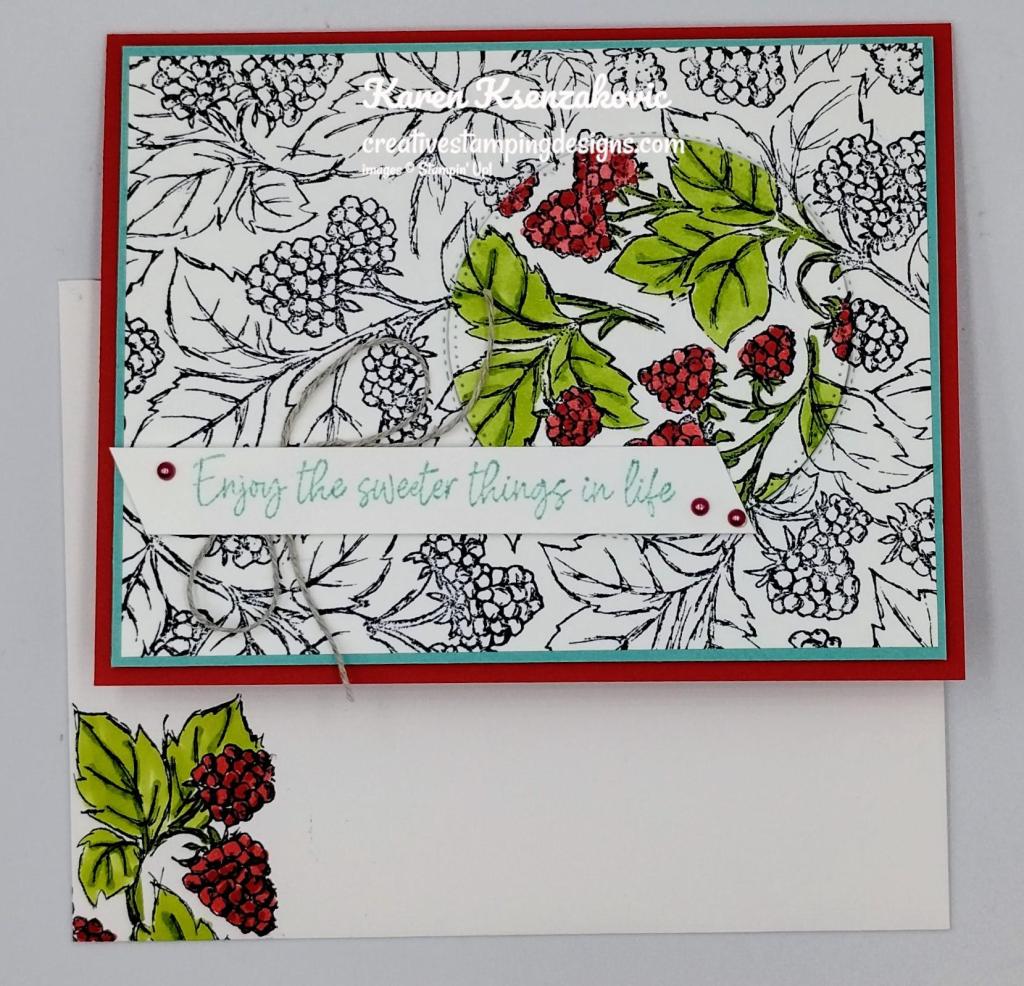
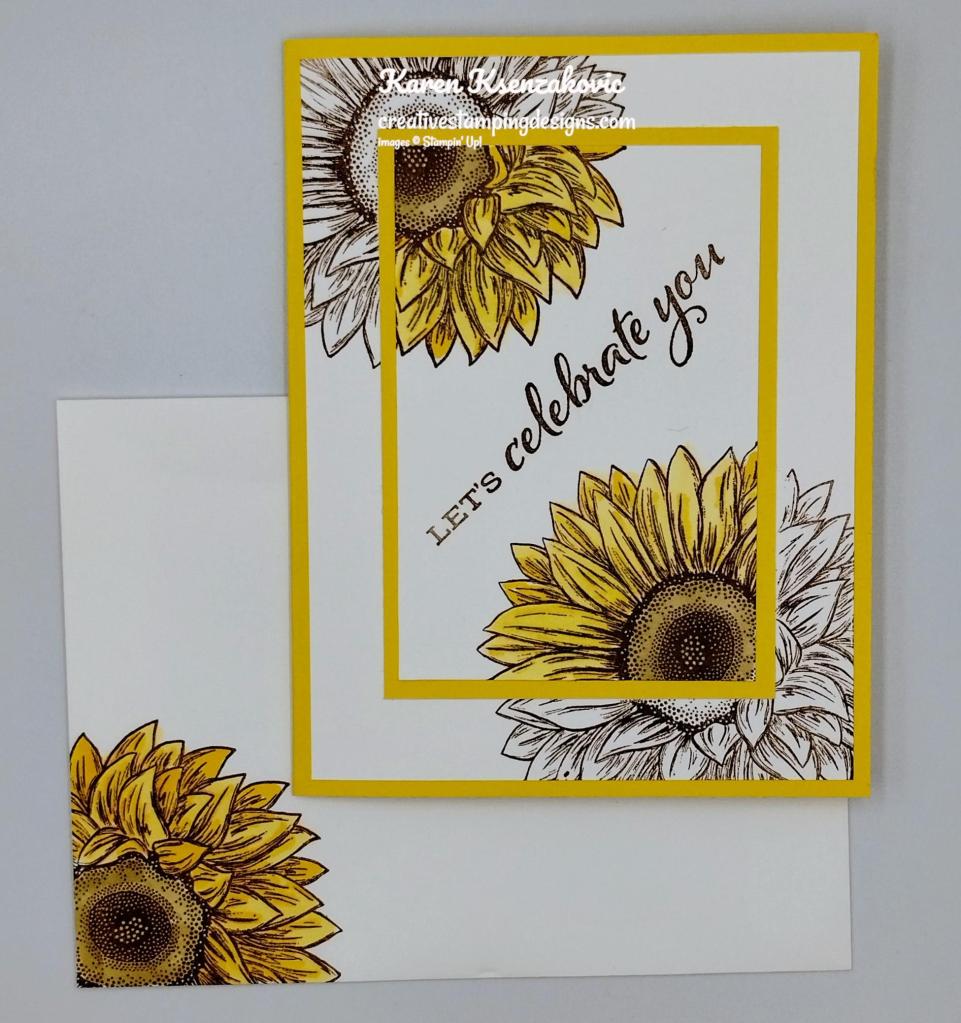
Decorate a Basic White Medium Envelope to finish your card. Stamp the large floral image from Gallery Blooms stamp set in Secret Sea Ink on the envelope front. Color one of the flowers with Pretty in Pink Stampin’ Blends Markers and the leaves with Old Olive Stampin’ Blends Markers. Adhere a panel of Beautiful Gallery DSP to the envelope flap coloring 1 image on the DSP with Old Olive and Pretty in Pink Stampin’ Blends Markers.
Thank you for stopping by my blog today. I hope you like the card and will give it a try. Happy Stamping!!
*********************************************************************************************************
If you need any stamping supplies, I’d love to be your Demonstrator. Just click HERE to go directly to my online store or drop me an email if you have any questions.
*********************************************************************************************************
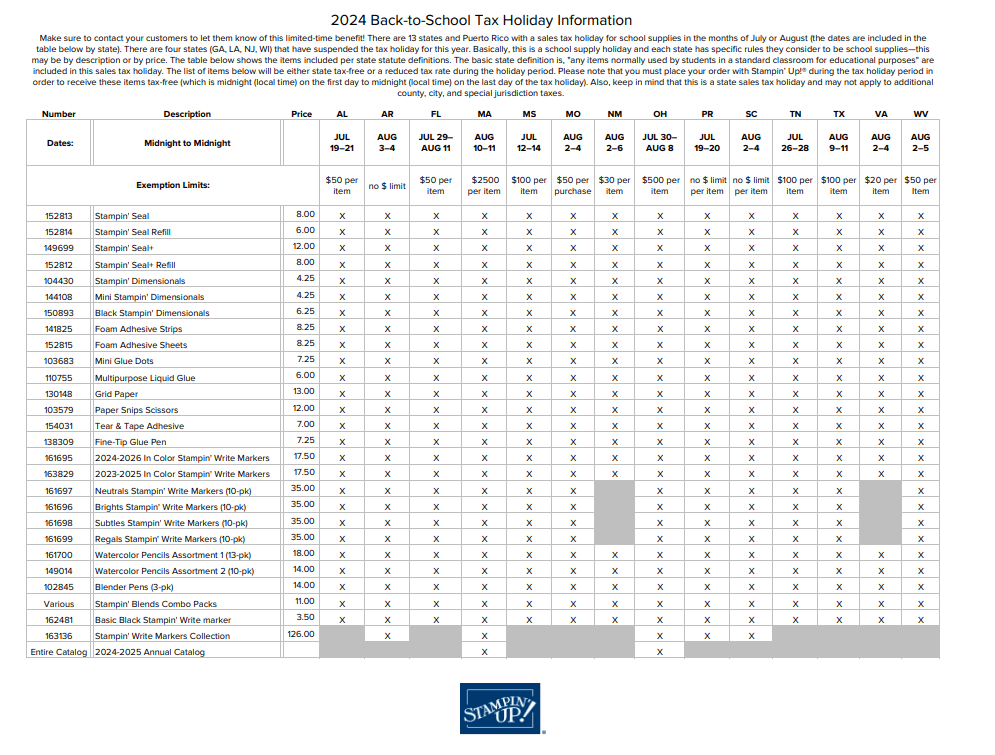
Sales Tax Holiday

Twelve states and Puerto Rico are having Back-to-School Sales Tax Holidays this year and some Stampin’ Up! items qualify for the tax break in those states!
The states with upcoming tax holidays are: Alabama, Arkansas, Florida, Massachusetts, Missouri, New Mexico, Ohio, South Carolina, Tennessee, Texas, Virginia and West Virginia. So if you live in one of those states or Puerto Rico, take a second to download the spreadsheet below and mark your calendar!
Here is the list of states having sales tax holidays, what the dates are and what supplies will be tax free during the holiday (click on the image to download a full-size printable page):
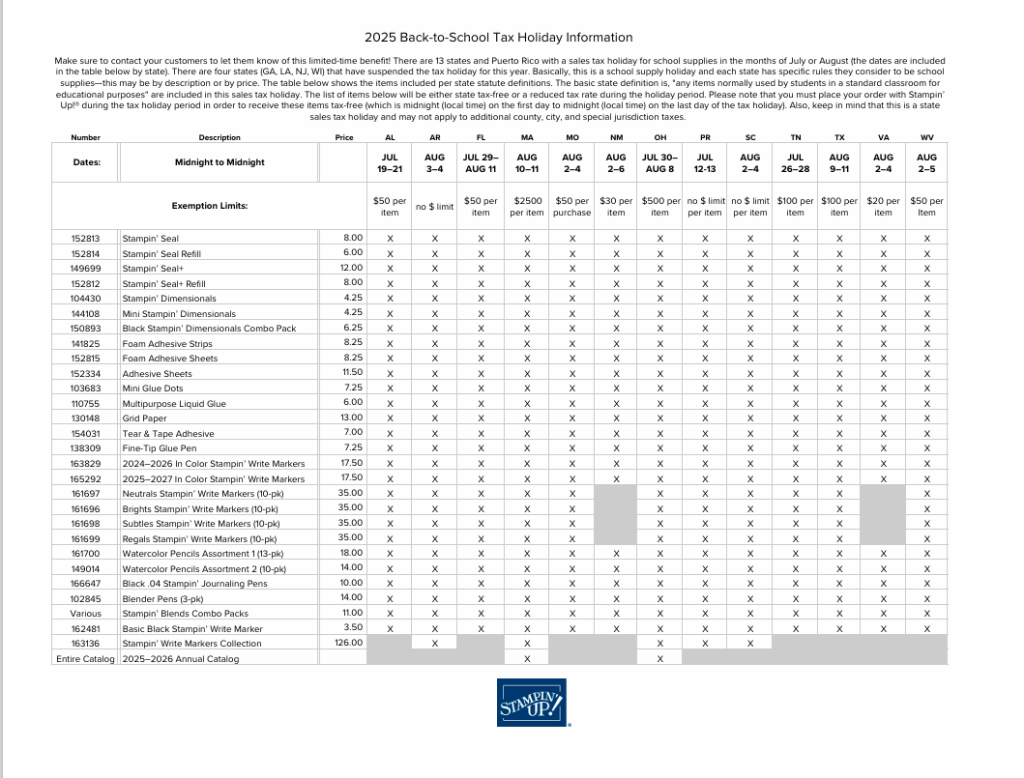
Please note that you must place your order with Stampin’ Up! during the tax holiday period in your state in order to receive these items tax-free (which is midnight on the first day to midnight on the last day of the tax holiday). Also, keep in mind that this is a state sales tax holiday; the state statute may not apply to county, city, and special jurisdiction taxes.
For those wondering about Georgia, Illinois, Louisiana, New Jersey, and Wisconsin, those states have suspended the sales tax holiday this year.
*********************************************************************************************************
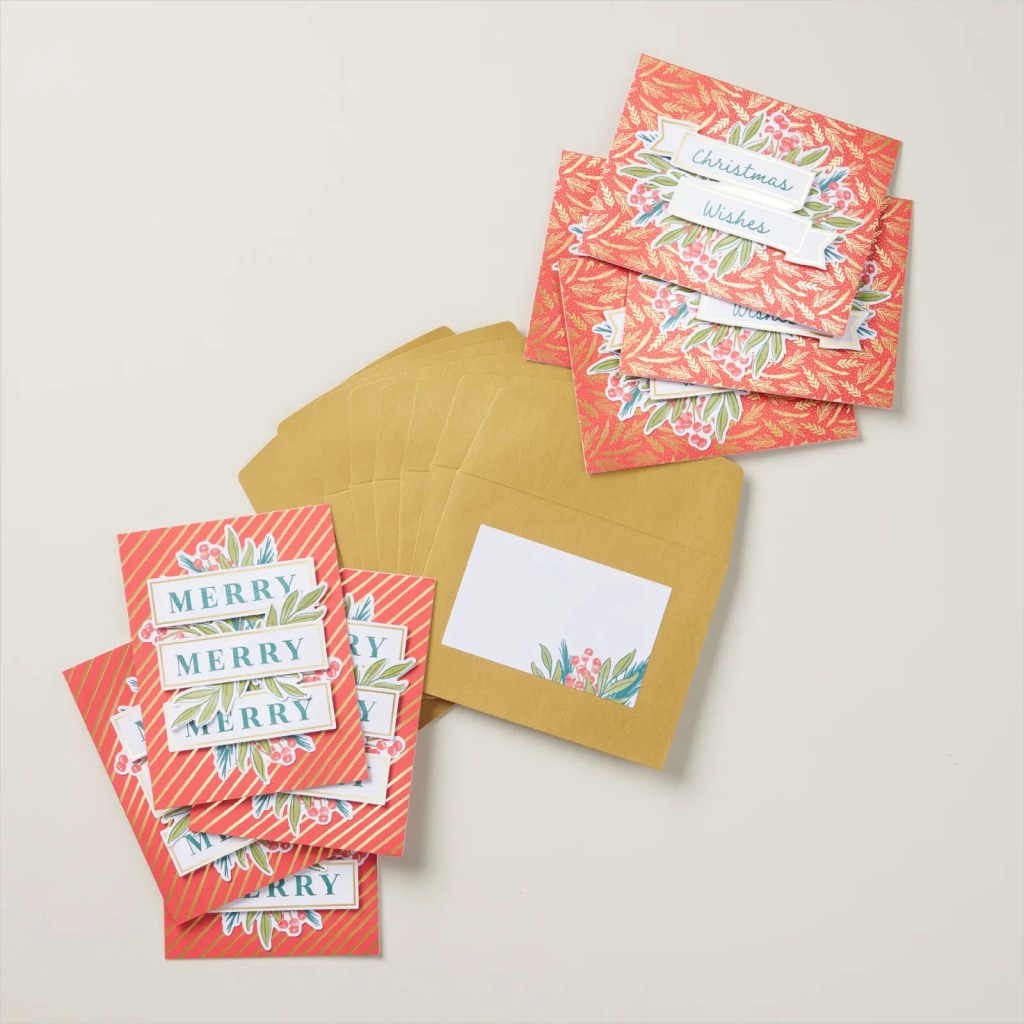
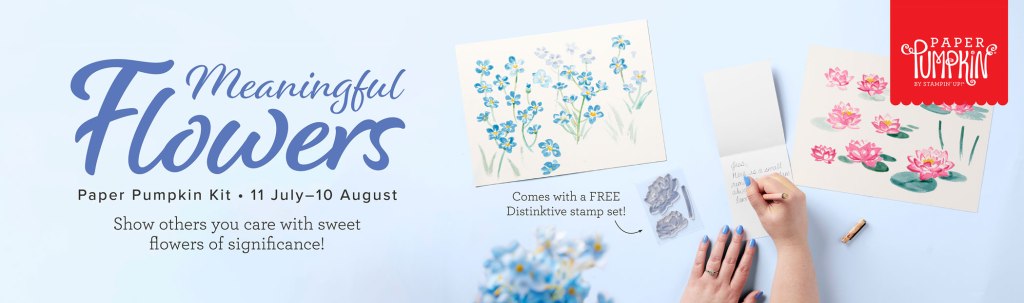
Farmhouse Florals
Subscribe July 11 – August 10
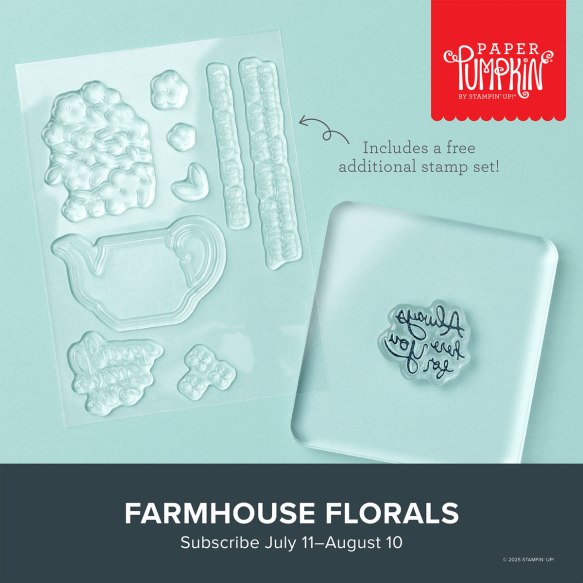
Send whimsical cards featuring flowers nestled in delightfully unexpected places.
- Makes 9 cards: 3 each of 3 designs with 9 coordinating envelopes
- Precut paper pieces and linen thread
- Sentiment stamps for the outside and inside of the cards
- Coordinating colors: Calypso Coral, Darling Duckling, Gray Granite, Lost Lagoon, Pecan Pie, Secret Sea (Classic Stampin’ Spot)
Subscribe to the August Paper Pumpkin Kit between 11 July and 10 August by clicking here!
*********************************************************************************************************
Don’t miss the coordinating
Circle of Seasons Dies Add-On!

Make the most of your Paper Pumpkin kits with the Circle of Seasons Dies add-on! Quickly and cleanly cut out a strawberry with a blossom, a circle, a leaf, or an acorn to elevate your crafting projects. These additional dies are designed to work with THREE Paper Pumpkin Kits: the Sweeter with You Paper Pumpkin Kit, the Farmhouse Florals Paper Pumpkin Kit, and the Fall for Toile Paper Pumpkin Kit. Pair these dies with other Stampin’ Up! products for even more creative options! This exclusive add-on (item 167277) coordinates with the three upcoming kits! Paper Pumpkin subscribers can purchase it beginning June 11. Add-on is available only while supplies last, so it’s best to shop early!
DETAILS
– 4 dies
– Largest die: 2-1/2″ x 1-1/4″ (6.4 x 3.2 cm)
– Use with a Stampin’ Cut & Emboss Machine (sold separately)
You must be a current Paper Pumpkin subscriber to purchase this item. To become a subscriber, visit www.stampinup.com/paperpumpkin.
Note: Supplies may be limited toward the end of the subscription period.
#167277 $12
*********************************************************************************************************
Card stock cuts for this project:
- Basic Beige Cardstock 5 1/2″ x 8 1/2″(card base scored & folded at 4 1/4″), 1/2″ x 2″(sentiment), 3 3/4″ x 5″(inner liner)
- Secret Sea Cardstock (2) – 4″ x 5 1/4″(card front & inner liner mat)
- Beautiful Gallery 6 x 6 Designer Series Paper 3 3/4″ x 5″(card front), 3/4″ x 3 3/4″(inner liner), 2 1/4″ x 6″(envelope flap)
*********************************************************************************************************
Product List
![Beautiful Motifs Photopolymer Stamp Set (English) [ 165198 ]](https://assets1.tamsnetwork.com/images/EC042017NF/165198s.jpg "Beautiful Motifs Photopolymer Stamp Set (English) [ 165198 ]")
![Gallery Blooms Photopolymer Stamp Set [ 165211 ]](https://assets1.tamsnetwork.com/images/EC042017NF/165211s.jpg "Gallery Blooms Photopolymer Stamp Set [ 165211 ]")
![Basic Beige 8 1/2" X 11" Cardstock [ 164511 ]](https://assets1.tamsnetwork.com/images/EC042017NF/164511s.jpg "Basic Beige 8 1/2\" X 11\" Cardstock [ 164511 ]")
![Secret Sea 8 1/2" X 11" Cardstock [ 165624 ]](https://assets1.tamsnetwork.com/images/EC042017NF/165624s.jpg "Secret Sea 8 1/2\" X 11\" Cardstock [ 165624 ]")
![Beautiful Gallery 6" X 6" (15.2 X 15.2 Cm) Designer Series Paper [ 165196 ]](https://assets1.tamsnetwork.com/images/EC042017NF/165196s.jpg "Beautiful Gallery 6\" X 6\" (15.2 X 15.2 Cm) Designer Series Paper [ 165196 ]")
![Secret Sea Classic Stampin' Pad [ 165285 ]](https://assets1.tamsnetwork.com/images/EC042017NF/165285s.jpg "Secret Sea Classic Stampin' Pad [ 165285 ]")
![Cloud Cover Stampin’ Blends Combo Pack [ 165287 ]](https://assets1.tamsnetwork.com/images/EC042017NF/165287s.jpg "Cloud Cover Stampin’ Blends Combo Pack [ 165287 ]")
![Old Olive Stampin' Blends Combo Pack [ 154892 ]](https://assets1.tamsnetwork.com/images/EC042017NF/154892s.jpg "Old Olive Stampin' Blends Combo Pack [ 154892 ]")
![Pretty In Pink Stampin’ Blends Combo Pack [ 163824 ]](https://assets1.tamsnetwork.com/images/EC042017NF/163824s.jpg "Pretty In Pink Stampin’ Blends Combo Pack [ 163824 ]")
![1 7/8" (4.8 Cm) Circle Punch [ 165259 ]](https://assets1.tamsnetwork.com/images/EC042017NF/165259s.jpg "1 7/8\" (4.8 Cm) Circle Punch [ 165259 ]")
![2" (5.1 Cm) Circle Punch [ 133782 ]](https://assets1.tamsnetwork.com/images/EC042017NF/133782s.jpg "2\" (5.1 Cm) Circle Punch [ 133782 ]")
![Pressed Flower Motifs [ 165215 ]](https://assets1.tamsnetwork.com/images/EC042017NF/165215s.jpg "Pressed Flower Motifs [ 165215 ]")
![Secret Sea 3/8" (1 Cm) Faux Linen Ribbon [ 165273 ]](https://assets1.tamsnetwork.com/images/EC042017NF/165273s.jpg "Secret Sea 3/8\" (1 Cm) Faux Linen Ribbon [ 165273 ]")
![Basic White Medium Envelopes [ 159236 ]](https://assets1.tamsnetwork.com/images/EC042017NF/159236s.jpg "Basic White Medium Envelopes [ 159236 ]")


![Take Your Pick [ 144107 ]](https://assets1.tamsnetwork.com/images/EC042017NF/144107s.jpg "Take Your Pick [ 144107 ]")


")


")
")


")
")


")
")