
Good Monday morning my stamping friends. How was everyone’s weekend? I actually impressed myself yesterday. Since my husband had started undecorating and packing up Christmas while I was at work on Saturday, I finished most of it Saturday night. Sunday morning, I got up and finished packing up anything else I had to do. By 10:30am I was completely finished packing up Christmas, had everything back in my attic and I rearranged my furniture and vacuumed. I had the rest of the day for me, well kind of.
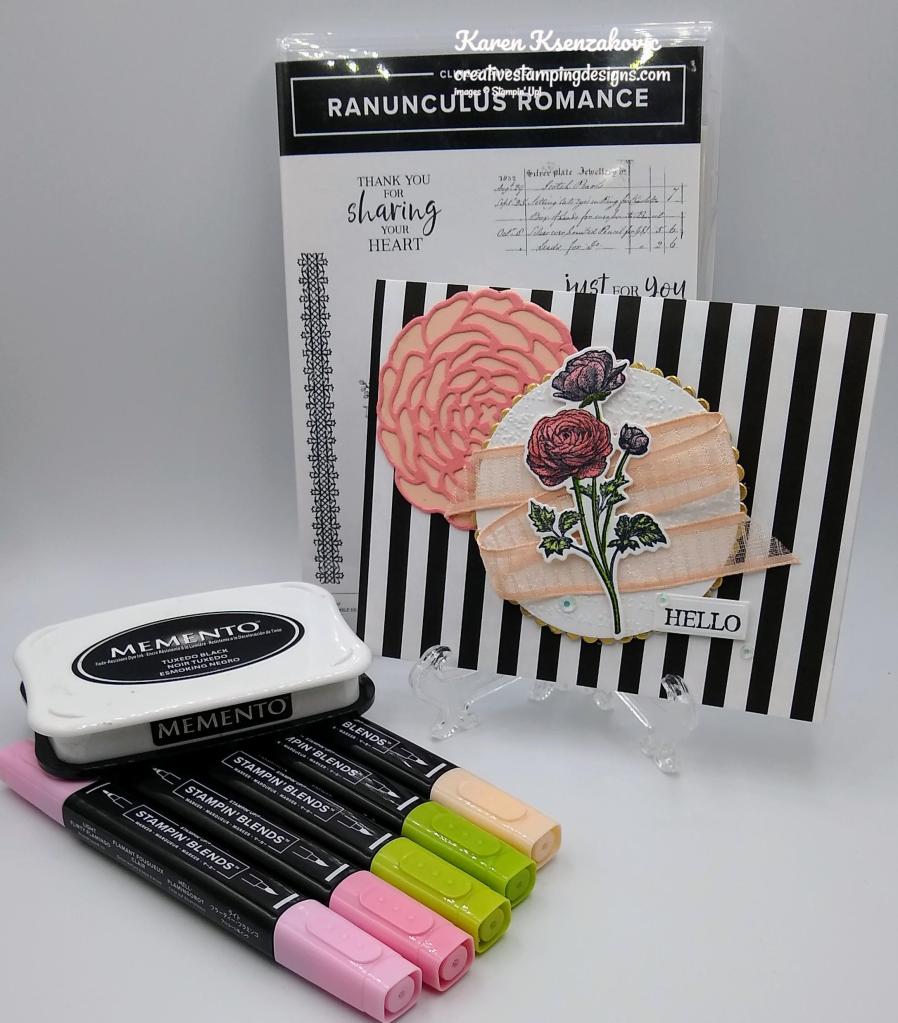
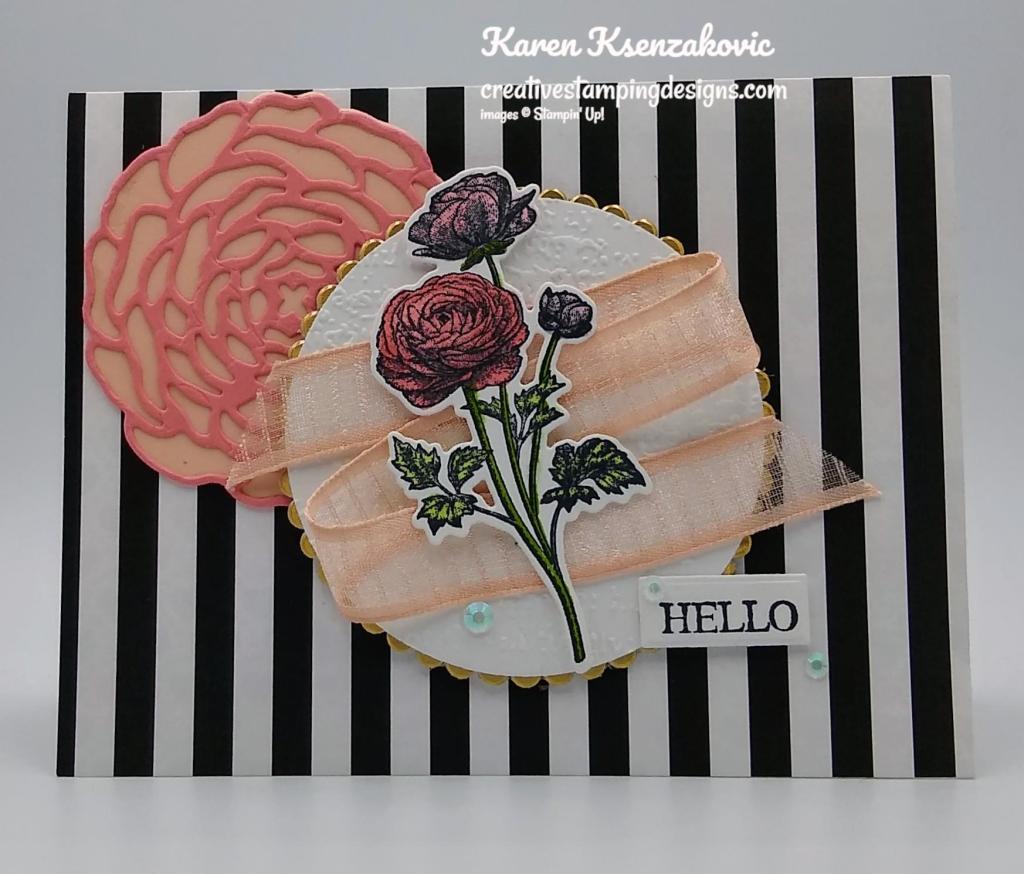
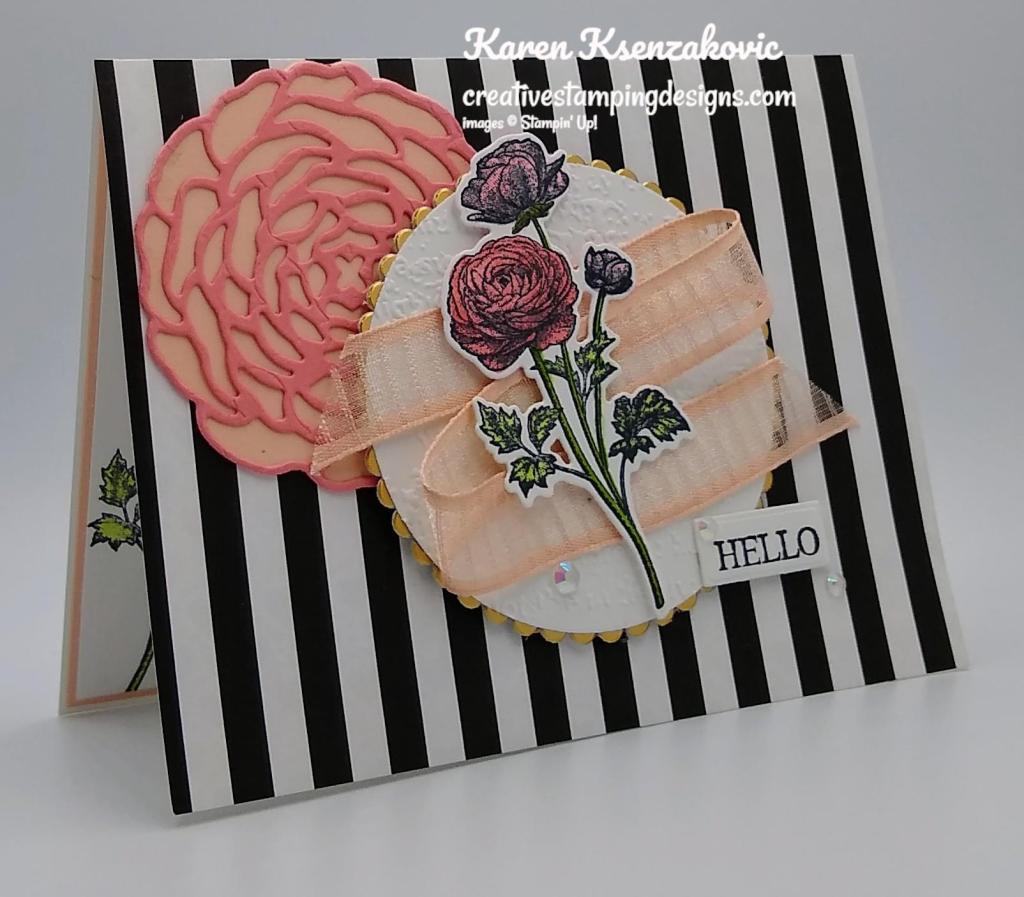
Today I have a mix of Sale-a-bration, 2021-2022 Annual Catalog and January-June 2022 Mini Catalog for you. I was using a little of everything to make a CAS card. Here’s my card for today.
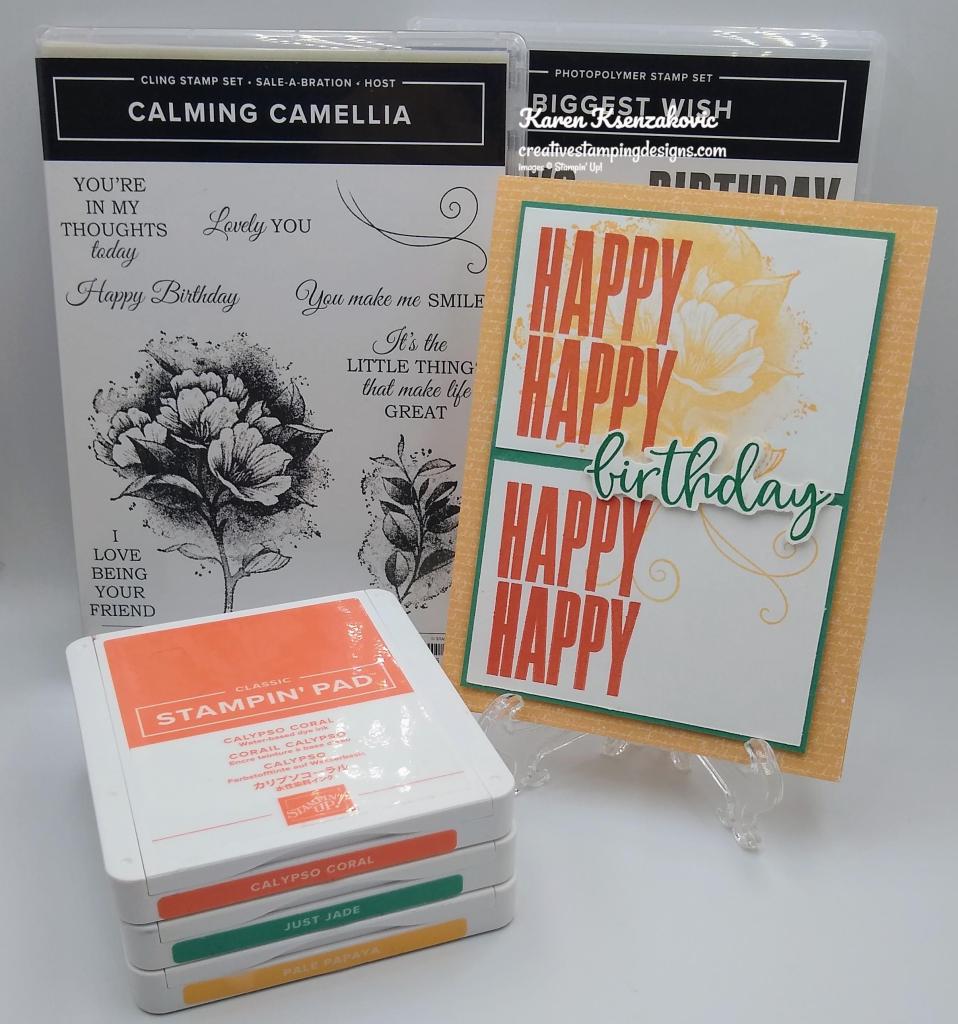
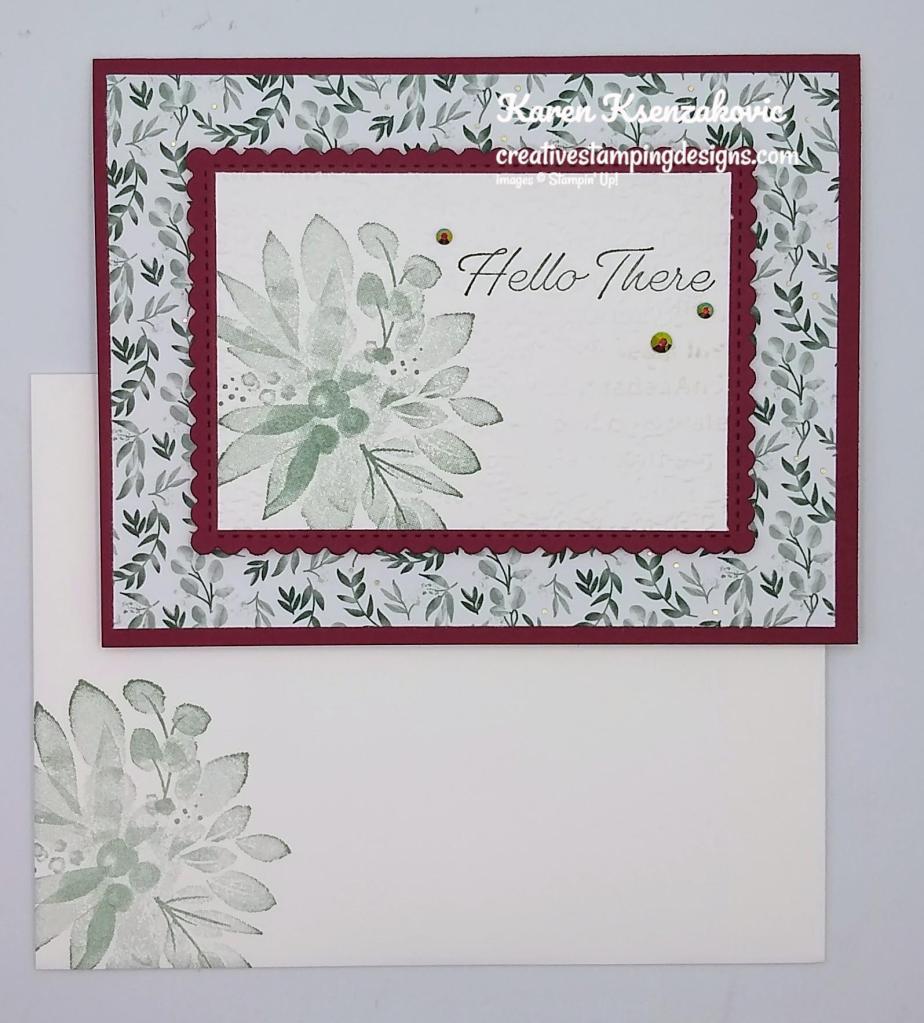
I used the gorgeous Stampin’ Up! Calming Camellia Cling Stamp Set along with the Stampin’ Up! Biggest Wish Photopolymer Stamp Set and the Artfully Composed Designer Series Paper for my card today.
My Theme is from the Inspire. Create. Birthday Challenge #107.
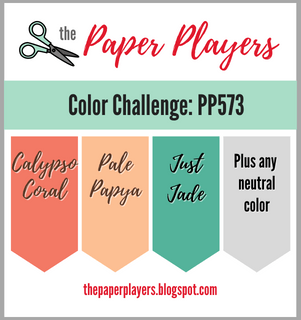
My colors are from the Paper Players Challenge #573. I used White as my neutral color.

My design is from Sunday Stamps Challenge #273.
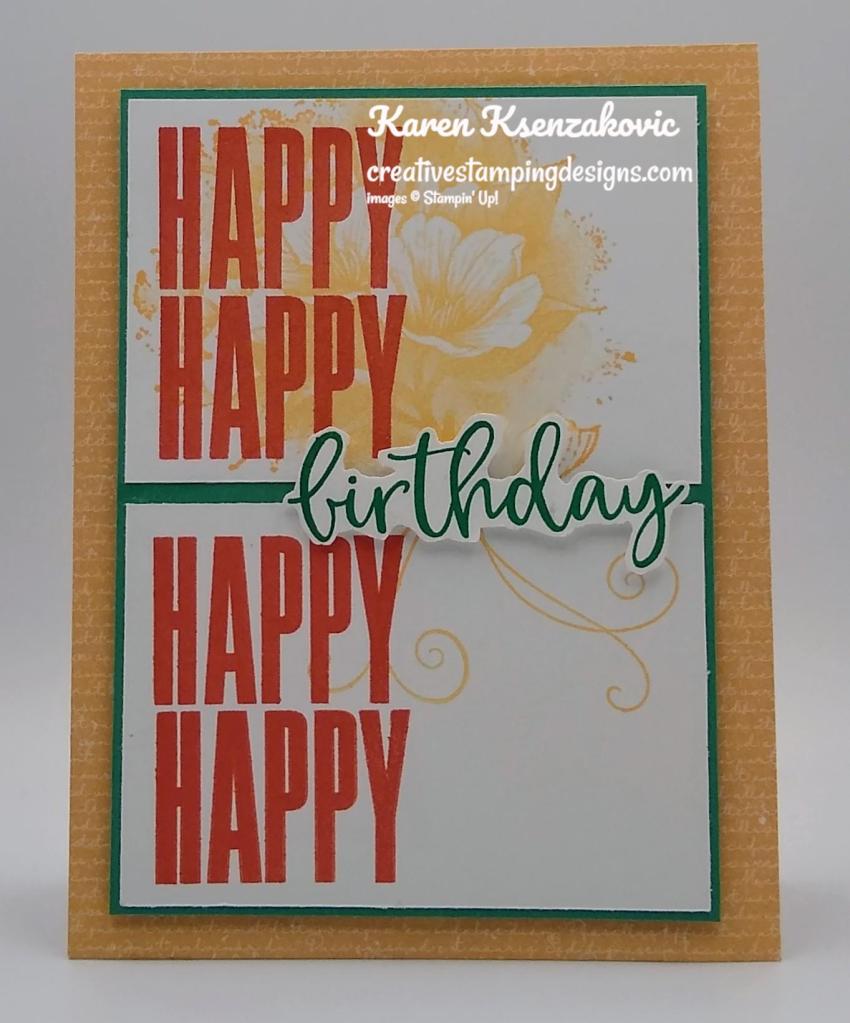
I started by adhering a panel of the Artfully Composed DSP to a Pale Papaya card base. Using my Stamparatus, I stamped the large sentiment from the Biggest Wish stamp set in Calypso Coral Ink on a panel of Basic White cardstock. I stamped the 1st 2 sentiments then moved the sentiment to the bottom and stamped the bottom 2.
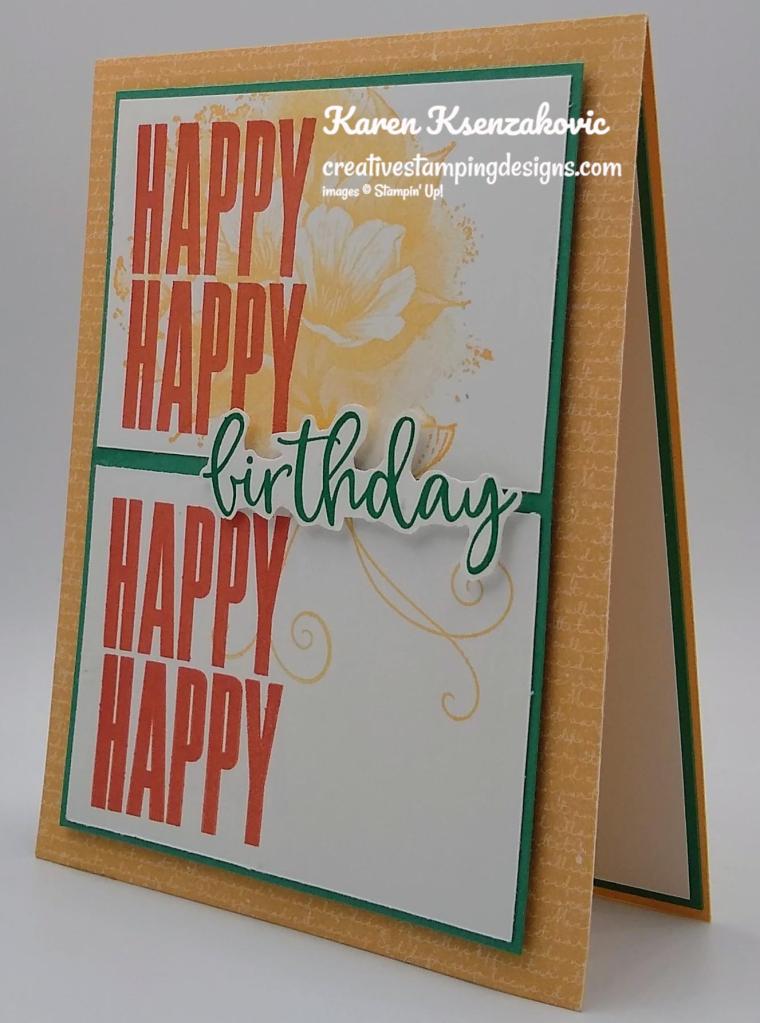
I stamped the large floral image and the swirl image from the Calming Camellia stamp set in Pale Papaya Ink over the sentiments. I cut the panel in half at 2 3/8″. I adhered both panels to a Just Jade mat using Stampin’ Seal. I stamped the script sentiment from the Biggest Wish stamp set in Just Jade Ink on a panel of Basic White cardstock and fussy cut it using my Paper Snips.

I adhered the script sentiment using Stampin’ Dimensionals. I adhered the layered panel to the card front using Stampin’ Dimensionals.
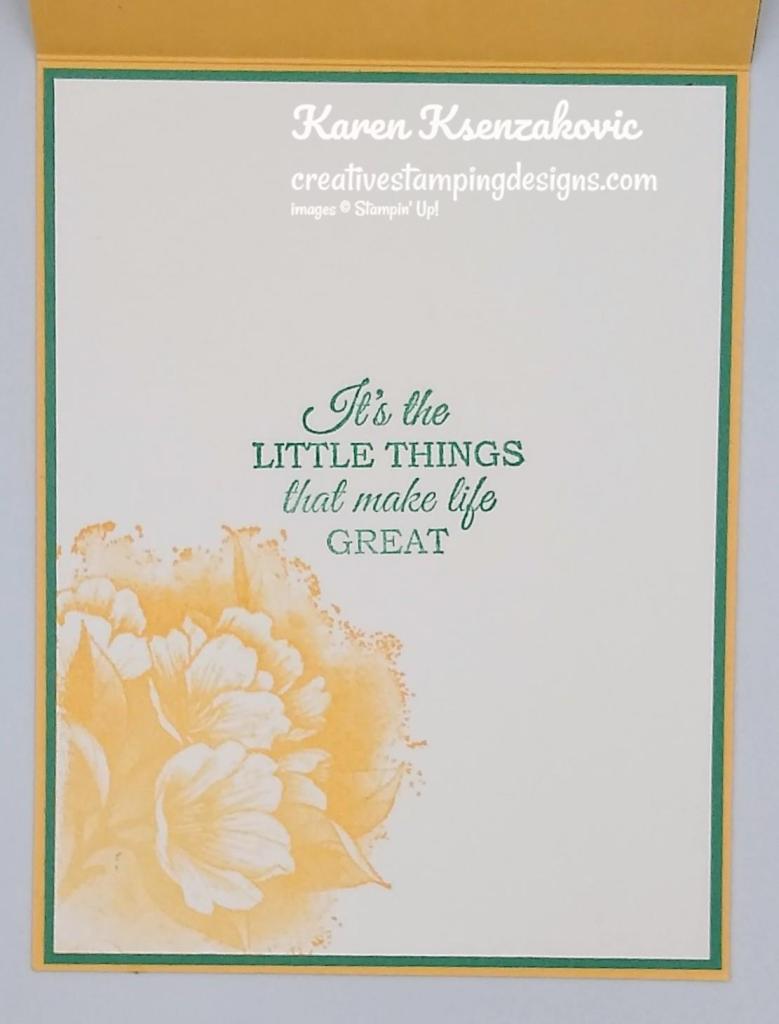
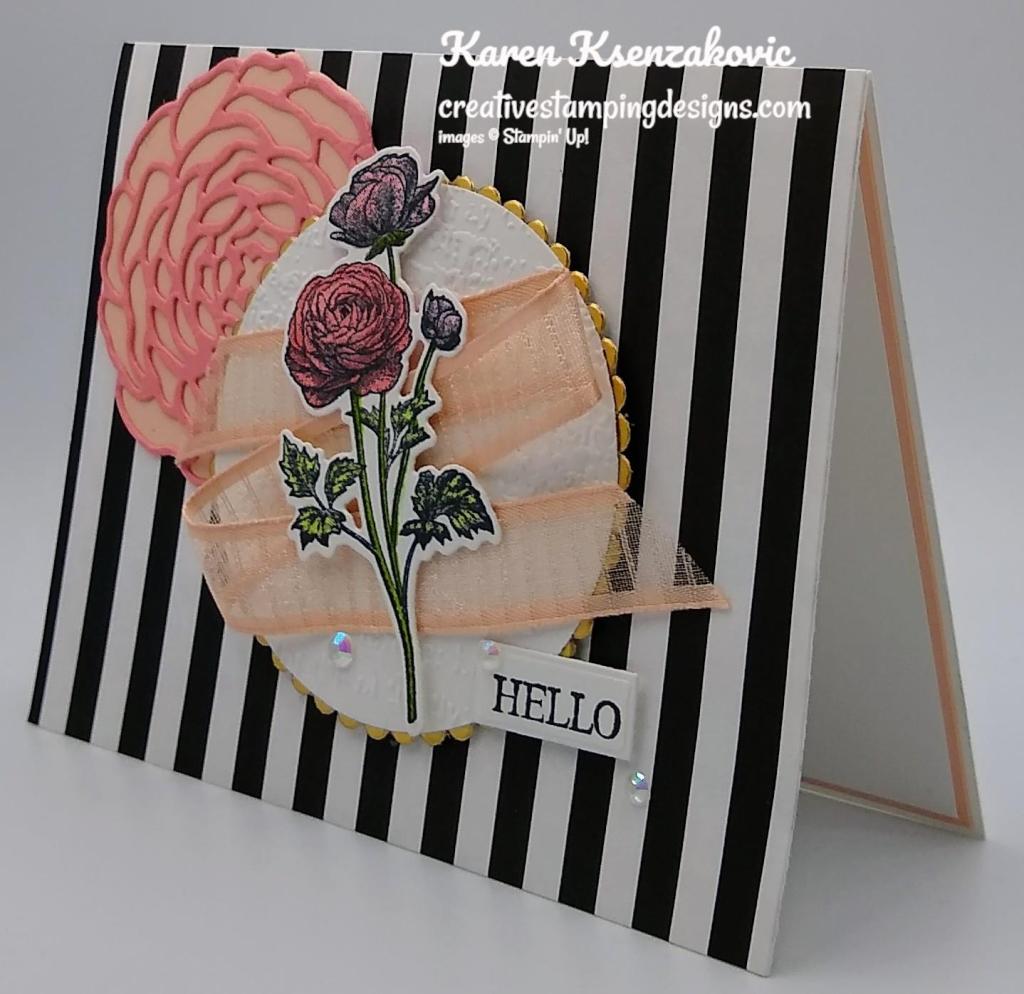
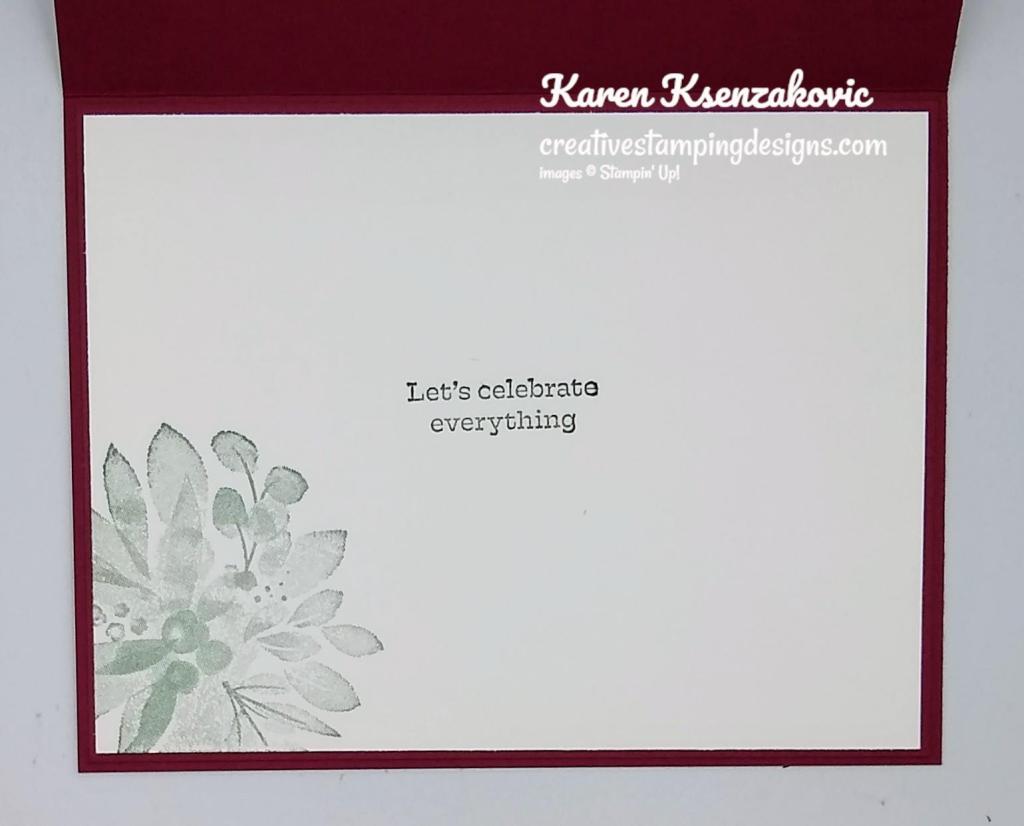
On the inside I stamped the sentiment from the Calming Camellia stamp set in Just Jade Ink on a Basic White panel. I stamped the large floral image from the Calming Camellia stamp set in Pale Papaya Ink on the bottom of the panel. I adhered the Basic Whtie panel to a Just Jade mat and then to the inside of the Pale Papaya card base.
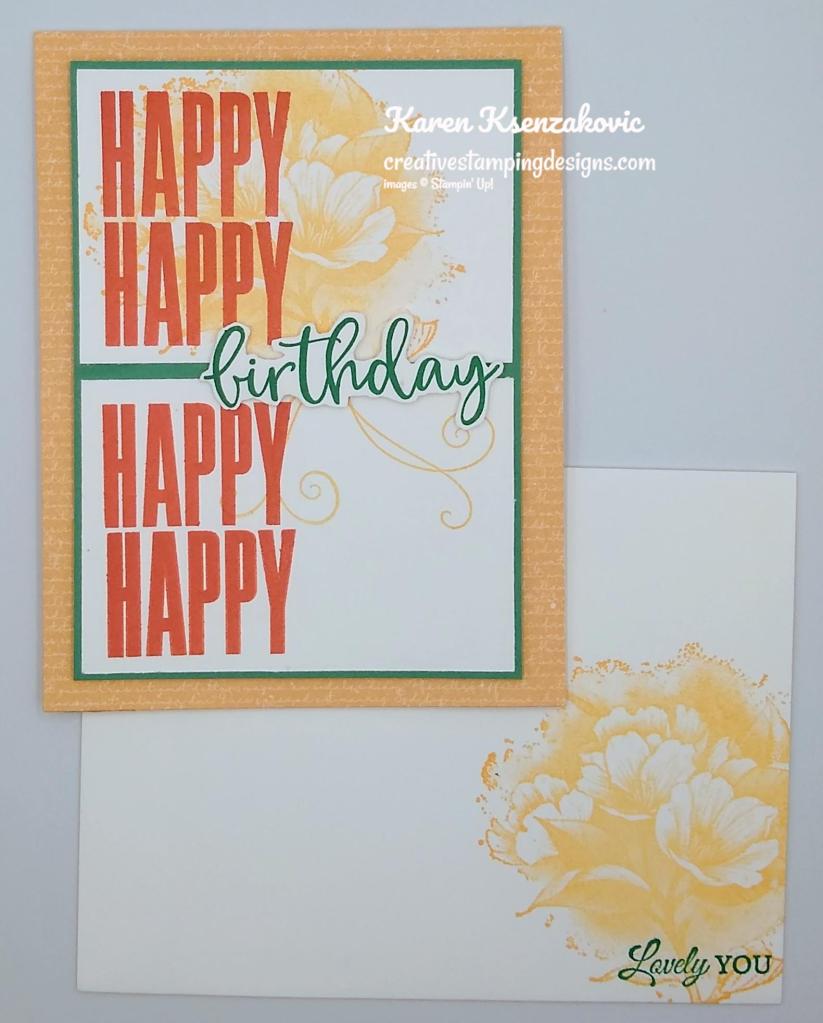
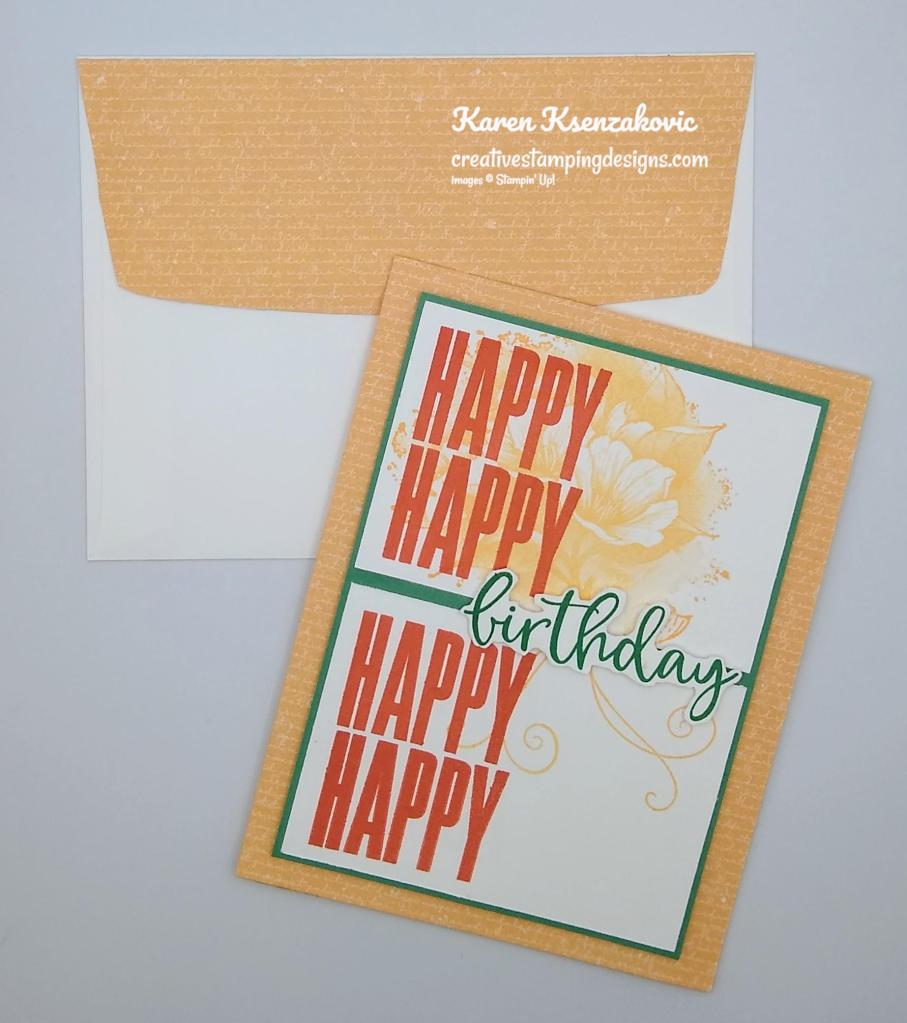
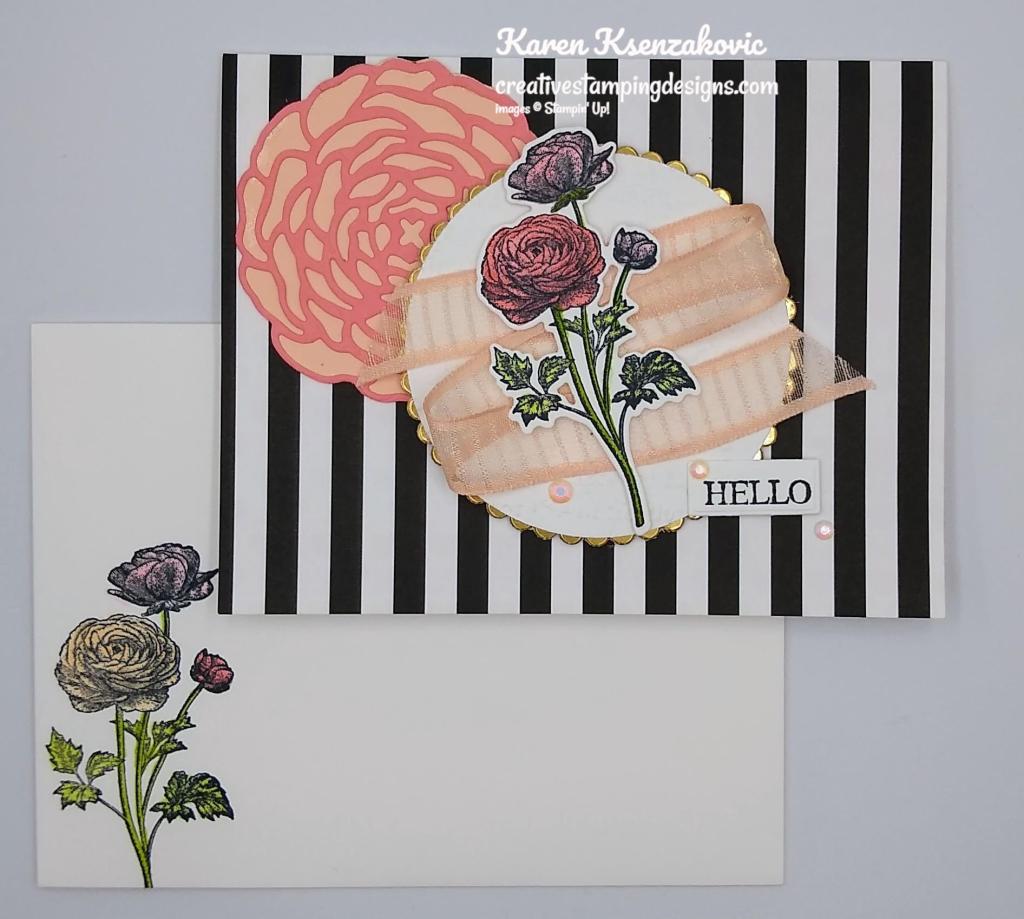
To finish my card, I decorated a Basic White Medium Envelope. I stamped the large floral image from the Calming Camellia stamp set on the envelope front in Pale Papaya Ink. I stamped the sentiment from the Calming Camellia stamp set in Just Jade Ink over the image. I adhered a panel of Artfully Composed DSP to the envelope flap.
Thank you for stopping by my blog today. I hope you liked my card and will give it a try. Just a reminder that today is the last day to take advantage of my Double Creative Stamping Designs Rewards. It ends tonight at 11:00pm ET. If you haven’t gotten your order in yet, there’s still time. This is a great time to get those rewards built up. Happy Stamping!!
*********************************************************************************************************
If you need any stamping supplies, I’d love to be your Demonstrator. Just click HERE to go directly to my online store or drop me an email if you have any questions.
MY CURRENT HOST CODE IS: 6P9HT6GS
Use this host code when placing an order with me. When you order $50 or greater you will receive a free gift from me! If your order is over $150, please do not use this code, but you’ll still get the free gift. The free gift is your choice of any 1 item valued up to $10.00 from the 2020-2021 Annual Catalog or the July-December 2021 Mini Catalog! For any orders $50 or more I will also send you my monthly class tutorials. Click HERE or go to my Customer Rewards for more details and to see what this months tutorials are.
Please remember to use my current Host Code and make sure that you can see my name on the final checkout page listed as your Demonstrator when you order so that you know that you’re ordering with me and you’ll get my rewards!
Happy Stamping, Karen!
*********************************************************************************************************
Kisses & Hugs
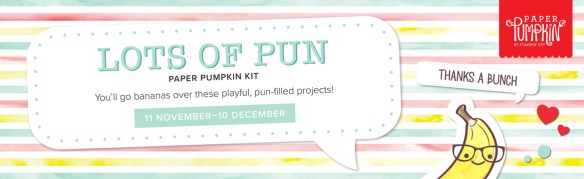
Today is The Last Day to Subscribe
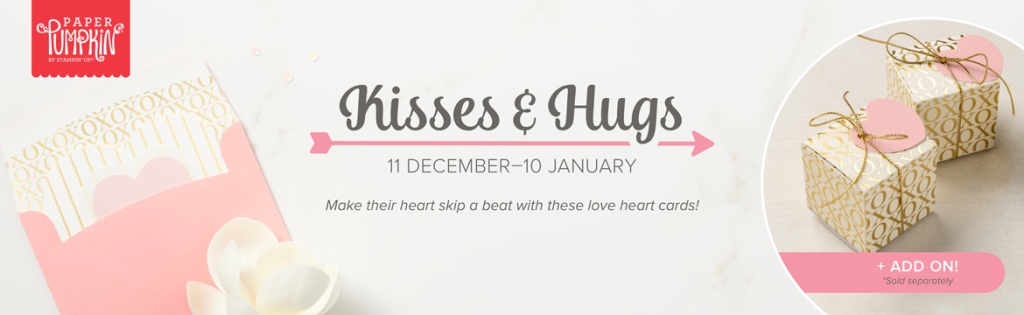
We all know that roses are red and violets are blue—it’s time that love-themed cards got an upgrade! The Kisses & Hugs Paper Pumpkin Kit will help you express that forever kind of love with heart-shaped cards that would make Cupid jealous.
The Kisses & Hugs kit is not bound to just Valentine’s Day, it works for all love occasions year-round like anniversaries, weddings, birthdays, or those “just because” days. Check out the teaser video below to get a taste of what’s included.
Details:
- Kit contains enough supplies to create 10 cards—5 each of 2 designs—and 10 coordinating envelopes
- Kit features an exclusive Two-Step photopolymer stamp set
- Kit includes a Gray Granite Classic Stampin’ Spot
- Card size: 4-1/2″ x 4-1/4″ (11.4 x 10.8 cm) heart-shaped cards; folded
- Coordinating colors: Blushing Bride, Flirty Flamingo, Gray Granite, Very Vanilla
ADD-ON
Name: Kisses & Hugs Mini Treat Boxes
Item number: 160147 | $10.00 USD | $13.75 CAD
Details:
- Contains 20 mini treat boxes and 20 heart tags
- Gold cord: 10-1/2″ yards (9.6 m)
- Finished size: 1-3/4″ x 1-3/4″ x 1-3/4″ (4.4 x 4.4 x 4.4 cm)
- Printed with gold foil
These coordinated treat boxes are not included in this month’s kit and are only available for purchase separately as an add-on online starting 25 January. You must be a Paper Pumpkin subscriber to purchase and they are only available while supplies last.
Subscribe to the January 2022 Paper Pumpkin Kit between 11 December and 10 January at paperpumpkin.com!
Note: Supplies may be limited toward the end of the subscription period.
*********************************************************************************************************
Sale-a-bration January 4 – February 28!!!

Sale-a-bration is going on right now. Click Here for a PDF version of the Sale-a-bration brochure. This is my most favorite time of Stampin’ Up! because you get to earn FREE products. There are 7 wonderful stamp sets and 4 gorgeous packs of Designer Series Paper. You can earn all of these FREE with qualifying orders. Who doesn’t like FREE??????
When you are placing your order, don’t forget to use my Current Host Code 6P9HT6GS for all orders under $150.
*********************************************************************************************************
Host A Party During Sale-a-bration

If you host a party during Sale-a-bration, both you and your guests can earn FREE Sal-a-bration products! Plus, place any party or personal order of $300 or more and receive the exclusive Stampin’ Up! Calming Camellia Stamp Set for FREE! Interested? I can set up a Host Code for you and your friends/family to order with. Drop me a line at creativestampingdesigns@gmail.com. I’d be happy to talk to you about it.
*********************************************************************************************************
Join The Stampin’ Up! Community During Sale-a-bration and get 2 FREE Stamp Sets
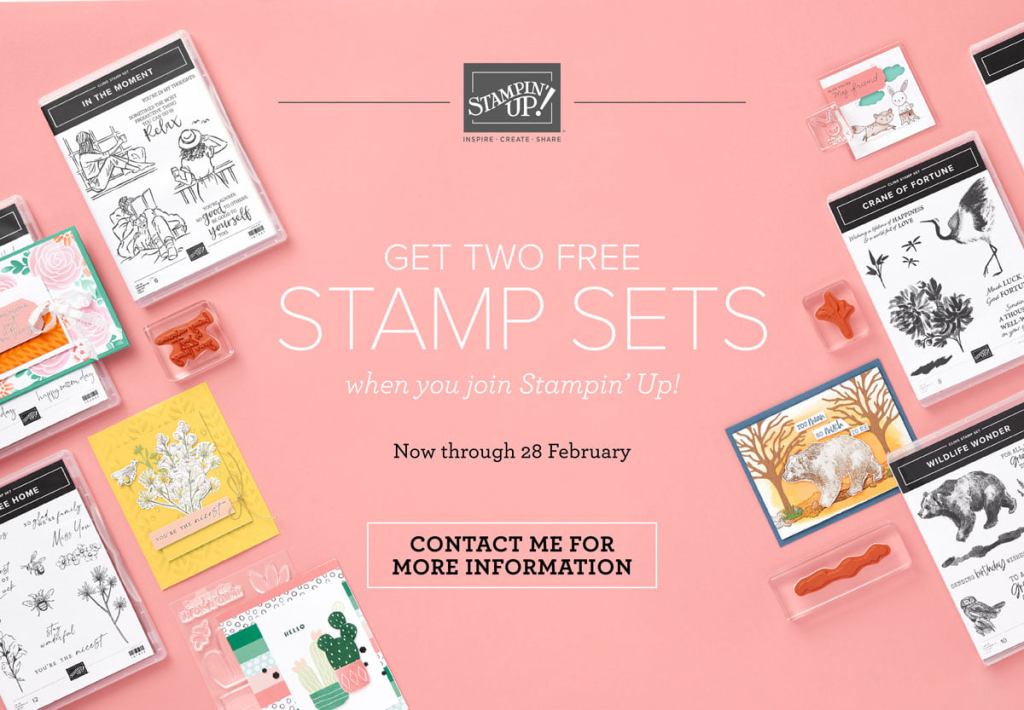
Starting January 4 through February 28 you can get 2 FREE STAMP SETS when you join Stampin’ Up! For just $99 you get to choose $125 of product of your choice from any of the current catalogs and you can also choose any 2 Stamp Sets of your choice (cannot be host or Sale-a-bration sets) absolutely FREE!!! You can end up with $175 in product for just $99. There is no obligation to sell, you can join as a Hobby Demonstrator. Interested??? Ask me how. I’d love to have you on my team, drop me a note at creativestampingdesigns@gmail.com I’d be more than happy to talk to you about it.
*********************************************************************************************************
Card stock cuts for this project:
- Basic White Cardstock 3 1/2″ X 4 3/4″ (artwork cut in half), 3″ X 1 1 /4″ (sentiment), 4″ X 5 1/4″(inner liner)
- Just Jade Cardstock 5″ X 3 5/8″ (artwork mat), 4 1/8″ X 5 3/8″ (inner liner mat)
- Pale Papaya Cardstock 4 1/4″ X 11″ (card base scored & folded at 5 1/2″)
- Artfully Composed Dsigner Series Paper 4 1/4″ X 5 1/2″ (card front), 2 1/4″ X 6″ (envelope)
*********************************************************************************************************
Product List
")
")


 Designer Series Paper")


")
")


 Host Designer Series Paper")


 Organdy Striped Ribbon")


")


")


 Designer Series Paper")


 Open Weave Ribbon")


 Designer Series Paper")


")
")


")

 Specialty Designer Series Paper")


")


 Specialty Designer Series Paper")
 Specialty Pack")


