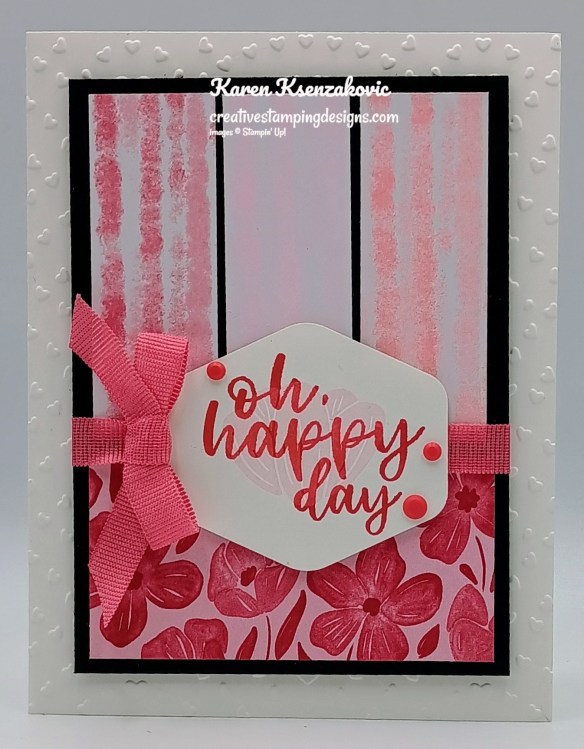
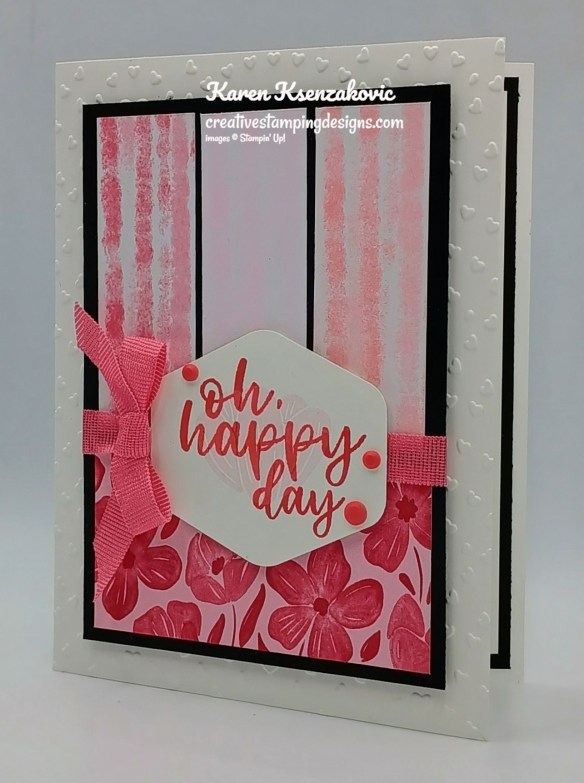
Good Thursday morning stamping friends welcome to our Happy Inkin’ Thursday Blog Hop. If you are starting with me, thank you, I hope you will stop by everyone’s blog to see what they have created this week. If you are hopping over from Mary’s blog, thank you for stopping by. This week we have Color Challenge. If you’d like to see a quick video on how I made this card, Click Here to go to my Instagram Reels. Here is my card using this week’s colors.
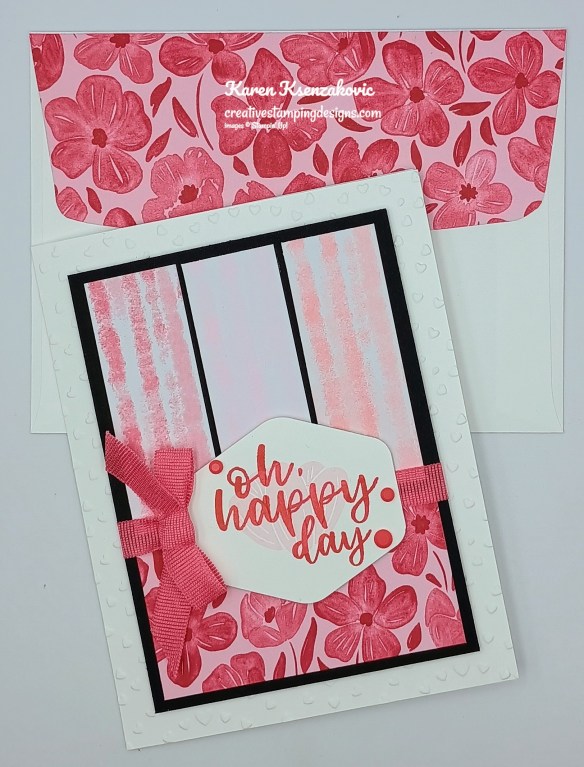
I used the new Stampin’ Up! Online Exclusive A Round of Hellos Stamp Set along with the Heartfelt Hexagon Punch, Hearts of Love 3D Embossing Folder,Brights, Regals, Subtles and 2025-2027 In-Color 6 x 6 Designer Series Paper for my card today.
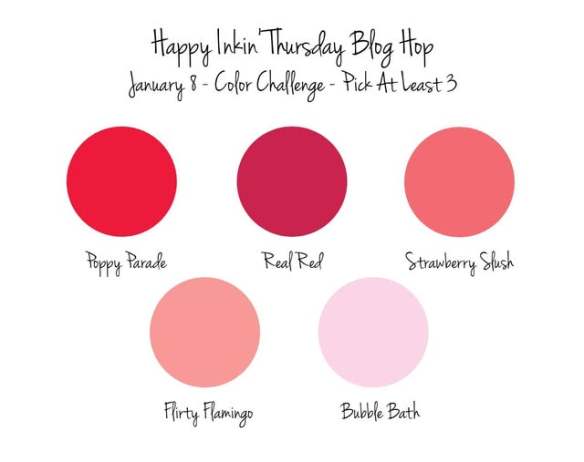
These are out colors for this week.
Emboss a Basic White card front using the Hearts of Love EF. Adhere the embossed panel to the front of the Basic White card base.
Adhere the panel of Regals DSP to the bottom of a Basic Black mat. Adhere the 3 strips of the Brights, Subtle and 2025-2027 In-Color 6 X 6 DSP to the top of the panel. Wrap a piece of Strawberry Slush 3/8″ Faux Linen Ribbon around the layered panel and tie a bow. Adhere the layered panel to the Basic Whtie card front with Stampin’ Dimensionals.
On a panel of Basic White, stamp the sentiment from A Round of Hellos stamp set in Poppy Parade Ink. Stamp the flower image from A Round of Hellos stamp set in Bubble Bath Ink over the sentiment. Punch the sentiment out using the Heartfelt Hexagon Punch. Adhere the sentiment to the card front over the ribbon with Stampin’ Dimensionals. Add a few Dear Dots to the sentiment.
On a panel of Basic White, stamp the sentiment from A Round of Hellos stamp set in Poppy Parade Ink. Stamp the flower image from A Round of Hellos stamp set in Bubble Bath Ink over the sentiment. Adhere the Basic White panel to a Basic Black mat then to the inside of the Basic White card base.
Decorate a Basic White Medium Envelope to complete your card. Stamp the flower image from A Round of Hellos stamp set in Bubble Bath Ink on the envelope front in a circle. Stamp the flower image in Tuxedo Black Ink. Adhere a panel of Regals DSP to the envelope flap.
Thank you for stopping by my blog today. Now that you’ve seen my card, let’s get on with the hop! Click the next button below to hop over to see what Tara has created. Happy Hopping!
Just in case you get lost along the way, here is a list of the team members involved in the hop today.
If you need any stamping supplies, I’d love to be your Demonstrator. Just click HERE to go directly to my online store or drop me an email if you have any questions.
Good Friday morning stamping friends and welcome to my Fun Fold Friday. I hope you all had a great week. Yesterday I finally got my first Newsletter out. I was very excited since it took me a while to get it started. I will be sending out the Newsletter once a week with updates. This will only go out to those that subscribed. If you didn’t get my Newsletter yesterday and would like to opt in, please go to my Home Page and click on the subscribe link on the right sidebar.
Today’s card was made since my daughter loves Disney’s Stitch so much and the new movie comes out today. I played with an Online Exclusive Bundles and some of the new Regals DSP. If you’d like to see a quick video of how I made this card, Click Here to go to my Instagram Reels. Here’s my card for today.
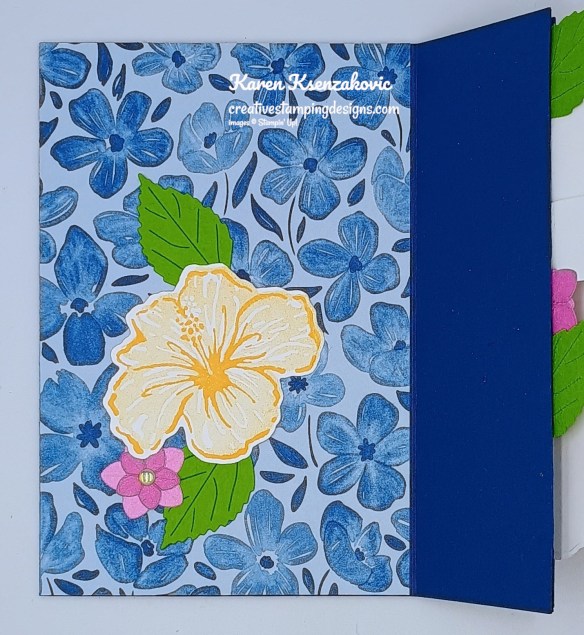
I used the Stampin’ Up! Online Exclusive Happy Hibiscus Bundle along with the Regals 6 x 6 Designer Series Paper and Memories in Bloom Two-Tone Cardstock for my card today.
Emboss the 2 smaller panels of Blueberry Bushel using the Happy Hibiscus Hybrid Embossing Folder. On a panel of Basic White, stamp the outlined triple flower image from the Stampin’ Up! Happy Hibiscus Photopolymer Stamp Set in Peach Pie and Strawberry Slush Inks. Stamp the 3 solid flower images from the Happy Hibiscus stamp set in Peach Pie and Strawberry Slush Inks, stamping off once on scrap paper, over the coordinating outlined images. Cut the images out using the Happy Hibiscus Dies.
Adhere the panel of Regals DSP to the card front with Liquid Glue. Using the Happy Hibiscus Dies, cut 6 of the leaves from a panel of Granny Apple Green and the small flowers from a panel of Petunia Pop Two-Tone Cardstock. Cut 6 of the larger flower on the lighter side of the paper and 6 of the smaller one on the darker side of the paper. Adhere the small flowers to the larger flowers with Glue Dots.
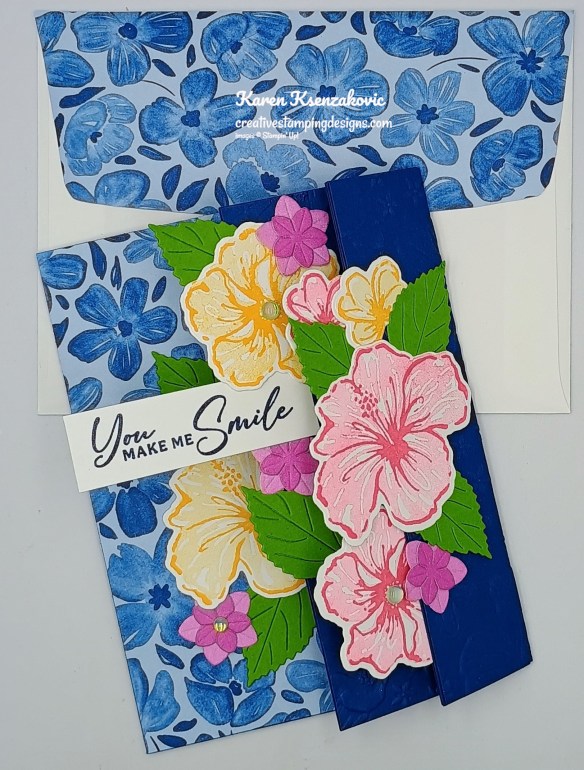
Adhere the 2 embossed panels to the 2 folded edges of the Blueberry Bushel card base with Liquid Glue. Randomly add the flowers to the card front panels with Glue Dots. Insert the leaves under the flowers with Glue Dots. On a strip of Basic White, stamp the sentiment from the Happy Hibiscus stamp set in Blueberry Bushel Ink. Adhere the sentiment to the 1 3/4″ folded panel with Liquid Glue making sure you can see it when the card is folded close. Add a few of the Holographic Resin Dots to the flowers.
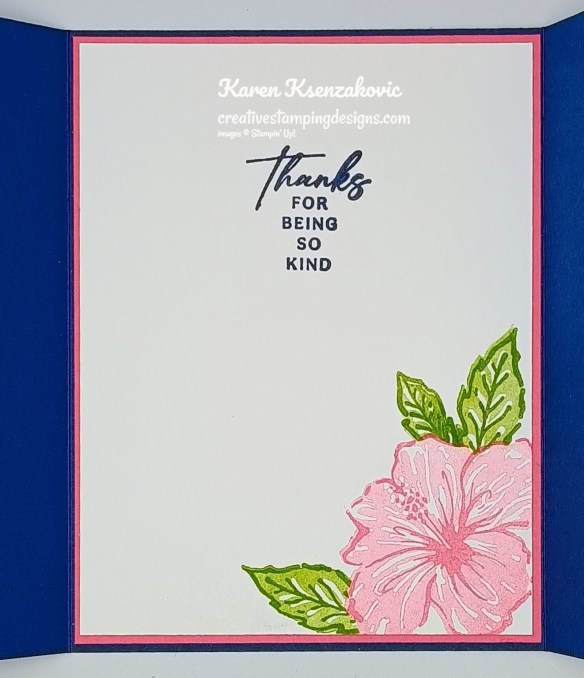
Stamp the sentiment from the Happy Hibiscus stamp set in Blueberry Bushel Ink on a panel of Basic White. Stamp the large, outlined flower image from the Happy Hibiscus stamp set in Strawberry Slush Ink on the bottom of the panel. Stamp the solid flower image in Strawberry Slush Ink, stamping off once on scrap paper, over the outlined image. Stamp the outlined leaf images in granny Apple Green Ink. Stamp the solid leaf images in Granny Apple Green Ink, stamping off once on scrap paper, over the detailed image. Adhere the Basic White panel to a Strawberry Slush mat then to the inside of the Blueberry Bushel card base.
Decorate a Basic White Medium Envelope to finish your card. Stamp the detailed flower images from the Happy Hibiscus stamp set in Strawberry Slush and Peach Pie Inks on the envelope front. Stamp the solid flower images in Strawberry Slush and Peach Pie Inks, stamping off once on scrap paper, over the outlined images. Stamp the leaf images in granny Apple Green Ink. Adhere a panel of Regals DSP to the envelope flap.
Thank you for stopping by my blog today. I hope you like the card and will give it a try. Happy Stamping!!
If you need any stamping supplies, I’d love to be your Demonstrator. Just click HERE to go directly to my online store or drop me an email if you have any questions.
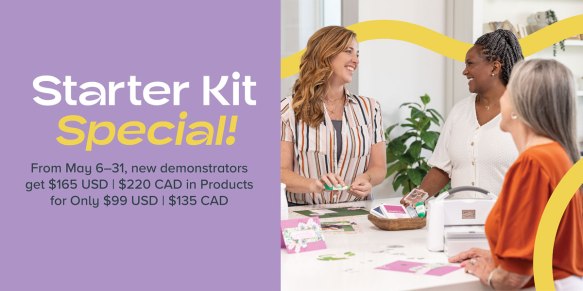
Stampin’ Up!’s BIGGEST Starter Kit Joining Special May 6th – 31st
May is an awesome time to join my Stampin’ Up! Team!! Have you ever thought about joining the Stampin’ Up! community? Are you into scrapbooking and have you seen all the new scrapbook products Stampin’ Up! has? Is your wish/want list pretty long and do you order often? Wouldn’t you love to get all these products at a discount? Why not consider joining the Stampin’ Up! community between May 6-31, and save a minimum of 20% off everything you buy? Are you new to stamping and don’t know where to start, but would like to join to save? Ask me for help, I’m here to help and assist you anyway that I can.
Stampin’ Up!’s BIGGEST Starter Kit Special will be available for a limited time! Between May 6–31, anyone who signs up to be a demonstrator can pack their Starter Kit with $165 USD worth of products for only $99 USD. That’s an extra $66 USD in products!
Crafting is even more fun with community, and there’s never been a better time to join then with Stampin’ Up!’s BIGGEST Starter Kit Special. Become a demonstrator and enjoy all the perks that come with that, like a 20–25% product discount, exclusive early access to new products, the chance to attend incredible training and crafting events like Stampin’ Up!’s OnStage and Creativity Now, and so much more!
If you join my team, I’m offering free classes to my team members. Tara Carpenter and I run Online Zoom classes and we decided that our direct team members will receive the classes for free. You’ll get the PDF and the link to the Online Zoom class along with the replay.
There is never an obligation to sell. You can join just to enjoy the discount for yourself along with all the other Demonstrator benefits. Once you join, you’ll get at least a 20% discount on all of your Stampin’ Up! merchandise purchases and you get to order early from the upcoming catalogs and Online Exclusives! You will also be able to attend the OnStage Events and any other events Stampin’ Up! has and you get to be a part of our awesome Stampin’ Up! team!
Unsure about this and want to talk? Contact me at creativestampingdesigns@gmail.com and we can talk. You can also find additional information Here at Join My Team. Being a part of the Stampin’ Up! Community is one of the best decisions I’ve ever made. I have made many friends along the way while doing what I love, Paper Crafting. This Joining offer is only good starting May 6 – May 31. Why not give it a try? I’d love to have you on my team.
Information For Karen & Tara’s next Online Class Coming Soon!!
Tara Carpenter and I are teaming up for an Online Zoom card class in June. Our next class will be on Sunday June 29th at 1pm ET. We will be using the Celebratory Sips Suite Collection. I will be posting information about the class along with a link to register in the next couple days.
Send your loved ones elevated cards with heartfelt sentiments! • Makes 9 cards: 3 each of 3 designs with 9 coordinating envelopes • Envelopes and card bases with decorative gold foil • Precut paper pieces and unique sentiment labels • Coordinating colors: Berry Burst, Cajun Craze, Early Espresso, Mossy Meadow, Pretty Peacock (Classic Stampin’ Spot), Timid Tiger Coordinates with the Floral Charm Suite Collection (item 166141)
Subscribe to the June Paper Pumpkin Kit between 11 May and 10 June by clicking here!
Don’t miss the coordinating Hugs Abloom Dies Add-On!
Make the most of your Paper Pumpkin kits with the Hugs Abloom Dies add-on! Quickly and cleanly cut out a flower, leaf sprig, sentiment label, or Hugs sentiment to elevate your crafting projects. These additional dies are designed to work with THREE Paper Pumpkin Kits: the Inked Occasions Paper Pumpkin Kit, the Mountain Majesties Paper Pumpkin Kit, and the Full of Charm Paper Pumpkin Kit. Pair these dies with other Stampin’ Up! products for even more creative options!
DETAILS – 4 dies – Largest die: 2-1/2″ x 1-1/4″ (6.4 x 3.2 cm) – Use with a Stampin’ Cut & Emboss Machine (sold separately)
You must be a current Paper Pumpkin subscriber to purchase this item. To become a subscriber, visit www.stampinup.com/paperpumpkin.
Note: Supplies may be limited toward the end of the subscription period.
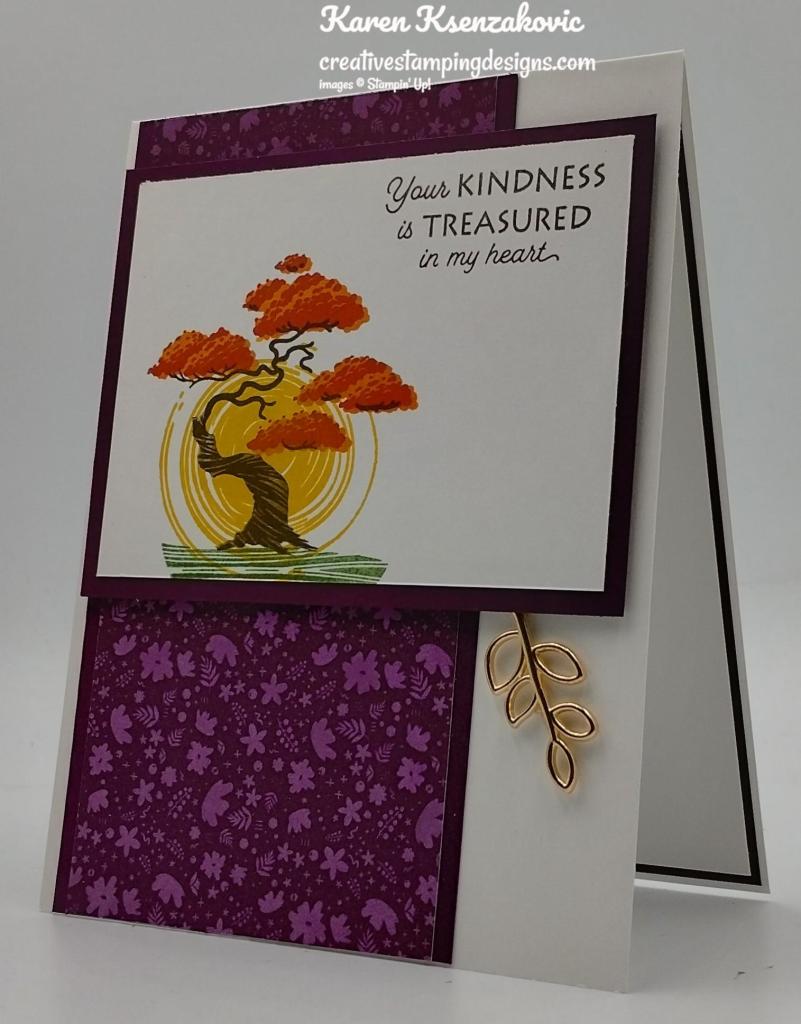
Good Thursday morning my stamping friends welcome to our Happy Inkin’ Thursday Blog Hop. I hope everyone is doing well today. I hope you will stop by everyone’s blog to see what they have created this week. If you are hopping over from Akiko’s blog, thank you for stopping by. This week we have Theme Challenge. Here is my card using this week’s Theme.
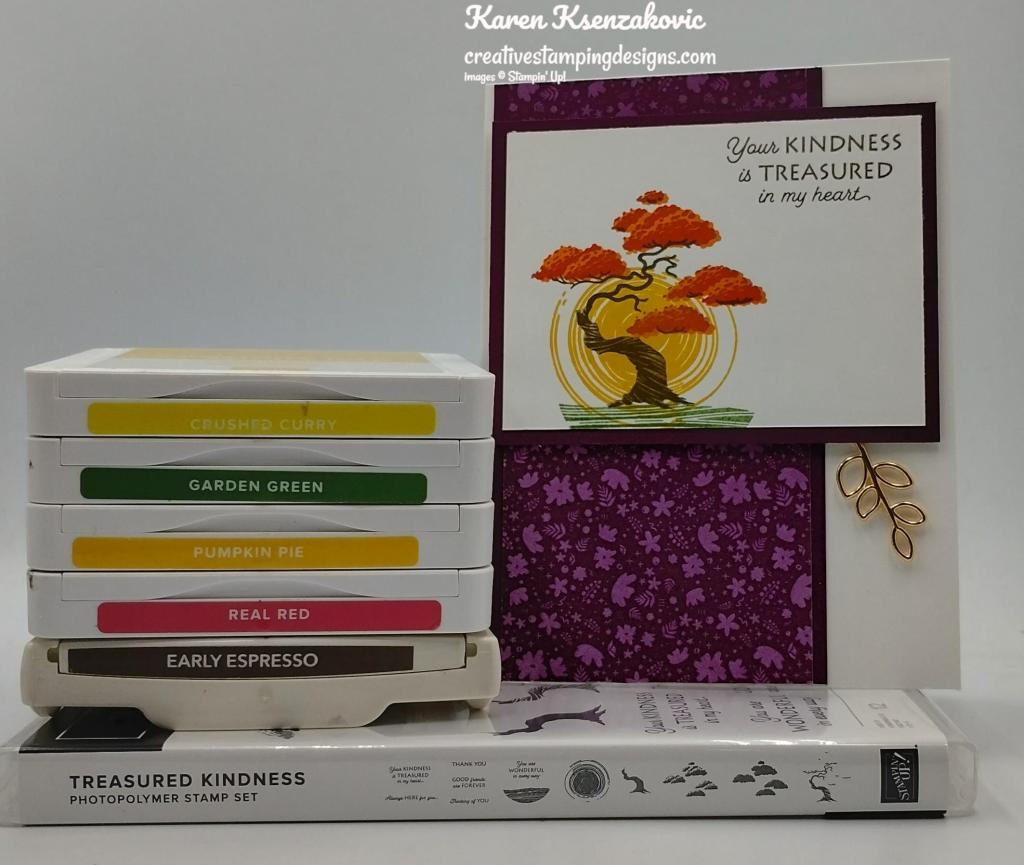
I used the Stampin’ Up! Treasured Kindness Photopolymer Stamp Set along with the Regals 6 X 6 Designer Series Paper for my card today.
This is this week’s Theme.
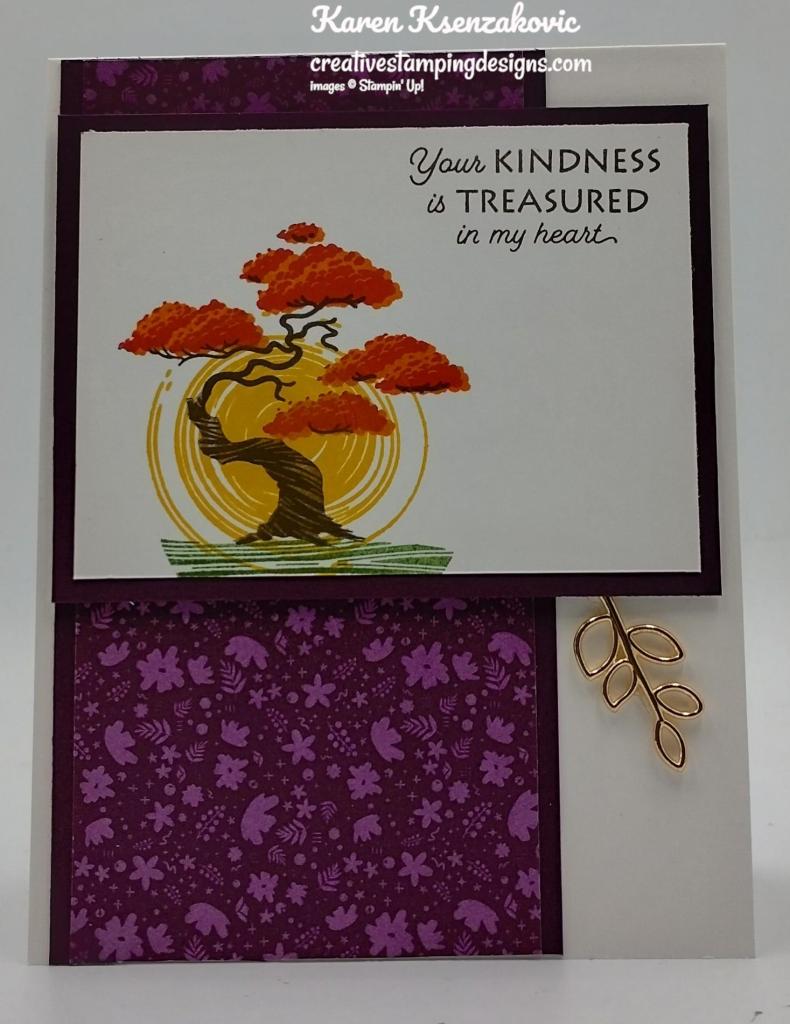
I started by adhering a panel of Blackberry Bliss Regals DSP to a Blackberry Bliss mat. I adhered the layered panel to a Basic White Thick card base using Multipurpose Liquid Glue.
On a panel of Basic White cardstock, I stamped the detailed tree trunk image from the Treasured Kindness stamp set in Early Espresso Ink. I stamped the tree trunk fill image in Early Espresso Ink, stamping off once on scrap paper. I stamped the solid leaf image from the Treasured Kindness stamp set in Pumpkin Pie Ink on the branches. I stamped the detail leaf image in Real Red Ink over the solid image. I stamped the bottom ground image in Garden Green Ink below the tree. I stamped the sun image from the Treasured Kindness stamp set in Crushed Curry Ink. I stamped the sentiment from the Treasured Kindness stamp set in Blackberry Ink on the top of the panel. I adhered the Basic White panel to a Blackberry Bliss mat.
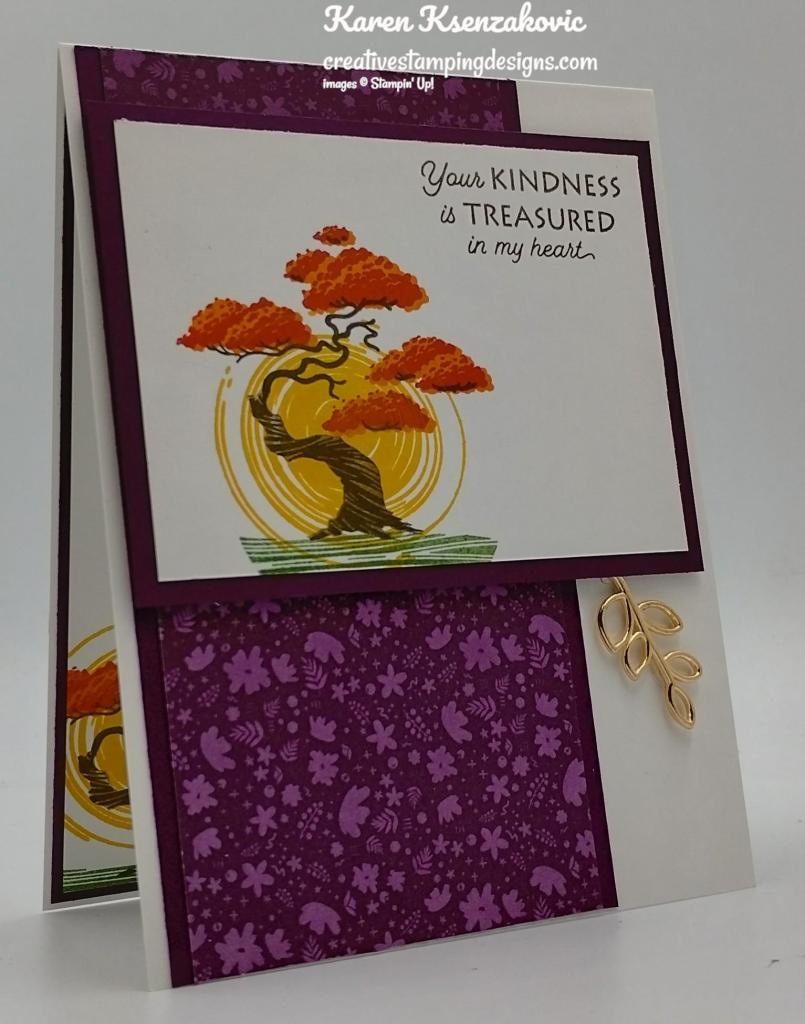
I adhered the matted artwork to the card front using Stampin’ Dimensionals. I added an Open Leaf Trinket to the card front using a Glue Dot.
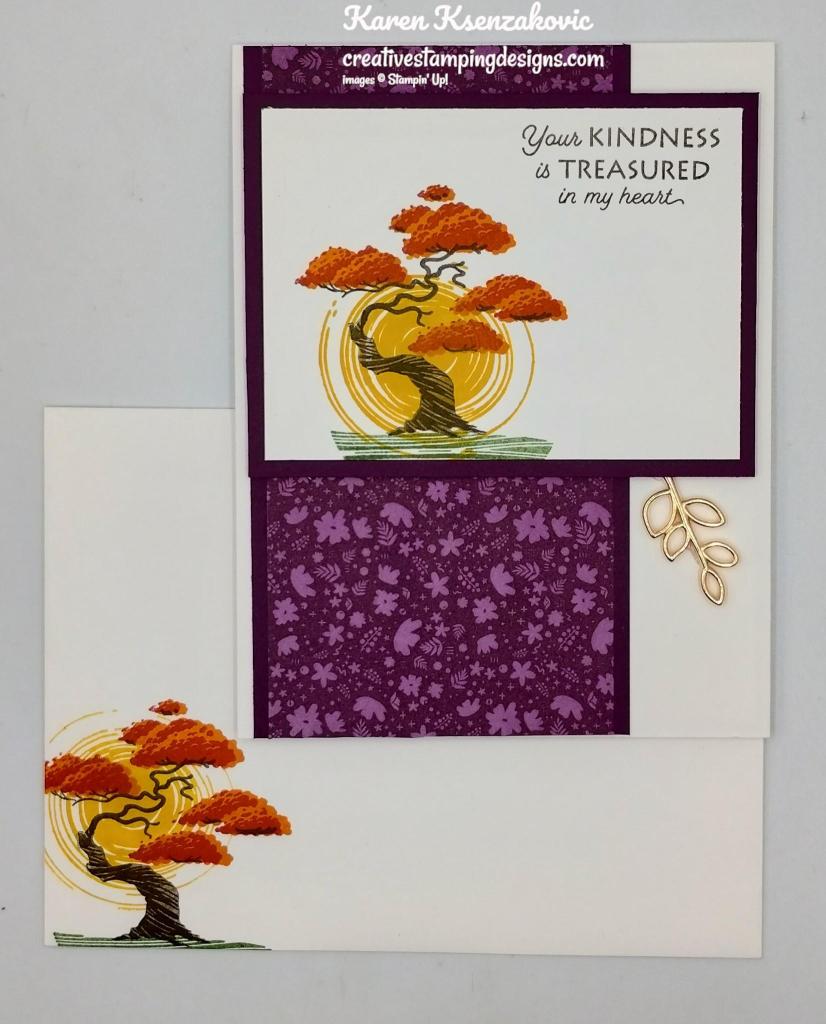
On the inside I stamped the sentiment from the Treasured Kindness stamp set in Blackberry Bliss Ink on a panel of Basic White cardstock. I stamped the tree image from the Treasured Kindness stamp set on the bottom of the panel the same as I did for the card front. I adhered the Basic White panel to a Blackberry Bliss mat then to the inside of the Basic White Thick card base.
To complete my card, I decorated a Basic White Medium Envelope. I stamped the tree image from the Treasured Kindness stamp set on the envelope front the same as I did for the card. I adhered a panel of Regals DSP to the envelope flap.
Thank you for stopping by my blog today. I hope you liked my card and will give it a try. Now that you’ve seen my card, take a minute to hop through and see everyone’s projects today. If you click on the Next Blog button, you’ll go to Tara’s page. Or you can just click on the names below to go directly to all their blogs! Happy Hopping!!
If you need any stamping supplies, I’d love to be your Demonstrator. Just click HERE to go directly to my online store or drop me an email if you have any questions.
MY CURRENT HOST CODE IS: 76V6XDMX
Use this host code when placing an order with me. When you order $50 or greater you will receive a free gift from me! If your order is over $150, please do not use this code, but you’ll still get the free gift. The free gift is your choice of any 1 item valued up to $10.00 from the 2022-2023 Annual Catalog or the July – December 2022 Mini Catalog!For any orders $50 or more I will also send you my monthly class tutorials. Click HERE or go to my Customer Rewards for more details and to see what this month’s tutorials are.
Please remember to use my current Host Code and make sure that you can see my name on the final checkout page listed as your Demonstrator when you order so that you know that you’re ordering with me and you’ll get my rewards!
Starter Kit + Promotion From Stampin’ Up! October 4-31!!
October is a fabulous time to join Stampin’ Up! You will get even MORE FREE products in your customizable Starter Kit! Between October 4-31, when you join, you will get $155 worth of products in your Starter Kit for only $99!! Plus you’ll get free shipping and all the fun being a part of Stampin’ Up! and our Inkin’ Krew Team!
STARTER KIT+ PROMOTION DATES: OCTOBER 4-31, 2022
When you purchase your Starter Kit, you will be able to redeem $155 of Starter Kit eligible products for just $99!!
You can select any eligible Stampin’ Up! products up to the stated value of $155.
Your Starter Kit also includes business resources like catalogs, brochures, order forms, and postcards.
The Starter Kit also includes a FREE past Paper Pumpkin kit!
In addition to the amazing added value to your Starter Kit, when you join Stampin’ Up! you get to be a part of our amazing community of crafters. Plus, you get to enjoy sharing simple and fun crafting experiences with others, early access to products, and exclusive access to training events!!
There is no requirement to hold events, share online or sell in any way to others. You can join and simply get the awesome Starter Kit+ deal and then get a minimum of a 20% discount on anything that you purchase as a Demonstrator!
New demonstrators who submit their Independent Demonstrator Agreement (IDA) before October 4 or after October 31 will not be eligible for this offer.
You can check out more information about joining our team Here and more details about the benefits of being a Demonstrator and find the link to join Here.
I’d be happy to help you and talk to you about joining. Contact me at creativestampingdesigns@gmail.com and we can connect. This is such a great deal you won’t want to pass it up.
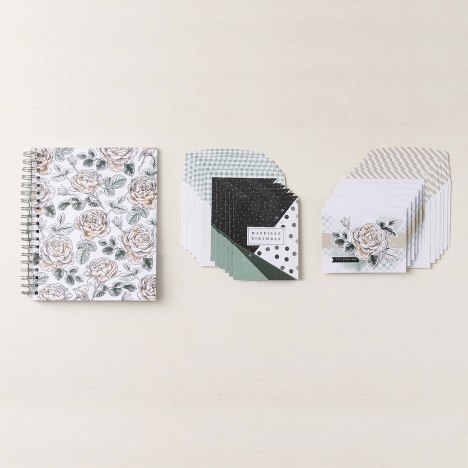
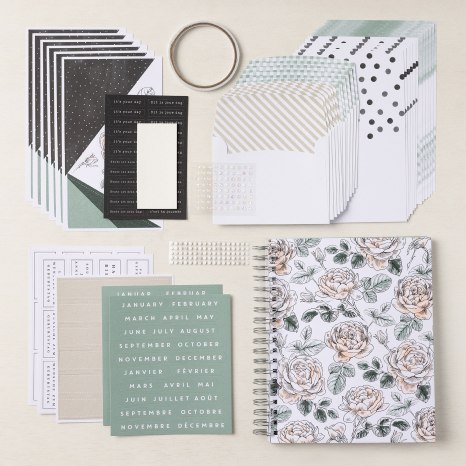
Get ready for the latest addition to the Kits Collection by Stampin’ Up! The Birthday Card Organizer Kit has everything you need to plan ahead and never forget another birthday again!
#161056 / $25 USD
Kit includes one 8″ x 10″ (20.3 x 25.4 cm) monthly planner with space to record birthdays each month as well as a pocket sleeve to hold birthday cards.
Includes 12 full-size birthday cards, 6 of 2 designs, and 12 coordinating envelopes.
Includes Glue Dots, Stampin’ Dimensionals, Adhesive-Backed Embellishments, and Tear & Tape Adhesive
Includes die-cut florals and pieces ready for you to use—no prep work required!
Includes sticker sentiments and die-cut labels in Dutch, English, French, and German
‘Tis the season to make your own Christmas cards with the Ho Ho Ho Paper Pumpkin Kit! This kit contains whimsical designs of Santa and his reindeer in a classic Christmas color palette which is sure to match various styles of holiday décor and look great on mantles everywhere. Each kit contains enough supplies to create 9 festive cards—3 each of 3 designs—and 9 coordinating envelopes. These cards are sure to bring the warm holiday spirit. And word from the North Pole is that this kit coordinates with next month’s Paper Pumpkin tag kit and the special add-on product! With so much coordination between products, you’ll have a breeze at creating a cohesive look for all your holiday gifting needs. Make this season the most wonderful time of the year for your loved ones—and for yourself!
This kit includes:
Ho Ho Ho Photopolymer Stamp Set
Early Espresso Classic Stampin’ Spot
Printed card bases
Printed envelopes
Printed die cuts
Die-cut labels
Iridescent foil die-cut snowflakes
Vellum
Vanilla expoy dots
Adhesive dots
Mini Dimensionals
Card size: 4-1/4″ x 5-1/2″ (10.8 x 14 cm)
Coordinating Stampin’ Up! colors: Bermuda Bay, Cherry Cobbler, Crumb Cake, Early Espresso, Shaded Spruce, Sweet Sorbet, Very Vanilla
Subscribe to the October Paper Pumpkin Kit between 11 September and 10 October at paperpumpkin.com!
Note: Supplies may be limited toward the end of the subscription period.
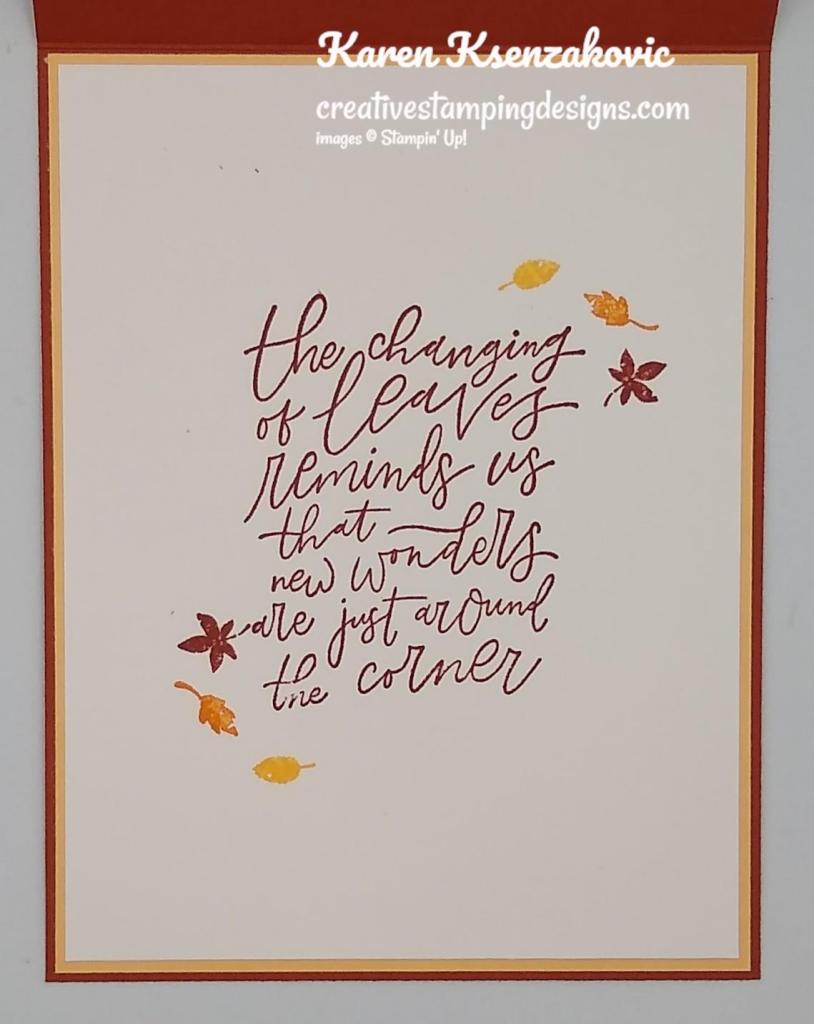
Good Sunday morning my stamping friends. How is everyone’s weekend going? I’ve got the day off today and it looks like it’s going to be a beautiful fall day. Unfortunately my husband is sick and my daughter is going to work, so I’ll just have to stay in and make some cards. I may run a couple errands just to get out for a bit.
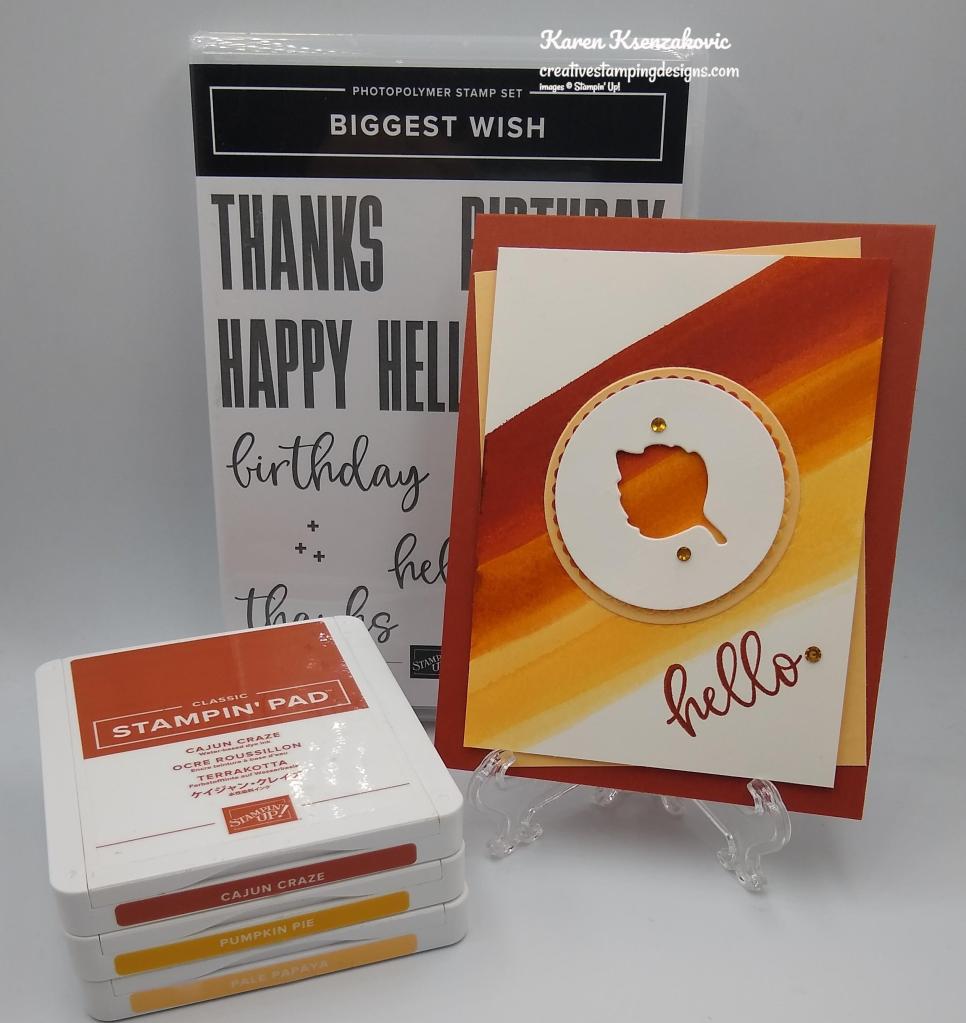
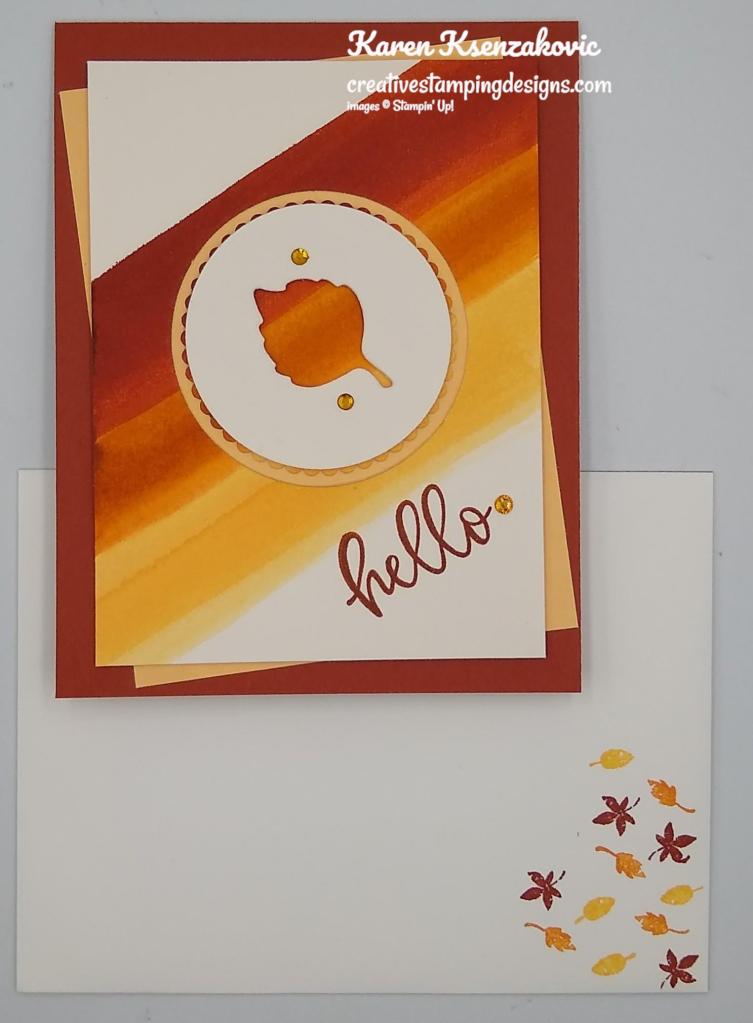
Today and tomorrow’s cards are a CASE from my upline Jaimie. Last week we had our monthly team meeting and she showed us a card using the Water Painters. I have to admit, since I’ve gotten all the Stampin’ Blends Markers I haven’t water colored. That was always my go to for relaxing. I changed my card up a bit from hers, but it’s basically the same. Here’s my card for today.
I used the Stampin’ Up! Biggest Wish Photopolymer Stamp Set along with my Water Painters and other sets for my card today.
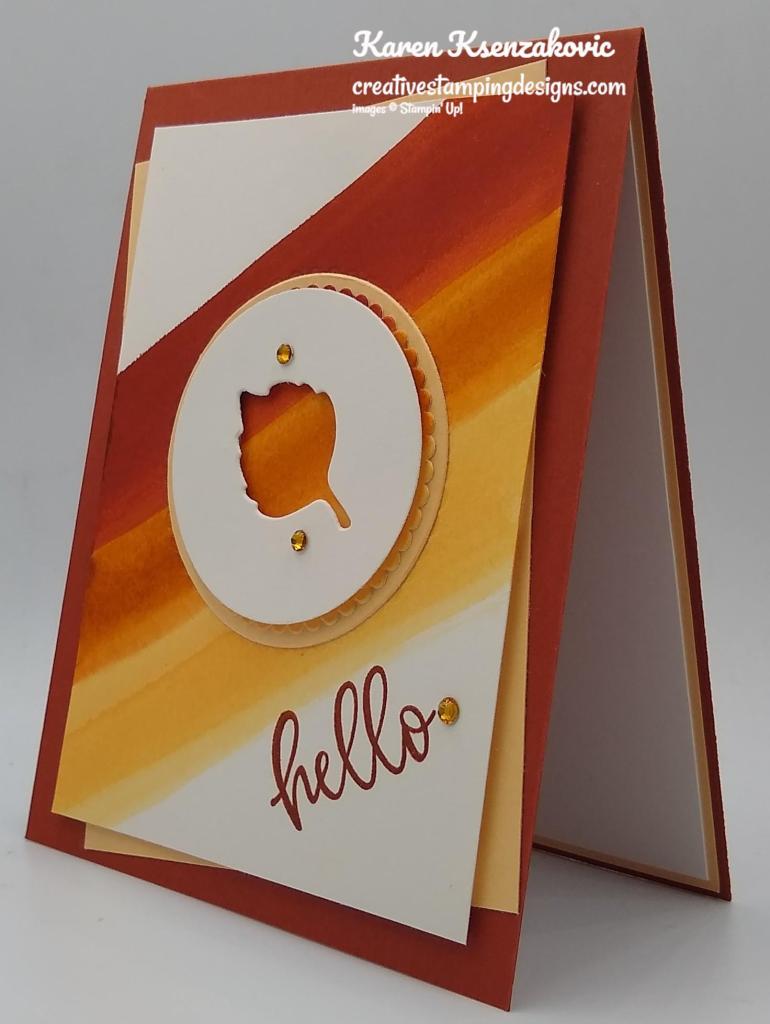
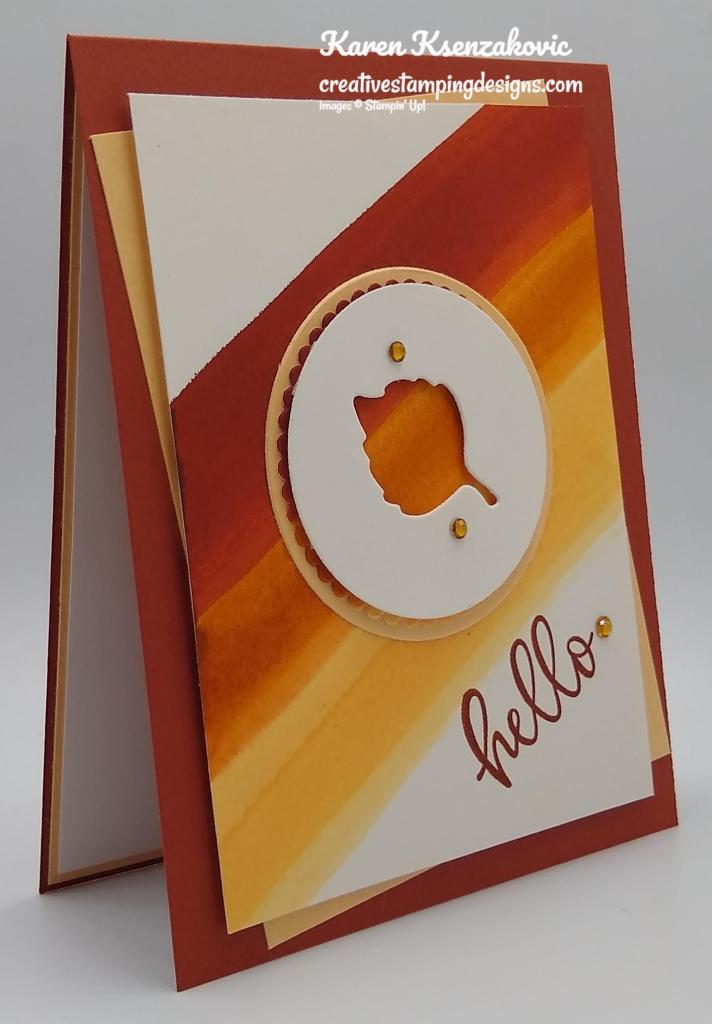
I started with a Shimmery White card front and one of my acrylic blocks. Using my Ink Refills, I put a drop of Cajun Craze, Pumpkin Pie and Pale Papaya in on the block. Making sure my largest Water Painter was really wet, you might want to have a little bowl of water handy, I lifted some of the Cajun Craze Ink and brushed it across the Shimmery White paper. I did the same with the Pumpkin Pie Ink and the Pale Papaya Ink, blending the inks together in between them. You can either let it dry on it’s own or use setting #1 on your Heat Tool to dry the panel.
I stamped the sentiment from the Biggest Wish stamp set in Cajun Craze Ink below the brushed ink on an angle. I adhered a panel of Pale Papaya card stock to a Cajun Craze card base on an angle.
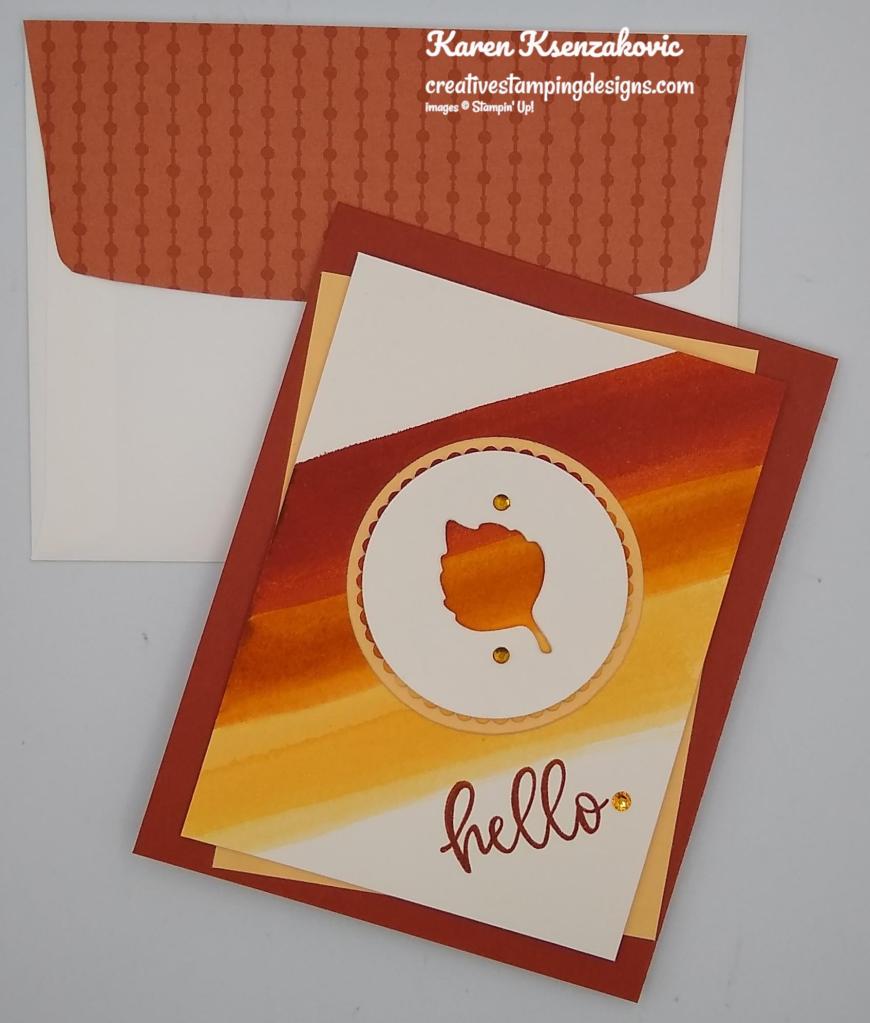
Using the 4th largest scallop circle from the Layering Circles Dies, I cut the inked panel. I cut a panel of Pale Papaya cardstock using the 3rd largest circle from the Layering Circles Dies. From a panel of Shimmery White cardstock I cut the 4th largest circle using the Layering Circles Dies. From the Shimmery White circle I cut the leaf die using my Intricate Leaves Dies. I adhered the Pale Papaya circle to the card front over the cut area. I adhered the scalloped circle over the Pale Papaya making sure the stripes from the brushed ink lined up. I adhered the leaf cut circle die over the scalloped circle using Stampin’ Dimensionals. I adhered the card front over the Pale Papaya panel using Stampin’ Dimensionals. I added a few Pumpkin Pie rhinestones from the Holiday Rhinestone Basic Jewels.
On the inside I stamped the sentiment from the Stampin’ Up! Beauty of Tomorrow Cling Stamp Set in Cajun Craze Ink on a Basic White panel. I stamped the trio leaf image from the Stampin’ Up! Gorgeous Leaves Cling Stamp Set on either side of the sentiment, coloring the stamp using my Cajun Craze, Pumpkin Pie and Pale Papaya Stampin’ Write Markers. I adhered the Basic White panel to a Pale Papaya mat and then to the inside of the Cajun Craze card base.
To finish my card I decorated a Basic White Medium Envelope. I stamped the trio leaves image from the Gorgeous Leaves stamp set, colored the same as I did for the card, on the envelope front. I adhered a panel of Cajun Craze from the Regals 6 X 6 Designer Series Paper to the envelope flap.
Thank you for stopping by my blog today. I hope you liked my card and will give it a try. Happy Stamping!!
If you need any stamping supplies, I’d love to be your Demonstrator. Just click HERE to go directly to my online store or drop me an email if you have any questions.
MY CURRENT HOST CODE IS: BM9R7DQX
Use this host code when you order $50 or greater and receive a free gift from me! If your order is over $150, please do not use this code, but you’ll still get the free gift. The free gift is your choice of any 1 item valued up to $10.00 from the 2020-2021 Annual Catalog or the January-June 2021 Mini Catalog!For any orders $50 or more I will also send you my monthly class tutorials. Click HERE or go to my Customer Rewards for more details and to see what this months tutorials are.
Please remember to use my current Host Code and make sure that you can see my name on the final checkout page listed as your Demonstrator when you order so that you know that you’re ordering with me and you’ll get my rewards!
Stampin’ Up! has added more items to their Clearance Rack. All items are **While Supplies Last**. So don’t wait if there is something you’ve been wanting, grab it while you can.
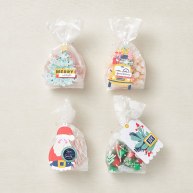
We all love to see piles of presents on Christmas morning. Make that your reality with the Gifts Galore Paper Pumpkin Kit! With classic Christmas sentiments, bright and festive colors, a sweet snowman, a tree with all the trimmings, or a playful pile of presents, you’ll have everything you need to make eye-catching treat packages that are sure to spread Christmas cheer. Each Gifts Galore box contains enough supplies to create nine treat packages—three each of three designs—and nine food-safe bags that are adorably styled for easy Christmas gifting. There’s plenty of joy to share with Gifts Galore!
Kit contains enough supplies to create nine treat packages—three each of three designs—and nine food-safe bags.
This all-inclusive kit includes printed die cuts, die-cut boxes, cellophane treat bags, adhesive, and more!
Includes an exclusive stamp set and a Classic Stampin’ Spot
Coordinating colors: Evening Evergreen, Flirty Flamingo, Old Olive, Pool Party, Poppy Parade
Subscribe to the November 2021 Paper Pumpkin Kit between 11 October and 10 November at paperpumpkin.com!
Note: Supplies may be limited toward the end of the subscription period.
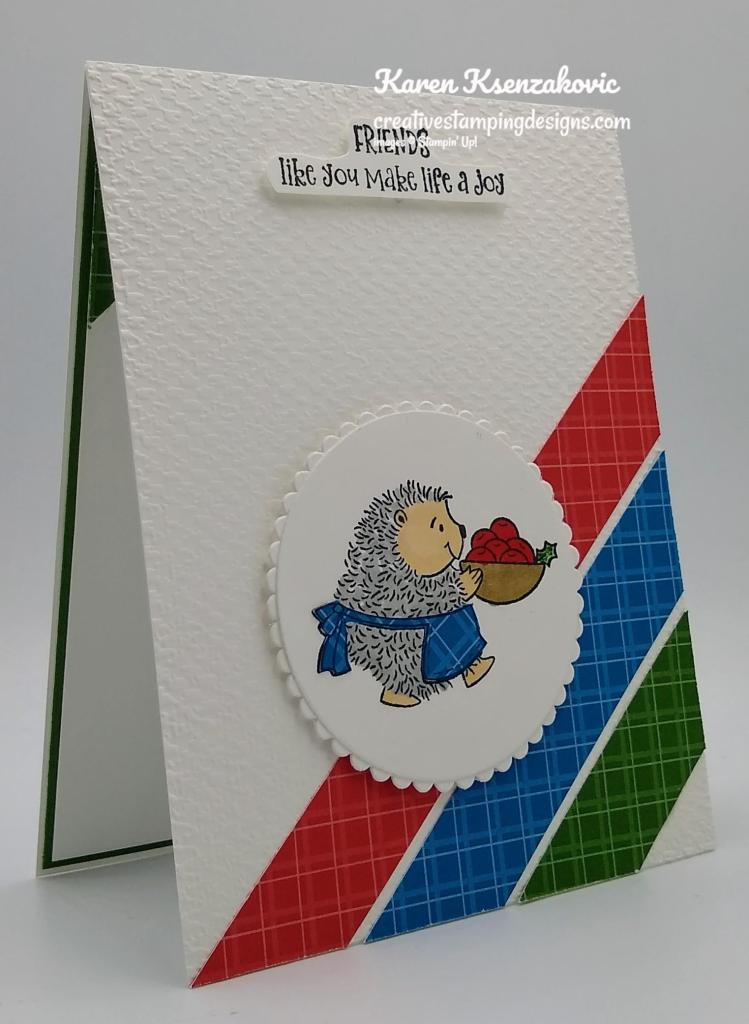
Good Sunday morning my stamping friends. How is your weekend going? Is anyone doing anything adventurous and fun?
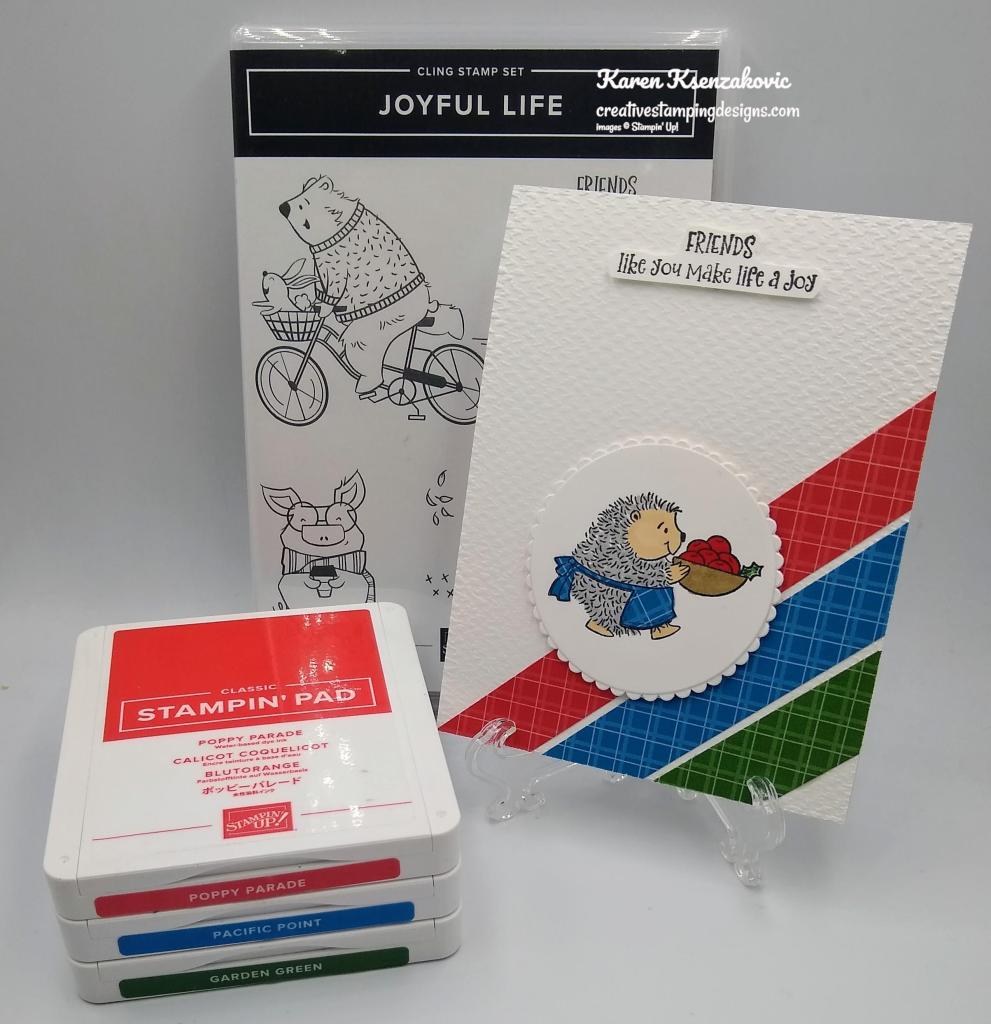
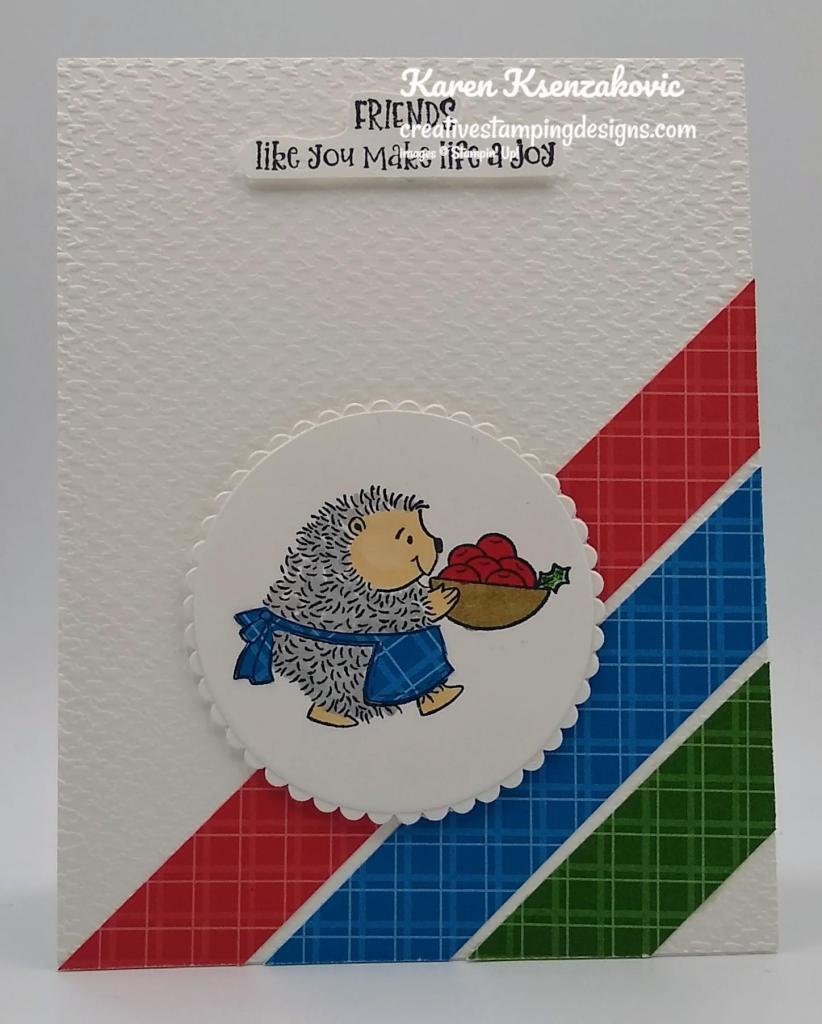
I used another one of my favorite sets today for a CAS card. Here’s my card for today.
I used the Stampin’ Up! Joyful Life Cling Stamp Set along with the Brights 6 X 6 Designer Series Paper and the Regals 6 X 6 Designer Series Paper for my card today.
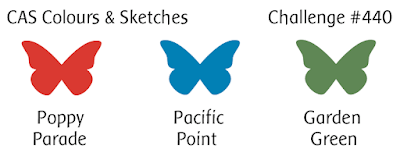
I started by embossing a Basic White card front using the Tasteful Textile 3D Embossing Folder. I adhered 2 strips of the Brights DSP in Poppy Parade and Pacific Point and 1 strip of the Garden Green Regals DSP to the card front on an angle. I adhered the card front to a Thick Basic White card base.
Using my Layering Circle Dies I cut the 3rd largest circle and the coordinating scallop circle from a panel of Basic White cardstock. I stamped the image from the Joyful Life stamp set in Tuxedo Black Ink on the circle. I colored the image in using my Crumb Cake, Ivory, Poppy Parade and Smoky Slate Stampin’ Blends Markers and my Garden Green Stampin’ Write Marker. On a scrap of the Pacific Point Brights DSP I stamped the same image from the Joyful Life stamp set in Tuxedo Black Ink and fussy cut the apron out using my Paper Snips and adhered it to the stamped image. I adhered the circle to the scalloped circle and then to the card front.
On a scrap of Basic White cardstock I stamped the sentiment from the Joyful Life stamp set in Tuxedo Black Ink and fussy cut it using my Paper Snips. I adhered the sentiment to the top of the card front.
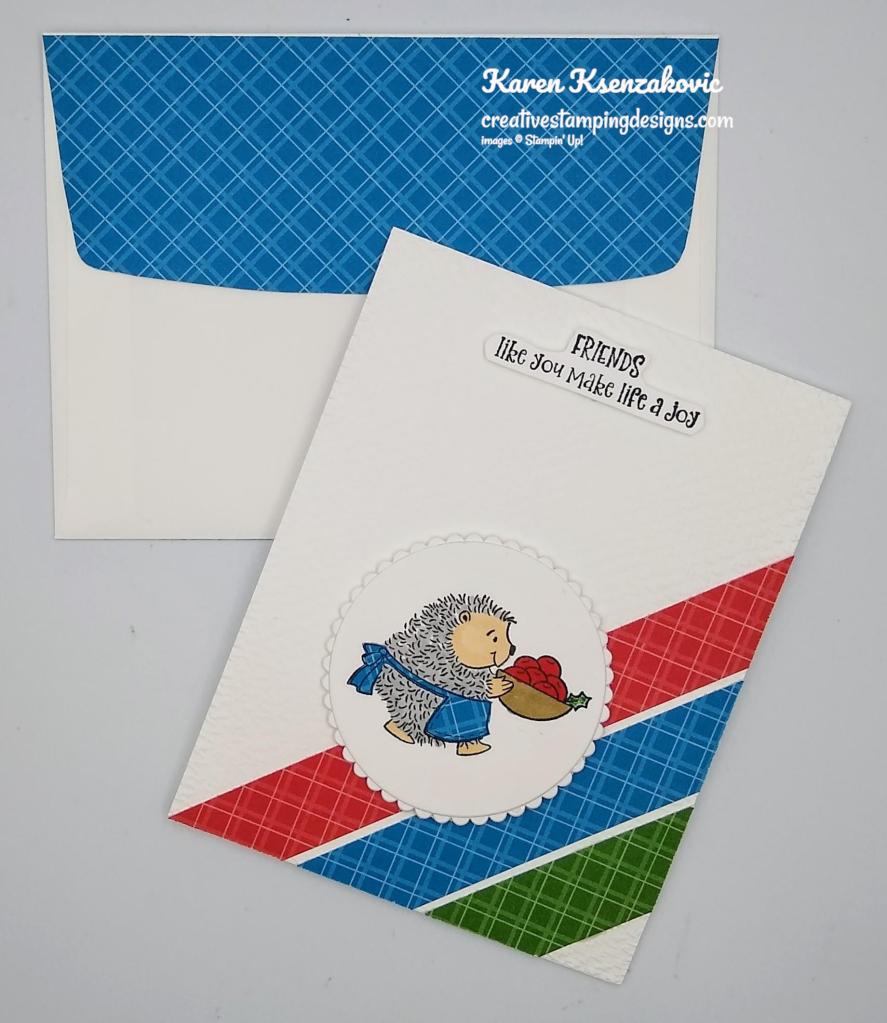
On the inside I stamped the sentiment from the Stampin‘ Up! Sunny Sentiments Cling Stamp Set in Tuxedo Black Ink on a Basic White panel. I adhered 2 strips of the Garden Green Regals DSP to the corners of the panel. I adhered the Basic White panel to a Garden Green mat and then to the inside of the Thick Basic White card base.
To finish my card I decorated a Basic White Medium Envelope. I adhered a strip of the Brights DSP to the envelope front and a panel to the envelope flap.
Thank you for stopping by my blog today. I hope you liked my card and will give it a try. Happy Stamping!!
If you need any stamping supplies, I’d love to be your Demonstrator. Just click HERE to go directly to my online store or drop me an email if you have any questions.
MY CURRENT HOST CODE IS: BM9R7DQX
Use this host code when you order $50 or greater and receive a free gift from me! If your order is over $150, please do not use this code, but you’ll still get the free gift. The free gift is your choice of any 1 item valued up to $10.00 from the 2020-2021 Annual Catalog or the January-June 2021 Mini Catalog!For any orders $50 or more I will also send you my monthly class tutorials. Click HERE or go to my Customer Rewards for more details and to see what this months tutorials are.
Please remember to use my current Host Code and make sure that you can see my name on the final checkout page listed as your Demonstrator when you order so that you know that you’re ordering with me and you’ll get my rewards!
Stampin’ Up! has added more items to their Clearance Rack. All items are **While Supplies Last**. So don’t wait if there is something you’ve been wanting, grab it while you can.
Santa’s back in a fun and easy tag kit to spruce up your Christmas gifting! The Love, Santa Tag Kit has everything you need to create 12 whimsically designed tags.
That means you’ll find printed die-cut tags and labels, sequin embellishments, pink and white baker’s twine, an exclusive stamp set, a Night of Navy Classic Stampin’ Spot, and more in this all-inclusive kit! You can sleigh ride right in without the prep work.
This is the kit exclusive photopolymer stamp set called Love, Santa!
Kit contains enough supplies to create 12 tags—3 each of 4 designs.
Includes printed die-cut tags, decorative die cuts, adhesive, embellishments, and pink baker’s twine.
Features an exclusive stamp set and a Night of Navy Classic Stampin’ Spot.
Finished tag size: approximately 2-1/2″ x 4-3/4″ (6.4 x 12.1 cm)
Coordinating colors: Bumblebee, Just Jade, Night of Navy, Polished Pink, Poppy Parade
158375 LOVE, SANTA TAG KIT $19.00 USD | $26.00 CAD
Available in English (158375) and French (158376).
Love, Santa Treat Bags – Also Available
And to make Christmas gifting even easier, the Love, Santa Treat Bags (available for purchase separately) are food-safe cellophane bags that coordinate with the Love, Santa tags! The treat bags come in a pack of 12—3 each of 4 festive designs.
That’s right—figuring out how to dress up your gifts this year is no longer a “Claus” for concern! But don’t relax too soon as these products are based on availability!
12 treat bags
3 each of 4 designs
4″ x 9-1/2″ (10.2 x 24.1 cm)
Food safe
158381 LOVE, SANTA TREAT BAGS $7.00 USD | $9.50https://www.youtube.com/embed/p6QuK9rDDSY?version=3&rel=1&showsearch=0&showinfo=1&iv_load_policy=1&fs=1&hl=en&autohide=2&wmode=transparent
Watch this video for more details about the new Christmas Whimsy Kit!
Click on the image for a flyer of all the items coming November 2nd. Want to get it early??? Demonstrators can preorder the items. Contact me at creativestampingdesigns@gmail.com and I’d be happy to talk to you about joining.
When you picture a peaceful Christmas, what comes to mind? Do you see snow outside your window, softly swirling through the sky? A tree trimmed with tinsel, a fire crackling nearby? Maybe you’re dreaming of decorating a holly jolly gingerbread house. Can you catch a whiff of Christmas cookies wafting through the air?
Whatever it is you think about when Christmas comes to town, picture a peaceful Christmas with the Peaceful Christmas Paper Pumpkin Kit! This glimmering and gleaming kit is your creative kickstart to Christmas cardmaking. With sprinkles of snow, shimmering silver skies, and heartwarming holiday wishes, you’ll have enough elements and embellishments to create 10 Christmas cards and coordinating envelopes.
Speaking of coordination, make even more Christmas magic with Peaceful Place products! Our stunning Peaceful Place Suite Collection (item 156277) pairs perfectly with the kit’s components. Brew a cup of cocoa, snuggle up with a soft blanket, and prepare for a cozy craft night in!
Details:
The kit contains enough elements to create 10 Christmas cards—5 each of 2 designs—and coordinating envelopes. This all-inclusive kit includes printed card bases, die-cut paper pieces, embellishments, adhesive, and more!
October’s kit arrives in a cute collectible box covered with enchanting evergreen trees. Use this special, limited-edition box to store your holiday handicrafts, or transform it into a well-wrapped package for a present!
The kit’s contents pair perfectly with the Peaceful Place Suite Collection (item 156277). To continue your Christmas crafting, combine the kit’s components with the suite’s patterned paper, shimmery sequins, and more!
Card size: 4-1/4″ x 5-1/2″ (10.8 x 14 cm)
Envelope size: 4-1/2″ x 5-3/4″ (11.4 x 14.6 cm)
Coordinating colors: Basic Gray, Real Red, Shaded Spruce, silver foil
Subscribe to the October 2021 Paper Pumpkin Kit between 11 September and 10 October at paperpumpkin.com!
Note: Supplies may be limited toward the end of the subscription period.
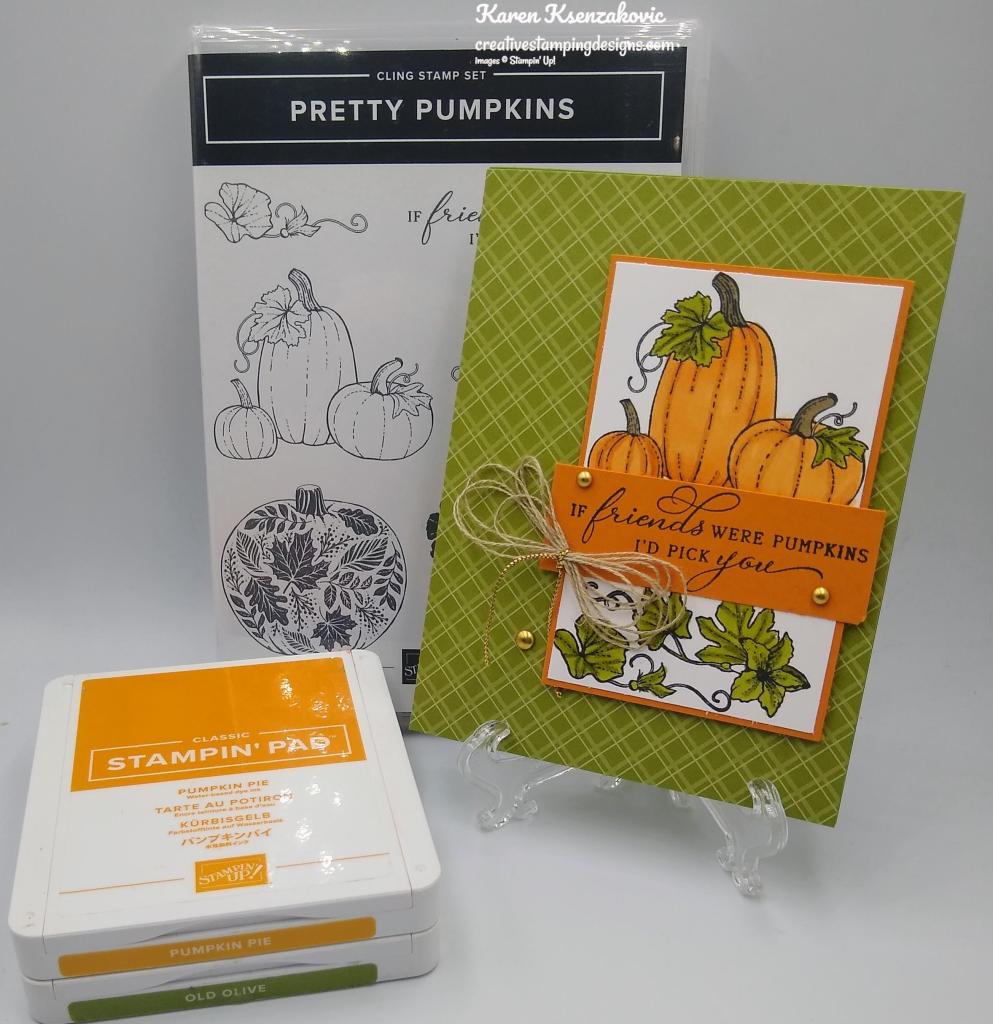
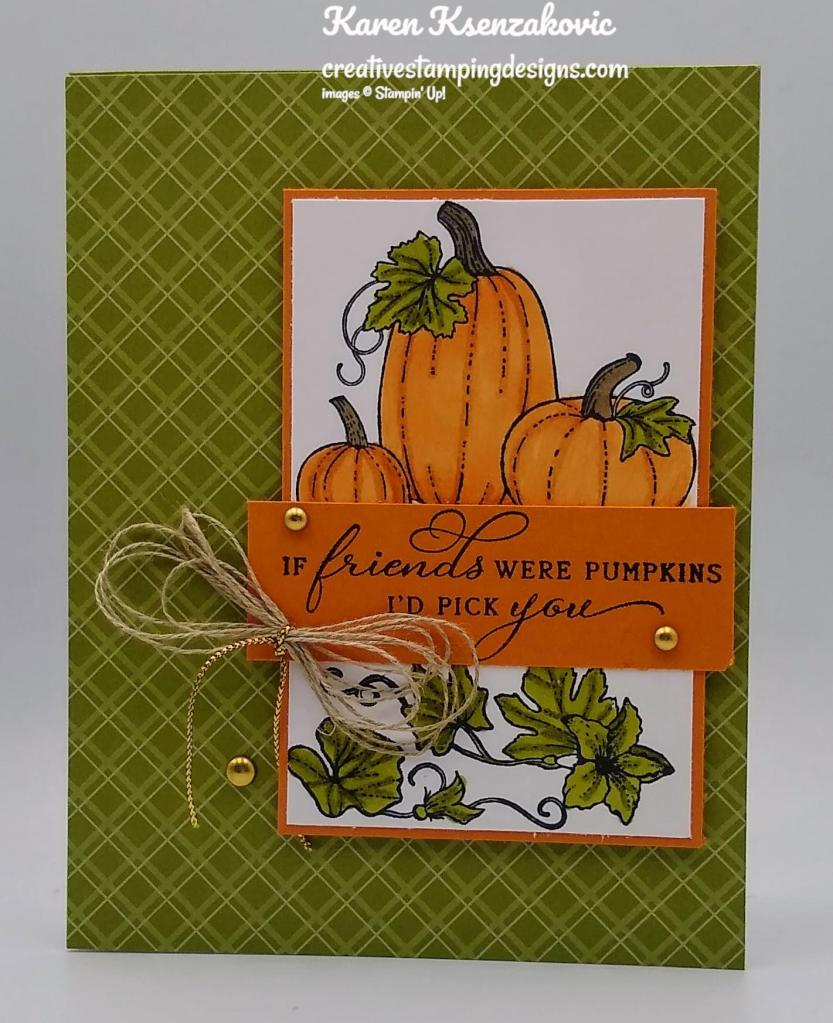
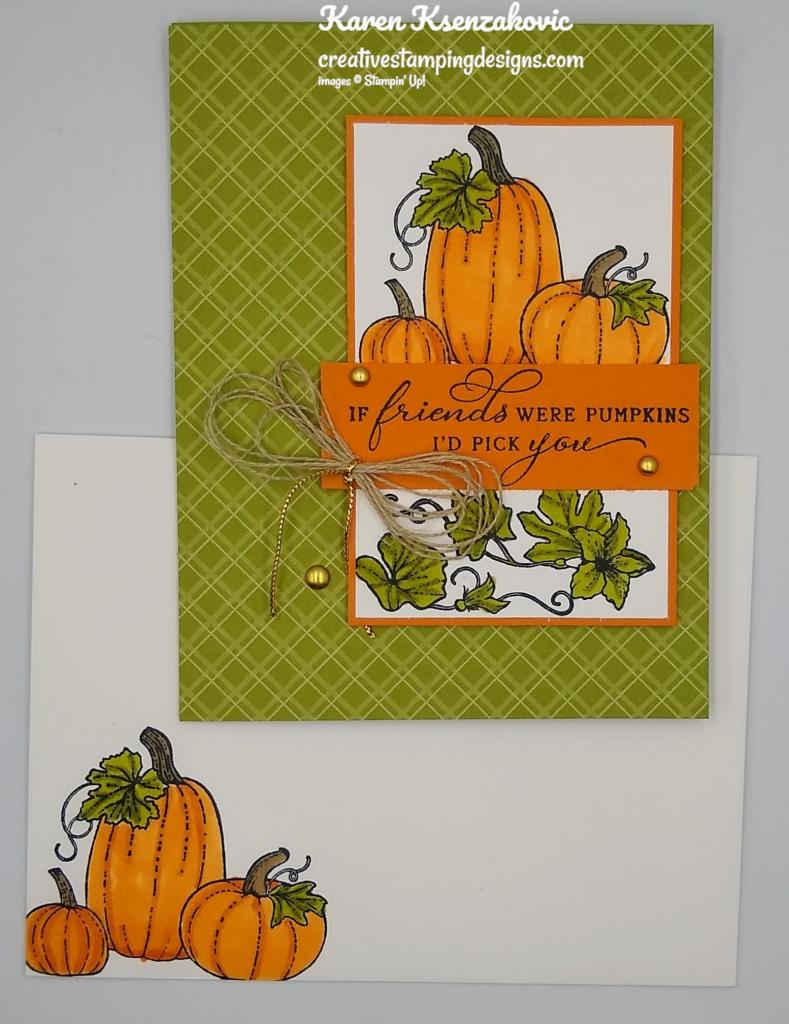
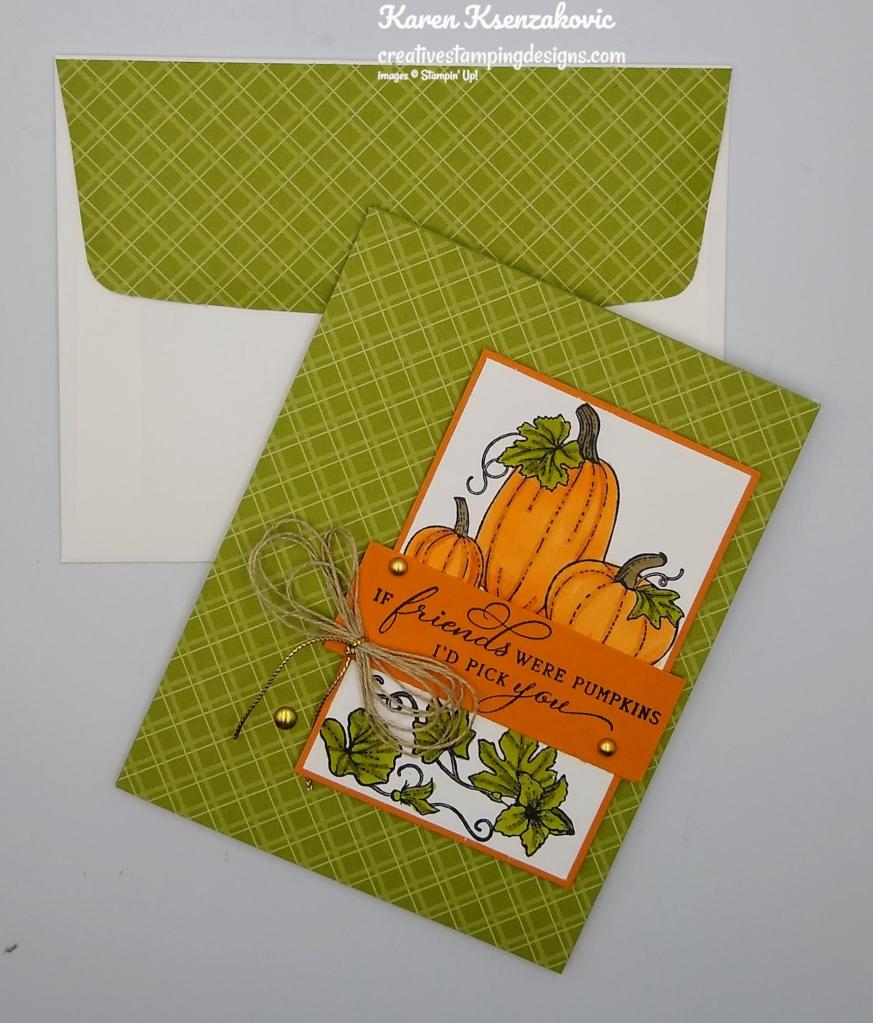
Good Thursday morning my stamping friends! Welcome to our Happy Inkin’ Thursday Blog Hop. I hope everyone is doing well today. If you are hopping over from Akiko Sudano’s blog, thank you for stopping by my blog. This week we have a Sketch Challenge. Be sure to take a moment to hop around to see everyone’s beautiful projects. Here is my card using this weeks Sketch.
I used the Stampin’ Up! Pretty Pumpkin Cling Stamp Set along with the Regals 6 X 6 Designer Series Paper for my card today.
Here is our sketch for this week.
I started by adhering a panel of Regals DSP to an Old Olive card base using Multipurpose Liquid Glue.
On a panel of Basic White cardstock I stamped the trio pumpkin image from the Pretty Pumpkins stamp set in Tuxedo Black Ink, towards the top of the panel. I stamped the 2 leafy images from the Pretty Pumpkin stamp set on the bottom of the panel in Tuxedo Black Ink. I colored the images in using my Crumb Cake, Old Olive and Pumpkin Pie Stampin’ Blends Markers. I adhered the Basic White panel to a Pumpkin Pie mat using Stampin’ Seal and then to the card front using Stampin’ Dimensionals.
I stamped the sentiment from the Pretty Pumpkin stamp set in Tuxedo Black Ink on a strip of Pumpkin Pie cardstock. I adhered the sentiment to the center of the artwork using Stampin’ Seal. I tied a multiloop bow using Linen Thread and tied it off with a piece of Gold Simply Elegant Trim. I adhered the bow using a Glue Dot. I added a few Brushed Metallic Dots to the card front.
On the inside I stamped the sentiment from the Pretty Pumpkin stamp set in Tuxedo Black Ink on a Basic White panel/ I stamped the 2 leafy images from the Pretty Pumpkin stamp set in Tuxedo Black Ink towards the bottom of the panel leaving enough room to adhered a strip of Regals DSP. I colored the leafy images in using my Old Olive Stampin’ Blends Markers. I adhered the Basic White panel to a Pumpkin Pie mat using Stampin’ Seal and then to the inside of the Old Olive card base using Multipurpose Liquid Glue.
To complete my card I decorated a Basic White Envelope. I stamped the pumpkin trio image from the Pretty Pumpkins stamp set in Tuxedo Black Ink on the envelope front. I colored it in the same as I did for the card. I adhered a panel of the Regals DSP to the envelope flap.
Thank you for visiting my blog today. I hope you liked my card and will give it a try. Now that you’ve seen my card, take a minute to hop through all our projects today. If you click on the Next Blog button, you’ll go to Amy’s page. Or you can just click on the names below to go directly to all their blogs! Happy Hopping!!
If you need any stamping supplies, I’d love to be your Demonstrator. Just click HERE to go directly to my online store or drop me an email if you have any questions.
MY CURRENT HOST CODE IS: JAK446GF
Use this host code when you order $50 or greater and receive a free gift from me! If your order is over $150, please do not use this code, but you’ll still get the free gift. The free gift is your choice of any 1 item valued up to $10.00 from the 2020-2021 Annual Catalog or the January-June 2021 Mini Catalog!For any orders $50 or more I will also send you my monthly class tutorials. Click HERE or go to my Customer Rewards for more details and to see what this months tutorials are.
Please remember to use my current Host Code and make sure that you can see my name on the final checkout page listed as your Demonstrator when you order so that you know that you’re ordering with me and you’ll get my rewards!
Awesome Joining Promotions Until September 30, 2021
There is an AWESOME joining promotion happening! If you purchase the Starter Kit between August 3 and September 30, you’ll get to pick a FREE bundle from this list!
Frosted Gingerbread
Christmas Season
Christmas To Remember
Whimsical Trees
Peaceful Deer
Sweet Little Stockings
Penguin Place
Peaceful Cabin
Arctic Bears
Beauty Of Tomorrow
Gorgeous Leaves
Nature’s Harvest
When you purchase the Starter Kit for $99 + taxes (if applicable), the kit ships for FREE and YOU get to pick $125 in Stampin’ Up! merchandise OF YOUR CHOICE. If you purchase the kit during Sale-a-bration, you’ll get an additional FREE bundle from the select twelve listed above (with a value up to $60.25!!) with your kit! A free bundle in addition to $125 in merchandise for $99, YES PLEASE!!You will also get a past Paper Pumpkin Kit and other supplies free in your kit.
If you are planning on placing an order of $100, you might really want to consider joining. This is such an awesome joining deal, you don’t want to pass it up. There is no obligation to sell, have workshops or do Facebook lives. You can join strictly to be a ‘hobby demonstrator’ and enjoy the 20% discount. I would love to have you on my team!!!You also get to enjoy all the demonstrator perks like early ordering, sneak peeks at what’s coming and best of all the events. Why wait, this is such a great sign up promotions, join now and be a part of our awesome Stampin’ Up! family!!!
If you have any questions about joining, please drop me a note at creativestampingdesigns@gmail.com, I’d love to talk with you about it! You can find more information about joining on my blog @ creativestampingdesigns.com
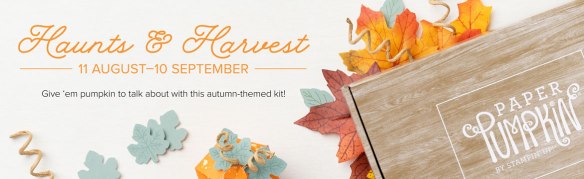
Hay, there! Experience everything the autumn season has to offer with the Haunts & Harvest Paper Pumpkin Kit! This month’s kit includes enough supplies to create 12 treat boxes—4 each of 3 designs. That means you can take your pick of apple, pumpkins, or jack-o-lantern treat boxes! Plus, the Paper Pumpkin box is designed to easily transform into a vintage wheelbarrow for you to display your harvest!
Whether you’re thinking about crisp red apples or you’re ready to carve some spooky jack-o-lanterns (or both!), the Haunts & Harvest Paper Pumpkin Kit—designed in a vivid fall palette—is a hands-on crafting experience for all autumn lovers!
Details:
Kit contains enough supplies to create 12 treat packages—4 each of 3 designs. The all-inclusive kit includes printed die-cut boxes, die-cut sheets, adhesive, and more!
Finished treat box size: 2-1/2″ x 2″ (6.4 x 5.1 cm)
Includes an exclusive stamp set and a Classic Stampin’ Spot
Good Saturday morning my stamping friends. Welcome to the weekend. I hope you have some fun plans this weekend. Maybe even some plans just to relax and enjoy the summer. I’ll be at work all day, but I get out by 5pm so there’s still time to do something. Yesterday I got another one of my gardens finished. My niece and her 2 boys came over and helped me out. 6 bags of top soil, 19 bags of ocean pebbles and 6 hours later, it looks so much nicer. We dug out a 30 year old pine tree, with a lot of digging and cutting, then planted a couple hydrangeas. Her boys love digging out trees/bushes.
I have a clean and simple card for you today using just Stamps, Ink and Paper. Here’s my card for today.
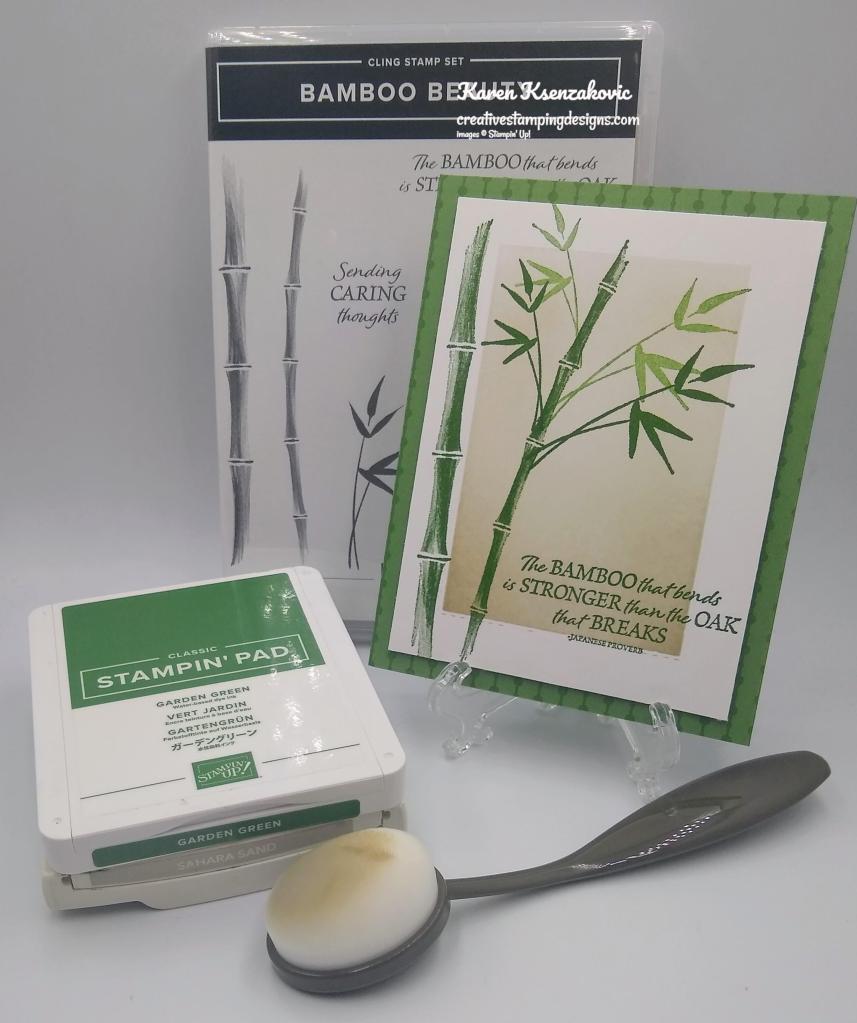
I used the Stampin’ Up! Bamboo Beauty Cling Stamp Set along with the Regals 6 X 6 Designer Series Paper for my card today.
I started by adhering a Regals DSP card front to a Garden Green card base using Multipurpose Liquid Glue. I taped off all 4 sides of the Basic White card front using Post-It tape. Using my Blending Brush I brushed Sahara Sand Ink on the exposed panel starting from the bottom and working my way up. I kept adding ink until I got the Ombre effect that I wanted.
I removed the Post-It tape and stamped the bamboo images from the Bamboo Beauty stamp set in Garden Green Ink on the side of the inked area. I stamped the leaf images from the Bamboo Beauty stamp set in Garden Green Ink on the bamboo, once full strength and once stamped off.
I stamped the sentiment from the Bamboo Beauty stamp set in Garden Green Ink next to the bamboo image. I adhered the artwork to the card front using Stampin’ Dimensionals.
On the inside I stamped the sentiment from the Bamboo Beauty stamp set in Garden Green Ink on a Basic White panel. I stamped the bamboo images from the Bamboo Beauty stamp set in Garden Green Ink, stamped off once, on either side of the panel. I stamped the leaf image in Garden Green Ink, stamped off once and twice on the bamboo images. I adhered the Basic White panel to a Sahara Sand mat using Stampin’ Seal and then to the inside of the Garden Green card base using Multipurpose Liquid Glue.
To finish my card I decorated a Basic White Medium Envelope. I stamped the bamboo images from the Bamboo Beauty stamp set in Garden Green Ink on the envelope front. I adhered a panel of the Regals DSP to the envelope flap.
Thank you for stopping by my blog today. I hope you liked my CAS card and will give it a try. Happy Stamping!!
If you need any stamping supplies, I’d love to be your Demonstrator. Just click HERE to go directly to my online store or drop me an email if you have any questions.
MY CURRENT HOST CODE IS: CEWAN9UD
Use this host code when you order $50 or greater and receive a free gift from me! If your order is over $150, please do not use this code, but you’ll still get the free gift. The free gift is your choice of any 1 item valued up to $10.00 from the 2020-2021 Annual Catalog or the January-June 2021 Mini Catalog!For any orders $50 or more I will also send you my monthly class tutorials. Click HERE or go to my Customer Rewards for more details and to see what this months tutorials are.
Please remember to use my current Host Code and make sure that you can see my name on the final checkout page listed as your Demonstrator when you order so that you know that you’re ordering with me and you’ll get my rewards!
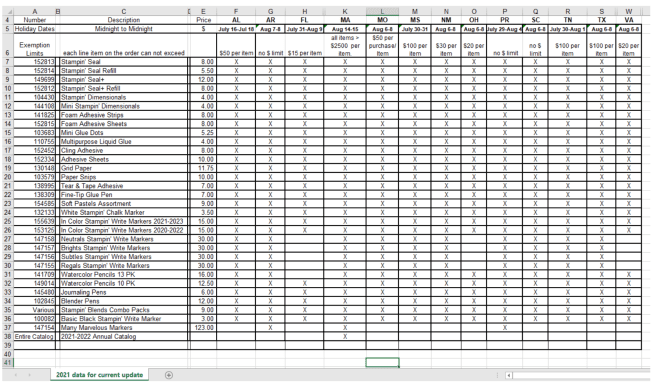
For those of you living in Alabama, Arkansas, Florida, Massachusetts, Missouri, Mississippi, New Mexico, Ohio, Puerto Rico, South Carolina, Tennessee, Texas and Virginia…you’ve got sales tax holidays coming up (or starting today if you’re in Alabama!)!!
The good news is that some items in the Stampin’ Up! Catalogs qualify for the sales tax holidays! The list of sales tax holidays by state and items in that state that qualify are listed below (click on the image to open up a full-size printable document):
Please note that you must place your order with Stampin’ Up! during the tax holiday period in order to receive these items tax-free (which is midnight on the first day to midnight on the last day of the tax holiday). Also, keep in mind that this is a state sales tax holiday; the state statute may not apply to county, city, and special jurisdiction taxes.
If you live in one of those states, YAY! Have fun shopping tax free during your holiday!
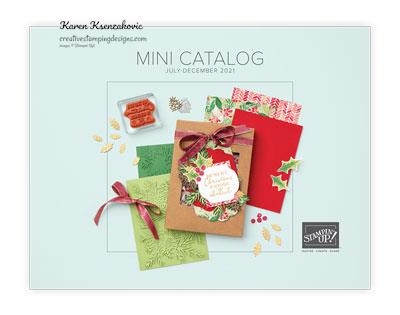
July-December 2021 Mini Catalog Designer Series Paper
I’m offering a Designer Series Paper share from the Stampin’ Up! July-December 2021 Mini Catalog and I’d love to have you join!! I’m placing my share order early on August 3 and I’m going to use the expedited shipping option so I should be able to have the shares cut, bundled and back out to you during the week of August 9.
How my shares work: I order full packs of all of the Designer Series Papers listed below, I cut them into 6″ x 6″ pieces (or 6″ x 12″ pieces for double shares) and give you one panel of each design from each pack on the list. I pack up the paper in a cellophane bag and mail it back out to you just as quickly as I can! Shares give you a good working sample of all of the papers so that you can decide which ones to order in full packs!
Here are the Designer Series Paper Shares that I am offering from the new Mini Catalog!
New Designer Series Paper Share – $25.00 plus $5.00 for 1st Class Mail shipping
You will receive one 6×6 sheet of each design from the following new DSP packs (the number behind the name indicates how many 6×6 sheets of that paper pack you will receive):
Gingerbread & Peppermint 6″ x 6″ – 12
Painted Christmas – 6
Whimsy & Wonder Specialty – 6
Sweet Stockings – 6
Peaceful Place Specialty – 6
Blackberry Beauty Specialty – 6
Cute Halloween 6″ x 6″ – 8
Harvest Meadow – 6
Heartwarming Hugs – 6 (returning)
Kraft 6″ x 6″ – 2
Brushed Metallic – 3 (returning)
Red & Green Foil Sheets – 2 (returning)
Silver Foil Specialty Pack – 3 (one of each)
Snowy White Velvet Sheets – 1
Gold Shimmer Vellum – 1
Cork Specialty Paper – 1 ***please note that Cork paper will be approximately 6″ x 6″ as the sizes of the original papers may vary slightly.
In all, you’ll receive 75 – 6” x 6” sheets of new designer or speciality paper!
Double DSP Share – $50 + $7.75 Shipping by Priority Mail – if you’d like double shares of the designer paper, that’s fine too. I’ll cut the designer paper sheets into 6×12 so that you’ll be able to get 3 full A2 size card fronts from each sheet (except for the Gingerbread & Peppermint, Cute Halloween and Kraft 6″ × 6″, you’ll get double sheets of those since they’re already precut).
Anyone is welcome to join in my share (please note, I can only ship to addresses within the US). If you’d like to join, either complete the form below or email the following information to creativestampingdesigns@gmail.com
Your first and last name
The email address that is connected to your PayPal account. I only accept PayPal for payment. ***You do not need to have a PayPal account to pay the invoice, you can choose to pay by credit card without having a PayPal account.
FREE Gift From Me! – As a bonus for joining my share, you’ll also get a sampler of some of the Sale-a-bration Designer Series Paper Packs!
Deadline to sign up for my share is Sunday, August 1 at 5:00 PM ET.
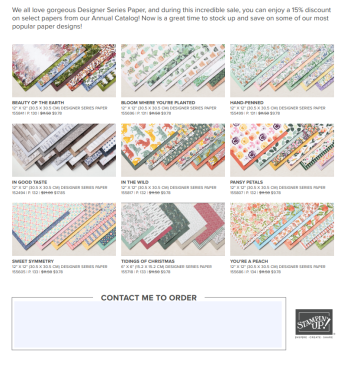
SAVE 15% ON DESIGNER SERIES PAPER JULY 1 – AUGUST 2!
We all love gorgeous Designer Series Paper, and during this incredible sale, you can enjoy a 15% discount on select papers from the 2021–2022 Annual Catalog! July is a great time to stock up and save on some of Stampin’ Up!’s most popular paper designs!
PROMOTION DETAILS:
Sales Period: July 1 – August 2
All order types qualify for this promotion.
There is no limit to how many packages of Designer Series Paper may be purchased during this promotion.
Only select Designer Series Papers are available at a 15% discount during this promotion.
Orders must be placed—and closed—during the promotion period for the 15% discount to apply.
Designer Series Paper ordered as part of a Starter Kit or with Stampin’ Rewards qualify for the 15% discount.
Order Deadline: August 2, 2021 at 11:59 PM (MT)
Click on image below for a printable PDF of the Sale Designer Series Papers
Empower yourself and others with the Hope Box Paper Pumpkin Kit! Created from the heart and soul of Stampin’ Up! cofounder, Shelli, the Hope Box Paper Pumpkin Kit reminds us why life is precious. This month’s Paper Pumpkin kit includes supplies to create nine encouraging cards and coordinating envelopes in an inspiring color palette, and a specially designed Hope Box!
The Hope Box is designed to be a keepsake box—keep mementos of cherished memories or reminders of what’s yet to come. Collect treats and trinkets that represent what hope means to you in your Hope Box and look inside for inspiration or share it with a friends who could use some uplifting!
What will you put in your Hope Box? Letters, song lyrics, inspiring quotes, and photographs are powerful reminders of hope and connection—and great additions to a Hope Box.
Kit contains supplies to create nine cards and coordinating envelopes and comes in a special box!
The box is specially designed to turn into a Hope Box—a keepsake box full of cherished items to add hope to your life or in the lives of others.
Includes an exclusive stamp set and a Classic Stampin’ Spot
Card size: 4-1/4″ x 5-1/2″ (10.8 x 14 cm)
Envelope size: 4-1/2″ x 5-3/4″ (11.4 x 14.6 cm)
Coordinating colors: Bermuda Bay, Blackberry Bliss, Bumblebee, Melon Mambo, Petal Pink, Pool Party, Poppy Parade
Subscribe to the August 2021 Paper Pumpkin Kit between 11 July and 10 August at paperpumpkin.com!
Note: Supplies may be limited toward the end of the subscription period.
Good Friday morning my stamping friends. How was everyone’s short week? We’re upon a weekend again and things are starting to open up slowly here. The Jersey shores opened last weekend and I believe hair salons are opening up next week. Time will tell. I have to work both days this weekend, Sunday is the last of the month. Where did May go??? What is everyone else doing this weekend?
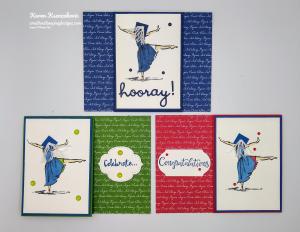
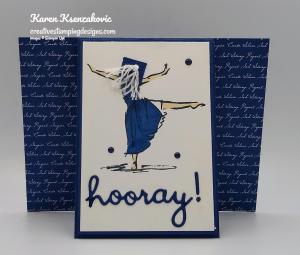
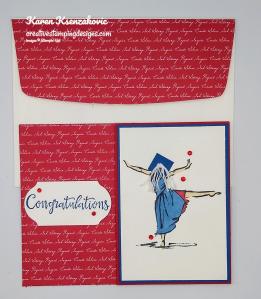
For those of you who know me you know that I was a Girl Scout leader for 13 years. Last week a couple of my girls that I was very close with graduated from college. One with a nursing degree and one with a teaching degree. I watched them grow from Kindergarten on up. Also my daughter’s best friend graduated with honors with a Bachelors degree in behavioral science and a minor in history. She is like a 2nd daughter to me. I am so proud of all these girls, so of course I had to make them all graduation cards. Unfortunately, some of the items I used have been sold out since before I could get my cards posted. Most of you know I don’t do any 2 cards alike, but since they are all for graduation they are all similar. I also looked up each of the girls school colors and coordinated the cards accordingly, one was navy & white, one was blue & green and one was blue & red. Here are my cards for today.
I started by adhering panels of Regals and Neutrals Designer Series Paper to the card bases, which are 4 1/4″ X 5 1/2″, using Snail. The card bases are Garden Green, Night of Navy and Real Red. I adhered the small cards to the card base using Multipurpose Liquid Glue. The small cards are Garden Green, Night of Navy and Real Red.
On Whisper White panels I stamped the dancing woman image from the Stampin’ Up! Beautiful You Cling Stamp Set in Tuxedo Black Memento Ink. I colored the images in using my Dark Night of Navy (for the top one), Light Night of Navy, Dark Granny Apple Green, Dark Real Red and Ivory Stampin’ Blends Markers. I adhered the top artwork to a Night of Navy mat using Snail and the bottom 2 artwork to Blueberry Bushel mats using Snail. I adhered the matted artwork to the front of the small cards using Stampin’ Dimensionals. To make the caps, I cut 1 Night of Navy and 2 Blueberry Bushel pieces of card stock to 1/2″ X 1/2″ and adhered them to the womens heads using Multipurpose Liquid Glue. To make the tassels I took a piece of Whisper White Bakers Twine and folded it in half and tied a knot. I then frayed the ends to look like a tassel and adhered them to the caps using Glue Dots. I trimmed them so they weren’t too long. For the top one, I cut the sentiment from Well Written Dies out of a panel of Night of Navy cardstock and adhered it under the artwork using my Fine Tip Glue Pen. I added a few Night of Navy Happiness Blooms Enamel Dots to the artwork. For the bottom 2, I stamped the sentiments from Stampin’ Up! Peaceful Moments Cling Stamp Set and Beautiful You stamp set in Blueberry Bushel Ink on a panel of Whisper White cardstock. I cut one of the sentiments out using the Timeless Label Punch and the other out using my Stitched So Sweetly Dies. I adhered the sentiments to the card base using Stampin’ Dimensionals. I added some Granny Apple Green Glitter Enamel Dots to the Garden Green card and Red Rhinestones to the Real Red card.
On the inside of all the cards I stamped the sentiment from the Stampin’ Up! Strong & Beautiful Cling Stamp Set in Night of Navy or Blueberry Bushel Inks. On the Night of Navy and Garden Green cards I stamped the sentiment from Peaceful Moments stamp set below the 1st sentiment in either Night of Navy or Blueberry Bushel Ink. I adhered the Whisper White panels to Night of Navy (for the top card) and Blueberry Bushel (for the bottom 2 cards) mats using Snail and then to the inside of the small cards using Multipurpose Liquid Glue.
To finish my cards I decorated 3 Medium Whisper White Envelopes. I stamped the dancing woman image from the Beautiful You stamp set in Tuxedo Black Memento Ink on all 3 envelopes. I colored the images in using my Dark Granny Apple Green, Ivory, Night of Navy and Dark Real Red Stampin’ Blends Markers. I stamped the sentiment from the Peaceful Moments stamp set on the envelope fronts in Garden Green, Night of Navy and Real Red Inks.
I adhered panel of Neutrals of Regals 6 X 6 DSP to the envelope flaps.
Thank you for stopping by my blog today. I hope you liked my cards and will give it a try. The measurements for the cards are below, they are all identical I just placed the small card fronts in a different spot on each one. I hope you all have a wonderful weekend. Happy Stamping!!
If you need any stamping supplies, I’d love to be your Demonstrator. Just click HERE to go directly to my online store or drop me an email if you have any questions.
MY CURRENT HOST CODE IS: KBMV24AJ
Use this host code when you order $50 or greater and receive a free gift from me! If your order is over $150, please do not use this code, but you’ll still get the free gift. The free gift is your choice of any item valued up to $10.00 in either the 2019-2020 Annual Catalog or the 2020 January-June Mini Catalog!For any orders $50 or more I will also send you my monthly class tutorials. Click HERE or go to my Customer Rewards for more details and to see what this months tutorials are.
2020-2021 Annual Catalog Designer Series Paper Share.
Deadline to sign up for my share is Tuesday, June 2 at 1:00 PM ET
Do you want all the great new Designer Series Paper from the 2020-2021 Annual Catalog, but can’t afford everything? I’m offering a Designer Series Paper share from the Stampin’ Up! 2020-2021 Annual Catalog and I’d love to have you join!! I’m placing my share order early on June 3 and I’m going to use the expedited shipping option so I should be able to have the shares cut, bundled and back out to you during the week of June 8. Click here for more information.
This exclusive Sara-inspired Paper Pumpkin kit is here to help you #sharesunshine. It includes supplies for eight handmade cards and is specially designed to help you create a box full of cheer. Once you’ve made all the cards, use any leftover pieces to decorate the box. Fill it with yellow goodies, add the included adhesive label, address it to someone special, and brighten their life with a little sunshine!
It’s a one-of-a-kind kit, inspired by Sara and her #sharesunshine passion. It provides a unique crafting experience with the added Box of Sunshine element.
Kit contains supplies for 8 cards and envelopes (2 cards of 4 designs)
This kit includes extra pieces and stickers (including a sticker label) to help you create cards AND a Box of Sunshine filled with treats and goodies to send to a friend. (Treats not included.)
Subscribe for the June kit from 11 May–10 June at paperpumpkin.com.
Supplies may be limited toward the end of each subscription period.
2019-2020 Annual Catalog and Mini Catalog Retiring List
Let me know if you have any questions about the retiring lists! You can also download copies of the full retiring lists in PDF Form here:
Click here to get a copy of the full retiring list from the 2019-20 Annual Catalog. The font is super tiny, so you’ll need to zoom out to read it!
Click here to get a copy of the full retiring list from the January-June 2020 Mini Catalog. The font is super tiny, so you’ll need to zoom out to read it!
Have fun shopping! Don’t forget, everything except for the stamp sets are only available while supplies last!!
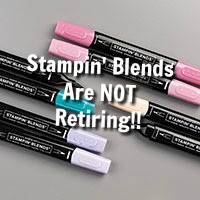
One quick FYI, the Stampin’ Blends are NOT retiring, they’re being repackaged and sold as Combo Packs starting with the new catalog. So don’t panic! They’re still going to be available.
Stampin’ Up! is committed to making a difference in our global communities and caring about people first. As part of our Making a Difference program we’re offering a product giveback opportunity to support organizations that are helping COVID-19 frontline responders and communities vulnerable to the pandemic.
You can purchase the Share Sunshine PDF Download and we will donate 100% of the proceeds to COVID-19 efforts.
The Share Sunshine PDF Download is a digital stamp set that’s packed with both lighthearted and heartfelt sentiments and imagery relevant to the unique COVID-19 and social distancing situation we’re currently experiencing–including many ideas that came from you! You can use the download in your cardmaking and papercrafting projects. Simply print the imagery on cardstock and cut it out using our Paper Trimmer, punches, or dies. Since we are physically distanced from each other, now is a perfect time to share sunshine with our friends and family by sending cards!
Garden Green Cardstock, Night of Navy Cardstock and Real Red Cardstock 4 1/4″ X 5 1/2″ (card bases), 3″ X 8 1/2″ (small cards scored and folded at 4 1/4″), 2- 2 7/8″ X 4 1/8″ (night of navy mats for artwork and inner liner), 3″ X 1″ (night of navy sentiment)
Blueberry Bushel Cardstock 4 – 2 7/8″ X 4 1/8″ (mats for artwork and inner liners for garden green and real red cards)
Whisper White Cardstock 6 – 2 3/4″ X 4″ (artwork and inner liners), 3″ X 3 1/2″ (sentiments)
Neutrals or Regals 6 X 6 Designer Series Paper 4 1/4″ X 5 1/2″ (panels on card bases), 2 1/4″ X 6″ (pieces for envelope flaps)
Good Friday morning my fellow stampers and welcome to my Fun Fold Friday. How was everyone’s week? We’re upon a holiday weekend, which normally I would have a lot going on. I do have to work Sunday and I told my boss I would come in on Saturday for a couple hours to relieve the cashiers so they could take breaks. These past few weekends no one was able to take a break it was so busy. Plus, if I go in on Saturday and do some of my work in the office, I won’t have to go in on Tuesday (which is my daughter’s birthday). Luckily we are closed on Monday, the store has been closed for 60 years on Memorial Day and they are not about to start opening now.
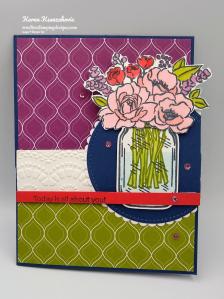
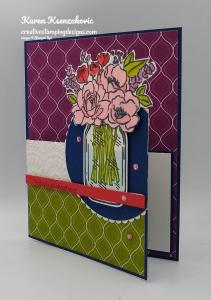
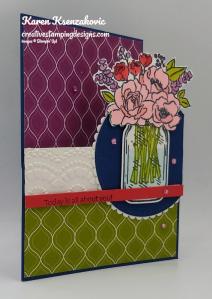
Onto my card for today. I mixed up some retiring items along with some new items for today’s card. I’m really determined to use up some more of my DSP that’s retiring. Here’s my card for today.
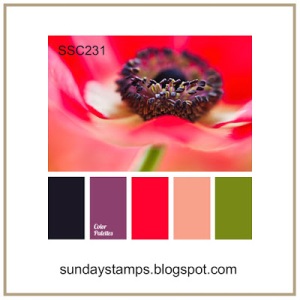
My colors were inspired by Sunday Stamps Challenge #231. I thought the 1st color of the pallet was Navy, but the more I look at it I believe it’s Black. Here are their colors.
I started by cutting part of my card front off so that I had a half panel. I took an 8 1/2″ X 5 1/2″ card base and scored it at 4 1/4″. From the top center I cut down to the 3″ mark. I then turned my card base and cut from the center at that 3″ mark to the outside of the panel leaving just the bottom portion. I adhered a panel of Old Olive Regals 6 X 6 Designer Series Paper to the bottom portion of the card front.
On a panel of Whisper White cardstock I stamped the flower and jar images from the Stampin’ Up! Jar of Flowers Photopolymer Stamp Set in Tuxedo Black Memento Ink. I colored the flowers in using my Flirty Flamingo, Old Olive, Poppy Parade and Rich Razzleberry Stampin’ Blends Markers. I stamped the stem image from the Jar of Flowers stamp set in Old Olive Ink in the jar and punched it out using the Jar Punch. I colored the stems in using my Old Olive Stampin’ Blends Markers, fussy cut the flowers using my Paper Snips and adhered them to the top of the jar using Glue Dots. I cut the largest circle from the Stitched Shapes Dies from a panel of Night of Navy cardstock. I cut the largest scalloped circle from the Layering Circles Dies out of a panel of Whisper White cardstock. I took a 1″ strip of Whisper White cardstock and embossed it using my Lace 3D Embossing Folder. On a thin strip of Poppy Parade cardstock I stamped the sentiment from the Stampin’ Up! Many Mates Cling Stamp Set in Tuxedo Black Memento Ink.
I adhered the embossed Whisper White strip to the top of the card front using Multipurpose Liquid Glue. I adhered the Night of Navy stitched circle to the Whisper White scalloped circle using Snail and adhered it to the card front, hanging off the right side, using Multipurpose Liquid Glue. I cut the circle straight with the side of the card front. I adhered the jar of flowers to the circle using Stampin’ Dimensionals. I adhered the Poppy Parade sentiment strip across the card front over lapping the embossed strip and the jar using Stampin’ Dimensionals. I added a few Noble Peacock Rhinestones to the card front.
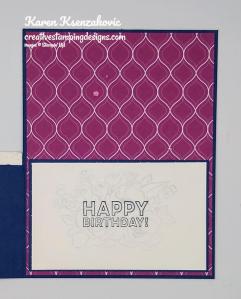
On the inside I adhered a Rich Razzleberry Regals 6 X 6 DSP panel to the card base using Snail. I stamped the sentiment from the Many Mates stamp set in Tuxedo Black Memento Ink in the center of the Whisper White panel. I stamped the flower image from the Jar of Flowers stamp set in Night of Navy Ink over the sentiment, stamping off 4 times to get a very light image. I adhered the Whisper White panel to a Night of Navy mat using Snail and then to the inside of the card base using Multipurpose Liquid Glue.
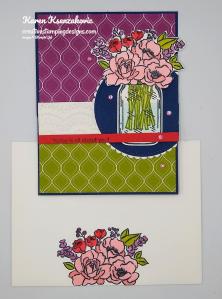
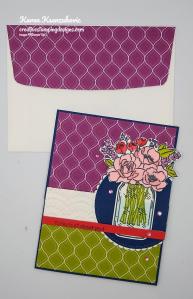
To finish my card I decorated a Medium Whisper White Envelope. I stamped the flower image from the Jar of Flowers stamp set on the envelope front. I colored the image in using my Flirty Flamingo, Old Olive, Poppy Parade and Rich Razzleberry Stampin’ Blends Markers. I adhered a panel of the Regals 6 X 6 DSP to the envelope flap.
Thank you for stopping by my blog today. I hope you liked my card and will give it a try. I hope you all have a wonderful Memorial Day Weekend. Stay Safe!! Happy Stamping.
If you need any stamping supplies, I’d love to be your Demonstrator. Just click HERE to go directly to my online store or drop me an email if you have any questions.
MY CURRENT HOST CODE IS: KBMV24AJ
Use this host code when you order $50 or greater and receive a free gift from me! If your order is over $150, please do not use this code, but you’ll still get the free gift. The free gift is your choice of any item valued up to $10.00 in either the 2019-2020 Annual Catalog or the 2020 January-June Mini Catalog!For any orders $50 or more I will also send you my monthly class tutorials. Click HERE or go to my Customer Rewards for more details and to see what this months tutorials are.
2020-2021 Annual Catalog Designer Series Paper Share.
Deadline to sign up for my share is Tuesday, June 2 at 1:00 PM ET
Do you want all the great new Designer Series Paper from the 2020-2021 Annual Catalog, but can’t afford everything? I’m offering a Designer Series Paper share from the Stampin’ Up! 2020-2021 Annual Catalog and I’d love to have you join!! I’m placing my share order early on June 3 and I’m going to use the expedited shipping option so I should be able to have the shares cut, bundled and back out to you during the week of June 8. Click here for more information.
This exclusive Sara-inspired Paper Pumpkin kit is here to help you #sharesunshine. It includes supplies for eight handmade cards and is specially designed to help you create a box full of cheer. Once you’ve made all the cards, use any leftover pieces to decorate the box. Fill it with yellow goodies, add the included adhesive label, address it to someone special, and brighten their life with a little sunshine!
It’s a one-of-a-kind kit, inspired by Sara and her #sharesunshine passion. It provides a unique crafting experience with the added Box of Sunshine element.
Kit contains supplies for 8 cards and envelopes (2 cards of 4 designs)
This kit includes extra pieces and stickers (including a sticker label) to help you create cards AND a Box of Sunshine filled with treats and goodies to send to a friend. (Treats not included.)
Subscribe for the June kit from 11 May–10 June at paperpumpkin.com.
Supplies may be limited toward the end of each subscription period.
2019-2020 Annual Catalog and Mini Catalog Retiring List
Let me know if you have any questions about the retiring lists! You can also download copies of the full retiring lists in PDF Form here:
Click here to get a copy of the full retiring list from the 2019-20 Annual Catalog. The font is super tiny, so you’ll need to zoom out to read it!
Click here to get a copy of the full retiring list from the January-June 2020 Mini Catalog. The font is super tiny, so you’ll need to zoom out to read it!
Have fun shopping! Don’t forget, everything except for the stamp sets are only available while supplies last!!
One quick FYI, the Stampin’ Blends are NOT retiring, they’re being repackaged and sold as Combo Packs starting with the new catalog. So don’t panic! They’re still going to be available.
Stampin’ Up! is committed to making a difference in our global communities and caring about people first. As part of our Making a Difference program we’re offering a product giveback opportunity to support organizations that are helping COVID-19 frontline responders and communities vulnerable to the pandemic.
You can purchase the Share Sunshine PDF Download and we will donate 100% of the proceeds to COVID-19 efforts.
The Share Sunshine PDF Download is a digital stamp set that’s packed with both lighthearted and heartfelt sentiments and imagery relevant to the unique COVID-19 and social distancing situation we’re currently experiencing–including many ideas that came from you! You can use the download in your cardmaking and papercrafting projects. Simply print the imagery on cardstock and cut it out using our Paper Trimmer, punches, or dies. Since we are physically distanced from each other, now is a perfect time to share sunshine with our friends and family by sending cards!
Night of Navy Cardstock 8 1/2″ X 5 1/2″ (card base scored and folded at 4 1/4″ then cut as the above directions), 3 1/2″ X 3 1/2″ (stitched circle), 2 1/2″ X 4″ (inner liner mat)
Poppy Parade Cardstock 1/4″ X 4 1/8″ (sentiment strip)
Whisper White Cardstock 1″ X 4 1/8″ (embossed card front strip), 3 1/2″ X 3 1/2″(scalloped circle), 4 1/2″ X 3 1/2″ (artwork), 2 3/8″ X 3 7/8″(inner liner)
Regals 6 X 6 Designer Series Paper 2 3/8″ X 4 1/8″ (card front), 4 1/8″ X 5 3/8″ (inner panel), 2 1/4″ X 6″ (piece for envelope flap)
Good Sunday morning my stamping friends. Happy Mother’s Day to all mothers, grandmothers, God mothers, mothers to be, step mothers, aunts, animal mothers and all our angle mothers. I hope you all have a very enjoyable day. I’m hoping to get in some crafting time since we really can’t go anywhere. This will be my first without my mom, so it’s going to be a little tough for me.
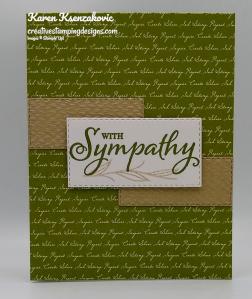
Today’s card is one of those we don’t like to make, but we have to. I received my preorder last week and one of the sets I received was a Host exclusive set which just happen to have a Sympathy sentiment in it. Here’s my card for today.
My design was inspired by Freshly Made Sketches Challenge #434. They had the perfect clean and simple design for my sympathy card. Here is their sketch.
I started by adhering a panel of the Old Olive Regals 6 X 6 Designer Series Paper to an Old Olive card base using Snail.
I cut 2 rectangles out using the Stitched Rectangles Dies from a panel of Crumb Cake cardstock. I embossed the rectangles using the new Tasteful Textiles 3D Embossing Folder (available June 3rd). I adhered the rectangles to the card front using Multipurpose Liquid Glue.
On a Whisper White panel I stamped the sentiment from the Stampin’ Up! Touched My Heart Host Cling Stamp Set (available June 3rd) in Old Olive Ink. I stamped the leaf image from the Touched My Heart stamp set in Crumb Cake Ink below the sentiment, stamping off twice. I cut the image out using the Stitched Rectangle Dies and adhered it to the card front using Stampin’ Dimensionals.
On the inside I stamped the sentiment from the Stampin’ Up! Path of Petals Photopolymer Stamp Set in Old Olive Ink in the center of a Whisper White panel. I stamped the leaf images from the Touched My Heart stamp set in Crumb Cake Ink on either side of the sentiment stamping off once. I adhered a strip of the Old Olive Regals 6 X 6 DSP to the bottom of the panel using Snail. I adhered the Whisper White panel to a Crumb Cake mat using Snail and then to the inside of the Old Olive card base using Multipurpose Liquid Glue.
To finish my card I decorated a Medium Whisper White Envelope. I stamped the leaf images from the Touched My Heart stamp set in Old Olive Ink on the envelope front. I adhered a panel of the Old Olive Regals 6 X 6 DSP to the envelope flap.
Thank you for stopping by my blog today. I hope you liked my card and will give it a try. Enjoy the rest of your weekend and have a wonderful day. Happy Stamping!!
If you need any stamping supplies, I’d love to be your Demonstrator. Just click HERE to go directly to my online store or drop me an email if you have any questions.
MY CURRENT HOST CODE IS: KBMV24AJ
Use this host code when you order $50 or greater and receive a free gift from me! If your order is over $150, please do not use this code, but you’ll still get the free gift. The free gift is your choice of any item valued up to $10.00 in either the 2019-2020 Annual Catalog or the 2020 January-June Mini Catalog!For any orders $50 or more I will also send you my monthly class tutorials. Click HERE or go to my Customer Rewards for more details and to see what this months tutorials are.
The Clearance Rack has been updated. Click HERE to shop the clearance rack.
THINGS ARE GOING FAST. IF YOU ARE INTERESTED IN ANY OF THE RETIRING ITEMS, DON’T WALK, RUN OVER TO GRAB THEM WHILE YOU STILL CAN.
2019-2020 Annual Catalog and Mini Catalog Retiring List
Let me know if you have any questions about the retiring lists! You can also download copies of the full retiring lists in PDF Form here:
Click here to get a copy of the full retiring list from the 2019-20 Annual Catalog. The font is super tiny, so you’ll need to zoom out to read it!
Click here to get a copy of the full retiring list from the January-June 2020 Mini Catalog. The font is super tiny, so you’ll need to zoom out to read it!
Stampin’ Up! is committed to making a difference in our global communities and caring about people first. As part of our Making a Difference program we’re offering a product giveback opportunity to support organizations that are helping COVID-19 frontline responders and communities vulnerable to the pandemic.
You can purchase the Share Sunshine PDF Download and we will donate 100% of the proceeds to COVID-19 efforts.
The Share Sunshine PDF Download is a digital stamp set that’s packed with both lighthearted and heartfelt sentiments and imagery relevant to the unique COVID-19 and social distancing situation we’re currently experiencing–including many ideas that came from you! You can use the download in your cardmaking and papercrafting projects. Simply print the imagery on cardstock and cut it out using our Paper Trimmer, punches, or dies. Since we are physically distanced from each other, now is a perfect time to share sunshine with our friends and family by sending cards!


![Basic Black 8-1/2" X 11" Cardstock [ 121045 ]](https://assets1.tamsnetwork.com/images/EC042017NF/121045s.jpg "Basic Black 8-1/2\" X 11\" Cardstock [ 121045 ]")
![Basic White 8 1/2" X 11" Cardstock [ 166780 ]](https://assets1.tamsnetwork.com/images/EC042017NF/166780s.jpg "Basic White 8 1/2\" X 11\" Cardstock [ 166780 ]")
![Basic White 8 1/2" X 11" Thick Cardstock [ 159229 ]](https://assets1.tamsnetwork.com/images/EC042017NF/159229s.jpg "Basic White 8 1/2\" X 11\" Thick Cardstock [ 159229 ]")
![Brights 6" X 6" (15.2 X 15.2 Cm) Designer Series Paper [ 165301 ]](https://assets1.tamsnetwork.com/images/EC042017NF/165301s.jpg "Brights 6\" X 6\" (15.2 X 15.2 Cm) Designer Series Paper [ 165301 ]")
![Regals 6" X 6" (15.2 X 15.2 Cm) Designer Series Paper [ 165304 ]](https://assets1.tamsnetwork.com/images/EC042017NF/165304s.jpg "Regals 6\" X 6\" (15.2 X 15.2 Cm) Designer Series Paper [ 165304 ]")
![Subtles 6" X 6" (15.2 X 15.2 Cm) Designer Series Paper [ 165306 ]](https://assets1.tamsnetwork.com/images/EC042017NF/165306s.jpg "Subtles 6\" X 6\" (15.2 X 15.2 Cm) Designer Series Paper [ 165306 ]")
![2025–2027 In Color™ 6" X 6" (15.2 X 15.2 Cm) Designer Series Paper [ 165300 ]](https://assets1.tamsnetwork.com/images/EC042017NF/165300s.jpg "2025–2027 In Color™ 6\" X 6\" (15.2 X 15.2 Cm) Designer Series Paper [ 165300 ]")
![Bubble Bath Classic Stampin' Pad [ 161664 ]](https://assets1.tamsnetwork.com/images/EC042017NF/161664s.jpg "Bubble Bath Classic Stampin' Pad [ 161664 ]")
![Poppy Parade Classic Stampin' Pad [ 119782 ] (Retired)](https://assets1.tamsnetwork.com/images/EC042017NF/119782s.jpg "Poppy Parade Classic Stampin' Pad [ 119782 ] (Retired)")
![Tuxedo Black Memento Ink Pad [ 132708 ]](https://assets1.tamsnetwork.com/images/EC042017NF/132708s.jpg "Tuxedo Black Memento Ink Pad [ 132708 ]")
![Strawberry Slush 3/8" (1 Cm) Faux Linen Ribbon [ 165274 ]](https://assets1.tamsnetwork.com/images/EC042017NF/165274s.jpg "Strawberry Slush 3/8\" (1 Cm) Faux Linen Ribbon [ 165274 ]")
![Dear Dots [ 165848 ]](https://assets1.tamsnetwork.com/images/EC042017NF/165848s.jpg "Dear Dots [ 165848 ]")
![Basic White Medium Envelopes [ 159236 ]](https://assets1.tamsnetwork.com/images/EC042017NF/159236s.jpg "Basic White Medium Envelopes [ 159236 ]")


![Tear & Tape Adhesive [ 154031 ]](https://assets1.tamsnetwork.com/images/EC042017NF/154031s.jpg "Tear & Tape Adhesive [ 154031 ]")

![Take Your Pick [ 144107 ]](https://assets1.tamsnetwork.com/images/EC042017NF/144107s.jpg "Take Your Pick [ 144107 ]")


![Happy Hibiscus Bundle (English) [ 164880 ]](https://assets1.tamsnetwork.com/images/EC042017NF/164880s.jpg "Happy Hibiscus Bundle (English) [ 164880 ]")
![Happy Hibiscus Photopolymer Stamp Set (English) [ 164877 ]](https://assets1.tamsnetwork.com/images/EC042017NF/164877s.jpg "Happy Hibiscus Photopolymer Stamp Set (English) [ 164877 ]")
![Happy Hibiscus Hybrid Embossing Folder [ 164879 ]](https://assets1.tamsnetwork.com/images/EC042017NF/164879s.jpg "Happy Hibiscus Hybrid Embossing Folder [ 164879 ]")
![Blueberry Bushel 8-1/2" X 11" Cardstock [ 146968 ]](https://assets1.tamsnetwork.com/images/EC042017NF/146968s.jpg "Blueberry Bushel 8-1/2\" X 11\" Cardstock [ 146968 ]")
![Granny Apple Green 8-1/2" X 11" Cardstock [ 146990 ]](https://assets1.tamsnetwork.com/images/EC042017NF/146990s.jpg "Granny Apple Green 8-1/2\" X 11\" Cardstock [ 146990 ]")
![Strawberry Slush 8 1/2" X 11" Cardstock [ 165625 ]](https://assets1.tamsnetwork.com/images/EC042017NF/165625s.jpg "Strawberry Slush 8 1/2\" X 11\" Cardstock [ 165625 ]")
![Memories In Bloom 12" X 12" (30.5 X 30.5 Cm) Two Tone Cardstock [ 166715 ]](https://assets1.tamsnetwork.com/images/EC042017NF/166715s.jpg "Memories In Bloom 12\" X 12\" (30.5 X 30.5 Cm) Two Tone Cardstock [ 166715 ]")
![Blueberry Bushel Classic Stampin' Pad [ 147138 ]](https://assets1.tamsnetwork.com/images/EC042017NF/147138s.jpg "Blueberry Bushel Classic Stampin' Pad [ 147138 ]")
![Granny Apple Green Stampin' Pad [ 147095 ]](https://assets1.tamsnetwork.com/images/EC042017NF/147095s.jpg "Granny Apple Green Stampin' Pad [ 147095 ]")
![Peach Pie Classic Stampin Pad [ 163810 ]](https://assets1.tamsnetwork.com/images/EC042017NF/163810s.jpg "Peach Pie Classic Stampin Pad [ 163810 ]")
![Strawberry Slush Classic Stampin' Pad [ 165286 ]](https://assets1.tamsnetwork.com/images/EC042017NF/165286s.jpg "Strawberry Slush Classic Stampin' Pad [ 165286 ]")
![Holographic Resin Dots [ 165598 ]](https://assets1.tamsnetwork.com/images/EC042017NF/165598s.jpg "Holographic Resin Dots [ 165598 ]")


")


 Designer Series Paper")


")


")


 Designer Series Paper")


")

 Designer Series Paper")


")


 Designer Series Paper")
 Designer Series Paper")


")