Stampin’ Up! Snowbody Better for Fun Fold Friday

Good Friday morning my stamping friends and welcome to my Fun Fold Friday. Sorry I missed another live this week. I’m really hoping to be back soon. I miss everyone. How was everyone’s week? Does anyone have plans for the weekend yet? I’ll be at work all weekend, but taking it really easy (I hope).

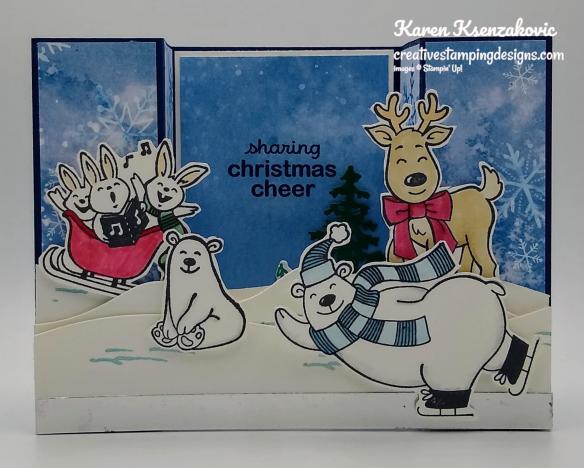
So I thought I was done making all my Christmas cards, then my husband said “I need 2 cards for the bosses at work”, UGH! So here’s what I came up with for 1 of them. I’m really hoping he can pick one of my already made cards for the other one.

I used the Stampin’ Up! Snowbody Better Cling Stamp Set along with the Tidings of Christmas 6 X 6 Designer Series Paper for my card today.

My colors are from the Sunday Stamps Color Challenge #271.

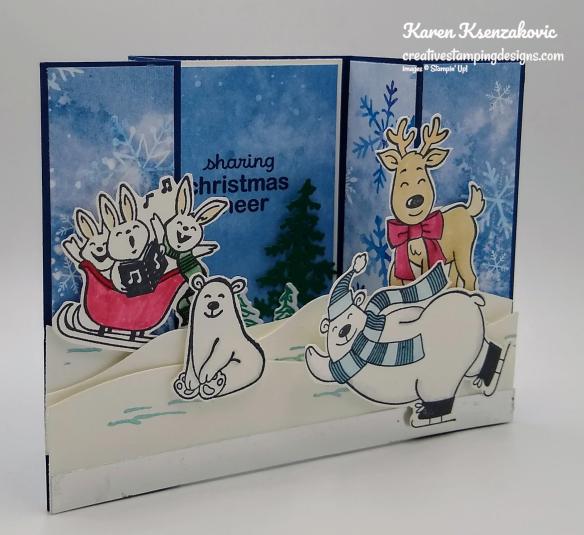
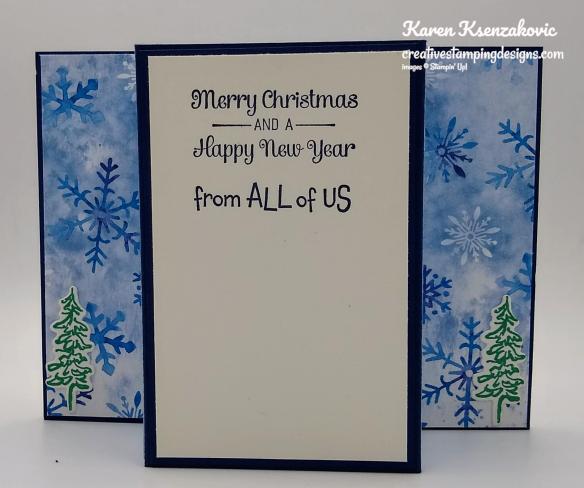
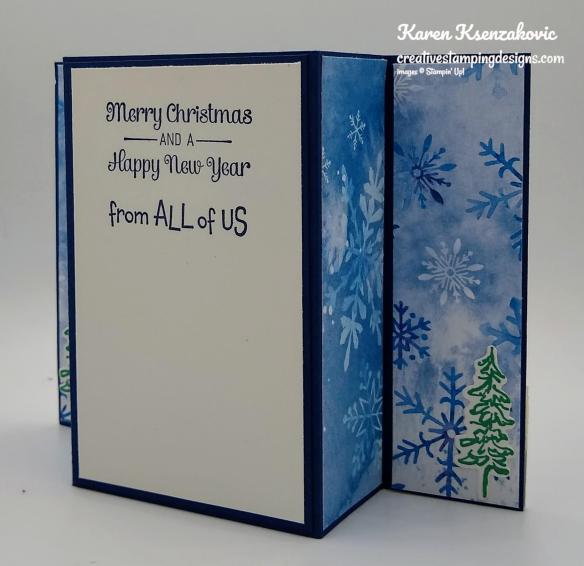
Today’s is a really simple fun fold we made a similar card at our team meeting this past Sunday. I scored and folded a panel of Cherry Cobbler cardstock and adhered it to the right inside of the Soft Succulent card base using Tear & Tape.

I started by adhering a panel of Tidings of Christmas DSP to the front panel of the Soft Succulent card base.

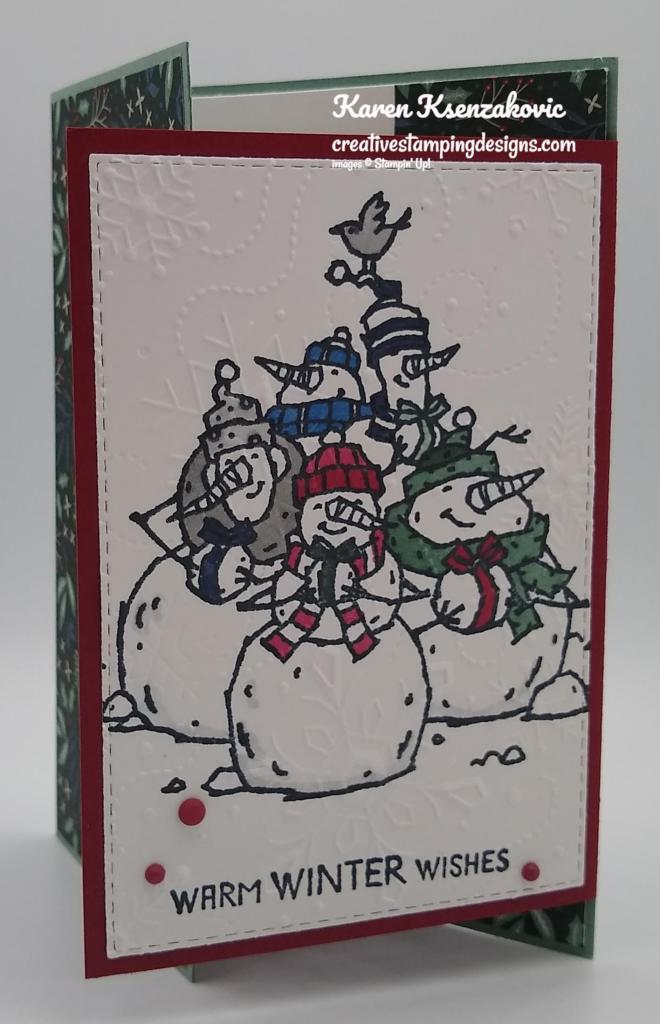
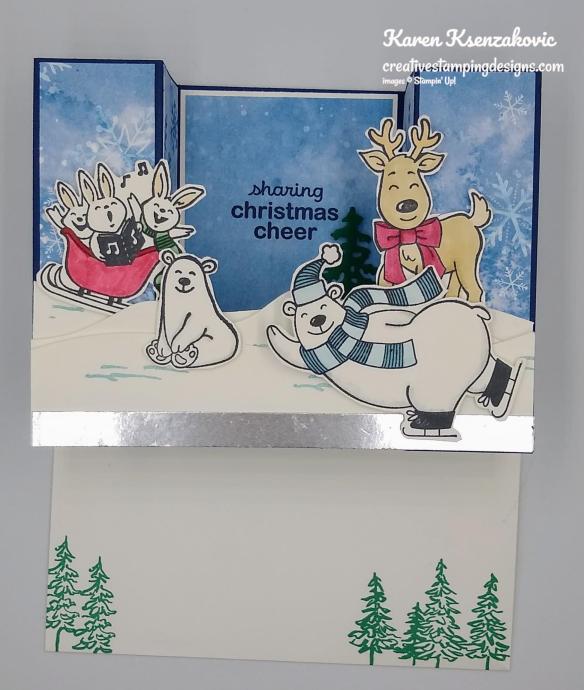
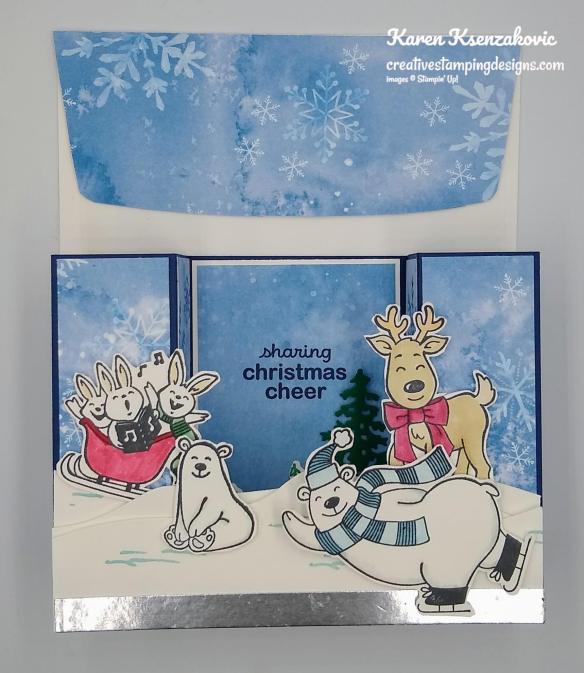
On a panel of Basic White cardstock I stamped the snowman image from the Snowbody Better stamp set in Tuxedo Black Ink. I colored the image using my Balmy Blue, Cherry Cobbler, Evening Evergreen, Misty Moonlight, Smoky Slate and Soft Succulent Stampin’ Blends Markers. I cut the image our using my Stitched Rectangle Dies and embossed is using my Wintry 3D Embossing Folder. I adhered it to the Cherry Cobbler panel using Multipurpose Liquid Glue. I added a few Decorative Matte Dots to the artwork.

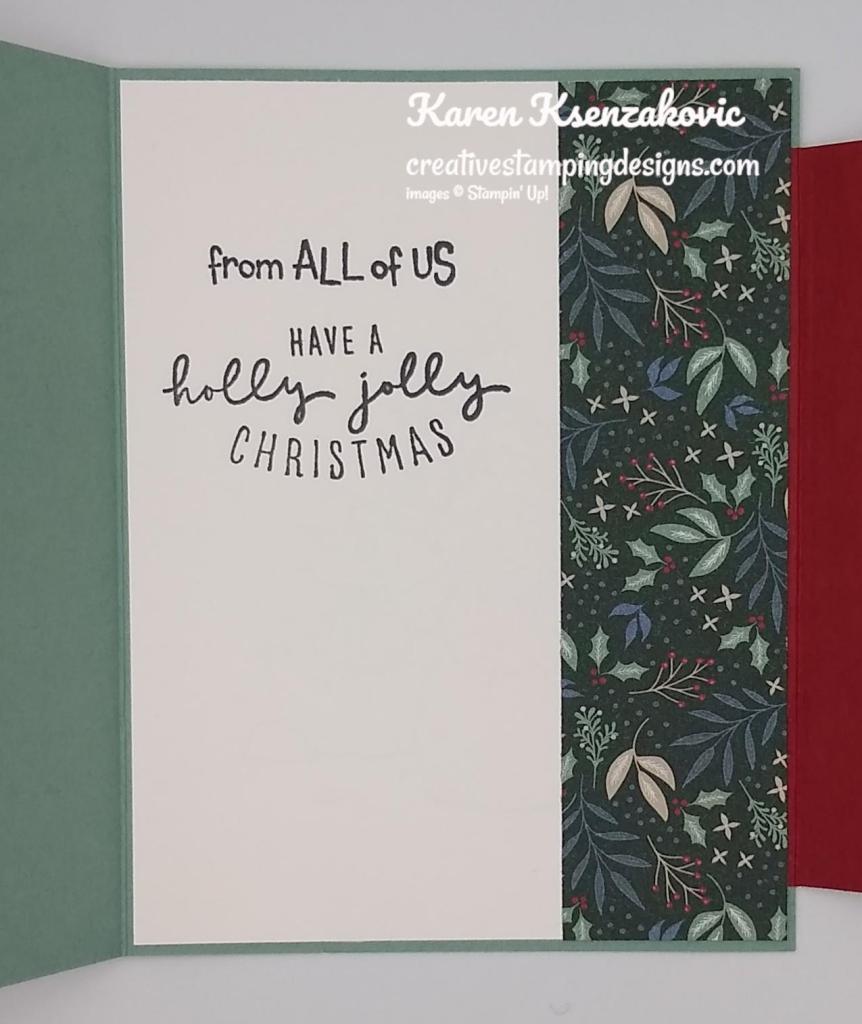
On the inside I stamped the sentiment from the Stampin’ Up! From All Of Us Cling Stamp Set in Evening Evergreen Ink on the left side of a Basic White panel. I stamped the sentiment from the Stampin’ Up! Christmas To Remember Cling Stamp Set below the 1st sentiment in Evening Evergreen Ink on the Basic White panel. I adhered a panel of Tidings of Christmas DSP to the right side of the panel. I adhered the Basic White panel to the inside of the Soft Succulent card base, over the Cherry Cobbler panel, using Multipurpose Liquid Glue.

To finish my card, I decorated a Basic Whtie Medium Envelope. I adhered a strip of the Tidings of Christmas DSP to the envelope front and a panel to the envelope flap.

Thank you for stopping by my blog today. I hope you liked my card and will give it a try. Happy Stamping!!

*********************************************************************************************************

If you need any stamping supplies, I’d love to be your Demonstrator. Just click HERE to go directly to my online store or drop me an email if you have any questions. 

MY CURRENT HOST CODE IS:   JSPXUJD6

Use this host code when placing an order with me. When you order $50 or greater you will receive a free gift from me! If your order is over $150, please do not use this code, but you’ll still get the free gift. The free gift is your choice of any 1 item valued up to $10.00 from the 2020-2021 Annual Catalog or the July-December 2021 Mini Catalog!   For any orders $50 or more I will also send you my monthly class tutorials.  Click HERE or go to my Customer Rewards for more details and to see what this months tutorials are.

Please remember to use my current Host Code and make sure that you can see my name on the final checkout page listed as your Demonstrator when you order so that you know that you’re ordering with me and you’ll get my rewards! 

Happy Stamping, Karen!

*********************************************************************************************************

Stampin’ Up! has updated the Clearance Rack with a few new goodies!  Head over there quick to get your hands on some great deals.  But hurry!!  Clearance Rack deals are only while supplies last!

CLICK HERE to head over to my online store to shop those great deals now!!  Have fun shopping!

*********************************************************************************************************

The July–December 2021 Mini Catalog will be retiring soon! t’s always bittersweet to see a classic Stampin’ Up! catalog take a trip to retirement. But, we’re looking forward to all the new products on their way—and we hope you are, too!  Beginning December 1, Stock up on your favorite products before they’re gone for good! Save up to 50% on essential craft supplies. The selection of Last Chance Products is only available while supplies last.

Click Here to open the full retiring list from the July-December 2021 Mini Catalog (includes the sale prices that start on December 1)

Click Here to see the full carryover list (items that will continue to be available and items that will be available again in the July-December 2022 Mini Catalog)

Last Chance Sale Details:

  • See the full Retiring List (products that will no longer be available once the catalog retires) with the sale prices Here. The sale prices start on December 1!
  • See the Carryover List (products that will still be available once the catalog retires) Here.
  • All retiring products are available while supplies last, and there are no purchase limits.
  • Discounted items can be added to a Starter Kit and redeemed as a 50% off item or with Stampin’ Rewards.
  • Last Chance Sales Period:  Starts December 1, 2021 at 12:01 AM MT and ends January 3, 2022 at 11:50 PM MT

Let me know if you have any questions and don’t forget to pick up any of those items on the retiring list that you’re wanting soon so that you don’t miss out!

*********************************************************************************************************

LOTS OF PUN

Subscribe November 11 – December 10 LAST DAY TO SUBSCRIBE!!

This image has an empty alt attribute; its file name is 11.21_lots_of_pun_banner1.jpg

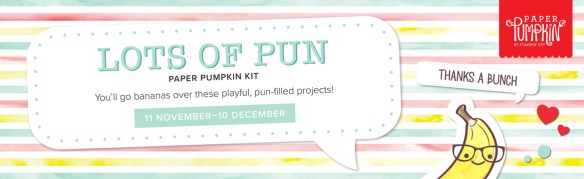
What’s not to “loaf” about a punny joke? It never hurts to have a little laughter, light-heartedness, and humor sprinkled into your schedule. If you’re a fan of fun, get a kick out of clever crafts, and can’t keep it together when you hear a classic knee-slapper, you’ll go bananas over this month’s cute ‘n’ quirky kit!

The Lots of Pun Paper Pumpkin Kit includes enough egg-citing elements to create nine cards and coordinating envelopes. From giddy gingham to splatters and stripes, this playful Paper Pumpkin kit features a fun and fresh look with one-of-a-kind patterns and designs! Egg-cellent for any occasion, reason, or season throughout the year, the kit’s pun-packed stamp set provides completely customizable characters for a very versatile crafting experience. Pair each stamp with its matching die-cut snack, then mix up the faces and accessories for an absolutely adorable accent!

Pick up your friends and family with pun-filled projects. December’s delightful kit is sure to make ‘em smile!

Details

  • The kit contains enough elements to create 9 cards—3 each of 3 designs—and 9 coordinating envelopes. This all-inclusive kit includes printed card bases, die-cut paper pieces, embellishments, adhesive, and more!
  • The Lots of Pun Stamp Set is a builder stamp set! This means the included images can be mixed and matched to build a variety of unique characters with different looks and features.
  • Card size: 4-1/4″ x 5-1/2″ (10.8 x 14 cm)
  • Envelope size: 4-1/2″ x 5-3/4″ (11.4 x 14.6 cm)
  • Coordinating colors: Crumb Cake, Daffodil Delight, Early Espresso, Granny Apple Green, Pool Party, Poppy Parade
  • Includes a Classic Stampin’ Spot

Subscribe to the December 2021 Paper Pumpkin Kit between 11 November and 10 December at paperpumpkin.com!

Note: Supplies may be limited toward the end of the subscription period.

*********************************************************************************************************

Card stock cuts for this project:

  • Basic White Cardstock 4″ x 5 1/4″ (artwork), 4 1/8″ X 5 3/8″ (inner liner)
  • Cherry cobbler Cardstock 3 1/2″ x 4 5/8″ (card front panel scored at 1/4″)
  • Soft Succulent Cardstock 7″ X 5 1/2″ (card base scored & folded at 4 1/4″)
  • Tiding of Christmas Designer Series Paper 2 5/8″ X 5 3/8″ (card front panel), 1 7/16″ X 5 3/8″ (inner liner panel), 1/2″ X 6″ & 2 1/4″ x 6″ (envelope)

*********************************************************************************************************

Product List

Stampin’ Up! From All Of Us for The Happy Inkin’ Thursday Blog Hop

Good Thursday morning my stamping friends and welcome to our Happy Inkin’ Thursday Blog Hop. I hope everyone is doing well today. If you are hopping over from Akiko, thank you for stopping by my blog. This week we have a sketch challenge. Be sure to take a moment to hop around to see everyone’s beautiful projects. My card for today is made special for my great nephew. He’s your typical monkey climbing all the time and his birthday is coming up next week, he turns 7. I used the Stampin’ Up! From All Of Us Cling Stamp Set for my card. Here is my card for today.

I played along with Global Design Project #279. They have a Theme Challenge this week.

I started by stamping the tree images from the From All Of Us stamp set in Tuxedo Black Ink on a Basic White card front. Using my Blending Brushes I added color to the top of the panel with Balmy Blue Ink. I added the color a little at a time until I had the shade I wanted. I then colored the tree trunks and branches in using my Soft Suede Stampin’ Blends Markers. I colored the leave in using my Old Olive Stampin’ Blends Markers. I adhered a panel of the Granny Apple Green Brights 6 X 6 Designer Series Paper to the bottom of the panel using Stampin’ Seal. I adhered the card front to a Basic Black mat using Stampin’ Seal.

On a panel of Basic White cardstock I stamped the large animal image from the From All Of Us stamp set in Tuxedo Black Ink. I colored the image in using my Basic Black, Bronze/Ivory, Gray Granite, Just Jade, Mango Melody, Petal Pink and Smoky Slate Stampin’ Blends Markers. I fussy cut the image using my Paper Snips. I stamped the image again on another panel of Basic White cardstock. I fussy cut the ostrich and monkey images out using my Paper Snips and colored them in using my Bronze/Ivory, Petal Pink and Smoky Slate Stampin’ Blends Markers. I adhered the ostrich and monkey to the larger image using Stampin’ Dimensionals then adhered the large image to the card front using Stampin’ Dimensionals.

On a strip of Basic White cardstock I stamped the sentiment from the From All Of Us stamp set in Tuxedo Black Ink and adhered it to the card front using Multipurpose Liquid Glue. I adhered the card front to a Granny Apple Green card base using Stampin’ Dimensionals. I added a few Artistry Bloom Adhesive-Backed Sequins to the card front.

On the inside I stamped the tree images from the From All Of Us stamp set in Tuxedo Black Ink on a Basic White panel. I colored the images in using my Old Olive and Soft Suede Stampin’ Blends Markers. I adhered a strip of the Granny Apple Green Brights 6 X 6 DSP to the bottom of the panel using Stampin’ Seal. I stamped the sentiment from the From All Of Us stamp set in Tuxedo Black Ink in the center of the panel. I adhered the Basic White panel to a Basic Black mat using Stampin’ Seal and then to the inside of the Granny Apple Green card base using Multipurpose Liquid Glue.

To complete my card I decorated a Basic White Medium Envelope. I stamped the tree images from the From All Of Us stamp set in Tuxedo Black Ink on the envelope front and colored them in using my Old Olive and Soft Suede Stampin’ Blends Markers. I adhered a strip of the Brights 6 X 6 DSP to the bottom of the envelope. I adhered a panel of the Brights 6 X 6 DSP to the envelope flap.

Thank you for visiting my blog today. I hope you liked my card and will give it a try. Now that you’ve seen my card, take a minute to hop through all our projects today. If you click on the Next Blog button, you’ll go to Amy’s page. Or you can just click on the names below to go directly to all their blogs! Happy Hopping!!

Amy Koenders:

Mary Deatherage:

Kristi Gray:

Jaimie Babarczy:

Sue Prather:

Karen Finkle:

Akiko Sudano:

Karen Ksenzakovic: You Are Here

*********************************************************************************************************

If you need any stamping supplies, I’d love to be your Demonstrator. Just click HERE to go directly to my online store or drop me an email if you have any questions. 

MY CURRENT HOST CODE IS: 9BCVNW9D

Use this host code when you order $50 or greater and receive a free gift from me! If your order is over $150, please do not use this code, but you’ll still get the free gift. The free gift is your choice of any 1 item valued up to $10.00 from the 2020-2021 Annual Catalog or the January-June 2021 Mini Catalog!   For any orders $50 or more I will also send you my monthly class tutorials.  Click HERE or go to my Customer Rewards for more details and to see what this months tutorials are.

 Click HERE to shop the clearance rack.

Please remember to use my current Host Code and make sure that you can see my name on the final checkout page listed as your Demonstrator when you order so that you know that you’re ordering with me and you’ll get my rewards! 

Happy Stamping, Karen!

*********************************************************************************************************

Coming Soon!!!

Bring in the beauty of nature with the artistic designs of the Butterfly Brilliance Bundle and coordinating designer series paper, along with textured specialty paper that will put a pop of brilliance on every project. The Butterfly Brilliance Collection will be available March2 — May 3, 2021.

*********************************************************************************************************

Here’s To You

Subscribe February11th – March 10th

Three cheers for mountain air, a sky filled with sunshine, and finding joy in life’s journey! Adventure awaits inside this month’s majestic, mountain-themed kit. With enough elements and embellishments to create eight cards and coordinating envelopes, the Here’s to You Paper Pumpkin Kit is the perfect pick for celebrating life’s little moments and mountain-high milestones!

What makes March’s kit one-of-a-kind? The spectacular set of four free stencils—and a stamping sponge—that you’ll find inside! Pair this pack of stunning stencils with the kit’s contents to stamp a springtime scene, then store the set to stamp for any season in the future. Clean up your binoculars and dust off your hiking boots—the Here’s to You Paper Pumpkin Kit is ready to lead you on an excursion to explore your creativity!

ABOUT THE MARCH KIT

Details

  • Kit contains enough supplies to create 8 cards—4 each of 2 designs—and coordinating envelopes. The kit’s contents include printed card bases, die-cut paper pieces, embellishments, adhesive, and more!
  • Card size: 4-1/4″ x 5-1/2″ (10.8 x 14 cm)
  • Envelope size: 4-1/2″ x 5-3/4″ (11.4 x 14.6 cm)
  • Coordinating colors: Bumblebee, Calypso Coral, Old Olive, Petal Pink, Pretty Peacock, Seaside Spray
  • Includes four free stencils and a stamping sponge!
  • Arrives in a cute and collectible box.

Subscribe to the March 2021 Paper Pumpkin Kit between 11 February and 10 March at paperpumpkin.com!

Note: Supplies may be limited toward the end of the subscription period.

*********************************************************************************************************

Card stock cuts for this project:

  • Basic Black Cardstock 2 – 4 1/8″ X 5 3/8″ (card front and inner liner mats)
  • Basic White Cardstock 2 – 4″ X 5 1/4″ (card front and inner liner), 2 – 3 1/2″ X 4 1/4″ (artwork), 1/2″ X 2 1/4″ (sentiment)
  • Granny Apple Green Cardstock 8 1/2″ X 5 1/2″ (Card base scored and folded at 4 1/4″)
  • Brights 6 X 6 Designer Series Paper 2″ X 5 1/4″ (card front panel), 1/4″ X 5 1/4″ (strip on inner liner), 1/4″ X 6″ (card front strip), 2 1/2″ X 6″ (envelope flap panel)

*********************************************************************************************************

Product List

Stampin’ Up! Warm and Toasty for Fun Fold Friday

Good Friday morning my fellow stampers and welcome to my Fun Fold Friday. How was everyone’s week? Are you all ready for the weekend? I’m not sure, but I think my husband might be going to cut our tree. I’ll be working all weekend I believe.

I thought I was done making my Christmas cards and my husband asked me to make a card for his department to give their supervisor. Today’s card I made on my Facebook Live video on Wednesday. If you were able to join me or watched the replay, thank you very much. If you’d like to watch my video and stamp along, the measurements are below along with the links to my Facebook page and my YouTube channel. Here’s my card that I made. I used a few stamp set for my card, but the main set I used was the Stampin’ Up! Warm & Toasty Cling Stamp Set.

I played along with The Spot Challenge #140. Their theme is Holiday Throwdown (Over the Top Holiday Cards).

I started by adhering 8 panels of the Snowflake Splendor Designer Series Paper to the front and back of the Night of Navy card base using Multipurpose Liquid Glue. I stamped the sentiment from Warm & Toasty stamp set in Night of Navy Ink on a panel of Snowflake Splendor DSP. I adhered the DSP to a Whisper White mat using Stampin’ Seal and then to the center of the card base using Multipurpose Liquid Glue. I stamped 4 of the animal images from the Warm & Toasty stamp set in Tuxedo Black Memento Ink on a panel of Whisper White cardstock. I colored the images in using my Balmy Blue, Cherry Cobbler, Crumb Cake, Ivory, Just Jade, Real Red, Smoky Slate and Color Lifter Stampin’ Blends Markers. I fussy cut all the images using my Paper Snips. Using the Pine Woods Dies, I cut 3 of the snow drift dies from a panel of Whisper White cardstock.

I adhered a strip of Silver Foil sheet to the top snow drift using Stampin’ Seal. I adhered the snow drifts together using Glue Dots on the bottom 2 and Stampin’ Dimensionals on the top one. I stamped the snow image in Balmy Blue Ink on the drifts to give them a little dimension. I adhered the snow drifts to the card base using Tear & Tape on the top section and Stampin’ Dimensionals on the bottom.

I adhered the cut images to the card front and snow using Stampin’ Dimensionals. After I added them I felt like the inside still needed a little something, so I added a tall pine tree I had cut from a panel of Shaded Spruce cardstock using the Pine Woods Dies. I also stamped the tree cluster image from the Stampin’ Up! In The Pines Photopolymer Stamp Set in Just Jade Ink on a panel of Whisper White cardstock and cut out using the Pine Woods Dies. I adhered the tall pine tree using Multipurpose Liquid Glue and the tree cluster using Glue Dots.

This is how the card looks when it is sitting on a table, so you can see how it is folded.

On a Whisper White panel I stamped the sentiments from the Stampin’ Up! Itty Bitty Christmas Cling Stamp Set the the Stampin’ Up! From All Of Us Cling Stamp Set in Night of Navy Ink towards the top. I adhered the Whisper white panel to a Night of Navy mat using Stampin Seal and then adhered it to the back of the card base using Multipurpose Liquid Glue.

I stamped 2 of the small tree images from the In The Pines stamp set in Just Jade Ink and cut them out using the Pine Woods Dies. I adhered them to the side panels using Multipurpose Liquid Glue.

To finish my card I decorated a Medium Whisper White Envelope. I stamped the small tree images from the In The Pines stamp set in Just Jade Ink on the bottom front of the envelope. I adhered a panel of Snowflake Splendor DSP to the envelope flap.

Thank you for stopping by my blog today. I hope you liked my card and will give it a try. The list of measurements are below if you’d like to stamp along while watching the video. You can watch my video on my Facebook page Here.

You can also view the video on my YouTube channel Here. Happy Stamping!!

*********************************************************************************************************

If you need any stamping supplies, I’d love to be your Demonstrator. Just click HERE to go directly to my online store or drop me an email if you have any questions. 

MY CURRENT HOST CODE IS: YUWDMJMT

Use this host code when you order $50 or greater and receive a free gift from me! If your order is over $150, please do not use this code, but you’ll still get the free gift. The free gift is your choice of any 1 item valued up to $10.00 in the 2020-2021 Annual Catalog!   For any orders $50 or more I will also send you my monthly class tutorials.  Click HERE or go to my Customer Rewards for more details and to see what this months tutorials are.

 Click HERE to shop the clearance rack.

Please remember to use my current Host Code and make sure that you can see my name on the final checkout page listed as your Demonstrator when you order so that you know that you’re ordering with me and you’ll get my rewards! 

Happy Stamping, Karen!

*********************************************************************************************************

Stampin’ Up!’s Year End Closeout Sale going on now

If you love great deals, our Giant Year-End Closeout event is the perfect time to shop. You’ll get deep discounts on your favorite products from the August–December 2020 Mini Catalog. The Year-End Closeout happens only once a year!

Year End Closeout Sale Details:

Sale Dates:  December 8, 2020 through January 4, 2021

  • No minimum purchase required.
  • Retiring items are available while supplies last.
  • Exclusions apply: Carryover items will not be discounted.
  • Due to increased shipping times and possible shipping delays during the month of December, we can’t guarantee delivery before Christmas.
  • Ordering Deadlines:  January 4, 2021 at 11:50 PM (MT)

Click here to download the full list of items that are retiring and which items are on sale starting on Tuesday, December 8!  And get your lists ready to shop early!!  The items that are retiring are only while supplies last!!  And everything on this list is retiring!!

*********************************************************************************************************

FREE Bonus Quite Curvy and Curvy Christmas Project Tutorials With Videos When You Purchase The Bundle From Me!!

This image has an empty alt attribute; its file name is curvy-celebrations-onlline-class.png

A group of us worked together to create five awesome tutorials using the Stampin’ Up! Curvy Celebrations special release products with video tutorials!  You can get this set of exclusive tutorials when you purchase either the Quite Curvy Variety Bundle (item 158396) or the Quite Curvy Bundle (item 156228) from me between now and January 4!

If your order is $50 or greater and includes either of these bundles, you will get this set of tutorials in addition to the monthly online class tutorials AND your $10 thank you gift!  And you’ll also earn my Creative Stamping Designs Reward Points!

*********************************************************************************************************

Card stock cuts for this project:

  • Night of Navy Cardstock 4 1/4″ X 8 1/4″ (card base scored and folded at 1 3/8″, 2 3/4″, 5 1/2″ & 8 1/4″), 2 1/2″ X 4″ (back panel mat)
  • Shaded Spruce Cardstock 3″ X 1 1/2″ (tree die cut)
  • Whisper White Cardstock 4 1/4″ X 5 1/2″ (snow drifts), 5 1/4″ x 4″ (animals), 2 5/8″ X 4 1/8″ (inside front mat), 2″ x 3 1/2″ (small trees), 2 1/2″ X 4″ (back panel)
  • Silver Foil Sheet 3/8″ X 5 1/2″
  • Snowflake Splendor Designer Series Paper 8 – 1 1/4″ X 4 1/8″ panels, 2 1/2″ X 4″ (inside front panel), 2 1/4″ X 6″ (piece for envelope flap)

*********************************************************************************************************

Product List