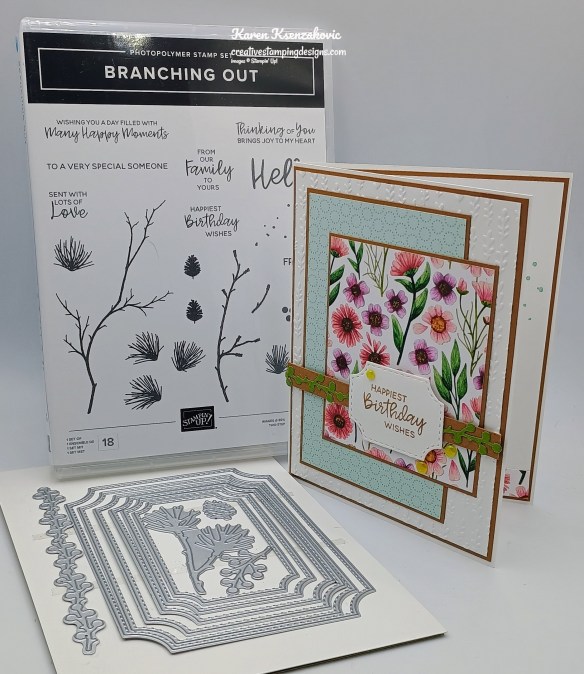
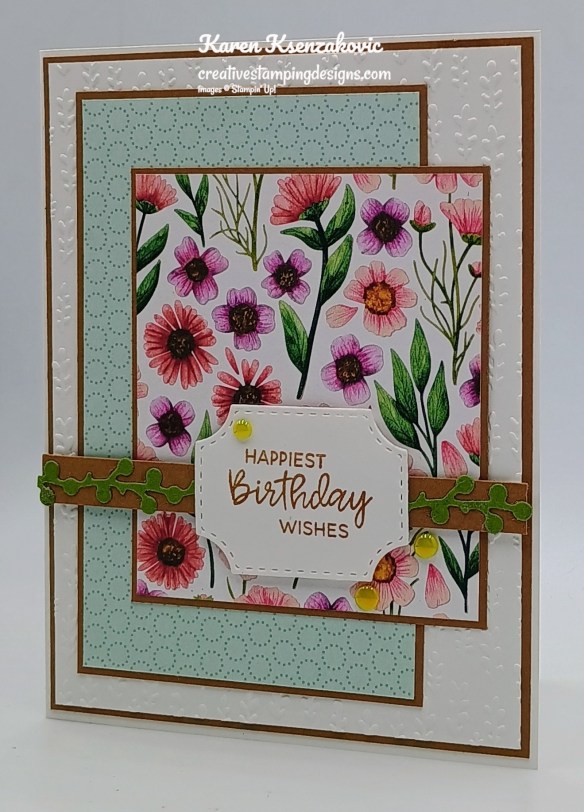
Good Thursday morning stamping friends and welcome to our Happy Inkin’ Thursday Blog Hop. If you are starting with me, thank you. I hope you will stop by everyone’s blog to see what they have created this week. If you are hopping over from Mary’s blog, thank you for stopping by. This week we have Color Challenge. If you’d like to see a quick video of how I made this card, Click Here to go to my Instagram Reels. Here is my card using this week’s colors.
I used the new Stamping Up! Branching Out Bundle along with the new Online Exclusive Gathering Leaves Embossing Folder (both items will be available Sept 3rd) and the Floral Impressions Designer Series Paper for my card today.
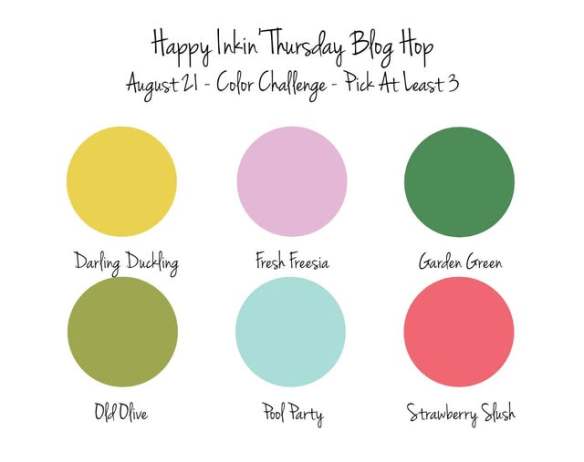
These are our colors for this week.
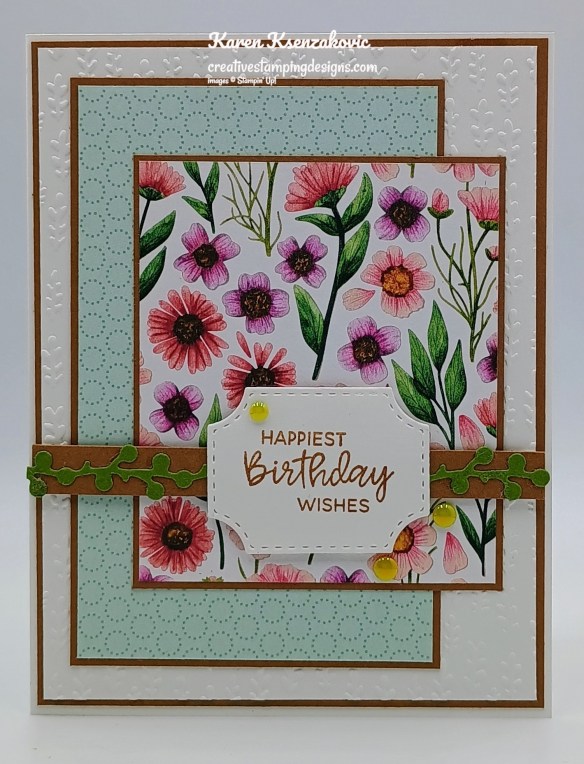
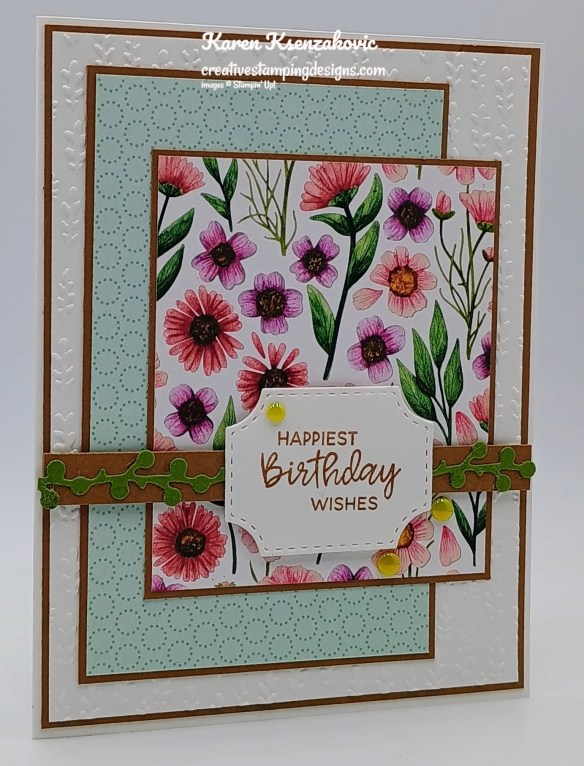
Emboss Basic White card front using the Gathering Leaves EF. Adhere the embossed panel to a Pecan Pie mat with Liquid Glue. Adhere 2 panels of Floral Impressions DSP to coordinating Pecan Pie mats with Stampin’ Seal. Adhere the layered panel to a Basic White Thick card base with Liquid Glue.
Adhere the larger DSP layered panel to the card front with Liquid Glue. Adhere the smaller DSP layered panel to the card front, overlapping the 1st panel, with Liquid Glue. Using the Branching Out Dies, cut the sprig die from a panel of Old Olive. Adhere the sprig to a Pecan Pie mat. Trim off excess. Adhere the layered strip to the card front.
On a panel of Basic White, stamp the sentiment from the Stampin’ Up! Branching Out Photopolymer Stamp Set in Pecan Pie Ink. Using the smallest Branching Out Dies, cut the top portion of the sentiment. Move the die to the desired size, matching up the dashes, and cut the bottom portion of the sentiment. Adhere the sentiment to the card front with Stampin’ Dimensionals. Add a few 2025-2027 In-Color Flat Pearls to the card front.
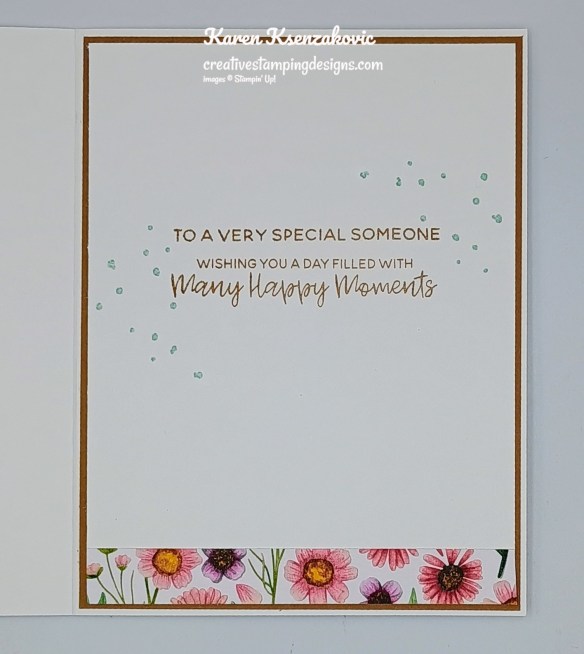
Stamp the sentiment from the Branching Out stamp set in Pecan Pie Ink on a panel of Basic White. Stamp the splatter image from the Branching Out stamp set in Pool Party Ink on either side of the sentiment. Adhere a panel of Floral Impressions DSP to the bottom of the panel. Adhere the Basic White panel to a Pecan Pie mat then to the inside of the Basic White Thick card base.
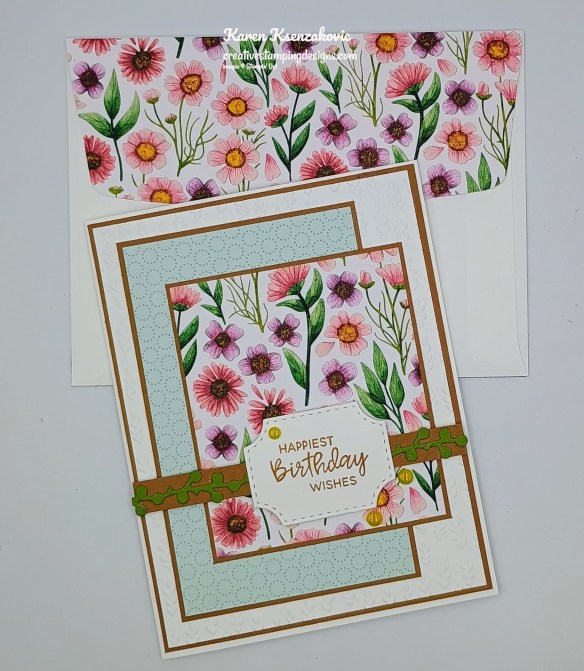
Decorate a Basic White Medium Envelope to compete your card. Adhere a strip of the Floral Impressions DSP to the envelope front and a panel to the envelope flap.
Thank you for stopping by my blog today. Now that you’ve seen my card, let’s get on with the hop! Click the button below to hop over to see what Akiko has created. Happy Hopping!!
Just in case you get lost along the way, here is a list of the team members involved in the hop today.
If you need any stamping supplies, I’d love to be your Demonstrator. Just click HERE to go directly to my online store or drop me an email if you have any questions.
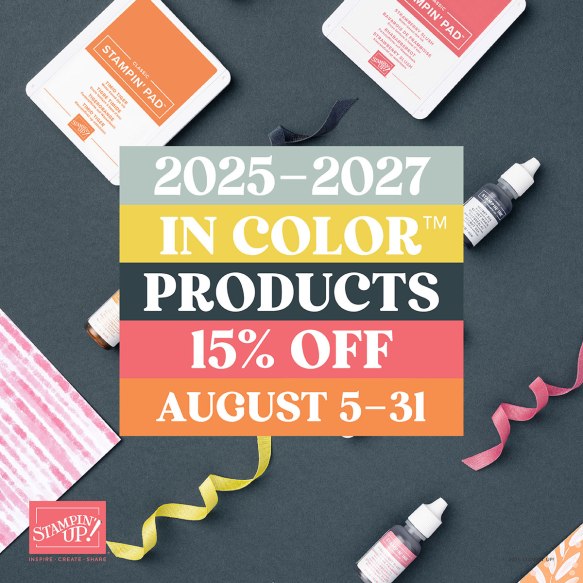
Starting August 5, select products that feature the new 2025–2027 In Colors™ are 15% off! This is a great opportunity to purchase new In Color products at a discount, so grab products you love—like ink, two-tone cardstock, and Designer Series Paper—and get everything you need to create projects that showcase Stampin’ Up!’s amazing color coordination!
Promotion Details:
Sales Period: August 5–31
Ordering Deadline: August 31, 2025, at 11:59 p.m. (MT)
Sale includes select inks, cardstock, Designer Series Paper, embellishments, and other products that include these new In Colors. Only products featured on the 2025–2027 In Colors page are included in this promotion.
Products are available only while supplies last.
You can find the 2025-2027 In Color sale items that will be on sale beginning August 5 right here! Get your list ready and shop early for the best selection!
Basic White Cardstock (2) 4″ x 5 1/4(card front & inner liner), 1 1/2″ x 2 1/2″(sentiment)
Basic White Tick Cardstock 5 1/2″ x 8 1/2″(card base scored & folded at 4 1/4″)
Old Olive Cardstock 1″ x 5″(die cut)
Pecan Pie Cardstock (2) – 4 1/8″ x 5 3/8″(card front & inner liner mats), 3″ x 4 3/4& 3″ x 3 1/2″(card front panel mats), 1/2″ x 4 1/8″(die cut mat)
Floral Impressions Designer Series Paper 2 7/8″ x 4 5/8″ & 2 7/8″ x 2 3/8″(card front panels), 3/8″ x 4″(inner liner), 1/2″ x 6″ & 2 1/4″ x 6″(envelope)
Hello, stamping friends and welcome to my Fun Fold Friday. I wasn’t sure what time I had to leave today and it turns out I had enough time to finish my card before going.
I mixed up some Online Exclusives for today’s card using one of my favorite sets. If you’d like to see a quick video of how I made this card, Click Here to go to my Instagram Reels. Here’s my card for today.
I used the Stampin’ Up! You Are Remarkable Photopolymer Stamp Set along with the Floral Impressions Designer Series Paper, Branching Out Dies (available Sept 3rd) and Stampin’ Up! Coneflower Celebrations Bundle for my card today.
Adhere the panels of Floral Impressions DSP to the coordinating Darling Duckling mats with Stampin’ Seal. Adhere the 2″ x 5 3/8″ layered panel to the front of the card base with Stampin’ Seal.
Using the Branching Out Dies, cut the smallest one from a panel of Basic White, the 2nd smallest from a panel of Darling Duckling and the 3rd smallest from a panel of Garden Green. Adhere the Darling Duckling die cut to the Garden Green die cut with Stampin’ Seal. On the Basic White die cut, stamp the sentiment from the You Are Remarkable stamp set in Pecan Pie Ink. Stamp the stem/leaf image from the You Are Remarkable stamp set in Garden Green Ink, stamping off on scrap paper 2 times, over the sentiment. Stamp the flower image from You Are Remarkable stamp set in Basic Beige Ink and the flower center image in Pecan Pie Ink, stamping off on scrap paper once, inside the flower. Stamp the splatter image from You Are Remarkable stamp set in Peach Pie Ink around the panel. Adhere the Basic White die cut panel to the Darling Duckling/Garden Green layered panel. Adhere the layered panel to the right side of the card front.
On a panel of Basic White, stamp the butterfly image from the Stampin’ Up! Coneflower Celebrations Photopolymer Stamp Set in Tuxedo Black Ink. Color the image with Daffodil Delight, Darling Duckling and Lemon Lolly Stampin’ Blends Markers. Cut the image out with the Coneflower Celebrations Dies. Adhere the butterfly to the layered panel with Glue Dots. Add a Tiny Bee Trinket to the card front.
On a panel of Basic White, stamp the sentiment from You Are Remarkable stamp set in Pecan Pie Ink. Adhere 2 panels of Floral Impressions DSP on either side of the panel. Stamp the bee image from You Are Remarkable stamp set in Tuxedo Black Ink and the splatter image in Peach Pie Ink. Adhere the Basic White panel to the inside of the card base.
Decorate a Basic White Medium Envelope for finish your card. Stamp the stem/leaf image from the You Are Remarkable stamp set in Garden Green Ink, stamping off once on scrap paper, on the envelope front. Stamp the flower image from You Are Remarkable stamp set in Basic Beige Ink on top of the stem. Stamp the flower center in Pecan Pie Ink, stamping off once on scrap paper. Stamp the bee image in Tuxedo Black and the splatter image in Peach Pie. Adhere a panel of Floral Impressions DSP to the envelope flap.
Thank you for stopping by my blog today. I hope you like the card and will give it a try. Happy Stamping!!
If you need any stamping supplies, I’d love to be your Demonstrator. Just click HERE to go directly to my online store or drop me an email if you have any questions.
My September – December 2025 Mini Catalog and September Online Exclusive Designer Series Paper, Ribbon and Embellishment Shares are open for ordering. You can order just the DSP share, just the Two-Tone cardstock share, just the Ribbon share or just the Embellishment share, or you can it all!!
I’m offering a Designer Series PaperShare, Two-Tone Cardstock Share, Ribbon Share & Embellishment Share from the September-December 2025 Mini Catalog, along with the upcoming September Online Exclusives and I’d love to have you join!! I’m placing my share order early on September 3rd and I’m going to use the expedited shipping option so I should be able to have the shares cut, bundled and back out to you during the week of September 8th. Wouldn’t you love to have all of the gorgeous new Designer Series Papers in the Stampin’ Up! September – December 2025 Mini Catalog and the upcoming September Online Exclusives? What is a Paper Share you ask? It’s a sample of each of the new Designer Series Papers from the Catalog and Online Exclusives. Shares give you a good working sample of all of the papers so that you can decide which ones to order in full packs! If you were to purchase all of the DSP in the new Catalog and Online Exclusives, it would cost you over $165.00 plus shipping and if you were to purchase all the ribbon it would cost you over $75.00.
New Designer Series Paper Share – $21.00 plus $9.00 for Priority Mail Shipping
How my shares work: I order full packs of all of the Designer Series Papers listed below, I cut them into 6″ X 6″ pieces (or 6″ X 12″ pieces for double shares) and give you one panel of each design from each pack on the list. I pack up the paper in a cellophane bag with labels listing the Name, Item # and Colors in the pack and mail it back out to you just as quickly as I can!
New Designer Series Paper Share – $21.00 plus $9.00 for Priority Mail shipping
You will receive one 6×6 sheet of each design from the following DSP packs (the number after the name indicates how many 6×6 sheets of that paper pack you will receive):
All Season Velvet (3)
Autumn Toil (4)
Christmas Tags & More (8)
Earthen Toned Metallic (1)
Elegant Pine Snowflakes (6)
Gathering Together (6)
Lights of Aurora (6)
Modern Christmas (6)
North Pole Delivery (5)
Peaceful Garden (6)
Peaceful Garden Glimmer (3)
Traditions of Christmas (6)
Silent Snowflake (1)
In all, you’ll receive 61 – 6” x 6” sheets of designer or specialty paper!
Double Designer Series Paper Share – $42.00 Plus $9.00 Priority Mail Shipping
As a gift from me for ordering a Double Share of Designer Series Paper, I will include a Greetings For You Mix & Match Ephemera Pack. This gift is only for ordering a Double DSP Share.
Two-Tone Cardstock Share
Have you been wanting to try the Two-Tone Cardstock but didn’t want to buy a whole pack? You can add a share of the 4 different Two-Tone Cardstock packs for an additional $6 or purchase them separately for $6 + $9 Priority Shipping
You will receive one 6×6 sheet of each color from each of the packs (the number after the name indicates how many 6×6 sheets of that paper pack you will receive):
Keeping Traditions (6)
Peaceful Days (6)
Lovely Florals (6)
Sweet Halloween (6)
In all, you’ll receive 24 – 6” x 6” sheets of cardstock!
If you’d like double shares of the designer paper or cardstock, I’m offering those too! I’ll cut the 12″ x 12″ sheets into 6″ × 12″ so that you’ll be able to get 3 full A2 size card fronts from each sheet and you’ll get double sheets of the 6″ x 6″ since they’re already precut.
Ribbon Share – $20.00 plus $9.00 Priority Mail Shipping
All ribbons will come individually wrapped and labeled with the name and number of the product.
One-Fourth of a Roll of each:
Balmy Blue 1/2″ Sheer Ribbon
Black & White & Gold Baker’s Twine
Early Espresso & Old Olive Linen Thread
Irregular Weave 3/8″ Trim
Misty Moonlight & Silver Edged 1/2″ Ribbon
Real Red 1/2″ Shiny Ribbon
Shaded Spruce 7/8″ Ribbon
White 3/8″ Fluffy Trim
Double Ribbon Share – $40.00 Plus $9.00 Priority Mail Shipping and you will be getting 1/2 of the roll or each ribbon.
Embellishment Share – $16.00 plus $9.00 Priority Mail Shipping
I’m also offering an Embellishment Share. I will divide the embellishments up and package them in a cello bag with the name and number for easy ordering, just like I do with the paper and ribbon.
You will receive (approximate # listed:
Cajun Craze & Gold Dots (30)
Dear Dots (40)
Delightful Decorative Dots (36)
Faceted Snowflakes (42)
Frosted Iridescent Dots (40)
Hues of Blue Flowers (32)
Large Gold Hoops (2)
Streaked Dots (32)
Traditional Sparkling Sequins (48)
Double Share of the Embellishments – $32.00 plus $9.00 Priority Mail Shipping
Anyone is welcome to join in my shares (please note, I can only ship to addresses within the US). To make ordering the shares a little easier, I have created a form for you to submit, that way you can order any combination of shares you want. Click Here for the form. I will send out PayPal Invoices by September 1st.
Deadline to sign up for my share is Sunday August 31st at 5:00 PM ET.
I put together a video showing you everything included in my shares Here.
Let me know if you have any questions, I’m more than happy to help you. Thank you for joining in my Shares!!
Final Days to Register for our August Online Technique Class
Tara Carpenter, Nicole Bloxom and I are teaming up to offer a fun Technique Online Zoom Class. We will be creating 6 different cards using 6 different techniques. This class is free with a $50 purchase from my Online Store. We will supply a list of supplies we are going to be using in the next couple days. We decided to open registration early so you can take advantage of the Free Shipping and my Double Rewards and also earn a free class.
The class requirements and What You Will Receive:
Visit my Online Store and place a $50 or more order before tax and shipping.
Zoom class with complete step by step instructions to complete each card as we go.
PDF with detailed directions and photos
A Link to the recorded class after we are done so you can watch it again and make more cards.
Here is a list of just some of the items that Tara, Nicole and I will be using.
Charming Day Bundle
Elements of Text stamp set
Artistic Leaves Stamp Set
Two-Tone Cardstock
Fluid 100 Watercolor Paper
Iridescent Treat Bags
Stampin’ Spritzer
Wow Basics Embossing Powder
Heat Tool
Floral Charm DSP
Adhesive Sheets
Stylish Shapes Dies
A week before the class I will send you the complete PDF of the cards so you can cut all your cardstock and gather your supplies, so you are ready to go. We will NOT be cutting cardstock live. Everyone’s cards will be unique since you will pick which color cardstock and ink you want to use for each card.
The class will be held on Sunday August 24th from 1pm – 5pm Eastern Time via Zoom. This will allow everyone all over the United States to participate live!
I will email you the Zoom link to the class a few days before the event.
Basic White Cardstock 2″ x 3 1/2″(sentiment), 2″ x 2″(butterfly), 3 1/4″ x 3 1/4″(inner liner
Darling Duckling Cardstock (2) – 2″ x 5 3/8″ & 4 1/8″ x 5 3/8″(dsp mats), 2 1/2″ x 4″(sentiment mat)
Garden Green Cardstock 5 1/2″ x 8 1/2″(card base scored & folded at 2 1/8″ & 4 1/4″), 2 3/4″ x 4 1/4″(sentiment mat)
Floral Impressions Designer Series Paper (2) – 1 7/8″ x 5 1/4″(card front & inside panel), 4″ x 5 1/4″(back panel), (2) – 3/8″ x 3 1/4″(inner liner), 2 1/4″ x 6″(envelope)
Good Sunday morning stamping friends. I hope you are all having a great weekend. Yesterday turned out to be a nice day, once the humidity lifted. I was able to take my 2 pups for a walk after dinner and not work up a sweat.
Today’s card we made at our monthly team meeting on Tuesday night. Jaimie sent us all the measurements and talked us through the process of creating the card. Our cards were all similar but different. Here’s my card for today.
I used the Stampin’ Up! Impressions Abloom Bundle along with the Eyelet 3D Embossing Folder, Floral Impressions Designer Series Paper and 1 3/4″ Circle Punch for my card.
Emboss a panel of Fresh Freesia using the Eyelet EF. Using your Fresh Freesia stamp pad, swipe across the embossed panel to ink the raised images. Adhere the embossed panel to a Basic White mat with Liquid Glue.
Adhere a panel of Floral Impressions DSP to the bottom of the embossed panel with Liquid Glue. Wrap a piece of 1/4″ Misty Moonlight Ribbon around the layered panel and tie a bow. Adhere the layered panel to a Misty Moonlight card base with Stampin’ Dimensionals.
Using the Impressions Abloom Dies, cut 2 of the leaf dies from a panel of Pool Party and 6 tiny flowers from a panel of Fresh Freesia. Adhere the die cut leaves to the card front with Glue Dots. Adhere the tiny flowers on the leaves with Glue Dots. On a panel of Basic White, stamp the sentiment from Impressions Abloom stamp set in Misty Moonlight Ink. Cut the sentiment out using the Circle Punch. Adhere the sentiment to the card front with Stampin’ Dimensionals. Add a few Rainbow Adhesive-Backed Dots to the card front.
Stamp the sentiment from Impressions Abloom stamp set in Misty Moonlight Ink on a panel of Basic White. Stamp the stem and leaf images from Impressions Abloom stamp set in Pool Party Ink on the bottom of the panel. Stamp the small, detailed flower image from Impressions Abloom stamp set in Fresh Freesia Ink on the stems. Stamp the small, solid flower image over the detailed image in Fresh Freesia Ink, stamping off once on scrap paper. Stamp the flower centers in Lemon Lolly Ink. Adhere the Basic White panel to a Fresh Freesia mat then to the inside of the Misty Moonlight card base.
Decorate a Basic White Medium Envelope to finish your card. Stamp the small flower image from the Impressions Abloom stamp set across the envelope front the same as you did for the inside of the card. Adhere a panel of Floral Impressions DSP to the envelope flap.
Thank you for stopping by my blog today. I hope you like the card and will give it a try. Happy Stamping!!
If you need any stamping supplies, I’d love to be your Demonstrator. Just click HERE to go directly to my online store or drop me an email if you have any questions.
Together Let’s Raise Some Money for the Floods in Texas from July 4th
We’ve all been watching – and crying – as we’ve watched the devastation caused by the flooding of the Guadalupe River in Texas on July 4th. It’s beyond horrible. Since there’s really nothing most of us can do that is hands-on – I try to help financially. I’m coming to you for HELP! So…I’m going to do a fundraiser that’ll start right now. I’ve selected Mercury One as the recipient of our donation.
Mercury One is a 501(c)(3) charity that was founded in 2011 by media personality, entrepreneur, and New York Times best-selling author Glenn Beck. It was created to inspire the world in the same way the United States’ space program shaped America’s national destiny by setting a goal and committing to reach it against all odds. The only limitations to achievement are those we place on ourselves, and we believe in the goodness and power of the individual to overcome any obstacle.
How can you help me help them??
Place a Stampin’ Up! Order Thru Me OR Donate Directly!
And – as an added incentive – if we hit our donation goal – $500– I’ll be giving away a new Stampin’ Cut and Emboss Machine to one winner!
I’m setting a goal of donating a total of $500 – and here’s how you can help me (and be entered to win a new Stampin’ Cut and Emboss Machine!).
1. – Shop Online:
For any orders placed through my Online Store between now and Saturday July 19,2025, I’ll be making a targeted donation of 20% of your merchandise total to Mercury One for Texas Hill County Flood Victims.
You’ll earn your Creative Stamping Designs Rewards with all order of $50 or more (before tax & shipping).
Anyone ordering $50+ (before tax & shipping) will be entered to win a new Stampin’ Cut & Emboss Machine from me to give away on July 20th.
OR…
2. – Make a Donation of $50+ directly to Mercury One at this LINK
For those in the US, send me a screenshot (to creativestampingdesigns@gmail.com) of the receipt for your donation of $50+ to Mercury One and you’ll be entered to win a new Stampin’ Cut & Emboss Machine from me to be give away on July 20th.
OR…
3. – Do Both!!
If you order $50+ through my Stampin’ Up! Online Store AND donate at least $50 directly to Mercury One, then your name will be entered TWICE to win the Stampin’ Cut & Emboss Machine!
Please note: Per Stampin’ Up! rules, I’m only allowed to ship the Stampin’ Cut & Emboss Machine to addresses in the United States or military APO addresses. Only those with US/APO shipping addresses will be eligible to win the Stampin’ Cut & Emboss Machine. Anyone outside the US is welcome to donate but will not be eligible to win the machine.
NOTE: Orders and/or Donations must be placed by midnight Eastern Time on Saturday July 19 to be entered to win the machine. One winner of the Stampin’ Cut & Emboss Machine will be randomly chosen on Sunday July 20th from all of the entries received.
Any questions, please send me an email to creativestampingdesigns@gmail.com. I appreciate your help more than I can express.
Don’t miss the coordinating Circle of Seasons Dies Add-On!
Make the most of your Paper Pumpkin kits with the Circle of Seasons Dies add-on! Quickly and cleanly cut out a strawberry with a blossom, a circle, a leaf, or an acorn to elevate your crafting projects. These additional dies are designed to work with THREE Paper Pumpkin Kits: the Sweeter with You Paper Pumpkin Kit, the Farmhouse Florals Paper Pumpkin Kit, and the Fall for Toile Paper Pumpkin Kit. Pair these dies with other Stampin’ Up! products for even more creative options! This exclusive add-on (item 167277) coordinates with the three upcoming kits! Paper Pumpkin subscribers can purchase it beginning June 11. Add-on is available only while supplies last, so it’s best to shop early!
DETAILS – 4 dies – Largest die: 2-1/2″ x 1-1/4″ (6.4 x 3.2 cm) – Use with a Stampin’ Cut & Emboss Machine (sold separately)
You must be a current Paper Pumpkin subscriber to purchase this item. To become a subscriber, visit www.stampinup.com/paperpumpkin.
Note: Supplies may be limited toward the end of the subscription period.
Good Thursday morning stamping friends and welcome to our Happy Inkin’ Thursday Blog Hop. If you are starting with me, thank you. I hope you will stop by everyone’s blog to see what they have created this week. If you are hopping over from Mary’s blog, thank you for stopping by. This week we have Theme Challenge. If you’d like to see a quick video of how I made this card, Click Here to go to my Instagram Reels. Here is my card using this week’s theme.
I used the Stampin’ Up! Feathered Fun Photopolymer Stamp Set along with the Stampin’ Up! Blooming Phrases Photopolymer Stamp Set, Floral Impressions Designer Series Paper, Label Me Grateful Dies and Stampin’ Up! Layers of Beauty Photopolymer Stamp Set for my card today.
Our theme for this week is Birds.
Adhere a panel of Floral Impressions DSP to a Daffodil Delight mat with Stampin’ Seal. Adhere the layered panel to an Old Olive card base with Liquid Glue. Cut 3 of the leaf dies using the Label Me Grateful Dies from a panel of Old Olive.
On a panel of Basic White, stamp the sentiment from Blooming Phrases stamp set on all 4 sides in Tuxedo Black Ink. Using daffodil Delight and Granny Apple Green Stampin’ Blends Markers, tap the blends on a Bone Folder to splatter ink on the panel. Adhere the stamped panel to the card front with Stampin’ Dimensionals.
On a panel of Basic White, stamp the love bird image from the Feathered Fun stamp set in Tuxedo Black Ink. Color the image with Calypso Coral, Daffodil Delight, Granny Apple Green, Lemon Lime Twist, Lemon Lolly, Pecan Pie and Timid Tiger Stampin’ Blends Markers. Fussy cut the birds with Paper Snips. Adhere the leaf die cuts to the side of the sentiment panel with Stampin’ Seal. Tie a bow with Linen Thread and adhere it to the bottom of the die cuts with a Glue Dot. Adhere the fussy cut birds over the leaves with Stampin’ Dimensionals. Add a few Low-Profile Sparkle Dots to the card front.
On a panel of Basic White, stamp the sentiment from Layers of Beauty stamp set in Tuxedo Black Ink. Stamp the hear image from the Feathered Fun stamp set in Tuxedo Black Ink next to the sentiment. Color the hearts with Calypso Coral Stampin’ Blends Markers. Adhere a strip of Floral Impressions DSP to the bottom of the panel. Adhere the Basic White panel to a Daffodil Delight mat then to the inside of the Old Olive card base.
Decorate a Basic White Medium Envelope to complete your card. Stamp the small bird and heart images from Feathered Fun stamp set in Tuxedo Black Ink on the bottom of the panel. Adhere a panel of Floral Impressions DSP to the envelope flap.
Thank you for stopping by my blog today. Now that you’ve seen my card, let’s get on with the hop! Click the button below to hop over to see what Tara has created. Happy Hopping!
Just in case you get lost along the way, here is a list of the team members involved in the hop today.
If you need any stamping supplies, I’d love to be your Demonstrator. Just click HERE to go directly to my online store or drop me an email if you have any questions.
Craft sweet handmade cards featuring sun-kissed strawberries and breezy gingham. • Makes 8 cards: 2 each of 4 designs with 8 coordinating envelopes • Precut paper pieces and vellum accents • Hand-painted card base designs • Coordinating colors: Garden Green (Classic Stampin’ Spot), Granny Apple Green, Pool Party, Poppy Parade, Strawberry Slush, Timid Tiger
Subscribe to the June Paper Pumpkin Kit between 11 June and 10 July by clicking here!
Don’t miss the coordinating Circle of Seasons Dies Add-On!
Make the most of your Paper Pumpkin kits with the Circle of Seasons Dies add-on! Quickly and cleanly cut out a strawberry with a blossom, a circle, a leaf, or an acorn to elevate your crafting projects. These additional dies are designed to work with THREE Paper Pumpkin Kits: the Sweeter with You Paper Pumpkin Kit, the Farmhouse Florals Paper Pumpkin Kit, and the Fall for Toile Paper Pumpkin Kit. Pair these dies with other Stampin’ Up! products for even more creative options! This exclusive add-on (item 167277) coordinates with the three upcoming kits! Paper Pumpkin subscribers can purchase it beginning June 11. Add-on is available only while supplies last, so it’s best to shop early!
DETAILS – 4 dies – Largest die: 2-1/2″ x 1-1/4″ (6.4 x 3.2 cm) – Use with a Stampin’ Cut & Emboss Machine (sold separately)
You must be a current Paper Pumpkin subscriber to purchase this item. To become a subscriber, visit www.stampinup.com/paperpumpkin.
Note: Supplies may be limited toward the end of the subscription period.
Good Sunday morning stamping friends. How is your weekend going? The temperatures are rising here in NJ, we’re in the 90’s today and 100’s tomorrow & Tuesday. I guess Summer is finally here. I had yesterday off to attend the Creativity Now Event with Stampin’ Up! so I have to work today.
Today’s card I played with one of my favorite Online Exclusive sets and DSP. If you’d like to see a quick video of how I made this card, Click Here to go to my Instagram Reels. Here’s my card for today.
I used the Stampin’ Up! Impressions Abloom Photopolymer Stamp Set along with the Floral Impressions Designer Series Paper,Mini Corrugated 3D Embossing Folder and Nested Essentials Dies for my card today.
Emboss a Basic White card front with the Mini Corrugated EF. Adhere the embossed panel to a Timid Tiger card base with Liquid Glue
Adhere a panel of Floral Impressions DSP to a Timid Tiger mat with Stampin’ Seal. Adhere the layered panel to the card front with Stampin’ Dimensionals.
Stamp the detailed daisy image from Impressions Abloom stamp set in Timid Tiger Ink on a panel of Basic White. Stamp the solid daisy image from Impressions Abloom stamp set in Timid Tiger Ink, stamping off once on scrap paper, over the detailed image. Stamp the flower center in Darling Duckling Ink. Stamp the sentiment from Impressions Abloom stamp set in Tuxedo Black Ink on top of the flower image. Cut the image out with the smallest rectangle from the Nested Essentials Dies. Cut a panel of Timid Tiger using the 2nd smallest Nested Essentials Dies. Adhere the sentiment to the timid Tiger mat with Stampin’ Seal. Adhere the layered panel to the cad front with Stampin’ Dimensionals. Add a few 2025-2027 In-Color Flat Pearls to the card front.
Stamp the sentiment from Impressions Abloom stamp set in Tuxedo Black Ink on a panel of Basic White. Stamp the detailed daisy image from Impressions Abloom stamp set in Timid Tiger Ink on the side of the panel. Stamp the solid daisy image in Timid Tiger Ink, stamping off once on scrap paper, on top of the detailed image. Stamp the stem and leaf images from the Impressions Abloom stamp set in Garden Green Ink. Adhere a panel of Floral Impressions DSP to the bottom of the panel. Adhere the Basic White panel to a Timid Tiger mat then to the inside of the Timid Tiger card base.
Decorate a Basic White Medium Envelope to finish your card. Stamp the daisy image from Impressions Abloom stamp set on the envelope front the same as for the card. Adhere a panel of Floral Impressions DSP to the envelope flap.
Thank you for stopping by my blog today. I hope you like the card and will give it a try. Happy Stamping!!
If you need any stamping supplies, I’d love to be your Demonstrator. Just click HERE to go directly to my online store or drop me an email if you have any questions.
June 3-30, all available suites and suite products from the 2025–2026 Annual Catalog and Online Exclusives are buy one, get one 50% off! If you’ve had your eye on a new suite from the annual catalog or you really like the look of a stamp set from an Online Exclusives suite, you don’t have to choose—you can get both!
Here are the promotion details:
All available suites and suite products from the 2025–2026 Annual Catalog and Online Exclusives are buy one, get one 50% off.
When you shop the sale, the 50% off discount will apply to the lower-priced item (for example, if you buy a suite collection and a stamp set from a suite, the suite would be full price, and the stamp set would be 50% off).
Suite collections are available if all items are in stock; if all items are not in stock, you can still shop the available suite products.
You don’t have to buy a suite and suite products all from the same suite collection for the discount to apply. You can buy any suite products from any suite.
The discount will appear in your cart once you’ve added two items within the sale parameters to your cart.
Products are available only while supplies last.
See and shop all qualifying suites in the Online Store
The sale begins June 3, 2025 at 12:01 AM MT.
The sale ends June 30, 2025 at 11:59 PM MT.
Let me know if you have any questions. YAY for an awesome sale! Get your lists ready and get your orders placed between June 3-30!!
Craft sweet handmade cards featuring sun-kissed strawberries and breezy gingham. • Makes 8 cards: 2 each of 4 designs with 8 coordinating envelopes • Precut paper pieces and vellum accents • Hand-painted card base designs • Coordinating colors: Garden Green (Classic Stampin’ Spot), Granny Apple Green, Pool Party, Poppy Parade, Strawberry Slush, Timid Tiger
Subscribe to the June Paper Pumpkin Kit between 11 June and 10 July by clicking here!
Don’t miss the coordinating Circle of Seasons Dies Add-On!
Make the most of your Paper Pumpkin kits with the Circle of Seasons Dies add-on! Quickly and cleanly cut out a strawberry with a blossom, a circle, a leaf, or an acorn to elevate your crafting projects. These additional dies are designed to work with THREE Paper Pumpkin Kits: the Sweeter with You Paper Pumpkin Kit, the Farmhouse Florals Paper Pumpkin Kit, and the Fall for Toile Paper Pumpkin Kit. Pair these dies with other Stampin’ Up! products for even more creative options! This exclusive add-on (item 167277) coordinates with the three upcoming kits! Paper Pumpkin subscribers can purchase it beginning June 11. Add-on is available only while supplies last, so it’s best to shop early!
DETAILS – 4 dies – Largest die: 2-1/2″ x 1-1/4″ (6.4 x 3.2 cm) – Use with a Stampin’ Cut & Emboss Machine (sold separately)
You must be a current Paper Pumpkin subscriber to purchase this item. To become a subscriber, visit www.stampinup.com/paperpumpkin.
Note: Supplies may be limited toward the end of the subscription period.
Good Friday morning stamping friends and welcome to my Fun Fold Friday. I hope you all had a wonderful week and are looking forward to the weekend.
I received my Online Exclusive Preorder yesterday and I didn’t know what to play with first. The first thing on my list was the new embossing folder, so I thought I’d start with that. I did pair it up with some DSP that is available now. Here’s my card for today.
I used the new Online Exclusive Products coming July 1st for today’s card. The Stampin’ Up! Label Me Grateful Cling Stamp Set, Sunflower 3D Embossing Folder, Stampin’ Up! Prairie Grass Cling Stamp Set along with the Floral Impressions Designer Series Paper and Everyday Arches Dies.
Start by folding the Old Olive card base into an accordion fold. Adhere 3 panels of Floral Impressions DSP to each panel with Stampin’ Seal. Cut 3 panels of Old Olive using the 3rd larges Everyday Arches Dies.
Cut a panel of Darling Duckling using the 4th largest Everyday Arches Dies. Stamp the sentiment from Label Me Grateful stamp set in Pecan Pie Ink on the top of the panel. Emboss the panel using the new Sunflower 3D Embossing Folder. Using the Small Blending Brush, add Pecan Pie Ink to the sunflower centers. Adhere the embossed panel to one of the Old Olive die cut arches with Liquid Glue. Adhere the layered panel to the front of the Old Olive card base with Tear & Tape.
Cut a panel of Floral Impressions DSP using the 4th largest Everyday Arches Dies. Adhere the panel to an Old Olive die cut panel with Stampin’ Seal. Adhere the layered panel to the center section of the Old Olive card base with Tear & Tape.
cut a panel of Basic White with the 4th largest Everyday Arches Dies. Stamp the sentiment from Label Me Grateful stamp set in Pecan Pie Ink. Stamp the grass image from the Prairie Grass stamp set in Old Olive Ink on the bottom of the panel. Adhere the Basic White panel to an Old Olive die cut arch with Stampin’ Seal. Adhere the layered panel to the back section of the Old Olive card base with Tear & Tape.
Decorate a Basic White Medium Envelope to finish your card. Adhere a strip of Floral Impressions DSP to the front of the envelope and a panel to the envelope flap.
Thank you for stopping by my blog today. I hope you like the card and will give it a try. Happy Stamping!!
If you need any stamping supplies, I’d love to be your Demonstrator. Just click HERE to go directly to my online store or drop me an email if you have any questions.
The Buy 1 Get 1 50% off Sale is going on, YAY!!! To kick this sale off, I’m offering a little bonus. With this awesome Suite Sale from Stampin’ Up!, I thought that I’d give you a little bonus to help you with coloring all of those pretty stamped images! I’m offering a FREE pack of Stampin’ Blends Combo Pack Markers of your choice starting June 3rd – Tuesday June 10th for any order of $50 or more before tax, shipping and after Stampin’ Rewards. If you use your Stampin’ Up! Rewards and it falls below $50; it will not qualify for a pack of blends or my rewards. You will also still earn your Creative Stamping Designs Rewards from me for your order of $50 or more. Once you have placed your order, I will send you an email asking which combo pack you would like. You must send me your selection by June 11th or I will pick a color pack for you. I’ll be placing my order for the blends on June 11th.
June 3-30, all available suites and suite products from the 2025–2026 Annual Catalog and Online Exclusives are buy one, get one 50% off! If you’ve had your eye on a new suite from the annual catalog or you really like the look of a stamp set from an Online Exclusives suite, you don’t have to choose—you can get both!
Here are the promotion details:
All available suites and suite products from the 2025–2026 Annual Catalog and Online Exclusives are buy one, get one 50% off.
When you shop the sale, the 50% off discount will apply to the lower-priced item (for example, if you buy a suite collection and a stamp set from a suite, the suite would be full price, and the stamp set would be 50% off).
Suite collections are available if all items are in stock; if all items are not in stock, you can still shop the available suite products.
You don’t have to buy a suite and suite products all from the same suite collection for the discount to apply. You can buy any suite products from any suite.
The discount will appear in your cart once you’ve added two items within the sale parameters to your cart.
Products are available only while supplies last.
See and shop all qualifying suites in the Online Store
The sale begins June 3, 2025 at 12:01 AM MT.
The sale ends June 30, 2025 at 11:59 PM MT.
Let me know if you have any questions. YAY for an awesome sale! Get your lists ready and get your orders placed between June 3-30!!
Karen & Tara’s Cheers & Sips Online Zoom Class Registration Open
Tara Carpenter and I are teaming up to offer a fun online class using Stampin’ Up! Online Exclusive Cheers & Sips Bundle. We will be creating 6 different cards during the class including 2 fun folds.
The class fee includes:
Stampin’ Up! Holographic Resin Dots (full pack)
Stampin’ Up! Gold Striped Mesh Ribbon (full pack)
Pre-cut card kits to complete each card
Zoom class with complete instructions to complete each card
PDF with detailed directions
During sign up you will have the option to add additional items to your order that you can take advantage of at no additional shipping cost. These items are optional, however if you want to recreate the cards you will need them.
The class will be held Sunday June 29th from 1 to 5 pm Eastern Time via Zoom. This allows anyone in the United States to participate live! Can’t join us live… no worries, we will record the session so it can be replayed at any time.
We will email written directions that will include directions, cardstock cuts as well as photos to help you create each card.
We are not including the bundle in the price of the class. You can purchase the bundle through me at an additional 10% discount of the Online Exclusive price (see below).
Class Cost $35 + $9 (Priority Shipping)
Additional purchased items will be included in the above shipping price. We will invoice you through PayPal by June 15tth to insure we can get the products delivered, packaged up and out to you with enough time.
Deadline: Saturday June 14th (this is so we have time to order all the bundles, embellishments and DSP being used)
Click Here to register for the class now!! Let me know if you have any questions.
Stampin’ Up! has added a bunch of items to the Last Chance Products list! Be sure to scroll through all of the pages so that you don’t miss anything. There are newly added items sprinkled throughout the list.
You can find the Last Chance Products list Here in the online store.
Don’t forget that Last Chance Products are only available while supplies last, so order early for the best selection!
Send your loved ones elevated cards with heartfelt sentiments! • Makes 9 cards: 3 each of 3 designs with 9 coordinating envelopes • Envelopes and card bases with decorative gold foil • Precut paper pieces and unique sentiment labels • Coordinating colors: Berry Burst, Cajun Craze, Early Espresso, Mossy Meadow, Pretty Peacock (Classic Stampin’ Spot), Timid Tiger Coordinates with the Floral Charm Suite Collection (item 166141)
Subscribe to the June Paper Pumpkin Kit between 11 May and 10 June by clicking here!
Don’t miss the coordinating Hugs Abloom Dies Add-On!
Make the most of your Paper Pumpkin kits with the Hugs Abloom Dies add-on! Quickly and cleanly cut out a flower, leaf sprig, sentiment label, or Hugs sentiment to elevate your crafting projects. These additional dies are designed to work with THREE Paper Pumpkin Kits: the Inked Occasions Paper Pumpkin Kit, the Mountain Majesties Paper Pumpkin Kit, and the Full of Charm Paper Pumpkin Kit. Pair these dies with other Stampin’ Up! products for even more creative options!
DETAILS – 4 dies – Largest die: 2-1/2″ x 1-1/4″ (6.4 x 3.2 cm) – Use with a Stampin’ Cut & Emboss Machine (sold separately)
You must be a current Paper Pumpkin subscriber to purchase this item. To become a subscriber, visit www.stampinup.com/paperpumpkin.
Note: Supplies may be limited toward the end of the subscription period.
Good Friday morning stamping friends and welcome to my Fun Fold Friday. We’re at the end of the week and end of the month and at the end of the awesome Starter Kit Joining Special. Tomorrow is the LAST DAY to get $165 in products of your choice for only $99. Let’s get you signed up today!!
I have a book fold card for you today playing with one of my favorite sets and my favorite DSP. The book fold card is the perfect fun fold for someone that’s new to making fun folds. If you’d like to see a quick video of how I made this card, Click Here to go to my Instagram Reels. Here’s my card for today.
I used the Online Exclusives Stampin’ Up! Impressions Abloom Bundle along with the Floral Impressions Designer Series Paper, Stampin’ Up! Year of Flowers Cling Stamp Set, Stylish Shapes Dies and 1 3/4″ Circle Punch for my card today.
Adhere the Pool Party card base together with Liquid Glue between the 4 1/4″ & 5 1/2″ score lines. Adhere the panels of Floral Impressions DSP to the Misty Moonlight mats with Stampin’ Seal. Adhere the layered panels to the Pool Party card base with Liquid Glue. Using the 1 3/4″ Circle Punch cut a panel of Basic White. From the panel of Misty Moonlight cut the circle using the Stylish Shapes Dies. On the Basic White circle, stamp the sentiment from Year of Flowers stamp set in Misty Moonlight Ink. Adhere the sentiment to the Misty Moonlight mat with Stampin’ Seal. Adhere the layered sentiment to the card front with Stampin’ Dimensionals.
Using the 1 3/4″ Circle Punch cut a panel of Basic White. From the panel of Misty Moonlight cut the circle using the Stylish Shapes Dies. On the Basic White circle, stamp the sentiment from Year of Flowers stamp set in Misty Moonlight Ink. Adhere the sentiment to the Misty Moonlight mat with Stampin’ Seal. On the Basic White panel, stamp the small, detailed flower image from the Stampin’ Up! Impressions Abloom Photopolymer Stamp Set in Berry Burst and Misty Moonlight Inks multiple times. Stamp the small solid flower image from the Impressions Abloom stamp set in Berry Burst and Misty Moonlight Inks, stamping off 2 times on scrap paper, over the detailed images. Stamp the flower centers in Darling Duckling Ink. Using the Impressions Abloom Dies, cut the flowers, the leaves from a panel of Old Olive and the small flowers from a panel of Pool Party. Arrange the flowers partially around the sentiment with Glue Dots. Add a Two-Tone Sparkle Gem to the sentiment.
Cut a small notch on the top and bottom of the binder side of the card base using Paper Snips. Wrap a piece of Misty Moonlight 1/4″ Ribbon around the side and tie a bow.
Stamp the sentiment from Year of Flowers stamp set in Misty Moonlight Ink on a panel of Basic White. Stamp the small, detailed flower image from Impressions Abloom stamp set in Berry Burst Ink on either side of the sentiment. Stamp the small solid flower image from the Impressions Abloom stamp set in Berry Burst Ink, stamping off 2 times on scrap paper, over the detailed images. Adhere the Basic White panel to a Misty Moonlight mat then to the inside of the Pool Party card base.
Decorate a Basic White Medium Envelope to finish your card. Stamp the small, detailed flower image from Impressions Abloom stamp set in Berry Burst and Misty Moonlight Inks on the envelope front. Stamp the small solid flower image from Impressions Abloom stamp set in Berry Burst and Misty Moonlight Inks, stamping off 2 times on scrap paper, over the detailed images. Stamp the flower centers in Darling Duckling Ink. Adhere a panel of Floral Impressions DSP to the envelope flap.
Thank you for stopping by my blog today. I hope you like the card and will give it a try. Happy Stamping!!
If you need any stamping supplies, I’d love to be your Demonstrator. Just click HERE to go directly to my online store or drop me an email if you have any questions.
Final Week for Stampin’ Up!’s BIGGEST Starter Kit Joining Special –Ends May 31st
May is an awesome time to join my Stampin’ Up! Team!! Have you ever thought about joining the Stampin’ Up! community? Are you into scrapbooking and have you seen all the new scrapbook products Stampin’ Up! has? Is your wish/want list pretty long and do you order often? Wouldn’t you love to get all these products at a discount? Why not consider joining the Stampin’ Up! community between May 6-31, and save a minimum of 20% off everything you buy? Are you new to stamping and don’t know where to start, but would like to join to save? Ask me for help, I’m here to help and assist you anyway that I can.
Stampin’ Up!’s BIGGEST Starter Kit Special will be available for a limited time! Between May 6–31, anyone who signs up to be a demonstrator can pack their Starter Kit with $165 USD worth of products for only $99 USD. That’s an extra $66 USD in products!
Crafting is even more fun with community, and there’s never been a better time to join then with Stampin’ Up!’s BIGGEST Starter Kit Special. Become a demonstrator and enjoy all the perks that come with that, like a 20–25% product discount, exclusive early access to new products, the chance to attend incredible training and crafting events like Stampin’ Up!’s OnStage and Creativity Now, and so much more!
If you join my team, I’m offering free classes to my team members. Tara Carpenter and I run Online Zoom classes and we decided that our direct team members will receive the classes for free. You’ll get the PDF and the link to the Online Zoom class along with the replay.
There is never an obligation to sell. You can join just to enjoy the discount for yourself along with all the other Demonstrator benefits. Once you join, you’ll get at least a 20% discount on all of your Stampin’ Up! merchandise purchases and you get to order early from the upcoming catalogs and Online Exclusives! You will also be able to attend the OnStage Events and any other events Stampin’ Up! has and you get to be a part of our awesome Stampin’ Up! team!
Unsure about this and want to talk? Contact me at creativestampingdesigns@gmail.com and we can talk. You can also find additional information Here at Join My Team. Being a part of the Stampin’ Up! Community is one of the best decisions I’ve ever made. I have made many friends along the way while doing what I love, Paper Crafting. This Joining offer is only good starting May 6 – May 31. Why not give it a try? I’d love to have you on my team.
Karen & Tara’s Cheers & Sips Online Zoom Class Registration Open
Tara Carpenter and I are teaming up to offer a fun online class using Stampin’ Up! Online Exclusive Cheers & Sips Bundle. We will be creating 6 different cards during the class including 2 fun folds.
The class fee includes:
Stampin’ Up! Holographic Resin Dots (full pack)
Stampin’ Up! Gold Striped Mesh Ribbon (full pack)
Pre-cut card kits to complete each card
Zoom class with complete instructions to complete each card
PDF with detailed directions
During sign up you will have the option to add additional items to your order that you can take advantage of at no additional shipping cost. These items are optional, however if you want to recreate the cards you will need them.
The class will be held Sunday June 29th from 1 to 5 pm Eastern Time via Zoom. This allows anyone in the United States to participate live! Can’t join us live… no worries, we will record the session so it can be replayed at any time.
We will email written directions that will include directions, cardstock cuts as well as photos to help you create each card.
We are not including the bundle in the price of the class. You can purchase the bundle through me at an additional 10% discount of the Online Exclusive price (see below).
Class Cost $35 + $9 (Priority Shipping)
Additional purchased items will be included in the above shipping price. We will invoice you through PayPal by June 15tth to insure we can get the products delivered, packaged up and out to you with enough time.
Deadline: Saturday June 14th (this is so we have time to order all the bundles, embellishments and DSP being used)
Click Here to register for the class now!! Let me know if you have any questions.
June 3-30, all available suites and suite products from the 2025–2026 Annual Catalog and Online Exclusives are buy one, get one 50% off! If you’ve had your eye on a new suite from the annual catalog or you really like the look of a stamp set from an Online Exclusives suite, you don’t have to choose—you can get both!
Here are the promotion details:
All available suites and suite products from the 2025–2026 Annual Catalog and Online Exclusives are buy one, get one 50% off.
When you shop the sale, the 50% off discount will apply to the lower-priced item (for example, if you buy a suite collection and a stamp set from a suite, the suite would be full price, and the stamp set would be 50% off).
Suite collections are available if all items are in stock; if all items are not in stock, you can still shop the available suite products.
You don’t have to buy a suite and suite products all from the same suite collection for the discount to apply. You can buy any suite products from any suite.
The discount will appear in your cart once you’ve added two items within the sale parameters to your cart.
Products are available only while supplies last.
See and shop all qualifying suites in the Online Store
The sale begins June 3, 2025 at 12:01 AM MT.
The sale ends June 30, 2025 at 11:59 PM MT.
Let me know if you have any questions. YAY for an awesome sale! Get your lists ready and get your orders placed between June 3-30!!
Send your loved ones elevated cards with heartfelt sentiments! • Makes 9 cards: 3 each of 3 designs with 9 coordinating envelopes • Envelopes and card bases with decorative gold foil • Precut paper pieces and unique sentiment labels • Coordinating colors: Berry Burst, Cajun Craze, Early Espresso, Mossy Meadow, Pretty Peacock (Classic Stampin’ Spot), Timid Tiger Coordinates with the Floral Charm Suite Collection (item 166141)
Subscribe to the June Paper Pumpkin Kit between 11 May and 10 June by clicking here!
Don’t miss the coordinating Hugs Abloom Dies Add-On!
Make the most of your Paper Pumpkin kits with the Hugs Abloom Dies add-on! Quickly and cleanly cut out a flower, leaf sprig, sentiment label, or Hugs sentiment to elevate your crafting projects. These additional dies are designed to work with THREE Paper Pumpkin Kits: the Inked Occasions Paper Pumpkin Kit, the Mountain Majesties Paper Pumpkin Kit, and the Full of Charm Paper Pumpkin Kit. Pair these dies with other Stampin’ Up! products for even more creative options!
DETAILS – 4 dies – Largest die: 2-1/2″ x 1-1/4″ (6.4 x 3.2 cm) – Use with a Stampin’ Cut & Emboss Machine (sold separately)
You must be a current Paper Pumpkin subscriber to purchase this item. To become a subscriber, visit www.stampinup.com/paperpumpkin.
Note: Supplies may be limited toward the end of the subscription period.
Good Tuesday morning stamping friends. I hope your week has started off well. We had such a beautiful breezy day here yesterday. Little to no humidity, 70’s, sunny and a little breezy. Those are the kind of days I’d love to bottle up and save.
Today’s card I played with some Online Exclusive products again. I positive this is my absolute favorite pack of DSP. I just can’t get enough of it, good thing I have 2 packs. If you’d like to see a quick video of how I made this card, Click Here to go to my Instagram Reels. Here’s my card for today.
I used the Stampin’ Up! Online Exclusive Mixed Labels Bundle along with the Floral Impressions Designer Series Paper, Fancy Borders Dies and Stampin’ Up! Impressions Abloom Photopolymer Stamp Set for my card today.
Cut the bottom edge of a panel of Floral Impressions DSP using the Fancy Borders Dies. Cut the bottom portion of a Misty Moonlight mat using the Fancy Borders Dies. Adhere the panel of Floral Impressions DSP to the top of the Misty Moonlight mat with Stampin’ Seal.
Adhere the layered panel to a Strawberry Slush card base with Stampin’ Dimensionals. Add a Strawberry Slush Gem in the center of the hearts on the bottom of the panel.
On a panel of Basic White, stamp the sentiment from the Stampin’ Up! Mixed Labels Cling Stamp Set in Misty Moonlight Ink. Cut the sentiment out using the Mixed Labels Dies. Adhere a piece of Misty Moonlight 1/4″ Ribbon from the Misty Moonlight & White 1/4″ Starter Ribbon Pack. Adhere the sentiment over the ribbon with Stampin’ Dimensionals.
On a panel of Basic White, stamp the sentiment from the Mixed Labels stamp set in Misty Moonlight Ink. Using the Fancy Borders Dies, cut the hearts from the top of the panel. Stamp the stem and detailed leaf images from the Impressions Abloom stamp set in Old Olive Ink on the side of the panel. Stamp the solid leaf image from the Impressions Abloom stamp set in Old Olive Ink, stamping off once on scrap paper, over the detailed images. Stamp the detailed daisy image from Impressions Abloom stamp set in Strawberry Slush Ink on top of the stem. Stamp the solid daisy image in Strawberry Slush Ink, stamping off once on scrap paper, over the detailed image. Stamp the flower center in Darling Duckling Ink. Adhere some of the Misty Moonlight hearts that you cut out from the cut panel around the sentiment. Adhere the Basic White panel to a Misty Moonlight mat then to the inside of the Strawberry Slush card base.
Decorate a Basic White Medium Envelope to finish your card. Stamp the stem and leaf images from the Impressions Abloom stamp set in Old Olive Ink on the envelope front. Stamp the daisy image in Strawberry Slush Ink and the flower center in Darling Duckling Ink. Adhere a panel of Floral Impressions DSP to the envelope flap.
Thank you for stopping by my blog today. I hope you like the card and will give it a try. Happy Stamping!!
If you need any stamping supplies, I’d love to be your Demonstrator. Just click HERE to go directly to my online store or drop me an email if you have any questions.
Stampin’ Up!’s BIGGEST Starter Kit Joining Special May 6th – 31st
May is an awesome time to join my Stampin’ Up! Team!! Have you ever thought about joining the Stampin’ Up! community? Are you into scrapbooking and have you seen all the new scrapbook products Stampin’ Up! has? Is your wish/want list pretty long and do you order often? Wouldn’t you love to get all these products at a discount? Why not consider joining the Stampin’ Up! community between May 6-31, and save a minimum of 20% off everything you buy? Are you new to stamping and don’t know where to start, but would like to join to save? Ask me for help, I’m here to help and assist you anyway that I can.
Stampin’ Up!’s BIGGEST Starter Kit Special will be available for a limited time! Between May 6–31, anyone who signs up to be a demonstrator can pack their Starter Kit with $165 USD worth of products for only $99 USD. That’s an extra $66 USD in products!
Crafting is even more fun with community, and there’s never been a better time to join then with Stampin’ Up!’s BIGGEST Starter Kit Special. Become a demonstrator and enjoy all the perks that come with that, like a 20–25% product discount, exclusive early access to new products, the chance to attend incredible training and crafting events like Stampin’ Up!’s OnStage and Creativity Now, and so much more!
If you join my team, I’m offering free classes to my team members. Tara Carpenter and I run Online Zoom classes and we decided that our direct team members will receive the classes for free. You’ll get the PDF and the link to the Online Zoom class along with the replay.
There is never an obligation to sell. You can join just to enjoy the discount for yourself along with all the other Demonstrator benefits. Once you join, you’ll get at least a 20% discount on all of your Stampin’ Up! merchandise purchases and you get to order early from the upcoming catalogs and Online Exclusives! You will also be able to attend the OnStage Events and any other events Stampin’ Up! has and you get to be a part of our awesome Stampin’ Up! team!
Unsure about this and want to talk? Contact me at creativestampingdesigns@gmail.com and we can talk. You can also find additional information Here at Join My Team. Being a part of the Stampin’ Up! Community is one of the best decisions I’ve ever made. I have made many friends along the way while doing what I love, Paper Crafting. This Joining offer is only good starting May 6 – May 31. Why not give it a try? I’d love to have you on my team.
Send your loved ones elevated cards with heartfelt sentiments! • Makes 9 cards: 3 each of 3 designs with 9 coordinating envelopes • Envelopes and card bases with decorative gold foil • Precut paper pieces and unique sentiment labels • Coordinating colors: Berry Burst, Cajun Craze, Early Espresso, Mossy Meadow, Pretty Peacock (Classic Stampin’ Spot), Timid Tiger Coordinates with the Floral Charm Suite Collection (item 166141)
Subscribe to the June Paper Pumpkin Kit between 11 May and 10 June by clicking here!
Don’t miss the coordinating Hugs Abloom Dies Add-On!
Make the most of your Paper Pumpkin kits with the Hugs Abloom Dies add-on! Quickly and cleanly cut out a flower, leaf sprig, sentiment label, or Hugs sentiment to elevate your crafting projects. These additional dies are designed to work with THREE Paper Pumpkin Kits: the Inked Occasions Paper Pumpkin Kit, the Mountain Majesties Paper Pumpkin Kit, and the Full of Charm Paper Pumpkin Kit. Pair these dies with other Stampin’ Up! products for even more creative options!
DETAILS – 4 dies – Largest die: 2-1/2″ x 1-1/4″ (6.4 x 3.2 cm) – Use with a Stampin’ Cut & Emboss Machine (sold separately)
You must be a current Paper Pumpkin subscriber to purchase this item. To become a subscriber, visit www.stampinup.com/paperpumpkin.
Note: Supplies may be limited toward the end of the subscription period.
Good Monday morning stamping friends and welcome to a new week. How was your weekend. We ended up having a beautiful one here. Yesterday the humidity lifted and it turned out to be a beautiful breezy day.
Today’s card I played with some Online Exclusive products. I think this is one of my absolute favorite packs of DSP. I love all the flowers and designs in it. If you’d like to see a quick video of how I made this card, Click Here to go to my Instagram Reels. Here’s my card for today.
I used the Stampin’ Up! Impressions Abloom Photopolymer Stamp Set along with the Floral Impressions Designer Series Paper, Everyday Arches Dies and Exposed Brick 3D Embossing Folder for my card today.
Adhere a panel of Floral Impressions DSP to a Strawberry Slush card base with Stampin’ Seal.
Using the 6th largest Everyday Arches Dies (expected back in stock the 1st week of June), cut out the center of the Pretty in Pink panel. Score the sides of the panel at 1/4″, 1/2″, 3 3/8″ & 3 5/8″. Emboss the panel using the Exposed Brick EF. Fold the sides on the score lines and adhere it to the card front with Tear & Tape.
On a panel of Basic White, stamp the sentiment from the Impressions Abloom stamp set in Strawberry Slush Ink. Adhere the sentiment to the bottom of the arch with Liquid Glue. Add a few Strawberry Slush Gems.
Stamp the sentiment from Impressions Abloom stamp set in Strawberry Slush Ink on a panel of Basic White. Cut the panel using the 2nd largest Everyday Arches Dies. Stamp the stem image from the Impressions Abloom stamp set in Garden Green Ink 3 times on the bottom of the panel. Stamp the detailed leaf image from Impressions Abloom stamp set on the stems. Stamp the solid leaf image in Garden Green Ink, stamping off once on scrap paper, over the detailed images. Stamp the detailed flower image from Impressions Abloom stamp set in Strawberry Slush Ink on the stems. Stamp the solid flower image in Strawberry Slush Ink, stamping off once on scrap paper, over the detailed images. Stamp the flower center image in Darling Duckling Ink. Adhere the Basic White panel to the Pretty in Pink mat then to the inside of the Strawberry Slush card base.
Decorate a Basic White Medium Envelope to finish your card. Stamp the stem and leaf images from Impressions Abloom stamp set in Garden Green Ink on the envelope front. Stamp the detailed flower image in Strawberry Slush Ink on the stem. Stamp the solid flower image from Impressions Abloom stamp set in Strawberry Slush Ink, stamping off once on scrap paper, over the detailed image. Stamp the flower center in Darling Duckling Ink. Adhere a panel of Floral Impressions DSP to the envelope flap.
Thank you for stopping by my blog today. I hope you like the card and will give it a try. Happy Stamping!!
If you need any stamping supplies, I’d love to be your Demonstrator. Just click HERE to go directly to my online store or drop me an email if you have any questions.
Stampin’ Up!’s BIGGEST Starter Kit Joining Special May 6th – 31st
May is an awesome time to join my Stampin’ Up! Team!! Have you ever thought about joining the Stampin’ Up! community? Are you into scrapbooking and have you seen all the new scrapbook products Stampin’ Up! has? Is your wish/want list pretty long and do you order often? Wouldn’t you love to get all these products at a discount? Why not consider joining the Stampin’ Up! community between May 6-31, and save a minimum of 20% off everything you buy? Are you new to stamping and don’t know where to start, but would like to join to save? Ask me for help, I’m here to help and assist you anyway that I can.
Stampin’ Up!’s BIGGEST Starter Kit Special will be available for a limited time! Between May 6–31, anyone who signs up to be a demonstrator can pack their Starter Kit with $165 USD worth of products for only $99 USD. That’s an extra $66 USD in products!
Crafting is even more fun with community, and there’s never been a better time to join then with Stampin’ Up!’s BIGGEST Starter Kit Special. Become a demonstrator and enjoy all the perks that come with that, like a 20–25% product discount, exclusive early access to new products, the chance to attend incredible training and crafting events like Stampin’ Up!’s OnStage and Creativity Now, and so much more!
If you join my team, I’m offering free classes to my team members. Tara Carpenter and I run Online Zoom classes and we decided that our direct team members will receive the classes for free. You’ll get the PDF and the link to the Online Zoom class along with the replay.
There is never an obligation to sell. You can join just to enjoy the discount for yourself along with all the other Demonstrator benefits. Once you join, you’ll get at least a 20% discount on all of your Stampin’ Up! merchandise purchases and you get to order early from the upcoming catalogs and Online Exclusives! You will also be able to attend the OnStage Events and any other events Stampin’ Up! has and you get to be a part of our awesome Stampin’ Up! team!
Unsure about this and want to talk? Contact me at creativestampingdesigns@gmail.com and we can talk. You can also find additional information Here at Join My Team. Being a part of the Stampin’ Up! Community is one of the best decisions I’ve ever made. I have made many friends along the way while doing what I love, Paper Crafting. This Joining offer is only good starting May 6 – May 31. Why not give it a try? I’d love to have you on my team.
Send your loved ones elevated cards with heartfelt sentiments! • Makes 9 cards: 3 each of 3 designs with 9 coordinating envelopes • Envelopes and card bases with decorative gold foil • Precut paper pieces and unique sentiment labels • Coordinating colors: Berry Burst, Cajun Craze, Early Espresso, Mossy Meadow, Pretty Peacock (Classic Stampin’ Spot), Timid Tiger Coordinates with the Floral Charm Suite Collection (item 166141)
Subscribe to the June Paper Pumpkin Kit between 11 May and 10 June by clicking here!
Don’t miss the coordinating Hugs Abloom Dies Add-On!
Make the most of your Paper Pumpkin kits with the Hugs Abloom Dies add-on! Quickly and cleanly cut out a flower, leaf sprig, sentiment label, or Hugs sentiment to elevate your crafting projects. These additional dies are designed to work with THREE Paper Pumpkin Kits: the Inked Occasions Paper Pumpkin Kit, the Mountain Majesties Paper Pumpkin Kit, and the Full of Charm Paper Pumpkin Kit. Pair these dies with other Stampin’ Up! products for even more creative options!
DETAILS – 4 dies – Largest die: 2-1/2″ x 1-1/4″ (6.4 x 3.2 cm) – Use with a Stampin’ Cut & Emboss Machine (sold separately)
You must be a current Paper Pumpkin subscriber to purchase this item. To become a subscriber, visit www.stampinup.com/paperpumpkin.
Note: Supplies may be limited toward the end of the subscription period.
Good Saturday morning stamping friends and welcome to the weekend. I hope you have some fun plans in the works. I’ll be working all day today and cutting up my paper shares tomorrow.
I played with some Online Exclusive products for today’s card. If you’d like to see a quick video of how I made this card, Click Here to go to my Instagram Reels. Here is my card for today.
I used the Stampin’ Up! Online Exclusive Impressions Abloom Bundle along with the Floral Impressions Designer Series Paper for my card today.
Adhere a panel of Floral Impressions DSP to a Basic White mat with Stampin’ Seal. Adhere the layered panel to a Garden Green card base with Stampin’ Seal. From a panel of Basic White and Blackberry Bliss, cut the 2-part oval using the Floral Impressions Dies. Adhere the Blackberry Bliss oval frame and Basic White center to the card front with Stampin’ Dimensionals.
On a panel of Basic White, stamp the large, detailed flower image from the Stampin’ Up! Impressions Abloom Photopolymer Stamp Set in Blackberry Bliss Ink. Stamp the small, detailed flower image from Impressions Abloom stamp set in Blackberry Bliss Ink, stamping off once on scrap paper. Stamp the detailed daisy image from Impressions Abloom stamp set in Timid Tiger Ink. Stamp the large solid flower image from Impressions Abloom stamp set in Fresh Freesia Ink. Stamp the small solid flower image in Fresh Freesia Ink, stamping off once on scrap paper, over the detailed image. Stamp the solid daisy image in Timid Tiger Ink, stamping off once on scrap paper, over the detailed daisy image. Stamp the detailed flower centers in Darling Duckling Ink. Stamp the solid flower center images in Darling Duckling Ink, stamping off once on scrap paper, over the detailed images. Using the Impressions Abloom Dies, cut the flower images out. Cut the stems and leaves from a panel of Garden Green and the leaf image from a panel of Granny Apple Green. Adhere the stems and leaves to the Basic White panel. Adhere the die cut flower images to the stems with Stampin’ Dimensionals.
Stamp the sentiment from Impressions Abloom stamp set in Blackberry Bliss Ink on a panel of Basic White. Adhere the sentiment to the card front with Stampin’ Dimensionals. Add a few Two-Tone Sparkle Gems to the card front.
Stamp the sentiments from Impressions Abloom stamp set in Blackberry Bliss Ink on a panel of Basic White. Stamp the detailed large flower image from Impressions Abloom stamp set in Blackberry Bliss Ink, stamping off once on scrap paper. on the Basic White panel. Stamp the solid flower image from Impressions Abloom stamp set in Fresh Freesia Ink, stamping off once on scrap paper, over the detailed image. Stamp the flower center in Darling Duckling Ink. Stamp the daisy detailed image in Timid Tiger Ink. Stamp the solid daisy image in Timid Tiger Ink, stamping off once on scrap paper over the detailed image. Stamp the flower center in Darling Duckling Ink. Stamp the stems and leaves in Garden Green Ink. Adhere the Basic White panel to a Fresh Freesia mat then to the inside of the Garden Green card base.
Decorate a Basic White Medium Envelope to finish your card. Stamp the flower image from the Impressions Abloom stamp set in Blackberry Bliss, Fresh Freesia and Darling Duckling Inks on the envelope front. Stamp the stems and leaves in Garden Green Ink. Adhere a panel of Floral Impressions DSP to the envelope flap.
Thank you for stopping by my blog today. I hope you like the card and will give it a try. Happy Stamping!!
Tara Carpenter and I are super excited about offering you this Free Online Zoom Class
Do you struggle with different ways to use all your Designer Series Paper? Tara and I are teaming up for a Zoom class to show you 6 different cards using just Designer Series Paper and a Sentiment. Of course, we’ll add embellishments and maybe ribbon or twine, but this class will primarily be using DSP. We have picked a pack of DSP with all the new 2025-2027 In-Colors and that’s what we will be focusing on. You can see the DSP starting on page 40 of the 2025-2026 Annual Catalog. The class will be held on Sunday May 18th from 1pm-5pm ET. The best part is you can earn this class absolutely FREE. You will cut all the cardstock and DSP of your choice prior to the class so you are ready to go. We will NOT be cutting up cardstock or DSP the day of the event. You will choose the color cardstock and your favorite DSP to use from what you purchase. Please remember to order early so that you receive it on time to prep for the class.
The class requirements:
Visit my Online Store on or after May 6th and purchase 1 pack of Florals in Bloom 12″ x 12″ Designer Series Paper (165175), 1 pack of the 2025-2027 In-Color Cardstock Assortment Pack (165623) and 1 pack of the 2025-2027 In-Color Flat Pearls (165192)
Once you have made your purchase Click Here to sign up
Once you sign up you will receive:
Zoom class with complete step by step instructions to complete each card as we go.
PDF with detailed directions and photos
A Link to the recorded class after we are done so you can watch it again and make more cards.
When you Sign Up for the class, I will send you the complete PDF the week before the class so that you can cut up the color cardstock of your choice and the Designer Series Paper of your choice. Everyone’s card will be unique since you will pick your favorite designs of DSP and color cardstock.
The class will be held on Zoom and anyone in the United States is welcome to purchase the class and join us! If you are unable to join us for the live event, but would still like to participate in the class, we will be recording the session so you can watch the replay any time and make the cards. We will also be emailing written tutorials with instructions and cardstock cuts so that you will have a reference too.
Class Cost: This class is FREE to customers who make the purchase through my Online Store.
If you are a Demonstrator and would like to attend the class and get the PDF, there will be a $20 charge that will be billed through PayPal. I know you would like to purchase the products yourself getting your discount but still would like to attend.
Class Sign up Deadline: Sunday May 11th at 5pm ET
Click Here to register for the class now!! Let me know if you have any question
The New 2025 – 2026 Annual Catalog and the New Online Exclusive products are available in the Online Store., YAY!!! To kick off the new catalog, I’m offering Double Creative Stamping Designs Rewards for ALL orders of $50 or more, before shipping and tax, starting today, May 6th – Monday May 12th. How does this work? For a $50 you’ll earn 2 rewards, $100 you’ll earn 4 rewards, $150 you’ll earn 6 rewards, etc. This is my way of celebrating with you. Head over to my Online Store and get those orders in early.
Triple Creative Stamping Designs Rewards When You Refer a friend to Me
Do you have any friends or family that are interested in card making or scrap booking? Maybe they are new to stamping and want to try the new Kits we have. When you refer a friend to me and they place their first order of $50 you receive 1 of my Creative Stamping Designs Rewards. Starting today, May 4th – Saturday May 10th I’m going to give you 3 of my Creative Stamping Designs Rewards when you refer someone to me and they place an order of $50 or more. With the new Catalog and new Online Exclusives starting on Tuesday and all the new beautiful paper, card making, scrap booking, kits and paper crafting supplies, there’s lots for them to order.
When you refer someone to me, send me an email at creativestampingdesigns@gmail.com with their name. When they place their 1st order and they tell me you referred them, I will add 3 rewards to your total rewards.
My triple rewards are for referring a friend only, not placing orders.
Stampin’ Up!’s BIGGEST Starter Kit Joining Special May 6th – 31st
May is an awesome time to join my Stampin’ Up! Team!! Have you ever thought about joining the Stampin’ Up! community? Are you into scrapbooking and have you seen all the new scrapbook products Stampin’ Up! has? Is your wish/want list pretty long and do you order often? Wouldn’t you love to get all these products at a discount? Why not consider joining the Stampin’ Up! community between May 6-31, and save a minimum of 20% off everything you buy? Are you new to stamping and don’t know where to start, but would like to join to save? Ask me for help, I’m here to help and assist you anyway that I can.
Stampin’ Up!’s BIGGEST Starter Kit Special will be available for a limited time! Between May 6–31, anyone who signs up to be a demonstrator can pack their Starter Kit with $165 USD worth of products for only $99 USD. That’s an extra $66 USD in products!
Crafting is even more fun with community, and there’s never been a better time to join then with Stampin’ Up!’s BIGGEST Starter Kit Special. Become a demonstrator and enjoy all the perks that come with that, like a 20–25% product discount, exclusive early access to new products, the chance to attend incredible training and crafting events like Stampin’ Up!’s OnStage and Creativity Now, and so much more!
If you join my team, I’m offering free classes to my team members. Tara Carpenter and I run Online Zoom classes and we decided that our direct team members will receive the classes for free. You’ll get the PDF and the link to the Online Zoom class along with the replay.
There is never an obligation to sell. You can join just to enjoy the discount for yourself along with all the other Demonstrator benefits. Once you join, you’ll get at least a 20% discount on all of your Stampin’ Up! merchandise purchases and you get to order early from the upcoming catalogs and Online Exclusives! You will also be able to attend the OnStage Events and any other events Stampin’ Up! has and you get to be a part of our awesome Stampin’ Up! team!
Unsure about this and want to talk? Contact me at creativestampingdesigns@gmail.com and we can talk. You can also find additional information Here at Join My Team. Being a part of the Stampin’ Up! Community is one of the best decisions I’ve ever made. I have made many friends along the way while doing what I love, Paper Crafting. This Joining offer is only good starting May 6 – May 31. Why not give it a try? I’d love to have you on my team.
If you need any stamping supplies, I’d love to be your Demonstrator. Just click HERE to go directly to my online store or drop me an email if you have any questions.
Don’t miss the coordinating Hugs Abloom Dies Add-On!
Make the most of your Paper Pumpkin kits with the Hugs Abloom Dies add-on! Quickly and cleanly cut out a flower, leaf sprig, sentiment label, or Hugs sentiment to elevate your crafting projects. These additional dies are designed to work with THREE Paper Pumpkin Kits: the Inked Occasions Paper Pumpkin Kit, the Mountain Majesties Paper Pumpkin Kit, and the Full of Charm Paper Pumpkin Kit. Pair these dies with other Stampin’ Up! products for even more creative options!
DETAILS – 4 dies – Largest die: 2-1/2″ x 1-1/4″ (6.4 x 3.2 cm) – Use with a Stampin’ Cut & Emboss Machine (sold separately)
You must be a current Paper Pumpkin subscriber to purchase this item. To become a subscriber, visit www.stampinup.com/paperpumpkin.
Note: Supplies may be limited toward the end of the subscription period.


![Basic White 8 1/2" X 11" Cardstock [ 166780 ]](https://assets1.tamsnetwork.com/images/EC042017NF/166780s.jpg "Basic White 8 1/2\" X 11\" Cardstock [ 166780 ]")
![Basic White 8 1/2" X 11" Thick Cardstock [ 159229 ]](https://assets1.tamsnetwork.com/images/EC042017NF/159229s.jpg "Basic White 8 1/2\" X 11\" Thick Cardstock [ 159229 ]")
![Old Olive 8-1/2" X 11" Cardstock [ 100702 ]](https://assets1.tamsnetwork.com/images/EC042017NF/100702s.jpg "Old Olive 8-1/2\" X 11\" Cardstock [ 100702 ]")
![Pecan Pie 8 1/2" X 11" Cardstock [ 161717 ]](https://assets1.tamsnetwork.com/images/EC042017NF/161717s.jpg "Pecan Pie 8 1/2\" X 11\" Cardstock [ 161717 ]")
![Floral Impressions 12" X 12" (30.5 X 30.5 Cm) Designer Series Paper [ 165603 ]](https://assets1.tamsnetwork.com/images/EC042017NF/165603s.jpg "Floral Impressions 12\" X 12\" (30.5 X 30.5 Cm) Designer Series Paper [ 165603 ]")
![Pecan Pie Classic Stampin' Pad [ 161665 ]](https://assets1.tamsnetwork.com/images/EC042017NF/161665s.jpg "Pecan Pie Classic Stampin' Pad [ 161665 ]")
![Pool Party Classic Stampin' Pad [ 147107 ]](https://assets1.tamsnetwork.com/images/EC042017NF/147107s.jpg "Pool Party Classic Stampin' Pad [ 147107 ]")
![2025–2027 In Color™ Flat Pearls [ 165192 ]](https://assets1.tamsnetwork.com/images/EC042017NF/165192s.jpg "2025–2027 In Color™ Flat Pearls [ 165192 ]")
![Basic White Medium Envelopes [ 159236 ]](https://assets1.tamsnetwork.com/images/EC042017NF/159236s.jpg "Basic White Medium Envelopes [ 159236 ]")


![Take Your Pick [ 144107 ]](https://assets1.tamsnetwork.com/images/EC042017NF/144107s.jpg "Take Your Pick [ 144107 ]")


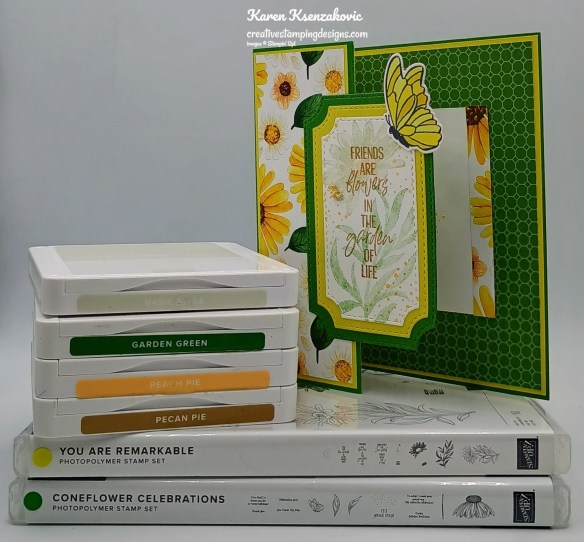
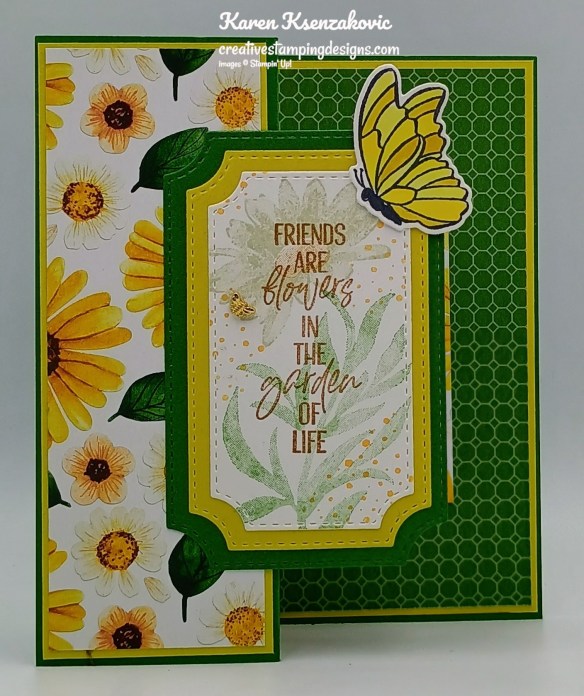
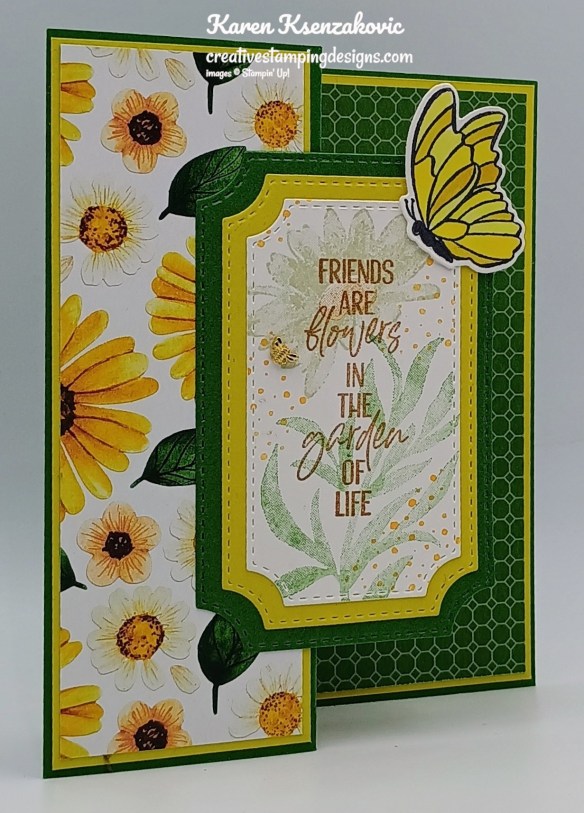
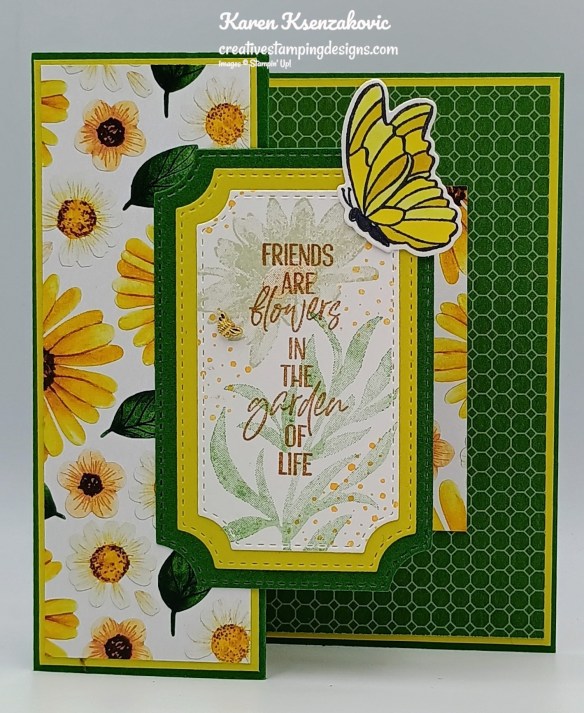

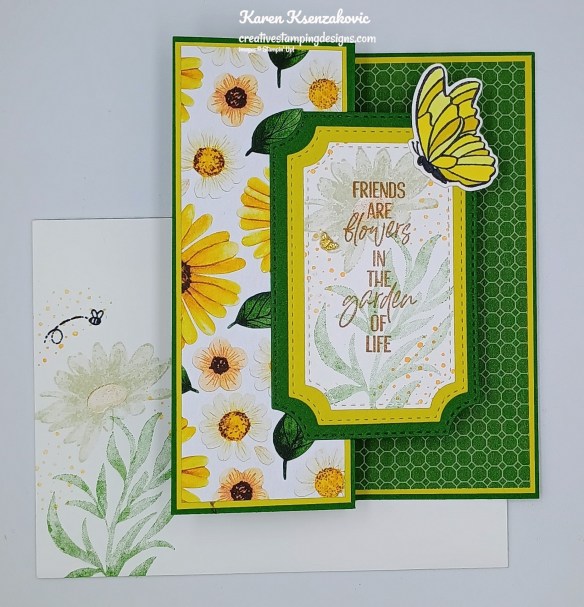
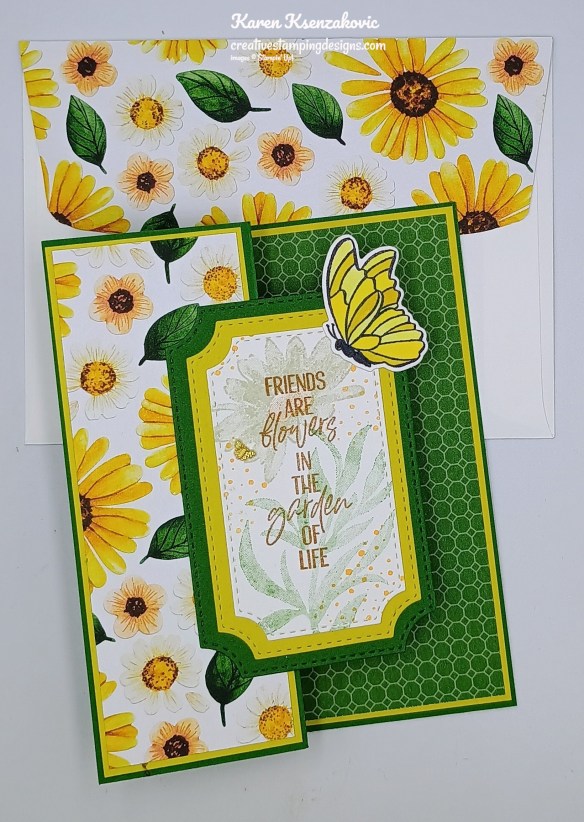
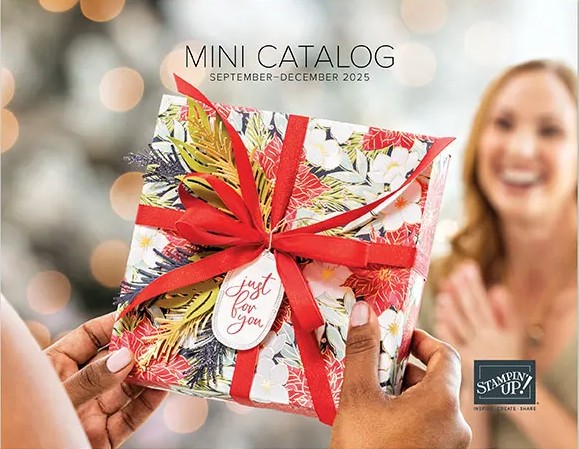


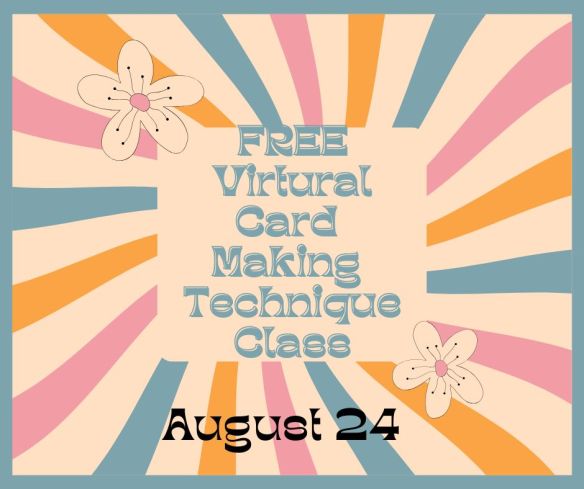
![You Are Remarkable Photopolymer Stamp Set (English) [ 165445 ]](https://assets1.tamsnetwork.com/images/EC042017NF/165445s.jpg "You Are Remarkable Photopolymer Stamp Set (English) [ 165445 ]")
![Coneflower Celebration Bundle (English) [ 165251 ]](https://assets1.tamsnetwork.com/images/EC042017NF/165251s.jpg "Coneflower Celebration Bundle (English) [ 165251 ]")
![Coneflower Celebrations Photopolymer Stamp Set (English) [ 165247 ]](https://assets1.tamsnetwork.com/images/EC042017NF/165247s.jpg "Coneflower Celebrations Photopolymer Stamp Set (English) [ 165247 ]")
![Coneflower Celebrations Dies [ 165250 ]](https://assets1.tamsnetwork.com/images/EC042017NF/165250s.jpg "Coneflower Celebrations Dies [ 165250 ]")
![Darling Duckling 8 1/2" X 11" Cardstock [ 165622 ]](https://assets1.tamsnetwork.com/images/EC042017NF/165622s.jpg "Darling Duckling 8 1/2\" X 11\" Cardstock [ 165622 ]")
![Garden Green 8-1/2" X 11" Cardstock [ 102584 ]](https://assets1.tamsnetwork.com/images/EC042017NF/102584s.jpg "Garden Green 8-1/2\" X 11\" Cardstock [ 102584 ]")
![Basic Beige Classic Stampin Pad [ 163806 ]](https://assets1.tamsnetwork.com/images/EC042017NF/163806s.jpg "Basic Beige Classic Stampin Pad [ 163806 ]")
![Garden Green Classic Stampin' Pad [ 147089 ]](https://assets1.tamsnetwork.com/images/EC042017NF/147089s.jpg "Garden Green Classic Stampin' Pad [ 147089 ]")
![Peach Pie Classic Stampin Pad [ 163810 ]](https://assets1.tamsnetwork.com/images/EC042017NF/163810s.jpg "Peach Pie Classic Stampin Pad [ 163810 ]")
![Tuxedo Black Memento Ink Pad [ 132708 ]](https://assets1.tamsnetwork.com/images/EC042017NF/132708s.jpg "Tuxedo Black Memento Ink Pad [ 132708 ]")
![Daffodil Delight Stampin' Blends Combo Pack [ 154883 ]](https://assets1.tamsnetwork.com/images/EC042017NF/154883s.jpg "Daffodil Delight Stampin' Blends Combo Pack [ 154883 ]")
![Darling Duckling Stampin’ Blends Combo Pack [ 165288 ]](https://assets1.tamsnetwork.com/images/EC042017NF/165288s.jpg "Darling Duckling Stampin’ Blends Combo Pack [ 165288 ]")
![Lemon Lolly Stampin’ Blends Combo Pack [ 161673 ]](https://assets1.tamsnetwork.com/images/EC042017NF/161673s.jpg "Lemon Lolly Stampin’ Blends Combo Pack [ 161673 ]")
![Tiny Bee Trinkets [ 164714 ]](https://assets1.tamsnetwork.com/images/EC042017NF/164714s.jpg "Tiny Bee Trinkets [ 164714 ]")

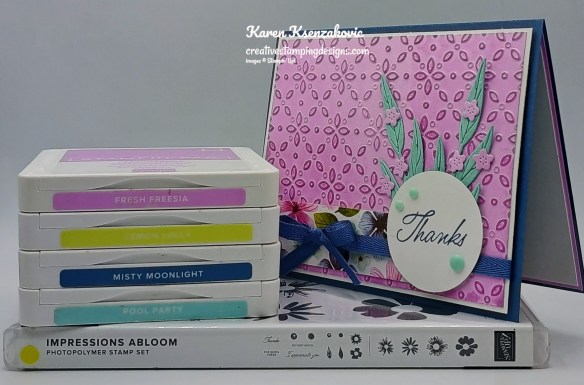
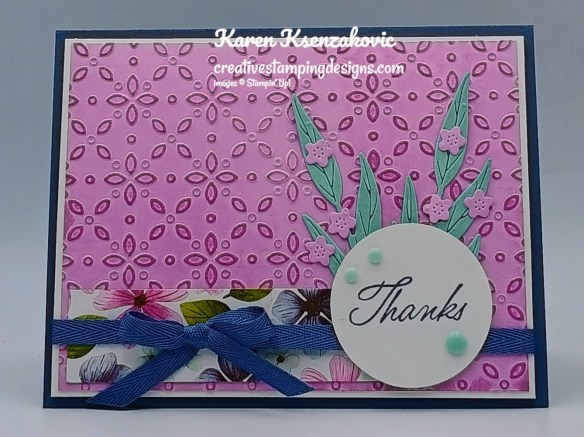
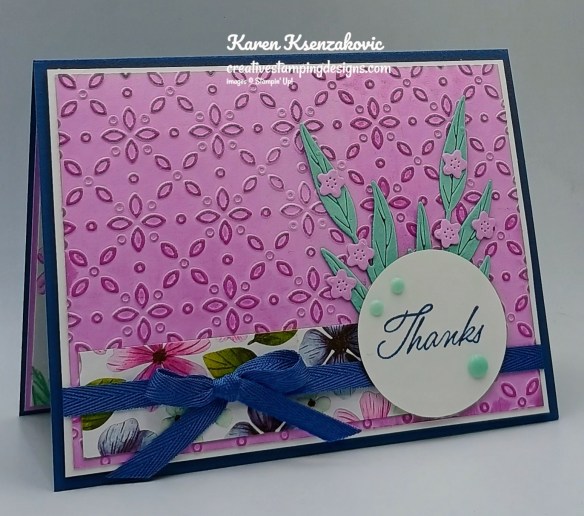
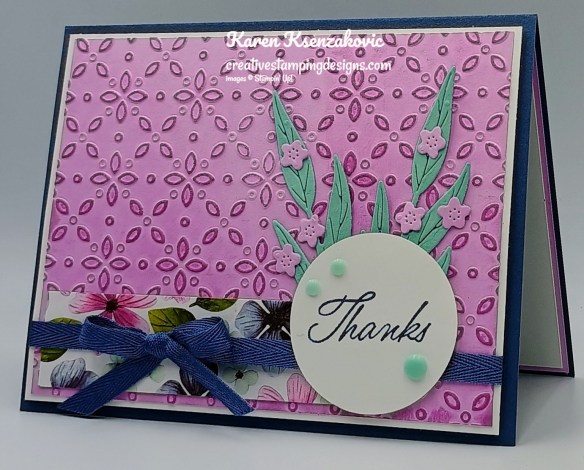
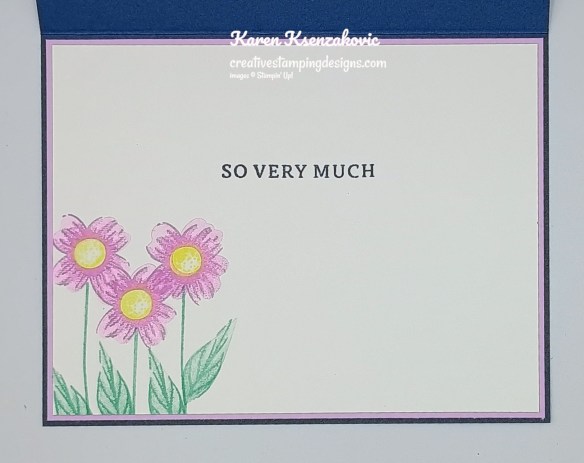
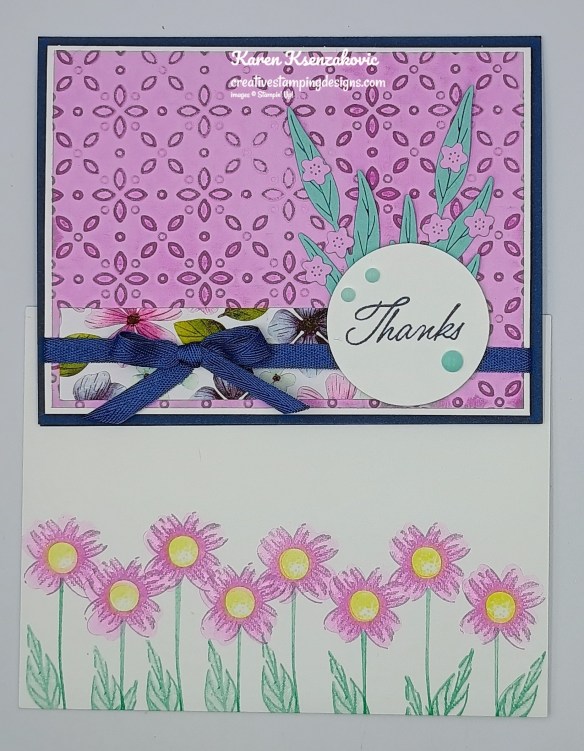
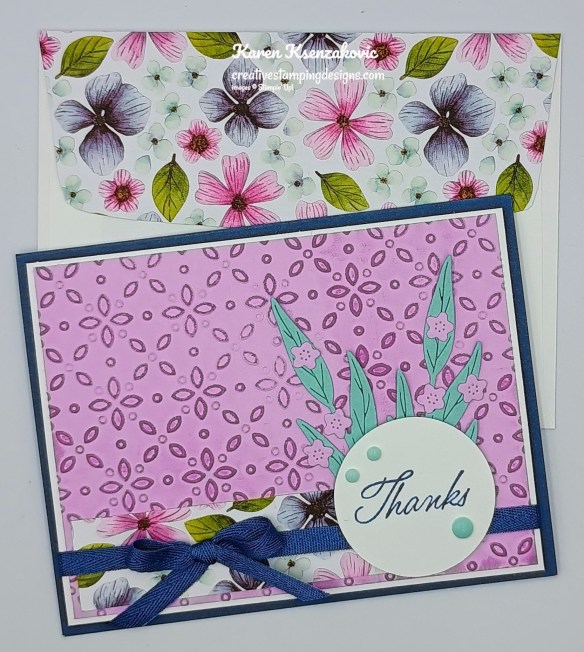

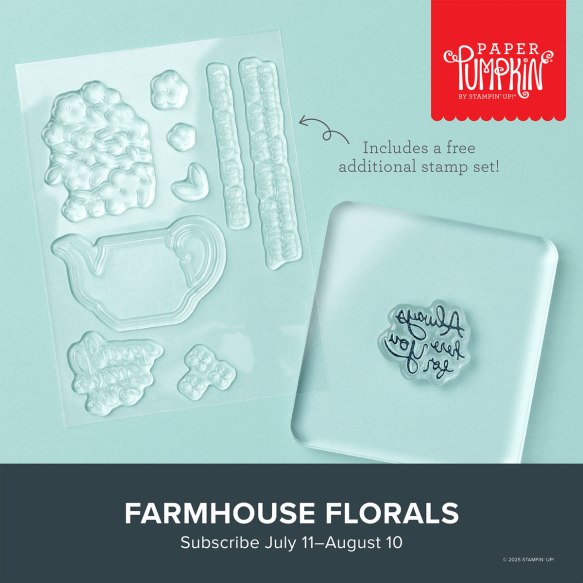

![Impressions Abloom Bundle (English) [ 165611 ]](https://assets1.tamsnetwork.com/images/EC042017NF/165611s.jpg "Impressions Abloom Bundle (English) [ 165611 ]")
![Impressions Abloom Photopolymer Stamp Set (English) [ 165605 ]](https://assets1.tamsnetwork.com/images/EC042017NF/165605s.jpg "Impressions Abloom Photopolymer Stamp Set (English) [ 165605 ]")
![Impressions Abloom Dies [ 165610 ]](https://assets1.tamsnetwork.com/images/EC042017NF/165610s.jpg "Impressions Abloom Dies [ 165610 ]")
![Fresh Freesia 8 1/2" X 11" Cardstock [ 155613 ]](https://assets1.tamsnetwork.com/images/EC042017NF/155613s.jpg "Fresh Freesia 8 1/2\" X 11\" Cardstock [ 155613 ]")
![Misty Moonlight 8-1/2" X 11" Cardstock [ 153081 ]](https://assets1.tamsnetwork.com/images/EC042017NF/153081s.jpg "Misty Moonlight 8-1/2\" X 11\" Cardstock [ 153081 ]")
![Pool Party 8-1/2" X 11" Cardstock [ 122924 ]](https://assets1.tamsnetwork.com/images/EC042017NF/122924s.jpg "Pool Party 8-1/2\" X 11\" Cardstock [ 122924 ]")
![Fresh Freesia Classic Stampin' Pad [ 155611 ]](https://assets1.tamsnetwork.com/images/EC042017NF/155611s.jpg "Fresh Freesia Classic Stampin' Pad [ 155611 ]")
![Lemon Lolly Classic Stampin' Pad [ 161666 ]](https://assets1.tamsnetwork.com/images/EC042017NF/161666s.jpg "Lemon Lolly Classic Stampin' Pad [ 161666 ]")
![Misty Moonlight Classic Stampin' Pad [ 153118 ]](https://assets1.tamsnetwork.com/images/EC042017NF/153118s.jpg "Misty Moonlight Classic Stampin' Pad [ 153118 ]")
![Eyelet 3D Embossing Folder [ 163414 ]](https://assets1.tamsnetwork.com/images/EC042017NF/163414s.jpg "Eyelet 3D Embossing Folder [ 163414 ]")
![1-3/4" (4.4 Cm) Circle Punch [ 119850 ]](https://assets1.tamsnetwork.com/images/EC042017NF/119850s.jpg "1-3/4\" (4.4 Cm) Circle Punch [ 119850 ]")
![Misty Moonlight & White 1/4" (6.4 Mm) Starter Ribbon Pack [ 165276 ]](https://assets1.tamsnetwork.com/images/EC042017NF/165276s.jpg "Misty Moonlight & White 1/4\" (6.4 Mm) Starter Ribbon Pack [ 165276 ]")
![Rainbow Adhesive Backed Dots [ 162758 ]](https://assets1.tamsnetwork.com/images/EC042017NF/162758s.jpg "Rainbow Adhesive Backed Dots [ 162758 ]")

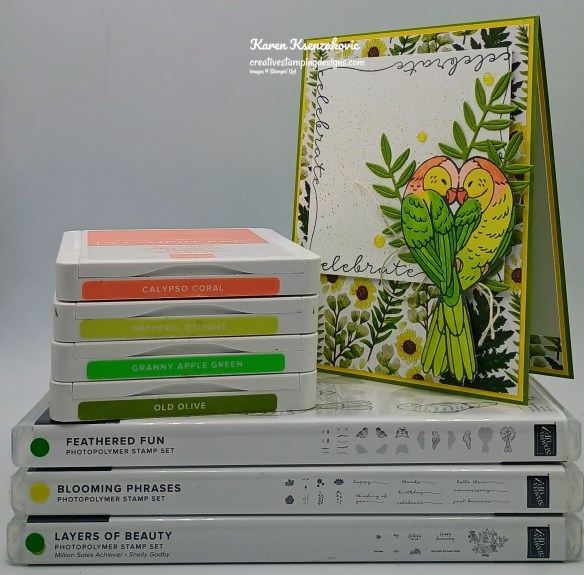
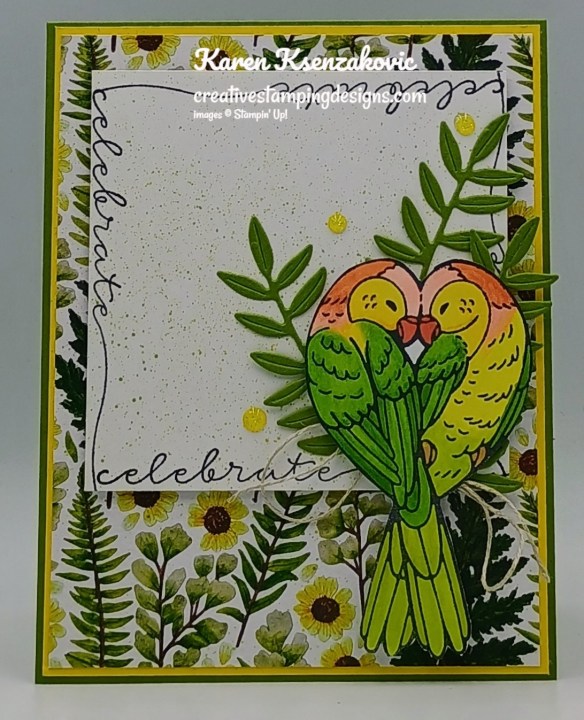
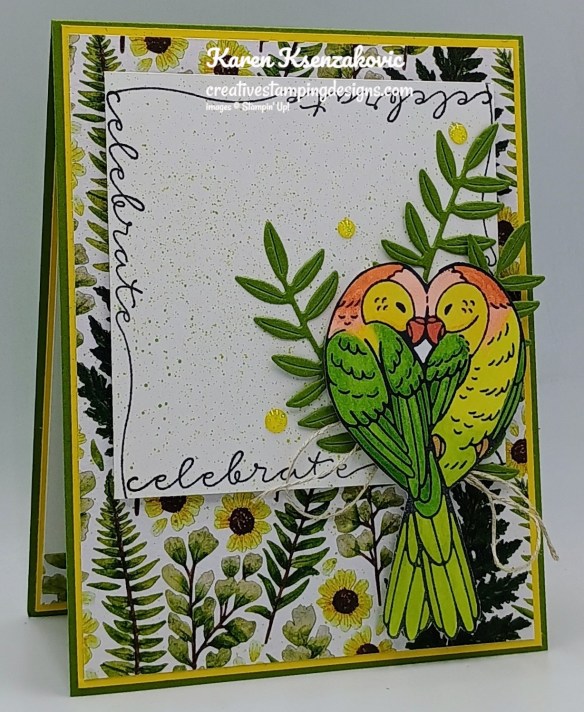
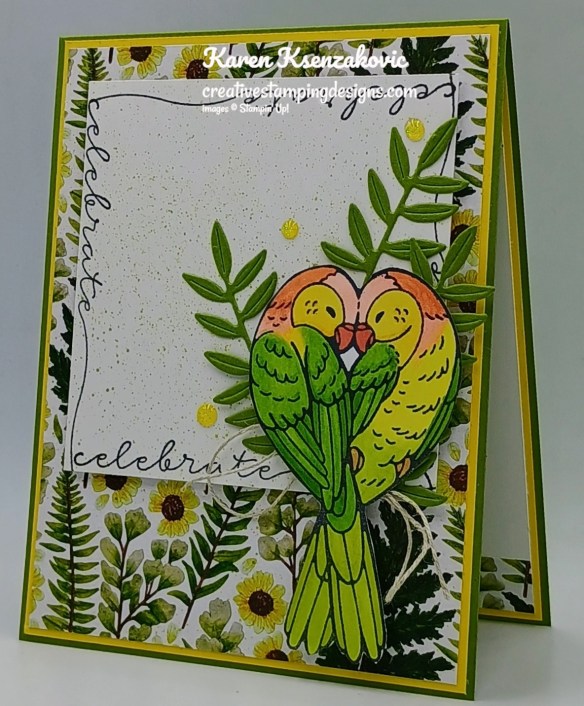
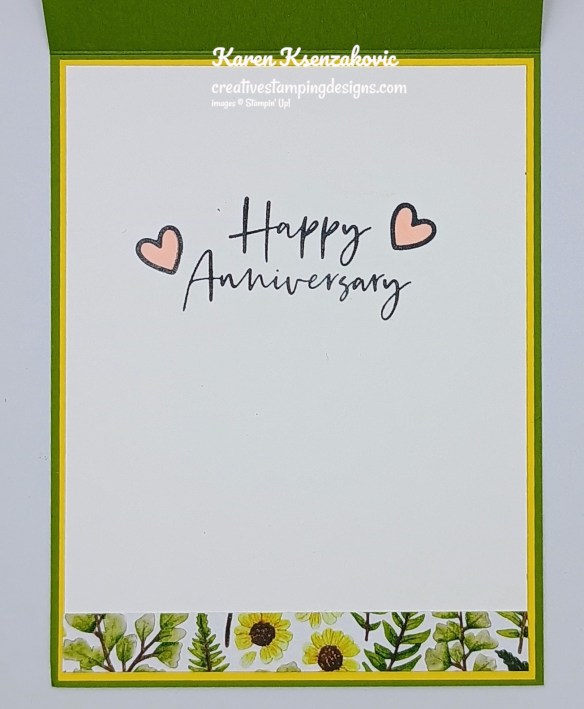
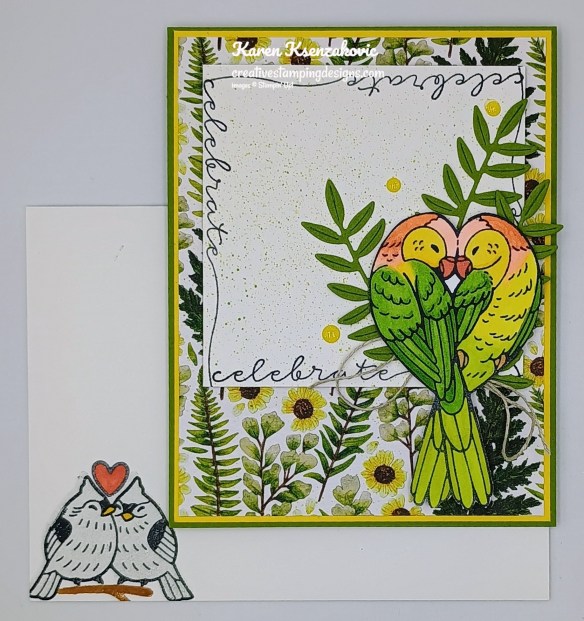
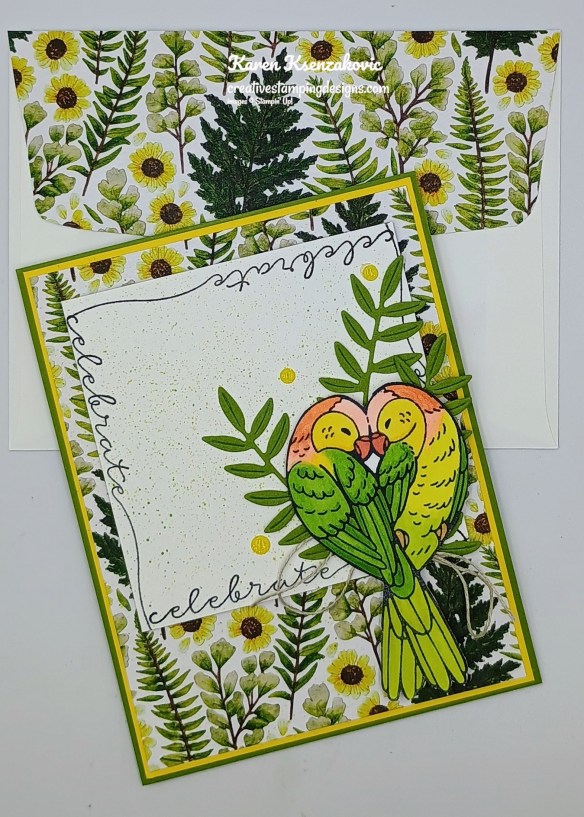
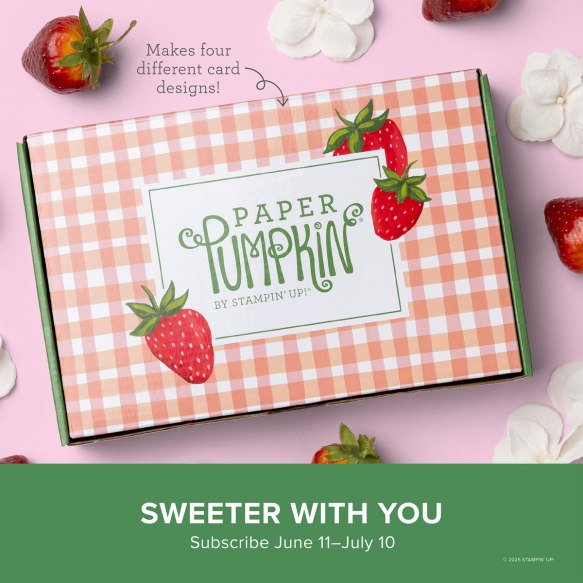
![Feathered Fun Photopolymer Stamp Set [ 165336 ]](https://assets1.tamsnetwork.com/images/EC042017NF/165336s.jpg "Feathered Fun Photopolymer Stamp Set [ 165336 ]")
![Blooming Phrases Photopolymer Stamp Set (English) [ 165523 ]](https://assets1.tamsnetwork.com/images/EC042017NF/165523s.jpg "Blooming Phrases Photopolymer Stamp Set (English) [ 165523 ]")
![Layers Of Beauty Photopolymer Stamp Set (English) [ 163514 ]](https://assets1.tamsnetwork.com/images/EC042017NF/163514s.jpg "Layers Of Beauty Photopolymer Stamp Set (English) [ 163514 ]")
![Daffodil Delight 8-1/2" X 11" Cardstock [ 119683 ]](https://assets1.tamsnetwork.com/images/EC042017NF/119683s.jpg "Daffodil Delight 8-1/2\" X 11\" Cardstock [ 119683 ]")
![Calypso Coral Stampin' Blends Combo Pack [ 154881 ]](https://assets1.tamsnetwork.com/images/EC042017NF/154881s.jpg "Calypso Coral Stampin' Blends Combo Pack [ 154881 ]")
![Granny Apple Green Stampin' Blends Combo Pack [ 154885 ]](https://assets1.tamsnetwork.com/images/EC042017NF/154885s.jpg "Granny Apple Green Stampin' Blends Combo Pack [ 154885 ]")
![Lemon Lime Twist Stampin’ Blends Combo Pack [ 161682 ]](https://assets1.tamsnetwork.com/images/EC042017NF/161682s.jpg "Lemon Lime Twist Stampin’ Blends Combo Pack [ 161682 ]")
![Pecan Pie Stampin’ Blends Combo Pack [ 161674 ]](https://assets1.tamsnetwork.com/images/EC042017NF/161674s.jpg "Pecan Pie Stampin’ Blends Combo Pack [ 161674 ]")
![Timid Tiger Stampin’ Blends Combo Pack [ 165291 ]](https://assets1.tamsnetwork.com/images/EC042017NF/165291s.jpg "Timid Tiger Stampin’ Blends Combo Pack [ 165291 ]")
![Label Me Grateful Dies [ 166111 ]](https://assets1.tamsnetwork.com/images/EC042017NF/166111s.jpg "Label Me Grateful Dies [ 166111 ]")
![Linen Thread [ 104199 ]](https://assets1.tamsnetwork.com/images/EC042017NF/104199s.jpg "Linen Thread [ 104199 ]")
![Low Profile Sparkle Dots [ 166157 ]](https://assets1.tamsnetwork.com/images/EC042017NF/166157s.jpg "Low Profile Sparkle Dots [ 166157 ]")

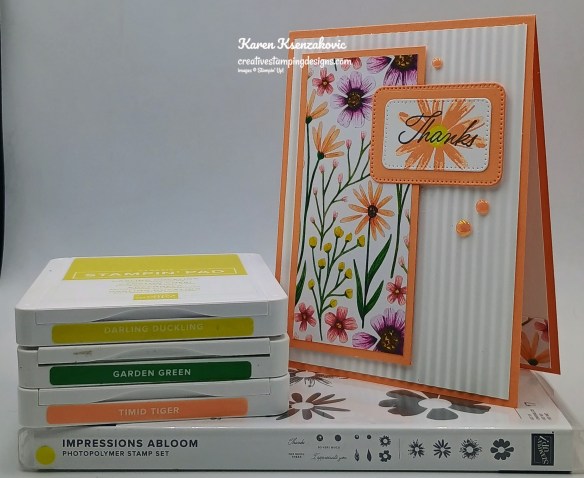


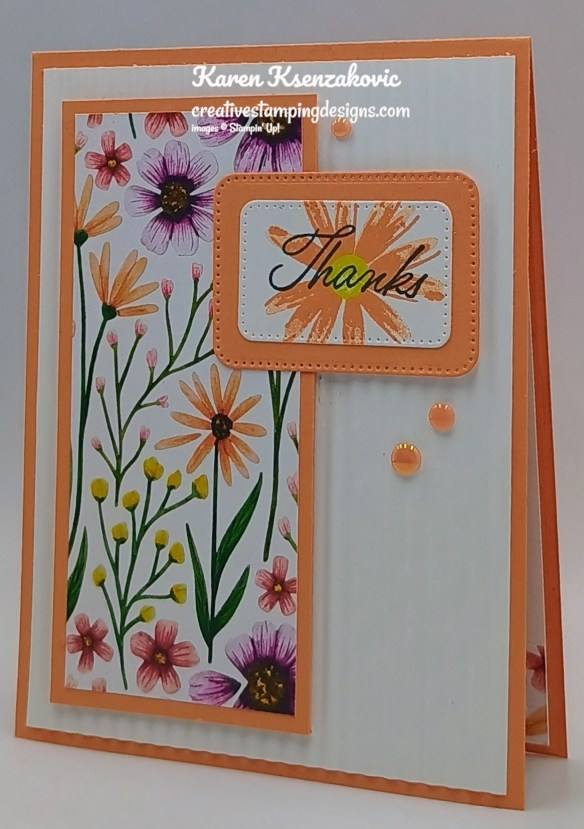
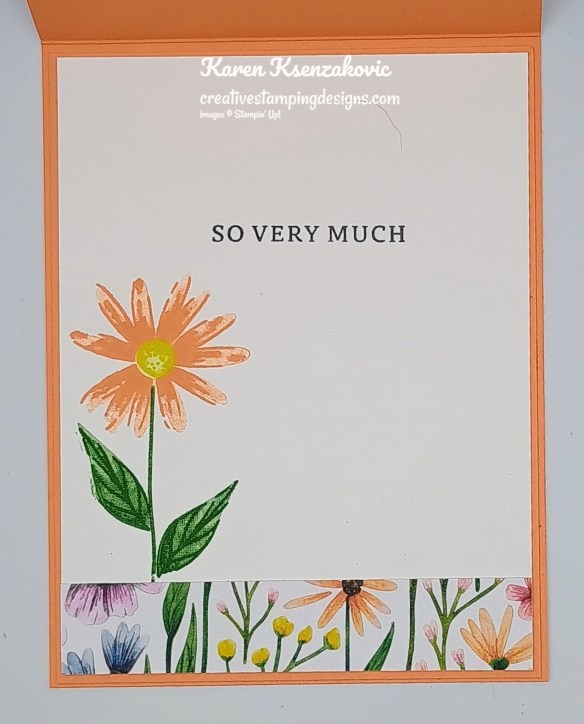
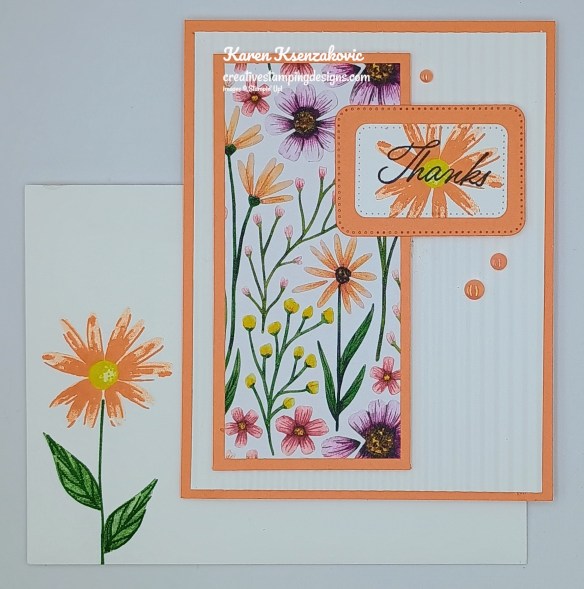

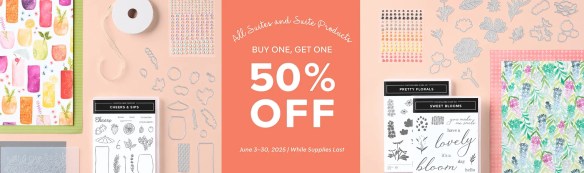
![Timid Tiger 8 1/2" X 11" Cardstock [ 165626 ]](https://assets1.tamsnetwork.com/images/EC042017NF/165626s.jpg "Timid Tiger 8 1/2\" X 11\" Cardstock [ 165626 ]")
![Darling Duckling Classic Stampin' Pad [ 165277 ]](https://assets1.tamsnetwork.com/images/EC042017NF/165277s.jpg "Darling Duckling Classic Stampin' Pad [ 165277 ]")
![Timid Tiger Classic Stampin' Pad [ 165278 ]](https://assets1.tamsnetwork.com/images/EC042017NF/165278s.jpg "Timid Tiger Classic Stampin' Pad [ 165278 ]")
![Mini Corrugated 3 D Embossing Folder [ 165559 ]](https://assets1.tamsnetwork.com/images/EC042017NF/165559s.jpg "Mini Corrugated 3 D Embossing Folder [ 165559 ]")
![Nested Essentials Dies [ 161597 ]](https://assets1.tamsnetwork.com/images/EC042017NF/161597s.jpg "Nested Essentials Dies [ 161597 ]")

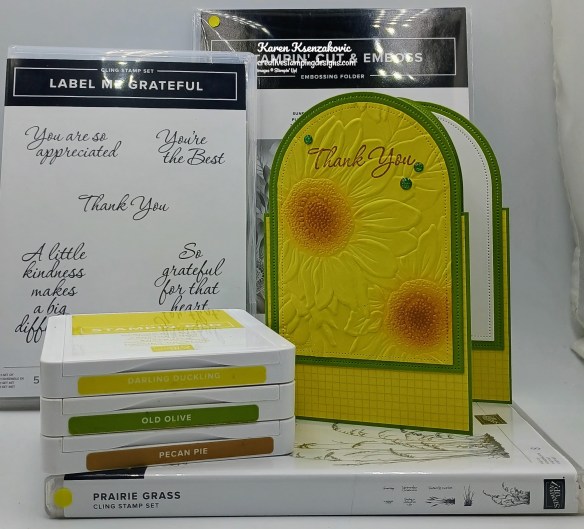
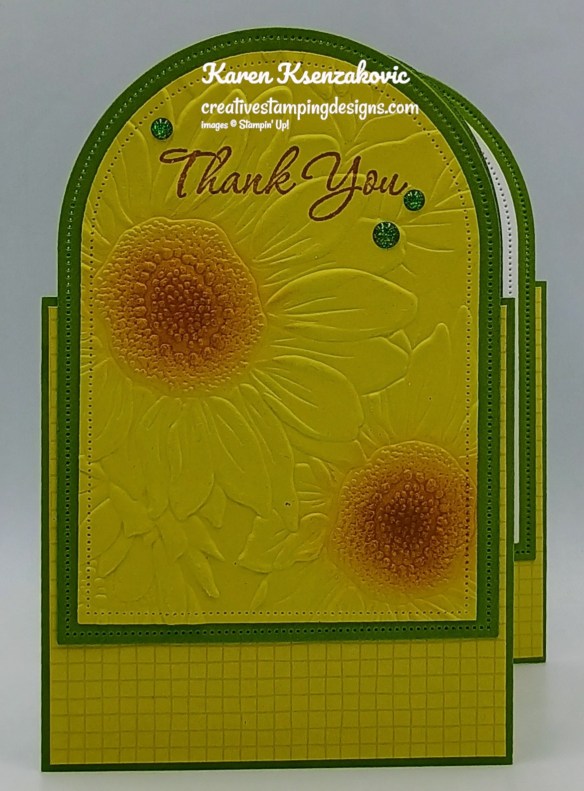
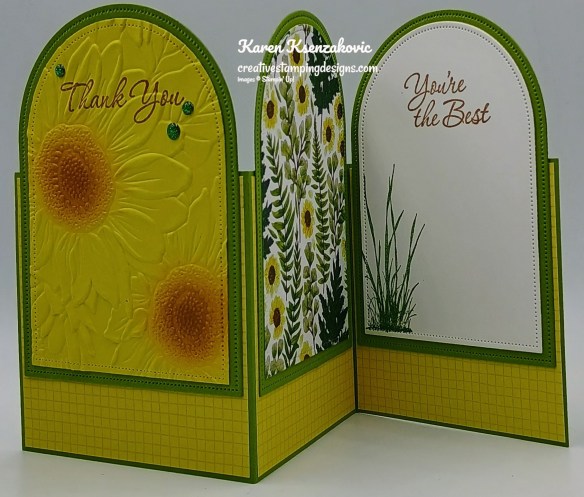
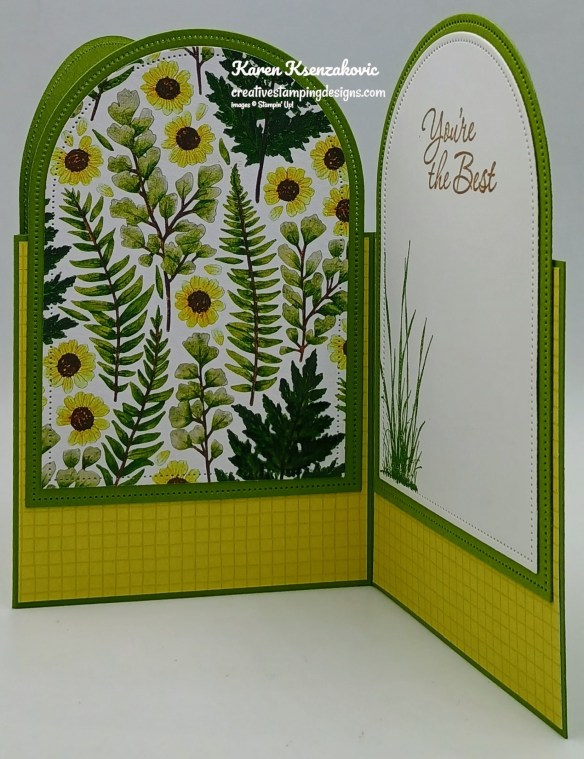
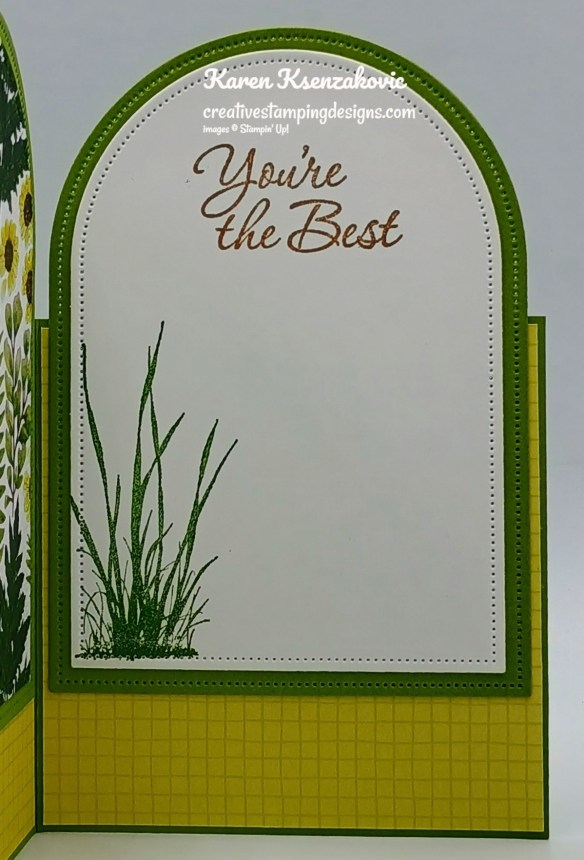
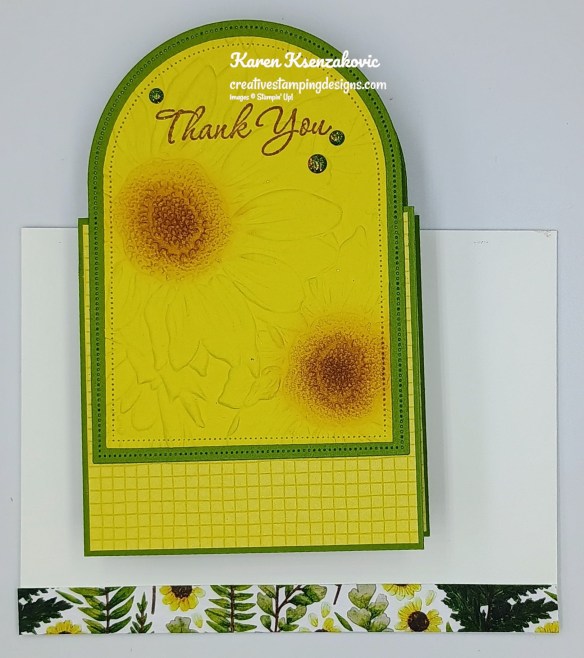
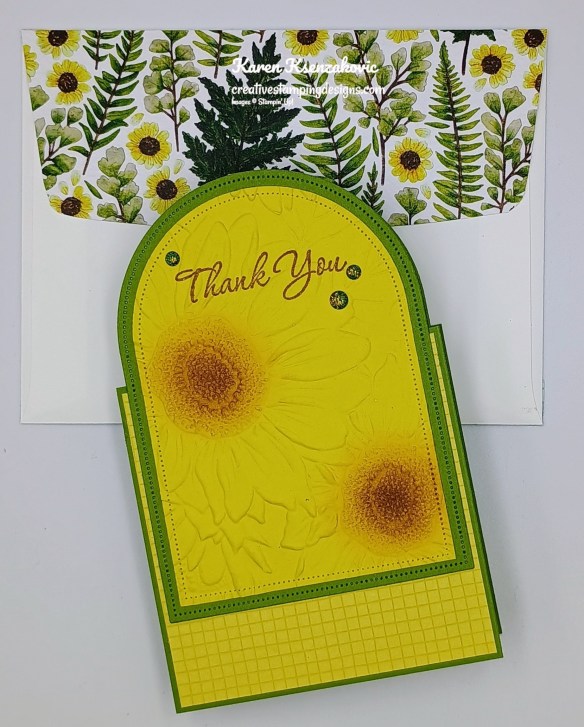
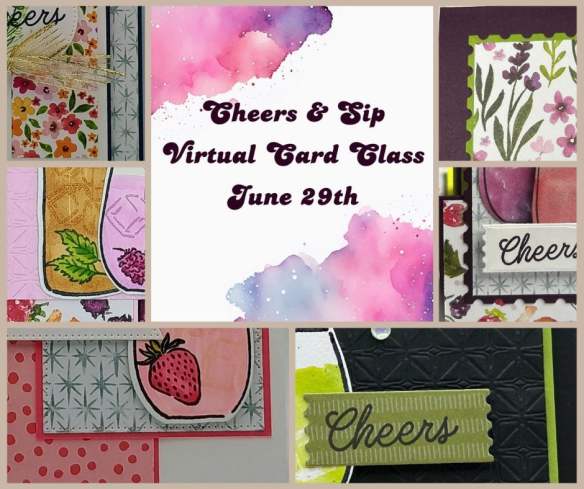


![Old Olive Classic Stampin' Pad [ 147090 ]](https://assets1.tamsnetwork.com/images/EC042017NF/147090s.jpg "Old Olive Classic Stampin' Pad [ 147090 ]")
![Small Blending Brushes [ 160518 ]](https://assets1.tamsnetwork.com/images/EC042017NF/160518s.jpg "Small Blending Brushes [ 160518 ]")
![Everyday Arches Dies [ 164629 ]](https://assets1.tamsnetwork.com/images/EC042017NF/164629s.jpg "Everyday Arches Dies [ 164629 ]")

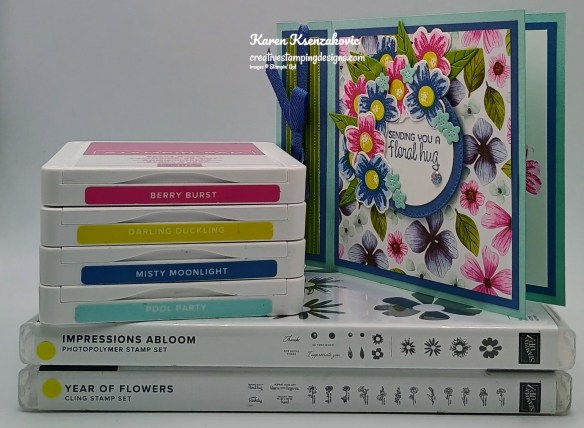

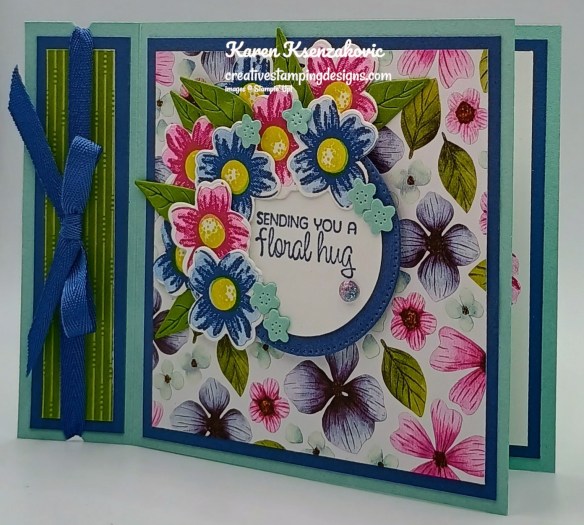
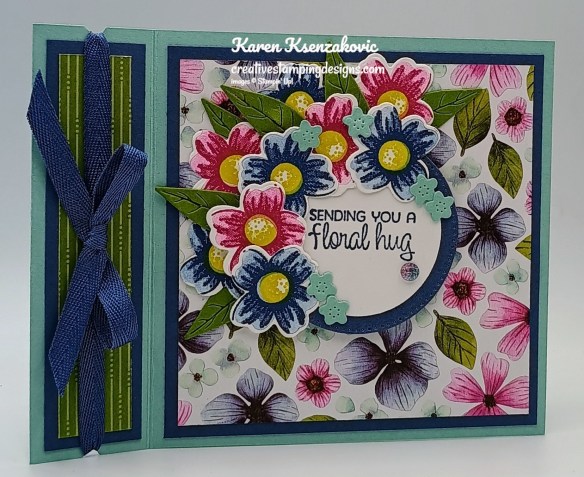
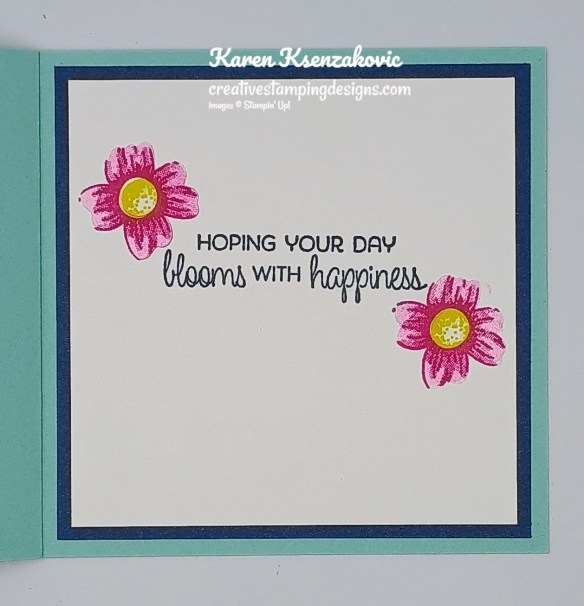
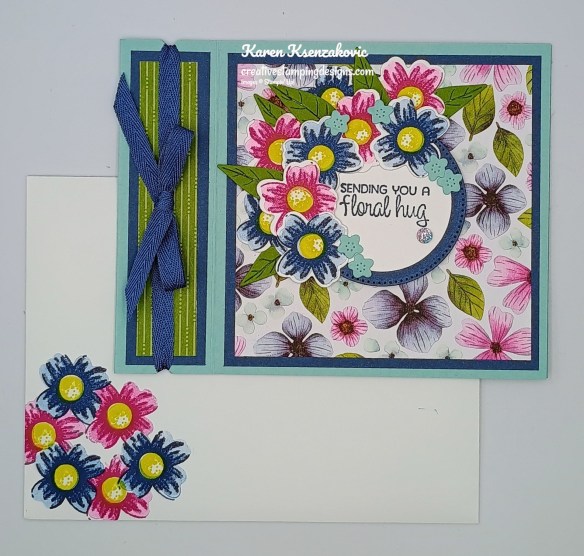
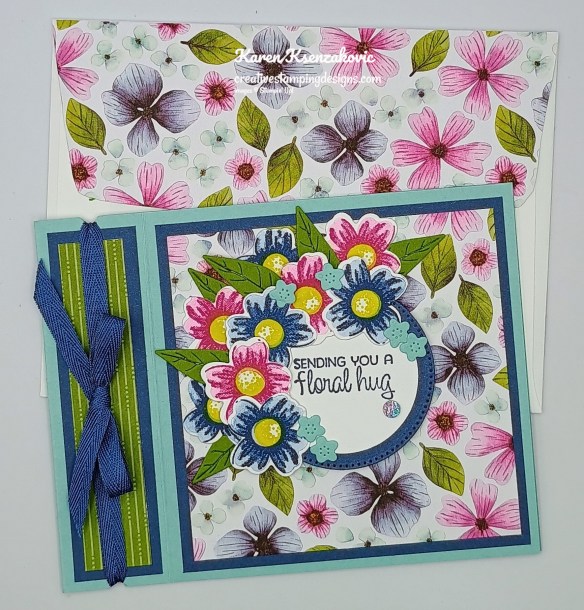
![Year Of Flowers Cling Stamp Set (English) [ 165367 ]](https://assets1.tamsnetwork.com/images/EC042017NF/165367s.jpg "Year Of Flowers Cling Stamp Set (English) [ 165367 ]")
![Berry Burst Classic Stampin' Pad [ 147143 ]](https://assets1.tamsnetwork.com/images/EC042017NF/147143s.jpg "Berry Burst Classic Stampin' Pad [ 147143 ]")
![Stylish Shapes Dies [ 159183 ]](https://assets1.tamsnetwork.com/images/EC042017NF/159183s.jpg "Stylish Shapes Dies [ 159183 ]")
![Two Tone Sparkle Gems [ 164633 ]](https://assets1.tamsnetwork.com/images/EC042017NF/164633s.jpg "Two Tone Sparkle Gems [ 164633 ]")

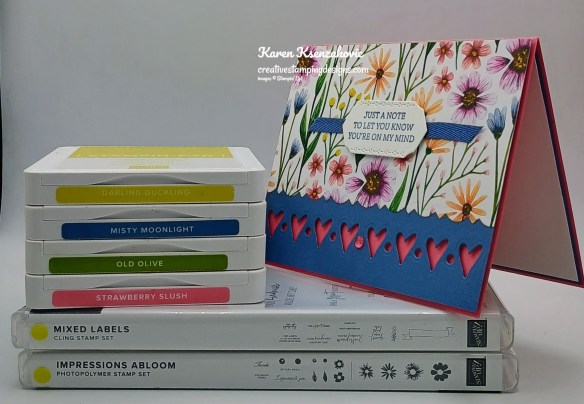


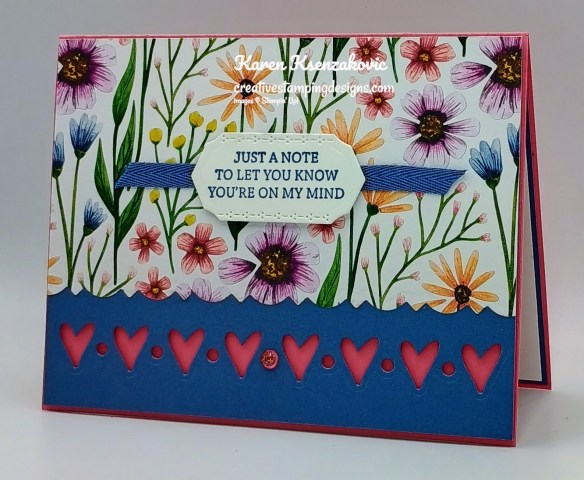
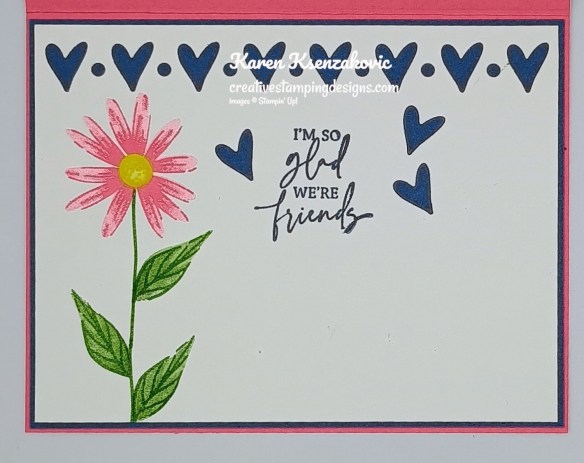
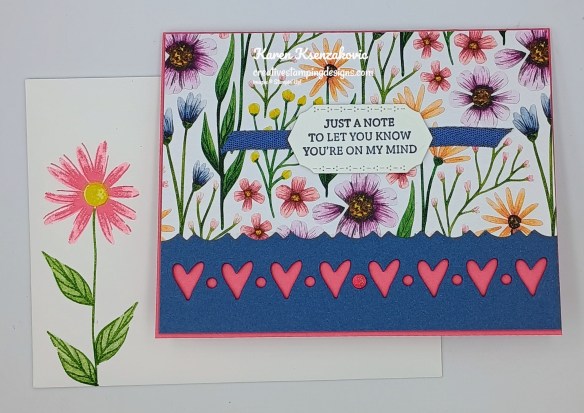

![Mixed Labels Bundle (English) [ 164653 ]](https://assets1.tamsnetwork.com/images/EC042017NF/164653s.jpg "Mixed Labels Bundle (English) [ 164653 ]")
![Mixed Labels Cling Stamp Set (English) [ 164643 ]](https://assets1.tamsnetwork.com/images/EC042017NF/164643s.jpg "Mixed Labels Cling Stamp Set (English) [ 164643 ]")
![Mixed Labels Dies [ 164652 ]](https://assets1.tamsnetwork.com/images/EC042017NF/164652s.jpg "Mixed Labels Dies [ 164652 ]")
![Strawberry Slush 8 1/2" X 11" Cardstock [ 165625 ]](https://assets1.tamsnetwork.com/images/EC042017NF/165625s.jpg "Strawberry Slush 8 1/2\" X 11\" Cardstock [ 165625 ]")
![Strawberry Slush Classic Stampin' Pad [ 165286 ]](https://assets1.tamsnetwork.com/images/EC042017NF/165286s.jpg "Strawberry Slush Classic Stampin' Pad [ 165286 ]")
![Fancy Borders Dies [ 165380 ]](https://assets1.tamsnetwork.com/images/EC042017NF/165380s.jpg "Fancy Borders Dies [ 165380 ]")
![Strawberry Slush & Pretty In Pink Gems [ 165615 ]](https://assets1.tamsnetwork.com/images/EC042017NF/165615s.jpg "Strawberry Slush & Pretty In Pink Gems [ 165615 ]")

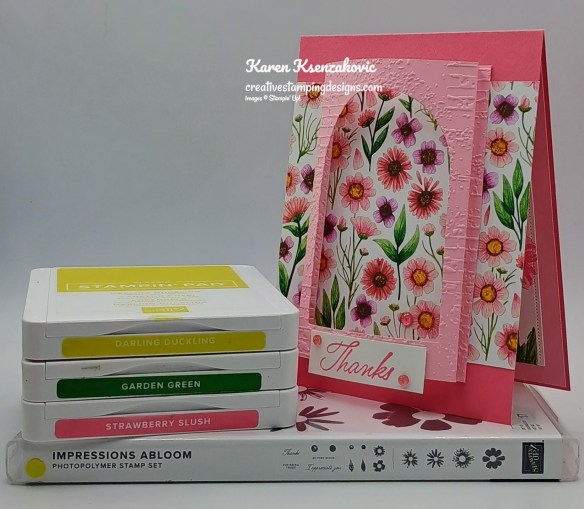
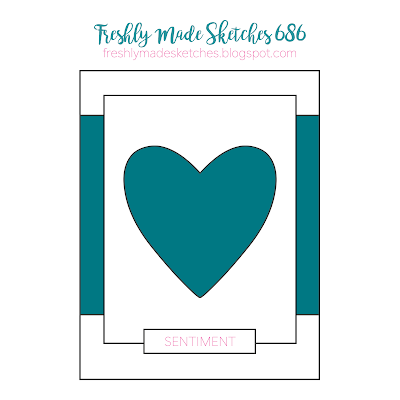
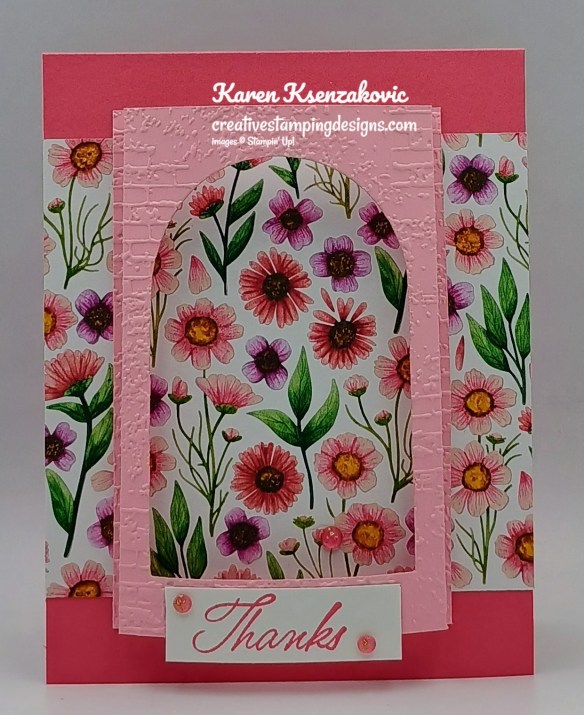
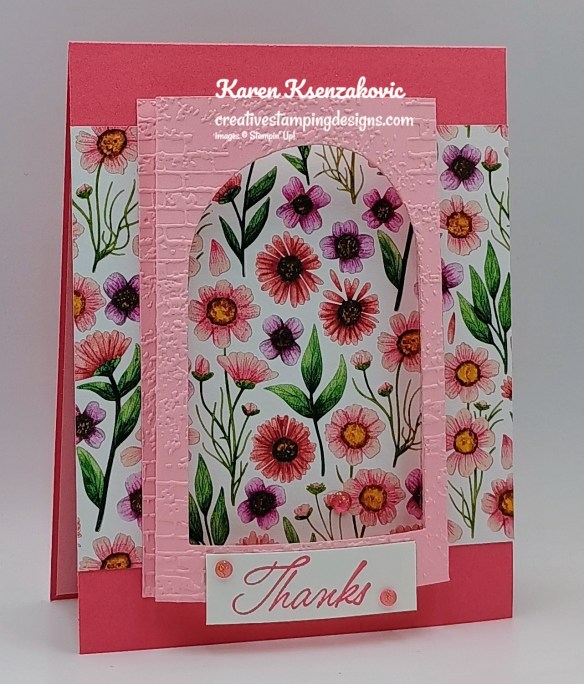
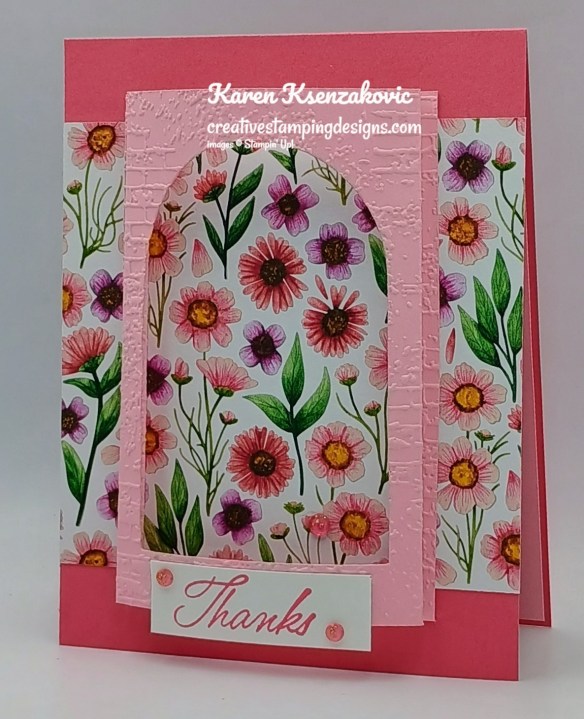
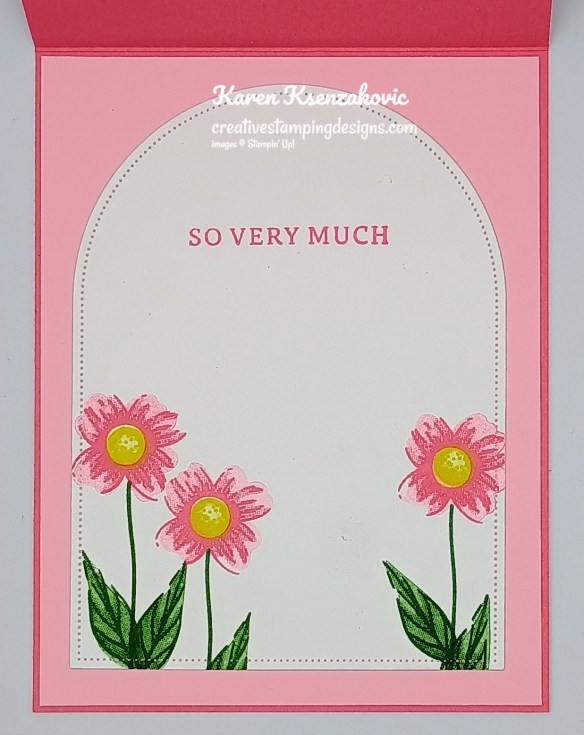

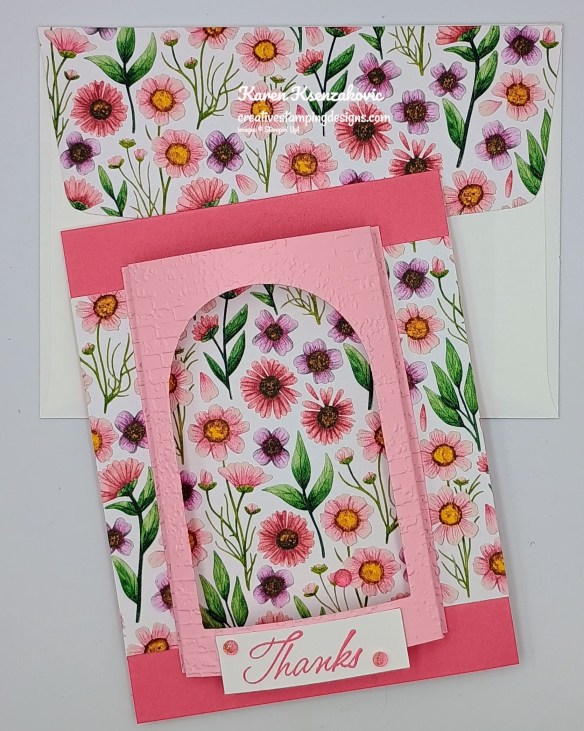
![Pretty In Pink 8 1/2" X 11" Cardstock [ 163793 ]](https://assets1.tamsnetwork.com/images/EC042017NF/163793s.jpg "Pretty In Pink 8 1/2\" X 11\" Cardstock [ 163793 ]")
![Exposed Brick 3 D Embossing Folder [ 161600 ]](https://assets1.tamsnetwork.com/images/EC042017NF/161600s.jpg "Exposed Brick 3 D Embossing Folder [ 161600 ]")


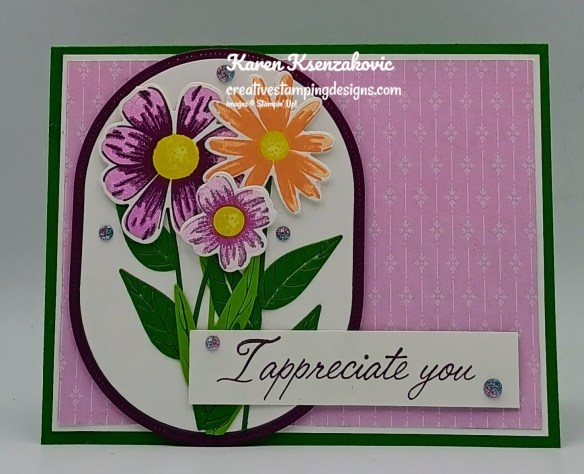

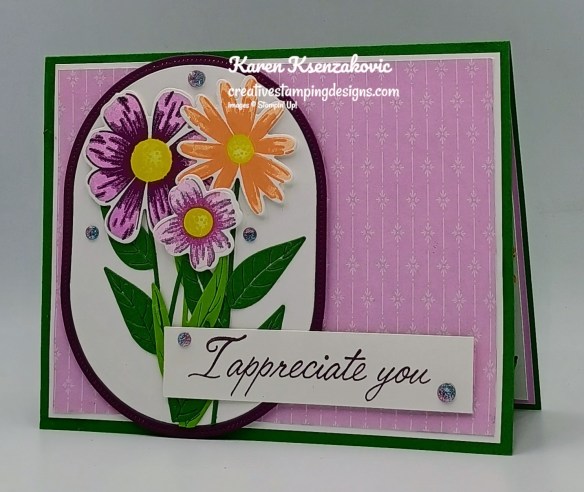
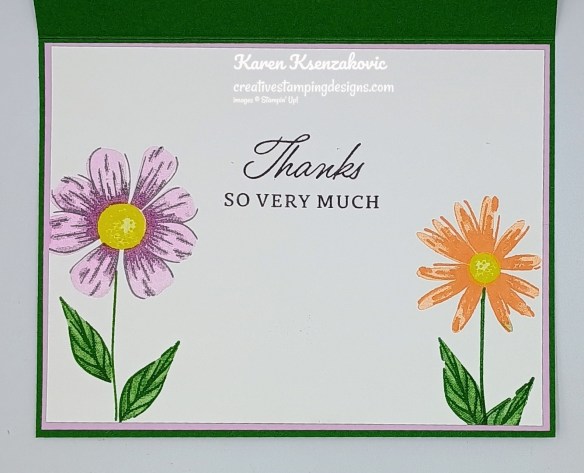
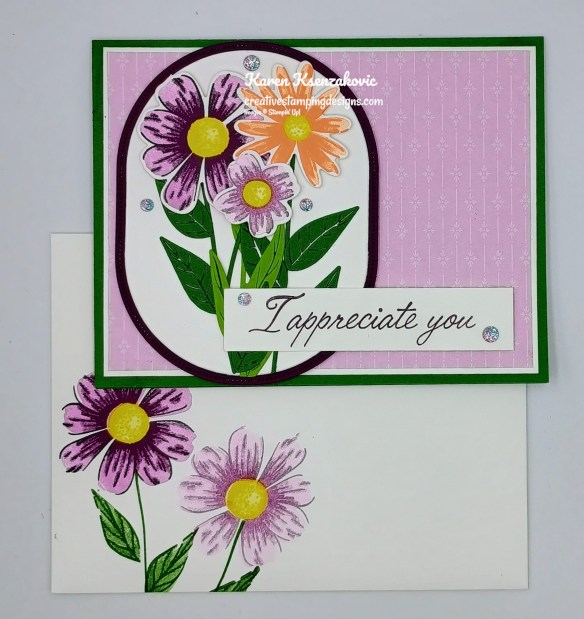
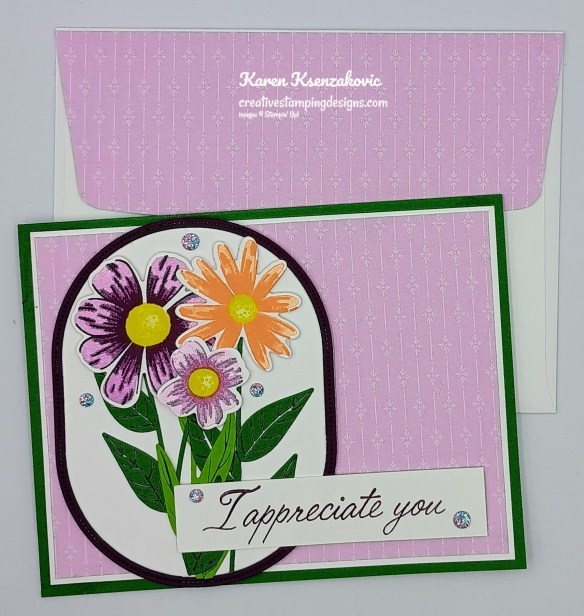
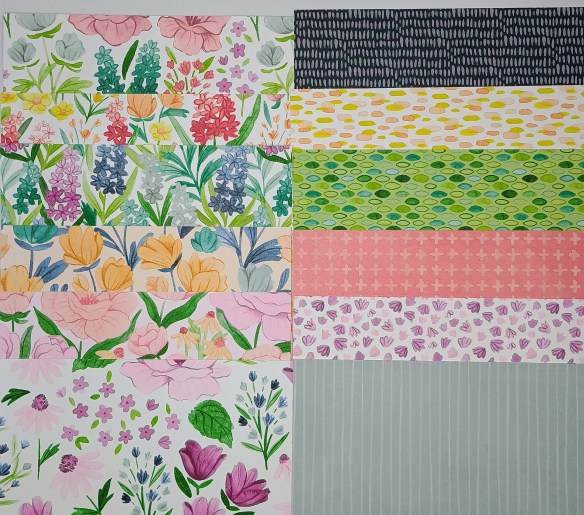

![Blackberry Bliss 8-1/2" X 11" Cardstock [ 133675 ]](https://assets1.tamsnetwork.com/images/EC042017NF/133675s.jpg "Blackberry Bliss 8-1/2\" X 11\" Cardstock [ 133675 ]")
![Granny Apple Green 8-1/2" X 11" Cardstock [ 146990 ]](https://assets1.tamsnetwork.com/images/EC042017NF/146990s.jpg "Granny Apple Green 8-1/2\" X 11\" Cardstock [ 146990 ]")
![Blackberry Bliss Classic Stampin' Pad [ 147092 ]](https://assets1.tamsnetwork.com/images/EC042017NF/147092s.jpg "Blackberry Bliss Classic Stampin' Pad [ 147092 ]")

