
Goods Friday morning my fellow stampers. How was everyone’s week? I’ve had an interesting couple of days. For some of you that know me, I had to have shoulder surgery Wednesday. Last June I tore my rotator cuff and the surgeon said he had to do a lot of repairing of my biceps. I’ve been with one arm for the past few months waiting till I could make an appointment to get it repaired. With that being said, I am 1 armed right now in a sling and all bandaged up. I’m typing with one hand, luckily I’m a pretty good typist and I made all these cards with one hand. The most challenging part was trying to make bows, but I was determined and I did it. I’m the type of person that nothing will stop me. I’m very determined and stubborn and I won’t let anything get me down. I was determined to have a card ready to blog for you for today and I not only made 1, but I made 9 along with a case to hold them. It’s the April Paper Pumpkin Kit. Take a look.
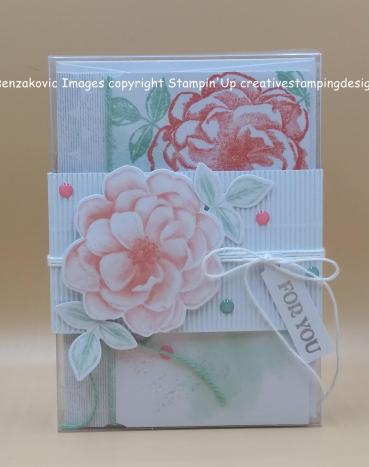
I don’t really have my normal step by step instructions for you, but I have the pictures of all the cards inside and out.
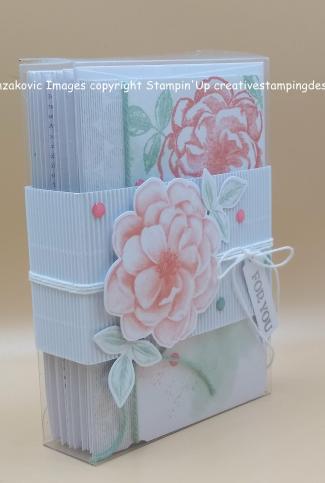
After I made all the cards I made the box that came with the kit for the cards to go in. The Stampin’ Up Paper Pumpkin Kits come with everything you need. Of course I had to add some extras, because that’s what I do. Your 1st kit comes with a clear block and you use that block for all future sets. Everything comes cut for you, all adhesives are included. Each kit comes with a new stamp set, ink spot, envelopes, embellishments and step by step instructions. These kits are great for on the go. They are perfect for new stampers that want to get their feet wet without investing in too much to see if they like stamping (but who doesn’t like creating beautiful cards).

A couple of them I followed the instructions, but again those who know me know I do my own thing. I never have 2 cards exactly the same. I’ve never liked duplicating cards. Even when I make my Christmas cards, if I’m sending out 50, it’s 50 different cards.
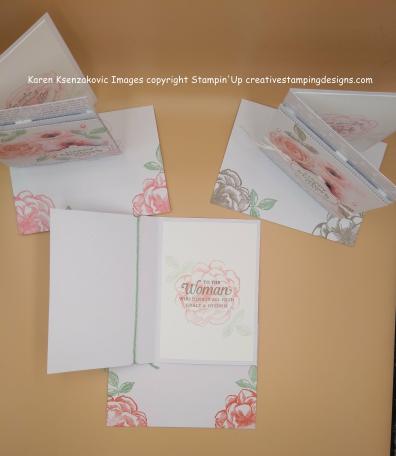
I added sentiments from the Stampin’ Up Strong & Beautiful Stamp Set to the Mother’s Day cards.

I made a couple of them into birthday cards.
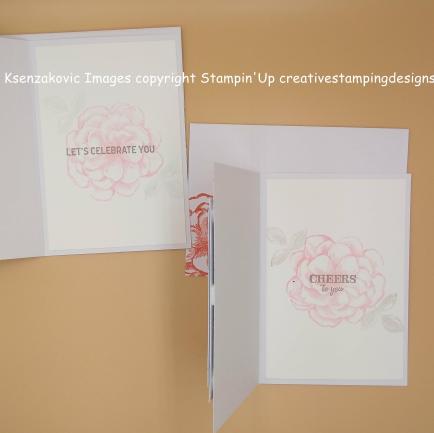
And stamped the inside with sentiments from the Stampin’ Up Itty Bitty Birthdays Stamp Set.

I made a couple of them into thank you cards.
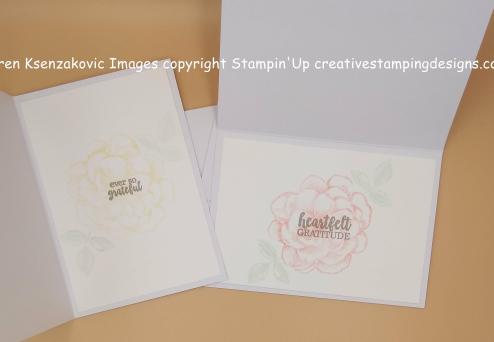
And stamped the inside with sentiments from the Stampin’ Up A Big Thank You Stamp Set.

The last ones I made into thinking of you and best wishes.

And stamped the insides with sentiments from the Stampin’ Up Well Said Stamp Set.
Thank you for stopping by my blog today. This just goes to show that even someone with only 1 arm can make cards. I did cut liners for the inside of each card and it was easier than I thought it would be. I hope you liked my cards and would consider subscribing to the Paper Pumpkin. If you are interested in subscribing, click here.
I hope you all have a wonderful weekend and those who celebrate, have a Blessed Easter. Happy Stamping!!
If you need any stamping supplies, I’d be very happy to be your Demonstrator. Just click here to go directly to my online store or drop me an email if you have any questions. Click here to shop the clearance rack.
MY CURRENT HOST CODE IS: 7923DX9M
Happy Stamping, Karen!
****************************************************************************************************
If you are interested in joining my team click here for details or email me. I’d be glad to have you on my team.
****************************************************************************************************
If you’re on my mailing list I will be sending you a catalog as soon as I get them the beginning of May. If you want to be on my mailing list, you must have placed an order of $50 or more before May 1st 2019.
****************************************************************************************************
Stampin’ Up! has posted their retiring lists for the 2018-19 Annual Catalog and 2019 Occasions Catalog. Head over to my online store to pick up those retiring items now! They’re only available while supplies last from now through June 3!
A few notes about the lists:
- Due to high demand for retiring stamp sets, these items will have guaranteed availability until May 24; all other products are not guaranteed and are available while supplies last only.
- Order deadline to get the retiring products: June 3, 2019; 11:50 PM (MT)
Click the images below to head over to shop the specific retiring items:


Please note, some of the bundle items may be carrying over into the new 2019-2020 Annual Catalog. However, the bundle pricing will go away, so get them while you can at the discounted price!!
Stampin’ Up! Retirement List Clarification
It looks like every single stamp set from the 2018-19 Annual Catalog is being retired and that isn’t the case, the carryover sets are being transitioned to Cling Mount.
The stamp sets offered in clear-mount or wood-mount in the 2018–2019 annual catalog that are carrying over into the 2019–2020 annual catalog will be offered in clear-mount and/or wood-mount until existing inventory has been depleted or until June 4, 2019 (whichever comes first).
If the inventory is depleted, you will be notified of the automatic switch to cling when placing an order for that stamp set. This means that you may end up purchasing select cling stamp sets (in carryover artwork) before they can be ordered from the catalog! All carryover rubber stamp sets will be available in cling medium only (with the exception of background stamps in North America) beginning June 4, 2019.
Here is the list of stamp sets that WILL be in the 2019-2020 Annual Catalog. The stamp sets on this list will not be retiring, they will simply be transitioned to Cling Mount moving forward:
- Accented Blooms
- Animal Outing
- Artisan Textures
- Barn Door
- Beautiful Day
- Beautiful You
- Bee Thankful
- Birthday Backgrounds
- Bokeh Dots
- Botanical Bliss
- Country Road
- Crafting Forever
- Dandelion Wishes
- Dashing Deer
- First Frost
- Flourishing Phrases
- Gallery Grunge
- Healing Hugs
- Heartland
- Hold on to Hope
- Itty Bitty Greetings
- Kindness & Compassion
- Label Me Pretty
- Lilypad Lake
- Little Elephant
- Little Twinkle
- Love You to Pieces
- Magical Mermaid
- Painted Glass
- Peaceful Place
- Perennial Birthday
- Pop of Petals
- Rooted in Nature
- Sea of Textures
- Sorry for Everything
- Special Celebrations
- Stitched All Around
- This Little Piggy
- Tropical Chic
- Winter Woods
Any other stamp sets in the 2018-19 Annual Catalog that are NOT on this list will be retired. Sorry again for the confusion! Stampin’ Up! is aware of the confusion and hopefully will be posting an updated list for us.
You can download copies of the full retiring lists in PDF Form here:
- Click here to get a copy of the full retiring list from the Occasions Catalog.
- Click here to get a copy of the full retiring list from the 2018-19 Annual Catalog.
****************************************************************************************************
 About the “Shelli” Kit
Shelli Gardner worked closely with designers and concept artists to create a Paper Pumpkin kit that is uniquely hers. It includes an exclusive photopolymer stamp set, paper and crafting materials to create 12 mailable cards (3 cards of 4 unique designs), 12 exclusive, coordinating envelopes, and a Classic Stampin’ Spot.
Coordinating colors: Crumb Cake, Early Espresso, Old Olive, Petal Pink, Pool Party, Pretty Peacock, Soft Suede, and Very Vanilla
- In order to receive the Hugs from Shelli kit, the subscriber must have an active subscription by May 10 at 11:50 PM (MT).
- Supplies may be limited toward the end of the subscription period.
Don’t miss out on the May Paper Pumpkin. Click HERE to subscribe.
****************************************************************************************************
Product List


 I started with a panel of Nature’s Poem Designer Series Paper and using my Big Shot, I ran it through with the Pinewood Planks Dynamic Textured Impressions Embossing Folder. I adhered the card front to a Tranquil Tide card base using Multipurpose Liquid Glue.
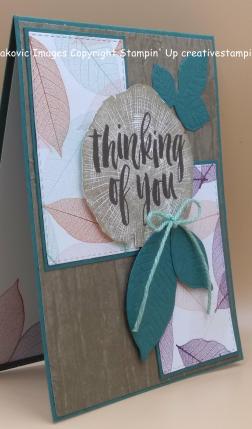 Using my Big Shot again, I cut 2 panels of the Nature’s Poem DSP out using my Rectangle Stitched Framelits Dies. I adhered each of the rectangles to a Tranquil Tide mat using Snail then I adhered them to the card front using Multipurpose Liquid Glue.
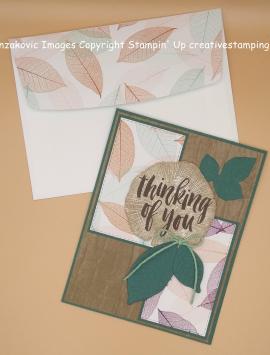
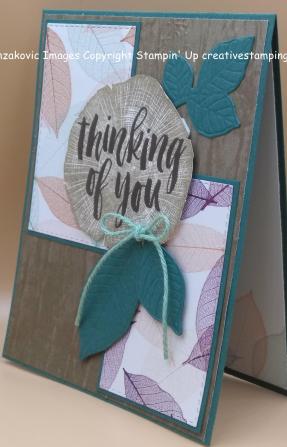 On a small piece of Whisper White cardstock I stamped the tree trunk image from the Stampin’ Up Rooted In Nature Stamp Set in Soft Suede Ink, stamping off twice. I stamped the sentiment from the Rooted In Nature stamp set in Soft Suede Ink in the center of the trunk then I fussy cut the trunk. I adhered the trunk to the center of the card front using Stampin’ Dimensionals. I embossed and die cut a couple of the leaves from the Nature’s Roots Framelits Dies in Tranquil Tide cardstock. I adhered the triple leaf under the top of the trunk using Multipurpose Liquid Glue and I adhered the other 2 leaves on the bottom of the trunk using Stampin’ Dimensionals. I adhered a small Mint Macaron bow from the Nature’s Twine using a Glue Dot on top of the leaf stems.
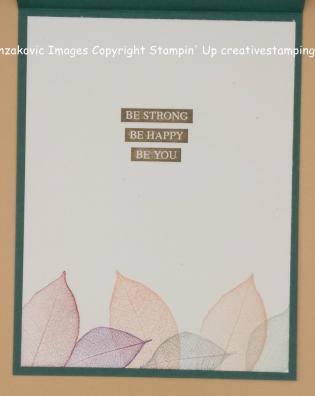 On the inside I stamped the sentiment from the Rooted In Nature stamp set in Soft Suede Ink in the center of a Whisper White panel. I stamped the leaf images from the same stamp set in Blackberry Bliss, Cajun Craze, Grapefruit Grove, Mint Macaron and Tranquil Tide Inks stamping off once or twice to get light images. I adhered the Whisper White panel to the inside of the Tranquil Tide card base using Multipurpose Liquid Glue.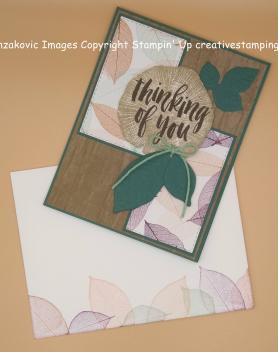


 I joined in with the
 I also joined in with the
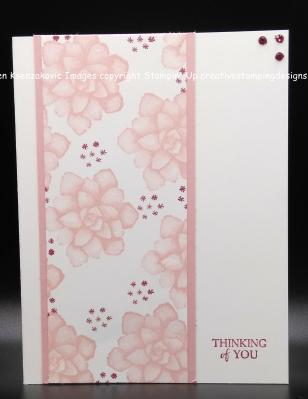
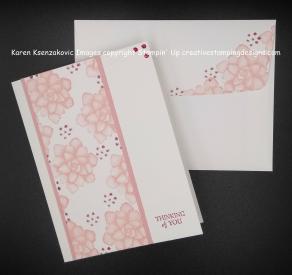
 I started with a panel of Whisper White cardstock and stamped the succulent flower image from the Painted Seasons stamp set in Blushing Bride Ink randomly around the paper. I stamped the star clusters from the same stamp set in Cherry Cobbler Ink around filling in empty spaces. I adhered the artwork panel to a Blushing Bride mat using Snail. I adhered the matted artwork to a Thick Whisper White card base using Multipurpose Liquid Glue.
 I stamped the sentiment from the Stampin’ Up By The Bay Stamp Set, FREE Sale-A-Bration item with a $50.00 order, in Cherry Cobbler Ink on the bottom right of the card front. I added 3 Rhinestone Basic Jewels that I had colored in with my Dark Cherry Cobbler Stampin’ Blend Marker, to the top corner of the card front.
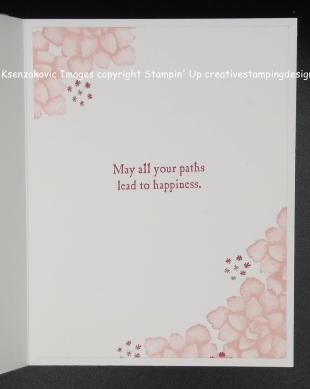 On the inside I stamped the succulent flower image from the Painted Seasons stamp set in Blushing Bride Ink on the two corners of a Whisper White panel. I stamped the star clusters from the same stamp set in Cherry Cobbler Ink by the flowers. I stamped the sentiment from the By The Bay stamp set in Cherry Cobbler Ink in the center of the panel. I adhered the Whisper White panel to the inside of the Thick Whisper White card base using Multipurpose Liquid Glue.


 I joined in with the
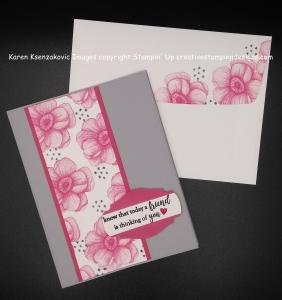
  I started with a Smoky Slate card front and ran it through my Big Shot using the Subtle Dynamic Textured Impressions Embossing Folder.
 Using the soon to be available from the Sale-A-Bration Coordination collection, Story Label Punch (available March 1st), I punched a label out in Melon Mambo cardstock. I stamped the sentiment from the Stampin’ Up Part Of My Story Stamp Set (Free Sale-A-Bration item) in Versamark Ink on a strip of Whisper White cardstock. I sprinkled it immediately with my Black Stampin’ Emboss Powder and heat set it with my Heat Tool. I adhered the sentiment to the label and trimmed the ends to the label. I added a Heart Epoxy Droplet, which I colored with my Dark Lovely Lipstick Stampin’ Blend Marker (that was the closest to Melon Mambo I could get). I adhered the label to the right of my artwork with Stampin’ Dimensionals.
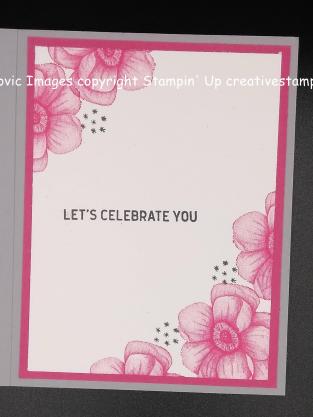 On the inside I stamped the flower from the Painted Seasons stamp set in Melon Mambo Ink on the two corners of a panel of Whisper White cardstock. I added a couple of the star clusters from the same stamp set in Tuxedo Black Memento Ink by the flowers. I stamped the sentiment from the Stampin’ Up Itty Bitty Birthdays Stamp Set in Tuxedo Black Memento Ink in the center of the panel. I adhered the Whisper White panel to a Melon Mambo mat using Snail and adhered it to the inside of the Smoky Slate card base using Multipurpose Liquid Glue.


 and here is ‘Just Us Girls’ Challenge
 I started with a panel of Wood Textures Designer Series Paper and adhered it to a Crumb Cake card base using Multipurpose Liquid Glue.
 On a panel of Whisper White cardstock I stamped the house image from the Stampin’ Up By The Bay Stamp Set in Tuxedo Black Memento Ink. This beautiful stamp set is a FREE item with a $50 order during Sale-A-Bration. I just love this image and would absolutely love to be in that house looking out at the bay right now. On a smaller piece of Whisper White cardstock I stamped the seagull image in Tuxedo Black Memento Ink. Using my Aqua Painter filled with Alcohol, I water colored the images in using Balmy Blue, Cajun Craze, Crumb Cake, Gray Granite, Pacific Point, Pear Pizzazz, Sahara Sand, Smoky Slate and Soft Suede Inks. To get the ink I squeezed the stamp pad before opening it so that ink goes on the inside of the lid. I used my Aqua Painter to pick up the ink to color my picture with. When I was done with each color, I wiped the lid with paper towel to make sure ALL alcohol was off the lid before closing it. You do not want to get alcohol in your ink. Once I was done watercoloring my pictures I cut them out using the Layering Oval Framelits Dies and my Big Shot. I adhered the house and bay image to the card front using Multipurpose Liquid Glue and I adhered the seagull image using Stampin’ Dimensionals.
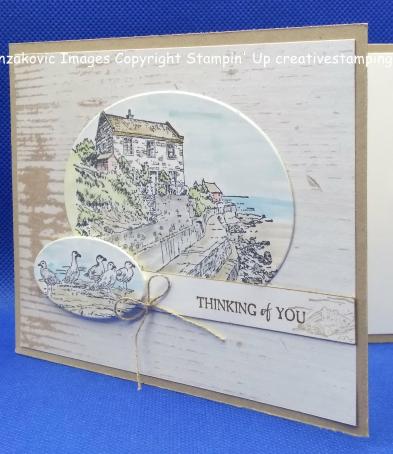 On a small strip of Whisper White cardstock I stamped the sentiment from the By The Bay stamp set in Soft Suede Ink. I stamped the seashell from the same stamp set to the right of the sentiment in Crumb Cake Ink. I edged the strip using my Crumb Cake Stampin’ Write Marker to give it a little dimension. I then adhered the sentiment to the card front, sliding it under the seagull image, using Multipurpose Liquid Glue. I attached a small bow made of Linen Thread to the sentiment strip using a Glue Dot.
 On the inside I stamped the house image from By The Bay stamp set in Crumb Cake Ink, stamping it off once, in the center of a Whisper White panel. I stamped the sentiment from the same stamp set in Soft Suede Ink over the house image.


