Stampin’ Up One For All Thank You Quick and Easy

Good Friday morning my fellow stampers.  How was you week?  The weekend is here and we’re suppose to have rain, AGAIN.  I’m going to have to build an ark soon in my backyard.

For today’s card I made a quick and easy one for you.  I’ve used 3 of the retiring 2017-2019 In-Colors along with the retiring Laser-Cut paper.  As of the last time I looked all the Inks, Refills and Paper are available except Lemon Lime Twist Paper.  If you are wanting any of these colors, I wouldn’t wait.  You’ll want to get them before they are gone.

Here’s my card for today.

I started with a panel of the Delightfully Detailed Laser-Cut Specialty Paper and adhered it to a Fresh Fig card front using Multipurpose Liquid Glue.  The designs that come with this paper are absolutely gorgeous.  There is a Whisper White side and a Very Vanilla side.  I used the Very Vanilla side.  I adhered the card front to a Tranquil Tide card base using Multipurpose Liquid Glue.

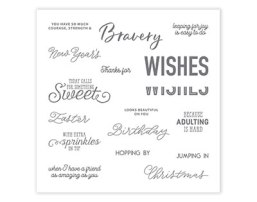
On a small panel of Very Vanilla cardstock I stamped the sentiment from the Stampin’ Up One For All Stamp Set in Tranquil Tide Ink.

I adhered the artwork to a Powder Pink mat using Snail and then to the card front using Stampin’ Dimensionals.

On the inside I stamped the sentiment from the Stampin’ Up A Big Thank You Stamp Set on a panel of Very Vanilla cardstock in Tranquil Tide Ink.  I stamped the small scroll below the sentiment in Powder Pink Ink.  I adhered the Very Vanilla panel to a Fresh Fig mat using Snail and then to the inside of the Tranquil Tide card base using Multipurpose Liquid Glue.

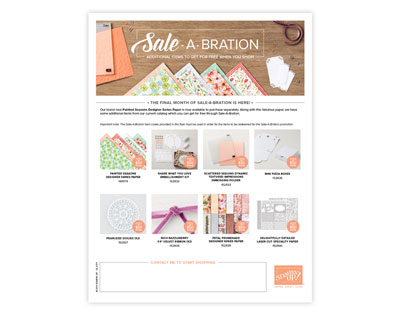
To complete my card I decorated a Medium Very Vanilla Envelope.  I adhered a strip of Share What You Love Specialty Designer Series Paper to the envelope front and a panel to the envelope flap.

Thank you for stopping by my blog today.  I hope you liked my card and will give it a try.  All the items I used today except the A Big Thank You stamp set will be retiring as of June 3rd.  Now’s the time to grab them.  Happy Stamping!!\

****************************************************************************************************

If you need any stamping supplies, I’d be very happy to be your Demonstrator.  Just click here to go directly to my online store or drop me an email if you have any questions.

The Clearance Rack has been updated with lots of new deals! So check it out

Click here to shop the clearance rack.

MY CURRENT HOST CODE IS: 7923DX9M

Happy Stamping, Karen!

****************************************************************************************************
If you are interested in joining my team click here for details or email me.  I’d love to have you on my team.

****************************************************************************************************

If you’re on my mailing list I will be sending you a catalog as soon as I get them the beginning of May. If you want to be on my mailing list, you must have placed an order of $50 or more before May 1st 2019.

****************************************************************************************************

Stampin’ Up! has posted their retiring lists for the 2018-19 Annual Catalog and 2019 Occasions Catalog.  Head over to my online store to pick up those retiring items now!  They’re only available while supplies last from now through June 3!

A few notes about the lists:

  • Due to high demand for retiring stamp sets, these items will have guaranteed availability until May 24; all other products are not guaranteed and are available while supplies last only.
  • Order deadline to get the retiring products:  June 3, 2019; 11:50 PM (MT)

Click the images below to head over to shop the specific retiring items:

Please note, some of the bundle items may be carrying over into the new 2019-2020 Annual Catalog.  However, the bundle pricing will go away, so get them while you can at the discounted price!!

Stampin’ Up! Retirement List Clarification

It looks like every single stamp set from the 2018-19 Annual Catalog is being retired and that isn’t the case, the carryover sets are being transitioned to Cling Mount.

The stamp sets offered in clear-mount or wood-mount in the 2018–2019 annual catalog that are carrying over into the 2019–2020 annual catalog will be offered in clear-mount and/or wood-mount until existing inventory has been depleted or until June 4, 2019 (whichever comes first).

If the inventory is depleted, you will be notified of the automatic switch to cling when placing an order for that stamp set. This means that you may end up purchasing select cling stamp sets (in carryover artwork) before they can be ordered from the catalog!  All carryover rubber stamp sets will be available in cling medium only (with the exception of background stamps in North America) beginning June 4, 2019.

Here is the list of stamp sets that WILL be in the 2019-2020 Annual Catalog.  The stamp sets on this list will not be retiring, they will simply be transitioned to Cling Mount moving forward:

  • Accented Blooms
  • Animal Outing
  • Artisan Textures
  • Barn Door
  • Beautiful Day
  • Beautiful You
  • Bee Thankful
  • Birthday Backgrounds
  • Bokeh Dots
  • Botanical Bliss
  • Country Road
  • Crafting Forever
  • Dandelion Wishes
  • Dashing Deer
  • First Frost
  • Flourishing Phrases
  • Gallery Grunge
  • Healing Hugs
  • Heartland
  • Hold on to Hope
  • Itty Bitty Greetings
  • Kindness & Compassion
  • Label Me Pretty
  • Lilypad Lake
  • Little Elephant
  • Little Twinkle
  • Love You to Pieces
  • Magical Mermaid
  • Painted Glass
  • Peaceful Place
  • Perennial Birthday
  • Pop of Petals
  • Rooted in Nature
  • Sea of Textures
  • Sorry for Everything
  • Special Celebrations
  • Stitched All Around
  • This Little Piggy
  • Tropical Chic
  • Winter Woods

Any other stamp sets in the 2018-19 Annual Catalog that are NOT on this list will be retired.  Sorry again for the confusion!  Stampin’ Up! is aware of the confusion and hopefully will be posting an updated list for us.

You can download copies of the full retiring lists in PDF Form here:

  • Click here to get a copy of the full retiring list from the Occasions Catalog.
  • Click here to get a copy of the full retiring list from the 2018-19 Annual Catalog.

****************************************************************************************************

About the “Shelli” Kit

Shelli Gardner worked closely with designers and concept artists to create a Paper Pumpkin kit that is uniquely hers. It includes an exclusive photopolymer stamp set, paper and crafting materials to create 12 mailable cards (3 cards of 4 unique designs), 12 exclusive, coordinating envelopes, and a Classic Stampin’ Spot.

Coordinating colors: Crumb Cake, Early Espresso, Old Olive, Petal Pink, Pool Party, Pretty Peacock, Soft Suede, and Very Vanilla

  • In order to receive the Hugs from Shelli kit, the subscriber must have an active subscription by May 10 at 11:50 PM (MT).
  • Supplies may be limited toward the end of the subscription period.

Don’t miss out on the May Paper Pumpkin.  Click HERE to subscribe.

****************************************************************************************************

Card stock cuts for this project:

  • Fresh Fig Cardstock 3 5/8″ X 5 1/8″ (card front mat), 4″ X 5 1/4″ (inner liner mat)
  • Powder Pink Cardstock 2 7/8″ X 2 7/8″ (artwork mat)
  • Tranquil Tide Cardstock 8 1/2″ X 5 1/2″ (card base scored and folded at 4 1/4″)
  • Very Vanilla Cardstock 2 3/4″ X 2 3/4″ (artwork), 3 3/4″ X 5″(inner liner)
  • Delightfully Detailed Laser-Cut Specialty Paper 3 1/2″ X 5″ (card front)
  • Share What You Love Specialty Designer Series Paper (pieces for envelope)

****************************************************************************************************

Product List

Stampin’ Up April Paper Pumpkin

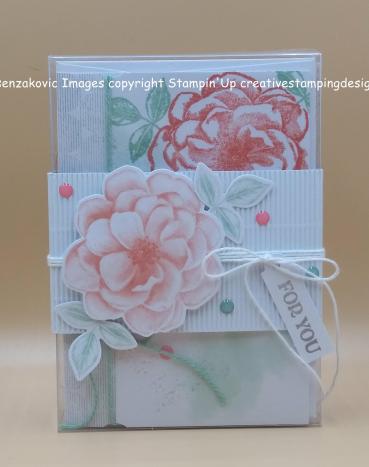
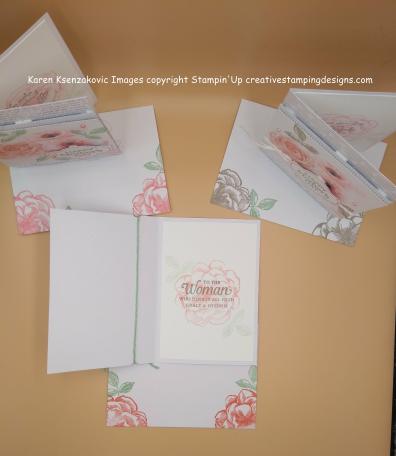
Goods Friday morning my fellow stampers.  How was everyone’s week?   I’ve had an interesting couple of days.  For some of you that know me, I had to have shoulder surgery Wednesday.  Last June I tore my rotator cuff and the surgeon said he had to do a lot of repairing of my biceps.  I’ve been with one arm for the past few months waiting till I could make an appointment to get it repaired.   With that being said, I am 1 armed right now in a sling and all bandaged up.  I’m typing with one hand, luckily I’m a pretty good typist and I made all these cards with one hand.  The most challenging part was trying to make bows, but I was determined and I did it.  I’m the type of person that nothing will stop me.  I’m very determined and stubborn and I won’t let anything get me down.   I was determined to have a card ready to blog for you for today and I not only made 1, but I made 9 along with a case to hold them.  It’s the April Paper Pumpkin Kit.  Take a look.

I don’t really have my normal step by step instructions for you, but I have the pictures of all the cards inside and out.

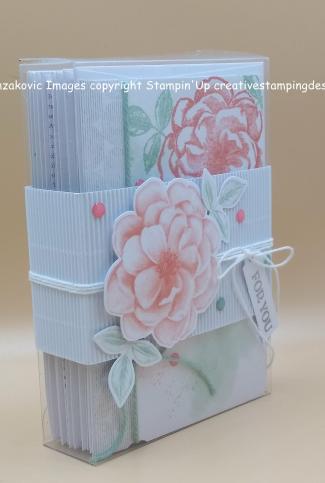
After I made all the cards I made the box that came with the kit for the cards to go in.  The Stampin’ Up Paper Pumpkin Kits come with everything you need.  Of course I had to add some extras, because that’s what I do.  Your 1st kit comes with a clear block and you use that block for all future sets.  Everything comes cut for you, all adhesives are included.  Each kit comes with a new stamp set, ink spot, envelopes, embellishments and step by step instructions.  These kits are great for on the go.  They are perfect for new stampers that want to get their feet wet without investing in too much to see if they like stamping (but who doesn’t like creating beautiful cards).

A couple of them I followed the instructions, but again those who know me know I do my own thing.  I never have 2 cards exactly the same.  I’ve never liked duplicating cards.  Even when I make my Christmas cards, if I’m sending out 50, it’s 50 different cards.

I added sentiments from the Stampin’ Up Strong & Beautiful Stamp Set to the Mother’s Day cards.

I made a couple of them into birthday cards.

And stamped the inside with sentiments from the Stampin’ Up Itty Bitty Birthdays Stamp Set.

I made a couple of them into thank you cards.

And stamped the inside with sentiments from the Stampin’ Up A Big Thank You Stamp Set.

The last ones I made into thinking of you and best wishes.

And stamped the insides with sentiments from the Stampin’ Up Well Said Stamp Set.

Thank you for stopping by my blog today.  This just goes to show that even someone with only 1 arm can make cards.  I did cut liners for the inside of each card and it was easier than I thought it would be.  I hope you liked my cards and would consider subscribing to the Paper Pumpkin.  If you are interested in subscribing, click here.

I hope you all have a wonderful weekend and those who celebrate, have a Blessed Easter.  Happy Stamping!!

****************************************************************************************************

If you need any stamping supplies, I’d be very happy to be your Demonstrator.  Just click here to go directly to my online store or drop me an email if you have any questions.  Click here to shop the clearance rack.

MY CURRENT HOST CODE IS: 7923DX9M

Happy Stamping, Karen!

****************************************************************************************************

If you are interested in joining my team click here for details or email me.  I’d be glad to have you on my team.

****************************************************************************************************

If you’re on my mailing list I will be sending you a catalog as soon as I get them the beginning of May. If you want to be on my mailing list, you must have placed an order of $50 or more before May 1st 2019.

****************************************************************************************************

Stampin’ Up! has posted their retiring lists for the 2018-19 Annual Catalog and 2019 Occasions Catalog.  Head over to my online store to pick up those retiring items now!  They’re only available while supplies last from now through June 3!

A few notes about the lists:

  • Due to high demand for retiring stamp sets, these items will have guaranteed availability until May 24; all other products are not guaranteed and are available while supplies last only.
  • Order deadline to get the retiring products:  June 3, 2019; 11:50 PM (MT)

Click the images below to head over to shop the specific retiring items:

Please note, some of the bundle items may be carrying over into the new 2019-2020 Annual Catalog.  However, the bundle pricing will go away, so get them while you can at the discounted price!!

Stampin’ Up! Retirement List Clarification

It looks like every single stamp set from the 2018-19 Annual Catalog is being retired and that isn’t the case, the carryover sets are being transitioned to Cling Mount.

The stamp sets offered in clear-mount or wood-mount in the 2018–2019 annual catalog that are carrying over into the 2019–2020 annual catalog will be offered in clear-mount and/or wood-mount until existing inventory has been depleted or until June 4, 2019 (whichever comes first).

If the inventory is depleted, you will be notified of the automatic switch to cling when placing an order for that stamp set. This means that you may end up purchasing select cling stamp sets (in carryover artwork) before they can be ordered from the catalog!  All carryover rubber stamp sets will be available in cling medium only (with the exception of background stamps in North America) beginning June 4, 2019.

Here is the list of stamp sets that WILL be in the 2019-2020 Annual Catalog.  The stamp sets on this list will not be retiring, they will simply be transitioned to Cling Mount moving forward:

  • Accented Blooms
  • Animal Outing
  • Artisan Textures
  • Barn Door
  • Beautiful Day
  • Beautiful You
  • Bee Thankful
  • Birthday Backgrounds
  • Bokeh Dots
  • Botanical Bliss
  • Country Road
  • Crafting Forever
  • Dandelion Wishes
  • Dashing Deer
  • First Frost
  • Flourishing Phrases
  • Gallery Grunge
  • Healing Hugs
  • Heartland
  • Hold on to Hope
  • Itty Bitty Greetings
  • Kindness & Compassion
  • Label Me Pretty
  • Lilypad Lake
  • Little Elephant
  • Little Twinkle
  • Love You to Pieces
  • Magical Mermaid
  • Painted Glass
  • Peaceful Place
  • Perennial Birthday
  • Pop of Petals
  • Rooted in Nature
  • Sea of Textures
  • Sorry for Everything
  • Special Celebrations
  • Stitched All Around
  • This Little Piggy
  • Tropical Chic
  • Winter Woods

Any other stamp sets in the 2018-19 Annual Catalog that are NOT on this list will be retired.  Sorry again for the confusion!  Stampin’ Up! is aware of the confusion and hopefully will be posting an updated list for us.

You can download copies of the full retiring lists in PDF Form here:

  • Click here to get a copy of the full retiring list from the Occasions Catalog.
  • Click here to get a copy of the full retiring list from the 2018-19 Annual Catalog.

****************************************************************************************************

About the “Shelli” Kit

Shelli Gardner worked closely with designers and concept artists to create a Paper Pumpkin kit that is uniquely hers. It includes an exclusive photopolymer stamp set, paper and crafting materials to create 12 mailable cards (3 cards of 4 unique designs), 12 exclusive, coordinating envelopes, and a Classic Stampin’ Spot.

Coordinating colors: Crumb Cake, Early Espresso, Old Olive, Petal Pink, Pool Party, Pretty Peacock, Soft Suede, and Very Vanilla

  • In order to receive the Hugs from Shelli kit, the subscriber must have an active subscription by May 10 at 11:50 PM (MT).
  • Supplies may be limited toward the end of the subscription period.

Don’t miss out on the May Paper Pumpkin.  Click HERE to subscribe.

****************************************************************************************************

Product List

Stampin’ Up Butterfly Gala Quick and Easy card

Good Monday morning my fellow stampers.  How was your weekend?  We had a beautiful one here. I took my 4 legged furry baby out and went for over a 5 mile walk yesterday.  It felt so good to be out walking and not cold.  Jasmine loved every minute of the walk too.

For today’s card I made another quick and easy card for you featuring a Sale-A-Bration item.  I’m going to try to feature a different Sale-A-Bration item each day this week.  This is your LAST WEEK OF SALE-A-BRATION.  This wonderful time of year ends Sunday, so if there are items that you would like to receive for free, now’s the time to get them.  Here is my card.

 I started with a Lemon Lime Twist card front and adhered a piece of the beautiful  Sale-A-Bration Botanical Butterfly Designer Series Paper to it using Multipurpose Liquid Glue.  I stamped the sentiment from the Stampin’ Up Butterfly Gala Stamp Set in Tuxedo Black Memento Ink on the bottom portion of the cardstock.  I then ran it through my Big Shot using the Subtle Dynamic Textured Impressions Embossing Folder to give it a little texture.

I wrapped a piece of Grapefruit Grove Nature’s Twine around the bottom and tied a bow.  I adhered a large and small grapefruit grove butterfly and 2 small daffodil delight butterflies, that I had punched out from another sheet of the Botanical Butterfly DSP using my Butterfly Duet Punch, to the card front using Stampin’ Dimensionals.  I adhered the card front to a Lemon Lime Twist card base using Stampin’ Dimensionals.

I added a few Daffodil Delight and 1 Grapefruit Grove Gingham Gala Adhesive-Backed Sequins to the card front.

On the inside I adhered another piece of the Botanical Butterfly DSP to the inside of the Lemon Lime Twist card base using Multipurpose Liquid Glue.  I stamped the sentiment from the Butterfly Gala stamp set toward the top of a panel of Whisper White cardstock using Tuxedo Black Memento Ink.  I adhered the Whisper White panel to the Botanical Butterfly DSP on the inside of the card base using Snail.  I adhered a daffodil delight and lemon lime twist butterfly using Multipurpose Liquid Glue.

To finish my card I decorated a Medium Whisper White Envelope.  I adhered a Lemon Lime Twist butterfly to the envelope front and a panel of the Botanical Butterfly DSP to the envelope flap.  This was a very quick and easy card that the DSP did most of the work for you.

Thank you for stopping by my blog today.   I hope you liked my card and will give it a try. Happy Stamping!!

****************************************************************************************************

If you need any stamping supplies, I’d be very happy to be your Demonstrator.  Just click here to go directly to my online store or drop me an email if you have any questions.

MY CURRENT HOST CODE IS: EDKNVWRP

Happy Stamping, Karen!

****************************************************************************************************

SALE-A-BRATION COORDINATION ITEMS. THIS IS THE LAST WEEK THEY ARE AVAILABLE.  THEY WILL BE GONE SUNDAY

LIMITED-TIME PRODUCTS THAT COORDINATE PERFECTLY WITH SELECT SALE-A-BRATION PRODUCTS.  VISIT MY ONLINE STORE HERE FOR MORE DETAILS.

****************************************************************************************************

Third release of SALE-A-BRATION  items available.  Click HERE to see items.

Delightfully Detailed Laser-Cut Specialty Paper, Mini Pizza Boxes, Pearlized Doilies, Petal Promenade Designer Series Paper, Rich Razzleberry 1/4″ (6.4 Mm) Velvet Ribbon, Scattered Sequins Dynamic Textured Impressions Embossing & Share What You Love Embellishment Kit.

****************************************************************************************************

Here at Paper Pumpkin, we love providing easy, fast, and fun creative experiences for our subscribers. We do this in a cost-saving and time-efficient way: by delivering a cute package filled with fun paper-crafting goodies . . . right to your door.
In addition to providing everything you need to make a pre-designed, all-inclusive project, we also have another goal in mind: to help you unlock and explore your creativity by introducing you to exciting and innovative products from Stampin’ Up!
In April’s Paper Pumpkin kit, we’re pleased to announce that we’ll be treating you to something extra-special: Stampin’ Up!’s brand new Distinktive® stamp images.

About Distinktive Stamps
Distinktive stamps give you photo-realistic images with just one stamp. They have a special texture that gives added depth and dimension in a single step.
These stamps are available only from Stampin’ Up! and are made using a patent-pending process.
Distinktive stamps are available in red rubber and photopolymer; Paper Pumpkin’s April kit includes photopolymer stamps.
Shop Distinktive stamps in the online store by searching “Distinktive,” or look for the Distinktive icon in Stampin’ Up! catalogs.

Click HERE to go to my store to subscribe to April’s Paper Pumpkin before April 10th.

****************************************************************************************************

April I will be starting my Online Host Club and I have a couple of spots open.  If you have a long wish list and you want to purchase Stampin’ Up supplies a little at a time, this might just be the perfect solution for you.  For more information click HERE.  If you are interested in joining in, please email me at creativestampingdesigns@gmail.com.

****************************************************************************************************

Card stock cuts for this project:

  • Lemon Lime Twist Cardstock 8 1/2″ X 5 1/2″ (card base scored and folded at        4 1/4″), 4 1/4″ X 5 1/2″ (card front)
  • Whisper White Cardstock 3 1/4″ X 4 1/2″ (inner liner)
  • Botanical Butterfly Designer Series Paper 3 3/8″ X 5 1/2″ (card front), piece for envelope flap

****************************************************************************************************

Product List

Stampin’ Up Wishing You Well

Good Wednesday morning my fellow stampers.  We’re half way through the week, YAY!  ONLY 2 WEEKS TILL SPRING!!  I don’t know about you, but I am definitely getting spring fever.  I can’t wait till it warms up.  I’m done with winter now.

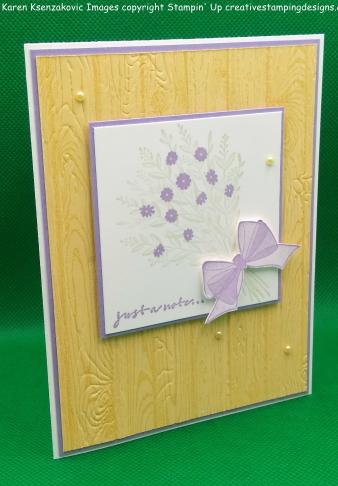
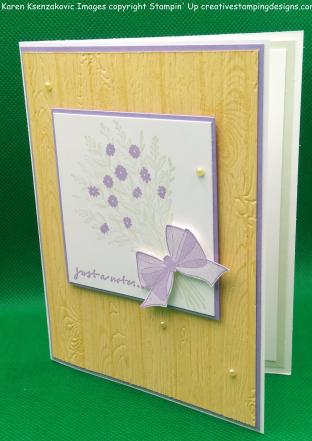
For today’s card I used the beautiful Stampin’ Up Wishing You Well Stamp Set from the Annual Catalog.  I  love this set and it just screams SPRING to me.  Here’s my card.

Today I also played along with 2 challenges.  First is CAS(E) This Sketch Challenge #311.  Be sure to stop by to see what everyone has made and to play along.  Here is their sketch.

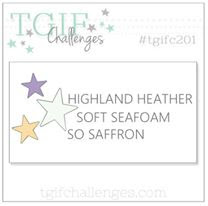
Next I played along with TGIF Sweet Color Challenge #201.  Be sure to stop by their blog to play along and see everyone’s projects.  Here are their beautiful spring colors.

I started with a So Saffron card front and stamped it with the Stampin’ Up Hardwood Stamp in So Saffron Ink.  I then ran it through my Big Shot using the Pinewood Planks Dynamic Textured Impressions Embossing Folder.  I adhered it to a Highland Heather mat using Multipurpose Liquid Glue.

On a small panel of Whisper White cardstock I stamped the bouquet image from the Wishing You Well stamp set in Soft Sea Foam Ink on an angle.  I then stamped the flowers from the same stamp set in Highland Heather Ink on top of the Soft Sea Foam.  I stamped the bow image from the same stamp set on a scrap piece of Whisper White cardstock in Highland Heather Ink and fussy cut it.  I stamped the sentiment from the same stamp set in Highland Heather Ink on the bottom left of the artwork.

I adhered the artwork to a Highland Heather mat using Snail and then adhered it to my card front using Stampin’ Dimensionals.  I adhered the bow to the artwork using Mini Stampin’ Dimensionals.  I adhered the card front to a Thick Whisper White card base using Multipurpose Liquid Glue. I added a few So Saffron Share What You Love Artisan Pearls to the card front.

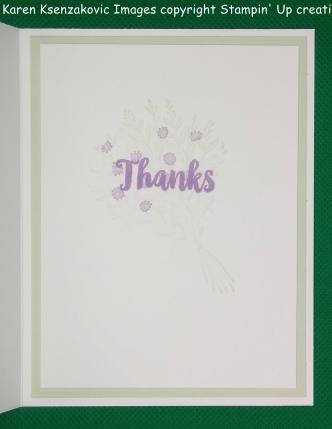
On the inside I stamped the bouquet image from the Wishing You Well stamp set in Soft Sea Foam Ink on a Whisper White panel stamping it off once.  I stamped the flowers in Highland Heather Ink over the Soft Sea Foam stamping them off once.  I stamped the sentiment from the Stampin’ Up A Big Thank You Stamp Set in Highland Heather Ink over the lightly stamped image.  I adhered the Whisper White panel to a Soft Sea Foam mat using Snail then adhered it to the inside of the Thick Whisper White card base using Multipurpose Liquid Glue.

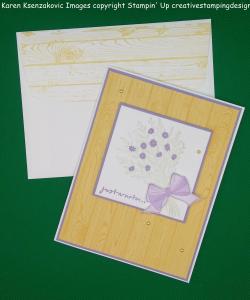
To finish my card I decorated a Medium Whisper White Envelope.  I stamped the bouquet from the Wishing You Well stamp set on the front of the envelope the same as I did for the card front.  I stamped the Hardwood stamp on the envelope flap in So Saffron Ink.

Thank you for visiting my blog today.  I hope you liked my card and will give it a try. Happy Stamping!!

****************************************************************************************************

If you need any stamping supplies, I’d be very happy to be your Demonstrator.  Just click here to go directly to my online store or drop me an email if you have any questions.

MY CURRENT HOST CODE IS: EDKNVWRP

Happy Stamping, Karen!

****************************************************************************************************

SALE-A-BRATION COORDINATION ITEMS ARE AVAILABLE NOW THROUGH MARCH 31, 2019 OR WHILE SUPPLIES LAST.

LIMITED-TIME PRODUCTS THAT COORDINATE PERFECTLY WITH SELECT SALE-A-BRATION PRODUCTS.  VISIT MY ONLINE STORE HERE FOR MORE DETAILS.

****************************************************************************************************

Third release of SALE-A-BRATION  items available.  Click HERE to see items.

Delightfully Detailed Laser-Cut Specialty Paper, Mini Pizza Boxes, Pearlized Doilies, Petal Promenade Designer Series Paper, Rich Razzleberry 1/4″ (6.4 Mm) Velvet Ribbon, Scattered Sequins Dynamic Textured Impressions Embossing & Share What You Love Embellishment Kit.

****************************************************************************************************

ONLY 4 DAYS LEFT TO SUBSCRIBE!! DON’T MISS OUT ON THE FREE STAMP SET

Paper Pumpkin is turning six and we want to celebrate with you! After all, we could not have shared all these years of creativity if it weren’t for our subscribers.
To celebrate this fun occasion and to thank everyone who supports Paper Pumpkin month after month, we’re offering a specially-designed March kit and a FREE STAMP SET. Oh, yes. You read that right. In March, you will receive TWO stamp sets with your Paper Pumpkin kit.

There has never been a better time to give Paper Pumpkin a try. And because it’s our sixth birthday celebration, we’ll be pulling out all the stops. You’ll get an adorable kit, a special box, and most importantly, you’ll get TWO stamp sets instead of one.
$20 for a Paper Pumpkin kit is always a steal, but in March the deal is even better! There has never been a better time for you to join Paper Pumpkin.

Because it’s our birthday, we decided to create a kit that is perfect for making birthday cards!
The March kit features eight full-sized, mailable cards
Coordinating colors are Basic Black, Bermuda Bay, Daffodil Delight, Flirty Flamingo, and Poppy Parade
This kit has an element that is sure to “pop”!
The FREE stamp set is even bigger and better than your typical Paper Pumpkin stamp set and can be used on a variety of crafting projects.

A subscriber must have an active subscription by March 10, 2019 in order to receive the March kit.
The FREE stamp set coordinates with the March kit but it is not needed to complete the projects.
Supplies may be limited toward the end of the subscription period, so DON’T WAIT.

Click HERE to go to my store and subscribe.

****************************************************************************************************

April I will be starting my Online Host Club and I have a couple spots open.  If you have a long wish list and you want to purchase Stampin’ Up supplies a little at a time, this might just be the perfect solution for you.  For more information click HERE.  If you are interested in joining in, please email me at creativestampingdesigns@gmail.com.

****************************************************************************************************

Card stock cuts for this project:

  • Highland Heather Cardstock 4 1/8″ X 5 3/8″ (card front mat), 2 7/8″ X 2 7/8″ (artwork mat)
  • Soft Sea Foam Cardstock 4″ X 5 1/4″ (inner liner mat)
  • So Saffron Cardstock 4″ X 5 1/4″ (card front)
  • Whisper White Cardstock 3 3/4″ X 5″ (inner liner), 2 3/4″ X 2 3/4″ (artwork)
  • Thick Whisper White Cardstock 8 1/2″ X 5 1/2″(card base scored and folded at 4 1/4″)

****************************************************************************************************

Product List

Stampin’ Up Abstract Impressions Thank You

Good Wednesday morning all my fellow stampers.  We’re half way through the week already.  Hope you are all having a great one.

For today’s card I used the Stampin’ Up Abstract Impressions Bundle.  Did you know if you purchase the Bundle (Stamp Set and Thinlits Dies) you get 10% off?  Who doesn’t like to save some money?  I know I sure do.  Purchasing this bundle you are just about to your $50 to earn a free Sale-A-Bration item and who doesn’t like FREE?

Here’s my card for today.  Take a look.

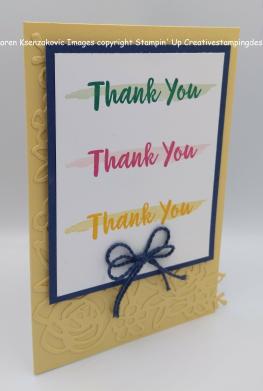
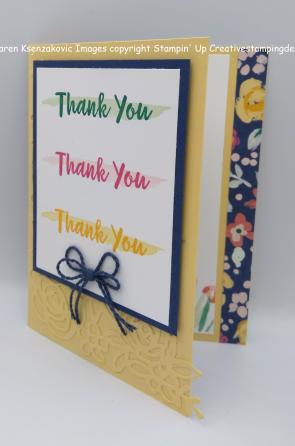
For this card, the measurements are a little different then my normal cards.  The measurements are below.  Using my Big Shot, I started by cutting out the beautiful corner floral piece from the Springtime Impressions Thinlits Dies in So Saffron cardstock.  I adhered the die cut to a So Saffron card base using Multipurpose Liquid Glue.

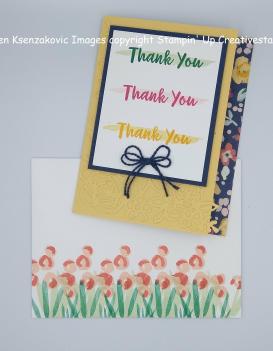
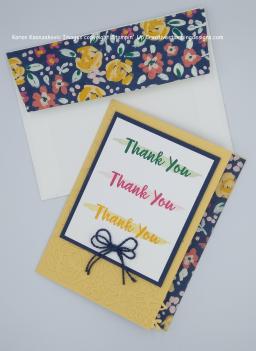
On a Whisper White panel, using my Stamparatus, I stamped the Thank You sentiment from the Stampin’ Up Abstract Impressions stamp set in Shaded Spruce, Melon Mambo and Mango Melody Inks.  I then stamped the watermark behind each sentiment in Soft Sea Foam, Powder Pink and So Saffron Inks.  I was able to get everything lined up perfectly by using the Stamparatus and hinging down to repeat each sentiment, (hope that made sense).  I adhered the Whisper White panel to a Night Of Navy mat using Snail.

I adhered a double bow using Night Of Navy Medium Bakers Twine below the sentiments.  I adhered the artwork to the So Saffron card base using Stampin’ Dimensionals.

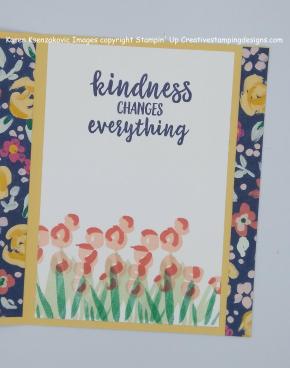
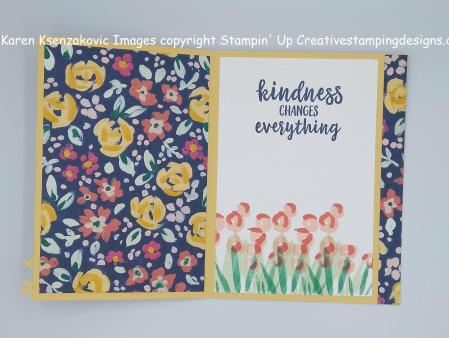
On the inside I adhered a piece of Garden Impressions Designer Series Paper to the right side of the card base.  I stamped the flowers from the Abstract Impressions stamp set in Shaded Spruce Ink, stamped off once, Soft Sea Foam Ink, Petal Pink Ink and Calypso Coral Ink along the bottom of a Whisper White panel.  I stamped the sentiment from the same stamp set in Night of Navy Ink in the center.  I adhered the Whisper White panel to the So Saffron card base using Multipurpose Liquid Glue.

I adhered a panel of the Garden Impressions Designer Series Paper to the inside left of the card base using Snail.

To finish my card I decorated a Medium Whisper White Envelope.  I stamped the flowers from the Abstract Impressions stamp set along the bottom front of the envelope the same way I did for the inner liner.  I adhered a piece of Garden Impressions DSP to the envelope flap.

Thank you for visiting my blog today.  I hope you liked my card and will give it a try. Happy stamping.

****************************************************************************************************

If you need any stamping supplies, I’d be very happy to be your Demonstrator.  Just click here to go directly to my online store or drop me an email if you have any questions.

MY CURRENT HOST CODE IS: Q2B3H6HZ 

Happy Stamping, Karen!

****************************************************************************************************

Card stock cuts for this project:

  • So Saffron Cardstock 5 1/2″ X 8″  (card base scored and folded at 4 1/4″), piece for the front die cut
  • Night Of Navy Cardstock 3 1/4″ X 4″ (artwork mat)
  • Whisper White Cardstock 3″ X 3 3/4″ (artwork), 3 1/2″ X 5 1/4″ (inner liner)
  • Garden Impressions Designer Series Paper 3 1/2″ X 5 1/4″ (left side inner liner), 1/2″ X 5 1/2″ (strip for right side of card), piece for envelope flap

****************************************************************************************************

Product List

Stampin’ Up Bee Thankful for Global Design Project #170 and SIP Challenge #180

Good Friday morning my fellow stampers.  Hope you have all had a wonderful short week and are ready for the weekend..  Does anyone have any fun plans for the weekend?

For today’s card I played along with the Global Designs Project #170 Challenge.  Be sure to stop by Global Design to see all the amazing projects made and to play along.

Here is their sketch.

I also played along with the Stamp Ink Paper Challenge #180.  Be sure to stop by the Stamp Ink Paper blog to see all their projects.  Here is their Challenge.

Here is what I came up with for this Sketch and Thank you Challenge.  Take a look.

I started with a Calypso Coral card front and using my Big Shot I embossed it with the Swirls & Curls Textured Impressions Embossing Folder.  I adhered the card front to a Calypso Coral card base using Multipurpose Liquid Glue.

On a piece of Whisper White cardstock I stamped the image from the Stampin’ Up Bee Thankful stamp set in Tuxedo Black Memento Ink.  I colored the image in using my Calypso Coral, Daffodil Delight and Granny Apple Green Stampin’ Blends Markers.  To get the shading on the thanks, I first colored with my Light Calypso Coral Stampin’ Blends Marker.  I then colored the bottom with the Dark Calypso Coral Stampin’ Blends Marker and then blended it with my Light Calypso Coral Stampin’ Blends Marker.  I adhered the artwork to a Granny Apple Green mat using Snail.  I adhered a piece of the Daffodil Delight 1/4″ Organdy Ribbon across the bottom of the artwork.  I adhered the artwork to the card front using Stampin’ Dimensionals.

On a scrap piece of Whisper White cardstock I stamped the so much sentiment from the Stampin’ Up A Big Thank You stamp set in Calypso Coral Ink.  I cut the ends on an angle using my Paper Snips and adhered it below the artwork using Mini Stampin’ Dimensionals.  I added a Granny Apple Green Glitter Enamel Dot to the small strip.

On the inside on a Whisper White panel I stamped the sentiment from A Big Thank You stamp set in Calypso Coral Ink in the center.  I stamped the scroll from the same stamp set in Granny Apple Green Ink below the sentiment.  I adhered the Whisper White panel to the Calypso Coral card base using Multipurpose Liquid Glue.

To finish my card, I decorated a Medium Whisper White Envelope.  I stamped the Bee from the Bee Thankful stamp set on the bottom front of the envelope and colored it in the same as I did on the card front.  I adhered a piece of Share What You Love Specialty Designer Series Paper to the envelope flap.

Thank you so much for stopping by my blog today.  I hope you liked my card and will give it a try.  Happy Stamping.

****************************************************************************************************

If you need any stamping supplies, I’d be very happy to be your Demonstrator.  Just click here to go directly to my online store or drop me an email if you have any questions.

MY CURRENT HOST CODE IS: Q2B3H6HZ 

Happy Stamping, Karen!

****************************************************************************************************

Paper Pumpkin and Animal Expedition Go Wild for Valentine’s Day

January’s Paper Pumpkin Kit is a Valentine Kit called Be Mine. It combines everything you love about Paper Pumpkin-style treat packaging with adorable critter coordination in the popular Animal Expedition Kit!

About the Kit

January’s Paper Pumpkin kit is a Valentine kit coordinates with the Animal Expedition Suite. Here are a few more details:

  • Makes 24 adorable Valentine’s treat packages
  • Coordinating colors: Crumb Cake, Flirty Flamingo, Lemon Lime Twist, Melon Mambo, Petal Pink, and Pool Party

Subscribers must have an active subscription by January 10, 2019 to receive the Be Mine, Valentine kit.

Supplies are limited, so don’t wait—subscribe today!

In the event of supplies running out, Stampin’ Up! will end the subscription period early and stop taking new subscribers for January.

If you’re interested in subscribing to Paper Pumpkin yourself, you can either sign up for a subscription where you are billed monthly for your kit or you can purchase a prepaid subscription in my online store.  Just click here to go directly to my online store.  To see more information and sign up for the monthly subscription click here.

****************************************************************************************************

Card stock cuts for this project:

  • Calypso Coral Cardstock 8 1/2″ X 5 1/2″ (card base scored and folded at 4 1/4″),  4 1/8″ X 5 3/8″ (card front)
  • Granny Apple Green Cardstock 2 9/16″ X 4 15/16″ (artwork mat)
  • Whisper White Cardstock 2 1/2″ X 4 7/8″ (artwork), 4″ X 5 1’4″ (inner liner),       1/4″ strip for sentiment
  • Share What You Love Specialty Designer Series Paper for envelope flap

****************************************************************************************************

Product List

Stampin’ Up Accented Blooms Thank You

Good Monday morning all my fellow stampers.  How was your weekend?  Did you do anything fun?  I finished my baking. 26 different kinds of cookies and a couple candies.  Got my trays ready to go, now I just have to deliver them.  I even attached homemade gift tags to most of them.  Now I just need to finish and mail Christmas cards.

For today’s card I used the Stampin’ Up Accented Blooms stamp set and the Tailored Tag Punch.  Take a look.

I started with a Mint Macaron card front and ran it through my Big Shot using the Layering Leaves Dynamic Textured Impressions Embossing Folder.  I adhered a piece of Subtles 6 X 6 Designer Series Paper in Petal Pink down the center.  On a piece of Whisper White cardstock I stamped the image from the Accented Blooms stamp set in Early Espresso Ink.  I colored it in using my Calypso Coral, Mint Macaron and Petal Pink Stampin’ Blends Markers.

I stamped the Thank You image from the Accented Blooms in Mint Macaron Ink on a piece of Whisper White cardstock and punched it out using the Tailored Tag punch.  I adhered using Stampin’ Dimensionals to the floral stamped image.  I adhered the artwork to a Calypso Coral mat using Snail then adhered it to the card front using Stampin’ Dimensionals.

I adhered the card front to a Mint Macaron card base using Multipurpose Liquid Glue.  I added 3 Mint Macaron Faceted Dots to the artwork.

On the inside I stamped the sentiment from A Big Thank You stamp set in Calypso Coral Ink in the center of a Whisper White panel.  I stamped the scroll below the sentiment from the same stamp set in Petal Pink Ink.  I adhered the Whisper White panel to a Calypso Coral mat using Snail then adhered it to the Mint Macaron card base using Multipurpose Liquid Glue.

To finish my card I decorated a Medium Whisper White Envelope.  I stamped the small flowered from the Accented Blooms stamp set in Early Espresso Ink on the bottom front of the envelope.  I adhered a piece of Petal Pink Subtles 6 X 6 DSP to the envelope flap.

Thank you for visiting my blog today.  I hope you liked my card and will give it a try.  Happy Stamping!

****************************************************************************************************

If you need any stamping supplies, I’d be very happy to be your Demonstrator.  Just click here to go directly to my online store or drop me an email if you have any questions.

MY CURRENT HOST CODE IS: MBWFWZCA

Happy Stamping, Karen!

****************************************************************************************************

I’m starting an online Host Club for January, February and March.  I’m doing it during Sale-A-Bration.  Everyone loves to get free items, why not be the host for a month and get extra free items.  Are you interested in building your Stampin’ Up supplies a little at a time and want to be able to receive host benefits?  An Online Host Club might be the perfect solution for you!  With the new Occasions and Sale-A-Bration Catalogs starting on January 3, this is a great time to join!

You sign up for a 3 month term and commit to:

  • A $50.00 minimum order each month (which will get you a free Sale-A-Bration item)
  • Place your order by the 20th of each month
  • Using the Host code for each month provided to you in an email sent out at the beginning of each month

Once 3 members have joined a random draw will determine your host month and you are guaranteed:

  • a $150.00 Workshop order during your host month
  • $15.00 minimum of Host Dollars to spend on the exclusive Host Stamp Sets, or any other current Stampin’ Up! product during your host month
  • At the end of the 3 months you will get a gift from me.

If you are interested in joining, please contact me ASAP.  This is a great way to earn some free products and build your Stampin’ Up supplies.

****************************************************************************************************

Card stock cuts for this project:

  • Calypso Coral Cardstock 3 3/4″ X 3 1/2″(artwork mat), 4 1/8″ X 5 3/8″ (inner liner mat)
  • Mint Macaron Cardstock 8 1/2″ X 5 1/2″ (card base scored and folded at 4 1/4″),  4″ X 5 1/4″ (card front)
  • Whisper White Cardstock 3 1/2″ X 3 1/4″ (artwork), 4″ X 5 1/4″ (inner liner)
  • 6 X 6 Designer Series Paper Subtles Collection 2 1/2″ X 5 1/4″

****************************************************************************************************

Product List

Stampin’ Up Colorful Seasons

Good Friday morning everyone.  Hope you’ve had a successful week and have some fun plans for the weekend.  Sunday Autumn officially starts.  It’s always such a beautiful time of the year with all the leaves changing colors.

For today’s card I used the Colorful Seasons Photopolymer Stamp Set.  This set is so versatile.  It’s got images for Winter, Spring, Summer and Fall.  It also has a Seasonal Layers Thinlits set that can be used with it.  I chose not to use them with todays card, take a look.

I started with a panel of Whisper White cardstock.  I placed my Oval Stitched Framelit Die where I thought I’d want my sentiment.  I then stamped the sentiment from the Colorful Seasons stamp set in Mossy Meadow Ink.  I moved the framelit out-of-the-way and stamped the detailed Leaves from the set in Mossy Meadow Ink around the sentiment.  I colored the leaves in with my Cajun Craze, Cherry Cobbler, Daffodil Delight, Mango Melody, Pumpkin Pie and Real Red Stampin’ Blends Markers. Once everything was colored in I cut out the oval using the largest Oval from the Stitched Shapes Framelits.

I adhered a strip from the Wood Textures Designer Series Paper, with Snail, along the left edge of the card front.  Using Multipurpose Liquid Glue, I adhered the card front to a Thick Whisper White card base.

I then put some Stampin’ Dimensionals on the back of the oval.  I cut a long enough piece of Rose Metallic Thread  and placed it how I thought it would look nice, peeking out the sides of the oval.  It’s very hard to see in the photo since the thread is so fine.  Believe me, it’s there and just gives it a little sparkle. I adhered the oval back  to where I cut it out of the card front.  I added 4 Rhinestone Basic Jewels to 4 of the leaves to give it a little bling.

On the inside panel I stamped the leaves in the 4 corners with Mossy Meadow Ink and colored them in with Cherry Cobbler, Mango Melody, Pumpkin Pie and Real Red Stampin’ Blends Markers.  I stamped the sentiment from Country Home Photopolymer stamp set in Mossy Meadow Ink.  I adhered the panel to the card base using Snail.

To finish off my card, I adhered a thin strip from the Wood Textures DSP to the bottom front of a Medium Whisper White Envelope using Snail.  I then stamped the leaves again on the front and back flap of the envelope in Mossy Meadow Ink and colored them in the same as on the card front.  So that the markers didn’t bleed through the envelope, I inserted a piece of scrap paper until I was done coloring.  Hope you’ll try this card, the coloring was a lot of fun.  Thanks for checking out my blog and hope you will stop back again.

****************************************************************************************************

If you need any stamping supplies, I’d be very happy to be your Demonstrator.  Just click here to go directly to my online store or drop me an email if you have any questions.  Happy Stamping, Karen!

****************************************************************************************************

Card stock cuts for this project:

  • Thick Whisper White Cardstock 5 1/2″ X 8 1/2″ (card base)
  • Whisper White Cardstock 4 1/8″ X 5 3/8″ (card front), 3 3/4″ X 5″ (inside liner)
  • Wood Textures Designer Series Paper 1/2″ X 5 3/8″ (card front side strip),        1/2″ X 5 3/4″ (envelope strip)

****************************************************************************************************

Product List