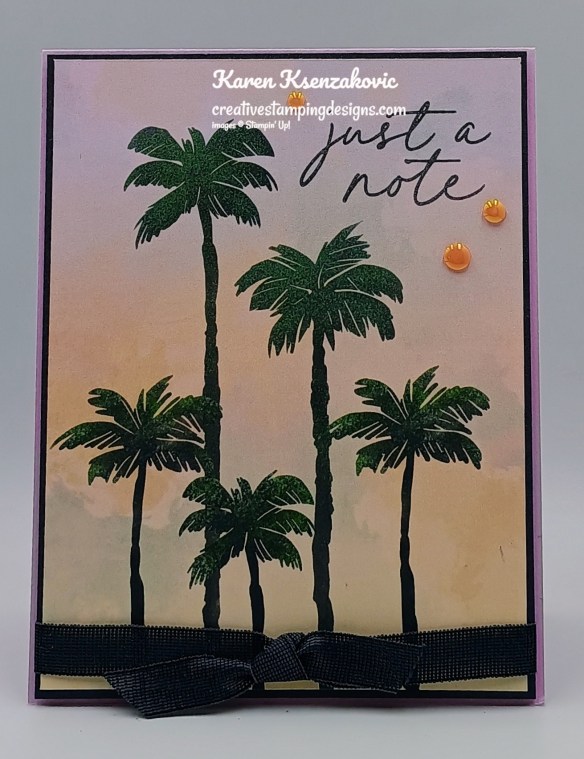
Stampin’ Up! A Round of Hellos Daisies

Good Wednesday morning stamping friends. I hope you are all having a wonderful week. Since I didn’t have to work on Monday, my days are all mixed up.

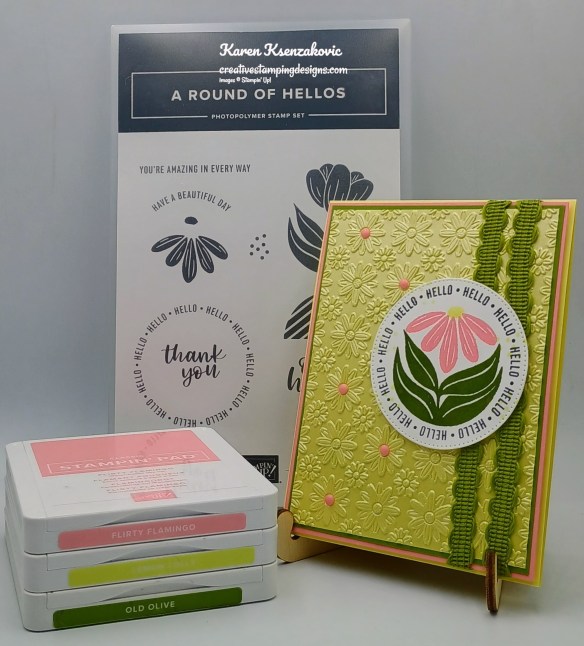
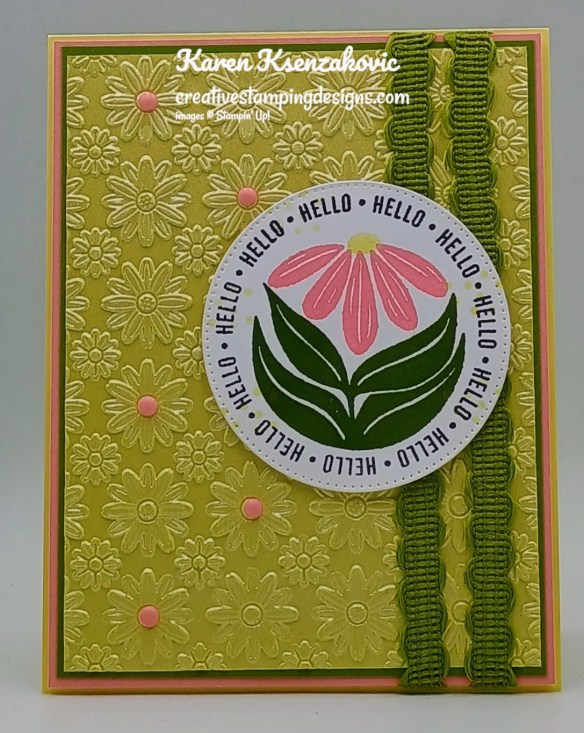
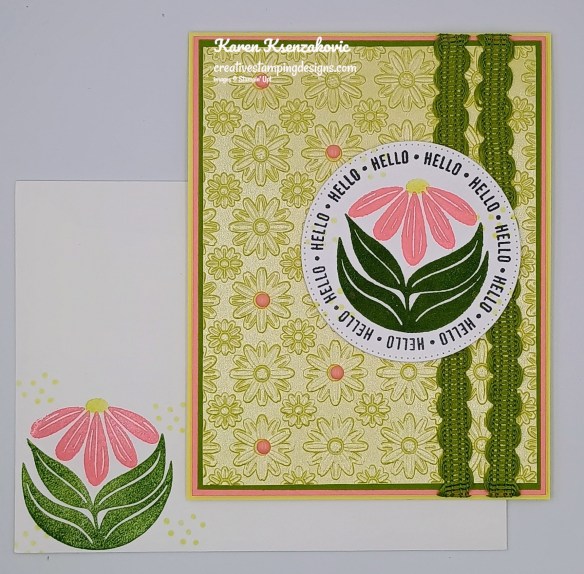
The star of today’s card is the new embossing folder. This was a must have for me. It makes beautiful cards all by itself. If you’d like to see a quick video on how I made this card, Click Here to go to my Instagram Reels. Here is my card for today.
Stampin' Up! A Round of Hellos 1 creativestampingdesigns.com

I used the Stampin’ Up! A Round of Hellos Stamp Set along with the new Lazy Daisy 3D Embossing Folder, Pastels Shimmer Specialty Paper and Stylish Shapes Dies for my card today.
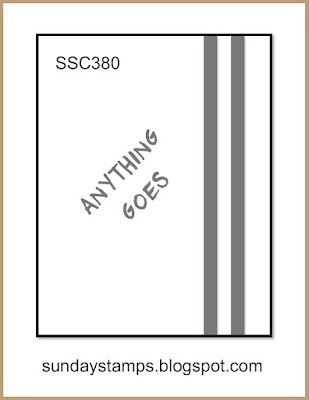
My design is from Sunday Stamps Wide Open Challenge #380.
Stampin' Up! A Round of Hellos 2 creativestampingdesigns.com

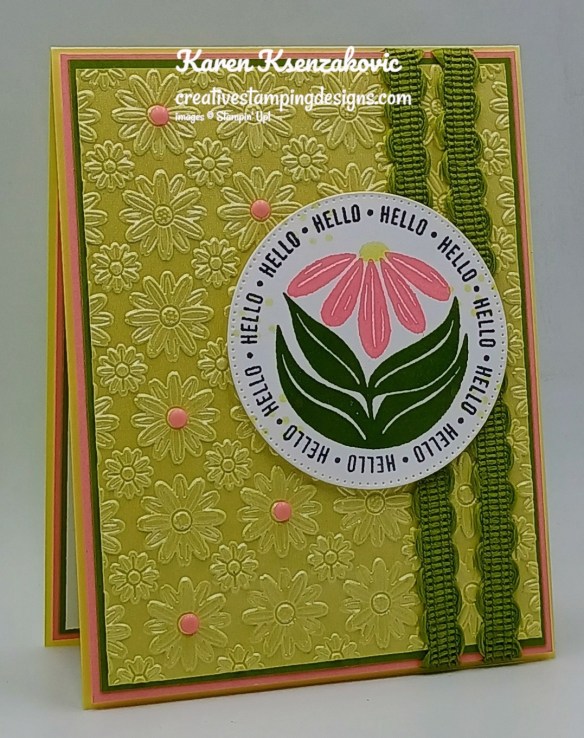
Emboss a panel of Lemon Lolly Pastel Shimmer Paper using the new Lazy Daisy EF. Adhere the embossed panel to an Old Olive mat.
Stampin' Up! A Round of Hellos 3 creativestampingdesigns.com

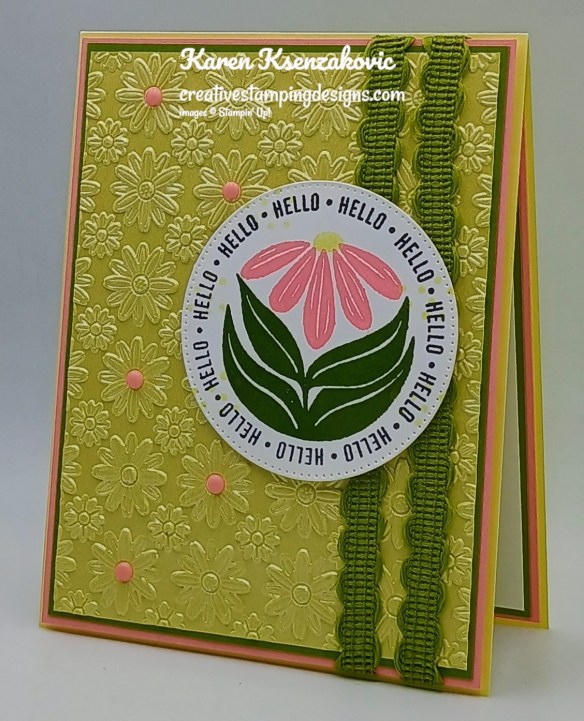
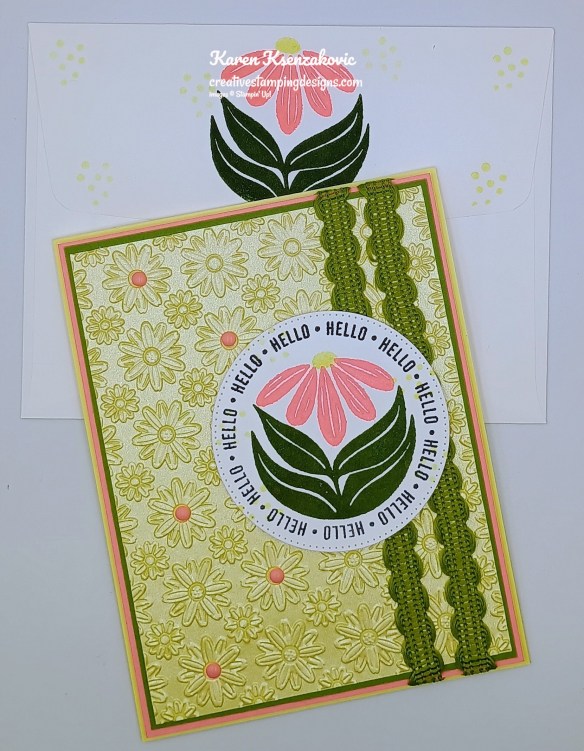
Adhere the layered panel to a Flirty Flamingo mat. Wrap 2 pieces of Old Olive 3/8″ Specialty Rickrack around the layered panel and adhere in the back. Adhere the layered panel to a Lemon Lolly card base with Stampin’ Dimensionals.
Stampin' Up! A Round of Hellos 4 creativestampingdesigns.com

On a panel of Basic White, stamp the round of Hellos sentiment from A Round of Hellos stamp set in Tuxedo Black Ink. Stamp the leaf image from A Round of Hellos stamp set in Old Olive Ink in the center of the sentiment. Stamp the flower image from A Round of Hellos stamp set in Flirty Flamingo Ink. Stamp the flower center in and the splatter image randomly around the panel in Lemon Lolly Ink. Cut the image out using the Stylish Shapes Dies. Adhere the artwork to the card front with Stampin’ Dimensionals. Add a few Rainbow Adhesive-Backed Dots to the card front.
Stampin' Up! A Round of Hellos 5 creativestampingdesigns.com

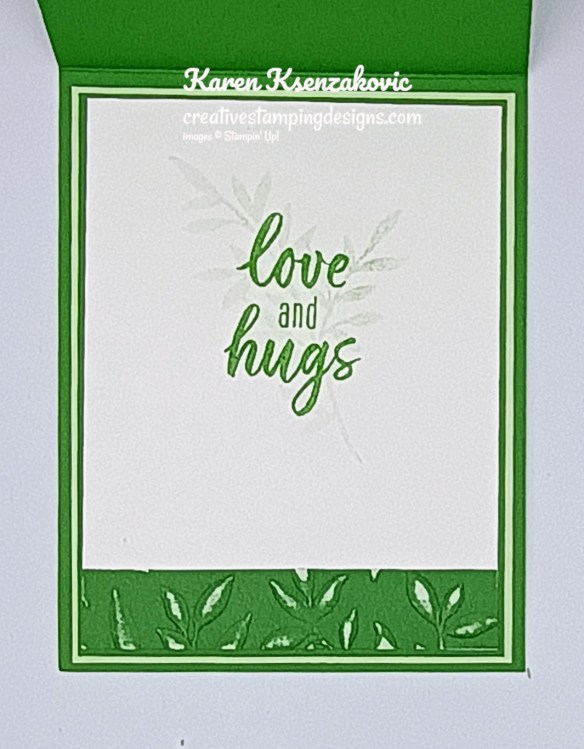
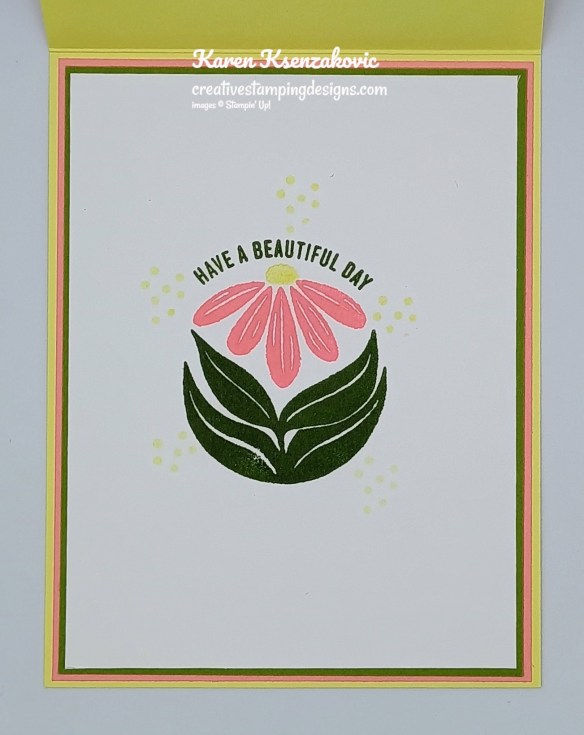
Stamp the sentiment from A Round of Hellos stamp set in Old Olive Ink on a panel of Basic Whtie. Stamp the flower image from A Round of Hellos stamp set in Flirty Flamingo Ink below the sentiment. Stamp the leaf image in Old Olive Ink and the flower center in Lemon Lolly Ink. Randomly stamp the splatter image around the flower and sentiment in Lemon Lolly Ink. Adhere the Basic White panel to Old Olive and Flirty Flamingo mats then to the inside of the Lemon Lolly card base.
Stampin' Up! A Round of Hellos 6 creativestampingdesigns.com

to finish your card, decorate a Basic White Medium Envelope. Stamp the leaf image from A Round of Hellos stamp set on the envelope front and flap. Stamp the flower image in Flirty Flamingo and the flower center in Lemon Lolly Inks.
Stampin' Up! A Round of Hellos 7 creativestampingdesigns.com

Thank you for stopping by my blog today. I hope you like the card and will give it a try. Happy Stamping!!

*********************************************************************************************************

If you need any stamping supplies, I’d love to be your Demonstrator. Just click HERE to go directly to my online store or drop me an email if you have any questions. 

*********************************************************************************************************

Double Creative Stamping Designs Rewards
The new March Online Exclusives are now available to order.  I’m offering Double Creative Stamping Designs Rewards. THAT’S 2X THE REWARDS FOR YOU FROM ME!!!  March 3 – Monday March 9 for all orders over $50 (before tax & shipping)!! How does this work? For a $50 you’ll earn 2 rewards, $100 you’ll earn 4 rewards, $150 you’ll earn 6 rewards, etc. Head over to my Online Store and get those orders in early and earn those Double Rewards!!

*********************************************************************************************************

Poetry Garden Online Class Registration Open
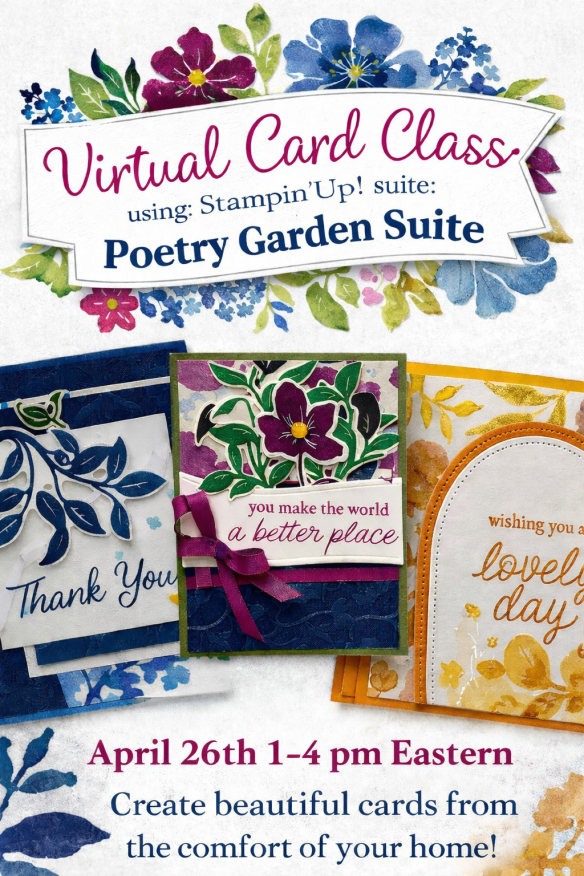
Tara Carpenter and I are teaming up to offer a fun online class using Stampin’ Up! March Online Exclusive Poetry Garden Suite.  We will be creating 6 different cards during the class including 2 Fun Fold Cards.  Sign Up now by Clicking Here to reserve your spot.

The class fee includes:

  • Stampin’ Up! Garden Epoxy Dots (full pack)
  • Stampin’ Up! Berry Burst 1/4″ Shiny Ribbon (full pack)
  • Pre-cut card kits to complete each card
  • Zoom class with complete instructions to complete each card
  • PDF with detailed directions

During sign up you will have the option to add additional items to your order that you can take advantage of at no additional shipping cost.  These items are optional, however if you want to recreate the cards you will need them. If you’ve attended a previous class, you were given a discount code, there is a spot to put that code on the form and the discount only applies to the products that you check off that you wish to purchase, not the class.  Since the Bundles are already discounted, the discount does not apply to them either.

The class will be held Sunday April 26th from 1 to 4 pm Eastern Time via Zoom.  This allows anyone in the United States to participate live!  Can’t join us live… no worries, we will record the session so it can be replayed at any time.

I will email written directions that will include directions, cardstock cuts as well as photos to help you create each card.

The bundles are not included in the price of the class.  You can purchase the bundle through me at an additional 10% discount of the Online Exclusive price (see below).

Class Cost $40 + $10 (Shipping) 

Additional purchased items will be included in the above shipping price.  I will invoice you through PayPal and invoices must be paid by April 5th to insure I can get the products delivered, packaged up and out to you with enough time.  

Deadline: Sunday April 5th 

Click Here to register for the class now!! Let me know if you have any questions.

*********************************************************************************************************

Stampin’ Up! Product of The Month

Spring into stamping with the Notes of Spring Stamp Set! Featuring adorable springtime animals like a deer, bunny, and duck, plus some delicate river plants, this stamp set makes it easy to create layered, watercolor-style images. Includes a few all-occasion sentiments to complete your handmade cards for birthdays, thank-you’s, and more.
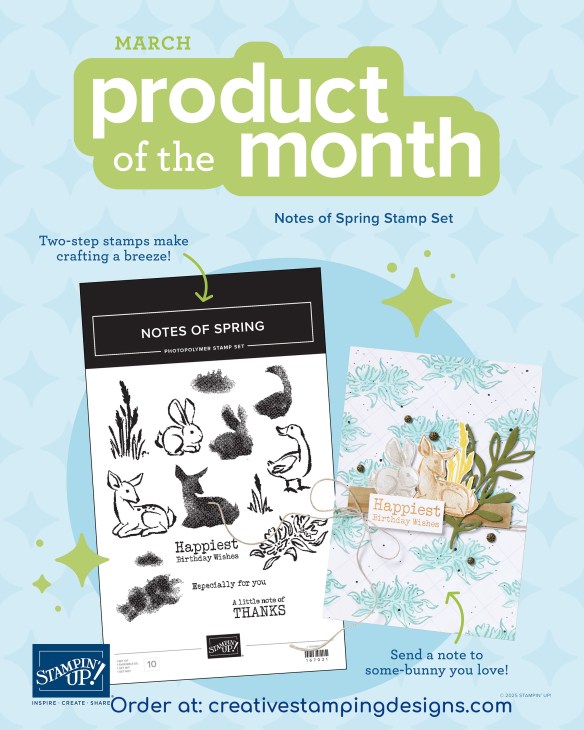
The Notes of Spring Stamp Set is the exclusive Product of the Month for March 2026! Only available until stocks run out—don’t wait to get yours! This is a Two-Step Stampin’ set; it allows you to layer two or more images to create one final image with extra texture and dimension in the colors you want. This is a Distinktive stamp set; it has a special texture that gives added depth and dimension in a single step, creating photo-realistic images.
DETAILS
– March 2026 Product of the Month
– 15 photopolymer stamps
– Suggested clear blocks (sold separately): b, c
– Two-Step
– Distinktive
PHOTOPOLYMER STAMPS
– Are clear stamps that make image placement easy.
– Have just enough give to create a perfectly stamped image every time.
– Cling to clear blocks without slipping.
– Are repositionable—temporarily mount on clear blocks to stamp, then remove to store.
– Save space—one set of blocks (sold separately) works for all your stamps.
– Are packed in a slim, durable envelope for easy storage and lasting protection.

*********************************************************************************************************

Card stock cuts for this project:

  • Basic White Cardstock 3″ x 4″(artwork), 3 7/8″ x 5 1/8″(inner liner)
  • Flirty Flamingo Cardstock (2) – 4 1/8″ x 5 3/8″ (card front & inner liner mats)
  • Lemon Lolly Cardstock 4 1/4″ x 11″(card base scored & folded at 5 1/2″)
  • Old Olive Cardstock (2) – 4″ x 5 1/4″ (card front & inner liner mats)
  • Pastel Shimmer Specialty Designer Series Paper 3 7/8″ x 5 1/8″(card front)

*********************************************************************************************************

Product List

Stampin’ Up! Paradise Garden Sunflowers

Good snowy Wednesday morning stamping friends. Yup, another 2″ of snow to shovel this morning. At this rate, I’m not going to see my lawn and gardens until May. I hope you are having a good week; we’re already halfway through it and this is the last week of February.

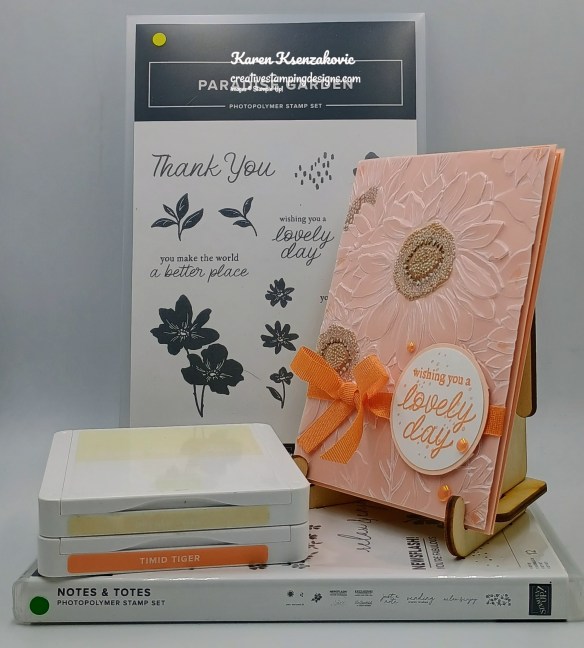
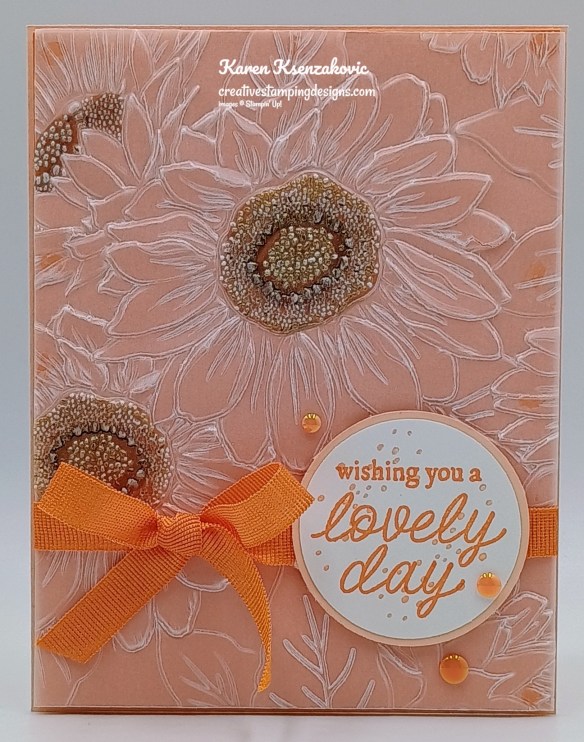
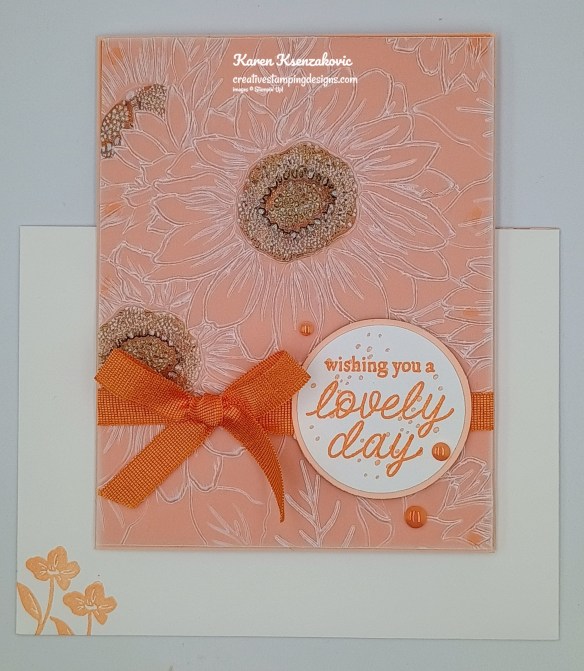
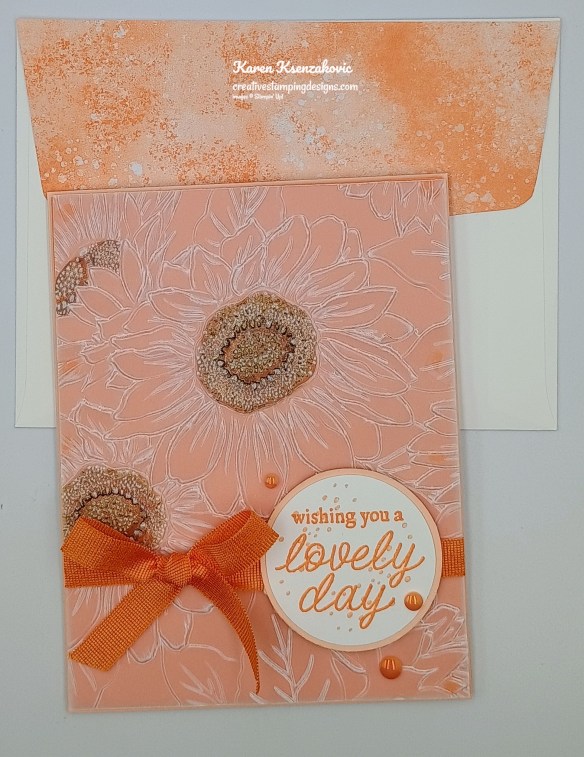
For today’s card I did some dry embossing on Vellum. As a lot of you know, I’m not a fan of orange, but I love Timid Tiger. Here’s my card for today.

Stampin' Up! Paradise Garden Sunflower 1 creativestampingdesigns.com

I used the Sunflower 3D Embossing Folder along with the Stampin’ Up! Paradise Garden Stamp Set (available March 3), Vellum Specialty Paper and Stampin’ Up! Notes & Totes Stamp Set for my card today.

Stampin' Up! Paradise Garden Sunflower 2 creativestampingdesigns.com

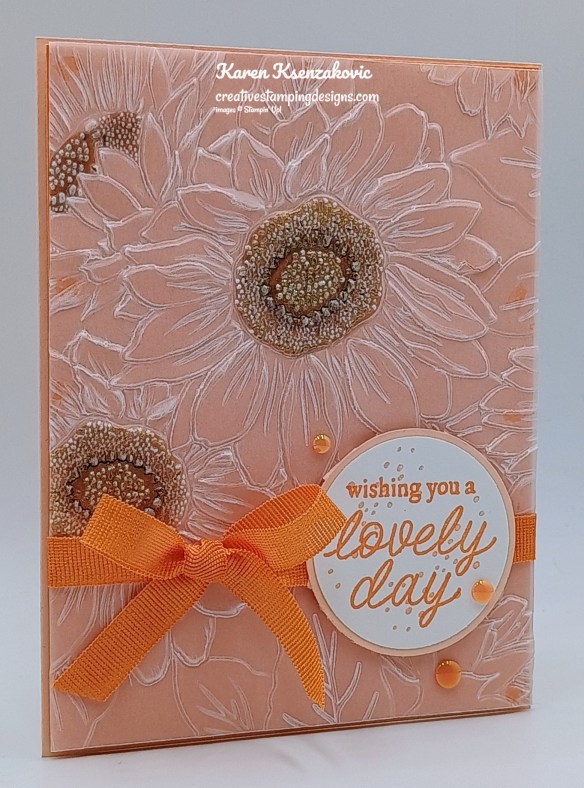
Emboss a panel of Vellum Paper using the Sunflower EF. On the back of the embossed panel, color the sunflower centers using the Pecan Pie Stampin’ Blends Markers. Adhere the embossed panel to a panel of Timid Tiger.

Stampin' Up! Paradise Garden Sunflower 3 creativestampingdesigns.com

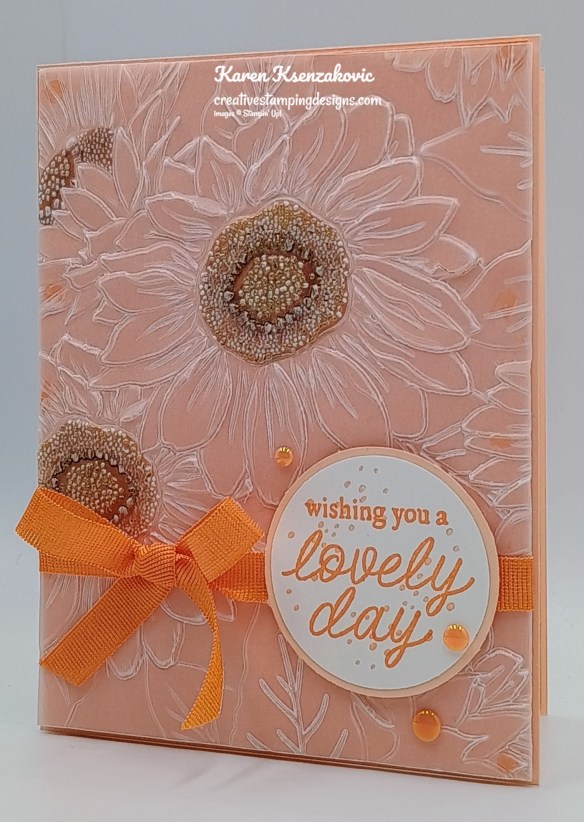
Wrap a piece of the Timid Tiger 3/8″ Faux Linen Ribbon around the panel and tie a bow. Adhere the layered panel to a Petal Pink card front with Stampin’ Dimensionals.. Go over the front of the embossed panel flower centers with Clear Wink of Stella Glitter Brush.

Stampin' Up! Paradise Garden Sunflower 4 creativestampingdesigns.com

Stamp the sentiment from Paradise Garden stamp set in Timid Tiger Ink on a panel of Basic White. Stamp the splatter image from the Notes & Totes stamp set in Petal Pink Ink over the sentiment. Punch the sentiment out using the 1 3/4″ Circle Punch. Punch a mat from a panel of Petal Pink using the 1 7/8″ Circle Punch. Adhere the sentiment to the mat. Adhere the layered sentiment to the card front over the ribbon using Stampin’ Dimensionals.

Stampin' Up! Paradise Garden Sunflower 5 creativestampingdesigns.com

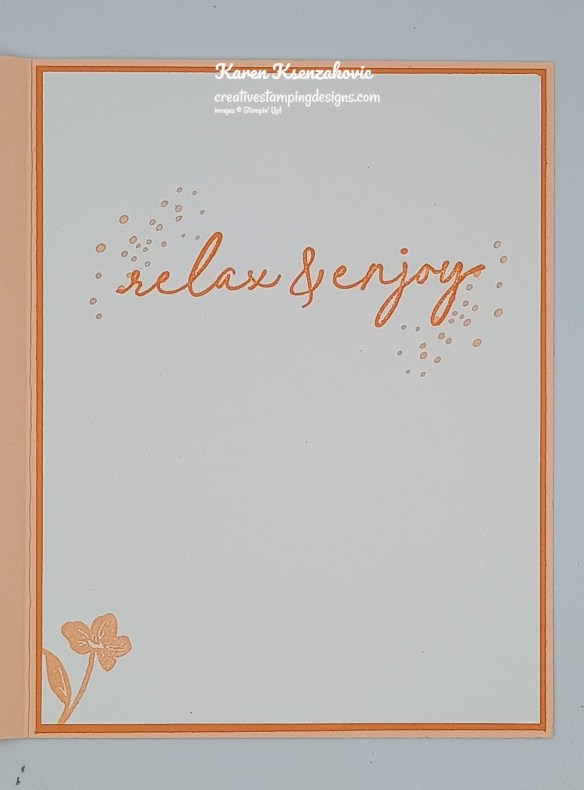
Stamp the sentiment from the Notes & Totes stamp set in Timid Tiger Ink on a panel of Basic White. Stamp the splatter image from the Notes & Totes stamp set in Petal Pink by the sentiment. Stamp the small flower image from the Paradise Garden stamp set in Petal Pink Ink on the bottom of the panel. Adhere the Basic White panel to a Timid Tiger mat then to the inside of the Petal Pink card base.

Stampin' Up! Paradise Garden Sunflower 6 creativestampingdesigns.com

Decorate a Basic White Medium Envelope to finish your card. Stamp the small flower image from the Paradise Garden stamp set in Petal Pink Ink on the envelope front 2 times. Adhere a panel of 2025-2027 In-Color DSP to the envelope flap.

Stampin' Up! Paradise Garden Sunflower 7 creativestampingdesigns.com

Thank you for stopping by my blog today. I hope you like the card and will give it a try. Happy Stamping!!

*********************************************************************************************************

If you need any stamping supplies, I’d love to be your Demonstrator. Just click HERE to go directly to my online store or drop me an email if you have any questions. 

*********************************************************************************************************

Final Days to Redeem Those Bonus Days Coupons February 3 – 28

  • Redemption Period: February 3–28, 2026
    • There is no limit to the number of coupon codes you can redeem on an order during the redemption period. If you’re redeeming multiple codes, you must put a space between each code.
    • You may only redeem coupon codes one time. You cannot redeem them after February 28.
    • You can redeem Bonus Days coupon codes for month-to-month Paper Pumpkin subscriptions and new prepaid subscriptions.
    • Some restrictions apply. Coupons can’t be redeemed towards Starter Kits and you cannot use them on exchanges.
    • Redemption period ends:  February 28, 2026, at 11:59 p.m. (MT)

*********************************************************************************************************

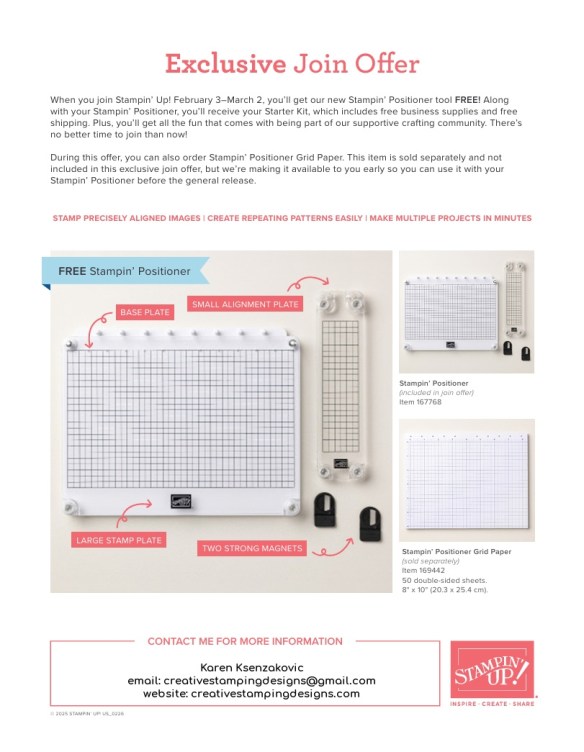
February 3 – March 2 – Stampin’ Up! Joining Special – Free Positioning Tool

Stampin’ Up! has an amazing new tool that will be available for FREE with the purchase of a Starter Kit between February 3-March 2!!  Anyone that purchases the Starter Kit during the promotion will get the awesome new Stampin’ Positioner with their Starter Kit absolutely FREE!! As a bonus for joining my team, you get to attend all my monthly Online Classes absolutely FREE. Contact me today and we can talk about getting you signed up.

Here are the Starter Kit promotion details:

  • Promotion Period: February 3–March 2
  • New team members who purchase their Starter Kit February 3–March 2 will also receive our new Stampin’ Positioner*.
  • New demonstrators who submit their Independent Demonstrator Agreement (IDA) before February 3 or after March 2 will not be eligible for this offer.
  • Joining deadline:  March 2, 2026, at 11:59 p.m. (MT)

*What’s the Stampin’ Positioner?

It’s Stampin’ Up!’s new stamping alignment tool that makes stamping easier and more accurate. It allows you to stamp precisely aligned images, create repeating patterns and Two-Step Stampin’ images easily, and make multiple projects in minutes.

Stampin’ Positioner Grid Paper will also be available for to order but it is not included as part of this exclusive join offer.

A few other things to know:

  • The Stampin’ Positioner WILL be available for purchase by everyone at a later date.  We have not been given any details on when that will be.
  • The Stampin’ Positioner is available for a limited time for current Demonstrators to purchase.

You can read more details about the joining offer on this PDF (click the image to open a full-size printable PDF):

We’d love to have you join our team!!  Once you join, you get at least a 20% discount on all of your Stampin’ Up! purchases and you get to preorder from the upcoming catalogs and promotions!! You can attend the Stampin’ Up! events too. There’s never an obligation to sell, you can join to enjoy the discount for yourself. Contact me if you have any questions and we can talk. I’d love to have you on my team. I’d be more than happy to answer any of your questions, contact me at creativestampingdesigns@gmail.com

You can read a bit more information about the benefits of being a Demonstrator and a part of our team here.  When you’re ready to join, you can get started here.  Let me know if you have any questions.

*********************************************************************************************************

Card stock cuts for this project:

  • Basic White Cardstock 2″ x 2″(sentiment), 4″ x 5 1/4″(inner liner)
  • Petal Pink Cardstock 5 1/2″ x 8 1/2″(card base scored & folded at 4 1/4″), 2 1/4″ x 2 1/4″(sentiment mat)
  • Timid Tiger Cardstock (2) – 4 1/8″ x 5 3/8″(inner liner mat)
  • Vellum Specialty Paper 4 1/8″ x 5 3/8″(card front)
  • 2025-2027 In-Color 6 x 6 Designer Series Paper 2 1/4″ x 6″(envelope)

*********************************************************************************************************

Product List

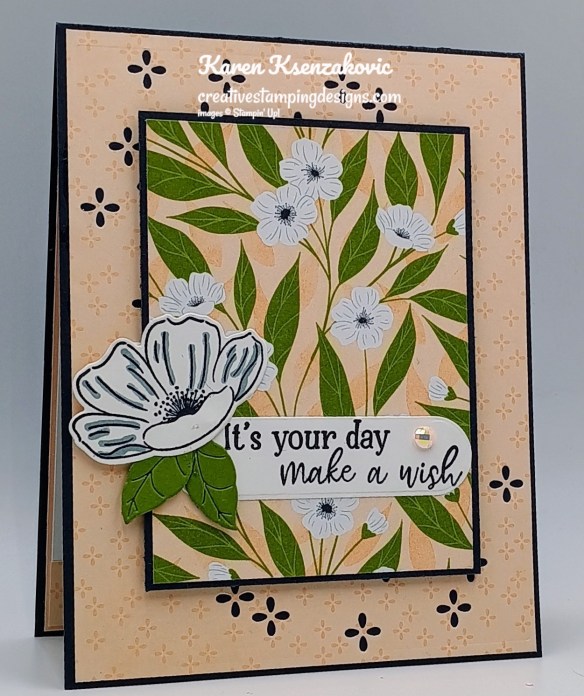
Stampin’ Up! Make A Wish

Good Tuesday morning stamping friends. We’re all dug out from the snow, but the winds last night were horrific. I had trouble sleeping they were so bad and we’re back to being COLD!! I just can’t get warm no matter what I do. Spring can’t get here quick enough.

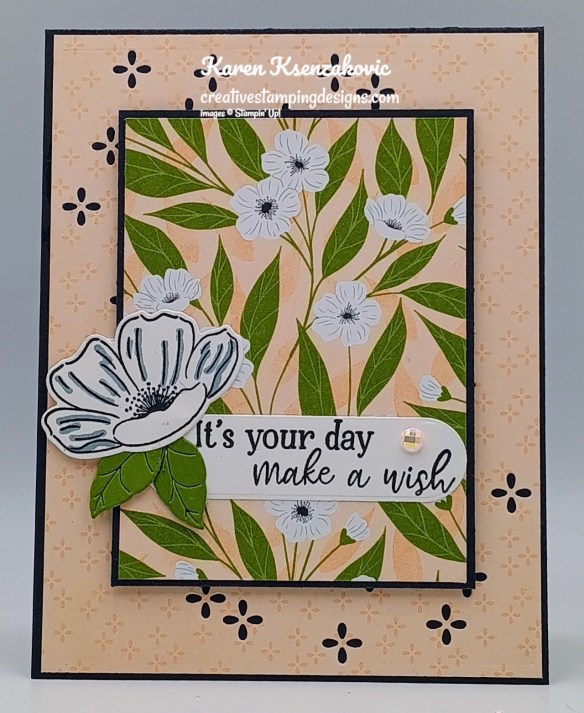
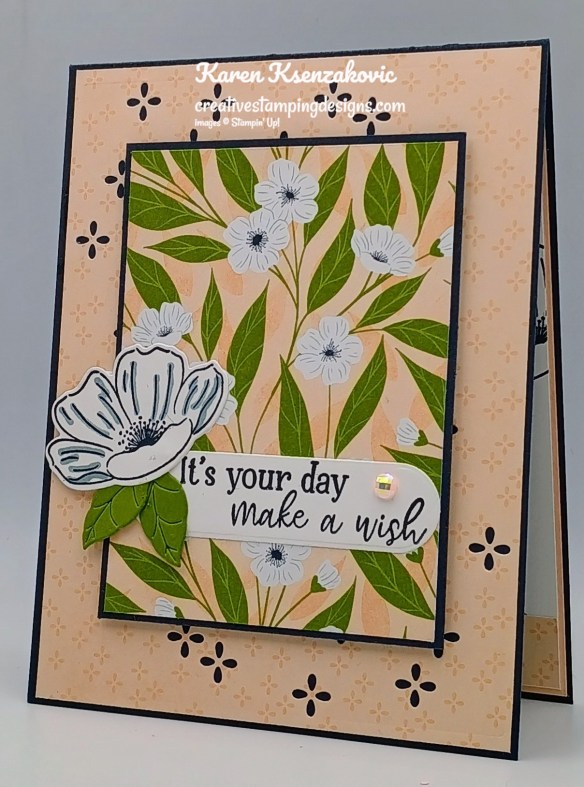
I have a quick card today where I mixed a couple different Online Exclusive sets and DSP.  If you’d like to see a quick video on how I made this card, Click Here to go to my Instagram Reels. Here is my card for today.

Stampin' Up! Make A Wish CAS 1 creativestampingdesigns.com

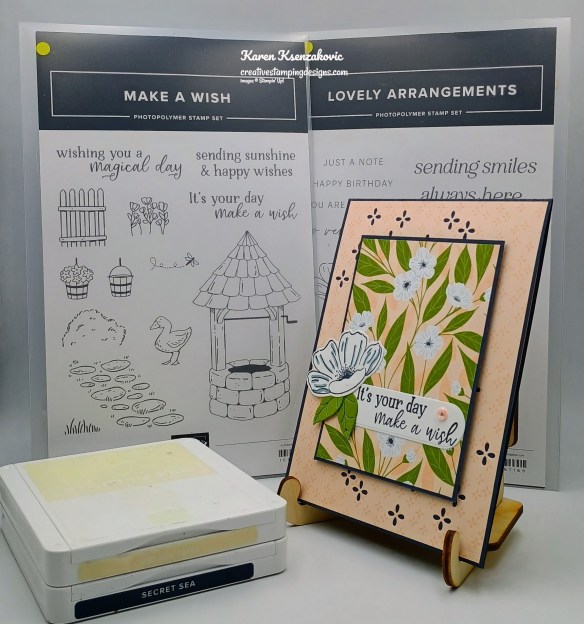
I used the new Stampin’ Up! Make A Wish Stamp Set (available March 3) along with the Lovely Arrangements Bundle and Lovely Blossoms Designer Series Paper for my card today.

Stampin' Up! Make A Wish CAS 2 creativestampingdesigns.com

Die cut a panel of Lovely Blossoms DSP using the Lovely Arrangements Dies. Adhere the panel to a Secret Sea card base. Adhere a smaller panel of Lovely Blossoms DSP to a Secret Sea mat. Adhere the layered panel to the center of the card front with Stampin’ Dimensionals.

Stampin' Up! Make A Wish CAS 3 creativestampingdesigns.com

Stamp the sentiment from Make A Wish stamp set in Secret Sea Ink on a panel of Basic White. Cut the sentiment out using the Lovely Arrangements Dies. Adhere the sentiment to the card front.

Stampin' Up! Make A Wish CAS 4 creativestampingdesigns.com

Stamp the flower from Lovely Arrangements stamp set in Secret Sea Ink on a panel of Basic White. Using the Lovely Arrangements Dies, cut out the flower. Cut the leaves from a panel of Old Olive. Adhere the flower to the card front by the sentiment. Adhere the leaves under the flower. Add a Pearlized Faceted Circle to the sentiment.

Stampin' Up! Make A Wish CAS 5 creativestampingdesigns.com

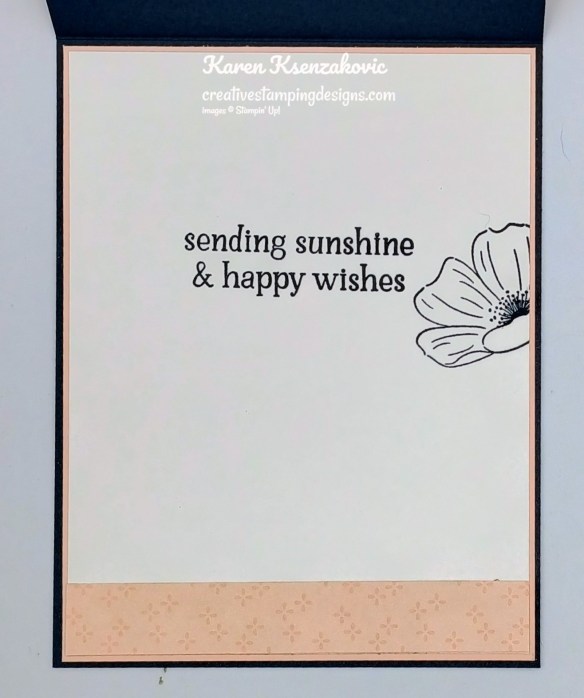
Stamp the sentiment from the Make A Wish stamp set in Secret Sea Ink on a panel of Basic White. Stamp the flower image from the Lovely Arrangements stamp set in Secret Sea Ink next to the sentiment. Adhere a panel of Lovely Arrangement DSP to the bottom of the panel. Adhere the Basic White panel to a Petal Pink mat then to the inside of the Secret Sea card base.

Stampin' Up! Make A Wish CAS 6 creativestampingdesigns.com

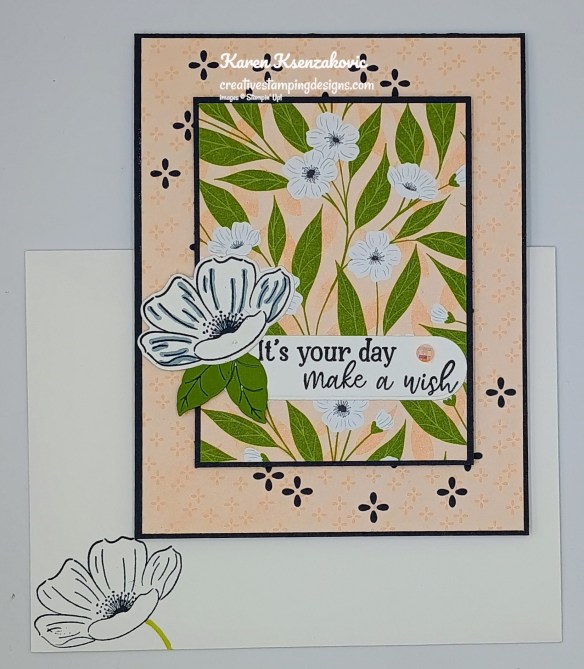
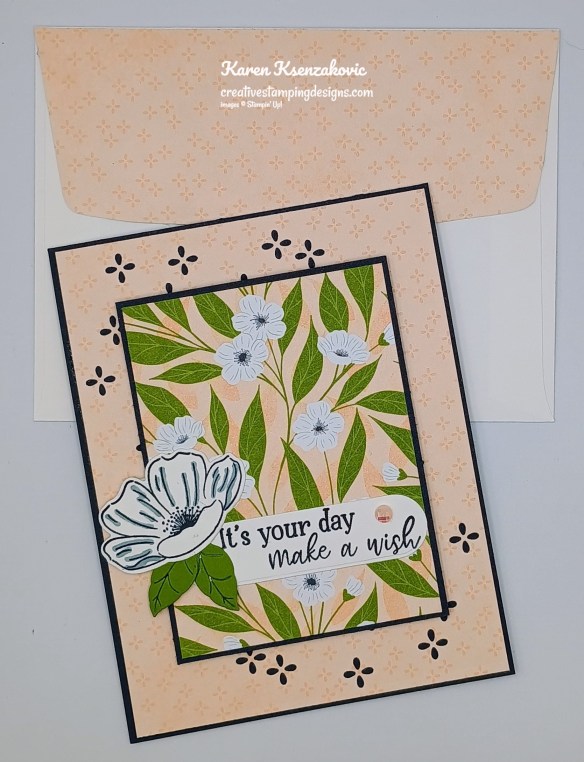
Decorate a Basic White Medium Envelope to finish your card. Stamp the flower image from the Lovely Arrangements stamp set in Secret Sea Ink on the envelope front. Adhere a panel of Lovely Blossoms DSP to the envelope flap.

Stampin' Up! Make A Wish CAS 7 creativestampingdesigns.com

Thank you for stopping by my blog today. I hope you like the card and will give it a try. Happy Stamping!!

*********************************************************************************************************

If you need any stamping supplies, I’d love to be your Demonstrator. Just click HERE to go directly to my online store or drop me an email if you have any questions. 

*********************************************************************************************************

Final Days to Redeem Those Bonus Days Coupons February 3 – 28

  • Redemption Period: February 3–28, 2026
    • There is no limit to the number of coupon codes you can redeem on an order during the redemption period. If you’re redeeming multiple codes, you must put a space between each code.
    • You may only redeem coupon codes one time. You cannot redeem them after February 28.
    • You can redeem Bonus Days coupon codes for month-to-month Paper Pumpkin subscriptions and new prepaid subscriptions.
    • Some restrictions apply. Coupons can’t be redeemed towards Starter Kits and you cannot use them on exchanges.
    • Redemption period ends:  February 28, 2026, at 11:59 p.m. (MT)

*********************************************************************************************************

February 3 – March 2 – Stampin’ Up! Joining Special – Free Positioning Tool

Stampin’ Up! has an amazing new tool that will be available for FREE with the purchase of a Starter Kit between February 3-March 2!!  Anyone that purchases the Starter Kit during the promotion will get the awesome new Stampin’ Positioner with their Starter Kit absolutely FREE!! As a bonus for joining my team, you get to attend all my monthly Online Classes absolutely FREE. Contact me today and we can talk about getting you signed up.

Here are the Starter Kit promotion details:

  • Promotion Period: February 3–March 2
  • New team members who purchase their Starter Kit February 3–March 2 will also receive our new Stampin’ Positioner*.
  • New demonstrators who submit their Independent Demonstrator Agreement (IDA) before February 3 or after March 2 will not be eligible for this offer.
  • Joining deadline:  March 2, 2026, at 11:59 p.m. (MT)

*What’s the Stampin’ Positioner?

It’s Stampin’ Up!’s new stamping alignment tool that makes stamping easier and more accurate. It allows you to stamp precisely aligned images, create repeating patterns and Two-Step Stampin’ images easily, and make multiple projects in minutes.

Stampin’ Positioner Grid Paper will also be available for to order but it is not included as part of this exclusive join offer.

A few other things to know:

  • The Stampin’ Positioner WILL be available for purchase by everyone at a later date.  We have not been given any details on when that will be.
  • The Stampin’ Positioner is available for a limited time for current Demonstrators to purchase.

You can read more details about the joining offer on this PDF (click the image to open a full-size printable PDF):

We’d love to have you join our team!!  Once you join, you get at least a 20% discount on all of your Stampin’ Up! purchases and you get to preorder from the upcoming catalogs and promotions!! You can attend the Stampin’ Up! events too. There’s never an obligation to sell, you can join to enjoy the discount for yourself. Contact me if you have any questions and we can talk. I’d love to have you on my team. I’d be more than happy to answer any of your questions, contact me at creativestampingdesigns@gmail.com

You can read a bit more information about the benefits of being a Demonstrator and a part of our team here.  When you’re ready to join, you can get started here.  Let me know if you have any questions.

*********************************************************************************************************

Card stock cuts for this project:

  • Basic White Cardstock 1 1/4″ x 3″(sentiment), 2″ x 2 1/4″(die cut), 4″ x 5 1/4″(inner liner)
  • Old Olive Cardstock 1 1/2″ x 1 1/2″(die cuts)
  • Petal Pink Cardstock 4 1/8″ x 5 3/8″(inner liner mat)
  • Secret Sea Cardstock 4 1/4″ x 11″(card base scored & folded at 5 1/2″), 3″ x 4″(card front panel mat)
  • Lovely Blossoms Designer Series Paper 4″ x 5 1/4″(card front), 2 7/8″ x 3 7/8″(card front panel), 5/8″ x 4″(inner liner), 2 1/4″ x 6″(envelope)

*********************************************************************************************************

Product List

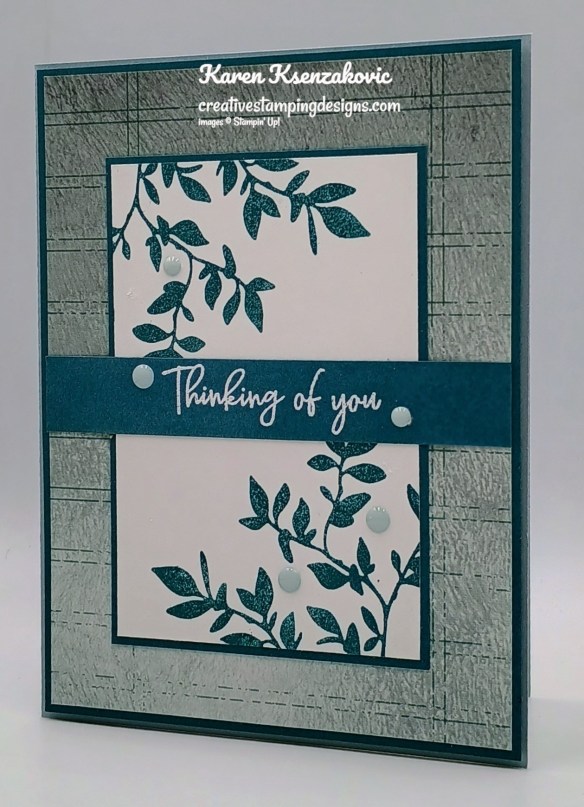
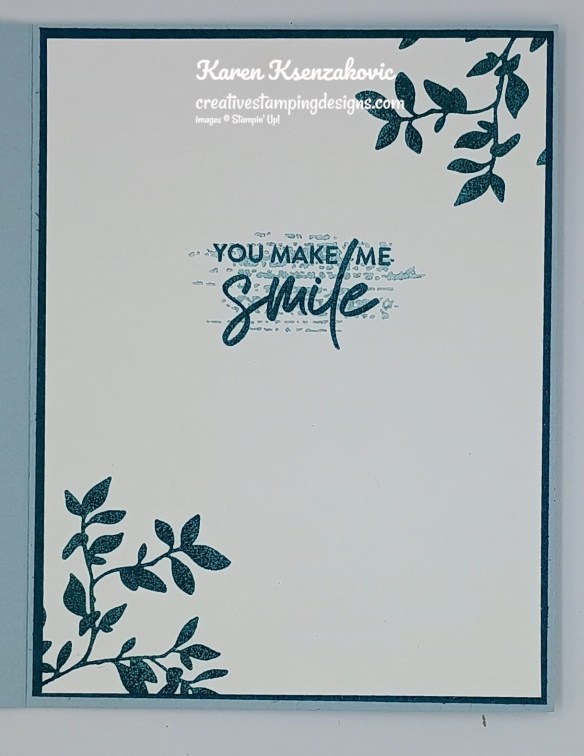
Stampin’ Up! Nature’s Symphony CAS

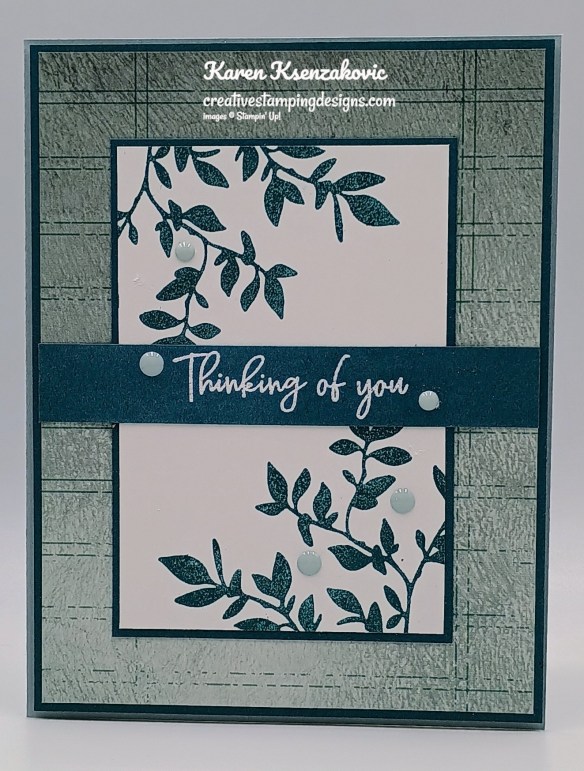
Good Snowy Monday morning stamping friends and welcome to a new week. We are under blizzard warning conditions here in NJ. So far, we have 15″ and it’s supposed to continue until 6pm tonight. No work today since only plows and emergency vehicles are allowed out. I let my pups out this morning, and they were buried, both of them are only about 20″ when standing on all 4’s. I saw that this is the 1st time in 30 years that we’ve had this bad of a blizzard warning. I thought I’d share this picture of 30 years ago when my son was 6-months old and this was his 1st snowstorm.

Today I have a quick and easy CAS card for you featuring one of my go to sets. If you’d like to see a quick video on how I made this card, Click Here to go to my Instagram Reels. Here is my card for today.

Stampin' Up! Nature's Symphony CAS 1 creativestampingdesigns.com

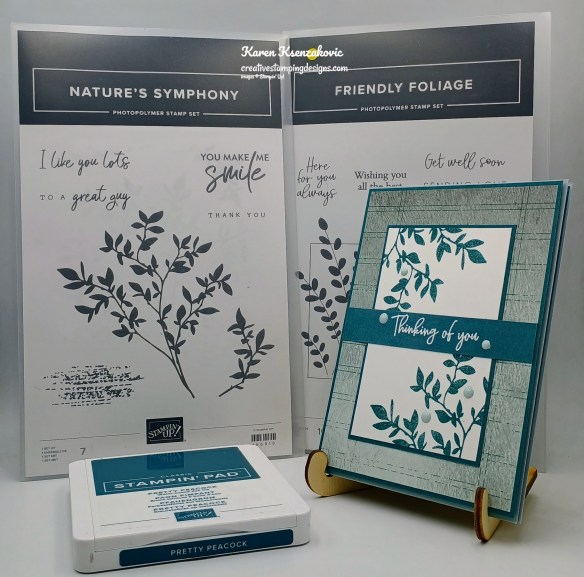
I used the Stampin’ Up! Nature’s Symphony Stamp Set along with the Nature Walk Designer Series Paper and the Stampin’ Up! Friendly Foliage Stamp Set for my card today.

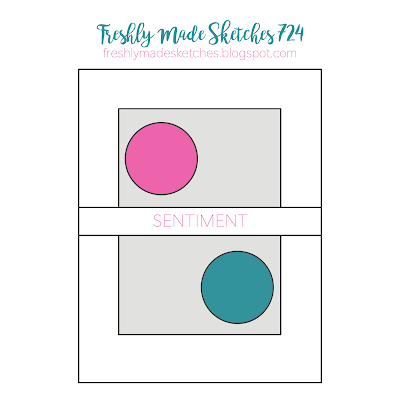
My design is from Freshly Made Sketches Challenge #724

Stampin' Up! Nature's Symphony CAS 2 creativestampingdesigns.com

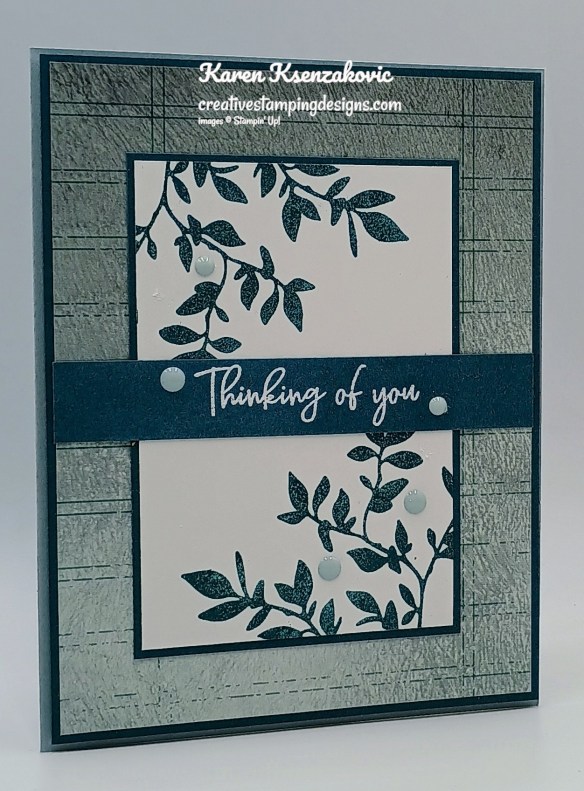
Adhere a panel of Nature Walk DSP to a Pretty Peacock mat. Adhere the layered panel to a Cloud Cover card base with Stampin’ Dimensionals.

Stampin' Up! Nature's Symphony CAS 3 creativestampingdesigns.com

On a panel of Basic White, stamp the large leaf image from the Nature’s Symphony stamp set in the corners of the panel with Pretty Peacock Ink. Adhere the panel to a Pretty Peacock mat. Adhere the layered panel to the center of the card front.

Stampin' Up! Nature's Symphony CAS 4 creativestampingdesigns.com

On a strip of Pretty Peacock, stamp the sentiment from the Friendly Foliage stamp set in Versamark Ink. Sprinkle the sentiment with White Embossing Powder and set it with the Heat Tool. Adhere the sentiment to the card front. Add a few Moody Palette Glossy Dots to the card front.

Stampin' Up! Nature's Symphony CAS 5 creativestampingdesigns.com

On a panel of Basic White, stamp the sentiment from the Nature’s Symphony stamp set in Pretty Peacock Ink. Stamp the large leaf image from the Nature’s Symphony stamp set in Pretty Peacock Ink in the corners of the panel. Stamp the woodgrain image from the Nature’s Symphony stamp set in Pretty Peacock Ink, stamping off 2 times on scrap paper, over the sentiment. Adhere the Basic White panel to a Pretty Peacock mat then to the inside of the Cloud Cover card base

Stampin' Up! Nature's Symphony CAS 6 creativestampingdesigns.com

Decorate a Basic White Medium Envelope to finish your card. Stamp the large leaf image from the Nature’s Symphony stamp set in Pretty Peacock Ink, stamping off on scrap paper, on the envelope front. Adhere a panel of Nature Walk DSP to the envelope flap.

Stampin' Up! Nature's Symphony CAS 7 creativestampingdesigns.com

Thank you for stopping by my blog today. I hope you like the card and will give it a try. Happy Stamping!!

*********************************************************************************************************

If you need any stamping supplies, I’d love to be your Demonstrator. Just click HERE to go directly to my online store or drop me an email if you have any questions. 

*********************************************************************************************************

Redeem Those Bonus Days Coupons February 3 – 28

  • Redemption Period: February 3–28, 2026
    • There is no limit to the number of coupon codes you can redeem on an order during the redemption period. If you’re redeeming multiple codes, you must put a space between each code.
    • You may only redeem coupon codes one time. You cannot redeem them after February 28.
    • You can redeem Bonus Days coupon codes for month-to-month Paper Pumpkin subscriptions and new prepaid subscriptions.
    • Some restrictions apply. Coupons can’t be redeemed towards Starter Kits and you cannot use them on exchanges.
    • Redemption period ends:  February 28, 2026, at 11:59 p.m. (MT)

*********************************************************************************************************

February 3 – March 2 – Stampin’ Up! Joining Special – Free Positioning Tool

Stampin’ Up! has an amazing new tool that will be available for FREE with the purchase of a Starter Kit between February 3-March 2!!  Anyone that purchases the Starter Kit during the promotion will get the awesome new Stampin’ Positioner with their Starter Kit absolutely FREE!! As a bonus for joining my team, you get to attend all my monthly Online Classes absolutely FREE. Contact me today and we can talk about getting you signed up.

Here are the Starter Kit promotion details:

  • Promotion Period: February 3–March 2
  • New team members who purchase their Starter Kit February 3–March 2 will also receive our new Stampin’ Positioner*.
  • New demonstrators who submit their Independent Demonstrator Agreement (IDA) before February 3 or after March 2 will not be eligible for this offer.
  • Joining deadline:  March 2, 2026, at 11:59 p.m. (MT)

*What’s the Stampin’ Positioner?

It’s Stampin’ Up!’s new stamping alignment tool that makes stamping easier and more accurate. It allows you to stamp precisely aligned images, create repeating patterns and Two-Step Stampin’ images easily, and make multiple projects in minutes.

Stampin’ Positioner Grid Paper will also be available for to order but it is not included as part of this exclusive join offer.

A few other things to know:

  • The Stampin’ Positioner WILL be available for purchase by everyone at a later date.  We have not been given any details on when that will be.
  • The Stampin’ Positioner is available for a limited time for current Demonstrators to purchase.

You can read more details about the joining offer on this PDF (click the image to open a full-size printable PDF):

We’d love to have you join our team!!  Once you join, you get at least a 20% discount on all of your Stampin’ Up! purchases and you get to preorder from the upcoming catalogs and promotions!! You can attend the Stampin’ Up! events too. There’s never an obligation to sell, you can join to enjoy the discount for yourself. Contact me if you have any questions and we can talk. I’d love to have you on my team. I’d be more than happy to answer any of your questions, contact me at creativestampingdesigns@gmail.com

You can read a bit more information about the benefits of being a Demonstrator and a part of our team here.  When you’re ready to join, you can get started here.  Let me know if you have any questions.

*********************************************************************************************************

Card stock cuts for this project:

  • Basic White Cardstock 2 5/8″ x 3 7/8″(artwork), 4″ x 5 1/4″(inner liner)
  • Cloud Cover Cardstock 5 1/2″ x 8 1/2″(card base scored & folded at 4 2/4″)
  • Pretty Peacock Cardstock (2) – 4 1/8″ x 5 3/8″(card font & inner liner mats), 2 3/4″ x 4″(artwork mat), 5/8″ x 4″(sentiment)
  • Nature Walk Designer Series Paper 4″ x 5 1/4″(card front), 2 1/4″ x 6″(envelope)

*********************************************************************************************************

Product List

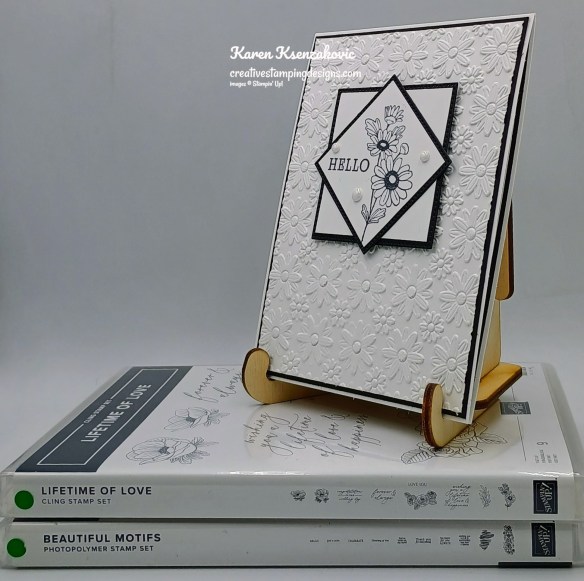
Stampin’ Up! Lifetime of Love in Black & White

Good Saturday morning stamping friends and welcome to the weekend. I hope you have some plans in the works. I’ll be working all day and I’m guessing it’ll be busy since they issued a winter storm watch for us, another 8″-10″ of snow. I’m so ready for spring.

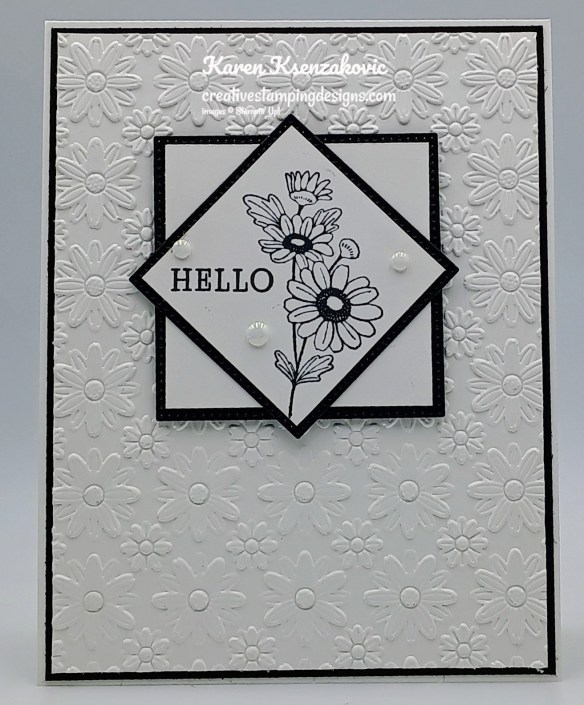
Today’s card is a super easy one mixing some brand new and older products to make a Black & White card.  If you’d like to see a quick video on how I made this card, Click Here to go to my Instagram Reels. Here is my card for today.

Stampin' Up! Lifetime of Love Black & White 1 creativestampingdesigns.com

I used the Stampin’ Up! Lifetime of Love Stamp Set along with the new Lazy Daisy 3D Embossing Folder, Stampin’ Up! Beautiful Motifs Stamp Set and Stylish Shapes Dies for my card today.

Stampin' Up! Lifetime of Love Black & White 2 creativestampingdesigns.com

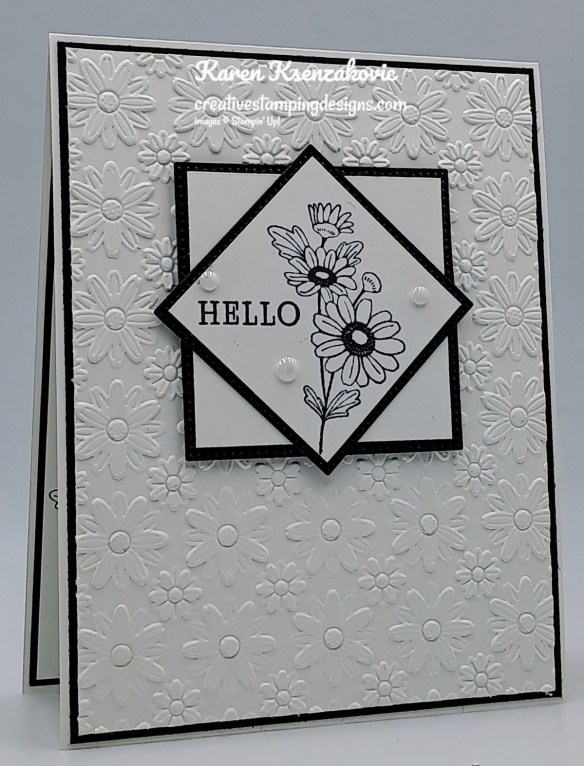
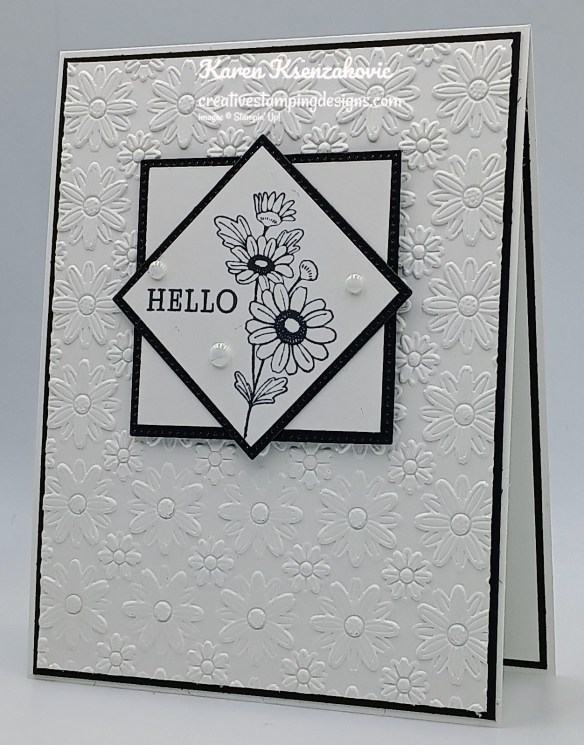
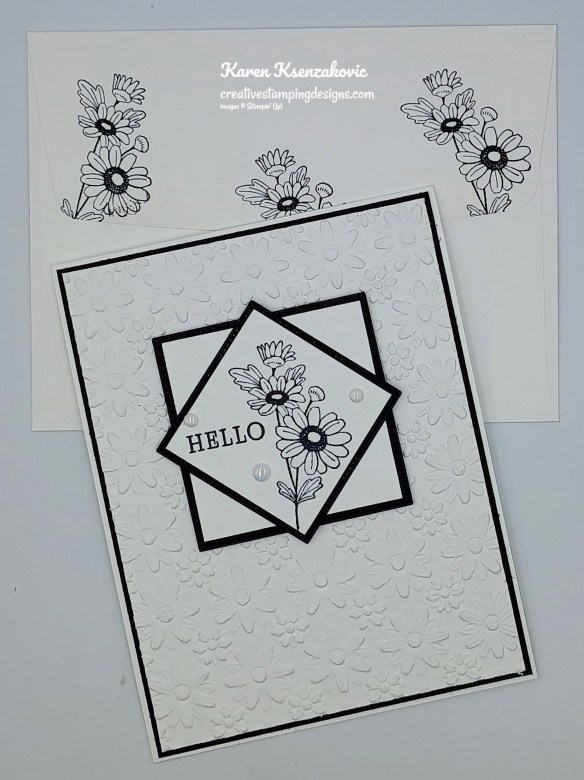
Emboss a Basic White card front using the new Lazy Daisy EF. Adhere the embossed panel to a Basic Black mat. Adhere the layered panel to a Basic White Thick card base.

Stampin' Up! Lifetime of Love Black & White 3 creativestampingdesigns.com

Using the Stylish Shapes dies, cut 2 squares from a panel of Basic Black. Adhere the larger panel of Basic White on the larger die cut square. On the smaller panel of Basic White, stamp the daisy image from Lifetime of Love stamp set in Tuxedo Black Ink with the Basic White panel in a diamond. Stamp the sentiment from Beautiful Motifs stamp set next to the daisy image in Tuxedo Black Ink.

Stampin' Up! Lifetime of Love Black & White 4 creativestampingdesigns.com

Adhere the artwork to the smaller die cut square. Adhere the diamond layered panel to the larger layered panel. Adhere the layered panel to the card front with Stampin’ Dimensionals. Add a few Pearls of Beauty to the card front.

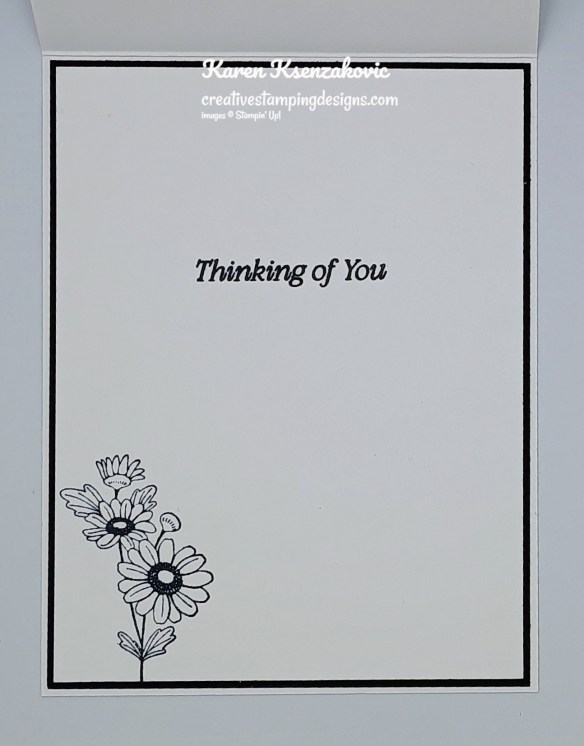
Stampin' Up! Lifetime of Love Black & White 5 creativestampingdesigns.com

Stamp the sentiment from the Beautiful Motifs stamp set in Tuxedo Black Ink on a panel of Basic White. Stamp the daisy image from the Lifetime of Love stamp set in Tuxedo Black Ink on the bottom of the panel. Adhere the Basic White panel to a Basic Black mat then to the inside of the Basic White Thick card base.

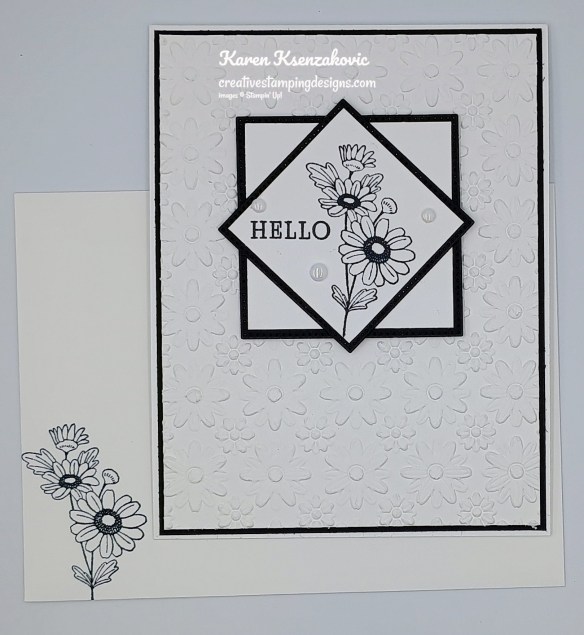
Stampin' Up! Lifetime of Love Black & White 6 creativestampingdesigns.com

Decorate a Basic White Medium Envelope to finish your card. Stamp the daisy image from the Lifetime of Love stamp set on the envelope front and flap in Tuxedo Black Ink.

Stampin' Up! Lifetime of Love Black & White 7 creativestampingdesigns.com

Thank you for stopping by my blog today. I hope you like the card and will give it a try. Happy Stamping!!

*********************************************************************************************************

If you need any stamping supplies, I’d love to be your Demonstrator. Just click HERE to go directly to my online store or drop me an email if you have any questions. 

*********************************************************************************************************

Redeem Those Bonus Days Coupons February 3 – 28

  • Redemption Period: February 3–28, 2026
    • There is no limit to the number of coupon codes you can redeem on an order during the redemption period. If you’re redeeming multiple codes, you must put a space between each code.
    • You may only redeem coupon codes one time. You cannot redeem them after February 28.
    • You can redeem Bonus Days coupon codes for month-to-month Paper Pumpkin subscriptions and new prepaid subscriptions.
    • Some restrictions apply. Coupons can’t be redeemed towards Starter Kits and you cannot use them on exchanges.
    • Redemption period ends:  February 28, 2026, at 11:59 p.m. (MT)

*********************************************************************************************************

February 3 – March 2 – Stampin’ Up! Joining Special – Free Positioning Tool

Stampin’ Up! has an amazing new tool that will be available for FREE with the purchase of a Starter Kit between February 3-March 2!!  Anyone that purchases the Starter Kit during the promotion will get the awesome new Stampin’ Positioner with their Starter Kit absolutely FREE!! As a bonus for joining my team, you get to attend all my monthly Online Classes absolutely FREE. Contact me today and we can talk about getting you signed up.

Here are the Starter Kit promotion details:

  • Promotion Period: February 3–March 2
  • New team members who purchase their Starter Kit February 3–March 2 will also receive our new Stampin’ Positioner*.
  • New demonstrators who submit their Independent Demonstrator Agreement (IDA) before February 3 or after March 2 will not be eligible for this offer.
  • Joining deadline:  March 2, 2026, at 11:59 p.m. (MT)

*What’s the Stampin’ Positioner?

It’s Stampin’ Up!’s new stamping alignment tool that makes stamping easier and more accurate. It allows you to stamp precisely aligned images, create repeating patterns and Two-Step Stampin’ images easily, and make multiple projects in minutes.

Stampin’ Positioner Grid Paper will also be available for to order but it is not included as part of this exclusive join offer.

A few other things to know:

  • The Stampin’ Positioner WILL be available for purchase by everyone at a later date.  We have not been given any details on when that will be.
  • The Stampin’ Positioner is available for a limited time for current Demonstrators to purchase.

You can read more details about the joining offer on this PDF (click the image to open a full-size printable PDF):

We’d love to have you join our team!!  Once you join, you get at least a 20% discount on all of your Stampin’ Up! purchases and you get to preorder from the upcoming catalogs and promotions!! You can attend the Stampin’ Up! events too. There’s never an obligation to sell, you can join to enjoy the discount for yourself. Contact me if you have any questions and we can talk. I’d love to have you on my team. I’d be more than happy to answer any of your questions, contact me at creativestampingdesigns@gmail.com

You can read a bit more information about the benefits of being a Demonstrator and a part of our team here.  When you’re ready to join, you can get started here.  Let me know if you have any questions.

*********************************************************************************************************

Card stock cuts for this project:

  • Basic Black Cardstock (2) – 4 1/8″ x 5 3/8″ (card front & inner liner mats), 2 1/2″ x 4 1/2″ panel
  • Basic White Cardstock (2) – 4″ x 5 1/4″(card front & inner liner), 2 3/16″ x 2 3/16″ panel, 1 3/4″ x 1 3/4″(artwork)
  • Basic White Thick cardstock 4 1/4″ x 11″(card base scored & folded at 5 1/2″)

*********************************************************************************************************

Product List

Stampin’ Up! Delicate Whispers

Good Monday morning stamping friends and welcome to a new week. Is anyone lucky enough to have the day off for Presidents’ Day? I don’t, so I’ll be in the office this morning.

I have a very quick CAS card for you today featuring a new set and DSP coming March 3. If you’d like to see a quick video on how I made this card, Click Here to go to my Instagram Reels. Here is my card for today.

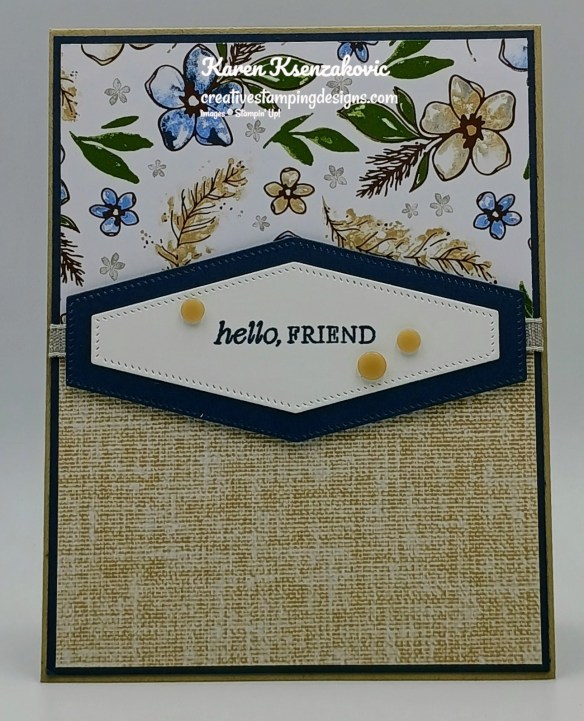
Stampin' Up! Delicate Whispers Hello 1 creativestampingdesigns.com

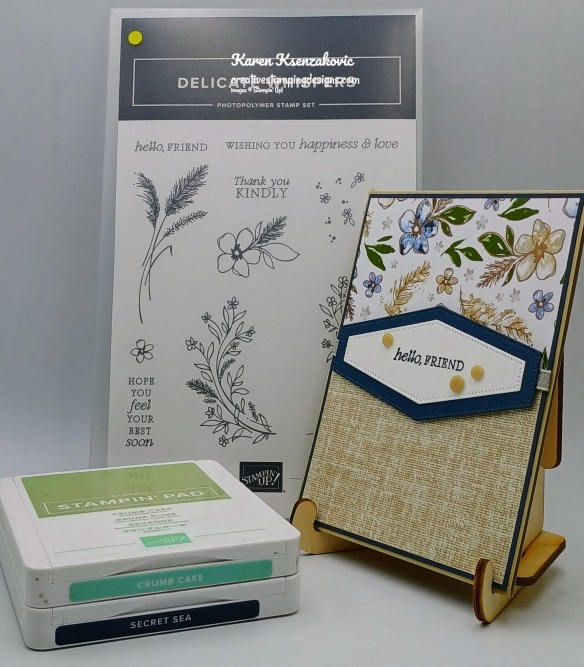
I used the New Stampin’ Up! Delicate Whispers Stamp Set along with the Delicate Dreams Specialty Designer Series Paper (both avail Mar 3) and the Nested Essentials Dies for my card today.

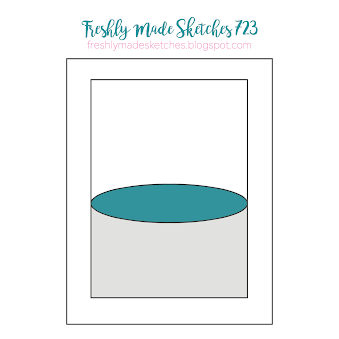
My design today is from Freshly Made Sketches #723

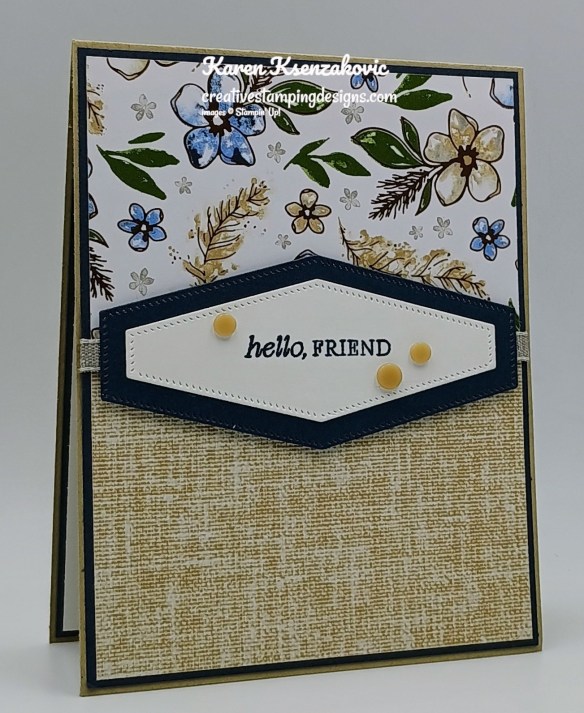
Stampin' Up! Delicate Whispers Hello 2 creativestampingdesigns.com

Adhere the 2 panels of Delicate Dreams DSP to a Secret Sea mat, overlapping in the center a tiny bit. Wrap a piece of the Gray Granite 1/4″ Variegated Trim (avail Mar 3) around the center and adhere on the back.

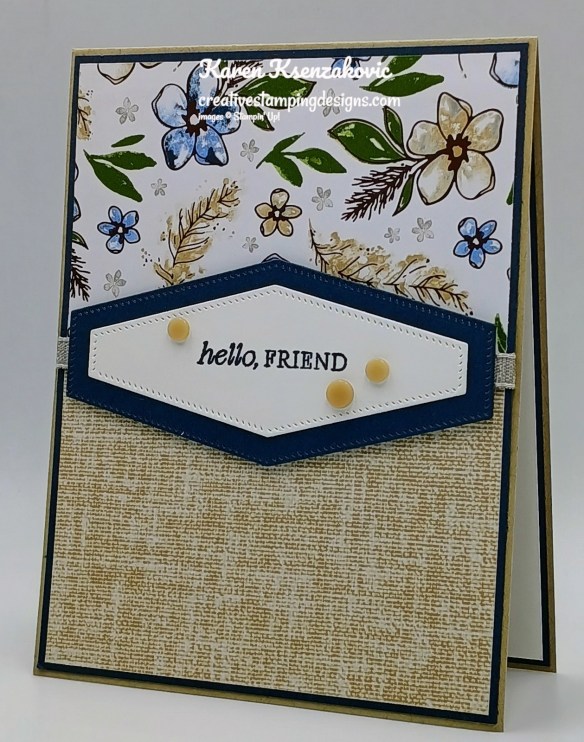
Stampin' Up! Delicate Whispers Hello 3 creativestampingdesigns.com

Adhere the layered panel to a Crumb Cake card base. Cut a panel of Basic White using the Nested Essentials Dies. Cut a panel of Secret Sea using the next largest Nested Essentials Dies. Stamp the sentiment from the Delicate Whispers stamp set in Secret Sea Ink on the die cut Basic White panel.

Stampin' Up! Delicate Whispers Hello 4 creativestampingdesigns.com

Adhere the Basic White die cut to the Secret Sea die cut. Adhere the layered sentiment to the card front with Stampin’ Dimensionals over the ribbon. Add a few Natural Matte Dots to the card front

Stampin' Up! Delicate Whispers Hello 5 creativestampingdesigns.com

On a panel of Basic White, stamp the sentiment from the Delicate Whispers stamp set in Secret Sea Ink. Stamp the flower image from the Delicate Whispers stamp set in Secret Sea Ink net to the sentiment. Color the flower image with Crumb Cake and Mossy Meadow Stampin’ Blends Markers. Adhere the Basic Whtie panel to a Secret Sea mat then to the inside of the Crumb Cake card base.

Stampin' Up! Delicate Whispers Hello 6 creativestampingdesigns.com

Decorate a Basic White Medium Envelope to finish your card. Stamp the flower image from the Delicate Whispers stamp set in Secret Sea Ink on the envelope front. Color the image using Crumb Cake and Mossy Meadow Stampin’ Blends Markers. Adhere a panel of Delicate Dreams DSP to the envelope flap.

Stampin' Up! Delicate Whispers Hello 7 creativestampingdesigns.com

Thank you for stopping by my blog today. I hope you like the card and will give it a try. Happy Stamping!!

*********************************************************************************************************

If you need any stamping supplies, I’d love to be your Demonstrator. Just click HERE to go directly to my online store or drop me an email if you have any questions. 

*********************************************************************************************************

February 3 – March 2 – Stampin’ Up! Joining Special – Free Positioning Tool

Stampin’ Up! has an amazing new tool that will be available for FREE with the purchase of a Starter Kit between February 3-March 2!!  Anyone that purchases the Starter Kit during the promotion will get the awesome new Stampin’ Positioner with their Starter Kit absolutely FREE!! As a bonus for joining my team, you get to attend all my monthly Online Classes absolutely FREE. Contact me today and we can talk about getting you signed up.

Here are the Starter Kit promotion details:

  • Promotion Period: February 3–March 2
  • New team members who purchase their Starter Kit February 3–March 2 will also receive our new Stampin’ Positioner*.
  • New demonstrators who submit their Independent Demonstrator Agreement (IDA) before February 3 or after March 2 will not be eligible for this offer.
  • Joining deadline:  March 2, 2026, at 11:59 p.m. (MT)

*What’s the Stampin’ Positioner?

It’s Stampin’ Up!’s new stamping alignment tool that makes stamping easier and more accurate. It allows you to stamp precisely aligned images, create repeating patterns and Two-Step Stampin’ images easily, and make multiple projects in minutes.

Stampin’ Positioner Grid Paper will also be available for to order but it is not included as part of this exclusive join offer.

A few other things to know:

  • The Stampin’ Positioner WILL be available for purchase by everyone at a later date.  We have not been given any details on when that will be.
  • The Stampin’ Positioner is available for a limited time for current Demonstrators to purchase.

You can read more details about the joining offer on this PDF (click the image to open a full-size printable PDF):

We’d love to have you join our team!!  Once you join, you get at least a 20% discount on all of your Stampin’ Up! purchases and you get to preorder from the upcoming catalogs and promotions!! You can attend the Stampin’ Up! events too. There’s never an obligation to sell, you can join to enjoy the discount for yourself. Contact me if you have any questions and we can talk. I’d love to have you on my team. I’d be more than happy to answer any of your questions, contact me at creativestampingdesigns@gmail.com

You can read a bit more information about the benefits of being a Demonstrator and a part of our team here.  When you’re ready to join, you can get started here.  Let me know if you have any questions.

*********************************************************************************************************

Redeem Those Bonus Days Coupons February 3 – 28

  • Redemption Period: February 3–28, 2026
    • There is no limit to the number of coupon codes you can redeem on an order during the redemption period. If you’re redeeming multiple codes, you must put a space between each code.
    • You may only redeem coupon codes one time. You cannot redeem them after February 28.
    • You can redeem Bonus Days coupon codes for month-to-month Paper Pumpkin subscriptions and new prepaid subscriptions.
    • Some restrictions apply. Coupons can’t be redeemed towards Starter Kits and you cannot use them on exchanges.
    • Redemption period ends:  February 28, 2026, at 11:59 p.m. (MT)

*********************************************************************************************************

Card stock cuts for this project:

  • Basic White Cardstock 1 1/2″ x 4″(sentiment), 4″ x 5 1/4″(inner liner)
  • Crumb Cake Cardstock 4 1/4″ x 11″(card base scored & folded at 5 1/2″)
  • Secret Sea Cardstock (2) – 4 1/8″ x 5 3/8″(card front & inner liner mats), 2″ x 4″ (sentiment mat)
  • Delicate Dreams Specialty Designer Series Paper (2) – 2 3/4″ x 4″(card front panels), 2 1/4″ x 6″(envelope)

*********************************************************************************************************

Product List

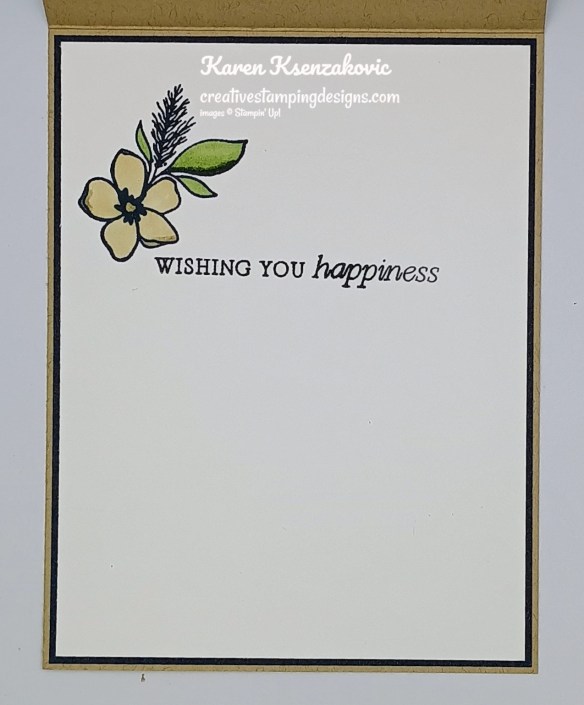
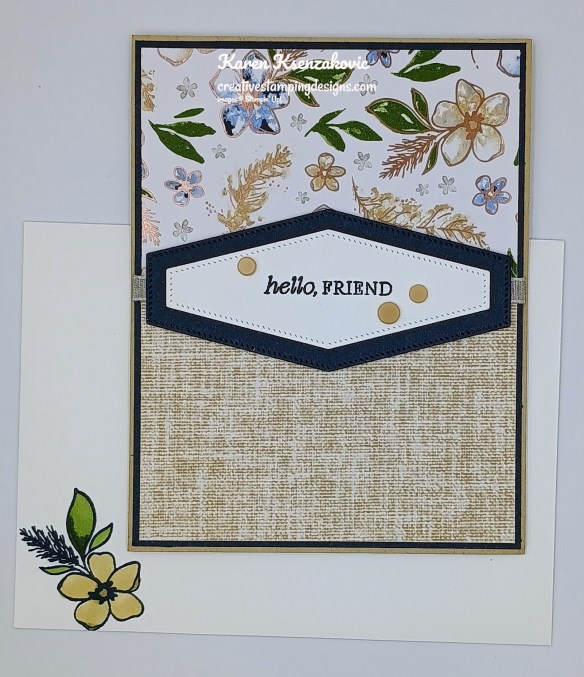
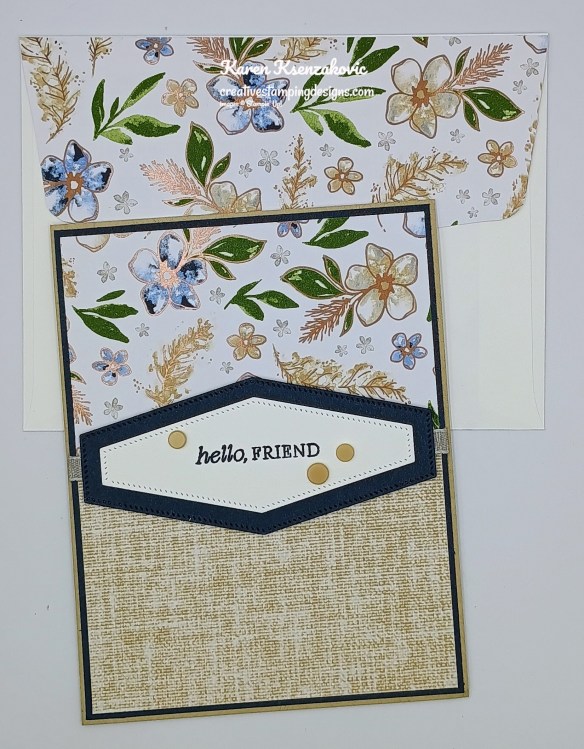
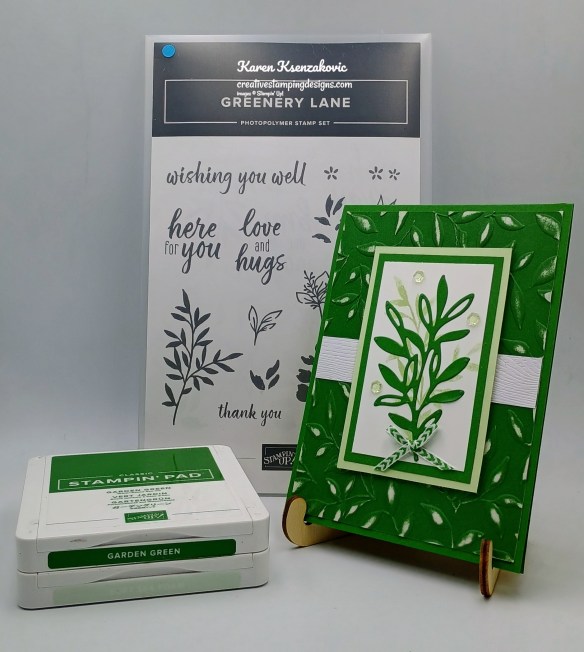
Stampin’ Up! Greenery Lane for The Card Concepts

Good Wednesday morning my stamping friends. How is everyone doing today? We’re halfway through the week and on our way to the weekend already. It’s warming up a bit here in NJ. We’ve been in the 30’s finally, still dropping to the teens at night though so everything could freeze up again.

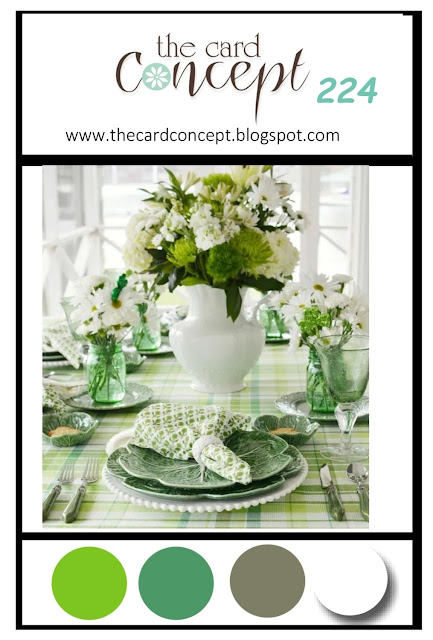
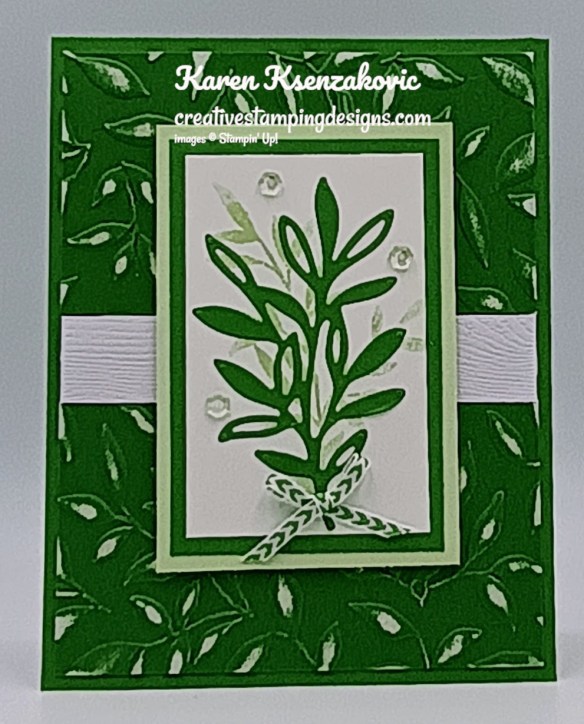
Today’s card is for the inspiration challenge from The Card Concepts. The inspiration photo #224 is Monochromatic Greens. I used lots of layered on my card again, since that is one of my favorite kinds of cards to make. If you’d like to see a quick video of how I made this card, Click Here to go to my Instagram Reels. Here’s my card for today.

Stampin' Up! Greenery Lane Monochromatic 1 creativestampingdesigns.com

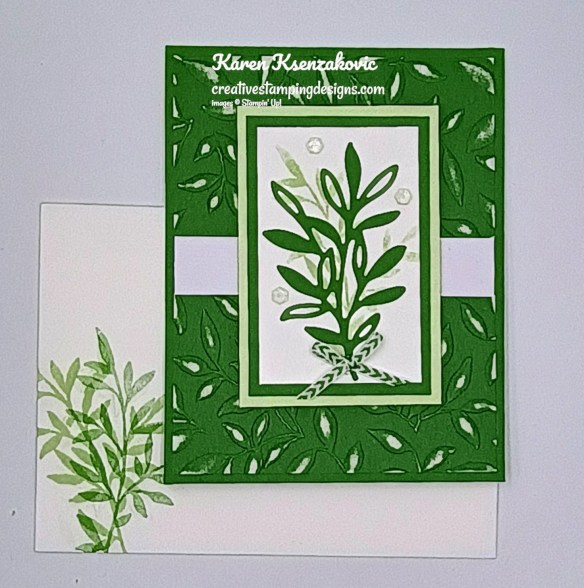
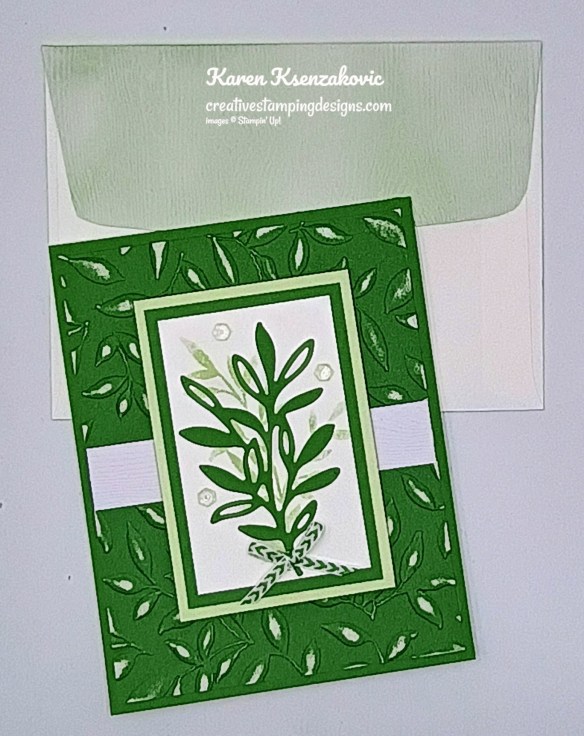
I used the Stampin’ Up! Greenery Lane Bundle along with the new Paradise Garden Hybrid Embossing Folder (available March 3). I was inspired by the theme along with the greenery in the photo for my Clean & Layered card.

I hope you will take a moment to visit The Card Concepts and join us for our challenge 224.  How are you inspired by the photos?

Stampin' Up! Greenery Lane Monochromatic 2 creativestampingdesigns.com

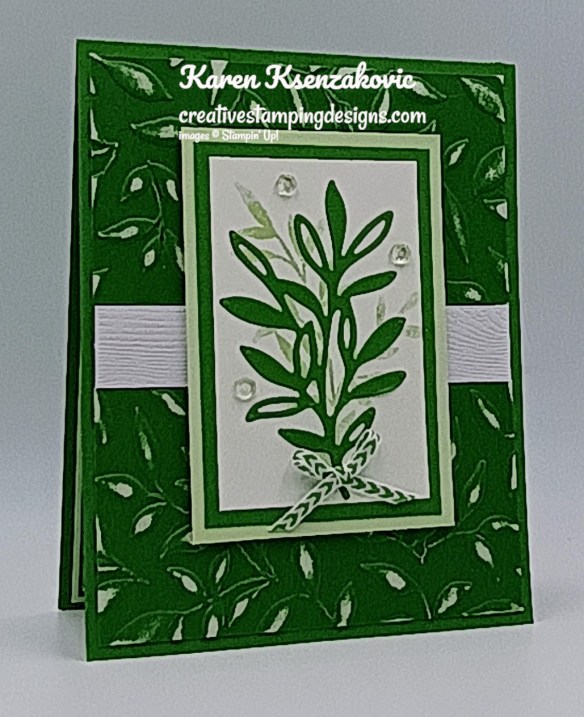
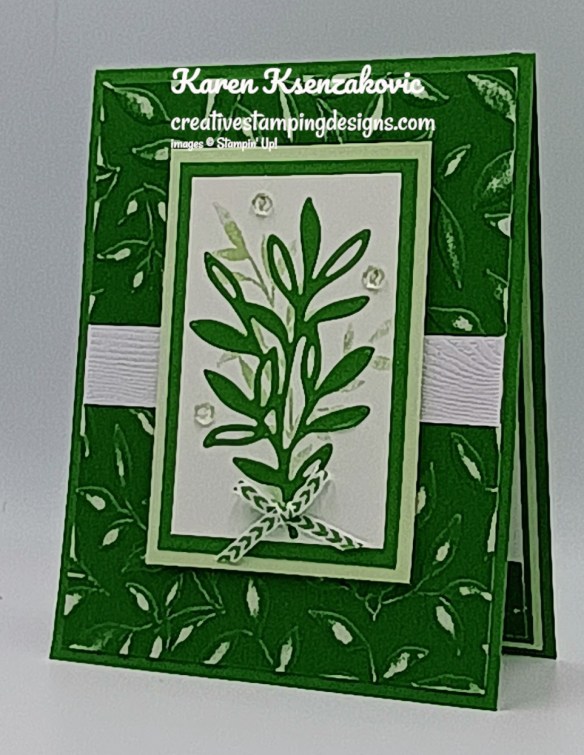
Emboss a panel of Garden Green Two-Tone Cardstock using the Paradise Garden EF. Use a sanding block and go over the panel to highlight the leaves. Adhere a panel of Wood Textured Paper to the center of the embossed panel. Adhere the embossed panel to the front of a Garden Green card base.

Stampin' Up! Greenery Lane Monochromatic 3 creativestampingdesigns.com

Stamp the leaf image from the Greenery Lane stamp set in Soft Sea Foam Ink on a panel of Basic White. Adhere the stamped panel to a Garden Green mat and to a Soft Sea Foam mat. Adhere the layered panel to the card front with Stampin’ Dimensionals.

Stampin' Up! Greenery Lane Monochromatic 4 creativestampingdesigns.com

Using the Greenery Lane Dies, cut the leaf die from a panel of Garden Green. Adhere it to the stamped Basic White panel. Tie a small bow using the Garden Green 1/8″ Chevron Ribbon and adhere it to the stem with a Glue Dot. Add a few Shades of Green Hexagons to the card front.

Stampin' Up! Greenery Lane Monochromatic 5 creativestampingdesigns.com

Stamp the sentiment from the Greenery Lane stamp set in Garden Green Ink on a panel of Basic White. Stamp the leaf image from the Greenery Lane stamp set in Soft Sea Foam Ink, stamping it off once on scrap paper, over the sentiment. Adhere a panel of Garden Green Two-Tone cardstock that was embossed with the Paradise Garden EF and sanded using the sanding block, on the bottom of the panel. Adhere the Basic White panel to a Garden Green mat and a Soft Sea Foam mat then to the inside of the Garden Green card base.

Stampin' Up! Greenery Lane Monochromatic 6 creativestampingdesigns.com

Decorate a Basic White Medium Envelope to complete the card. Stamp the leaf image from the Greenery Lane stamp set in Garden Green Ink, stamped off once on scrap paper and Soft Sea Foam Ink, on the bottom front of the envelope. Using the Blending Brush, add sone Soft Sea Foam Ink to a panel of Wood Textured Paper and adhere it to the envelope flap.

Stampin' Up! Greenery Lane Monochromatic 7 creativestampingdesigns.com

Thank you for stopping by my blog today. I hope you like the card and will give it a try. Happy Stamping!!

*********************************************************************************************************

If you need any stamping supplies, I’d love to be your Demonstrator. Just click HERE to go directly to my online store or drop me an email if you have any questions. 

*********************************************************************************************************

Stuck on You Ordering Special Ends Saturday February 14

I’m offering a little ordering special for Valentine’s Day again this year!  I call it my “Stuck on You Valentine” ordering special! For all orders of $50 or greater (before shipping and taxes and after coupons) placed through me between now and Saturday, February 14, you’ll get your choice of a free adhesive! 

This can be anything that Stampin’ Up! sells that could be used as an adhesive!  And for the adhesives that are $5 or under, two packs will equal one choice (see the items with the (2) on the list below) so if you select those, you’ll get double!!

Here is a list of the adhesives that you can pick from:

  • Adhesive Sheets – 152334
  • Multipurpose Liquid Glue – 110755
  • Mini Glue Dots – 103683
  • Tear & Tape Adhesive – 154031
  • Stampin’ Seal – 152813
  • Stampin’ Seal Refill – 152814
  • Stampin’ Seal + – 149699
  • Stampin’ Seal + Refill – 152812
  • Fine-Tip Glue Pen – 138309
  • Silicone Craft Sheet (even though it’s not an adhesive…it is an awesome tool for adhesives!) – 127853
  • Foam Adhesive Strips – 141825
  • Stampin’ Dimensionals (2) – 104430
  • Mini Stampin’ Dimensionals (2) – 144108
  • Black Stampin’ Dimensionals Combo Pack – 150893
  • Foam Adhesive Sheets – 152815

I’ll be placing the order for the adhesives on February 16th, so please be sure to send your selections right away when you order…otherwise I’ll pick one for you and send it out with your thank you gift!

*With Stampin’ Up!’s backorder policy where numbers are turned off for ordering if they go on backorder, if the adhesive that you pick is turned off for ordering when I place the order on the 16th, I’ll order Stampin’ Dimensionals for you instead.

Visit my Online Store Here and start shopping now!!

*********************************************************************************************************

February’s Free Online Fun Fold Class Registration Open

It’s time to cash in those Bonus Coupons (starting February 3), so Tara Carpenter and I are offering a Free Online Zoom Class for February.  We will be creating 6 different Fun Fold cards; we’re hoping to show you how easy some fun folds can be.  This class will be FREE with a $50 purchase from my Online Store.   We will not be sharing the products we are using since the cards we make live will most likely be using new products that will be available in March (a week after the class).

The class requirements:

  • Visit my Online Store and place a $50 or more order before tax and shipping and after coupon codes.
  • Once you have made the purchase, fill out the Google Form HERE and submit.

What you will receive:

  • Zoom class with complete step by step instructions to complete each card as we go.
  • PDF with detailed directions and photos
  • A Link to the recorded class after we are done so you can watch it again and make more cards.

A week before the class I will send you the complete PDF of the cards so you can cut all your cardstock gather your supplies, so you are ready to go.  We will NOT be cutting cardstock or doing any die cutting live since all the cards will be different.  Everyone’s cards will be unique since you will pick which color cardstock and ink you want to use along with the Designer Series Paper, Ribbon & Embellishments for each card.

The class will be held on Sunday February 22nd from 1pm – 4pm Eastern Time via Zoom.  This will allow everyone all over the United States to participate live!  

I will email you the Zoom link to the class a day before the event.

Click Here to Register.

Deadline to sign up is Sunday February 15th at 5pm ET  

*********************************************************************************************************

February 3 – March 2 – Stampin’ Up! Joining Special – Free Positioning Tool

Stampin’ Up! announced an amazing new tool that will be available for FREE with the purchase of a Starter Kit between February 3-March 2!!  Anyone that purchases the Starter Kit during the promotion will get the awesome new Stampin’ Positioner with their Starter Kit absolutely FREE!!

Here are the Starter Kit promotion details:

  • Promotion Period: February 3–March 2
  • New team members who purchase their Starter Kit February 3–March 2 will also receive our new Stampin’ Positioner*.
  • New demonstrators who submit their Independent Demonstrator Agreement (IDA) before February 3 or after March 2 will not be eligible for this offer.
  • Joining deadline:  March 2, 2026, at 11:59 p.m. (MT)

*What’s the Stampin’ Positioner?

It’s Stampin’ Up!’s new stamping alignment tool that makes stamping easier and more accurate. It allows you to stamp precisely aligned images, create repeating patterns and Two-Step Stampin’ images easily, and make multiple projects in minutes.

Stampin’ Positioner Grid Paper will also be available for to order but it is not included as part of this exclusive join offer.

A few other things to know:

  • The Stampin’ Positioner WILL be available for purchase by everyone at a later date.  We have not been given any details on when that will be.
  • The Stampin’ Positioner is available for a limited time for current Demonstrators to purchase.

You can read more details about the joining offer on this PDF (click the image to open a full-size printable PDF):

We’d love to have you join our team!!  Once you join, you get at least a 20% discount on all of your Stampin’ Up! purchases and you get to preorder from the upcoming catalogs and promotions!! You can attend the Stampin’ Up! events too. There’s never an obligation to sell, you can join to enjoy the discount for yourself. Contact me if you have any questions and we can talk. I’d love to have you on my team. I’d be more than happy to answer any of your questions, contact me at creativestampingdesigns@gmail.com

You can read a bit more information about the benefits of being a Demonstrator and a part of our team here.  When you’re ready to join, you can get started here.  Let me know if you have any questions.

*********************************************************************************************************

Redeem Those Bonus Days Coupons February 3 – 28

  • Redemption Period: February 3–28, 2026
    • There is no limit to the number of coupon codes you can redeem on an order during the redemption period. If you’re redeeming multiple codes, you must put a space between each code.
    • You may only redeem coupon codes one time. You cannot redeem them after February 28.
    • You can redeem Bonus Days coupon codes for month-to-month Paper Pumpkin subscriptions and new prepaid subscriptions.
    • Some restrictions apply. Coupons can’t be redeemed towards Starter Kits and you cannot use them on exchanges.
    • Redemption period ends:  February 28, 2026, at 11:59 p.m. (MT)

*********************************************************************************************************

Card stock cuts for this project:

  • Basic White Cardstock 2″ x 3 1/4″(artwork), 3 3/4″ x 5″(inner liner)
  • Garden Green Cardstock 4 1/4″ x 11″(card base scored & folded at 5 1/2″), 2 1/4″ x 3 1/2″(artwork mat), 2 1/4″ x 3″ (die cut), 3 7/8″ x 5 1/8″(inner liner mat)
  • Soft Sea Foam Cardstock 2 1/2″ x 3 3/4″(artwork mat), 4″ x 5 1/4″(inner liner mat)
  • Garden Green Two-Tone Cardstock 4″ x 5 1/4″(card front), 3/4″ x 3 3/4″(inner liner)
  • Wood Textured Specialty Paper 3/4″ x 4″(card front panel), 2 1/4″ x 6″(envelope)

*********************************************************************************************************

Product List

Stampin’ Up! Winter Scenes Right Words

Good Freezing Sunday morning stamping friends. I hope you are having a great weekend. This has been by far the coldest winter in NJ I remember. The temps are supposed to be warming up to the 30’s this week last I saw. It was 1-degree this morning when I looked with a negative real feel with the winds.

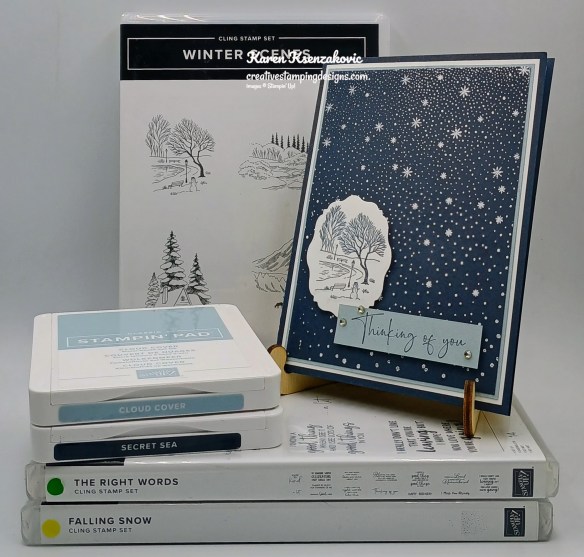
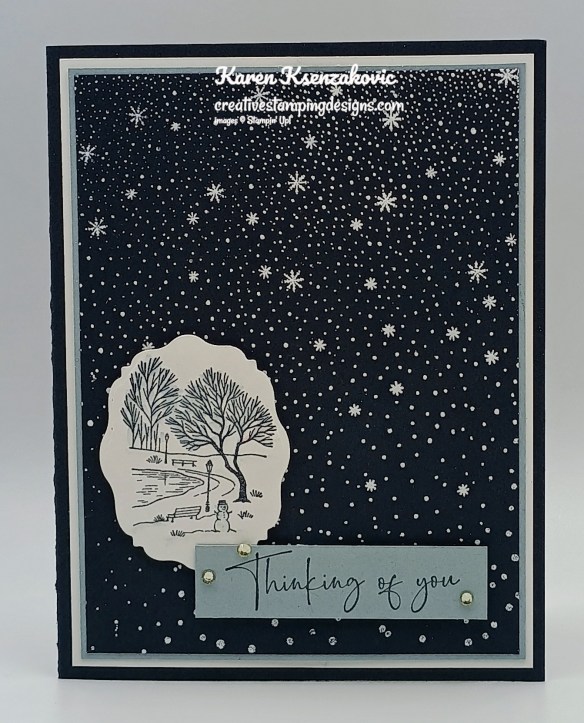
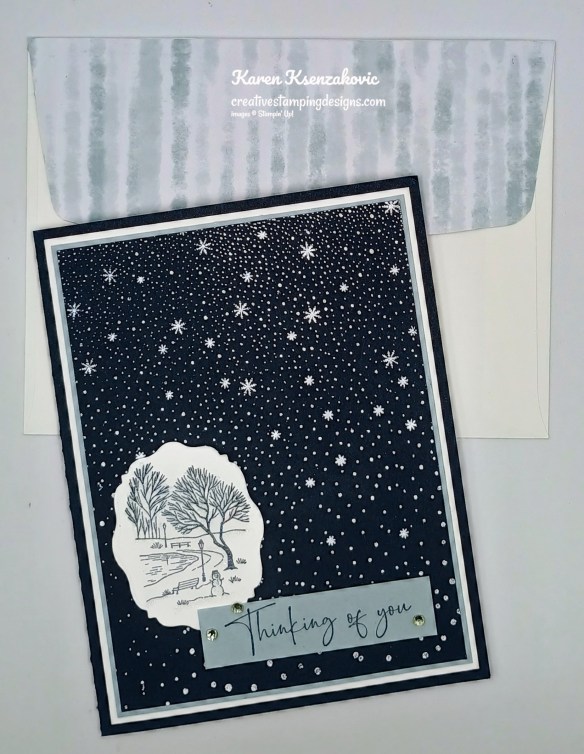
My card today features my 2 favorite 2025-2027 In-Colors, Cloud Cover and Secret Sea, along with my favorite, lots of layers. I love this color combination and hope that one day they make these 2 colors permanent. What are your favorite In-Colors? Here’s my card for today.

Stampin' Up! Winter Scenes Right Words 1 creativestampingdesigns.com

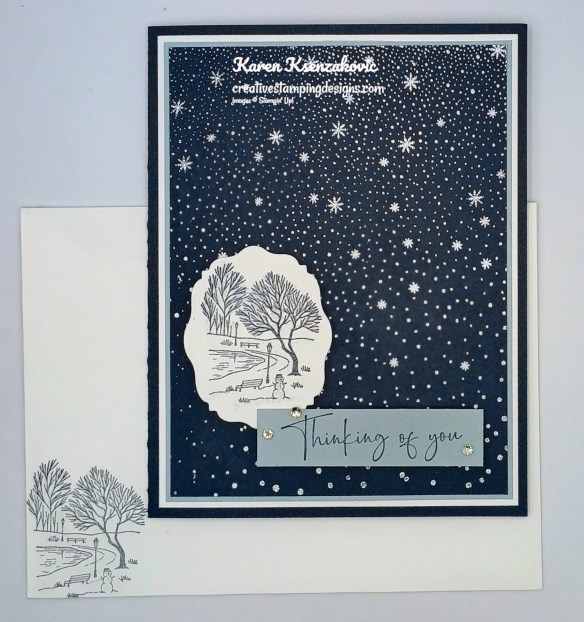
I used the Stampin’ Up! Winter Scenes Stamp Set along with the Stampin’ Up! the Right Words Stamp Set and Stampin’ Up! Falling Snow Stamp Set for my card today.

Stampin' Up! Winter Scenes Right Words 2 creativestampingdesigns.com

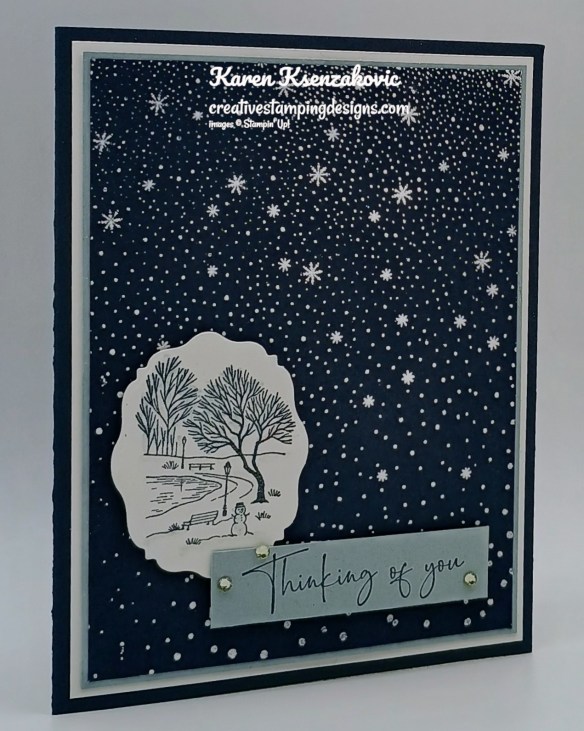
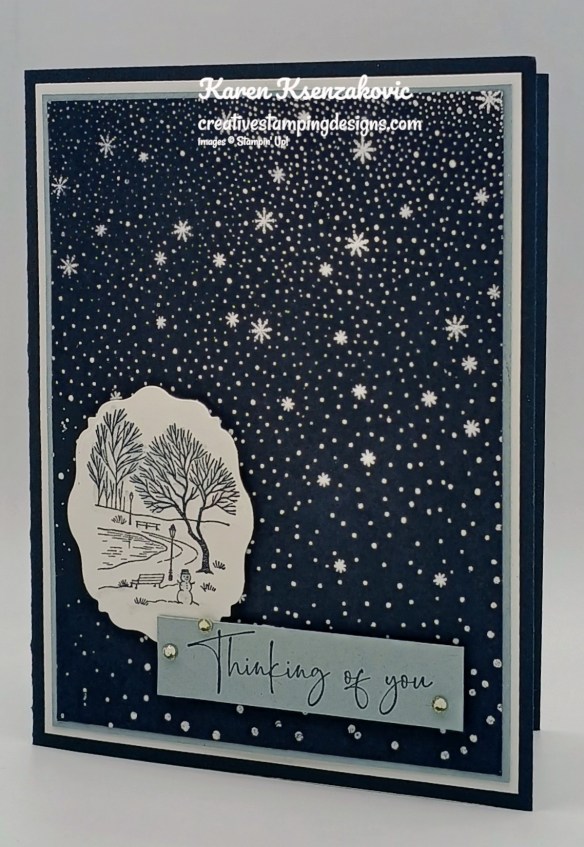
Stamp the snow image from the Falling Snow stamp set on a panel of Secret Sea in Versamark Ink. Sprinkle the image with White Embossing Powder and set it using the Heat Tool. Adhere the embossed panel to a Cloud Cover mat and a Basic White mat. Adhere the layered panel to a Secret Sea card base.

Stampin' Up! Winter Scenes Right Words 3 creativestampingdesigns.com

Stamp the park image from the Winter Scenes stamp set in Secret Sea Ink on a panel of Basic White. Cut the image out using the Beautifully Celebrated Dies. Using the Clear Wink of Stella Brush, go over the trees, snowman and snow on the ground. Adhere the die cut image to the card front with Stampin’ Dimensionals.

Stampin' Up! Winter Scenes Right Words 4 creativestampingdesigns.com

On a panel of Cloud Cover, stamp the sentiment from The Right Words stamp set in Secret Sea Ink.. Adhere the sentiment to the card front with Stampin’ Diimensionals. Add a few Rhinestone Basic Jewels to the card front.

Stampin' Up! Winter Scenes Right Words 5 creativestampingdesigns.com

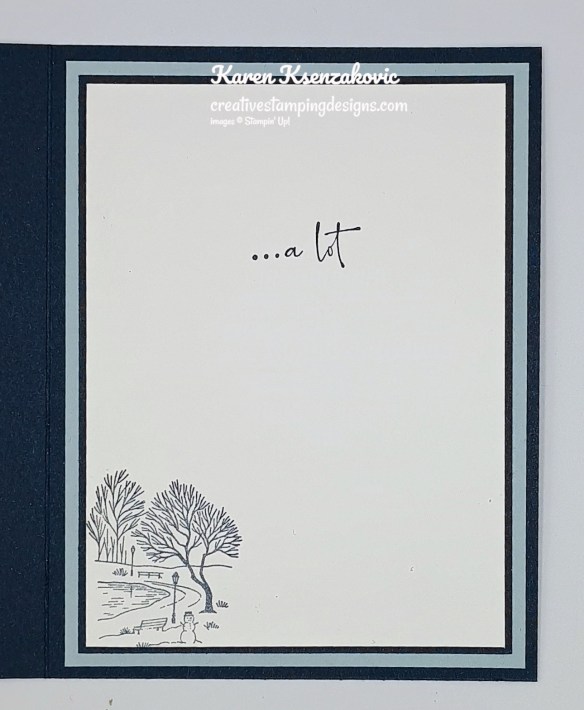
Stamp the sentiment from The Right Words stamp set in Secret Sea Ink on a panel of Basic White. Stamp the park scene from the Winter Scenes stamp set in Secret Sea Ink on the bottom of the panel. Adhere the Basic White panel to Secret Sea and Cloud Cover mats then to the inside of the Secret Sea card base

Stampin' Up! Winter Scenes Right Words 6 creativestampingdesigns.com

Decorate a Basic White Medium Envelope to finish your card. Stamp the park image from the Winter Scenes stamp set in Secret Sea Ink on the envelope front. Adhere a panel of 2025-2027 In-Color 6 x 6 Designer Series Paper to the envelope flap.

Stampin' Up! Winter Scenes Right Words 7 creativestampingdesigns.com

Thank you for stopping by my blog today. I hope you like the card and will give it a try. Happy Stamping!!

*********************************************************************************************************

If you need any stamping supplies, I’d love to be your Demonstrator. Just click HERE to go directly to my online store or drop me an email if you have any questions. 

*********************************************************************************************************

Stuck on You Ordering Special

I’m offering a little ordering special for Valentine’s Day again this year!  I call it my “Stuck on You Valentine” ordering special! For all orders of $50 or greater (before shipping and taxes and after coupons) placed through me between now and Saturday, February 14, you’ll get your choice of a free adhesive! 

This can be anything that Stampin’ Up! sells that could be used as an adhesive!  And for the adhesives that are $5 or under, two packs will equal one choice (see the items with the (2) on the list below) so if you select those, you’ll get double!!

Here is a list of the adhesives that you can pick from:

  • Adhesive Sheets – 152334
  • Multipurpose Liquid Glue – 110755
  • Mini Glue Dots – 103683
  • Tear & Tape Adhesive – 154031
  • Stampin’ Seal – 152813
  • Stampin’ Seal Refill – 152814
  • Stampin’ Seal + – 149699
  • Stampin’ Seal + Refill – 152812
  • Fine-Tip Glue Pen – 138309
  • Silicone Craft Sheet (even though it’s not an adhesive…it is an awesome tool for adhesives!) – 127853
  • Foam Adhesive Strips – 141825
  • Stampin’ Dimensionals (2) – 104430
  • Mini Stampin’ Dimensionals (2) – 144108
  • Black Stampin’ Dimensionals Combo Pack – 150893
  • Foam Adhesive Sheets – 152815

I’ll be placing the order for the adhesives on February 16th, so please be sure to send your selections right away when you order…otherwise I’ll pick one for you and send it out with your thank you gift!

*With Stampin’ Up!’s backorder policy where numbers are turned off for ordering if they go on backorder, if the adhesive that you pick is turned off for ordering when I place the order on the 16th, I’ll order Stampin’ Dimensionals for you instead.

Visit my Online Store Here and start shopping now!!

*********************************************************************************************************

February’s Free Online Fun Fold Class Registration Open

It’s time to cash in those Bonus Coupons (starting February 3), so Tara Carpenter and I are offering a Free Online Zoom Class for February.  We will be creating 6 different Fun Fold cards; we’re hoping to show you how easy some fun folds can be.  This class will be FREE with a $50 purchase from my Online Store.   We will not be sharing the products we are using since the cards we make live will most likely be using new products that will be available in March (a week after the class).

The class requirements:

  • Visit my Online Store and place a $50 or more order before tax and shipping and after coupon codes.
  • Once you have made the purchase, fill out the Google Form HERE and submit.

What you will receive:

  • Zoom class with complete step by step instructions to complete each card as we go.
  • PDF with detailed directions and photos
  • A Link to the recorded class after we are done so you can watch it again and make more cards.

A week before the class I will send you the complete PDF of the cards so you can cut all your cardstock gather your supplies, so you are ready to go.  We will NOT be cutting cardstock or doing any die cutting live since all the cards will be different.  Everyone’s cards will be unique since you will pick which color cardstock and ink you want to use along with the Designer Series Paper, Ribbon & Embellishments for each card.

The class will be held on Sunday February 22nd from 1pm – 4pm Eastern Time via Zoom.  This will allow everyone all over the United States to participate live!  

I will email you the Zoom link to the class a day before the event.

Click Here to Register.

Deadline to sign up is Sunday February 15th at 5pm ET  

*********************************************************************************************************

February 3 – March 2 – Stampin’ Up! Joining Special – Free Positioning Tool

Stampin’ Up! announced an amazing new tool that will be available for FREE with the purchase of a Starter Kit between February 3-March 2!!  Anyone that purchases the Starter Kit during the promotion will get the awesome new Stampin’ Positioner with their Starter Kit absolutely FREE!!

Here are the Starter Kit promotion details:

  • Promotion Period: February 3–March 2
  • New team members who purchase their Starter Kit February 3–March 2 will also receive our new Stampin’ Positioner*.
  • New demonstrators who submit their Independent Demonstrator Agreement (IDA) before February 3 or after March 2 will not be eligible for this offer.
  • Joining deadline:  March 2, 2026, at 11:59 p.m. (MT)

*What’s the Stampin’ Positioner?

It’s Stampin’ Up!’s new stamping alignment tool that makes stamping easier and more accurate. It allows you to stamp precisely aligned images, create repeating patterns and Two-Step Stampin’ images easily, and make multiple projects in minutes.

Stampin’ Positioner Grid Paper will also be available for to order but it is not included as part of this exclusive join offer.

A few other things to know:

  • The Stampin’ Positioner WILL be available for purchase by everyone at a later date.  We have not been given any details on when that will be.
  • The Stampin’ Positioner is available for a limited time for current Demonstrators to purchase.

You can read more details about the joining offer on this PDF (click the image to open a full-size printable PDF):

We’d love to have you join our team!!  Once you join, you get at least a 20% discount on all of your Stampin’ Up! purchases and you get to preorder from the upcoming catalogs and promotions!! You can attend the Stampin’ Up! events too. There’s never an obligation to sell, you can join to enjoy the discount for yourself. Contact me if you have any questions and we can talk. I’d love to have you on my team. I’d be more than happy to answer any of your questions, contact me at creativestampingdesigns@gmail.com

You can read a bit more information about the benefits of being a Demonstrator and a part of our team here.  When you’re ready to join, you can get started here.  Let me know if you have any questions.

*********************************************************************************************************

Redeem Those Bonus Days Coupons February 3 – 28

  • Redemption Period: February 3–28, 2026
    • There is no limit to the number of coupon codes you can redeem on an order during the redemption period. If you’re redeeming multiple codes, you must put a space between each code.
    • You may only redeem coupon codes one time. You cannot redeem them after February 28.
    • You can redeem Bonus Days coupon codes for month-to-month Paper Pumpkin subscriptions and new prepaid subscriptions.
    • Some restrictions apply. Coupons can’t be redeemed towards Starter Kits and you cannot use them on exchanges.
    • Redemption period ends:  February 28, 2026, at 11:59 p.m. (MT)

*********************************************************************************************************

New Stampin’ Up! Product of The Month

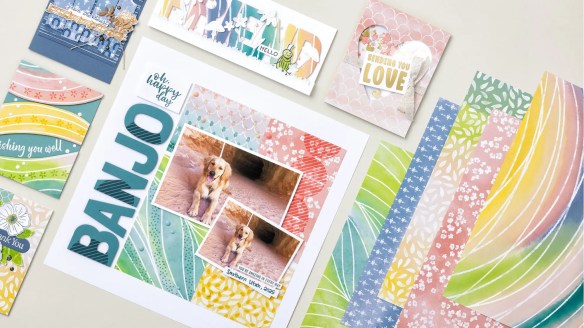
Add color and whimsy to your paper crafting with the Painted Illusions 12″ x 12″ (30.5 x 30.5 cm) Designer Series Paper! This craft paper features soft watercolor gradients in pink, green, blue, teal, and yellow, with white patterns that flow over the background. Layer with other Stampin’ Up! products in coordinating colors to create your own harmonious card making and scrapbooking designs. The Painted Illusions 12″ x 12″ (30.5 x 30.5 cm) Designer Series Paper is the exclusive Product of the Month for February 2026! Only available until stocks run out—don’t wait to get yours!

DETAILS
– February 2026 Product of the Month
– 12 sheets: 3 each of 4 double-sided designs
– 12″ x 12″ (30.5 x 30.5 cm)
– Acid and lignin free (this product is photo-safe)
– Colors: Darling Duckling, Flirty Flamingo, Granny Apple Green, Lost Lagoon, Misty Moonlight, Petal Pink, Pretty Peacock

DESIGNER SERIES PAPER
– Can be used for card making, scrapbooking, and other paper crafts!
– Features exclusive designs by in-house Stampin’ Up! artists.
– Complements other Stampin’ Up! products and colors.

PRODUCT OF THE MONTH
– Is a new exclusive product released each month!
– Can be unlocked for just $5 with orders over $75 (after discounts and rewards).
– Is only available while supplies last—they can sell out quickly!
– Is limited to one per customer (including language versions).

*********************************************************************************************************

Card stock cuts for this project:

  • Basic White Cardstock2″ x 2″(artwork), 4″ x 5 1/4″(card front mat), 3 5/8″ x 4 7/8″(inner liner)
  • Cloud Cover Cardstock 3 7/8″ x 5 1/8″(card front mat), 5/8″ x 2 1/2″(sentiment), 4″ x 5 1/4″(inner liner mat)
  • Secret Sea Cardstock 5 1/2″ x 8 1/2″(card base scored & folded at 4 1/4″), (2) – 3 3/4″ x 5″(card front & inner liner mat)
  • 2025-2027 In-Color 6 x 6 Designer Series Paper 2 1/4″ x 6″(envelope)

*********************************************************************************************************

Product List

Stampin’ Up! Framed All Around Birthday

Good Saturday morning stamping friends and welcome to the weekend. Does anyone have any plans? It’s going to be a cold one here in NJ again today with temps in the teens and there’s a wind advisory; I’ll be at work all day today trying to stay warm. Who’s going to be watching the Super Bowl Sunday? I told my daughter I thought that would be a good time to go grocery shopping. Fun stuff huh?

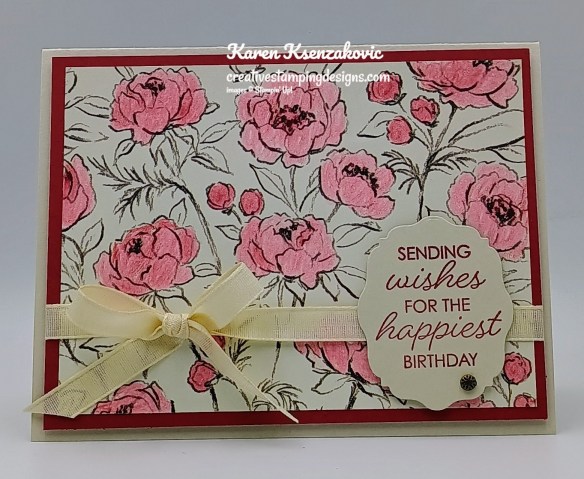
Today’s card has a sneak peek of a new set coming out with the March Online Exclusives on March 3rd. If you’d like to see a quick video on how I made this card, Click Here to go to my Instagram Reels. Here’s my card for today.

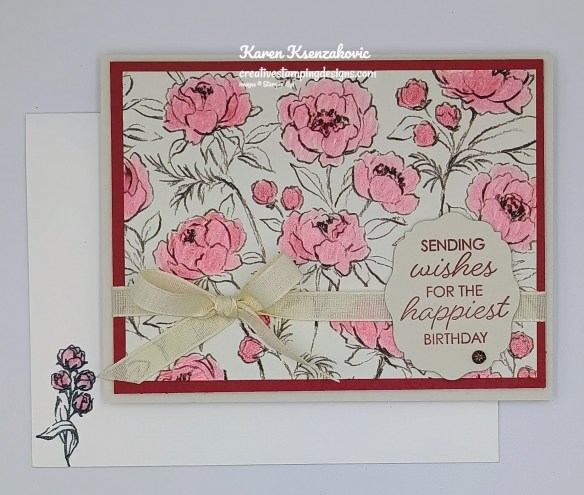
Stampin' Up! Framed All around Birthday 1 creativestampingdesigns.com

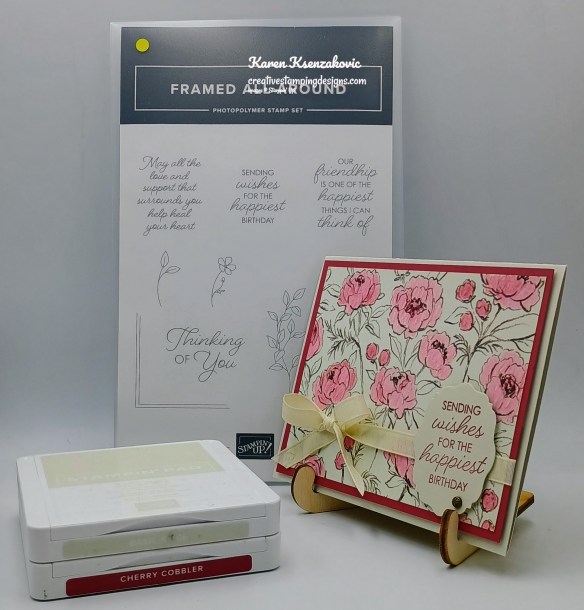
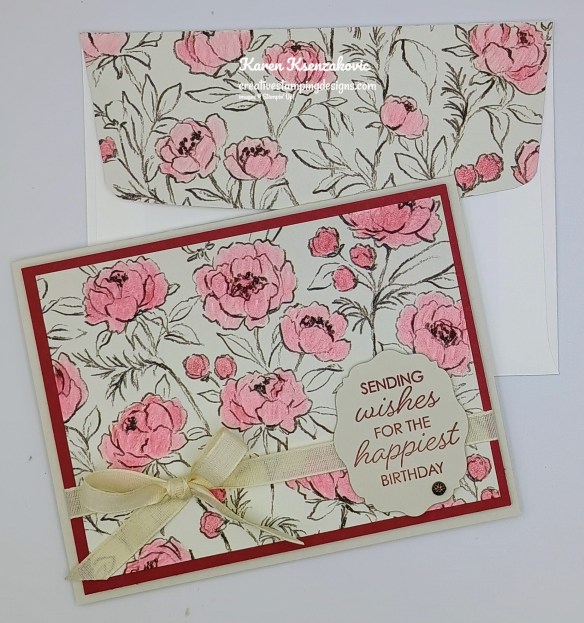
I used the new Framed All Around Stamp Set (avail Mar 3) along with the Gallery Blooms 6 x 6 Designer Series Paper and Beautifully Celebrated Dies for my card today.

Stampin' Up! Framed All around Birthday 2 creativestampingdesigns.com

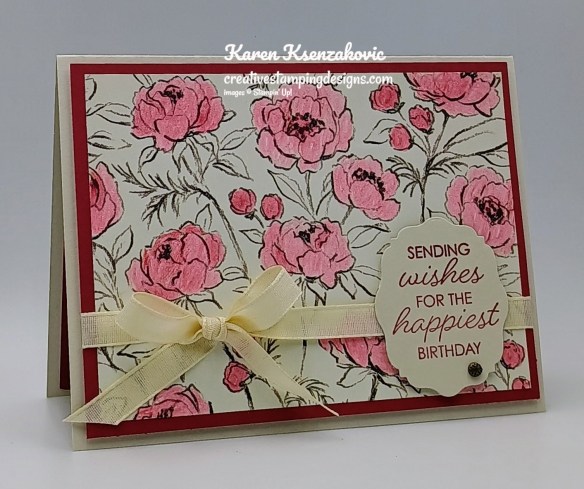
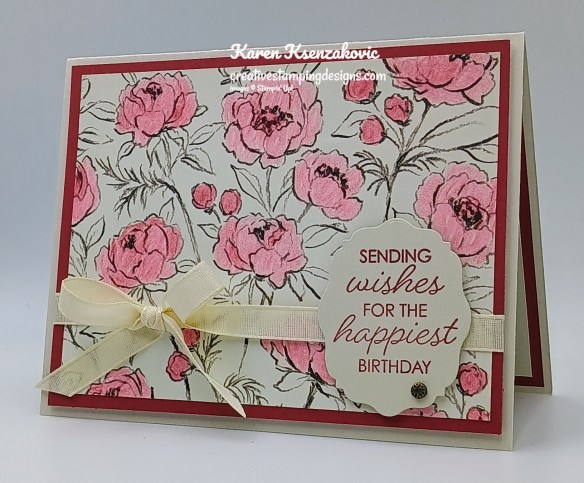
Color the flowers on a panel of Gallery Blooms DSP using the Cherry Cobbler Watercolor Pencil. go over the colored flowers using the Blender Pen to smooth the pencil streaks. Adhere the colored panel of Gallery Blooms DSP to a Cherry Cobbler mat.

Stampin' Up! Framed All around Birthday 3 creativestampingdesigns.com

Wrap a piece of Basic Beige 3/8″ Classic Ribbon around the layered panel and tie a bow. Adhere the layered panel to a Basic Beige card base with Stampin’ Dimesionals.

Stampin' Up! Framed All around Birthday 4 creativestampingdesigns.com

Stamp the sentiment from the new Framed All Around stamp set in cherry Cobbler Ink on a panel of Basic Beige. Cut the sentiment out using the Beautifully Celebrated Dies. Adhere the sentiment to the card front, over the ribbon, with Stampin’ Dimensionals. Add a Pressed Flower Motifs to the card front.

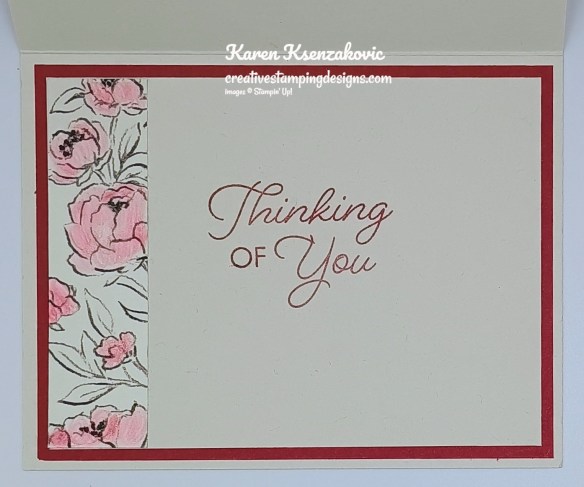
Stampin' Up! Framed All around Birthday 5 creativestampingdesigns.com

Stamp the sentiment from the Framed All Around stamp set in cherry cobbler Ink on a panel of Basic Beige. Adhere a panel of the Gallery Blooms DSP to the side of the panel. Adhere the Basic Beige panel to a Cherry Cobbler mat then to the inside of the Basic Beige card base.

Stampin' Up! Framed All around Birthday 6 creativestampingdesigns.com

Decorate a Basic White Medium Envelope to finish the card. Stamp the small flower image from the Gallery Blooms stamp set in Tuxedo Black Ink on the envelope front. Color the flower using the Cherry Cobbler Watercolor Pencil. Adhere a panel of Gallery Blooms DSP, that was colored the same way as the card front, to the envelope flap.

Stampin' Up! Framed All around Birthday 7 creativestampingdesigns.com

Thank you for stopping by my blog today. I hope you like the card and will give it a try. Happy Stamping!!

*********************************************************************************************************

If you need any stamping supplies, I’d love to be your Demonstrator. Just click HERE to go directly to my online store or drop me an email if you have any questions. 

*********************************************************************************************************

Stuck on You Ordering Special

I’m offering a little ordering special for Valentine’s Day again this year!  I call it my “Stuck on You Valentine” ordering special! For all orders of $50 or greater (before shipping and taxes and after coupons) placed through me between now and Saturday, February 14, you’ll get your choice of a free adhesive! 

This can be anything that Stampin’ Up! sells that could be used as an adhesive!  And for the adhesives that are $5 or under, two packs will equal one choice (see the items with the (2) on the list below) so if you select those, you’ll get double!!

Here is a list of the adhesives that you can pick from:

  • Adhesive Sheets – 152334
  • Multipurpose Liquid Glue – 110755
  • Mini Glue Dots – 103683
  • Tear & Tape Adhesive – 154031
  • Stampin’ Seal – 152813
  • Stampin’ Seal Refill – 152814
  • Stampin’ Seal + – 149699
  • Stampin’ Seal + Refill – 152812
  • Fine-Tip Glue Pen – 138309
  • Silicone Craft Sheet (even though it’s not an adhesive…it is an awesome tool for adhesives!) – 127853
  • Foam Adhesive Strips – 141825
  • Stampin’ Dimensionals (2) – 104430
  • Mini Stampin’ Dimensionals (2) – 144108
  • Black Stampin’ Dimensionals Combo Pack – 150893
  • Foam Adhesive Sheets – 152815

I’ll be placing the order for the adhesives on February 16th, so please be sure to send your selections right away when you order…otherwise I’ll pick one for you and send it out with your thank you gift!

*With Stampin’ Up!’s backorder policy where numbers are turned off for ordering if they go on backorder, if the adhesive that you pick is turned off for ordering when I place the order on the 16th, I’ll order Stampin’ Dimensionals for you instead.

Visit my Online Store Here and start shopping now!!

*********************************************************************************************************

February’s Free Online Fun Fold Class Registration Open

It’s time to cash in those Bonus Coupons (starting February 3), so Tara Carpenter and I are offering a Free Online Zoom Class for February.  We will be creating 6 different Fun Fold cards; we’re hoping to show you how easy some fun folds can be.  This class will be FREE with a $50 purchase from my Online Store.   We will not be sharing the products we are using since the cards we make live will most likely be using new products that will be available in March (a week after the class).

The class requirements:

  • Visit my Online Store and place a $50 or more order before tax and shipping and after coupon codes.
  • Once you have made the purchase, fill out the Google Form HERE and submit.

What you will receive:

  • Zoom class with complete step by step instructions to complete each card as we go.
  • PDF with detailed directions and photos
  • A Link to the recorded class after we are done so you can watch it again and make more cards.

A week before the class I will send you the complete PDF of the cards so you can cut all your cardstock gather your supplies, so you are ready to go.  We will NOT be cutting cardstock or doing any die cutting live since all the cards will be different.  Everyone’s cards will be unique since you will pick which color cardstock and ink you want to use along with the Designer Series Paper, Ribbon & Embellishments for each card.

The class will be held on Sunday February 22nd from 1pm – 4pm Eastern Time via Zoom.  This will allow everyone all over the United States to participate live!  

I will email you the Zoom link to the class a day before the event.

Click Here to Register.

Deadline to sign up is Sunday February 15th at 5pm ET  

*********************************************************************************************************

February 3 – March 2 – Stampin’ Up! Joining Special – Free Positioning Tool

Stampin’ Up! announced an amazing new tool that will be available for FREE with the purchase of a Starter Kit between February 3-March 2!!  Anyone that purchases the Starter Kit during the promotion will get the awesome new Stampin’ Positioner with their Starter Kit absolutely FREE!!

Here are the Starter Kit promotion details:

  • Promotion Period: February 3–March 2
  • New team members who purchase their Starter Kit February 3–March 2 will also receive our new Stampin’ Positioner*.
  • New demonstrators who submit their Independent Demonstrator Agreement (IDA) before February 3 or after March 2 will not be eligible for this offer.
  • Joining deadline:  March 2, 2026, at 11:59 p.m. (MT)

*What’s the Stampin’ Positioner?

It’s Stampin’ Up!’s new stamping alignment tool that makes stamping easier and more accurate. It allows you to stamp precisely aligned images, create repeating patterns and Two-Step Stampin’ images easily, and make multiple projects in minutes.

Stampin’ Positioner Grid Paper will also be available for to order but it is not included as part of this exclusive join offer.

A few other things to know:

  • The Stampin’ Positioner WILL be available for purchase by everyone at a later date.  We have not been given any details on when that will be.
  • The Stampin’ Positioner is available for a limited time for current Demonstrators to purchase.

You can read more details about the joining offer on this PDF (click the image to open a full-size printable PDF):

We’d love to have you join our team!!  Once you join, you get at least a 20% discount on all of your Stampin’ Up! purchases and you get to preorder from the upcoming catalogs and promotions!! You can attend the Stampin’ Up! events too. There’s never an obligation to sell, you can join to enjoy the discount for yourself. Contact me if you have any questions and we can talk. I’d love to have you on my team. I’d be more than happy to answer any of your questions, contact me at creativestampingdesigns@gmail.com

You can read a bit more information about the benefits of being a Demonstrator and a part of our team here.  When you’re ready to join, you can get started here.  Let me know if you have any questions.

*********************************************************************************************************

Redeem Those Bonus Days Coupons February 3 – 28

  • Redemption Period: February 3–28, 2026
    • There is no limit to the number of coupon codes you can redeem on an order during the redemption period. If you’re redeeming multiple codes, you must put a space between each code.
    • You may only redeem coupon codes one time. You cannot redeem them after February 28.
    • You can redeem Bonus Days coupon codes for month-to-month Paper Pumpkin subscriptions and new prepaid subscriptions.
    • Some restrictions apply. Coupons can’t be redeemed towards Starter Kits and you cannot use them on exchanges.
    • Redemption period ends:  February 28, 2026, at 11:59 p.m. (MT)

*********************************************************************************************************

New Stampin’ Up! Product of The Month

Add color and whimsy to your paper crafting with the Painted Illusions 12″ x 12″ (30.5 x 30.5 cm) Designer Series Paper! This craft paper features soft watercolor gradients in pink, green, blue, teal, and yellow, with white patterns that flow over the background. Layer with other Stampin’ Up! products in coordinating colors to create your own harmonious card making and scrapbooking designs. The Painted Illusions 12″ x 12″ (30.5 x 30.5 cm) Designer Series Paper is the exclusive Product of the Month for February 2026! Only available until stocks run out—don’t wait to get yours!

DETAILS
– February 2026 Product of the Month
– 12 sheets: 3 each of 4 double-sided designs
– 12″ x 12″ (30.5 x 30.5 cm)
– Acid and lignin free (this product is photo-safe)
– Colors: Darling Duckling, Flirty Flamingo, Granny Apple Green, Lost Lagoon, Misty Moonlight, Petal Pink, Pretty Peacock

DESIGNER SERIES PAPER
– Can be used for card making, scrapbooking, and other paper crafts!
– Features exclusive designs by in-house Stampin’ Up! artists.
– Complements other Stampin’ Up! products and colors.

PRODUCT OF THE MONTH
– Is a new exclusive product released each month!
– Can be unlocked for just $5 with orders over $75 (after discounts and rewards).
– Is only available while supplies last—they can sell out quickly!
– Is limited to one per customer (including language versions).

*********************************************************************************************************

Card stock cuts for this project:

  • Basic Beige Cardstock 5 1/2″ x 8 1/2″(card base scored & folded at 4 1/4″), 2″ x 3″(sentiment), 3 3/4″ x 5″(inner liner)
  • Cherry Cobbler Cardstock (2) – 4″ x 5 1/4″ (card front & inner liner mats)
  • Beautiful Gallery 6 x 6 Designer Series Paper 3 3/4″ x 5″(card front), 1″ x 3 3/4″(inner liner), 2 1/4″ x 6″(envelope)

*********************************************************************************************************

Product List

Stampin’ Up! Notes & Totes CAS and February Online Class Registrations Open

Good Sunday morning stamping friends HAPPY FEBRUARY!! I hope your weekend is going well and you’re staying warm, especially if you’re covered in snow like we are. I’ll be in the office all day again doing my January bills. What are your plans?

Today I have a super simple CAS card for you that took me less than 10 minutes to put together. If you’d like to see a quick video on how I made this card, Click Here to go to my Instagram Reels. Here’s my card for today.

Stampin' Up! Notes & Totes CAS 1 creativestampingdesigns.com

I used the Stampin’ Up! Notes & Totes Stamp Set along with the Beach Boardwalk Designer Series Paper for my card today.

Stampin' Up! Notes & Totes CAS 2 creativestampingdesigns.com

Stamp the sentiment from the Notes & Totes stamp set on the top of the Beach Boardwalk DSP panel in secret Sea Ink.

Stampin' Up! Notes & Totes CAS 3 creativestampingdesigns.com

Adhere the Beach Boardwalk DSP panel to a Secret Sea mat. Wrap a piece of Secret Sea 3/8″ Fau Linen Ribbon around the layered panel and tie a knot.

Stampin' Up! Notes & Totes CAS 4 creativestampingdesigns.com

Adhere the layered panel to a Fresh Freesia card base with Stampin’ Dimensionals. Add a few 2025-2027 In-Color Flat Pearls to the card front.

Stampin' Up! Notes & Totes CAS 5 creativestampingdesigns.com

Stamp the sentiment from Notes & Totes stamp set in Secret Sea Ink on a panel of Basic White. Stamp the hibiscus image from the Notes & Totes stamp set in Fresh Freesia Ink on either side of the sentiment. Adhere a panel of Beach Boardwalk DSP to the bottom of the panel. Adhere the Basic White panel to a Secret Sea mat then to the inside of the Fresh Freesia card base.

Stampin' Up! Notes & Totes CAS 6 creativestampingdesigns.com

Decorate a Basic White Medium Envelope to finish your card. Stamp the hibiscus image from the Notes & Totes stamp set in Fresh Freesia Ink on the envelope front. Adhere a panel of Beach Boardwalk DSP to the envelope flap.

Stampin' Up! Notes & Totes CAS 7 creativestampingdesigns.com

Thank you for stopping by my blog today. I hope you like the card and will give it a try. Happy Stamping!!

*********************************************************************************************************

If you need any stamping supplies, I’d love to be your Demonstrator. Just click HERE to go directly to my online store or drop me an email if you have any questions. 

*********************************************************************************************************

February’s Free Online Fun Fold Class Registration Open

It’s time to cash in those Bonus Coupons (starting February 3), so Tara Carpenter and I are offering a Free Online Zoom Class for February.  We will be creating 6 different Fun Fold cards; we’re hoping to show you how easy some fun folds can be.  This class will be FREE with a $50 purchase from my Online Store.   We will not be sharing the products we are using since the cards we make live will most likely be using new products that will be available in March (a week after the class).

The class requirements:

  • Visit my Online Store and place a $50 or more order before tax and shipping and after coupon codes.
  • Once you have made the purchase, fill out the Google Form HERE and submit.

What you will receive:

  • Zoom class with complete step by step instructions to complete each card as we go.
  • PDF with detailed directions and photos
  • A Link to the recorded class after we are done so you can watch it again and make more cards.

A week before the class I will send you the complete PDF of the cards so you can cut all your cardstock gather your supplies, so you are ready to go.  We will NOT be cutting cardstock or doing any die cutting live since all the cards will be different.  Everyone’s cards will be unique since you will pick which color cardstock and ink you want to use along with the Designer Series Paper, Ribbon & Embellishments for each card.

The class will be held on Sunday February 22nd from 1pm – 4pm Eastern Time via Zoom.  This will allow everyone all over the United States to participate live!  

I will email you the Zoom link to the class a day before the event.

Click Here to Register.

Deadline to sign up is Sunday February 15th at 5pm ET  

*********************************************************************************************************

Bonus Days Ending Tomorrow, Monday February 2 and Redeem February 3-28!!

It’s almost time for BONUS DAYS! Because do you know what’s a great deal? Getting rewarded for all the crafting supplies you’re already going to buy! When you shop between January 6 and February 2 and spend $50 USD, you will earn a $5 USD coupon! Make sure you save all your coupons because you can redeem them (and we mean ALL of them) between February 3 and 28. And don’t forget—each purchase earns you Stampin’ Rewards, so that’s even more bang for your buck! There’s no limit to how many coupons you can earn!

Details:

  • Earn a $5 USD coupon for every $50 USD spent (before shipping and tax).
  • All coupon codes will be emailed right after a qualifying purchase has been made. You must have a customer account with a valid email address to earn coupons when you shop.
  • If you earn multiple codes from a single order, you will receive one email with multiple codes. If you earn multiple codes from multiple orders, you will receive separate emails for each code earned.
  • All order types qualify for this promotion.
  • Orders started before the promotion begins will not count toward earning coupon codes. You must add items to your cart and complete your purchase during the earning period.
  • There is no limit to the number of coupon codes participants can earn per order or throughout the duration of the earning period.
  • Redemption Period: February 3–28, 2026
    • There is no limit to the number of coupon codes you can redeem on an order during the redemption period. If you’re redeeming multiple codes, you must put a space between each code.
    • You may only redeem coupon codes one time. You cannot redeem them after February 28.
    • You can redeem Bonus Days coupon codes for month-to-month Paper Pumpkin subscriptions and new prepaid subscriptions.
    • Some restrictions apply. Coupons can’t be redeemed towards Starter Kits and you cannot use them on exchanges.
    • Redemption period ends:  February 28, 2026, at 11:59 p.m. (MT)

*********************************************************************************************************

Card stock cuts for this project:

  • Basic White Cardstock 4″ x 5 1/4″(inner liner)
  • Fresh Freesia Cardstock 4 1/4″ x 11″(card base scored & folded at 5 1/2″)
  • Secret Sea Cardstock (2) – 4 1/8″ x 5 3/8″(card front & inner liner mats)
  • Beach Boardwalk Designer Series Paper 4″ x 5 1/4″(card front), 3/4″ x 4″(inner liner), 2 1/4″ x 6″(envelope flap)

*********************************************************************************************************

Product List