Stampin’ Up Amazing Life Birthday Card

Good Wednesday morning my stamping friends.  How is your week going?  Hope you’re having a good one.

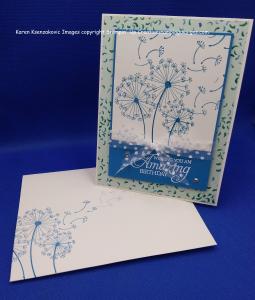
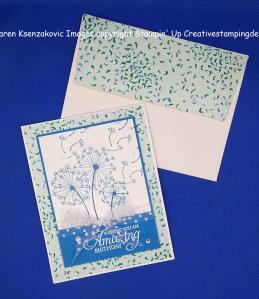
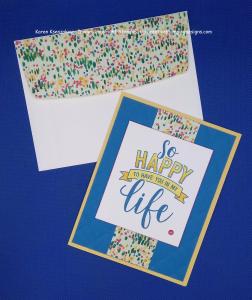
For today’s card I used the Stampin’ Up Amazing Life Stamp Set.  This is another card we made at my workshop.  I had different levels of stampers and everyone did an amazing job making it.  Take a look.
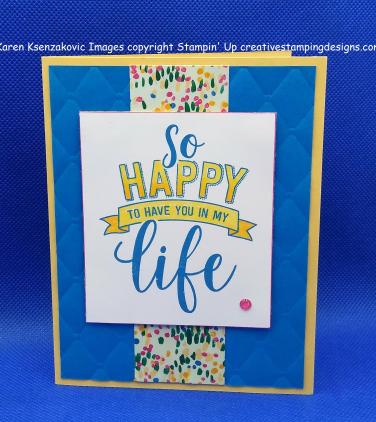
I started with a Pacific Point card front and ran it through my Big Shot using the Tufted Dynamic Textured Impressions Embossing Folder.  I adhered a strip of Garden Impressions 6 X 6 Designer Series Paper down the center of the card front using Multipurpose Liquid Glue.
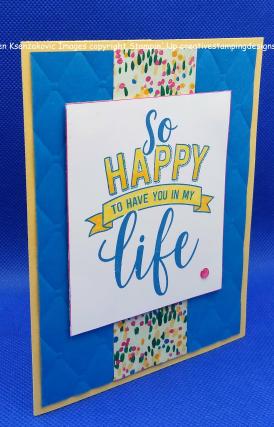
On a small panel of Whisper White cardstock I stamped the large sentiment from the Amazing Life stamp set in Pacific Point Ink.  I colored the image in using my Mango Melody Stampin’ Blends Markers.  I then took my Melon Mambo Stampin’ Write Marker and edged the  artwork.  I adhered the artwork to the card front using Stampin’ Dimensionals.
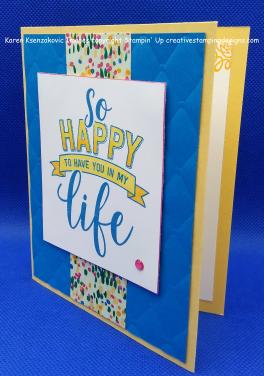
I added a Melon Mambo Glitter Enamel Dot to the artwork.  I adhered the card front to a So Saffron card base using Multipurpose Liquid Glue.
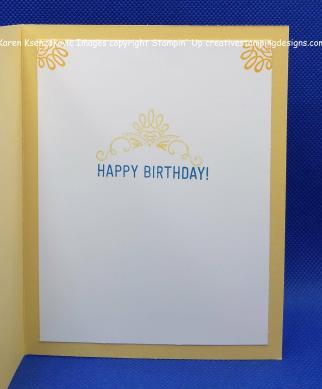
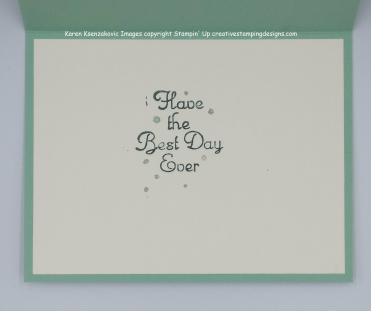
On the inside I stamped the Happy Birthday sentiment from the Amazing Life stamp set in Pacific Point Ink on a Whisper White panel.  I stamped the scroll from the same stamp set above the sentiment in Mango Melody Ink, stamping off once.  I stamped just the top of the same scroll in the corners in Mango Melody Ink.  I adhered the Whisper White panel to the So Saffron card base using Multipurpose Liquid Glue.

To finish my card off I decorated a Medium Whisper White Envelope.  I stamped the scroll from the Amazing Life stamp set in Mango Melody Ink on the envelope front.  I adhered a piece of Garden Impressions 6 X 6 DSP to the envelope flap.

Thank you for stopping by my blog today.  I hope you liked my card and will give it a try. Happy Stamping.

****************************************************************************************************

If you need any stamping supplies, I’d be very happy to be your Demonstrator.  Just click here to go directly to my online store or drop me an email if you have any questions.

MY CURRENT HOST CODE IS: Q2B3H6HZ 

Happy Stamping, Karen!

****************************************************************************************************

Card stock cuts for this project:

  • Pacific Point Cardstock 4″ X 5 1/4″ (card front)
  • So Saffron Cardstock 8 1/2″ X 5 1/2″ (card base scored and folded at 4 1/4″)
  • Whisper White Cardstock 4″ X 5 1/4″ (inner liner), 3″ X 3 1/2″ (artwork)
  • Garden Impressions 6 X 6 Designer Series Paper 1 1/2″ X 5 1/4″ (card front strip), piece for envelope flap

****************************************************************************************************

Product List

Stampin’ Up Colorful Seasons Quick and Easy Card

Good Friday morning my stamping friends.  How was your week?  Are you ready for the weekend?  Have you made some fun plans?

For today’s card I joined in with 2 challenges.   The first one is What Will You Stamp Challenge #203.  This was a new one for me.  They give you a stamp set and you come up with something.  Be sure to stop by to see what everyone has made at What Will You Stamp and to play along.  Here is their challenge.

The other challenge I joined in with is Colour and Sketches #305.  Stop by to see what everyone has made at Colour and Sketches and to play along with them .. Here is their sketch.

I’ve made a very clean and simple card today for the 2 challenges.  I don’t usually do simple, but every once in a while I like to add one in.  Take a look.
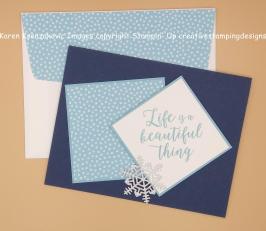
I started by cutting 2 mats in Balmy Blue cardstock.  On the larger mat I adhered a piece of Subtles 6 X 6 Designer Series Paper in Balmy Blue using Snail.  I adhered the matted DSP to a Night of Navy card base using Multipurpose Liquid Glue.
On a panel of Whisper White cardstock I stamped the sentiment from the Stampin’ Up Colorful Seasons stamp set in Balmy Blue Ink.  I adhered the stamped panel to the smaller Balmy Blue mat using Snail.  I then adhered it to the Night of Navy card base,  using Stampin’ Dimensionals, over lapping the matted DSP panel.

I cut one of the snowflakes from the Seasonal Layers Thinlits Dies using my Big Shot out of a piece of Sparkle Glimmer Paper.  I adhered the snowflake to the over lapped matted panels using Stampin’ Dimensionals and Multipurpose Liquid Glue.

On the inside I stamped the larger snowflake from the Colorful Seasons stamp set in Balmy Blue Ink, stamping off once, across a Whisper White panel.  I stamped the sentiment from the same stamp set in Night of Navy Ink over the snowflakes.  I adhered the Whisper White panel to the inside of the Night of Navy card base using Multipurpose Liquid Glue.

To finish my card I decorated a Medium Whisper White Envelope.  I stamped the smaller snowflake from the Colorful Seasons stamp set across the bottom front of the envelope.  I adhered a piece of the Subtles 6 X 6 DSP to the envelope flap.

Thank you for stopping by my blog today.  I hope you liked my quick and easy card and will give it a try.  Happy Stamping.

****************************************************************************************************

If you need any stamping supplies, I’d be very happy to be your Demonstrator.  Just click here to go directly to my online store or drop me an email if you have any questions.

MY CURRENT HOST CODE IS: Q2B3H6HZ 

Happy Stamping, Karen!

****************************************************************************************************

Card stock cuts for this project:

  • Balmy Blue Cardstock 3″ X 3″ (dsp mat), 2 5/8″ X 2 5/8″ (sentiment mat)
  • Night of Navy Cardstock 8 1/2″ X 5 1/2″ (card base scored and folded at 4 1/4″)
  • Sparkle Glimmer Paper (scrap for snowflake)
  • Whisper White Cardstock 4″ X 5 1/4″ (inner liner)
  • Subtles 6 X 6 Designer Series Paper 2 7/8″ X 2 7/8″ (card front artwork)

****************************************************************************************************

Product List

Stampin’ Up Meant To Be For Paper Craft Crew and Sunday Stamps

Good Tuesday morning my fellow stampers.  How has your week started off?  We are having a couple very cold days here.  It’s been in the negative digits with the wind chill.

For today’s card I played along with 2 challenges.

The first was the Paper Craft Crew Valentine Color Challenge #322.  Be sure to stop by to see what everyone has made and to play along. Here is their challenge.

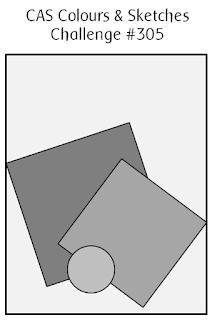
The next one is Sunday Stamps Sketch Challenge #196.  Be sure to stop by to see what they have made and to play along with them. Here is their sketch.

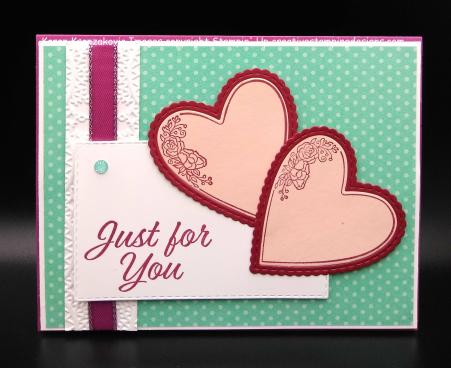
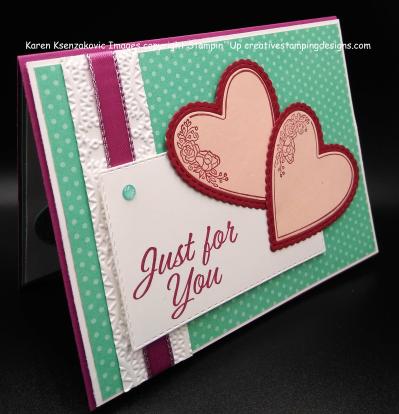
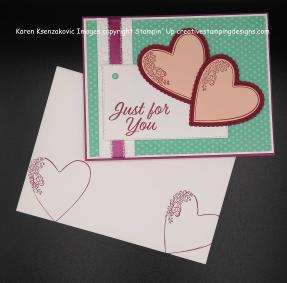
I started with a Whisper White card front and adhered a piece of How Sweet It Is Designer Series Paper using Snail.  I took a strip of Whisper White cardstock and using my Big Shot, I embossed it with the Lace Dynamic Textured Impressions Embossing Folder.  I adhered it to the left side of the card front using Multipurpose Liquid Glue.  I wrapped a piece of the 3/8″ Berry Burst Metallic Edge Ribbon around the embossed strip and the card front.

On a small piece of Whisper White cardstock I stamped the sentiment from the Stampin’ Up Meant To Be Cling Stamp Set in Cherry Cobbler Ink.  Using the 5th from the largest Rectangle Stitched Framelits Dies I cut the sentiment out with my Big Shot.  I adhered it to the card front using Stampin’ Dimensionals and added a Coastal Cabana Glitter Enamel Dot to the corner.

On a panel of Petal Pink Cardstock I stamped the floral heart image from the Meant To Be stamp set in Cherry Cobbler Ink twice.  I then cut the 2 hearts out using the Be Mine Stitched Framelits Dies.  I also cut 2 of the same size hearts out in Cherry Cobbler cardstock for the frame around the stamped hearts.  I adhered the hearts to the sentiment using Stampin’ Dimensionals and Multipurpose Liquid Glue.  I adhered the card front to a Berry Burst card base using Stampin’ Dimensionals.

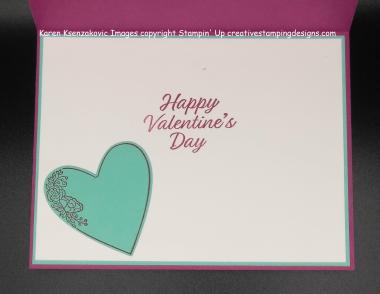
On the inside on a Whisper White panel I stamped the sentiment from the Meant To Be stamp set in Cherry Cobbler Ink.  I stamped one more of the floral hearts in Cherry Cobbler Ink on a piece of Coastal Cabana cardstock and cut it out using the Be Mine Stitched Framelits Dies.  I adhered the heart to the left side of the Whisper White panel using Multipurpose Liquid Glue.  I adhered the Whisper White panel to a Coastal Cabana mat using Snail then adhered it to the Berry Burst card base using Multipurpose Liquid Glue.

To finish my card I decorated a Medium Whisper White Envelope.  I stamped the floral heart from the Meant To Be stamp set on the front of the envelope.  I adhered a piece of the How Sweet It Is DSP to the envelope flap.

Thank you for visiting my blog today.  I hope you liked my card and will give it a try. Happy Stamping.

****************************************************************************************************

If you need any stamping supplies, I’d be very happy to be your Demonstrator.  Just click here to go directly to my online store or drop me an email if you have any questions.

MY CURRENT HOST CODE IS: Q2B3H6HZ 

Happy Stamping, Karen!

****************************************************************************************************

Card stock cuts for this project:

  • Berry Burst Cardstock 8 1/2″ X 5 1/2″ (card base scored and folded at 4 1/4″)
  • Cherry Cobbler Cardstock for 2 hearts
  • Coastal Cabana Cardstock 4 1/8″ X 5 3/8″ (inner liner mat), piece for inner heart
  • Petal Pink Cardstock (piece of 2 hearts)
  • Whisper White Cardstock 4 1/8″ X 5 3/8″ (card front), 4″ X 5 1/4″ (inner liner), 3″ X 4″ (rectangle sentiment panel), 1″ X 4 1/8″ (embossed strip on card front)
  • How Sweet It I Designer Series Paper 4″ X 5 1/4″ (card front), piece for envelope flap

****************************************************************************************************

Product List

Stampin’ Up One For All Around The Corner

Good Friday morning my fellow stampers.  Have you all had a good week?  Any fun plans for the weekend?  I’m hoping to spend some time at my craft table.  I’ve seen a lot of great challenges that I’d like to try.

For today’s card I have a very quick and easy card even though there are many layers.  This is one of the cards we made at my workshop.  I had different levels of stampers and they all did a fabulous job.  Take a look.

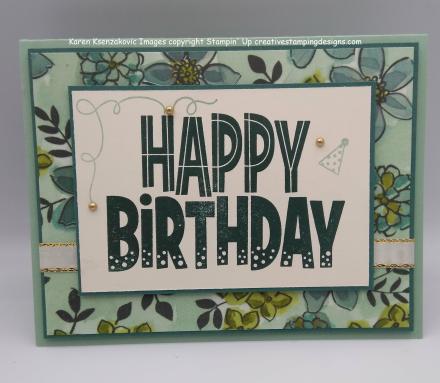
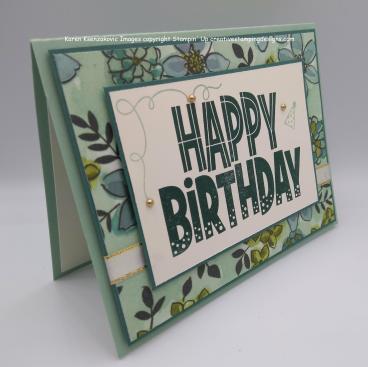
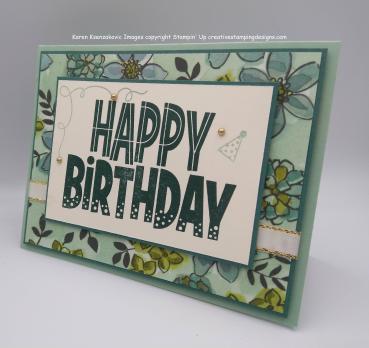
I started with a Tranquil Tide card front and adhered a panel of Share What You Love Specialty Designer Series Paper to it using Snail.  I wrapped a piece of 3/8″ Gold Metallic-Edge Ribbon around the bottom section of the card front.  I then adhered the card front to a Mint Macaron card base using Stampin’ Dimensionals.  If you really like the Tranquil Tide, now is the time to grab it.  It will be going away in June, so it would be best to get it now before it hits the retiring list.  It’s such a beautiful rich teal color.  I’m surely going to miss it.

Using my Stamparatus, I stamped the Happy Birthday sentiment from the Stampin’ Up One For All stamp set in Tranquil Tide Ink.  By using the Stamparatus if the image wasn’t dark enough I was able to re-stamp it perfectly.  I then stamped the streamer and the birthday hat from the Stampin’ Up Around The Corner stamp set in Mint Macaron Ink.  I adhered the artwork to a Tranquil Tide Mat using Snail then adhered it to the card front using Stampin’ Dimensionals.

I added a few Gold Metallic Pearls to the artwork to add a little bling.

For the inside I used my Tranquil Tide and Mint Macaron Stampin’ Write Markers to color just the sentiment part of one of the other images from the One For All stamp set.  I stamped the sentiment in the center of a Very Vanilla panel then adhered it to the Mint Macaron card base using Multipurpose Liquid Glue.

To finish my card, I adhered a piece of the Share What You Love Specialty DSP to a Medium Very Vanilla Envelope flap.  There you have it a very quick and easy card that looks like it took you hours to make.

Thank you so much for stopping by my blog today.  I hope you liked my card and will give it a try.  Happy Stamping!!

****************************************************************************************************

If you need any stamping supplies, I’d be very happy to be your Demonstrator.  Just click here to go directly to my online store or drop me an email if you have any questions.

MY CURRENT HOST CODE IS: Q2B3H6HZ 

Happy Stamping, Karen!

****************************************************************************************************)

Card stock cuts for this project:

  • Mint Macaron Cardstock 8 1/2″ X 5 1/2″ (card base scored and folded at 4 1/4″)
  • Tranquil Tide Cardstock 4″ X 5 1/4″ (card front), 2 7/8″ X 4 1/8″ (artwork mat)
  • Very Vanilla Cardstock 4″ X 5 1/4″ (inner liner), 2 3/4″ X 4″ (artwork)
  • Share What You Love Specialty Designer Series Paper 3 7/8″ X 5 1/8″ (card front), piece for envelope flap

****************************************************************************************************

Product List

Stampin’ Up Abstract Impressions Thank You

Good Wednesday morning all my fellow stampers.  We’re half way through the week already.  Hope you are all having a great one.

For today’s card I used the Stampin’ Up Abstract Impressions Bundle.  Did you know if you purchase the Bundle (Stamp Set and Thinlits Dies) you get 10% off?  Who doesn’t like to save some money?  I know I sure do.  Purchasing this bundle you are just about to your $50 to earn a free Sale-A-Bration item and who doesn’t like FREE?

Here’s my card for today.  Take a look.

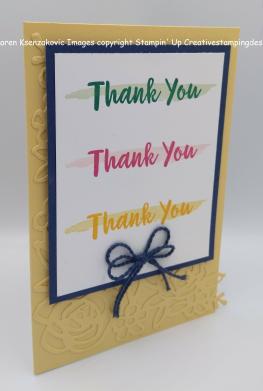
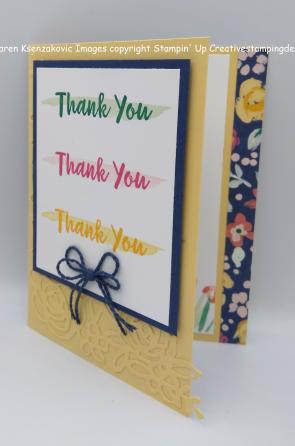
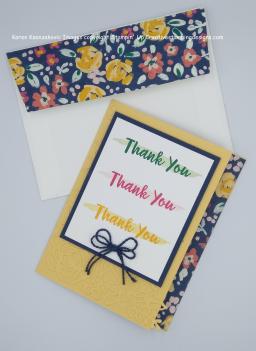
For this card, the measurements are a little different then my normal cards.  The measurements are below.  Using my Big Shot, I started by cutting out the beautiful corner floral piece from the Springtime Impressions Thinlits Dies in So Saffron cardstock.  I adhered the die cut to a So Saffron card base using Multipurpose Liquid Glue.

On a Whisper White panel, using my Stamparatus, I stamped the Thank You sentiment from the Stampin’ Up Abstract Impressions stamp set in Shaded Spruce, Melon Mambo and Mango Melody Inks.  I then stamped the watermark behind each sentiment in Soft Sea Foam, Powder Pink and So Saffron Inks.  I was able to get everything lined up perfectly by using the Stamparatus and hinging down to repeat each sentiment, (hope that made sense).  I adhered the Whisper White panel to a Night Of Navy mat using Snail.

I adhered a double bow using Night Of Navy Medium Bakers Twine below the sentiments.  I adhered the artwork to the So Saffron card base using Stampin’ Dimensionals.

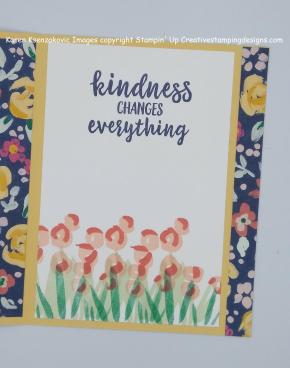
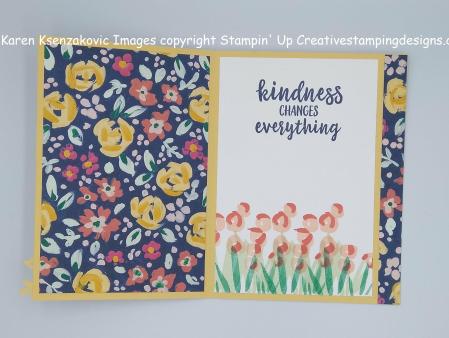
On the inside I adhered a piece of Garden Impressions Designer Series Paper to the right side of the card base.  I stamped the flowers from the Abstract Impressions stamp set in Shaded Spruce Ink, stamped off once, Soft Sea Foam Ink, Petal Pink Ink and Calypso Coral Ink along the bottom of a Whisper White panel.  I stamped the sentiment from the same stamp set in Night of Navy Ink in the center.  I adhered the Whisper White panel to the So Saffron card base using Multipurpose Liquid Glue.

I adhered a panel of the Garden Impressions Designer Series Paper to the inside left of the card base using Snail.

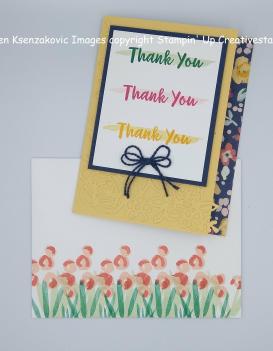
To finish my card I decorated a Medium Whisper White Envelope.  I stamped the flowers from the Abstract Impressions stamp set along the bottom front of the envelope the same way I did for the inner liner.  I adhered a piece of Garden Impressions DSP to the envelope flap.

Thank you for visiting my blog today.  I hope you liked my card and will give it a try. Happy stamping.

****************************************************************************************************

If you need any stamping supplies, I’d be very happy to be your Demonstrator.  Just click here to go directly to my online store or drop me an email if you have any questions.

MY CURRENT HOST CODE IS: Q2B3H6HZ 

Happy Stamping, Karen!

****************************************************************************************************

Card stock cuts for this project:

  • So Saffron Cardstock 5 1/2″ X 8″  (card base scored and folded at 4 1/4″), piece for the front die cut
  • Night Of Navy Cardstock 3 1/4″ X 4″ (artwork mat)
  • Whisper White Cardstock 3″ X 3 3/4″ (artwork), 3 1/2″ X 5 1/4″ (inner liner)
  • Garden Impressions Designer Series Paper 3 1/2″ X 5 1/4″ (left side inner liner), 1/2″ X 5 1/2″ (strip for right side of card), piece for envelope flap

****************************************************************************************************

Product List

Stampin’ Up Assorted Valentine Cards

Good Friday morning my fellow stampers.  Well, we made it to Friday.  Has anyone made any fun plans for the weekend?

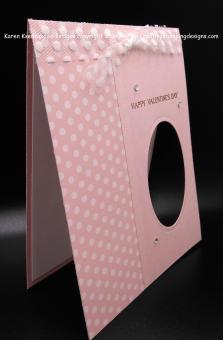
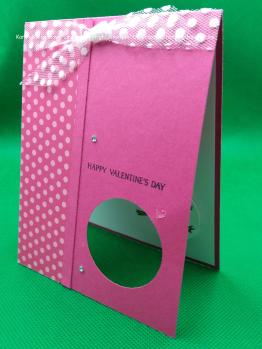
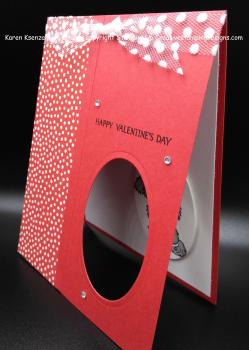
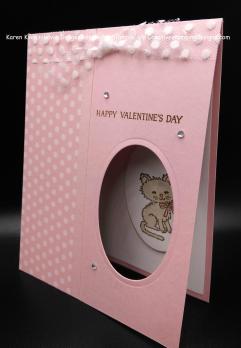
For today I have an assortment of cards for you.  They are all the same design just different colors and images.  This card is super simple and quick.  I never make 2 cards the same, so that’s why each card is a different color and had a different image on it.  This is one of the cards we will be making next week at my workshop.  Take a look.

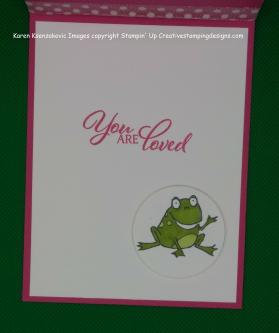
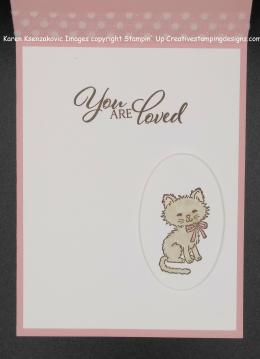
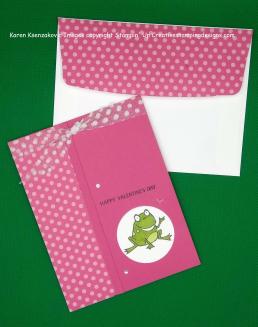
As you can see all the cards are kind of the same.  The frog card is made with Melon Mambo and the 1 1/2″ Circle Punch.  The puppy is made with Poppy Parade and the Layering Ovals Framelits Dies and the kitty is made with Blushing Bride and the Layering Ovals Framelits Dies.  All these cards are Peek-A-Boo cards.


I started with a card base in each of the differed colors. Using Snail, I adhered a panel of either Brights 6 X 6 Designer Series Paper or Subtle 6 X 6 Designer Series Paper to match the card base. I then adhered a strip of the matching cardstock along the seam of the DSP.  I punched the 1 1/2″ Circle Punch out of the Melon Mambo card and the Layering Ovals Framelits Dies from the Poppy Parade and Blushing Bride cards.

I stamped the Happy Valentine’s Day sentiment from the Stampin’ Up Forever Lovely stamp set in either Tuxedo Black Memento Ink (on the Melon Mambo or Poppy Parade cards) or Early Espresso Ink (for the Blushing Bride card) above the circle or ovals.  I wrapped a piece of Whisper White 5/8″ Polka Dot Tulle Ribbon around the top of each card base and tied a knot.  I added 3 Rhinestone Basic Jewels to each of the card fronts.

On a piece of Whisper White cardstock I stamped the frog from Stampin’ Up So Hoppy Together, the puppy from Stampin’ Up Bella & Friends stamp set in Tuxedo Black Memento Ink and the kitten from Stampin’ Up Pretty Kitty stamp set in Early Espresso Ink.  I colored the frog in using my Granny Apple Green Stampin’ Blends Markers.  I colored the puppy in using my Poppy Parade and Smoky Slate Stampin’ Blends Markers.  I colored the kitten in using my Crumb Cake and Petal Pink Stampin’ Blends Markers and my Blushing Bride Stampin’ Write Marker.  I cut each of the images out using the 1 1/2″ Circle Punch or the same size Oval from the Layering Ovals Framelits Dies. 

I stamped the You Are Loved sentiment from the Forever Lovely stamp set on a Whisper White panel using Melon Mambo, Poppy Parade or Early Espresso Inks.  I adhered the Whisper White panel to the inside of each of the card bases.

I lined up the cut image with the card front and using Stampin’ Dimensionals I adhered the images to the inside panel.

To complete each card I decorated a Medium Whisper White Envelope.  I stamped the frog, puppy or kitten on the front of each envelope and colored them in the same as I did for the cards.  I adhered a piece of the matching 6 X 6 DSP to the envelope flaps.

Thank you for stopping by my blog today.  I hope you liked my cards and will give them a try.  This is a super quick and easy card that looks like you took a lot of time to make. Happy Stamping.

****************************************************************************************************

If you need any stamping supplies, I’d be very happy to be your Demonstrator.  Just click here to go directly to my online store or drop me an email if you have any questions.

MY CURRENT HOST CODE IS: Q2B3H6HZ 

Happy Stamping, Karen!

****************************************************************************************************

Card stock cuts for this project:

  • Blushing Bride Cardstock, Melon Mambo Cardstock or Poppy Parade Cardstock  4 1/4″ X 11″ (card base scored and folded at 5 1/2″), 1/4″ X 5 1/2″(strip for card front)
  • Brights or Subtles 6 X 6 Designer Series Paper 1 3/4″ X 5 1/2″ (card front panel)
  • Whisper White Cardstock 4 x 5 1/4″ (inner liner), piece for artwork

****************************************************************************************************

Product List

Big Shot

$110.00

Glue Dots

$5.25

Stamparatus

$49.00

Stampin’ Up Dandelion Wishes Humming Along

Good Thursday morning my fellow stampers.  We’re almost through the week.  After having 2 short weeks this one feels extra long to me.  I really think we should have 3 day work weeks and 4 day weekends all the time.

For today’s card I pulled out another set from the Annual Catalog called Dandelion Wishes.  Take a look

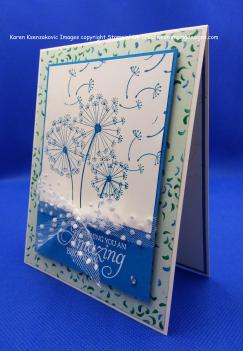
I started with  Thick Very Vanilla card base and adhered a panel of Garden Impressions Designer Series Paper to the front using Snail.  I took a small piece of Very Vanilla cardstock and stamped the triple dandelion image and the flying dandelion pieces image from the Stampin’ Up Dandelion Wishes stamp set in Pacific Point Ink.  I immediately sprinkled it with Clear Stampin’ Emboss Powder and heat set it using my Heat Tool.

I adhered the artwork to a Pacific Point panel using Snail.  I stamped the sentiment from the Stampin’ Up Humming Along stamp set in Versamark Ink below the artwork.  I sprinkled it with my White Stampin’ Emboss Powder and heat set it using my Heat Tool.  I wrapped a piece of Very Vanilla 5/8″ Polka Dot Tulle Ribbon around the artwork and tied a bow.

I adhered the artwork to the card front using Stampin’ Dimensionals.  I then added a couple Clear Rhinestone Basic Jewels to the card front.

On the inside I stamped the dandelion image from the Dandelion Wishes stamp set in Soft Sea Foam Ink in the center of a Very Vanilla panel.  I stamped the sentiment with the Stampin’ Up Seasoned With Kindness stamp set over the dandelion image in Pacific Point Ink.  I adhered the Very Vanilla panel to a Pacific Point mat using Snail then to the Thick Very Vanilla card base using Multipurpose Liquid Glue.

To finish my card I decorated a Medium Very Vanilla Envelope.  I stamped the dandelion image from Dandelion Wishes stamp set on the envelope front.  I adhered a piece of Garden Impressions DSP to the envelope flap.

Thank you for stopping by my blog today.  I hope you like my quick and easy card and will give it a try.  Happy Stamping.

****************************************************************************************************

If you need any stamping supplies, I’d be very happy to be your Demonstrator.  Just click here to go directly to my online store or drop me an email if you have any questions.

MY CURRENT HOST CODE IS: Q2B3H6HZ 

Happy Stamping, Karen!

****************************************************************************************************

Paper Pumpkin and Animal Expedition Go Wild for Valentine’s Day

Today is the last day to sign up for the Paper Pumpkin Subscription to be sure to get the January Valentine Kit.

January’s Paper Pumpkin Kit is a Valentine Kit called Be Mine. It combines everything you love about Paper Pumpkin-style treat packaging with adorable critter coordination in the popular Animal Expedition Kit!

About the Kit

January’s Paper Pumpkin kit is a Valentine kit coordinates with the Animal Expedition Suite. Here are a few more details:

  • Makes 24 adorable Valentine’s treat packages
  • Coordinating colors: Crumb Cake, Flirty Flamingo, Lemon Lime Twist, Melon Mambo, Petal Pink, and Pool Party

Subscribers must have an active subscription by January 10, 2019 to receive the Be Mine, Valentine kit.

Supplies are limited, so don’t wait—subscribe today!

In the event of supplies running out, Stampin’ Up! will end the subscription period early and stop taking new subscribers for January.

If you’re interested in subscribing to Paper Pumpkin yourself, you can either sign up for a subscription where you are billed monthly for your kit or you can purchase a prepaid subscription in my online store.  Just click here to go directly to my online store.  To see more information and sign up for the monthly subscription click here.

****************************************************************************************************

Card stock cuts for this project:

  • Thick Very Vanilla Cardstock 4 1/4″ X 11″ (card base scored and folded at 5 1/2″)
  • Pacific Point Cardstock 3 3/8″ X 4 5/8″ (artwork mat), 4 1/8″ X 5 3/8″ (inner liner mat)
  • Very Vanilla Cardstock 3 1/4″ X 3 1/4″ (artwork), 4″ X 5 1/4″ (inner liner)
  • Garden Impressions Designer Series Paper 4 1/8″ X 5 3/8″ (card front), piece for envelope flap

****************************************************************************************************

Product List

Stampin’ Up Animal Expeditions Birthday

Good Friday morning my fellow stampers.  Well, we’re up to another weekend already and for some of you it’s another 4 day weekend.  I just love these short weeks.  Is anyone making some fun plans for the weekend or New Year’s yet?  2019 is just 4 days away and that means that in just 6 days the 2019 Occasions Catalog and Sale-A-Bration Catalog start.  I’m making up my wish list and I hope you are too.

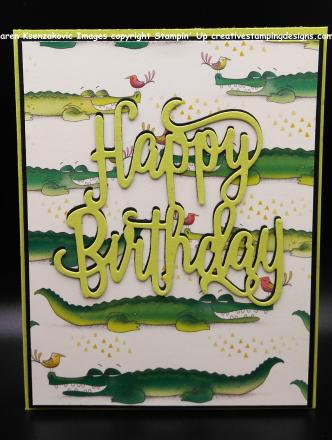
For today’s card I pulled out some of the Animal Expeditions Designer Series Paper and let that do all the work for me.  I have a nephew’s birthday coming up and he loves alligators.  I don’t know about you, but I always have trouble with masculine cards and boys cards.  I’m always afraid I’m going to make them too girly looking.  Here’s what I came up with for an 8 year old boy. Take a look.

I started with a Basic Black card front and adhered a piece of the Animal Expeditions Designer Series Paper using Snail.  I then adhered it to a Lemon Lime Twist card base using Stampin’ Dimensionals.

Using my Big Shot and my Happy Birthday Thinlits Dies, I cut it out twice.  Once in Lemon Lime Twist cardstock and once in Basic Black cardstock.  I adhered the Lemon Lime Twist Happy Birthday to the Basic Black Happy Birthday using Multipurpose Liquid Glue.

I then adhered the Happy Birthday dies to the card front using Glue Dots.

On the inside Whisper White panel I stamped the sentiment from Postcard Pals stamp set in Shaded Spruce Ink in the center.  I adhered the Whisper White panel to a Shaded Spruce mat using Snail.  I then fussy cut some of the alligators from the Animal Expeditions DSP and adhered them to the Whisper White panel using Snail.  I adhered the matted panel to the Lemon Lime Twist card base using Multipurpose Liquid Glue.

To finish up my card I adhered a piece of the Animal Expeditions DSP to a Medium Whisper White Envelope.  There you go a super simple little boy’s birthday card and not too girly looking.

Thank you for stopping by my blog today.  I hope you liked my card and will give it a try. Happy Stamping!!

****************************************************************************************************

If you need any stamping supplies, I’d be very happy to be your Demonstrator.  Just click here to go directly to my online store or drop me an email if you have any questions.

MY CURRENT HOST CODE IS: MBWFWZCA

Happy Stamping, Karen!

****************************************************************************************************

Paper Pumpkin and Animal Expedition Go Wild for Valentine’s Day

January’s Paper Pumpkin Kit is a Valentine Kit called Be Mine. It combines everything you love about Paper Pumpkin-style treat packaging with adorable critter coordination in the popular Animal Expedition Kit!

About the Kit

January’s Paper Pumpkin kit is a Valentine kit coordinates with the Animal Expedition Suite. Here are a few more details:

  • Makes 24 adorable Valentine’s treat packages
  • Coordinating colors: Crumb Cake, Flirty Flamingo, Lemon Lime Twist, Melon Mambo, Petal Pink, and Pool Party

Subscribers must have an active subscription by January 10, 2019 to receive the Be Mine, Valentine kit.

Supplies are limited, so don’t wait—subscribe today!

In the event of supplies running out, Stampin’ Up! will end the subscription period early and stop taking new subscribers for January.

If you’re interested in subscribing to Paper Pumpkin yourself, you can either sign up for a subscription where you are billed monthly for your kit or you can purchase a prepaid subscription in my online store.  Just click here to go directly to my online store.  To see more information and sign up for the monthly subscription click here.

****************************************************************************************************

Card stock cuts for this project:

  • Basic Black Cardstock 4 1/8″ X 5 3/8″ (card front mat), Piece for Happy Birthday
  • Lemon Lime Twist Cardstock 8 1/2″ X 5 1/2″ (card base scored and folded at 4 1/4″), Piece for Happy Birthday
  • Shaded Spruce Cardstock 4 1/8″ X 5 3/8″ (inner liner mat)
  • Whisper White Cardstock 4″ X 5 1/4″ (inner liner)
  • Animal Expeditions Designer Series Paper 4″ X 5 1/4″ (card front)

****************************************************************************************************

Product List

Stampin’ Up Around The Corner Birthday Wishes For You

Good Thursday morning my fellow stampers. Well the week is just about over and only 5 days till Christmas.  I guess I should go get my shopping done and my Christmas cards in the mail.  Have you finished your shopping, baking and card making?

I’ve got a quick and easy, clean and simple card for you today.  I used the Around The Corner stamp set.  Take a look.

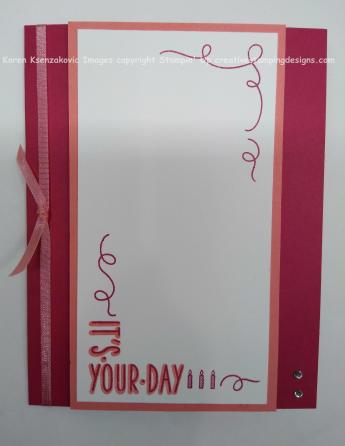
I started with a piece of Whisper White card stock and stamped the bottom corner with the It’s Your Day image from the Around The Corner stamp set in Lovely Lipstick Ink.  I stamped the shadow image in Flirty Flamingo Ink over the outlined image. I then stamped the ribbon image on the top right of the Whisper White cardstock in Lovely Lipstick Ink.  I adhered the Whisper White cardstock to a Flirty Flamingo mat using Snail.

I adhered the matted artwork to a Lovely Lipstick card base using Stampin’ Dimentionals.  I tied a piece of 1/8″ Flirty Flaming ribbon from the All My Love Ribbon Combo Pack available January 3, 2019, around the side and tied a knot.

I added a couple of the Clear Rhinestone Basic Jewels to the bottom right side.

On the inside on a Whisper White panel I stamped the Happy Birthday from the Birthday Wishes For You stamp set in Lovely Lipstick.  I then colored it in using my Flirty Flamingo Stampin’ Blends Markers.  I stamped the other image from the same stamp set in Lovely Lipstick Ink below the Happy Birthday.  I adhered the Whisper White panel to the Lovely Lipstick card base using Multipurpose Liquid Glue.

To finish my card I decorated a Medium Whisper White Envelope with the ribbon image from Around The Corner stamp set in Lovely Lipstick Ink.

Thank you for stopping by my blog today.  I hope you liked this super quick and easy card and will give it a try.  Sometimes you just need a very simple card.  Happy Stamping.

****************************************************************************************************

If you need any stamping supplies, I’d be very happy to be your Demonstrator.  Just click here to go directly to my online store or drop me an email if you have any questions.

MY CURRENT HOST CODE IS: MBWFWZCA

Happy Stamping, Karen!

****************************************************************************************************

Card stock cuts for this project:

  • Flirty Flamingo Cardstock 3″ X 5 1/2″ (artwork mat)
  • Lovely Lipstick Cardstock 5 1/2″ X 8 1/2″ (card base scored and folded at 4 1/4″)
  • Whisper White Cardstock 2 3/4″ X 5 1/4″ (artwork), 5 1/4″ X 4″ (inner liner)

****************************************************************************************************

Product List

Stampin’ Up Christmas Card for CAS(E) This Sketch #301

Good Tuesday morning my fellow stampers.  How has your week started off?  We’re down to the final week before Christmas. I’m still trying to get my cards finished. I’m hoping to finish up tonight.  Are you done with everything?

I have another Christmas card for you today and I played along with the CAS(E) This Sketch challenge # 301.  Be sure to stop by CAS(E) This Sketch to see what everyone has made and to play along.  Here is their sketch.

Here is what I came up with for the sketch.  Take a look.

I started with a card front from the Dashing Along Designer Series Paper.  I embossed 2 strips of Garden Green cardstock with the Subtles Dynamic Textured Imperssions Embossing Folder using my Big Shot.  I adhered them to opposite corners on the DSP using Multipurpose Liquid Glue.  I trimmed them to fit the paper.  I then wrapped 2 pieces of Silver Metallic Edge Ribbon over the Garden Green and adhered them on the back using Snail.  I then adhered the card front to a Cherry Cobbler card base using Stampin’ Dimensionals.

On a small piece of Whisper White cardstock I stamped the sentiment from Snowflake Sentiments in Garden Green Ink.  I stamped the poinsettia from the Timeless Tidings stamp set in Cherry Cobbler above the sentiment.  I then cut the sentiment out using my Big Shot and a square from Stitched Shaped Framelits Dies.  I cut a scalloped square out of Silver Foil Sheets and my Layering Squares Framelits Dies.

I adhered the Stitched square to the scalloped Square using Multipurpose Liquid Glue.  I adhered the artwork to the card front using Stampin’ Dimensionals and added a Clear Rhinestone Basic Jewel in the middle of the flower.

On the inside I stamped the poinsettia from the Timeless Tidings stamp set in Cherry Cobbler Ink in the 4 corners of a Whisper White panel.  I stamped one poinsettia in the center stamping off 3 times.  I stamped the sentiment from the same stamp set in Garden Green Ink over the poinsettia.  I adhered the Whisper White panel to a Garden Green mat using Snail then adhered it to the Cherry Cobbler card base using Multipurpose Liquid Glue.
To finish my card I decorated a Medium Whisper White Envelope.  I stamped the poinsettias from the Timeless Tidings stamp set in Cherry Cobbler Ink on the front of the envelope.  I adhered a piece of Dashing Along DSP to the envelope flap.

Thank you for stopping by my blog today.  I hope you liked my card and will give it a try.  Happy Stamping.

****************************************************************************************************

If you need any stamping supplies, I’d be very happy to be your Demonstrator.  Just click here to go directly to my online store or drop me an email if you have any questions.

MY CURRENT HOST CODE IS: MBWFWZCA

Happy Stamping, Karen!

****************************************************************************************************

I’m starting an online Host Club for January, February and March.  I’m doing it during Sale-A-Bration.  Everyone loves to get free items, why not be the host for a month and get extra free items.  Are you interested in building your Stampin’ Up supplies a little at a time and want to be able to receive host benefits?  An Online Host Club might be the perfect solution for you!  With the new Occasions and Sale-A-Bration Catalogs starting on January 3, this is a great time to join!

You sign up for a 3 month term and commit to:

  • A $50.00 minimum order each month (which will get you a free Sale-A-Bration item)
  • Place your order by the 20th of each month
  • Using the Host code for each month provided to you in an email sent out at the beginning of each month

Once 3 members have joined a random draw will determine your host month and you are guaranteed:

  • a $150.00 Workshop order during your host month
  • $15.00 minimum of Host Dollars to spend on the exclusive Host Stamp Sets, or any other current Stampin’ Up! product during your host month
  • At the end of the 3 months you will get a gift from me.

If you are interested in joining, please contact me ASAP.  This is a great way to earn some free products and build your Stampin’ Up supplies.

****************************************************************************************************

Card stock cuts for this project:

  • Cherry Cobbler Cardstock 8 1/2″ X 5 1/2″ (card base scored and folded at 4 1/4″)
  • Garden Green Cardstock 5 1/4″ X 4″ (Inner liner mat), 2 – 1″ X 4 1/2″ (corner pieces)
  • Whisper White Cardstock 5″ X 3 3/4″ (Inner liner), 3″ X 3″ (artwork)
  • Silver Foil Sheet 3″ X 3″ (artwork mat)
  • Dashing Along Designer Series Paper (5 1/4″ X 4″

****************************************************************************************************

Product List