Stampin’ Up Wishing You Well for Sunday Stamps

Good Wednesday morning my stamping friends.  Hope your week is going well

For today’s card I used the Stampin’ Up Wishing You Well stamp set and joined in with the Sunday Stamps Challenge #193.  Please be sure to stop by Sunday Stamps to see all the beautiful projects that everyone has made and to play along.  They had a fun color challenge to work with.  Here are their colors.

Here it what I came up with for these colors. Take a look.
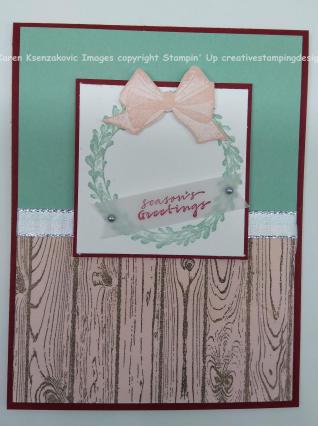
I started with a small piece of Petal Pink cardstock and stamped it with the Hardwood background stamp in Early Espresso Ink.  I adhered it to a Mint Macaron card front using Snail.  I wrapped a piece of 3/8″ Silver Metallic Edge Ribbon around the center of the card front.  I adhered the card front to a Cherry Cobbler card base using Stampin’ Dimensionals.

On a small piece of Whisper White cardstock I stamped the wreath from the Wishing You Well stamp set in Mint Macaron Ink.  I stamped the bow from the same stamp set in Blushing Bride Ink on a scrap piece of Whisper White cardstock and fussy cut it.  I adhered the bow to the wreath using Stampin’ Dimensionals.  I adhered the artwork to a Cherry Cobbler mat using Snail and adhered it to the card front using Stampin’ Dimensionals.

On a small strip of Vellum I stamped the sentiment from the Wishing You Well stamp set in Cherry Cobbler Ink and made a banner.  I adhered the banner across the wreath using Glue Dots and added a couple Silver Metallic Pearls.

On a panel of Whisper White cardstock I stamped the bow from the Wishing You Well stamp set in the center in Blushing Bride Ink stamping off once.  I stamped the sentiment from Snowflake Sentiments in Cherry Cobbler Ink over the bow.  I adhered the Whisper White panel to a Mint Macaron mat using Snail then adhered it to the Cherry Cobbler card base using Multipurpose Liquid Glue.

To finish my card I decorated a Medium Whisper White Envelope.  I stamped the front of the envelope with the bow from the Wishing You Well stamp set in Blushing Bride Ink.  I stamped the envelope flap with the Hardwood background stamp in Early Espresso Ink.

Thank you for stopping by my blog today.  I hope you liked my card and will give it a try.  Happy Stamping!

****************************************************************************************************

If you need any stamping supplies, I’d be very happy to be your Demonstrator.  Just click here to go directly to my online store or drop me an email if you have any questions.

MY CURRENT HOST CODE IS: MBWFWZCA

Happy Stamping, Karen!

****************************************************************************************************

Card stock cuts for this project:

  • Cherry Cobbler Cardstock 4 1/4″ X 11″ (card base scored and folded at 5 1/2″),    2 1/2″ X 2 1/2″ (artwork mat)
  • Mint Macaron Cardstock 4″ X 5 1/4″ (card front and inner liner mat)
  • Petal Pink Cardstock 4″ X 2 1/2″ (bottom section of card front)
  • Whisper White Cardstock 3 3/4″ X 5″ (inner liner), 2 3/8″ X 2 3/8″ (artwork)

****************************************************************************************************

Product List

Stampin’ Up Christmas Pines Detailed Baubles For Global Design

Good Thursday morning everyone. Another week almost over. Anyone making plans for the weekend? Have you all gotten your shopping done? I sure haven’t.

For today’s card I joined in with the Global Design Project #167.  Be sure to stop by Global Design to play along and see what everyone has made.  This week was a Theme Challenge.

Here’s my card for the challenge.  Take a look.

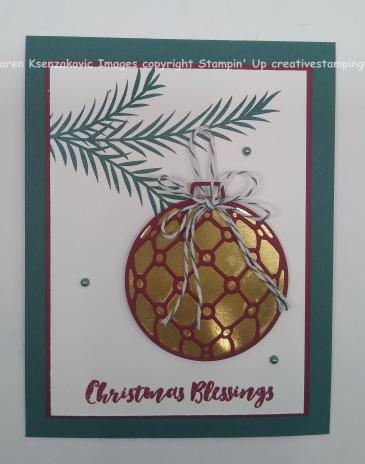
I started with a Whisper White card front and stamped the pines from Christmas Pines stamp set in Tranquil Tide Ink.  I stamped the sentiment in Cherry Cobbler Ink on the bottom and quickly sprinkled it with Clear Stampin’ Emboss Powder and heat set it with my Heat Tool.  Using my Big Shot I cut the round ornament from Detailed Baubles Thinlits Dies in Cherry Cobbler cardstock.  If you like this Thinlit Die set, I’d head over to my online store ASAP.  It’s available at a discounted price right now along with many other items that are being retired.

I cut a circle from the Layering Circles Framelits Dies from a piece of Gold Foil Sheet.  I adhered the Detailed Baubles ornament to the Gold Foil circle using Multipurpose Liquid Glue.  I tied a piece of Tranquil Tide Bakers Twine from the Share What You Love Embellishment Kit, (also discounted in my online store), around the top of the ornament and made a double bow.  I adhered it to one of the pines using a Glue Dot.

I adhered the ornament to the card front using Stampin’ Dimensionals.  I added 3 of the Tranquil Tide Share What You Love Artisan Pearls around the ornament.  I adhered the card front to a Cherry Cobbler mat using Snail then adhered it to a Tranquil Tide card base using Multipurpose Liquid Glue.

On the inside on a Whisper White panel I stamped the pines from the Christmas Pines stamp set in Tranquil Tide Ink, stamping off twice.  I stamped the sentiment from the same stamp set in Cherry Cobbler Ink in the center of the panel.  I adhered the Whisper White panel to the Tranquil Tide card base using Multipurpose Liquid Glue.

To finish my card I stamped the pines from Christmas Pines stamp set in Tranquil Tide Ink on the front left and the flap of a Medium Whisper White Envelope.

Thank you for stopping by my blog today.  I hope you liked my card and will give it a try.  This was another quick and easy card.  Happy Stamping!

****************************************************************************************************

If there are items you’ve been keeping you eye on, now’s the time to grab them.  It’s the YEAR-END CLOSEOUT SALE.

Stamp sets, Dies, Embellishments and more are at a discounted price.  Many items are retiring and you will not be able to get them once they are gone.

****************************************************************************************************

If you need any stamping supplies, I’d be very happy to be your Demonstrator.  Just click here to go directly to my online store or drop me an email if you have any questions.

MY CURRENT HOST CODE IS: MBWFWZCA

Happy Stamping, Karen!

****************************************************************************************************

Card stock cuts for this project:

  • Cherry Cobbler Cardstock 3 5/8″ X 4 7/8″ (card front mat)
  • Tranquil Tide Cardstock 4 1/4″ X 11″ (card base scored and folded at 5 1/2″)
  • Whisper White Cardstock 3 1/2″ X 4 3/4″ (card front), 5 1/2″ X 4″ (inner liner)
  • Gold Foil Sheet (circle behind ornament)

***************************************************************************************************
Product List

Stampin’ Up Amazing Life Sneak Peak

Good Wednesday morning everyone.  Hope your having a wonderful week so far.

I’ve got another sneak peak for you from the upcoming 2019 Occasions Catalog.  I used the Stampin’ Up Amazing Life stamp set and the  new Gingham Gala 6X6 Designer Series Paper which will be available January 3, 2019.  Take a look.

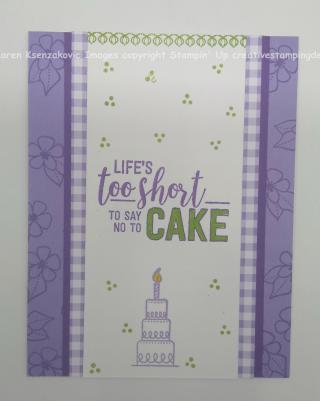
I started with a Whisper White panel and stamped the cake from Amazing Life stamp set in Highland Heather Ink on the bottom.  I stamped the sentiment from the same set in Gorgeous Grape Ink in the center of the panel.  I colored the word cake in using my Granny Apple Green Stampin’ Write Marker and I colored the candle flame in using my Pineapple Punch Stampin’ Write Marker.  I then stamped the border and dots from the same stamp set in Granny Apple Green Ink on the Whisper White panel.

I adhered the Whisper White panel to a piece of Highland Heather Gingham Gala 6X6 Designer Series Paper using Snail.  This new paper is so pretty.  There is large Gingham on one side and small Gingham on the other in 5 different colors.  This was a must have when I saw it.

I adhered the artwork to a Gorgeous Grape mat using Snail and then adhered it to a Highland Heather card base, using Multipurpose Liquid Glue, which I had stamped with the flower image from the Amazing Life stamp set in Highland Heather Ink.

On the inside I stamped the cake image from Amazing Life stamp set in Highland Heather Ink, stamping off once, in the center of a Whisper White Panel.  I stamped the Happy Birthday in Gorgeous Grape Ink over the middle of the cake.  I stamped one of the scrolls from the same stamp set in Granny Apple Green toward the top of the panel.  I adhered the Whisper White panel to the Highland Heather card base using Multipurpose Liquid Glue.

To finish my card I decorated a Medium Whisper White Envelope.  I stamped the cake image from the Amazing Life stamp set in Highland Heather Ink on the bottom left front of the envelope.  I adhered a piece of Gingham Gala 6X6 DSP to the envelope flap.

Thank you for stopping by my blog today.  I hope you liked my card. This is just one of the wonderful new sets that will be available January 3, 2019.

****************************************************************************************************

If you need any stamping supplies, I’d be very happy to be your Demonstrator.  Just click here to go directly to my online store or drop me an email if you have any questions.

MY CURRENT HOST CODE IS: MBWFWZCA

Happy Stamping, Karen!

****************************************************************************************************

Card stock cuts for this project:

  • Gorgeous Grape Cardstock 3 1/4″ X 5 1/2″ (artwork mat)
  • Highland Heather Cardstock 4 1/4″ X 11″ (card base scored and folded at 5 1/2″)
  • Whisper White Cardstock 2 1/2″ X 5 1/2″(artwork), 5 1/4″ X 4″(inner liner)
  • Gingham Gala 6X6 Designer Series Paper 3 1/4″ X 5 1/2″ (artwork mat)

****************************************************************************************************

Product List

Stampin’ Up Blackberry Bliss Snow Is Glistening Christmas Card

Good Wednesday morning everyone.  Hope you are having a wonderful week

Today I’m featuring another card from the Stampin’ Up Snow Is Glistening Stamp set and Snowfall Thinlits Dies only available for 2 more days.  Take a look.

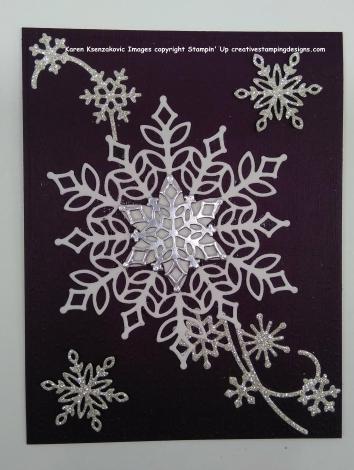
I started by cutting out some snowflakes, using my Big Shot, from the Snowfall Thinlits Dies.  I cut the largest snowflake in Whisper White, the snow swirl and 2 small snowflakes in Silver Glimmer Paper and another medium snowflake in Silver Foil Sheet.  I ran my Blackberry Bliss card front through my Big Shot using the Subtle Dynamic Textured Impressions Embossing Folder.

I arranged the snowflakes and the snow swirl on the card front the way I thought I’d like them.  Using Multipurpose Liquid Glue I adhered the largest snowflake and the snow swirl to my card front.

I adhered the Silver Foil snowflake to the center of the large snowflake using Stampin’ Dimensionals.  I adhered the smaller snowflakes using Stampin’ Dimensionals.  I then adhered the card front to a Blackberry Bliss card base using Multipurpose Liquid Glue.

On the inside Whisper White panel I stamped the medium snowflakes from the Snow Is Glistening stamp set in Smoky Slate Ink.  I stamped the sentiment from the same stamp set in Blackberry Bliss Ink in the center of the panel.  I adhered the Whisper White panel to the Blackberry Bliss card base using Multipurpose Liquid Glue.

To finish my card I stamped the snowflakes from the Snow Is Glistening stamp set in Smoky Slate Ink on the front and the flap of a Medium Whisper White Envelope.

Thank you for stopping by my blog today.  This was a pretty quick and easy card, I hope you will give it a try.  Happy Stamping!

****************************************************************************************************

If you need any stamping supplies, I’d be very happy to be your Demonstrator.  Just click here to go directly to my online store or drop me an email if you have any questions.

MY CURRENT HOST CODE IS: YTMBUVZE

Happy Stamping, Karen!

****************************************************************************************************

Don’t forget about ordering your Snowflake Showcase Products.  You only have 2 days left and then they are gone.

****************************************************************************************************

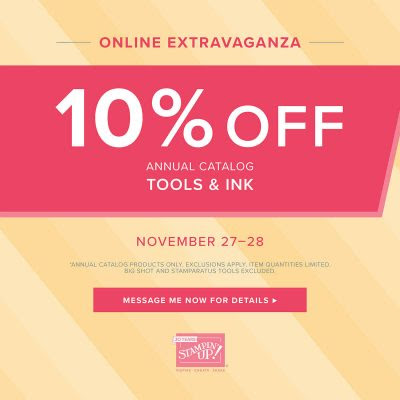
LAST DAY FOR THE STAMPIN’ UP ONLINE EXTRAVAGANZA.  DON’T MISS OUT ON THESE GREAT DEALS!

November 27–28

ANNUAL CATALOG TOOLS & INK – 10% OFF!!!

  • Adhesives
  • Applicators
  • Cleaners
  • Cutting tools
  • Embossing folders
  • Framelits and thinlits
  • Ink Pads
  • Ink refills
  • Markers
  • Punches
  • Scoring Tools
  • Stamp blocks and cases

Ordering Deadline for the Tools & Ink Sale: November 28, 11:50 PM (MT)

WOW!!!  That’s 10% off almost everything in the Annual Catalog!!!!

If you would like to see the full selection of discounted items during each 48-hour sale, please visit my online store during the sale timeframes!  Each sale will be given its own category, which will contain all available discounted items for that particular 48-hour sale.  After that, the only thing left to do is shop!  Get your WISH LIST READY AND SHOP!!!

****************************************************************************************************

Card stock cuts for this project:

  • Blackberry Bliss Cardstock 4 1/2″ X 11″ (card base scored and folded at 5 1/2″),   4 1/8″ X 5 3/8″ (card front)
  • Whisper White Cardstock 5″ X 3 3/4″ (inner liner), 4″ X 4″ (large snowflake)
  • Silver Glimmer Paper (snowflakes and snow swirl)
  • Silver Foil Sheet (medium snowflake)

****************************************************************************************************

Product List

Stampin’ Up Christmas Pines Quick and Easy Christmas Card

Good Wednesday morning everyone.  Hope your week is going well.  I can’t believe tomorrow is Thanksgiving already.  This week is flying by.  I’ll be baking my Pumpkin Pies, Apple Pies and Pumpkin Swirl Cheese Cake this afternoon and start prepping for Thanksgiving Dinner.  Does anyone else have Thanksgiving dinner at their house?

For today’s card I used an older stamp set that I love called Christmas Pines.  This is another quick and easy card for you.  Take a look.

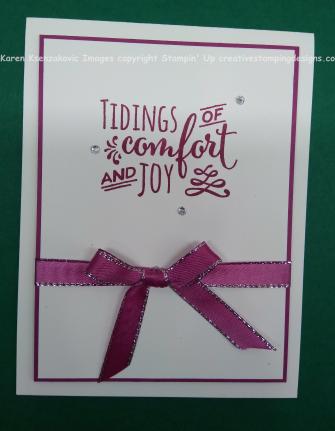
I started with a Whisper White cardstock panel and stamped the sentiment from Christmas Pines stamp set in Berry Burst Ink.  I adhered the card front to a Berry Burst mat using Snail.

I tied a Berry Burst Metallic Edge Ribbon around the card front and tied a bow.  To keep the bow in place I used a Glue Dot just under the bow.  I adhered the card front to a Whisper White card base using Stampin’ Dimensionals.

I added 3 Clear Rhinestone Basic Jewels to the card front to add a little extra bling.

On the inside Whisper White panel I stamped the snowflake image from the Christmas Pines stamp set in Gray Granite Ink, stamping off once.  I stamped another sentiment from the Christmas Pines stamp set in Berry Burst Ink on top of the snowflakes.  I adhered the Whisper White panel to a Berry Burst mat using Snail and adhered it to a Whisper White card base using Multipurpose Liquid Glue.

To finish my card I decorated a Medium Whisper White Envelope.  I stamped the snowflake image from the Christmas Pines stamp set in Gray Granite Ink, stamping off once, across the bottom front of the envelope and the envelope flap.

Thank you for stopping by my blog today.  I hope you liked my quick and easy card and will give it a try.  You can make this card and my other quick and easy cards in so many different colors.  happy Stamping!

****************************************************************************************************

If you need any stamping supplies, I’d be very happy to be your Demonstrator.  Just click here to go directly to my online store or drop me an email if you have any questions.

MY CURRENT HOST CODE IS: YTMBUVZE

Happy Stamping, Karen!

****************************************************************************************************

Don’t forget about ordering your Snowflake Showcase Products.  You only have until November 30th and then they are gone.

****************************************************************************************************

Card stock cuts for this project:

  • Berry Burst Cardstock 2 – 3 3/4″ X 5″ (card front mat and inner liner mat)
  • Whisper White Cardstock 4 1/4″ X 11″ (card base scored and folded at 5 1/2″), 3 5/8″ X 4 7/8″ (Inner liner)

****************************************************************************************************

Product List

Stampin’ Up Wishing You Well Clean and Simple Christmas Card

Good Friday morning everyone.  Hope you’ve had a productive week and are making some fun plans for the weekend.  I know I am.  If you live in the Central New Jersey area, this Sunday November 18th, I will be at a Holiday Craft Show at Immaculata High School in Somerville. Please stop by to say ‘Hi”.  I have some great teacher gifts and stocking stuffers.  I have 2 baskets filled with Stampin’ Up products that I will be raffling off and over 100 cards that I will be selling.

My card for today features the Stampin’ Up Wishing You Well Stamp Set.  I love all the images in this set, but especially the bow.  Take a look

I started with a panel from the Festive Farmhouse Designer Series Paper and embossed it with the Pinewood Planks Dynamic Textured Impressions Embossing Folder using my Big Shot.  I adhered it to a Whisper White card base using Multipurpose Liquid Glue.

I stamped the wreath from the Wishing You Well stamp set in Tranquil Tide Ink on a panel of Whisper White cardstock.  I stamped the bow on a scrap piece of Whisper White cardstock in Merry Merlot Ink and fussy cut it.  Using Stampin’ Dimensionals I adhered the bow to the wreath.  I adhered the artwork to a Whisper White mat using Snail and then adhered it to the card front using Stampin’ Dimensionals.

On a small piece of Whisper White cardstock, I stamped the sentiment from the Wishing You Well stamp set in Merry Merlot.  I made a banner from the sentiment and sponged it with Tranquil Tide Ink.  I adhered the banner to the left side of the card front using Stampin’ Dimensionals.

On the inside I first stamped the bow from Wishing You Well stamp set in Tranquil Tide Ink, stamping it off twice, in the center a Whisper White panel.  I stamped the sentiment from the Stampin’ Up Timeless Tidings Stamp Set in Merry Merlot Ink over the top of the bow.  I adhered the Whisper White panel to a Tranquil Tide mat using Snail and then adhered it to the card base using Multipurpose Liquid Glue.

To finish my card I decorated a Medium Whisper White Envelope.  I stamped the bow from Wishing You Well stamp set in Merry Merlot Ink and Tranquil Tide Ink on the front of the envelope.  I adhered a piece of Festive Farmhouse DSP to the envelope flap.

Thank you for stopping by my blog today.  I hope you liked my card, it was another quick and easy one, I hope you will give it a try.  Happy Stamping!

****************************************************************************************************

If you need any stamping supplies, I’d be very happy to be your Demonstrator.  Just click here to go directly to my online store or drop me an email if you have any questions.

MY CURRENT HOST CODE IS: YTMBUVZE

Happy Stamping, Karen!

****************************************************************************************************

Card stock cuts for this project:

  • Tranquil Tide Cardstock 4 1/8″ X 5 3/8″ (inner liner mat)
  • Whisper White Cardstock 8 1/2″ X 5 1/2″ (card base scored and folded at 4 1/4″), 4″ X 5 1/4″ (inner liner), 2 3/4″ X 2 3/4″ (artwork), 3″ X 3″ (artwork mat)
  • Festive Farmhouse Designer Series Paper 4 1/4″ X 5 1/2″ (card front)

****************************************************************************************************

Product List

Stampin’ Up Merry Christmas To All Christmas Card

Good Friday morning everyone.  Hope you’ve had a wonderful week and are looking forward to a fun weekend.

Just a reminder before we get to today’s card, you only have 1 day left to subscribe to the Paper Pumpkin.

The Paper Pumpkin team designed November’s Paper Pumpkin kit to give you a solution for your holiday crafting needs!  When you subscribe by November 10 (or resubscribe if you have canceled), you’ll get the specially-designed box filled with everything that you need for a holly-jolly, handmade holiday!

About the Kit:

  • November’s kit gives a you everything you need to make plenty of holiday cards!  The kit will create 10 cards; 5 of 2 unique holiday designs!
  • The box is a sneak of what’s inside!
  • Coordinating colors for this kit:
    • Cherry Cobbler, Crumb Cake, Garden Green, Gold, Soft Suede, Very Vanilla, Whisper White
  • Subscribers get all of this PLUS an exclusive stamp set AND an ink spot for $19.95!

Click here to head over to my Paper Pumpkin page to subscribe now!   We’ll be getting an awesome card kit in November!

****************************************************************************************************

For today’s card I used the Merry Christmas To All Bundle with a little Snowfall Thinlit Dies.  Take a look.

I started with a piece of the Silver Foil Sheet and adhered a Merry Merlot strip to the top of it using Multipurpose Liquid Glue.  I then adhered it to a Whisper White card front.

Using my Big Shot I cut the Merry from the Merry Christmas Thinlits Dies from a piece of a Silver Foil Sheet.  Also using my Big Shot, I cut the Snowflake Swirl from the Snowfall Thinlits Dies from a piece of Silver Glimmer Paper.

I adhered the Snowflake Swirl to the center of the Merry Merlot panel using Multipurpose Liquid Glue.  I adhered the Merry to the left side using Multipurpose Liquid Glue.  I adhered the card front to a Whisper White card base using Multipurpose Liquid Glue.

On the inside Whisper White panel, I stamped the sentiment from the Merry Christmas To All stamp set in Merry Merlot Ink in the center.  I adhered the Whisper White panel to a Merry Merlot mat using Snail and then adhered it to the Whisper White card base using Multipurpose Liquid Glue.

To finish my card I decorated a Medium Whisper White Envelope.  I stamped the scrolls from the Merry Christmas To All stamp set in Merry Merlot Ink on the envelope front and the envelope flap.

Thank you for stopping by my blog today.  I hope you liked my card, this was another quick and easy one and I hope you will give it a try.  Happy Stamping!

****************************************************************************************************

If you need any stamping supplies, I’d be very happy to be your Demonstrator.  Just click here to go directly to my online store or drop me an email if you have any questions.

MY CURRENT HOST CODE IS: YTMBUVZE

Happy Stamping, Karen!

****************************************************************************************************

Card stock cuts for this project:

  • Whisper White Cardstock 8 1/2″ X 5 1/2″ (card base scored and folded at 4 1/4″), 4 1/8″ X 5 3/8″ (card front), 3 7/8″ X 5 1/8″ (inner liner)
  • Merry Merlot Cardstock 2″ X 5 3/8″ (front panel), 4: X 5 1/4″ (inner liner mat)
  • Silver Foil Sheet 2 1/4″ X 5 3/8″ (mat for Merry Merlot), piece for Merry
  • Silver Glimmer Paper for Snowflake Swirl

****************************************************************************************************

Product List

Stampin’ Up Detailed Baubles Snowflake Sentiments Holiday Card

Good Thursday morning everyone.  The week is starting to wind down, hope you are making some fun plans for the weekend.  I’m still in Orlando and having a great time.

For today’s card I made you a quick and easy one using the Detailed Baubles Thinlits Dies and the Snowflake Sentiments stamp set.  Take a look.

I started with a Mint Macaron card front and stamped the sentiment from Snowflake Sentiments stamp set in Tranquil Tide Ink on the bottom. I immediately sprinkled it with Clear Stampin’ Emboss Powder and heat set it with my Heat Tool.

Using my Big Shot I cut out 2 of the ornaments from Detailed Baubles Thinlits Dies, one in the Rose Glimmer Paper and the other in Sparkle Glimmer Paper.  I attached a piece of Rose Metallic Thread to the top of each ornament and using multipurpose Liquid Glue I adhered the ornaments to the card front.  I tacked the Rose Metallic Thread on the back of the card front with Snail.

I adhered the card front to a Tranquil Tide mat using Snail and adhered it to a Blushing Bride card base using Stampin’ Dimensionals.  I added 3 of the Tranquil Tide Share What You Love Artisan Pearls to the card front.

On the inside on a panel of Whisper White I stamped the sentiment from Snowflake Sentiments stamp set in Tranquil Tide Ink in the center.  I stamped a couple of the swirls from the same stamp set in Mint Macaron Ink on either side of the sentiment.  I adhered the Whisper White panel to a Tranquil Tide mat using Snail, then adhered it to the Blushing Bride card base using Multipurpose Liquid Glue.

To finish my card I stamped the swirls from Snowflake Sentiments stamp set in Mint Macaron Ink on  the front and flap of a Medium Whisper White Envelope.

Thank you for stopping by my blog today.  I hope you liked my quick and easy card and will give it a try.  Happy Stamping!

****************************************************************************************************

If you need any stamping supplies, I’d be very happy to be your Demonstrator.  Just click here to go directly to my online store or drop me an email if you have any questions.

MY CURRENT HOST CODE IS: YTMBUVZE

Happy Stamping, Karen!

****************************************************************************************************

The Paper Pumpkin team designed November’s Paper Pumpkin kit to give you a solution for your holiday crafting needs!  When you subscribe by November 10 (or resubscribe if you have canceled), you’ll get the specially-designed box filled with everything that you need for a holly-jolly, handmade holiday!

About the Kit:

  • November’s kit gives a you everything you need to make plenty of holiday cards!  The kit will create 10 cards; 5 of 2 unique holiday designs!
  • The box is a sneak of what’s inside!
  • Coordinating colors for this kit:
    • Cherry Cobbler, Crumb Cake, Garden Green, Gold, Soft Suede, Very Vanilla, Whisper White
  • Subscribers get all of this PLUS an exclusive stamp set AND an ink spot for $19.95!

Click here to head over to my Paper Pumpkin page to subscribe now!   We’ll be getting an awesome card kit in November!

****************************************************************************************************

Card stock cuts for this project:

  • Blushing Bride Cardstock 4 1/4″ X 11″ (card base scored and folded at 5 1/2″)
  • Mint Macaron Cardstock 3 7/8″ X 5 1/8″ (card front)
  • Tranquil Tide Cardstock 2 – 4″ X 5 1/4″ (card front and inner liner mats)
  • Whisper White Cardstock 3 7/8″ X 5 18″ (inner liner)
  • Rose Glimmer Paper 2″ X 3″ (ornament)
  • Sparkle Glimmer Paper 2″ X 3″ (ornament)

****************************************************************************************************

Product List

Stampin’ Up Merry Quick and Easy Christmas Card

Good Wednesday morning everyone.  Hope your having a wonderful week so far.

For today I made another quick and easy Christmas card using the Merry Christmas Thinlits Dies, and the sentiment from the Merry Christmas To All Stamp Set.  Take a look.

I started with a Very Vanilla cardstock panel.  I adhered a small piece of the Festive Farmhouse Designer Series Paper to the bottom of it using Snail.  I adhered the panel to a Basic Black mat using Snail.  I wrapped a piece of Very Vanilla Cotton Twine from the Festive Farmhouse Cotton Twine pack, around the card front twice and tied a bow.  To keep the bow in place, I secured it with a Glue Dot under the bow.

Using my Big Shot, I cut the Merry from the Merry Christmas Thinlits Dies out of a piece of Festive Farmhouse DSP and Basic Black cardstock.  I adhered the plaid Merry to the front of the Basic Black Merry, off setting it a little to give it a shadow, using Multipurpose Liquid Glue.  I adhered the Merry to the card front using Multipurpose Liquid Glue.

I adhered the card front to a Thick Very Vanilla card base using Stampin’ Dimensionals.  I colored 3 of the largest Basic Jewel Pearls with my Cherry Cobbler Stampin’ Blends Marker.  Once they were dry, I adhered them to the card front.

On the inside I stamped the sentiment from the Merry Christmas To All stamp set in Tuxedo Black Memento Ink in the center of a Very Vanilla panel.  I stamped the small scroll from the Merry Christmas To All stamp set in Cherry Cobbler Ink under the sentiment.  I adhered the Very Vanilla panel to a Basic Black mat using Snail and adhered it to the Thick Very Vanilla card base using Multipurpose Liquid Glue.

To finish my card I adhered a piece of Festive Farmhouse DSP to the flap of a Medium Very Vanilla Envelope.  Another quick and easy card for you to make.

Thank you for stopping by my blog today.  I hope you enjoyed my quick and easy card and will give it a try.  Happy Stamping!

****************************************************************************************************

If you need any stamping supplies, I’d be very happy to be your Demonstrator.  Just click here to go directly to my online store or drop me an email if you have any questions.

MY CURRENT HOST CODE IS: YTMBUVZE

Happy Stamping, Karen!

****************************************************************************************************

The Paper Pumpkin team designed November’s Paper Pumpkin kit to give you a solution for your holiday crafting needs!  When you subscribe by November 10 (or resubscribe if you have canceled), you’ll get the specially-designed box filled with everything that you need for a holly-jolly, handmade holiday!

About the Kit:

  • November’s kit gives a you everything you need to make plenty of holiday cards!  The kit will create 10 cards; 5 of 2 unique holiday designs!
  • The box is a sneak of what’s inside!
  • Coordinating colors for this kit:
    • Cherry Cobbler, Crumb Cake, Garden Green, Gold, Soft Suede, Very Vanilla, Whisper White
  • Subscribers get all of this PLUS an exclusive stamp set AND an ink spot for $19.95!

Click here to head over to my Paper Pumpkin page to subscribe now!   We’ll be getting an awesome card kit in November!

****************************************************************************************************

Card stock cuts for this project:

  • Basic Black Cardstock 4 1/16″ X 5 5/16″ (card front mat), 4″ X 5 1/4″ (inner liner mat)
  • Very Vanilla Cardstock 4 X 5 1/4″ (card front), 3 3/4″ X 5″ (inner liner)
  • Thick Very Vanilla Cardstock 4 1/4″ X 11″ (card base scored and folded at 5 1/2″)
  • Festive Farmhouse Designer Series Paper 2″ X 4″ (bottom card front)

****************************************************************************************************

Product List

Stampin’ Up Snow Is Glistening Christmas Card

Good Monday morning everyone.  Hope you all had a wonderful weekend.  Hope you were able to do something fun and the weather was nice for you.

For today’s card I used the Stampin; Up Snow Is Glistening Stamp Set and SnowFall Thinlits Dies that are available for the month of November.  Take a look.

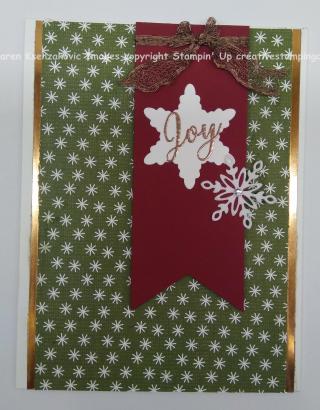
I started with a card front of Festive Farmhouse Designer Series Paper.  I really love all the designs in this pack of DSP. I adhered 2 strips of Copper Foil Paper to either side of the DSP using Snail.  I adhered the card front to a Whisper White card base using Multipurpose Liquid Glue.

I took a piece of Cherry Cobbler cardstock and made a banner using my Banner Triple Punch.  I wrapped a piece of 1/4″ Copper Trim Ribbon around the top of the banner and tied a bow.  I adhered the banner to the card front using Stampin’ Dimensionals.

On a small piece of Whisper White card stock I stamped the Joy from the Snow Is Glistening stamp set in Versamark Ink.  I sprinkled it with my Copper Stampin’ Emboss Powder and heat set it using my Heat Tool.  I cut the sentiment out using my Big Shot with the Snowfall Thinlits Dies.  I cut another snowflake out of a small piece of White Velvet Sheet using the Snowfall Thinlits Dies. I adhered both snowflakes using Multipurpose Liquid Glue to the banner having the one hanging off a little.  I added a Clear Rhinestone Basic Jewel to the smaller snowflake.

On the inside Whisper White panel I stamped the medium snowflake from the Snow Is Glistening stamp set around the top of the panel in Mossy Meadow Ink, stamping off twice.  I stamped the sentiment in the center in Cherry Cobbler Ink.  I adhered the Whisper White panel to a Mossy Meadow mat using Snail and adhered it to the Whisper White card base using Multipurpose Liquid Glue.

To finish my card I decorated a Medium Whisper White Envelope.  I stamped the medium snowflake from the Snow Is Glistening stamp set along the bottom front of the envelope in Mossy Meadow Ink stamping off once.  I adhered a panel of Festive Farmhouse DSP to the envelope flap.

Thank you for stopping by my blog today.  I hope you liked my card.  This was a pretty quick and easy card, I hope you will give it a try.  Happy Stamping!

****************************************************************************************************

If you need any stamping supplies, I’d be very happy to be your Demonstrator.  Just click here to go directly to my online store or drop me an email if you have any questions.

MY CURRENT HOST CODE IS: YTMBUVZE

Happy Stamping, Karen!

****************************************************************************************************

The Paper Pumpkin team designed November’s Paper Pumpkin kit to give you a solution for your holiday crafting needs!  When you subscribe by November 10 (or resubscribe if you have canceled), you’ll get the specially-designed box filled with everything that you need for a holly-jolly, handmade holiday!

About the Kit:

  • November’s kit gives a you everything you need to make plenty of holiday cards!  The kit will create 10 cards; 5 of 2 unique holiday designs!
  • The box is a sneak of what’s inside!
  • Coordinating colors for this kit:
    • Cherry Cobbler, Crumb Cake, Garden Green, Gold, Soft Suede, Very Vanilla, Whisper White
  • Subscribers get all of this PLUS an exclusive stamp set AND an ink spot for $19.95!

Click here to head over to my Paper Pumpkin page to subscribe now!   We’ll be getting an awesome card kit in November!

****************************************************************************************************

Card stock cuts for this project:

  • Whisper White Cardstock 4 1/4″ X 11″ (card base scored and folded at 5 1/2″),     3 3/4″ X 5″ (inner liner)
  • Cherry Cobbler Cardstock 1 3/4″ X 4 1/2″ (banner)
  • Mossy Meadow Cardstock 4″ X 5 1/4″ (inner liner mat)
  • Festive Farmhouse Designer Series Paper 3 3/4″ X 5 1/2″ (card front)
  • Copper Foil Sheet 2 – 1/4″ X 5 1/2″ (strips on side of DSP)

****************************************************************************************************

Product List