
Good Friday morning my fellow stampers. How was your week? Are you happy the weekend is finally here? Has anyone made fun plans? I’m hoping to get a little crafting in myself, but we’ll see.
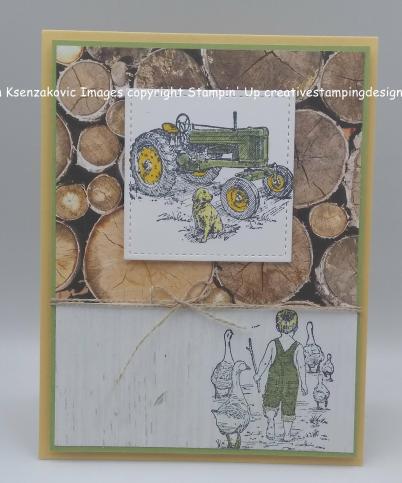
For today’s card I used the Stampin’ Up Heartland Stamp Set to make a masculine card for you. This can be a Father’s Day card, Birthday, Thinking of you, or anything else you can think of.
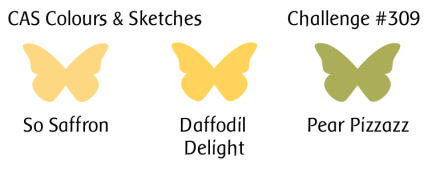
 I also joined in with a couple challenges today. 1st is the CAS Colour & Sketch Challenge # 309. Be sure to stop by to see what everyone has made and to play along. Here are their colors for the challenge.
 The next is Watercooler Wednesday Challenge #209. Be sure to stop by here too and see what everyone has made and to play along. Here is their challenge.
 I started by adhering a piece of Wood Textures Designer Series Paper to a panel of Pear Pizzazz cardstock using Snail. On another smaller piece of Wood Textures DSP I stamped the little boy with the ducks from the Heartland stamp set in Tuxedo Black Memento Ink on the right side. I colored the little boy in with my Pear Pizzazz Stampin’ Write Marker and my light Daffodil Delight Stampin’ Blends Marker. I then adhered the panel to the bottom of the Pear Pizzazz card front using Snail.
 I wrapped a piece of Linen Thread around the seam twice and tied a small bow. I adhered the card front to a So Saffron card base using Stampin’ Dimensionals.
 On a small piece of Whisper White cardstock I stamped the tractor with the dog from the Heartland stamp set in Tuxedo Black Memento Ink. I colored the tractor in using my Pear Pizzazz Stampin’ Write Marker and my Dark Daffodil Delight Stampn’ Blends Marker. Using my Big Shot, I cut the image out with my Square Stitched Shaped Framelits Dies and I adhered it to the card front using Stampin’ Dimensionals.
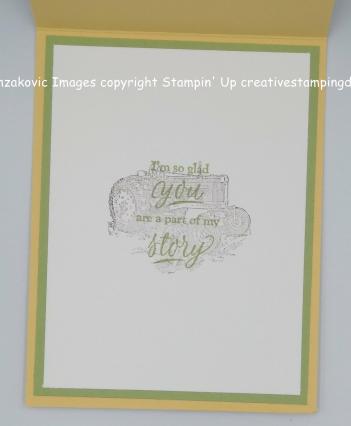 On the inside I stamped the tractor image from the Heartland stamp set in Early Espresso Ink, stamping off twice, in the center of a Whisper White panel. I stamped the sentiment from the Stampin’ Up Part Of My Story Stamp Set in Pear Pizzazz Ink over the tractor. This stamp set is a Sale-A-Bration item free with a $50 order.
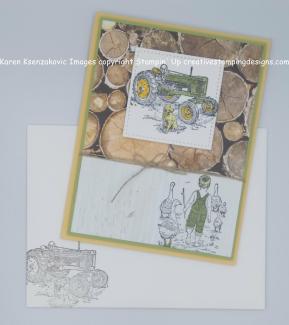
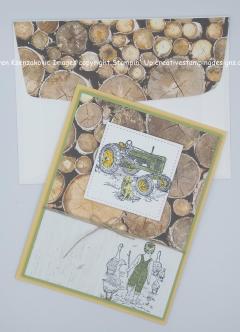
To finish my card I decorated a Medium Whisper White Envelope. I stamped the tractor image from the Heartland stamp set on the front of the envelope. I adhered a piece of Wood Textures DSP to the envelope flap.
Thank you for stopping by my blog today. I hope you liked my card and will give it a try. This was a pretty quick and easy card to make. Happy Stamping!!
If you need any stamping supplies, I’d be very happy to be your Demonstrator. Just click here to go directly to my online store or drop me an email if you have any questions.
MY CURRENT HOST CODE IS: EHUYUM4S
Happy Stamping, Karen!
****************************************************************************************************

Paper Pumpkin is turning six and we want to celebrate with you! After all, we could not have shared all these years of creativity if it weren’t for our subscribers.
To celebrate this fun occasion and to thank everyone who supports Paper Pumpkin month after month, we’re offering a specially-designed March kit and a FREE STAMP SET. Oh, yes. You read that right. In March, you will receive TWO stamp sets with your Paper Pumpkin kit.
There has never been a better time to give Paper Pumpkin a try. And because it’s our sixth birthday celebration, we’ll be pulling out all the stops. You’ll get an adorable kit, a special box, and most importantly, you’ll get TWO stamp sets instead of one.
$20 for a Paper Pumpkin kit is always a steal, but in March the deal is even better! There has never been a better time for you to join Paper Pumpkin.
Because it’s our birthday, we decided to create a kit that is perfect for making birthday cards!
The March kit features eight full-sized, mailable cards
Coordinating colors are Basic Black, Bermuda Bay, Daffodil Delight, Flirty Flamingo, and Poppy Parade
This kit has an element that is sure to “pop”!
The FREE stamp set is even bigger and better than your typical Paper Pumpkin stamp set and can be used on a variety of crafting projects.
A subscriber must have an active subscription by March 10, 2019 in order to receive the March kit.
The FREE stamp set coordinates with the March kit but it is not needed to complete the projects.
Supplies may be limited toward the end of the subscription period, so DON’T WAIT.
Click HERE to go to my store and subscribe.
****************************************************************************************************
Card stock cuts for this project:
- Pear Pizzazz Cardstock 2 – 4″ X 5 1/4″ (card front and inner liner mat)
- So Saffron Cardstock 4 1/4″ X 11″ (card base scored and folded at 5 1/2″)
- Whisper White Cardstock 3 3/4″ X 5″ (inner liner), 2 3/4″ X 2 3/4″ (artwork)
- Wood Textures Designer Series Paper 3 1/2″ X 3 7/8″ (top of card front), 1 7/8″ X 3 7/8″ (bottom of card front), piece for envelope flap
****************************************************************************************************
Product List


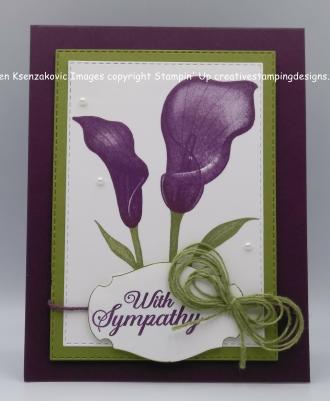

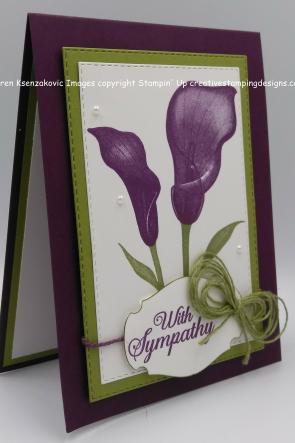
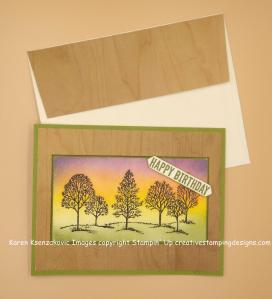
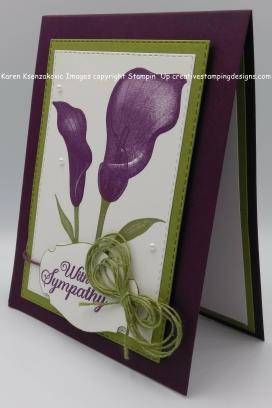 I made a bow from the Old Olive Linen Thread and adhered it to the side of the label using a Glue Dot. I added a few Pearl Basic Jewels to the card front.
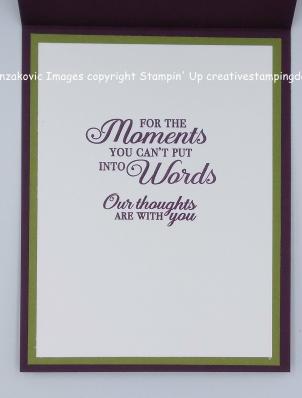 On the inside I stamped the sentiments from the Lasting Lily stamp set in Blackberry Bliss Ink on a Whisper White panel. I adhered the Whisper White panel to an Old Olive mat using Snail and then to the inside of the Blackberry Bliss card base using Multipurpose Liquid Glue.
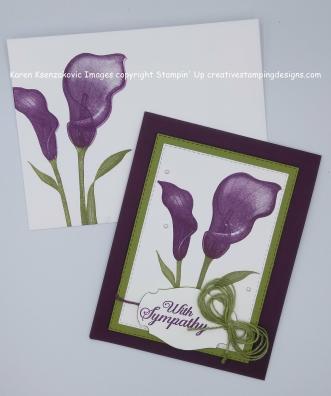 To finish my card I decorated a Medium Whisper White Envelope. I stamped the lily’s from the Lasting Lily stamp set the same as I did for the card front on the front of the envelope.


 I joined in with the
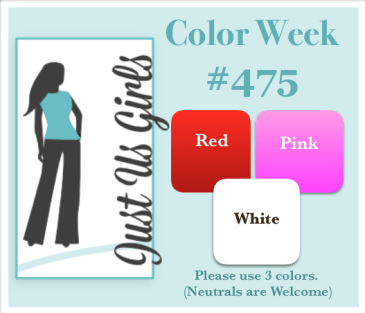 I also joined in with the
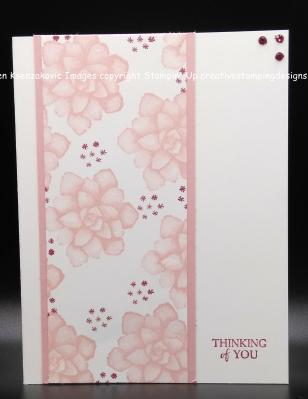
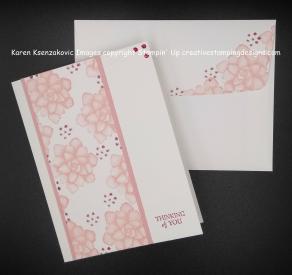
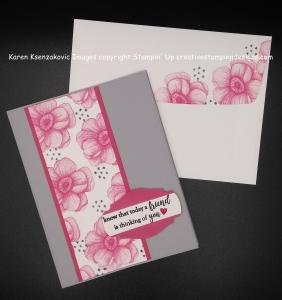
 I started with a panel of Whisper White cardstock and stamped the succulent flower image from the Painted Seasons stamp set in Blushing Bride Ink randomly around the paper. I stamped the star clusters from the same stamp set in Cherry Cobbler Ink around filling in empty spaces. I adhered the artwork panel to a Blushing Bride mat using Snail. I adhered the matted artwork to a Thick Whisper White card base using Multipurpose Liquid Glue.
 I stamped the sentiment from the Stampin’ Up By The Bay Stamp Set, FREE Sale-A-Bration item with a $50.00 order, in Cherry Cobbler Ink on the bottom right of the card front. I added 3 Rhinestone Basic Jewels that I had colored in with my Dark Cherry Cobbler Stampin’ Blend Marker, to the top corner of the card front.
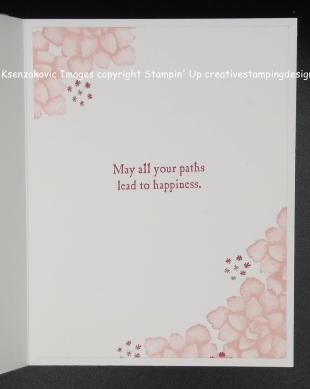 On the inside I stamped the succulent flower image from the Painted Seasons stamp set in Blushing Bride Ink on the two corners of a Whisper White panel. I stamped the star clusters from the same stamp set in Cherry Cobbler Ink by the flowers. I stamped the sentiment from the By The Bay stamp set in Cherry Cobbler Ink in the center of the panel. I adhered the Whisper White panel to the inside of the Thick Whisper White card base using Multipurpose Liquid Glue.


 I joined in with the
 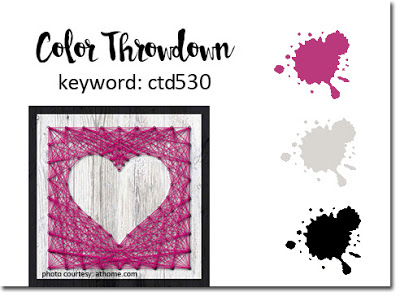 I started with a Smoky Slate card front and ran it through my Big Shot using the Subtle Dynamic Textured Impressions Embossing Folder.
 Using the soon to be available from the Sale-A-Bration Coordination collection, Story Label Punch (available March 1st), I punched a label out in Melon Mambo cardstock. I stamped the sentiment from the Stampin’ Up Part Of My Story Stamp Set (Free Sale-A-Bration item) in Versamark Ink on a strip of Whisper White cardstock. I sprinkled it immediately with my Black Stampin’ Emboss Powder and heat set it with my Heat Tool. I adhered the sentiment to the label and trimmed the ends to the label. I added a Heart Epoxy Droplet, which I colored with my Dark Lovely Lipstick Stampin’ Blend Marker (that was the closest to Melon Mambo I could get). I adhered the label to the right of my artwork with Stampin’ Dimensionals.
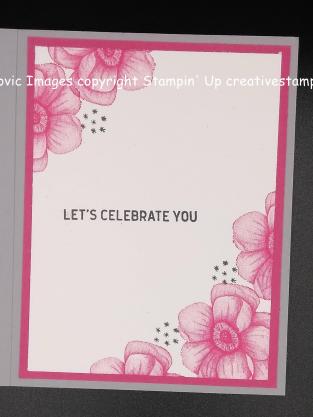 On the inside I stamped the flower from the Painted Seasons stamp set in Melon Mambo Ink on the two corners of a panel of Whisper White cardstock. I added a couple of the star clusters from the same stamp set in Tuxedo Black Memento Ink by the flowers. I stamped the sentiment from the Stampin’ Up Itty Bitty Birthdays Stamp Set in Tuxedo Black Memento Ink in the center of the panel. I adhered the Whisper White panel to a Melon Mambo mat using Snail and adhered it to the inside of the Smoky Slate card base using Multipurpose Liquid Glue.


 I joined in with 2 challenges today also. First I played along with
  Second I played along with
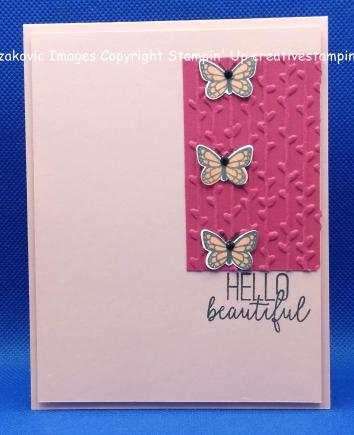
  I started with a Blushing Bride card front and stamped the sentiment from the Stampin’ Up Butterfly Gala Stamp Set in Tuxedo Black Memento Ink on the right side.
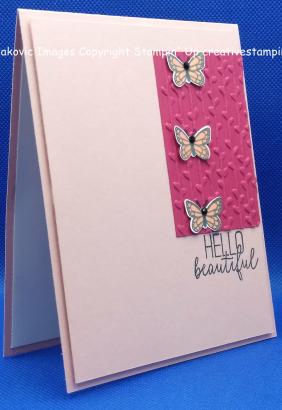 I took a small panel of Lovely Lipstick cardstock and ran it through my Big Shot with the Petal Pair Textured Impressions Embossing Folder. I adhered the embossed panel to the right side of the card front, up against the edge, using Multipurpose Liquid Glue.
 I stamped one of the small butterflies from the Butterfly Gala stamp set 3 times on a piece of Whisper White cardstock in Tuxedo Black Memento Ink. I then stamped the inside of each of the butterflies in Grapefruit Grove Ink. I punched the butterflies out using my Butterfly Duet Punch (which unfortunately is currently on backorder) and adhered them to the embossed panel using Glue Dots. I added a Black Faceted Dots to each of the butterflies and bent their wings up a little. I adhered the card front to a Blushing Bride card base using Stampin’ Dimensionals.
 On the inside I stamped the sentiment from the Stampin’ Up Bright Wishes Stamp Set in Tuxedo Black Memento Ink in the center of a Whisper White panel. I stamped 3 more butterflies from the Butterfly Gala stamp set in Tuxedo Black Memento Ink on a piece of Whisper White cardstock. I stamped the top portion of 2 of the butterflies and bottom portion of 1 butterfly in Lovely Lipstick Ink. I stamped the top portion of 1 butterfly and bottom portion of 2 butterflies in Grapefruit Grove Ink then punched all 3 butterflies out using the Butterfly Duet Punch. I adhered the butterflies around the sentiment using Multipurpose Liquid Glue.


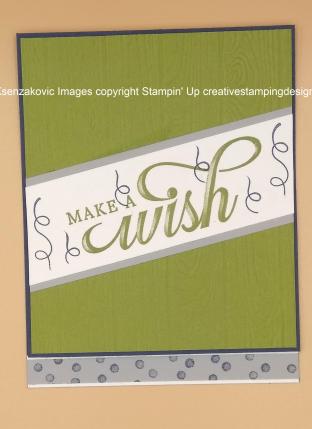 I started with an Old Olive card front and ran it through my Big Shot using the Pinewood Planks Dynamic Textured Impressions Embossing Folder. I stamped the ‘Make A Wish’ from the Life Is Grand stamp set in Old Olive Ink on a small piece of Whisper White cardstock. I stamped the streamers from the Stampin’ Up Around The Corner Stamp Set in Night of Navy Ink around the sentiment.
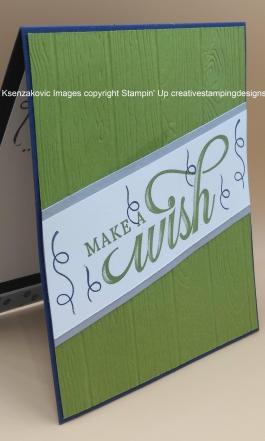 I adhered the Whisper White panel to a Smoky Slate mat using Snail. I adhered the matted sentiment to the card front, using Multipurpose Liquid Glue, on an angle so that it over hung on both sides of the card front. I cut off the excess from each side using my Paper Snips.
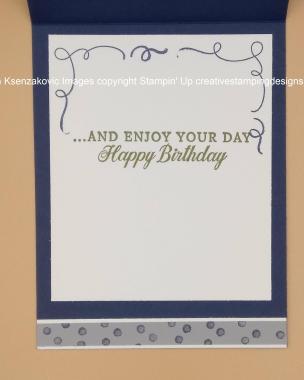 On the inside Whisper White panel I stamped the sentiment from the Life Is Grand stamp set in Old Olive Ink. I stamped the corner streamers from the Around The Corner stamp set in Night of Navy Ink. I adhered the Whisper White panel to the inside of the Night of Navy card base using Snail. I adhered a strip of Smoky Slate cardstock to a Whisper White mat using Snail and adhered it to the bottom of the card base using Multipurpose Liquid Glue.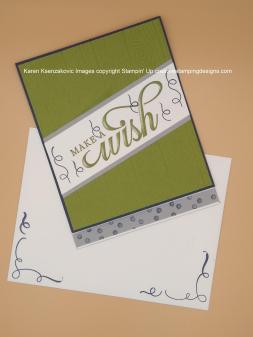


 I started with a Whisper White card front. I took a scrap piece of paper and cut a circle out for a stencil. I put the stencil where I wanted it on my card front and sponged inside the circle using first my So Saffron Ink then my Daffodil Delight Ink. Once I was happy with the results, I removed the paper. I stamped the image from Enjoy Life stamp set in Tuxedo Black Memento Ink over the sun. I stamped the butterfly from the same stamp set above the floral image in Tuxedo Black Memento Ink.
 I stamped the ‘With Love & Sympathy” sentiment from the Stampn’ Up Itty Bitty Greetings Stamp Set in Tuxedo Black Memento Ink on the bottom of the card front. I wrapped a piece of 5/8″ Burlap Ribbon around the card front and tied a knot.
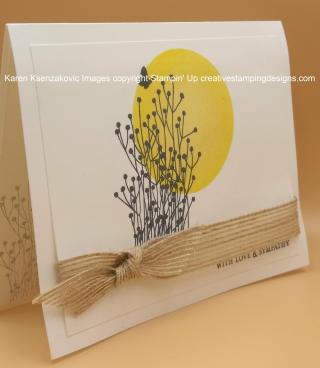 I adhered the card front to a Whisper White card base using Multipurpose Liquid Glue.


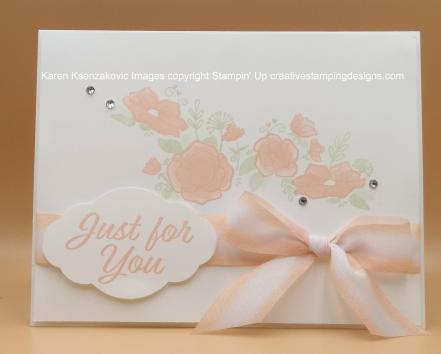
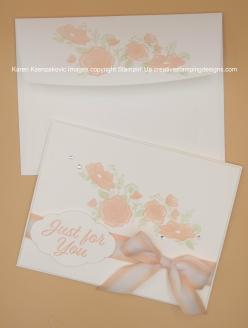
 I am really loving my Stamparatus. I used it for this card and envelope and was able to line everything up perfectly. I started with a Whisper White card front and stamped the floral image from Forever Lovely stamp set. I first stamped the leaf image in Soft Sea Foam Ink. I then stamped the floral image, lining it up using my Stamparatus, in Petal Pink Ink.
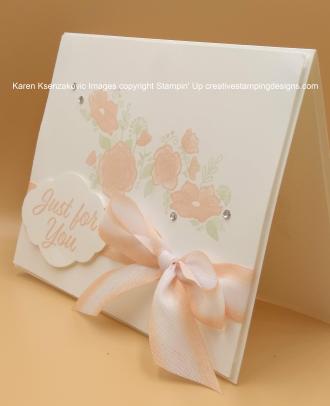 I wrapped a piece of the gorgeous new Petal Pink/Whisper White Variegated Ribbon around the card front and tied a bow. This ribbon is so wonderful to work with and makes bows so easy. I added a Glue Dot under the bow to hold it in place. I added a few clear Rhinestone Basic Jewels to the card front by the flowers.
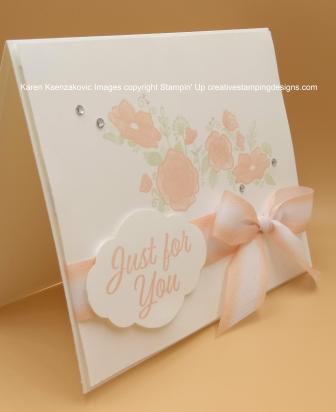 I stamped the sentiment from the Meant To Be stamp set in Petal Pink on a small piece of Whisper White cardstock and punched it out with the Pretty Label Punch. I adhered it to the card front using Stampin’ Dimensionals. I adhered the card front to a Whisper White card base using Stampin’ Dimensionals.
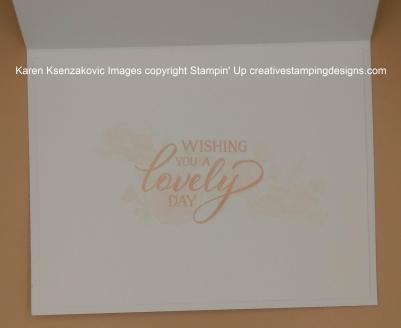 It is extremely hard to see, but I stamped the leaves and floral design, from the Forever Lovely stamp set, the same way I did on the card front, stamping off once, on the inside Whisper White panel. I stamped the sentiment from the Forever Lovely stamp set in Petal Pink Ink over the floral image. I adhered the Whisper White panel to the inside of the Whisper White card base using Snail.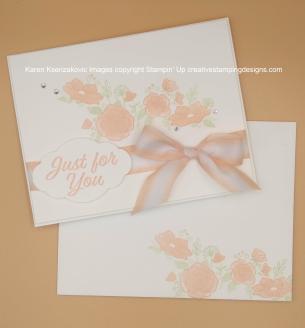


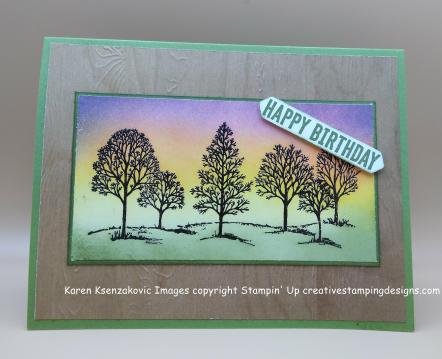 I started by embossing a panel of Wood Textures Designer Series Paper with my Pinewood Planks Dynamic Textured Impressions Embossing Folder in my Big Shot. I adhered it to an Old Olive card base using Multipurpose Liquid Glue.
 I took a panel of Very Vanilla cardstock and stamped it with one of the tree images from the Lovely As A Tree stamp set in Early Espresso Ink. I quickly sprinkled it with Clear Stampin’ Emboss Powder and heat set it with my Heat Tool. I then started sponging colors to give it a bit of a sunset look. I started at the bottom with Old Olive and Mossy Meadow Inks. Going up, I sponged with So Saffron, Daffodil Delight and Mango Melody Inks blending them together. I then used Flirty Flamingo, Melon Mambo, Highland Heather and Night of Navy Inks for the top section, again blending them. Once I was happy with the way it looked I adhered the artwork to an Old Olive mat using Snail.
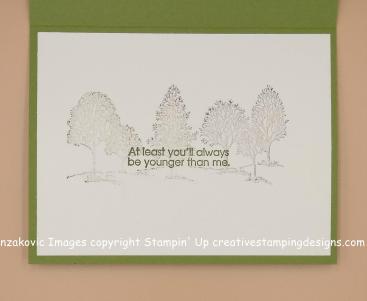 On the inside I stamped the tree image from Lovely As A Tree stamp set in Early Espresso Ink, stamping off 4 times, on a panel of Very Vanilla cardstock. I stamped the sentiment from Itty Bitty Birthdays stamp set in Early Espresso Ink over the trees. I adhered the Very Vanilla panel to the inside of the Old Olive card base using Snail.


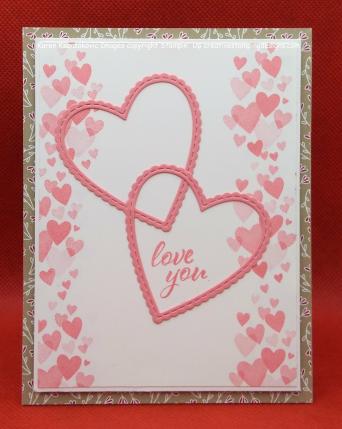 I started with a Crumb Cake card base and adhered a panel of the All My Love Designer Series Paper to the front using Snail.
 On a panel of Whisper White cardstock I stamped the heart cluster from the Stampin’ Up Forever Lovely stamp set down both sides in Flirty Flamingo Ink. Using my Big Shot, I cut out 2 of the Be Mine Stitched Framelits Dies in Flirty Flamingo cardstock.
 I placed the 2 hearts on the artwork panel the way I thought I’d like them and stamped the Love You sentiment from the Forever Lovely stamp set in Flirty Flamingo Ink inside the bottom heart. I then adhered the hearts to the artwork using Multipurpose Liquid Glue. I adhered the artwork to a Whisper White mat using Snail then adhered it to the card front using Stampin’ Dimensionals.
 On the inside I stamped the heart cluster from the Forever Lovely stamp set in Flirty Flamingo Ink, stamping off once, on a Whisper White panel. I then stamped the sentiment from the same stamp set in Flirty Flamingo Ink over the hearts. I adhered the Whisper White panel to a Flirty Flamingo mat using Snail then adhered it to the Crumb Cake card base using Multipurpose Liquid Glue.


