
Good Sunday morning stamping friends. I hope you are all having a great weekend. Just a quick reminder that TODAY is the LAST DAY to sign up for my May-August Product Shares. Information is below.
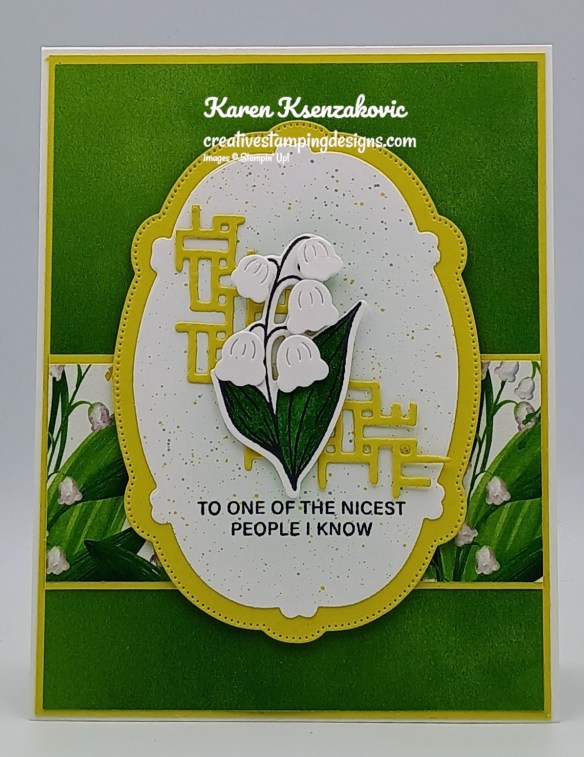
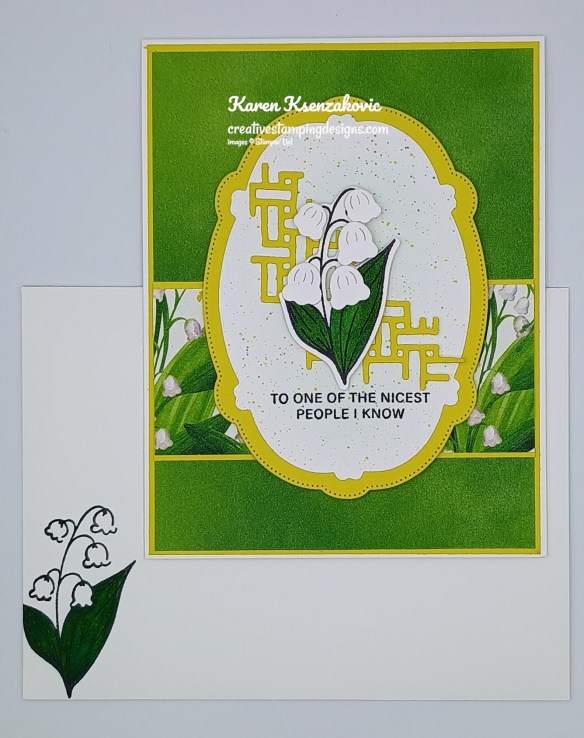
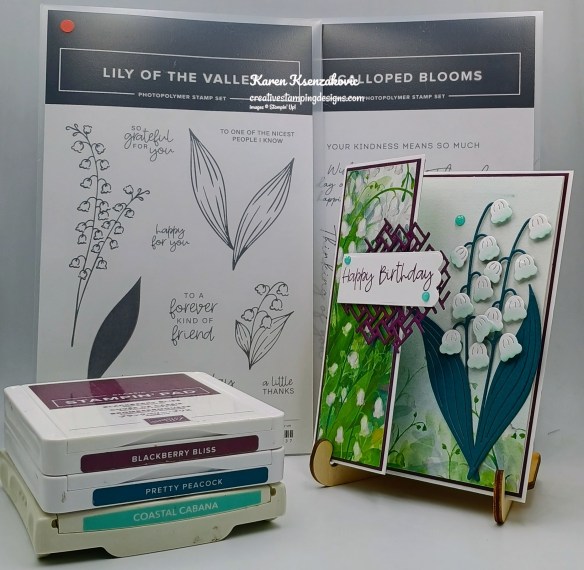
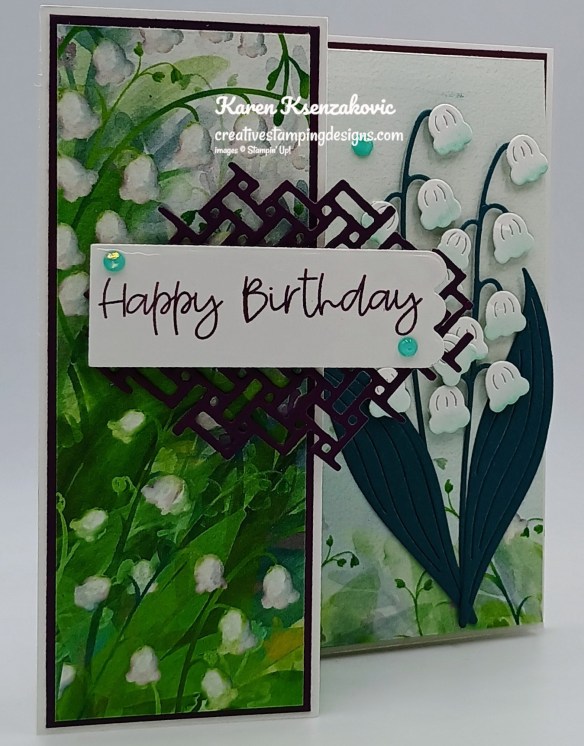
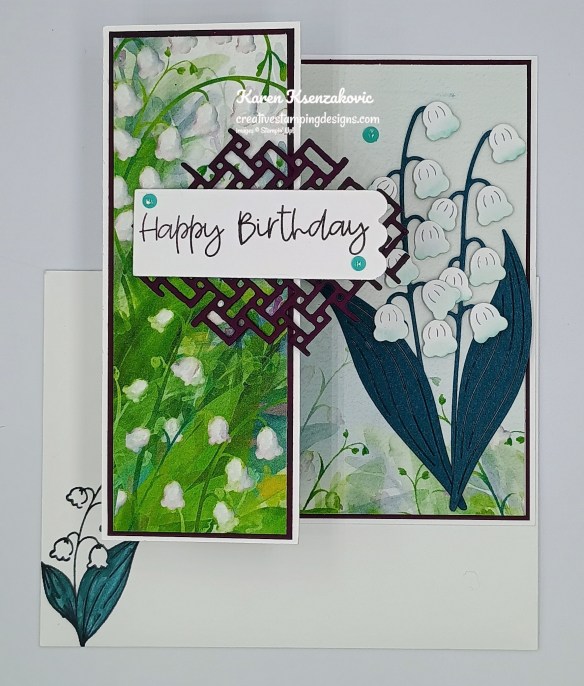
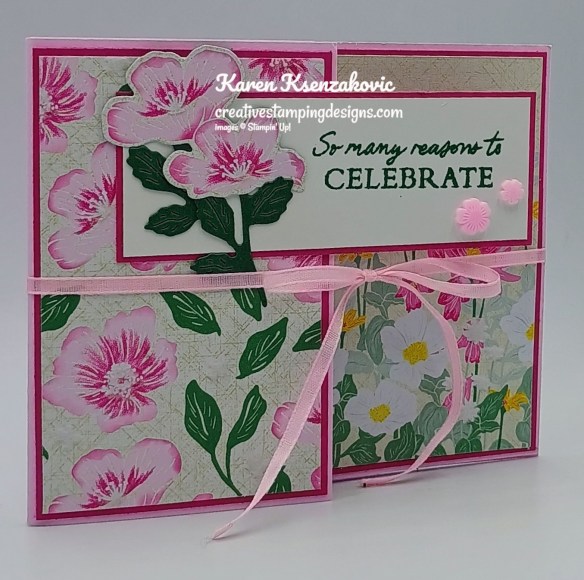
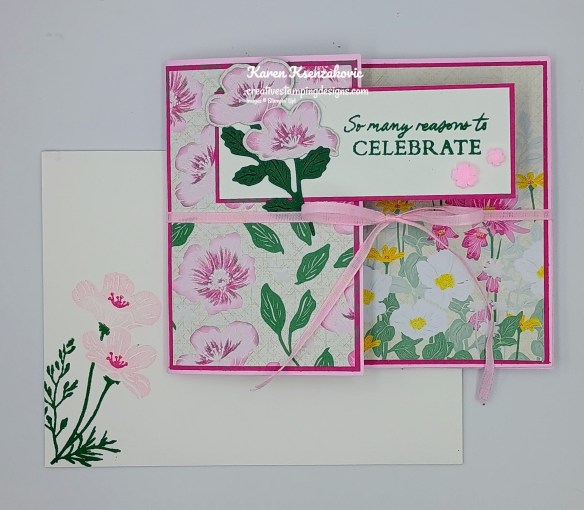
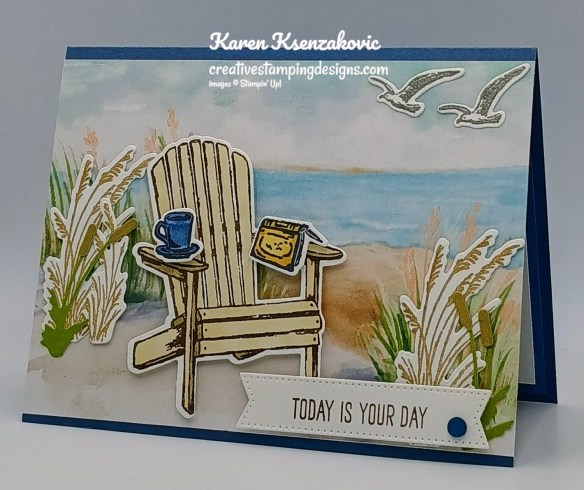
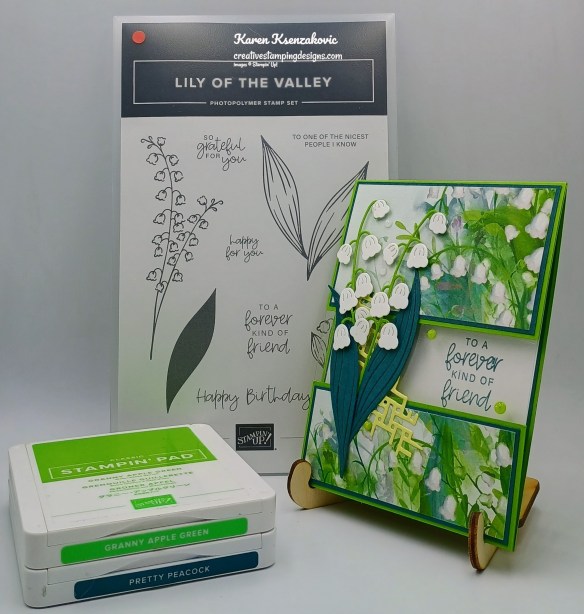
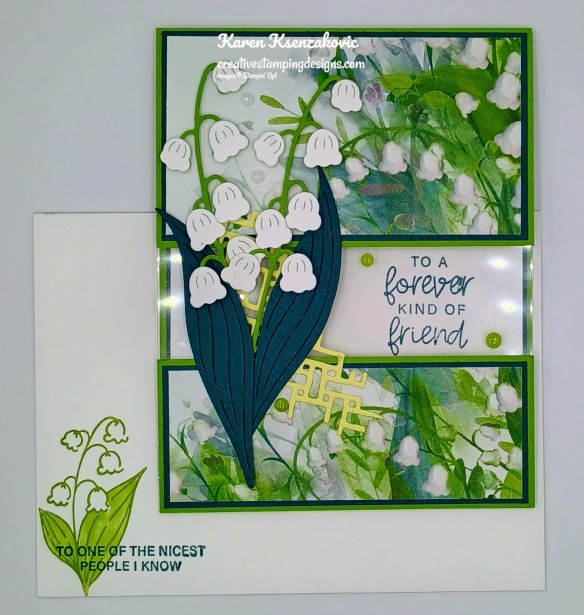
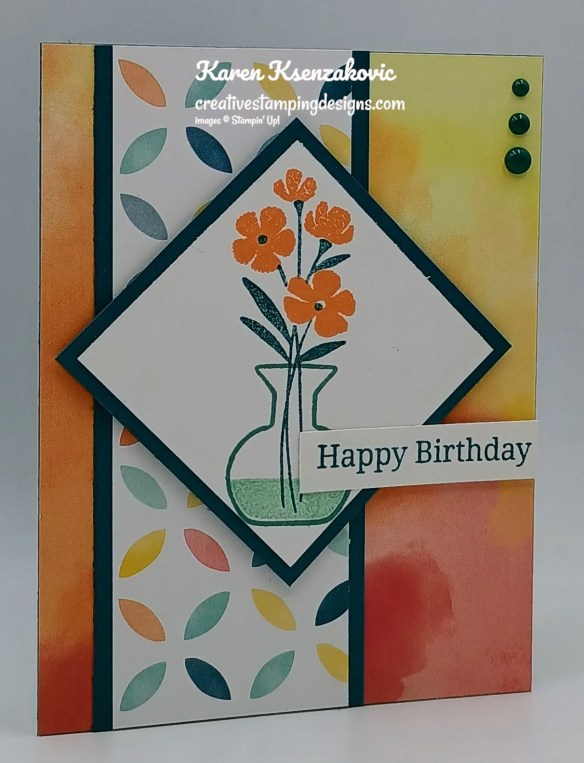
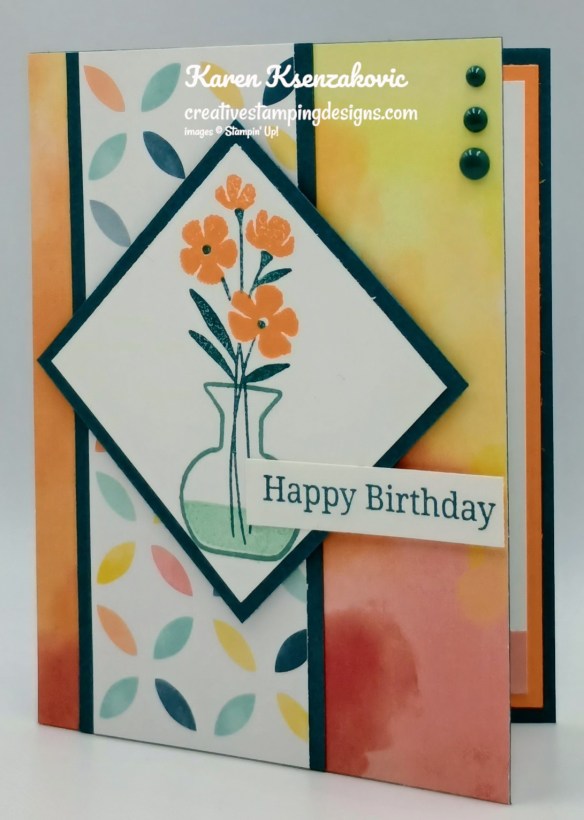
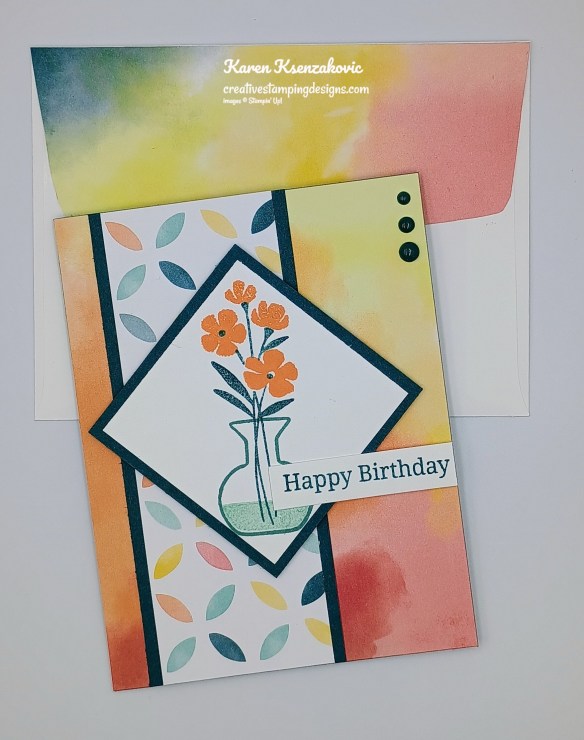
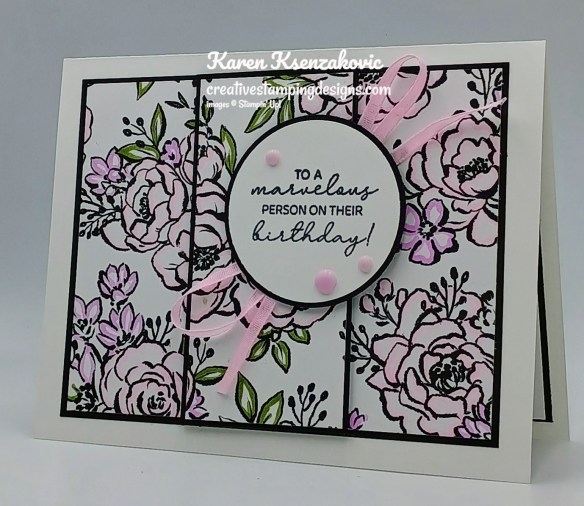
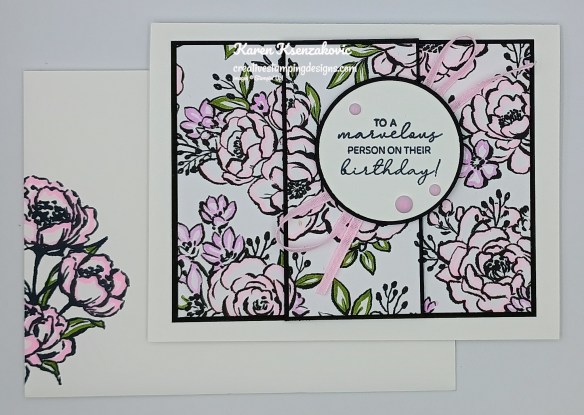
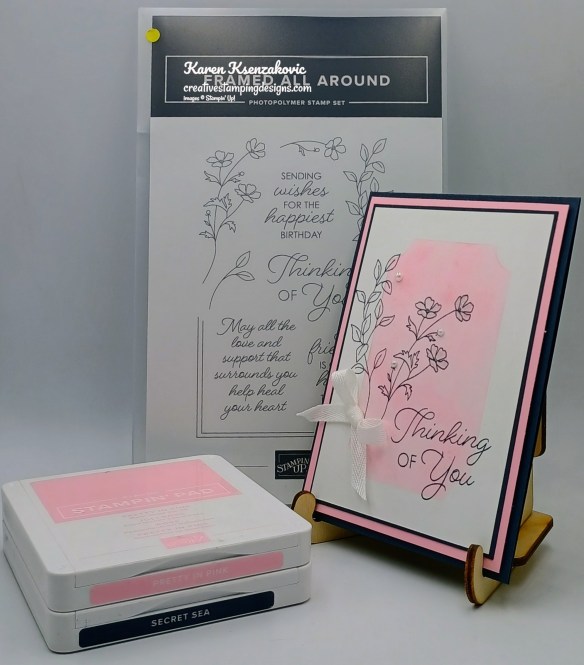
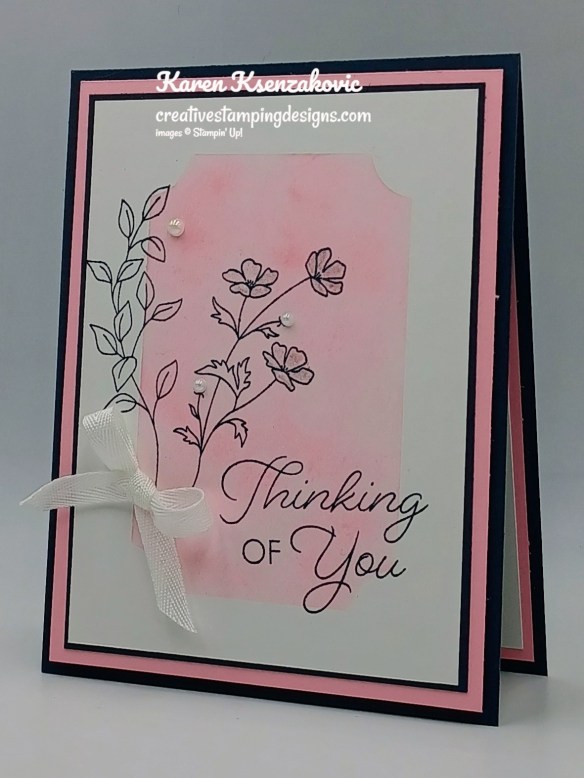
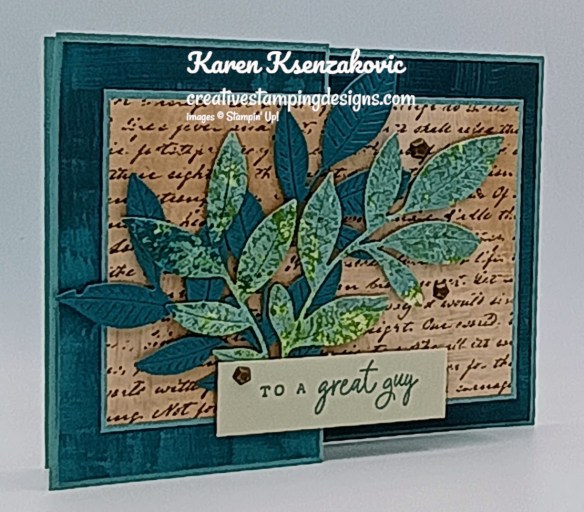
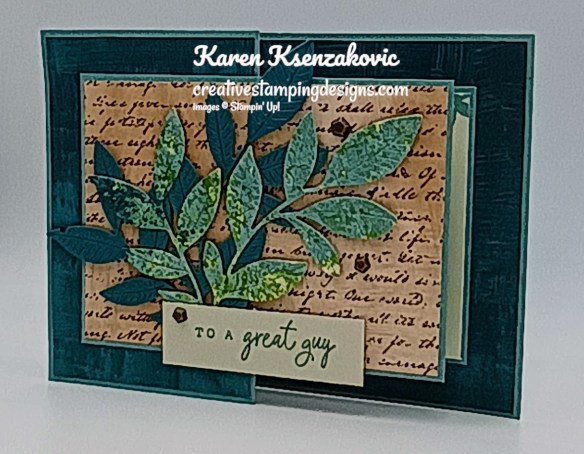
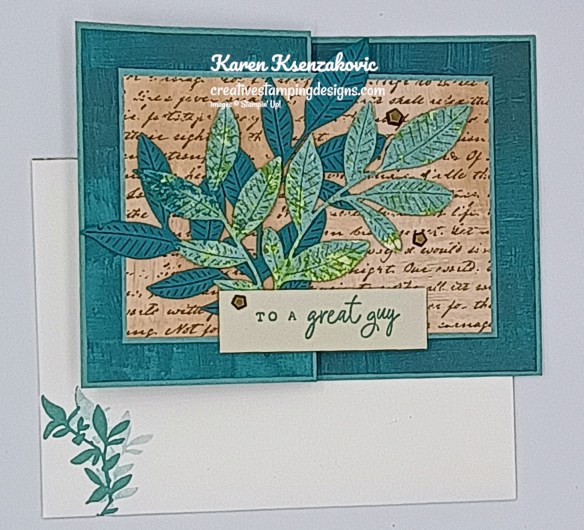
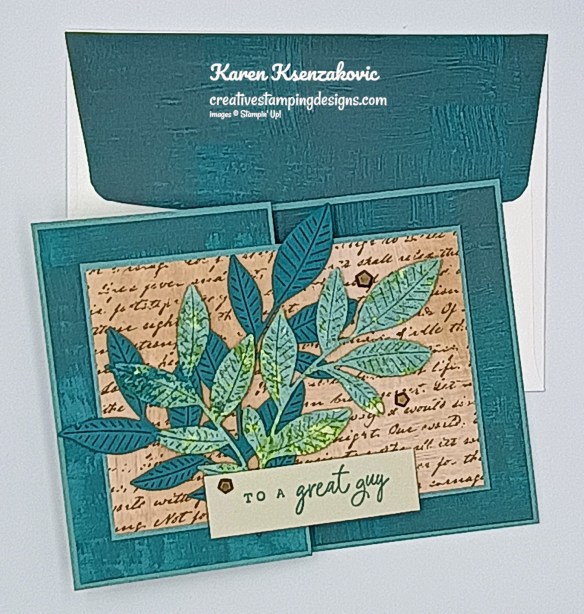
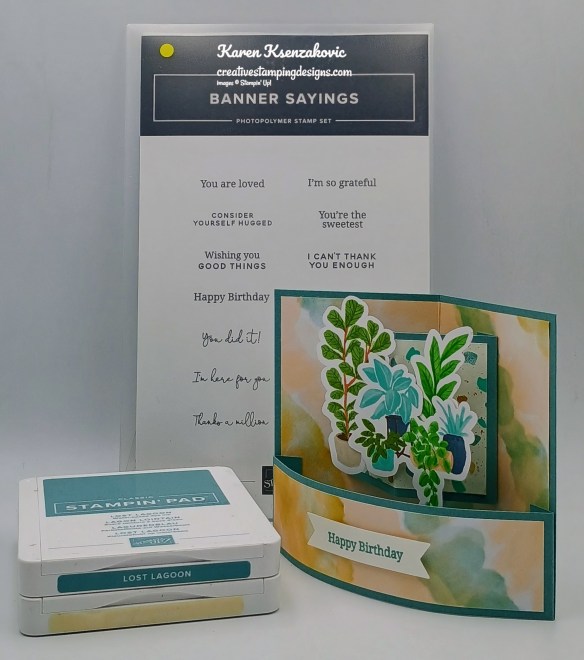
Today’s card is one that I’ll be presenting at our quarterly meeting today. We’re having our meeting a little earlier than normal since Amy, our leader, has things going on for next month. Here’s my card for today.

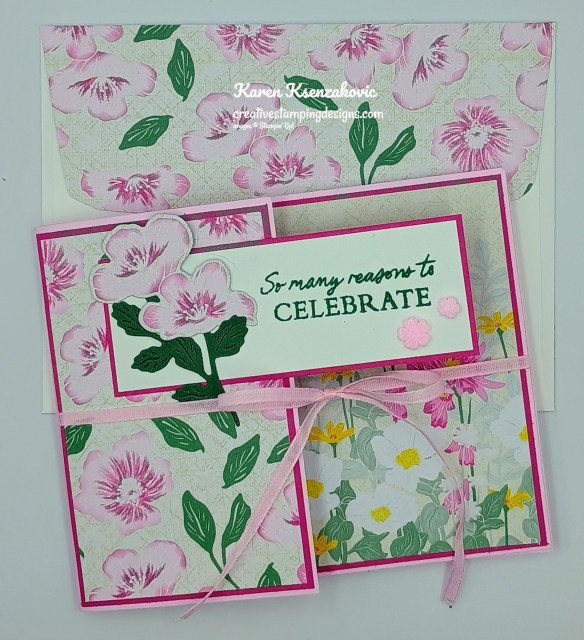
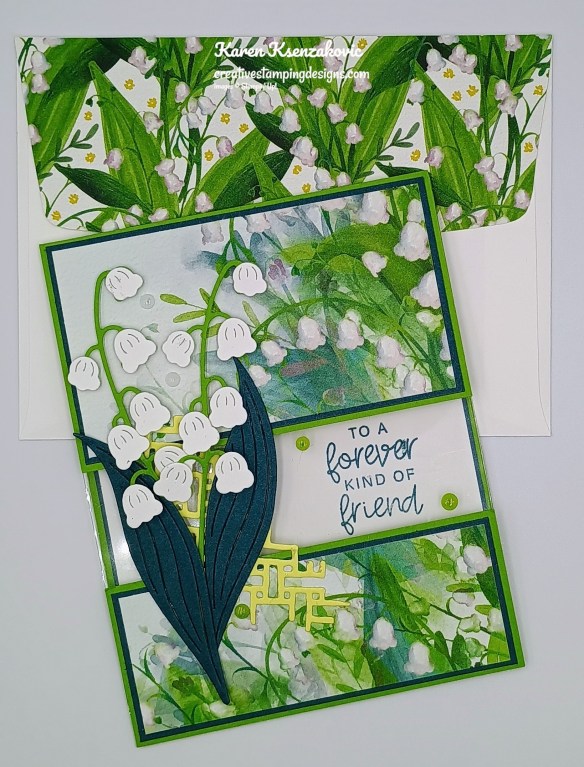
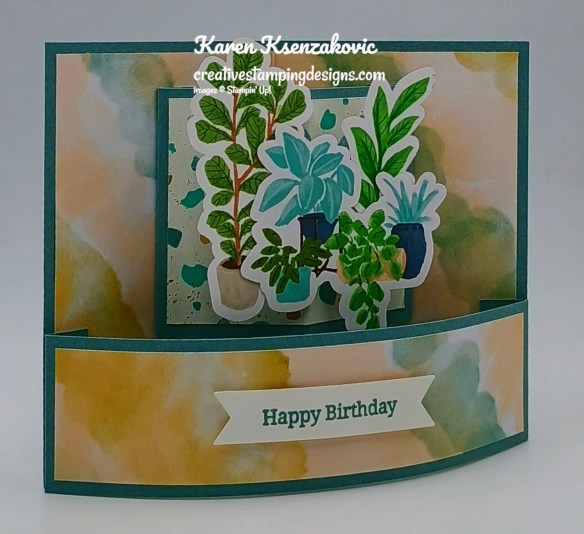
I used the Stampin’ Up! Lily of the Valley Bundle along with the Valley in Bloom Designer Series Paper and the new Online Exclusive Sweet Words and Labels Dies for my card today. All these products will be available on Tuesday May 5th.
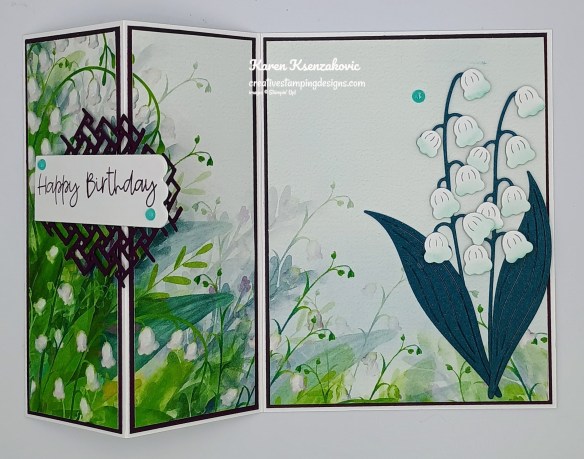
Adhere a panel of Valley in Bloom DSP to a Darling Duckling mat. Adhere a smaller panel of Valley in Bloom DSP to a Darling Duckling mat. Adhere the small, layered panel to the layered card front. Adhere the layered card front panel to a Basic White Thick card base.
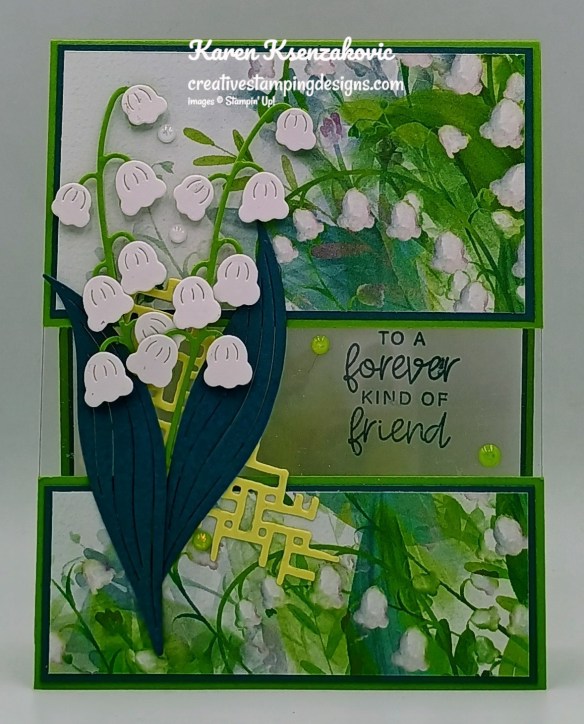
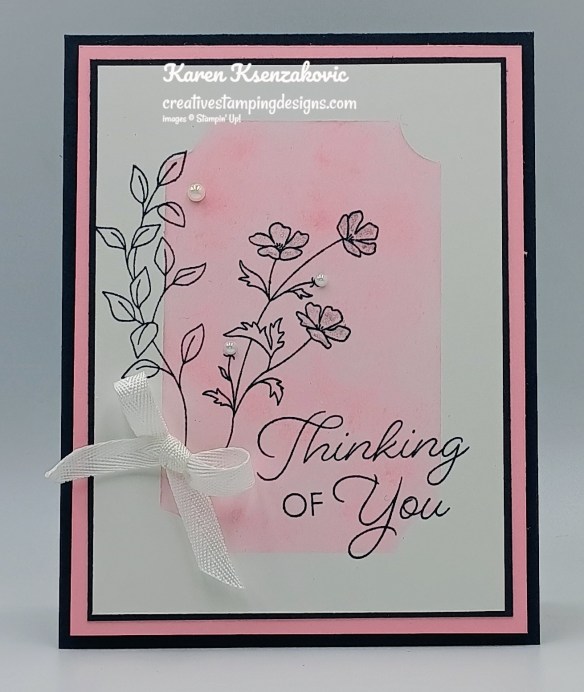
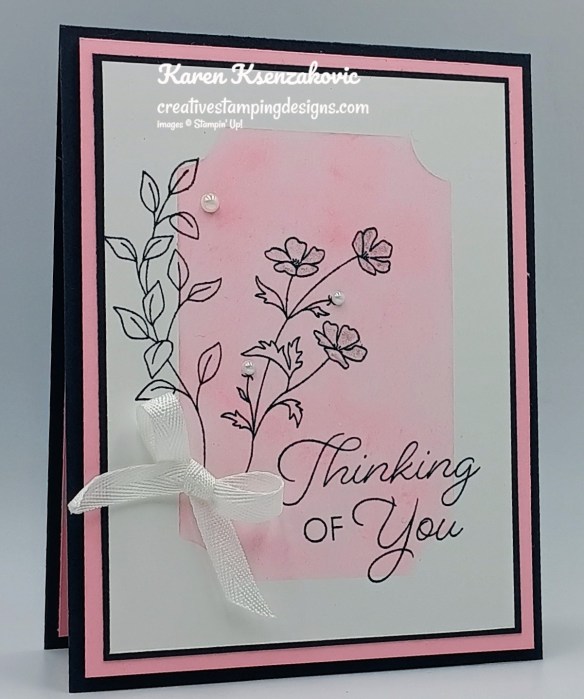
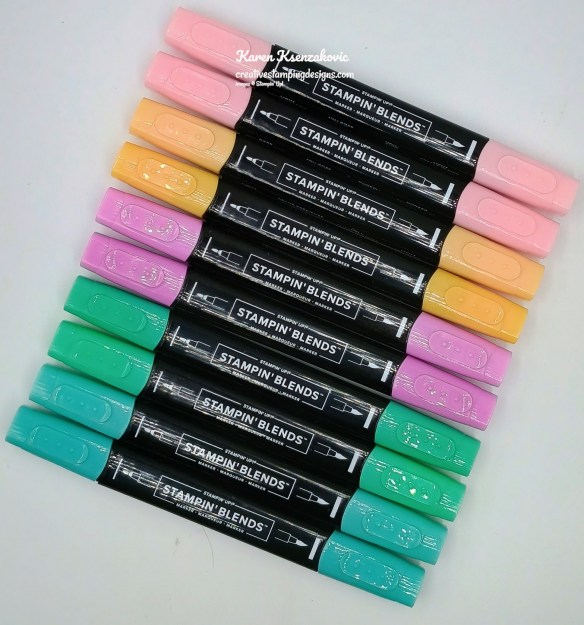
On a panel of Basic White, using the Darling Duckling and Peaceful Pine Stampin’ Blends Marker, tap the marker on a Bone Folder to splatter ink. Using the 2nd largest Sweet Words & Labels Dies, cut the Basic White panel. Using the largest Sweet Words & Labels Dies, cut the panel of Darling Duckling. Stamp the sentiment from the Lily of the Valley stamp set in Tuxedo Black Ink on the bottom of the Basic White die cut panel. Adhere the Basic Whtie panel to the Darling Duckling mat. Adhere the layered panel to the card front with Stampin’ Dimensionals.
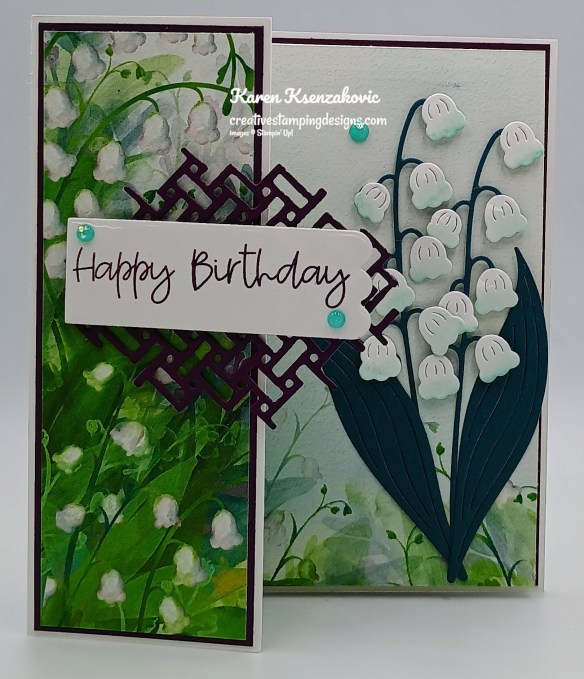
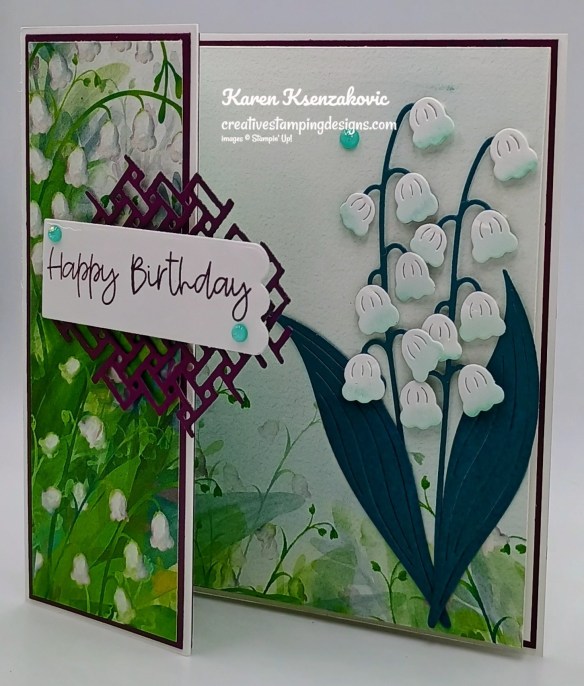
Cut the grid die using the Lily of the Valley Dies from a panel of Darling Duckling. Adhere it to the Basic White die cut on an angle. Stamp the small flower image from the Lily of the Valley stamp set in Tuxedo Black Ink. Colot the leaves first with Dark Shaded Spruce Stampin’ Blends Marker then go over it with Dark Granny Apple Green Stampin’ Blends Marker to get Garden Green. This trick to get Garden Green is from Patty Bennett. Cut the flower out using Lily of the Valley Dies. Cut 5 of the flowers from the Basic White panel using the Lily of the Valley Dies. Adhere the flowers to the die cut flower. Adhere the flower over the grid die with Stampin’ Dimensionals.
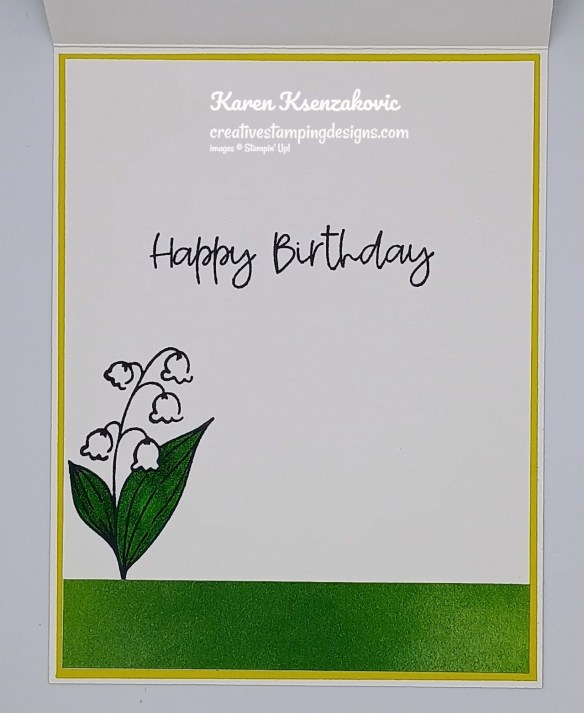
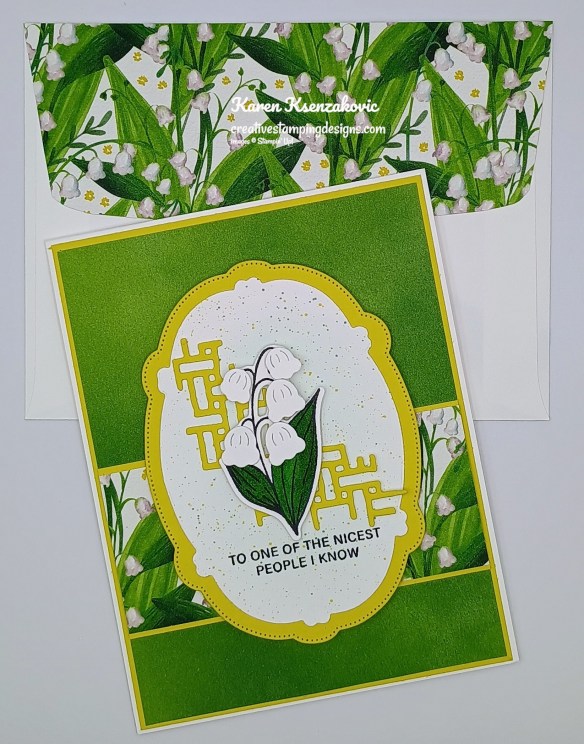
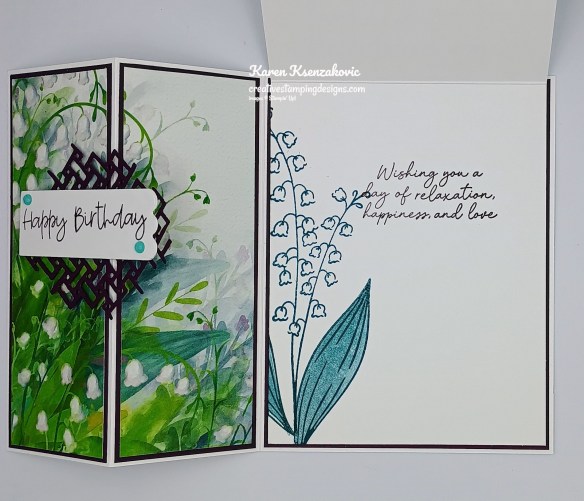
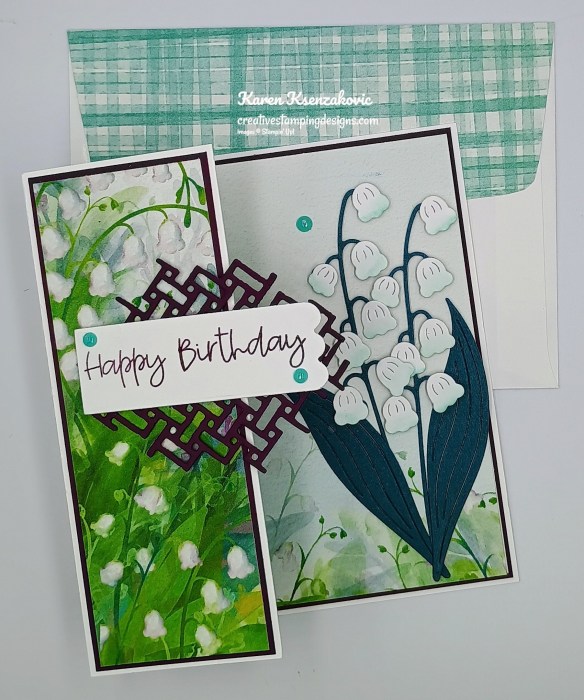
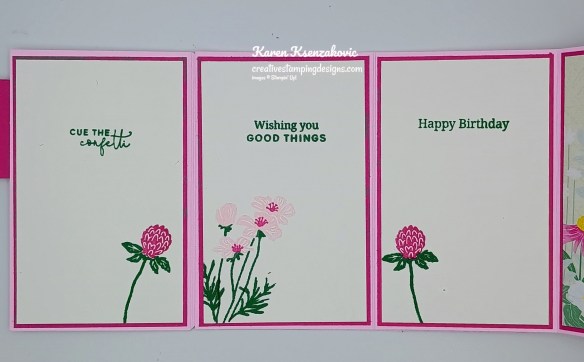
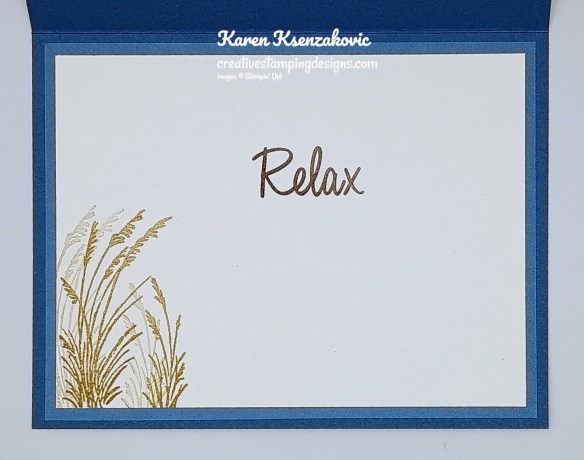
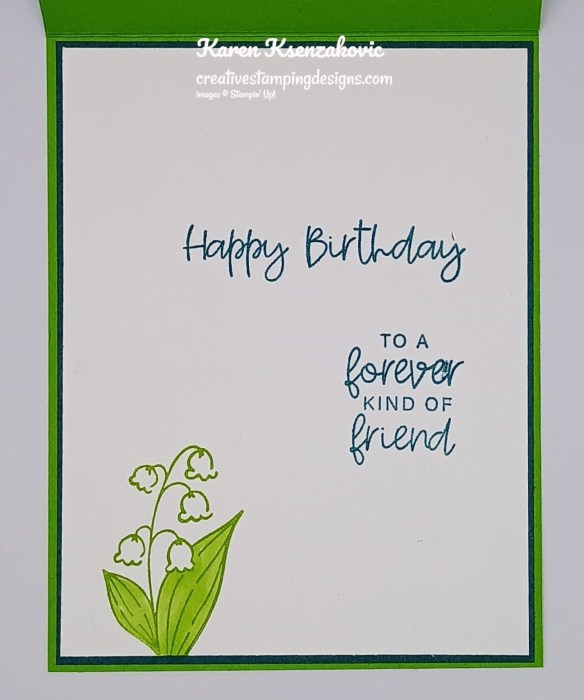
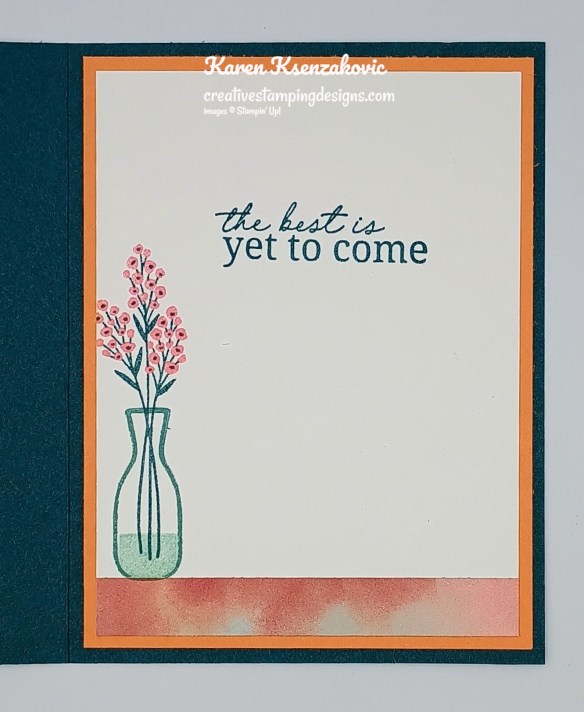
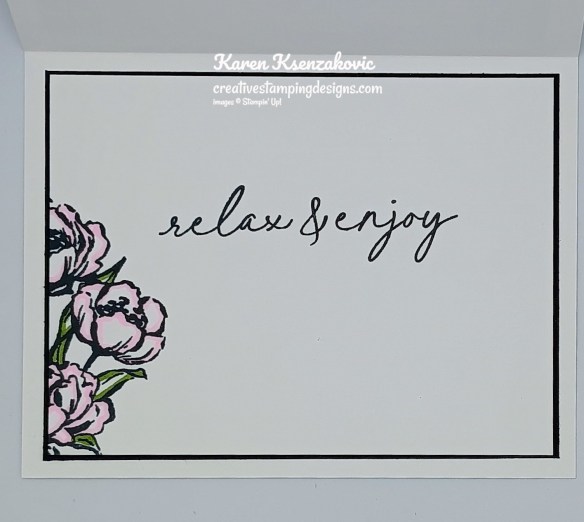
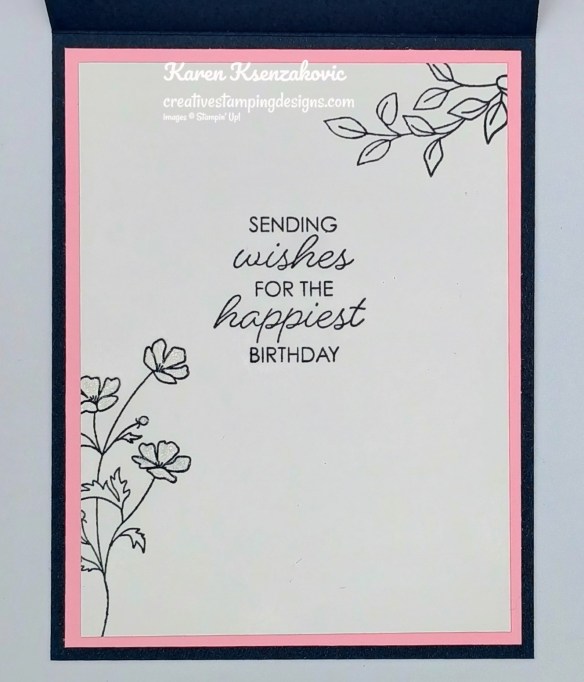
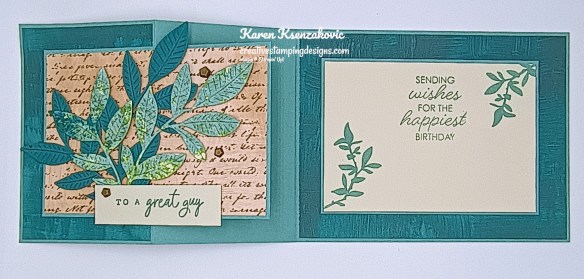
Stamp the sentiment from the Lily of the Valley stamp set in Tuxedo Black Ink on a panel of Basic White. Adhere a panel of Valley in Bloom DSP to the bottom of the panel. Stamp the small flower image from Lily of the Valley stamp set in Tuxedo Black Ink on the bottom of the panel. Color the leaves using Dark Shaded Spruce and Dark Granny Apple Green Stampin’ Blends Markers. Adhere the Basic White panel to a Darling Duckling mat then to the inside of the Basic White Thick card base.
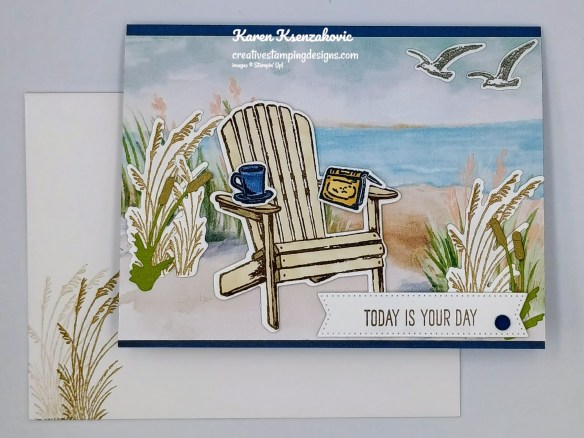
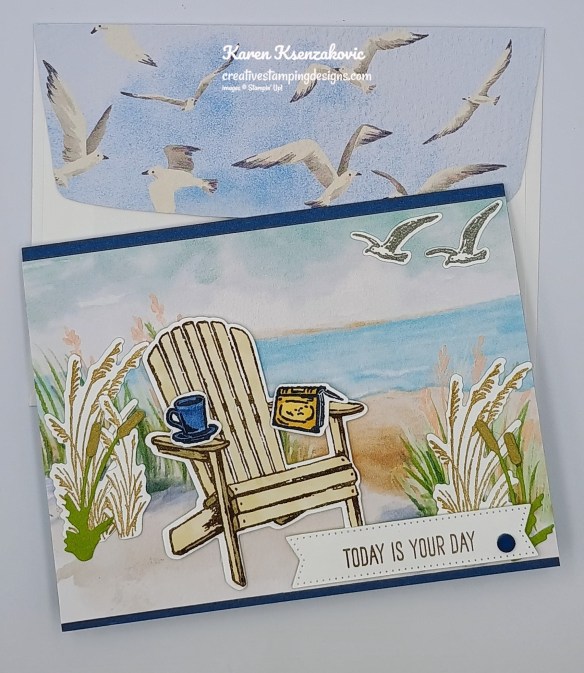
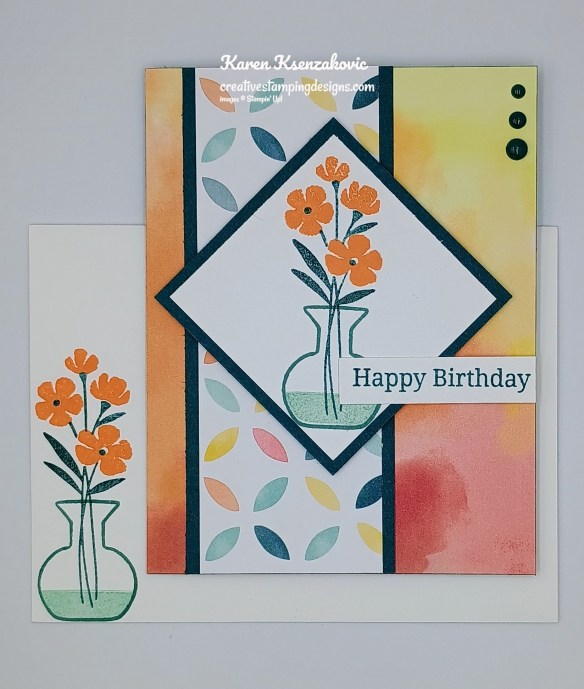
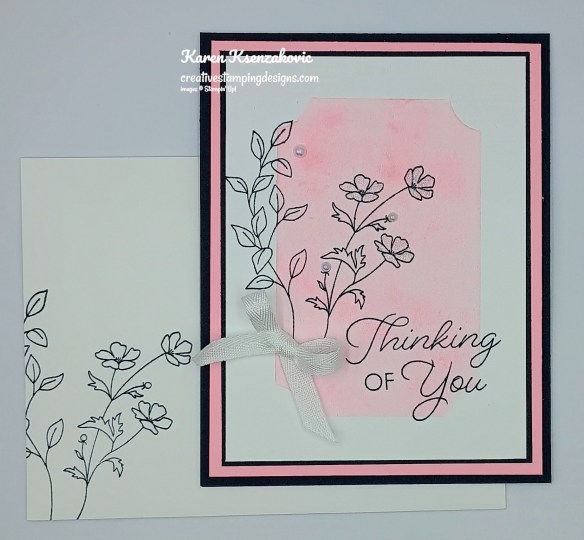
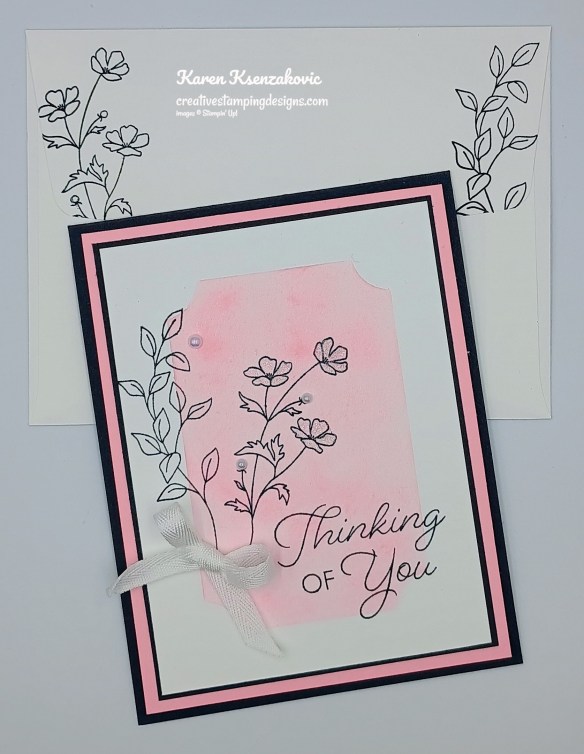
Decorate a Basic White Medium Envelope to finish your card. Stamp the small lily valley from the Lily of the Valley stamp set in Tuxedo Black Ink on the envelope front. Color the leaves using Dark Shaded Spruce and Dark Granny Apple Green Stampin’ Blends Markers. Adhere a panel of Valley in Bloom DSP to the envelope flap.
Thank you for stopping by my blog today. I hope you like my card and will give it a try. Happy Stamping!!
*********************************************************************************************************
If you need any stamping supplies, I’d love to be your Demonstrator. Just click HERE to go directly to my online store or drop me an email if you have any questions.
*********************************************************************************************************
This is the LAST DAY to sign up for my May – August 2026 Catalog and May Online Exclusive Product Shares. You can order just the DSP share, just the Two-Tone cardstock share, just the Ribbon share or just the Embellishment share, or you can have it all!! Click Here to order.
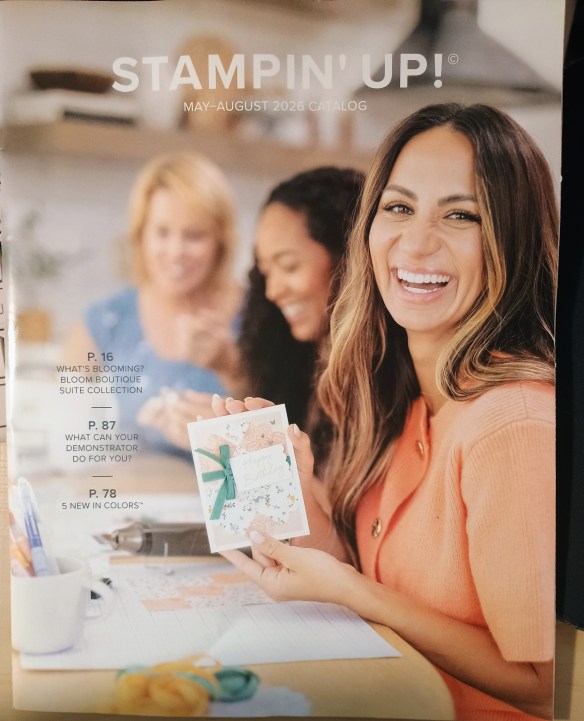
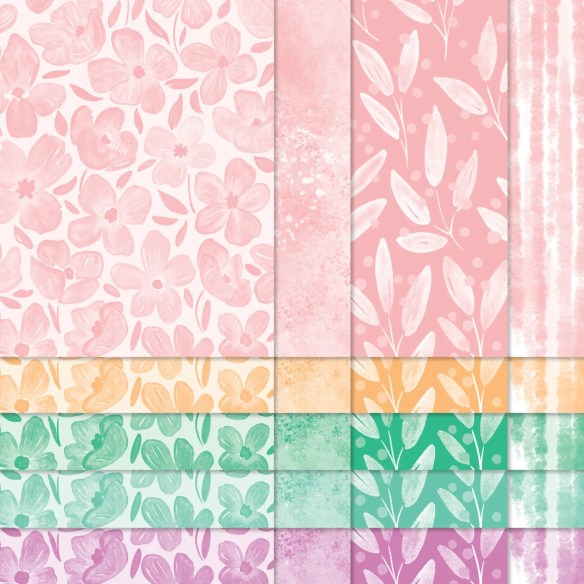
I’m offering a Designer Series Paper Share, Two-Tone Cardstock Share, Ribbon Share & Embellishment Share from the May – August 2026 Catalog, along with the upcoming May 2026 Online Exclusives and I’d love to have you join!! I’m placing my share order early on May 5th and I’m going to use the expedited shipping option so I should be able to have the shares cut, bundled and back out to you during the week of May 11th. Wouldn’t you love to have all of the gorgeous new Designer Series Papers in the Stampin’ Up! May-August 2026 Catalog and the upcoming May 2026 Online Exclusives? What is a Paper Share you ask? It’s a sample of each of the new Designer Series Papers from the Catalog and Online Exclusives. Shares give you a good working sample of all of the papers so that you can decide which ones to order in full packs! If you were to purchase all of the DSP in the new Catalog and Online Exclusives, it would cost you over $300.00 plus shipping.
New Designer Series Paper Share – $50.00 plus $10.00 for Priority Mail Shipping
How my shares work: I order full packs of all of the Designer Series Papers listed below, I cut them into 6″ X 6″ pieces (or 6″ X 12″ pieces for double shares) and give you one panel of each design from each pack on the list. I pack up the paper in a cellophane bag with labels listing the Name, Item # and Colors in the pack and mail it back out to you just as quickly as I can!
New Designer Series Paper Share – $50.00 plus $10.00 for Priority Mail shipping
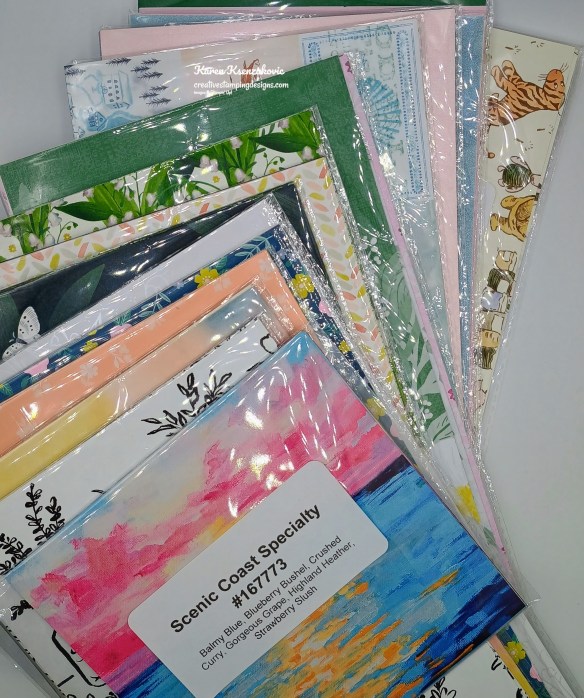
You will receive one 6×6 sheet of each design from the following DSP packs (the number after the name indicates how many 6×6 sheets of that paper pack you will receive):
- Artisan Sketched Garden (6)
- Basics Painted Patterns (6)
- Beautiful Ordinary Life (6)
- Bloom Boutique Specialty (6)
- Brights Painted patterns (20)
- Everyday Essentials Mix & Match (6)
- Luxe White Specialty (3)
- Moonlit Flora (6)
- Neutrals Painted Patterns (20)
- Paper Medley Mix Ins (6)
- Regals Painted Patterns (20)
- Scenic Coast 6×6 Specialty (8)
- Subtle Painted Patterns (20)
- Vally in Bloom (6)
- Velvet Meadow Specialty (6)
- Waterside Retreat (6)
- 2026-2028 In-Color Painted Patterns (10)
- 2026-2028 In-Color Pearlized (5)
- Sunset Shimmer Vellum (3)
- Velveteen Assortment (3)
- Silly Old Bear OLE (6)
In all, you’ll receive 178 – 6” x 6” sheets of designer or specialty paper!
Double Designer Series Paper Share – $100.00 Plus $10.00 Priority Mail Shipping
As a gift from me for ordering a Double Share of Designer Series Paper, I will include a Meant To Be Mix & Match Ephemera Pack #167700. This gift is only for ordering a Double DSP Share.
Two-Tone Cardstock Share
Do you likethe Two-Tone Cardstock but don’t want to buy a whole pack? You can add a share of the 3 different Two-Tone Cardstock packs for an additional $4.50 or purchase them separately for $4.50 + $10 Priority Shipping
You will receive one 6×6 sheet of each color from each of the packs (the number after the name indicates how many 6×6 sheets of that paper pack you will receive):
- Extraordinary Life (6)
- Heirloom Boutique (6)
- Life In Bloom (6)
In all, you’ll receive 18 – 6” x 6” sheets of cardstock!
Double Share of the Two-Tone Cardstock – $9.00 plus $10.00 Priority Mail Shipping
If you’d like double shares of the designer paper or cardstock, I’m offering those too! I’ll cut the 12″ x 12″ sheets into 6″ × 12″ so that you’ll be able to get 3 full A2 size card fronts from each sheet and you’ll get double sheets of the 6″ x 6″ since they’re already precut.
Ribbon Share – $11.25 plus $10.00 Priority Mail Shipping
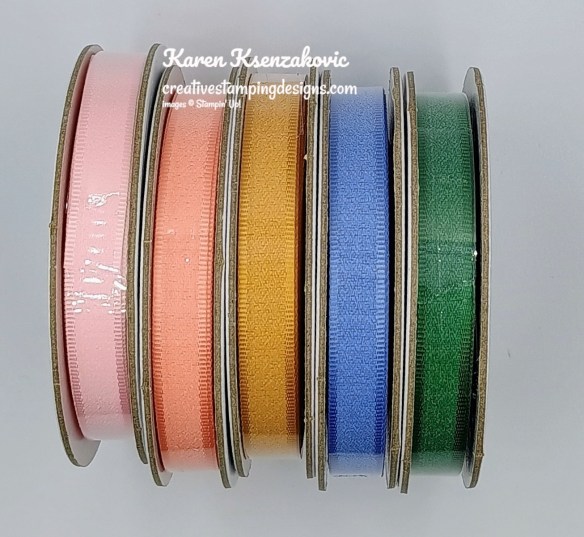
All ribbons will come individually wrapped and labeled with the name and number of the product.
One-Fourth of a Roll of each:
- Barely Blush 3/8″ Bordered Ribbon
- Crisp Cantaloupe 3/8″ Bordered Ribbon
- Golden Glow 3/8″ Bordered Ribbon
- Hydrangea Hue 3/8″ Bordered Ribbon
- Peaceful Pine 3/8″ Bordered Ribbon
Double Ribbon Share – $22.50 Plus $10.00 Priority Mail Shipping and you will be getting 1/2 of the roll or each ribbon.
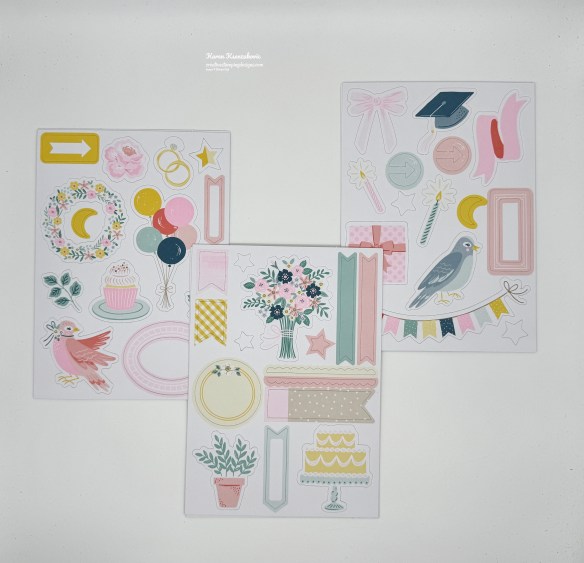
Embellishment Share – $14.00 plus $10.00 Priority Mail Shipping
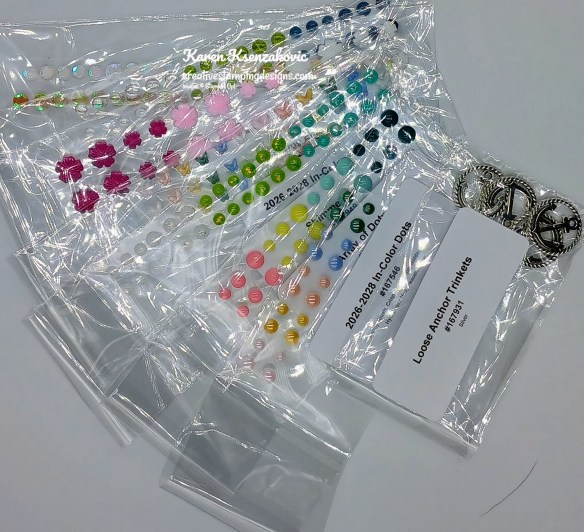
I’m also offering an Embellishment Share. I will divide the embellishments up and package them in a cello bag with the name and number for easy ordering, just like I do with the paper and ribbon.
You will receive (approximate # listed:
- Array of Dots (24)
- Dewdrops Embellishments (36)
- Dreamy Flowers (24)
- Loose Anchor Trinkets (4)
- Shimmer Dots (36)
- Sunset Sparkle Sequins (40)
- 2026-2028 In-Color Butterflies (36)
- 2026-2028 In-Color Dots (20)
Double Share of the Embellishments – $28.00 plus $10.00 Priority Mail Shipping
Anyone is welcome to join in my shares (please note, I can only ship to addresses within the US). To make ordering the shares a little easier, I have created a form for you to submit, that way you can order any combination of shares you want. Click Here for the form. I will send out PayPal Invoices by May 3rd.
Deadline to sign up for my share is Saturday May 3rd at 5:00 PM ET.
*********************************************************************************************************
Card stock cuts for this project:
- Basic Whtie Cardstock 3 1/2″ x 4 3/4″(die cut), 3″ x 3″ (die cuts), 4″ x 5 1/4″(inner liner)
- Basic White Thick Cardstock 4 1/4″ x 11″(card base scored & folded at 5 1/2″)
- Darling Duckling Cardstock (2) – 4 1/8″ x 5 3/8″(card front & inner liner mats), 3 1/4″ x 4″ (mat), 1 1/2″ x 3 1/2″(die cut), 1 7/8″ x 4″(mat)
- Valey in Bloom Designer Series Paper 4″ x 5 1/4″(card front), 1 3/4″ x 4″(card front panel), 3/4″ x 4″ (inner liner), 2 1/4″ x 6″(envelope)
*********************************************************************************************************
Product List
![Basic White 8 1/2" X 11" Cardstock [ 166780 ]](https://assets1.tamsnetwork.com/images/EC042017NF/166780s.jpg "Basic White 8 1/2\" X 11\" Cardstock [ 166780 ]")
![Basic White 8 1/2" X 11" Thick Cardstock [ 159229 ]](https://assets1.tamsnetwork.com/images/EC042017NF/159229s.jpg "Basic White 8 1/2\" X 11\" Thick Cardstock [ 159229 ]")
![Darling Duckling 8 1/2" X 11" Cardstock [ 165622 ]](https://assets1.tamsnetwork.com/images/EC042017NF/165622s.jpg "Darling Duckling 8 1/2\" X 11\" Cardstock [ 165622 ]")
![Pool Party Classic Stampin' Pad [ 147107 ]](https://assets1.tamsnetwork.com/images/EC042017NF/147107s.jpg "Pool Party Classic Stampin' Pad [ 147107 ]")
![Tuxedo Black Memento Ink Pad [ 132708 ]](https://assets1.tamsnetwork.com/images/EC042017NF/132708s.jpg "Tuxedo Black Memento Ink Pad [ 132708 ]")
![Darling Duckling Stampin’ Blends Combo Pack [ 165288 ]](https://assets1.tamsnetwork.com/images/EC042017NF/165288s.jpg "Darling Duckling Stampin’ Blends Combo Pack [ 165288 ]")
![Granny Apple Green Stampin' Blends Combo Pack [ 154885 ]](https://assets1.tamsnetwork.com/images/EC042017NF/154885s.jpg "Granny Apple Green Stampin' Blends Combo Pack [ 154885 ]")
![Shaded Spruce Stampin' Blends Combo Pack [ 154903 ]](https://assets1.tamsnetwork.com/images/EC042017NF/154903s.jpg "Shaded Spruce Stampin' Blends Combo Pack [ 154903 ]")
![Small Blending Brushes [ 160518 ]](https://assets1.tamsnetwork.com/images/EC042017NF/160518s.jpg "Small Blending Brushes [ 160518 ]")
![Basic White Medium Envelopes [ 159236 ]](https://assets1.tamsnetwork.com/images/EC042017NF/159236s.jpg "Basic White Medium Envelopes [ 159236 ]")
![Stampin' Cut & Emboss Machine [ 149653 ]](https://assets1.tamsnetwork.com/images/EC042017NF/149653s.jpg "Stampin' Cut & Emboss Machine [ 149653 ]")
![Mini Glue Dots [ 103683 ]](https://assets1.tamsnetwork.com/images/EC042017NF/103683s.jpg "Mini Glue Dots [ 103683 ]")
![Multipurpose Liquid Glue [ 110755 ]](https://assets1.tamsnetwork.com/images/EC042017NF/110755s.jpg "Multipurpose Liquid Glue [ 110755 ]")
![Stampin' Dimensionals [ 104430 ]](https://assets1.tamsnetwork.com/images/EC042017NF/104430s.jpg "Stampin' Dimensionals [ 104430 ]")
![Stampin' Seal [ 152813 ]](https://assets1.tamsnetwork.com/images/EC042017NF/152813s.jpg "Stampin' Seal [ 152813 ]")
![Bone Folder [ 102300 ]](https://assets1.tamsnetwork.com/images/EC042017NF/102300s.jpg "Bone Folder [ 102300 ]")
![Take Your Pick [ 144107 ]](https://assets1.tamsnetwork.com/images/EC042017NF/144107s.jpg "Take Your Pick [ 144107 ]")
![Paper Trimmer [ 152392 ]](https://assets1.tamsnetwork.com/images/EC042017NF/152392s.jpg "Paper Trimmer [ 152392 ]")

![Blackberry Bliss 8-1/2" X 11" Cardstock [ 133675 ]](https://assets1.tamsnetwork.com/images/EC042017NF/133675s.jpg "Blackberry Bliss 8-1/2\" X 11\" Cardstock [ 133675 ]")
![Pretty Peacock 8-1/2" X 11" Cardstock [ 150880 ]](https://assets1.tamsnetwork.com/images/EC042017NF/150880s.jpg "Pretty Peacock 8-1/2\" X 11\" Cardstock [ 150880 ]")
![Blackberry Bliss Classic Stampin' Pad [ 147092 ]](https://assets1.tamsnetwork.com/images/EC042017NF/147092s.jpg "Blackberry Bliss Classic Stampin' Pad [ 147092 ]")
![Coastal Cabana Classic Stampin' Pad [ 147097 ]](https://assets1.tamsnetwork.com/images/EC042017NF/147097s.jpg "Coastal Cabana Classic Stampin' Pad [ 147097 ]")
![Pretty Peacock Classic Stampin’ Pad [ 150083 ]](https://assets1.tamsnetwork.com/images/EC042017NF/150083s.jpg "Pretty Peacock Classic Stampin’ Pad [ 150083 ]")
![Pretty Peacock Stampin’ Blends Combo Pack [ 161676 ]](https://assets1.tamsnetwork.com/images/EC042017NF/161676s.jpg "Pretty Peacock Stampin’ Blends Combo Pack [ 161676 ]")

![Banner Sayings Photopolymer Stamp Set (English) [ 167044 ]](https://assets1.tamsnetwork.com/images/EC042017NF/167044s.jpg "Banner Sayings Photopolymer Stamp Set (English) [ 167044 ]")
![Berry Burst 8-1/2" X 11" Cardstock [ 144243 ]](https://assets1.tamsnetwork.com/images/EC042017NF/144243s.jpg "Berry Burst 8-1/2\" X 11\" Cardstock [ 144243 ]")
![Bubble Bath 8 1/2" X 11" Cardstock [ 161718 ]](https://assets1.tamsnetwork.com/images/EC042017NF/161718s.jpg "Bubble Bath 8 1/2\" X 11\" Cardstock [ 161718 ]")
![Berry Burst Classic Stampin' Pad [ 147143 ]](https://assets1.tamsnetwork.com/images/EC042017NF/147143s.jpg "Berry Burst Classic Stampin' Pad [ 147143 ]")
![Bubble Bath Classic Stampin' Pad [ 161664 ]](https://assets1.tamsnetwork.com/images/EC042017NF/161664s.jpg "Bubble Bath Classic Stampin' Pad [ 161664 ]")
![Bubble Bath 1/8" (3.2 Mm) Faux Linen Ribbon [ 167075 ]](https://assets1.tamsnetwork.com/images/EC042017NF/167075s.jpg "Bubble Bath 1/8\" (3.2 Mm) Faux Linen Ribbon [ 167075 ]")


![Misty Moonlight 8-1/2" X 11" Cardstock [ 153081 ]](https://assets1.tamsnetwork.com/images/EC042017NF/153081s.jpg "Misty Moonlight 8-1/2\" X 11\" Cardstock [ 153081 ]")
![Crumb Cake 12" X 12" (30.5 X 30.5 Cm) Two Tone Cardstock [ 166671 ]](https://assets1.tamsnetwork.com/images/EC042017NF/166671s.jpg "Crumb Cake 12\" X 12\" (30.5 X 30.5 Cm) Two Tone Cardstock [ 166671 ]")
![Misty Moonlight 12" X 12" (30.5 X 30.5 Cm) Two Tone Cardstock [ 166686 ]](https://assets1.tamsnetwork.com/images/EC042017NF/166686s.jpg "Misty Moonlight 12\" X 12\" (30.5 X 30.5 Cm) Two Tone Cardstock [ 166686 ]")
![Old Olive 12" X 12" (30.5 X 30.5 Cm) Two Tone Cardstock [ 166683 ]](https://assets1.tamsnetwork.com/images/EC042017NF/166683s.jpg "Old Olive 12\" X 12\" (30.5 X 30.5 Cm) Two Tone Cardstock [ 166683 ]")
![Basic Gray Classic Stampin' Pad [ 149165 ]](https://assets1.tamsnetwork.com/images/EC042017NF/149165s.jpg "Basic Gray Classic Stampin' Pad [ 149165 ]")
![Crumb Cake Classic Stampin' Pad [ 147116 ]](https://assets1.tamsnetwork.com/images/EC042017NF/147116s.jpg "Crumb Cake Classic Stampin' Pad [ 147116 ]")
![Early Espresso Classic Stampin' Pad [ 147114 ]](https://assets1.tamsnetwork.com/images/EC042017NF/147114s.jpg "Early Espresso Classic Stampin' Pad [ 147114 ]")
![Crumb Cake Stampin' Blends Combo Pack [ 154882 ]](https://assets1.tamsnetwork.com/images/EC042017NF/154882s.jpg "Crumb Cake Stampin' Blends Combo Pack [ 154882 ]")
![Misty Moonlight Stampin' Blends Combo Pack [ 153108 ]](https://assets1.tamsnetwork.com/images/EC042017NF/153108s.jpg "Misty Moonlight Stampin' Blends Combo Pack [ 153108 ]")
![Stylish Shapes Dies [ 159183 ]](https://assets1.tamsnetwork.com/images/EC042017NF/159183s.jpg "Stylish Shapes Dies [ 159183 ]")
![Strawberries & Dots [ 167479 ]](https://assets1.tamsnetwork.com/images/EC042017NF/167479s.jpg "Strawberries & Dots [ 167479 ]")


![Granny Apple Green 8-1/2" X 11" Cardstock [ 146990 ]](https://assets1.tamsnetwork.com/images/EC042017NF/146990s.jpg "Granny Apple Green 8-1/2\" X 11\" Cardstock [ 146990 ]")
![Lemon Lolly 8 1/2" X 11" Cardstock [ 161720 ]](https://assets1.tamsnetwork.com/images/EC042017NF/161720s.jpg "Lemon Lolly 8 1/2\" X 11\" Cardstock [ 161720 ]")
![Window Sheets [ 142314 ]](https://assets1.tamsnetwork.com/images/EC042017NF/142314s.jpg "Window Sheets [ 142314 ]")
![Granny Apple Green Stampin' Pad [ 147095 ]](https://assets1.tamsnetwork.com/images/EC042017NF/147095s.jpg "Granny Apple Green Stampin' Pad [ 147095 ]")

![Timid Tiger 8 1/2" X 11" Cardstock [ 165626 ]](https://assets1.tamsnetwork.com/images/EC042017NF/165626s.jpg "Timid Tiger 8 1/2\" X 11\" Cardstock [ 165626 ]")
![Flirty Flamingo Classic Stampin' Pad [ 147052 ]](https://assets1.tamsnetwork.com/images/EC042017NF/147052s.jpg "Flirty Flamingo Classic Stampin' Pad [ 147052 ]")
![Lost Lagoon Classic Stampin' Pad [ 161678 ]](https://assets1.tamsnetwork.com/images/EC042017NF/161678s.jpg "Lost Lagoon Classic Stampin' Pad [ 161678 ]")
![Timid Tiger Classic Stampin' Pad [ 165278 ]](https://assets1.tamsnetwork.com/images/EC042017NF/165278s.jpg "Timid Tiger Classic Stampin' Pad [ 165278 ]")


![Notes & Totes Photopolymer Stamp Set (English) [ 165239 ]](https://assets1.tamsnetwork.com/images/EC042017NF/165239s.jpg "Notes & Totes Photopolymer Stamp Set (English) [ 165239 ]")
![Basic Black 8-1/2" X 11" Cardstock [ 121045 ]](https://assets1.tamsnetwork.com/images/EC042017NF/121045s.jpg "Basic Black 8-1/2\" X 11\" Cardstock [ 121045 ]")
![Bubble Bath Stampin’ Blends Combo Pack [ 161675 ]](https://assets1.tamsnetwork.com/images/EC042017NF/161675s.jpg "Bubble Bath Stampin’ Blends Combo Pack [ 161675 ]")
![Fresh Freesia Stampin' Blends Combo Pack [ 155518 ]](https://assets1.tamsnetwork.com/images/EC042017NF/155518s.jpg "Fresh Freesia Stampin' Blends Combo Pack [ 155518 ]")
![Mossy Meadow Stampin' Blends Combo Pack [ 154890 ]](https://assets1.tamsnetwork.com/images/EC042017NF/154890s.jpg "Mossy Meadow Stampin' Blends Combo Pack [ 154890 ]")
![1 7/8" (4.8 Cm) Circle Punch [ 165259 ]](https://assets1.tamsnetwork.com/images/EC042017NF/165259s.jpg "1 7/8\" (4.8 Cm) Circle Punch [ 165259 ]")
![2" (5.1 Cm) Circle Punch [ 133782 ]](https://assets1.tamsnetwork.com/images/EC042017NF/133782s.jpg "2\" (5.1 Cm) Circle Punch [ 133782 ]")
![Rainbow Adhesive Backed Dots [ 162758 ]](https://assets1.tamsnetwork.com/images/EC042017NF/162758s.jpg "Rainbow Adhesive Backed Dots [ 162758 ]")


![Framed All Around Photopolymer Stamp Set (English) [ 167221 ]](https://assets1.tamsnetwork.com/images/EC042017NF/167221s.jpg "Framed All Around Photopolymer Stamp Set (English) [ 167221 ]")
![Pretty In Pink 8 1/2" X 11" Cardstock [ 163793 ]](https://assets1.tamsnetwork.com/images/EC042017NF/163793s.jpg "Pretty In Pink 8 1/2\" X 11\" Cardstock [ 163793 ]")
![Secret Sea 8 1/2" X 11" Cardstock [ 165624 ]](https://assets1.tamsnetwork.com/images/EC042017NF/165624s.jpg "Secret Sea 8 1/2\" X 11\" Cardstock [ 165624 ]")
![Pretty In Pink Classic Stampin Pad [ 163807 ]](https://assets1.tamsnetwork.com/images/EC042017NF/163807s.jpg "Pretty In Pink Classic Stampin Pad [ 163807 ]")
![Secret Sea Classic Stampin' Pad [ 165285 ]](https://assets1.tamsnetwork.com/images/EC042017NF/165285s.jpg "Secret Sea Classic Stampin' Pad [ 165285 ]")
![Clear Wink Of Stella Glitter Brush [ 141897 ]](https://assets1.tamsnetwork.com/images/EC042017NF/141897s.jpg "Clear Wink Of Stella Glitter Brush [ 141897 ]")
![Iridescent Pearl Basic Jewels [ 158987 ]](https://assets1.tamsnetwork.com/images/EC042017NF/158987s.jpg "Iridescent Pearl Basic Jewels [ 158987 ]")
![Misty Moonlight & White 1/4" (6.4 Mm) Starter Ribbon Pack [ 165276 ]](https://assets1.tamsnetwork.com/images/EC042017NF/165276s.jpg "Misty Moonlight & White 1/4\" (6.4 Mm) Starter Ribbon Pack [ 165276 ]")
![Branching Out Dies [ 165775 ]](https://assets1.tamsnetwork.com/images/EC042017NF/165775s.jpg "Branching Out Dies [ 165775 ]")


![Nature's Symphony Bundle (English) [ 166926 ]](https://assets1.tamsnetwork.com/images/EC042017NF/166926s.jpg "Nature's Symphony Bundle (English) [ 166926 ]")
![Nature's Symphony Photopolymer Stamp Set (English) [ 166919 ]](https://assets1.tamsnetwork.com/images/EC042017NF/166919s.jpg "Nature's Symphony Photopolymer Stamp Set (English) [ 166919 ]")
![Nature's Symphony Dies [ 166925 ]](https://assets1.tamsnetwork.com/images/EC042017NF/166925s.jpg "Nature's Symphony Dies [ 166925 ]")
![Basic Beige 8 1/2" X 11" Cardstock [ 164511 ]](https://assets1.tamsnetwork.com/images/EC042017NF/164511s.jpg "Basic Beige 8 1/2\" X 11\" Cardstock [ 164511 ]")
![Lost Lagoon 8-1/2" X 11" Cardstock [ 133679 ]](https://assets1.tamsnetwork.com/images/EC042017NF/133679s.jpg "Lost Lagoon 8-1/2\" X 11\" Cardstock [ 133679 ]")
![Nature Walk 12" X 12" (30.5 X 30.5 Cm) Designer Series Paper [ 166912 ]](https://assets1.tamsnetwork.com/images/EC042017NF/166912s.jpg "Nature Walk 12\" X 12\" (30.5 X 30.5 Cm) Designer Series Paper [ 166912 ]")
![Faux Bronze Pentagons [ 166931 ]](https://assets1.tamsnetwork.com/images/EC042017NF/166931s.jpg "Faux Bronze Pentagons [ 166931 ]")


![Banner Sayings Bundle (English) [ 167051 ]](https://assets1.tamsnetwork.com/images/EC042017NF/167051s.jpg "Banner Sayings Bundle (English) [ 167051 ]")
![Three Banner Punch [ 167050 ]](https://assets1.tamsnetwork.com/images/EC042017NF/167050s.jpg "Three Banner Punch [ 167050 ]")
![Petal Pink 8-1/2" X 11" Cardstock [ 146985 ]](https://assets1.tamsnetwork.com/images/EC042017NF/146985s.jpg "Petal Pink 8-1/2\" X 11\" Cardstock [ 146985 ]")
![Hobby Haven 12" X 12" (30.5 X 30.5 Cm) Specialty Designer Series Paper [ 167201 ]](https://assets1.tamsnetwork.com/images/EC042017NF/167201s.jpg "Hobby Haven 12\" X 12\" (30.5 X 30.5 Cm) Specialty Designer Series Paper [ 167201 ]")

