Stampin’ Up! Seaside Bay for Fun Fold Friday

Good Friday morning my stamping friends welcome to my fun fold Friday. How was everyone’s week? Does anyone have plans for the weekend yet? I’ll be working all day tomorrow in the office doing my bills. The good thing is I won’t be there till 5pm like a normal Saturday.

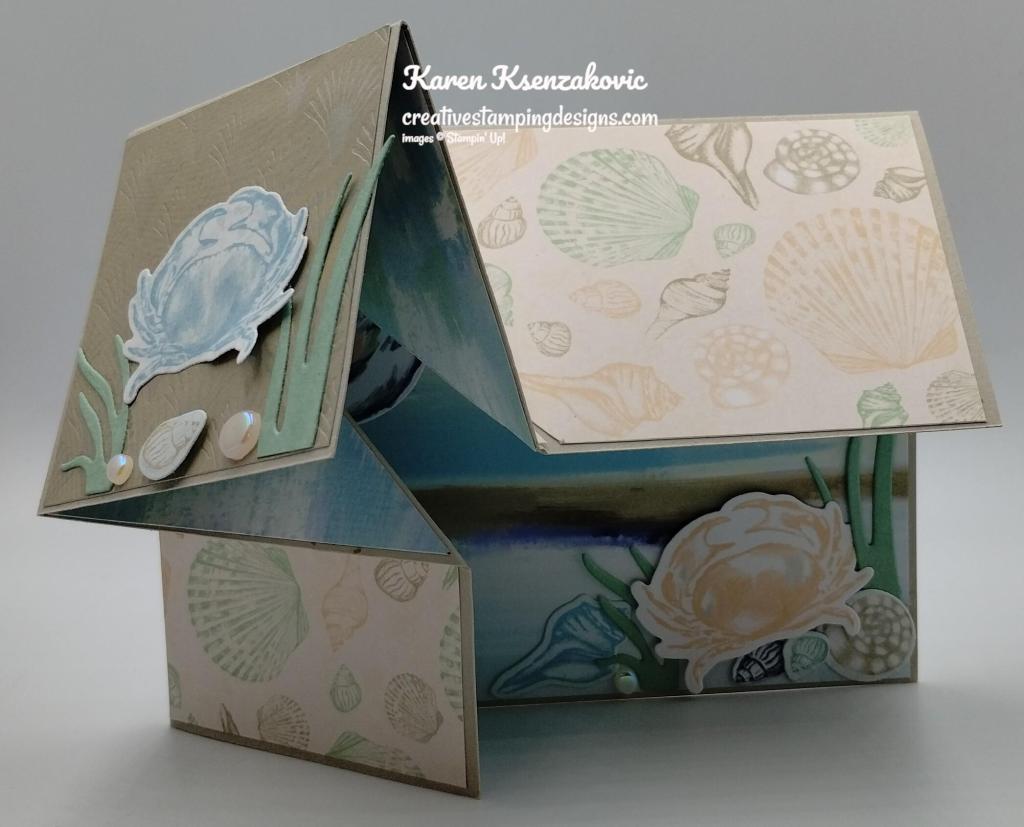
Today’s card I made on my Facebook Live video on Wednesday. If you were able to join me or watched the replay, thank you. If you’d like to watch my video and stamp along, the measurements are below along with the links to my Facebook page and my YouTube channel. Here is my card for today.
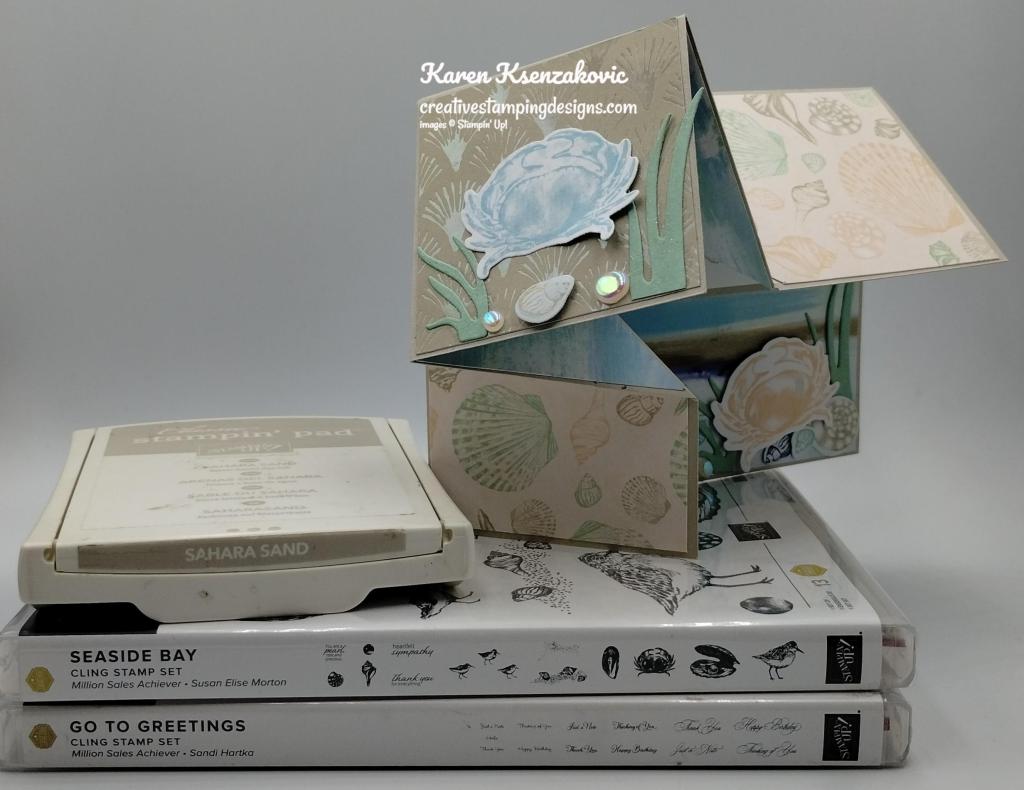
Stampin' Up! Seaside Bay Fun Fold 1 creativestampingdesigns.com

I used the Stampin’ Up! Seaside Bay Bundle along with the Stampin’ Up! Go To Greetings Cling Stamp Set and By The Bay 6 X 6 Designer Series Paper for my card today.
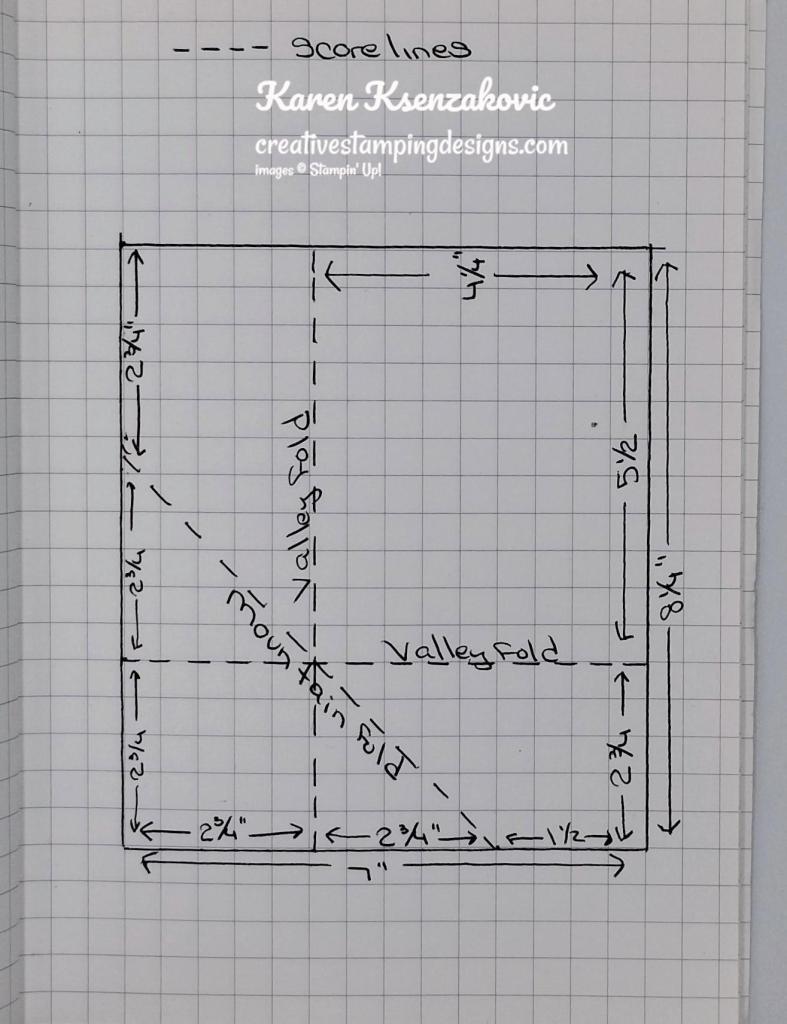
Here is my template for the card.
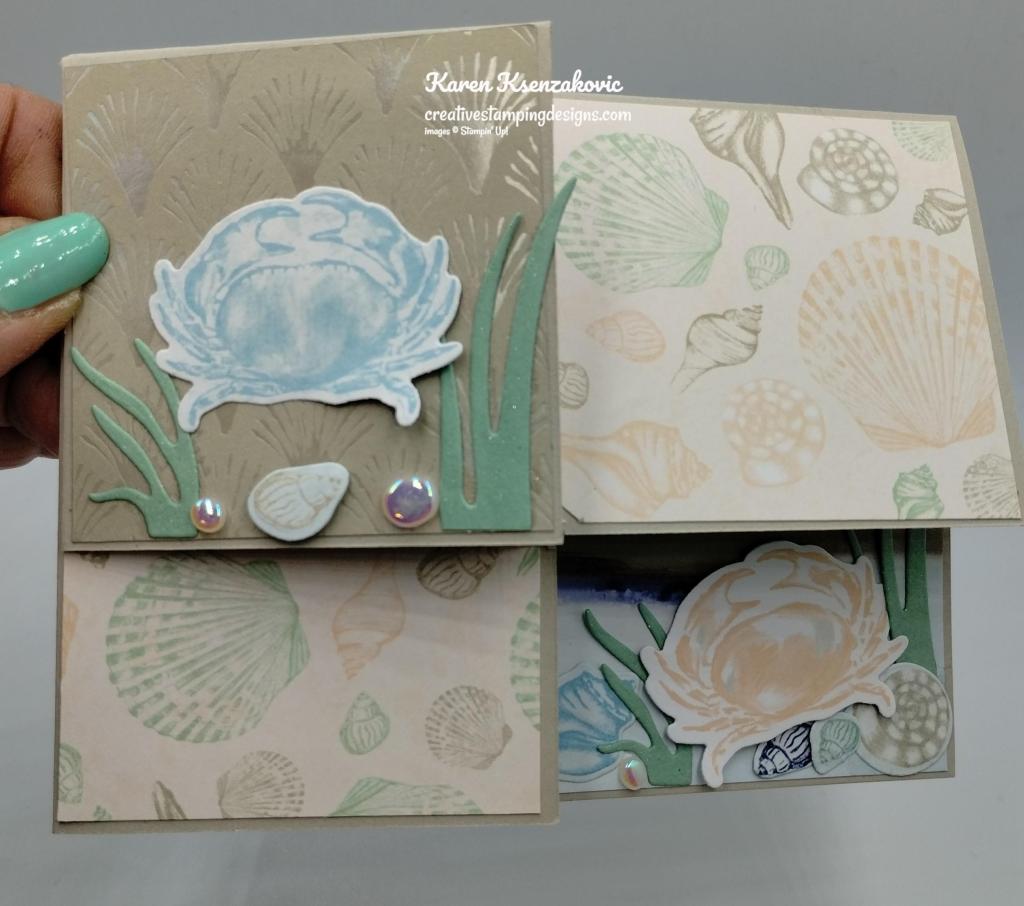
Stampin' Up! Seaside Bay Fun Fold 2 creativestampingdesigns.com

I started by scoring and folding a Sahara Sand card base as pictured above in the photo of the template.
Stampin' Up! Seaside Bay Fun Fold 3 creativestampingdesigns.com

I cut a bird, crabs and shells from panels of By The Bay DSP using my Seaside Bay Dies.
Stampin' Up! Seaside Bay Fun Fold 4 creativestampingdesigns.com

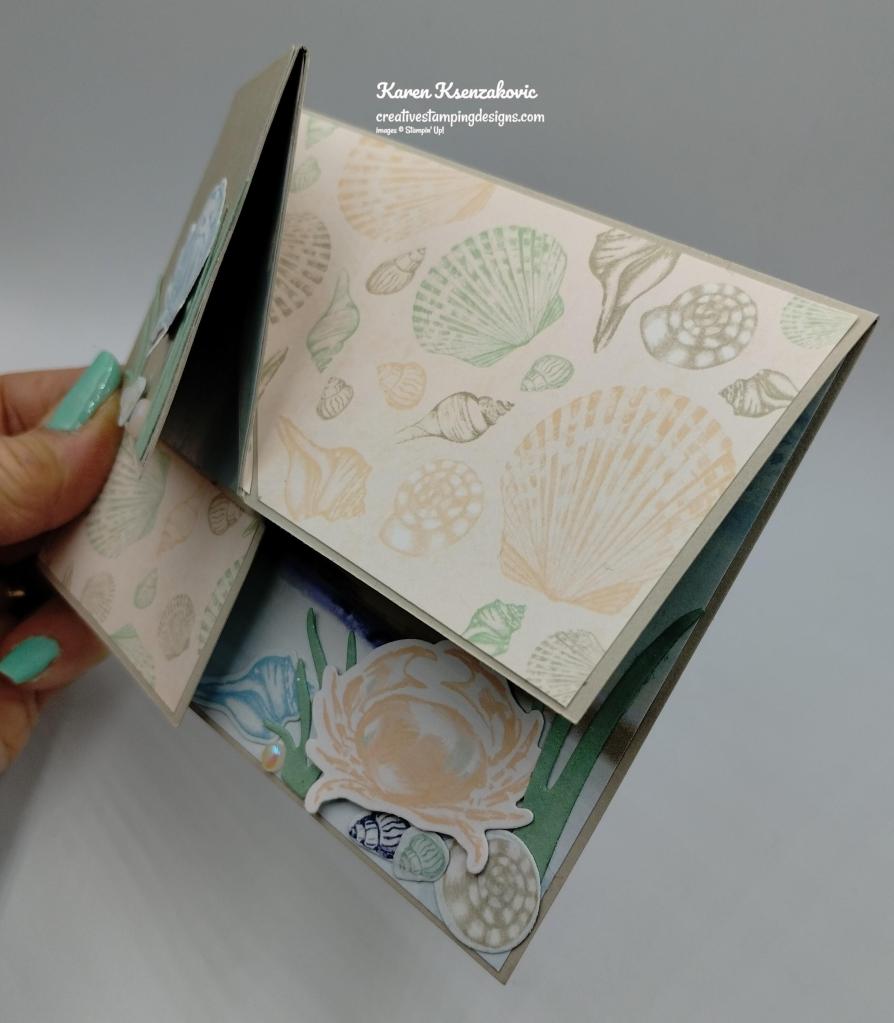
I cut and adhered panels of the By The Bay DSP to the card base using Multipurpose Liquid Glue. The basic measurements of the DSP are listed below. You will have to line them up with your card to measure where to cut them on an angle.
Stampin' Up! Seaside Bay Fun Fold 5 creativestampingdesigns.com

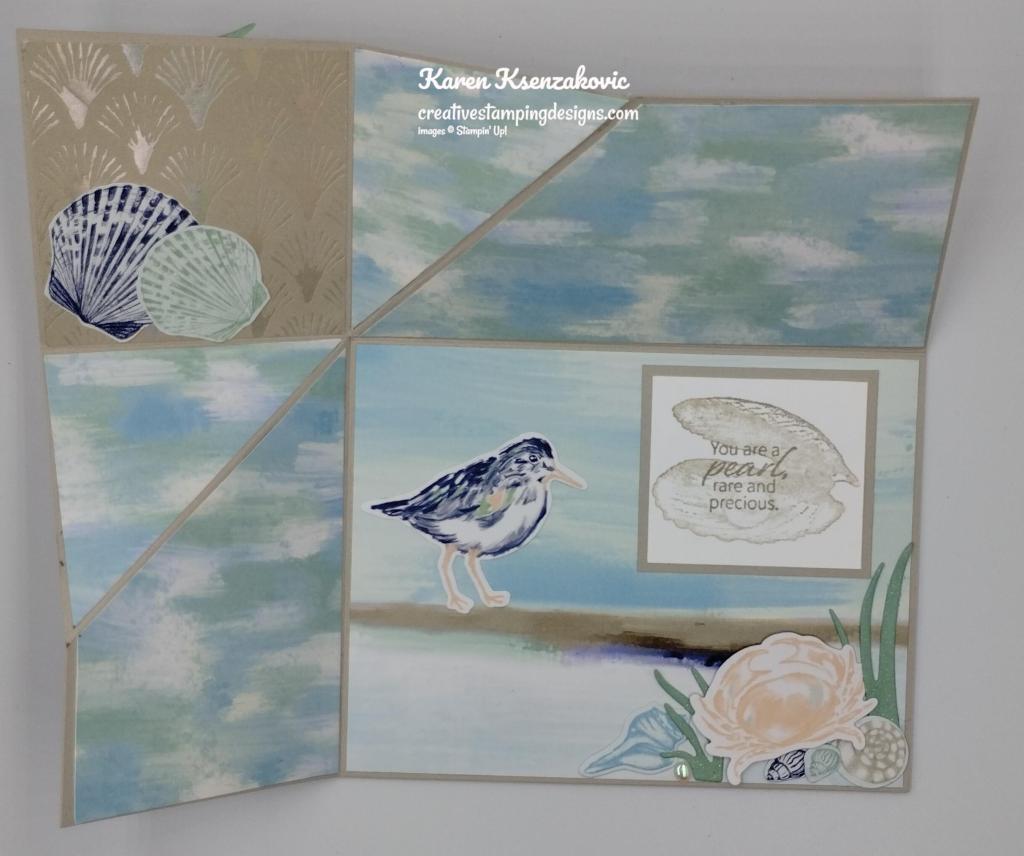
On the inside, I stamped the shell image from the Stampin’ Up! Seaside Bay Cling Stamp Set in Sahara Sand Ink, stamped off once on scrap paper, on a panel of Basic White cardstock. I stamped the sentiment from the Seaside Bay stamp set in Sahara Sand Ink on top of the shell, I adhered the Basic White panel to a Sahara Sand mat then to the inside panel using Stampin’ Seal. I adhered the bird, seagrass and shells using Multipurpose Liquid Gue and Glue Dots. I adhered the crab using Stampin’ Dimensionals.
Stampin' Up! Seaside Bay Fun Fold 6 creativestampingdesigns.com

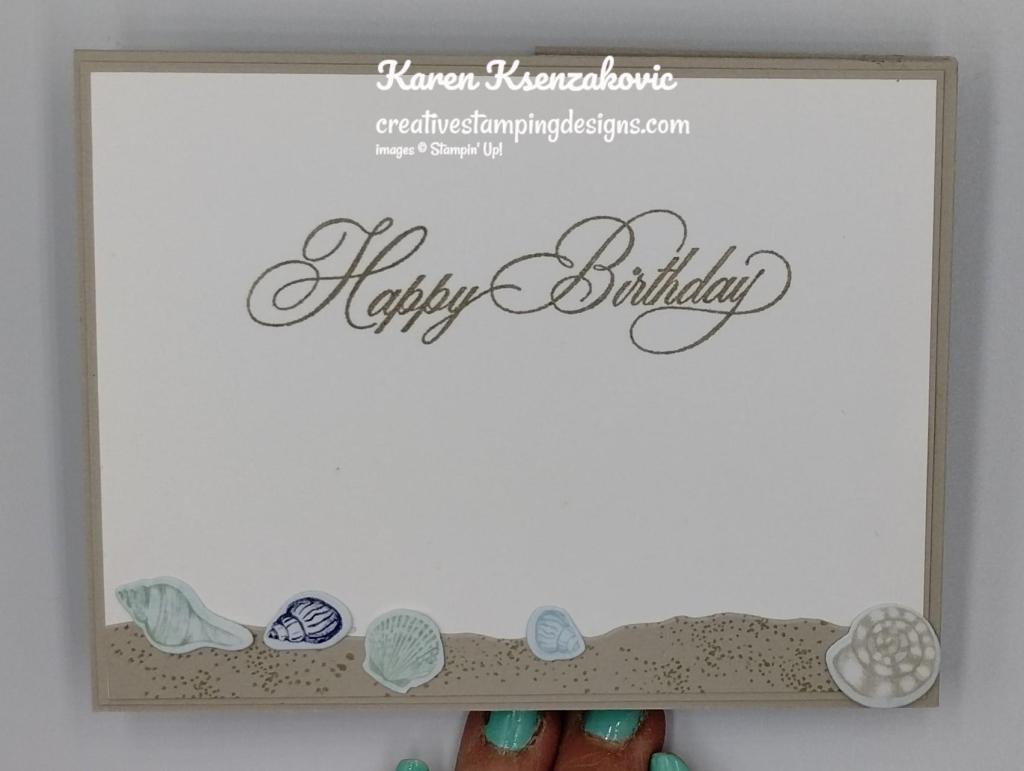
On the back, I stamped the sentiment from the Go To Greetings in Sahara Sand Ink on a panel of Basic White. I stamped the sand image from the Seaside Bay stamp set on a strip of Sahara Sand cardstock in Sahara Sand Ink. I cut the strip using the Seaside Bay Dies. I adhered it to the bottom of the panel using Multipurpose Liquid Glue. I adhered the shells along the sand using Glue Dots. I adhered the Basic Whtie panel to a Sahara Sand mat then to the back of the card base using Multipurpose Liquid Glue.

Stampin' Up! Seaside Bay Fun Fold 7 creativestampingdesigns.com

To finish my card, I decorated a Basic White Medium Envelope. I stamped the sand and bird images from the Seaside Bay stamp set in Sahara Sand Ink on the front of the envelope. I adhered a panel of By The Bay DSP to the envelope flap.
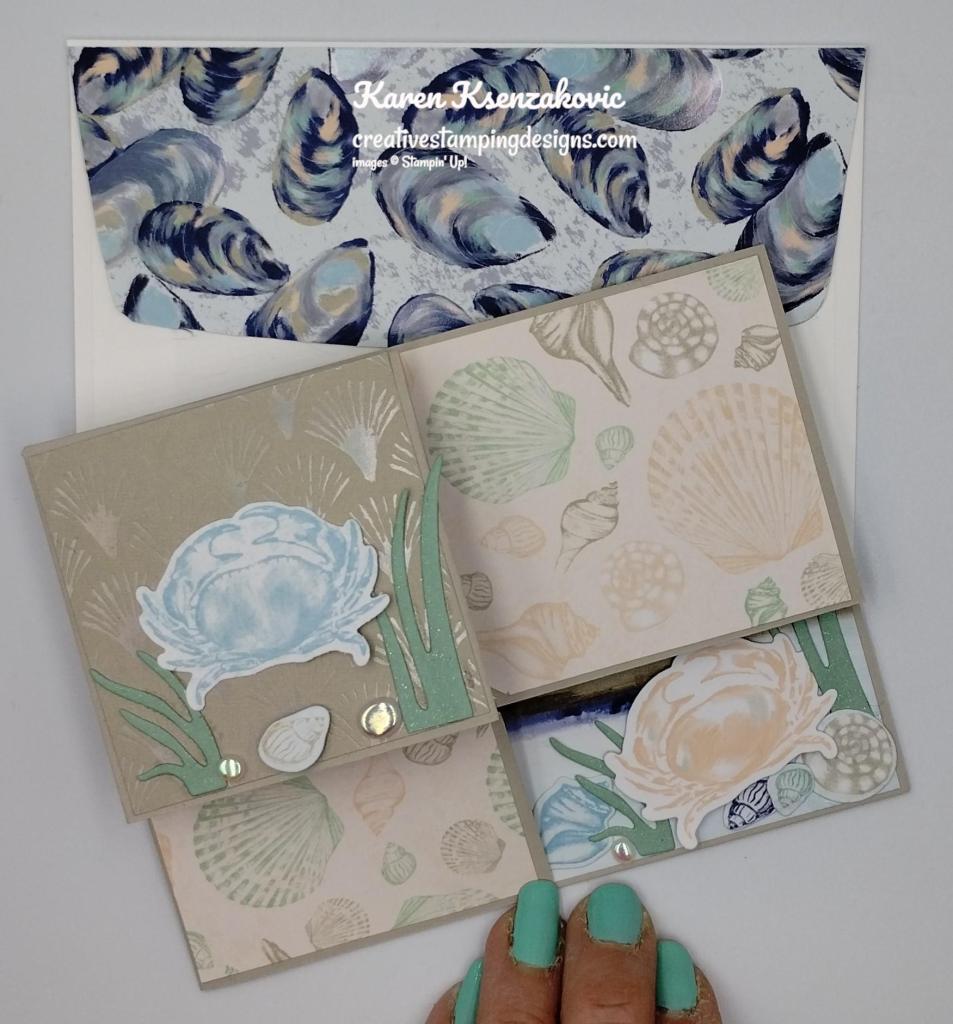
Stampin' Up! Seaside Bay Fun Fold 8 creativestampingdesigns.com

Thank you for stopping by my blog today. I hope you liked my card and will give it a try. I hope you will CASE this card and please feel free to post it in the comments of my Facebook page under my post. I’d love to see your take on the card. The list of measurements are below if you’d like to stamp along while watching the video. You can watch my video on my Facebook page Here.

You can also view the video on my YouTube channel Here. If you watch this on my YouTube channel, please remember to subscribe so that you will get notified when a new video goes live. I’m hoping to start doing YouTube lives soon, thanks to all that have subscribed. Happy Stamping!!

*********************************************************************************************************

If you need any stamping supplies, I’d love to be your Demonstrator. Just click HERE to go directly to my online store or drop me an email if you have any questions. 

MY CURRENT HOST CODE IS:    XMVFTAU4

Use this host code when placing an order with me. When you order $50 or greater you will receive a free gift from me! If your order is over $150, please do not use this code, but you’ll still get the free gift. The free gift is your choice of any 1 item valued up to $10.00 from the 2022-2023 Annual Catalog or the January-April 2023 Mini Catalog!  Unfortunately, packs of cardstock are no longer an option for a free gift. Shipping has become too expensive to ship and it’s costing me as much to ship as the cardstock costs. For any orders $50 or more I will also send you my monthly class tutorials.  Click HERE or go to my Customer Rewards for more details and to see what this month’s tutorials are.

Please remember to use my current Host Code and make sure that you can see my name on the final checkout page listed as your Demonstrator when you order so that you know that you’re ordering with me, and you’ll get my rewards! 

Happy Stamping, Karen

*********************************************************************************************************

In response to changing policies at Stampin’ Up – I’m adjusting my Ordering Gift policy as well.  I’m having to get a little more tough on the adding of Host codes when you place your order thru my Online Store.

Not to worry – you’re still going to get that $10 ordering gift for orders of $50 (before shipping & tax) or greater.  And the gift is still any 1 SU! product up to that $10 value – which includes some of our fun Host Sets!

But – if you DO NOT use the Host code for your orders of less than $150 (this is the RETAIL total before Shipping & Handling), then you’ll have two options:

  1. You’ll need to call Stampin’ Up! (1-800-Stamp-Up) and ask them to add it for you. They’re very helpful and will get it done quickly!  OR….
  2. If your order was over the $50 threshold but under $150, then…you’ll forfeit that $10 ordering gift and rewards – this is the Bummer Option – and I REALLY don’t want to do this, SO please remember to add my Current Host Code.

*********************************************************************************************************

Stampin’ Up! Color Refresh Coming Soon!!!

Stampin’ Up! is all about creativity and sharing what we love with those we love. And that means providing a compelling selection of high-quality craft supplies in coordinating colors and designs. We’re always working to not only meet trends but set them. That means evaluating and even refreshing our current products—This year we’re refreshing our complete color collection!

Stampin’ Up! has announced that, in addition to the new 2023-2025 In Colors, we’ll be getting some new colors in the core color families (Brights, Neutrals, Regals and Subtles) with the new 2023-2024 Annual Catalog! You’ll find some new friends and returning favorites among our Brights, Neutrals, Regals, and Subtles. And you won’t want to miss our new 2023–2025 In Colors. We hope you’re as excited as we are to start crafting with these fresh new colors and to share them with your fellow crafting enthusiasts. 

New Core Family Colors from Stampin’ Up!

Stampin’ Up! has put together a quick video showing you the colors that are leaving and the new colors coming in, including the new In Colors!  You can see it here:

If you want a quick list of the retiring core colors, here they are:

  • Blushing Bride
  • Pear Pizzazz
  • Mint Macaron
  • Rich Razzleberry
  • So Saffron
  • Merry Merlot
  • Pacific Point
  • Mango Melody
  • Soft Suede
  • Sahara Sand
  • Bermuda Bay

2023-2025 In Colors!

Here is a peek at the new 2023-2025 In Colors!
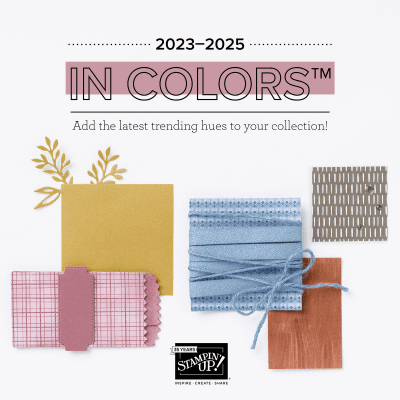
They are really pretty!  Their names are:

  • Copper Clay
  • Wild Wheat
  • Boho Blue
  • Moody Mauve
  • Pebbled Path

The new and returning colors are so pretty!  Can’t wait to get them!!
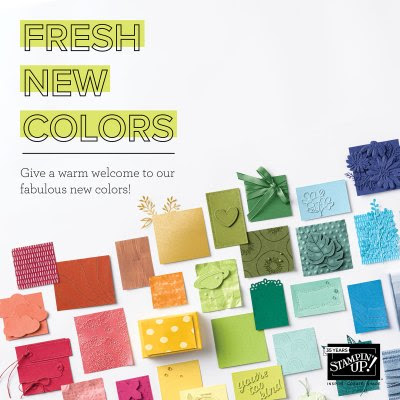
2023-2024 Annual Catalog Coming Soon!!

The new catalog is awesome!! I’ve already started my list of all the new products I want to get. I will be ordering the New 2023-2024 Annual Catalogs on April 4th for my customers and will be shipping them out as soon as I get them. If you are a current customer of mine and have placed an order in 2022-2023, you will automatically be receiving a new catalog once I receive them. If you haven’t placed an order in the past year, I will not be automatically sending you one. If you have not ordered and/or would like to be a customer of mine and would like a copy of the 2023-2024 Annual Catalog, please send me an email at creativestampingdesigns@gmail.com requesting a catalog.

*********************************************************************************************************

Price Changes Coming With The 2023-2024 Annual Catalog

Stampin’ Up! let us know that some of the items in the new catalog will have higher prices when the catalog is launched on May 2.  The prices for all items that are carrying over will continue to be the current catalog prices through May 1.  So now is a great time to stock up on any favorites before the price increases happen in early May!  We have not been told any specifics on the amount that the prices will increase but we have been given a list of items that will increase in price with the new catalog.

Due to increased costs to produce these items, beginning May 2 new prices will be in effect within the following product categories:

  • Cardstock
  • Designer Series Paper
  • Specialty Paper
  • Notecards and Envelopes
  • Classic Stampin’ Ink Pads and Refills
  • Stampin’ Blends
  • Stampin’ Write Markers
  • Select Specialty Inks
  • Stampin’ Cut & Emboss Machines and plates
  • Embossing Folders
  • Punches
  • Take Your Pick products
  • Storage
  • Clear Blocks
  • Select tools
  • Select adhesives
  • Select stamp sets
  • Paper Pumpkin

To see the updated pricing, check the new 2023–2024 Annual Catalog.  I’ll be mailing out the catalogs in mid-April to my ordering customers so take a peek when it arrives in your mailbox.  So, the good news is that you will have time to order any last-minute items before the new pricing starts once you see the upcoming catalog!  

*********************************************************************************************************

All The Little Things

Subscribe March 11 – April 10

Good things take time, but you can start creating them now with the All the Little Things Paper Pumpkin kit! This kit includes nine cards, three each of three designs, with elegant designs and bright colors. The iridescent foil is the shining detail to bring your crafts together. You can make a card for anyone and for any occasion!

And don’t wait, because anyone who subscribes to this month’s kit will get a FREE box organizer! This organizer fits perfectly inside your Paper Pumpkin box and is great for keeping your supplies from past kits organized, so you know right where everything is! 

This kit includes:

  • 9 cards, 3 each of 3 designs, and 9 coordinating envelopes.
  • 1 photopolymer stamp set with celebratory sentiments.
  • 1 Shaded Spruce Stampin’ Spot.
  • Precut cherry blossom paper pieces with iridescent foil.
  • Unique embellishments and twine.
  • Adhesives to complete the projects.
  • Final card size: 5-1/2” x 4-1/4” (14 x 10.8 cm). 
  • Coordinating Stampin’ Up! colors: Balmy Blue, Basic Black, Calypso Coral, Granny Apple Green, Petal Pink, Poppy Parade, Shaded Spruce.
  • FREE box organizer

Subscribe to the April Paper Pumpkin Kit between 11 March 2023 and 10 April 2023 by clicking here!

Note: Supplies may be limited toward the end of the subscription period.

*********************************************************************************************************

Card stock cuts for this project:

  • Basic White Cardstock 2 1/16″ x 1 13/16″ (sentiment), 4″ X 5 1/4″ (back panel)
  • Mint Macaron Cardstock 3″ X 2 1/2″ (seagrass)
  • Sahara Sand Cardstock 8 1/4″ x 7″ (scored & folded as in diagram), 2″ X 2 1/4″ (sentiment mat)
  • By The Bay 6 X 6 Designer Series Paper 2 – 2 5/8″ X 5 3/8″(horizontal panels), 2 – 2 5/8″ x 4 1/8″(vertical panels), 2 – 2 5/8″ x 2 5/8″(pop up panels), 4 1/8″ x 5 3/8″ (inside panel), 2 1/4″ X 6″ (envelope flap) bird, crabs and shells cut form other panels

*********************************************************************************************************

Product List

Stampin’ Up! Nature’s Butterfly Brilliance for The Happy Inkin’ Thursday Blog Hop

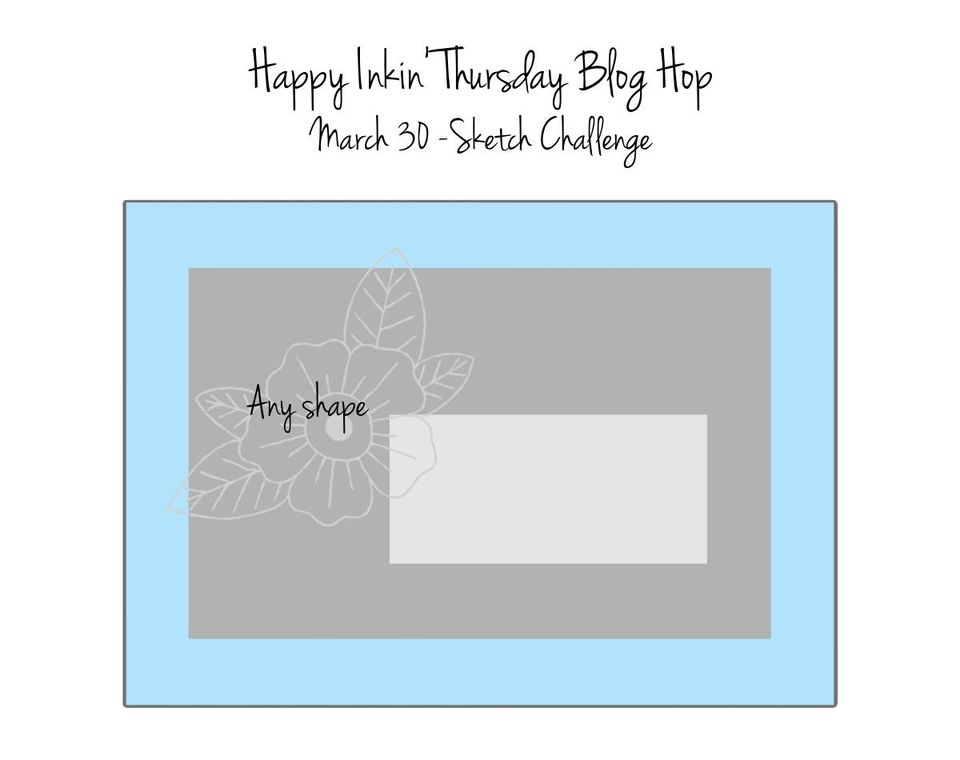
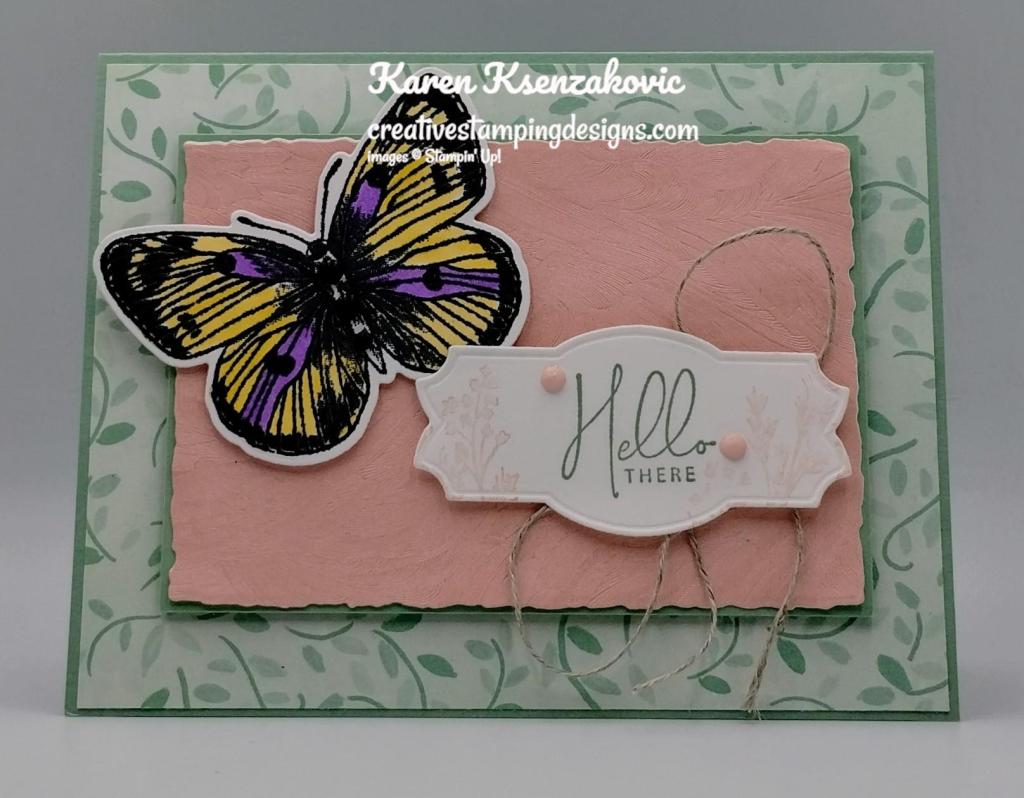
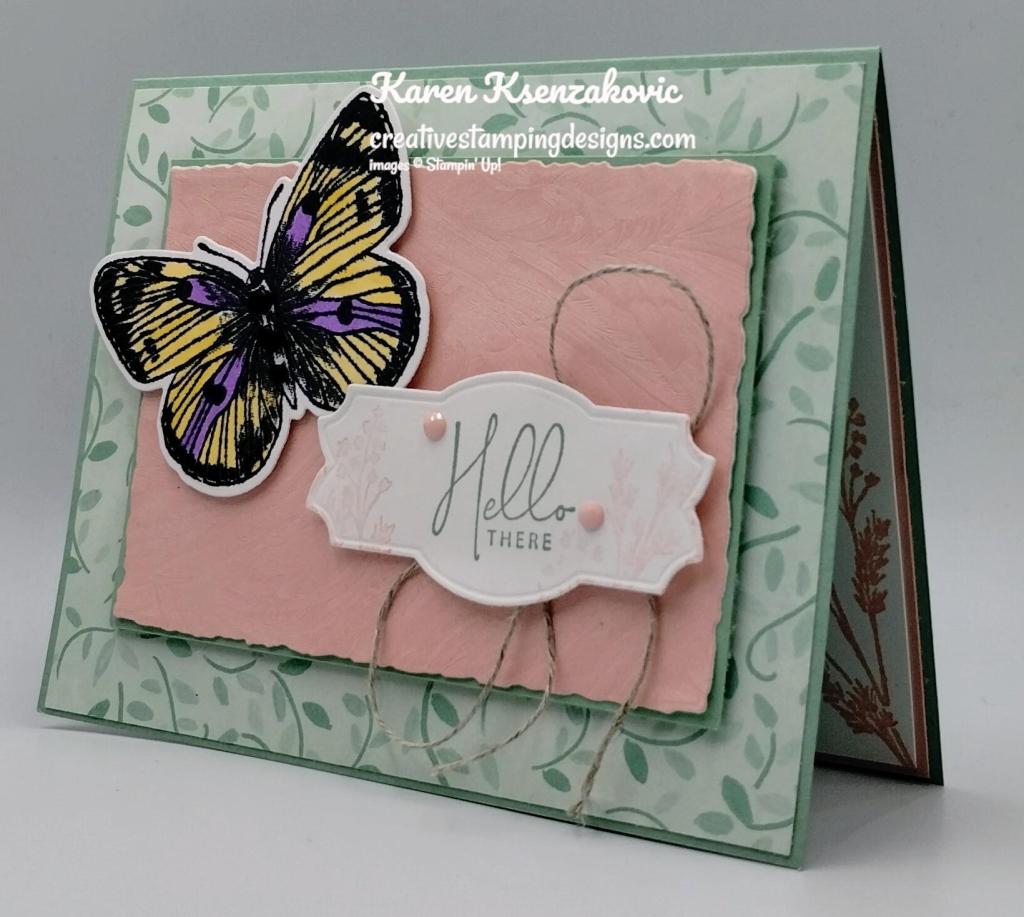
Good Thursday morning my stamping friends welcome to our Happy Inkin’ Thursday Blog Hop. If you are starting with me, thank you. I hope you will stop by everyone’s blog to see what they have created this week. If you are hopping over from Akiko’s blog, thank you for stopping by. This week we have Sketch Challenge. Here is my card using this week’s Sketch.

Stampin' Up! Butterfly Brilliance Nature 1 creativestampingdesigns.com

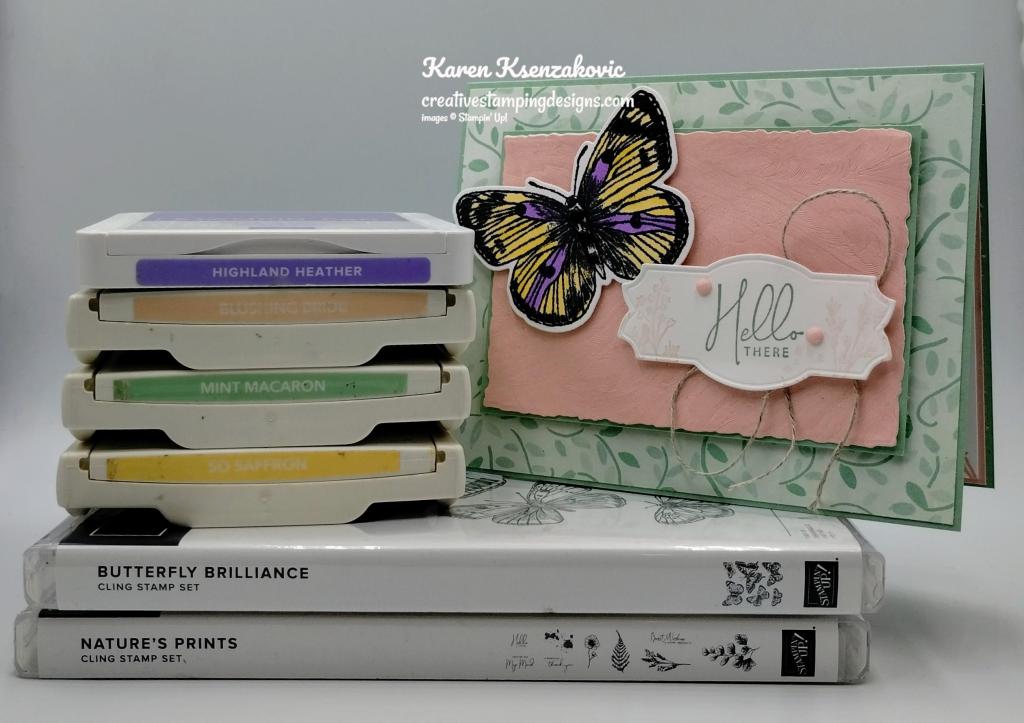
I used the Stampin’ Up! Butterfly Brilliance Cling Stamp Set along with the Stampin’ Up! Nature’s Prints Bundle, Design A Daydream Host Designer Series Paper and Brushstroke Specialty Paper for my card today.

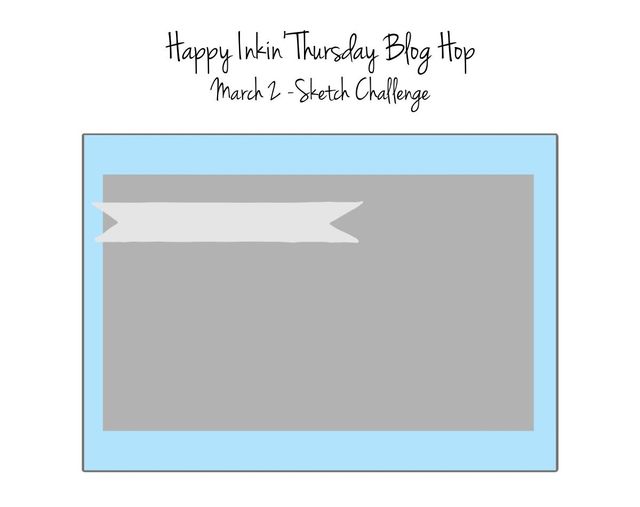
This is our sketch for this week.

Stampin' Up! Butterfly Brilliance Nature 2 creativestampingdesigns.com

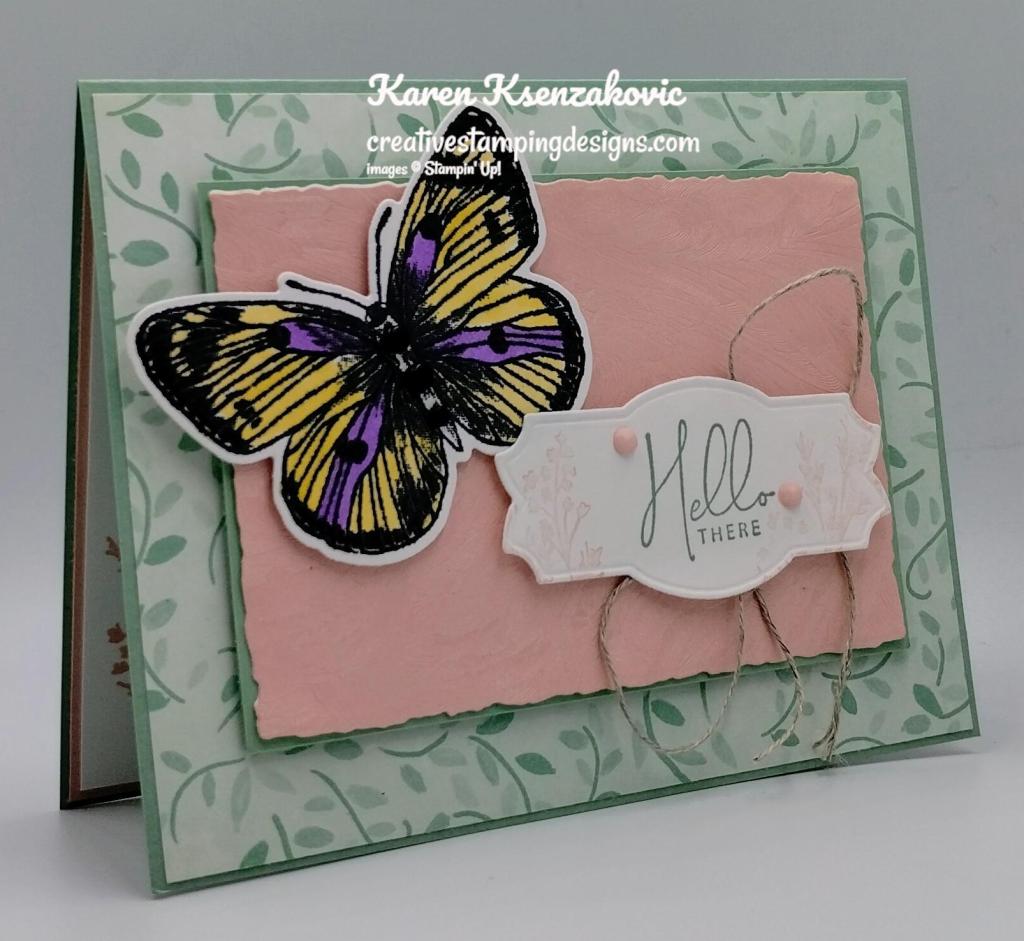
I started by adhering a panel of Design A Daydream DSP to a Mint Macaron card base using Multipurpose Liquid Glue. I cut a panel of Brushstroke Specialty Paper using the Deckled Rectangle Dies. I adhered the panel to a Mint Macaron mat using Stampin’ Seal. I adhered the layered panel to the card front using Stampin’ Dimensionals.

Stampin' Up! Butterfly Brilliance Nature 3 creativestampingdesigns.com

On a panel of Basic White cardstock, I stamped the butterfly image from the Butterfly Brilliance stamp set in Tuxedo Black Ink. I colored the image using my Highland Heather and So Saffron Stampin’ Blends Markers. I cut the butterfly out using the Brilliant Wings Dies. I adhered the butterfly to the layered panel using Stampin’ Dimensionals.

Stampin' Up! Butterfly Brilliance Nature 4 creativestampingdesigns.com

On a strip of Basic White cardstock, I stamped the sentiment from the Stampin’ Up! Nature’s Prints Cling Stamp Set in Mint Macaron Ink. I cut the sentiment out using the Natural Prints Dies. I stamped the floral image from the Nature’s Prints stamp set in Blushing Bride Ink, stamping off once on scrap paper, on either side of the sentiment. I tied a large bow using Linen Thread and adhered it to the layered panel using a Glue Dot. I adhered the sentiment over the bow using Stampin’ Dimensionals. I added 3 black Classic Matte Dots to the butterfly body. I added a couple Solid Faceted Gems to the sentiment.

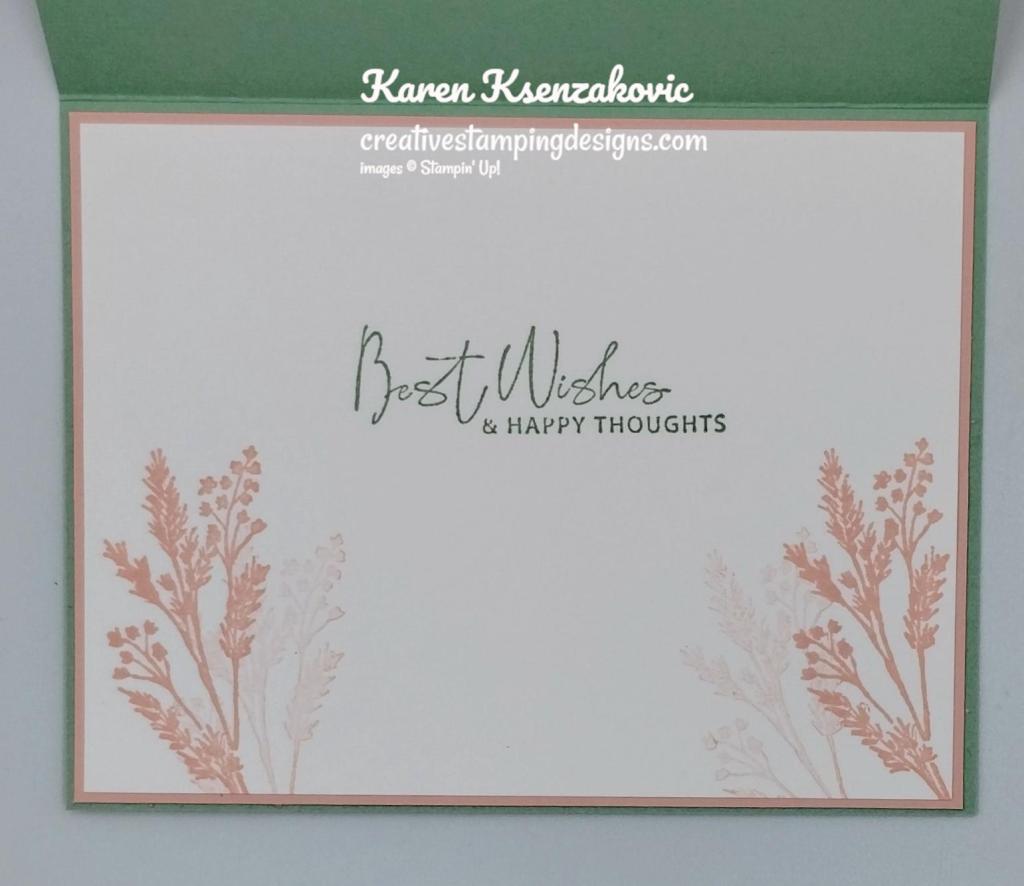
Stampin' Up! Butterfly Brilliance Nature 5 creativestampingdesigns.com

On the inside I stamped the sentiment from the Nature’s Prints stamp set in Mint Macaron Ink on a panel of Basic White. I stamped the floral image from the Nature’s Prints stamp set in Blushing Bride Ink on the bottom of the panel. I adhered the Basic White panel to a Blushing Bride mat then to the inside of the Mint Macaron card base.

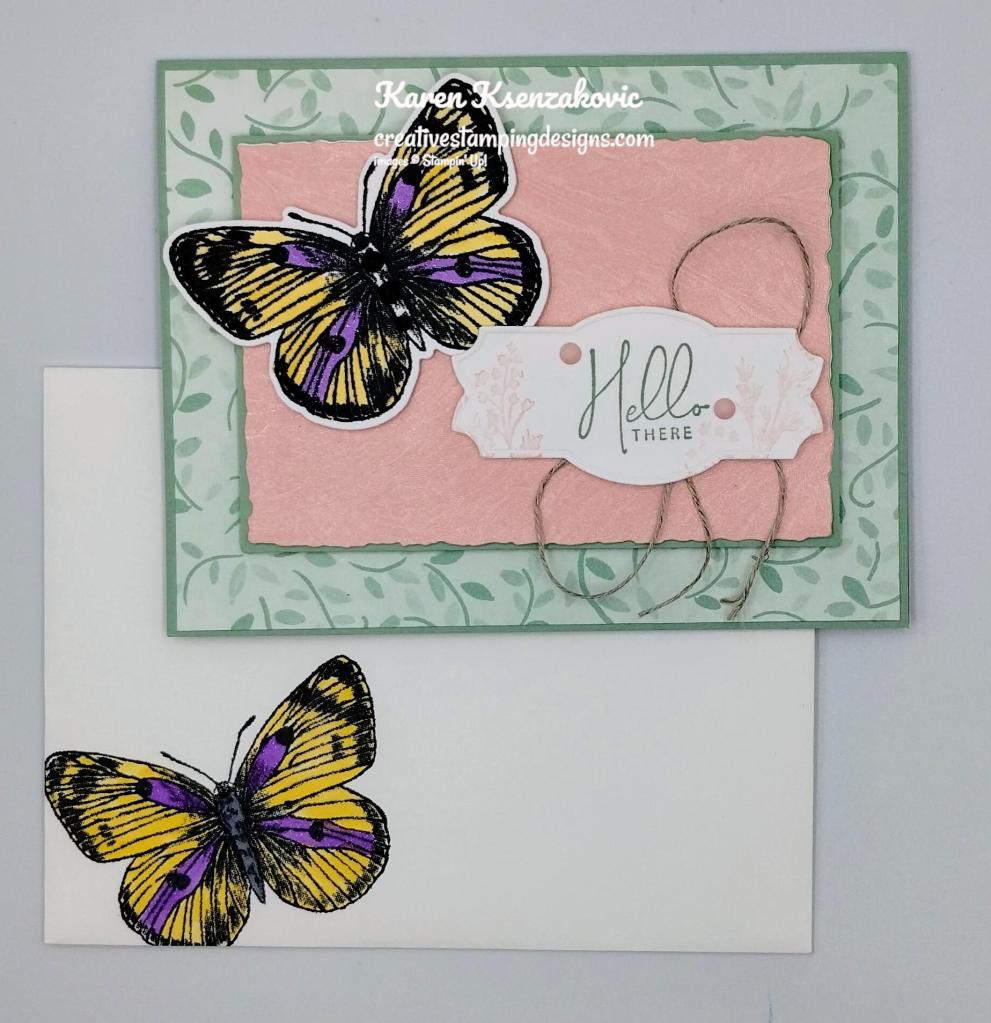
Stampin' Up! Butterfly Brilliance Nature 6 creativestampingdesigns.com

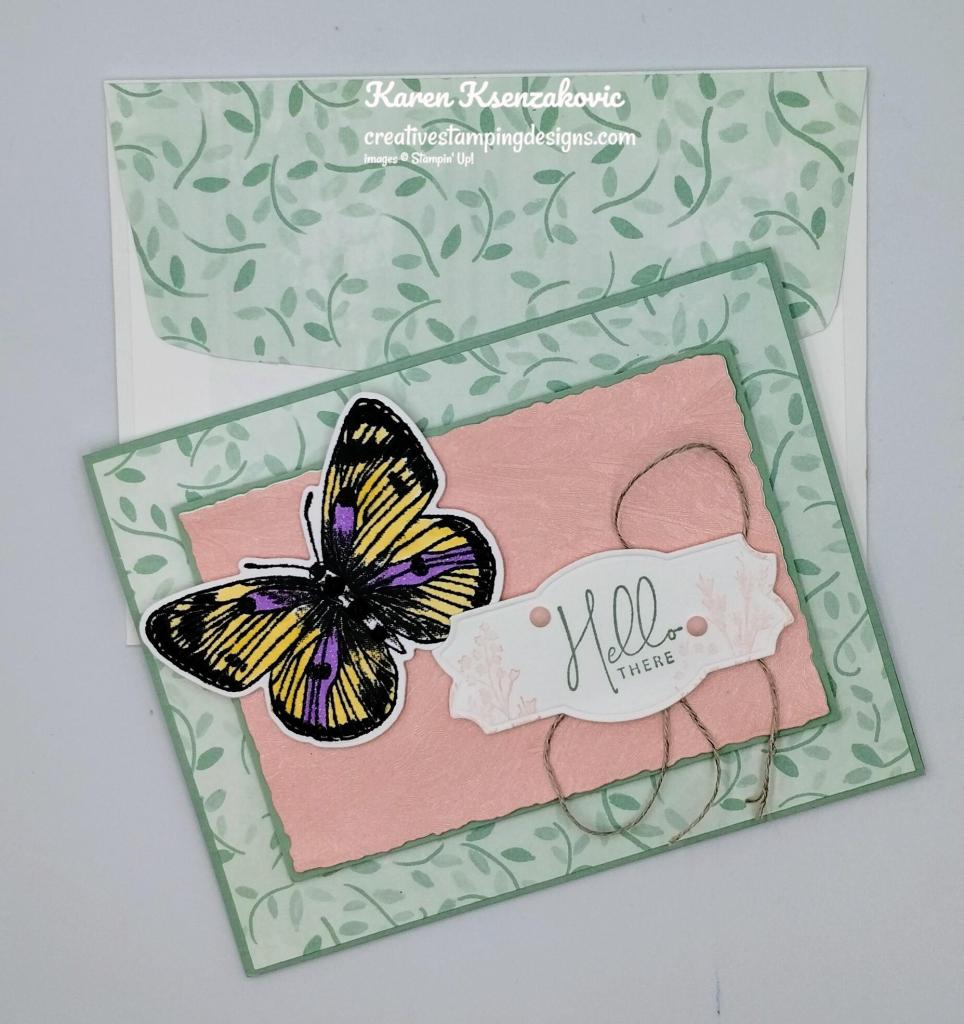
To complete my card, I decorated a Basic White Medium Envelope. I stamped the butterfly image from the Butterfly Brilliance stamp set in Tuxedo Black Ink on the envelope front. I colored the image with my Highland Heather and So Saffron Stampin’ Blends Markers. I adhered a panel of Design A Daydream DSP to the envelope flap.

Stampin' Up! Butterfly Brilliance Nature 7 creativestampingdesigns.com

Thank you for stopping by my blog today. I hope you liked my card and will give it a try. Now that you’ve seen my card, take a minute to hop through and see everyone’s projects today. If you click on the Next Blog button, you’ll go to Tara’s page. Or you can just click on the names below to go directly to all their blogs! Happy Hopping!!

Amy Koenders:

Mary Deatherage:

Kristi Gray:

Jaimie Babarczy:

Sue Prather:

Karen Finkle:

Akiko Sudano:

Karen Ksenzakovic: You Are Here

Tara Carpenter:

Terry Lynn Bright:

Carol Buckalew:

*********************************************************************************************************

If you need any stamping supplies, I’d love to be your Demonstrator. Just click HERE to go directly to my online store or drop me an email if you have any questions. 

MY CURRENT HOST CODE IS:   XMVFTAU4

Use this host code when placing an order with me. When you order $50 or greater you will receive a free gift from me! If your order is over $150, please do not use this code, but you’ll still get the free gift. The free gift is your choice of any 1 item valued up to $10.00 from the 2022-2023 Annual Catalog or the January-April 2023 Mini Catalog!  Unfortunately, packs of cardstock are no longer an option for a free gift. Shipping has become too expensive to ship and it’s costing me as much to ship as the cardstock costs. For any orders $50 or more I will also send you my monthly class tutorials.  Click HERE or go to my Customer Rewards for more details and to see what this month’s tutorials are.

Please remember to use my current Host Code and make sure that you can see my name on the final checkout page listed as your Demonstrator when you order so that you know that you’re ordering with me, and you’ll get my rewards! 

Happy Stamping, Karen

*********************************************************************************************************

In response to changing policies at Stampin’ Up – I’m adjusting my Ordering Gift policy as well.  I’m having to get a little more tough on the adding of Host codes when you place your order thru my Online Store.

Not to worry – you’re still going to get that $10 ordering gift for orders of $50 (before shipping & tax) or greater.  And the gift is still any 1 SU! product up to that $10 value – which includes some of our fun Host Sets!

But – if you DO NOT use the Host code for your orders of less than $150 (this is the RETAIL total before Shipping & Handling), then you’ll have two options:

  1. You’ll need to call Stampin’ Up! (1-800-Stamp-Up) and ask them to add it for you. They’re very helpful and will get it done quickly!  OR….
  2. If your order was over the $50 threshold but under $150, then…you’ll forfeit that $10 ordering gift and rewards – this is the Bummer Option – and I REALLY don’t want to do this, SO please remember to add my Current Host Code.

*********************************************************************************************************

Stampin’ Up! Color Refresh Coming Soon!!!

Stampin’ Up! is all about creativity and sharing what we love with those we love. And that means providing a compelling selection of high-quality craft supplies in coordinating colors and designs. We’re always working to not only meet trends but set them. That means evaluating and even refreshing our current products—This year we’re refreshing our complete color collection!

Stampin’ Up! has announced that, in addition to the new 2023-2025 In Colors, we’ll be getting some new colors in the core color families (Brights, Neutrals, Regals and Subtles) with the new 2023-2024 Annual Catalog! You’ll find some new friends and returning favorites among our Brights, Neutrals, Regals, and Subtles. And you won’t want to miss our new 2023–2025 In Colors. We hope you’re as excited as we are to start crafting with these fresh new colors and to share them with your fellow crafting enthusiasts. 

New Core Family Colors from Stampin’ Up!

Stampin’ Up! has put together a quick video showing you the colors that are leaving and the new colors coming in, including the new In Colors!  You can see it here:

If you want a quick list of the retiring core colors, here they are:

  • Blushing Bride
  • Pear Pizzazz
  • Mint Macaron
  • Rich Razzleberry
  • So Saffron
  • Merry Merlot
  • Pacific Point
  • Mango Melody
  • Soft Suede
  • Sahara Sand
  • Bermuda Bay

2023-2025 In Colors!

Here is a peek at the new 2023-2025 In Colors!

They are really pretty!  Their names are:

  • Copper Clay
  • Wild Wheat
  • Boho Blue
  • Moody Mauve
  • Pebbled Path

The new and returning colors are so pretty!  Can’t wait to get them!!

2023-2024 Annual Catalog Coming Soon!!

The new catalog is awesome!! I’ve already started my list of all the new products I want to get. I will be ordering the New 2023-2024 Annual Catalogs on April 4th for my customers and will be shipping them out as soon as I get them. If you are a current customer of mine and have placed an order in 2022-2023, you will automatically be receiving a new catalog once I receive them. If you haven’t placed an order in the past year, I will not be automatically sending you one. If you have not ordered and/or would like to be a customer of mine and would like a copy of the 2023-2024 Annual Catalog, please send me an email at creativestampingdesigns@gmail.com requesting a catalog.

*********************************************************************************************************

Price Changes Coming With The 2023-2024 Annual Catalog

Stampin’ Up! let us know that some of the items in the new catalog will have higher prices when the catalog is launched on May 2.  The prices for all items that are carrying over will continue to be the current catalog prices through May 1.  So now is a great time to stock up on any favorites before the price increases happen in early May!  We have not been told any specifics on the amount that the prices will increase but we have been given a list of items that will increase in price with the new catalog.

Due to increased costs to produce these items, beginning May 2 new prices will be in effect within the following product categories:

  • Cardstock
  • Designer Series Paper
  • Specialty Paper
  • Notecards and Envelopes
  • Classic Stampin’ Ink Pads and Refills
  • Stampin’ Blends
  • Stampin’ Write Markers
  • Select Specialty Inks
  • Stampin’ Cut & Emboss Machines and plates
  • Embossing Folders
  • Punches
  • Take Your Pick products
  • Storage
  • Clear Blocks
  • Select tools
  • Select adhesives
  • Select stamp sets
  • Paper Pumpkin

To see the updated pricing, check the new 2023–2024 Annual Catalog.  I’ll be mailing out the catalogs in mid-April to my ordering customers so take a peek when it arrives in your mailbox.  So, the good news is that you will have time to order any last-minute items before the new pricing starts once you see the upcoming catalog!  

*********************************************************************************************************

All The Little Things

Subscribe March 11 – April 10

Good things take time, but you can start creating them now with the All the Little Things Paper Pumpkin kit! This kit includes nine cards, three each of three designs, with elegant designs and bright colors. The iridescent foil is the shining detail to bring your crafts together. You can make a card for anyone and for any occasion!

And don’t wait, because anyone who subscribes to this month’s kit will get a FREE box organizer! This organizer fits perfectly inside your Paper Pumpkin box and is great for keeping your supplies from past kits organized, so you know right where everything is! 

This kit includes:

  • 9 cards, 3 each of 3 designs, and 9 coordinating envelopes.
  • 1 photopolymer stamp set with celebratory sentiments.
  • 1 Shaded Spruce Stampin’ Spot.
  • Precut cherry blossom paper pieces with iridescent foil.
  • Unique embellishments and twine.
  • Adhesives to complete the projects.
  • Final card size: 5-1/2” x 4-1/4” (14 x 10.8 cm). 
  • Coordinating Stampin’ Up! colors: Balmy Blue, Basic Black, Calypso Coral, Granny Apple Green, Petal Pink, Poppy Parade, Shaded Spruce.
  • FREE box organizer

Subscribe to the April Paper Pumpkin Kit between 11 March 2023 and 10 April 2023 by clicking here!

Note: Supplies may be limited toward the end of the subscription period.

*********************************************************************************************************

Card stock cuts for this project:

  • Basic White Cardstock 2 3/4″ X 3 1/2″ (butterfly), 1 1/2″ X 3″ (sentiment), 4″ X 5 1/4″ (inner liner)
  • Blushing Bride Cardstock 4 1/8″ X 5 3/8″ (inner liner mat)
  • Mint Macaron Cardstock 8 1/2″ X 5 1/2″ (card base scored & folded at 4 1/4″), 4 7/16″ X 1 1/16″ (artwork mat)
  • Design A Daydream Host Designer Series Paper 4 1/8″ X 5 3/8″ (card front), 2 1/4″ X 6″ (envelope flap)
  • Brushstroke Specialty Paper 3 1/2″ X 4 1/2″ (artwork)

*********************************************************************************************************

Product List

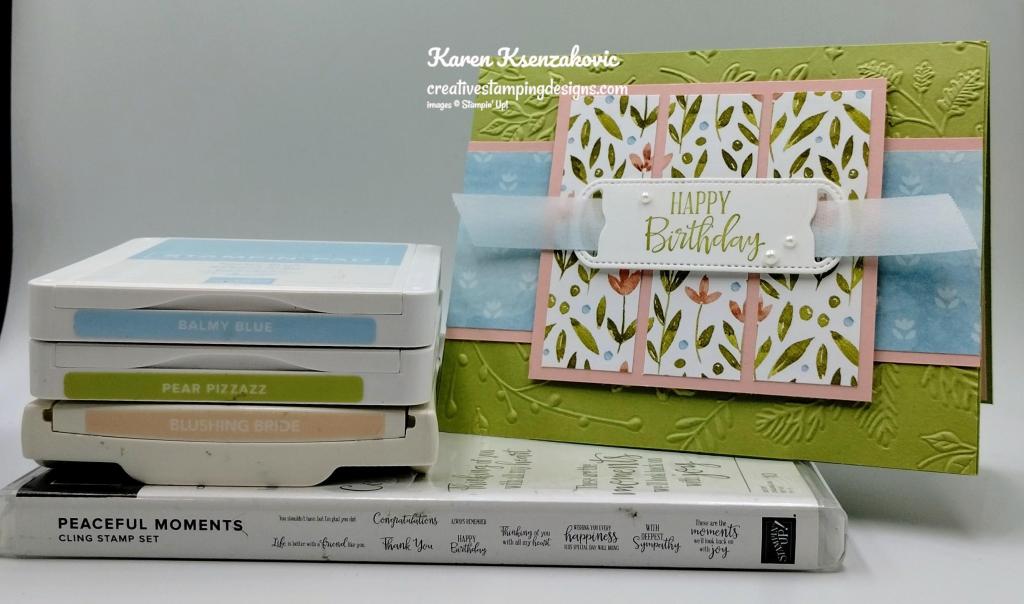
Stampin’ Up! Peaceful Moments Birthday

Good Monday morning my stamping friends. How was everyone’s weekend? Yesterday was such a beautiful day here in NJ. It was a little cool, in the 60’s, but sunny and beautiful. It felt like spring was in the air. I did have to work all day, but it was fun seeing all the dogs that came in to visit (and there were a lot of them).

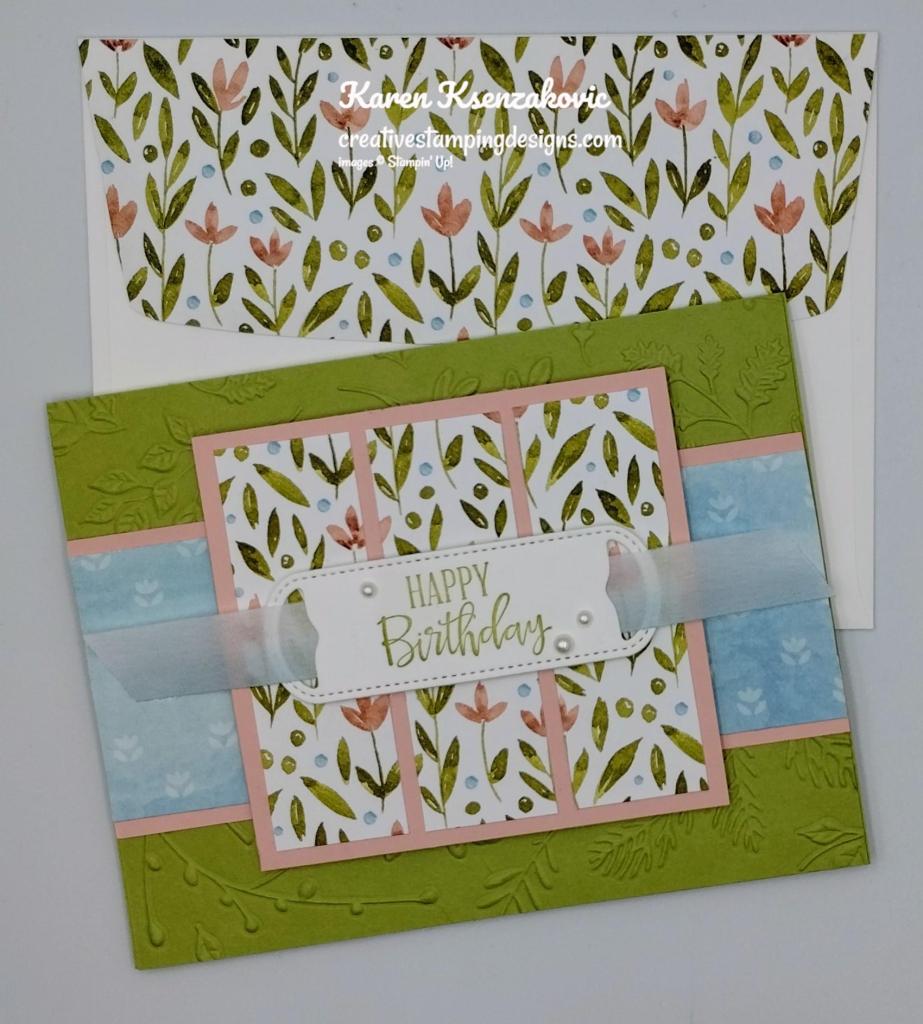
I have one more card featuring the DSP. After making these cards the past few days, I realized I don’t use DSP nearly as much as I like. I love that I can create all different designs with the DSP and a sentiment. You can make these cards with any DSP you have and some of them use just scraps. Here’s my card for today.

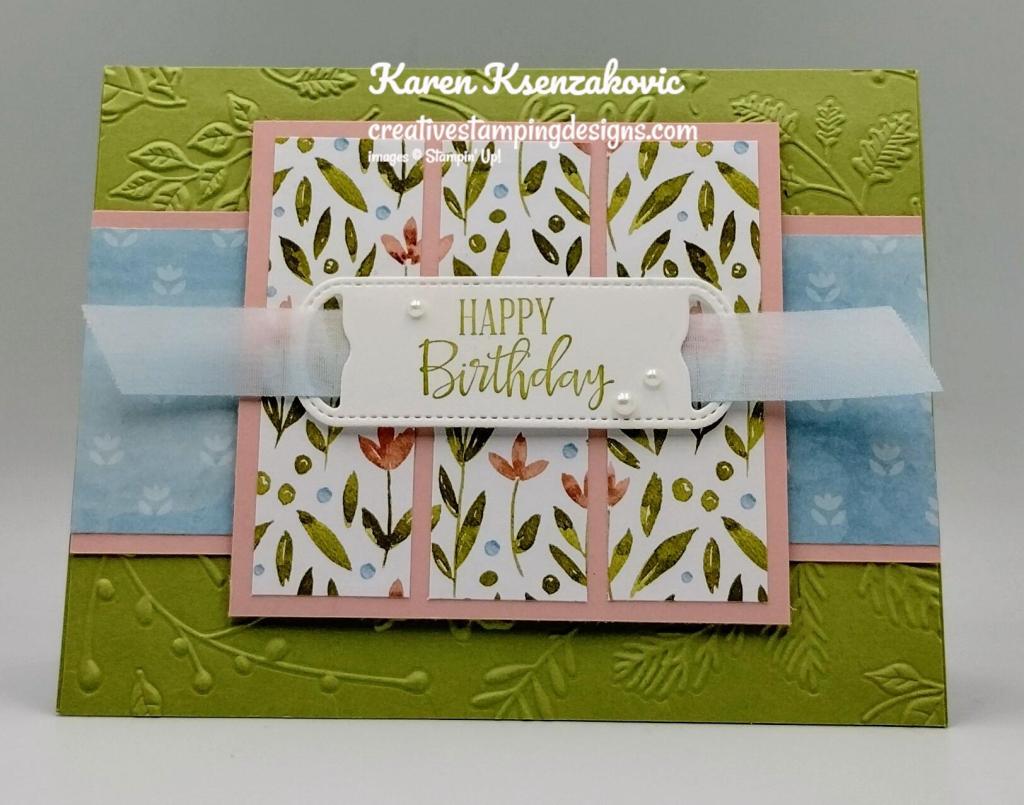
Stampin' Up! Peaceful Moments Birthday 1 creativestampingdesigns.com

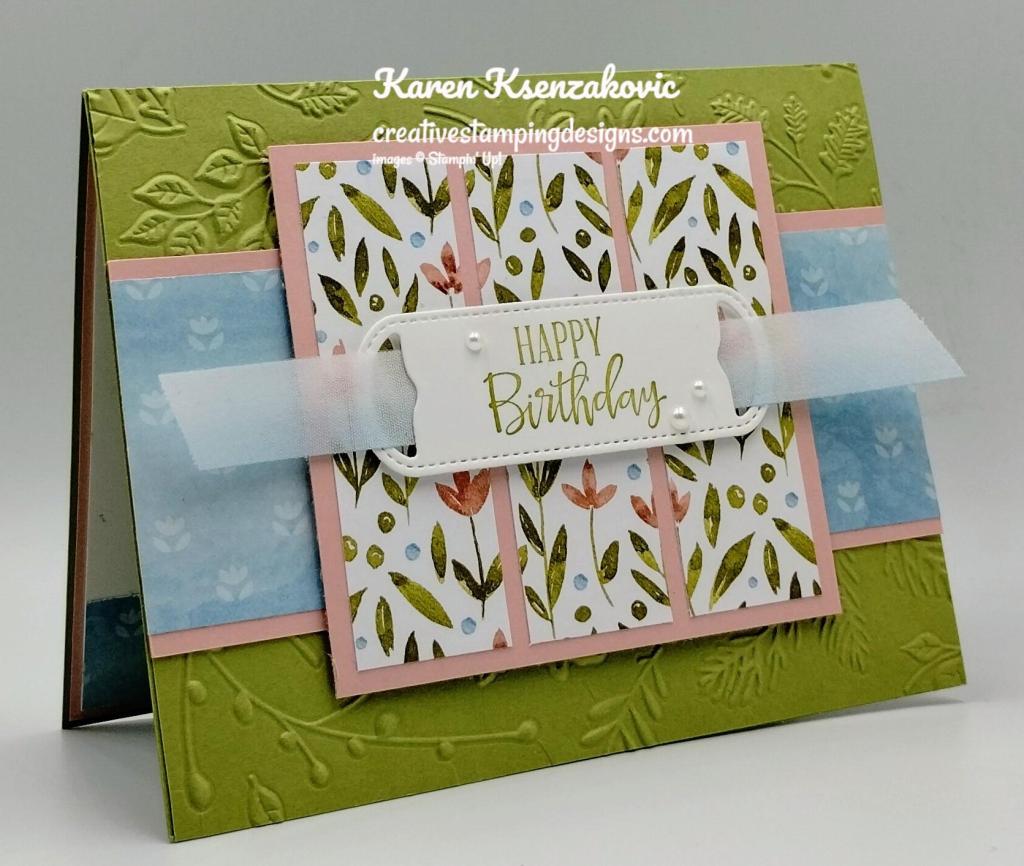
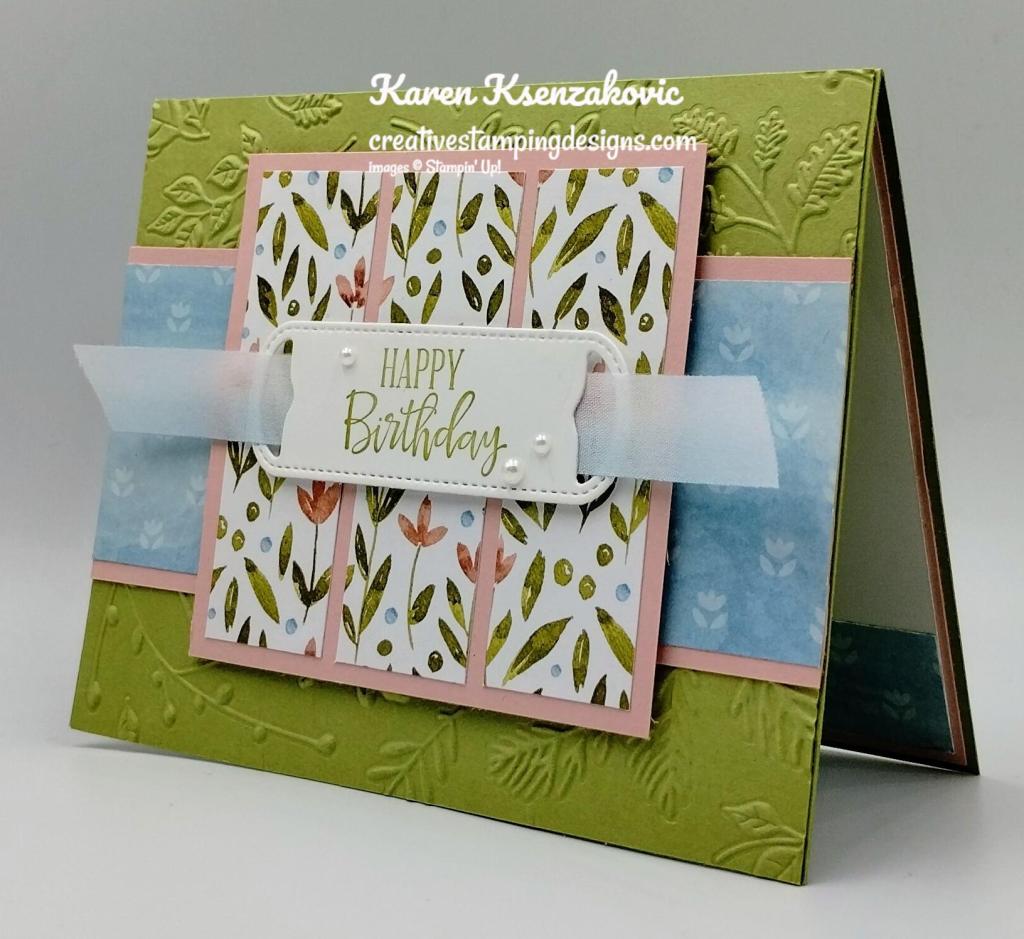
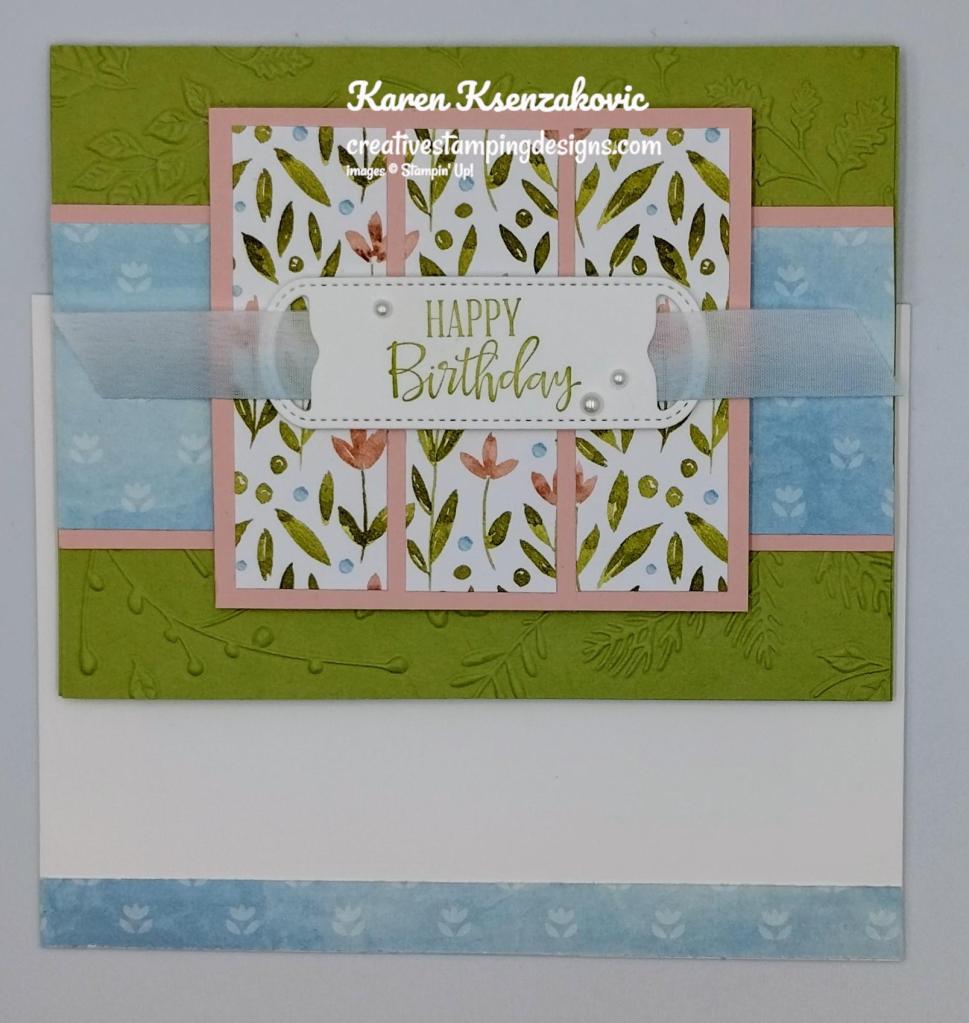
I used the Stampin’ Up! Peaceful Moments Cling Stamp Set along with Awash In Beauty Designer Series Paper and the Twigs & Sprigs Embossing Folder for my card today.

Stampin' Up! Peaceful Moments Birthday 2 creativestampingdesigns.com

I started by embossing a Pear Pizzazz card front using the Twigs & Sprigs Embossing Folder. I adhered the Pear Pizzazz card front to a Pear Pizzazz card base using Multipurpose Liquid Glue.

Stampin' Up! Peaceful Moments Birthday 3 creativestampingdesigns.com

I adhered a panel of Awash In Beauty DSP to a Blushing Bride mat using Stampin’ Seal. I adhered the layered panel to the card front using Multipurpose Liquid Glue. I adhered 3 panels of Awash In Beauty DSP to a Blushing Bride Mat using Multipurpose Liquid Glue. I adhered the layered panel to the card front using Stampin’ Dimensionals.

Stampin' Up! Peaceful Moments Birthday 4 creativestampingdesigns.com

On a panel of Basic White cardstock, I stamped the sentiment from the Peaceful Moments stamp set in Pear Pizzazz Ink. I cut the sentiment out using the Waves Dies. I threaded a piece of 1/2″ Balmy Blue/White Variegated Ribbon through the ends of the die cut piece. I adhered the sentiment to the card front using Stampin’ Dimensionals. I added a few Pearl Basic Jewels to the card front.

Stampin' Up! Peaceful Moments Birthday 5 creativestampingdesigns.com

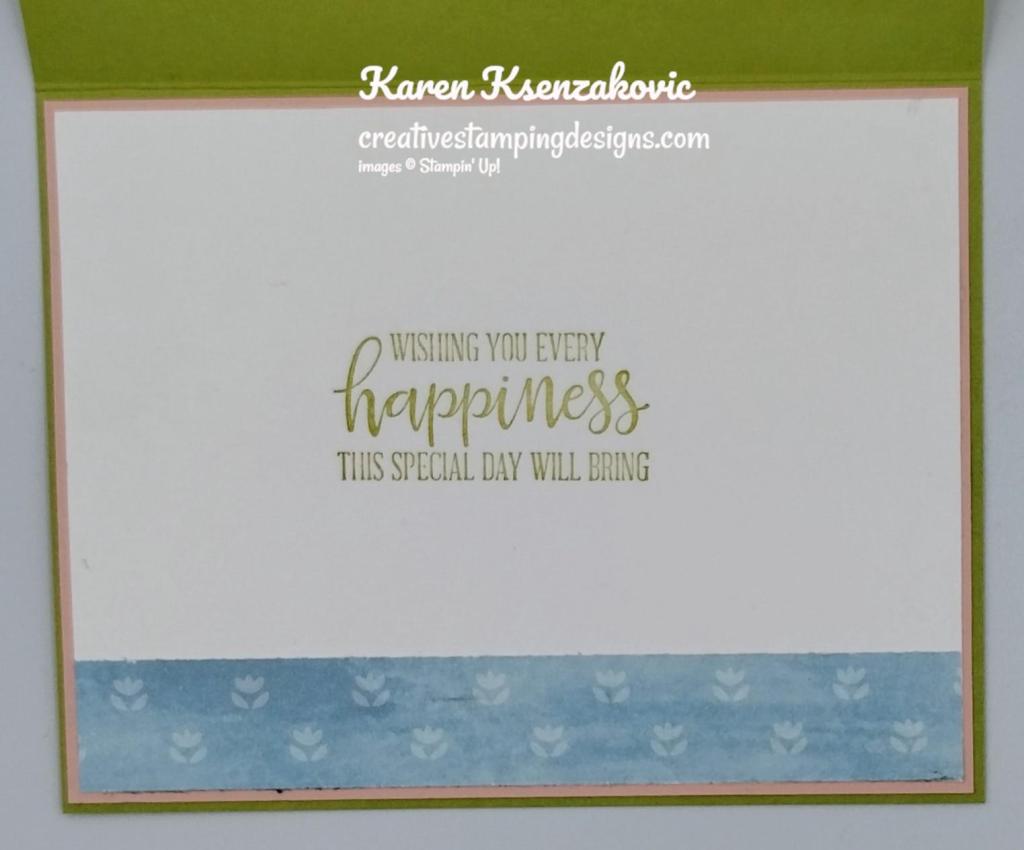
On the inside, I stamped the sentiment from the Peaceful Moments stamp set in Pear Pizzazz Ink on a panel of Basic White. I adhered a strip of the Awash In Beauty DSP to the bottom of the panel. I adhered the Basic Whtie panel to a Blushing Bride mat then to the inside of the Pear Pizzazz card base.

Stampin' Up! Peaceful Moments Birthday 6 creativestampingdesigns.com

To finish my card, I decorated a Basic Whtie Medium Envelope. I adhered a strip of Awash In Beauty DSP to the envelope front and a panel to the envelope flap.

Stampin' Up! Peaceful Moments Birthday 7 creativestampingdesigns.com

Thank you for stopping by my blog today. I hope you like the card and will give it a try. Happy Stamping!!

*********************************************************************************************************

If you need any stamping supplies, I’d love to be your Demonstrator. Just click HERE to go directly to my online store or drop me an email if you have any questions. 

MY CURRENT HOST CODE IS:    7KF3QB4G

Use this host code when placing an order with me. When you order $50 or greater you will receive a free gift from me! If your order is over $150, please do not use this code, but you’ll still get the free gift. The free gift is your choice of any 1 item valued up to $10.00 from the 2022-2023 Annual Catalog or the January-April 2023 Mini Catalog!  Unfortunately, packs of cardstock are no longer an option for a free gift. Shipping has become too expensive to ship and it’s costing me as much to ship as the cardstock costs. For any orders $50 or more I will also send you my monthly class tutorials.  Click HERE or go to my Customer Rewards for more details and to see what this month’s tutorials are.

Please remember to use my current Host Code and make sure that you can see my name on the final checkout page listed as your Demonstrator when you order so that you know that you’re ordering with me, and you’ll get my rewards! 

Happy Stamping, Karen

*********************************************************************************************************

In response to changing policies at Stampin’ Up – I’m adjusting my Ordering Gift policy as well.  I’m having to get a little more tough on the adding of Host codes when you place your order thru my Online Store.

Not to worry – you’re still going to get that $10 ordering gift for orders of $50 (before shipping & tax) or greater.  And the gift is still any 1 SU! product up to that $10 value – which includes some of our fun Host Sets!

But – if you DO NOT use the Host code for your orders of less than $150 (this is the RETAIL total before Shipping & Handling), then you’ll have two options:

  1. You’ll need to call Stampin’ Up! (1-800-Stamp-Up) and ask them to add it for you. They’re very helpful and will get it done quickly!  OR….
  2. If your order was over the $50 threshold but under $150, then…you’ll forfeit that $10 ordering gift and rewards – this is the Bummer Option – and I REALLY don’t want to do this, SO please remember to add my Current Host Code.

*********************************************************************************************************

2023-2024 Annual Catalog Coming Soon!!

If you are a current customer of mine and have placed an order in 2022-2023, you will automatically be receiving a new catalog once I receive them. If you haven’t placed an order in the past year, I will not be automatically sending you one. If you have not ordered and/or would like to be a customer of mine and would like a copy of the 2023-2024 Annual Catalog, please send me an email at creativestampingdesigns@gmail.com requesting one.

*********************************************************************************************************

Stampin’ Up! Color Refresh Coming Soon!!!

Stampin’ Up1 is all about creativity and sharing what we love with those we love. And that means providing a compelling selection of high-quality craft supplies in coordinating colors and designs. We’re always working to not only meet trends but set them. That means evaluating and even refreshing our current products—This year we’re refreshing our complete color collection!

Stampin’ Up! has announced that, in addition to the new 2023-2025 In Colors, we’ll be getting some new colors in the core color families (Brights, Neutrals, Regals and Subtles) with the new 2023-2024 Annual Catalog! You’ll find some new friends and returning favorites among our Brights, Neutrals, Regals, and Subtles. And you won’t want to miss our new 2023–2025 In Colors. We hope you’re as excited as we are to start crafting with these fresh new colors and to share them with your fellow crafting enthusiasts. 

We haven’t been told what colors will be retiring, but if you have any favorites that you can’t live without, stock up now!   We do know that the current 2021-2023 In-Colors (Evening Evergreen, Fresh Freesia, Pale Papaya, Polished Pink and Soft Succulent) will be retiring. You might want to stock up on the Cardstock, DSP, Reinkers, Stampin’ Blends Markers, Stampin’ Write Markers, Ribbons etc. When supplies run out, they will not be restocking them.

More details about the updates to the color list will be announced on March 29 so look for more information then.  And pick up a few of your favorite colors now to make sure that you’ll have a good supply if your favorites end up retiring with the color refresh!

*********************************************************************************************************

Price Changes Coming With The 2023-2024 Annual Catalog

Stampin’ Up! let us know that some of the items in the new catalog will have higher prices when the catalog is launched on May 2.  The prices for all items that are carrying over will continue to be the current catalog prices through May 1.  So now is a great time to stock up on any favorites before the price increases happen in early May!  We have not been told any specifics on the amount that the prices will increase but we have been given a list of items that will increase in price with the new catalog.

Due to increased costs to produce these items, beginning May 2 new prices will be in effect within the following product categories:

  • Cardstock
  • Designer Series Paper
  • Specialty Paper
  • Notecards and Envelopes
  • Classic Stampin’ Ink Pads and Refills
  • Stampin’ Blends
  • Stampin’ Write Markers
  • Select Specialty Inks
  • Stampin’ Cut & Emboss Machines and plates
  • Embossing Folders
  • Punches
  • Take Your Pick products
  • Storage
  • Clear Blocks
  • Select tools
  • Select adhesives
  • Select stamp sets
  • Paper Pumpkin

To see the updated pricing, check the new 2023–2024 Annual Catalog.  I’ll be mailing out the catalogs in mid-April to my ordering customers so take a peek when it arrives in your mailbox.  So, the good news is that you will have time to order any last-minute items before the new pricing starts once you see the upcoming catalog!  

*********************************************************************************************************

All The Little Things

Subscribe March 11 – April 10

Good things take time, but you can start creating them now with the All the Little Things Paper Pumpkin kit! This kit includes nine cards, three each of three designs, with elegant designs and bright colors. The iridescent foil is the shining detail to bring your crafts together. You can make a card for anyone and for any occasion!

And don’t wait, because anyone who subscribes to this month’s kit will get a FREE box organizer! This organizer fits perfectly inside your Paper Pumpkin box and is great for keeping your supplies from past kits organized, so you know right where everything is! 

This kit includes:

  • 9 cards, 3 each of 3 designs, and 9 coordinating envelopes.
  • 1 photopolymer stamp set with celebratory sentiments.
  • 1 Shaded Spruce Stampin’ Spot.
  • Precut cherry blossom paper pieces with iridescent foil.
  • Unique embellishments and twine.
  • Adhesives to complete the projects.
  • Final card size: 5-1/2” x 4-1/4” (14 x 10.8 cm). 
  • Coordinating Stampin’ Up! colors: Balmy Blue, Basic Black, Calypso Coral, Granny Apple Green, Petal Pink, Poppy Parade, Shaded Spruce.
  • FREE box organizer

Subscribe to the April Paper Pumpkin Kit between 11 March 2023 and 10 April 2023 by clicking here!

Note: Supplies may be limited toward the end of the subscription period.

*********************************************************************************************************

Card stock cuts for this project:

  • Basic White Cardstock 1 1/4″ X 4″ (sentiment), 4″ X 5 1/4″ (inner liner)
  • Blushing Bride Cardstock 3 1/4″ X 3 1/2″ (card front panels mat), 2 1/4″ X 5 1/2″ (card front panel mat). 4 1/8″ X 5 3/8″ (inner liner mat)
  • Pear Pizzazz Cardstock 8 1/2″ X 5 1/2″ (card base scored & folded at 4 1/4″), 4 1/4″ X 5 1/2″ (card front)
  • Awash In Beauty Designer Series Paper 3 – 1″ X 3″ (card front panels), 2″ X 5 1/2″ (card front panel), 3/4″ X 5 1/4″ (inner liner strip), 1/2″ X 6″ & 2 1/4″ X 6″ (envelope)

*********************************************************************************************************

Product List

Stampin’ Up! Irresistible Blooms Multi-Fold Card

Good Tuesday morning my stamping friends. How has everyone’s week started off. I finally have a day off again. It was a long week of working every day. I’m not sure what I’m going to do first.

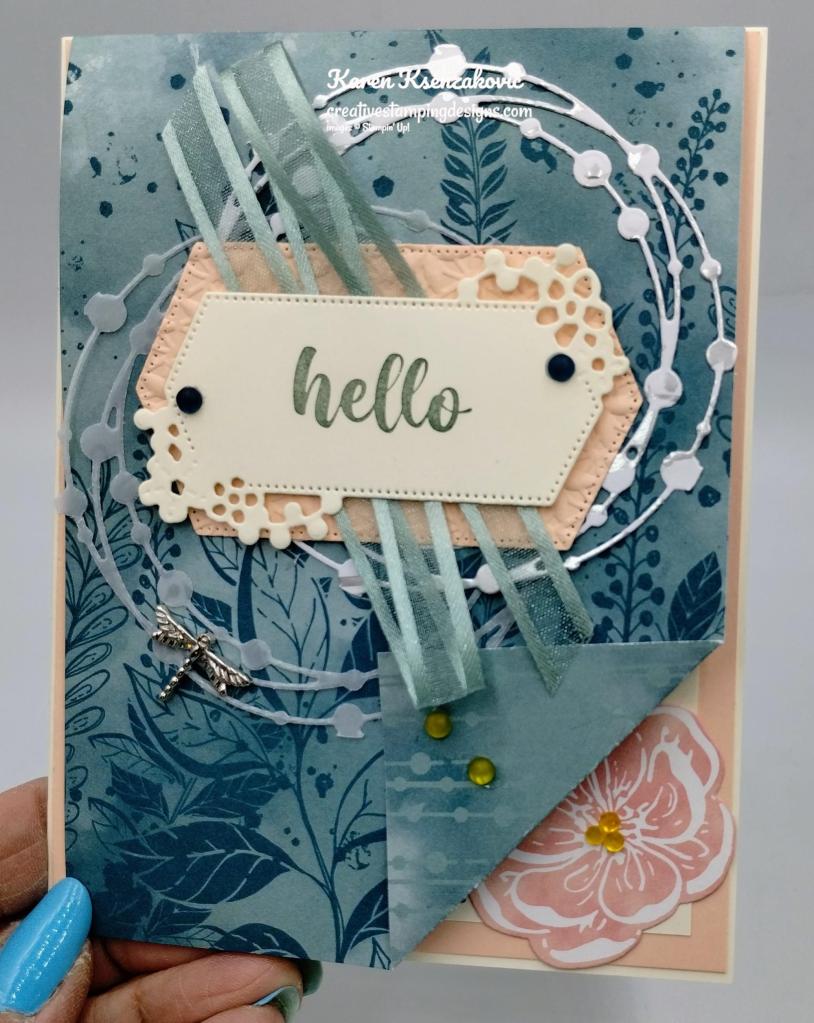
Today’s card is another one we made at our quarterly team meeting last Sunday. This card was designed by one of my team members Darryl Robbins. I made a couple changes from his card doing my own thing. Some of the items uses are unavailable right now but should be back in stock by mid-April. Here’s my card for today.

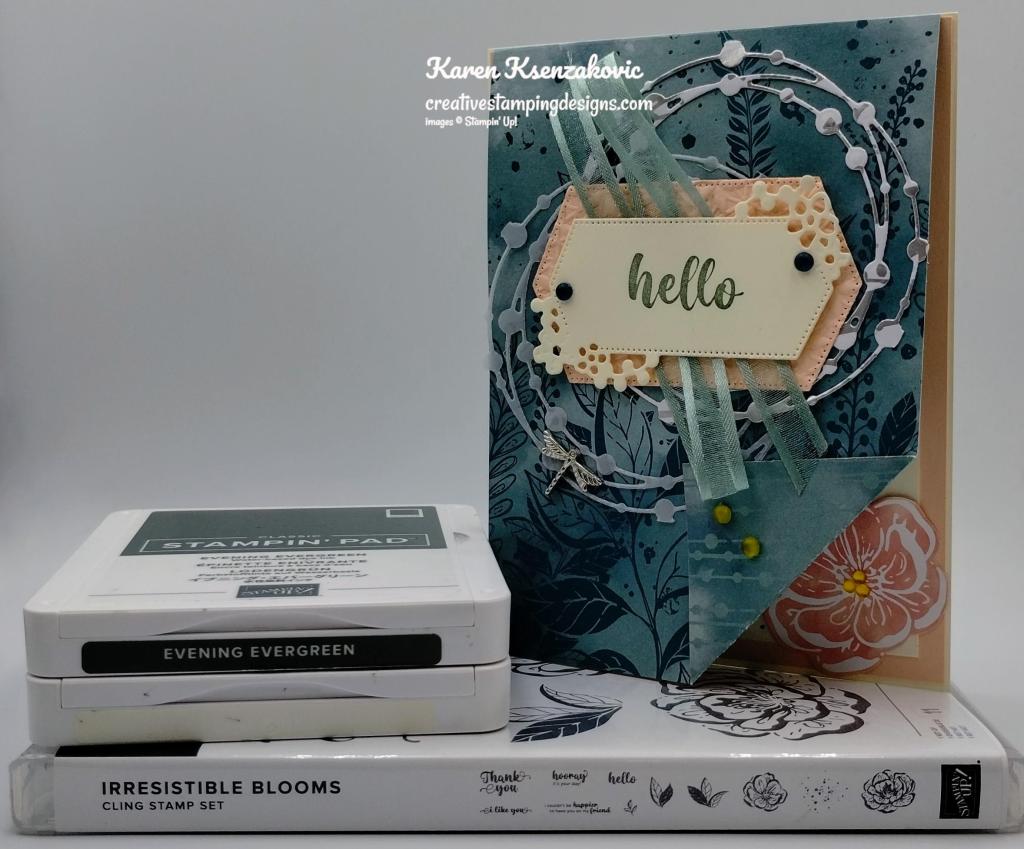
Stampin' Up! Irresistible Blooms Multi Fold 1 creativestampingdesigns.com

I used the Stampin’ Up! Irresistible Blooms Bundle along with the Hello Irresistible 6 X 6 Designer Series Paper and Sentimental Parks Dies for my card today.

Stampin' Up! Irresistible Blooms Multi Fold 2 creativestampingdesigns.com

To start, I adhered the scored & folded panel of Hello Irresistible DSP to a Petal Pink card front, adhering the folded edge to the back of the panel using Multipurpose Liquid Glue. I adhered the Petal Pink panel to the front of a Very Vanilla card base using Multipurpose Liquid Glue. I cut out 2 of the dotted circle dies from the Irresistible Blooms Die from panels of Naturally Gilded Specialty Designer Series Paper and Vellum Paper. I sniped the circle away from the panel using my Paper Snips. I adhered the die cut pieces to the DSP card front using Multipurpose Liquid Glue. I folded the bottom right corner of the Hello Irresistible DSP up and adhered it with a Glue Dot.

Stampin' Up! Irresistible Blooms Multi Fold 3 creativestampingdesigns.com

On a panel of Very Vanilla cardstock, I stamped the sentiment from the Stampin’ Up! Irresistible Blooms Cling Stamp Set in Evening Evergreen Ink. I cut the sentiment out using the Sentimental Parks Dies. I cut the sentiment mat from a panel of Petal Pink cardstock using the Sentiment Parks Dies. I embossed the mat using the Basics 3D Embossing Folder. I adhered the mat to the card front using Multipurpose Liquid Glue.

Stampin' Up! Irresistible Blooms Multi Fold 4 creativestampingdesigns.com

I adhered a piece of Soft Succulent 3/8″ Open Weave Ribbon to the mat using Stampin’ Seal. I adhered the sentiment over the ribbon using Stampin’ Dimensionals. I added a few Loose Frosted Dots and a Dragonfly Trinket to the card front.

Stampin' Up! Irresistible Blooms Multi Fold 5 creativestampingdesigns.com

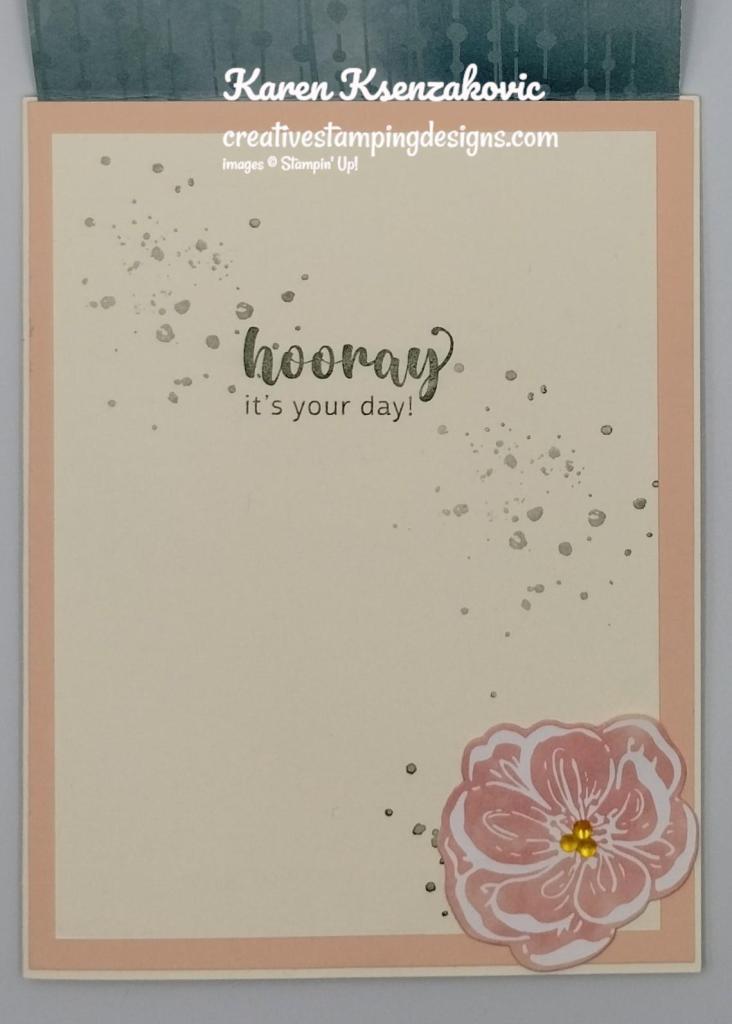
Under the DSP flap, I stamped the sentiment from the Irresistible Blooms stamp set in Evening Evergreen Ink on a panel of Very Vanilla cardstock. I stamped the splotch image from the Irresistible Blooms stamp set in Evening Evergreen Ink, stamping off once on scrap paper, around the sentiment. I adhered a die cut flower from the Hello Irresistible DSP to the bottom of the panel. I adhered the Very Vanilla panel to the Petal Pink panel using Stampin’ Seal.

Stampin' Up! Irresistible Blooms Multi Fold 6 creativestampingdesigns.com

On the inside I stamped the sentiment from the Irresistible Blooms stamp set in Evening Evergreen Ink on a panel of Very Vanilla cardstock towards the right of the panel. I cut the long lines and dot die from the Irresistible Blooms Die from a panel of Hello Irresistible DSP. I adhered the die cut to the Very Vanilla panel using Multipurpose Liquid Glue. I adhered die cut flowers from the Hello Irresistible DSP to the side of the panel using Multipurpose Liquid Glue. I adhered the die cut leaves from the Hello Irresistible DSP under the flowers using Multipurpose Liquid Glue. I adhered the Very Vanilla panel to a Hello Irresistible DSP mat then to the inside of the Very Vanilla card base.

Stampin' Up! Irresistible Blooms Multi Fold 7 creativestampingdesigns.com

To finish my card, I decorated a Very Vanilla Medium Envelope. I stamped the flower image from the Irresistible Blooms stamp set in Flirty Flamingo Ink on the envelope front. I stamped the leaf image from the Irresistible Blooms stamp set in Evening Evergreen Ink by the flower. I adhered a panel of Hello Irresistible DSP to the envelope flap.

Stampin' Up! Irresistible Blooms Multi Fold 8 creativestampingdesigns.com

Thank you for stopping by my blog today. I hope you like the multi fold card and will try it. Happy Stamping!!

*********************************************************************************************************

If you need any stamping supplies, I’d love to be your Demonstrator. Just click HERE to go directly to my online store or drop me an email if you have any questions. 

MY CURRENT HOST CODE IS:    7KF3QB4G

Use this host code when placing an order with me. When you order $50 or greater you will receive a free gift from me! If your order is over $150, please do not use this code, but you’ll still get the free gift. The free gift is your choice of any 1 item valued up to $10.00 from the 2022-2023 Annual Catalog or the January-April 2023 Mini Catalog!  Unfortunately, packs of cardstock are no longer an option for a free gift. Shipping has become too expensive to ship and it’s costing me as much to ship as the cardstock costs. For any orders $50 or more I will also send you my monthly class tutorials.  Click HERE or go to my Customer Rewards for more details and to see what this month’s tutorials are.

Please remember to use my current Host Code and make sure that you can see my name on the final checkout page listed as your Demonstrator when you order so that you know that you’re ordering with me, and you’ll get my rewards! 

Happy Stamping, Karen

*********************************************************************************************************

In response to changing policies at Stampin’ Up – I’m adjusting my Ordering Gift policy as well.  I’m having to get a little more tough on the adding of Host codes when you place your order thru my Online Store.

Not to worry – you’re still going to get that $10 ordering gift for orders of $50 (before shipping & tax) or greater.  And the gift is still any 1 SU! product up to that $10 value – which includes some of our fun Host Sets!

But – if you DO NOT use the Host code for your orders of less than $150 (this is the RETAIL total before Shipping & Handling), then you’ll have two options:

  1. You’ll need to call Stampin’ Up! (1-800-Stamp-Up) and ask them to add it for you. They’re very helpful and will get it done quickly!  OR….
  2. If your order was over the $50 threshold but under $150, then…you’ll forfeit that $10 ordering gift and rewards – this is the Bummer Option – and I REALLY don’t want to do this, SO please remember to add my Current Host Code.

*********************************************************************************************************

All The Little Things

Subscribe March 11 – April 10

Good things take time, but you can start creating them now with the All the Little Things Paper Pumpkin kit! This kit includes nine cards, three each of three designs, with elegant designs and bright colors. The iridescent foil is the shining detail to bring your crafts together. You can make a card for anyone and for any occasion!

And don’t wait, because anyone who subscribes to this month’s kit will get a FREE box organizer! This organizer fits perfectly inside your Paper Pumpkin box and is great for keeping your supplies from past kits organized, so you know right where everything is! 

This kit includes:

  • 9 cards, 3 each of 3 designs, and 9 coordinating envelopes.
  • 1 photopolymer stamp set with celebratory sentiments.
  • 1 Shaded Spruce Stampin’ Spot.
  • Precut cherry blossom paper pieces with iridescent foil.
  • Unique embellishments and twine.
  • Adhesives to complete the projects.
  • Final card size: 5-1/2” x 4-1/4” (14 x 10.8 cm). 
  • Coordinating Stampin’ Up! colors: Balmy Blue, Basic Black, Calypso Coral, Granny Apple Green, Petal Pink, Poppy Parade, Shaded Spruce.
  • FREE box organizer

Subscribe to the April Paper Pumpkin Kit between 11 March 2023 and 10 April 2023 by clicking here!

Note: Supplies may be limited toward the end of the subscription period.

*********************************************************************************************************

Card stock cuts for this project:

  • Petal Pink Cardstock 4 1/8″ X 5 3/8″ (front panel), 3 1/2″ x 2 1/2″ (sentiment mat)
  • Very Vanilla Cardstock 8 1/2″ X 5 1/2″ (card base scored & folded at 4 1/4″), 2 1/2″ x 3 1/2″ (sentiment), 3 3/4″ X 5″ (inner panel under flap), 4″ X 5 1/4″ (inner liner)
  • Hello Irresistible 6 X 6 Designer Series Paper 4″ X 6″ (card front panel scored @ 5 1/4″), 4 1/8″ x 5 3/8″ (inner liner mat), 2 1/4″ x 6″ (envelope flap), die cut flowers, leaves and inner liner die cut)
  • Naturally Gilded Specialty Designer Series Paper 4″ X 4″ (card front die cut)
  • Vellum Paper 4″ X 4″ (card front die cut)

*********************************************************************************************************

Product List

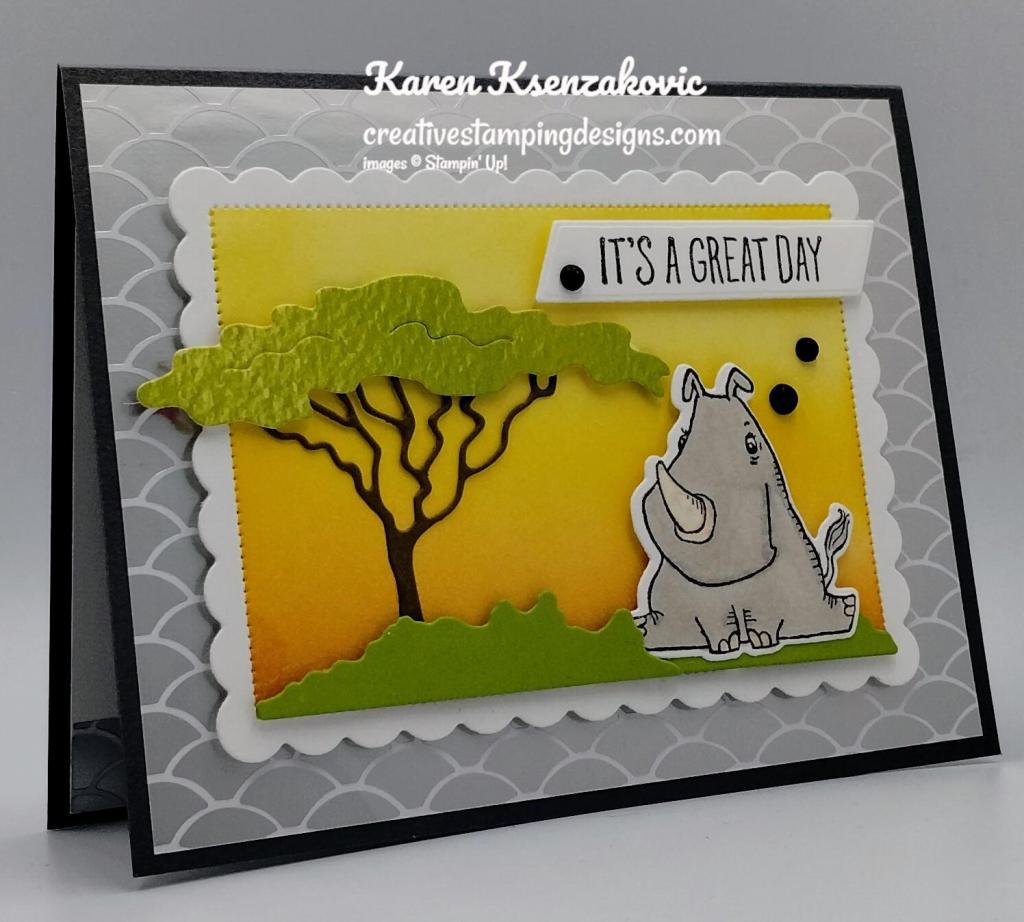
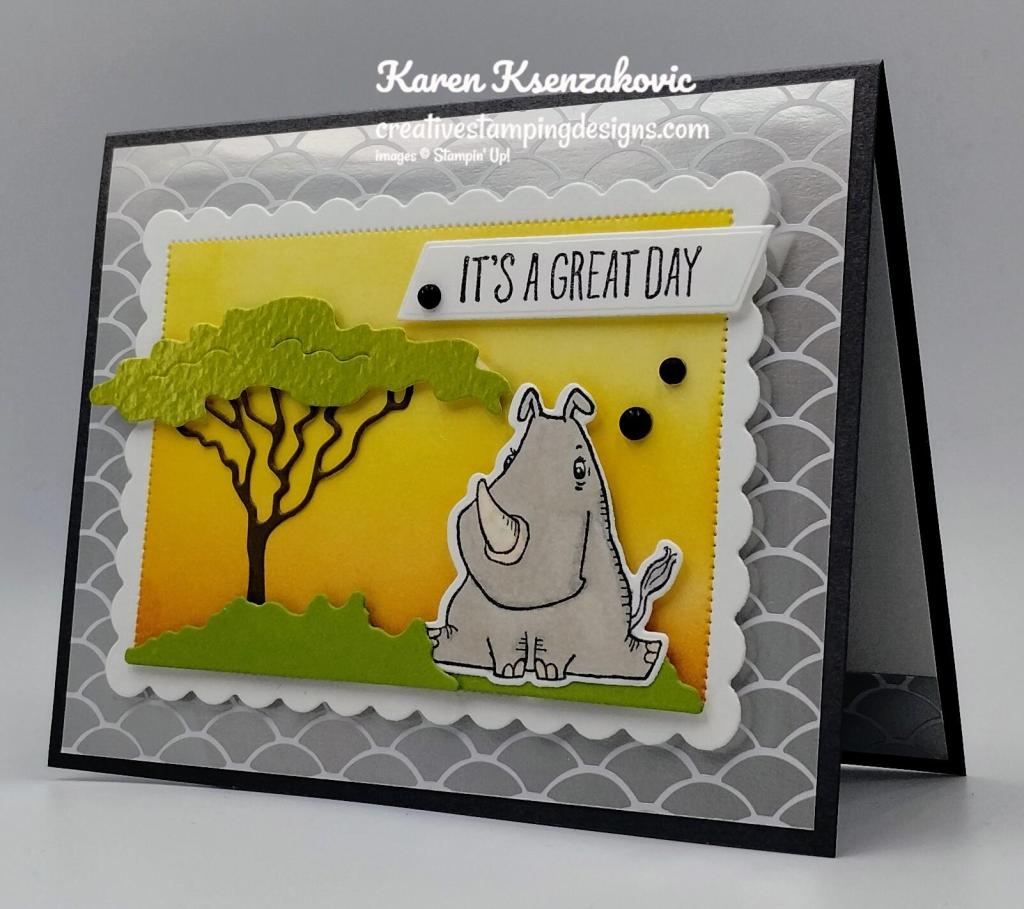
Stampin’ Up! Rhino Ready Birthday

Good Sunday morning my stamping friends. I hope your weekend is going well.

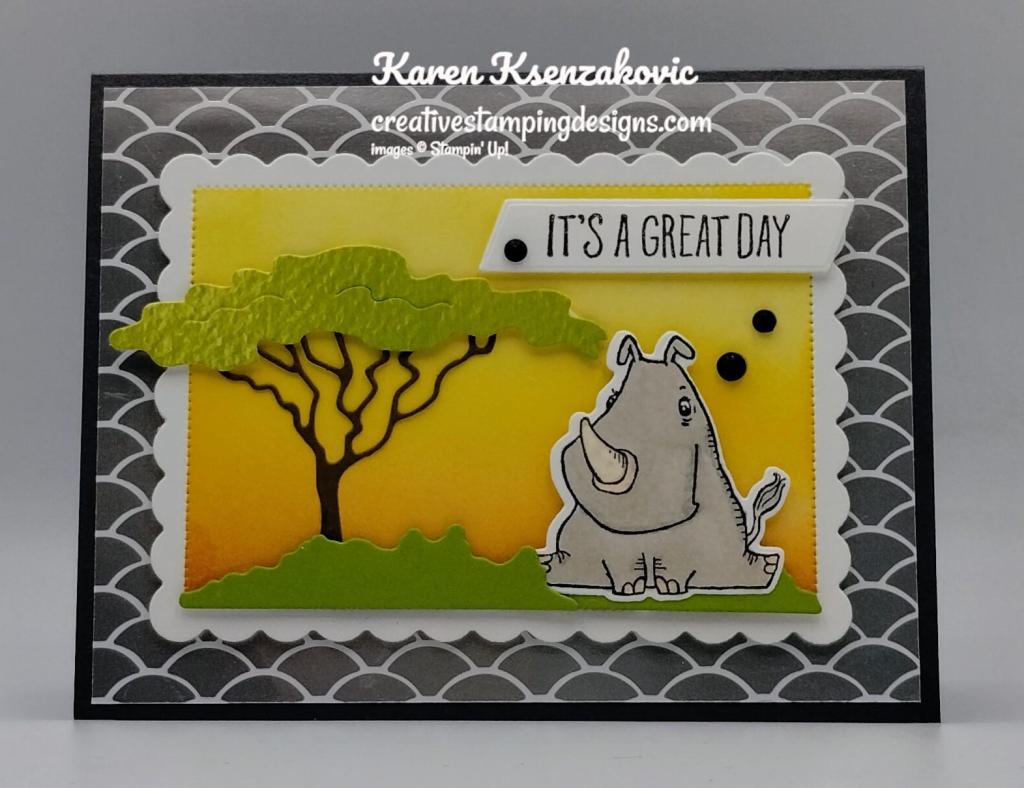
Today’s card is one that we made last Sunday at our quarterly team meeting. The card was designed by one or my team members Tara Carpenter. This was a lot of fun to make. The bundle we used for this card is an Online Exclusive product. Here’s my card for today.

Stampin' Up! Thino Ready Birthday 1 creativestampingdesigns.com

I used the Stampin’ Up! Rhino Ready Bundle along with Scalloped Contours Dies and Like An Animal Designer Series Paper for my card today.

Stampin' Up! Thino Ready Birthday 2 creativestampingdesigns.com

I started by adhering a panel of Like An Animal DSP to a Basic Gray card base using Multipurpose Liquid Glue. I cut a panel of Basic White cardstock using the Scalloped Contours Dies. Using Post-It Note tape, I taped off all 4 sides of the die along the dotted lines. Using the Blending Brushes I added Daffodil Delight Ink on the top, Mango Melody Ink in the center and Pumpkin Pie Ink on the bottom.

Stampin' Up! Thino Ready Birthday 3 creativestampingdesigns.com

Using the Rhino Ready Dies, I cut the tree trunk from the panel of Soft Suede, grass from the Granny Apple Green and treetop from the scrap of Awash In Beauty DSP. On a panel of Basic White cardstock, I stamped the adorable rhino and sentiment from the Stampin’ Up! Rhino Ready Cling Stamp Set in Tuxedo Black Ink. I cut the rhino out using the Rhino Ready Dies and the sentiment using the Something Fancy Dies. I colored the rhino using the Gray Granite and Ivory Stampin’ Blends Markers.

Stampin' Up! Thino Ready Birthday 4 creativestampingdesigns.com

I adhered the tree trunk to the die cut panel using Multipurpose Liquid Glue. I adhered the treetop, grass, rhino and sentiment using Stampin’ Dimensionals. I adhered the artwork to the card front using Stampin’ Dimensionals. I added Matte Black Dots to the card front.

Stampin' Up! Thino Ready Birthday 5 creativestampingdesigns.com

On the inside, I stamped the sentiment from Rhino Ready stamp set in Tuxedo Black Ink on a panel of Basic White. I adhered a strip of Like An Animal DSP to the bottom of the panel. I adhered the Basic Whtie panel to the inside of the Basic Gray card base.

Stampin' Up! Thino Ready Birthday 6 creativestampingdesigns.com

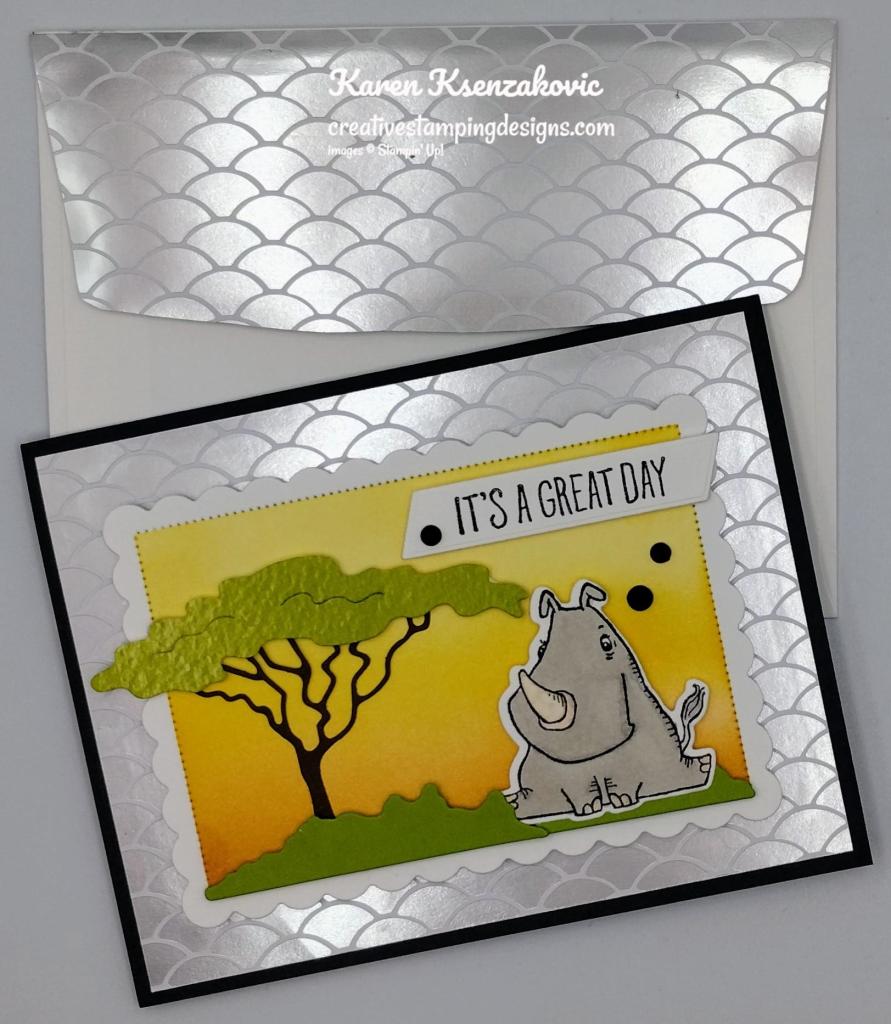
To finish my card, I decorated a Basic White Medium Envelope. I stamped the rhino image from the Rhino Ready stamp set on the envelope front in Tuxedo Black Ink. I colored the image using my Gray Granite and Ivory Stampin’ Blends Markers. I adhered a panel of Like An Animal DSP to the envelope flap.

Stampin' Up! Thino Ready Birthday 7 creativestampingdesigns.com

Thank you for stopping by my blog today. I hope you like the card and will give it a try. Happy Stamping!!

*********************************************************************************************************

If you need any stamping supplies, I’d love to be your Demonstrator. Just click HERE to go directly to my online store or drop me an email if you have any questions. 

MY CURRENT HOST CODE IS:    7KF3QB4G

Use this host code when placing an order with me. When you order $50 or greater you will receive a free gift from me! If your order is over $150, please do not use this code, but you’ll still get the free gift. The free gift is your choice of any 1 item valued up to $10.00 from the 2022-2023 Annual Catalog or the January-April 2023 Mini Catalog!  Unfortunately, packs of cardstock are no longer an option for a free gift. Shipping has become too expensive to ship and it’s costing me as much to ship as the cardstock costs. For any orders $50 or more I will also send you my monthly class tutorials.  Click HERE or go to my Customer Rewards for more details and to see what this month’s tutorials are.

Please remember to use my current Host Code and make sure that you can see my name on the final checkout page listed as your Demonstrator when you order so that you know that you’re ordering with me, and you’ll get my rewards! 

Happy Stamping, Karen

*********************************************************************************************************

In response to changing policies at Stampin’ Up – I’m adjusting my Ordering Gift policy as well.  I’m having to get a little more tough on the adding of Host codes when you place your order thru my Online Store.

Not to worry – you’re still going to get that $10 ordering gift for orders of $50 (before shipping & tax) or greater.  And the gift is still any 1 SU! product up to that $10 value – which includes some of our fun Host Sets!

But – if you DO NOT use the Host code for your orders of less than $150 (this is the RETAIL total before Shipping & Handling), then you’ll have two options:

  1. You’ll need to call Stampin’ Up! (1-800-Stamp-Up) and ask them to add it for you. They’re very helpful and will get it done quickly!  OR….
  2. If your order was over the $50 threshold but under $150, then…you’ll forfeit that $10 ordering gift and rewards – this is the Bummer Option – and I REALLY don’t want to do this, SO please remember to add my Current Host Code.

*********************************************************************************************************

Online Exclusives Now Available

Now available Stampin’ Up! Online Exclusive Products. Click Here for a printable PDF flyer with the items that will be available. There is so much more than what is on the flyer though. You’ll want to go to my Online Store to see it all.

*********************************************************************************************************

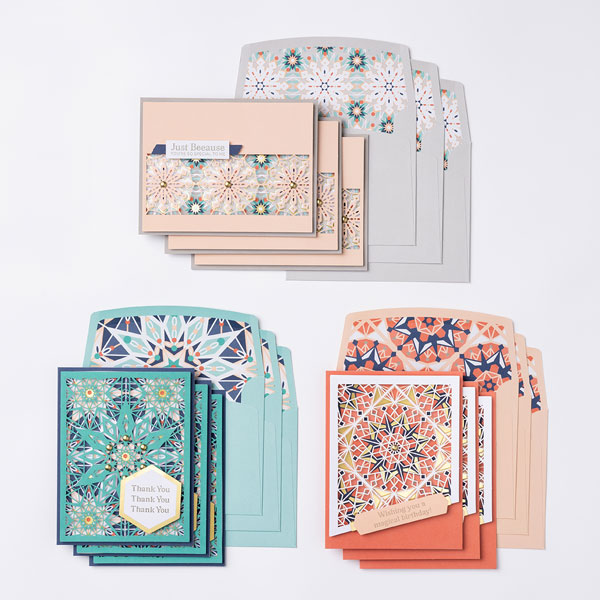
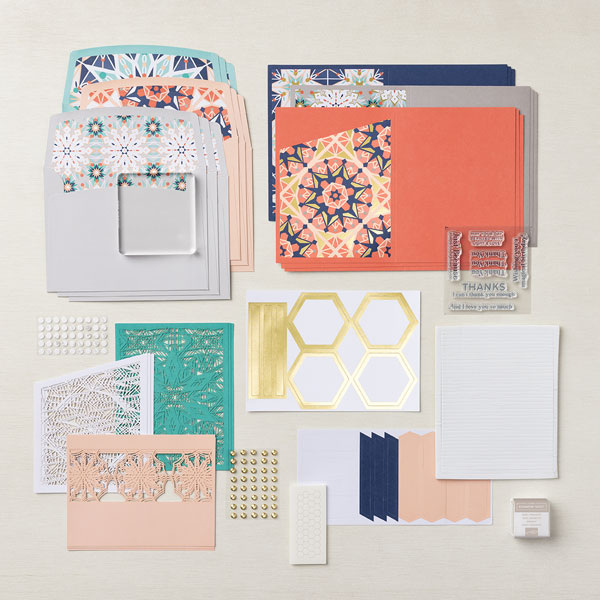
The Colorful Kaleidoscope Kit Now Available

Get ready for the latest addition to the Kits Collection by Stampin’ Up! The Colorful Kaleidoscope Kit is filled with geometric shapes and unique kaleidoscopic patterns. It’s time to give a card that no one will forget! 

This kit includes: 

  • 9 full-size cards, 3 each of 3 designs, measuring 4-1/4″ x 5-1/2″ (10.8 x 14 cm) and 9 coordinating envelopes.
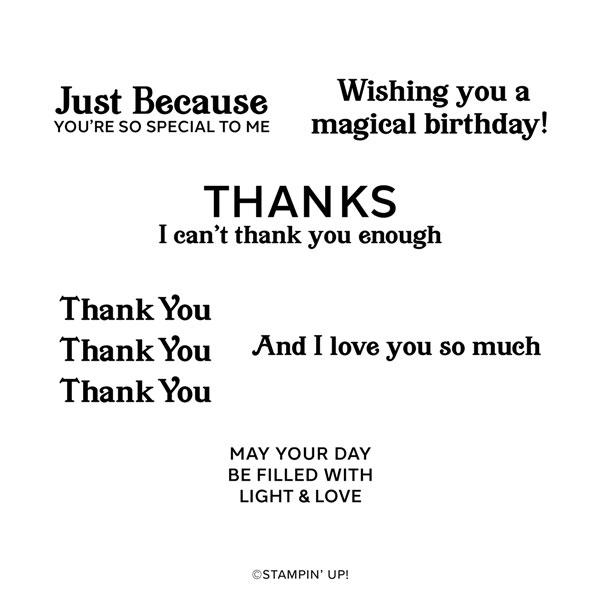
  • One photopolymer stamp set with all-occasion sentiments that go beyond the basics.
  • One Gray Granite Stampin’ Spot.
  • 9 peek-through laser cuts that can easily be layered to create a kaleidoscopic effect.
  • Precut die cuts that are lined with gold foil, perfect for all your stamped sentiments.
  • Mini Stampin’ Dimensionals, Tear & Tape Adhesive, and Foam Adhesive Strips.
  • Gold, pearlized embellishments.
  • The coordinating colors are Bermuda Bay, Calypso Coral, Gray Granite, Night of Navy, and Petal Pink.
  • Each project takes less than 60 minutes to complete. 

Item #161804 $23.00 USD

*********************************************************************************************************

All The Little Things

Subscribe March 11 – April 10

Good things take time, but you can start creating them now with the All the Little Things Paper Pumpkin kit! This kit includes nine cards, three each of three designs, with elegant designs and bright colors. The iridescent foil is the shining detail to bring your crafts together. You can make a card for anyone and for any occasion!

And don’t wait, because anyone who subscribes to this month’s kit will get a FREE box organizer! This organizer fits perfectly inside your Paper Pumpkin box and is great for keeping your supplies from past kits organized, so you know right where everything is! 

This kit includes:

  • 9 cards, 3 each of 3 designs, and 9 coordinating envelopes.
  • 1 photopolymer stamp set with celebratory sentiments.
  • 1 Shaded Spruce Stampin’ Spot.
  • Precut cherry blossom paper pieces with iridescent foil.
  • Unique embellishments and twine.
  • Adhesives to complete the projects.
  • Final card size: 5-1/2” x 4-1/4” (14 x 10.8 cm). 
  • Coordinating Stampin’ Up! colors: Balmy Blue, Basic Black, Calypso Coral, Granny Apple Green, Petal Pink, Poppy Parade, Shaded Spruce.
  • FREE box organizer

Subscribe to the April Paper Pumpkin Kit between 11 March 2023 and 10 April 2023 by clicking here!

Note: Supplies may be limited toward the end of the subscription period.

*********************************************************************************************************

Card stock cuts for this project:

  • Basic White Cardstock 2 – 4″ X 5 1/4″ (card front panel & inner liner), 2″ X 5 1/2″ (rhino & sentiment)
  • Basic Gray Cardstock 8 1/2″ X 5 1/2″ (card bases scored & folded at 4 1/4″)
  • Granny Apple Green Cardstock scraps for grass dies
  • Soft Suede Cardstock 3″ X 3″ (tree)
  • Like An Animal Designer Series Paper 4″ X 5 1/4′ (card front), 1/2″ X 5 1/4″ (inner liner strip), 2 1/4″ X 6″ (envelope flap)
  • Awash In Beauty Designer Series Paper scrap of green for treetop

*********************************************************************************************************

Product List

Stampin’ Up! Celebrate Sunflowers Spotlight

Good Saturday morning my stamping friends and welcome to the weekend. I hope you have some plans in the works. I’ll be working today and hoping it will be busy to make the day go by quickly.

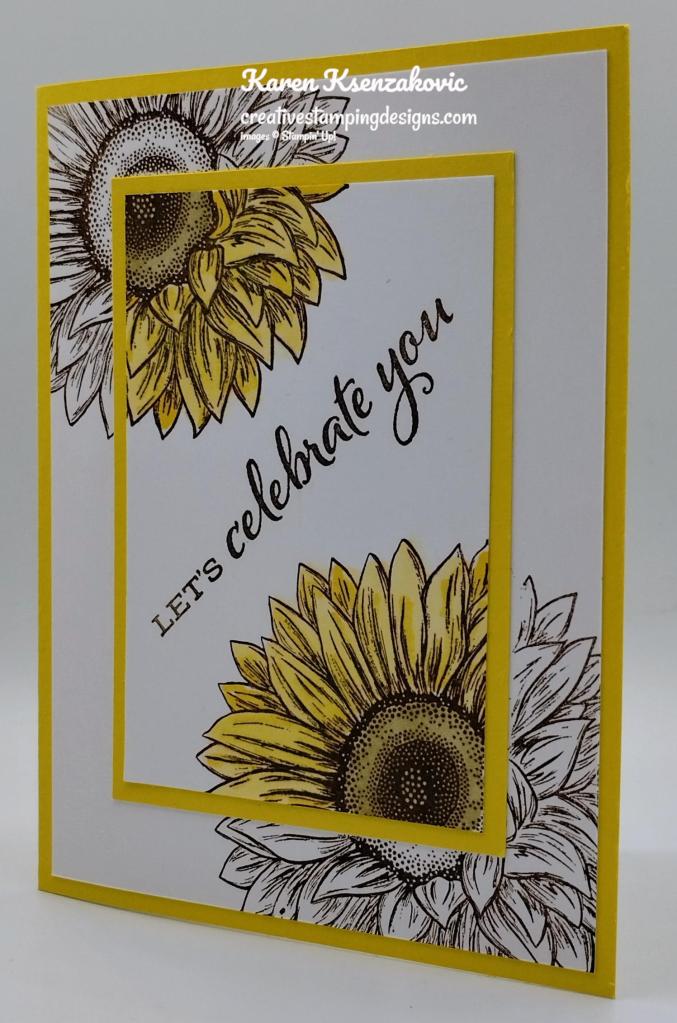
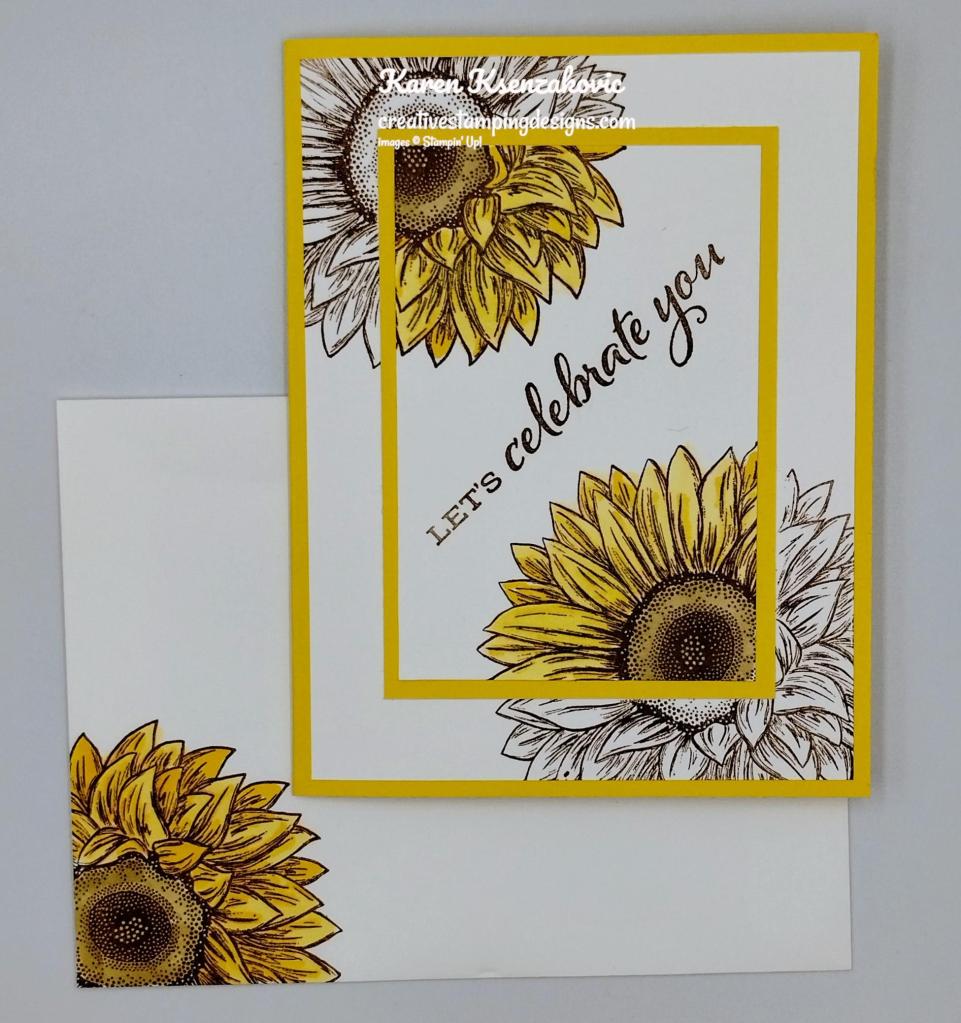
Today’s card is one we made at our team meeting this past Monday. I was excited to lead mystery stamping and I showed everyone 2 techniques in one card using just Stamps, Ink and Paper. Here’s my card for today.

Stampin' Up! Celebrate Sunflowers Spotlight 1 creativestampingdesigns.com

I used the Stampin’ Up! Celebrate Sunflowers Cling Stamp Set and the Stampin’ Up! Go To Greetings Cling Stamp Set for my card today.

Stampin' Up! Celebrate Sunflowers Spotlight  2 creativestampingdesigns.com

I started by lightly adhering the small panel of Basic White cardstock to the larger panel of Basic White cardstock. I stamped the large sunflower image from the Celebrate Sunflowers stamp set on the 2 corners of the panels in Soft Suede Ink.

Stampin' Up! Celebrate Sunflowers Spotlight 3 creativestampingdesigns.com

I took the panels apart and using my Daffodil Delight and Soft Suede Stampin’ Blends Markers, I colored just the images on the small panel. I stamped the sentiment from the Celebrate Sunflowers stamp set on the small panel in Soft Suede Ink.

Stampin' Up! Celebrate Sunflowers Spotlight 4 creativestampingdesigns.com

I adhered the small panel to the Daffodil Delight mat using Stampin’ Seal. I adhered the layered panel to the larger stamped panel using Multipurpose Liquid Glue lining up the flowers. I adhered the layered panel to the Daffodil Delight card base using Multipurpose Liquid Glue.

Stampin' Up! Celebrate Sunflowers Spotlight 5 creativestampingdesigns.com

On the inside, I stamped the sentiment from the Celebrate Sunflowers stamp set in Soft Suede Ink on a Basic White panel. I stamped the sentiment from the Go To Greetings stamp set in Soft Suede Ink below the 1st sentiment. I stamped the large sunflower image from the Celebrate Sunflowers stamp set in Soft Suede Ink on the bottom of the panel. I colored the image using my Daffodil Delight and Soft Suede Stampin’ Blends Markers. I adhered the Basic White panel to a Soft Suede mat then to the inside of the Daffodil Delight card base.

Stampin' Up! Celebrate Sunflowers Spotlight 6 creativestampingdesigns.com

To finish my card, I decorated a Basic White Medium Envelope. I stamped the sunflower image from the Celebrate Sunflowers stamp set on the envelope front and flap in Soft Suede Ink. I colored the images using my Daffodil Delight and Soft Suede Stampin’ Blends Markers.

Stampin' Up! Celebrate Sunflowers Spotlight 7 creativestampingdesigns.com

Thank you for stopping by my blog today. I hope you liked the card and will give it a try. Happy Stamping!!

*********************************************************************************************************

If you need any stamping supplies, I’d love to be your Demonstrator. Just click HERE to go directly to my online store or drop me an email if you have any questions. 

MY CURRENT HOST CODE IS:    7KF3QB4G

Use this host code when placing an order with me. When you order $50 or greater you will receive a free gift from me! If your order is over $150, please do not use this code, but you’ll still get the free gift. The free gift is your choice of any 1 item valued up to $10.00 from the 2022-2023 Annual Catalog or the January-April 2023 Mini Catalog!  Unfortunately, packs of cardstock are no longer an option for a free gift. Shipping has become too expensive to ship and it’s costing me as much to ship as the cardstock costs. For any orders $50 or more I will also send you my monthly class tutorials.  Click HERE or go to my Customer Rewards for more details and to see what this month’s tutorials are.

Please remember to use my current Host Code and make sure that you can see my name on the final checkout page listed as your Demonstrator when you order so that you know that you’re ordering with me, and you’ll get my rewards! 

Happy Stamping, Karen

*********************************************************************************************************

In response to changing policies at Stampin’ Up – I’m adjusting my Ordering Gift policy as well.  I’m having to get a little more tough on the adding of Host codes when you place your order thru my Online Store.

Not to worry – you’re still going to get that $10 ordering gift for orders of $50 (before shipping & tax) or greater.  And the gift is still any 1 SU! product up to that $10 value – which includes some of our fun Host Sets!

But – if you DO NOT use the Host code for your orders of less than $150 (this is the RETAIL total before Shipping & Handling), then you’ll have two options:

  1. You’ll need to call Stampin’ Up! (1-800-Stamp-Up) and ask them to add it for you. They’re very helpful and will get it done quickly!  OR….
  2. If your order was over the $50 threshold but under $150, then…you’ll forfeit that $10 ordering gift and rewards – this is the Bummer Option – and I REALLY don’t want to do this, SO please remember to add my Current Host Code.

*********************************************************************************************************

All The Little Things

Subscribe March 11 – April 10

Good things take time, but you can start creating them now with the All the Little Things Paper Pumpkin kit! This kit includes nine cards, three each of three designs, with elegant designs and bright colors. The iridescent foil is the shining detail to bring your crafts together. You can make a card for anyone and for any occasion!

And don’t wait, because anyone who subscribes to this month’s kit will get a FREE box organizer! This organizer fits perfectly inside your Paper Pumpkin box and is great for keeping your supplies from past kits organized, so you know right where everything is! 

This kit includes:

  • 9 cards, 3 each of 3 designs, and 9 coordinating envelopes.
  • 1 photopolymer stamp set with celebratory sentiments.
  • 1 Shaded Spruce Stampin’ Spot.
  • Precut cherry blossom paper pieces with iridescent foil.
  • Unique embellishments and twine.
  • Adhesives to complete the projects.
  • Final card size: 5-1/2” x 4-1/4” (14 x 10.8 cm). 
  • Coordinating Stampin’ Up! colors: Balmy Blue, Basic Black, Calypso Coral, Granny Apple Green, Petal Pink, Poppy Parade, Shaded Spruce.
  • FREE box organizer

Subscribe to the April Paper Pumpkin Kit between 11 March 2023 and 10 April 2023 by clicking here!

Note: Supplies may be limited toward the end of the subscription period.

*********************************************************************************************************

Card stock cuts for this project:

  • Basic White Cardstock 2 – 4″ X 5 1/4″ (card front panel & inner liner), 2 5/8″ X 3 7/8″ (card front panel)
  • Daffodil Delight Cardstock 8 1/2″ X 5 1/2″ (card base scored & folded at 4 1/4″), 2 7/8″ X 4 1/8″ (mat)
  • Soft Suede Cardstock 4 1/8″ X 5 3/8″ (inner liner mat)

*********************************************************************************************************

Product List

Stampin’ Up! Season of Chic for The Happy Inkin’ Thursday Blog Hop

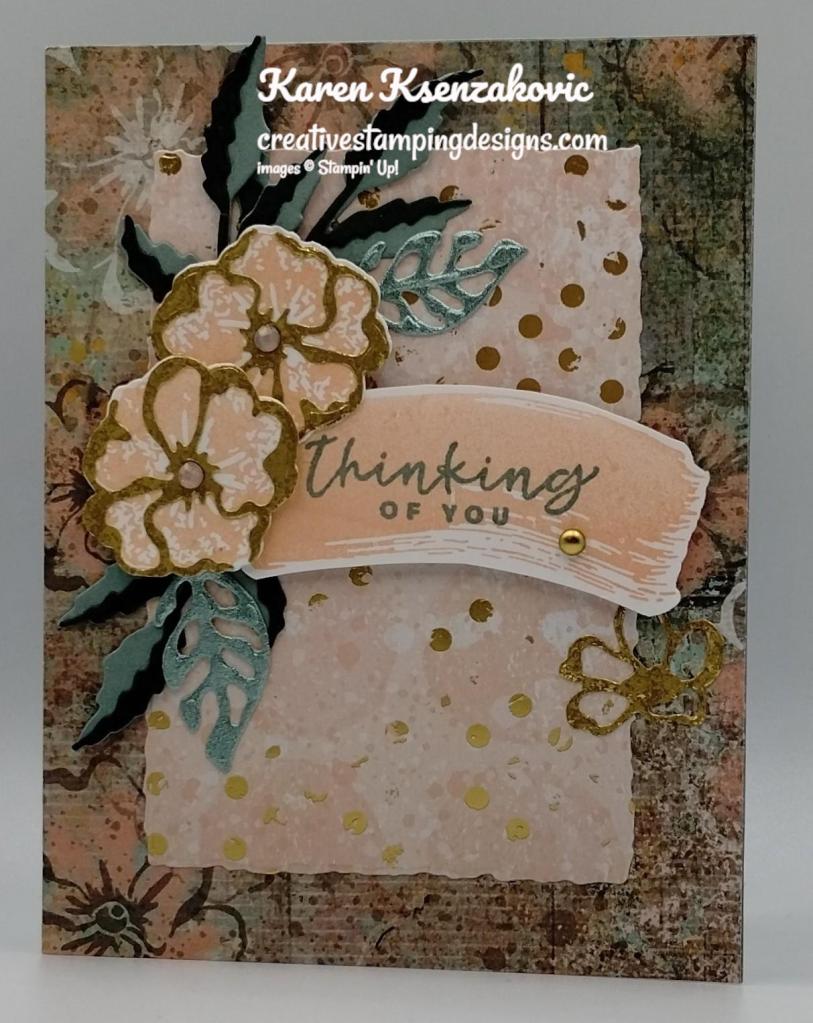
Good Thursday morning my stamping friends welcome to our Happy Inkin’ Thursday Blog Hop. If you are starting with me, thank you. I hope you will stop by everyone’s blog to see what they have created this week. If you are hopping over from Akiko’s blog, thank you for stopping by. This week we have Sketch Challenge. Here is my card using this week’s Sketch.

Stampin' Up! Season of Chic Birthday 1 creativestampingdesigns.com

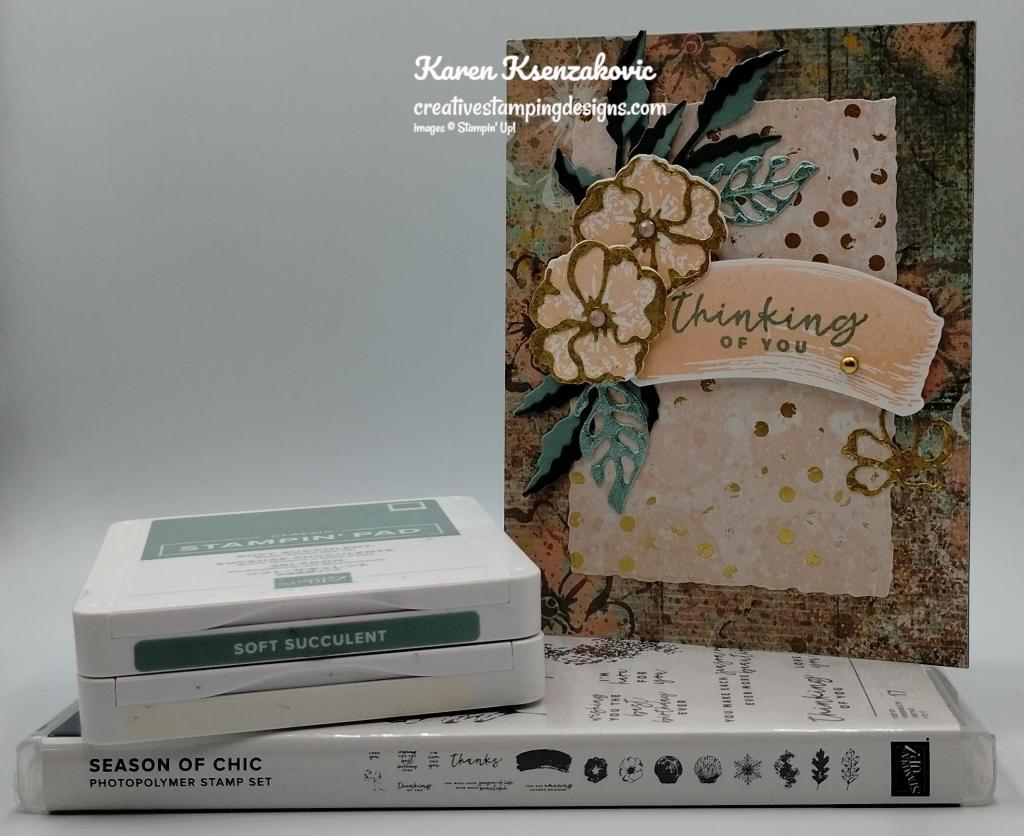
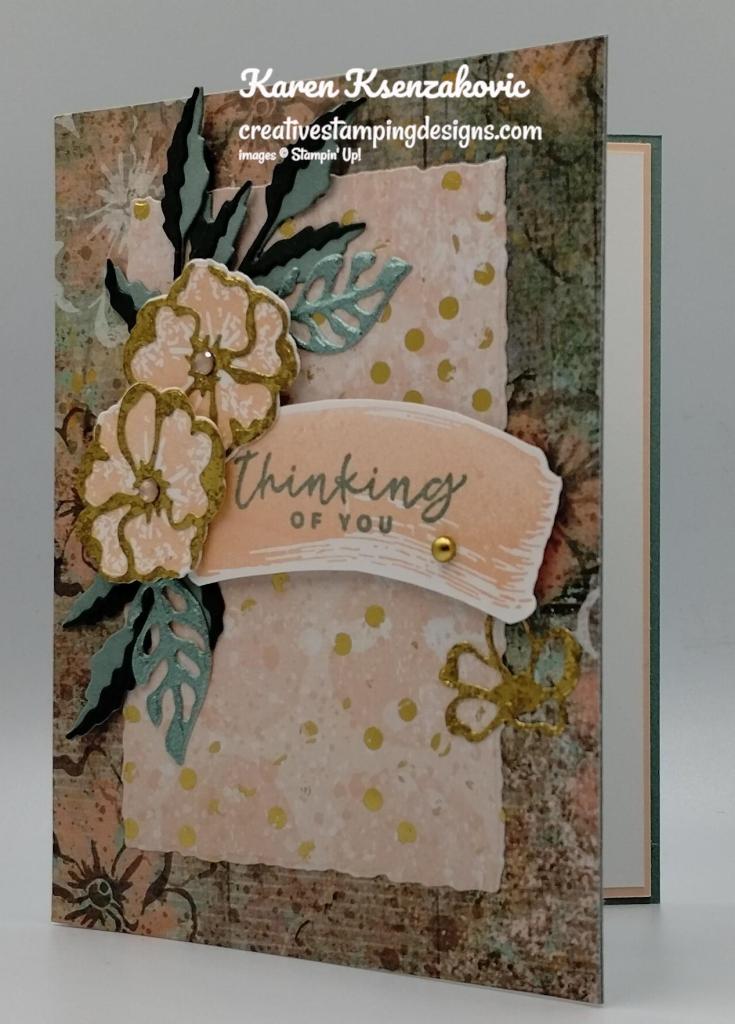
I used one of my favorite suites from the 2022-2023 Annual Catalog the Stampin’ Up! Texture Chic Suite along with the Deckled Rectangle Dies and Poppy Moments Dies for my card today.

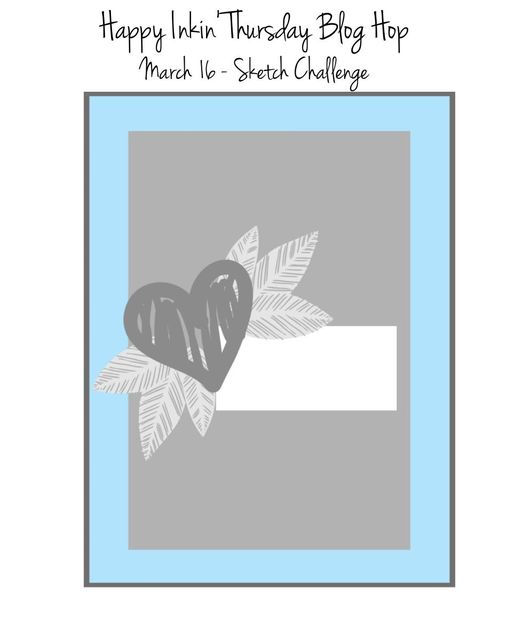
This is our sketch for this week.

Stampin' Up! Season of Chic Birthday 2 creativestampingdesigns.com

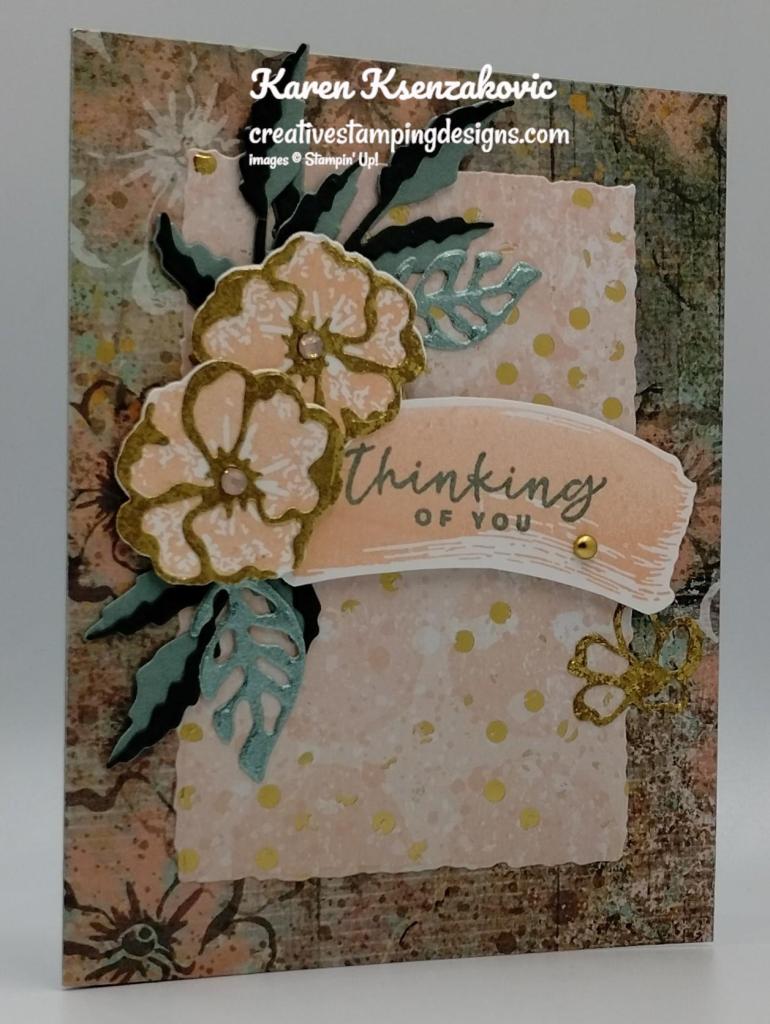
I started by adhering a panel of Texture Chic Specialty Designer Series Paper to a Soft Succulent card base using Multipurpose Liquid Glue. I cut another panel of Texture Chic DSP using the Deckled Rectangle Dies and adhered it to the card front using Multipurpose Liquid Glue.

Stampin' Up! Season of Chic Birthday 3 creativestampingdesigns.com

Using the Poppy Moments Dies, I cut the full leaf from a panel of Soft Succulent cardstock and the detailed leaf from a panel of Evening Evergreen cardstock. I adhered the leaves together using Multipurpose Liquid Glue. Using the Chic Dies, I cut 2 large & 2 detailed flowers from a panel of Distressed Gold Paper, 2 of the detailed leaves from a panel of Soft Succulent Fine Shimmer Paper, 1 solid flower from Vellum Paper and 1 large, detailed flower from Texture Chic DSP. On a panel of Basic White cardstock, I stamped the swish and flower images from the Stampin’ Up! Season of Chic Photopolymer Stamp Set in Petal Pink Ink. I stamped the sentiment from the Season of Chic stamp set in Soft Succulent Ink over the swish image. I cut the flowers out using the Chic Dies. I fussy cut the swish image using my Paper Snips.

Stampin' Up! Season of Chic Birthday 4 creativestampingdesigns.com

I adhered the sentiment to the card front using Stampin’ Dimensionals. I adhered the Distressed Gold outline flowers to the solid stamped flowers using Multipurpose Liquid Glue. I adhered the flowers to the card front using Stampin’ Dimensionals. I cut the top 3 leaves off the leave stems from the Poppy Moments Dies and adhered them under the flowers using Multipurpose Liquid Glue. I adhered the Fine Shimmer leaves under the flowers using Multipurpose Liquid Glue. I adhered 1 of the small outlined Distressed Gold flowers to the card front using Multipurpose Liquid Glue. I added a Brushed Metallic Adhesive-Backed Dot to the sentiment. I added an Elegant Faceted Gem to the flower centers.

Stampin' Up! Season of Chic Birthday 5 creativestampingdesigns.com

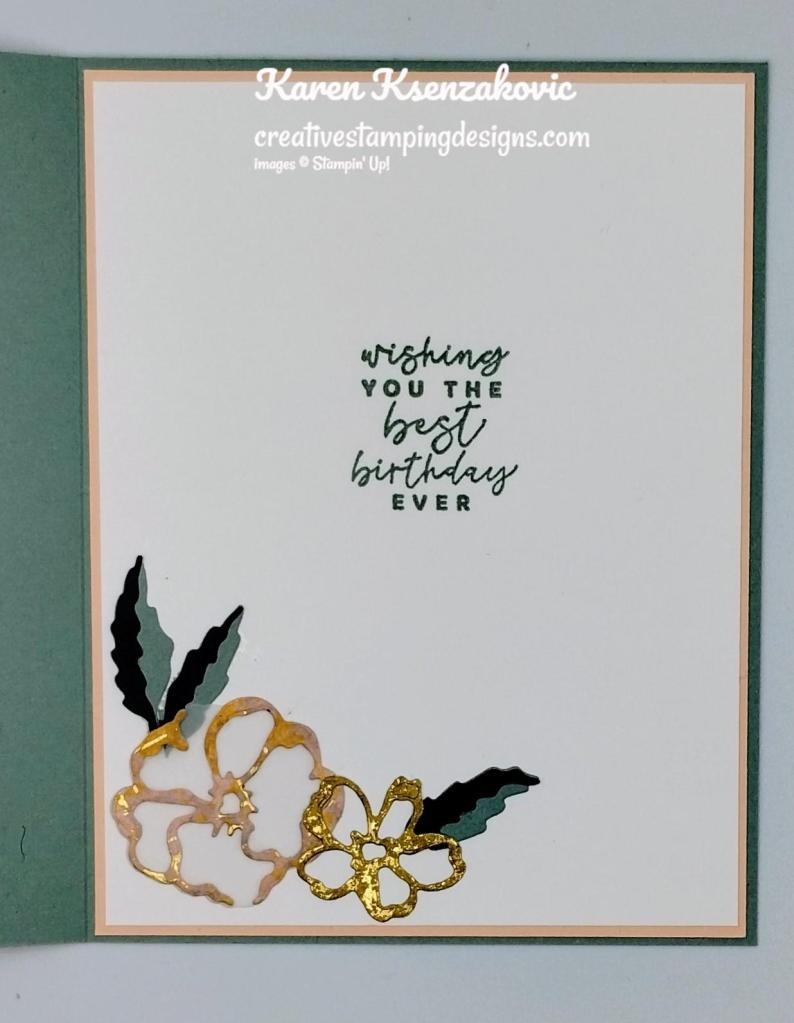
On the inside, I stamped the sentiment from Season of Chic stamp set in Soft Succulent Ink on a panel of Basic White. I adhered the die cut flowers to the bottom of the panel. I cut apart one of the die cut leaves and adhered them under the flowers. I adhered the Basic Whtie panel to a Petal Pink mat then to the inside of the Soft Succulent card base.

Stampin' Up! Season of Chic Birthday 6 creativestampingdesigns.com

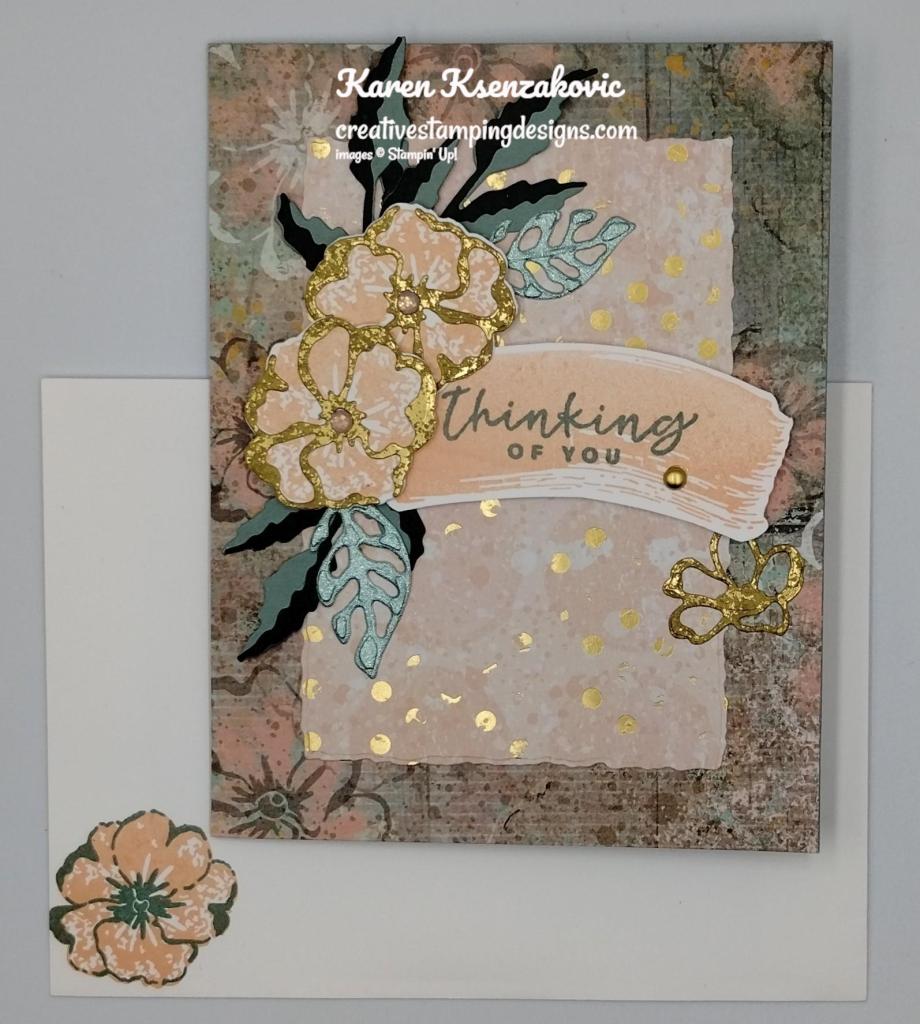
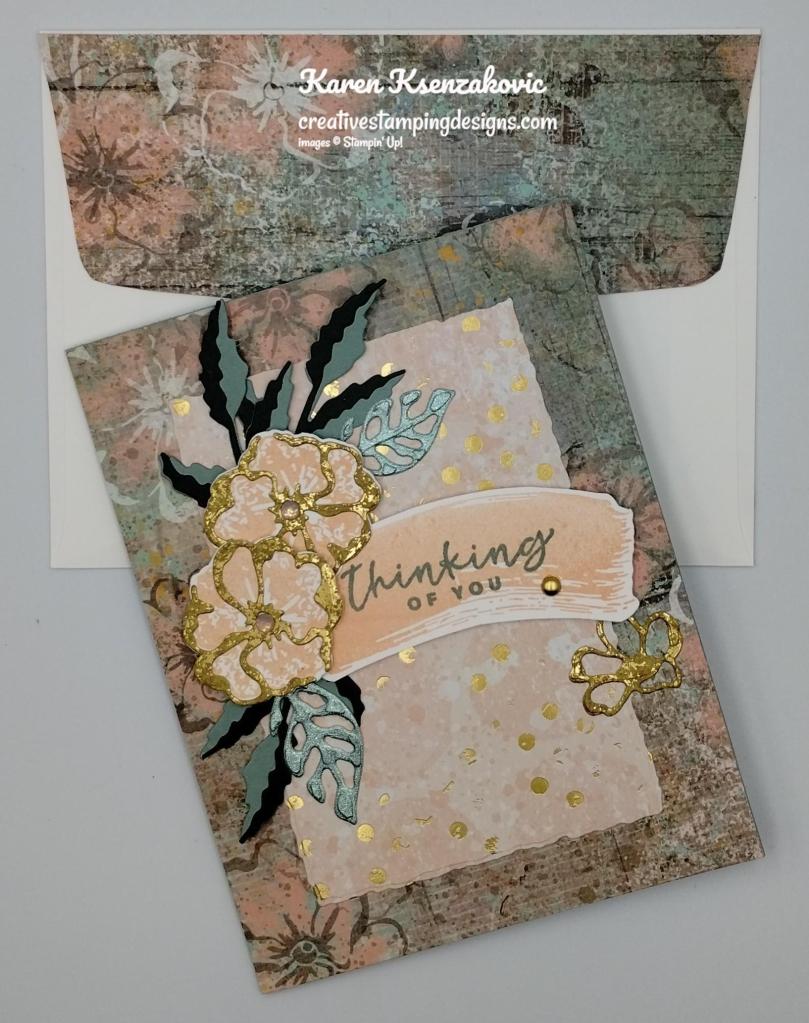
To complete my card, I decorated a Basic White Medium Envelope. I stamped the solid flower image from the Season of Chic stamp set on the envelope front in Petal Pink Ink. I stamped the outline flower image from Season of Chic stamp set in Soft Succulent Ink over the solid image. I adhered a panel of Texture Chic DSP to the envelope flap.

Stampin' Up! Season of Chic Birthday 7 creativestampingdesigns.com

Thank you for stopping by my blog today. I hope you liked my card and will give it a try. Now that you’ve seen my card, take a minute to hop through and see everyone’s projects today. If you click on the Next Blog button, you’ll go to Tara’s page. Or you can just click on the names below to go directly to all their blogs! Happy Hopping!!

Amy Koenders:

Mary Deatherage:

Kristi Gray:

Jaimie Babarczy:

Karen Finkle:

Akiko Sudano:

Karen Ksenzakovic: You are Here

Tara Carpenter:

Terry Lynn Bright:

Carol Buckalew:

*********************************************************************************************************

If you need any stamping supplies, I’d love to be your Demonstrator. Just click HERE to go directly to my online store or drop me an email if you have any questions. 

MY CURRENT HOST CODE IS:    7KF3QB4G

Use this host code when placing an order with me. When you order $50 or greater you will receive a free gift from me! If your order is over $150, please do not use this code, but you’ll still get the free gift. The free gift is your choice of any 1 item valued up to $10.00 from the 2022-2023 Annual Catalog or the January-April 2023 Mini Catalog!  Unfortunately, packs of cardstock are no longer an option for a free gift. Shipping has become too expensive to ship and it’s costing me as much to ship as the cardstock costs. For any orders $50 or more I will also send you my monthly class tutorials.  Click HERE or go to my Customer Rewards for more details and to see what this month’s tutorials are.

Please remember to use my current Host Code and make sure that you can see my name on the final checkout page listed as your Demonstrator when you order so that you know that you’re ordering with me, and you’ll get my rewards! 

Happy Stamping, Karen

*********************************************************************************************************

In response to changing policies at Stampin’ Up – I’m adjusting my Ordering Gift policy as well.  I’m having to get a little more tough on the adding of Host codes when you place your order thru my Online Store.

Not to worry – you’re still going to get that $10 ordering gift for orders of $50 (before shipping & tax) or greater.  And the gift is still any 1 SU! product up to that $10 value – which includes some of our fun Host Sets!

But – if you DO NOT use the Host code for your orders of less than $150 (this is the RETAIL total before Shipping & Handling), then you’ll have two options:

  1. You’ll need to call Stampin’ Up! (1-800-Stamp-Up) and ask them to add it for you. They’re very helpful and will get it done quickly!  OR….
  2. If your order was over the $50 threshold but under $150, then…you’ll forfeit that $10 ordering gift and rewards – this is the Bummer Option – and I REALLY don’t want to do this, SO please remember to add my Current Host Code.

*********************************************************************************************************

All The Little Things

Subscribe March 11 – April 10

Good things take time, but you can start creating them now with the All the Little Things Paper Pumpkin kit! This kit includes nine cards, three each of three designs, with elegant designs and bright colors. The iridescent foil is the shining detail to bring your crafts together. You can make a card for anyone and for any occasion!

And don’t wait, because anyone who subscribes to this month’s kit will get a FREE box organizer! This organizer fits perfectly inside your Paper Pumpkin box and is great for keeping your supplies from past kits organized, so you know right where everything is! 

This kit includes:

  • 9 cards, 3 each of 3 designs, and 9 coordinating envelopes.
  • 1 photopolymer stamp set with celebratory sentiments.
  • 1 Shaded Spruce Stampin’ Spot.
  • Precut cherry blossom paper pieces with iridescent foil.
  • Unique embellishments and twine.
  • Adhesives to complete the projects.
  • Final card size: 5-1/2” x 4-1/4” (14 x 10.8 cm). 
  • Coordinating Stampin’ Up! colors: Balmy Blue, Basic Black, Calypso Coral, Granny Apple Green, Petal Pink, Poppy Parade, Shaded Spruce.
  • FREE box organizer

Subscribe to the April Paper Pumpkin Kit between 11 March 2023 and 10 April 2023 by clicking here!

Note: Supplies may be limited toward the end of the subscription period.

*********************************************************************************************************

Card stock cuts for this project:

  • Basic White Cardstock 2″ X 6″ (flowers & sentiment), 4″ X 5 1/4″ (inner liner)
  • Evening evergreen Cardstock 4″ X 4″ (leaves)
  • Petal Pink Cardstock 4 1/8″ X 5 3/8″ (inner liner mat)
  • Soft Succulent Cardstock 8 1/2″ X 5 1/2″ (card base scored & folded at 4 1/4″), 4 1/4″ X 4″ (leaves)
  • Texture Chic Specialty Designer Series Paper 4 1/4″ X 5 1/2″ (card front), 3 1/4″ X 4 3/4″ (card front panel), 1 3/4″ X 1 3/4″ (flower outline), 2 1/4″ X 6″ (envelope flap)
  • Distressed Gold Paper 2″ X 4″ (outline flowers)
  • Fine Shimmer Paper 2 1/2″ X 1 1/4″ (leaves)
  • Vellum Paper 2″ X 2″ (flower)

*********************************************************************************************************

Product List

Stampin’ Up! Irresistible Blooms Fancy Fold

Good Friday morning my stamping friends welcome to my Fun Fold Friday. How was everyone’s week? Does anyone have plans for the weekend? I’ll be at work all day tomorrow and Sunday is our quarterly in person meeting.

Today’s card I made on my Facebook Live video on Wednesday. If you were able to join me or watched the replay, thank you. If you’d like to watch my video and stamp along, the measurements are below along with the links to my Facebook page and my YouTube channel. Here is my card for today.

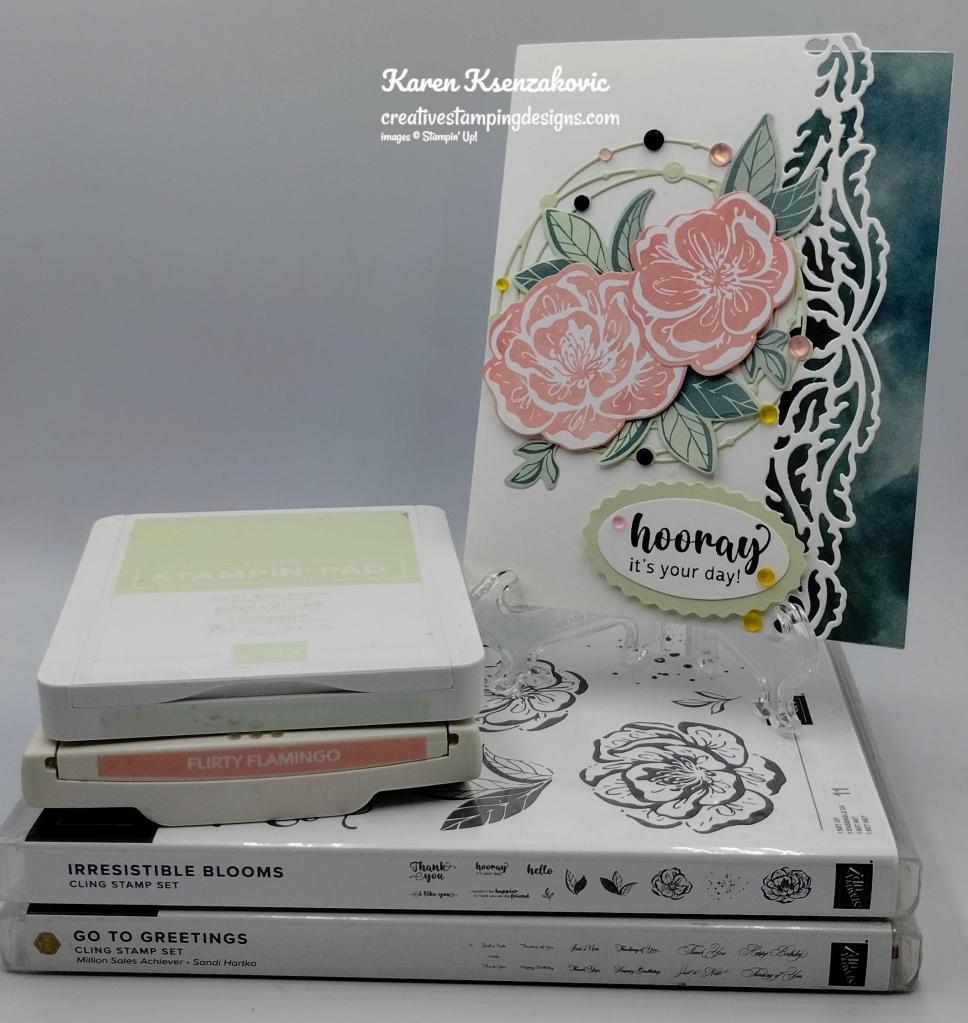
Stampin' Up! Irresistible Blooms Birthday 1 creativestampingdesigns.com

I used the Stampin’ Up! Irresistible Blooms Bundle along with the Stampin’ Up! Go To Greetings Cling Stamp Set, Hello Irresistible 6 X 6 Designer Series Paper and the Elegant Borders Dies for my card today. All the items except for the Go To Greetings set are Online Exclusive products. These items are not and will not be in any of the catalogs, they are only available to see and purchase on the Online Store.

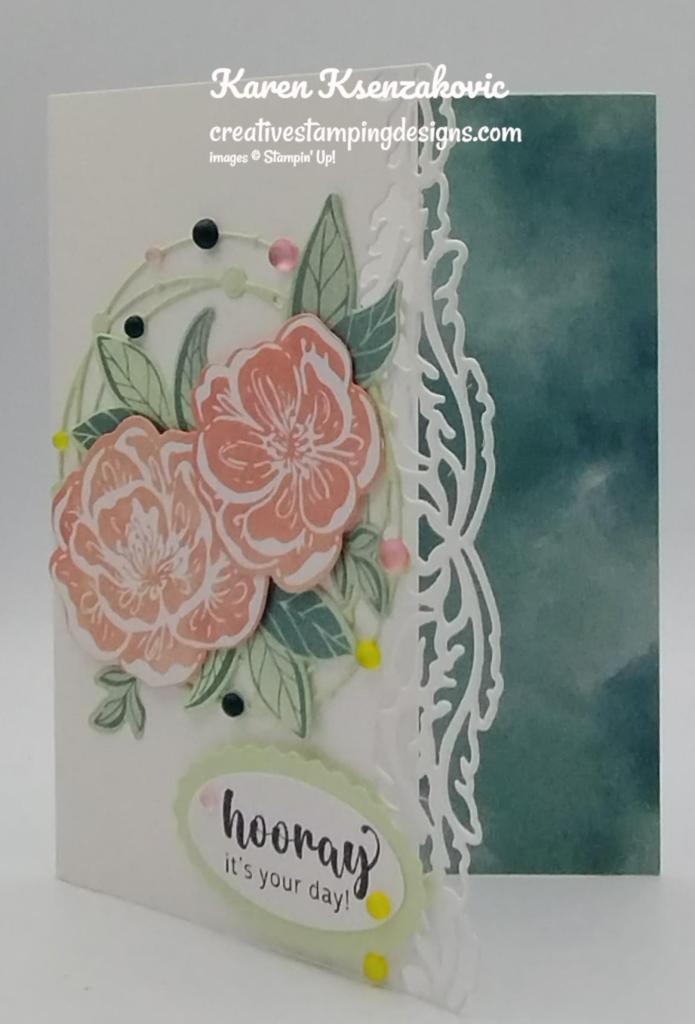
Stampin' Up! Irresistible Blooms Birthday 2 creativestampingdesigns.com

I started with a Thick Basic White card base and cut the front of the card base using one of the Elegant Borders Dies. I cut the dotted circle die from the Irresistible Blooms Dies from a panel of Soft Sea Foam cardstock. I adhered the dotted circle to the front of the card base using small amounts of Multipurpose Liquid Glue.

Stampin' Up! Irresistible Blooms Birthday 3 creativestampingdesigns.com

Using the Irresistible Blooms Dies, I cut the flowers and leaves from panels of Hello Irresistible DSP. I adhered the flowers to the card front using Stampin’ Dimensionals. I adhered the leaves under the flowers using Multipurpose Liquid Glue.

Stampin' Up! Irresistible Blooms Birthday 4 creativestampingdesigns.com

I stamped the sentiment from the Stampin’ Up! Irresistible Blooms Cling Stamp Set on a panel of Basic White cardstock in Tuxedo Black Ink. I cut the sentiment out using the Double Oval Punch. From a panel of Soft Sea Foam cardstock, I punched out the scalloped oval using the Double Oval Punch. I adhered the sentiment to the scalloped oval using Stampin’ Seal. I adhered the sentiment to the card front using Stampin’ Dimensionals. I added Loose Frosted Dots using tiny amounts of Multipurpose Liquid Glue.

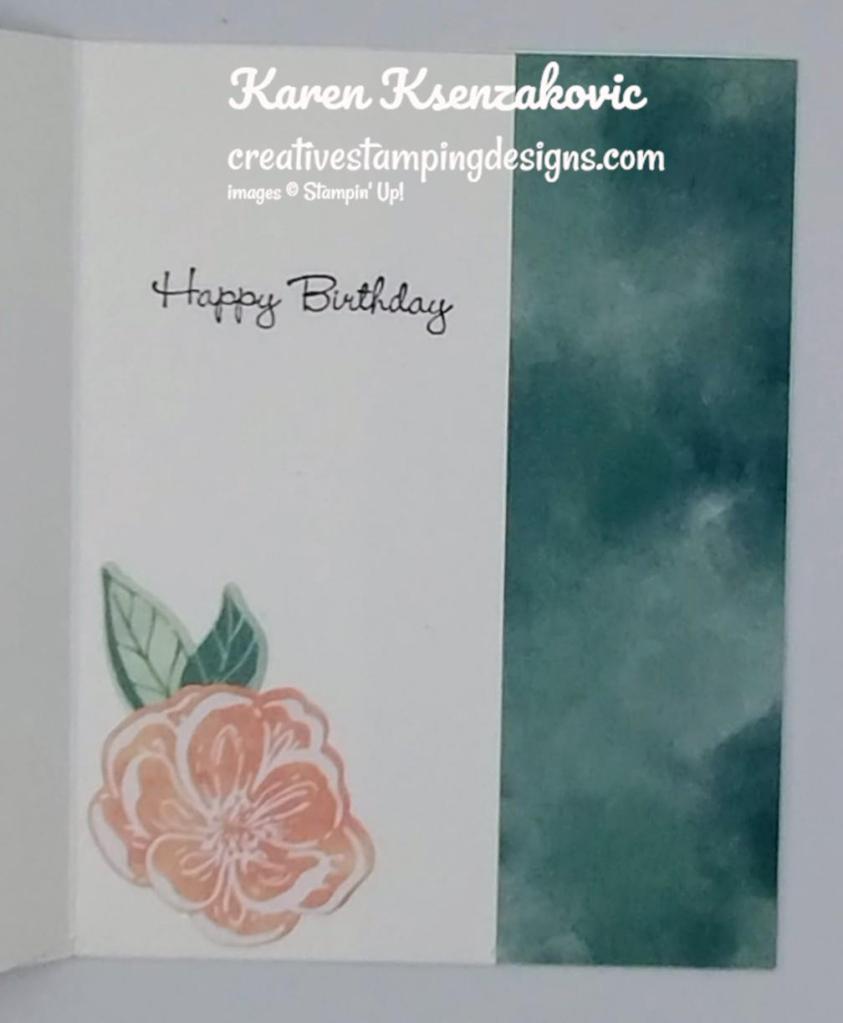
Stampin' Up! Irresistible Blooms Birthday 5 creativestampingdesigns.com

On the inside right of the card base I adhered a panel of Hello Irresistible DSP. On a panel of Basic White cardstock, I stamped the sentiment from the Go To Greetings stamp set in Tuxedo Black Ink. I adhered another die cut flower and leave from the Hello Irresistible DSP to the bottom of the panel using Multipurpose Liquid Glue. I adhered the Basic White panel to the inside of the Thick Basic White card base.

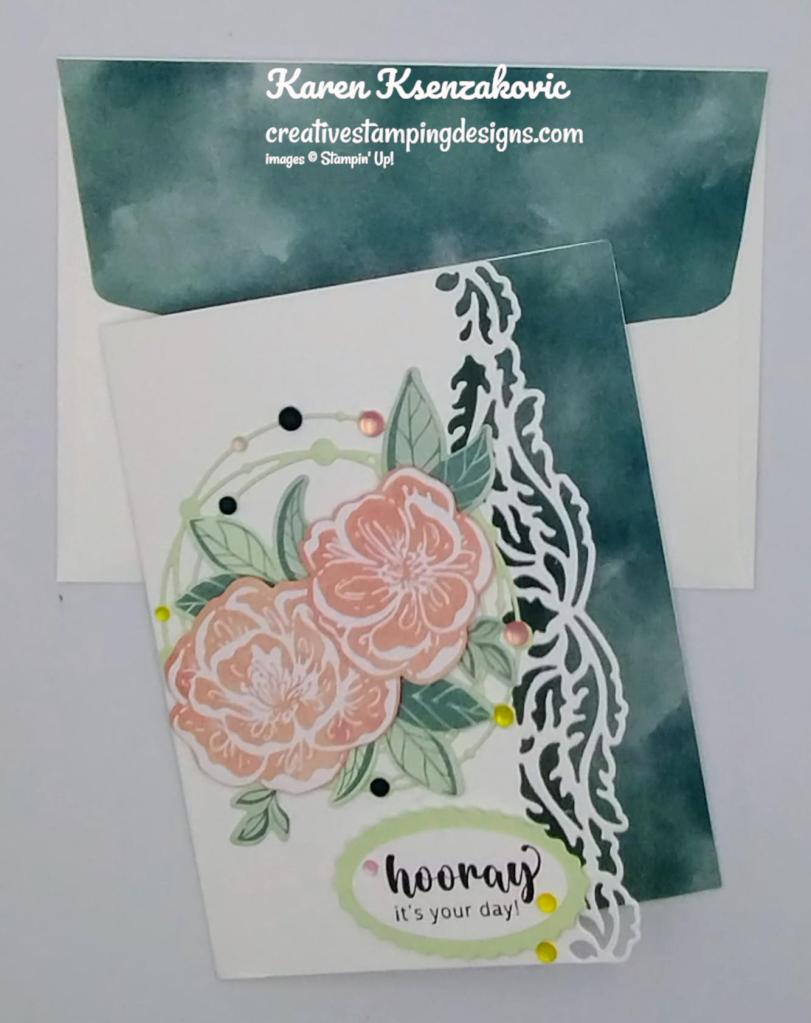
Stampin' Up! Irresistible Blooms Birthday 6 creativestampingdesigns.com

To finish my card, I decorated a Basic White Medium Envelope. I stamped the larger flower image from the Irresistible Blooms stamp set in Flirty Flamingo Ink on the envelope front. I stamped the leaf images from the Irresistible Bloom stamp set in Soft Sea Foam Ink by the flower. I adhered a panel of Hello Irresistible DSP to the envelope flap.

Stampin' Up! Irresistible Blooms Birthday 7 creativestampingdesigns.com

Thank you for stopping by my blog today. I hope you liked my card and will give it a try. I hope you will CASE this card and please feel free to post it in the comments of my Facebook page under my post. I’d love to see your take on the card. The list of measurements are below if you’d like to stamp along while watching the video. You can watch my video on my Facebook page Here.

You can also view the video on my YouTube channel Here. If you watch this on my YouTube channel, please remember to subscribe so that you will get notified when a new video goes live. I’m hoping to start doing YouTube lives soon, thanks to all that have subscribed. Happy Stamping!!

*********************************************************************************************************

If you need any stamping supplies, I’d love to be your Demonstrator. Just click HERE to go directly to my online store or drop me an email if you have any questions. 

MY CURRENT HOST CODE IS:    7KF3QB4G

Use this host code when placing an order with me. When you order $50 or greater you will receive a free gift from me! If your order is over $150, please do not use this code, but you’ll still get the free gift. The free gift is your choice of any 1 item valued up to $10.00 from the 2022-2023 Annual Catalog or the January-April 2023 Mini Catalog!  Unfortunately, packs of cardstock are no longer an option for a free gift. Shipping has become too expensive to ship and it’s costing me as much to ship as the cardstock costs. For any orders $50 or more I will also send you my monthly class tutorials.  Click HERE or go to my Customer Rewards for more details and to see what this month’s tutorials are.

Please remember to use my current Host Code and make sure that you can see my name on the final checkout page listed as your Demonstrator when you order so that you know that you’re ordering with me, and you’ll get my rewards! 

Happy Stamping, Karen

*********************************************************************************************************

In response to changing policies at Stampin’ Up – I’m adjusting my Ordering Gift policy as well.  I’m having to get a little more tough on the adding of Host codes when you place your order thru my Online Store.

Not to worry – you’re still going to get that $10 ordering gift for orders of $50 (before shipping & tax) or greater.  And the gift is still any 1 SU! product up to that $10 value – which includes some of our fun Host Sets!

But – if you DO NOT use the Host code for your orders of less than $150 (this is the RETAIL total before Shipping & Handling), then you’ll have two options:

  1. You’ll need to call Stampin’ Up! (1-800-Stamp-Up) and ask them to add it for you. They’re very helpful and will get it done quickly!  OR….
  2. If your order was over the $50 threshold but under $150, then…you’ll forfeit that $10 ordering gift and rewards – this is the Bummer Option – and I REALLY don’t want to do this, SO please remember to add my Current Host Code.

*********************************************************************************************************

Retirement List Updated

I’ve updated my retirement list. Did you miss out on a Sale-a-bration item that you really wanted. Visit my Retirement Sale List Here.

*********************************************************************************************************

Online Exclusives Now Available

Now available Stampin’ Up! Online Exclusive Products. Click Here for a printable PDF flyer with the items that will be available. There is so much more than what is on the flyer though. You’ll want to go to my Online Store to see it all.

*********************************************************************************************************

The Colorful Kaleidoscope Kit Now Available

Get ready for the latest addition to the Kits Collection by Stampin’ Up! The Colorful Kaleidoscope Kit is filled with geometric shapes and unique kaleidoscopic patterns. It’s time to give a card that no one will forget! 

This kit includes: 

  • 9 full-size cards, 3 each of 3 designs, measuring 4-1/4″ x 5-1/2″ (10.8 x 14 cm) and 9 coordinating envelopes.
  • One photopolymer stamp set with all-occasion sentiments that go beyond the basics.
  • One Gray Granite Stampin’ Spot.
  • 9 peek-through laser cuts that can easily be layered to create a kaleidoscopic effect.
  • Precut die cuts that are lined with gold foil, perfect for all your stamped sentiments.
  • Mini Stampin’ Dimensionals, Tear & Tape Adhesive, and Foam Adhesive Strips.
  • Gold, pearlized embellishments.
  • The coordinating colors are Bermuda Bay, Calypso Coral, Gray Granite, Night of Navy, and Petal Pink.
  • Each project takes less than 60 minutes to complete. 

Item #161804 $23.00 USD

*********************************************************************************************************

Ten Years Of Growth

Subscribe February 11 – March 10

It’s Paper Pumpkin’s 10-year anniversary and we want to celebrate how much we’ve grown! This month’s kit is all about happy greetings, organic and botanical designs digitally painted by our in-house artists, along with all-occasion sentiments to celebrate the happy moments in life and recognize the people around you who help you grow! 

And as part of our anniversary celebration, the March Paper Pumpkin Kit includes a FREE GIFT featuring a plant and pot builder to make all your projects plant-astic!

This kit includes:

  • All the supplies you need to create 9 cards: 3 each of 3 designs; and coordinating envelopes.
  • An all-occasion stamp set to recognize the people in your life who help you grow with greetings and beautiful botanical images.
  • 1 Polished Pink Classic Stampin’ Spot
  • Paper pieces and embellishments with digitally-painted designs and images.
  • Mini Stampin’ Dimensionals.
  • 1 FREE additional stamp set, which includes a plant and pot builder to make plant-astic projects!

Completed card size: 5-1/2″ x 4-1/4″ (14 x 10.8 cm)

Coordinating Stampin’ Up! colors: Shaded Spruce, Garden Green, Coastal Cabana, Orchid Oasis, Fresh Freesia, Polished Pink, Crumb Cake

Subscribe to the March Paper Pumpkin Kit between 11 February 2023 and 10 March 2023 by clicking here!

Note: Supplies may be limited toward the end of the subscription period.

*********************************************************************************************************

Card stock cuts for this project:

  • Basic White Cardstock 1 1/4″ X 1 2/4″ (sentiment), 2 1/2″ X 5 1/2″ (inner liner)
  • Basic White Thick Cardstock 8 1/2″ X 5 1/2″ (card base scored & folded at 4 1/4″)
  • Soft Sea Foam Cardstock 3 3/4″ X 3 3/4″ (dotted circle die), 1 3/4″ X 2 1/4″ (scalloped oval)
  • Hello Irresistible 6 X 6 Designer Series Paper 2 1/2″ X 5 1/2″ (inner liner panel), panel for flower and leave die cuts, 2 1/4″ X 6″ (envelope flap)

*********************************************************************************************************

Product List

Stampin’ Up! Sweet Citrus for The Happy Inkin’ Thursday Blog Hop

Good Thursday morning my stamping friends welcome to our Happy Inkin’ Thursday Blog Hop. If you are starting with me, thank you. I hope you will stop by everyone’s blog to see what they have created this week. If you are hopping over from Akiko’s blog, thank you for stopping by. This week we have Sketch Challenge and I thought I’d go a little tropical. Here is my card using this week’s sketch.

Stampin' Up! Sweet Citrus Coconut 1 creativestampingdesigns.com

I used the Stampin’ Up! Sweet Citrus Bundle along with the Stampin’ Up! Paradise Palms Photopolymer Stamp Set, Palm Dies, and 2022-2024 In-Color 6 X 6 Designer Series Paper for my card today.

This is our sketch for this week.

Stampin' Up! Sweet Citrus Coconut 2 creativestampingdesigns.com

I started by adhering a panel of the 2022-2024 In-Color DSP to a Tahitian Tide card base using Multipurpose Liquid Glue. I cut a panel of Basic White cardstock using the 4th largest Stitched Rectangle Dies. I embossed the rectangle using the Basics 3D Embossing Folder. I adhered the embossed panel to a Tahitian Tide mat using Multipurpose Liquid Glue. I adhered the layered panel to the card front using Stampin’ Dimensionals.

Stampin' Up! Sweet Citrus Coconut 3 creativestampingdesigns.com

On a panel of Basic White cardstock, I stamped the large image from the Stampin’ Up! Sweet Citrus Photopolymer Stamp Set in Soft Suede Ink. Using my Water Painter, I added some Smoky Slate Ink just to the center of the larger 2 images. I cut the images out using the Sweet Citrus Dies. On a panel of Basic White cardstock, I stamped the leaf image from the Sweet Citrus stamp set in Parakeet Party Ink 5 times. I stamped the flower images from the Sweet Citrus stamp set in Polished Pink Ink. I colored the flowers using the Pale Papaya Stampin’ Blends Markers. I cut all the images out using the Sweet Citrus Dies. From a panel of Parakeet Party cardstock, I cut 3 of the palms from the Palms Dies.

Stampin' Up! Sweet Citrus Coconut 4 creativestampingdesigns.com

I adhered the coconut images to the layered panel using Stampin’ Dimensionals. I adhered the leaves and palms under the coconuts using Multipurpose Liquid Glue. I adhered the flowers around the coconuts using Stampin’ Dimensionals. I added 2021-2023 In-Color Opal Rounds to the center of the flowers. On a strip of Basic White cardstock, I stamped the sentiment from the Sweet Citrus stamp set in Tahitian Tide Ink. I cut both ends of the strip into a banner using the Banner Pick A Punch. I adhered the sentiment to the card front using Stampin’ Dimensionals.

Stampin' Up! Sweet Citrus Coconut 5 creativestampingdesigns.com

On the inside, I stamped the sentiments from the Paradise Palms stamp set in Tahitian Tide Ink on a panel of Basic White cardstock. I stamped the flower image from the Sweet Citrus stamp set on either side of the sentiment in Polished Pink Ink and colored the flowers with the Pale Papaya Stampin’ Blends Markers. I stamped the ‘coconut’ image from the Sweet Citrus stamp set on the bottom of the panel in Soft Suede Ink. I added some Smoky Slate Ink in the center only of the image using my Water Painter. I stamped the leaf image from the Sweet Citrus stamp set by the coconut. I adhered the Basic White panel to a Tahitian Tide mat and then to the inside of the Tahitian Tide card base.

Stampin' Up! Sweet Citrus Coconut 6 creativestampingdesigns.com

To complete my card, I decorated a Basic White Medium Envelope. I stamped the ‘coconut’ image from the Sweet Citrus stamp set in Soft Suede Ink on the envelope front. I stamped the leaf image from the Sweet Citrus stamp set in Parakeet Party Ink by the coconut. I stamped the flower image from the Sweet Citrus stamp set in Polished Pink Ink on the bottom of the envelope front and colored them with the Pale Papaya Stampin’ Blends Markers. I adhered a panel of 2022-2024 In-Color DSP to the envelope flap.

Stampin' Up! Sweet Citrus Coconut 7 creativestampingdesigns.com

Thank you for stopping by my blog today. I hope you liked my card and will give it a try. Now that you’ve seen my card, take a minute to hop through and see everyone’s projects today. If you click on the Next Blog button, you’ll go to Tara’s page. Or you can just click on the names below to go directly to all their blogs! Happy Hopping!!

Amy Koenders:

Mary Deatherage:

Jaimie Babarczy:

Sue Prather:

Karen Finkle:

Akiko Sudano:

Karen Ksenzakovic: You Are Here

Tara Carpenter:

Terry Lynn Bright:

Carol Buckalew:

*********************************************************************************************************

If you need any stamping supplies, I’d love to be your Demonstrator. Just click HERE to go directly to my online store or drop me an email if you have any questions. 

MY CURRENT HOST CODE IS:    7KF3QB4G

Use this host code when placing an order with me. When you order $50 or greater you will receive a free gift from me! If your order is over $150, please do not use this code, but you’ll still get the free gift. The free gift is your choice of any 1 item valued up to $10.00 from the 2022-2023 Annual Catalog or the January-April 2023 Mini Catalog!  Unfortunately, packs of cardstock are no longer an option for a free gift. Shipping has become too expensive to ship and it’s costing me as much to ship as the cardstock costs. For any orders $50 or more I will also send you my monthly class tutorials.  Click HERE or go to my Customer Rewards for more details and to see what this month’s tutorials are.

Please remember to use my current Host Code and make sure that you can see my name on the final checkout page listed as your Demonstrator when you order so that you know that you’re ordering with me, and you’ll get my rewards! 

Happy Stamping, Karen

*********************************************************************************************************

In response to changing policies at Stampin’ Up – I’m adjusting my Ordering Gift policy as well.  I’m having to get a little more tough on the adding of Host codes when you place your order thru my Online Store.

Not to worry – you’re still going to get that $10 ordering gift for orders of $50 (before shipping & tax) or greater.  And the gift is still any 1 SU! product up to that $10 value – which includes some of our fun Host Sets!

But – if you DO NOT use the Host code for your orders of less than $150 (this is the RETAIL total before Shipping & Handling), then you’ll have two options:

  1. You’ll need to call Stampin’ Up! (1-800-Stamp-Up) and ask them to add it for you. They’re very helpful and will get it done quickly!  OR….
  2. If your order was over the $50 threshold but under $150, then…you’ll forfeit that $10 ordering gift and rewards – this is the Bummer Option – and I REALLY don’t want to do this, SO please remember to add my Current Host Code.

*********************************************************************************************************

Online Exclusives Now Available

Now available Stampin’ Up! Online Exclusive Products. Click Here for a printable PDF flyer with the items that will be available. There is so much more than what is on the flyer though. You’ll want to go to my Online Store to see it all.

*********************************************************************************************************

The Colorful Kaleidoscope Kit Now Available

Get ready for the latest addition to the Kits Collection by Stampin’ Up! The Colorful Kaleidoscope Kit is filled with geometric shapes and unique kaleidoscopic patterns. It’s time to give a card that no one will forget! 

This kit includes: 

  • 9 full-size cards, 3 each of 3 designs, measuring 4-1/4″ x 5-1/2″ (10.8 x 14 cm) and 9 coordinating envelopes.
  • One photopolymer stamp set with all-occasion sentiments that go beyond the basics.
  • One Gray Granite Stampin’ Spot.
  • 9 peek-through laser cuts that can easily be layered to create a kaleidoscopic effect.
  • Precut die cuts that are lined with gold foil, perfect for all your stamped sentiments.
  • Mini Stampin’ Dimensionals, Tear & Tape Adhesive, and Foam Adhesive Strips.
  • Gold, pearlized embellishments.
  • The coordinating colors are Bermuda Bay, Calypso Coral, Gray Granite, Night of Navy, and Petal Pink.
  • Each project takes less than 60 minutes to complete. 

Item #161804 $23.00 USD

*********************************************************************************************************

Ten Years Of Growth

Subscribe February 11 – March 10

It’s Paper Pumpkin’s 10-year anniversary and we want to celebrate how much we’ve grown! This month’s kit is all about happy greetings, organic and botanical designs digitally painted by our in-house artists, along with all-occasion sentiments to celebrate the happy moments in life and recognize the people around you who help you grow! 

And as part of our anniversary celebration, the March Paper Pumpkin Kit includes a FREE GIFT featuring a plant and pot builder to make all your projects plant-astic!

This kit includes:

  • All the supplies you need to create 9 cards: 3 each of 3 designs; and coordinating envelopes.
  • An all-occasion stamp set to recognize the people in your life who help you grow with greetings and beautiful botanical images.
  • 1 Polished Pink Classic Stampin’ Spot
  • Paper pieces and embellishments with digitally-painted designs and images.
  • Mini Stampin’ Dimensionals.
  • 1 FREE additional stamp set, which includes a plant and pot builder to make plant-astic projects!

Completed card size: 5-1/2″ x 4-1/4″ (14 x 10.8 cm)

Coordinating Stampin’ Up! colors: Shaded Spruce, Garden Green, Coastal Cabana, Orchid Oasis, Fresh Freesia, Polished Pink, Crumb Cake

Subscribe to the March Paper Pumpkin Kit between 11 February 2023 and 10 March 2023 by clicking here!

Note: Supplies may be limited toward the end of the subscription period.

*********************************************************************************************************

Card stock cuts for this project:

  • Basic White Cardstock 3 – 4″ X 5 1/4″ (artwork & inner liner), 3 1/2″ X 5″ (embossed panel), 1/2″ X 4″ (sentiment)
  • Tahitian Tide Cardstock 8 1/2″ X 5 1/2″ (card base scored & folded at 4 1/4″), 3 1/8″ X 4 1/8″ (embossed panel mat), 4 1/8″ X 5 3/8″ (inner liner mat)
  • Parakeet Party Cardstock 3″ X 4″ (palms)
  • 2022-2024 In-color 6 X 6 Designer Series Paper 4 1/4″ X 5 1/2″ (card front), 2 1/4″ x 6″ (envelope flap)

*********************************************************************************************************

Product List

Stampin’ Up! In The Country CAS Masculine

Good Sunday morning my stamping friends. Hope your weekend is going well. Before I get going with my card, I just want to remind everyone that Sale-a-bration ends Tuesday, that’s just 2 more sleeps away. If you haven’t gotten everything that you wanted from Sale-a-bration now is a great time to get that order in. Also, I want to remind you that the 2021-2023 In-Colors will be retiring in April. Don’t wait to stock up on the Cardstock, Stampin’ Write Markers, Stampin’ Blends, Ribbons, Embellishments, etc. Stock up now and get some FREE items at the same time.
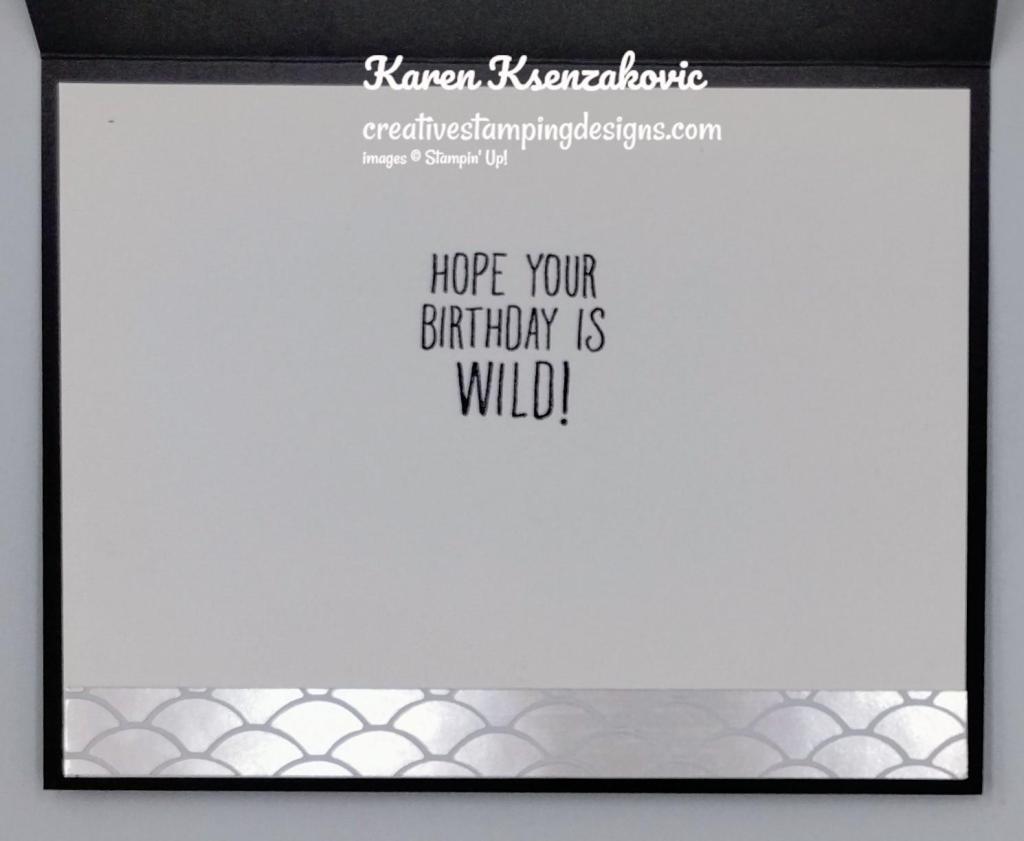
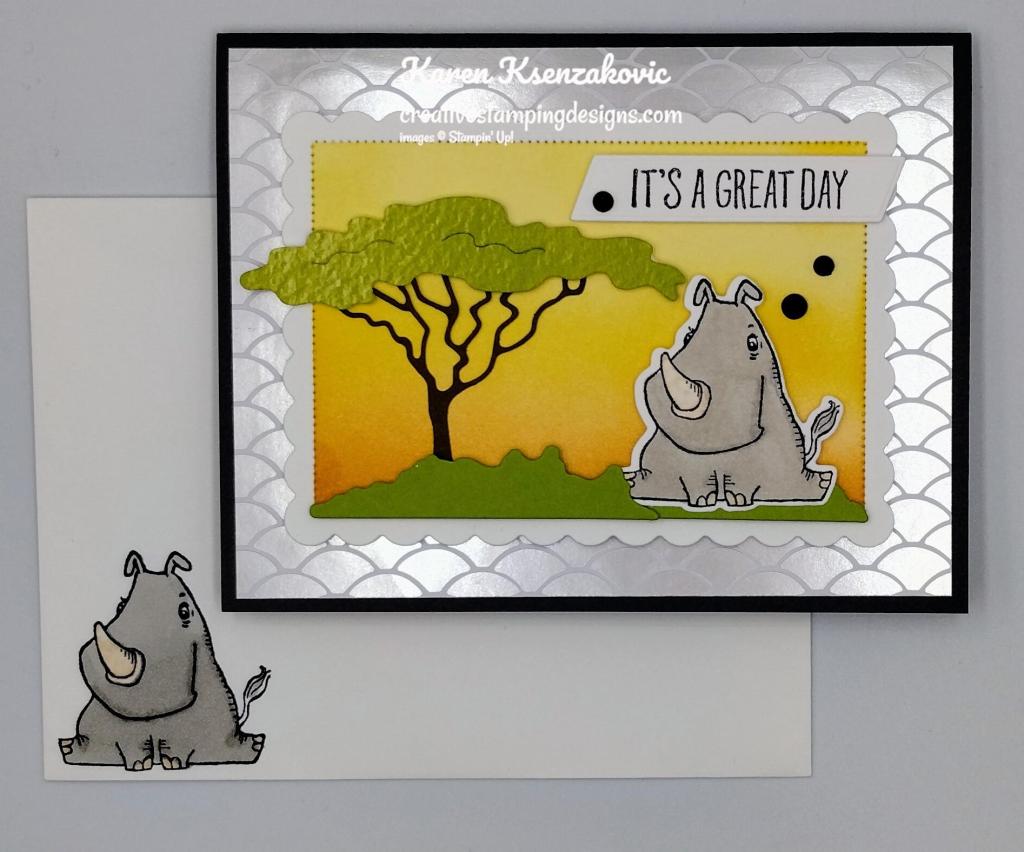
I have a super quick card for you today and it’s a masculine one. I don’t know about you, but I struggle with masculine cards all the time. I don’t have the need for many, and I avoid making them. This Sale-a-bration set, that will only be available until Tuesday February 28th makes a perfect masculine card. Here’s my card for today.

Stampin' Up! In The Country CAS 1 creativestampingdesigns.com

I used the Stampin’ Up! In The Country Cling Stamp Set and the Stampin’ Up! Inspired Thoughts Cling Stamp Set along with the Neutrals 6 X 6 Designer Series Paper for my card today.

Stampin' Up! In The Country CAS 2 creativestampingdesigns.com

I started by adhering a panel of Neutrals DSP to a Basic Gray card base using Multipurpose Liquid Glue. On a panel of Basic White cardstock I stamped the country road image from the In The Country stamp set in Basic Gray Ink.

Stampin' Up! In The Country CAS 3 creativestampingdesigns.com

Using the largest die from the Fabulous Frames Dies, I cut a panel of Basic White and Basic Gray cardstock. I only needed the inner piece from the Basic Gray die cut. I adhered the stamped image to the Basic Gray mat using Stampin’ Seal.

Stampin' Up! In The Country CAS 4 creativestampingdesigns.com

I adhered the Basic White frame to the card front using Stampin’ Dimensionals. I adhered the layered panel to the inside of the frame using Multipurpose Liquid Glue.

Stampin' Up! In The Country CAS 5 creativestampingdesigns.com

On the inside, I stamped the sentiment from the Inspired Thoughts stamp set in Basic Gray Ink on a panel of Basic White. I adhered a strip of the Neutrals DSP to the bottom of the panel using Stampin’ Seal. I adhered the Basic White panel to a Basic Gray mat then to the inside of the Basic Gray card base.

Stampin' Up! In The Country CAS 6 creativestampingdesigns.com

To finish my card, I decorated a Basic White Medium Envelope. I stamped the country road image from the In The Country stamp set in Basic Gray Ink on the envelope front. I adhered a panel of Neutrals DSP to the envelope flap.

Stampin' Up! In The Country CAS 7 creativestampingdesigns.com

Thank you for stopping by my blog today. I hope you like my card and will give it a try. Happy Stamping!!

*********************************************************************************************************

If you need any stamping supplies, I’d love to be your Demonstrator. Just click HERE to go directly to my online store or drop me an email if you have any questions. 

MY CURRENT HOST CODE IS:    7KF3QB4G

Use this host code when placing an order with me. When you order $50 or greater you will receive a free gift from me! If your order is over $150, please do not use this code, but you’ll still get the free gift. The free gift is your choice of any 1 item valued up to $10.00 from the 2022-2023 Annual Catalog or the January-April 2023 Mini Catalog!  Unfortunately, packs of cardstock are no longer an option for a free gift. Shipping has become too expensive to ship and it’s costing me as much to ship as the cardstock costs. For any orders $50 or more I will also send you my monthly class tutorials.  Click HERE or go to my Customer Rewards for more details and to see what this month’s tutorials are.

Please remember to use my current Host Code and make sure that you can see my name on the final checkout page listed as your Demonstrator when you order so that you know that you’re ordering with me, and you’ll get my rewards! 

Happy Stamping, Karen

*********************************************************************************************************

In response to changing policies at Stampin’ Up – I’m adjusting my Ordering Gift policy as well.  I’m having to get a little more tough on the adding of Host codes when you place your order thru my Online Store.

Not to worry – you’re still going to get that $10 ordering gift for orders of $50 (before shipping & tax) or greater.  And the gift is still any 1 SU! product up to that $10 value – which includes some of our fun Host Sets!

But – if you DO NOT use the Host code for your orders of less than $150 (this is the RETAIL total before Shipping & Handling), then you’ll have two options:

  1. You’ll need to call Stampin’ Up! (1-800-Stamp-Up) and ask them to add it for you. They’re very helpful and will get it done quickly!  OR….
  2. If your order was over the $50 threshold but under $150, then…you’ll forfeit that $10 ordering gift and rewards – this is the Bummer Option – and I REALLY don’t want to do this, SO please remember to add my Current Host Code.

*********************************************************************************************************

Coming on March 1, 2023, Stampin’ Up! is going to be having Online Exclusive Products and the first will be available starting March 1st. Click Here for a printable PDF flyer with the items that will be available. If you like what you see, there is a way you can get them NOW. If you join Stampin’ Up! before the end of February, you can either add the items to your starter kit, or you can pre-order them once you join. This is just one of the perks of being a demonstrator.

Final Days of Stampin’ Up!’s Amazing Joining Special – Ends February 28

Stampin’ Up! has an amazingly awesome joining special. You get to choose what you want. All the options ship for free and include a past Paper Pumpkin Kit along with some business supplies in case you want to make this a business. There is No Obligation to sell, you do NOT have to use this as a business, you can join just to enjoy the discount for yourself. I would LOVE to have you on my team. Join as a hobby demonstrator and enjoy all the benefits of a business demonstrator.

Option #1 This exclusive Boho Blue Mini Stampin’ Cut & Emboss Machine ($63 value) + Your choice of $175 of Stampin’ Up! products for only $129.00. The Boho Blue is one of the new In-Colors coming for 2023-2025.

Option #2 The original White Mini Stampin’ Cut & Emboss Machine (a $63 value), + Your choice of $175 of Stampin’ Up! products for only $129.00

Option #3. Your choice of $175 of Stampin’ Up! products for only $99.00.

If you have a LONG shopping list, this is a great way to get everything you always want at a discount. Enjoy at least a 20% discount on the products you purchase. Why wait, this is such an awesome deal, and it only sticks around until February 28th. Join now and start enjoying that discount right away!!! Contact me at creativestampingdesigns@gmail.com and we can talk about you joining. We have people on our team from all over the United States. We get together monthly via Zoom; we have team Facebook pages where we share what we make and ask questions. This was one of the best decisions I’ve ever made, I’ve made a lot of new friends from all over.

*********************************************************************************************************

Ten Years Of Growth

Subscribe February 11 – March 10

It’s Paper Pumpkin’s 10-year anniversary and we want to celebrate how much we’ve grown! This month’s kit is all about happy greetings, organic and botanical designs digitally painted by our in-house artists, along with all-occasion sentiments to celebrate the happy moments in life and recognize the people around you who help you grow! 

And as part of our anniversary celebration, the March Paper Pumpkin Kit includes a FREE GIFT featuring a plant and pot builder to make all your projects plant-astic!

This kit includes:

  • All the supplies you need to create 9 cards: 3 each of 3 designs; and coordinating envelopes.
  • An all-occasion stamp set to recognize the people in your life who help you grow with greetings and beautiful botanical images.
  • 1 Polished Pink Classic Stampin’ Spot
  • Paper pieces and embellishments with digitally-painted designs and images.
  • Mini Stampin’ Dimensionals.
  • 1 FREE additional stamp set, which includes a plant and pot builder to make plant-astic projects!

Completed card size: 5-1/2″ x 4-1/4″ (14 x 10.8 cm)

Coordinating Stampin’ Up! colors: Shaded Spruce, Garden Green, Coastal Cabana, Orchid Oasis, Fresh Freesia, Polished Pink, Crumb Cake

Subscribe to the March Paper Pumpkin Kit between 11 February 2023 and 10 March 2023 by clicking here!

Note: Supplies may be limited toward the end of the subscription period.

*********************************************************************************************************

Card stock cuts for this project:

  • Basic White Cardstock 2 – 4″ X 5 1/4″ (frame & inner liner), 2 3/4″ X 4″ (artwork)
  • Basic Gray Cardstock 8 1/2″ X 5 1/2″ (card base scored & folded at 4 1/4″), 4″ X 5 1/4″ (artwork mat cut down), 4 1/8″ X 5 3/8″ (inner liner mat)
  • Neutrals 6 X 6 Designer Series Paper 4 1/4″ X 5 1/2″ (card front), 1/2″ X 5 1/4″ (inner liner strip), 2 1/4″ X 6″ (envelope flap)

*********************************************************************************************************

Product List