
Good Monday morning my fellow stampers. How was everyone’s weekend? Did anyone do anything fun? I actually had a really fun day at work Saturday. The group that I work with are always a lot of fun. As busy as it was with our bucket sale going on, we laughed and had a really good time which made the day fly by. Sunday I was able to get some crafting time in, which is always relaxing for me.
For today’s card I used the Triple Time Technique for you Here’s my card.

My card played along with the Color Throwdown Challenge #554. Here are their colors.

I started by layering the 3 Whisper White panels of cardstock together with the tiniest amount of Snail just so that they would stay in place while I was stamping. I first stamped the sentiment from the Stampin’ Up New Wonders Host Exclusive Cling Stamp Set in Tuxedo Black Memento Ink in the center of the smallest Whisper White panel. I then stamped the 1st part of the sunflower from the Stampin’ Up Painted Harvest Photopolymer Stamp Set randomly around using Real Red Ink that I stamped off once. I then stamped the 2nd part of the flower from the Painted Harvest stamp set in Cherry Cobbler Ink on top of the 1st part of the flower.

I stamped all the centers of the flowers from the Painted Harvest stamp set in Crumb Cake Ink. I stamped the seed image from the Painted Harvest stamp set in Crumb Cake Ink in the center of each flower. I stamped the 1st part of the leaf image from the Painted Harvest stamp set in Old Olive Ink randomly around the layered panels. I stamped the 2nd part of the leaf image from the Painted Harvest stamp set in Old Olive Ink on top of the 1st image stamping off once. I carefully took the panels apart and adhered the small and medium one to a Cherry Cobbler mat using Snail. I adhered all the layered panels together, making sure to line up the flowers and leaves, using Snail.

I wrapped a piece of Linen Thread around the card front 3 times and tied a knot. With another piece of Linen Thread I made a double bow and adhered it to the card front using a Glue Dot. I colored a few Rhinestone Basic Jewels using my Dark Basic Black Stampin’ Blends Marker and adhered them to the smallest panel. I adhered the card front to a Crumb Cake card base using Stampin’ Dimensionals.

On the inside I stamped a few more flowers and leaves from the Painted Harvest stamp set the same as I did for the card front on a Whisper White panel. I adhered the Whisper White panel to a Cherry Cobbler mat using Snail and adhered it to the inside of the Crumb Cake card base using Multipurpose Liquid Glue. I did not use a sentiment on the inside so that I could write my own thank you.


To finish my card off I decorated a Medium Whisper White Envelope. I stamped the flowers and leaves from the Painted Harvest stamp set on the front of the envelope and the envelope flap the same as I did for the card front.
Thank you for stopping by my blog today. I hope you liked my card and will give it a try. Happy Stamping!!
****************************************************************************************************
If you need any stamping supplies, I’d be very happy to be your Demonstrator. Just click HERE to go directly to my online store or drop me an email if you have any questions.
MY CURRENT HOST CODE IS: 66KPP6BN
For any orders $50 or more I will send you my monthly class tutorials. Click HERE or go to my Customer Rewards to see what this months tutorials are.
Click HERE to shop the clearance rack.
Happy Stamping, Karen!
****************************************************************************************************
IT’S TIME TO REDEEM THOSE COUPONS YOU RECEIVED IN JULY. IF YOU HAVE QUESTIONS ON HOW TO REDEEM THEM, PLEASE CONTACT ME.

****************************************************************************************************
EXTRA, EXTRA!! JOINING PROMOTION JULY 1, 2019 – AUGUST 31, 2019

From July 1 until August 31, new demonstrators will receive an additional $30 to put toward bonus products in their Starter Kit (for a total of $155 in merchandise for $99)!! THEN, they’ll receive a $10 coupon code the following month. Are you interested? Keep reading to learn more!
Dates: July 1 – August 31 at 11:50 PM MT
Details:
- The bonus at initial sign up allows demonstrators to pick $30 more than usual. You will pay $99 to sign up and choose $155 worth of Stampin’ Up! products in your Starter Kit.
- Coupon codes will be sent between the fifth and seventh business day of the following month the new demonstrator signs up.
- The email address listed in a new demonstrator’s profile will be used to send the $10 coupon code.
- Coupon codes may be redeemed only once.
- Coupon codes expire October 31, 2019; after this date, they will no longer be valid.
- New demonstrators who submit their Independent Demonstrator Agreement (IDA) before July 1 or after August 31 will not be eligible for this promotion.
If you’ve ever considered purchasing that Starter Kit, now is a great time! We’d love to have you join and get that discount for yourself or start your own business!!
If you are interested in joining my team click HERE for details or email me. I’d love to have you on my team.
****************************************************************************************************
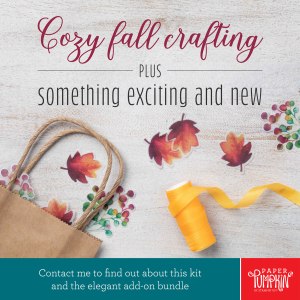
Subscribe for the August kit from July 11–August 10

What’s the old saying? Variety is the spice of life? At Paper Pumpkin, we like to mix things up and keep our customer’s crafting experience fresh and fun. We plan each kit carefully, allowing them to check as many creative boxes as possible while keeping our projects simple—so they can explore the world of paper crafting with confidence. With this in mind, we are bringing an elegant fall gift packaging kit to Paper Pumpkin fans this August.
Now, it’s no secret that our subscribers love cardmaking. So when we offer treat or gift packaging, you generally like to make a few card alternates with the kit. That’s why THIS month we decided to bring you the best of both worlds with the Gift of Fall Add-On Bundle. This coordinating product will allow you to turn your Gift of Fall gift packaging into cards in an easy and inexpensive way.
- The August kit includes 6 gift bags and 12 gift tags. To receive this kit you must subscribe by August 10.
- The Gift of Fall Add-On Bundle is a separate purchase for those who would like to convert their August Paper Pumpkin kit into cards.
- The Gift of Fall Add-On Bundle card designs offer a great sneak of the designs and elements to come in the August kit.
- Once you have completed the August kit, you will have extra kit components so you can easily combine them with the add-on without having to purchase additional kits.
- Just as you would with any other Stampin’ Up! product, you will need to purchase the add-on bundle via OEX or the online store. You will not be able to add it to a Paper Pumpkin subscription purchase.
- The price for the add-on bundle is $10.00 usd/$13.00 cad and is available for Paper Pumpkin subscribers only. This add-on is available beginning August 1, while supplies last!
- The add-on bundle is a cash and carry item
- Click Here to subscribe. Supplies may be limited toward the end of the subscription period.
Click HERE for a sneak peek of the August Paper Pumpkin Kit.
August Kit Information
Makes 6 fall-themed gift bags
Makes 12 fall-themed gift tags
Coordinating colors: Blackberry Bliss, Calypso Coral, Crumb Cake, Crushed Curry, Merry Merlot, Mint Macaron, Old Olive, Pretty Peacock, and Soft Suede
Add-On Information
Gift of Fall Add-On Bundle (item 152885)
Price: $10.00 usd/$13.00 cad
Includes 24 card bases of 2 different designs with coordinating envelopes (note card size)
Available August 1, while supplies last
Purchase via my online store
Not included with an August Paper Pumpkin subscription
Important note: The Gift of Fall Add-On Bundle is not needed to complete the August kit projects.
****************************************************************************************************

I have gathered up a lot of retired Stamp Sets, Embossing Folders & Dies and put a list together for anyone interested. I have single Stamp Sets along with Stamp Sets bundled with Dies or Punches. Take a look and see if there is anything that you missed out on getting and would still like. Click Here to go to my list.
****************************************************************************************************
Card stock cuts for this project:
- Cherry Cobbler Cardstock 3 1/2″ X 4 1/2″, 2 1/4″ X 3 1/2″ (artwork mats), 4 1/8″ X 5 3/8″ (inner liner mat)
- Crumb Cake Cardstock 4 1/4″ X 11″ (card base scored and folded at 5 1/2″)
- Whisper White Cardstock 2 – 4″ X 5 1/4″(artwork and inner liner), 3″ X 4 1/4″ & 2″ X 3 1/4″ (artwork)
****************************************************************************************************
Product List


 Designer Series Paper")


 Flax Ribbon")


 Vellum Cardstock")


