
Good Saturday morning stamping friends and welcome to the weekend. I hope you are starting to make some plans for the weekend. I’ll be working all day today and I’m guessing it won’t be too busy since it’s supposed to be a rainy day again.
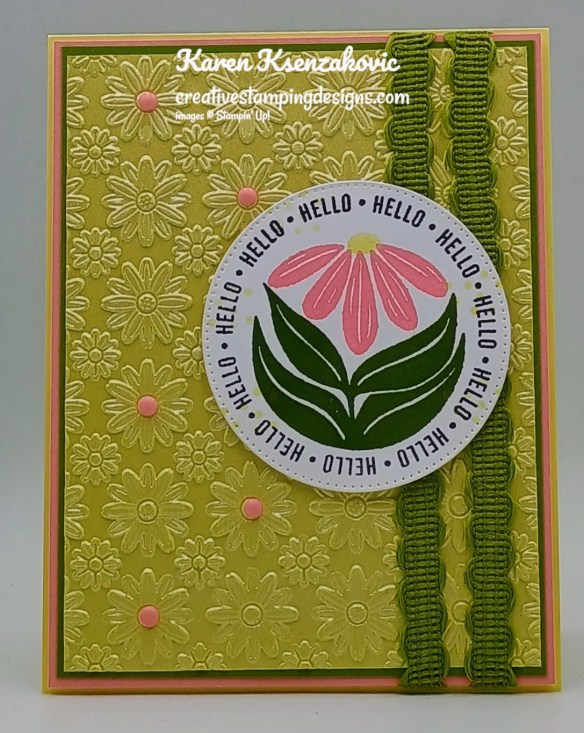
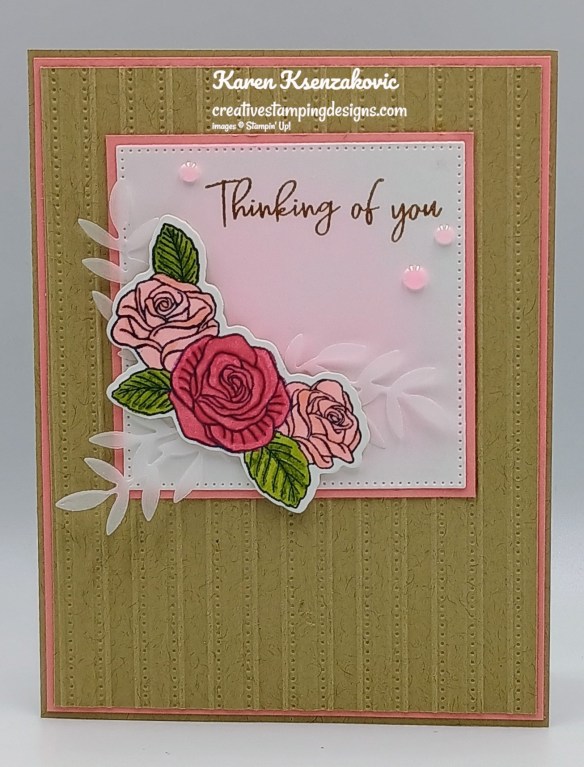
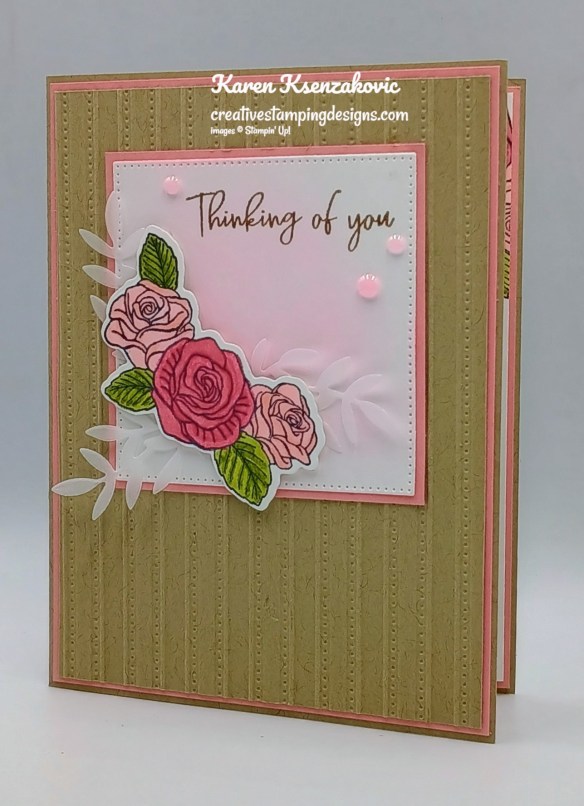
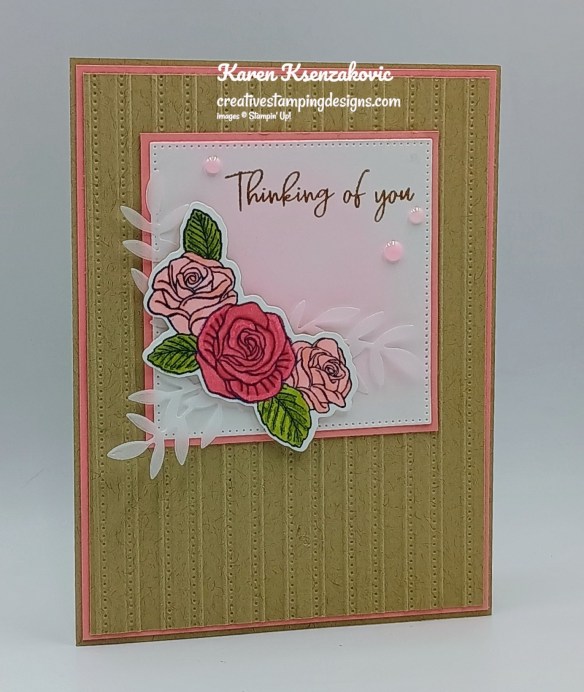
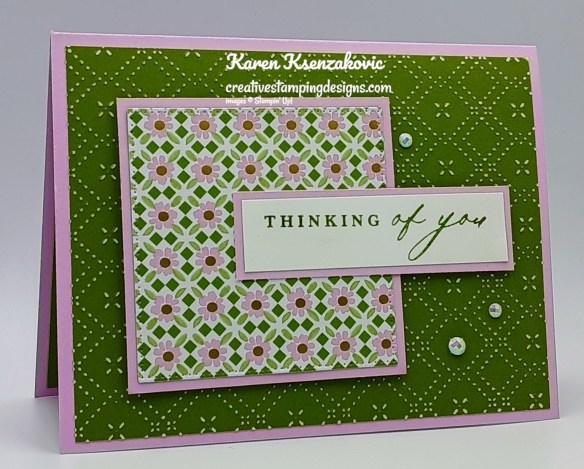
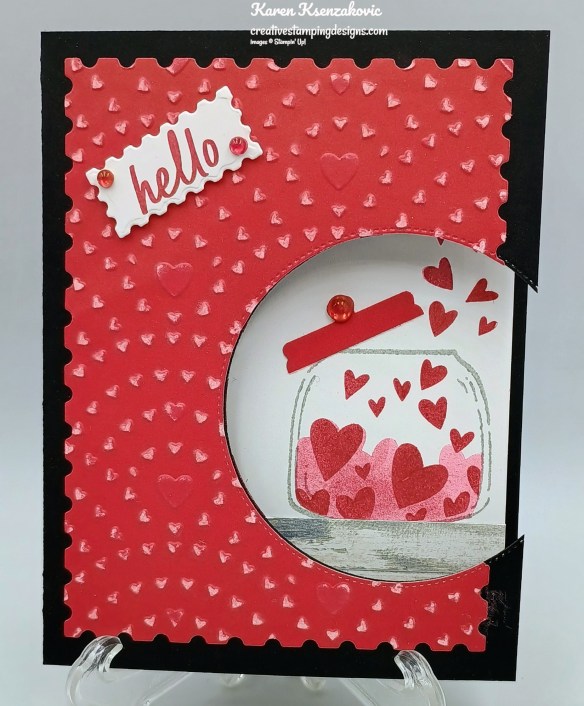
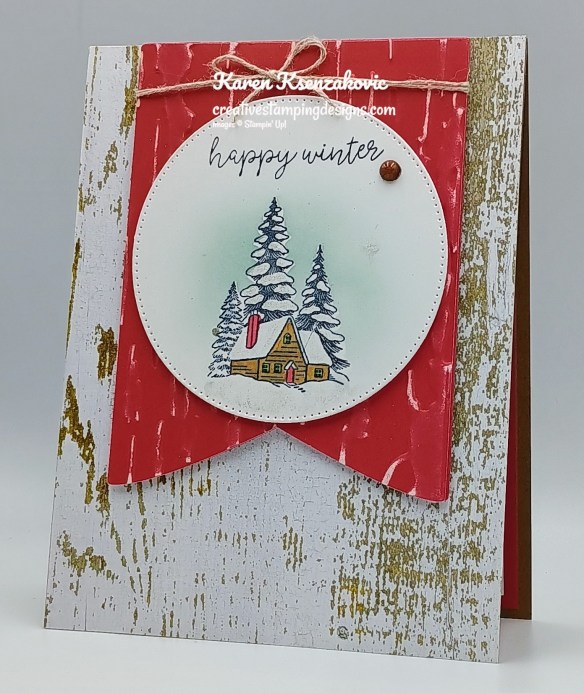
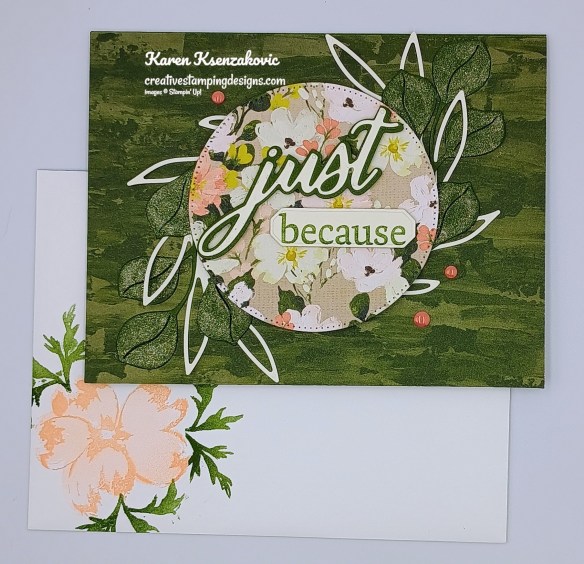
I played with some new Online Exclusive sets for today’s card doing a simple and fun technique If you’d like to see a quick video on how I made this card, Click Here to go to my Instagram Reels. Here is my card for today.
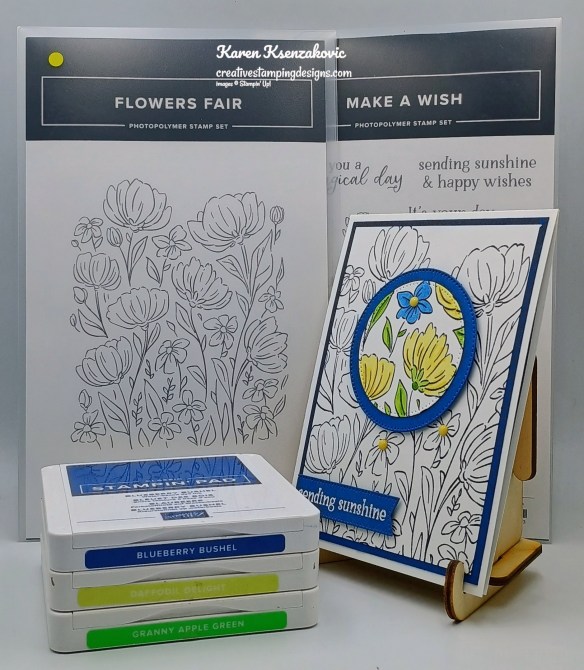
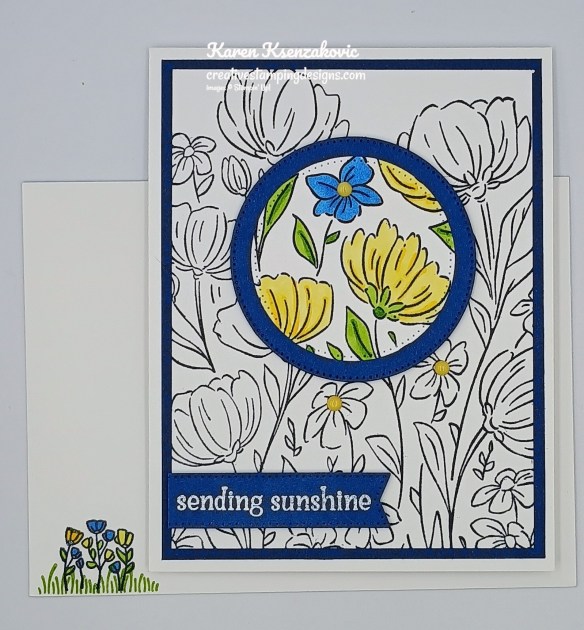
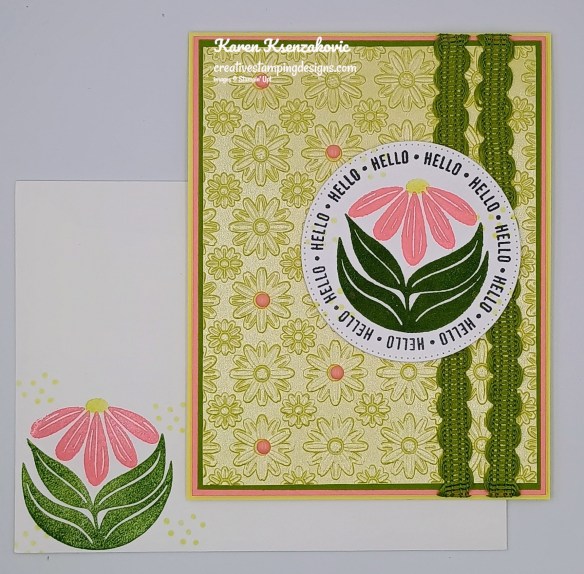
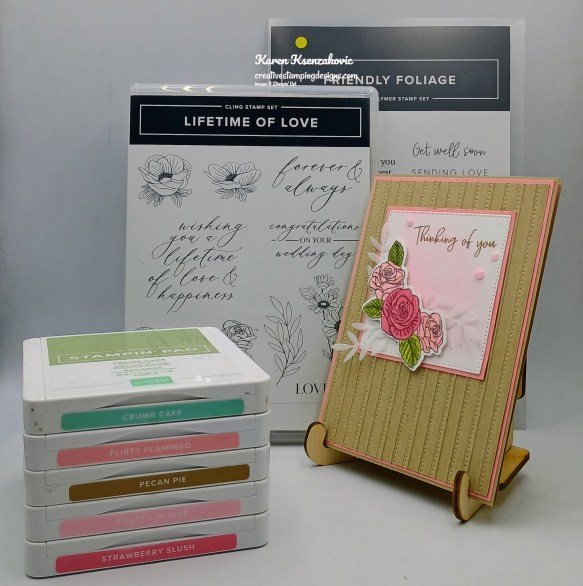
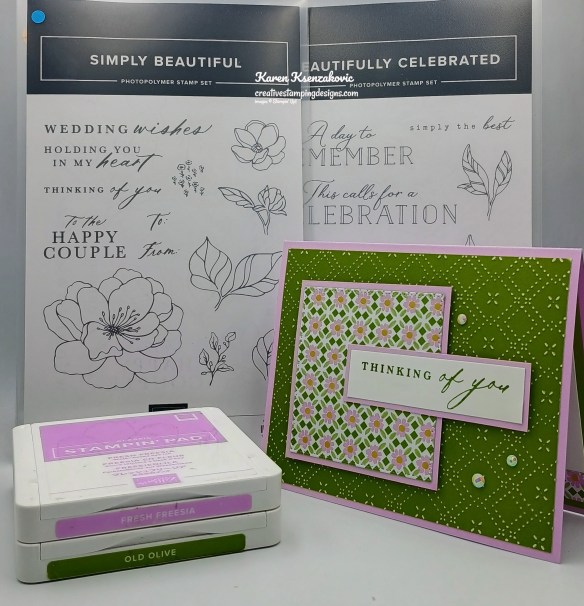
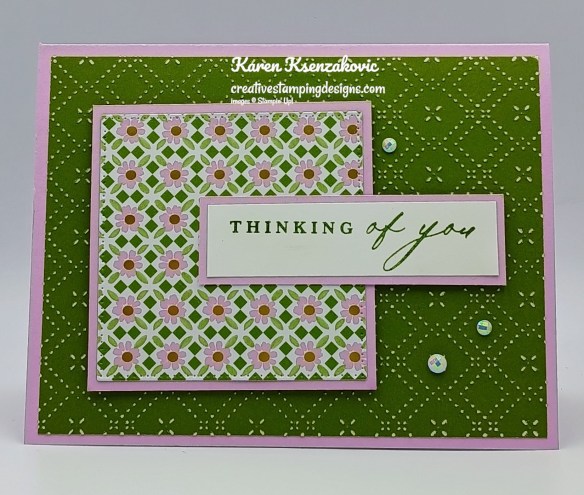
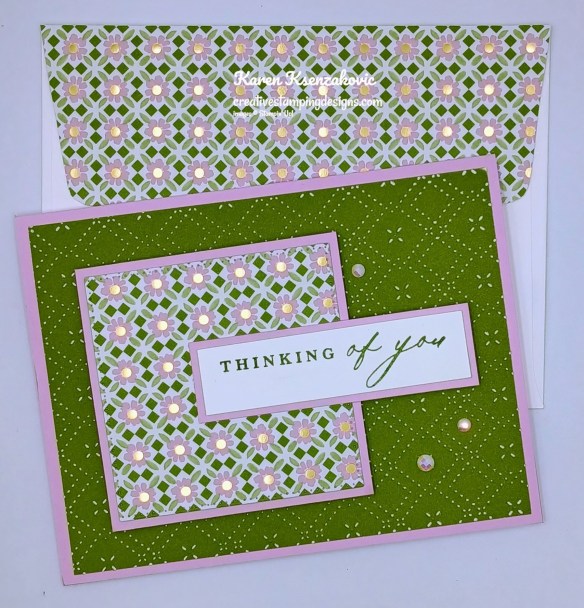
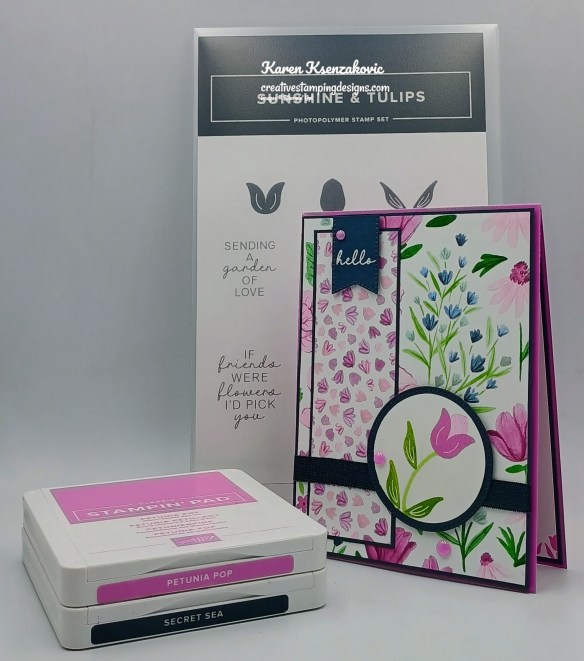
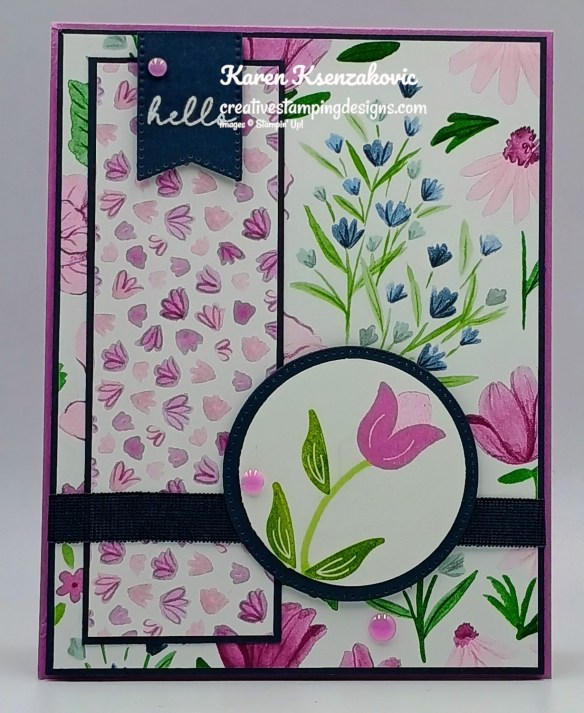
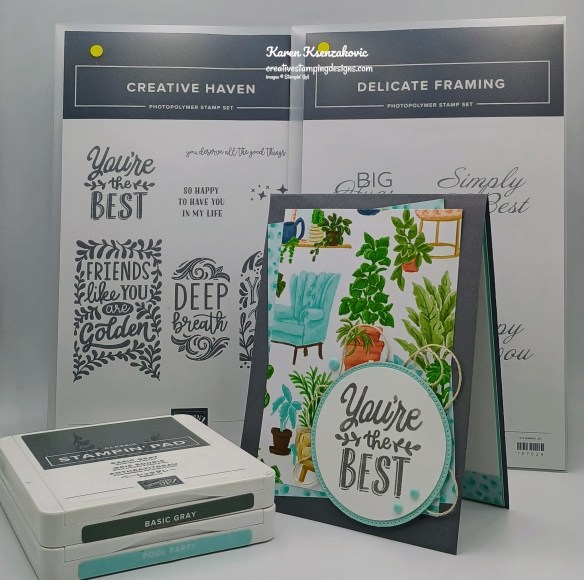
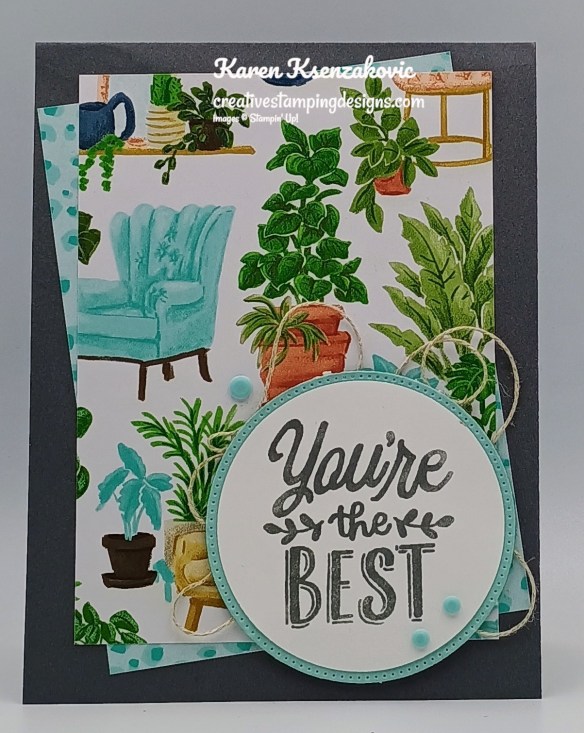
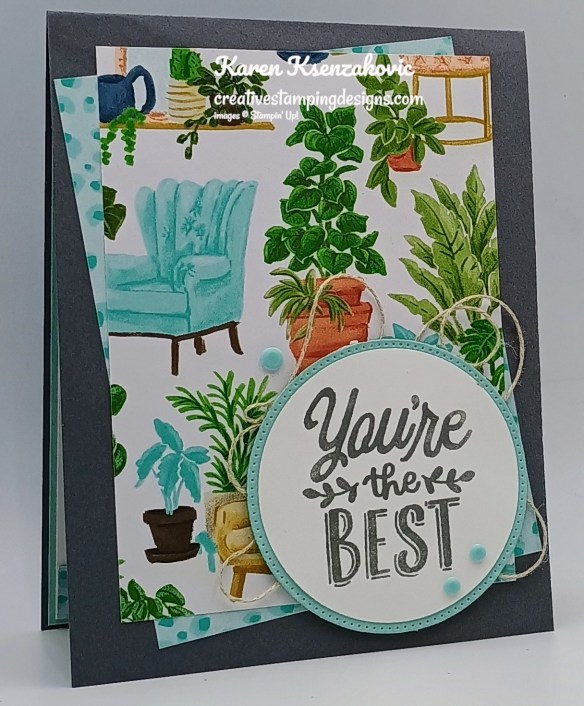
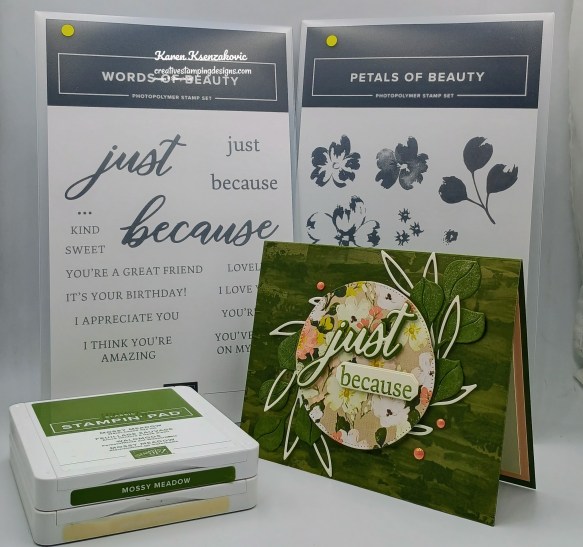
I used the new Stampin’ Up! Flower Fair Stamp Set along with the Stylish Shapes Dies and Stampin’ Up! Make A Wish Stamp Set for my card today.
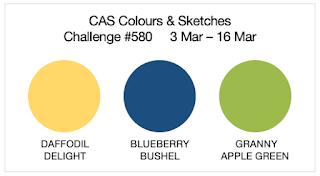
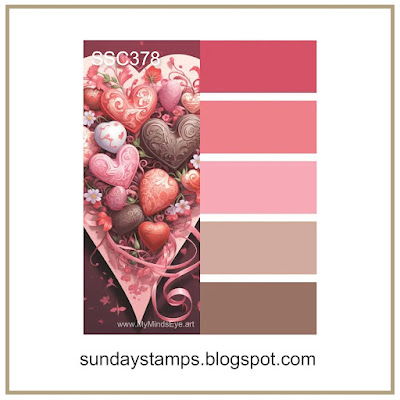
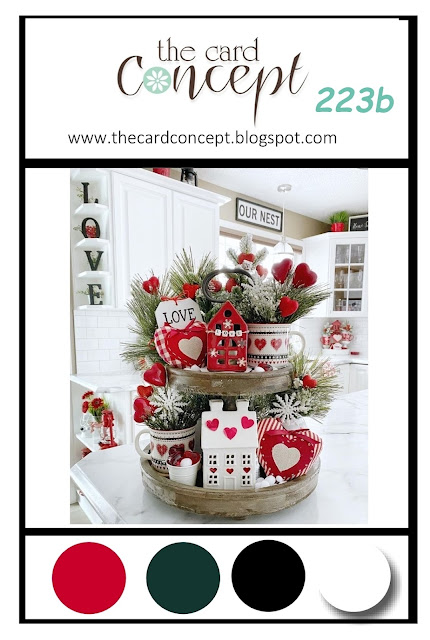
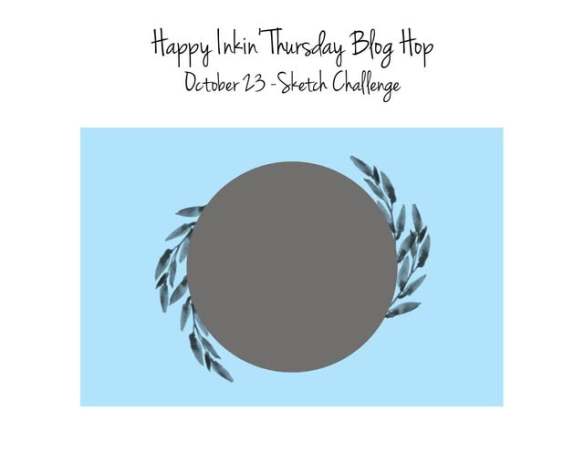
The colors for my card today are from the Colours & Sketches Challenge #580
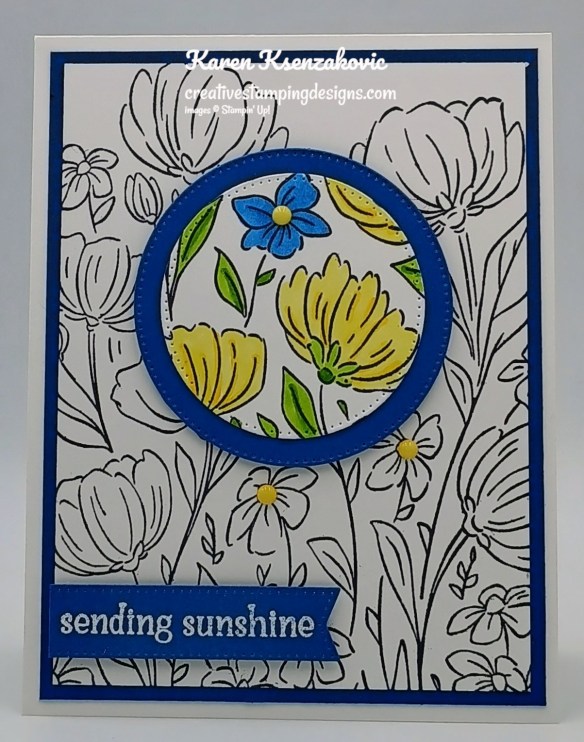
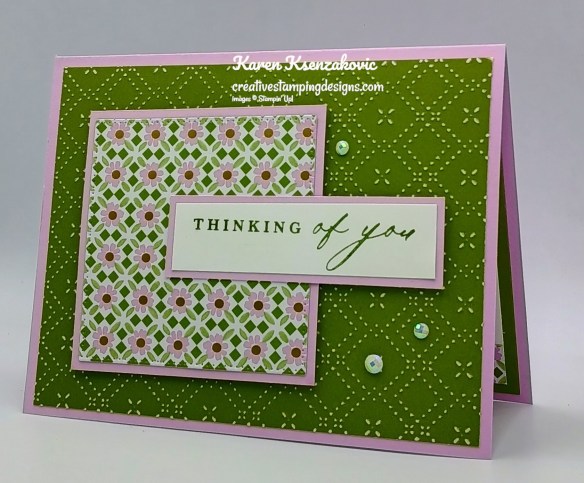
Stamp the flower image from Flower Fair stamp set in Tuxedo Black Ink on a Basic White card front. Using the Stylish Shapes Dies, cut a circle out from the image. Using the next size larger circle from the Stylish Shapes Dies, cut a panel of Blueberry Bushel. Color the die cut area only using Blueberry Bushel, Daffodil Delight and Granny Apple Green Stampin’ Blends Markers.
Adhere the stamped Basic White panel to a Blueberry Bushel mat. Adhere the layered panel to a Basic White Thick card base. Adhere the colored die cut to the Blueberry Bushel die cut mat. Adhere the layered panel to the card front, where you cut it from, with Stampin’ Dimensionals.

On a panel of Blueberry Bushel, stamp the sentiment from the Make A Wish stamp set in Versamark Ink. Sprinkle the sentiment with White Embossing Powder and set it using the Heat Tool. Cut the sentiment out using the banner die from the Stylish Shapes Dies. Adhere the sentiment to the card front with Stampin’ Dimensionals. Add a few Muted Palette Dots to the card front.
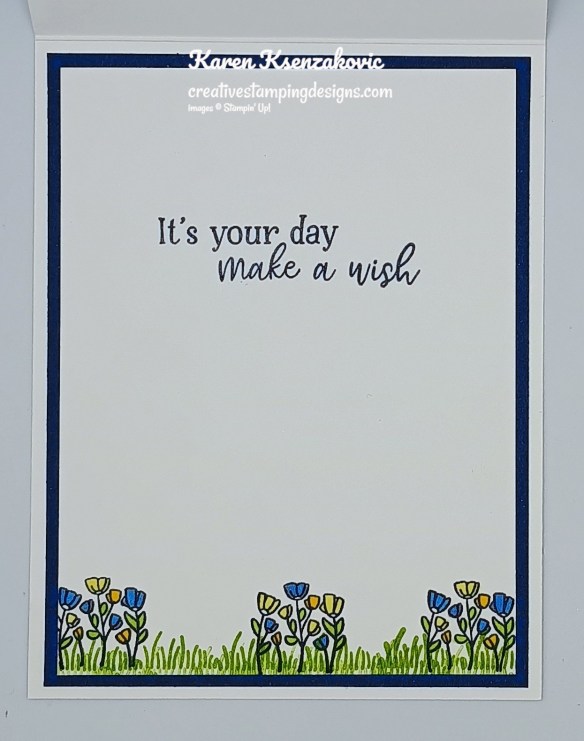
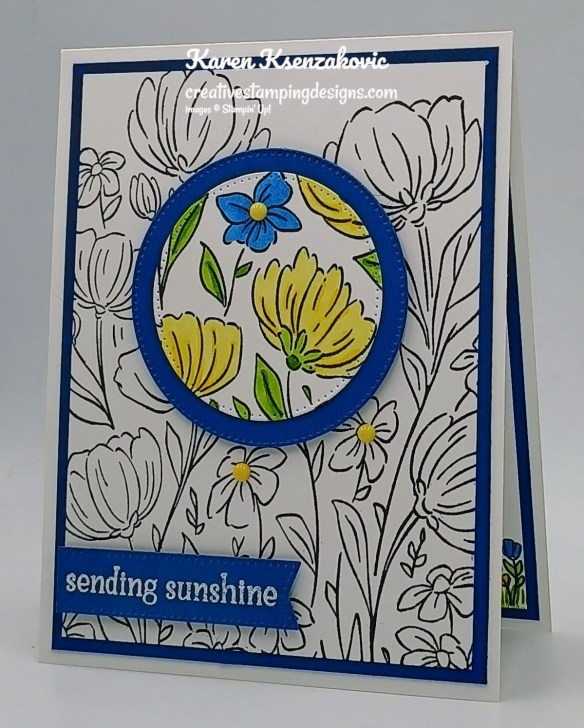
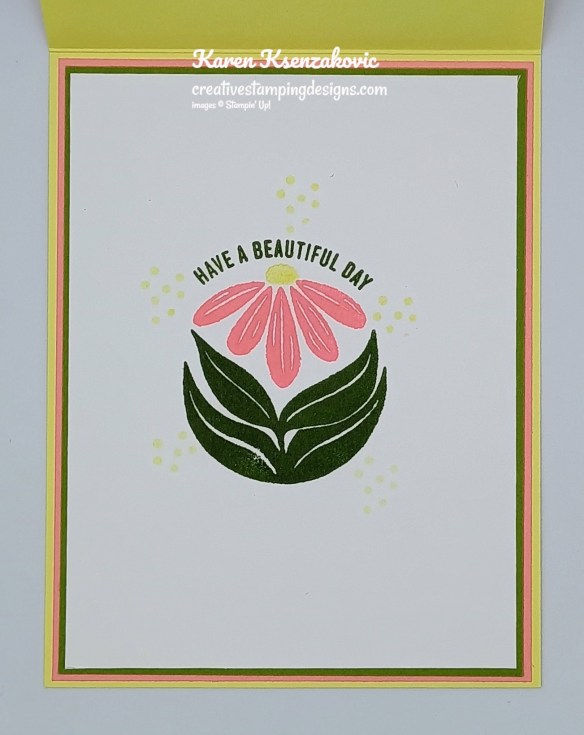
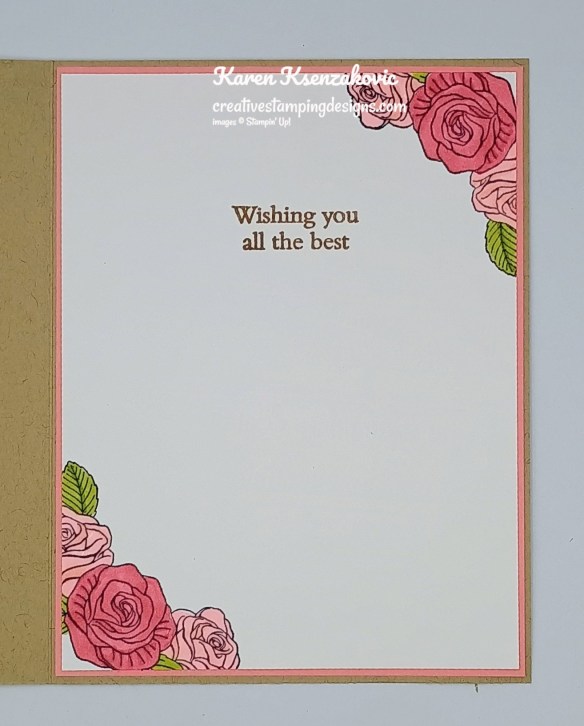
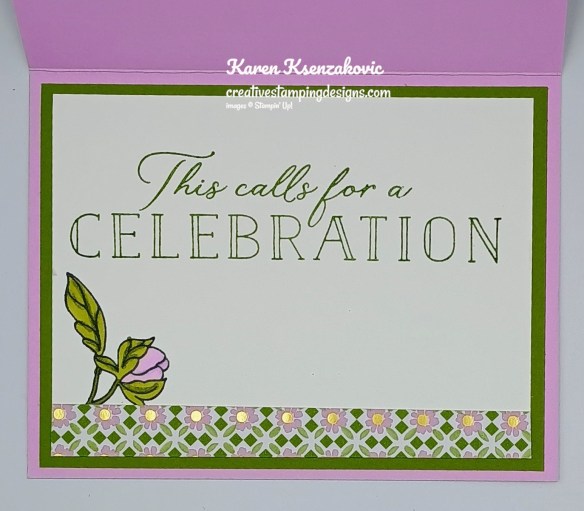
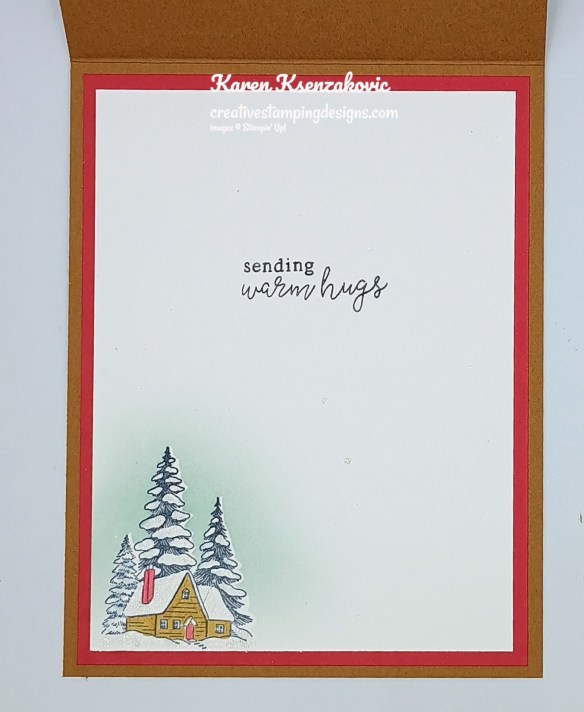
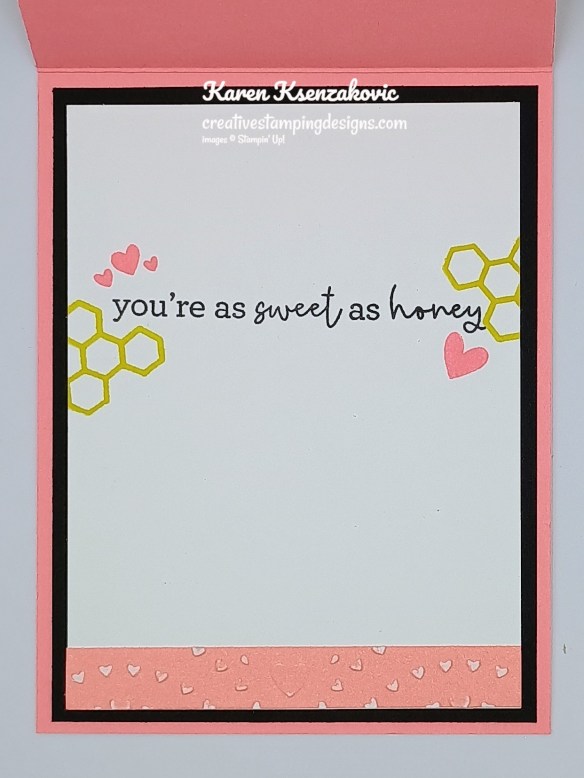
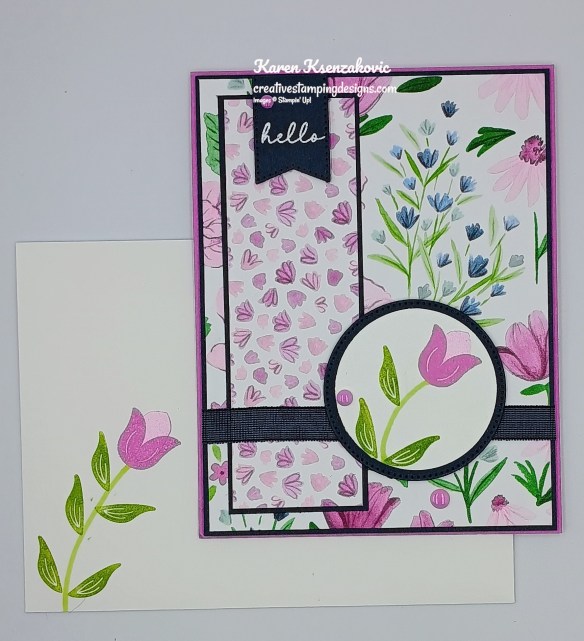
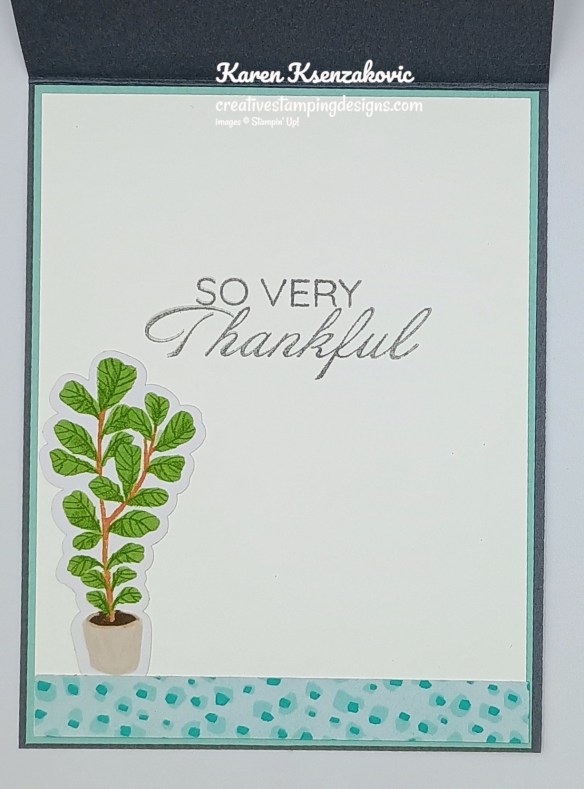
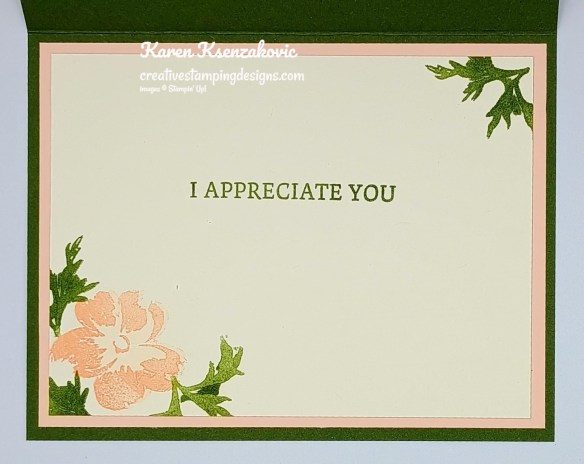
Stamp the sentiment from the Make A Wish stamp set in Blueberry Bushel Ink on a panel of Basic White. Stamp the grass image from Make A Wish stamp set along the bottom of the panel. Stamp the flower image from Make A Wish stamp set in Tuxedo Black Ink on the bottom of the panel. Color the images using Blueberry Bushel, Daffodil Delight and Granny Apple Green Stampin’ Blends Markers. Adhere the Basic White panel to a Blueberry Bushel mat then to the inside of the Basic Whtie Thick card base.
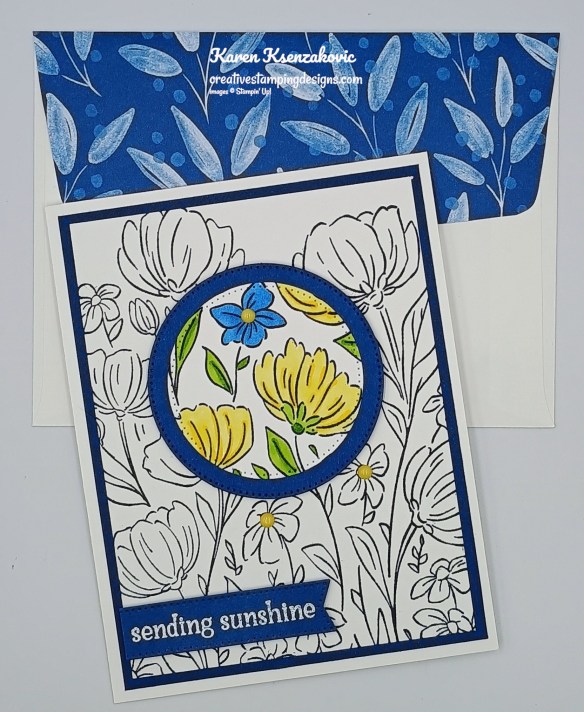
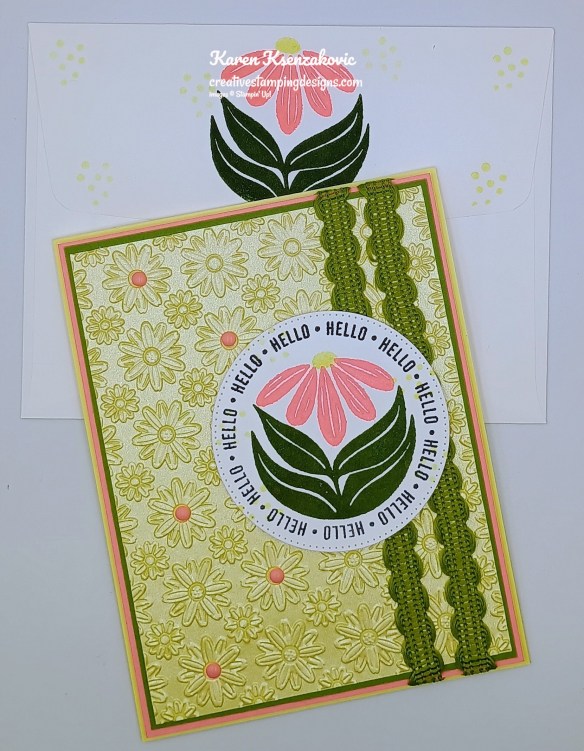
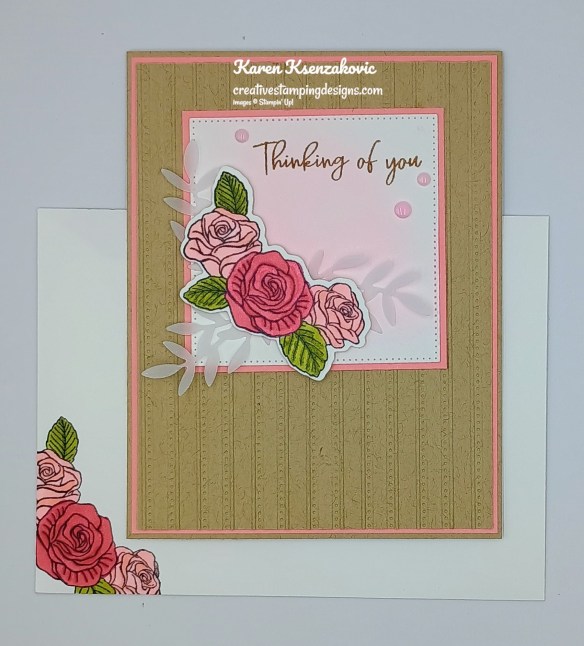
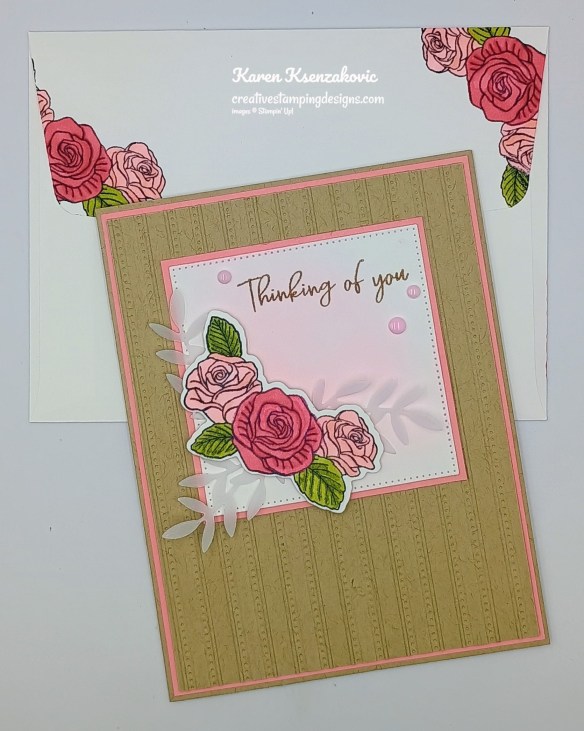
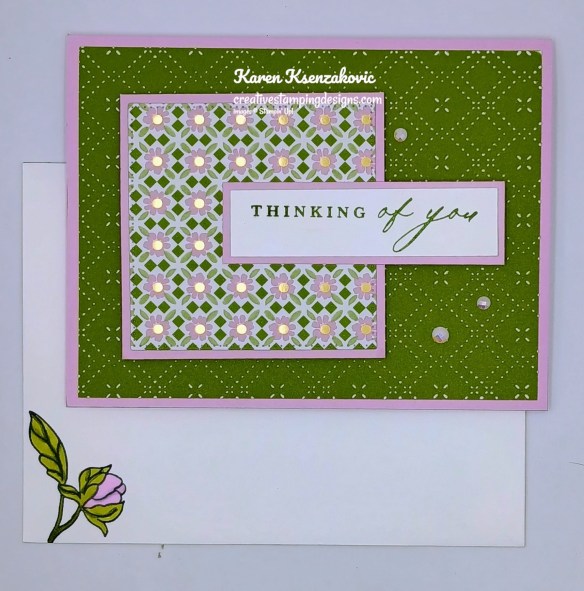
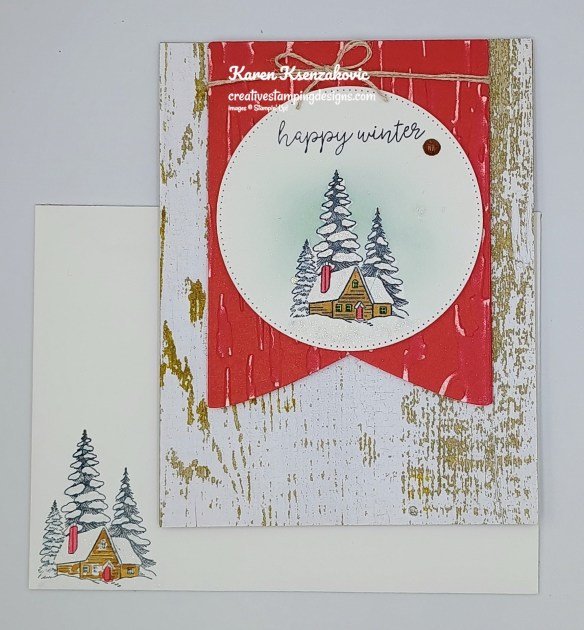
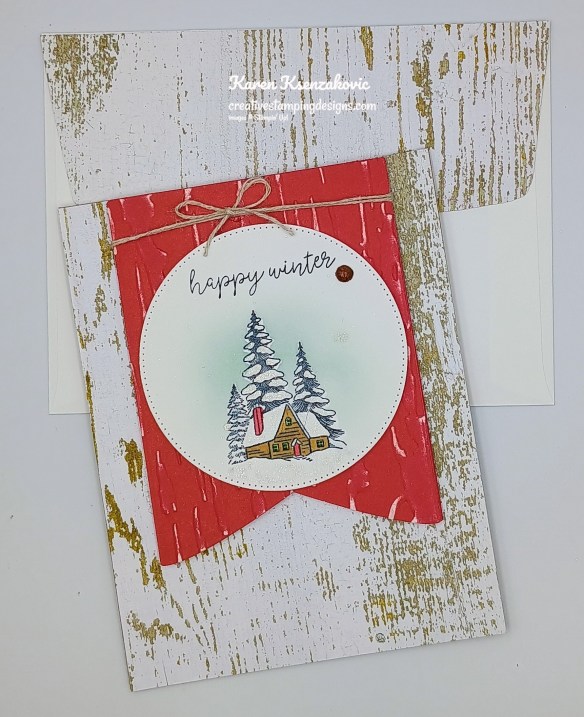
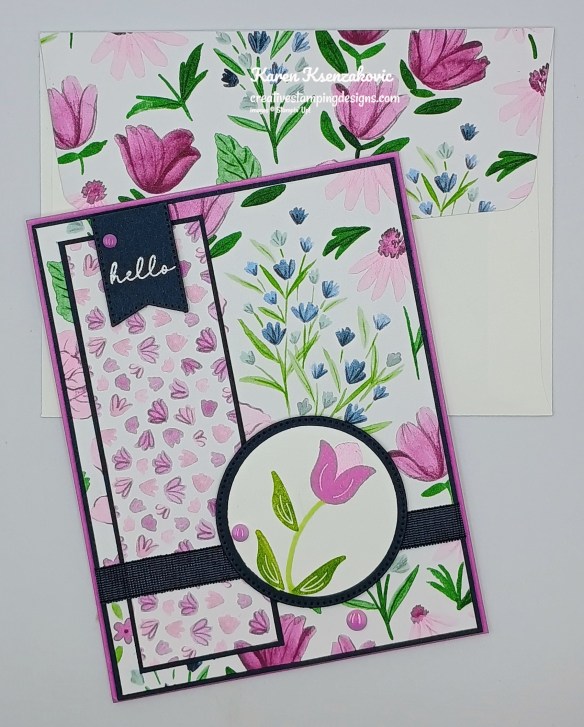
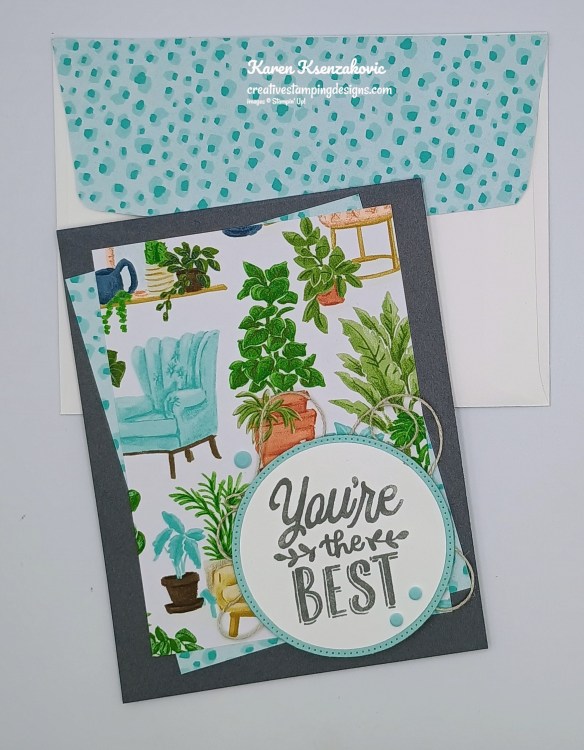
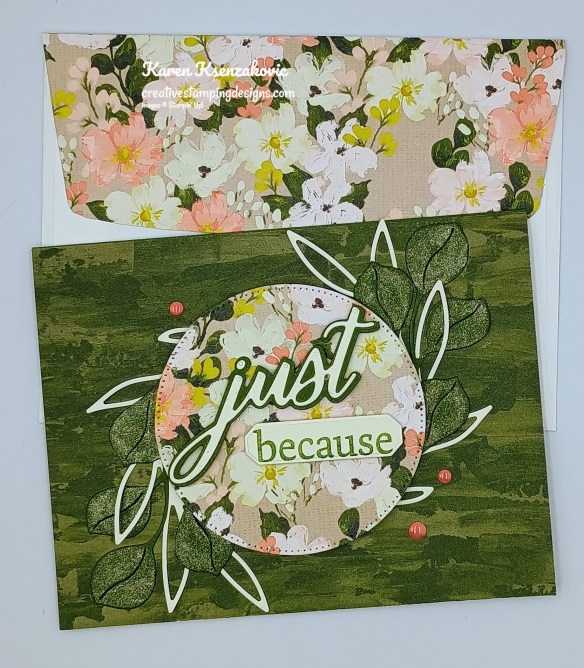
Decorate a Basic White Medium Envelope to finish the card. Stamp the grass image from the Make A Wish stamp set in Granny Apple Green Ink on the envelope front. Stamp the flower image from the Make A Wish stamp set in Tuxedo Black Ink. Color the image with Blueberry Bushel, Daffodil Delight and Granny Apple Green Stampin’ Blends Markers. Adhere a panel of Regals 6 x 6 DSP to the envelope flap.
Thank you for stopping by my blog today. I hope you like the card and will give it a try. Happy Stamping!!
*********************************************************************************************************
If you need any stamping supplies, I’d love to be your Demonstrator. Just click HERE to go directly to my online store or drop me an email if you have any questions.
*********************************************************************************************************
Double Creative Stamping Designs Rewards

The new March Online Exclusives are now available to order. I’m offering Double Creative Stamping Designs Rewards. THAT’S 2X THE REWARDS FOR YOU FROM ME!!! March 3 – Monday March 9 for all orders over $50 (before tax & shipping)!! How does this work? For a $50 you’ll earn 2 rewards, $100 you’ll earn 4 rewards, $150 you’ll earn 6 rewards, etc. Head over to my Online Store and get those orders in early and earn those Double Rewards!!
*********************************************************************************************************
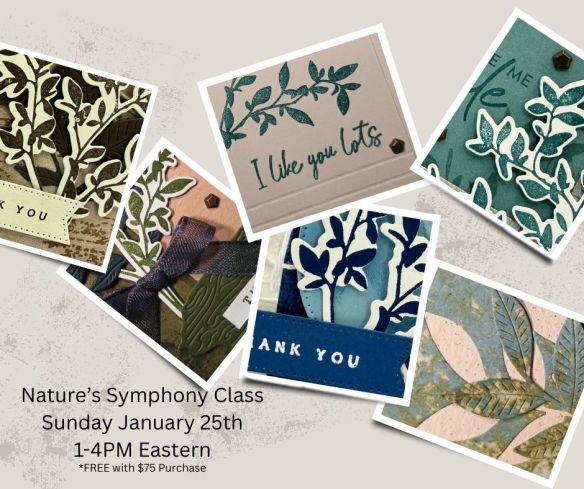
Poetry Garden Online Class Registration Open
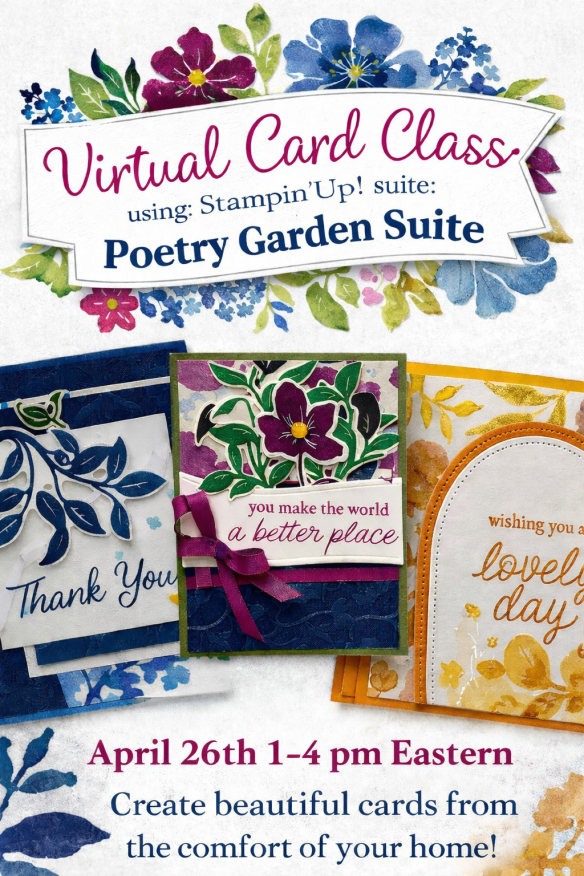
Tara Carpenter and I are teaming up to offer a fun online class using Stampin’ Up! March Online Exclusive Poetry Garden Suite. We will be creating 6 different cards during the class including 2 Fun Fold Cards. Sign Up now by Clicking Here to reserve your spot.
The class fee includes:
- Stampin’ Up! Garden Epoxy Dots (full pack)
- Stampin’ Up! Berry Burst 1/4″ Shiny Ribbon (full pack)
- Pre-cut card kits to complete each card
- Zoom class with complete instructions to complete each card
- PDF with detailed directions
During sign up you will have the option to add additional items to your order that you can take advantage of at no additional shipping cost. These items are optional, however if you want to recreate the cards you will need them. If you’ve attended a previous class, you were given a discount code, there is a spot to put that code on the form and the discount only applies to the products that you check off that you wish to purchase, not the class. Since the Bundles are already discounted, the discount does not apply to them either.
The class will be held Sunday April 26th from 1 to 4 pm Eastern Time via Zoom. This allows anyone in the United States to participate live! Can’t join us live… no worries, we will record the session so it can be replayed at any time.
I will email written directions that will include directions, cardstock cuts as well as photos to help you create each card.
The bundles are not included in the price of the class. You can purchase the bundle through me at an additional 10% discount of the Online Exclusive price (see below).
Class Cost $40 + $10 (Shipping)
Additional purchased items will be included in the above shipping price. I will invoice you through PayPal and invoices must be paid by April 5th to insure I can get the products delivered, packaged up and out to you with enough time.
Deadline: Sunday April 5th
Click Here to register for the class now!! Let me know if you have any questions.
*********************************************************************************************************

I’ve updated my Retired List. I’ve added a LOT more items that have been retired by Stampin’ Up! at a discounted price. Check out my list, there might be something that you missed out on and really wanted. You can find it by Clicking Here.
*********************************************************************************************************
Card stock cuts for this project:
- Basic White Cardstock (2) – 3 3/4″ x 5″(card front & inner liner)
- Basic White Thick Cardstock 4 1/4″ x 11″(card base scored & folded at 5 1/2″)
- Blueberry Bushel Cardstock (2) – 4″ x 5 1/4″(card front & inner liner mats), 3″ x 3″(spotlight mat), 1″ x 3 1/4″(sentiment)
- regals 6 x 6 Designer Series Paper 2 1/4″ x 6″(envelope)
*********************************************************************************************************
Product List
![Basic White 8 1/2" X 11" Cardstock [ 166780 ]](https://assets1.tamsnetwork.com/images/EC042017NF/166780s.jpg "Basic White 8 1/2\" X 11\" Cardstock [ 166780 ]")
![Basic White 8 1/2" X 11" Thick Cardstock [ 159229 ]](https://assets1.tamsnetwork.com/images/EC042017NF/159229s.jpg "Basic White 8 1/2\" X 11\" Thick Cardstock [ 159229 ]")
![Blueberry Bushel 8-1/2" X 11" Cardstock [ 146968 ]](https://assets1.tamsnetwork.com/images/EC042017NF/146968s.jpg "Blueberry Bushel 8-1/2\" X 11\" Cardstock [ 146968 ]")
![Regals 6" X 6" (15.2 X 15.2 Cm) Designer Series Paper [ 165304 ]](https://assets1.tamsnetwork.com/images/EC042017NF/165304s.jpg "Regals 6\" X 6\" (15.2 X 15.2 Cm) Designer Series Paper [ 165304 ]")
![Blueberry Bushel Classic Stampin' Pad [ 147138 ]](https://assets1.tamsnetwork.com/images/EC042017NF/147138s.jpg "Blueberry Bushel Classic Stampin' Pad [ 147138 ]")
![Granny Apple Green Stampin' Pad [ 147095 ]](https://assets1.tamsnetwork.com/images/EC042017NF/147095s.jpg "Granny Apple Green Stampin' Pad [ 147095 ]")
![Tuxedo Black Memento Ink Pad [ 132708 ]](https://assets1.tamsnetwork.com/images/EC042017NF/132708s.jpg "Tuxedo Black Memento Ink Pad [ 132708 ]")
![Blueberry Bushel Stampin’ Blends Combo Pack [ 161679 ]](https://assets1.tamsnetwork.com/images/EC042017NF/161679s.jpg "Blueberry Bushel Stampin’ Blends Combo Pack [ 161679 ]")
![Granny Apple Green Stampin' Blends Combo Pack [ 154885 ]](https://assets1.tamsnetwork.com/images/EC042017NF/154885s.jpg "Granny Apple Green Stampin' Blends Combo Pack [ 154885 ]")
![Daffodil Delight Stampin' Blends Combo Pack [ 154883 ]](https://assets1.tamsnetwork.com/images/EC042017NF/154883s.jpg "Daffodil Delight Stampin' Blends Combo Pack [ 154883 ]")
![Stylish Shapes Dies [ 159183 ]](https://assets1.tamsnetwork.com/images/EC042017NF/159183s.jpg "Stylish Shapes Dies [ 159183 ]")
![Muted Palette Dots [ 165155 ]](https://assets1.tamsnetwork.com/images/EC042017NF/165155s.jpg "Muted Palette Dots [ 165155 ]")
![Basic White Medium Envelopes [ 159236 ]](https://assets1.tamsnetwork.com/images/EC042017NF/159236s.jpg "Basic White Medium Envelopes [ 159236 ]")
![Stampin' Cut & Emboss Machine [ 149653 ]](https://assets1.tamsnetwork.com/images/EC042017NF/149653s.jpg "Stampin' Cut & Emboss Machine [ 149653 ]")
![Mini Glue Dots [ 103683 ]](https://assets1.tamsnetwork.com/images/EC042017NF/103683s.jpg "Mini Glue Dots [ 103683 ]")
![Multipurpose Liquid Glue [ 110755 ]](https://assets1.tamsnetwork.com/images/EC042017NF/110755s.jpg "Multipurpose Liquid Glue [ 110755 ]")
![Stampin' Dimensionals [ 104430 ]](https://assets1.tamsnetwork.com/images/EC042017NF/104430s.jpg "Stampin' Dimensionals [ 104430 ]")
![Stampin' Seal [ 152813 ]](https://assets1.tamsnetwork.com/images/EC042017NF/152813s.jpg "Stampin' Seal [ 152813 ]")
![Bone Folder [ 102300 ]](https://assets1.tamsnetwork.com/images/EC042017NF/102300s.jpg "Bone Folder [ 102300 ]")
![Take Your Pick [ 144107 ]](https://assets1.tamsnetwork.com/images/EC042017NF/144107s.jpg "Take Your Pick [ 144107 ]")
![Paper Trimmer [ 152392 ]](https://assets1.tamsnetwork.com/images/EC042017NF/152392s.jpg "Paper Trimmer [ 152392 ]")


![A Round Of Hellos Photopolymer Stamp Set (English) [ 167227 ]](https://assets1.tamsnetwork.com/images/EC042017NF/167227s.jpg "A Round Of Hellos Photopolymer Stamp Set (English) [ 167227 ]")
![Flirty Flamingo 8-1/2" X 11" Cardstock [ 141416 ]](https://assets1.tamsnetwork.com/images/EC042017NF/141416s.jpg "Flirty Flamingo 8-1/2\" X 11\" Cardstock [ 141416 ]")
![Lemon Lolly 8 1/2" X 11" Cardstock [ 161720 ]](https://assets1.tamsnetwork.com/images/EC042017NF/161720s.jpg "Lemon Lolly 8 1/2\" X 11\" Cardstock [ 161720 ]")
![Old Olive 8-1/2" X 11" Cardstock [ 100702 ]](https://assets1.tamsnetwork.com/images/EC042017NF/100702s.jpg "Old Olive 8-1/2\" X 11\" Cardstock [ 100702 ]")
![Pastels Shimmer 12" X 12" (30.5 X 30.5 Cm) Specialty Paper [ 167198 ]](https://assets1.tamsnetwork.com/images/EC042017NF/167198s.jpg "Pastels Shimmer 12\" X 12\" (30.5 X 30.5 Cm) Specialty Paper [ 167198 ]")
![Flirty Flamingo Classic Stampin' Pad [ 147052 ]](https://assets1.tamsnetwork.com/images/EC042017NF/147052s.jpg "Flirty Flamingo Classic Stampin' Pad [ 147052 ]")
![Lemon Lolly Classic Stampin' Pad [ 161666 ]](https://assets1.tamsnetwork.com/images/EC042017NF/161666s.jpg "Lemon Lolly Classic Stampin' Pad [ 161666 ]")
![Old Olive Classic Stampin' Pad [ 147090 ]](https://assets1.tamsnetwork.com/images/EC042017NF/147090s.jpg "Old Olive Classic Stampin' Pad [ 147090 ]")
![Old Olive 3/8" (1 Cm) Specialty Rickrack [ 167006 ]](https://assets1.tamsnetwork.com/images/EC042017NF/167006s.jpg "Old Olive 3/8\" (1 Cm) Specialty Rickrack [ 167006 ]")
![Rainbow Adhesive Backed Dots [ 162758 ]](https://assets1.tamsnetwork.com/images/EC042017NF/162758s.jpg "Rainbow Adhesive Backed Dots [ 162758 ]")


![Lifetime Of Love Bundle (English) [ 162584 ]](https://assets1.tamsnetwork.com/images/EC042017NF/162584s.jpg "Lifetime Of Love Bundle (English) [ 162584 ]")
![Lifetime Of Love Cling Stamp Set (English) [ 162574 ]](https://assets1.tamsnetwork.com/images/EC042017NF/162574s.jpg "Lifetime Of Love Cling Stamp Set (English) [ 162574 ]")
![Lifetime Of Love Dies [ 162583 ]](https://assets1.tamsnetwork.com/images/EC042017NF/162583s.jpg "Lifetime Of Love Dies [ 162583 ]")
![Friendly Foliage Photopolymer Stamp Set (English) [ 167021 ]](https://assets1.tamsnetwork.com/images/EC042017NF/167021s.jpg "Friendly Foliage Photopolymer Stamp Set (English) [ 167021 ]")
![Crumb Cake 8-1/2" X 11" Cardstock [ 120953 ]](https://assets1.tamsnetwork.com/images/EC042017NF/120953s.jpg "Crumb Cake 8-1/2\" X 11\" Cardstock [ 120953 ]")
![Vellum 12" X 12" (30.5 X 30.5 Cm) Specialty Paper [ 167099 ]](https://assets1.tamsnetwork.com/images/EC042017NF/167099s.jpg "Vellum 12\" X 12\" (30.5 X 30.5 Cm) Specialty Paper [ 167099 ]")
![Pecan Pie Classic Stampin' Pad [ 161665 ]](https://assets1.tamsnetwork.com/images/EC042017NF/161665s.jpg "Pecan Pie Classic Stampin' Pad [ 161665 ]")
![Old Olive Stampin' Blends Combo Pack [ 154892 ]](https://assets1.tamsnetwork.com/images/EC042017NF/154892s.jpg "Old Olive Stampin' Blends Combo Pack [ 154892 ]")
![Pretty In Pink Stampin’ Blends Combo Pack [ 163824 ]](https://assets1.tamsnetwork.com/images/EC042017NF/163824s.jpg "Pretty In Pink Stampin’ Blends Combo Pack [ 163824 ]")
![Strawberry Slush Stampin’ Blends Combo Pack [ 165290 ]](https://assets1.tamsnetwork.com/images/EC042017NF/165290s.jpg "Strawberry Slush Stampin’ Blends Combo Pack [ 165290 ]")
![Lovely Stripes 3 D Embossing Folder [ 167179 ]](https://assets1.tamsnetwork.com/images/EC042017NF/167179s.jpg "Lovely Stripes 3 D Embossing Folder [ 167179 ]")
![2024 2026 In Color™ Flat Pearls [ 165266 ]](https://assets1.tamsnetwork.com/images/EC042017NF/165266s.jpg "2024 2026 In Color™ Flat Pearls [ 165266 ]")

![Tear & Tape Adhesive [ 154031 ]](https://assets1.tamsnetwork.com/images/EC042017NF/154031s.jpg "Tear & Tape Adhesive [ 154031 ]")

![Simply Beautiful Photopolymer Stamp Set (English) [ 166958 ]](https://assets1.tamsnetwork.com/images/EC042017NF/166958s.jpg "Simply Beautiful Photopolymer Stamp Set (English) [ 166958 ]")
![Beautifully Celebrated Photopolymer Stamp Set (English) [ 166968 ]](https://assets1.tamsnetwork.com/images/EC042017NF/166968s.jpg "Beautifully Celebrated Photopolymer Stamp Set (English) [ 166968 ]")
![Fresh Freesia 8 1/2" X 11" Cardstock [ 155613 ]](https://assets1.tamsnetwork.com/images/EC042017NF/155613s.jpg "Fresh Freesia 8 1/2\" X 11\" Cardstock [ 155613 ]")
![Old Olive 12" X 12" (30.5 X 30.5 Cm) Two Tone Cardstock [ 166683 ]](https://assets1.tamsnetwork.com/images/EC042017NF/166683s.jpg "Old Olive 12\" X 12\" (30.5 X 30.5 Cm) Two Tone Cardstock [ 166683 ]")
![Lovely & Beautiful 12" X 12" (30.5 X 30.5 Cm) Specialty Designer Series Paper [ 166957 ]](https://assets1.tamsnetwork.com/images/EC042017NF/166957s.jpg "Lovely & Beautiful 12\" X 12\" (30.5 X 30.5 Cm) Specialty Designer Series Paper [ 166957 ]")
![Fresh Freesia Stampin' Blends Combo Pack [ 155518 ]](https://assets1.tamsnetwork.com/images/EC042017NF/155518s.jpg "Fresh Freesia Stampin' Blends Combo Pack [ 155518 ]")
![Beautiful Pattern 3 D Embossing Folder [ 167097 ]](https://assets1.tamsnetwork.com/images/EC042017NF/167097s.jpg "Beautiful Pattern 3 D Embossing Folder [ 167097 ]")
![Pearlized Faceted Circles [ 166978 ]](https://assets1.tamsnetwork.com/images/EC042017NF/166978s.jpg "Pearlized Faceted Circles [ 166978 ]")


![Sweet Jar Bundle (English) [ 165507 ]](https://assets1.tamsnetwork.com/images/EC042017NF/165507s.jpg "Sweet Jar Bundle (English) [ 165507 ]")
![Sweet Jar Photopolymer Stamp Set (English) [ 165501 ]](https://assets1.tamsnetwork.com/images/EC042017NF/165501s.jpg "Sweet Jar Photopolymer Stamp Set (English) [ 165501 ]")
![Sweet Jar Builder Punch [ 165506 ]](https://assets1.tamsnetwork.com/images/EC042017NF/165506s.jpg "Sweet Jar Builder Punch [ 165506 ]")
![Simply Said Mix & Match Photopolymer Stamp Set (English) [ 163756 ]](https://assets1.tamsnetwork.com/images/EC042017NF/163756s.jpg "Simply Said Mix & Match Photopolymer Stamp Set (English) [ 163756 ]")
![Basic Black 8-1/2" X 11" Cardstock [ 121045 ]](https://assets1.tamsnetwork.com/images/EC042017NF/121045s.jpg "Basic Black 8-1/2\" X 11\" Cardstock [ 121045 ]")
![Real Red 12" X 12" (30.5 X 30.5 Cm) Two Tone Cardstock [ 166696 ]](https://assets1.tamsnetwork.com/images/EC042017NF/166696s.jpg "Real Red 12\" X 12\" (30.5 X 30.5 Cm) Two Tone Cardstock [ 166696 ]")
![Real Red Classic Stampin' Pad [ 147084 ]](https://assets1.tamsnetwork.com/images/EC042017NF/147084s.jpg "Real Red Classic Stampin' Pad [ 147084 ]")
![Smoky Slate Classic Stampin' Pad [ 147113 ]](https://assets1.tamsnetwork.com/images/EC042017NF/147113s.jpg "Smoky Slate Classic Stampin' Pad [ 147113 ]")
![Hearts Of Love 3 D Embossing Folder [ 167071 ]](https://assets1.tamsnetwork.com/images/EC042017NF/167071s.jpg "Hearts Of Love 3 D Embossing Folder [ 167071 ]")
![Perennial Postage Dies [ 162607 ]](https://assets1.tamsnetwork.com/images/EC042017NF/162607s.jpg "Perennial Postage Dies [ 162607 ]")
![Holographic Resin Dots [ 165598 ]](https://assets1.tamsnetwork.com/images/EC042017NF/165598s.jpg "Holographic Resin Dots [ 165598 ]")


![Winter Scenes Cling Stamp Set (English) [ 166088 ]](https://assets1.tamsnetwork.com/images/EC042017NF/166088s.jpg "Winter Scenes Cling Stamp Set (English) [ 166088 ]")
![Snowflake Kisses Photopolymer Stamp Set (English) [ 166018 ]](https://assets1.tamsnetwork.com/images/EC042017NF/166018s.jpg "Snowflake Kisses Photopolymer Stamp Set (English) [ 166018 ]")
![Pecan Pie 8 1/2" X 11" Cardstock [ 161717 ]](https://assets1.tamsnetwork.com/images/EC042017NF/161717s.jpg "Pecan Pie 8 1/2\" X 11\" Cardstock [ 161717 ]")
![Real Red 8-1/2" X 11" Cardstock [ 102482 ]](https://assets1.tamsnetwork.com/images/EC042017NF/102482s.jpg "Real Red 8-1/2\" X 11\" Cardstock [ 102482 ]")
![Country Woods 12" X 12" (30.5 X 30.5 Cm) Designer Series Paper [ 163393 ]](https://assets1.tamsnetwork.com/images/EC042017NF/163393s.jpg "Country Woods 12\" X 12\" (30.5 X 30.5 Cm) Designer Series Paper [ 163393 ]")
![Pool Party Classic Stampin' Pad [ 147107 ]](https://assets1.tamsnetwork.com/images/EC042017NF/147107s.jpg "Pool Party Classic Stampin' Pad [ 147107 ]")
![Small Blending Brushes [ 160518 ]](https://assets1.tamsnetwork.com/images/EC042017NF/160518s.jpg "Small Blending Brushes [ 160518 ]")
![Secret Sea Classic Stampin' Pad [ 165285 ]](https://assets1.tamsnetwork.com/images/EC042017NF/165285s.jpg "Secret Sea Classic Stampin' Pad [ 165285 ]")
![Pecan Pie Stampin’ Blends Combo Pack [ 161674 ]](https://assets1.tamsnetwork.com/images/EC042017NF/161674s.jpg "Pecan Pie Stampin’ Blends Combo Pack [ 161674 ]")
![Real Red Stampin' Blends Combo Pack [ 154899 ]](https://assets1.tamsnetwork.com/images/EC042017NF/154899s.jpg "Real Red Stampin' Blends Combo Pack [ 154899 ]")
![Clear Wink Of Stella Glitter Brush [ 141897 ]](https://assets1.tamsnetwork.com/images/EC042017NF/141897s.jpg "Clear Wink Of Stella Glitter Brush [ 141897 ]")
![Birch Wood 3 D Embossing Folder [ 164069 ]](https://assets1.tamsnetwork.com/images/EC042017NF/164069s.jpg "Birch Wood 3 D Embossing Folder [ 164069 ]")
![Party Banners Dies [ 165264 ]](https://assets1.tamsnetwork.com/images/EC042017NF/165264s.jpg "Party Banners Dies [ 165264 ]")
![Linen Thread [ 104199 ]](https://assets1.tamsnetwork.com/images/EC042017NF/104199s.jpg "Linen Thread [ 104199 ]")
![Streaked Dots [ 165902 ]](https://assets1.tamsnetwork.com/images/EC042017NF/165902s.jpg "Streaked Dots [ 165902 ]")


![Bee My Valentine Photopolymer Stamp Set (English) [ 162547 ]](https://assets1.tamsnetwork.com/images/EC042017NF/162547s.jpg "Bee My Valentine Photopolymer Stamp Set (English) [ 162547 ]")
![Darling Duckling 8 1/2" X 11" Cardstock [ 165622 ]](https://assets1.tamsnetwork.com/images/EC042017NF/165622s.jpg "Darling Duckling 8 1/2\" X 11\" Cardstock [ 165622 ]")
![Flirty Flamingo 12" X 12" (30.5 X 30.5 Cm) Two Tone Cardstock [ 166667 ]](https://assets1.tamsnetwork.com/images/EC042017NF/166667s.jpg "Flirty Flamingo 12\" X 12\" (30.5 X 30.5 Cm) Two Tone Cardstock [ 166667 ]")
![Turtle Y Cute 12" X 12" (30.5 X 30.5 Cm) Designer Series Paper [ 165221 ]](https://assets1.tamsnetwork.com/images/EC042017NF/165221s.jpg "Turtle Y Cute 12\" X 12\" (30.5 X 30.5 Cm) Designer Series Paper [ 165221 ]")
![Daffodil Delight Classic Stampin' Pad [ 147094 ]](https://assets1.tamsnetwork.com/images/EC042017NF/147094s.jpg "Daffodil Delight Classic Stampin' Pad [ 147094 ]")
![Darling Duckling Classic Stampin' Pad [ 165277 ]](https://assets1.tamsnetwork.com/images/EC042017NF/165277s.jpg "Darling Duckling Classic Stampin' Pad [ 165277 ]")
![Nested Essentials Dies [ 161597 ]](https://assets1.tamsnetwork.com/images/EC042017NF/161597s.jpg "Nested Essentials Dies [ 161597 ]")


![Petunia Pop 8 1/2" X 11" Cardstock [ 163801 ]](https://assets1.tamsnetwork.com/images/EC042017NF/163801s.jpg "Petunia Pop 8 1/2\" X 11\" Cardstock [ 163801 ]")
![Secret Sea 8 1/2" X 11" Cardstock [ 165624 ]](https://assets1.tamsnetwork.com/images/EC042017NF/165624s.jpg "Secret Sea 8 1/2\" X 11\" Cardstock [ 165624 ]")
![Florals In Bloom 12" X 12" (30.5 X 30.5 Cm) Designer Series Paper [ 165175 ]](https://assets1.tamsnetwork.com/images/EC042017NF/165175s.jpg "Florals In Bloom 12\" X 12\" (30.5 X 30.5 Cm) Designer Series Paper [ 165175 ]")
![Petunia Pop Classic Stampin Pad [ 163811 ]](https://assets1.tamsnetwork.com/images/EC042017NF/163811s.jpg "Petunia Pop Classic Stampin Pad [ 163811 ]")
![Versamark Pad [ 102283 ]](https://assets1.tamsnetwork.com/images/EC042017NF/102283s.jpg "Versamark Pad [ 102283 ]")
![Basics Wow! Embossing Powder [ 165679 ]](https://assets1.tamsnetwork.com/images/EC042017NF/165679s.jpg "Basics Wow! Embossing Powder [ 165679 ]")
![Heat Tool (Us And Canada) [ 129053 ]](https://assets1.tamsnetwork.com/images/EC042017NF/129053s.jpg "Heat Tool (Us And Canada) [ 129053 ]")
![1 7/8" (4.8 Cm) Circle Punch [ 165259 ]](https://assets1.tamsnetwork.com/images/EC042017NF/165259s.jpg "1 7/8\" (4.8 Cm) Circle Punch [ 165259 ]")
![Secret Sea 3/8" (1 Cm) Faux Linen Ribbon [ 165273 ]](https://assets1.tamsnetwork.com/images/EC042017NF/165273s.jpg "Secret Sea 3/8\" (1 Cm) Faux Linen Ribbon [ 165273 ]")
![Adhesive Sheets [ 152334 ]](https://assets1.tamsnetwork.com/images/EC042017NF/152334s.jpg "Adhesive Sheets [ 152334 ]")


![Creative Haven Photopolymer Stamp Set (English) [ 167202 ]](https://assets1.tamsnetwork.com/images/EC042017NF/167202s.jpg "Creative Haven Photopolymer Stamp Set (English) [ 167202 ]")
![Delicate Framing Photopolymer Stamp Set (English) [ 167024 ]](https://assets1.tamsnetwork.com/images/EC042017NF/167024s.jpg "Delicate Framing Photopolymer Stamp Set (English) [ 167024 ]")
![Basic Gray 8-1/2" X 11" Cardstock [ 121044 ]](https://assets1.tamsnetwork.com/images/EC042017NF/121044s.jpg "Basic Gray 8-1/2\" X 11\" Cardstock [ 121044 ]")
![Pool Party 8-1/2" X 11" Cardstock [ 122924 ]](https://assets1.tamsnetwork.com/images/EC042017NF/122924s.jpg "Pool Party 8-1/2\" X 11\" Cardstock [ 122924 ]")
![Hobby Haven 12" X 12" (30.5 X 30.5 Cm) Specialty Designer Series Paper [ 167201 ]](https://assets1.tamsnetwork.com/images/EC042017NF/167201s.jpg "Hobby Haven 12\" X 12\" (30.5 X 30.5 Cm) Specialty Designer Series Paper [ 167201 ]")
![Basic Gray Classic Stampin' Pad [ 149165 ]](https://assets1.tamsnetwork.com/images/EC042017NF/149165s.jpg "Basic Gray Classic Stampin' Pad [ 149165 ]")
![2 3/8" (6 Cm) Circle Punch [ 161354 ]](https://assets1.tamsnetwork.com/images/EC042017NF/161354s.jpg "2 3/8\" (6 Cm) Circle Punch [ 161354 ]")
![Dear Dots [ 165848 ]](https://assets1.tamsnetwork.com/images/EC042017NF/165848s.jpg "Dear Dots [ 165848 ]")


![Mossy Meadow 8-1/2" X 11" Cardstock [ 133676 ]](https://assets1.tamsnetwork.com/images/EC042017NF/133676s.jpg "Mossy Meadow 8-1/2\" X 11\" Cardstock [ 133676 ]")
![Petal Pink 8-1/2" X 11" Cardstock [ 146985 ]](https://assets1.tamsnetwork.com/images/EC042017NF/146985s.jpg "Petal Pink 8-1/2\" X 11\" Cardstock [ 146985 ]")
![Very Vanilla 8 1/2" X 11" Cardstock [ 166784 ]](https://assets1.tamsnetwork.com/images/EC042017NF/166784s.jpg "Very Vanilla 8 1/2\" X 11\" Cardstock [ 166784 ]")
![Mossy Meadow Classic Stampin' Pad [ 147111 ]](https://assets1.tamsnetwork.com/images/EC042017NF/147111s.jpg "Mossy Meadow Classic Stampin' Pad [ 147111 ]")
![Petal Pink Classic Stampin' Pad [ 147108 ]](https://assets1.tamsnetwork.com/images/EC042017NF/147108s.jpg "Petal Pink Classic Stampin' Pad [ 147108 ]")

