Stampin’ Up! Butterfly Brilliance CAS Note Card

Good rainy Monday morning my stamping friends, Happy March!! How was everyone’s weekend? It was and still is a bit rainy here, most of our snow has disappeared except for a few piles. It’s suppose to be a little warmer here this week so I’m sure it will all be gone before the end of the week.

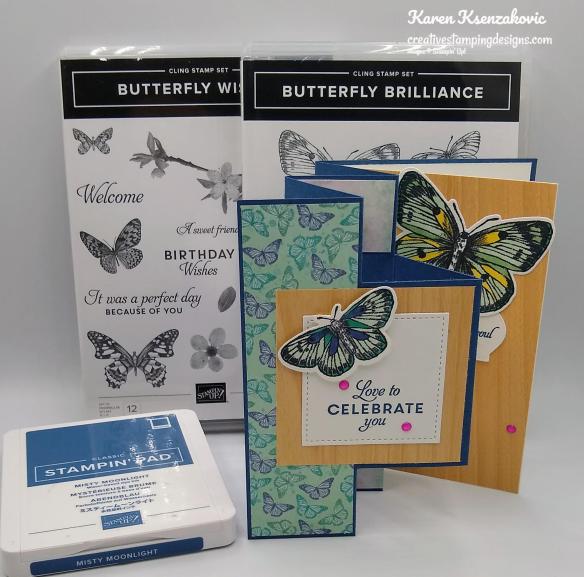
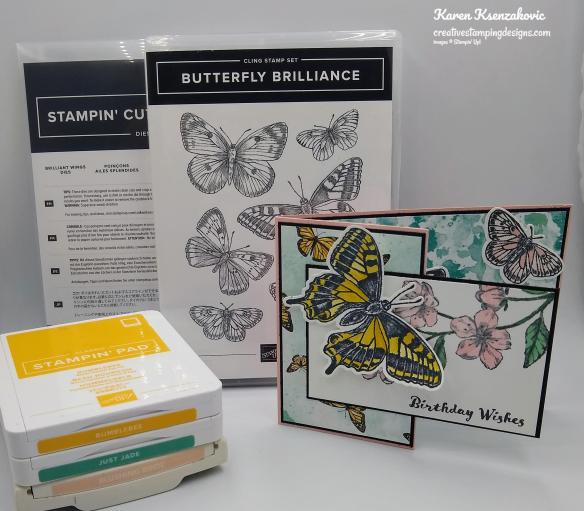
Tomorrow is the day a lot of you have been waiting for. The new Stampin’ Up! Butterfly Bouquet will be available to order. Don’t forget the DSP’s are while supplies last. For my card today I used the Stampin’ Up! Butterfly Brilliance Bundle. Here’s my card for today.

My design is from Freshly Made Sketches #474.

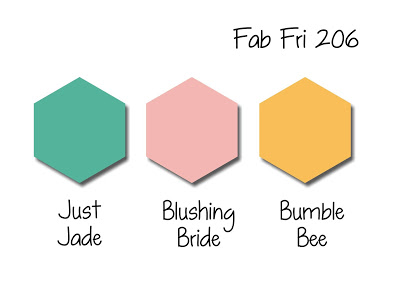
My colors are from CAS on Friday Challenge #199.

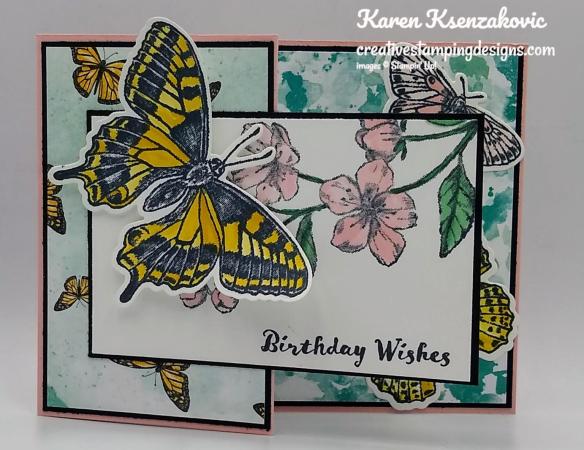
I started by stamping the sentiment from the Stampin’ Up! Enjoy The Moment Cling Stamp Set in Tuxedo Black Ink on a Butterfly Bijou Designer Series Paper card front. I adhered the card front to a panel of Bermuda Bay cardstock (to give a little more stability). I wrapped a piece of 1/2″ White Faux Linen Ribbon from the Flowers for Every Season Ribbon Combo Pack around the card front and adhered it in the back using Stampin’ Seal. I adhered the card front to a Bermuda Bay card base using Stampin’ Dimensionals.

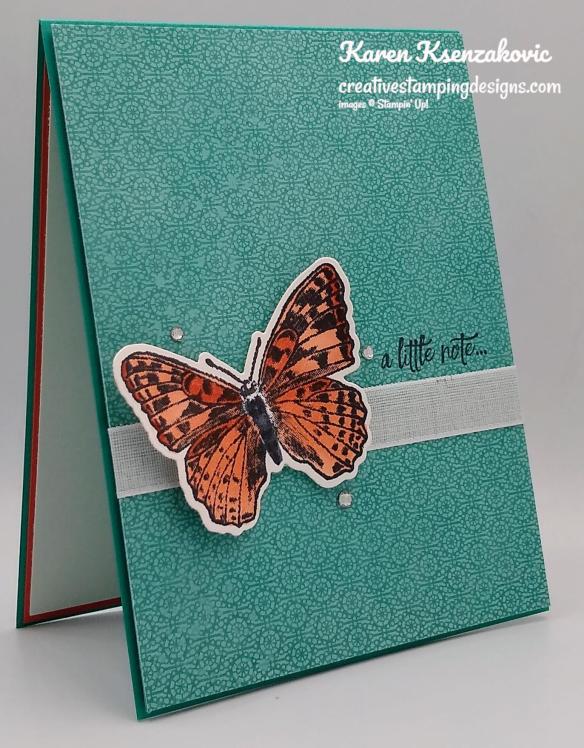
I stamped the butterfly from the Stampin’ Up! Butterfly Brilliance Cling Stamp in Tuxedo Black Ink on a panel of Basic White cardstock. I cut the butterfly out using the Brilliant Wings Dies and colored the image in using my Calypso Coral Stampin’ Blends Markers.

I curved the butterfly wings using my Bone Folder and adhered the butterfly to the card front using Stampin’ Dimensionals. I added a few Rhinestone Basic Jewels to the card front.

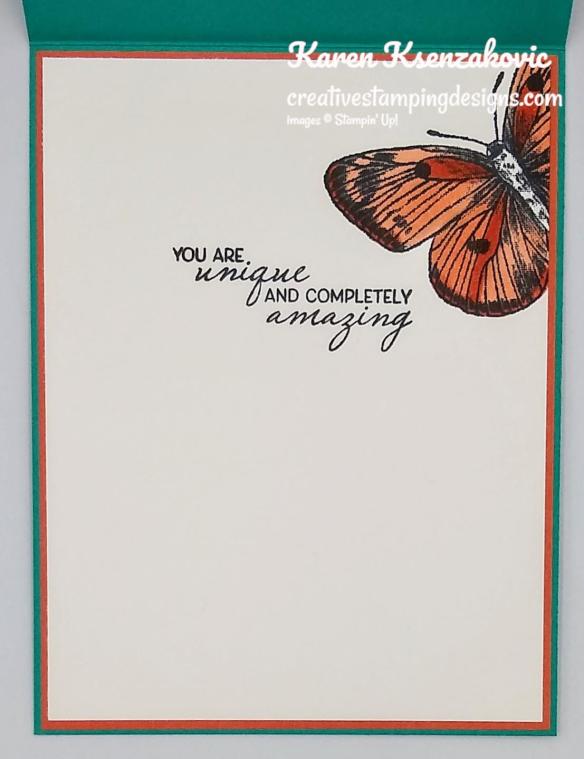
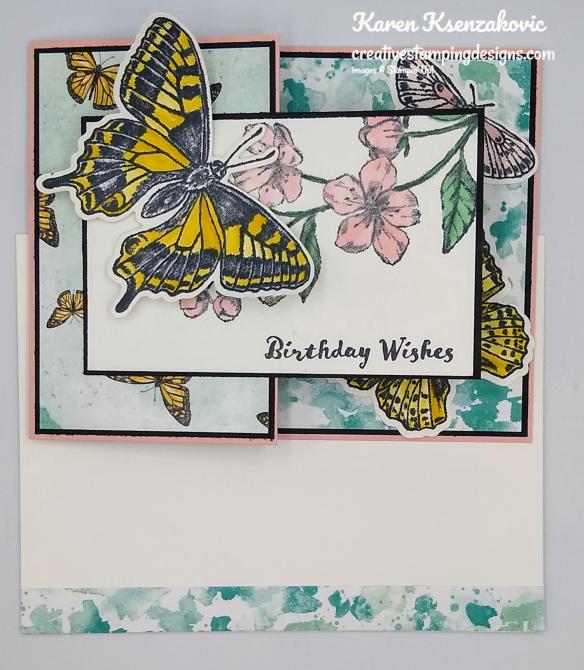
On the inside I stamped the sentiment from the Stampin’ Up! Friends Are Like Seashells Photopolymer Stamp Set in Tuxedo Black Ink in the center of a Basic White panel. I stamped the butterfly image from the Butterfly Brilliance stamp in Tuxedo Black Ink on the side of the panel and colored it in using my Calypso Coral Stampin’ Blends Markers. I adhered the Basie White panel to a Calypso Coral mat using Stampin’ Seal and then to the inside of the Bermuda Bay card base using Multipurpose Liquid Glue.

To finish my card I decorated a Basic White Medium Envelope. I stamped a butterfly from the Butterfly Brilliance stamp in Tuxedo Black Ink on the front or the envelope and colored it in using my Calypso Coral Stampin’ Blends Markers. I adhered a panel of Butterfly Bijou DSP to the envelope flap.

Thank you for stopping by my blog today. I hope you liked my card and will give it a try. Happy Stamping!!

*********************************************************************************************************

If you need any stamping supplies, I’d love to be your Demonstrator. Just click HERE to go directly to my online store or drop me an email if you have any questions. 

MY CURRENT HOST CODE IS: 2QRN664Q

Use this host code when you order $50 or greater and receive a free gift from me! If your order is over $150, please do not use this code, but you’ll still get the free gift. The free gift is your choice of any 1 item valued up to $10.00 from the 2020-2021 Annual Catalog or the January-June 2021 Mini Catalog!   For any orders $50 or more I will also send you my monthly class tutorials.  Click HERE or go to my Customer Rewards for more details and to see what this months tutorials are.

 Click HERE to shop the clearance rack.

Please remember to use my current Host Code and make sure that you can see my name on the final checkout page listed as your Demonstrator when you order so that you know that you’re ordering with me and you’ll get my rewards! 

Happy Stamping, Karen!

*********************************************************************************************************

Available Tomorrow!!!

Bring in the beauty of nature with the artistic designs of the Butterfly Brilliance Bundle and coordinating designer series paper, along with textured specialty paper that will put a pop of brilliance on every project. The Butterfly Brilliance Collection will be available March2 — May 3, 2021.

*********************************************************************************************************

The 2019-2021 In-Colors will be retiring soon. See the complete list of items in my online store Here.

*********************************************************************************************************

Here’s To You

Subscribe February11th – March 10th

Three cheers for mountain air, a sky filled with sunshine, and finding joy in life’s journey! Adventure awaits inside this month’s majestic, mountain-themed kit. With enough elements and embellishments to create eight cards and coordinating envelopes, the Here’s to You Paper Pumpkin Kit is the perfect pick for celebrating life’s little moments and mountain-high milestones!

What makes March’s kit one-of-a-kind? The spectacular set of four free stencils—and a stamping sponge—that you’ll find inside! Pair this pack of stunning stencils with the kit’s contents to stamp a springtime scene, then store the set to stamp for any season in the future. Clean up your binoculars and dust off your hiking boots—the Here’s to You Paper Pumpkin Kit is ready to lead you on an excursion to explore your creativity!

ABOUT THE MARCH KIT

Details

  • Kit contains enough supplies to create 8 cards—4 each of 2 designs—and coordinating envelopes. The kit’s contents include printed card bases, die-cut paper pieces, embellishments, adhesive, and more!
  • Card size: 4-1/4″ x 5-1/2″ (10.8 x 14 cm)
  • Envelope size: 4-1/2″ x 5-3/4″ (11.4 x 14.6 cm)
  • Coordinating colors: Bumblebee, Calypso Coral, Old Olive, Petal Pink, Pretty Peacock, Seaside Spray
  • Includes four free stencils and a stamping sponge!
  • Arrives in a cute and collectible box.

Subscribe to the March 2021 Paper Pumpkin Kit between 11 February and 10 March at paperpumpkin.com!

Note: Supplies may be limited toward the end of the subscription period.

*********************************************************************************************************

Card stock cuts for this project:

  • Basic White Cardstock 2 1/2″ X 2 1/2″ (butterfly), 4″ X 5 1/4″ (inner liner)
  • Bermuda Bay Cardstock 4 1/4″ X 11″ (card base scored and folded at 5 1/2″), 4 1/8″ X 5 3/8″ (card front)
  • Calypso Coral Cardstock 4 1/8″ X 5 3/8″ (inner liner mat)
  • Butterfly Bijou Designer Series Paper 4 1/8″ X 5 3/8″ (card front), 2 1/2″ X 6″ (envelope flap)

*********************************************************************************************************

Product List

Stampin’ Up! Butterfly Brilliance Birthday for Fun Fold Friday

Good Friday morning my stamping friends and welcome to my Fun Fold Friday. How was everyone’s week? Is anyone doing anything for the weekend? I’ll be working all weekend at both jobs.

Today’s card I made on my Facebook Live video on Wednesday. If you were able to join me or watched the replay, thank you very much. If you’d like to watch my video and stamp along, the measurements are below along with the links to my Facebook page and my YouTube channel. Here’s my card that I made.

I used the Stampin’ Up! Butterfly Brilliance Bundle, coming March 2nd, and the Stampin’ Up! Butterfly Wishes Cling Stamp Set for my fun fold card. I played along with the Aud Sentiments Challenge #268, ‘Anything Goes + A Sentiment’. I also played along with Watercooler Wednesday Challenge #308.

I started by scoring and cutting a Misty Moonlight card base at 1 3/4″, 3 1/2″, 5 1/4″ & 7″. I lined the long edge of the card base at the 1 1/4″ mark on my trimmer and cut from the 1 3/4″ score line up to the 5 1/4″ score line. I slid the card base so the opposite long edge was lined up at the 1 1/4″ mark on my trimmer and again cut from the 1 3/4″ score line up to the 5 1/4″ score line. I folded the card like an accordion having the cut portion popping out. I stamped the butterflies from the Stampin’ Up! Butterfly Brilliance Cling Stamp (coming March 2nd) in Tuxedo Black Ink on a panel of Basic White cardstock. I cut the butterflies out using the Brilliant Wings Dies (coming March 2nd). I colored the butterflies in using my Bermuda Bay, Mint Macaron, Misty Moonlight and So Saffron Stampin’ Blends Markers.

Above is a top view of how the card base should look.

I adhered a panel of the new Butterfly Bijou 6 X 6 Designer Series Paper (coming March 2nd) to the front of the card base using Stampin’ Seal. I adhered a panel of the Natural Touch Specialty Paper (coming March 2nd) to the pop out portion overlapping the front DSP panel using Multipurpose Liquid Glue. On a panel of Basic White cardstock I stamped the sentiment from the Butterfly Wishes stamp set in Misty Moonlight Ink and cut the panel out using the 2nd largest square from the Stitched Shapes Dies. I adhered the sentiment to the card front panel using Stampin’ Seal and adhered a butterfly to it using Stampin’ Dimensionals.

I adhered 4 small panels of Butterfly Bijou DSP to the card base using Multipurpose Liquid glue.

I adhered a panel of the Butterfly Bijou DSP to the inside of the card base using Multipurpose Liquid Glue. I adhered a panel of the Natural Touch Specialty Paper to the pop out panel using Multipurpose Liquid Glue. I stamped the sentiment from the Butterfly Wishes stamp set in Misty Moonlight Ink on a panel of Basic White cardstock and adhered it to the pop out panel using Stampin’ Seal. I cut a small butterfly from another panel of Butterfly Bijou DSP using my Paper Snips and adhered it to the sentiment using Glue Dots. I adhered a panel of Natural Touch Specialty Designer Paper to the front of a small Basic White card base using Multipurpose Liquid Glue. I cut a panel of Basic White cardstock using the Hippo & Friends Dies. I stamped the sentiment from the Butterfly Wishes stamp set in Misty Moonlight Ink in the center of the die cut panel and adhered it to the 2nd card front using Stampin’ Seal.

On the inside of the small card base I stamped the sentiment from the Stampin’ Up! Punch Party Photopolymer Sale-a-bration Host Stamp Set in Misty Moonlight Ink in the center. I colored the flowers and leaves in on the sentiment using my Magenta Madness and Just Jade Stampin’ Blends Markers. I adhered a butterfly to the inside using Glue Dots. I adhered the small card base to the back of the larger card base using Stampin’ Seal. I added a few 2020-2022 In-Color Enamel Dots to the card fronts.

To finish my card I decorated a Basic White Medium Envelope. I stamped one of the butterflies from the Butterfly Brilliance stamp set in Tuxedo Black Ink on the envelope front and colored it in using my Bermuda Bay, Mint Macaron and Misty Moonlight Stampin’ Blends Markers. I adhered a panel of Butterfly Bijou to the envelope flap.

Thank you for stopping by my blog today. I hope you liked my card and will give it a try. The list of measurements are below if you’d like to stamp along while watching the video. You can watch my video on my Facebook page Here.

You can also view the video on my YouTube channel Here. Happy Stamping!!

*********************************************************************************************************

If you need any stamping supplies, I’d love to be your Demonstrator. Just click HERE to go directly to my online store or drop me an email if you have any questions. 

MY CURRENT HOST CODE IS: 9BCVNW9D

Use this host code when you order $50 or greater and receive a free gift from me! If your order is over $150, please do not use this code, but you’ll still get the free gift. The free gift is your choice of any 1 item valued up to $10.00 from the 2020-2021 Annual Catalog or the January-June 2021 Mini Catalog!   For any orders $50 or more I will also send you my monthly class tutorials.  Click HERE or go to my Customer Rewards for more details and to see what this months tutorials are.

 Click HERE to shop the clearance rack.

Please remember to use my current Host Code and make sure that you can see my name on the final checkout page listed as your Demonstrator when you order so that you know that you’re ordering with me and you’ll get my rewards! 

Happy Stamping, Karen!

*********************************************************************************************************

Here’s To You

Subscribe February11th – March 10th

Three cheers for mountain air, a sky filled with sunshine, and finding joy in life’s journey! Adventure awaits inside this month’s majestic, mountain-themed kit. With enough elements and embellishments to create eight cards and coordinating envelopes, the Here’s to You Paper Pumpkin Kit is the perfect pick for celebrating life’s little moments and mountain-high milestones!

What makes March’s kit one-of-a-kind? The spectacular set of four free stencils—and a stamping sponge—that you’ll find inside! Pair this pack of stunning stencils with the kit’s contents to stamp a springtime scene, then store the set to stamp for any season in the future. Clean up your binoculars and dust off your hiking boots—the Here’s to You Paper Pumpkin Kit is ready to lead you on an excursion to explore your creativity!

ABOUT THE MARCH KIT

Details

  • Kit contains enough supplies to create 8 cards—4 each of 2 designs—and coordinating envelopes. The kit’s contents include printed card bases, die-cut paper pieces, embellishments, adhesive, and more!
  • Card size: 4-1/4″ x 5-1/2″ (10.8 x 14 cm)
  • Envelope size: 4-1/2″ x 5-3/4″ (11.4 x 14.6 cm)
  • Coordinating colors: Bumblebee, Calypso Coral, Old Olive, Petal Pink, Pretty Peacock, Seaside Spray
  • Includes four free stencils and a stamping sponge!
  • Arrives in a cute and collectible box.

Subscribe to the March 2021 Paper Pumpkin Kit between 11 February and 10 March at paperpumpkin.com!

Note: Supplies may be limited toward the end of the subscription period.

*********************************************************************************************************

Card stock cuts for this project:

  • Basic White Cardstock 6″ X 5″ panel (butterflies), 2 3/4″ X 2 3/4″ (front sentiment), 1 1/2″ x 2 3/4″ (center sentiment), 3 1/2″ X 2″ (small card front sentiment), 7 1/4″ X 5 3/8″ (small card base scored at 3 5/8″)
  • Misty Moonlight Cardstock 5 1/2″ X 11″ (card base scored, cut and folded as listed above)
  • Butterfly Bijou 6 X 6 Designer Series Paper 2 – 1 5/8″ x 5 3/8″ & 4 – 1 5/8″ X 1 1/8″ (card base panels), 2 1/2″ X 6″ (piece for envelope flap)
  • Natural Touch Specialty Paper 2 7/8″ X 2 7/8″ (card front sentiment mat), 1 5/8″ x 2 7/8″ (center sentiment mat), 3 5/8″ x 5 3/8″ (small card front)

*********************************************************************************************************

Product List

Stampin’ Up! Butterfly Brilliance For Fun Fold Friday

Good Friday morning my fellow stampers and welcome to my Fun Fold Friday. How was everyone’s week? We’re upon a weekend already. This week just flew by for me. I guess with the snow Monday and Tuesday and working yesterday and today, it’s just gone.

Sorry I missed doing a Facebook live on Wednesday. I had a tooth ache so I went to the dentist (where you would normally go for that). 3 hours later I was still there, UGH!! Unfortunately I have to go for a root canal this morning and then to work from there. Fun times. So I changed my fun fold for today for a simple one using some NEW product that I received yesterday YAY!!! The gorgeous new Stampin’ Up! Butterfly Brilliance Collection. Here’s my card for today.

My colors are from Fab Friday Color Challenge #206.

I started by adhering a panel of the new Butterfly Bijou 6 X 6 Designer Series Paper to a Basic Black Mat using Stampin’ Seal. I scored and folded a Blushing Bride card base at 2 3/4″ & 5 1/2″. I folded the card in half and then folded the front panel back and adhered it using Stampin’ Seal. I adhered the matted panel to the card base using Multipurpose Liquid Glue.

On a panel of Basic White cardstock I stamped the butterfly image from the Stampin’ Up! Butterfly Brilliance Cling Stamp Set in Tuxedo Black Ink. This stamp set is one large background stamp that when you use the dies cuts it into 6 butterflies. I cut the butterflies out using the Brilliant Wings Dies. I colored the largest butterfly in using my Water Painters filled with alcohol and Bumblebee Ink on a clear block.

On a panel of Basic White cardstock I stamped the branch and floral image from the Stampin’ Up! Forever Blossoms Cling Stamp Set in Tuxedo Black Ink. I colored the image in using my Water Painter filled with alcohol and Blushing Bride Ink on a clear block and my Just Jade Stampin’ Blends Markers. I stamped the sentiment from the Stampin’ Up! Itty Bitty Birthdays Cling Stamp Set in Tuxedo Black Ink on the bottom of the panel. I adhered the Basic White panel to a Basic Black mat using Stampin’ Seal and then to the card front using Multipurpose Liquid Glue, only on half of the panel. I adhered the butterfly to the artwork using Stampin’ Dimensionals.

On the inside I stamped the sentiment from the Itty Bitty Birthdays on a Basic White panel. I adhered a strip of the Butterfly Bijou DSP to the bottom of the panel using Stampin’ Seal. I adhered the Basic White panel to a Basic Black mat using Stampin’ Seal and then to the inside of the Blushing Bride card base using Multipurpose Liquid Glue. I adhered another panel of the Butterfly Bijou DSP to a Basic Black mat using Stampin’ Seal and then to the inside back of the Blushing Bride card base. I colored the other butterflies using the Water Painters filled with alcohol and Blushing Bride and Bumblebee Inks on clear blocks and my Ivory Stampin’ Blends Marker. I adhered the butterflies to the inside of the card base using Multipurpose Liquid Glue and Glue Dots.

To finish my card I decorated a Basic White Medium Envelope. I adhered a strip of the Butterfly Bijou DSP to the envelope front and a panel to the envelope flap.

Thank you for stopping by my blog today. I hope you liked my card and will give it a try. Happy Stamping!!

*********************************************************************************************************

If you need any stamping supplies, I’d love to be your Demonstrator. Just click HERE to go directly to my online store or drop me an email if you have any questions. 

MY CURRENT HOST CODE IS: 9BCVNW9D

Use this host code when you order $50 or greater and receive a free gift from me! If your order is over $150, please do not use this code, but you’ll still get the free gift. The free gift is your choice of any 1 item valued up to $10.00 from the 2020-2021 Annual Catalog or the January-June 2021 Mini Catalog!   For any orders $50 or more I will also send you my monthly class tutorials.  Click HERE or go to my Customer Rewards for more details and to see what this months tutorials are.

 Click HERE to shop the clearance rack.

Please remember to use my current Host Code and make sure that you can see my name on the final checkout page listed as your Demonstrator when you order so that you know that you’re ordering with me and you’ll get my rewards! 

Happy Stamping, Karen!

*********************************************************************************************************

Bouquet of Hope

Subscribe January 11 – February 10

What is Paper Pumpkin? Paper Pumpkin is our monthly One-Stop Box™ that offers a unique variety of paper projects for subscribers of any skill level to enjoy! These thoughtfully-themed and all-inclusive craft kits encourage you to explore your creativity, try new techniques, and discover your potential in papercrafting.

Paper Pumpkin introduces you to an impressive collection of Stampin’ Up! products, from our one-of-a-kind ink pads to our eye-catching embellishments. Plus, the carefully-chosen components of each Paper Pumpkin kit highlight the unbeatable versatility and coordination our products provide! This easy and exciting way to stock up on supplies—and create small-batch projects for occasions of any kind—inspires you to continue crafting. With Paper Pumpkin, it’s simple: share what you love, and help others enjoy creativity!

The Bouquet of Hope Paper Pumpkin Kit provides enough supplies to create nine cards and coordinating envelopes. This soft, sympathetic kit includes patterned card bases, die-cut floral elements, ribbon, embellishments, and more!

The kit’s exclusive Bouquet of Hope Stamp Set features supportive sentiments centered around comfort, care, hope, and love. Such a versatile stamp set can be used throughout the year! Sadly, there is heartache in the world all around us. We all know someone who could use a heartfelt, handmade card that gives sympathy and strength during a difficult time. This kit’s cards are a must to have on-hand!

ABOUT THE FEBRUARY KIT

Details

  • Kit contains enough supplies to create 9 cards—3 each of 3 designs—and coordinating envelopes. Kit includes card bases, decorative die-cut pieces, embellishments, and more.
  • Card size: 4-1/4″ x 5-1/2″ (10.8 x 14 cm)
  • Envelope size: 4-1/2″ x 5-3/4″ (11.4 x 14.6 cm)
  • Coordinating colors: Basic Black, Bumblebee, Just Jade, Merry Merlot, Mossy Meadow, Rococo Rose
  • Coordinates with the Flower & Field Designer Series Paper, an exclusive Sale-A-Bration item.

Subscribe to the February 2021 Paper Pumpkin Kit between 11 January and 10 February at paperpumpkin.com!

Note: Supplies may be limited toward the end of the subscription period.

COORDINATING PRODUCT

155223 | Flower & Field Designer Series Paper

  • Earn this pack of paper for FREE with a purchase of $50 USD or more during Stampin’ Up!’s Sale-A-Bration promotion! 

*********************************************************************************************************

Card stock cuts for this project:

  • Basic Black Cardstock 2 – 2 5/8″ X 4 1/8″ (card front and inner liner mats), 4 1/4″ X 2 3/4″ (artwork mat), 4 1/8″ x 5 3/8″ (inner dsp mat)
  • Basic White Cardstock 2 5/8″ X 4 1/8″ (artwork), 5 1/2″ X 6 1/2″ (butterflies), 2 1/2″ X 4″ (inner liner)
  • Blushing Bride Cardstock 4 1/4″ X 11″ (card base scored and folded at 2 3/4″ & 5 1/2″)
  • Butterfly Bijou 6 X 6 Designer Series Paper 2 1/2″ X 4″ (card front), 4″ X 5 1/4″(back panel of card base), 3/4″ X 2 1/2″ (inner liner strip), 2 1/2″ X 6″ (envelope flap), 1/2″ X 6″ (envelope front)

*********************************************************************************************************

Product List