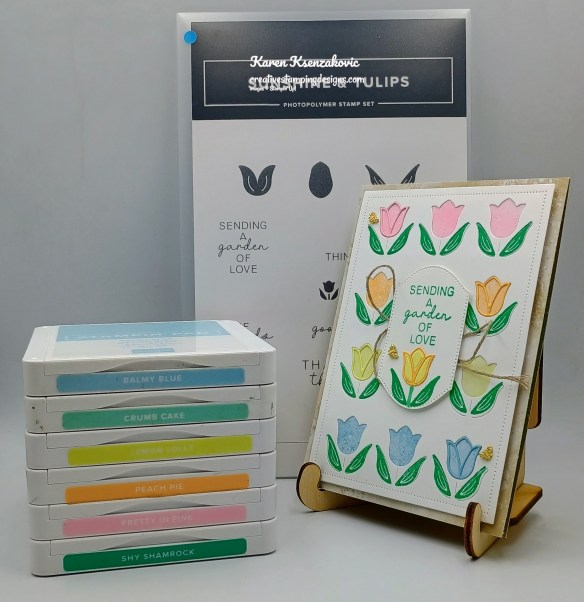
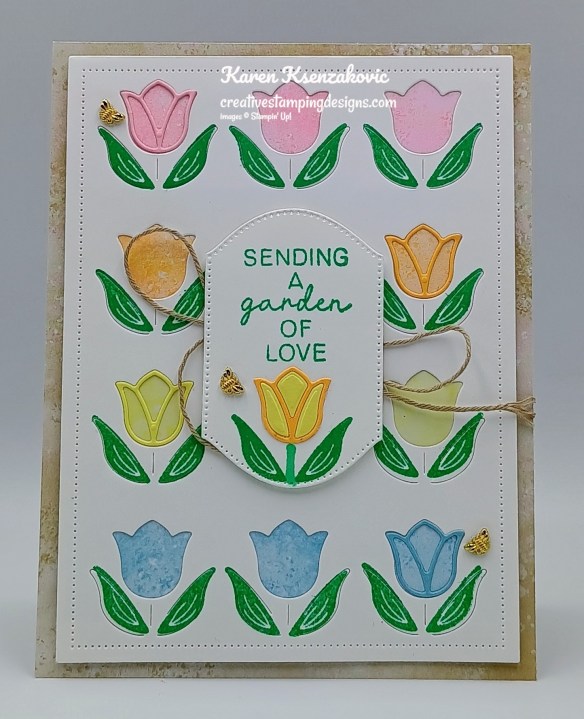
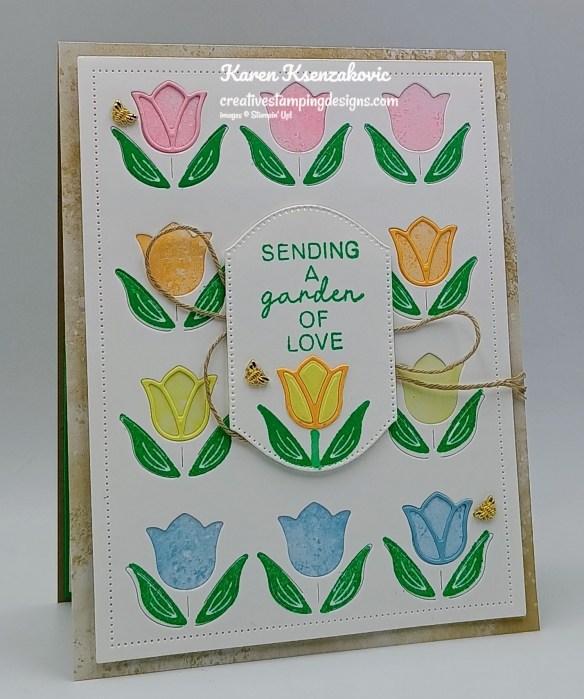
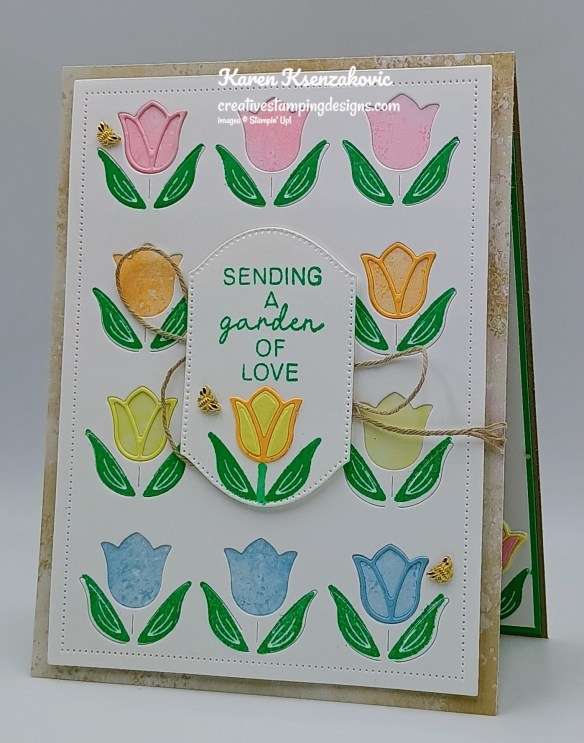
Good Thursday morning stamping friends welcome to our Happy Inkin’ Thursday Blog Hop. If you are starting with me, thank you, I hope you will stop by everyone’s blog to see what they have created this week. If you are hopping over from Mary’s blog, thank you for stopping by. This week we have beautiful Spring Color Challenge. If you’d like to see a quick video on how I made this card, Click Here to go to my Instagram Reels. Here is my card using this week’s colors.
I used the Stampin’ Up! sunshine & Tulips Bundle along with the Neutrals 6 x 6 Designer Series Paper, Subtles 6 x 6 Designer Series Paper & 2024-2026 In-Color 6 x 6 Designer Series Paper for my card today.
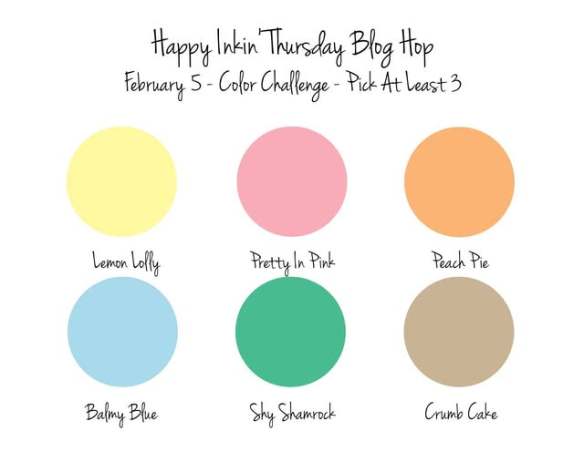
There are our colors for this week
Adhere a panel of Neutrals DSP to a Crumb Cake card base. Using the large Sunshine & Tulips Die, cut a panel of Basic White. Stamp the leaf image from the Sunshine & Tulips stamp set in Shy Shamrock Ink on the Basic White die cut panel. Adhere a panel of Pretty in Pink and Peach Pie 2024-2026 In-Color DSP to the back of the Basic White die cut panel. Adhere a panel of Lemon Lolly and Balmy Blue Subtle DSP to the back of the die cut Basic Whit panel.
Using the Sunshine & Tulips Dies, cut panels of Balmy Blue, Lemon Lolly, Pech Pie and Pretty in Pink using the detailed tulip die 2 times each. Adhere the Balmy Blue, Lemon Lolly, Peach Pie and Pretty in Pink die cut tulips on the die cut panel, 1 on each row of tulips. Adhere the card front to the Crumb Cake card base with Stampin’ Dimensionals.
Stamp the sentiment from the Sunshine & Tulips stamp set in Shy Shamrock Ink on a panel of Basic White. Cut the sentiment out using the Sunshine & Tulips Dies. Stamp the leaf image from the Sunshine & Tulips stamp set in Shy Shamrock Ink on the bottom of the sentiment. Draw a stem using the Shy Shamrock Stampin’ Blends Marker. Adhere the detailed die cut tulip to the stem. Adhere the inside pieces from the detailed die cut tulip inside the outlined panel. Tie a large bow using the Crumb Cake Baker’s Twine and adhere it to the card front. Adhere the sentiment over the bow with Stampin’ Dimensionals. Add a few Tiny Bee Trinkets to the card front.
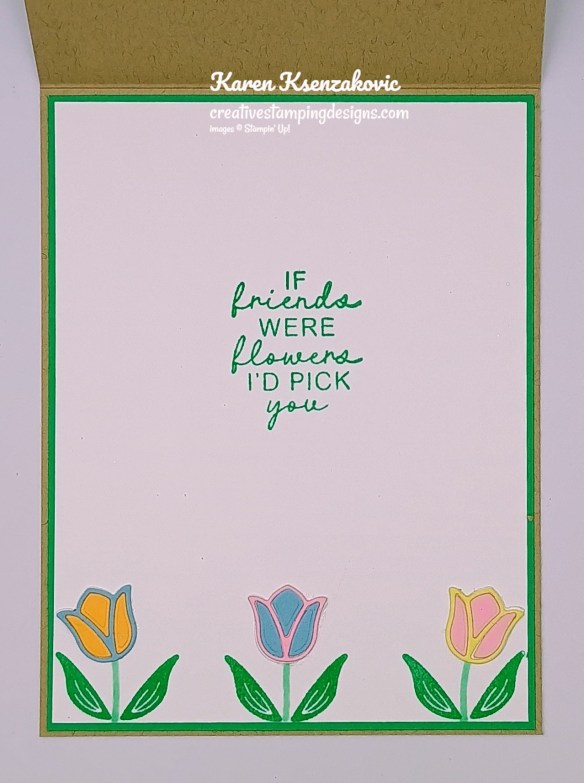
Stamp the sentiment from the Sunshine & Tulips stamp set in Shy Shamrock Ink on a panel of Basic White. Stamp the leaf image from the Sunshine & Tulips stamp set on the bottom of the panel 3 times. Draw stems using the Shy Shamrock Stampin’ Blends Marker. Adhere the other detailed outlined tulips on the stems and the detailed inside pieces. Adhere the Basic White panel to a Shy Shamrock mat then to the inside of the Crumb Cake card base.
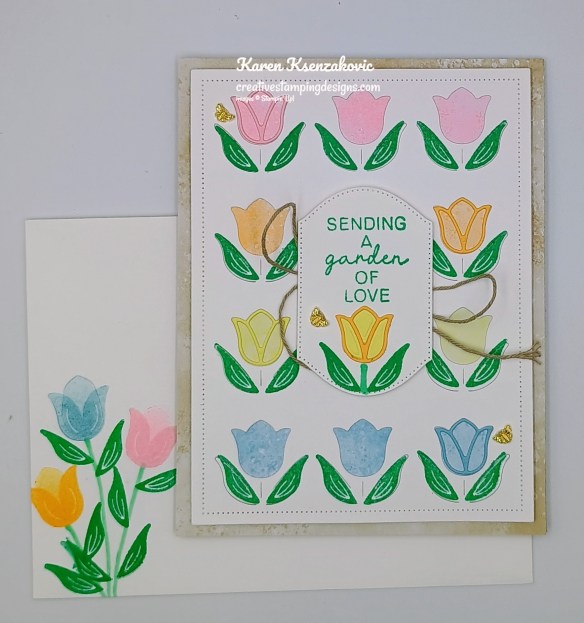
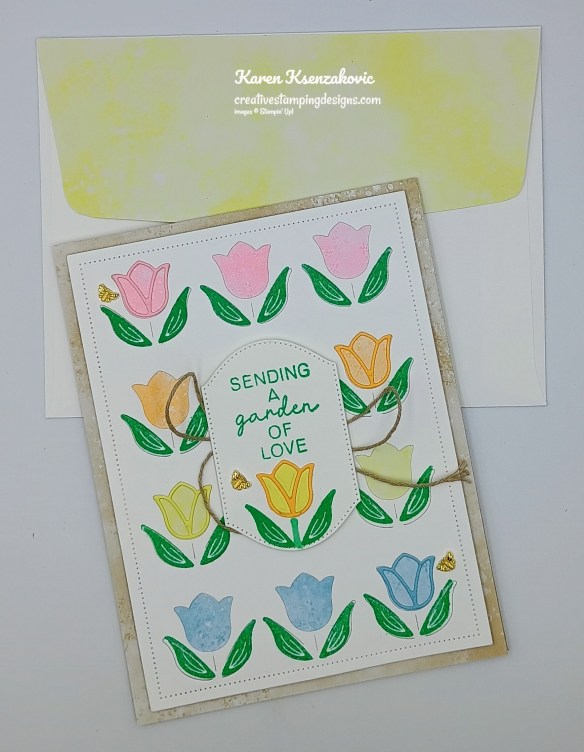
Stamp the tulip images from the Sunshine & Tulips stamp set in Balmy Blue, Peach Pie and Pretty in Pink Inks on the envelope front. Draw stems with the Shy Shamrock Stampin’ Blends Marker. Stamp the leaf image from the Sunshine & Tulips stamp set in Shy Shamrock Ink on the stems. Adhere a panel of Subtle DSP to the envelope flap.
Thank you for stopping by my blog today. Now that you’ve seen my card, let’s get on with the hop! Click the next button below to hop over to see what Tara has created. Happy Hopping
Just in case you get lost along the way, here is a list of the team members involved in the hop today.
If you need any stamping supplies, I’d love to be your Demonstrator. Just click HERE to go directly to my online store or drop me an email if you have any questions.
Good Thursday morning stamping friends HAPPY SPRING!!! Welcome to our Happy Inkin’ Thursday Blog Hop. If you are starting with me, thank you. I hope you will stop by everyone’s blog to see what they have created this week. If you are hopping over from Akiko’s blog, thank you for stopping by. This week we have Sketch Challenge, and I asked my daughter to pick colors for my card since I couldn’t decide. If you’d like to see a quick video of how I made this card, Click Here to go to my Instagram Reels. Here is my card using this week’s sketch.
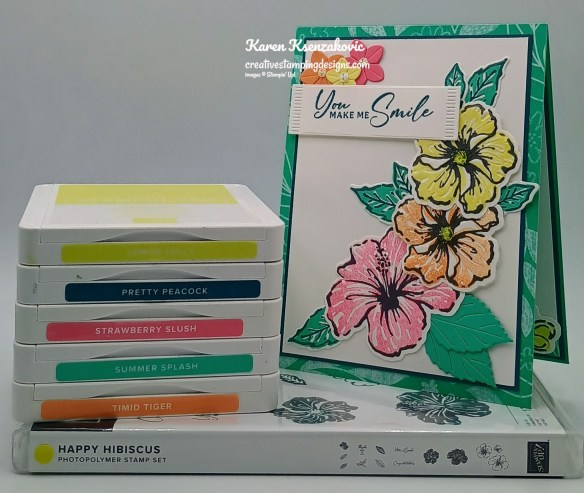
I used the Stampin’ UP! Online Exclusive Happy Hibiscus Bundle along with the 2024 – 2026 In-color 6 x 6 Designer Series Paper for my card today.
This is our sketch for this week.
Stamp the detailed flower trio from the Stampin’ Up! Happy Hibiscus Photopolymer Stamp Set on the 3 1/2″ x 4″ panel of Basic White in Tuxedo Black Ink. Stamp the medium and small flower from the same flower trio on the 2″ x 3 1/4″ panel of Basic White in Tuxedo Black Ink. Stamp the large solid flower from the Happy Hibiscus stamp set in Strawberry Slush Ink, stamping off once on scrap paper, over the detailed image. Stamp the medium solid flower image from the Happy Hibiscus stamp set in Timid Tiger Ink, stamping off once on scrap paper, over the detailed image. Stamp the medium solid flower image in Lemon Lolly Ink over the other medium detailed flower image. Stamp the small solid flower image in Lemon Lolly Ink over the detailed flower image. Stamp the small solid flower image again in Timid tiger Ink, stamping off once on scrap paper, over the other detailed flower image. cut all the flowers out using the Happy Hibiscus Hybrid Embossing Folder.
Stamp the large and small detailed leaf images from the Happy Hibiscus stamp set in Pretty Peacock Ink on a panel of Basic White. Stamp the large and small solid leaf images in Summer Splash Ink over the detailed images. Cut all the images out using the Happy Hibiscus Dies. From a panel of Summer Splash cut out 2 of the detailed leaf dies using the Happy Hibiscus Dies. From panels of Lemon Lolly, Strawberry Slush and Timid Tiger, cut the large and small solid flowers using the Happy Hibiscus Dies. Adhere the large flower to the Basic White card front panel using Glue Dots. Adhere the medium flowers to the card front using Stampin’ Dimensionals. Adhere the leaves under the flowers using Glue Dots. Add a couple Lemon Lolly Tinsel Gems to the flower centers.
On a panel of Basic White, stamp the sentiment from the Happy Hibiscus stamp set in Pretty Peacock Ink. Cut the sentiment out using the Happy Hibiscus Dies. Adhere the sentiment to the card front using Stampin’ Dimensionals. Add a Lemon Lolly, Strawberry Slush and Timid Tiger small flower just under the sentiment using Glue Dots. Add Iridescent Faceted Gems to the flower centers.
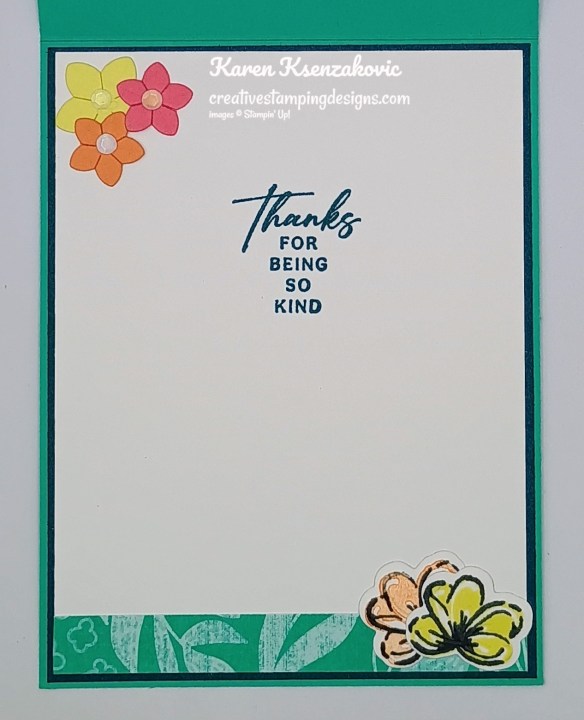
Stamp the sentiment from Happy Hibiscus stamp set in Pretty Peacock Ink on a panel of Basic White. Adhere a strip of 2024 – 2026 In-Color DSP to the bottom of the panel. Adhere the other die cut flowers to the corners. Adhere the Basic White panel to a Pretty Peacock mat then to the inside of the Summer Splash card base. Add a few White Adhesive-Backed Sequins to the flower centers.
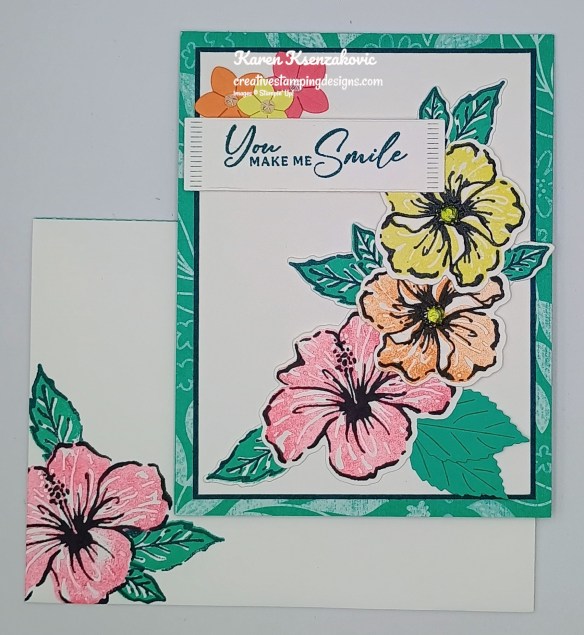
Decorate a Basic White Medium Envelope to complete your card. Stamp the large, detailed flower image from the Happy Hibiscus stamp set in Tuxedo Black Ink on the envelope front. Stamp the large solid flower image in Strawberry Slush Ink, stamping off once on scrap paper, over the detailed image. Stamp the detailed leaf images from the Happy Hibiscus stamp set around the flower in Pretty Peacock Ink. Stamp the solid leaf images over the detailed image in Summer Splash Ink. Adhere a panel of 2024 – 2026 In-Color DSP to the envelope flap.
Thank you for stopping by my blog today. Now that you’ve seen my card, let’s get on with the hop! Click the button below to hop over to see what Tara has created. Happy Hopping!
Just in case you get lost along the way, here is a list of the team members involved in the hop today.
If you need any stamping supplies, I’d love to be your Demonstrator. Just click HERE to go directly to my online store or drop me an email if you have any questions.
MY CURRENT HOST CODE IS: Q74RCCMW
Use this host code when placing an order with me. When you order $50 or greater you will receive a free gift from me! If your order is over $150, please do not use this code, but you’ll still get the free gift. The free gift is your choice of any 1 item valued up to $10.00 from the 2024 – 2025 Annual Catalog, January – April 2025 Mini Catalog or from the Online Exclusives! For any orders $50 or more I will also send you my monthly class tutorials. Click HERE or go to my Customer Rewards for more details and to see what this month’s tutorials are.
Please remember to use my current Host Code and make sure that you can see my name on the final checkout page listed as your Demonstrator when you order so that you know that you’re ordering with me, and you’ll get my rewards!
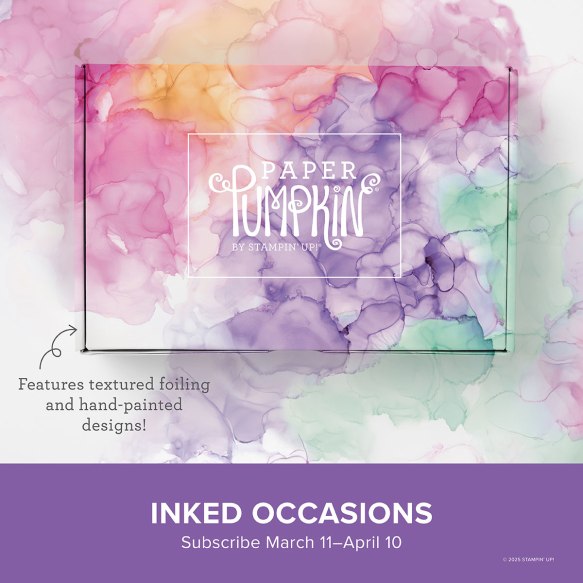
Craft stunning cards with hand-painted, alcohol ink designs! • Makes 9 cards: 3 each of 3 designs with 9 coordinating envelopes • Textured gold foil on the card bases and sentiments • Precut paper pieces and butterfly embellishments • Coordinating colors: Berry Burst (Classic Stampin’ Spot), Flirty Flamingo, Fresh Freesia, Gorgeous Grape, Peach Pie, Pool Party
Cards come in a beautiful coordinating box!
Subscribe to the April Paper Pumpkin Kit between 11 March and 10 April by clicking here!
Don’t miss the coordinating Hugs Abloom Dies Add-On!
Make the most of your Paper Pumpkin kits with the Hugs Abloom Dies add-on! Quickly and cleanly cut out a flower, leaf sprig, sentiment label, or Hugs sentiment to elevate your crafting projects. These additional dies are designed to work with THREE Paper Pumpkin Kits: the Inked Occasions Paper Pumpkin Kit, the Mountain Majesties Paper Pumpkin Kit, and the Full of Charm Paper Pumpkin Kit. Pair these dies with other Stampin’ Up! products for even more creative options!
DETAILS – 4 dies – Largest die: 2-1/2″ x 1-1/4″ (6.4 x 3.2 cm) – Use with a Stampin’ Cut & Emboss Machine (sold separately)
You must be a current Paper Pumpkin subscriber to purchase this item. To become a subscriber, visit www.stampinup.com/paperpumpkin.
Note: Supplies may be limited toward the end of the subscription period.
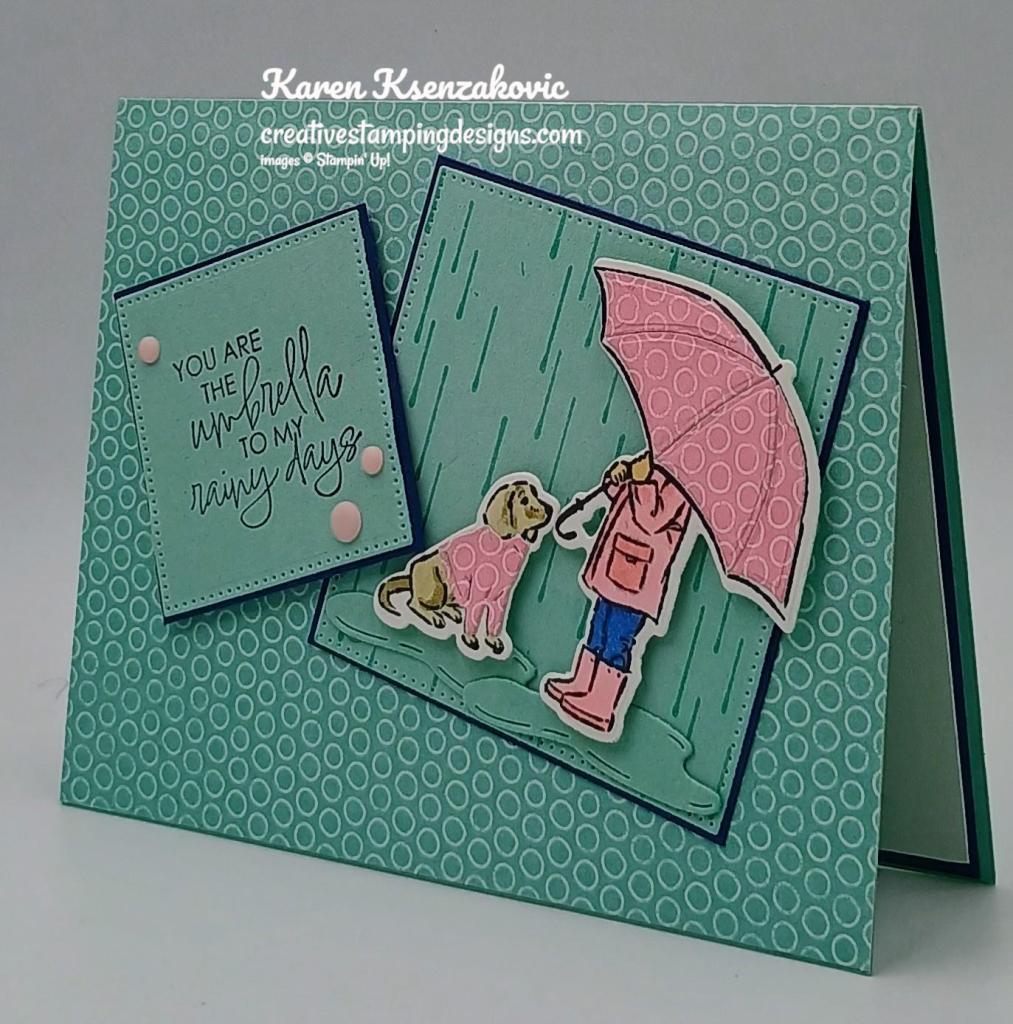
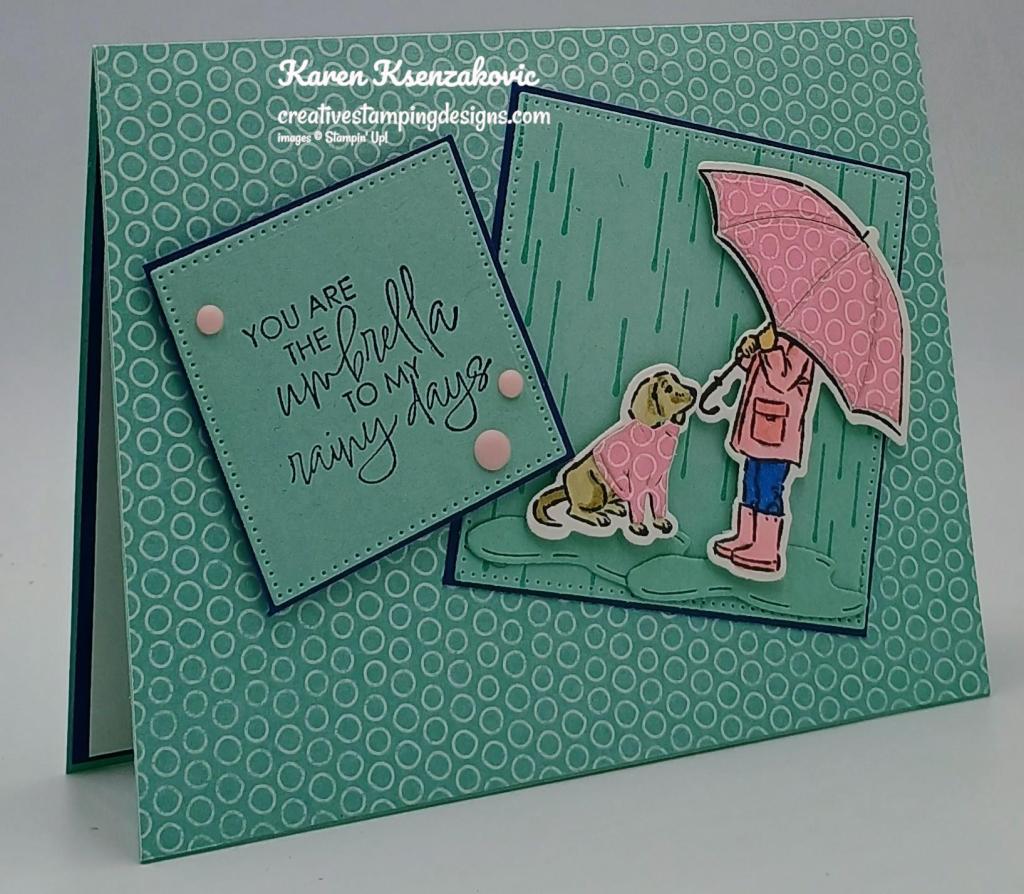
Good Thursday morning stamping friends and welcome to our Happy Inkin’ Thursday Blog Hop. If you are starting with me, thank you, I hope you will stop by everyone’s blog to see what they have created this week. If you are hopping over from Akiko’s blog, thank you for stopping by. This week we have Sketch Challenge. If you’d like to see a quick video of how I made this card, Click Here to go to my Instagram Reels. Here is my card using this week’s sketch.
I used the Stampin’ Up! Online Exclusive Umbrella Days Bundle (available Nov 5), along with the Stylish Shapes Dies, Subtle 6 X 6 Designer Series Paper, 2024-2026 In-Color 6 X 6 Designer Series Paper and the Stampin’ Up! Happiest Day Photopolymer Stamp Set for my card today.
This is our sketch for this week.
Adhere a panel of Subtle DSP to a Pool Party card base using Liquid Glue. On a panel of Pool Party, stamp the rain image from the Stampin’ Up! Umbrella Days Cling Stamp Set in Versamark Ink. Sprinkle the image using Clear Embossing Powder and set it using the Heat Tool. Cut the image out using the largest square from the Stylish Shapes Dies. Adhere the die cut panel to a Night of Navy mat using Stampin’ Seal. Adhere the layered panel to the card front using Liquid Glue.
Stamp the small girl and dog images from the Umbrella Days stamp set in Tuxedo Black Ink on a panel of Basic White. Color the images using Crumb Cake, Ivory, Night of Navy and Pretty in Pink Stampin’ Blends Markers. Cut the images out using the Umbrella Days Dies. Using the Umbrella Days Dies, cut the puddle die from a panel of Pool Party and the detailed umbrella and dogs’ coat from a panel of 2024-2026 In-Color DSP. Adhere the detailed umbrella pieces to the girl’s umbrella and the coat on the dog using Liquid Glue. Adhere the puddle die cuts to the bottom of the embossed rain panel using Glue Dots. Adhere the girl and dog to the panel using Stampin’ Dimensionals.
On a panel of Pool Party, stamp the sentiment from the Umbrella Days stamp set in Night of Navy Ink. Cut the sentiment out using the 3rd largest square from the Stylish Shapes Dies. Adhere the sentiment to a Night of Navy mat using Stampin’ Seal. Adhere the layered sentiment to the card front using Stampin’ Dimensionals. Add a few 2024-2026 In-Color Resin Dots to the sentiment.
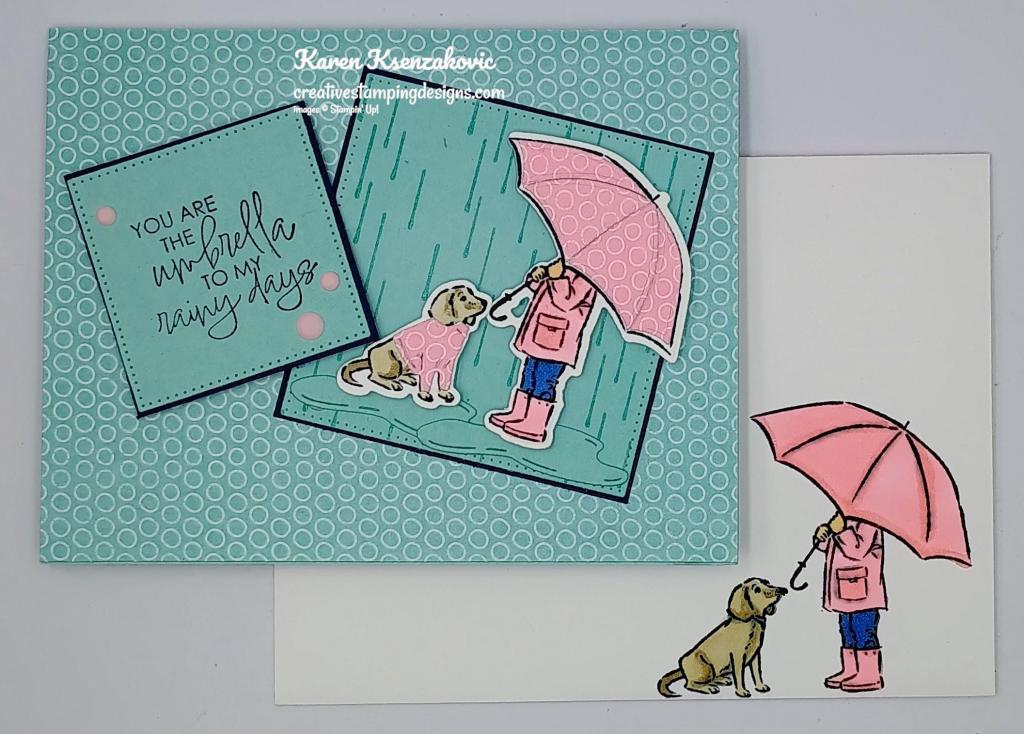
Stamp the sentiment from the Happiest Day stamp set in Night of Navy Ink on a panel of Basic White. Adhere a strip of Subtle DSP to the top of the panel. Adhere the Basic White panel to a Night of Navy mat then to the inside of the Pool Party card base.
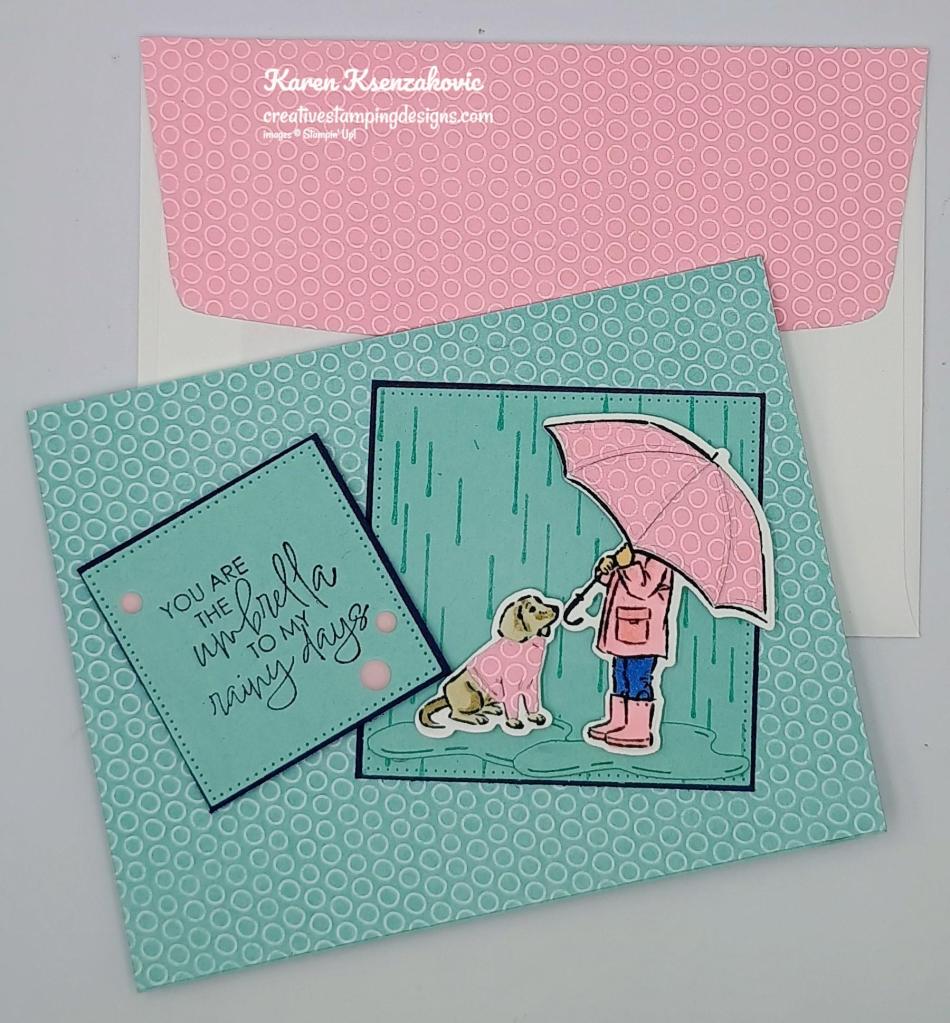
Complete the card by decorating a Basic White Medium Envelope. Stamp the girl and dog mages from the Umbrella Days stamp set in Tuxedo Black Ink on the envelope front. Color the images using Crumb Cake, Ivory, Night of Navy and Pretty in Pink Stampin’ Blends Markers. Adhered a panel of 2024-2026 In-Color DSP to the envelope flap.
Thank you for stopping by my blog today. Now that you’ve seen my card, let’s get on with the hop! Click the button below to hop over to see what Tara has created today. Happy Hopping!!
Just in case you get lost along the way, here is a list of the team members involved in the hop today.
If you need any stamping supplies, I’d love to be your Demonstrator. Just click HERE to go directly to my online store or drop me an email if you have any questions.
MY CURRENT HOST CODE IS: EMDXSBC9
Use this host code when placing an order with me. When you order $50 or greater you will receive a free gift from me! If your order is over $150, please do not use this code, but you’ll still get the free gift. The free gift is your choice of any 1 item valued up to $10.00 from the 2024-2025Annual Catalog, or from the Online Exclusives! Unfortunately, packs of cardstock are no longer an option for a free gift. Shipping has become too expensive to ship and it’s costing me as much to ship as the cardstock costs. For any orders $50 or more I will also send you my monthly class tutorials. Click HERE or go to my Customer Rewards for more details and to see what this month’s tutorials are.
Please remember to use my current Host Code and make sure that you can see my name on the final checkout page listed as your Demonstrator when you order so that you know that you’re ordering with me, and you’ll get my rewards!
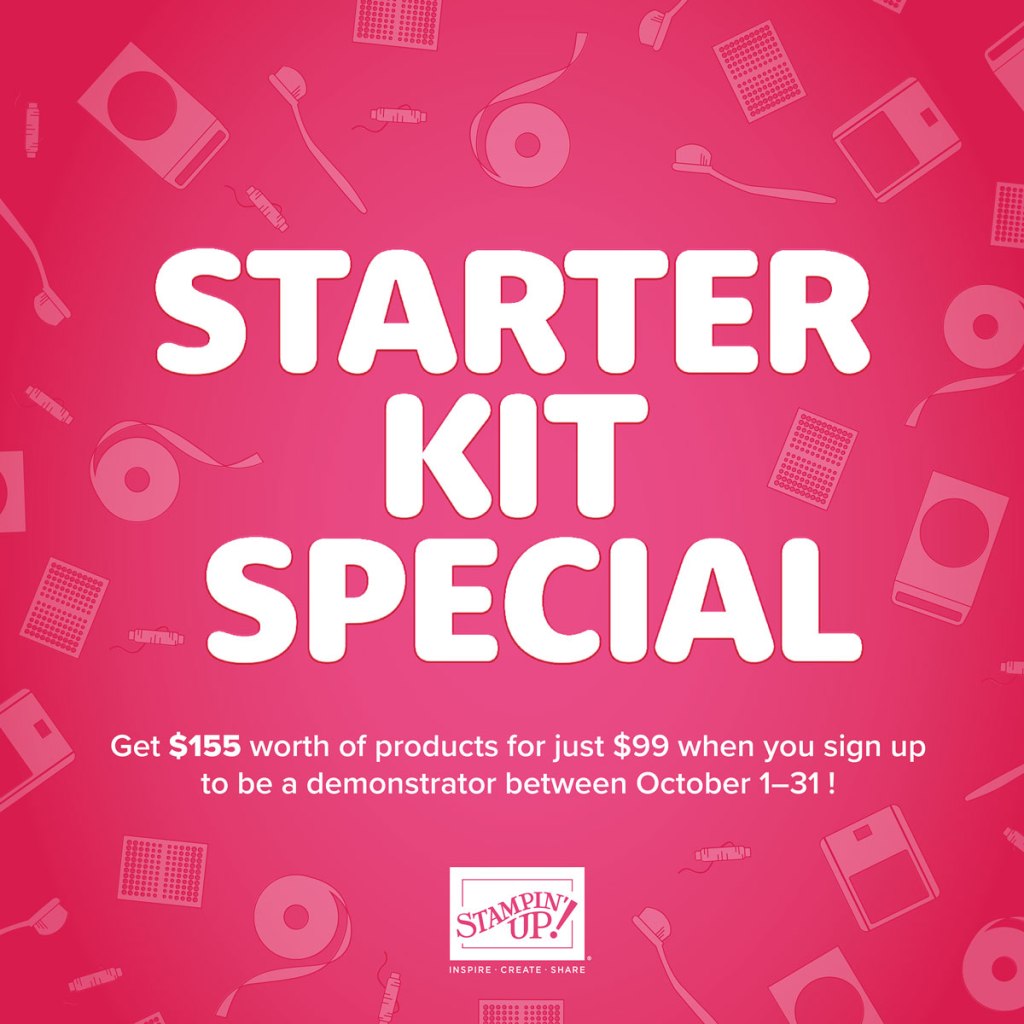
Starter Kit Special Ends in 1 Week – Get an extra $30 Your Starter Kit October 1 – 31
Hey, friend! Stampin’ Up! has a fantastic offer for anyone who becomes a demonstrator! Join my team between October 1–31and you can choose $155 worth of product in your Starter Kit for only $99! Starter Kits normally include $125 worth of product for $99, so that’s an extra $30 worth of product at no additional cost. This offering also includes free shipping and free business supplies! That’s MORE product for EVEN MORE fun!Click Here for all the details.
Interested but you are not really sure about wanting to commit? Contact me and we can talk, and you can ask me any questions at creativestampingdesigns@gmail.com.
Read more information about becoming a demonstrator Here.
A new line of products for Online Exclusives are coming! You won’t find these items in any catalog. This is a great opportunity to spark creativity, expand a crafting collection, and discover new opportunities—all from the convenience of the online store. These products will be available starting in November, BUTyou can add these new items to your Starter Kit if you join in October. Here’s a little sneak peek of some of the items that you can add to your Starter kit and get them before customers and start to play. Click Here for a sneak peek of what’s coming.
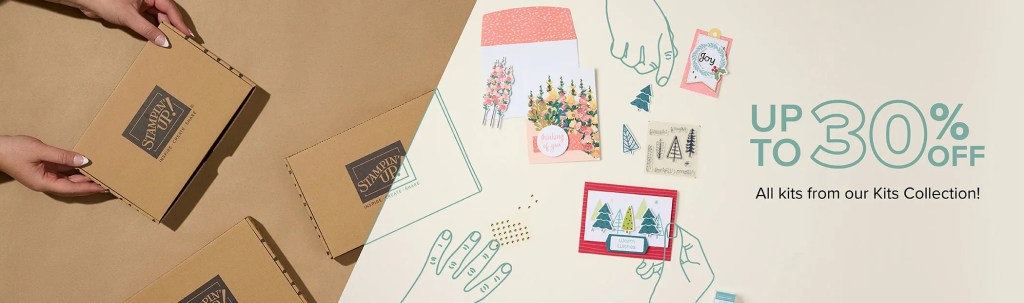
Kits Collection sale for up to 30% off End in 1 Week
Did you know as a demonstrator you can get up to 30% off all the kits AND get your 20% demo discount on top of that. What a GREAT way to save!!!
Save up to 30% off on all your favorite kits October 1–31! Our kits come with everything you need to create a unique paper craft. We have crafting options for card kits, treat packaging, home decor, and so much more! Kits are only available while supplies last.
Here are the details for the sale:
Promotion Period: October 1-31!
ALL kits from the kits collection qualify for the discount.
There is no limit on how many kits you can order, as long as product is available.
Orders must be opened and placed during the promotion dates. Orders opened before October 1 will not qualify for the sale.
Kits on sale will NOT qualify for the Stampin’ Rewards 50% off.
Kits can be added to a Starter Kit at their discounted rate.
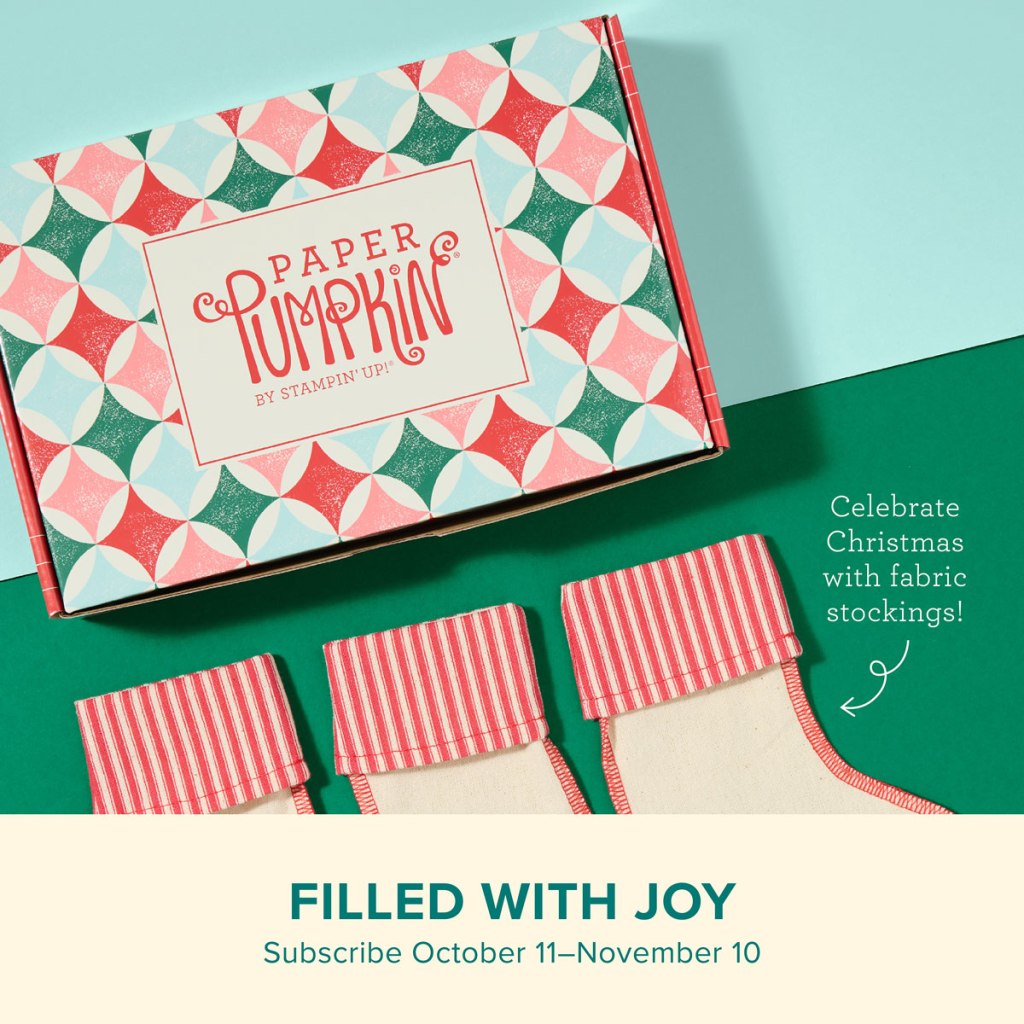
Celebrate Christmas with adorable stockings and gift tags!
Details: • Makes 8 projects: 8 stockings with 8 gift tags • Precut paper pieces • Safety pins and specialty gold foil • Coordinating colors: Flirty Flamingo, Pool Party, Poppy Parade (Classic Stampin’ Spot), Shaded Spruce, Very Vanilla
Subscribe to Paper Pumpkin for a monthly, all-inclusive crafting kit that’s a fun surprise! Each kit includes a photopolymer stamp set, Classic Stampin’ Spot, and step by step instructions to complete exclusive paper craft projects, including cards, tags, and gift packaging. And don’t miss the special add-on that coordinates with the next three months!
Subscribe to the November Paper Pumpkin Kit between 11 October and 10 November by clicking here!
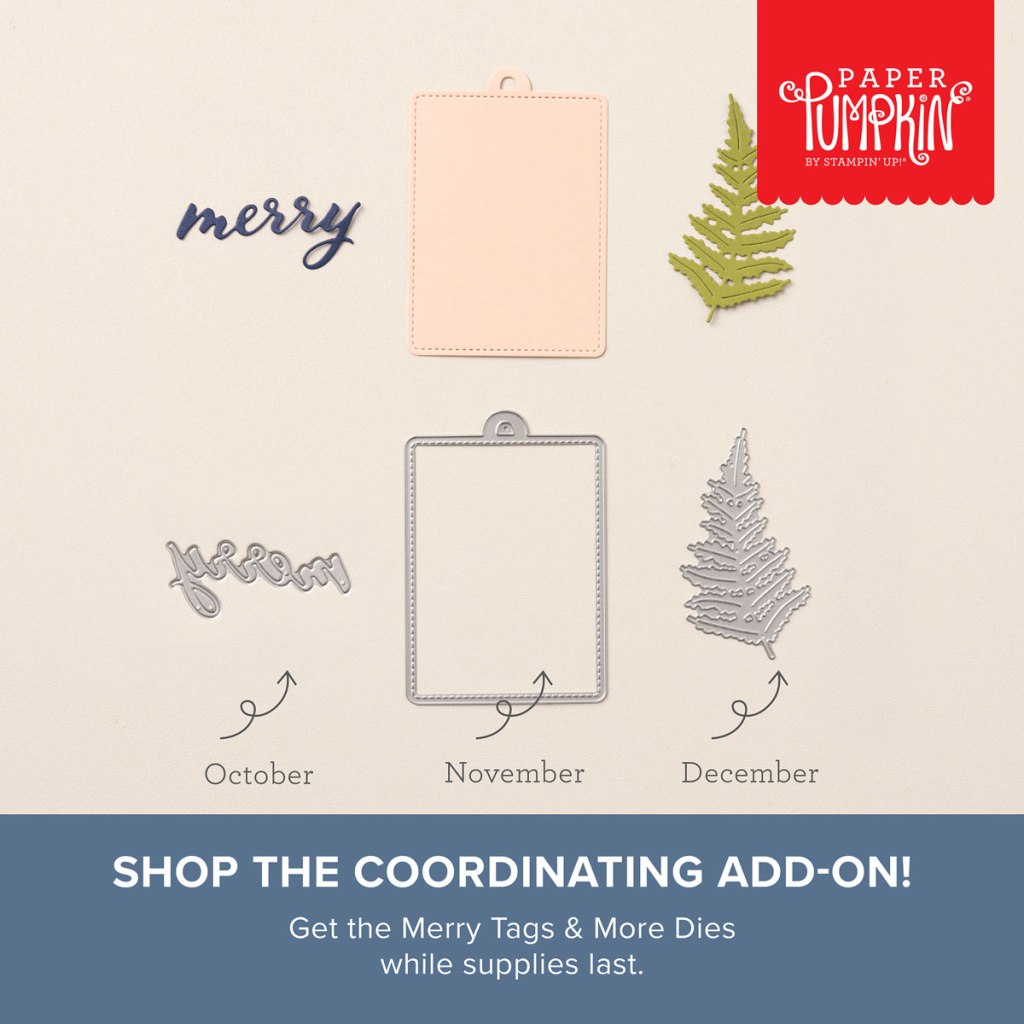
Don’t miss the coordinating Merry Tags & More Dies Add-On!
Add dimension and detail to your cards, scrapbook pages, and gift tags with the Merry Tags & More Dies! With a leaf and tag shape and Merry sentiment, these dies are a great way to expand your crafting experience. They even coordinate with three Paper Pumpkin Kits: Nests of Christmas, Filled with Joy, and Notes from the Heart. Such easy coordination makes these dies a must-have for any paper craft. Paper Pumpkin subscribers can purchase it beginning 11 September. The add-on is available only while supplies last, so it’s best to shop early! Please note that the Stampin’ Cut and Emboss Machine is not included and can be purchased separately.
#165639 $12
Note: Supplies may be limited toward the end of the subscription period.
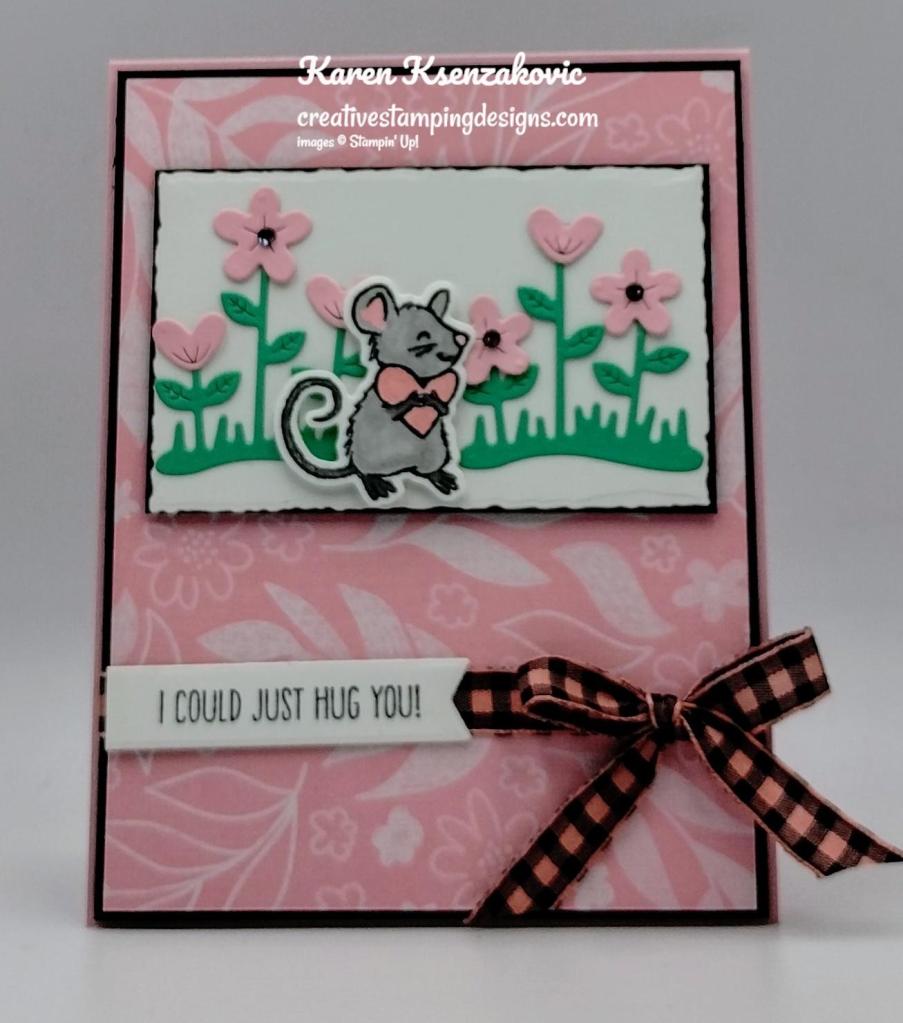
Good Thursday morning stamping friends and welcome to our Happy Inkin’ Thursday Blog Hop. If you are starting with me, thank you, I hope you will stop by everyone’s blog to see what they have created this week. If you are hopping over from Akiko’s blog, thank you for stopping by. This week we have Theme Challenge. If you’d like to see a quick video of how I made this card, Click Here to go to my Instagram Reels. Here is my card using this week’s theme.
I used the Stampin’ Up! Hearts & Hugs Bundle along with the 2024-2026 In-Color 6 C 6 Designer Series Paper and Online Exclusive Deckled Rectangle Dies for my card today.
This is our theme for this week.
Adhere a panel of 2024-2026 DSP to a Basic Black mat using Stampin’ Seal. Color a piece of Black & Very Vanilla 3/8″ Large Check Ribbon using the Dark Pretty in Pink Stampin’ Blends Marker. Wrap the ribbon around the bottom of the layered panel and tie a bow. Adhere the layered panel to a Pretty in Pink card base using Stampin’ Dimensionals.
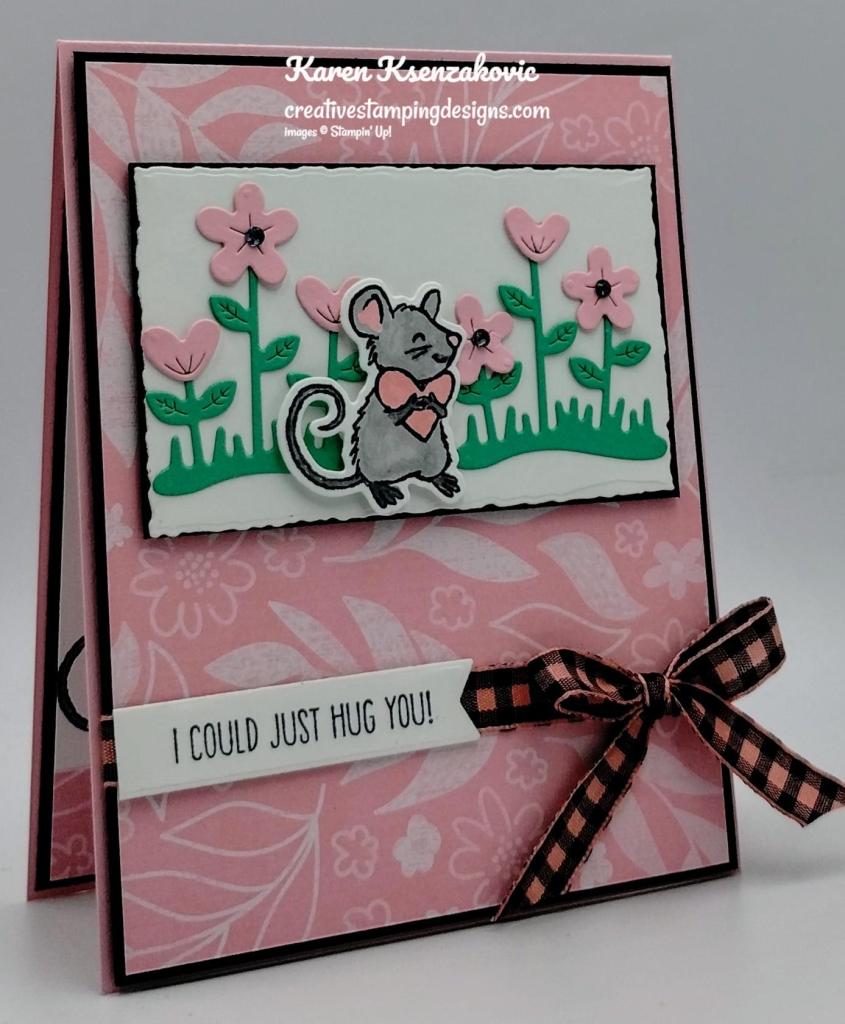
Cut a panel of Basic White using the 5th largest Deckled Rectangle Die. Adhere the rectangle to a Basic Black mat using Stampin’ Seal. Using the Hearts & Hugs Dies, cut the flowers from a panel of Pretty in Pink and the stems from a panel Shy Shamrock. On a panel of Basic White, stamp the mouse image from the Stampin’ Up! Hearts & Hugs Cling Stamp Set in Tuxedo Black Ink. Color the image using Pretty in Pink and Smoky Slate Stampin’ Blends Markers. Cut the mouse using the Hearts & Hugs Dies. Adhere the stems to the rectangle using Liquid Glue. Adhere the flowers on top of the stems using Glue Dots. Adhere the mouse using Stampin’ Dimensionals. Adhere the artwork to the card front using Stampin’ Dimensionals.
On a strip of Basic White, stamp the sentiment from the Hearts & Hugs stamp set in Tuxedo Black Ink. Cut the sentiment using the Hearts & Hugs Dies. Trim the sentiment using Paper Snips. Adhere the sentiment to the card front over the ribbon using Glue Dots. Color a few Rhinestones Basic Jewels using the Dark Basic Black Stampin’ Blends Marker. Adhere the Rhinestones to the flower centers.
On the inside, stamp the sentiment from the Hearts & Hugs stamp set in Tuxedo Black Ink on a panel of Basic White. Adhere a panel of 2024-2026 In-Color DSP to the bottom of the panel. Stamp the mouse image from the Hearts & Hugs stamp set in Tuxedo Black Ink above the DSP. Color the image using Pretty in Pink and Smoky Slate Stampin’ Blends Markers. Adhere the Basic White panel to a Basic Black mat then to the inside of the Pretty in Pink card base.
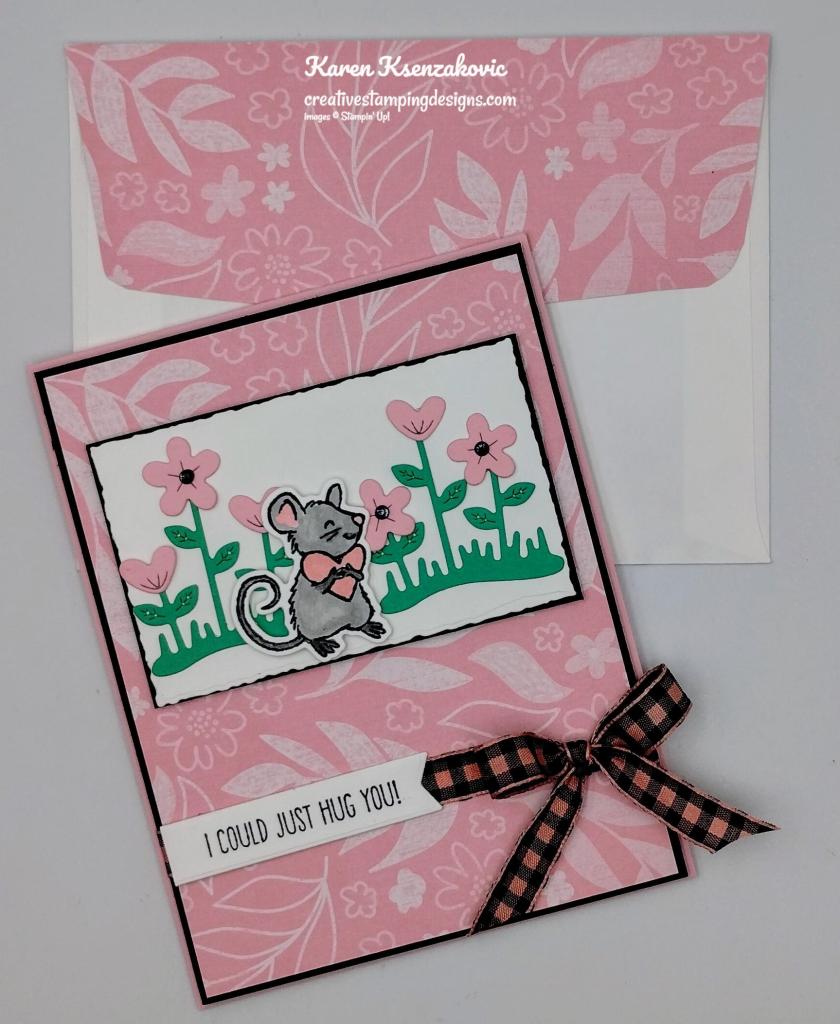
To complete the card, decorate a Basic White Medium Envelope. Stamp the mouse image from the Hearts & Hugs stamp set on the envelope front in Tuxedo Black Ink. Color the image using Pretty in Pink and Smoky Slate Stampin’ Blends Markers. Adhere a panel of 2024-2026 In-Color DSP to the envelope flap,
Thank you for stopping by my blog today. Now that you’ve seen my card, let’s get on with the hop! Click the button below to hop over to see what Tara has created today. Happy Hopping!
Just in case you get lost along the way, here is a list of the team members involved in the hop today.
If you need any stamping supplies, I’d love to be your Demonstrator. Just click HERE to go directly to my online store or drop me an email if you have any questions.
MY CURRENT HOST CODE IS: KFUKW3ZY
Use this host code when placing an order with me. When you order $50 or greater you will receive a free gift from me! If your order is over $150, please do not use this code, but you’ll still get the free gift. The free gift is your choice of any 1 item valued up to $10.00 from the 2024-2025Annual Catalog, or from the Online Exclusives! Unfortunately, packs of cardstock are no longer an option for a free gift. Shipping has become too expensive to ship and it’s costing me as much to ship as the cardstock costs. For any orders $50 or more I will also send you my monthly class tutorials. Click HERE or go to my Customer Rewards for more details and to see what this month’s tutorials are.
Please remember to use my current Host Code and make sure that you can see my name on the final checkout page listed as your Demonstrator when you order so that you know that you’re ordering with me, and you’ll get my rewards!
Redemption Period: August 1-31, 2024 Ordering Deadline: August 31, 2024 at 11:59 p.m. (MT)
There is no limit to the number of coupon codes you can redeem on an order during the redemption period. If using multiple codes, they must be separated by a space.
Coupon codes may be redeemed one time only. They cannot be redeemed after the August 31.
Coupon codes may be redeemed for any product (excluding Starter Kits). They cannot be used on exchanges.
Bonus Days coupon codes can be applied to month-to-month Paper Pumpkin subscriptions and new prepaid subscriptions.
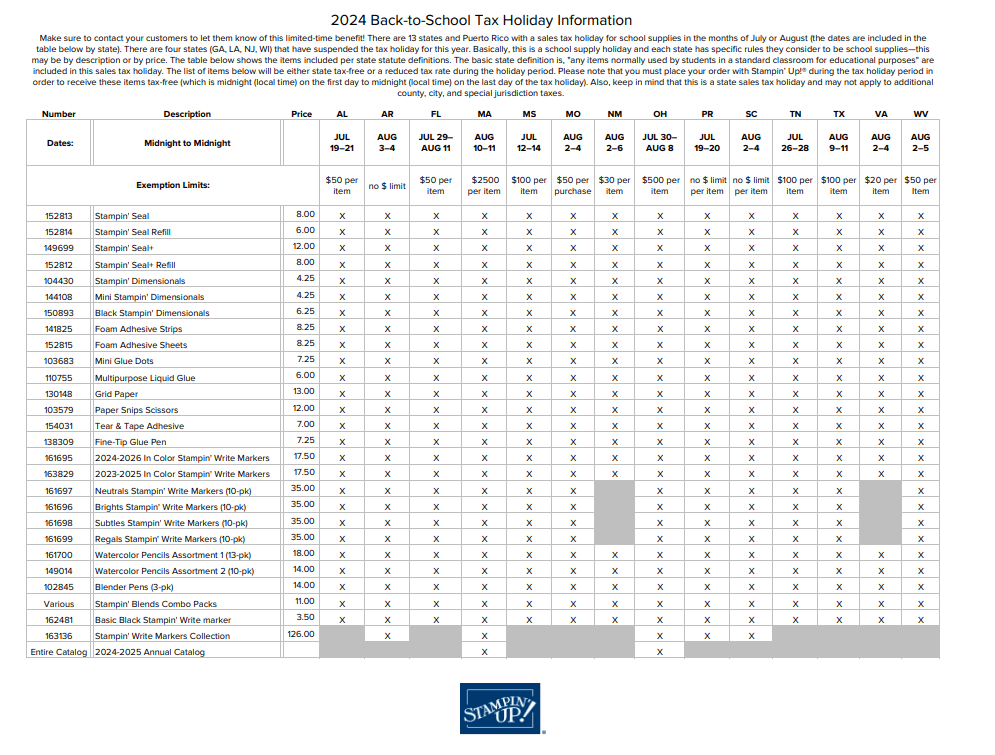
Thirteen states and Puerto Rico are having Back-to-School Sales Tax Holidays this year and some Stampin’ Up! items qualify for the tax break in those states!
The states with upcoming tax holidays are: Alabama, Arkansas, Florida, Massachusetts, Mississippi, Missouri, New Mexico, Ohio, South Carolina, Tennessee, Texas, Virginia and West Virginia. So if you live in one of those states or Puerto Rico, take a second to download the spreadsheet below and mark your calendar!
Here is the list of states having sales tax holidays, what the dates are and what supplies will be tax free during the holiday (click on the image to download a full-size printable page):
Subscribe to Paper Pumpkin for a monthly, all-inclusive crafting kit that’s a fun surprise! Each kit includes a photopolymer stamp set, Classic Stampin’ Spot, and step by step instructions to complete exclusive paper craft projects, including cards, tags, and gift packaging. And don’t miss the special add-on that coordinates with the next three months!
With the August Paper Pumpkin, Time for Cake, bring on a birthday bash with elegant birthday cards made with rose gold details!
• Makes 9 cards, 3 each of 3 designs • Project includes printed card bases, coordinating envelopes, and labels • Embellishments and rose gold cord • Coordinating colors: Moody Mauve, Night of Navy (Classic Stampin’ Spot), Petal Pink, Pecan Pie, Pretty in Pink, Wild Wheat
Don’t miss the coordinating Every Celebration Dies Add-On!
This exclusive add-on (item 164991) coordinates with the three upcoming kits! Paper Pumpkin subscribers can purchase it beginning 11 July. The add-on is available only while supplies last, so it’s best to shop early!
Subscribe to the August Paper Pumpkin Kit between 11 July and 10 August by clicking here!
Note: Supplies may be limited toward the end of the subscription period.
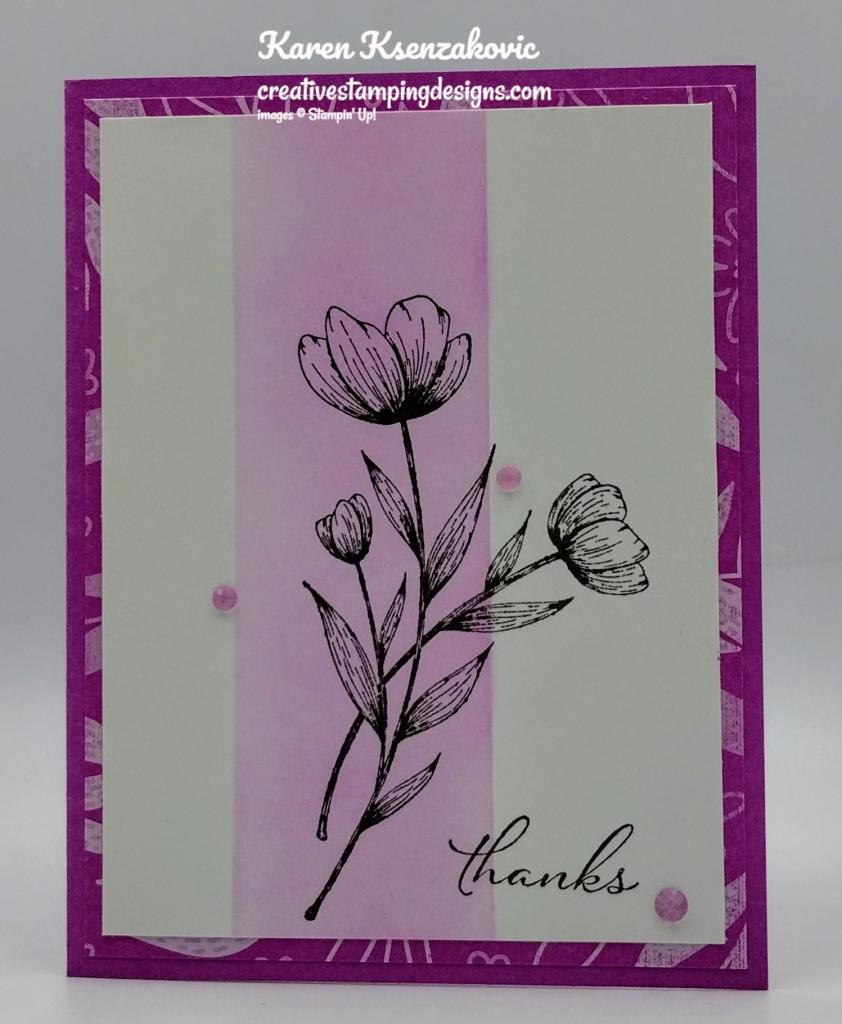
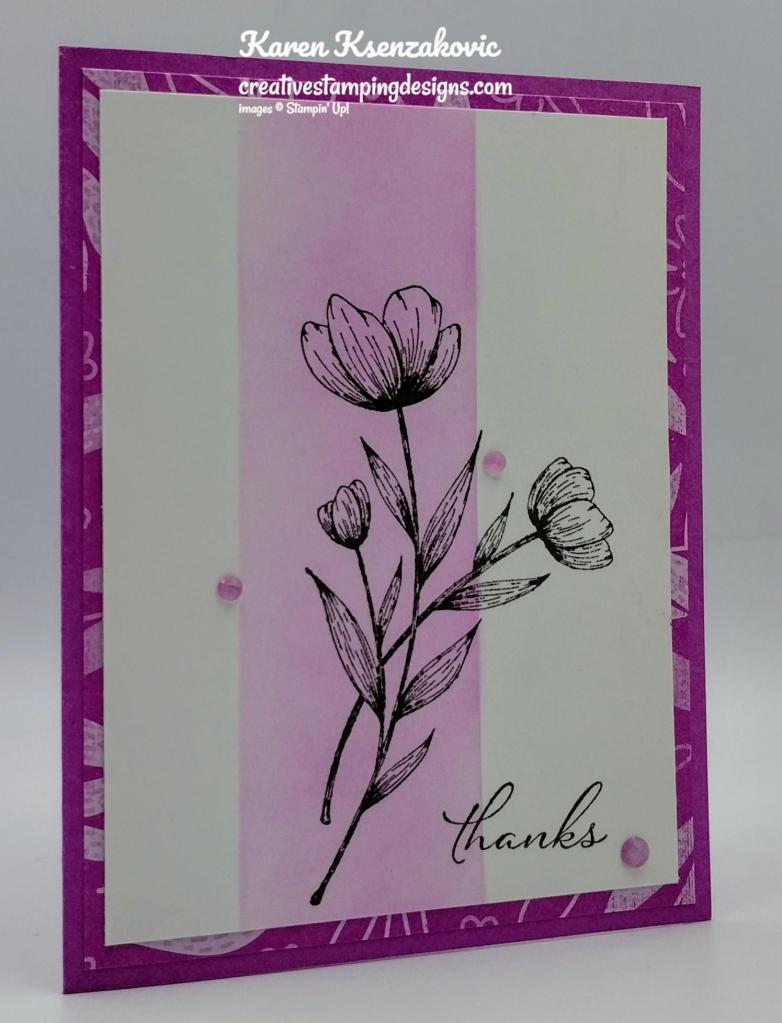
Good Wednesday morning stamping friends. We’re halfway through this HOT week and on our way to the weekend. It’s supposed to cool down here in NJ on Friday to the 80’s and then right back up to the upper 90’s next week. Hoe is it where you all live?
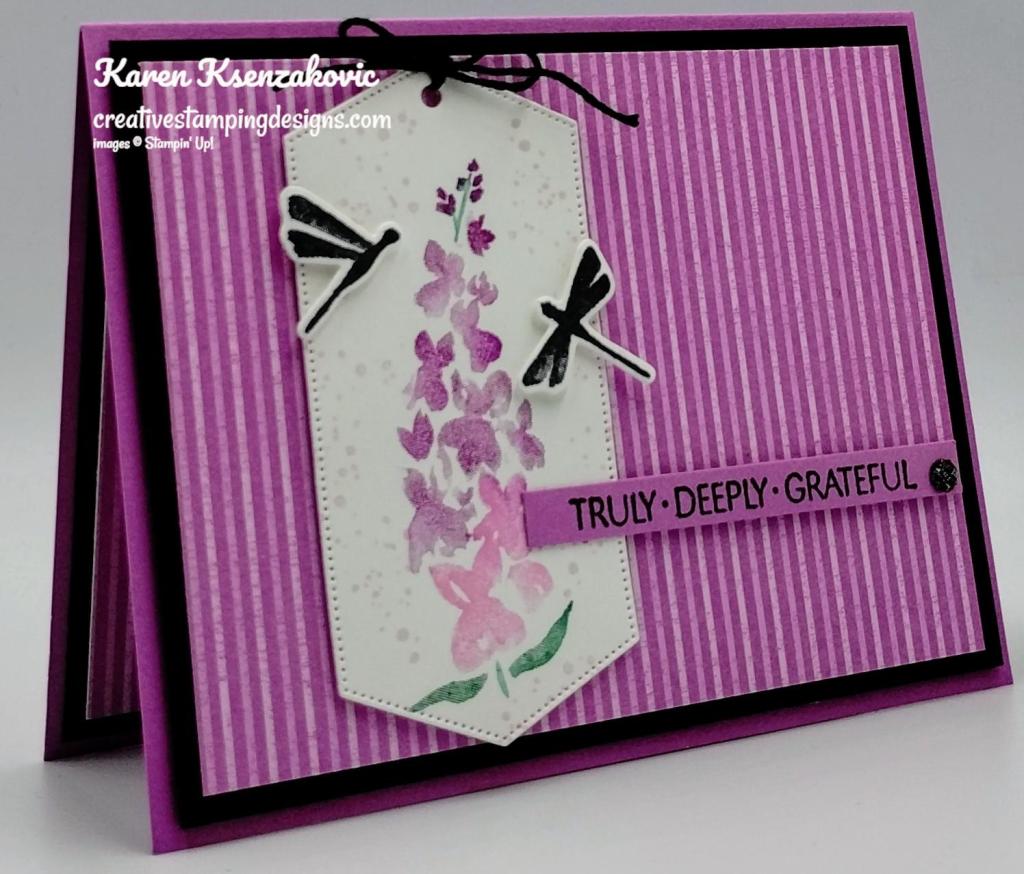
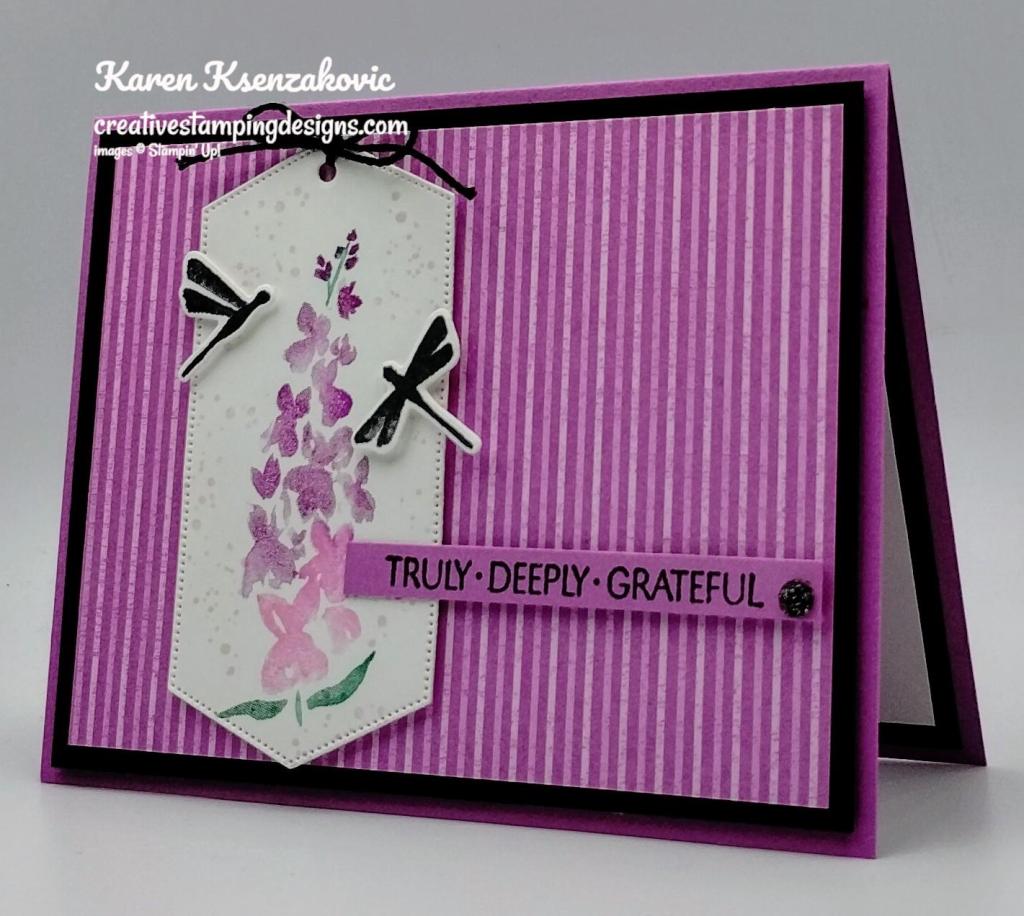
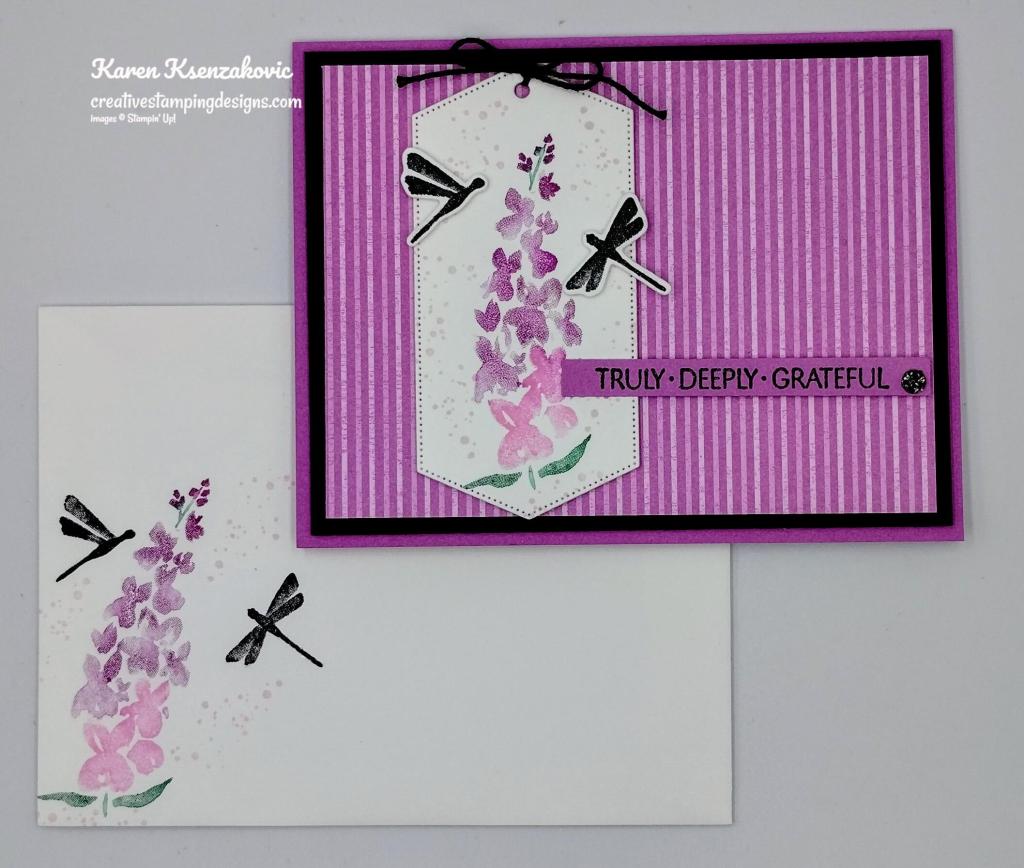
I have a quick card for you today playing with a new bundle that I just received. I did the Marker to Stamp technique for today’s card. If you’d like to see a quick video on how I made this card, Click Here to go to my Instagram Reels. Here’s my card for today.
I used the Stampin’ Up! Inspiring Snapdragons Bundle along with the Stampin’ Up! Hope You Know Cling Stamp Set, 2024-2026 In-Color 6 X 6 Designer Series Paper and Online Exclusive Greetings of the Season Dies for my card today.
I started by adhering a panel of 2024-2026 In-Color DSP to a Basic Black mat using Liquid Glue. I adhered the layered panel to a Petunia Pop card base using Stampin’ Dimensionals.
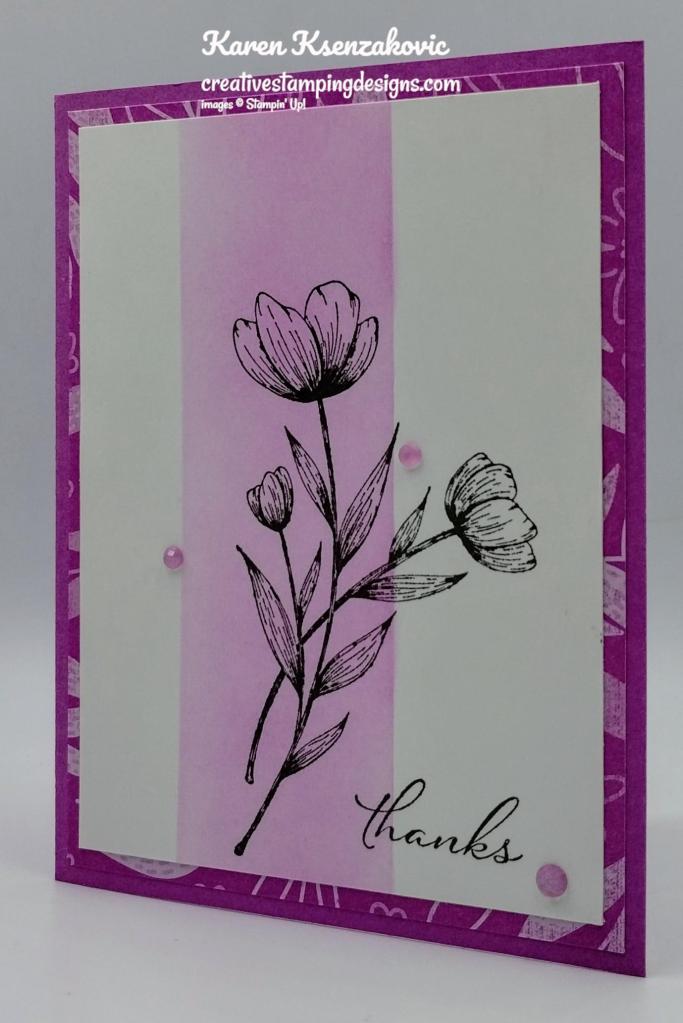
On a panel of Basic White, I stamped the medium snapdragon image from the Stampin’ Up! Inspiring Snapdragons Cling Stamp Set. I inked up the stamp using Berry Burst, Bubble Bath, Petunia Pop and Shy Shamrock Stampin’ Write Markers. I gave it a little huff and stamped the image on the panel of Basic White. I cut the image out using the Greetings of the Season Dies. I stamped the splatter image from the Inspiring Snapdragons stamp set in Bubble Bath Ink around the image. I threaded Black Baker’s Twine through the tag hole and tied a bow. I adhered the die cut panel to the card front using Stampin’ Dimensionals.
I stamped the 2 dragonfly images from the Inspiring Snapdragons stamp set in Tuxedo Black Ink on a panel of Basic White. I cut the images out using the Inspiring Snapdragons Dies. I adhered the dragonflies to the card front using Stampin’ Dimensionals. On a strip of Petunia Pop, I stamped the sentiment from Hope You Know stamp set in Versamark Ink. I sprinkled the sentiment with Black Embossing Powder and set it using the Heat Tool. I adhered the sentiment to the card front using Stampin’ Dimensionals. I added an Adhesive-Backed Sparkle Gem to the card front.
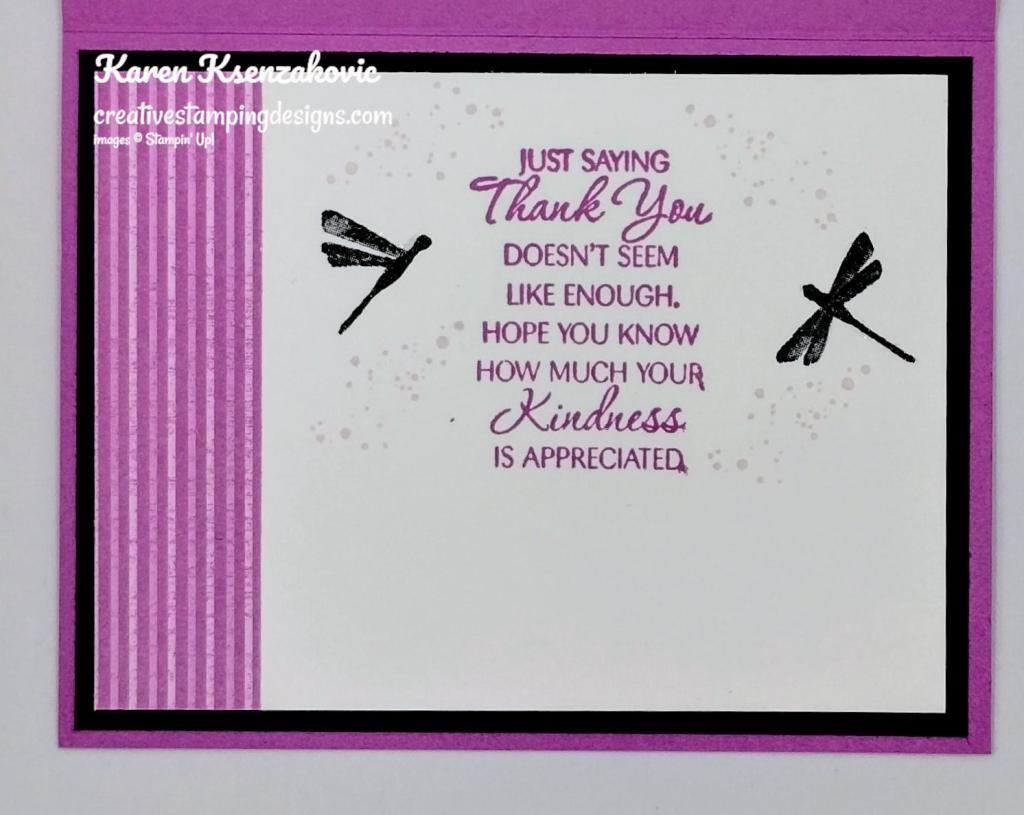
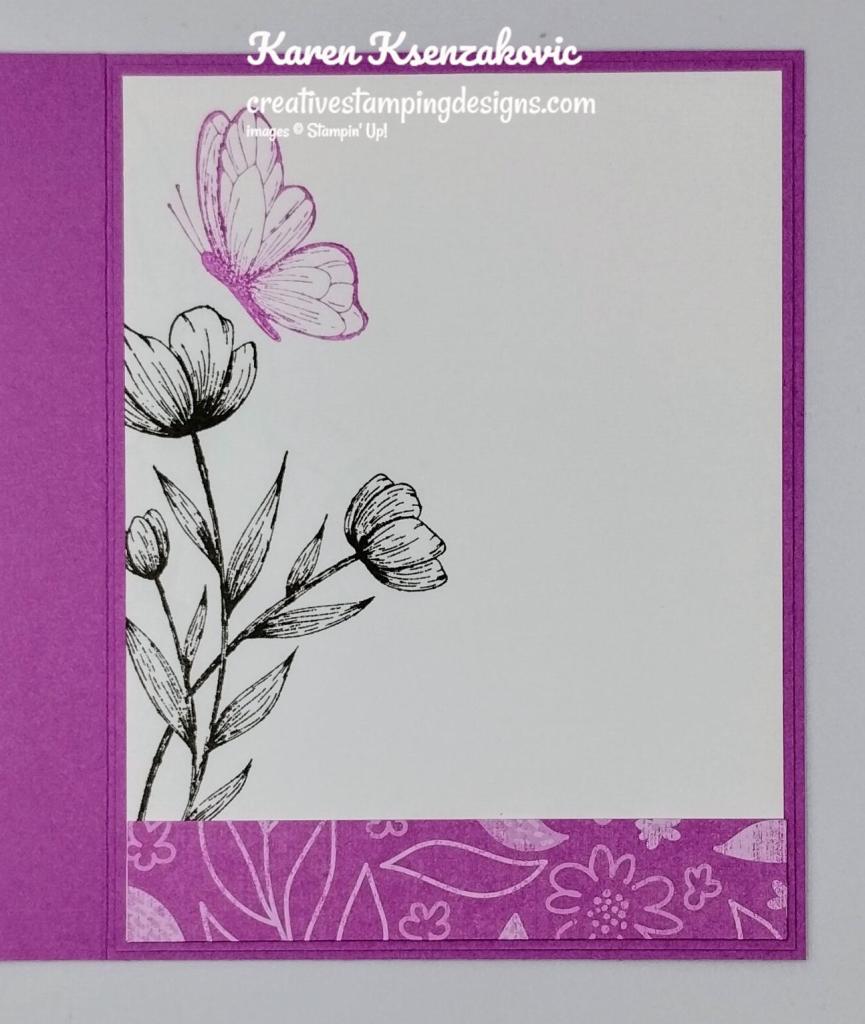
On the inside, I stamped the sentiment from Hope You Know stamp set in Petunia Pop Ink on a panel of Basic White. I stamped the splatter image from the Inspiring Snapdragons stamp set in Bubble Bath Ink around the sentiment. I stamped the 2 dragonfly images from Inspiring Snapdragons stamp set in Tuxedo Black Ink by the sentiment. I adhered a strip of 2024-2026 In-Color DSP to the side of the panel. I adhered the Basic White panel to a Basic Black mat then to the inside of the Petunia Pop card base.
To finish my card, I decorated a Basic White Medium Envelope. I stamped the medium snapdragon image from the Inspiring Snapdragons stamp set on the envelope front, inking it up the same way I did for the card. I stamped the splatter image from Inspiring Snapdragons stamp set in Bubble Bath Ink around the image. I stamped the dragonfly images from the Inspiring Snapdragons stamp set in Tuxedo Black Ink. I adhered a panel of 2024-2026 In-Color DSP to the envelope flap.
Thank you for stopping by my blog today. I hope you like the card and will give it a try. Happy Stamping!!
If you need any stamping supplies, I’d love to be your Demonstrator. Just click HERE to go directly to my online store or drop me an email if you have any questions.
MY CURRENT HOST CODE IS: D9NW3RJ3
Use this host code when placing an order with me. When you order $50 or greater you will receive a free gift from me! If your order is over $150, please do not use this code, but you’ll still get the free gift. The free gift is your choice of any 1 item valued up to $10.00 from the 2024-2025Annual Catalog, or from the Online Exclusives! Unfortunately, packs of cardstock are no longer an option for a free gift. Shipping has become too expensive to ship and it’s costing me as much to ship as the cardstock costs. For any orders $50 or more I will also send you my monthly class tutorials. Click HERE or go to my Customer Rewards for more details and to see what this month’s tutorials are.
Please remember to use my current Host Code and make sure that you can see my name on the final checkout page listed as your Demonstrator when you order so that you know that you’re ordering with me, and you’ll get my rewards!
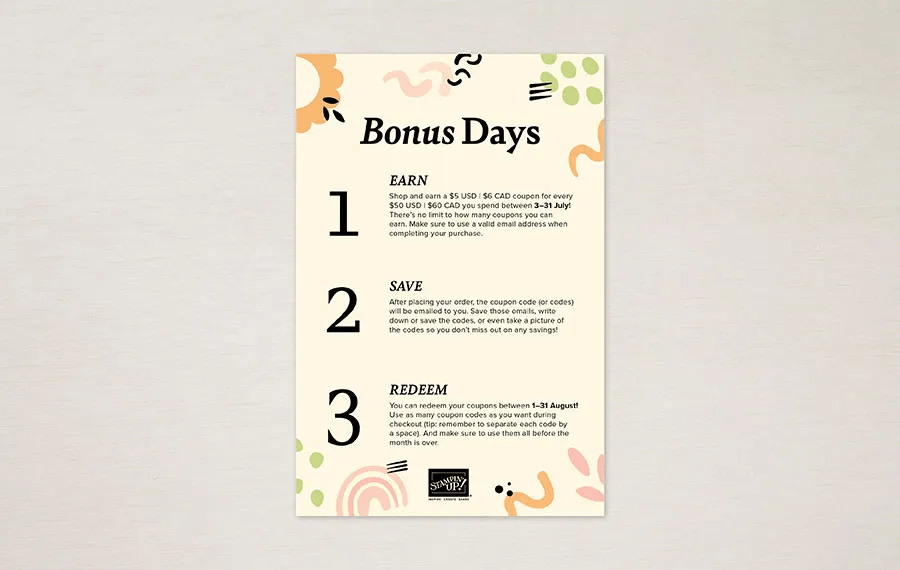
It’s almost time for one of your favorite promotions—BONUS DAYS! Because getting rewarded for all the crafting supplies you’re already going to buy is awesome! When you shop between July 3-31, for every $50 that you spend in one order, you will earn a $5 coupon! Make sure you save all your coupons because you can redeem them between August 1-31.
There’s no limit to how many coupons you can earn! And, as an added bonus, you’ll earn Creative Stamping Designs Reward points (my personal customer reward program) from me when you order $50+ too!!
Bonus Days Promotion Details:
Earning Period: July 3-31, 2024 Ordering Deadline: July 31, 2024 at 11:59 p.m. (MT)
Earn a $5 coupon for every $50 spent (before shipping and tax).
All coupon codes will be emailed right after a qualifying purchase has been made. You must have a valid email address to earn coupons when you shop.
If you earn multiple codes from a single order, you will receive one email with multiple codes. If you earn multiple codes from multiple orders, you will receive separate emails for each code earned.
All order types qualify for this promotion. Phone and email orders still require an email address.
Orders started before the promotion begins will not count toward earning coupon codes. You must add items to your cart and complete your purchase during the earning period.
There is no limit to the number of coupon codes you can earn per order or throughout the duration of the earning period.
Starter Kit orders are excluded from this offer.
For workshop orders, each customer who reaches a qualifying amount will receive a coupon code to their provided email address.
Redemption Period: August 1-31, 2024 Ordering Deadline: August 31, 2024 at 11:59 p.m. (MT)
There is no limit to the number of coupon codes you can redeem on an order during the redemption period. If using multiple codes, they must be separated by a space.
Coupon codes may be redeemed one time only. They cannot be redeemed after the August 31.
Coupon codes may be redeemed for any product (excluding Starter Kits). They cannot be used on exchanges.
Bonus Days coupon codes can be applied to month-to-month Paper Pumpkin subscriptions and new prepaid subscriptions.
Get your wish lists ready and earn those coupon codes in July! Then redeem them on your orders in August! Let me know if you have any questions.
Subscribe to Paper Pumpkin for a monthly, all-inclusive crafting kit that’s a fun surprise! Each kit includes a photopolymer stamp set, Classic Stampin’ Spot, and step by step instructions to complete exclusive paper craft projects, including cards, tags, and gift packaging. And don’t miss the special add-on that coordinates with the next three months!
With the July Paper Pumpkin, Painted Petals, you can craft beautiful cards with unique watercolor designs and pretty layers!
• Makes 9 cards: 3 each of 3 designs • Project includes printed cards and coordinating envelopes • Precut paper pieces and embellishments • Coordinating colors: Calypso Coral, Gray Granite (Classic Stampin’ Spot), Melon Mambo, Mossy Meadow, Old Olive Kit comes in a beautiful coordinating box
Don’t miss the coordinating Every Celebration Dies Add-On!
This exclusive add-on (item 164991) coordinates with the three upcoming kits! Paper Pumpkin subscribers can purchase it beginning 11 July. The add-on is available only while supplies last, so it’s best to shop early!
Subscribe to the July Paper Pumpkin Kit between 11 June and 10 July by clicking here!
Note: Supplies may be limited toward the end of the subscription period.
Good Sunday morning stamping friends and Happy Mother’s Day!!! I hope you are all enjoying your weekend and have some plans for today. My plan is to spend some time in my craft studio doing with I love to do. Usually on Mother’s Day I’m outside planting flowers of plants, but it’s going to be a very rainy day and crafting seemed like a better idea.
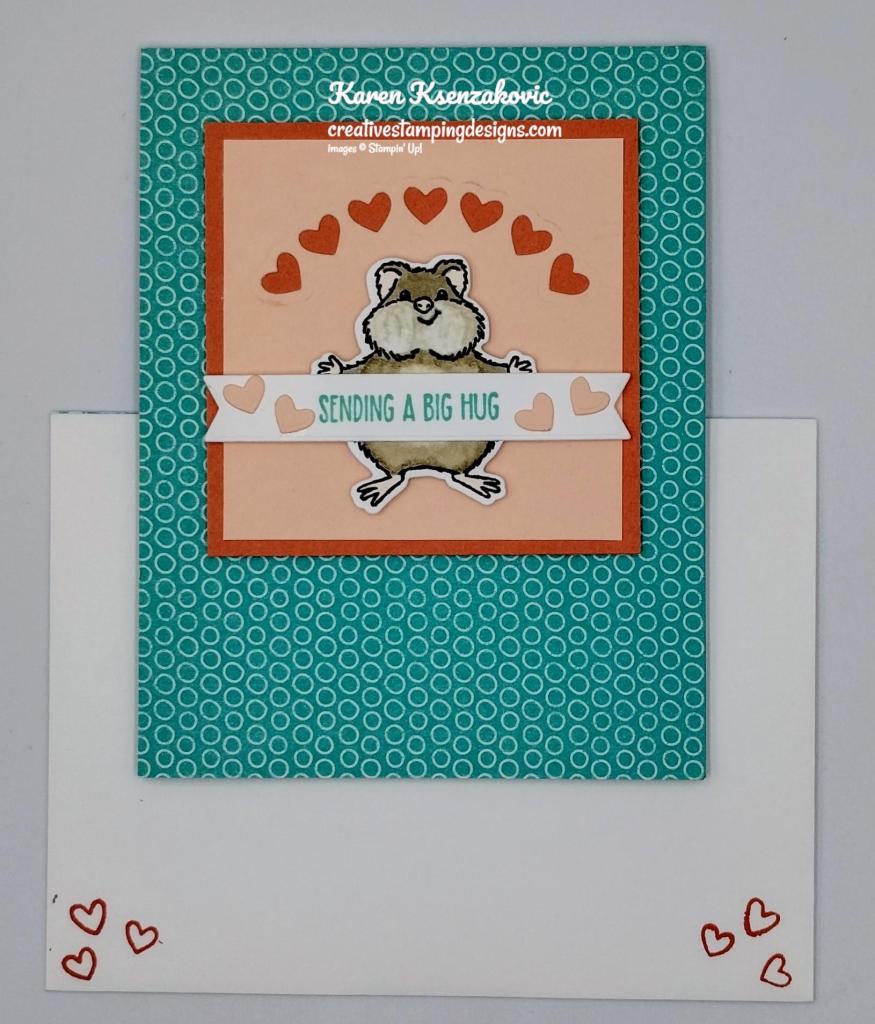
I have a quick card for you today playing with a new bundle and a new In-Color. Here’s my card for today.
I used the new Stampin’ Up! Hearts & Hugs Bundle along with the 2024-2026 In-Color 6 X 6 Designer Series Paper for my card today.
I started by adhering a panel of 2024-2026 In-Color DSP to a Summer Splash card base using Liquid Glue. Using the Hearts & Hugs Dies, I cut the hearts from a panel of Petal Pink. I adhered the Petal Pink panel to a Calypso Coral mat using Liquid Glue. I adhered the layered panel to the card front using Stampin’ Dimensionals.
On a panel of Basic White, I stamped the hamster image from the Stampin’ Up! Hearts & Hugs Cling Stamp Set in Early Espresso Ink. I colored the image using Crumb Cake and Petal Pink Stampin’ Blends Markers. I cut the image out using the Hearts & Hugs Dies.
I stamped the sentiment from the Hearts & Hugs stamp set in Summer Splash Ink on a panel of Basic White. I cut the image out using the Hearts & Hugs Dies. I adhered the hamster image to the Petal Pink panel below the die cut hearts, using Stampin’ Dimensionals. I adhered the sentiment banner across the hamster using Stampin’ Dimensionals on the ends and a Glue Dot in the center. I added some of the die cut hearts to the banner using Liquid Glue.
On the inside, I stamped the sentiment from the Hearts & Hugs stamp set in Summer Splash Ink on a panel of Basic White. I adhered some of the die cut hearts on either side of the sentiment using Liquid Glue. I adhered the Basic White panel to a Calypso Coral mat then to the inside of the Summer Splash card base.
To finish my card, I decorated a Basic White Medium Envelope. I stamped the heart image from the Hearts & Hugs stamp set in Calyp0so Coral Ink on the envelope front. I adhered a panel of 2024-2026 In-Color DSP to the envelope flap.
Thank you for stopping by my blog today. I hope you like the cards and will give it a try. Happy Stamping!!
If you need any stamping supplies, I’d love to be your Demonstrator. Just click HERE to go directly to my online store or drop me an email if you have any questions.
MY CURRENT HOST CODE IS: 6C44QBJA
Use this host code when placing an order with me. When you order $50 or greater you will receive a free gift from me! If your order is over $150, please do not use this code, but you’ll still get the free gift. The free gift is your choice of any 1 item valued up to $10.00 from the 2023-2024 Annual Catalog, the January-April 2024 Mini Catalog or from the Online Exclusives! Unfortunately, packs of cardstock are no longer an option for a free gift. Shipping has become too expensive to ship and it’s costing me as much to ship as the cardstock costs. For any orders $50 or more I will also send you my monthly class tutorials. Click HERE or go to my Customer Rewards for more details and to see what this month’s tutorials are.
Please remember to use my current Host Code and make sure that you can see my name on the final checkout page listed as your Demonstrator when you order so that you know that you’re ordering with me, and you’ll get my rewards!
In response to changing policies at Stampin’ Up – I’m adjusting my Ordering Gift policy as well. I’m having to get a little more tough on the adding of Host codes when you place your order thru my Online Store.
Not to worry – you’re still going to get that $10 ordering gift for orders of $50 (before shipping & tax) or greater. And the gift is still any 1 SU! product up to that $10 value – which includes some of our fun Host Sets!
But – if you DO NOT use the Host code for your orders of less than $150 (this is the RETAIL total before Shipping & Handling), then you’ll have two options:
You’ll need to call Stampin’ Up! (1-800-Stamp-Up) and ask them to add it for you. They’re very helpful and will get it done quickly! OR….
If your order was over the $50 threshold but under $150, then…you’ll forfeit that $10 ordering gift and rewards – this is the Bummer Option – and I REALLY don’t want to do this, SO please remember to add my Current Host Code.
If you’re going to be placing an order of $125 or more, you might want to consider this Starter Kit Joining Special.
Exciting News! Between 1–31 May, anyone who becomes a Stampin’ Up! demonstrator will receive four 2024–2026 In Color products in their Starter Kit for FREE!
In addition to the 2024-2026 In-Color products, new demonstrators will pick $125 USD worth of products of their choice. That’s $207 in products for only $99 and it all ships for FREE. You will also receive free business supplies in case you want to make this a business. Not to mention all the fun that comes with being a part of our wonderful crafting community.
When you join as a new demonstrator, all In Color products will be automatically added to their Starter Kit. Click Here for a PDF printable flyer of all the products you’ll get.
STARTER KIT SPECIAL DETAILS
Promotion Start Date: May 1, 2024
Deadline to Join: May 31, 2024 at 11:59 PM MT
In addition to the regular $125 worth of products of your choice for just $99, new demonstrators will receive the following products (an $82 value!!) in their Starter Kit at no additional cost:
2024–2026 In Color Classic Stampin’ Pad Bundle
2024–2026 In Color 8-1/2″ x 11″ Card Stock
2024–2026 In Color 6″ x 6″ Designer Series Paper
2024–2026 In Color Stampin’ Write Markers
All Starter Kits ship for FREE!!
If you’d like to join our team, we’d love to have you! Once you join, you’ll get at least a 20% discount on all of your Stampin’ Up! purchases and you can preorder from the upcoming catalogs!
We welcome all types of Demonstrators from those only purchasing to get the discount for themselves to those who want to run a business and those anywhere in between! We’re a relaxed group that loves to stamp with no pressure to sell!
Demonstrators get lots of perks including at least a 20% discount on all orders that you place as a Demonstrator, invitations to Stampin’ Up! Demonstrator events and preordering from upcoming catalogs and promotions!
There is no commitment and no penalty if you decide that being a Demonstrator isn’t right for you. Why not give it a try? We have a fun Facebook page where we chat a lot and we do virtual meetings monthly and in-person meetings quarterly.
What a great time to join and get all the new 2024-2026 In-Color products. Contact me @ creativestampingdesigns@gmail.com. I would love to have you on my team. Contact me today about joining May 1st.
Kits Collection by Stampin’ Up! is all about making crafting fun, accessible, and inclusive! We’re always working hard to design a collection full of different product options to allow you oodles of options when it comes to finding that perfect project or gift. Kits by Stampin’ Up! are perfect for new crafters, busy crafters, or crafters who want quick and easy projects. All-inclusive project kits have everything you need in one box! Give as a gift or try them yourself. Kits are while supplies last. Order today!
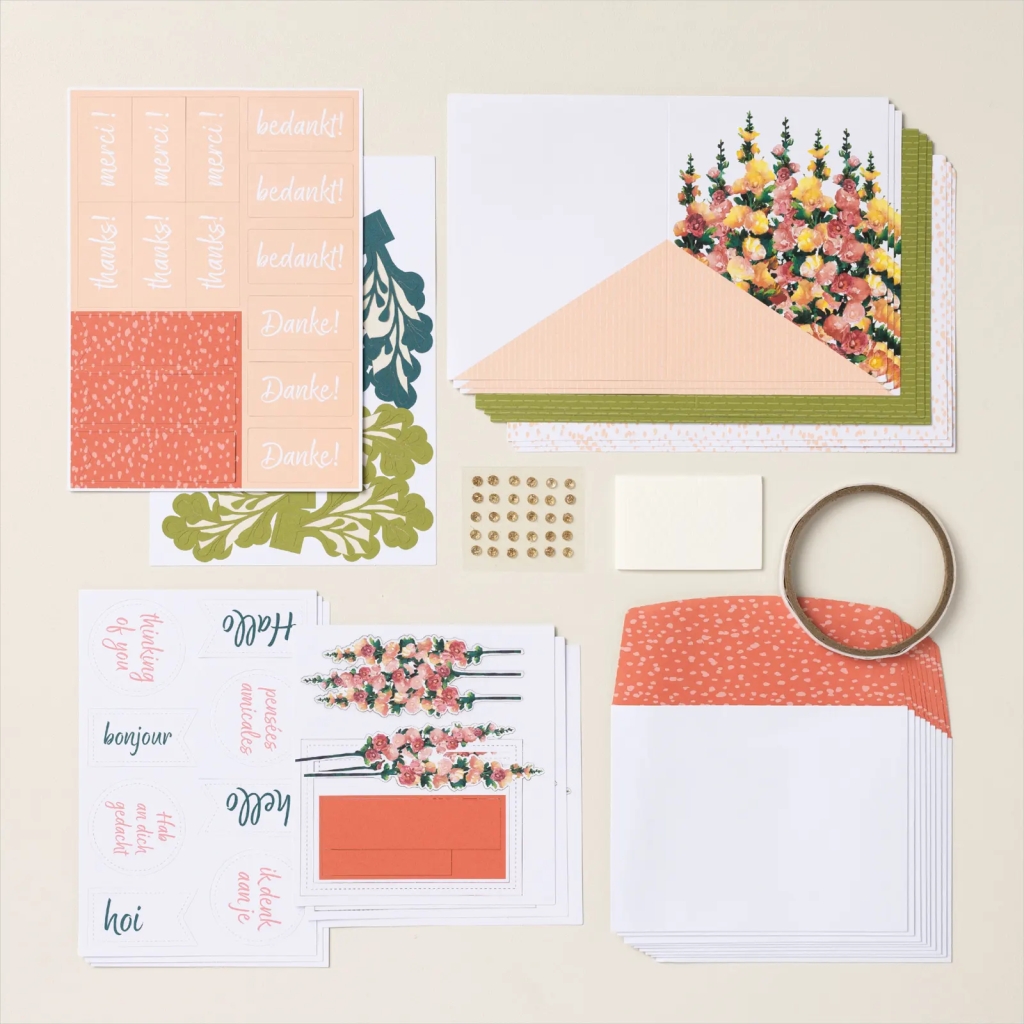
Hello Hollycock Kit
You’re sure to bright up someone’s day with the Hello Hollyhocks Kit! With colorful hollyhock designs, this kit’s all-occasion cards can help you send a friendly hello or a note of thanks to flower-loving friends and loved ones. Pair the desired sentiment, designed die cuts, and images from the kit to quickly create timeless cards. The printed sentiments are available in English, French, German, and Dutch.
Kit includes: * Predesigned projects * Step-by-step instructions * Precut pieces (No prep work! Get right to crafting) * Make 9 cards * 9 printed card bases * 9 printed envelopes * Folded card: 5-1/2″ x 4-1/4″ (14 x 10.8 cm) * Printed die-cut images and labels * Adhesive-backed sparkle gems * Enough adhesive to complete projects
Make all-occasion cards with the City Sights Kit. Featuring artistic cityscape designs in neutral colors, this kit has a masculine charm, and is great to anyone dreaming of big city skylines. Craft like an artist using the different elements from this kit. It’s easy to wish a happy birthday or send a friendly note to a special someone! The printed sentiments are available in English, French, German, and Dutch.
Kit includes: * City Sights Photopolymer Stamp Set * Pebbled Path Stampin’ Spot * Predesigned projects * Step-by-step instructions * Precut pieces (No prep work! Get right to crafting) * Make 8 cards: 4 each of 2 designs * 8 printed card bases * 8 printed envelopes * Folded card: 5-1/2″ x 4-1/4″ (14 x 10.8 cm) * Printed shaped die cuts and printed sentiments * Corrugated cardstock accent pieces * Copper metallic embellishments * Enough adhesive to complete projects
Subscribe to Paper Pumpkin for a monthly, all-inclusive crafting kit that’s a fun surprise! Each kit includes a photopolymer stamp set, Classic Stampin’ Spot, and step by step instructions to complete exclusive paper craft projects, including cards, tags, and gift packaging. And don’t miss the special add-on that coordinates with the next three months!
Celebrate the sweet things in life with textured, artistic cards. Featuring the new 2024–2026 In Colors!
Makes 9 cards: 3 each of 3 designs with 9 coordinating envelopes
Iridescent glimmer sentiments and precut paper pieces
Vellum accents, iridescent pearls, and linen thread
Coordinating colors: Poppy Parade, Peach Pie, Lemon Lolly, Shy Shamrock (Classic Stampin’ Spot), Pool Party, Pretty In Pink
Thanks and Beyond Add On Dies
Dies #164397 Price $12.00
This exclusive add-on coordinates with the three upcoming kits! Paper Pumpkin subscribers can purchase it beginning 11 March. The add-on is available only while supplies last, so it’s best to shop early!
Subscribe to the April Paper Pumpkin Kit between 11 March and 10 April by clicking here!
Note: Supplies may be limited toward the end of the subscription period.
Good Saturday morning stamping friends and welcome to the weekend. Do you all have plans in the works yet? I’ll be working all day today, but I do have tomorrow off. It was a gloomy rainy day here yesterday and I was able to get a little extra time in my craft studio. I’ve got a busy week ahead with a wedding reception Wednesday night and my daughter graduating on Thursday morning. Add work into the mix and I’m not going to have too much me time.
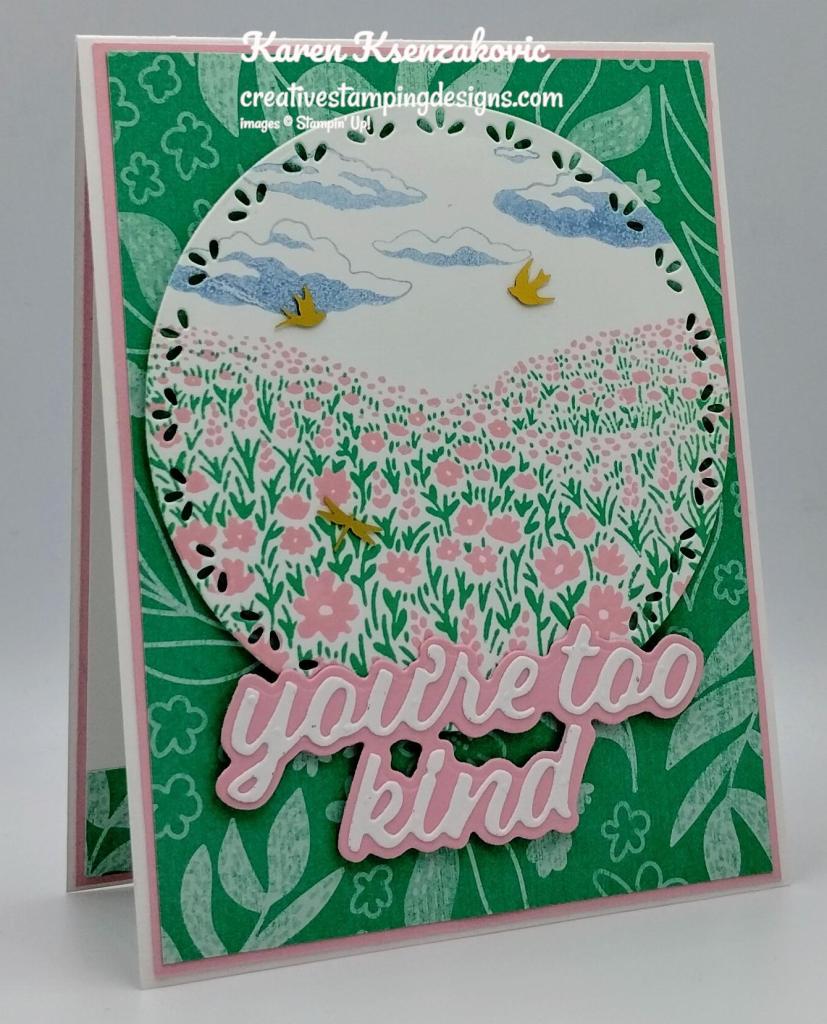
Today I have a quick card for you. When I saw this set, the first thing I thought of was The Wizard of Oz. If you’d like to see a quick video of how I made this card, Click Here to go to my Instagram Reels. Here is my card for today.
I used the Stampin’ Up! Fields In Bloom Photopolymer Stamp Set along with the Spotlight on Nature Dies, 2024-2026 In-Color 6 X 6 Designer Series Paper, Wanted to Say Dies and Stampin’ Up! Online Exclusive Sweetly Scripted Cling Stamp Set for my card today.
I started by adhering a panel of 2024-2026 In-Color DSP to a Pretty In Pink mat using Stampin’ Seal. I adhered the layered panel to a Basic White Thick card base using Liquid Glue.
On a panel of Basic White, I stamped the leaf image from the Fields in Bloom stamp set in Shy Shamrock Ink. I stamped the flower image from the Fields in Bloom stamp set in Pretty In Pink Ink. I stamped the cloud image from the Fields in Bloom stamp set in Boho Blue Ink, stamping off once on scrap paper. I cut the image out using the largest circle from the Spotlight on Nature Dies. I adhered the artwork to the card front using Stampin’ Dimensionals.
I cut the sentiment mat out of a panel of Pretty in Pink using the Wanted to Say Dies. I adhered an adhesive sheet to the back of a panel of Basic White and cut the detailed sentiment from the Wanted to Say Dies. I adhered the detailed sentiment to the Pretty in Pink mat. I adhered the sentiment to the card front using Stampin’ Dimensionals and Glue Dots. I added a few Adhesive-Backed Dragonflies and Birds to the card front.
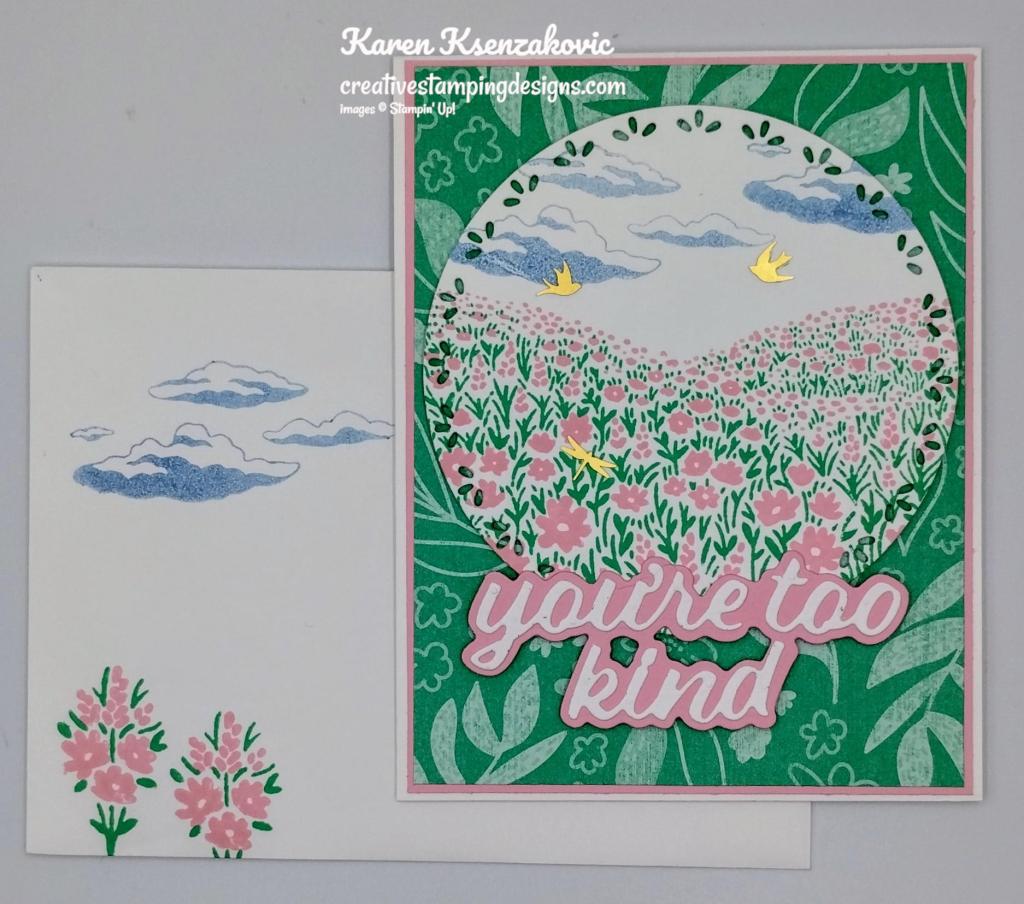
On the inside, I stamped the sentiment from the Sweetly Scripted stamp set in Shy Shamrock Ink on a panel of Basic White. I stamped the cloud image from the Fields in Bloom stamp set in Boho Blue Ink, stamping off once on scrap paper, on the top of the panel. I stamped the leaf image from the Fields in Bloom stamp set in Shy Shamrock on the bottom of the panel. I stamped the flowers in Pretty In Pink Ink. I adhered a strip of 2024-2026 In-Color DSP to the bottom of the panel. I adhered the Basic White panel to a Pretty In Pink mat then to the inside of the Basic White Thick card base.
To finish my card, I decorated a Basic White Medium Envelope. I stamped the stem/leaf image from the Fields in Bloom stamp set in Shy Shamrock Ink on the envelope front. I stamped the flowers in Pretty In Pink Ink on the stems. I stamped the cloud image on the top of the envelope. I adhered a panel of 2024-2026 In-Color DSP to the envelope flap.
Thank you for stopping by my blog today. I hope you like the cards and will give it a try. Happy Stamping!!
If you need any stamping supplies, I’d love to be your Demonstrator. Just click HERE to go directly to my online store or drop me an email if you have any questions.
MY CURRENT HOST CODE IS: 6C44QBJA
Use this host code when placing an order with me. When you order $50 or greater you will receive a free gift from me! If your order is over $150, please do not use this code, but you’ll still get the free gift. The free gift is your choice of any 1 item valued up to $10.00 from the 2023-2024 Annual Catalog, the January-April 2024 Mini Catalog or from the Online Exclusives! Unfortunately, packs of cardstock are no longer an option for a free gift. Shipping has become too expensive to ship and it’s costing me as much to ship as the cardstock costs. For any orders $50 or more I will also send you my monthly class tutorials. Click HERE or go to my Customer Rewards for more details and to see what this month’s tutorials are.
Please remember to use my current Host Code and make sure that you can see my name on the final checkout page listed as your Demonstrator when you order so that you know that you’re ordering with me, and you’ll get my rewards!
In response to changing policies at Stampin’ Up – I’m adjusting my Ordering Gift policy as well. I’m having to get a little more tough on the adding of Host codes when you place your order thru my Online Store.
Not to worry – you’re still going to get that $10 ordering gift for orders of $50 (before shipping & tax) or greater. And the gift is still any 1 SU! product up to that $10 value – which includes some of our fun Host Sets!
But – if you DO NOT use the Host code for your orders of less than $150 (this is the RETAIL total before Shipping & Handling), then you’ll have two options:
You’ll need to call Stampin’ Up! (1-800-Stamp-Up) and ask them to add it for you. They’re very helpful and will get it done quickly! OR….
If your order was over the $50 threshold but under $150, then…you’ll forfeit that $10 ordering gift and rewards – this is the Bummer Option – and I REALLY don’t want to do this, SO please remember to add my Current Host Code.
If you’re going to be placing an order of $125 or more, you might want to consider this Starter Kit Joining Special.
Exciting News! Between 1–31 May, anyone who becomes a Stampin’ Up! demonstrator will receive four 2024–2026 In Color products in their Starter Kit for FREE!
In addition to the 2024-2026 In-Color products, new demonstrators will pick $125 USD worth of products of their choice. That’s $207 in products for only $99 and it all ships for FREE. You will also receive free business supplies in case you want to make this a business. Not to mention all the fun that comes with being a part of our wonderful crafting community.
When you join as a new demonstrator, all In Color products will be automatically added to their Starter Kit. Click Here for a PDF printable flyer of all the products you’ll get.
STARTER KIT SPECIAL DETAILS
Promotion Start Date: May 1, 2024
Deadline to Join: May 31, 2024 at 11:59 PM MT
In addition to the regular $125 worth of products of your choice for just $99, new demonstrators will receive the following products (an $82 value!!) in their Starter Kit at no additional cost:
2024–2026 In Color Classic Stampin’ Pad Bundle
2024–2026 In Color 8-1/2″ x 11″ Card Stock
2024–2026 In Color 6″ x 6″ Designer Series Paper
2024–2026 In Color Stampin’ Write Markers
All Starter Kits ship for FREE!!
If you’d like to join our team, we’d love to have you! Once you join, you’ll get at least a 20% discount on all of your Stampin’ Up! purchases and you can preorder from the upcoming catalogs!
We welcome all types of Demonstrators from those only purchasing to get the discount for themselves to those who want to run a business and those anywhere in between! We’re a relaxed group that loves to stamp with no pressure to sell!
Demonstrators get lots of perks including at least a 20% discount on all orders that you place as a Demonstrator, invitations to Stampin’ Up! Demonstrator events and preordering from upcoming catalogs and promotions!
There is no commitment and no penalty if you decide that being a Demonstrator isn’t right for you. Why not give it a try? We have a fun Facebook page where we chat a lot and we do virtual meetings monthly and in-person meetings quarterly.
What a great time to join and get all the new 2024-2026 In-Color products. Contact me @ creativestampingdesigns@gmail.com. I would love to have you on my team. Contact me today about joining May 1st.
Kits Collection by Stampin’ Up! is all about making crafting fun, accessible, and inclusive! We’re always working hard to design a collection full of different product options to allow you oodles of options when it comes to finding that perfect project or gift. Kits by Stampin’ Up! are perfect for new crafters, busy crafters, or crafters who want quick and easy projects. All-inclusive project kits have everything you need in one box! Give as a gift or try them yourself. Kits are while supplies last. Order today!
Hello Hollycock Kit
You’re sure to bright up someone’s day with the Hello Hollyhocks Kit! With colorful hollyhock designs, this kit’s all-occasion cards can help you send a friendly hello or a note of thanks to flower-loving friends and loved ones. Pair the desired sentiment, designed die cuts, and images from the kit to quickly create timeless cards. The printed sentiments are available in English, French, German, and Dutch.
Kit includes: * Predesigned projects * Step-by-step instructions * Precut pieces (No prep work! Get right to crafting) * Make 9 cards * 9 printed card bases * 9 printed envelopes * Folded card: 5-1/2″ x 4-1/4″ (14 x 10.8 cm) * Printed die-cut images and labels * Adhesive-backed sparkle gems * Enough adhesive to complete projects
Make all-occasion cards with the City Sights Kit. Featuring artistic cityscape designs in neutral colors, this kit has a masculine charm, and is great to anyone dreaming of big city skylines. Craft like an artist using the different elements from this kit. It’s easy to wish a happy birthday or send a friendly note to a special someone! The printed sentiments are available in English, French, German, and Dutch.
Kit includes: * City Sights Photopolymer Stamp Set * Pebbled Path Stampin’ Spot * Predesigned projects * Step-by-step instructions * Precut pieces (No prep work! Get right to crafting) * Make 8 cards: 4 each of 2 designs * 8 printed card bases * 8 printed envelopes * Folded card: 5-1/2″ x 4-1/4″ (14 x 10.8 cm) * Printed shaped die cuts and printed sentiments * Corrugated cardstock accent pieces * Copper metallic embellishments * Enough adhesive to complete projects
Subscribe to Paper Pumpkin for a monthly, all-inclusive crafting kit that’s a fun surprise! Each kit includes a photopolymer stamp set, Classic Stampin’ Spot, and step by step instructions to complete exclusive paper craft projects, including cards, tags, and gift packaging. And don’t miss the special add-on that coordinates with the next three months!
Celebrate the sweet things in life with textured, artistic cards. Featuring the new 2024–2026 In Colors!
Makes 9 cards: 3 each of 3 designs with 9 coordinating envelopes
Iridescent glimmer sentiments and precut paper pieces
Vellum accents, iridescent pearls, and linen thread
Coordinating colors: Poppy Parade, Peach Pie, Lemon Lolly, Shy Shamrock (Classic Stampin’ Spot), Pool Party, Pretty In Pink
Thanks and Beyond Add On Dies
Dies #164397 Price $12.00
This exclusive add-on coordinates with the three upcoming kits! Paper Pumpkin subscribers can purchase it beginning 11 March. The add-on is available only while supplies last, so it’s best to shop early!
Subscribe to the April Paper Pumpkin Kit between 11 March and 10 April by clicking here!
Note: Supplies may be limited toward the end of the subscription period.
Good Wednesday morning stamping friends. We’re halfway through the week already. Last night was our monthly Stamp Camp Class. It was a lot of fun as usual. The ladies made 4 cards mostly using Online Exclusive products. When I designed the cards I didn’t have much of the new items yet and I didn’t want to use retiring items, so it was Online Exclusive. Next month we’ll be using products from the new Annual catalog.
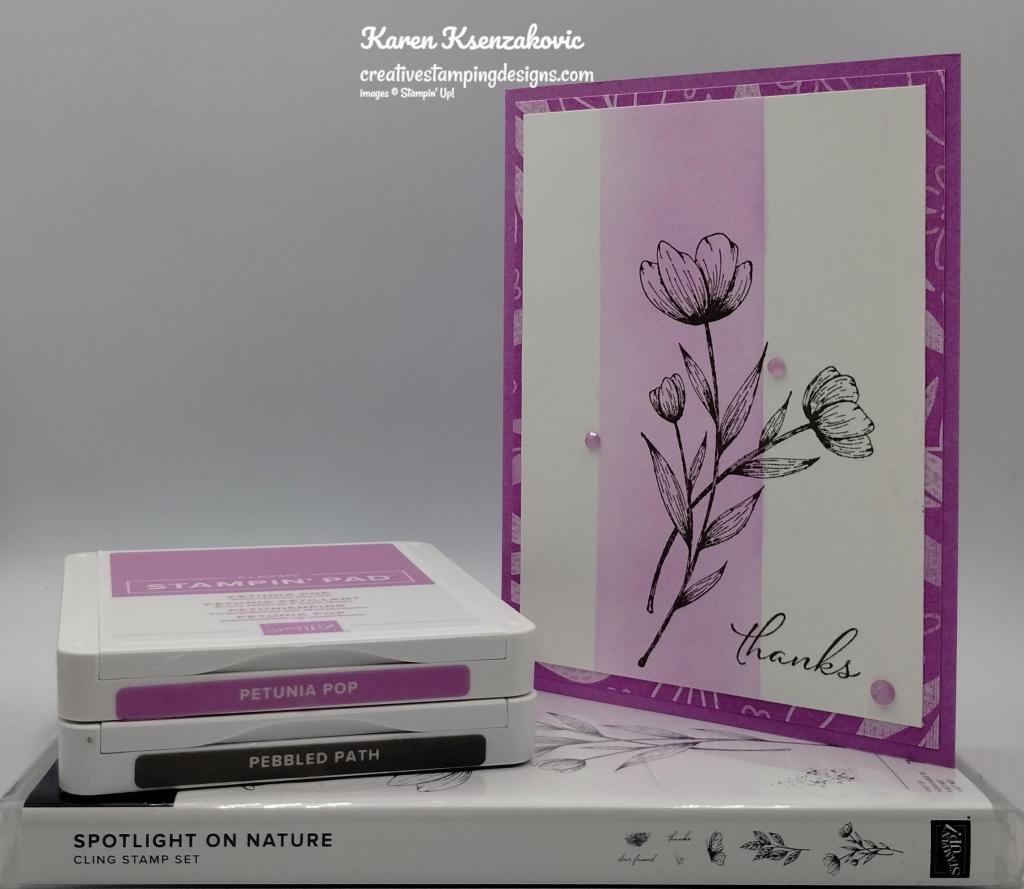
I’m having so much fun playing with all my new products. I really should make a list so that I’m sure to use everything at least once. I tried really hard to keep this simple, but I couldn’t help myself with adding the gems. If you’d like to see a quick video of how I made this card, Click Here to go to my Instagram Reels. Here is my card for today.
I used the Stampin’ Up! Spotlight On Nature Cling Stamp Set along with the 2024-2026 In-Color 6 X 6 Designer Series Paper for my card today.
I started by adhering a panel of 2024-21026 In-Color DSP to a Petunia Pop card base using Liquid Glue.
On a panel of Basic White, I adhered Post-It Note Tape leaving a small area open. Using my Small Blending Brush, I added Petunia Pop Ink. I removed the tape and trimmed the card base down using my Paper Trimmer (this was so I didn’t have any dark edges). I stamped the large flower image from the Spotlight on Nature stamp set in Pebbled Path Ink partially on the inked area.
I stamped the sentiment from the Spotlight on Nature stamp set in Pebbled Path Ink on the bottom of the panel. I adhered the Basic White panel to the card front using Stampin’ Seal. I added a few 2024-2026 In-Color Shimmer Gems to the card front.
I know this is unusual for my, but I didn’t stamp a sentiment on the inside. I stamped the large flower image from the Spotlight on Nature stamp set in Pebbled Path Ink on the side of a Basic White panel. I stamped the butterfly Image from the Spotlight on Nature stamp set in Petunia Path Ink, stamping off once on scrap paper, by the flower. I adhered a strip of 2024-2026 In-Color DSP to the bottom of the panel. I adhered the Basic White panel to a Petunia Pop mat then to the inside of the petunia Pop card base.
To finish my card, I decorated a Basic White Medium Envelope. I stamped the flower image from the Spotlight on Nature stamp set in Pebbled Path Ink on the envelope front. I stamped the butterfly image from the Spotlight on Nature stamp set in Petunia Pop Ink. I adhered a panel of 2024-2026 In-Color DSP to the envelope flap.
Thank you for stopping by my blog today. I hope you like the cards and will give it a try. Happy Stamping!!
If you need any stamping supplies, I’d love to be your Demonstrator. Just click HERE to go directly to my online store or drop me an email if you have any questions.
MY CURRENT HOST CODE IS: 6C44QBJA
Use this host code when placing an order with me. When you order $50 or greater you will receive a free gift from me! If your order is over $150, please do not use this code, but you’ll still get the free gift. The free gift is your choice of any 1 item valued up to $10.00 from the 2023-2024 Annual Catalog, the January-April 2024 Mini Catalog or from the Online Exclusives! Unfortunately, packs of cardstock are no longer an option for a free gift. Shipping has become too expensive to ship and it’s costing me as much to ship as the cardstock costs. For any orders $50 or more I will also send you my monthly class tutorials. Click HERE or go to my Customer Rewards for more details and to see what this month’s tutorials are.
Please remember to use my current Host Code and make sure that you can see my name on the final checkout page listed as your Demonstrator when you order so that you know that you’re ordering with me, and you’ll get my rewards!
In response to changing policies at Stampin’ Up – I’m adjusting my Ordering Gift policy as well. I’m having to get a little more tough on the adding of Host codes when you place your order thru my Online Store.
Not to worry – you’re still going to get that $10 ordering gift for orders of $50 (before shipping & tax) or greater. And the gift is still any 1 SU! product up to that $10 value – which includes some of our fun Host Sets!
But – if you DO NOT use the Host code for your orders of less than $150 (this is the RETAIL total before Shipping & Handling), then you’ll have two options:
You’ll need to call Stampin’ Up! (1-800-Stamp-Up) and ask them to add it for you. They’re very helpful and will get it done quickly! OR….
If your order was over the $50 threshold but under $150, then…you’ll forfeit that $10 ordering gift and rewards – this is the Bummer Option – and I REALLY don’t want to do this, SO please remember to add my Current Host Code.
If you’re going to be placing an order of $125 or more, you might want to consider this Starter Kit Joining Special.
Exciting News! Between 1–31 May, anyone who becomes a Stampin’ Up! demonstrator will receive four 2024–2026 In Color products in their Starter Kit for FREE!
In addition to the 2024-2026 In-Color products, new demonstrators will pick $125 USD worth of products of their choice. That’s $207 in products for only $99 and it all ships for FREE. You will also receive free business supplies in case you want to make this a business. Not to mention all the fun that comes with being a part of our wonderful crafting community.
When you join as a new demonstrator, all In Color products will be automatically added to their Starter Kit. Click Here for a PDF printable flyer of all the products you’ll get.
STARTER KIT SPECIAL DETAILS
Promotion Start Date: May 1, 2024
Deadline to Join: May 31, 2024 at 11:59 PM MT
In addition to the regular $125 worth of products of your choice for just $99, new demonstrators will receive the following products (an $82 value!!) in their Starter Kit at no additional cost:
2024–2026 In Color Classic Stampin’ Pad Bundle
2024–2026 In Color 8-1/2″ x 11″ Card Stock
2024–2026 In Color 6″ x 6″ Designer Series Paper
2024–2026 In Color Stampin’ Write Markers
All Starter Kits ship for FREE!!
If you’d like to join our team, we’d love to have you! Once you join, you’ll get at least a 20% discount on all of your Stampin’ Up! purchases and you can preorder from the upcoming catalogs!
We welcome all types of Demonstrators from those only purchasing to get the discount for themselves to those who want to run a business and those anywhere in between! We’re a relaxed group that loves to stamp with no pressure to sell!
Demonstrators get lots of perks including at least a 20% discount on all orders that you place as a Demonstrator, invitations to Stampin’ Up! Demonstrator events and preordering from upcoming catalogs and promotions!
There is no commitment and no penalty if you decide that being a Demonstrator isn’t right for you. Why not give it a try? We have a fun Facebook page where we chat a lot and we do virtual meetings monthly and in-person meetings quarterly.
What a great time to join and get all the new 2024-2026 In-Color products. Contact me @ creativestampingdesigns@gmail.com. I would love to have you on my team. Contact me today about joining May 1st.
Kits Collection by Stampin’ Up! is all about making crafting fun, accessible, and inclusive! We’re always working hard to design a collection full of different product options to allow you oodles of options when it comes to finding that perfect project or gift. Kits by Stampin’ Up! are perfect for new crafters, busy crafters, or crafters who want quick and easy projects. All-inclusive project kits have everything you need in one box! Give as a gift or try them yourself. Kits are while supplies last. Order today!
Hello Hollycock Kit
You’re sure to bright up someone’s day with the Hello Hollyhocks Kit! With colorful hollyhock designs, this kit’s all-occasion cards can help you send a friendly hello or a note of thanks to flower-loving friends and loved ones. Pair the desired sentiment, designed die cuts, and images from the kit to quickly create timeless cards. The printed sentiments are available in English, French, German, and Dutch.
Kit includes: * Predesigned projects * Step-by-step instructions * Precut pieces (No prep work! Get right to crafting) * Make 9 cards * 9 printed card bases * 9 printed envelopes * Folded card: 5-1/2″ x 4-1/4″ (14 x 10.8 cm) * Printed die-cut images and labels * Adhesive-backed sparkle gems * Enough adhesive to complete projects
Make all-occasion cards with the City Sights Kit. Featuring artistic cityscape designs in neutral colors, this kit has a masculine charm, and is great to anyone dreaming of big city skylines. Craft like an artist using the different elements from this kit. It’s easy to wish a happy birthday or send a friendly note to a special someone! The printed sentiments are available in English, French, German, and Dutch.
Kit includes: * City Sights Photopolymer Stamp Set * Pebbled Path Stampin’ Spot * Predesigned projects * Step-by-step instructions * Precut pieces (No prep work! Get right to crafting) * Make 8 cards: 4 each of 2 designs * 8 printed card bases * 8 printed envelopes * Folded card: 5-1/2″ x 4-1/4″ (14 x 10.8 cm) * Printed shaped die cuts and printed sentiments * Corrugated cardstock accent pieces * Copper metallic embellishments * Enough adhesive to complete projects
Subscribe to Paper Pumpkin for a monthly, all-inclusive crafting kit that’s a fun surprise! Each kit includes a photopolymer stamp set, Classic Stampin’ Spot, and step by step instructions to complete exclusive paper craft projects, including cards, tags, and gift packaging. And don’t miss the special add-on that coordinates with the next three months!
Make cards for Father’s Day and more to express your gratitude and admiration!
Makes 9 cards: 3 each of 3 designs with 9 coordinating envelopes
Precut paper accent pieces and labels
Woodgrain textures and masculine earthy tones
Coordinating colors: Wild Wheat, Pool Party, Misty Moonlight (Classic Stampin’ Spot), Early Espresso, Crumb Cake, Basic Beige Thanks & Beyond Dies Add-On—available only while supplies last! Partial pop-ups to make your cards shine!
Coordinates with the Country Woods Designer Series Paper (item 163393)
Thanks and Beyond Add On Dies
Dies #164397 Price $12.00
This exclusive add-on coordinates with the three upcoming kits! Paper Pumpkin subscribers can purchase it beginning 11 March. The add-on is available only while supplies last, so it’s best to shop early!
Subscribe to the April Paper Pumpkin Kit between 11 March and 10 April by clicking here!
Note: Supplies may be limited toward the end of the subscription period.


![Sunshine & Tulips Bundle (English) [ 166866 ]](https://assets1.tamsnetwork.com/images/EC042017NF/166866s.jpg "Sunshine & Tulips Bundle (English) [ 166866 ]")
![Sunshine & Tulips Photopolymer Stamp Set (English) [ 166859 ]](https://assets1.tamsnetwork.com/images/EC042017NF/166859s.jpg "Sunshine & Tulips Photopolymer Stamp Set (English) [ 166859 ]")
![Sunshine & Tulips Dies [ 166865 ]](https://assets1.tamsnetwork.com/images/EC042017NF/166865s.jpg "Sunshine & Tulips Dies [ 166865 ]")
![Balmy Blue 8-1/2" X 11" Cardstock [ 146982 ]](https://assets1.tamsnetwork.com/images/EC042017NF/146982s.jpg "Balmy Blue 8-1/2\" X 11\" Cardstock [ 146982 ]")
![Basic White 8 1/2" X 11" Cardstock [ 166780 ]](https://assets1.tamsnetwork.com/images/EC042017NF/166780s.jpg "Basic White 8 1/2\" X 11\" Cardstock [ 166780 ]")
![Crumb Cake 8-1/2" X 11" Cardstock [ 120953 ]](https://assets1.tamsnetwork.com/images/EC042017NF/120953s.jpg "Crumb Cake 8-1/2\" X 11\" Cardstock [ 120953 ]")
![Lemon Lolly 8 1/2" X 11" Cardstock [ 161720 ]](https://assets1.tamsnetwork.com/images/EC042017NF/161720s.jpg "Lemon Lolly 8 1/2\" X 11\" Cardstock [ 161720 ]")
![Peach Pie 8 1/2" X 11" Cardstock [ 163799 ]](https://assets1.tamsnetwork.com/images/EC042017NF/163799s.jpg "Peach Pie 8 1/2\" X 11\" Cardstock [ 163799 ]")
![Pretty In Pink 8 1/2" X 11" Cardstock [ 163793 ]](https://assets1.tamsnetwork.com/images/EC042017NF/163793s.jpg "Pretty In Pink 8 1/2\" X 11\" Cardstock [ 163793 ]")
![Shy Shamrock 8 1/2" X 11" Cardstock [ 163795 ]](https://assets1.tamsnetwork.com/images/EC042017NF/163795s.jpg "Shy Shamrock 8 1/2\" X 11\" Cardstock [ 163795 ]")
![Neutrals 6" X 6" (15.2 X 15.2 Cm) Designer Series Paper [ 165303 ]](https://assets1.tamsnetwork.com/images/EC042017NF/165303s.jpg "Neutrals 6\" X 6\" (15.2 X 15.2 Cm) Designer Series Paper [ 165303 ]")
![Subtles 6" X 6" (15.2 X 15.2 Cm) Designer Series Paper [ 165306 ]](https://assets1.tamsnetwork.com/images/EC042017NF/165306s.jpg "Subtles 6\" X 6\" (15.2 X 15.2 Cm) Designer Series Paper [ 165306 ]")
![2024–2026 In Color™ 6" X 6" (15.2 X 15.2 Cm) Designer Series Paper [ 165299 ]](https://assets1.tamsnetwork.com/images/EC042017NF/165299s.jpg "2024–2026 In Color™ 6\" X 6\" (15.2 X 15.2 Cm) Designer Series Paper [ 165299 ]")
![Balmy Blue Classic Stampin' Pad [ 147105 ]](https://assets1.tamsnetwork.com/images/EC042017NF/147105s.jpg "Balmy Blue Classic Stampin' Pad [ 147105 ]")
![Peach Pie Classic Stampin Pad [ 163810 ]](https://assets1.tamsnetwork.com/images/EC042017NF/163810s.jpg "Peach Pie Classic Stampin Pad [ 163810 ]")
![Pretty In Pink Classic Stampin Pad [ 163807 ]](https://assets1.tamsnetwork.com/images/EC042017NF/163807s.jpg "Pretty In Pink Classic Stampin Pad [ 163807 ]")
![Shy Shamrock Classic Stampin Pad [ 163808 ]](https://assets1.tamsnetwork.com/images/EC042017NF/163808s.jpg "Shy Shamrock Classic Stampin Pad [ 163808 ]")
![Shy Shamrock Stampin’ Blends Combo Pack [ 163825 ]](https://assets1.tamsnetwork.com/images/EC042017NF/163825s.jpg "Shy Shamrock Stampin’ Blends Combo Pack [ 163825 ]")
![Baker's Twine Essentials Pack [ 155475 ]](https://assets1.tamsnetwork.com/images/EC042017NF/155475s.jpg "Baker's Twine Essentials Pack [ 155475 ]")
![Tiny Bee Trinkets [ 164714 ]](https://assets1.tamsnetwork.com/images/EC042017NF/164714s.jpg "Tiny Bee Trinkets [ 164714 ]")
![Basic White Medium Envelopes [ 159236 ]](https://assets1.tamsnetwork.com/images/EC042017NF/159236s.jpg "Basic White Medium Envelopes [ 159236 ]")


![Tear & Tape Adhesive [ 154031 ]](https://assets1.tamsnetwork.com/images/EC042017NF/154031s.jpg "Tear & Tape Adhesive [ 154031 ]")

![Take Your Pick [ 144107 ]](https://assets1.tamsnetwork.com/images/EC042017NF/144107s.jpg "Take Your Pick [ 144107 ]")


")
")


 Designer Series Paper")


")


 Designer Series Paper")


")


")
")


 Large Check Ribbon")


")
")

")


")
")


 Designer Series Paper")


")


")


