
Good Monday morning stamping friends and welcome to the last week of August. WOW!!! That means summer is almost over, I still have 1 more month of it. It kind of makes me sad that summer is almost gone, but the good thing is Autumn is such a beautiful time of the year with all the leaves changing.
I have a fun CAS birthday card for you today using products from the annual catalog. If you’d like to see a quick video of how I made this card, Click Here to go to my Instagram Reels. Here is my card for today.
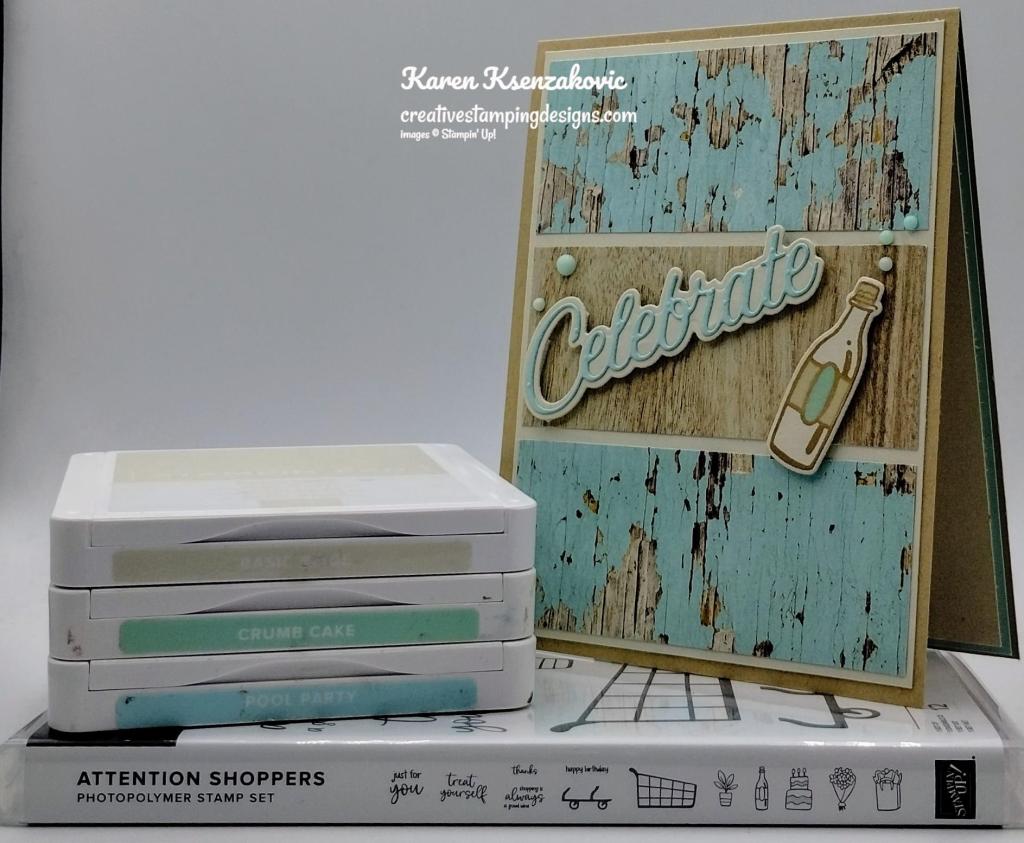
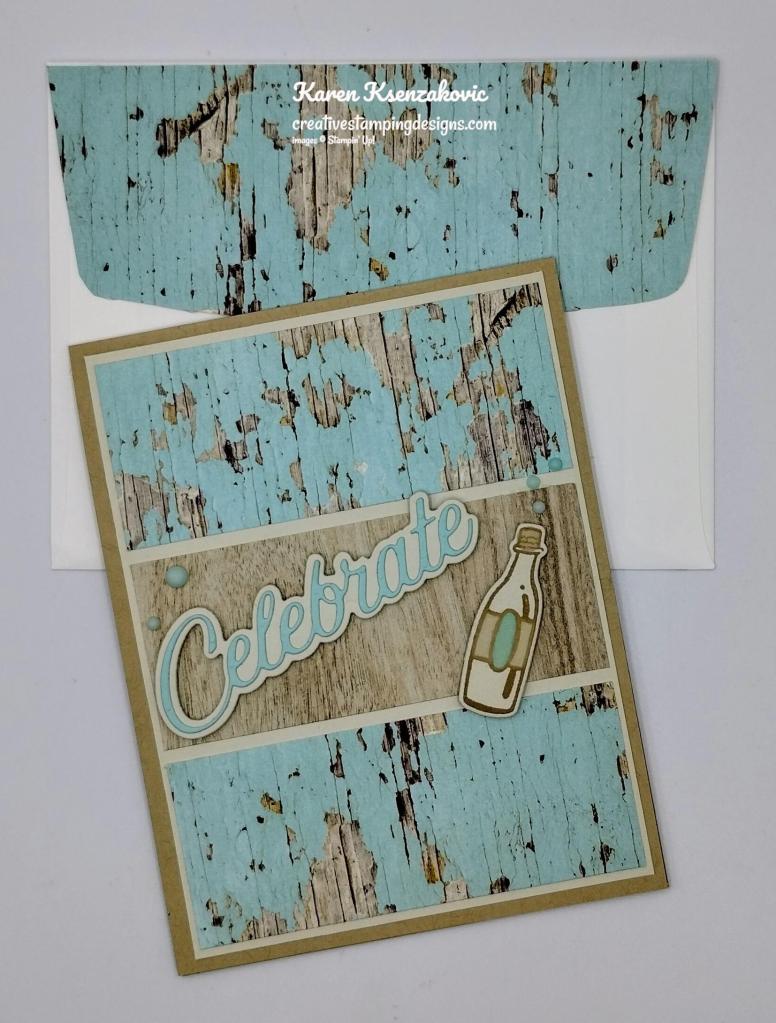
I used the Stampin’ Up! Attention Shoppers Bundle along with the Country Woods DSP and Wanted To Say Dies for my card today.

My design is from Freshly Made Sketches #650.

My colors are from The Color Throwdown Challenge #807. I love these soft colors.
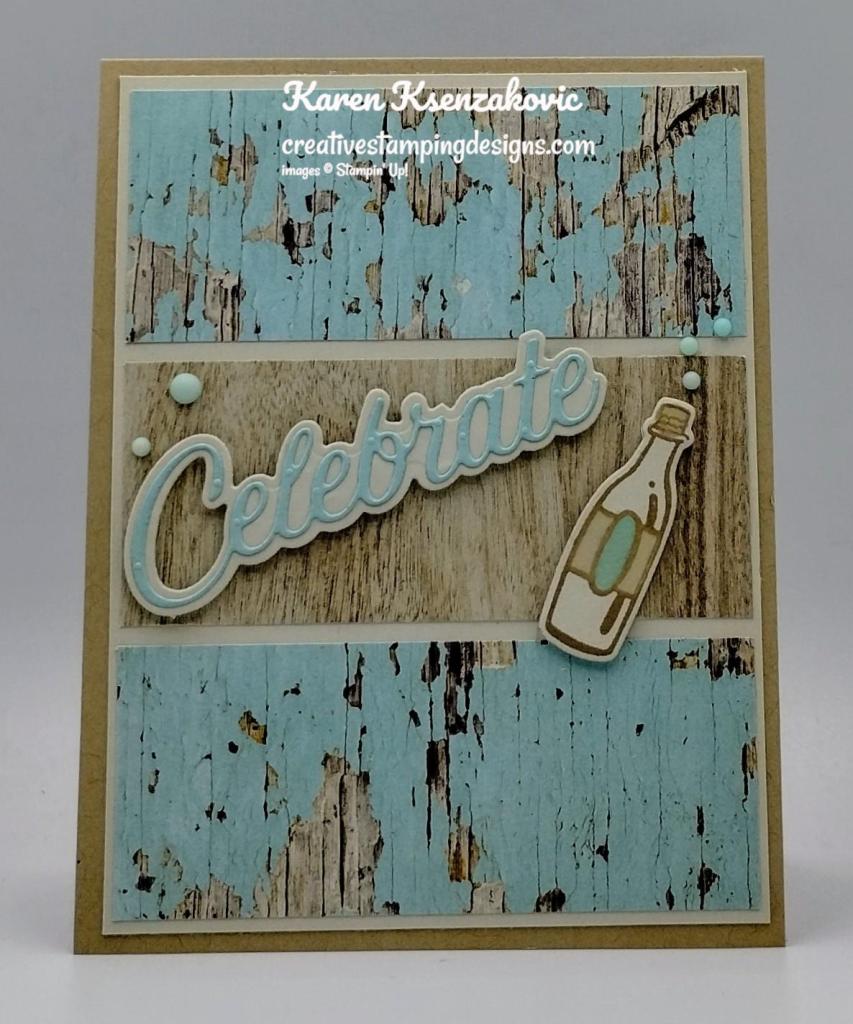
Adhere 3 panels of Country Woods DSP to a Basic Beige mat using Liquid Glue. Adhere the layered panel to a Crumb Cake card base using Liquid Glue.

Using the Wanted To Say Dies, cut the detailed sentiment from a panel of Pool Party and the mat for the sentiment from a panel of Basic Beige. Adhere the detailed sentiment to the mat using Liquid Glue. Adhere the sentiment to the center of the card front using Stampin’ Dimensionals.
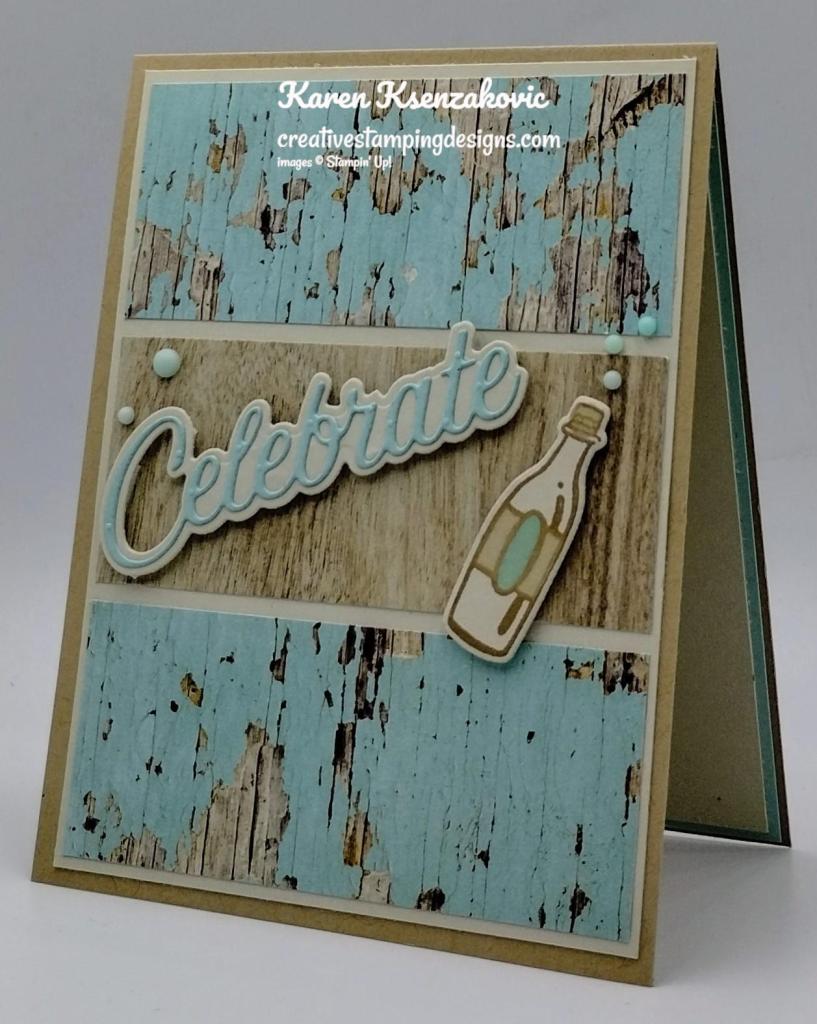
On a panel of Basic Beige, stamp the bottle image from the Stampin’ Up! Attention Shoppers Photopolymer Stamp Set in Crumb Cake Ink. Color the image using Crumb Cake and Pool Party Stampin’ Blends Markers. Cut the image out using the Attention Shopper Dies. Adhere the bottle to the card front using Stampin’ Dimensionals. Add a few Ombre Matte Decorative Dots to the card front.

On the inside, stamp the sentiments from the Attention Shoppers stamp set in Crumb Cake Ink on a panel of Basic Beige. Stamp the cake image from the Attention Shoppers stamp set in Crumb Cake Ink on the bottom of the panel. Color the image using Crumb Cake and Pool Party Stampin’ Blends Markers. Adhere the Basic Beige panel to a Pool Party mat then to the inside of the Crumb Cake card base.
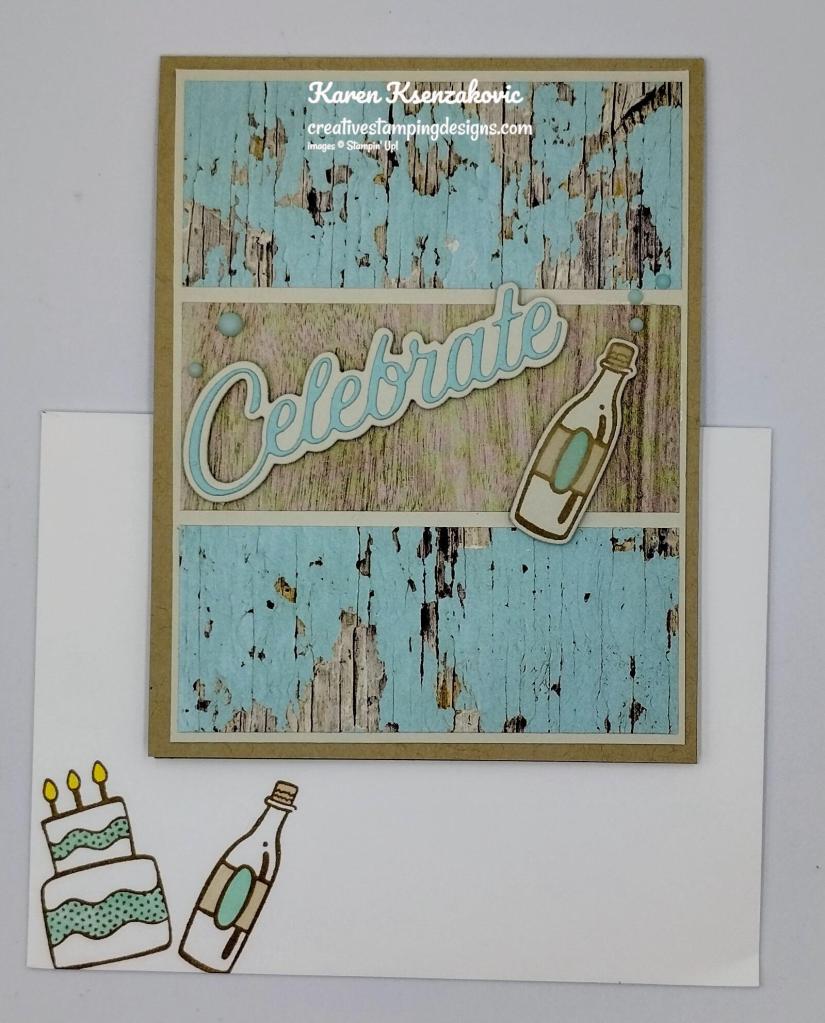
To finish the card, decorate a Basic White Medium Envelope. Stamp the cake and bottle images from the Attention Shoppers stamp set in Crumb Cake Ink on the envelope front. Color the images using Crumb Cake and Pool Party Stampin’ Blends Markers. Adhere a panel of Country Woods DSP to the envelope flap.
Thank you for stopping by my blog today. I hope you like the card and will give it a try. Happy Stamping!!
*********************************************************************************************************
If you need any stamping supplies, I’d love to be your Demonstrator. Just click HERE to go directly to my online store or drop me an email if you have any questions.
MY CURRENT HOST CODE IS: KFUKW3ZY
Use this host code when placing an order with me. When you order $50 or greater you will receive a free gift from me! If your order is over $150, please do not use this code, but you’ll still get the free gift. The free gift is your choice of any 1 item valued up to $10.00 from the 2024-2025Annual Catalog, or from the Online Exclusives! Unfortunately, packs of cardstock are no longer an option for a free gift. Shipping has become too expensive to ship and it’s costing me as much to ship as the cardstock costs. For any orders $50 or more I will also send you my monthly class tutorials. Click HERE or go to my Customer Rewards for more details and to see what this month’s tutorials are.
Please remember to use my current Host Code and make sure that you can see my name on the final checkout page listed as your Demonstrator when you order so that you know that you’re ordering with me, and you’ll get my rewards!
Happy Stamping, Karen
*********************************************************************************************************
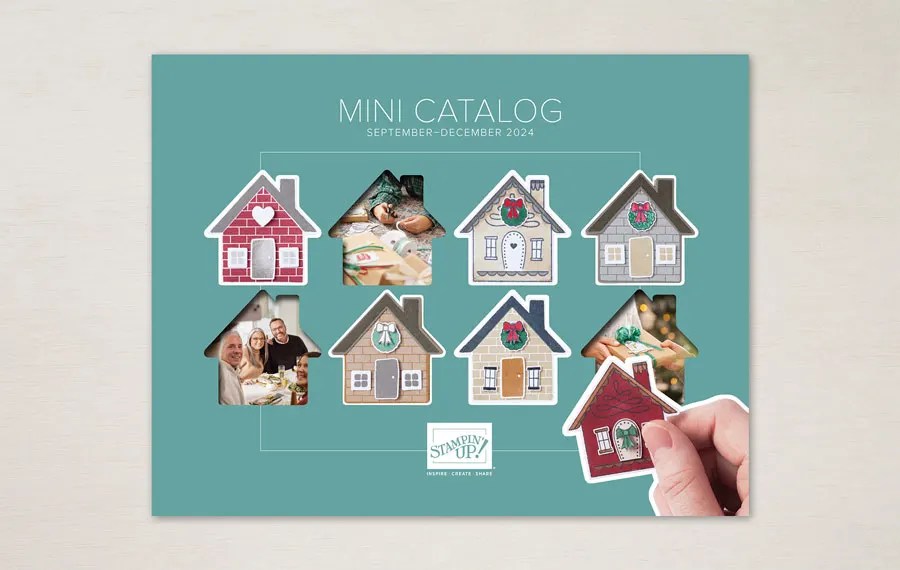
September-December 2024 Mini Catalog Paper and Ribbon Shares Open for Ordering
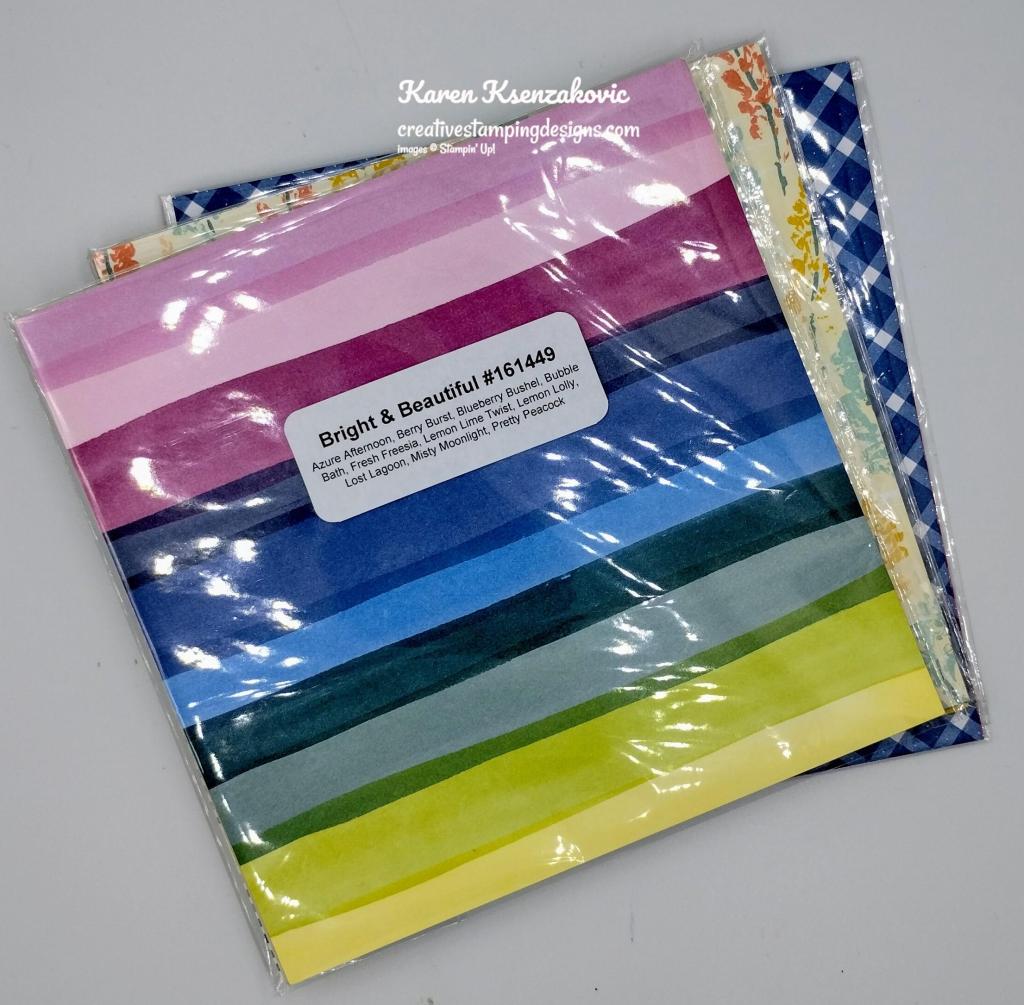
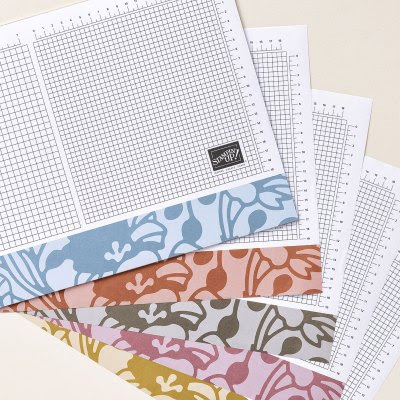
I’m offering a Designer Series Paper share from the September-December 2024 Mini Catalog and I’d love to have you join!! I’m placing my share order early on September 4th and I’m going to use the expedited shipping option so I should be able to have the shares cut, bundled and back out to you during the week of September 9. Wouldn’t you love to have all of the gorgeous new Designer Series Papers in the Stampin’ Up! September-December 2024 Mini Catalog? What is a Paper Share you ask? It’s a sample of each of the new Designer Series Papers from the September-December 2024 Mini Catalog. Shares give you a good working sample of all of the papers so that you can decide which ones to order in full packs! If you were to purchase all of the DSP in the new Catalog, it would cost you over $135.00 plus shipping and if you were to purchase all the ribbon it would cost you over $60.00.
New Designer Series Paper Share – $21.00 plus $9.00 for Priority Mail Shipping

How my shares work: I order full packs of all of the Designer Series Papers listed below, I cut them into 6″ X 6″ pieces (or 6″ X 12″ pieces for double shares) and give you one panel of each design from each pack on the list. I pack up the paper in a cellophane bag with labels listing the Name, Item # and Colors in the pack and mail it back out to you just as quickly as I can!
New Designer Series Paper Share – $21.00 plus $9.00 for Priority Mail shipping
You will receive one 6X6 sheet of each design from the following DSP packs (the number after the name indicates how many 6×6 sheets of that paper pack you will receive):
- Nests of Winter (6)
- Regal Winter (6)
- Regal Distressed Patterns (3)
- Reindeer Days (6)
- Season of Elegance (6)
- Sentimental Christmas (6)
- Snowy Scenes (6)
- A Little Bit Festive (3)
- Festive Glimmer (3)
- Splendid Autumn 6X6 (12)
- Take A Bow 6X6 (4)
In all, you’ll receive 61 – 6” X 6” sheets of designer or specialty paper!
Double DSP Share – $42.00 + $9.00 Shipping by Priority Mail – if you’d like double shares of the designer paper, I’m offering those too! I’ll cut the 12″ X 12″ designer paper sheets into 6″ X 12″ so that you’ll be able to get 3 full A2 size card fronts from each sheet and you’ll get double sheets of the 6″ X 6″ since they’re already precut.
New Ribbon Share – $17.00 plus $9.00 Priority Mail Shipping
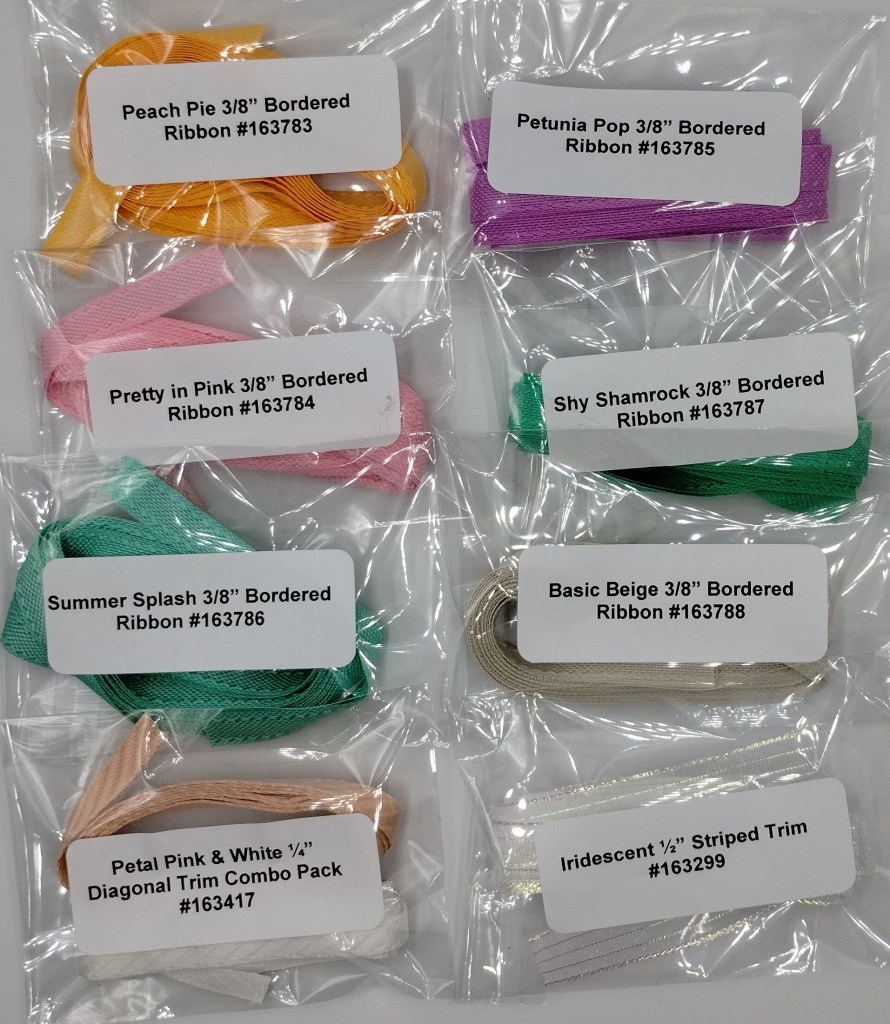
All ribbons will come individually wrapped and labeled with the name and number of the product. Please note that ribbons are being divided differently, you will be getting one fourth of a roll of each of the Ribbons.
One-Fourth of a Roll of each:
- Blackberry Bliss & Gold Textured Ribbon
- Cherry Cobbler & Gold Satin Ribbon
- Natural Tones Linen Thread
- Pool Party Pompom Ribbon
- Real Red & White Baker’s Twine
- Shaded Spruce Satin & Sheer Ribbon
- Wild Wheat Rustic Striped Ribbon
Double Ribbon Share – $34.00 + $9.00 Priority Mail Shipping – If you’d like double shares of the Ribbon, you will be getting 1/2 of the roll or each ribbon.
If you would like the Designer Series Paper Share & the Ribbon Share the cost will be:
$38.00 for a single share + $9.00 shipping
$76.00 for a double share + $9.00 shipping.
Anyone is welcome to join in my share (please note, I can only ship to addresses within the US). If you’d like to join, email the following information to creativestampingdesigns@gmail.com
- Your first and last name
- Your mailing address for paper to be shipped to.
- The email address that is connected to your PayPal account or let me know if you’d like to use Zelle. I will accept Zelle or PayPal for payment. ***You do not need to have a PayPal account to pay the invoice, you can choose to pay by credit card without having a PayPal account. If you’d like to use Zelle, email me and I’ll give you the number associated with my account.
Deadline to sign up for my share is Sunday September 1st at 5:00 PM ET.
Let me know if you have any questions. Thanks!
*********************************************************************************************************
Final Week to Redeem Those Coupons

Redemption Period: August 1-31, 2024
Ordering Deadline: August 31, 2024 at 11:59 p.m. (MT)
- There is no limit to the number of coupon codes you can redeem on an order during the redemption period. If using multiple codes, they must be separated by a space.
- Coupon codes may be redeemed one time only. They cannot be redeemed after the August 31.
- Coupon codes may be redeemed for any product (excluding Starter Kits). They cannot be used on exchanges.
- Bonus Days coupon codes can be applied to month-to-month Paper Pumpkin subscriptions and new prepaid subscriptions.
********************************************************************************************************
Final Week of Designer Series Paper Sale – 15% off August 6th-31st
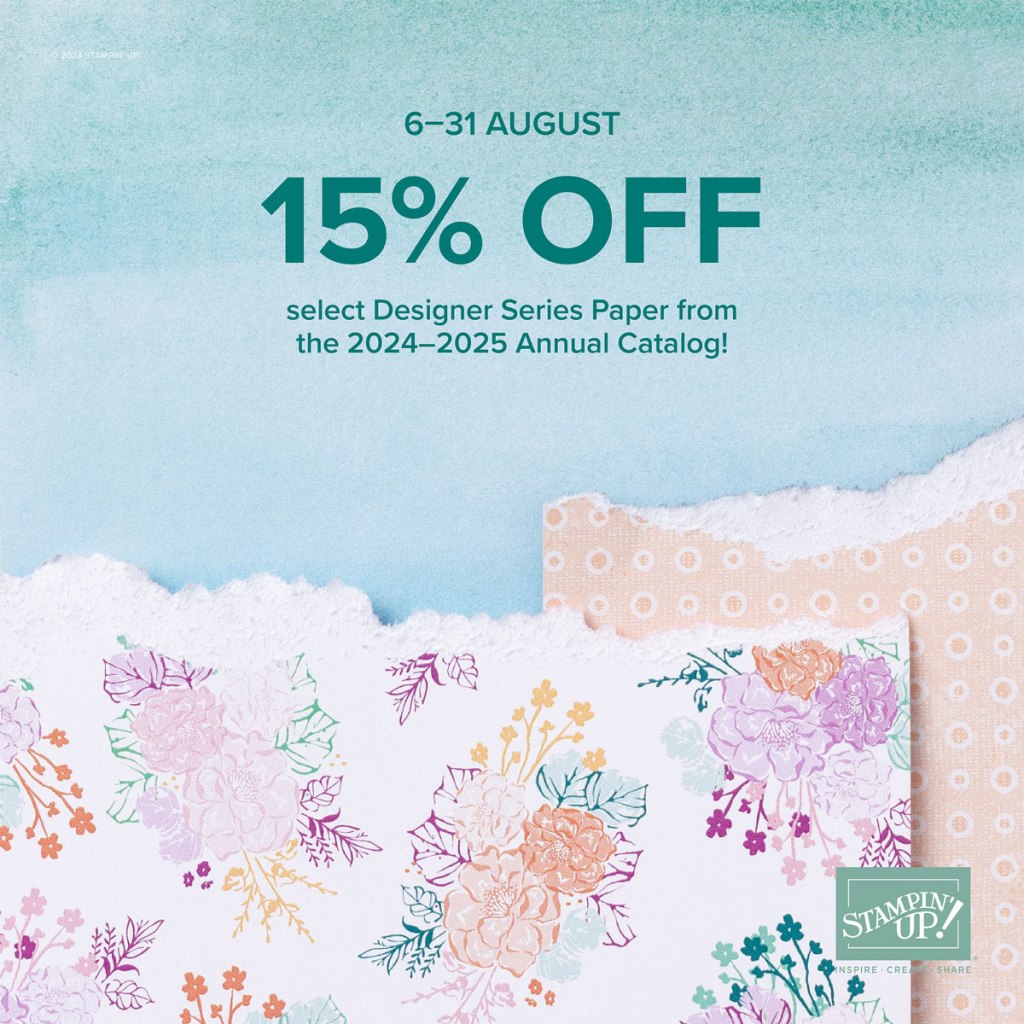
Between August 6-31, you can shop select Designer Series Paper from the 2024–2025 Annual Catalog at 15% off! This is the perfect time to stock up and save on some of your favorite paper.
Designer Series Paper Sale Details:
- Sales Period: August 6-31, 2024
- Ordering Deadlines: August 31 at 11:59 p.m. (MT)
- The fourteen paper packs included in the sale can be found listed in This Flyer
- Only the select packs of papers listed on the flyer are included in the sale.
- You CAN redeem your Bonus Days coupons when you order the sale papers!
- You must open and close the order during the allotted dates to receive the discount.
- There are NO limits on ordering. However, product is only available while supplies last.
- Designer Series Paper purchased with Stampin’ Rewards or as part of a Starter Kit WILL qualify for the discount.
Head over to my Online Store beginning August 6 and get 15% off your favorite packs of paper!!
*********************************************************************************************************
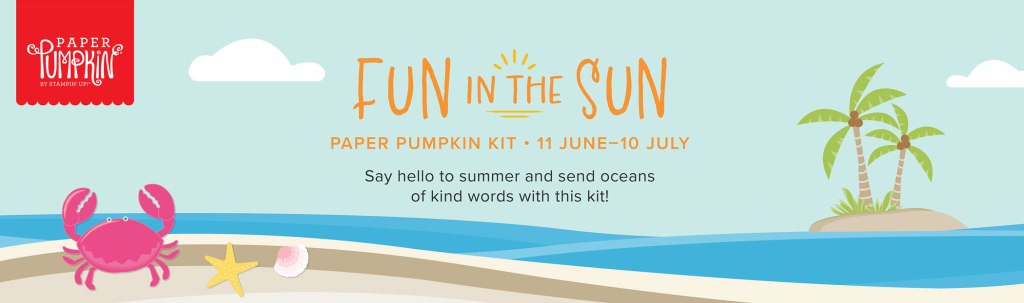
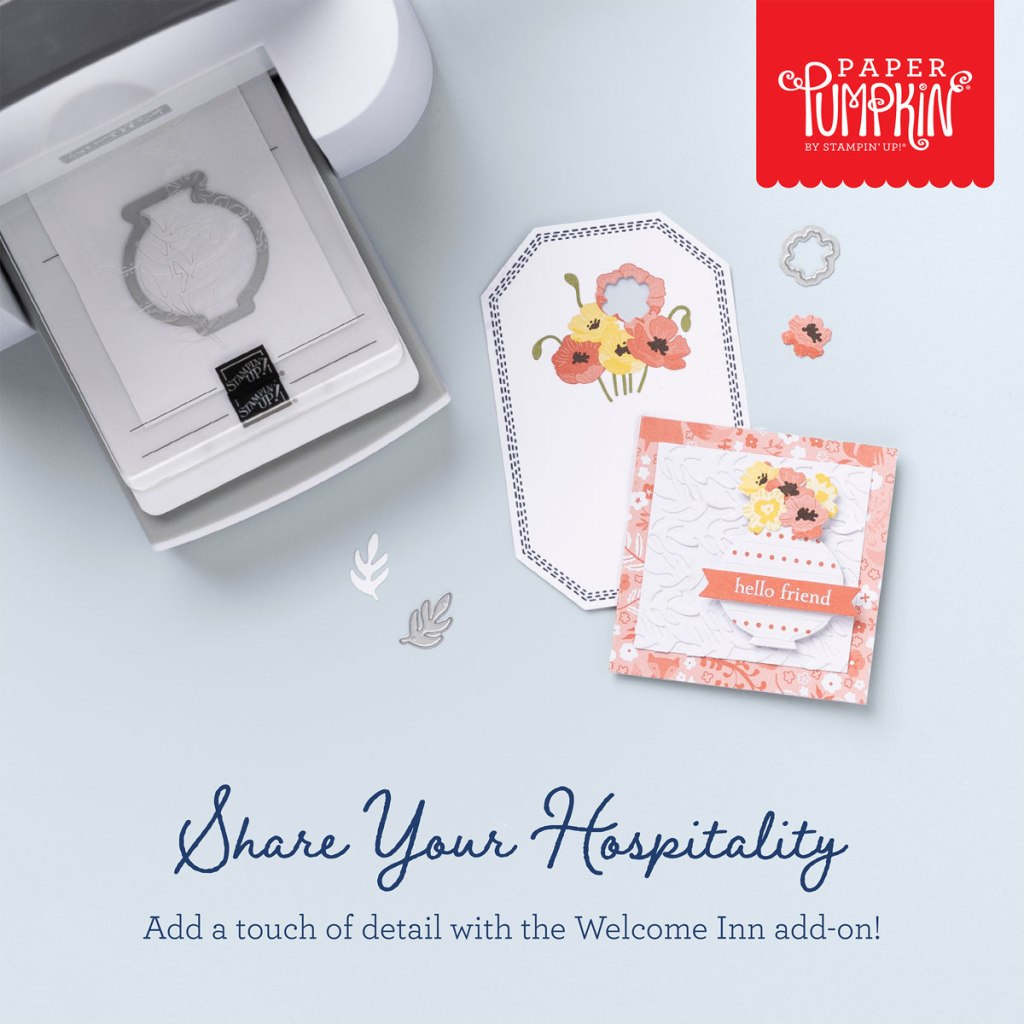
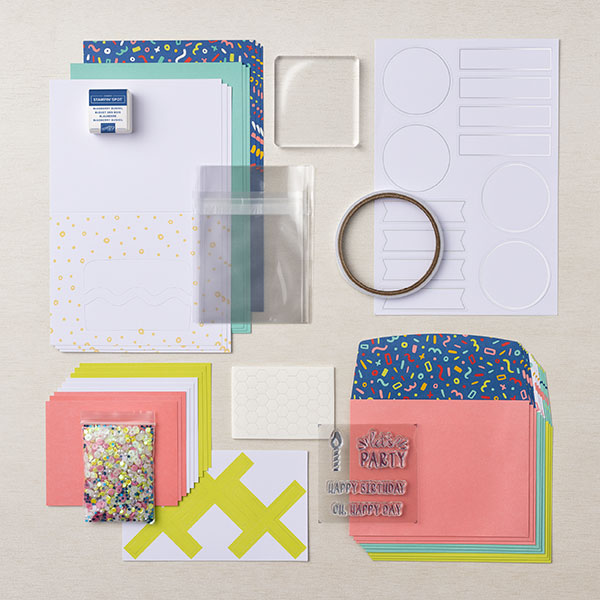
Autumn Abundance
Subscribe August 11 – September 10
Subscribe to Paper Pumpkin for a monthly, all-inclusive crafting kit that’s a fun surprise! Each kit includes a photopolymer stamp set, Classic Stampin’ Spot, and step by step instructions to complete exclusive paper craft projects, including cards, tags, and gift
packaging. And don’t miss the special add-on that coordinates with the next three months!
Share your love for all things autumn with this kit! Don’t miss the whimsical, water colored ephemera pack with this month’s Paper Pumpkin!

• Makes 9 cards, 3 each of 3 designs
• Project includes printed cards and coordinating envelopes
• Laser cut card fronts, ephemera pack, and embellishments
• Coordinating colors: Cajun Craze (Classic Stampin’ Spot), Crushed Curry, Poppy
Parade, Pumpkin Pie, Very Vanilla, Wild Wheat
*********************************************************************************************************
Don’t miss the coordinating
Every Celebration Dies Add-On!

This exclusive add-on (item 164991) coordinates with the three upcoming kits! Paper Pumpkin subscribers can purchase it beginning 11 July. The add-on is available only while supplies last, so it’s best to shop early!
Subscribe to the September Paper Pumpkin Kit between 11 August and 10 September by clicking here!
Note: Supplies may be limited toward the end of the subscription period.
*********************************************************************************************************
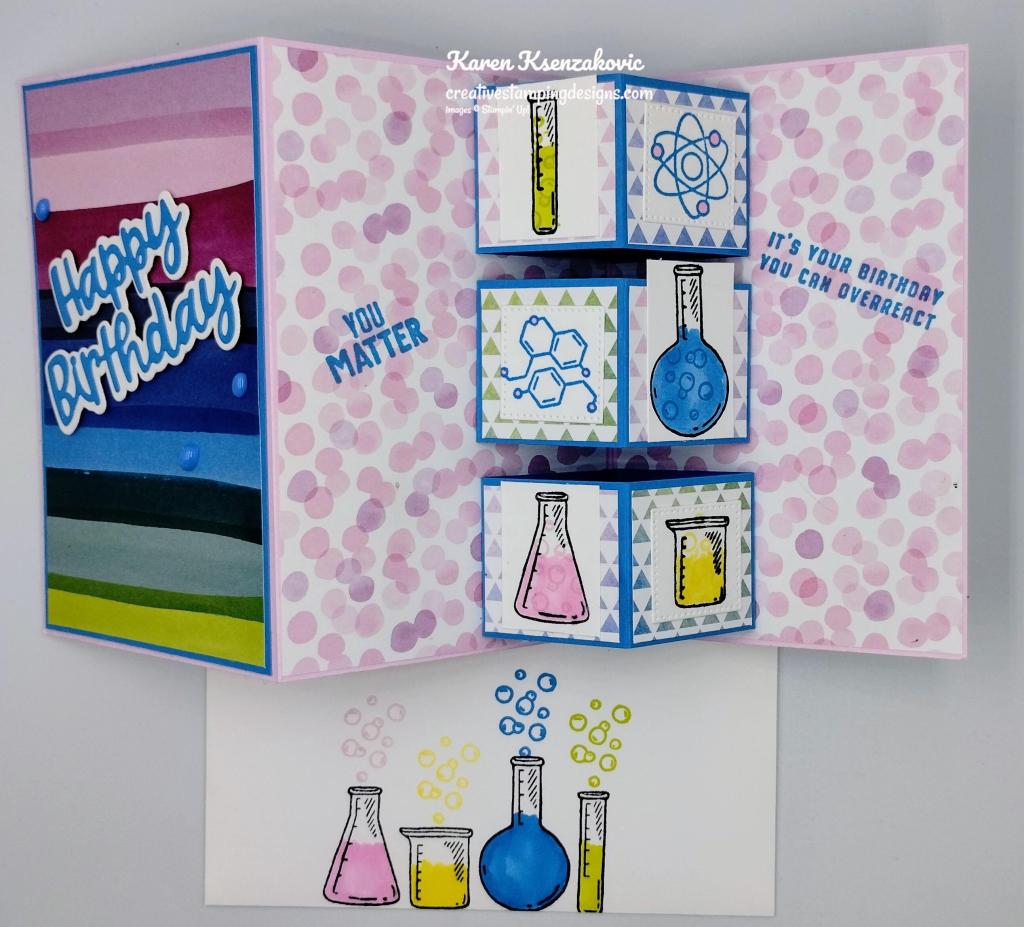
Card stock cuts for this project:
- Basic Beige Cardstock 2 – 4″ X 5 1/4″(card front mat & inner liner), 1 1/4″ X 3 1/2″(sentiment mat), 1 1/2″ X 2″ (bottle)
- Crumb Cake Cardstock 4 1/4″ X 11″(card base scored & folded at 5 1/2″)
- Pool Party Cardstock 1 1/4″ X 3 1/4″(sentiment), 4 1/8″ X 5 3/8″(inner liner mat)
- Country Woods Designer Series Paper 3 – 1 5/8″ X 3 7/8″ (card front panels), 2 1/4″ X 6″(envelope flap)
*********************************************************************************************************
Product List
")
")


 Designer Series Paper")


")


 Designer Series Paper")


")
")


 Designer Series Paper")


")


 Designer Series Paper")


")

 Circle Punch")


")


 Designer Series Paper")


")

 Designer Series Paper")


