Stampin’ Up! Otterly Amazing Love

Good Saturday morning stamping friends and welcome to the weekend. I hope you have some plans in the works. I’ll be at work all day today.

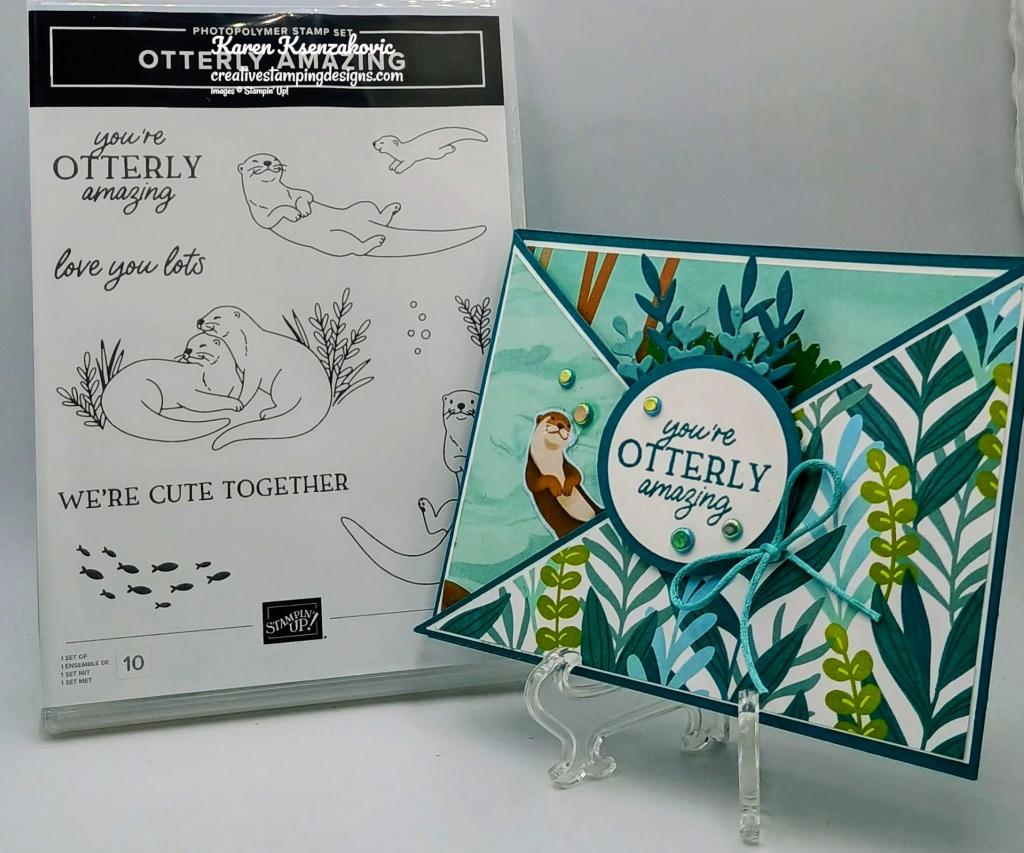
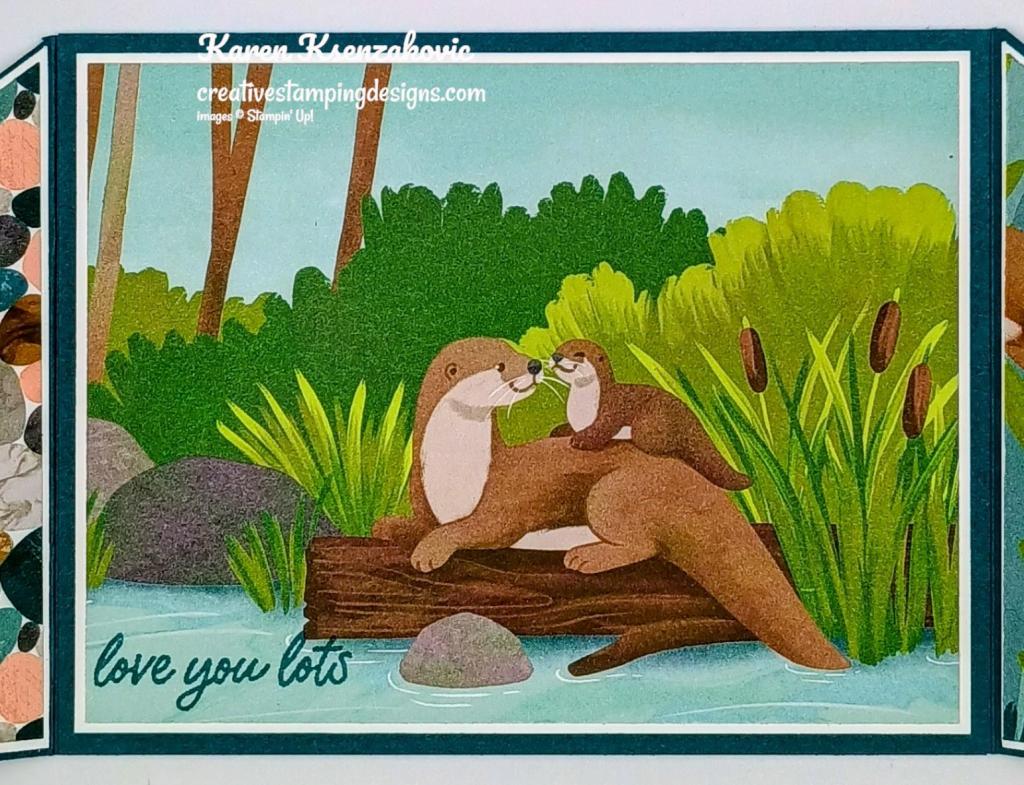
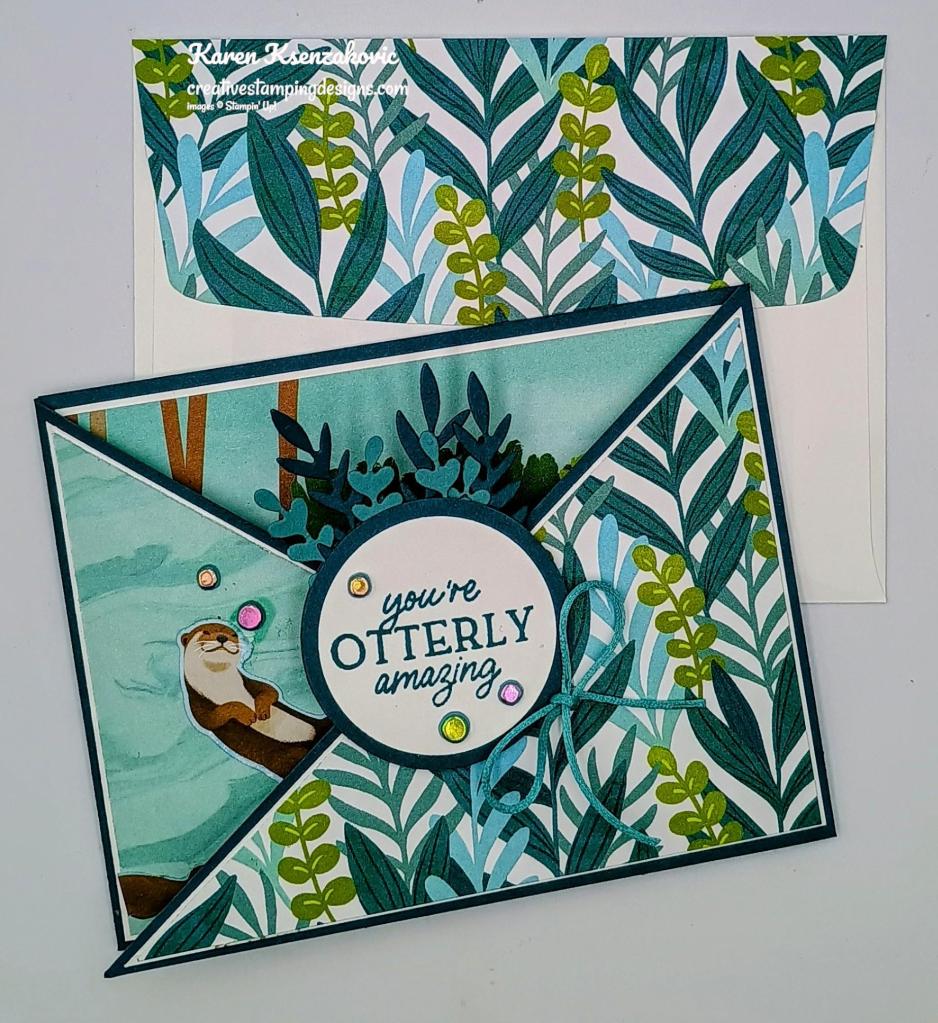
I played with new Online Exclusive products that will be available to purchase on Tuesday November 5th for my card today. Here’s my card for today.
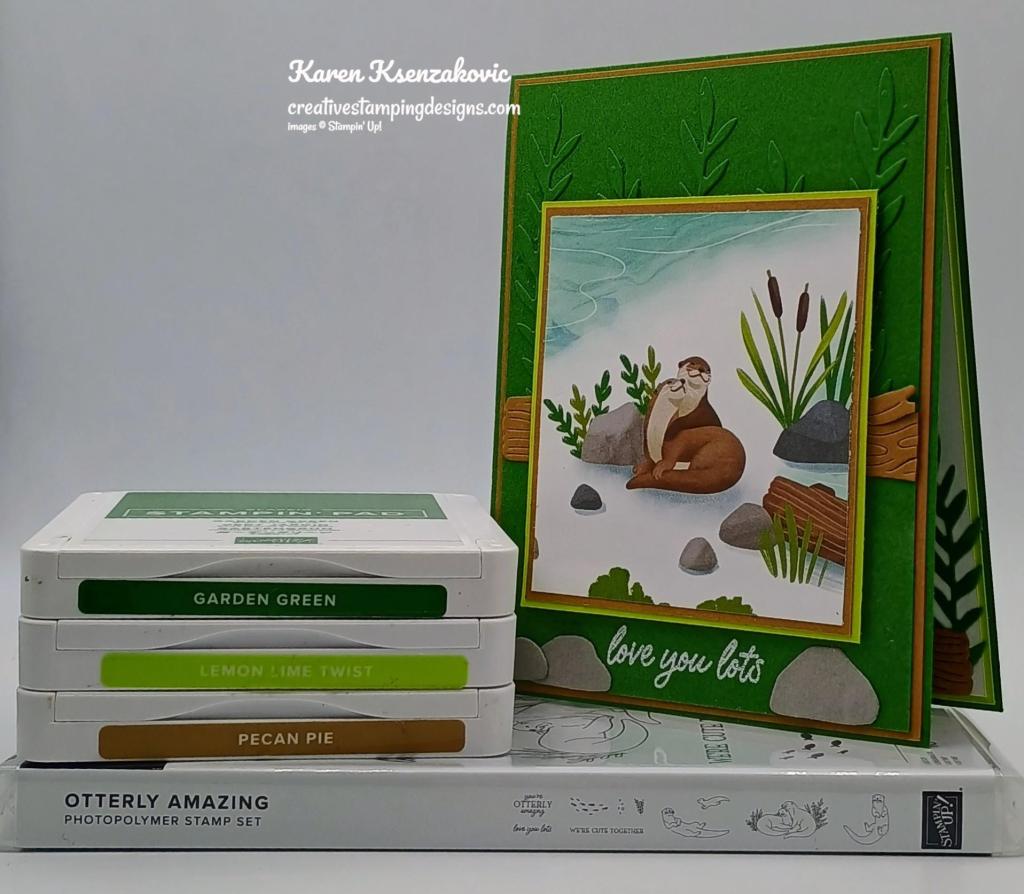
Stampin Up! Otterly Amazing Love 1 creativestampingdesigns.com

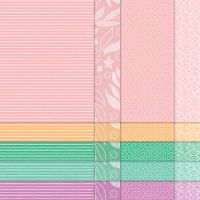
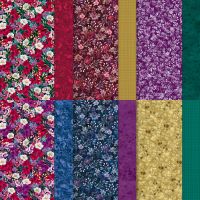
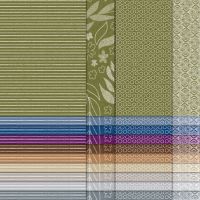
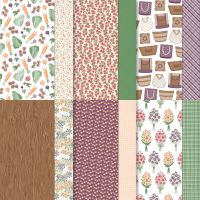
I used the Stampin’ Up! Online Exclusive Otterly Amazing Bundle along with the Otterly Adorable Designer Series Paper for my card today.

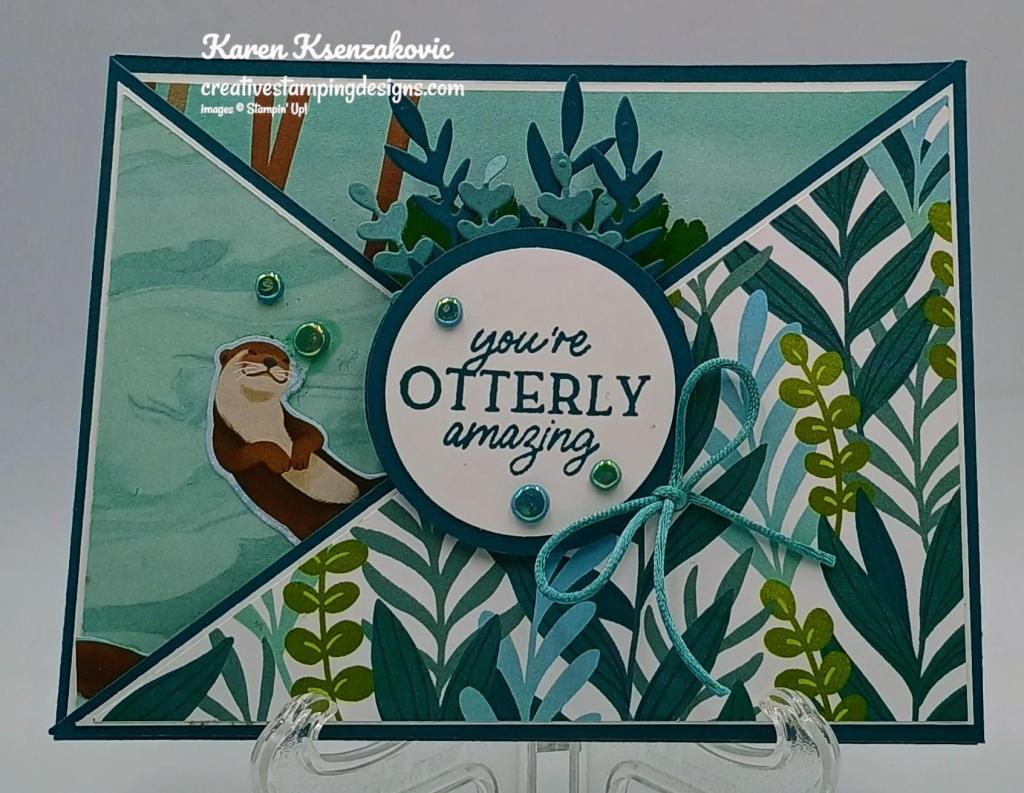
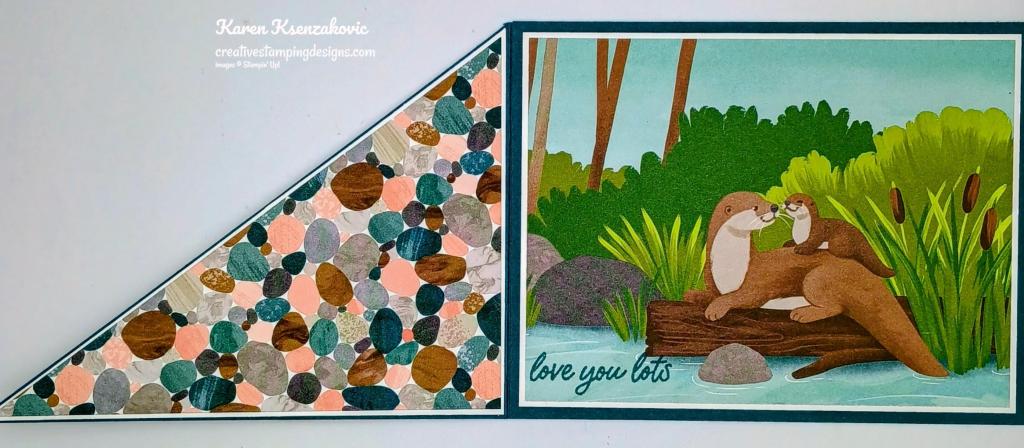
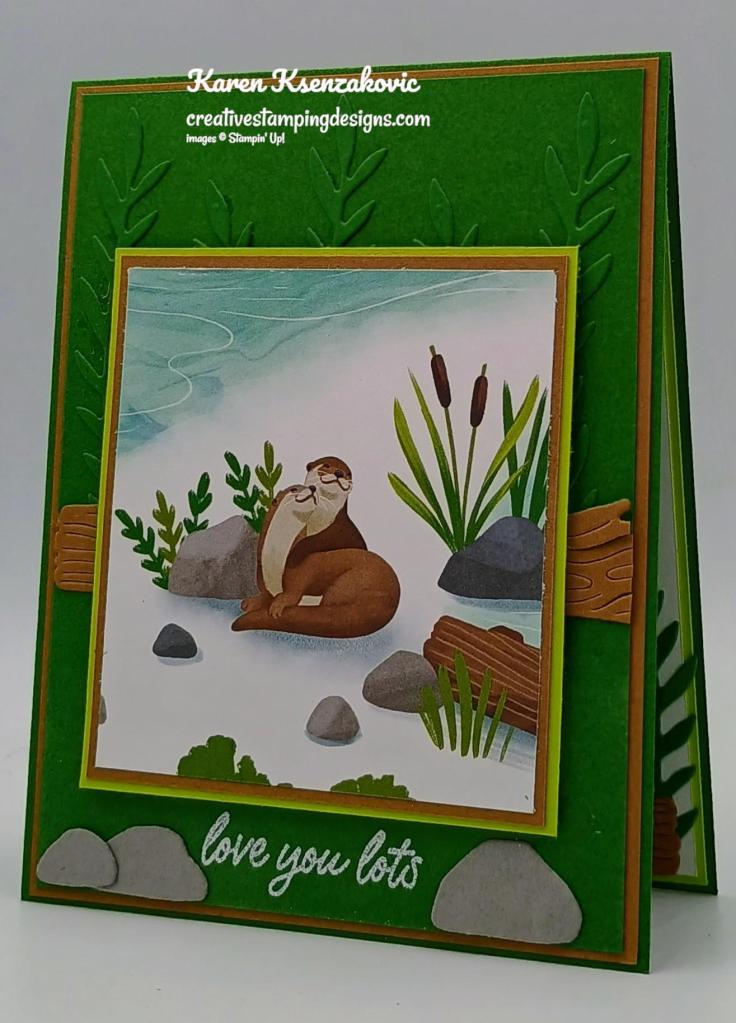
Stampin Up! Otterly Amazing Love 2 creativestampingdesigns.com

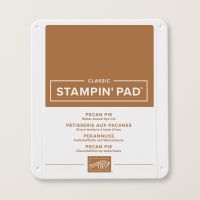
Using the Otterly Amazing Dies, cut 9 of the leaf dies from a panel of Garden Green, 2 of the logs from a panel of Pecan Pie and 3 rocks from a panel of Smoky Slate. Adhere 5 of the leaf die cut leaves to a Garden Green card front using Liquid Glue. Cut 1 of the logs in half using Paper Snips and adhere it to the center of either side of the Garden Green card front using Liquid Glue.

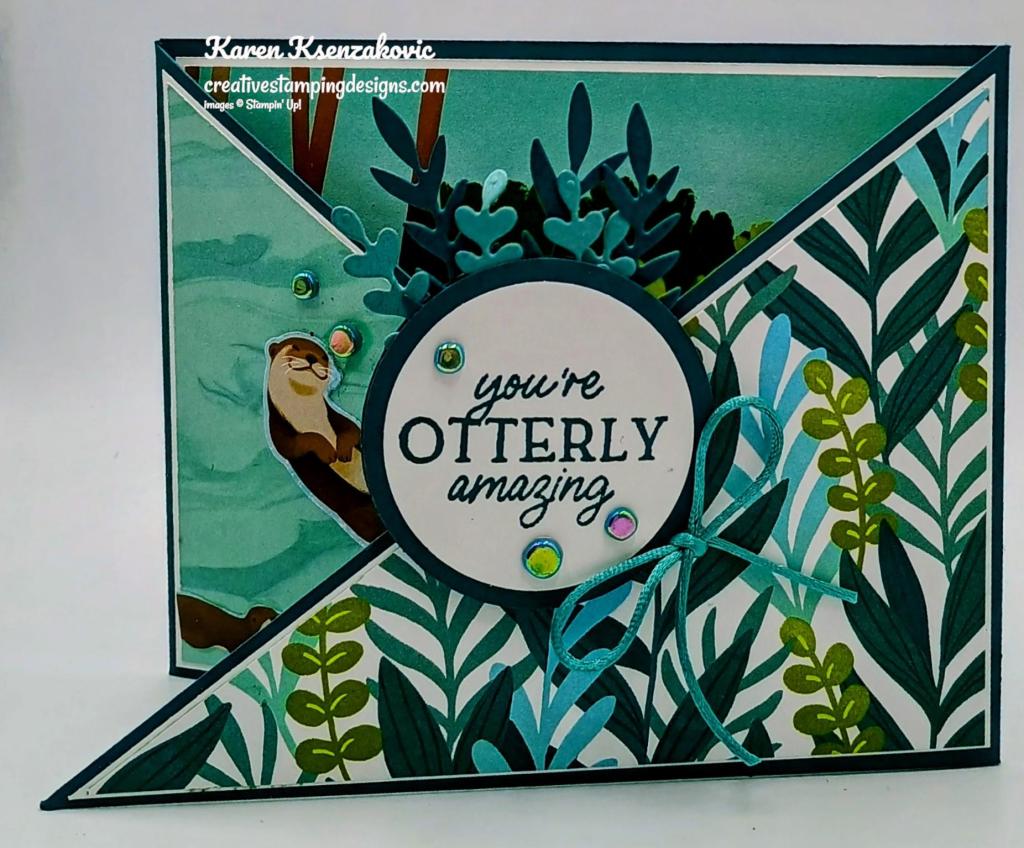
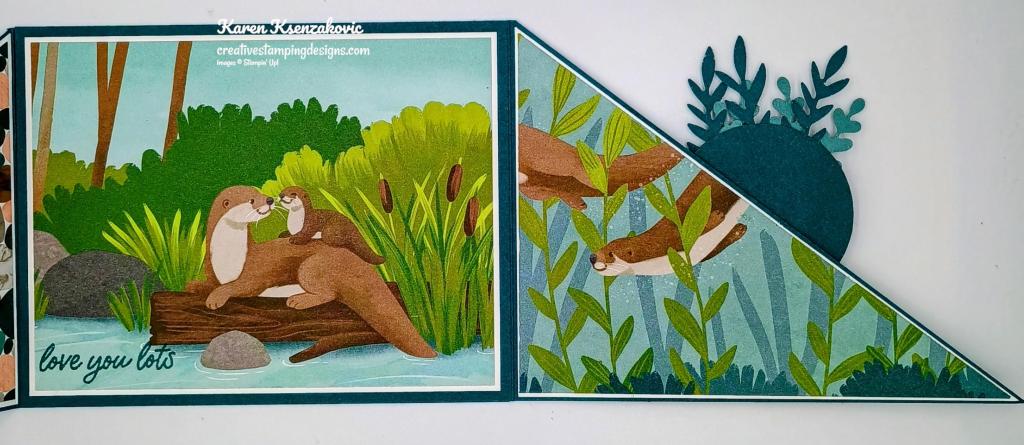
Stampin Up! Otterly Amazing Love 3 creativestampingdesigns.com

Stamp the sentiment from the Stampin’ Up! Otterly Amazing Photopolymer Stamp Set in Versamark Ink on the bottom of the panel. Sprinkle it with White Embossing Powder and set it using the Heat Tool. Adhere the Garden Green card front to a Pecan Pie mat using Stampin’ Seal. Adhere the layered panel to a Garden Green card base using Liquid Glue. Adhere the rocks on the bottom of the panel using Glue Dots.
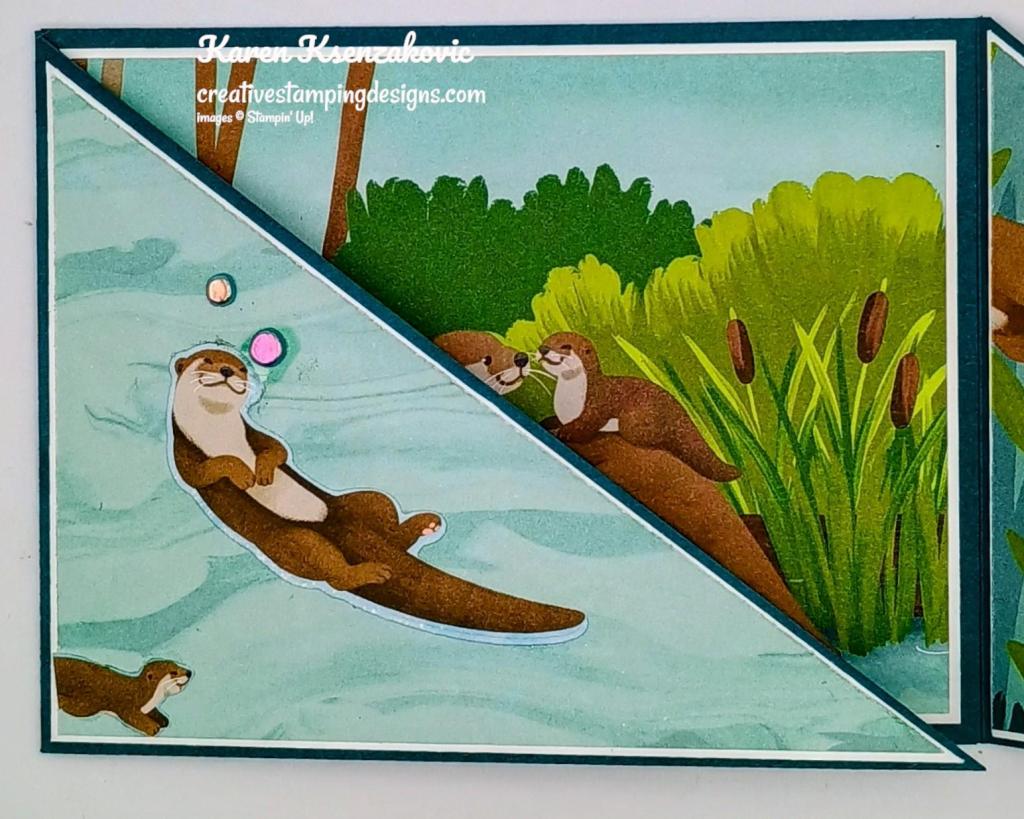
Stampin Up! Otterly Amazing Love 4 creativestampingdesigns.com

Adhere a panel of Otterly Adorable DSP to a Pecan Pie mat using Stampin’ Seal. Adhere the layered panel to a Lemon Lime Twist mat using Stampin’ Seal. Adhered the layered panel to the card front, over the logs, using Stampin’ Dimensionals.

Stampin Up! Otterly Amazing Love 5 creativestampingdesigns.com

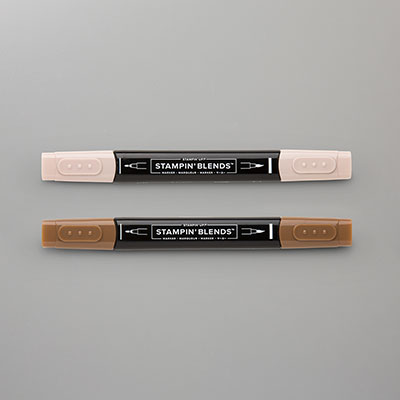
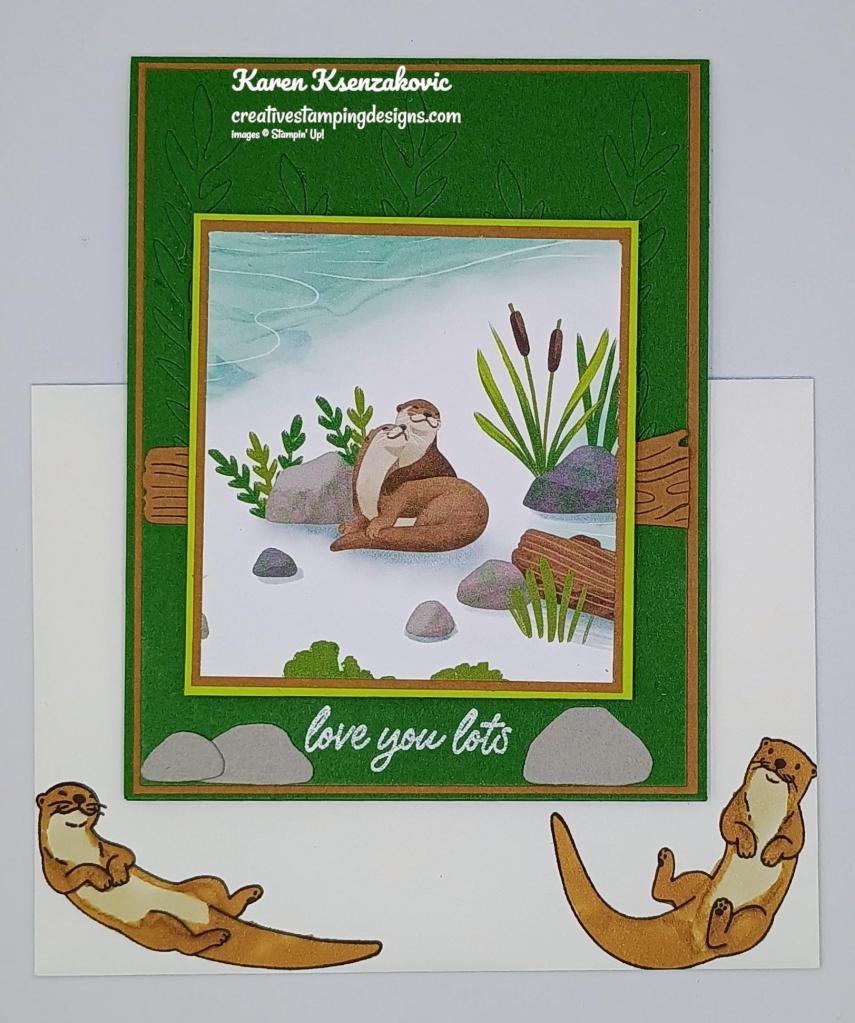
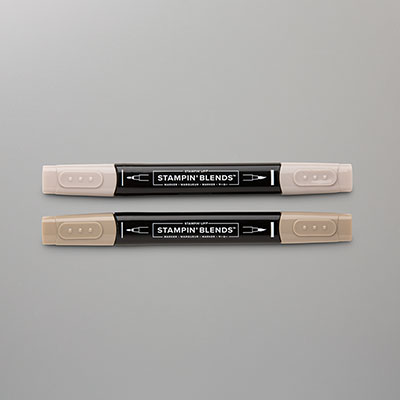
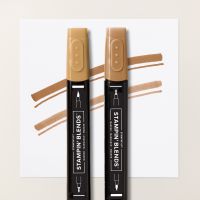
On a panel of Basic White, stamp the otter image from the Otterly Amazing stamp set in Tuxedo Black Ink on the bottom of the panel. Color the image using Crumb Cake and Pecan Pie Stampin’ Blends Markers. Adhere the die cut leaves to the bottom of the panel. Adhered the log to the bottom of the panel. Adhered the Basic White panel to a Lemon Lime Twist mat then to the inside of the Garden Green card base.
Stampin Up! Otterly Amazing Love 6 creativestampingdesigns.com

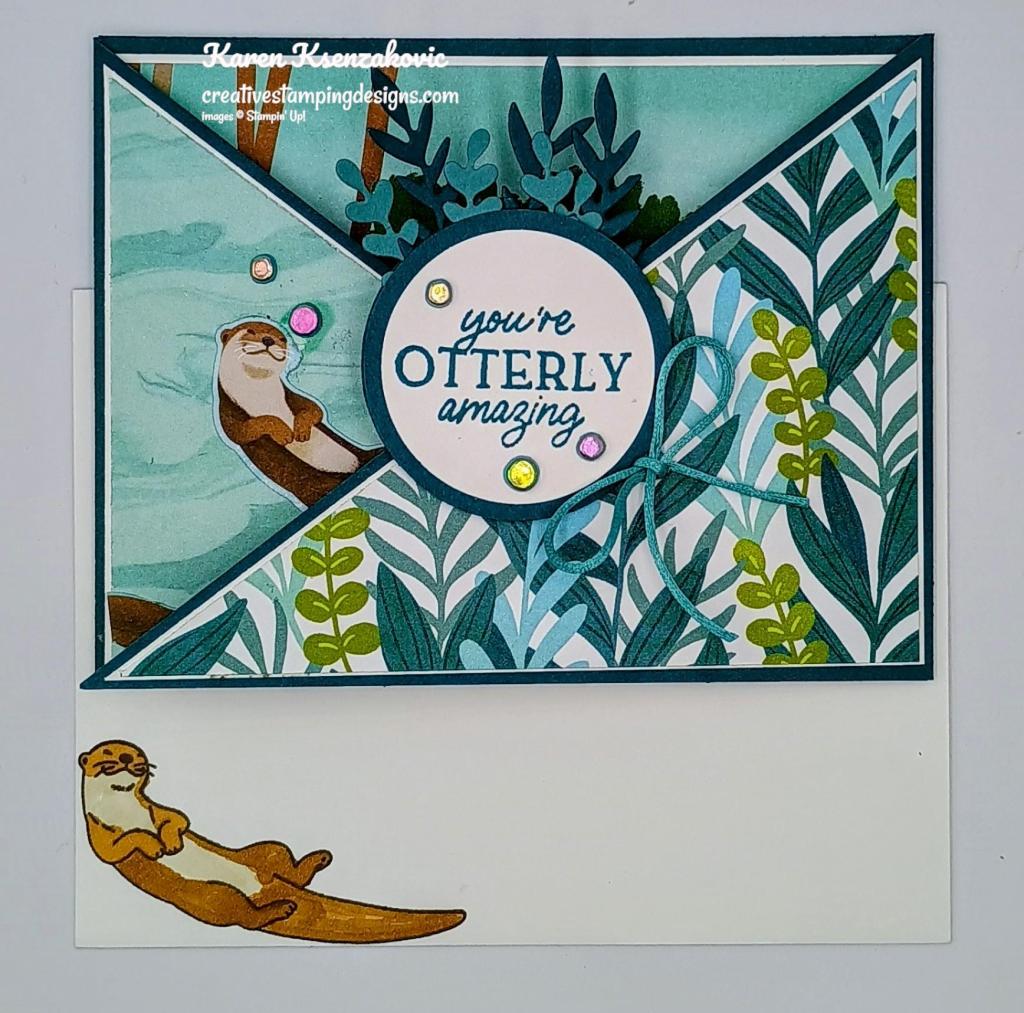
Finish the card by decorating a Basic White Medium Envelope. Stamp the 2 otter images from the Otterly Amazing stamp set in tuxedo Black Ink on the envelope front. color the images using Crumb Cake and Pecan Pie Stampin’ Blends Markers. Adhered a panel of Otterly Adorable DSP to the envelope flap.

Stampin Up! Otterly Amazing Love 7 creativestampingdesigns.com

Thank you for stopping by my blog today. I hope you like the card and will give it a try. Happy Stamping!!

*********************************************************************************************************

If you need any stamping supplies, I’d love to be your Demonstrator. Just click HERE to go directly to my online store or drop me an email if you have any questions. 

MY CURRENT HOST CODE IS:   4RTJCBH2

Use this host code when placing an order with me. When you order $50 or greater you will receive a free gift from me! If your order is over $150, please do not use this code, but you’ll still get the free gift. The free gift is your choice of any 1 item valued up to $10.00 from the 2024-2025Annual Catalog, or from the Online Exclusives!  Unfortunately, packs of cardstock are no longer an option for a free gift. Shipping has become too expensive to ship and it’s costing me as much to ship as the cardstock costs. For any orders $50 or more I will also send you my monthly class tutorials.  Click HERE or go to my Customer Rewards for more details and to see what this month’s tutorials are.

Please remember to use my current Host Code and make sure that you can see my name on the final checkout page listed as your Demonstrator when you order so that you know that you’re ordering with me, and you’ll get my rewards! 

Happy Stamping, Karen

*********************************************************************************************************

New Online Exclusive Products Coming Soon

A new line of products for Online Exclusives are coming! You won’t find these items in any catalog. This is a great opportunity to spark creativity, expand a crafting collection, and discover new opportunities—all from the convenience of the online store. These products will be available starting in November. Here’s a little sneak peek of some of the items. Click Here for a sneak peek of what’s coming.

*********************************************************************************************************

Filled With Joy

Subscribe October 11 – November 10
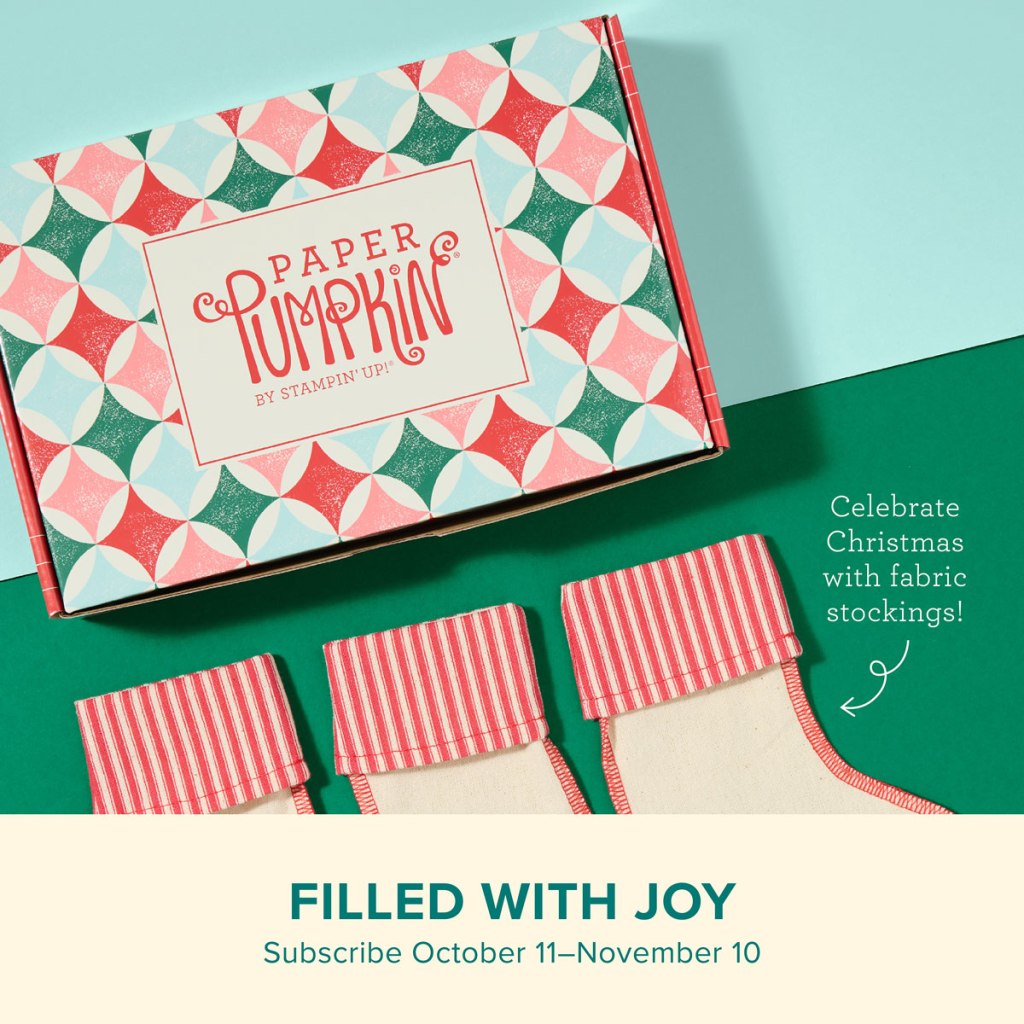
Celebrate Christmas with adorable stockings and gift tags!

Details:
• Makes 8 projects: 8 stockings with 8 gift tags
• Precut paper pieces
• Safety pins and specialty gold foil
• Coordinating colors: Flirty Flamingo, Pool Party, Poppy Parade
(Classic Stampin’ Spot), Shaded Spruce, Very Vanilla

Subscribe to Paper Pumpkin for a monthly, all-inclusive crafting kit that’s a fun surprise! Each kit includes a photopolymer stamp set, Classic Stampin’ Spot, and step by step instructions to complete exclusive paper craft projects, including cards, tags, and gift
packaging. And don’t miss the special add-on that coordinates with the next three months!

Subscribe to the November Paper Pumpkin Kit between 11 October and 10 November by clicking here!

*********************************************************************************************************

Don’t miss the coordinating
Merry Tags & More Dies Add-On!
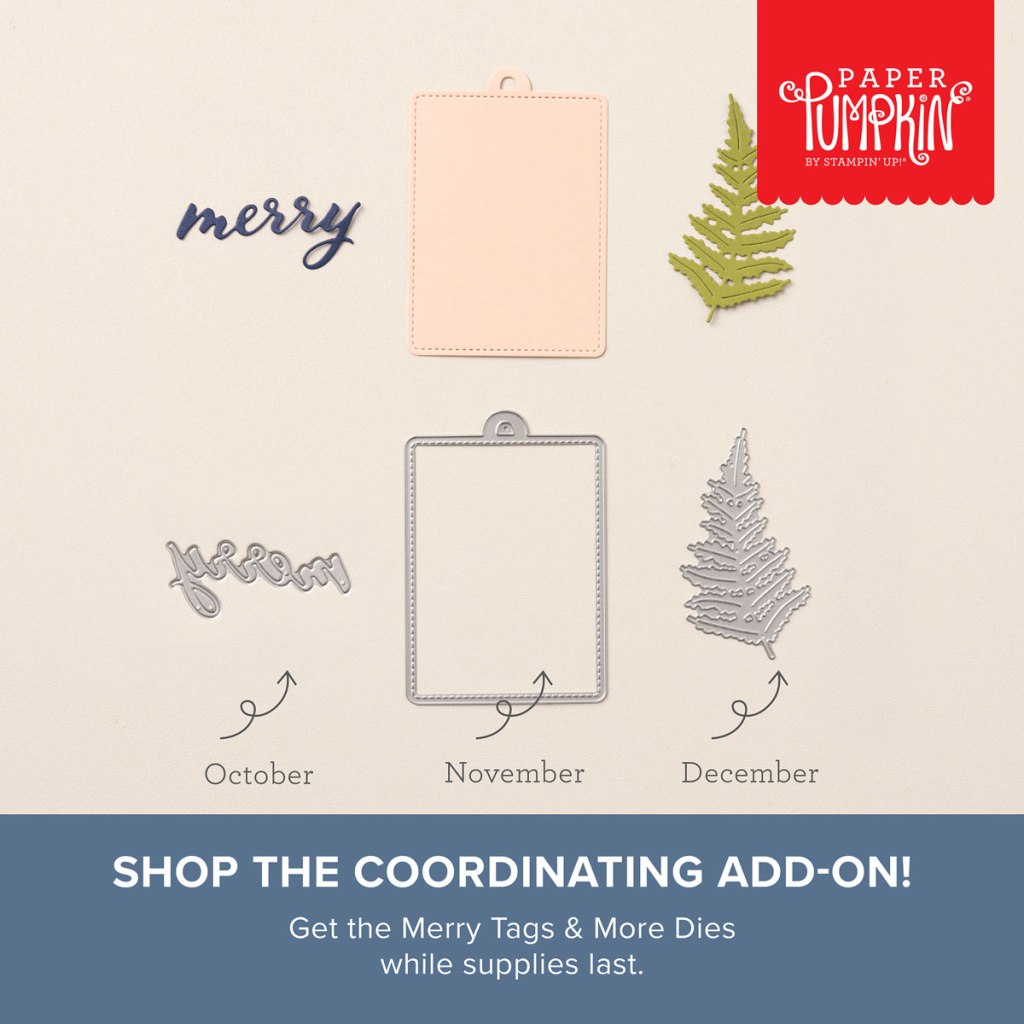
Add dimension and detail to your cards, scrapbook pages, and gift tags with the Merry Tags & More Dies! With a leaf and tag shape and Merry sentiment, these dies are a great way to expand your crafting experience. They even coordinate with three Paper Pumpkin Kits: Nests of Christmas, Filled with Joy, and Notes from the Heart. Such easy coordination makes these dies a must-have for any paper craft. Paper Pumpkin subscribers can purchase it beginning 11 September. The add-on is available only while supplies last, so it’s best to shop early! Please note that the Stampin’ Cut and Emboss Machine is not included and can be purchased separately.

#165639 $12

Note: Supplies may be limited toward the end of the subscription period.

*********************************************************************************************************

Card stock cuts for this project:

  • Basic White Cardstock 4″ X 5 1/4″(inner liner)
  • Garden Green Cardstock 4 1/4″ x 11″(card base scored & folded at 5 1/2″), 2 – 4″ x 5 1/4″(card front panel & leaf die cuts)
  • Lemon Lime Twist Cardstock 3 1/4″ x 3 1/2″(card front mat), 4 1/8″ X 5 3/8″(inner liner mat)
  • Pecan Pie Cardstock 4 1/8″ x 5 3/8″(card front panel mat), 3 1/8″ X 3 3/8″(card front mat), 2″ x 3″(log die cuts)
  • Smoky Slate Cardstock 1″ x 2″(rocks)
  • Otterly adorable Designer Series Paper 3″ X 3 1/4″(card front), 2 1/4″ X 6″(envelope flap)

*********************************************************************************************************

Product List

Stampin’ Up! Pretty Petals Birthday

Good Tuesday morning stamping friends. How is everyone doing today? I hope your week has started off well.

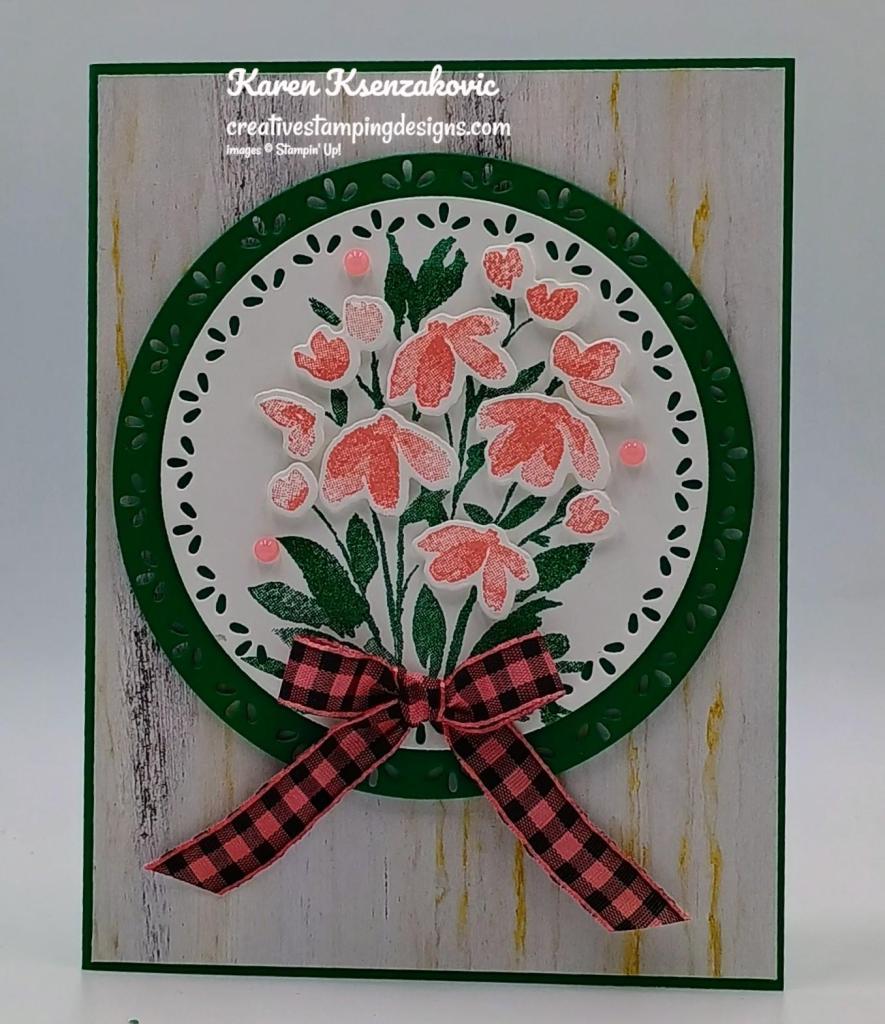
I have a sneak peek today for you of Online Exclusive products coming November 5th. If you’d like to see a quick video of how I made this card, Click Here to go to my Instagram Reels. Here is my card for today.

Stampin' Up! Pretty Petals Birthday 1 creativrestampingdesigns.com

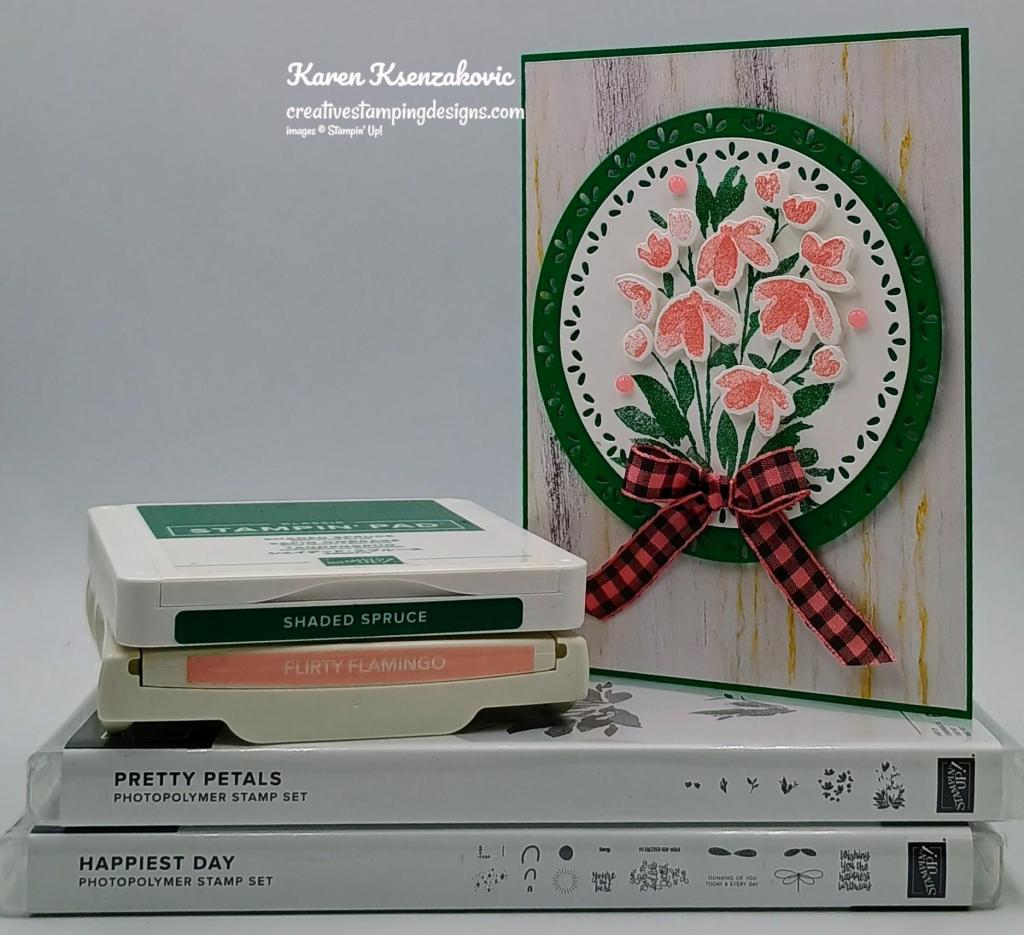
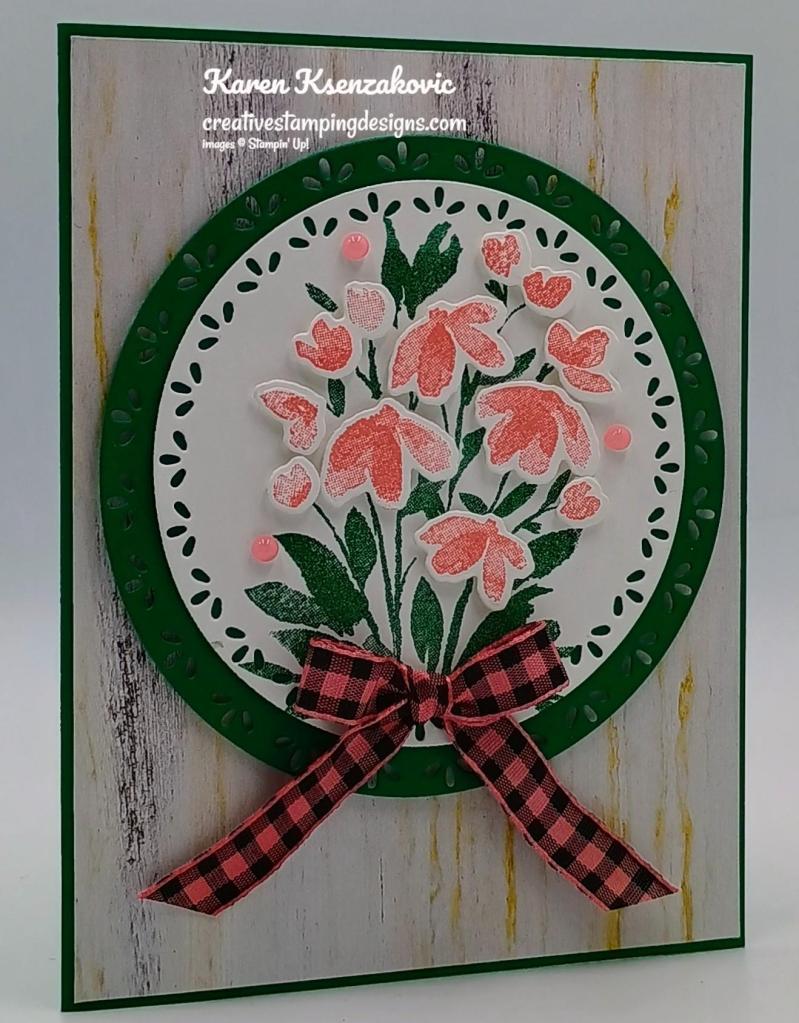
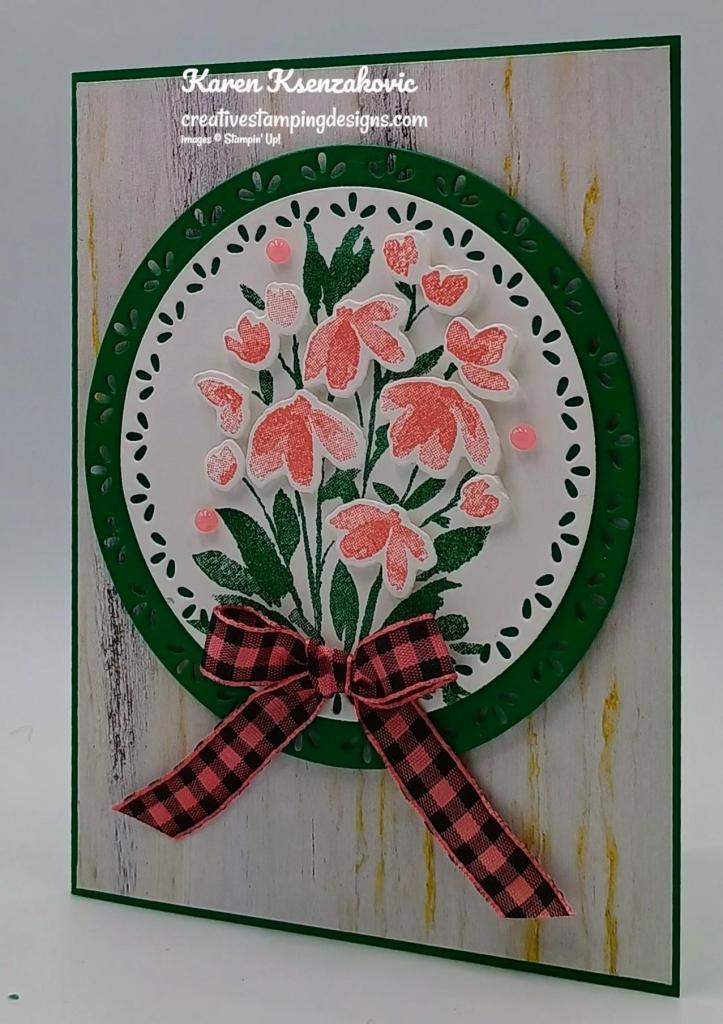
I used the new Stampin’ Up! Online Exclusive Pretty Petals Bundle which will be available starting next Tuesday November 5th, along with the Spotlight on Nature Dies, Country Woods Designer Series Paper and the Stampin’ Up! Happiest Day Photopolymer Stamp Set for my card today.

Stampin' Up! Pretty Petals Birthday 2 creativrestampingdesigns.com

Adhere a panel of Country Woods DSP to a Shaded Spruce card base using Liquid Glue. Cut the largest circle from the Spotlight on Nature Dies from a panel of Shaded Spruce.

Stampin' Up! Pretty Petals Birthday 3 creativrestampingdesigns.com

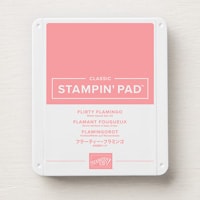
On a panel of Basic White, stamp the stem/leaf image from the Stampin’ Up! Pretty Petals Photopolymer Stamp Set in shaded Spruce Ink. Cut the image out using the 2nd largest Spotlight on Nature Die. On a panel of Basic White stamp the flower image from the Pretty Petals stamp set in Flirty Flamingo Ink. Cut the image out using the Pretty Petals Dies. Adhere the stamped circle to the Shaded Spruce circle using Stampin’ Seal. Adhere the die cut flowers to the stems using Stampin’ Dimensionals.

Stampin' Up! Pretty Petals Birthday 4 creativrestampingdesigns.com

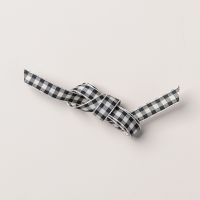
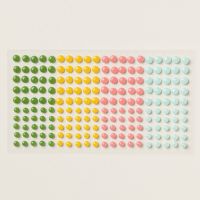
Adhere the layered image to the card front using Stampin’ Dimensionals. Color a piece of Black & Very Vanilla 3/8″ Large Check Ribbon using the Flirty Flamingo Stampin’ Blends Marker. Tie the ribbon into a small bow and adhere it to the bottom of the stems using a Glue Dot. Add a few Adhesive-Backed Dots for Days to the card front.

Stampin' Up! Pretty Petals Birthday 5 creativrestampingdesigns.com

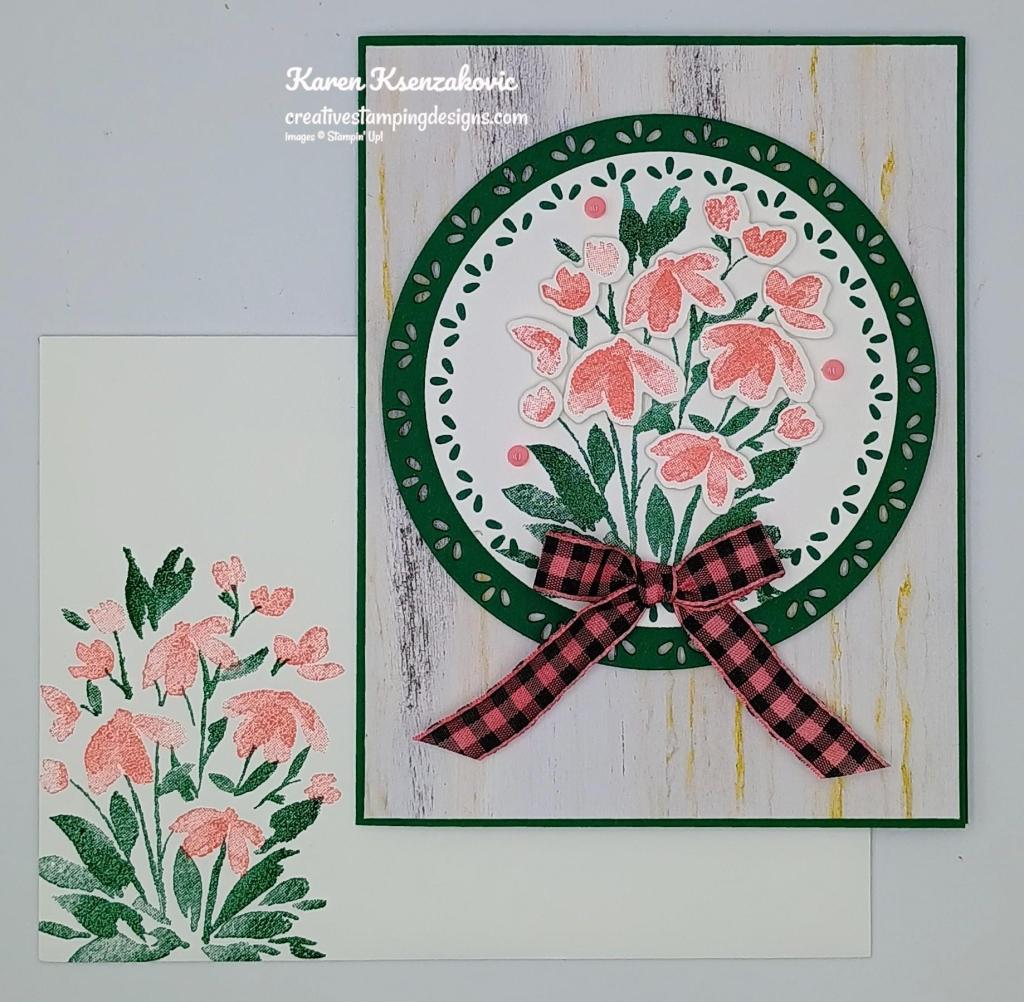
Stamp the sentiment from Happiest Day stamp set in Shaded Spruce Ink on a panel of Basic White. Stamp the stem image from the Pretty Petals stamp set in Shaded Spruce Ink on the bottom of the panel. Stamp the flower image from the Pretty Petals stamp set in Flirty Flamingo Ink on the stems. Adhere the Basic White panel to a Flirty Flamingo mat then to the inside of the Shaded Spruce card base.

Stampin' Up! Pretty Petals Birthday 6 creativrestampingdesigns.com

Finish the card by decorating a Basic White Medium Envelope. Stamp the stem image from the Pretty Petals stamp set in shaded Spruce Ink on the envelope front. Stamp the flower image from the Pretty Petals stamp set in Flirty Flamingo Ink on the stems. Adhere a panel of Country Woods DSP to the envelope flap.

Stampin' Up! Pretty Petals Birthday 7 creativrestampingdesigns.com

Thank you for stopping by my blog today. I hope you like the card, and you’ll give it a try. Happy Stamping!!

*********************************************************************************************************

If you need any stamping supplies, I’d love to be your Demonstrator. Just click HERE to go directly to my online store or drop me an email if you have any questions. 

MY CURRENT HOST CODE IS:   EMDXSBC9

Use this host code when placing an order with me. When you order $50 or greater you will receive a free gift from me! If your order is over $150, please do not use this code, but you’ll still get the free gift. The free gift is your choice of any 1 item valued up to $10.00 from the 2024-2025 Annual Catalog, September-December 2024 Mini Catalog or from the Online Exclusives!  For any orders $50 or more I will also send you my monthly class tutorials.  Click HERE or go to my Customer Rewards for more details and to see what this month’s tutorials are.

Please remember to use my current Host Code and make sure that you can see my name on the final checkout page listed as your Demonstrator when you order so that you know that you’re ordering with me, and you’ll get my rewards! 

Happy Stamping, Karen

*********************************************************************************************************

Final Days for Starter Kit Special – Get an extra $30 in Your Starter Kit October 1 – 31

Hey, friend! Stampin’ Up! has a fantastic offer for anyone who becomes a demonstrator! Join my team between October 1–31and you can choose $155 worth of product in your Starter Kit for only $99! Starter Kits normally include $125 worth of product for $99, so that’s an extra $30 worth of product at no additional cost. This offering also includes free shipping and free business supplies! That’s MORE product for EVEN MORE fun!  Click Here for all the details.

Interested but you are not really sure about wanting to commit? Contact me and we can talk, and you can ask me any questions at creativestampingdesigns@gmail.com.

Read more information about becoming a demonstrator Here.

*********************************************************************************************************

New Online Exclusive Products Coming Soon

A new line of products for Online Exclusives are coming! You won’t find these items in any catalog. This is a great opportunity to spark creativity, expand a crafting collection, and discover new opportunities—all from the convenience of the online store. These products will be available starting in November, BUT you can add these new items to your Starter Kit if you join in October. Here’s a little sneak peek of some of the items that you can add to your Starter kit and get them before customers and start to play. Click Here for a sneak peek of what’s coming.

*********************************************************************************************************

Final Days for Kits Collection will be on sale – up to 30% off

Did you know as a demonstrator you can get up to 30% off all the kits AND get your 20% demo discount on top of that. What a GREAT way to save!!!

Save up to 30% off on all your favorite kits October 1–31! Our kits come with everything you need to create a unique paper craft. We have crafting options for card kits, treat packaging, home decor, and so much more! Kits are only available while supplies last.

Here are the details for the sale:

  • Promotion Period:  October 1-31!
  • ALL kits from the kits collection qualify for the discount.
  • There is no limit on how many kits you can order, as long as product is available.
  • Orders must be opened and placed during the promotion dates. Orders opened before October 1 will not qualify for the sale.
  • Kits on sale will NOT qualify for the Stampin’ Rewards 50% off.
  • Kits can be added to a Starter Kit at their discounted rate.
  • Ordering deadline:  October 31 at 11:59 p.m. (MT)

*********************************************************************************************************

Filled With Joy

Subscribe October 11 – November 10

Celebrate Christmas with adorable stockings and gift tags!

Details:
• Makes 8 projects: 8 stockings with 8 gift tags
• Precut paper pieces
• Safety pins and specialty gold foil
• Coordinating colors: Flirty Flamingo, Pool Party, Poppy Parade
(Classic Stampin’ Spot), Shaded Spruce, Very Vanilla

Subscribe to Paper Pumpkin for a monthly, all-inclusive crafting kit that’s a fun surprise! Each kit includes a photopolymer stamp set, Classic Stampin’ Spot, and step by step instructions to complete exclusive paper craft projects, including cards, tags, and gift
packaging. And don’t miss the special add-on that coordinates with the next three months!

Subscribe to the November Paper Pumpkin Kit between 11 October and 10 November by clicking here!

*********************************************************************************************************

Don’t miss the coordinating
Merry Tags & More Dies Add-On!

Add dimension and detail to your cards, scrapbook pages, and gift tags with the Merry Tags & More Dies! With a leaf and tag shape and Merry sentiment, these dies are a great way to expand your crafting experience. They even coordinate with three Paper Pumpkin Kits: Nests of Christmas, Filled with Joy, and Notes from the Heart. Such easy coordination makes these dies a must-have for any paper craft. Paper Pumpkin subscribers can purchase it beginning 11 September. The add-on is available only while supplies last, so it’s best to shop early! Please note that the Stampin’ Cut and Emboss Machine is not included and can be purchased separately.

#165639 $12

Note: Supplies may be limited toward the end of the subscription period.

*********************************************************************************************************

Card stock cuts for this project:

  • Basic White Cardstock 4″ X 4″(artwork circle), 2 3/4″ X 2 3/4″(flowers), 4″ x 5 1/4″(inner liner)
  • Flirty Flamingo Cardstock 4 1/8″ X 5 3/8″(inner liner mat)
  • Shaded Spruce Cardstock 5 1/2″ X 8 1/2″(card base scored & folded at 4 1/4″), 4″ X 4″(circle mat)
  • Country Woods Designer Series Paper 4 1/8″ X 5 3/8″(card front), 2 1/4″ x 6″(envelope)

*********************************************************************************************************

Product List
Stampin’ Up! Umbrella Days for The Hapy Ini’ Thursday Blog Hop

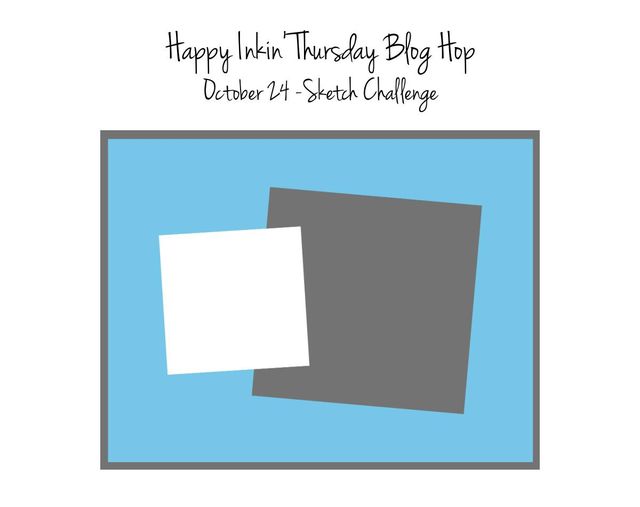
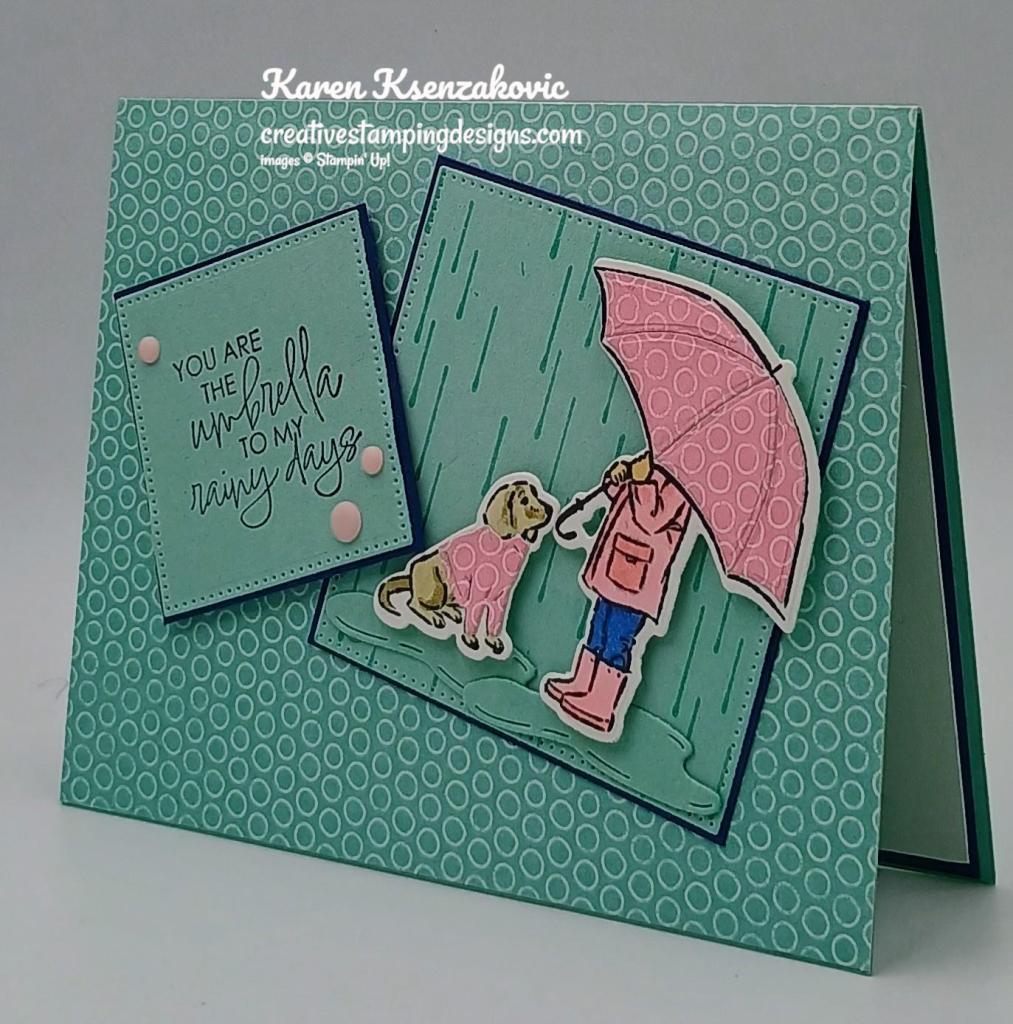
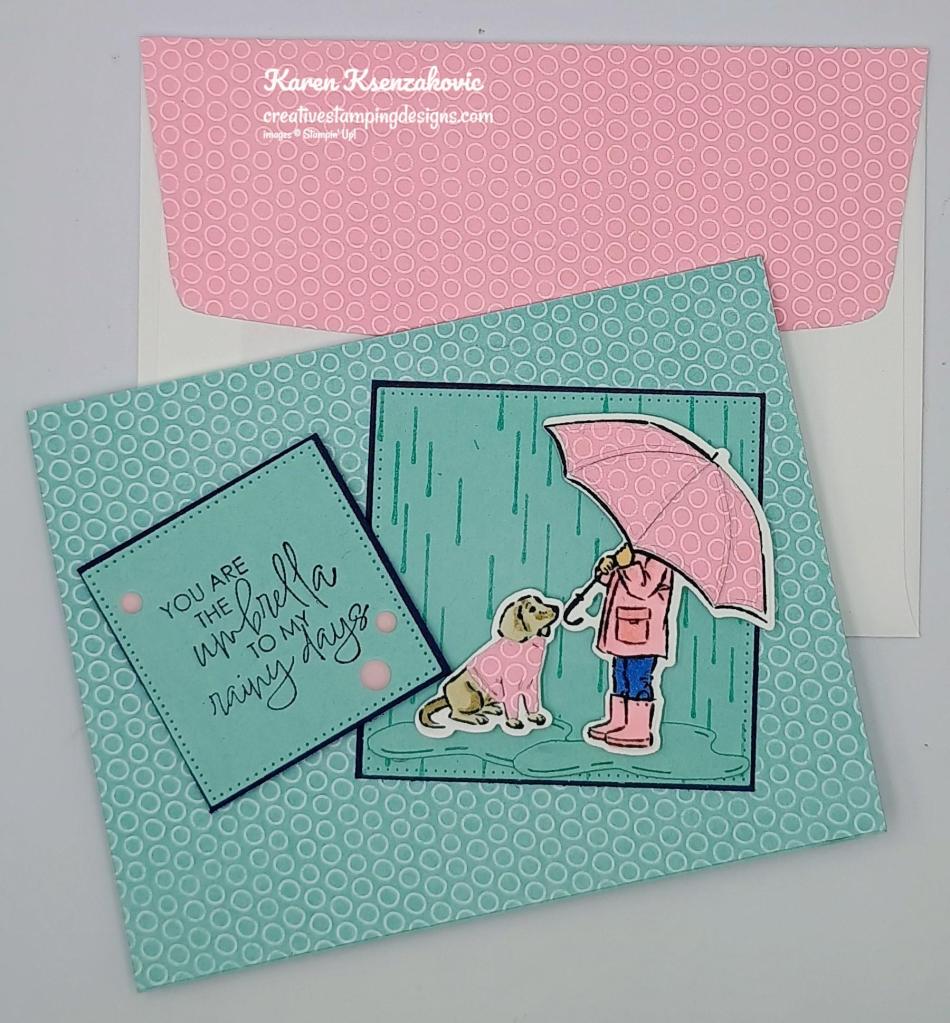
Good Thursday morning stamping friends and welcome to our Happy Inkin’ Thursday Blog Hop. If you are starting with me, thank you, I hope you will stop by everyone’s blog to see what they have created this week. If you are hopping over from Akiko’s blog, thank you for stopping by. This week we have Sketch Challenge. If you’d like to see a quick video of how I made this card, Click Here to go to my Instagram Reels. Here is my card using this week’s sketch.

Stampin' Up! Umbrella Days 1 creativestampingdesigns.com

I used the Stampin’ Up! Online Exclusive Umbrella Days Bundle (available Nov 5), along with the Stylish Shapes Dies, Subtle 6 X 6 Designer Series Paper, 2024-2026 In-Color 6 X 6 Designer Series Paper and the Stampin’ Up! Happiest Day Photopolymer Stamp Set for my card today.

This is our sketch for this week.

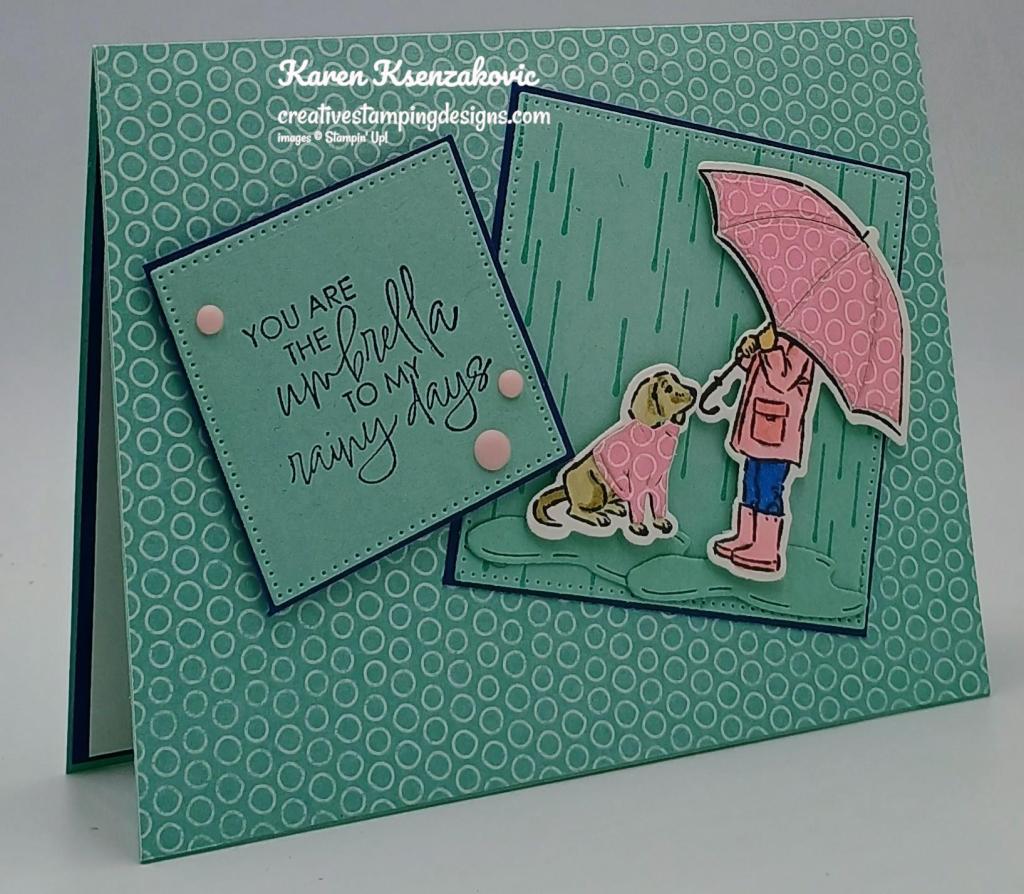
Stampin' Up! Umbrella Days 2 creativestampingdesigns.com

Adhere a panel of Subtle DSP to a Pool Party card base using Liquid Glue. On a panel of Pool Party, stamp the rain image from the Stampin’ Up! Umbrella Days Cling Stamp Set in Versamark Ink. Sprinkle the image using Clear Embossing Powder and set it using the Heat Tool. Cut the image out using the largest square from the Stylish Shapes Dies. Adhere the die cut panel to a Night of Navy mat using Stampin’ Seal. Adhere the layered panel to the card front using Liquid Glue.

Stampin' Up! Umbrella Days 3 creativestampingdesigns.com

Stamp the small girl and dog images from the Umbrella Days stamp set in Tuxedo Black Ink on a panel of Basic White. Color the images using Crumb Cake, Ivory, Night of Navy and Pretty in Pink Stampin’ Blends Markers. Cut the images out using the Umbrella Days Dies. Using the Umbrella Days Dies, cut the puddle die from a panel of Pool Party and the detailed umbrella and dogs’ coat from a panel of 2024-2026 In-Color DSP. Adhere the detailed umbrella pieces to the girl’s umbrella and the coat on the dog using Liquid Glue. Adhere the puddle die cuts to the bottom of the embossed rain panel using Glue Dots. Adhere the girl and dog to the panel using Stampin’ Dimensionals.

Stampin' Up! Umbrella Days 4 creativestampingdesigns.com

On a panel of Pool Party, stamp the sentiment from the Umbrella Days stamp set in Night of Navy Ink. Cut the sentiment out using the 3rd largest square from the Stylish Shapes Dies. Adhere the sentiment to a Night of Navy mat using Stampin’ Seal. Adhere the layered sentiment to the card front using Stampin’ Dimensionals. Add a few 2024-2026 In-Color Resin Dots to the sentiment.

Stampin' Up! Umbrella Days 5 creativestampingdesigns.com

Stamp the sentiment from the Happiest Day stamp set in Night of Navy Ink on a panel of Basic White. Adhere a strip of Subtle DSP to the top of the panel. Adhere the Basic White panel to a Night of Navy mat then to the inside of the Pool Party card base.

Stampin' Up! Umbrella Days 6 creativestampingdesigns.com

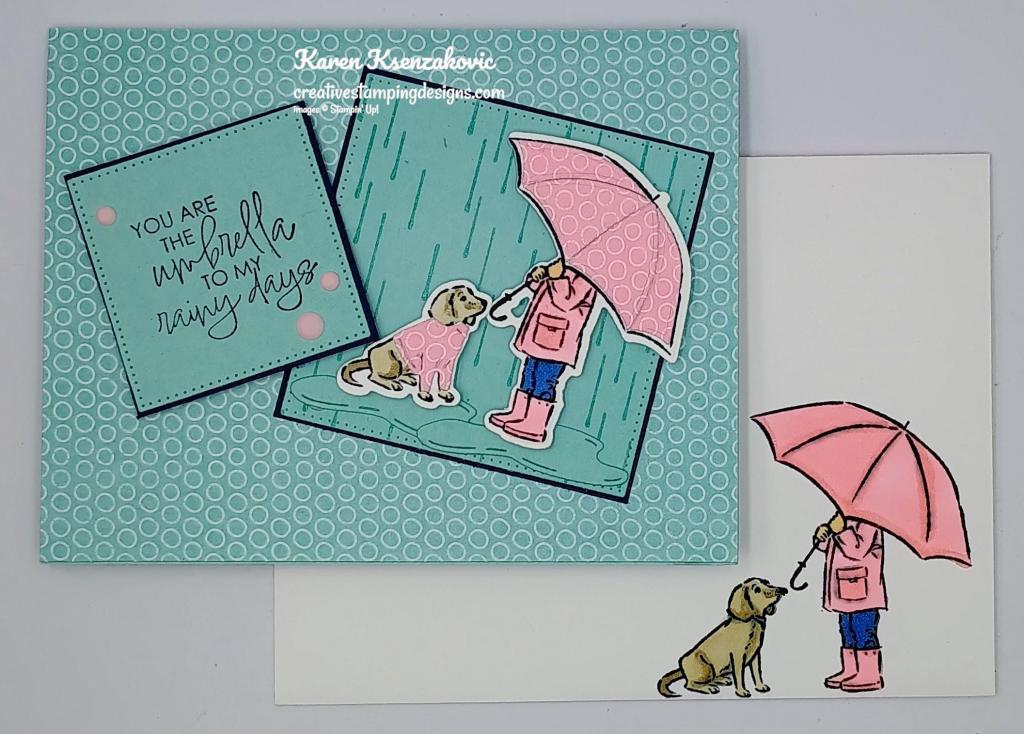
Complete the card by decorating a Basic White Medium Envelope. Stamp the girl and dog mages from the Umbrella Days stamp set in Tuxedo Black Ink on the envelope front. Color the images using Crumb Cake, Ivory, Night of Navy and Pretty in Pink Stampin’ Blends Markers. Adhered a panel of 2024-2026 In-Color DSP to the envelope flap.

Stampin' Up! Umbrella Days 7 creativestampingdesigns.com

Thank you for stopping by my blog today.  Now that you’ve seen my card, let’s get on with the hop!  Click the button below to hop over to see what Tara has created today. Happy Hopping!!

Just in case you get lost along the way, here is a list of the team members involved in the hop today.

Amy Koenders

Mary Deatherage

Jaimie Babarczy

Karen Finkle

Akiko Sudano

Karen Ksenzakovic You Are Here

Tara Carpenter

Terry Lynn Bright

Carol Buckalew

*********************************************************************************************************

If you need any stamping supplies, I’d love to be your Demonstrator. Just click HERE to go directly to my online store or drop me an email if you have any questions. 

MY CURRENT HOST CODE IS:   EMDXSBC9

Use this host code when placing an order with me. When you order $50 or greater you will receive a free gift from me! If your order is over $150, please do not use this code, but you’ll still get the free gift. The free gift is your choice of any 1 item valued up to $10.00 from the 2024-2025Annual Catalog, or from the Online Exclusives!  Unfortunately, packs of cardstock are no longer an option for a free gift. Shipping has become too expensive to ship and it’s costing me as much to ship as the cardstock costs. For any orders $50 or more I will also send you my monthly class tutorials.  Click HERE or go to my Customer Rewards for more details and to see what this month’s tutorials are.

Please remember to use my current Host Code and make sure that you can see my name on the final checkout page listed as your Demonstrator when you order so that you know that you’re ordering with me, and you’ll get my rewards! 

Happy Stamping, Karen

*********************************************************************************************************

Starter Kit Special Ends in 1 Week – Get an extra $30 Your Starter Kit October 1 – 31

Hey, friend! Stampin’ Up! has a fantastic offer for anyone who becomes a demonstrator! Join my team between October 1–31and you can choose $155 worth of product in your Starter Kit for only $99! Starter Kits normally include $125 worth of product for $99, so that’s an extra $30 worth of product at no additional cost. This offering also includes free shipping and free business supplies! That’s MORE product for EVEN MORE fun!  Click Here for all the details.

Interested but you are not really sure about wanting to commit? Contact me and we can talk, and you can ask me any questions at creativestampingdesigns@gmail.com.

Read more information about becoming a demonstrator Here.

*********************************************************************************************************

New Online Exclusive Products Coming Soon

A new line of products for Online Exclusives are coming! You won’t find these items in any catalog. This is a great opportunity to spark creativity, expand a crafting collection, and discover new opportunities—all from the convenience of the online store. These products will be available starting in November, BUT you can add these new items to your Starter Kit if you join in October. Here’s a little sneak peek of some of the items that you can add to your Starter kit and get them before customers and start to play. Click Here for a sneak peek of what’s coming.

*********************************************************************************************************

Kits Collection sale for up to 30% off End in 1 Week

Did you know as a demonstrator you can get up to 30% off all the kits AND get your 20% demo discount on top of that. What a GREAT way to save!!!

Save up to 30% off on all your favorite kits October 1–31! Our kits come with everything you need to create a unique paper craft. We have crafting options for card kits, treat packaging, home decor, and so much more! Kits are only available while supplies last.

Here are the details for the sale:

  • Promotion Period:  October 1-31!
  • ALL kits from the kits collection qualify for the discount.
  • There is no limit on how many kits you can order, as long as product is available.
  • Orders must be opened and placed during the promotion dates. Orders opened before October 1 will not qualify for the sale.
  • Kits on sale will NOT qualify for the Stampin’ Rewards 50% off.
  • Kits can be added to a Starter Kit at their discounted rate.
  • Ordering deadline:  October 31 at 11:59 p.m. (MT)

*********************************************************************************************************

Filled With Joy

Subscribe October 11 – November 10

Celebrate Christmas with adorable stockings and gift tags!

Details:
• Makes 8 projects: 8 stockings with 8 gift tags
• Precut paper pieces
• Safety pins and specialty gold foil
• Coordinating colors: Flirty Flamingo, Pool Party, Poppy Parade
(Classic Stampin’ Spot), Shaded Spruce, Very Vanilla

Subscribe to Paper Pumpkin for a monthly, all-inclusive crafting kit that’s a fun surprise! Each kit includes a photopolymer stamp set, Classic Stampin’ Spot, and step by step instructions to complete exclusive paper craft projects, including cards, tags, and gift
packaging. And don’t miss the special add-on that coordinates with the next three months!

Subscribe to the November Paper Pumpkin Kit between 11 October and 10 November by clicking here!

*********************************************************************************************************

Don’t miss the coordinating
Merry Tags & More Dies Add-On!

Add dimension and detail to your cards, scrapbook pages, and gift tags with the Merry Tags & More Dies! With a leaf and tag shape and Merry sentiment, these dies are a great way to expand your crafting experience. They even coordinate with three Paper Pumpkin Kits: Nests of Christmas, Filled with Joy, and Notes from the Heart. Such easy coordination makes these dies a must-have for any paper craft. Paper Pumpkin subscribers can purchase it beginning 11 September. The add-on is available only while supplies last, so it’s best to shop early! Please note that the Stampin’ Cut and Emboss Machine is not included and can be purchased separately.

#165639 $12

Note: Supplies may be limited toward the end of the subscription period.

*********************************************************************************************************

Card stock cuts for this project:

  • Basic White Cardstock 3″ X 3″ (artwork), 4″ X 5 1/4″(inner liner)
  • Night of Navy Cardstock 2″ X 2″(sentiment mat), 2 7/8″ X 2 7/8″(artowork mat), 4 1/8″ X 5 3/8″(inner liner mat)
  • Pool Party Cardstock 5 1/2″ X 8 1/2″(card base scored & folded at 4 1/4″), 2 1/4 x 2 1/4″(sentiment), 3″ X 3″(artwork), 1 1/4″ x 2″(puddles)
  • Subtle 6 X 6 Designer Series Paper 4 1/4″ X 5 1/2″(card front)
  • 2024-2026 In-color 6 X 6 Designer Series Paper 1″ X 3″(umbrella & dogs’ raincoat), 2 1/4″ X 6″(envelope flap)

*********************************************************************************************************

Product List
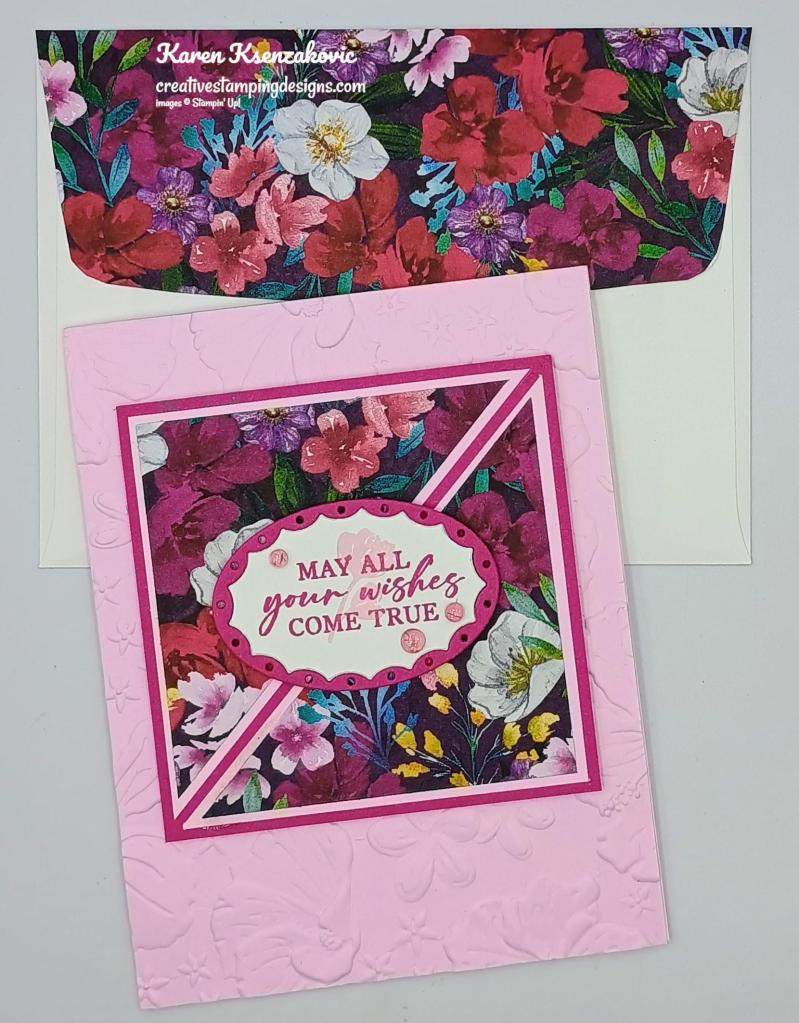
Stampin’ Up! Unbounded Love Birthday

Good Saturday morning stamping friends and welcome to the weekend!! I hope you all have some fun plans in the works. It’s off to Hollywood Studios for us today, so it will be another long full day. We have reservations for dinner at Mama Mel Rosa’s and we scheduled a few lightening Lane passes already. Yesterday was a fun day in Universal Studios. My daughter loves Harry Potter and she really enjoyed that section.

Today’s card is the first of a set of 4 cards I made with a One Sheet Wonder. I took a piece of 6 X 6 Designer Series Paper and cut it up to make 4 cards. If you’d like to see a quick video of how I made this card, Click Here to go to my Instagram Reels. Here is my card for today.

Stampin' Up! Unbounded Love Birthday 1 creativestampingdesigns.com

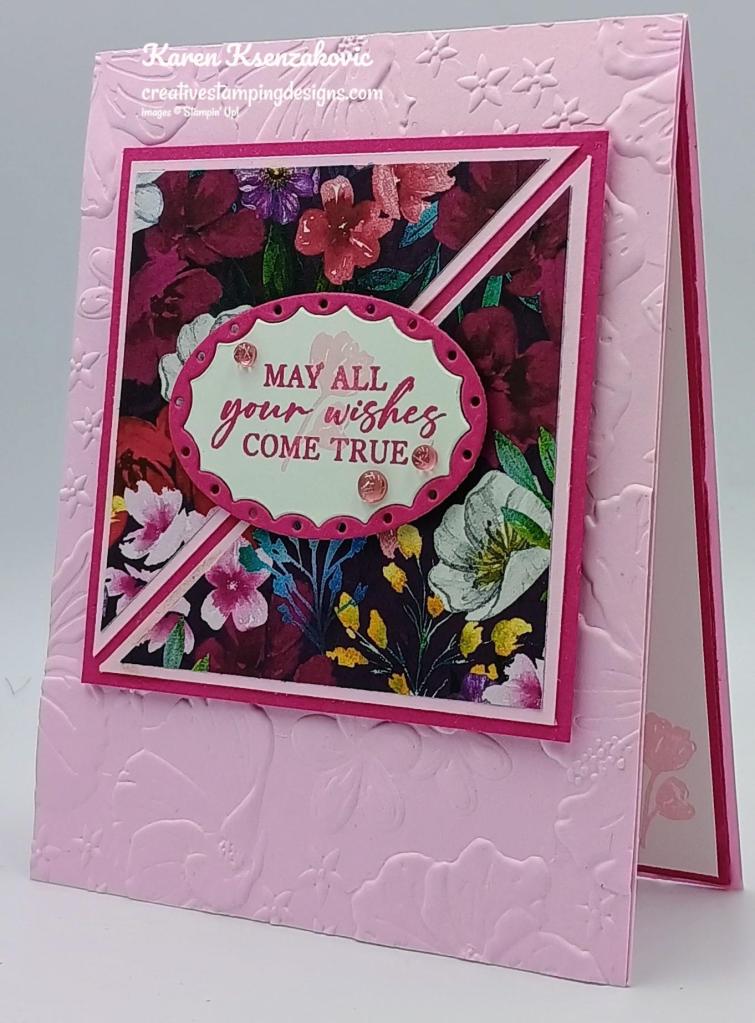
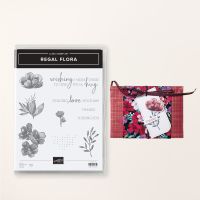
I used the Stampin’ Up! Unbounded Love Bundle along with the Stampin’ Up! Regal Flora Cling Stamp Set, Regal Winter Designer Series Paper and new Online Exclusive Happy Hibiscus Hybrid Embossing Folder for my card today.

Stampin' Up! Unbounded Love Birthday 2 creativestampingdesigns.com

Start by embossing a Bubble Bath card front using the Happy Hibiscus EF. Adhere the embossed panel to a Bubble Bath card base using Liquid Glue.

Stampin' Up! Unbounded Love Birthday 3 creativestampingdesigns.com

For the first One Sheet Wonder card you are going to take one of the 3″ X 3″ pieces of Regal Winter DSP and cut it on an angle using the Paper Trimmer. Adhere the 2 triangles to 2 triangle Bubble Bath mats using Liquid Glue. Adhere the 2 triangle layered panels to a Berry Burst mat using Liquid Glue. Adhere the layered panel to the card front using Stampin’ Dimensionals.

Stampin' Up! Unbounded Love Birthday 4 creativestampingdesigns.com

On a panel of Basic White, stamp the sentiment from the Stampin’ Up! Unbounded Love Photopolymer Stamp Set in Berry Burst Ink. Stamp the small flower image from the Regal Flora stamp set in Bubble Bath Ink over the sentiment. Cut the sentiment out using the Unbounded Love Dies. From a panel of Berry Burst, cut the same Unbounded Love Die. Fit the sentiment into the Berry Burst die cut. Use Stampin’ Dimensionals to adhere the 2 pieces to the center of the card front. Add a few Berry Burst Tinsel Gems to the card front.

Stampin' Up! Unbounded Love Birthday 5 creativestampingdesigns.com

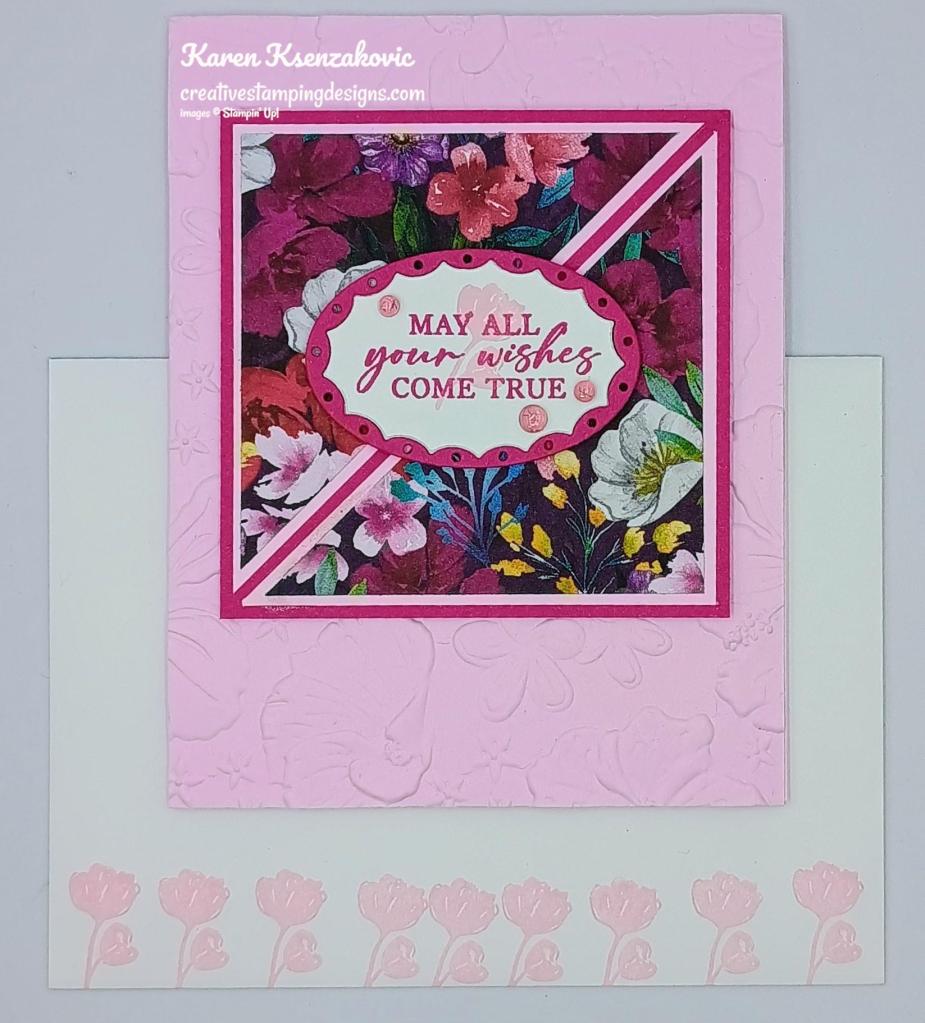
Stamp the sentiment from the Unbounded Love stamp set in Berry Burst Ink on a panel of Basic White. Stamp the small flower image from the Regal Flora stamp set in Bubble Bath Ink along the bottom of the panel. Adhered the Basic White panel to a Berry Burst mat then to the inside of the Bubble Bath card base.

Stampin' Up! Unbounded Love Birthday 6 creativestampingdesigns.com

Finish the card by decorating a Basic White Medium Envelope. Stamp the small flower image from the Regal Flora stamp set in Bubble Bath Ink along the envelope front. Adhere a panel of Regal Winter DSP to the envelope flap.

Stampin' Up! Unbounded Love Birthday 7 creativestampingdesigns.com

Thank you for stopping by my blog today. I hope you like the card, and you’ll give it a try. Happy Stamping!!

*********************************************************************************************************

If you need any stamping supplies, I’d love to be your Demonstrator. Just click HERE to go directly to my online store or drop me an email if you have any questions. 

MY CURRENT HOST CODE IS:   EMDXSBC9

Use this host code when placing an order with me. When you order $50 or greater you will receive a free gift from me! If your order is over $150, please do not use this code, but you’ll still get the free gift. The free gift is your choice of any 1 item valued up to $10.00 from the 2024-2025Annual Catalog, or from the Online Exclusives!  Unfortunately, packs of cardstock are no longer an option for a free gift. Shipping has become too expensive to ship and it’s costing me as much to ship as the cardstock costs. For any orders $50 or more I will also send you my monthly class tutorials.  Click HERE or go to my Customer Rewards for more details and to see what this month’s tutorials are.

Please remember to use my current Host Code and make sure that you can see my name on the final checkout page listed as your Demonstrator when you order so that you know that you’re ordering with me, and you’ll get my rewards! 

Happy Stamping, Karen

*********************************************************************************************************

It’s time to shop ‘til you drop! Starting October 16 at 12:00 a.m. (MT), you can purchase all* CTMH products for 30% off. That’s right—30%! And don’t wait too long—products are available only while supplies last.

*This sale does not include the September Scrapbooking Brochure and any future scrapbooking brochures. It also excludes any Stampin’ Up! scrapbooking products outside of the CTMH product category in the online store. 

*********************************************************************************************************

Starter Kit Special – Get an extra $30 Your Starter Kit October 1 – 31

Hey, friend! Stampin’ Up! has a fantastic offer for anyone who becomes a demonstrator! Join my team between October 1–31and you can choose $155 worth of product in your Starter Kit for only $99! Starter Kits normally include $125 worth of product for $99, so that’s an extra $30 worth of product at no additional cost. This offering also includes free shipping and free business supplies! That’s MORE product for EVEN MORE fun!  Click Here for all the details.

Interested but you are not really sure about wanting to commit? Contact me and we can talk, and you can ask me any questions at creativestampingdesigns@gmail.com.

Read more information about becoming a demonstrator Here.

*********************************************************************************************************

New Online Exclusive Products Coming Soon

A new line of products for Online Exclusives are coming! You won’t find these items in any catalog. This is a great opportunity to spark creativity, expand a crafting collection, and discover new opportunities—all from the convenience of the online store. These products will be available starting in November, BUT you can add these new items to your Starter Kit if you join in October. Here’s a little sneak peek of some of the items that you can add to your Starter kit and get them before customers and start to play. Click Here for a sneak peek of what’s coming.

*********************************************************************************************************

From October 1-31 All Kits from the Kits Collection will be on sale for up to 30% off

Did you know as a demonstrator you can get up to 30% off all the kits AND get your 20% demo discount on top of that. What a GREAT way to save!!!

Save up to 30% off on all your favorite kits October 1–31! Our kits come with everything you need to create a unique paper craft. We have crafting options for card kits, treat packaging, home decor, and so much more! Kits are only available while supplies last.

Here are the details for the sale:

  • Promotion Period:  October 1-31!
  • ALL kits from the kits collection qualify for the discount.
  • There is no limit on how many kits you can order, as long as product is available.
  • Orders must be opened and placed during the promotion dates. Orders opened before October 1 will not qualify for the sale.
  • Kits on sale will NOT qualify for the Stampin’ Rewards 50% off.
  • Kits can be added to a Starter Kit at their discounted rate.
  • Ordering deadline:  October 31 at 11:59 p.m. (MT)

*********************************************************************************************************

Filled With Joy

Subscribe October 11 – November 10

Celebrate Christmas with adorable stockings and gift tags!

Details:
• Makes 8 projects: 8 stockings with 8 gift tags
• Precut paper pieces
• Safety pins and specialty gold foil
• Coordinating colors: Flirty Flamingo, Pool Party, Poppy Parade
(Classic Stampin’ Spot), Shaded Spruce, Very Vanilla

Subscribe to Paper Pumpkin for a monthly, all-inclusive crafting kit that’s a fun surprise! Each kit includes a photopolymer stamp set, Classic Stampin’ Spot, and step by step instructions to complete exclusive paper craft projects, including cards, tags, and gift
packaging. And don’t miss the special add-on that coordinates with the next three months!

Subscribe to the November Paper Pumpkin Kit between 11 October and 10 November by clicking here!

*********************************************************************************************************

Don’t miss the coordinating
Merry Tags & More Dies Add-On!

Add dimension and detail to your cards, scrapbook pages, and gift tags with the Merry Tags & More Dies! With a leaf and tag shape and Merry sentiment, these dies are a great way to expand your crafting experience. They even coordinate with three Paper Pumpkin Kits: Nests of Christmas, Filled with Joy, and Notes from the Heart. Such easy coordination makes these dies a must-have for any paper craft. Paper Pumpkin subscribers can purchase it beginning 11 September. The add-on is available only while supplies last, so it’s best to shop early! Please note that the Stampin’ Cut and Emboss Machine is not included and can be purchased separately.

#165639 $12

Note: Supplies may be limited toward the end of the subscription period.

*********************************************************************************************************

Card stock cuts for this project:

  • Basic White Cardstock 1 3/4″ X 2 3/4″(sentiment), 4″ X 5 1/4″(inner liner)
  • Berry Burst Cardstock 3 1/2″ X 3 1/2″ artwork mat), 1 3/4″ X 2 3/4″(sentiment mat), 4 1/8″ X 5 3/8″(inner liner mat)
  • Bubble Bath Cardstock 4 1/4″ X 11″(card base scored & folded at 5 1/2″), 4 1/4″ X 5 1/2″(card front), 3 1/4″ X 3 1/4″(dsp mats cut on a diagonal)
  • Regal Winter Designer Series Paper 3″ X 3″(card front panel), 2 1/4″ X 6″(envelope flap)

*********************************************************************************************************

Product List
Stampin’ Up! Otterly Amazing for Fun Fold Friday

Good Friday morning stamping friends and welcome to my Fun Fold Friday. I hope you are all doing well and had a wonderful week. We stayed until Magic Kingdom closed on Wednesday and had such a great time going on rides, walking around, eating some great food and of course seeing the fabulous firework show. Yesterday we spent the whole day at Epcot. The wine and food festival is going on, so we tried some great food. I was able to get my caramel apple from Germany that’s made with Werther’s Caramels. I’ve waited 4 1/2 years to get another one of these apples. After having one here, I don’t want any others. One of my husband’s co-workers happen to be here in Disney and we met up with him and his wife for a delicious dinner in Canada, at Le Cellier Steakhouse. Today we’re off to Universal Studios. This will be the 1st time we’ve ever gone there, so I can’t wait to see what’s there.

Today’s card is one that we made at our monthly stamping studio last Tuesday for our mystery stamping portion of the meeting. Jaimie sent us all the measurements and talked us through the process of putting the card together. I decided I wanted to use some of the new Online Exclusive products that will be available starting November 5th. If you are interested in getting these products early, let me know, I’d be happy to talk to you about signing up to be a demonstrator and you can add them to your starter kit. Here’s my card for today.

Stampin' Up! Otterly Amazing Fun Fold 1 creativestampingdesigns.com

I used the Stampin’ Up! Online Exclusive Otterly Adorable Suite Collection for my card today.

Stampin' Up! Otterly Amazing Fun Fold 2 creativestampingdesigns.com

Start with 2 panels of Pretty Peacock card stock cut at 4 1/4″ X 11″ and scored at 5 1/2″. Cut 1 of the panels from the bottom right to the left side of the score line cutting on a diagonal. Cut the other panel from the bottom left to the right side of the score line cutting on a diagonal. Adhere the 2 panels together by adhering the solid card backs together using Liquid Glue.

Stampin' Up! Otterly Amazing Fun Fold 3 creativestampingdesigns.com

Adhere 1 of the triangle panels of Otterly Adorable Designer Series Paper to a Basic White triangle mat using Liquid Glue. Adhere the layered panel to the right card front using Liquid Glue. On a panel of Basic White, stamp the sentiment from the Stampin’ Up! Otterly Amazing Cling Stamp Set in Pretty Peacock Ink. Cut the sentiment out using the 1 3/4″ Circle Punch. From panels of Lost Lagoon and Pretty Peacock, cut 3 each of the greenery die from the Otterly Amazing Dies. Punch 2 circles using the 2″ Circle Punch from a panel of Pretty Peacock. Adhere the circle sentiment to the Pretty Peacock circle mat using Stampin’ Seal. Adhere the greenery to the back of the Pretty Peacock circle using Glue Dots. Adhere the 2nd circle to the back of the layered sentiment using Liquid Glue. Adhere the layered circle to the right card front using Stampin’ Dimensionals. Tie a small bow using the Lost Lagoon Soft Cording and adhere it next to the sentiment using a Glue Dot. Add a few Riverside Irregular Pearls to the sentiment.

Stampin' Up! Otterly Amazing Fun Fold 4 creativestampingdesigns.com

Adhere another triangle panel of the Otterly Adorable DSP to a triangle Basic White mat using Liquid Glue. Adhere the layered panel to the left side of the card front using Liquid Glue. Using the Otterly Amazing Dies, cut the otter images from a panel of Otterly Adorable DSP. Adhere them to the left side panel using Liquid Glue.

Stampin' Up! Otterly Amazing Fun Fold 5 creativestampingdesigns.com

For the inside, stamp the sentiment from the Otterly Amazing stamp set in Pretty Peacock Ink on the bottom of a panel of Otterly Adorable DSP. Adhere the stamped panel of Otterly Adorable DSP to a Basic White mat using Stampin’ Seal. Adhere the layered panel to the inside of the Pretty Peacock card base using Liquid Glue.

Stampin' Up! Otterly Amazing Fun Fold 6 creativestampingdesigns.com

For the inside of the right & left sides, adhere 2 triangle panels of Otterly Adorable DSP to Basic White mats using Liquid Glue. Adhere the layered panels to the inside of the right & left sides using Liquid Glue.

Stampin' Up! Otterly Amazing Fun Fold 7 creativestampingdesigns.com
Stampin' Up! Otterly Amazing Fun Fold 8 creativestampingdesigns.com

Finish the card by decorating a Basic White Medium Envelope. Stamp the otter image from the Otterly Amazing stamp set in Early Espresso Ink on the envelope front. Color the image using Crumb Cake and Pecan Pie Stampin’ Blends Markers. Adhere a panel of Otterly Adorable DSP to the envelope flap.

Stampin' Up! Otterly Amazing Fun Fold 9 creativestampingdesigns.com

Thank you for stopping by my blog today. I hope you like the card and will give it a try. Happy Stamping!!

*********************************************************************************************************

If you need any stamping supplies, I’d love to be your Demonstrator. Just click HERE to go directly to my online store or drop me an email if you have any questions. 

MY CURRENT HOST CODE IS:   EMDXSBC9

Use this host code when placing an order with me. When you order $50 or greater you will receive a free gift from me! If your order is over $150, please do not use this code, but you’ll still get the free gift. The free gift is your choice of any 1 item valued up to $10.00 from the 2024-2025Annual Catalog, or from the Online Exclusives!  Unfortunately, packs of cardstock are no longer an option for a free gift. Shipping has become too expensive to ship and it’s costing me as much to ship as the cardstock costs. For any orders $50 or more I will also send you my monthly class tutorials.  Click HERE or go to my Customer Rewards for more details and to see what this month’s tutorials are.

Please remember to use my current Host Code and make sure that you can see my name on the final checkout page listed as your Demonstrator when you order so that you know that you’re ordering with me, and you’ll get my rewards! 

Happy Stamping, Karen

*********************************************************************************************************

It’s time to shop ‘til you drop! Starting October 16 at 12:00 a.m. (MT), you can purchase all* CTMH products for 30% off. That’s right—30%! And don’t wait too long—products are available only while supplies last.

*This sale does not include the September Scrapbooking Brochure and any future scrapbooking brochures. It also excludes any Stampin’ Up! scrapbooking products outside of the CTMH product category in the online store. 

*********************************************************************************************************

Starter Kit Special – Get an extra $30 Your Starter Kit October 1 – 31

Hey, friend! Stampin’ Up! has a fantastic offer for anyone who becomes a demonstrator! Join my team between October 1–31and you can choose $155 worth of product in your Starter Kit for only $99! Starter Kits normally include $125 worth of product for $99, so that’s an extra $30 worth of product at no additional cost. This offering also includes free shipping and free business supplies! That’s MORE product for EVEN MORE fun!  Click Here for all the details.

Interested but you are not really sure about wanting to commit? Contact me and we can talk, and you can ask me any questions at creativestampingdesigns@gmail.com.

Read more information about becoming a demonstrator Here.

*********************************************************************************************************

New Online Exclusive Products Coming Soon

A new line of products for Online Exclusives are coming! You won’t find these items in any catalog. This is a great opportunity to spark creativity, expand a crafting collection, and discover new opportunities—all from the convenience of the online store. These products will be available starting in November, BUT you can add these new items to your Starter Kit if you join in October. Here’s a little sneak peek of some of the items that you can add to your Starter kit and get them before customers and start to play. Click Here for a sneak peek of what’s coming.

*********************************************************************************************************

From October 1-31 All Kits from the Kits Collection will be on sale for up to 30% off

Save up to 30% off on all your favorite kits October 1–31! Our kits come with everything you need to create a unique paper craft. We have crafting options for card kits, treat packaging, home decor, and so much more! Kits are only available while supplies last.

Here are the details for the sale:

  • Promotion Period:  October 1-31!
  • ALL kits from the kits collection qualify for the discount.
  • There is no limit on how many kits you can order, as long as product is available.
  • Orders must be opened and placed during the promotion dates. Orders opened before October 1 will not qualify for the sale.
  • Kits on sale will NOT qualify for the Stampin’ Rewards 50% off.
  • Kits can be added to a Starter Kit at their discounted rate.
  • Ordering deadline:  October 31 at 11:59 p.m. (MT)

*********************************************************************************************************

Filled With Joy

Subscribe October 11 – November 10

Celebrate Christmas with adorable stockings and gift tags!

Details:
• Makes 8 projects: 8 stockings with 8 gift tags
• Precut paper pieces
• Safety pins and specialty gold foil
• Coordinating colors: Flirty Flamingo, Pool Party, Poppy Parade
(Classic Stampin’ Spot), Shaded Spruce, Very Vanilla

Subscribe to Paper Pumpkin for a monthly, all-inclusive crafting kit that’s a fun surprise! Each kit includes a photopolymer stamp set, Classic Stampin’ Spot, and step by step instructions to complete exclusive paper craft projects, including cards, tags, and gift
packaging. And don’t miss the special add-on that coordinates with the next three months!

Subscribe to the November Paper Pumpkin Kit between 11 October and 10 November by clicking here!

*********************************************************************************************************

Don’t miss the coordinating
Merry Tags & More Dies Add-On!

Add dimension and detail to your cards, scrapbook pages, and gift tags with the Merry Tags & More Dies! With a leaf and tag shape and Merry sentiment, these dies are a great way to expand your crafting experience. They even coordinate with three Paper Pumpkin Kits: Nests of Christmas, Filled with Joy, and Notes from the Heart. Such easy coordination makes these dies a must-have for any paper craft. Paper Pumpkin subscribers can purchase it beginning 11 September. The add-on is available only while supplies last, so it’s best to shop early! Please note that the Stampin’ Cut and Emboss Machine is not included and can be purchased separately.

#165639 $12

Note: Supplies may be limited toward the end of the subscription period.

*********************************************************************************************************

Card stock cuts for this project:

  • Basic White Cardstock 2 – 4″ X 5 1/4″ (cut on a diagonal for dsp mats), 4″ X 5 1/4″(inner liner mat), 2 1/4″ X 2 1/4″(sentiment)
  • Lost Lagoon Cardstock 1 1/4″ X 3″(greenery)
  • Pretty Peacock Cardstock 2 – 4 1/4″ X 11″(card base scored & folded at 5 1/2″), 4″ X 5 1/4″(2 – circles & greenery)
  • Otterly Adorable Designer Series Paper 2 – 3 7/8″ X 5 1/8″(card front & inside panels cut on a diagonal), 3 7/8″ X 5 1/8″(inner liner panel), 2 1/4″x 6″(envelope flap)

*********************************************************************************************************

Product List
Stampin’ Up! Happy Hibiscus Sneak Peek

Good Sunday afternoon stamping friends. I hope you are all having a wonderful weekend. I’m running here, there and everywhere trying to get everything together for vacation. I’m always amazed how I think I have everything I need, they I read the restrictions on what size containers you can fly with and it’s off to writing a quick list and running to the store again. Today I’m sending my husband so I can get things done around the house and attend my monthly meeting this afternoon.

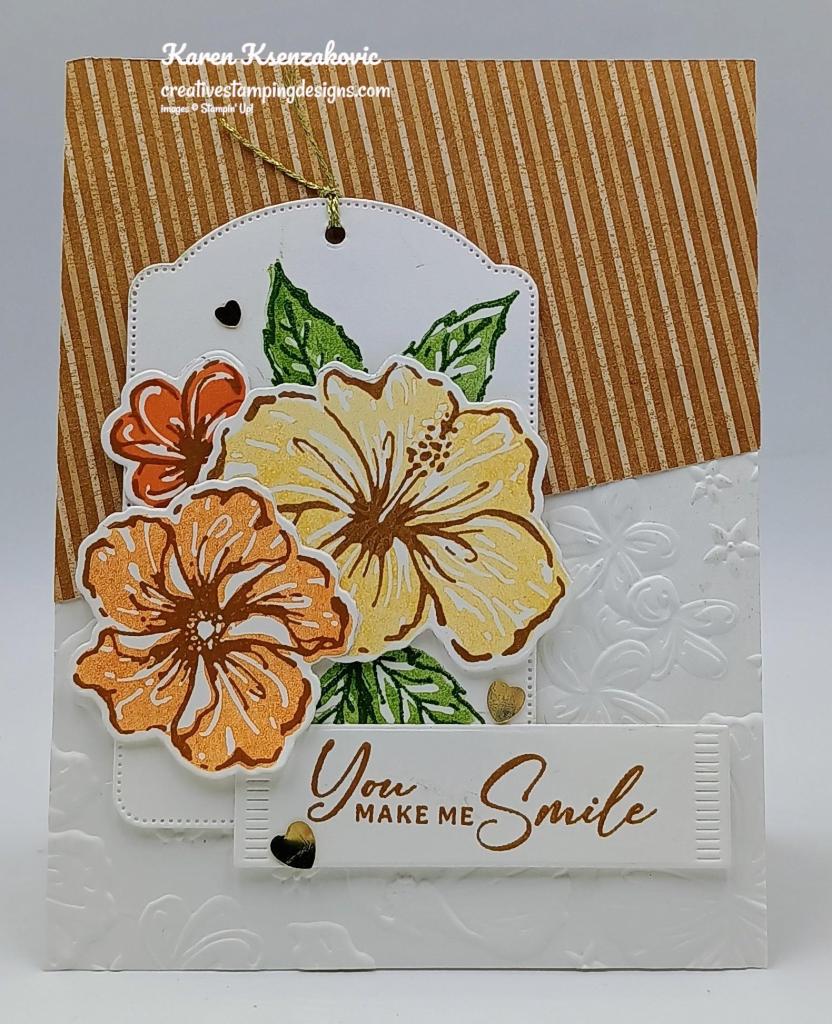
I played with a new Online Exclusive bundle coming November 5th. As soon as I saw this one, I just knew I had to have it.  If you’d like to see a quick video of how I made this card, Click Here to go to my Instagram Reels. Here’s my card for today.

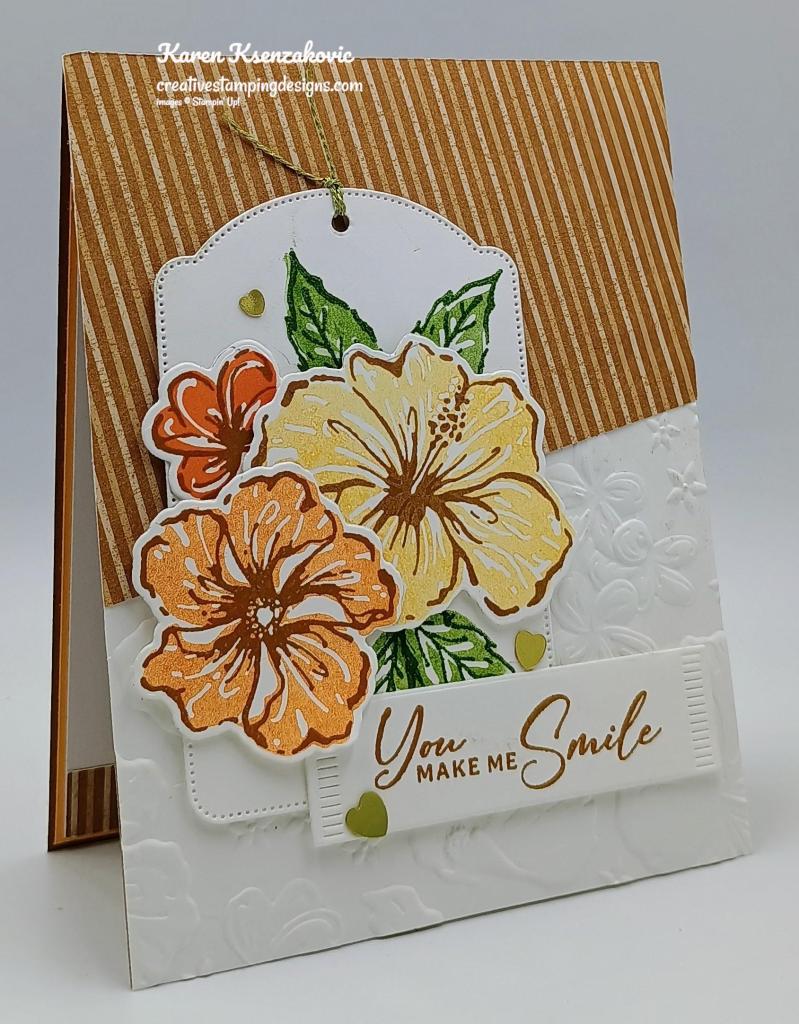
Stampin' Up! Happy Hibiscus Tag 1 creativestampingdesigns.com

I used the new Stampin’ Up! Online Exclusive Bundle for my card today along with the Online Exclusive Greetings of the Season Dies and Neutrals 6 X 6 Designer Series Paper. When I took my dog for a walk this morning, on the way back up my driveway I saw that my Hibiscus flowers are still blooming and that was my inspiration to make this card today.

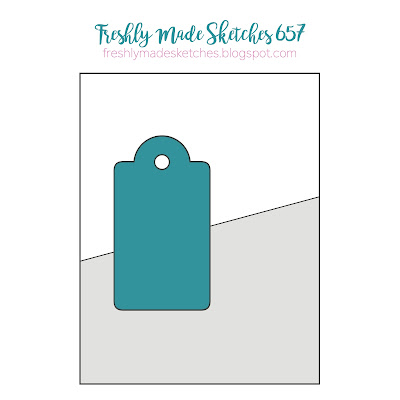
My design is from Freshly Made Sketches #657

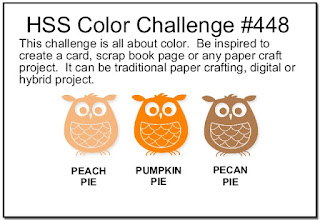
My colors are from Hand Stamped Sentiments Color Challenge #448. The colors sound like some yummy desserts to me.

Stampin' Up! Happy Hibiscus Tag 2 creativestampingdesigns.com

Start by embossing a Basic White card front using the Happy Hibiscus Hybrid Embossing Folder. Adhere a panel of Neutrals DSP on an angle across the top of the embossed panel using Liquid Glue. trim off excess using the Paper Trimmer. Adhere the card front panel to a Pecan Pie card base using Liquid Glue.

Stampin' Up! Happy Hibiscus Tag 3 creativestampingdesigns.com

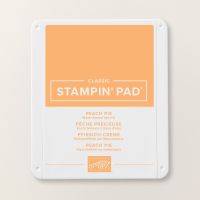
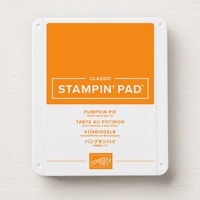
On a panel of Basic White, stamp the large outline 3 flower image from the Stampin’ Up! Happy Hibiscus Photopolymer Stamp Set in Pecan Pie Ink. Stamp the largest solid flower image from the Happy Hibiscus stamp set in Peach Pie Ink, stamping off once on scrap paper, over the outlined image. Stamp the medium solid flower image from the Happy Hibiscus stamp set in Pumpkin Pie Ink, stamping off once on scrap paper, over the outlined image. Stamp the smallest solid flower image from the Happy Hibiscus stamp set in Pumpkin Pie Ink over the outlined image. Cut the large image out using the Happy Hibiscus Dies. Using the Greetings of the Season Dies, cut the largest tag die from a panel of Basic White. Stamp the leaf images from the Happy Hibiscus stamp set a few times in Old Olive Ink on the tag. Stamp the outlined leaf image full strength and the solid leaf image in Old Olive Ink, stamping off once on scrap paper, over the outlined image. Adhere the hibiscus flowers to the tag using Stampin’ Dimensionals and Glue Dots.

Stampin' Up! Happy Hibiscus Tag 4 creativestampingdesigns.com

Thread a piece of the new Online Exclusive Gold Twisted Thread (available Nov 5), through the top of the tag. Adhere the tag to the card front using Stampin’ Dimensionals. On the panel of Basic White, stamp the sentiment from the Happy Hibiscus stamp set in Pecan Pie Ink. Cut the sentiment out using the Happy Hibiscus Dies. Adhere the sentiment to the card front using Stampin’ Dimensionals and Glue Dots. Add a few of the new Online Exclusive Adhesive-Backed Heart Sequins to the card front.

Stampin' Up! Happy Hibiscus Tag 5 creativestampingdesigns.com

For the inside, stamp the sentiment from the Happy Hibiscus stamp set in Pecan Pie Ink on a panel of Basic White. Stamp the larges solid flower image from the Happy Hibiscus stamp set in Peach Pie Ink, stamping off once on scrap paper, over the sentiment. Adhere a strip of the Neutrals DSP to the bottom of the panel. Adhere the Basic White panel to a Peach Pie mat then to the inside of the Pecan Pie card base.

Stampin' Up! Happy Hibiscus Tag 6 creativestampingdesigns.com

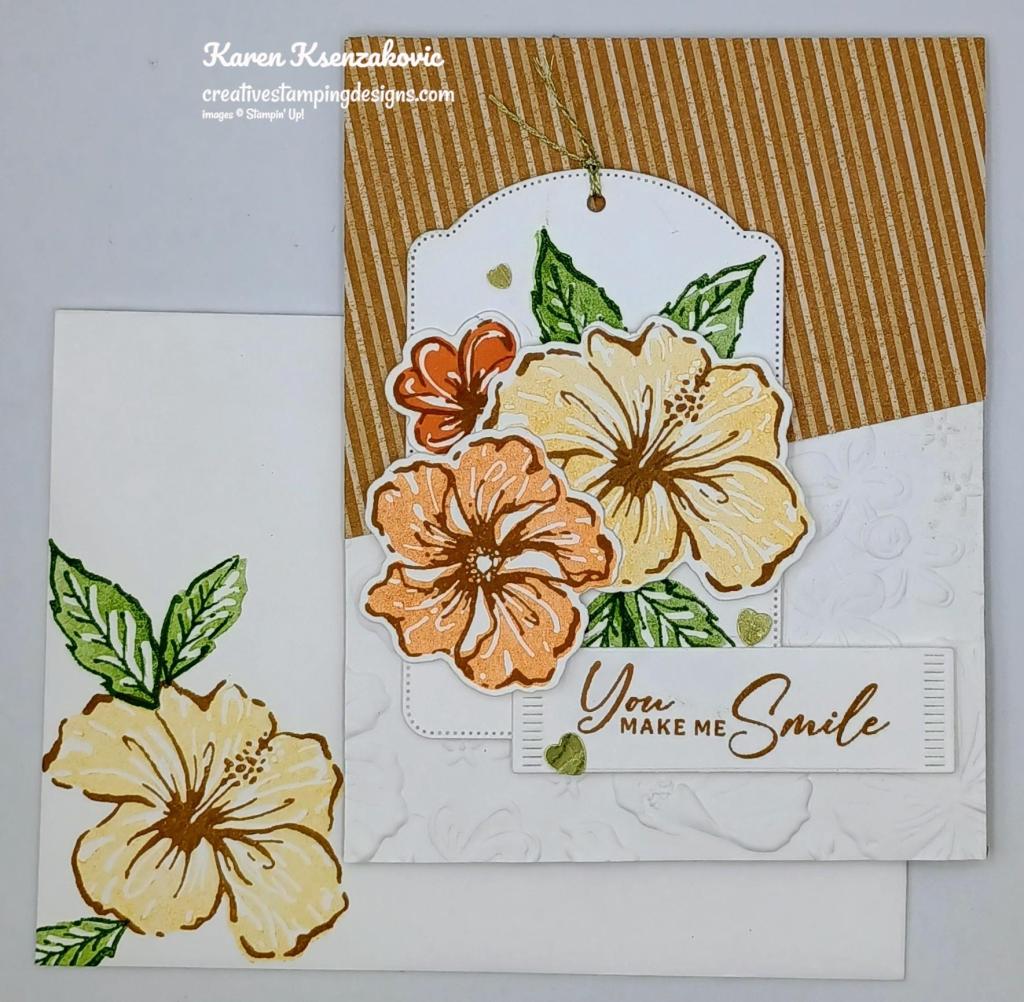
Finish the card by decorating a Basic White Medium Envelope. Stamp the largest outlined flower image from the Happy Hibiscus stamp set in Pecan Pie Ink on the envelope front. Stamp the large solid flower image from the Happy Hibiscus stamp set in Peach Pie Ink, stamping off once on scrap paper, over the outlined flower image. Stamp the leaf images from the Happy Hibiscus stamp set in Old Olive Ink around the flower. Adhere a panel of Neutrals DSP to the envelope flap.

Stampin' Up! Happy Hibiscus Tag 7 creativestampingdesigns.com

Thank you for stopping by my blog today. I hope you like the card, and you’ll give it a try. Happy Stamping!!

*********************************************************************************************************

If you need any stamping supplies, I’d love to be your Demonstrator. Just click HERE to go directly to my online store or drop me an email if you have any questions. 

MY CURRENT HOST CODE IS:   EMDXSBC9

Use this host code when placing an order with me. When you order $50 or greater you will receive a free gift from me! If your order is over $150, please do not use this code, but you’ll still get the free gift. The free gift is your choice of any 1 item valued up to $10.00 from the 2024-2025Annual Catalog, or from the Online Exclusives!  Unfortunately, packs of cardstock are no longer an option for a free gift. Shipping has become too expensive to ship and it’s costing me as much to ship as the cardstock costs. For any orders $50 or more I will also send you my monthly class tutorials.  Click HERE or go to my Customer Rewards for more details and to see what this month’s tutorials are.

Please remember to use my current Host Code and make sure that you can see my name on the final checkout page listed as your Demonstrator when you order so that you know that you’re ordering with me, and you’ll get my rewards! 

Happy Stamping, Karen

*********************************************************************************************************

Starter Kit Special – Get an extra $30 Your Starter Kit October 1 – 31

Hey, friend! Stampin’ Up! has a fantastic offer for anyone who becomes a demonstrator! Join my team between October 1–31and you can choose $155 worth of product in your Starter Kit for only $99! Starter Kits normally include $125 worth of product for $99, so that’s an extra $30 worth of product at no additional cost. This offering also includes free shipping and free business supplies! That’s MORE product for EVEN MORE fun!  Click Here for all the details.

Interested but you are not really sure about wanting to commit? Contact me and we can talk, and you can ask me any questions at creativestampingdesigns@gmail.com.

Read more information about becoming a demonstrator Here.

*********************************************************************************************************

New Online Exclusive Products Coming Soon

A new line of products for Online Exclusives are coming! You won’t find these items in any catalog. This is a great opportunity to spark creativity, expand a crafting collection, and discover new opportunities—all from the convenience of the online store. These products will be available starting in November, BUT you can add these new items to your Starter Kit if you join in October. Here’s a little sneak peek of some of the items that you can add to your Starter kit and get them before customers and start to play. Click Here for a sneak peek of what’s coming.

*********************************************************************************************************

From October 1-31 All Kits from the Kits Collection will be on sale for up to 30% off

Did you know as a demonstrator you can get up to 30% off all the kits AND get your 20% demo discount on top of that. What a GREAT way to save!!!

Save up to 30% off on all your favorite kits October 1–31! Our kits come with everything you need to create a unique paper craft. We have crafting options for card kits, treat packaging, home decor, and so much more! Kits are only available while supplies last.

Here are the details for the sale:

  • Promotion Period:  October 1-31!
  • ALL kits from the kits collection qualify for the discount.
  • There is no limit on how many kits you can order, as long as product is available.
  • Orders must be opened and placed during the promotion dates. Orders opened before October 1 will not qualify for the sale.
  • Kits on sale will NOT qualify for the Stampin’ Rewards 50% off.
  • Kits can be added to a Starter Kit at their discounted rate.
  • Ordering deadline:  October 31 at 11:59 p.m. (MT)

*********************************************************************************************************

Filled With Joy

Subscribe October 11 – November 10

Celebrate Christmas with adorable stockings and gift tags!

Details:
• Makes 8 projects: 8 stockings with 8 gift tags
• Precut paper pieces
• Safety pins and specialty gold foil
• Coordinating colors: Flirty Flamingo, Pool Party, Poppy Parade
(Classic Stampin’ Spot), Shaded Spruce, Very Vanilla

Subscribe to Paper Pumpkin for a monthly, all-inclusive crafting kit that’s a fun surprise! Each kit includes a photopolymer stamp set, Classic Stampin’ Spot, and step by step instructions to complete exclusive paper craft projects, including cards, tags, and gift
packaging. And don’t miss the special add-on that coordinates with the next three months!

Subscribe to the November Paper Pumpkin Kit between 11 October and 10 November by clicking here!

*********************************************************************************************************

Don’t miss the coordinating
Merry Tags & More Dies Add-On!

Add dimension and detail to your cards, scrapbook pages, and gift tags with the Merry Tags & More Dies! With a leaf and tag shape and Merry sentiment, these dies are a great way to expand your crafting experience. They even coordinate with three Paper Pumpkin Kits: Nests of Christmas, Filled with Joy, and Notes from the Heart. Such easy coordination makes these dies a must-have for any paper craft. Paper Pumpkin subscribers can purchase it beginning 11 September. The add-on is available only while supplies last, so it’s best to shop early! Please note that the Stampin’ Cut and Emboss Machine is not included and can be purchased separately.

#165639 $12

Note: Supplies may be limited toward the end of the subscription period.

*********************************************************************************************************

Card stock cuts for this project:

  • Basic White Cardstock 4 1/4″ X 5 1/2″(card front), 2 3/4″ X 4 1/4″(tag), 2 – 4″ X 5 1/4″(artwork & inner liner)
  • Peach Pie Cardstock 4 1/8″ X 5 3/8″ (inner liner mat)
  • Pecan Pie Cardstock 4 1/4″ X 11″(card base scored & folded at 5 1/2″)
  • Neutrals 6 X 6 Designer Series Paper 3 1/4″ X 6″(card front panel cut down), 1/2″ X 4″(inner liner), 2 1/4″ X 6″(envelope flap)

*********************************************************************************************************

Product List

Stampin’ Up! Regal Flora Thanks

Good Tuesday morning stamping friends. I hope everyone had a wonderful holiday weekend. It was gorgeous here in NJ. I opened all my windows to let the beautiful breeze go through my house. I have to admit, it got a little chilly during the night, I think it said it dropped to 48 during the night. That’s a little colder than I like.

I have a sneak peek for you today of a suite that you could purchase starting tomorrow, YAY!!! That’s right, the new September-December 2024 Mini Catalog goes live tomorrow morning. If you’d like to see a quick video of how I made this card, Click Here to go to my Instagram Reels. Here is my card for today.

Stampin' Up! Regal Flora Thanks 1 creativestampingdesings.com

I used the Stampin’ Up! Regal Flora Bundle, Regal Winter Designer Series Paper and the Stampin’ Up! Happiest Day Photopolymer Stamp Set for my card today.

Stampin' Up! Regal Flora Thanks 2 creativestampingdesings.com

Adhere a panel of regal Winter DSP to a Basic White Thick card base using Liquid Glue. Adhere a piece of Blackberry Bliss & Gold 1/2″ Textured Ribbon across the card front using Stampin’ Seal.

Stampin' Up! Regal Flora Thanks 3 creativestampingdesings.com

Adhere a panel of Regal Winter DSP to a Basic White mat using Stampin’ Seal. Adhere the layered panel to the card front using Liquid Glue. On a panel of Basic White, stamp the floral image from the Stampin’ Up! Regal Flora Cling Stamp Set in Blackberry Bliss Ink, stamping off once on scrap paper. Cut the image out using the Regal Flora Dies.

Stampin' Up! Regal Flora Thanks 4 creativestampingdesings.com

On a panel of Basic White, stamp the sentiment from the Regal Flora stamp set in Blackberry Bliss Ink on the top of the panel. Stamp the 2 leaf images from the Regal Flora stamp set in Pretty Peacock Ink on the bottom of the panel. Stamp the dotted image from the Regal Flora stamp set in Wild Wheat Ink on the panel, stamping off on scrap paper once. Adhere the Basic White panel to a Pretty Peacock mat. Adhere the layered panel to the card front using Stampin’ Dimensionals. Adhere the die cut flowers to the bottom of the panel over the stamped leaves using Stampin’ Dimensionals. Add a few Regal Foiled Adhesive-Backed Dots to the flower center.

Stampin' Up! Regal Flora Thanks 5 creativestampingdesings.com

Stamp the sentiment from the Happiest Day stamp set in Blackberry Bliss Ink on a panel of Basic White. Stamp the floral image from the Regal Flora stamp set in Blackberry Bliss Ink, stamping off once on scrap paper, on the bottom of the panel. Stamp the leaf images from the Regal Flora stamp set in Pretty Peacock Ink and the dotted image from the Regal Flora stamp set in Wild Wheat Ink. Adhere the Basic White panel to a Pretty Peacock mat then to the inside of the Basic White Thick card base.

Stampin' Up! Regal Flora Thanks 6 creativestampingdesings.com

To finish the card, decorate a Basic White Medium Envelope. Stamp the floral image from the Regal Flora stamp set in Blackberry Bliss Ink on the envelope front. Stamp the leaf image from the Regal Floral stamp set in Pretty Peacock Ink. Stamp the dotted image from the Regal Flora stamp set in Wild Wheat Ink. Adhere a panel of Regal Winter DSP to the envelope flap.

Stampin' Up! Regal Flora Thanks 7 creativestampingdesings.com

Thank you for stopping by my blog today. I hope you like the card and will give it a try. Happy Stamping!!

*********************************************************************************************************

If you need any stamping supplies, I’d love to be your Demonstrator. Just click HERE to go directly to my online store or drop me an email if you have any questions. 

MY CURRENT HOST CODE IS:   EPRVU3FN

Use this Host Code when placing ALL orders with me up to $149. When you order $50 or greater you will receive a free gift from me but only if you remember the Host Code! If your order is over $150, please do not use this code, but you’ll still get the free gift. The free gift is your choice of any 1 item valued up to $10.00 from the 2024-2025 Annual Catalog, or from the Online Exclusives! You MUST use the Host Code to earn this!!   For any orders $50 or more I will also send you my monthly class tutorials.  Click HERE or go to my Customer Rewards for more details and to see what this month’s tutorials are.

Please remember to use my current Host Code and make sure that you can see my name on the final checkout page listed as your Demonstrator when you order so that you know that you’re ordering with me, and you’ll get my rewards! 

Happy Stamping, Karen

********************************************************************************************************

Autumn Abundance

Subscribe August 11 – September 10

Subscribe to Paper Pumpkin for a monthly, all-inclusive crafting kit that’s a fun surprise! Each kit includes a photopolymer stamp set, Classic Stampin’ Spot, and step by step instructions to complete exclusive paper craft projects, including cards, tags, and gift
packaging. And don’t miss the special add-on that coordinates with the next three months!


Share your love for all things autumn with this kit! Don’t miss the whimsical, water colored ephemera pack with this month’s Paper Pumpkin!


• Makes 9 cards, 3 each of 3 designs
• Project includes printed cards and coordinating envelopes
• Laser cut card fronts, ephemera pack, and embellishments
• Coordinating colors: Cajun Craze (Classic Stampin’ Spot), Crushed Curry, Poppy
Parade, Pumpkin Pie, Very Vanilla, Wild Wheat

*********************************************************************************************************

Don’t miss the coordinating
Every Celebration Dies Add-On!

This exclusive add-on (item 164991) coordinates with the three upcoming kits! Paper Pumpkin subscribers can purchase it beginning 11 July. The add-on is available only while supplies last, so it’s best to shop early!

Subscribe to the September Paper Pumpkin Kit between 11 August and 10 September by clicking here!

Note: Supplies may be limited toward the end of the subscription period.

*********************************************************************************************************

Card stock cuts for this project:

  • Basic White Cardstock 2″ X 4 7/8″ (dsp mat), 2 1/4″ X 3 1/4″(artwork), 2″ X 3″(flowers) 4″ X 5 1/4″(inner liner)
  • Basic Whit thick Cardstock 4 1/4″ X 11″(card base scored & folded at 5 1/2″)
  • Pretty Peacock Cardstock 2 3/8″ X 3 3/8″(artwork mat), 4 1/8″ X 5 3/8″(inner liner mat)
  • Regal Winter Designer Series Paper 4 1/8″ X 5 3/8″(card front), 1 7/8″ X 4 3/4″(card front panel), 2 1/4″ x 6″(envelope flap)

*********************************************************************************************************

Product List
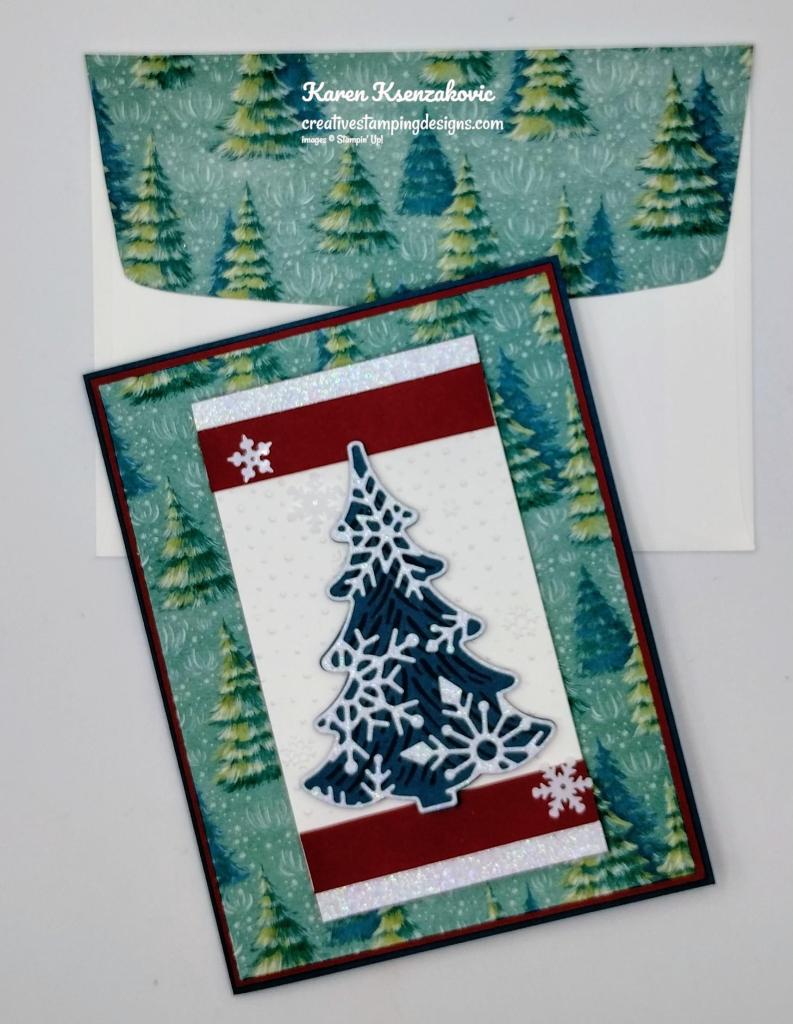
Stampin’ Up! Decorative Trees for The Happy Inkin’ Thursday Blog Hop

Good Thursday morning stamping friends and welcome to our Happy Inkin’ Thursday Blog Hop. If you are starting with me, thank you, I hope you will stop by everyone’s blog to see what they have created this week. If you are hopping over from Akiko’s blog, thank you for stopping by. This week we have Sketch Challenge. If you’d like to see a quick video of how I made this card, Click Here to go to my Instagram Reels. Here is my card using this week’s Sketch.

Stampin' Up! Decorative Trees 1 creativestampingdesigns.com

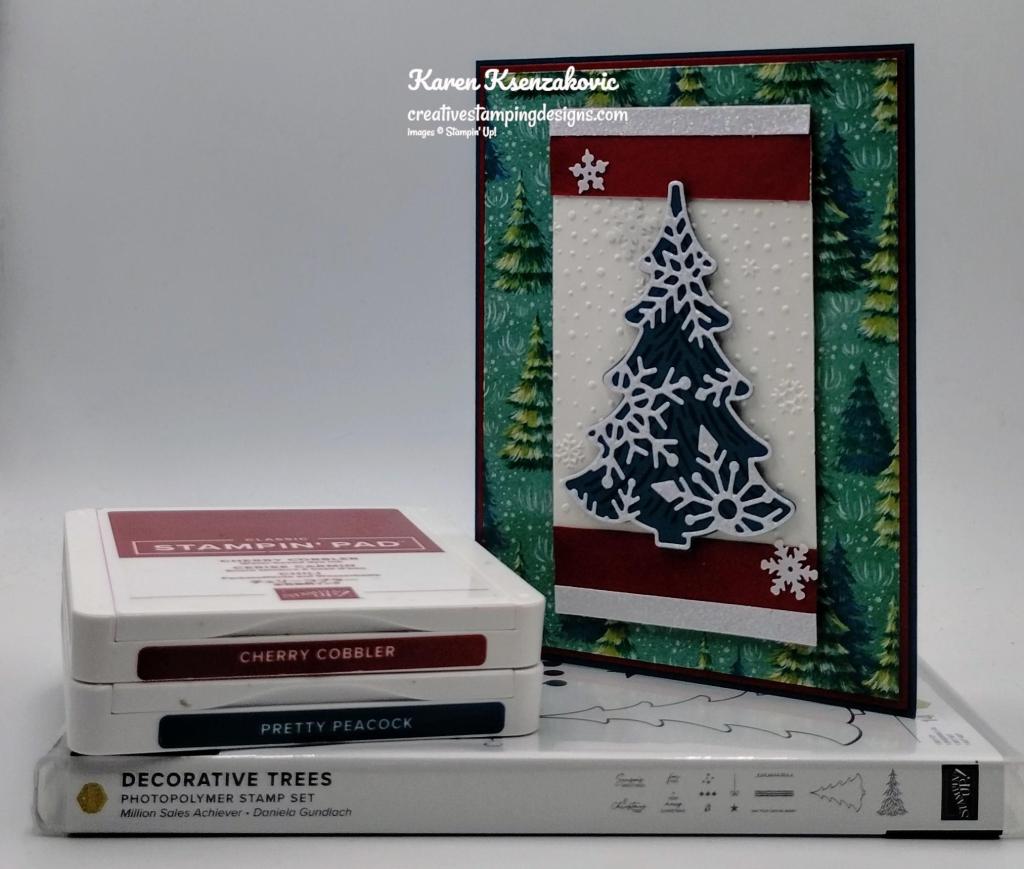
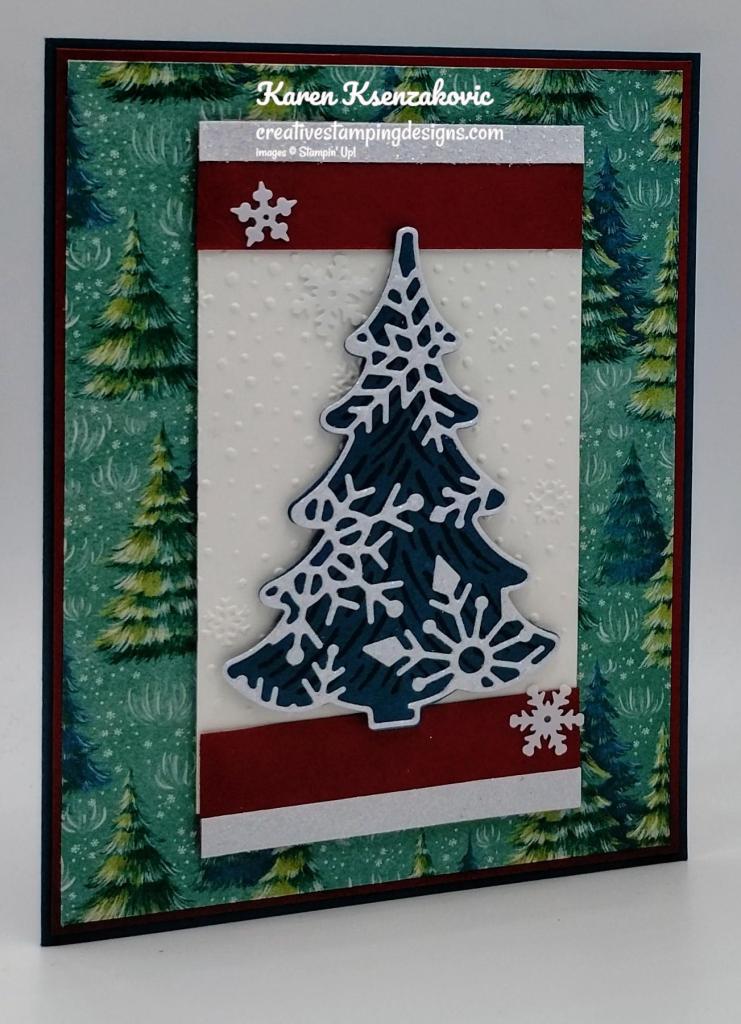
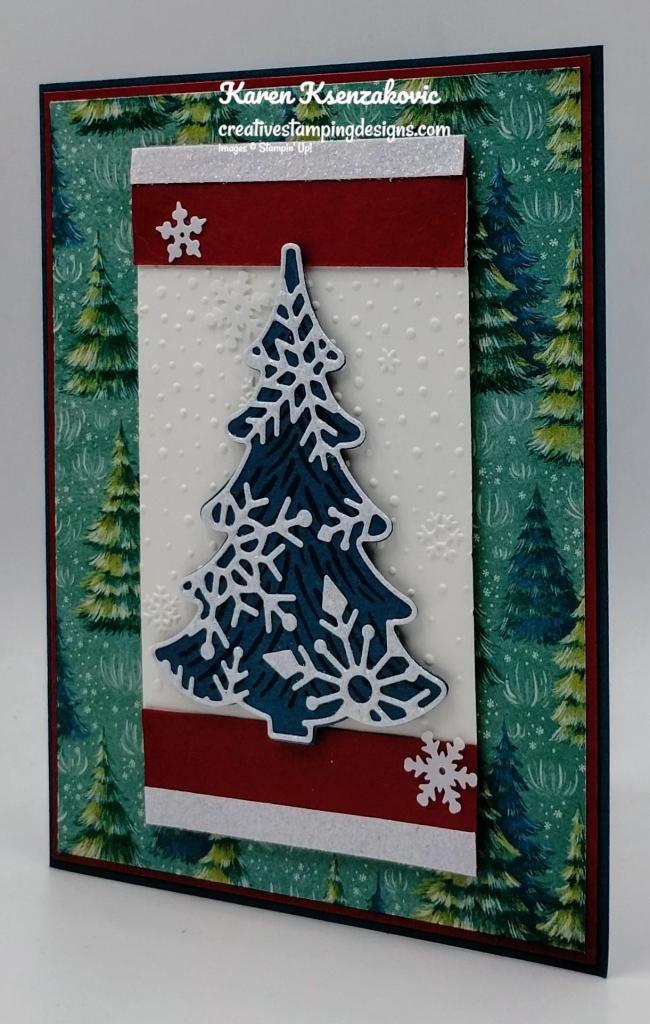
I used the new Stampin’ Up! Decorative Trees Bundle along with the Sentimental Christmas Designer Series Paper and Snowflake Sky 3D Embossing Folder for my card today. For each pack of this DSP purchased Stampin’ Up! will donate $3 to support Children’s Literacy.

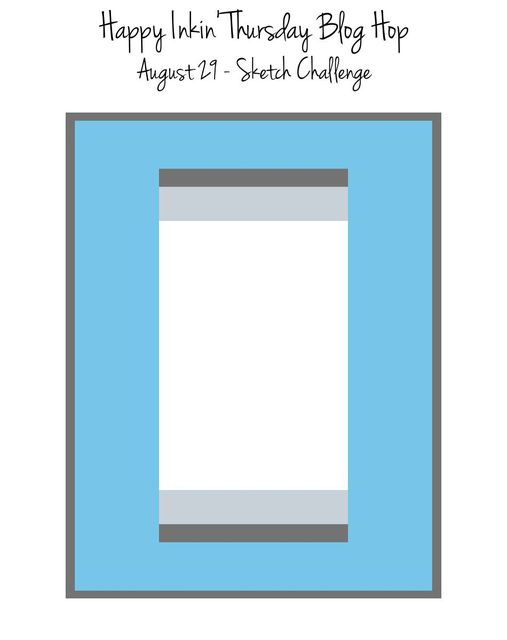
This is our sketch for this week.

Stampin' Up! Decorative Trees 2 creativestampingdesigns.com

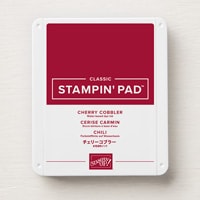
Adhere a panel of Sentimental Christmas DSP to a Cherry Cobbler mat using Stampin’ Seal. Adhere the layered panel to a Pretty Peacock card base using Liquid Glue.

Stampin' Up! Decorative Trees 3 creativestampingdesigns.com

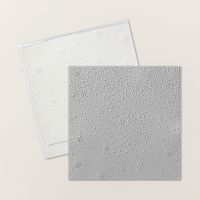
Emboss a panel of Basic White using the Snowflake Sky EF. Adhere 2 strips of Cherry Cobbler to the top and bottom of the panel. Adhere 2 strips of White Glimmer Paper to the Cherry Cobbler strips on the top and bottom. Adhere the layered panel to the card front using Stampin’ Dimensionals.

Stampin' Up! Decorative Trees 4 creativestampingdesigns.com

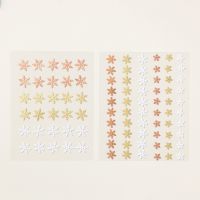
On a panel of Pretty Peacock stamp the detail pine bough image from the Stampin’ Up! Decorative Trees Photopolymer Stamp Set in Pretty Peacock Ink. Cut the image out using the Decorative Trees Dies. from a panel of White Glimmer Paper, cut the snowflake detail die using the Decorative Trees Dies. Adhere the details die to the top of the stamped tree image. Adhere the tree to the center of the embossed Basic White panel using Stampin’ Dimensionals. Add a few Adhesive-Backed Snowflakes to the card front.

Stampin' Up! Decorative Trees 5 creativestampingdesigns.com

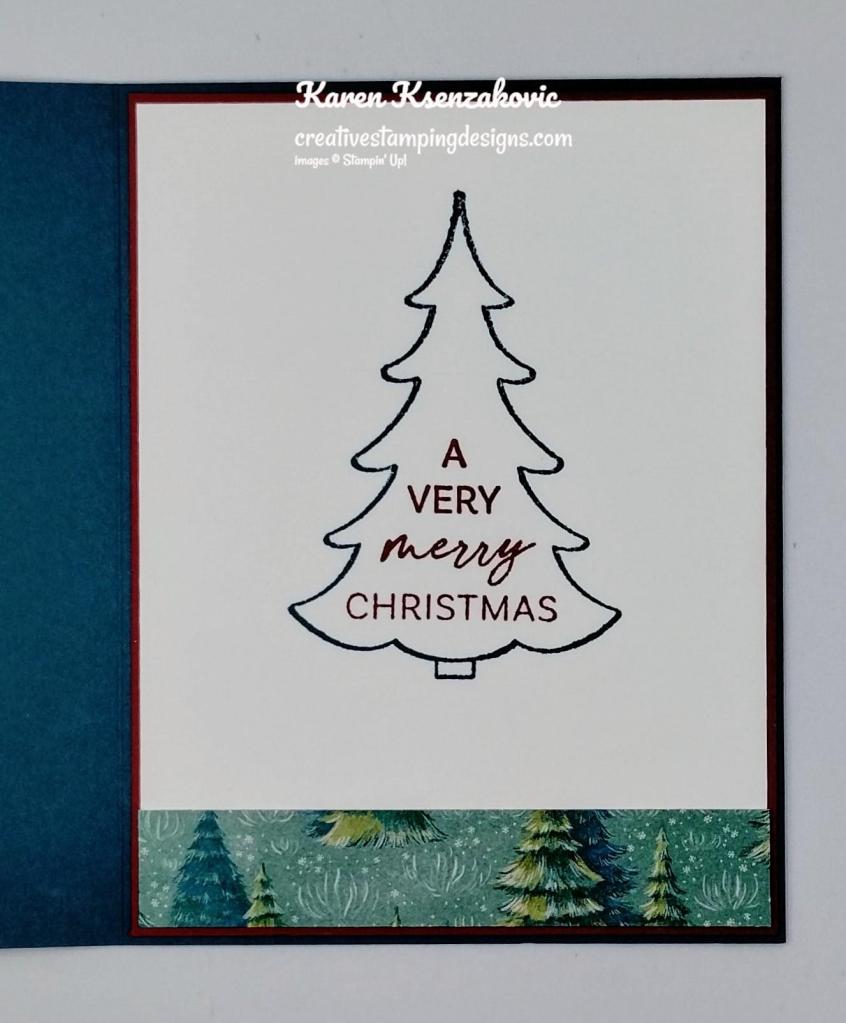
On the inside, stamp the outline tree image from the Decorative Trees stamp set in Pretty Peacock Ink. Stamp the sentiment from the Decorative Trees stamp set in Cherry Cobbler Ink inside the tree image. Adhere a strip of Sentimental Christmas DSP to the bottom of the panel. Adhere the Basic White panel to a Cherry Cobbler mat then to the inside of the Pretty Peacock card base.

Stampin' Up! Decorative Trees 6 creativestampingdesigns.com

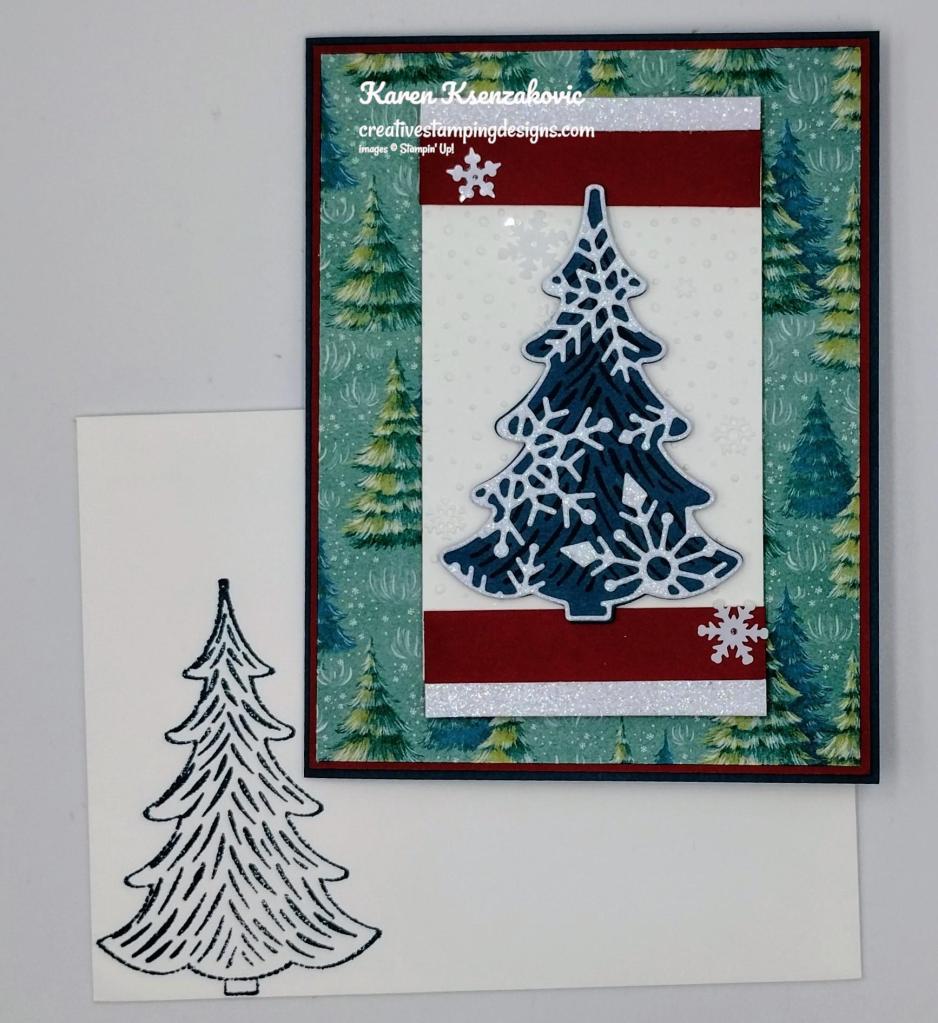
To complete your card, decorate a Basic White Medium Envelope. Stamp the outline tree image from the Decorative Trees stamp set in Pretty Peacock Ink on the envelope front. Stamp the tree pine bough image from the Decorative Trees stamp set in Pretty Peacock Ink inside the outlined image. Adhere a panel of Sentimental Christmas DSP to the envelope flap.

Stampin' Up! Decorative Trees 7 creativestampingdesigns.com

Thank you for stopping by my blog today.  Now that you’ve seen my card, let’s get on with the hop!  Click the button below to hop over to see what Tara has created today. Happy Hopping!

Just in case you get lost along the way, here is a list of the team members involved in the hop today.

Amy Koenders

Mary Deatherage

Jaimie Babarczy

Karen Finkle

Akiko Sudano

Karen Ksenzakovic You Are Here

Tara Carpenter

Terry Lynn Bright

Carol Buckalew

*********************************************************************************************************

If you need any stamping supplies, I’d love to be your Demonstrator. Just click HERE to go directly to my online store or drop me an email if you have any questions. 

MY CURRENT HOST CODE IS:   KFUKW3ZY

Use this host code when placing an order with me. When you order $50 or greater you will receive a free gift from me! If your order is over $150, please do not use this code, but you’ll still get the free gift. The free gift is your choice of any 1 item valued up to $10.00 from the 2024-2025Annual Catalog, or from the Online Exclusives!  Unfortunately, packs of cardstock are no longer an option for a free gift. Shipping has become too expensive to ship and it’s costing me as much to ship as the cardstock costs. For any orders $50 or more I will also send you my monthly class tutorials.  Click HERE or go to my Customer Rewards for more details and to see what this month’s tutorials are.

Please remember to use my current Host Code and make sure that you can see my name on the final checkout page listed as your Demonstrator when you order so that you know that you’re ordering with me, and you’ll get my rewards! 

Happy Stamping, Karen

*********************************************************************************************************

Final Week to Redeem Those Coupons

Redemption Period: August 1-31, 2024
Ordering Deadline:  August 31, 2024 at 11:59 p.m. (MT)

  • There is no limit to the number of coupon codes you can redeem on an order during the redemption period. If using multiple codes, they must be separated by a space. 
  • Coupon codes may be redeemed one time only. They cannot be redeemed after the August 31. 
  • Coupon codes may be redeemed for any product (excluding Starter Kits). They cannot be used on exchanges.
  • Bonus Days coupon codes can be applied to month-to-month Paper Pumpkin subscriptions and new prepaid subscriptions.

********************************************************************************************************

Final Week of Designer Series Paper Sale – 15% off August 6th-31st

Between August 6-31, you can shop select Designer Series Paper from the 2024–2025 Annual Catalog at 15% off! This is the perfect time to stock up and save on some of your favorite paper.

Designer Series Paper Sale Details:

  • Sales Period:  August 6-31, 2024
  • Ordering Deadlines:  August 31 at 11:59 p.m. (MT)
  • The fourteen paper packs included in the sale can be found listed in This Flyer
  • Only the select packs of papers listed on the flyer are included in the sale. 
  • You CAN redeem your Bonus Days coupons when you order the sale papers!
  • You must open and close the order during the allotted dates to receive the discount. 
  • There are NO limits on ordering. However, product is only available while supplies last. 
  • Designer Series Paper purchased with Stampin’ Rewards or as part of a Starter Kit WILL qualify for the discount. 

Head over to my Online Store beginning August 6 and get 15% off your favorite packs of paper!! 

*********************************************************************************************************

Autumn Abundance

Subscribe August 11 – September 10

Subscribe to Paper Pumpkin for a monthly, all-inclusive crafting kit that’s a fun surprise! Each kit includes a photopolymer stamp set, Classic Stampin’ Spot, and step by step instructions to complete exclusive paper craft projects, including cards, tags, and gift
packaging. And don’t miss the special add-on that coordinates with the next three months!


Share your love for all things autumn with this kit! Don’t miss the whimsical, water colored ephemera pack with this month’s Paper Pumpkin!


• Makes 9 cards, 3 each of 3 designs
• Project includes printed cards and coordinating envelopes
• Laser cut card fronts, ephemera pack, and embellishments
• Coordinating colors: Cajun Craze (Classic Stampin’ Spot), Crushed Curry, Poppy
Parade, Pumpkin Pie, Very Vanilla, Wild Wheat

*********************************************************************************************************

Don’t miss the coordinating
Every Celebration Dies Add-On!

This exclusive add-on (item 164991) coordinates with the three upcoming kits! Paper Pumpkin subscribers can purchase it beginning 11 July. The add-on is available only while supplies last, so it’s best to shop early!

Subscribe to the September Paper Pumpkin Kit between 11 August and 10 September by clicking here!

Note: Supplies may be limited toward the end of the subscription period.

*********************************************************************************************************

Card stock cuts for this project:

  • Basic White Cardstock 2 1/2″ X 4″(card front panel), 4″ X 5 1/4″(inner liner)
  • Cherry Cobbler Cardstock 2 – 4 1/8″ X 5 3/8″(card front & inner liner mats), 2 – 3/4″ X 2 1/2″(card front panels)
  • Pretty Peacock Cardstock 5 1/2″ X 8 1/2″(card base scored & folded at 4 1/4″), 2 3/4″ X 4″ (tree)
  • Glimmer Specialty Paper 2 1/2″ X 3 1/4″(detailed die cut), 2 – 1/4″ X 2 1/2″(card front panel)
  • Sentimental Christmas Designer Series Paper 4″ X 5 1/4″(card front), 2 1/4″ X 6″(envelope flap)

*********************************************************************************************************

Product List
Stampin’ Up! Sophisticated Sled

Good Wednesday morning stamping friends. We’re halfway through the week and on our way to the holiday weekend.

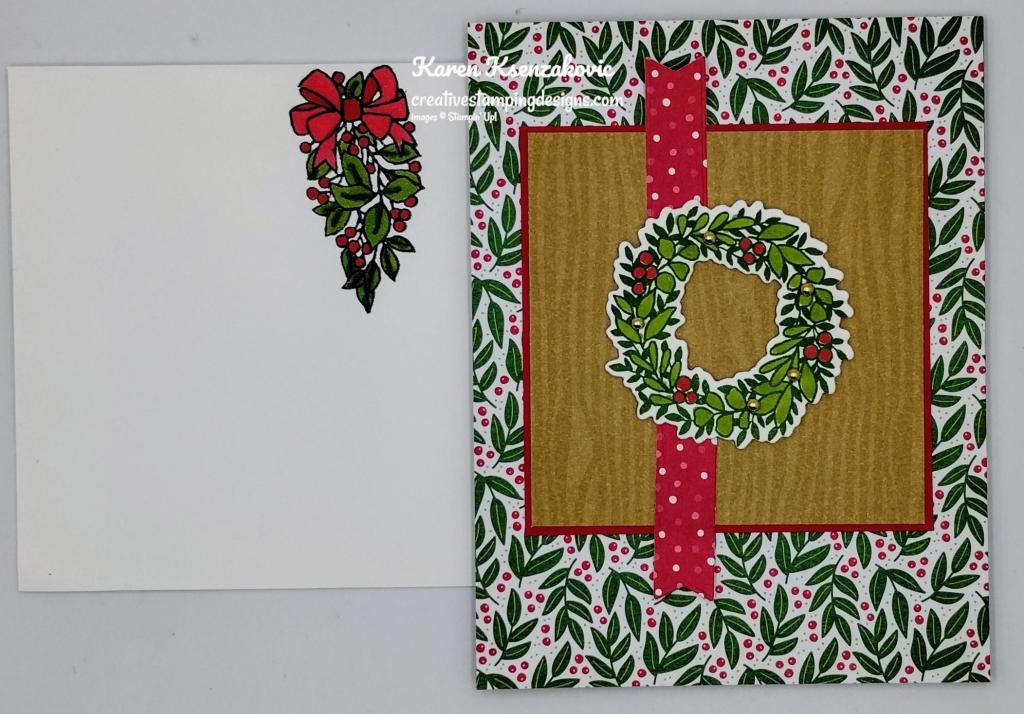
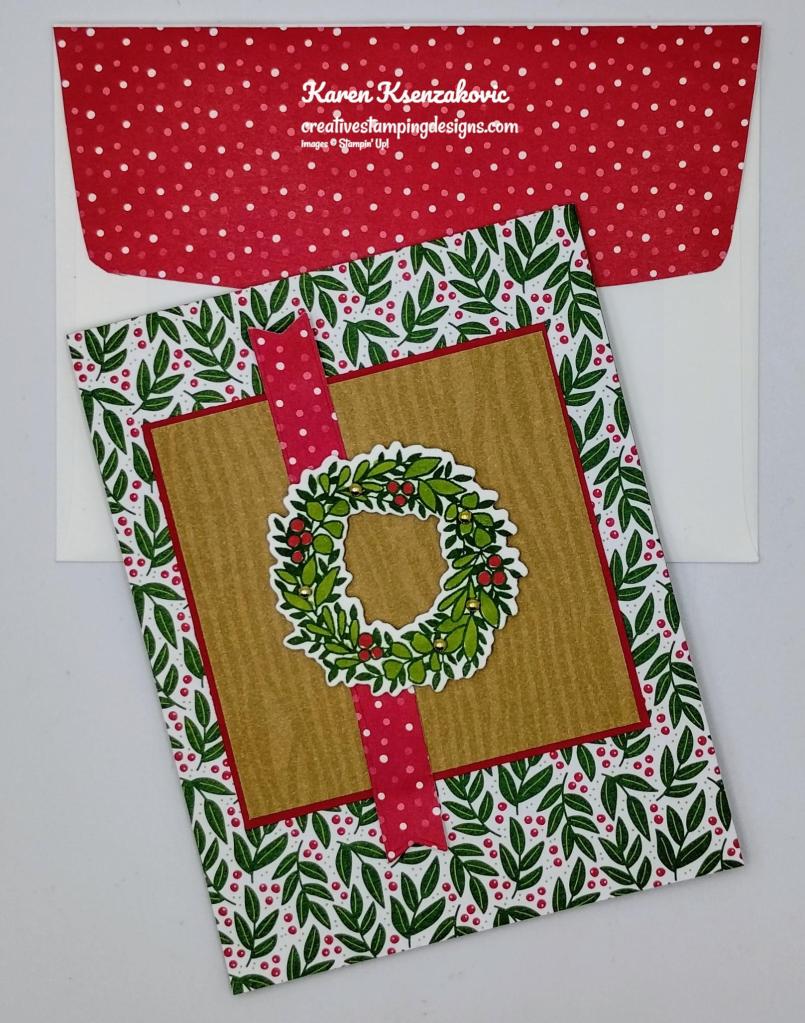
Today I have a Christmas card for you playing with an Online Exclusive Bundle. I know it’s only August, but when you make your own cards, you have to start early to get them done. I usually over make my holiday cards so I have a few to carry over to the next year. We’ll see what happens this year.  If you’d like to see a quick video of how I made this card, Click Here to go to my Instagram Reels. Here is my card for today.

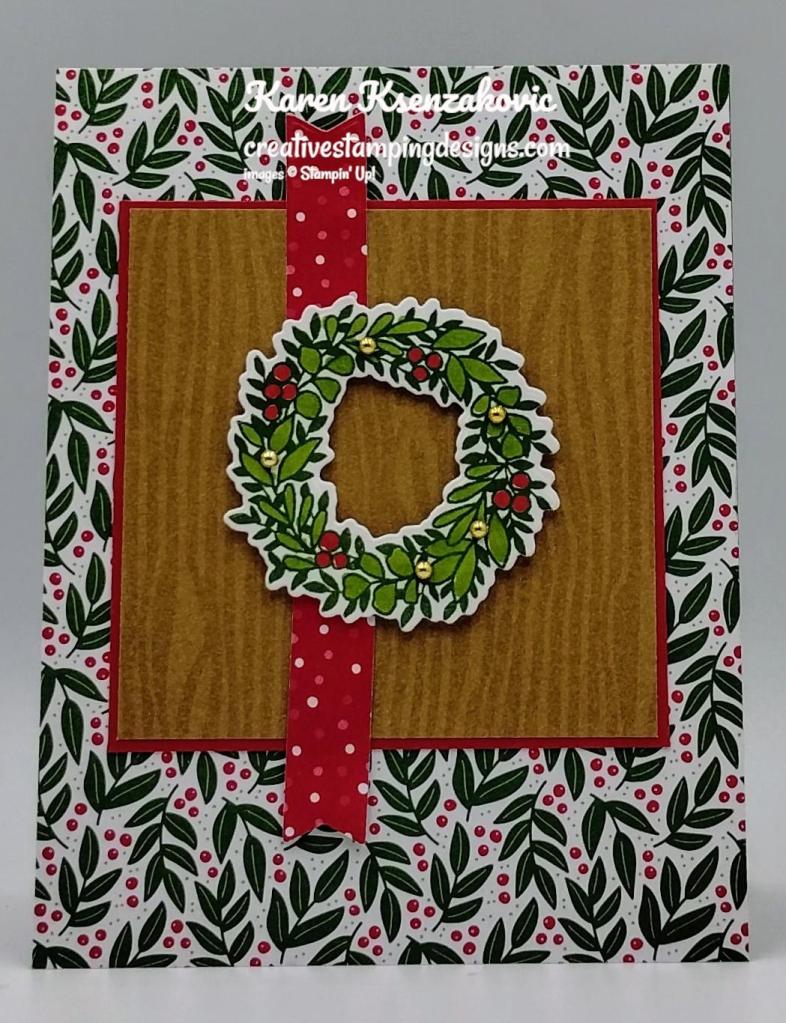
Stampin' Up! Sophisticated Sled Wreath 1 creativestampingdesigns.com

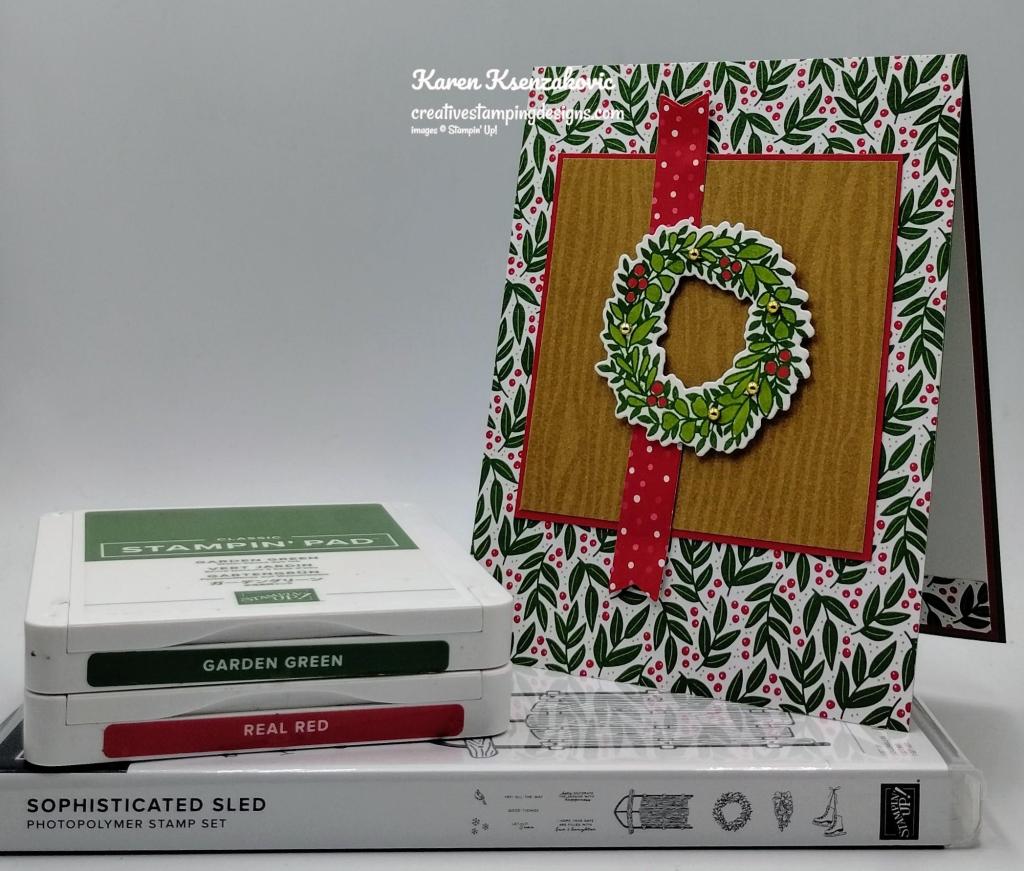
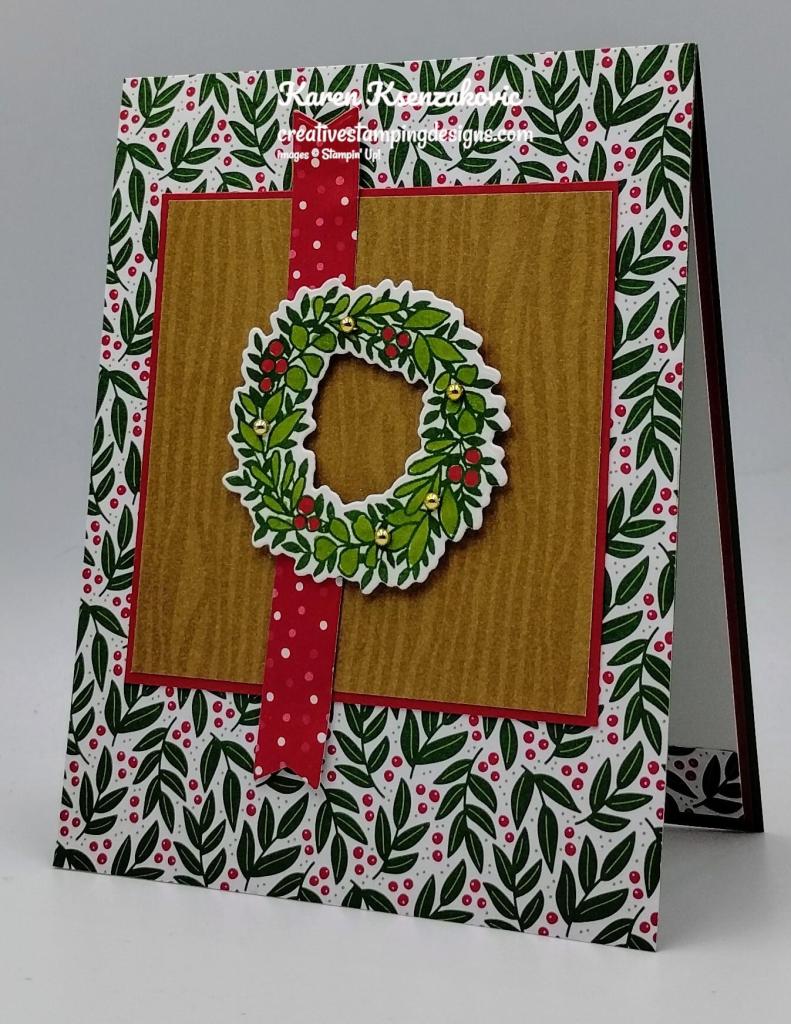
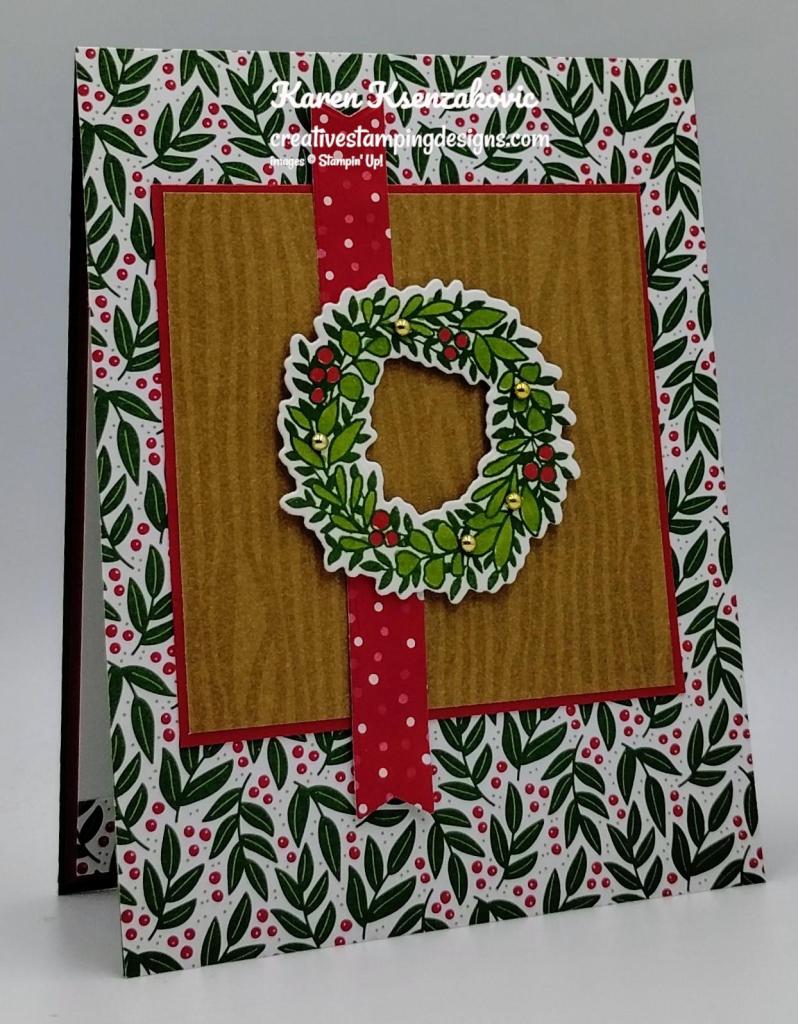
I used the Stampin’ Up! Online Exclusive Sophisticated Sled Bundle along with the To Market Designer Series Paper, Take a Bow 6 X 6 Designer Series Paper (available Sept 4), and Hearts & Hugs Dies for my card today.

My design is from Sunday Stamps Sketch Time Challenge #342.

Stampin' Up! Sophisticated Sled Wreath 4 creativestampingdesigns.com

Adhere a panel of Take a Bow DSP to a Garden Green card base using Liquid Glue. Adhere a panel of To Market DSP to a Real Red mat using Stampin’ Seal. Adhere the layered panel to the card front using Liquid Glue.

Stampin' Up! Sophisticated Sled Wreath 3 creativestampingdesigns.com

On a panel of Basic White, stamp the wreath image from the Stampin’ Up! Sophisticated Sled Photopolymer Stamp Set in Garden Green Ink. Color the image using Granny Apple Green and Real Red Stampin’ Blends Markers. Cut the image out using the Sophisticated Sled Dies. Adhere the wreath to the center panel on the card front using Stampin’ Dimensionals.

Stampin' Up! Sophisticated Sled Wreath 4 creativestampingdesigns.com

Using the banner die from the Hearts & Hugs Dies, cut a panel of Take a Bow DSP. cut the banner in half using Paper Snips and adhere it under the wreath using Glue Dots. Add a few Gold Blooming Pearls to the wreath.

Stampin' Up! Sophisticated Sled Wreath 5 creativestampingdesigns.com

For the inside, stamp the sentiment from the Sophisticated Sled stamp set in Garden Green Ink on a panel of Basic White. Stamp the mistletoe image from the Sophisticated Sled stamp set in Garden Green Ink on the top of the panel. Color the image using Granny Apple Green and Real Red Stampin’ Blends Markers. Adhere a strip of Take a Bow DSP to the bottom of the panel. Adhere the Basic White panel to a Real Red mat then to the inside of the Garden Green card base.

Stampin' Up! Sophisticated Sled Wreath 6 creativestampingdesigns.com

To finish the card, decorate a Basic White Medium Envelope. Stamp the mistletoe image from the Sophisticated Sled stamp set in Garden Green Ink on the envelope front. Color the image using Granny Apple Green and Real Red Stampin’ Blends Markers. Adhere a panel of Take a Bow DSP to the envelope flap.

Stampin' Up! Sophisticated Sled Wreath 7 creativestampingdesigns.com

Thank you for stopping by my blog today. I hope you like the card and will give it a try. Happy Stamping!!

*********************************************************************************************************

If you need any stamping supplies, I’d love to be your Demonstrator. Just click HERE to go directly to my online store or drop me an email if you have any questions. 

MY CURRENT HOST CODE IS:   KFUKW3ZY

Use this host code when placing an order with me. When you order $50 or greater you will receive a free gift from me! If your order is over $150, please do not use this code, but you’ll still get the free gift. The free gift is your choice of any 1 item valued up to $10.00 from the 2024-2025Annual Catalog, or from the Online Exclusives!  Unfortunately, packs of cardstock are no longer an option for a free gift. Shipping has become too expensive to ship and it’s costing me as much to ship as the cardstock costs. For any orders $50 or more I will also send you my monthly class tutorials.  Click HERE or go to my Customer Rewards for more details and to see what this month’s tutorials are.

Please remember to use my current Host Code and make sure that you can see my name on the final checkout page listed as your Demonstrator when you order so that you know that you’re ordering with me, and you’ll get my rewards! 

Happy Stamping, Karen

*********************************************************************************************************

September-December 2024 Mini Catalog Paper and Ribbon Shares Open for Ordering

I’m offering a Designer Series Paper share from the September-December 2024 Mini Catalog and I’d love to have you join!!  I’m placing my share order early on September 4th and I’m going to use the expedited shipping option so I should be able to have the shares cut, bundled and back out to you during the week of September 9. Wouldn’t you love to have all of the gorgeous new Designer Series Papers in the Stampin’ Up! September-December 2024 Mini Catalog?  What is a Paper Share you ask? It’s a sample of each of the new Designer Series Papers from the September-December 2024 Mini Catalog. Shares give you a good working sample of all of the papers so that you can decide which ones to order in full packs!  If you were to purchase all of the DSP in the new Catalog, it would cost you over $135.00 plus shipping and if you were to purchase all the ribbon it would cost you over $60.00.

New Designer Series Paper Share – $21.00 plus $9.00 for Priority Mail Shipping

How my shares work:  I order full packs of all of the Designer Series Papers listed below, I cut them into 6″ X 6″ pieces (or 6″ X 12″ pieces for double shares) and give you one panel of each design from each pack on the list.  I pack up the paper in a cellophane bag with labels listing the NameItem # and Colors in the pack and mail it back out to you just as quickly as I can!  

New Designer Series Paper Share – $21.00 plus $9.00 for Priority Mail shipping

You will receive one 6X6 sheet of each design from the following DSP packs (the number after the name indicates how many 6×6 sheets of that paper pack you will receive):

  • Nests of Winter (6)
  • Regal Winter (6)
  • Regal Distressed Patterns (3)
  • Reindeer Days (6)
  • Season of Elegance (6)
  • Sentimental Christmas (6)
  • Snowy Scenes (6)
  • A Little Bit Festive (3)
  • Festive Glimmer (3)
  • Splendid Autumn 6X6 (12)
  • Take A Bow 6X6 (4)

In all, you’ll receive 61 – 6” X 6” sheets of designer or specialty paper!

Double DSP Share – $42.00 + $9.00 Shipping by Priority Mail – if you’d like double shares of the designer paper, I’m offering those too!  I’ll cut the 12″ X 12″ designer paper sheets into 6″ X 12″ so that you’ll be able to get 3 full A2 size card fronts from each sheet and you’ll get double sheets of the 6″ X 6″ since they’re already precut.

New Ribbon Share – $17.00 plus $9.00 Priority Mail Shipping

All ribbons will come individually wrapped and labeled with the name and number of the product. Please note that ribbons are being divided differently, you will be getting one fourth of a roll of each of the Ribbons.

One-Fourth of a Roll of each:

  • Blackberry Bliss & Gold Textured Ribbon
  • Cherry Cobbler & Gold Satin Ribbon
  • Natural Tones Linen Thread
  • Pool Party Pompom Ribbon
  • Real Red & White Baker’s Twine
  • Shaded Spruce Satin & Sheer Ribbon
  • Wild Wheat Rustic Striped Ribbon

Double Ribbon Share – $34.00 + $9.00 Priority Mail Shipping – If you’d like double shares of the Ribbon, you will be getting 1/2 of the roll or each ribbon.

If you would like the Designer Series Paper Share & the Ribbon Share the cost will be:

$38.00 for a single share + $9.00 shipping

$76.00 for a double share + $9.00 shipping.

Anyone is welcome to join in my share (please note, I can only ship to addresses within the US).  If you’d like to join, email the following information to creativestampingdesigns@gmail.com

  • Your first and last name
  • Your mailing address for paper to be shipped to.
  • The email address that is connected to your PayPal account or let me know if you’d like to use Zelle. I will accept Zelle or PayPal for payment.  ***You do not need to have a PayPal account to pay the invoice, you can choose to pay by credit card without having a PayPal account. If you’d like to use Zelle, email me and I’ll give you the number associated with my account.

Deadline to sign up for my share is Sunday September 1st at 5:00 PM ET.

Let me know if you have any questions.  Thanks!

*********************************************************************************************************

Final Week to Redeem Those Coupons

Redemption Period: August 1-31, 2024
Ordering Deadline:  August 31, 2024 at 11:59 p.m. (MT)

  • There is no limit to the number of coupon codes you can redeem on an order during the redemption period. If using multiple codes, they must be separated by a space. 
  • Coupon codes may be redeemed one time only. They cannot be redeemed after the August 31. 
  • Coupon codes may be redeemed for any product (excluding Starter Kits). They cannot be used on exchanges.
  • Bonus Days coupon codes can be applied to month-to-month Paper Pumpkin subscriptions and new prepaid subscriptions.

********************************************************************************************************

Final Week of Designer Series Paper Sale – 15% off August 6th-31st

Between August 6-31, you can shop select Designer Series Paper from the 2024–2025 Annual Catalog at 15% off! This is the perfect time to stock up and save on some of your favorite paper.

Designer Series Paper Sale Details:

  • Sales Period:  August 6-31, 2024
  • Ordering Deadlines:  August 31 at 11:59 p.m. (MT)
  • The fourteen paper packs included in the sale can be found listed in This Flyer
  • Only the select packs of papers listed on the flyer are included in the sale. 
  • You CAN redeem your Bonus Days coupons when you order the sale papers!
  • You must open and close the order during the allotted dates to receive the discount. 
  • There are NO limits on ordering. However, product is only available while supplies last. 
  • Designer Series Paper purchased with Stampin’ Rewards or as part of a Starter Kit WILL qualify for the discount. 

Head over to my Online Store beginning August 6 and get 15% off your favorite packs of paper!! 

*********************************************************************************************************

Autumn Abundance

Subscribe August 11 – September 10

Subscribe to Paper Pumpkin for a monthly, all-inclusive crafting kit that’s a fun surprise! Each kit includes a photopolymer stamp set, Classic Stampin’ Spot, and step by step instructions to complete exclusive paper craft projects, including cards, tags, and gift
packaging. And don’t miss the special add-on that coordinates with the next three months!


Share your love for all things autumn with this kit! Don’t miss the whimsical, water colored ephemera pack with this month’s Paper Pumpkin!


• Makes 9 cards, 3 each of 3 designs
• Project includes printed cards and coordinating envelopes
• Laser cut card fronts, ephemera pack, and embellishments
• Coordinating colors: Cajun Craze (Classic Stampin’ Spot), Crushed Curry, Poppy
Parade, Pumpkin Pie, Very Vanilla, Wild Wheat

*********************************************************************************************************

Don’t miss the coordinating
Every Celebration Dies Add-On!

This exclusive add-on (item 164991) coordinates with the three upcoming kits! Paper Pumpkin subscribers can purchase it beginning 11 July. The add-on is available only while supplies last, so it’s best to shop early!

Subscribe to the September Paper Pumpkin Kit between 11 August and 10 September by clicking here!

Note: Supplies may be limited toward the end of the subscription period.

*********************************************************************************************************

Card stock cuts for this project:

  • Basic White Cardstock 3″ X 3″ (wreath), 4″ X 5 1/4″(inner liner)
  • Garden Green Cardstock 4 1/4″ X 11″(card base scored & folded at 5 1/2″)
  • Real Red Cardstock 3 3/8″ X 3 3/8″ (card front panel mat), 4 1/8″ X 5 3/8″(inner liner mat)
  • Take A Bow 6 X 6 Designer Series Paper 4 1/4″ X 5 1/2″(card front), 3/4″ X 3 1/2″(banner), 1/2″ X 4″ (inner liner), 2 1/4″ X 6″(envelope flap)
  • To Market Designer Series Paper 3 1/4″ X 3 1/4″(card front panel)

*********************************************************************************************************

Product List

Stampin’ Up! Winterly Tree Tops CAS

Good Tuesday morning stamping friends. I hope your week has started off well. The temperatures are rising here in NJ again. I think we’re heading back up to the 90’s this week.

I have a CAs card for you today using some new products coming in the September-December 2024 Mini Catalog. I was actually able to purchase this suite in May for an event I attended. If you’d like to see a quick video of how I made this card, Click Here to go to my Instagram Reels. Here is my card for today.

Stampin' Up! Winterly Tree Tops CAS 1 creativestampingdesigns.com

I used the new Stampin’ Up! Winterly Tree Tops Cling Stamp Set along with the Nests of Winter Designer Series Paper and Birch Wood 3D Embossing Folder for my card today.

Stampin' Up! Winterly Tree Tops CAS 2 creativestampingdesigns.com

Emboss a Copper Clay card front using the Birch Wood EF. Adhere the embossed panel to a Copper Clay card base using Liquid Glue.

Stampin' Up! Winterly Tree Tops CAS 3 creativestampingdesigns.com

On a panel of Nests of Winter DSP, stamp the sentiment from the Winterly Tree Tops stamp set in Night of Navy Ink on the top of the panel. Adhere the panel of DSP to a Night of Navy mat using Stampin’ Seal. Adhere the layered panel to the card front using Stampin’ Dimensionals.

Stampin' Up! Winterly Tree Tops CAS 4 creativestampingdesigns.com

Tie a double bow using the Night of Navy Natural Tones Linen Thread (available Sept 4). Adhere the bow to the card front using a Glue Dot. Add a few Earth Tones Shimmer Gems (available Sept 4), to the card front.

Stampin' Up! Winterly Tree Tops CAS 5 creativestampingdesigns.com

For the inside, cover the bottom portion of the sentiment from Winterly Tree Tops stamp set with Post-It Note tape or washi tape. Ink up the stamp with Night of Navy Ink, remove the tape and stamp the sentiment on a panel of Basic White. Adhere a strip of Nests of Winter DSP to the side of the panel. Adhere the Basic White panel to a Night of Navy mat then to the inside of the Copper Clay card base.

Stampin' Up! Winterly Tree Tops CAS 6 creativestampingdesigns.com

Stamp the pussy willow image from the Winterly Tree Tops stamp set in Copper Clay Ink on the envelope front. Adhere a panel of Nests of Winter DSP to the envelope flap.

Stampin' Up! Winterly Tree Tops CAS 7 creativestampingdesigns.com

Thank you for stopping by my blog today. I hope you like the card and will give it a try. Happy Stamping!!

*********************************************************************************************************

If you need any stamping supplies, I’d love to be your Demonstrator. Just click HERE to go directly to my online store or drop me an email if you have any questions. 
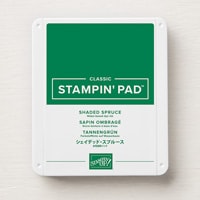
MY CURRENT HOST CODE IS:   KFUKW3ZY

Use this host code when placing an order with me. When you order $50 or greater you will receive a free gift from me! If your order is over $150, please do not use this code, but you’ll still get the free gift. The free gift is your choice of any 1 item valued up to $10.00 from the 2024-2025Annual Catalog, or from the Online Exclusives!  Unfortunately, packs of cardstock are no longer an option for a free gift. Shipping has become too expensive to ship and it’s costing me as much to ship as the cardstock costs. For any orders $50 or more I will also send you my monthly class tutorials.  Click HERE or go to my Customer Rewards for more details and to see what this month’s tutorials are.
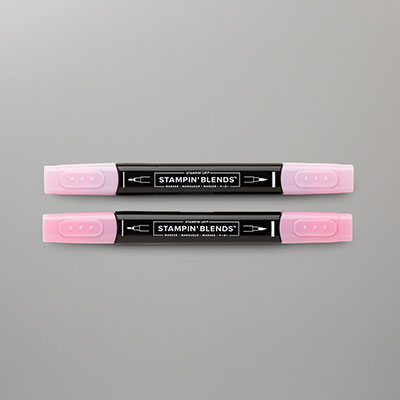
Please remember to use my current Host Code and make sure that you can see my name on the final checkout page listed as your Demonstrator when you order so that you know that you’re ordering with me, and you’ll get my rewards! 
Happy Stamping, Karen

*********************************************************************************************************

September-December 2024 Mini Catalog Paper and Ribbon Shares Open for Ordering

I’m offering a Designer Series Paper share from the September-December 2024 Mini Catalog and I’d love to have you join!!  I’m placing my share order early on September 4th and I’m going to use the expedited shipping option so I should be able to have the shares cut, bundled and back out to you during the week of September 9. Wouldn’t you love to have all of the gorgeous new Designer Series Papers in the Stampin’ Up! September-December 2024 Mini Catalog?  What is a Paper Share you ask? It’s a sample of each of the new Designer Series Papers from the September-December 2024 Mini Catalog. Shares give you a good working sample of all of the papers so that you can decide which ones to order in full packs!  If you were to purchase all of the DSP in the new Catalog, it would cost you over $135.00 plus shipping and if you were to purchase all the ribbon it would cost you over $60.00.

New Designer Series Paper Share – $21.00 plus $9.00 for Priority Mail Shipping

How my shares work:  I order full packs of all of the Designer Series Papers listed below, I cut them into 6″ X 6″ pieces (or 6″ X 12″ pieces for double shares) and give you one panel of each design from each pack on the list.  I pack up the paper in a cellophane bag with labels listing the NameItem # and Colors in the pack and mail it back out to you just as quickly as I can!  

New Designer Series Paper Share – $21.00 plus $9.00 for Priority Mail shipping

You will receive one 6X6 sheet of each design from the following DSP packs (the number after the name indicates how many 6×6 sheets of that paper pack you will receive):

  • Nests of Winter (6)
  • Regal Winter (6)
  • Regal Distressed Patterns (3)
  • Reindeer Days (6)
  • Season of Elegance (6)
  • Sentimental Christmas (6)
  • Snowy Scenes (6)
  • A Little Bit Festive (3)
  • Festive Glimmer (3)
  • Splendid Autumn 6X6 (12)
  • Take A Bow 6X6 (4)

In all, you’ll receive 61 – 6” X 6” sheets of designer or specialty paper!

Double DSP Share – $42.00 + $9.00 Shipping by Priority Mail – if you’d like double shares of the designer paper, I’m offering those too!  I’ll cut the 12″ X 12″ designer paper sheets into 6″ X 12″ so that you’ll be able to get 3 full A2 size card fronts from each sheet and you’ll get double sheets of the 6″ X 6″ since they’re already precut.

New Ribbon Share – $17.00 plus $9.00 Priority Mail Shipping

All ribbons will come individually wrapped and labeled with the name and number of the product. Please note that ribbons are being divided differently, you will be getting one fourth of a roll of each of the Ribbons.

One-Fourth of a Roll of each:

  • Blackberry Bliss & Gold Textured Ribbon
  • Cherry Cobbler & Gold Satin Ribbon
  • Natural Tones Linen Thread
  • Pool Party Pompom Ribbon
  • Real Red & White Baker’s Twine
  • Shaded Spruce Satin & Sheer Ribbon
  • Wild Wheat Rustic Striped Ribbon

Double Ribbon Share – $34.00 + $9.00 Priority Mail Shipping – If you’d like double shares of the Ribbon, you will be getting 1/2 of the roll or each ribbon.

If you would like the Designer Series Paper Share & the Ribbon Share the cost will be:

$38.00 for a single share + $9.00 shipping

$76.00 for a double share + $9.00 shipping.

Anyone is welcome to join in my share (please note, I can only ship to addresses within the US).  If you’d like to join, email the following information to creativestampingdesigns@gmail.com

  • Your first and last name
  • Your mailing address for paper to be shipped to.
  • The email address that is connected to your PayPal account or let me know if you’d like to use Zelle. I will accept Zelle or PayPal for payment.  ***You do not need to have a PayPal account to pay the invoice, you can choose to pay by credit card without having a PayPal account. If you’d like to use Zelle, email me and I’ll give you the number associated with my account.

Deadline to sign up for my share is Sunday September 1st at 5:00 PM ET.

Let me know if you have any questions.  Thanks!

*********************************************************************************************************

Final Week to Redeem Those Coupons

Redemption Period: August 1-31, 2024
Ordering Deadline:  August 31, 2024 at 11:59 p.m. (MT)

  • There is no limit to the number of coupon codes you can redeem on an order during the redemption period. If using multiple codes, they must be separated by a space. 
  • Coupon codes may be redeemed one time only. They cannot be redeemed after the August 31. 
  • Coupon codes may be redeemed for any product (excluding Starter Kits). They cannot be used on exchanges.
  • Bonus Days coupon codes can be applied to month-to-month Paper Pumpkin subscriptions and new prepaid subscriptions.

********************************************************************************************************

Final Week of Designer Series Paper Sale – 15% off August 6th-31st

Between August 6-31, you can shop select Designer Series Paper from the 2024–2025 Annual Catalog at 15% off! This is the perfect time to stock up and save on some of your favorite paper.

Designer Series Paper Sale Details:

  • Sales Period:  August 6-31, 2024
  • Ordering Deadlines:  August 31 at 11:59 p.m. (MT)
  • The fourteen paper packs included in the sale can be found listed in This Flyer
  • Only the select packs of papers listed on the flyer are included in the sale. 
  • You CAN redeem your Bonus Days coupons when you order the sale papers!
  • You must open and close the order during the allotted dates to receive the discount. 
  • There are NO limits on ordering. However, product is only available while supplies last. 
  • Designer Series Paper purchased with Stampin’ Rewards or as part of a Starter Kit WILL qualify for the discount. 

Head over to my Online Store beginning August 6 and get 15% off your favorite packs of paper!! 

*********************************************************************************************************

Autumn Abundance

Subscribe August 11 – September 10

Subscribe to Paper Pumpkin for a monthly, all-inclusive crafting kit that’s a fun surprise! Each kit includes a photopolymer stamp set, Classic Stampin’ Spot, and step by step instructions to complete exclusive paper craft projects, including cards, tags, and gift
packaging. And don’t miss the special add-on that coordinates with the next three months!


Share your love for all things autumn with this kit! Don’t miss the whimsical, water colored ephemera pack with this month’s Paper Pumpkin!


• Makes 9 cards, 3 each of 3 designs
• Project includes printed cards and coordinating envelopes
• Laser cut card fronts, ephemera pack, and embellishments
• Coordinating colors: Cajun Craze (Classic Stampin’ Spot), Crushed Curry, Poppy
Parade, Pumpkin Pie, Very Vanilla, Wild Wheat

*********************************************************************************************************

Don’t miss the coordinating
Every Celebration Dies Add-On!

This exclusive add-on (item 164991) coordinates with the three upcoming kits! Paper Pumpkin subscribers can purchase it beginning 11 July. The add-on is available only while supplies last, so it’s best to shop early!

Subscribe to the September Paper Pumpkin Kit between 11 August and 10 September by clicking here!

Note: Supplies may be limited toward the end of the subscription period.

*********************************************************************************************************

Card stock cuts for this project:

  • Basic White Cardstock 4″ X 5 1/4″(inner liner)
  • Copper clay Cardstock 4 1/4″ X 11″(card base scored & folded at 5 1/2″), 4 1/4″ X 5 1/2″(card front)
  • Night of Navy Cardstock 3 1/2″ X 3 7/8″ (card front panel mat), 4 1/8″ X 5 3/8″(inner liner mat)
  • Nests of Winter Designer Series Paper 3 3/8″ X 3 3/4″(card front panel), 1 1/8″ X 5 1/4″(inner liner), 2 1/4″ X 6″(envelope flap)

*********************************************************************************************************

Product List