Stampin’ Up! Impressions Abloom Daisies

Good Saturday morning stamping friends and welcome to the weekend. I hope you have some fun plans in the works. It’s going to be a warm one here in NJ. I heard it’s supposed to be in the 80’s today and back to the 50’s tomorrow. I’ll be at work all day today and after work I’m going to a school fund raiser tomorrow night. I don’t have any kids in school any longer, but I still support our schools.

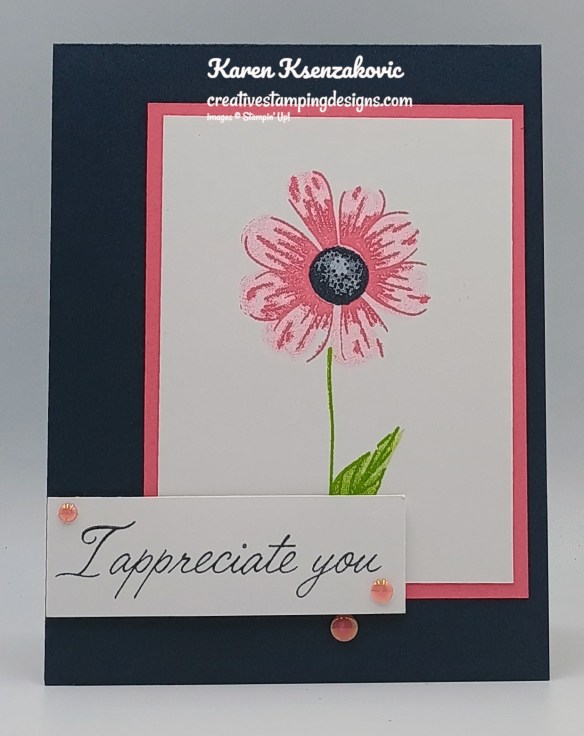
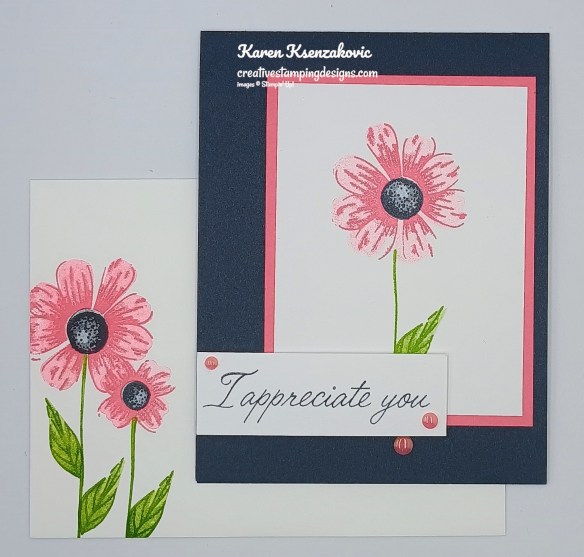
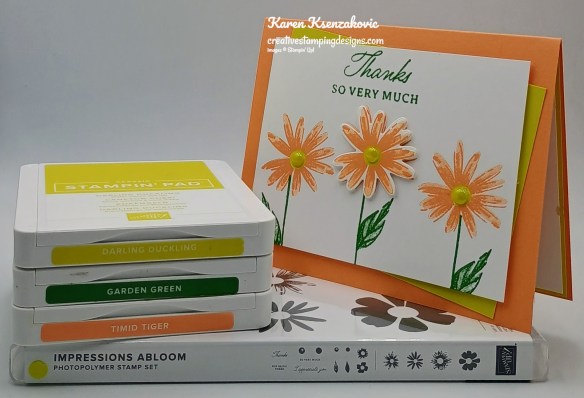
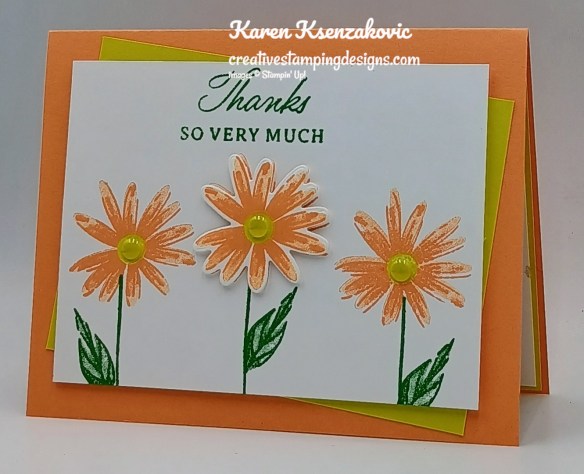
Today’s card is one that I made at OnStage After Hours. I didn’t follow the directions they gave us; I did what I wanted to do. I challenged myself to use my least favorite colors and to put the panel on an angle. When I got home, I felt it was too plain, so I made some changes. Here’s my card for today.
Stampin' Up! Impressions Abloom Daisies 1 creativestampingdesigns.com

I used the new Stampin’ Up! Online Exclusive Impressions Abloom Bundle for my card today. This bundle will be available along with the new In-Colors that I used, on May 6.

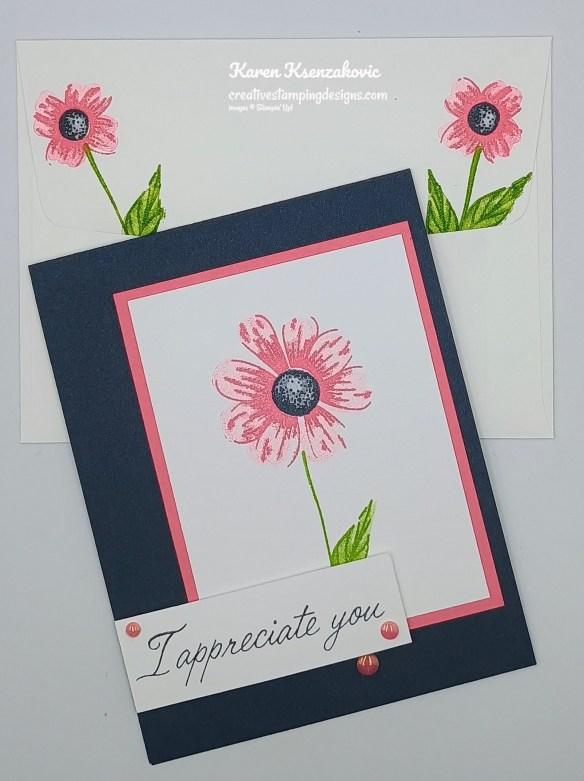
Stampin' Up! Impressions Abloom Daisies 2 creativestampingdesigns.com

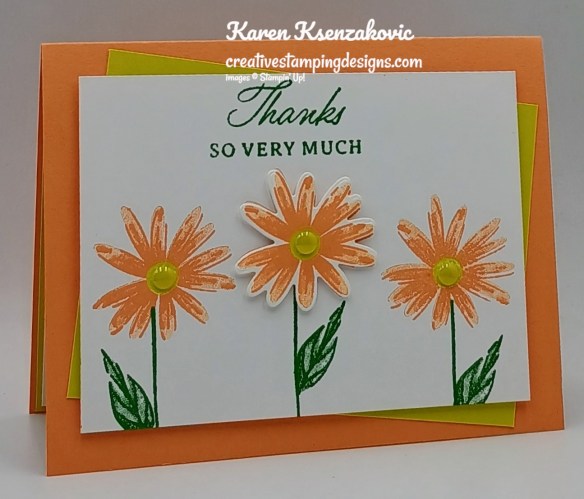
Start by stamping the stem and detailed leaf images from the Stampin’ Up! Impressions Abloom Stamp Set on a panel of Basic White in Garden Green Ink. Stamp the solid leaf image from the Impressions Abloom stamp set in garden Green Ink, stamping off once on scrap paper, over the detailed leaf images.
Stampin' Up! Impressions Abloom Daisies 3 creativestampingdesigns.com

Stamp the daisy image from Impressions Abloom stamp set in Timid Tiger Ink on the stems. Stamp the detailed daisy image on a separate panel of Basic White also. I have to admit, I’m really liking this Timid Tiger In-Color, it’s a pretty orange. Stamp the solid daisy image from Impressions Abloom stamp set in Timid tiger Ink, stamping off once on scrap paper, over the detailed images. Stamp the detailed flower center image from Impressions Abloom stamp set in Darling Duckling Ink in the center of the flowers. Stamp the solid flower center image in Darling Duckling Ink, stamping off once on scrap paper, over the detailed images. Cut the one daisy that is stamped on a separate panel of Basic White out using the Impressions Abloom Dies.
Stampin' Up! Impressions Abloom Daisies 4 creativestampingdesigns.com

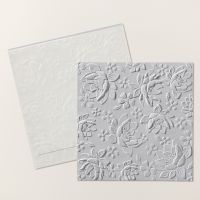
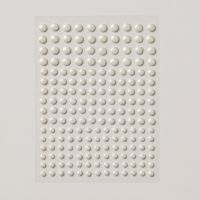
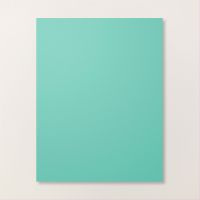
Stamp the sentiments from Impressions Abloom stamp set in Garden Green Ink on the top of the panel. Adhere a panel of Darling Duckling to the front of a Timid Tiger card base using Stampin’ Seal on an angle. Adhere the artwork panel over the Darling Duckling panel using Stampin’ Dimensionals. Adhere the die cut daisy to the center daisy using Stampin’ Dimensionals. Add 2025 – 2027 In-Color Flat Pearls to the flower centers.

Stampin' Up! Impressions Abloom Daisies 5 creativestampingdesigns.com

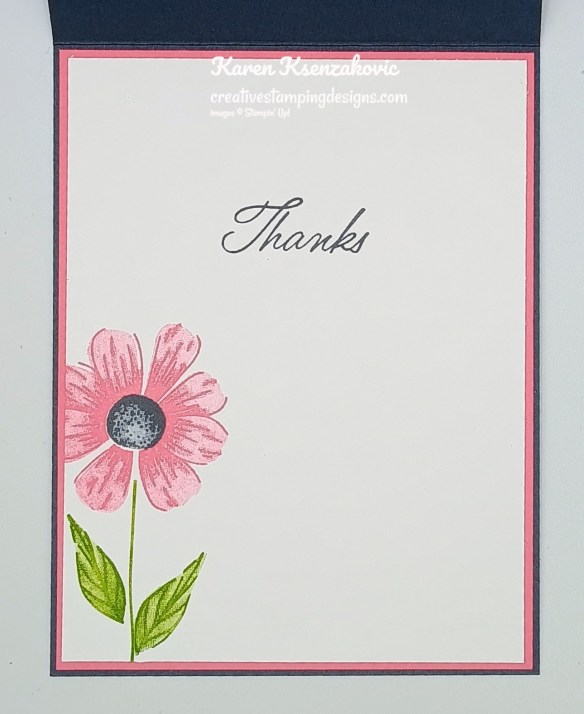
On a panel of Basic White, stamp the sentiment from Impressions Abloom stamp set in Garden Green Ink. Stamp the stem and leaf images from the Impressions Abloom stamp set in Garden Green Ink on the bottom of the panel. Stamp the detailed daisy image in Timid Tiger Ink on the stem. Stamp the solid daisy image in Timid Tiger Ink, stamping off once on scrap paper, over the detailed image. Stamp the flower center image in Darling Duckling Ink in the center of the flower. Adhere the Basic White panel to a Darling Duckling mat then to the inside of the Timid Tiger card base.

Stampin' Up! Impressions Abloom Daisies 6 creativestampingdesigns.com

Decorate a Basic White Medium Envelope to finish the card. Stamp the stem and leaf images from Impressions Abloom stamp set in Garden Green Ink on the envelope front and flap. Stamp the detailed daisy image from Impressions Abloom stamp set in Timid Tiger Ink on the stems. Stamp the solid daisy image in Timid Tiger Ink, stamping off once on scrap paper, over the detailed images. Stamp the flower centers in Darling Duckling Ink.

Stampin' Up! Impressions Abloom Daisies 7 creativestampingdesigns.com

Thank you for stopping by my blog today. I hope you like my card, and this set is on your shopping list to purchase in May. Happy Stamping!!

*********************************************************************************************************
If you need any stamping supplies, I’d love to be your Demonstrator. Just click HERE to go directly to my online store or drop me an email if you have any questions. 

MY CURRENT HOST CODE IS:   Q74RCCMW

Use this host code when placing an order with me. When you order $50 or greater you will receive a free gift from me! If your order is over $150, please do not use this code, but you’ll still get the free gift. The free gift is your choice of any 1 item valued up to $10.00 from the 2024 – 2025 Annual Catalog, January – April 2025 Mini Catalog or from the Online Exclusives!  For any orders $50 or more I will also send you my monthly class tutorials.  Click HERE or go to my Customer Rewards for more details and to see what this month’s tutorials are.

Please remember to use my current Host Code and make sure that you can see my name on the final checkout page listed as your Demonstrator when you order so that you know that you’re ordering with me, and you’ll get my rewards! 

Happy Stamping, Karen

*********************************************************************************************************

Start Thinking About Stocking Up on the 2023-2025 In-Colors Before They’re Gone

As we all know, the beautiful 2023 – 2025 In Colors will be retiring at the end of this catalog on April 30.  Now is a great time to start stocking up on ink refills, markers and card stock in your favorite colors so that you’re not left scrambling for them when the retiring list is announced.

The retiring list is usually posted in later March or early April and the In Color items on that list become available only while supplies last.  So, order yours now so that you’re guaranteed to get them!! Head over to my ONLINE STORE and shop the In-Colors

*********************************************************************************************************

The 2025 – 2026 Annual Catalog is coming soon. I ordered my catalogs and once I receive them, I will be shipping them out to all my customers. To be a customer of mine, you need to have placed an order with me within the last year and you will automatically receive the catalog. If you would like a copy of the catalog from me, just go to my Online Store and place an order and you will be on my list to receive the new catalog.

*********************************************************************************************************

Inked Occasions

Subscribe March 11 – April 10
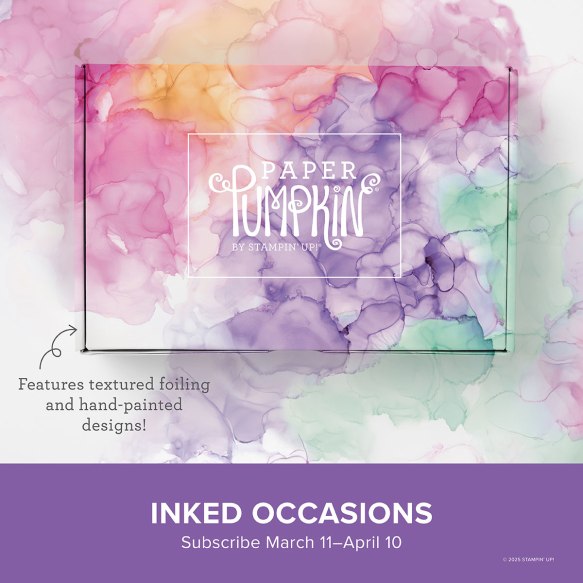
Craft stunning cards with hand-painted, alcohol ink designs!
• Makes 9 cards: 3 each of 3 designs with 9 coordinating envelopes
• Textured gold foil on the card bases and sentiments
• Precut paper pieces and butterfly embellishments
• Coordinating colors: Berry Burst (Classic Stampin’ Spot), Flirty Flamingo,
Fresh Freesia, Gorgeous Grape, Peach Pie, Pool Party

Cards come in a beautiful coordinating box!

Subscribe to the April Paper Pumpkin Kit between 11 March and 10 April by clicking here!

*********************************************************************************************************

Don’t miss the coordinating
Hugs Abloom Dies Add-On!
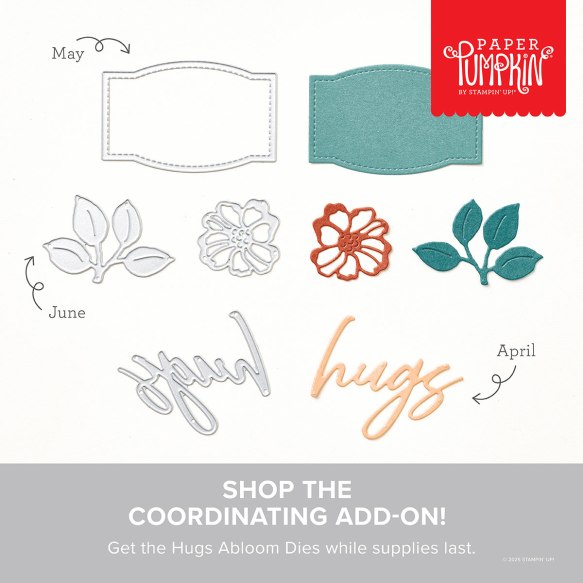
Make the most of your Paper Pumpkin kits with the Hugs Abloom Dies add-on! Quickly and cleanly cut out a flower, leaf sprig, sentiment label, or Hugs sentiment to elevate your crafting projects. These additional dies are designed to work with THREE Paper Pumpkin Kits: the Inked Occasions Paper Pumpkin Kit, the Mountain Majesties Paper Pumpkin Kit, and the Full of Charm Paper Pumpkin Kit. Pair these dies with other Stampin’ Up! products for even more creative options!

DETAILS
– 4 dies
– Largest die: 2-1/2″ x 1-1/4″ (6.4 x 3.2 cm)
– Use with a Stampin’ Cut & Emboss Machine (sold separately)

You must be a current Paper Pumpkin subscriber to purchase this item. To become a subscriber, visit www.stampinup.com/paperpumpkin.

Note: Supplies may be limited toward the end of the subscription period.

#166238 $12

*********************************************************************************************************

Card stock cuts for this project:

  • Basic White Cardstock 3 1/2″ x 4 3/4″ (card front panel), 2″ x 2″ (flower), 4″ x 5 1/4″(inner liner)
  • Darling Duckling Cardstock 3 1/2″ s 4 3/4″ (card front panel), 4 1/8″ x 5 3/8″(inner liner mat)
  • Timid Tiger Cardstock 5 1/2″ x 8 1/2″ (card base scored & folded at 4 1/4″)

*********************************************************************************************************

Product List

Stampin’ Up! Impressions Abloom in Strawberry Slush

Good Wednesday morning stamping friends. Well, it’s the last Wednesday of March. Another month gone, but that means it’s going to be getting warmer, and the days are longer, YAY!! My tulips are starting to pop up, my crocus are blooming and so are my mini-iris. Last year we had my front yard dug up to plant a new tree. They dug everything up to get most of the roots from the old tree out. I had a large garden in front of my house and since they were digging everything up, I told them to plant grass all around the new tree. I completely forgot about all the flower bulbs I had planted in the garden. Well, they are all blooming in the middle of all my new grass and it looks so pretty.

Today’s card is one that I made at OnStage After Hours. It’s a very CAS card since we had very minimum to work with, meaning stamps, ink, paper and a few embellishments. Here’s the finished card with a sneak peek of a couple of the new 2025-2027 In-Colors for today.

Stampin' Up! Impressions Abloom in Strawberry Slush 1 creativestampingdesigns.com

I used the Stampin’ Up! Impressions Abloom Photopolymer Stamp Set (available May 6th) for my card today.

Stampin' Up! Impressions Abloom in Strawberry Slush 2 creativestampingdesigns.com

On a panel of Basic White, stamp the stem and leaf images from the Impressions Abloom stamp set in Granny Apple Green Ink. Stamp the large, detailed flower image from the Impressions Abloom stamp set in Strawberry Slush (returning In-Color) above the stem. Stamp the large, solid flower image from Impressions Abloom stamp set in Strawberry Slush Ink, stamping off once on scrap paper, over the detailed image. Stamp the large, detailed flower center image from the Impressions Abloom stamp set in Secret Sea Ink in the center of the flower. Stamp the solid flower center image in Secret Sea Ink, stamping off once on scrap paper, over the detailed image.

Stampin' Up! Impressions Abloom in Strawberry Slush 3 creativestampingdesigns.com

Adhere the Basic White panel to a Strawberry Slush mat using Stampin’ Seal. Adhere the layered panel to the Secret Sea card base using Stampin’ Seal.

Stampin' Up! Impressions Abloom in Strawberry Slush 4 creativestampingdesigns.com

On a panel of Basic White, stamp the sentiment from Impressions Abloom stamp set in Secret Sea Ink. Adhere the sentiment to the card front using Stampin’ Dimensionals. Add a few 2025 – 2027 In-Color Flat Pearls to the card front.

Stampin' Up! Impressions Abloom in Strawberry Slush 5 creativestampingdesigns.com

On a panel of Basic White, stamp the sentiment from Impressions Abloom stamp set in Secret Sea Ink. Stamp the stem and leaf images from Impressions Abloom stamp set in Granny Apple Green Ink on the bottom of the panel. Stamp the large, detailed flower image from Impressions Abloom stamp set in Strawberry Slush Ink on the stem. Stamp the large, solid flower image in Strawberry Slush Ink, stamping off once on scrap paper, over the detailed image. Stamp the flower center image in Secret Sea Ink on the flower. Adhere the Basic White panel to a Strawberry Slush mat then to the inside of the Secret Sea card base.

Stampin' Up! Impressions Abloom in Strawberry Slush 6 creativestampingdesigns.com

Decorate a Basic White Medium Envelope to finish your card. Stamp the stem and leaf images from Impressions Abloom stamp set in Granny Apple Green Ink on the envelope front and flap. Stamp the large and small, detailed flower images in Strawberry Slush Ink on the stems. Stamp the large and small, solid flower images in Strawberry Slush Ink, stamping off once on scrap paper, over the detailed images. Stamp the flower centers in Secret Sea Ink.

Stampin' Up! Impressions Abloom in Strawberry Slush 7 creativestampingdesigns.com

Thank you for stopping by my blog today. I hope you like my CAS card, and this set might just be on your shopping list to purchase in May. Happy Stamping!!

*********************************************************************************************************

If you need any stamping supplies, I’d love to be your Demonstrator. Just click HERE to go directly to my online store or drop me an email if you have any questions. 

MY CURRENT HOST CODE IS:   Q74RCCMW

Use this host code when placing an order with me. When you order $50 or greater you will receive a free gift from me! If your order is over $150, please do not use this code, but you’ll still get the free gift. The free gift is your choice of any 1 item valued up to $10.00 from the 2024 – 2025 Annual Catalog, January – April 2025 Mini Catalog or from the Online Exclusives!  For any orders $50 or more I will also send you my monthly class tutorials.  Click HERE or go to my Customer Rewards for more details and to see what this month’s tutorials are.

Please remember to use my current Host Code and make sure that you can see my name on the final checkout page listed as your Demonstrator when you order so that you know that you’re ordering with me, and you’ll get my rewards! 

Happy Stamping, Karen

*********************************************************************************************************

Start Thinking About Stocking Up on the 2023-2025 In-Colors Before They’re Gone

As we all know, the beautiful 2023 – 2025 In Colors will be retiring at the end of this catalog on April 30.  Now is a great time to start stocking up on ink refills, markers and card stock in your favorite colors so that you’re not left scrambling for them when the retiring list is announced.

The retiring list is usually posted in later March or early April and the In Color items on that list become available only while supplies last.  So, order yours now so that you’re guaranteed to get them!! Head over to my ONLINE STORE and shop the In-Colors

*********************************************************************************************************

The 2025 – 2026 Annual Catalog is coming soon. I ordered my catalogs yesterday and once I receive them, I will be shipping them out to all my customers. To be a customer of mine, you need to have placed an order with me within the last year and you will automatically receive the catalog. If you would like a copy of the catalog from me, just go to my Online Store and place an order and you will be on my list to receive the new catalog.

*********************************************************************************************************

Inked Occasions

Subscribe March 11 – April 10

Craft stunning cards with hand-painted, alcohol ink designs!
• Makes 9 cards: 3 each of 3 designs with 9 coordinating envelopes
• Textured gold foil on the card bases and sentiments
• Precut paper pieces and butterfly embellishments
• Coordinating colors: Berry Burst (Classic Stampin’ Spot), Flirty Flamingo,
Fresh Freesia, Gorgeous Grape, Peach Pie, Pool Party

Cards come in a beautiful coordinating box!

Subscribe to the April Paper Pumpkin Kit between 11 March and 10 April by clicking here!

*********************************************************************************************************

Don’t miss the coordinating
Hugs Abloom Dies Add-On!

Make the most of your Paper Pumpkin kits with the Hugs Abloom Dies add-on! Quickly and cleanly cut out a flower, leaf sprig, sentiment label, or Hugs sentiment to elevate your crafting projects. These additional dies are designed to work with THREE Paper Pumpkin Kits: the Inked Occasions Paper Pumpkin Kit, the Mountain Majesties Paper Pumpkin Kit, and the Full of Charm Paper Pumpkin Kit. Pair these dies with other Stampin’ Up! products for even more creative options!

DETAILS
– 4 dies
– Largest die: 2-1/2″ x 1-1/4″ (6.4 x 3.2 cm)
– Use with a Stampin’ Cut & Emboss Machine (sold separately)

You must be a current Paper Pumpkin subscriber to purchase this item. To become a subscriber, visit www.stampinup.com/paperpumpkin.

Note: Supplies may be limited toward the end of the subscription period.

#166238 $12

*********************************************************************************************************

Card stock cuts for this project:

  • Basic White Cardstock 3″ x 4″ (artwork), 1″ x 3″(sentiment), 4″ x 5 1/4″(inner liner)
  • Secret Sea Cardstock 4 1/4″ x 11″(card base scored & folded at 5 1/2″)
  • Strawberry Slush Cardstock 3 1/4″x 4 1/4″(artwork mat), 4 1/8″ x 5 3/8″(inner liner mat)

*********************************************************************************************************

Product List
Stampin’ Up! Textured Notes CAS

Good Sunday morning stamping friends. I hope your weekend is going well. Last night we were invited to a surprise 50th wedding anniversary party. I haven’t seen the couple in quite a few years since they moved to DE. Their daughter messaged me asking for my address. If I remember right Joyce, the one the party was for, trained me many, many years ago when I first started working at the hardware store. Kelly, her daughter that contacted me, was one of my flower girls in my wedding almost 37 years ago. It was a lot of fun seeing everyone again and catching up.

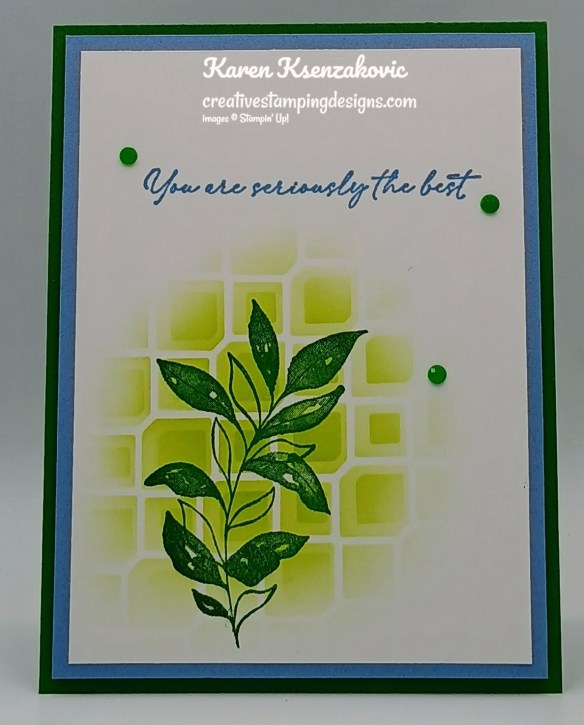
I played with a new Online Exclusive set today. I made is very clean and simple with Stamps, Ink and Paper. I did have to add a couple embellishments though. If you’d like to see a quick video of how I made this card, Click Here to go to my Instagram Reels. Here’s my card for today.

Stampin' Up! Textured Notes CAS 1 creativestampingdesigns.com

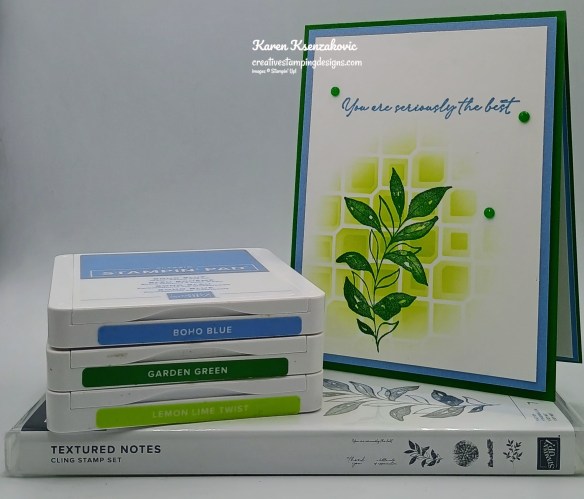
I used the Stampin’ Up! Online Exclusive Textured Notes Cling Stamp Set along with the Linked Together Decorative Masks for my card today.

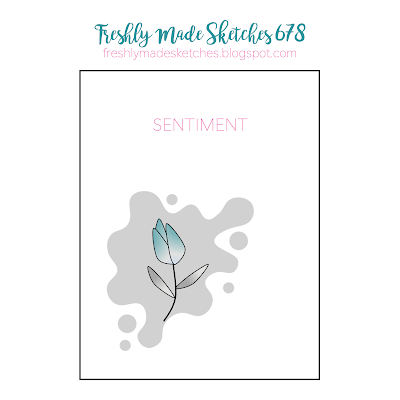
My design is from Freshly Made Sketched #678.

My colors are from the Color Throwdown Challenge #829

Stampin' Up! Textured Notes CAS 2 creativestampingdesigns.com

Using Mask #1 from the Linked Together Masks, add Lemon Lime Twist Ink using the Small Blending Brush in just a small area on the Basic White card front. Using Mask #3 from the Linked Together Masks, add more Lemon Lime Twist Ink with the Small Blending Brush in the same small area giving it some definition.

Stampin' Up! Textured Notes CAS 3 creativestampingdesigns.com

Stamp the large leaf image from the Textured Notes stamp set in Garden Green Ink over the masked area.

Stampin' Up! Textured Notes CAS 4 creativestampingdesigns.com

Stamp the sentiment from the Textured Notes stamp set in Boho Blue Ink on the top of the panel. Adhere the Basic White panel to a Boho Blue mat using Stampin’ Seal. Adhere the layered panel to the Garden Green card base using Stampin’ Dimensionals. Add a few Natural Tones Shimmer Gems to the card front.

Stampin' Up! Textured Notes CAS 5 creativestampingdesigns.com

On a panel of Basic White, stamp the sentiment from the Textured Notes stamp set in Boho Blue Ink. On the bottom of the panel, using Masks # 1 & 3 from the Linked Together Masks, add Lemon Lime Twist Ink to a small area using the Small Blending Brush. Stamp the large leaf image from the Textured Notes stamp set in Garden Green Ink. Adhere the Basic White panel to a Boho Blue mat then to the inside of the Garden Green card base.

Stampin' Up! Textured Notes CAS 6 creativestampingdesigns.com

Decorate a Basic White Medium Envelope to finish the card. Stamp the large leaf image from the Textured Notes stamp set in Garden Green Ink on the envelope front and flap. Stamp the smaller leaf image from the Textured Notes stamp set in Lemon Lime Twist Ink on the envelope front and flap.

Stampin' Up! Textured Notes CAS 7 creativestampingdesigns.com

Thank you for stopping by my blog today. I hope you like my card and will give it a try. Happy Stamping!!

*********************************************************************************************************

If you need any stamping supplies, I’d love to be your Demonstrator. Just click HERE to go directly to my online store or drop me an email if you have any questions. 

MY CURRENT HOST CODE IS:   RSQGVJPH

Use this host code when placing an order with me. When you order $50 or greater you will receive a free gift from me! If your order is over $150, please do not use this code, but you’ll still get the free gift. The free gift is your choice of any 1 item valued up to $10.00 from the 2024 – 2025 Annual Catalog, January – April 2025 Mini Catalog or from the Online Exclusives!  For any orders $50 or more I will also send you my monthly class tutorials.  Click HERE or go to my Customer Rewards for more details and to see what this month’s tutorials are.

Please remember to use my current Host Code and make sure that you can see my name on the final checkout page listed as your Demonstrator when you order so that you know that you’re ordering with me, and you’ll get my rewards! 

Happy Stamping, Karen

*********************************************************************************************************

Our Online Zoom Class Registration Ends Tuesday

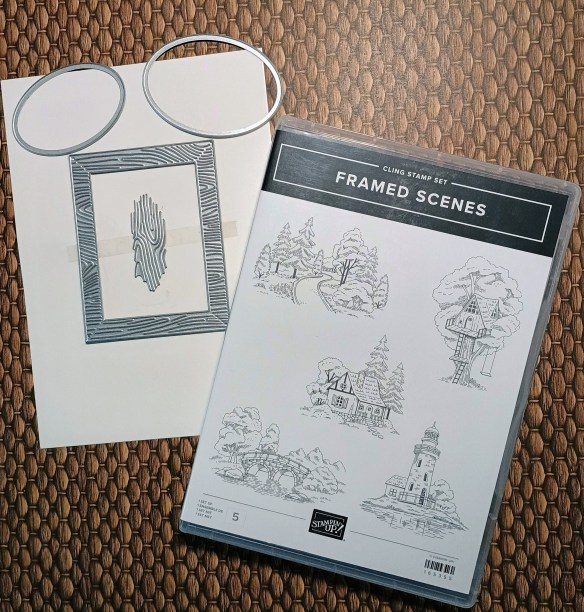
Tara and I are teaming up to do a Masculine Online Zoom Class on Sunday April 27th featuring the Stampin’ Up! Framed Scenes Bundle. I always seem to struggle with masculine cards, and I know a lot of others do too. We will be making 6 different cards featuring the bundle which is pictured below.

The class will be held on Zoom on Sunday April 27th from 1pm – 5pm ET.

The class fee includes:

  • 6 complete Pre-Cut card kits with envelopes so they are ready to mail when you’re done.
  • Full pack of Natural Matte Dots
  • Full pack of Linen Thread
  • Zoom class with complete step by step instructions to complete each card as we go.
  • PDF with detailed directions and photos
  • A Link to the recorded class after we are done so you can watch it again and make more cards.

When you sign up for the class, you will see that you can add additional items needed to make the cards in the class if you do not already have them. These items are optional to add on, but we will be using the items to create the cards. We are offering the Stampin’ Up! Online Exclusive Framed Scenes Bundle at an additional 10% discount when you order it through me during sign up.

The class will be held on Zoom and anyone in the United States is welcome to purchase the class and join us! If you are unable to join us for the live event, but would still like to participate in the class, we will be recording the session so you can watch the replay any time and make the cards. We will also be emailing written tutorials with instructions and cardstock cuts so that you will have a reference too.

Class Cost: $35.00 + $9.00 priority shipping (additional products will be added to the cost for the products) and invoices will be sent out by March 27th.

Class Sign up Deadline: Tuesday March 25th at 5pm ET

Click Here to register for the class now!! Let me know if you have any questions.

*********************************************************************************************************

Start Thinking About Stocking Up on the 2023-2025 In-Colors Before They’re Gone

As we all know, the beautiful 2023-2025 In Colors will likely be retiring at the end of this catalog on April 30.  Right now is a great time to start stocking up on ink refills, markers and card stock in your favorite colors so that you’re not left scrambling for them when the retiring list is announced.

The retiring list is usually posted in later March or early April and the In Color items on that list become available only while supplies last.  So, order yours now so that you’re guaranteed to get them!! Head over to my ONLINE STORE and shop the In-Colors

*********************************************************************************************************

Inked Occasions

Subscribe March 11 – April 10

Craft stunning cards with hand-painted, alcohol ink designs!
• Makes 9 cards: 3 each of 3 designs with 9 coordinating envelopes
• Textured gold foil on the card bases and sentiments
• Precut paper pieces and butterfly embellishments
• Coordinating colors: Berry Burst (Classic Stampin’ Spot), Flirty Flamingo,
Fresh Freesia, Gorgeous Grape, Peach Pie, Pool Party

Cards come in a beautiful coordinating box!

Subscribe to the April Paper Pumpkin Kit between 11 March and 10 April by clicking here!

*********************************************************************************************************

Don’t miss the coordinating
Hugs Abloom Dies Add-On!

Make the most of your Paper Pumpkin kits with the Hugs Abloom Dies add-on! Quickly and cleanly cut out a flower, leaf sprig, sentiment label, or Hugs sentiment to elevate your crafting projects. These additional dies are designed to work with THREE Paper Pumpkin Kits: the Inked Occasions Paper Pumpkin Kit, the Mountain Majesties Paper Pumpkin Kit, and the Full of Charm Paper Pumpkin Kit. Pair these dies with other Stampin’ Up! products for even more creative options!

DETAILS
– 4 dies
– Largest die: 2-1/2″ x 1-1/4″ (6.4 x 3.2 cm)
– Use with a Stampin’ Cut & Emboss Machine (sold separately)

You must be a current Paper Pumpkin subscriber to purchase this item. To become a subscriber, visit www.stampinup.com/paperpumpkin.

Note: Supplies may be limited toward the end of the subscription period.

#166238 $12

*********************************************************************************************************

Card stock cuts for this project:

  • Basic White Cardstock 3 3/4″ x 5″(card front), 4″ X 5 1/4″(inner liner)
  • Boho Blue Cardstock 4″ X 5 1/4″(card front mat), 4 1/8″ X 5 3/8″(inner liner mat)
  • Garden Green Cardstock 4 1/4″ X 11″(card base scored & folded at 5 1/2″)

*********************************************************************************************************

Product List
Stampin’ Up! Mixed Labels Florals

Good Saturday morning stamping friends and welcome to the weekend. I hope you have some fun plans in the works for the weekend. I’ll be at work today and tomorrow Tara and I will be hosting our 2nd Online Zoom class. I’m looking forward to getting together with everyone and stamping.

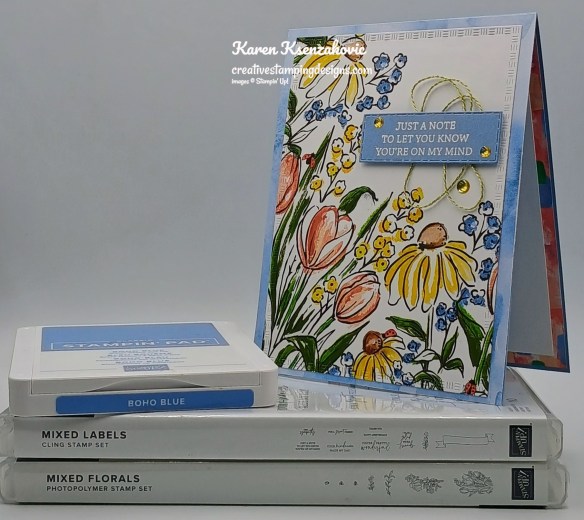
I have a super simple, quick card for you today where I let the DSP do most of the work for me. I’m using a 2023-2025 In-Color that will be going away the end of April. so if this is one that you really like, grab it before it’s gone. If you’d like to see a quick video of how I made this card, Click Here to go to my Instagram Reels. Here’s my card for today.

Stampin' Up! Mixed Labels CAS 1 creativestampingdesigns.com

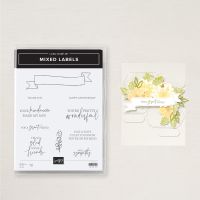
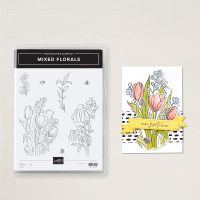
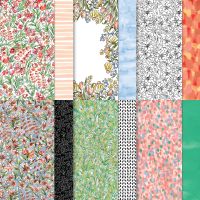
I used the Stampin’ Up! Online Exclusives Mixed Labels Cling Stamp Set, Mixed Media Florals Designer Series Paper, Textured Notes Dies and Mixed Florals Photopolymer Stamp Set for my card today.

Stampin' Up! Mixed Labels CAS 2 creativestampingdesigns.com

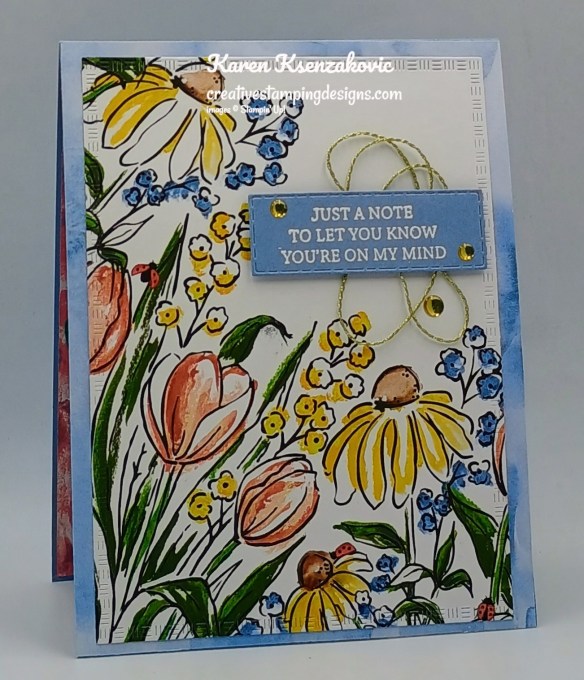
Adhere a panel of Mixed Media Florals DSP to a Boho Blue card base using Liquid Glue.

Stampin' Up! Mixed Labels CAS 3 creativestampingdesigns.com

Cut another panel of Mixed Media Florals DSP using the largest Textured Notes Dies. Adhere the die cut panel to the card front using Stampin’ Seal.

Stampin' Up! Mixed Labels CAS 4 creativestampingdesigns.com

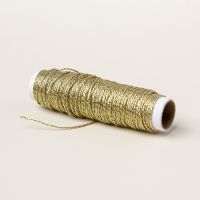
Stamp the sentiment from Mixed Labels stamp set in Versamark Ink. Sprinkle it with White Embossing Powder and set it using the Heat Tool. Cut the sentiment using the Textured Notes Dies. Adhere a piece of the Gold Twisted Thread to the card front using Stampin’ Seal. Adhere the sentiment over the thread using Stampin’ Dimensionals. Add a few of the Low-Profile Dots to the card front.

Stampin' Up! Mixed Labels CAS 5 creativestampingdesigns.com

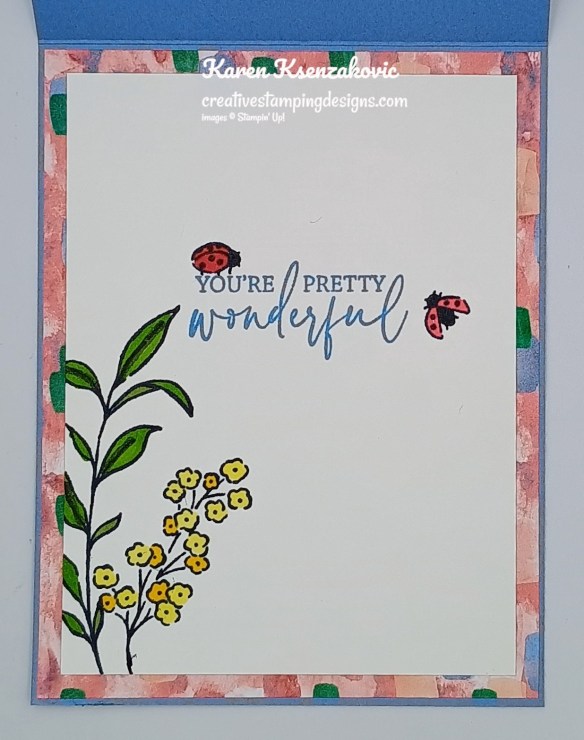
On a panel of Basic White, stamp the sentiment from Mixed Labels stamp set in Boho Blue Ink. Stamp the leaf and floral image from the Mixed Florals stamp set in Tuxedo Black Ink on the bottom of the panel. Stamp the ladybug images from the Mixed Florals stamp set in Tuxedo Black Ink by the sentiment. Color the images using Daffodil Delight, Granny Apple Green, Mossy Meadow and Poppy Parade Stampin’ Blends Markers. Adhere the Basic White panel to a Mixed Media Florals DSP mat and then to the inside of the Boho Blue card base.

Stampin' Up! Mixed Labels CAS 6 creativestampingdesigns.com

Decorate a Basic White Medium Envelope to finish your card. Stamp the leaf, floral and ladybug images from the Mixed Florals stamp set on the envelope front in Tuxedo Black Ink. Color the images using Daffodil Delight, Granny Apple Green, Mossy Meadow and Poppy Parade Stampin’ Blends Markers. Adhere a panel of Mixed Media Florals DSP to the envelope flap.

Stampin' Up! Mixed Labels CAS 7 creativestampingdesigns.com

Thank you for stopping by my blog today. I hope you like my card and will give it a try. Happy Stamping!!

*********************************************************************************************************

If you need any stamping supplies, I’d love to be your Demonstrator. Just click HERE to go directly to my online store or drop me an email if you have any questions. 

MY CURRENT HOST CODE IS:   RSQGVJPH

Use this host code when placing an order with me. When you order $50 or greater you will receive a free gift from me! If your order is over $150, please do not use this code, but you’ll still get the free gift. The free gift is your choice of any 1 item valued up to $10.00 from the 2024 – 2025 Annual Catalog, January – April 2025 Mini Catalog or from the Online Exclusives!  For any orders $50 or more I will also send you my monthly class tutorials.  Click HERE or go to my Customer Rewards for more details and to see what this month’s tutorials are.

Please remember to use my current Host Code and make sure that you can see my name on the final checkout page listed as your Demonstrator when you order so that you know that you’re ordering with me, and you’ll get my rewards! 

Happy Stamping, Karen

*********************************************************************************************************

Tuesday is the last day to Register for Our Online Zoom Class

Tara and I are teaming up to do a Masculine Online Zoom Class on Sunday April 27th featuring the Stampin’ Up! Framed Scenes Bundle. I always seem to struggle with masculine cards, and I know a lot of others do too. We will be making 6 different cards featuring the bundle which is pictured below.

The class will be held on Zoom on Sunday April 27th from 1pm – 5pm ET.

The class fee includes:

  • 6 complete Pre-Cut card kits with envelopes so they are ready to mail when you’re done.
  • Full pack of Natural Matte Dots
  • Full pack of Linen Thread
  • Zoom class with complete step by step instructions to complete each card as we go.
  • PDF with detailed directions and photos
  • A Link to the recorded class after we are done so you can watch it again and make more cards.

When you sign up for the class, you will see that you can add additional items needed to make the cards in the class if you do not already have them. These items are optional to add on, but we will be using the items to create the cards. We are offering the Stampin’ Up! Online Exclusive Framed Scenes Bundle at an additional 10% discount when you order it through me during sign up.

The class will be held on Zoom and anyone in the United States is welcome to purchase the class and join us! If you are unable to join us for the live event, but would still like to participate in the class, we will be recording the session so you can watch the replay any time and make the cards. We will also be emailing written tutorials with instructions and cardstock cuts so that you will have a reference too.

Class Cost: $35.00 + $9.00 priority shipping (additional products will be added to the cost for the products) and invoices will be sent out by March 27th.

Class Sign up Deadline: Tuesday March 25th at 5pm ET

Click Here to register for the class now!! Let me know if you have any questions.

*********************************************************************************************************

Start Thinking About Stocking Up on the 2023-2025 In-Colors Before They’re Gone

As we all know, the beautiful 2023-2025 In Colors will likely be retiring at the end of this catalog on April 30.  Right now is a great time to start stocking up on ink refills, markers and card stock in your favorite colors so that you’re not left scrambling for them when the retiring list is announced.

The retiring list is usually posted in later March or early April and the In Color items on that list become available only while supplies last.  So, order yours now so that you’re guaranteed to get them!! Head over to my ONLINE STORE and shop the In-Colors

*********************************************************************************************************

Inked Occasions

Subscribe March 11 – April 10

Craft stunning cards with hand-painted, alcohol ink designs!
• Makes 9 cards: 3 each of 3 designs with 9 coordinating envelopes
• Textured gold foil on the card bases and sentiments
• Precut paper pieces and butterfly embellishments
• Coordinating colors: Berry Burst (Classic Stampin’ Spot), Flirty Flamingo,
Fresh Freesia, Gorgeous Grape, Peach Pie, Pool Party

Cards come in a beautiful coordinating box!

Subscribe to the April Paper Pumpkin Kit between 11 March and 10 April by clicking here!

*********************************************************************************************************

Don’t miss the coordinating
Hugs Abloom Dies Add-On!

Make the most of your Paper Pumpkin kits with the Hugs Abloom Dies add-on! Quickly and cleanly cut out a flower, leaf sprig, sentiment label, or Hugs sentiment to elevate your crafting projects. These additional dies are designed to work with THREE Paper Pumpkin Kits: the Inked Occasions Paper Pumpkin Kit, the Mountain Majesties Paper Pumpkin Kit, and the Full of Charm Paper Pumpkin Kit. Pair these dies with other Stampin’ Up! products for even more creative options!

DETAILS
– 4 dies
– Largest die: 2-1/2″ x 1-1/4″ (6.4 x 3.2 cm)
– Use with a Stampin’ Cut & Emboss Machine (sold separately)

You must be a current Paper Pumpkin subscriber to purchase this item. To become a subscriber, visit www.stampinup.com/paperpumpkin.

Note: Supplies may be limited toward the end of the subscription period.

#166238 $12

*********************************************************************************************************

Card stock cuts for this project:

  • Basic White Cardstock 3 3/4″ X 5″(inner liner)
  • Boho Blue Cardstock 4 1/4″ X 11″(card base scored & folded at 5 1/2″), 1 1/2″ X 2 3/4″(sentiment)
  • Mixed Media Florals Designer Series Paper 2 – 4 1/4″ X 5 1/2″ (card front and card front panel), 4 1/8″ X 5 3/8″(inner liner mat), 2 1/4″ X 6″(envelope flap)

*********************************************************************************************************

Product List

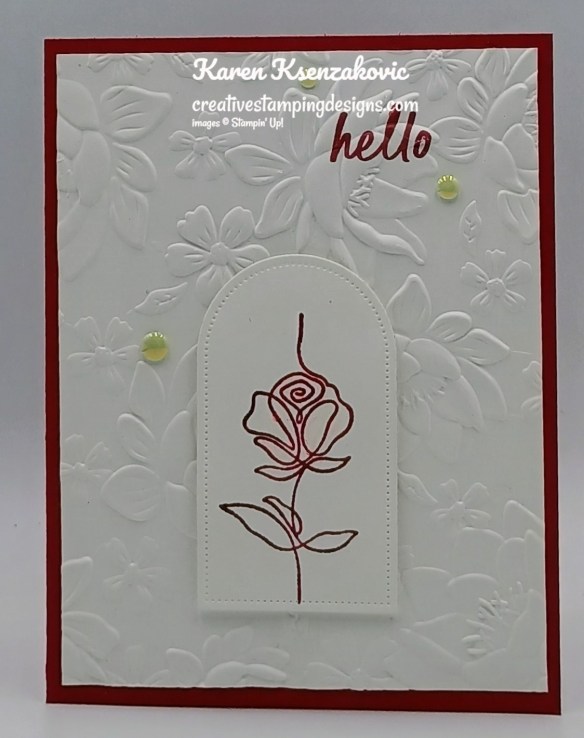
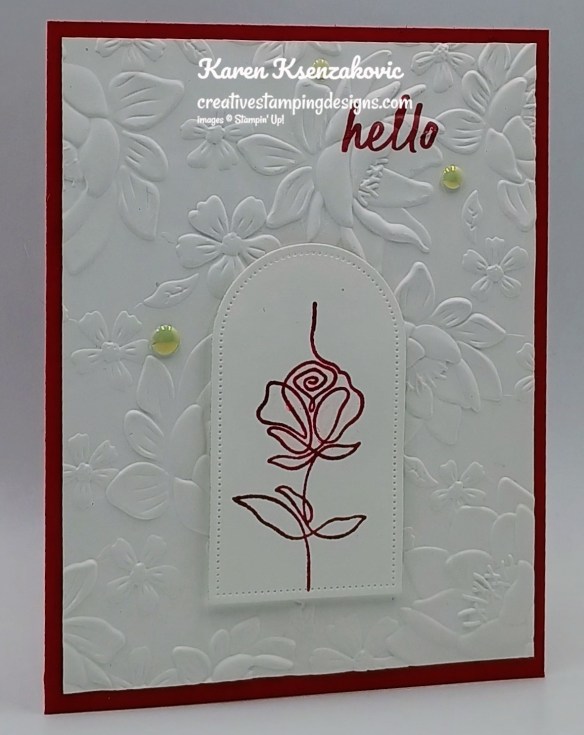
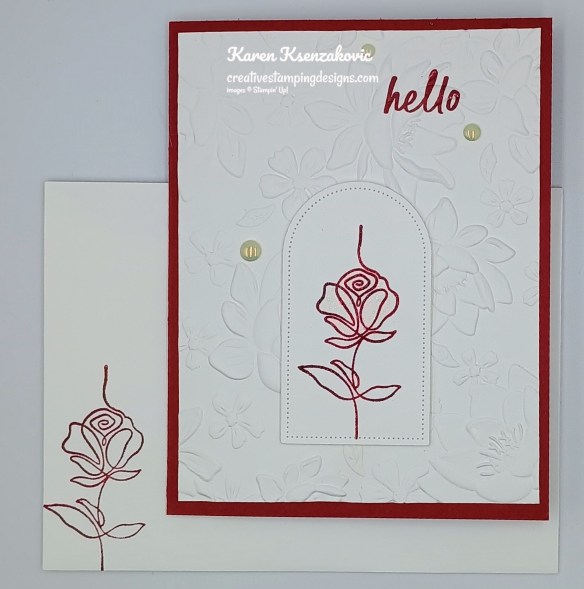
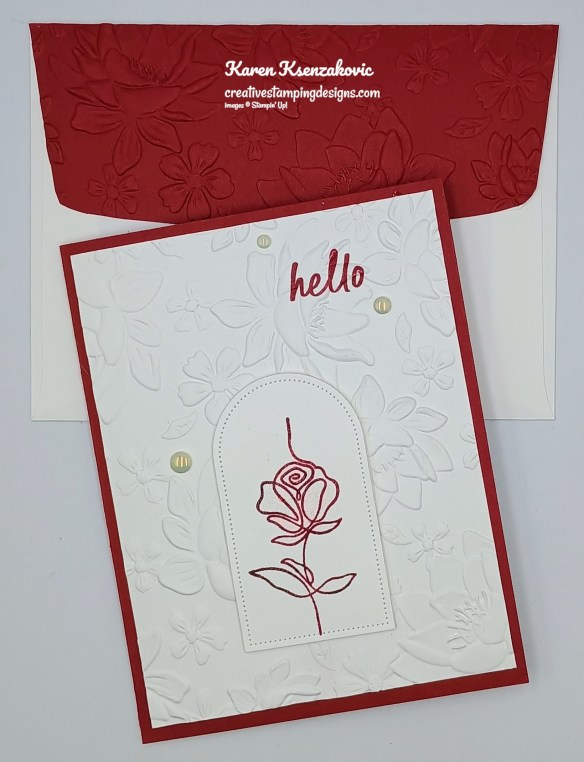
Stampin’ Up! Along these Lines Rose

Good Tuesday morning stamping friends. I hope you are all doing well today. I’m still so exhausted from the weekend.

Today’s card I have a little sneak peek for you of something coming in the new 2025 – 2026 Annual Catalog. I received this set as my Prize Patrol on Saturday. As soon as I saw the rose in the set, I thought about my daughter’s friend who love Beauty and The Beast. My daughter needed a birthday card for her, so that’s what I used. If you’d like to see a quick video of how I made this card, Click Here to go to my Instagram Reels. Here’s my card for today.

Stampin' Up! Along These Lines Rose 1 creativestampingdesigns.com

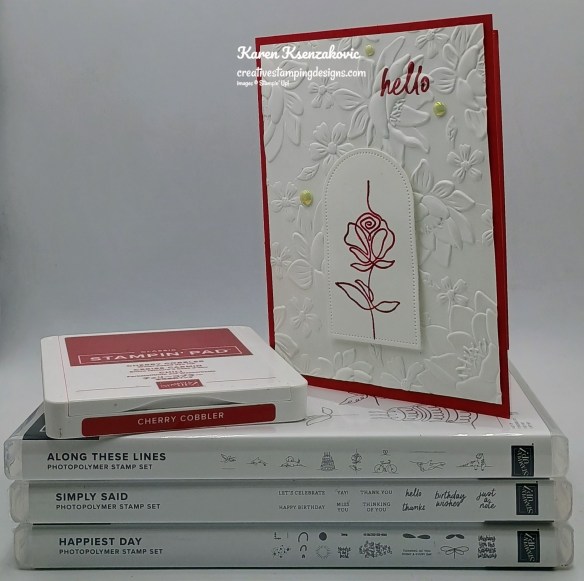
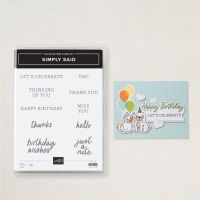
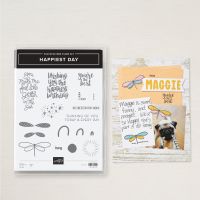
I used the Stampin’ Up! along These Lines Photopolymer Stamp Set along with the Stampin’ Up! Simply Said Photopolymer Stamp Set, Stampin’ Up! Happiest Day Photopolymer Stamp Set. Layered Florals 3D Embossing Folder and Online Exclusive Everyday Arches Dies for my card today.

Stampin' Up! Along These Lines Rose 2 creativestampingdesigns.com

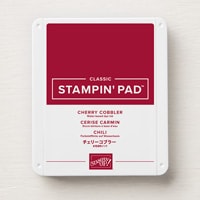
Stamp the sentiment from Simply Said stamp set in Cherry Cobbler Ink on a Basic White card front. Emboss the panel using the Layered Florals EF.

Stampin' Up! Along These Lines Rose 3 creativestampingdesigns.com

Adhere the embossed panel to a Cherry Cobbler card base using Liquid Glue. On a panel of Basic White, stamp the lined rose image from the Along These Lines stamp set in cherry Cobbler Ink. Sprinkle it with Clear Embossing Powder and set it using the Heat Tool.

Stampin' Up! Along These Lines Rose 4 creativestampingdesigns.com

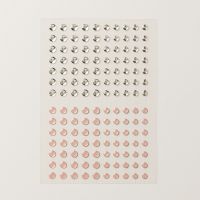
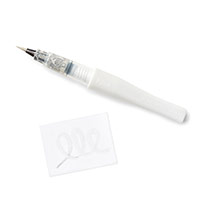
Cut the image out using the 3rd from the smallest Everyday Arches Dies. Using the Clear Wink of Stella Glitter Brush, paint inside the rose image. It will pick up some of the Cherry Cobbler ink to give it some dimension. Adhere the die cut panel to the card front using Stampin’ Dimensionals. Add a few Antique Pearls to the card front.

Stampin' Up! Along These Lines Rose 5 creativestampingdesigns.com

On a panel of Basic White, stamp the sentiment from Happiest Day stamp set in cherry Cobbler Ink. Stamp the rose image from Along These Lines stamp set in Cherry Cobbler Ink on the bottom of the panel. Adhered the Basic White panel to a Cherry Cobbler mat then to the inside of the Cherry Cobbler card base.

Stampin' Up! Along These Lines Rose 6 creativestampingdesigns.com

Finish the card by decorating a Basic White Medium Envelope. Stamp the rose image from Along These Lines on the bottom front of the envelope. Emboss a panel of Cherry Cobbler using the Layered Florals EF. Adhere the embossed panel to the envelope flap.

Stampin' Up! Along These Lines Rose 7 creativestampingdesigns.com

Thank you for stopping by my blog today. I hope you like my card and will give it a try. Happy Stamping!!

*********************************************************************************************************

If you need any stamping supplies, I’d love to be your Demonstrator. Just click HERE to go directly to my online store or drop me an email if you have any questions. 

MY CURRENT HOST CODE IS:   RSQGVJPH

Use this host code when placing an order with me. When you order $50 or greater you will receive a free gift from me! If your order is over $150, please do not use this code, but you’ll still get the free gift. The free gift is your choice of any 1 item valued up to $10.00 from the 2024 – 2025 Annual Catalog, January – April 2025 Mini Catalog or from the Online Exclusives!  For any orders $50 or more I will also send you my monthly class tutorials.  Click HERE or go to my Customer Rewards for more details and to see what this month’s tutorials are.

Please remember to use my current Host Code and make sure that you can see my name on the final checkout page listed as your Demonstrator when you order so that you know that you’re ordering with me, and you’ll get my rewards! 

Happy Stamping, Karen

*********************************************************************************************************

Final Week to Register for Our Online Zoom Class

Tara and I are teaming up to do a Masculine Online Zoom Class on Sunday April 27th featuring the Stampin’ Up! Framed Scenes Bundle. I always seem to struggle with masculine cards, and I know a lot of others do too. We will be making 6 different cards featuring the bundle which is pictured below.

The class will be held on Zoom on Sunday April 27th from 1pm – 5pm ET.

The class fee includes:

  • 6 complete Pre-Cut card kits with envelopes so they are ready to mail when you’re done.
  • Full pack of Natural Matte Dots
  • Full pack of Linen Thread
  • Zoom class with complete step by step instructions to complete each card as we go.
  • PDF with detailed directions and photos
  • A Link to the recorded class after we are done so you can watch it again and make more cards.

When you sign up for the class, you will see that you can add additional items needed to make the cards in the class if you do not already have them. These items are optional to add on, but we will be using the items to create the cards. We are offering the Stampin’ Up! Online Exclusive Framed Scenes Bundle at an additional 10% discount when you order it through me during sign up.

The class will be held on Zoom and anyone in the United States is welcome to purchase the class and join us! If you are unable to join us for the live event, but would still like to participate in the class, we will be recording the session so you can watch the replay any time and make the cards. We will also be emailing written tutorials with instructions and cardstock cuts so that you will have a reference too.

Class Cost: $35.00 + $9.00 priority shipping (additional products will be added to the cost for the products) and invoices will be sent out by March 27th.

Class Sign up Deadline: Tuesday March 25th at 5pm ET

Click Here to register for the class now!! Let me know if you have any questions.

*********************************************************************************************************

Start Thinking About Stocking Up on the 2023-2025 In-Colors Before They’re Gone

As we all know, the beautiful 2023-2025 In Colors will likely be retiring at the end of this catalog on April 30.  Right now is a great time to start stocking up on ink refills, markers and card stock in your favorite colors so that you’re not left scrambling for them when the retiring list is announced.

The retiring list is usually posted in later March or early April and the In Color items on that list become available only while supplies last.  So, order yours now so that you’re guaranteed to get them!! Head over to my ONLINE STORE and shop the In-Colors

*********************************************************************************************************

Inked Occasions

Subscribe March 11 – April 10

Craft stunning cards with hand-painted, alcohol ink designs!
• Makes 9 cards: 3 each of 3 designs with 9 coordinating envelopes
• Textured gold foil on the card bases and sentiments
• Precut paper pieces and butterfly embellishments
• Coordinating colors: Berry Burst (Classic Stampin’ Spot), Flirty Flamingo,
Fresh Freesia, Gorgeous Grape, Peach Pie, Pool Party

Cards come in a beautiful coordinating box!

Subscribe to the April Paper Pumpkin Kit between 11 March and 10 April by clicking here!

*********************************************************************************************************

Don’t miss the coordinating
Hugs Abloom Dies Add-On!

Make the most of your Paper Pumpkin kits with the Hugs Abloom Dies add-on! Quickly and cleanly cut out a flower, leaf sprig, sentiment label, or Hugs sentiment to elevate your crafting projects. These additional dies are designed to work with THREE Paper Pumpkin Kits: the Inked Occasions Paper Pumpkin Kit, the Mountain Majesties Paper Pumpkin Kit, and the Full of Charm Paper Pumpkin Kit. Pair these dies with other Stampin’ Up! products for even more creative options!

DETAILS
– 4 dies
– Largest die: 2-1/2″ x 1-1/4″ (6.4 x 3.2 cm)
– Use with a Stampin’ Cut & Emboss Machine (sold separately)

You must be a current Paper Pumpkin subscriber to purchase this item. To become a subscriber, visit www.stampinup.com/paperpumpkin.

Note: Supplies may be limited toward the end of the subscription period.

#166238 $12

*********************************************************************************************************

Card stock cuts for this project:

  • Basic White Cardstock 2 – 4″ x 5 1/4″(card front & inner liner), 3″ X 4″(artwork)
  • Cherry Cobbler Cardstock 5 1/2″ X 8 1/2″(card base scored & folded at 4 1/4″), 4 1/8″ X 5 3/8″(inner liner mat), 2 1/4″ X 6″(envelope flap)

*********************************************************************************************************

Product List

Stampin’ Up! Thankful Garden CAS Birthday

Good Sunday morning stamping friends. I hope you are all having a wonderful weekend. We have our in person quarterly meeting today, so that means we get to stamp together. I always look forward to these meetings, since they are always so much fun.

Today’s card is the one I’ll be presenting today at our meeting. I wanted to make it a quick and easy card since we will be making 2 others with this one. We will all be using this stamp set or bundle for out cards today. Here’s my card for today.

Stampin' Up! Thankful Garden CAS Birthday 1 creativestampingdesigns.com

I used the Stampin’ Up! Online Exclusive Thankful Garden Photopolymer Stamp Set and Stampin’ Up! Year of Flowers Cling Stamp Set (forgot to add that one in the picture) along with the Stampin’ Up! Unbounded Love Bundle and Spotlight on Nature Dies for my card today.

Stampin' Up! Thankful Garden CAS Birthday 2 creativestampingdesigns.com

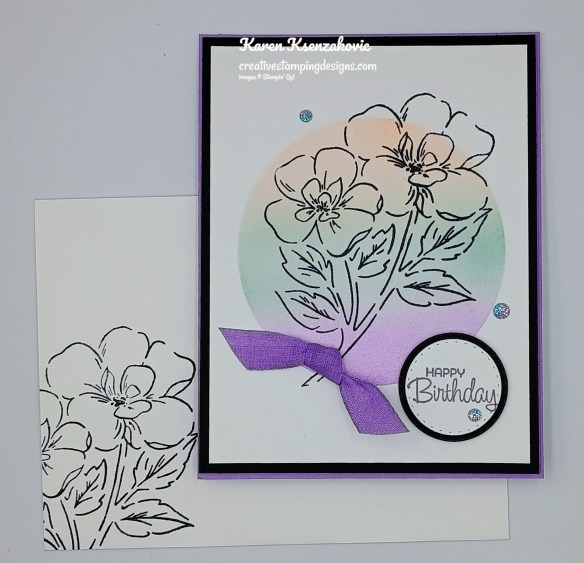
Using the 2nd largest Spotlight on Nature Dies, cut the center of the extra panel of cardstock for a template. Adhere the Basic White panel to Grid Paper using Post It Note Tape. Adhere the template panel over the Basic White panel using Post-It Note Tape to hold it in place. Starting at the top, add Petal Pink Ink using the Blending Brush to the top 3rd until the desired color is achieved. Add Pool Party Ink to the center 3rd using the Blending Brush until the desired color is achieved. Add Highland Heather Ink to the bottom 3rd using the Blending Brush until the desired color is achieved.

Stampin' Up! Thankful Garden CAS Birthday 3 creativestampingdesigns.com

Remove the template from the panel and the Post-It Note Tape. Stamp the flower image from the Thankful Garden stamp set in Tuxedo Black Ink, partially on the colored area and partially off. Adhere the Basic White panel to a Basic Black mat using Stampin’ Seal. Adhere the layered panel to the Highland Heather card base using Stampin’ Dimensionals. Color a piece of White 1/2″ Woven Ribbon using the Dark Highland Heather Stampin’ Blends Markers and set aside.

Stampin' Up! Thankful Garden CAS Birthday 4 creativestampingdesigns.com

On a panel of Basic White, stamp the sentiment from the Year of Flowers stamp set in Highland Heather Ink. Cut the sentiment out using the smallest circle from the Unbounded Love Dies. Cut the larger circle from the Unbounded Love Dies from a panel of Basic Black. Adhere the sentiment to the Basic Black mat using Stampin’ Seal. Adhere the layered sentiment to the card front using Stampin’ Dimensionals. Tie a knot with the colored Woven Ribbon and adhere it to the flower stem using a Glue Dot. Add a few Two-Tone Sparkle Gems to the card front.

Stampin' Up! Thankful Garden CAS Birthday 5 creativestampingdesigns.com

On a panel of Basic White, stamp the sentiment from Unbounded Love stamp set in Highland Heather Ink. Stamp the leaf image from the Thankful Garden stamp set in Pool Party Ink next to the sentiment. Adhere the Basic White panel to a Basic Black mat then to the inside of the Highland Heather card base.

Stampin' Up! Thankful Garden CAS Birthday 6 creativestampingdesigns.com

Decorate a Basic White Medium Envelope to finish the card. Stamp the flower image from the Thankful Garden stamp set in Tuxedo Black Ink on the envelope front. Stamp the leaf image from the Thankful Garden stamp set in Pool Party Ink on the envelope flap.

Stampin' Up! Thankful Garden CAS Birthday 7 creativestampingdesigns.com

Thank you for stopping by my blog today. I hope you like my card and will give it a try. Happy Stamping!!

*********************************************************************************************************

If you need any stamping supplies, I’d love to be your Demonstrator. Just click HERE to go directly to my online store or drop me an email if you have any questions. 

MY CURRENT HOST CODE IS:   RSQGVJPH

Use this host code when placing an order with me. When you order $50 or greater you will receive a free gift from me! If your order is over $150, please do not use this code, but you’ll still get the free gift. The free gift is your choice of any 1 item valued up to $10.00 from the 2024 – 2025 Annual Catalog, January – April 2025 Mini Catalog or from the Online Exclusives!  For any orders $50 or more I will also send you my monthly class tutorials.  Click HERE or go to my Customer Rewards for more details and to see what this month’s tutorials are.

Please remember to use my current Host Code and make sure that you can see my name on the final checkout page listed as your Demonstrator when you order so that you know that you’re ordering with me, and you’ll get my rewards! 

Happy Stamping, Karen

*********************************************************************************************************

Tara and I are teaming up to do a Masculine Online Zoom Class on Sunday April 27th featuring the Stampin’ Up! Framed Scenes Bundle. I always seem to struggle with masculine cards, and I know a lot of others do too. We will be making 6 different cards featuring the bundle which is pictured below. I will be adding graphics in the next couple days once we are both done designing the cards.

The class will be held on Zoom on Sunday April 27th from 1pm – 5pm ET.

The class fee includes:

  • 6 complete Pre-Cut card kits with envelopes so they are ready to mail when you’re done.
  • Full pack of Natural Matte Dots
  • Full pack of Linen Thread
  • Zoom class with complete step by step instructions to complete each card as we go.
  • PDF with detailed directions and photos
  • A Link to the recorded class after we are done so you can watch it again and make more cards.

When you sign up for the class, you will see that you can add additional items needed to make the cards in the class if you do not already have them. These items are optional to add on, but we will be using the items to create the cards. We are offering the Stampin’ Up! Online Exclusive Framed Scenes Bundle at an additional 10% discount when you order it through me during sign up.

The class will be held on Zoom and anyone in the United States is welcome to purchase the class and join us! If you are unable to join us for the live event, but would still like to participate in the class, we will be recording the session so you can watch the replay any time and make the cards. We will also be emailing written tutorials with instructions and cardstock cuts so that you will have a reference too.

Class Cost: $35.00 + $9.00 priority shipping (additional products will be added to the cost for the products) and invoices will be sent out by March 27th.

Class Sign up Deadline: Tuesday March 25th at 5pm ET

Click Here to register for the class now!! Let me know if you have any questions.

*********************************************************************************************************

Start Thinking About Stocking Up on the 2023-2025 In-Colors Before They’re Gone

As we all know, the beautiful 2023-2025 In Colors will likely be retiring at the end of this catalog on April 30.  Right now is a great time to start stocking up on ink refills, markers and card stock in your favorite colors so that you’re not left scrambling for them when the retiring list is announced.

The retiring list is usually posted in later March or early April and the In Color items on that list become available only while supplies last.  So, order yours now so that you’re guaranteed to get them!! Head over to my ONLINE STORE and shop the In-Colors

*********************************************************************************************************

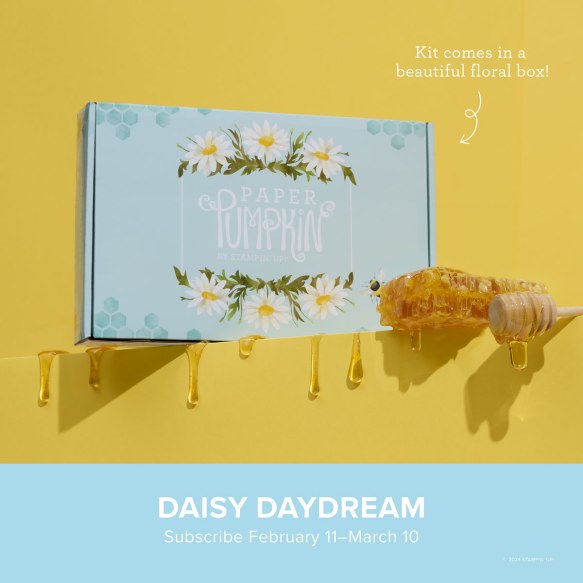
Daisy Daydream

Subscribe February 11 – March 10

Send sweet greetings with gorgeous cards featuring bees, honeycomb, and daisies.
• Makes 9 cards: 3 each of 3 designs with 9 coordinating envelopes
• Specialty gold foil and precut vellum accents
• Unique precut paper pieces
• Coordinating colors: Crumb Cake, Crushed Curry, Lemon Lime Twist, Lost Lagoon
(Classic Stampin’ Spot), Mossy Meadow, Very Vanilla

Kit comes in a beautiful box with a FREE additional stamp set!

Subscribe to the February Paper Pumpkin Kit between 11 January and 10 February by clicking here!

*********************************************************************************************************

Don’t miss the coordinating
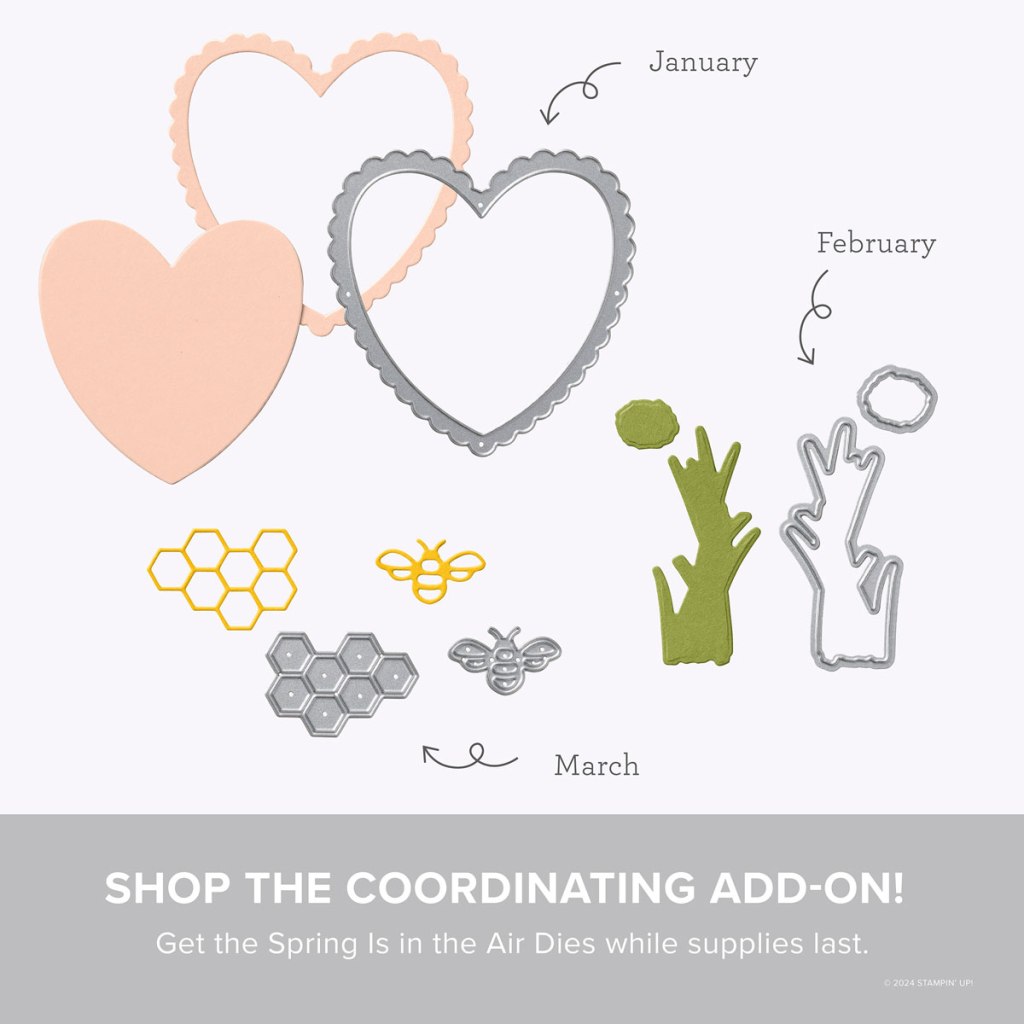
Spring is in The Air Dies Add-On!

Make the most of your Paper Pumpkin kits with the Spring Is in the Air Dies add-on! Quickly and cleanly cut out a heart frame, flowering chive, honeycomb, or tiny bumblebee to elevate your crafting projects. These additional dies are designed to work with THREE Paper Pumpkin Kits: the Hearts for You Paper Pumpkin Kit, the Spring Is in the Air Paper Pumpkin Kit, and the Daisy Daydream Paper Pumpkin Kit. Pair these dies with other Stampin’ Up! products for even more creative options!

DETAILS
– 5 dies
– Largest die: 3″ x 3″ (7.6 x 7.6 cm)
– Use with a Stampin’ Cut & Emboss Machine (sold separately)

You must be a current Paper Pumpkin subscriber to purchase this item. To become a subscriber, visit paperpumpkin.com.

#166237 $12

Note: Supplies may be limited toward the end of the subscription period.

*********************************************************************************************************

Card stock cuts for this project:

  • Basic Black Cardstock 2 – 4 1/8″ X 5 3/8″(card front & inner liner mats), 1 1/2″ X 1 1/2″(sentiment mat)
  • Basic White Cardstock 2 – 4″ X 5 1/4″(card front & inner liner), 1 1/4″ X 1 1/4″(sentiment)
  • Highland Heather Cardstock 4 1/4 x 11″(card base scored & folded at 5 1/2″)
  • Another panel of Cardstock any color for a Template 3 7/8″ X 5 1/8″

*********************************************************************************************************

Product List

Stampin’ Up! Fancy Borders for Fun Fold Friday

Good Friday morning stamping friends and welcome to my Fun Fold Friday. How was your week? Are you starting to make plans for the weekend yet? Don’t forget I’m offering Double Creative Stamping Designs Rewards until Monday March 10th.

I played with a new Online Exclusive bundle for today’s card and paired it up with some DSP from the Annual Catalog that will most likely be retiring in April. I love when the DSP does just about everything for you. It makes for a very quick card when you are pressed for time. If you’d like to see a quick video of how I made this card, Click Here to go to my Instagram Reels.  Here’s my card for today.

Stampin' Up! Fancy Borders Fun Fold 1 creativestampingdesigns.com

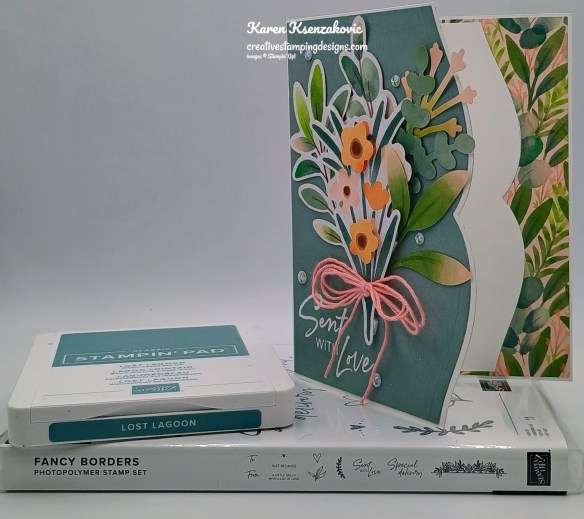
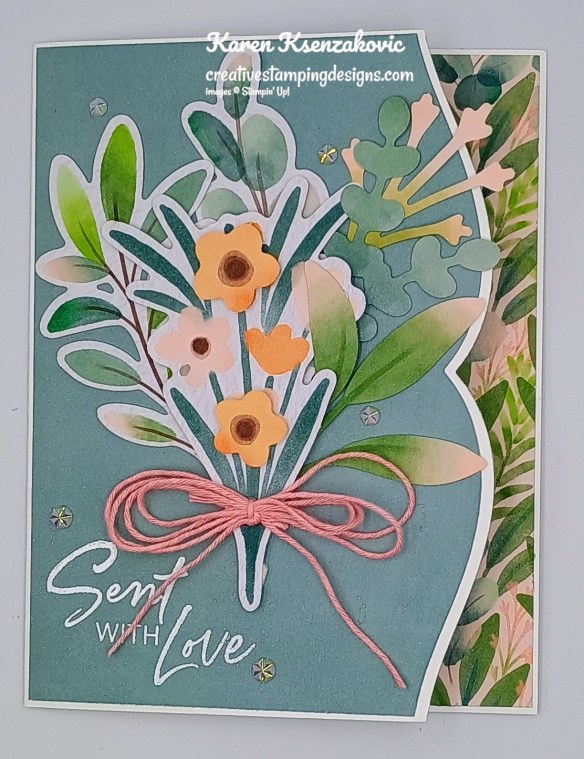
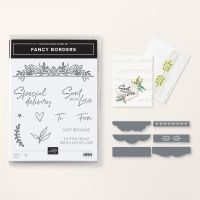
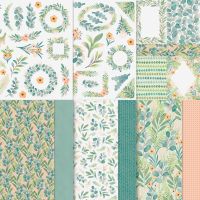
I used the new Stampin’ Up! Online Exclusive Fancy Borders Bundle along with the Frames & Flowers Specialty Designer Series Paper for my card today.

Stampin' Up! Fancy Borders Fun Fold 2 creativestampingdesigns.com

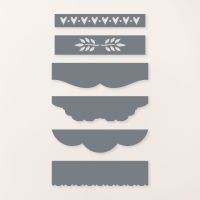
Using the Fancy Borders Dies, cut the right edge of the Basic White Thick card base and the panel of Frames & Flowers DSP. Adhere the Frames & Flowers DSP to the front of the Basic White Thick card base using Liquid Glue.

Stampin' Up! Fancy Borders Fun Fold 3 creativestampingdesigns.com

Make an arrangement on the card front using the Frames & Flowers DSP die cut pieces. Adhere them down using Glue Dots and Stampin’ Dimensionals.

Stampin' Up! Fancy Borders Fun Fold 4 creativestampingdesigns.com

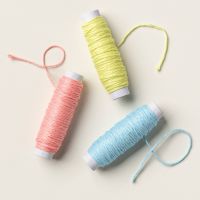
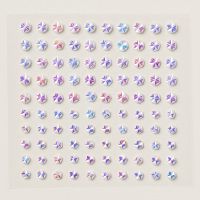
Stamp the sentiment from the Stampin’ Up! Fancy Borders Photopolymer Stamp Set in Versamark Ink on the bottom of the card front. Sprinkle it with White Embossing Powder and set it using the Heat Tool. Tie a multi loop bow using the Flirty Flamingo baker’s twine from the Baker’s Twine Three Color Pack. Adhere the bow to the bouquet using a Glue Dot. Add a few Iridescent Faceted Gems to the card front.

Stampin' Up! Fancy Borders Fun Fold 5 creativestampingdesigns.com

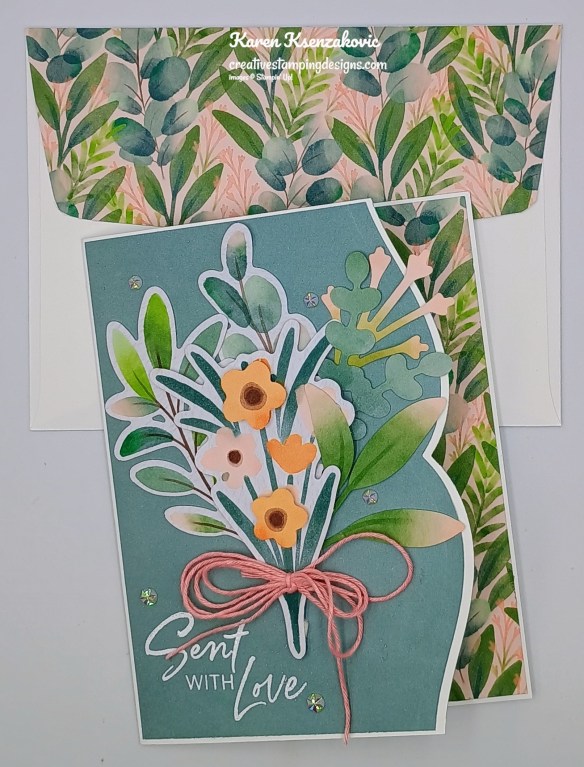
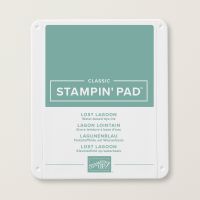
Stamp the sentiment from the Fancy Borders stamp set in Lost Lagoon Ink on a panel of Basic White. Cut the edge using the Fancy Borders Dies. Adhere one of the flowers form the Frames & Flowers DSP by the sentiment. Adhere a panel of Frames & Flowers DSP to the inside of the Basic White Thick card base. Adhere the Basic White panel to the DSP.

Stampin' Up! Fancy Borders Fun Fold 6 creativestampingdesigns.com

Decorate a Basic White Medium Envelope to finish the card. Stamp the image from the Fancy Borders stamp set in Lost Lagoon Ink on the envelope front. Adhere a panel of Frames & Flowers DSP to the envelope flap.

Stampin' Up! Fancy Borders Fun Fold 7 creativestampingdesigns.com

Thank you for stopping by my blog today. I hope you like my card and will give it a try. Happy Stamping!!

*********************************************************************************************************

If you need any stamping supplies, I’d love to be your Demonstrator. Just click HERE to go directly to my online store or drop me an email if you have any questions. 

MY CURRENT HOST CODE IS:   RSQGVJPH

Use this host code when placing an order with me. When you order $50 or greater you will receive a free gift from me! If your order is over $150, please do not use this code, but you’ll still get the free gift. The free gift is your choice of any 1 item valued up to $10.00 from the 2024 – 2025 Annual Catalog, January – April 2025 Mini Catalog or from the Online Exclusives!  For any orders $50 or more I will also send you my monthly class tutorials.  Click HERE or go to my Customer Rewards for more details and to see what this month’s tutorials are.

Please remember to use my current Host Code and make sure that you can see my name on the final checkout page listed as your Demonstrator when you order so that you know that you’re ordering with me, and you’ll get my rewards! 

Happy Stamping, Karen

*********************************************************************************************************

Tara and I are teaming up to do a Masculine Online Zoom Class on Sunday April 27th featuring the Stampin’ Up! Framed Scenes Bundle. I always seem to struggle with masculine cards, and I know a lot of others do too. We will be making 6 different cards featuring the bundle which is pictured below. I will be adding graphics in the next couple days once we are both done designing the cards.

The class will be held on Zoom on Sunday April 27th from 1pm – 5pm ET.

The class fee includes:

  • 6 complete Pre-Cut card kits with envelopes so they are ready to mail when you’re done.
  • Full pack of Natural Matte Dots
  • Full pack of Linen Thread
  • Zoom class with complete step by step instructions to complete each card as we go.
  • PDF with detailed directions and photos
  • A Link to the recorded class after we are done so you can watch it again and make more cards.

When you sign up for the class, you will see that you can add additional items needed to make the cards in the class if you do not already have them. These items are optional to add on, but we will be using the items to create the cards. We are offering the Stampin’ Up! Online Exclusive Framed Scenes Bundle at an additional 10% discount when you order it through me during sign up.

The class will be held on Zoom and anyone in the United States is welcome to purchase the class and join us! If you are unable to join us for the live event, but would still like to participate in the class, we will be recording the session so you can watch the replay any time and make the cards. We will also be emailing written tutorials with instructions and cardstock cuts so that you will have a reference too.

Class Cost: $35.00 + $9.00 priority shipping (additional products will be added to the cost for the products) and invoices will be sent out by March 27th.

Class Sign up Deadline: Tuesday March 25th at 5pm ET

Click Here to register for the class now!! Let me know if you have any questions.

*********************************************************************************************************

Daisy Daydream

Subscribe February 11 – March 10

Send sweet greetings with gorgeous cards featuring bees, honeycomb, and daisies.
• Makes 9 cards: 3 each of 3 designs with 9 coordinating envelopes
• Specialty gold foil and precut vellum accents
• Unique precut paper pieces
• Coordinating colors: Crumb Cake, Crushed Curry, Lemon Lime Twist, Lost Lagoon
(Classic Stampin’ Spot), Mossy Meadow, Very Vanilla

Kit comes in a beautiful box with a FREE additional stamp set!

Subscribe to the February Paper Pumpkin Kit between 11 January and 10 February by clicking here!

*********************************************************************************************************

Don’t miss the coordinating
Spring is in The Air Dies Add-On!

Make the most of your Paper Pumpkin kits with the Spring Is in the Air Dies add-on! Quickly and cleanly cut out a heart frame, flowering chive, honeycomb, or tiny bumblebee to elevate your crafting projects. These additional dies are designed to work with THREE Paper Pumpkin Kits: the Hearts for You Paper Pumpkin Kit, the Spring Is in the Air Paper Pumpkin Kit, and the Daisy Daydream Paper Pumpkin Kit. Pair these dies with other Stampin’ Up! products for even more creative options!

DETAILS
– 5 dies
– Largest die: 3″ x 3″ (7.6 x 7.6 cm)
– Use with a Stampin’ Cut & Emboss Machine (sold separately)

You must be a current Paper Pumpkin subscriber to purchase this item. To become a subscriber, visit paperpumpkin.com.

#166237 $12

Note: Supplies may be limited toward the end of the subscription period.

*********************************************************************************************************

Card stock cuts for this project:

  • Basic White Cardstock 4″ x 5 1/4″ (inner liner)
  • Basic White Thick Cardstock 5 1/2″X 8 1/2″(card base scored & folded at 4 1/4″)
  • Frames & Flowers Specialty Designer Series Paper 2 – 4 1/8″ X 5 3/8″(card front & inner liner mat), 2 1/4″ X 6″(envelope flap), pieces for bouquet

*********************************************************************************************************

Product List

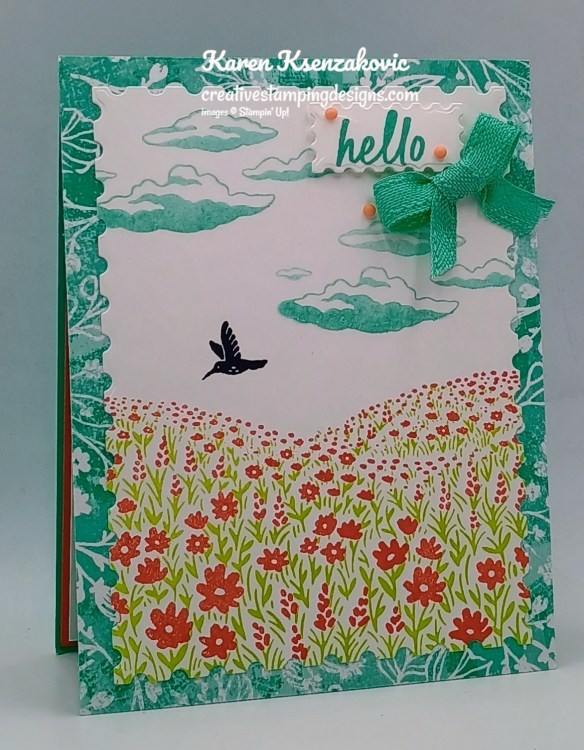
Stampin’ Up! Fields in Bloom Hello

Good Saturday morning stamping friends. HAPPY MARCH!!! I hope you are making some fun plans for the weekend or maybe even just planning on staying in and relaxing. Whatever you are planning, enjoy it! I’m at work already doing my first of the month bills. I came in extra early so that I’ll get finished early and can enjoy the rest of my day, since I do have to work tomorrow.

I pulled out a couple stamp sets from the annual catalog for today’s card. I need to start using them more, since some of them will most likely be retiring in April.  If you’d like to see a quick video of how I made this card, Click Here to go to my Instagram Reels. Here is my card for today.

Stampin' Up! Fields In Bloom Hello 1 creativestampingdesigns.com

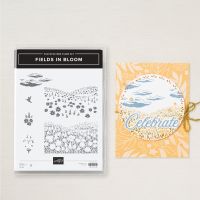
I used the Stampin’ Up! Fields in Bloom Photopolymer Stamp Set along with the Stampin’ Up! Simply Said Photopolymer Stamp Set and Unbounded Beauty Designer Series Paper for my card today.

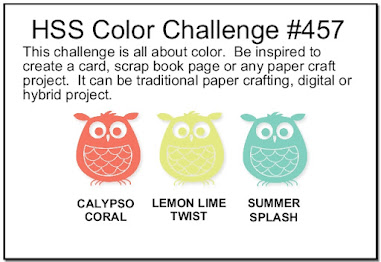
My colors for today’s card come from Hand Stamped Sentiments Color Challenge #457.

Stampin' Up! Fields In Bloom Hello 2 creativestampingdesigns.com

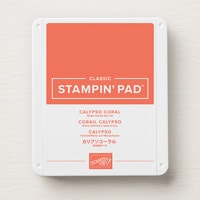
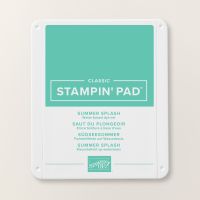
Start by stamping the leaf image from the Fields in Bloom stamp set in Lemon Lime Twist Ink on a panel of Basic White. Stamp the flower image from the Fields in Bloom stamp set in Calypso Coral Ink over the leaf image. Stamp the cloud image from the Fields in Bloom stamp set in Summer Splash Ink, stamping off once on scrap paper, on the panel of Basic White. Stamp the hummingbird image in Tuxedo Black Ink.

Stampin' Up! Fields In Bloom Hello 3 creativestampingdesigns.com

Cut the Basic White panel using the largest Perennial Postage Die. Adhere a panel of Unbounded Beauty DSP to a Summer Splash card base using Liquid Glue. Adhere the die cut artwork to the card front using Stampin’ Seal.

Stampin' Up! Fields In Bloom Hello 4 creativestampingdesigns.com

On a panel of Basic White, stamp the sentiment from the Simply Said stamp set in Summer Splash Ink. Cut the sentiment out using the smallest Perennial Postage Die. Adhere the sentiment to the card front using Stampin’ Dimensionals. Tie a small bow using the Summer Splash 3/8″ Bordered Ribbon and adhere it using a Glue Dot. Add a few Ombre Matte Decorative Dots to the card front.

Stampin' Up! Fields In Bloom Hello 5 creativestampingdesigns.com

Stamp the sentiment from Simply Said stamp set in Summer Splash Ink on a panel of Basic White. Stamp the cloud image from the Fields in Bloom stamp set in Summer Splash Ink, stamping off once on scrap paper, on the top of the Basic White panel. Stamp the single stem image from the Fields in Bloom stamp set in Lemon Lime Twist Ink on the bottom of the panel. Stamp the single flower image from the Fields in Bloom stamp set in Calypso Coral Ink on the stems and the hummingbird in Tuxedo Black Ink. Adhere the basic White panel to a Calypso Coral mat then to the inside of the Summer Splash card base.

Stampin' Up! Fields In Bloom Hello 6 creativestampingdesigns.com

Decorate a Basic White Medium Envelope to finish the card. Stamp the single stem image from the Fields in Bloom stamp set on the bottom front of the envelope in Lemon Lime Twist Ink. Stamp the flowers on the stem in Calypso Coral Ink, the hummingbird in Tuxedo Black and the clouds in Summer Splash Ink on the envelope front. Adhere a panel of Unbounded Beauty DSP to the envelope flap.

Stampin' Up! Fields In Bloom Hello 7 creativestampingdesigns.com

Thank you for stopping by my blog today. I hope you like my card and will give it a try. Happy Stamping!!

*********************************************************************************************************

If you need any stamping supplies, I’d love to be your Demonstrator. Just click HERE to go directly to my online store or drop me an email if you have any questions. 

MY CURRENT HOST CODE IS:   RSQGVJPH

Use this host code when placing an order with me. When you order $50 or greater you will receive a free gift from me! If your order is over $150, please do not use this code, but you’ll still get the free gift. The free gift is your choice of any 1 item valued up to $10.00 from the 2024 – 2025 Annual Catalog, January – April 2025 Mini Catalog or from the Online Exclusives!  For any orders $50 or more I will also send you my monthly class tutorials.  Click HERE or go to my Customer Rewards for more details and to see what this month’s tutorials are.

Please remember to use my current Host Code and make sure that you can see my name on the final checkout page listed as your Demonstrator when you order so that you know that you’re ordering with me, and you’ll get my rewards! 

Happy Stamping, Karen

*********************************************************************************************************

Stampin’ Up! Online Zoom Class with Karen & Tara

Tara Carpenter and I have teamed up again for another fun Online Zoom Class!! We are offering a fun Online Class using the new Online Exclusive Year of Flowers bundle (which will be available March 4th). We’ll be making 6 different cards, 2 which will be fun folds, using this Bundle.

The class will be held on Zoom on Sunday March 23rd from 1pm – 5pm ET.

The class fee includes:

  • 6 complete Pre-Cut card kits with envelopes so they are ready to mail when you’re done.
  • Full pack of Stampin’ Up! Blooming Pearls
  • Full pack of Baker’s Twine Essential Pack
  • Zoom class with complete step by step instructions to complete each card as we go.
  • PDF with detailed directions and photos
  • A Link to the recorded class after we are done so you can watch it again and make more cards.

When you sign up for the class, you will see that you can add additional items needed to make the cards in the class if you do not already have them. These items are optional to add on, but we will be using the items to create the cards. We are offering the Stampin’ Up! Online Exclusive Year of Flowers Bundle at an additional 10% discount when you order it through me during sign up.

The class will be held on Zoom and anyone in the United States is welcome to purchase the class and join us! If you are unable to join us for the live event, but would still like to participate in the class, we will be recording the session so you can watch the replay any time and make the cards. We will also be emailing written tutorials with instructions and cardstock cuts so that you will have a reference too.

Class Cost: $35.00 + $9.00 priority shipping (additional products will be added to the cost for the products) and invoices will be sent out by March 3rd.

Class Signup Deadline: Sunday March 2nd at 5pm ET (this is so we have time to order all the bundles, embellishments and DSP being used on March 23rd)

Click Here to register for the class now!! Let me know if you have any questions.

*********************************************************************************************************

Start Thinking About Stocking Up on the 2023-2025 In-Colors Before They’re Gone

As we all know, the beautiful 2023-2025 In Colors will likely be retiring at the end of this catalog on April 30.  Right now is a great time to start stocking up on ink refills, markers and card stock in your favorite colors so that you’re not left scrambling for them when the retiring list is announced.

The retiring list is usually posted in later March or early April and the In Color items on that list become available only while supplies last.  So, order yours now so that you’re guaranteed to get them!! Head over to my ONLINE STORE and shop the In-Colors

*********************************************************************************************************

Daisy Daydream

Subscribe February 11 – March 10

Send sweet greetings with gorgeous cards featuring bees, honeycomb, and daisies.
• Makes 9 cards: 3 each of 3 designs with 9 coordinating envelopes
• Specialty gold foil and precut vellum accents
• Unique precut paper pieces
• Coordinating colors: Crumb Cake, Crushed Curry, Lemon Lime Twist, Lost Lagoon
(Classic Stampin’ Spot), Mossy Meadow, Very Vanilla

Kit comes in a beautiful box with a FREE additional stamp set!

Subscribe to the February Paper Pumpkin Kit between 11 January and 10 February by clicking here!

*********************************************************************************************************

Don’t miss the coordinating
Spring is in The Air Dies Add-On!

Make the most of your Paper Pumpkin kits with the Spring Is in the Air Dies add-on! Quickly and cleanly cut out a heart frame, flowering chive, honeycomb, or tiny bumblebee to elevate your crafting projects. These additional dies are designed to work with THREE Paper Pumpkin Kits: the Hearts for You Paper Pumpkin Kit, the Spring Is in the Air Paper Pumpkin Kit, and the Daisy Daydream Paper Pumpkin Kit. Pair these dies with other Stampin’ Up! products for even more creative options!

DETAILS
– 5 dies
– Largest die: 3″ x 3″ (7.6 x 7.6 cm)
– Use with a Stampin’ Cut & Emboss Machine (sold separately)

You must be a current Paper Pumpkin subscriber to purchase this item. To become a subscriber, visit paperpumpkin.com.

#166237 $12

Note: Supplies may be limited toward the end of the subscription period.

*********************************************************************************************************

Card stock cuts for this project:

  • Basic White Cardstock 2 – 4″ X 5 1/4″ (card front & inner liner), 1″ X 2 1/2″ (sentiment)
  • Calypso Coral Cardstock 4 1/8″ X 5 3/8″(inner liner mat)
  • Summer Splash Cardstock 4 1/4″ X 11″(card base scored & folded at 5 1/2″)
  • Unbounded Beauty Designer Series Paper 4 1/4″ X 5 1/2″(card front), 2 1/4″ X 6″(envelope)

*********************************************************************************************************

Product List

Stampin’ Up! Thankful Garden Friendship

Good Sunday morning stamping friends. How is everyone’s weekend going? There was a little bit of plan changing for me this weekend. I’m still working both days, but alone. All my cashiers are sick. One offered to come in saying she wasn’t that bad, I politely refused since I don’t want to get sick. Luckily, I trained one of the salesmen to do a basic charge sale, so he hopped on a couple times yesterday when my line got too long. By the time I got home last night, I didn’t want to do anything. Hopefully everyone gets better soon.

For today’s card, I was playing with the new set coming in March. You may see a few cards this week using it since I was playing around with different colors. Here’s my card for today.

Stampin' Up! Thankful Garden Friendship 1 creativestampingdesigns.com

I used the Stampin’ Up! Thankful Garden Photopolymer Stamp Set along with the Textured Notes Dies. Both of these items will be available starting March 4th.

Stampin' Up! Thankful Garden Friendship 2 creativestampingdesigns.com

Start by masking off 1″ on either side of a Basic White card front using pieces of sticky note tape. Start at the top by applying Petal Pink Ink using a Blending Brush. Add Soft Sea Foam Ink below the Petal Pink using another Blending Brush. Add Highland Heather Ink to the bottom using a Blending Brush. Remove the sticky note tape.

Stampin' Up! Thankful Garden Friendship 3 creativestampingdesigns.com

Stamp the flower image from the Thankful Garden stamp set in Tuxedo Black Ink over the blended area. Adhere the Basic White panel to a Basic Black mat using Stampin’ Seal. On a panel of Basic White, stamp the sentiment from the Thankful Garden stamp set in Soft Sea Foam Ink. Cut the sentiment out using the longest die from the Textured Notes Dies.

Stampin' Up! Thankful Garden Friendship 4 creativestampingdesigns.com

Using the Soft Sea Foam Stampin’ Blends Marker, color a piece of White 1/2″ Woven Ribbon. Adhere the ribbon to the bottom of the panel using Stampin’ Seal. Adhere the sentiment over the ribbon using Stampin’ Dimensionals. Add a few Brushed Brass Butterflies to the card front. Adhere the layered card front to a Soft Sea Foam card base using Stampin’ Dimensionals.

Stampin' Up! Thankful Garden Friendship 5 creativestampingdesigns.com

On a panel of Basic White, stamp the sentiment from the Thankful Garden stamp set in Tuxedo Black Ink. Stamp the leaf image from the Thankful Garden stamp set on either side of the sentiment. Adhere the Basic White panel to a Basic Black mat then to the inside of the Soft Sea Foam card base.

Stampin' Up! Thankful Garden Friendship 6 creativestampingdesigns.com

Decorate a Basic White Medium Envelope to finish the card. Stamp the flower image from the Thankful Garden stamp set in Tuxedo Black Ink on the envelope front. Stamp the leaf image from the Thankful Garden stamp set in Soft Sea Foam Ink on the envelope flap.

Stampin' Up! Thankful Garden Friendship 7 creativestampingdesigns.com

Thank you for stopping by my blog today. I hope you like my card and will give it a try. Happy Stamping!!

*********************************************************************************************************

If you need any stamping supplies, I’d love to be your Demonstrator. Just click HERE to go directly to my online store or drop me an email if you have any questions. 

MY CURRENT HOST CODE IS:   ZZDPZRSF

Use this host code when placing an order with me. When you order $50 or greater you will receive a free gift from me! If your order is over $150, please do not use this code, but you’ll still get the free gift. The free gift is your choice of any 1 item valued up to $10.00 from the 2024 – 2025 Annual Catalog, January – April 2025 Mini Catalog or from the Online Exclusives!  For any orders $50 or more I will also send you my monthly class tutorials.  Click HERE or go to my Customer Rewards for more details and to see what this month’s tutorials are.

Please remember to use my current Host Code and make sure that you can see my name on the final checkout page listed as your Demonstrator when you order so that you know that you’re ordering with me, and you’ll get my rewards! 

Happy Stamping, Karen

*********************************************************************************************************

Tara Carpenter and I have teamed up again for another fun Online Zoom Class!! We are offering a fun Online Class using the new Online Exclusive Year of Flowers bundle (which will be available March 4th). We’ll be making 6 different cards, 2 which will be fun folds, using this Bundle.

The class will be held on Zoom on Sunday March 23rd from 1pm – 5pm ET.

The class fee includes:

  • 6 complete Pre-Cut card kits with envelopes so they are ready to mail when you’re done.
  • Full pack of Stampin’ Up! Blooming Pearls
  • Full pack of Baker’s Twine Essential Pack
  • Zoom class with complete step by step instructions to complete each card as we go.
  • PDF with detailed directions and photos
  • A Link to the recorded class after we are done so you can watch it again and make more cards.

When you sign up for the class, you will see that you can add additional items needed to make the cards in the class if you do not already have them. These items are optional to add on, but we will be using the items to create the cards. We are offering the Stampin’ Up! Online Exclusive Year of Flowers Bundle at an additional 10% discount when you order it through me during sign up.

The class will be held on Zoom and anyone in the United States is welcome to purchase the class and join us! If you are unable to join us for the live event, but would still like to participate in the class, we will be recording the session so you can watch the replay any time and make the cards. We will also be emailing written tutorials with instructions and cardstock cuts so that you will have a reference too.

Class Cost: $35.00 + $9.00 priority shipping (additional products will be added to the cost for the products) and invoices will be sent out by March 3rd.

Class Signup Deadline: Sunday March 2nd at 5pm ET (this is so we have time to order all the bundles, embellishments and DSP being used on March 23rd)

Click Here to register for the class now!! Let me know if you have any questions.

*********************************************************************************************************

Final Week for the JOINING SPECIAL

Sale-A-Bration is an excellent time you to join Stampin’ Up!  In addition to the already great value of the Starter Kit, if you sign up as a Stampin’ Up! demonstrator during Sale-a-bration, you can choose from two incredible options:

Option 1: Join Stampin’ Up! during Sale-a-bration as a new demonstrator and get $125 worth of products PLUS a choice of 2 Stampin’ Write Marker Assortments AND the Handmade Designs Cling Stamp Set, an exclusive stamp set designed to work with the markers. That’s a $216 value all for just $99!

Option 2: Join Stampin’ Up! during Sale-A-Bration and get $125 worth of product PLUS an additional $30 worth of product of your choice for just $99. That’s a $155 value!

Two joining options so you can pick the one that you like the best!! 

There is never an obligation to sell. You can join just to enjoy the discount for yourself along with all the other Demonstrator benefits. Once you join, you’ll get at least a 20% discount on all of your Stampin’ Up! merchandise purchases and you get to order early from the upcoming catalogs!  You will also be able to attend the OnStage Events and any other events Stampin’ Up! has and you get to be a part of our Stampin’ Up! team!  

Unsure about this and want to talk? Contact me at creativestampingdesigns@gmail.com and we can talk. You can also find additional information Here at Join My Team. Being a part of the Stampin’ Up! Community is one of the best decisions I’ve ever made. I have made many friends along the way while doing what I love, Paper Crafting. This Joining offer is only good during Sale-a-bration which starts January 7 and ends on February 28. Why not give it a try? I’d love to have you on my team.

Final Week for Sale-a-bration

Ready for more? There are EVEN MORE PRODUCTS available to shop, earn, and redeem during Sale-A-Bration. We don’t want you to miss out on these great products and incredible deals, Click HERE for the Sale-A-Bration Additional Products Flyer.

Remember, you must use the item numbers in the flyer in order to redeem these products as Sale-A-Bration items. These products have different item numbers in the catalog, which won’t register as part of Sale-A-Bration.

We’ve included two kits as part of our Sale-A-Bration newly added products. Once the kits sell out, they will be discontinued. If they do not sell out during Sale-A-Bration, they may be discounted at a later date.

Note: The newly added products that are now redeemable during Sale-A-Bration are part of Stampin’ Up!’s existing product offering.

Sale-a-bration 2025 runs through Friday, February 28!  There are some awesome new products that you can earn for FREE with orders of $60+ and orders of $120+ placed during Sale-a-bration as well as a great host bonus and a joining special!

SHOP

  • Spend $60 or more and pick from 12 new products (5 stamp sets,3 designer series paper packs, 1 embossing folder, 1 kit, 1 pack of embellishments and 1 spool of ribbon!) that are available as free items!
  • Spend $120 or more and pick from 2 new items (1 stamp bundle and 1 stamp set) that are available as free items!

HOST

  • Get an additional $30 in FREE Stampin’ Rewards with any party or individual order of $300 or greater during Sale-a-bration!  You can spend your Stampin’ Rewards on any items currently available from Stampin’ Up! including (but not limited to) the host exclusive stamp sets!

*********************************************************************************************************

Daisy Daydream

Subscribe February 11 – March 10

Send sweet greetings with gorgeous cards featuring bees, honeycomb, and daisies.
• Makes 9 cards: 3 each of 3 designs with 9 coordinating envelopes
• Specialty gold foil and precut vellum accents
• Unique precut paper pieces
• Coordinating colors: Crumb Cake, Crushed Curry, Lemon Lime Twist, Lost Lagoon
(Classic Stampin’ Spot), Mossy Meadow, Very Vanilla

Kit comes in a beautiful box with a FREE additional stamp set!

Subscribe to the February Paper Pumpkin Kit between 11 January and 10 February by clicking here!

*********************************************************************************************************

Don’t miss the coordinating
Spring is in The Air Dies Add-On!

Make the most of your Paper Pumpkin kits with the Spring Is in the Air Dies add-on! Quickly and cleanly cut out a heart frame, flowering chive, honeycomb, or tiny bumblebee to elevate your crafting projects. These additional dies are designed to work with THREE Paper Pumpkin Kits: the Hearts for You Paper Pumpkin Kit, the Spring Is in the Air Paper Pumpkin Kit, and the Daisy Daydream Paper Pumpkin Kit. Pair these dies with other Stampin’ Up! products for even more creative options!

DETAILS
– 5 dies
– Largest die: 3″ x 3″ (7.6 x 7.6 cm)
– Use with a Stampin’ Cut & Emboss Machine (sold separately)

You must be a current Paper Pumpkin subscriber to purchase this item. To become a subscriber, visit paperpumpkin.com.

#166237 $12

Note: Supplies may be limited toward the end of the subscription period.

*********************************************************************************************************

Card stock cuts for this project:

  • Basic Black Cardstock 2 – 4 1/8″ X 5 3/8″(card front & inner liner mats)
  • Basic White Cardstock 2 – 4″ X 5 1/4″ (card front & inner liner), 1″ X 4″(sentiment)
  • Soft Sea Foam Cardstock 4 1/4″X 11″(card base scored & folded at 5 1/2″)

*********************************************************************************************************

Product List

Stampin’ Up! Beautiful Butterflies CAS

Good Saturday morning stamping friends and welcome to the weekend. Does anyone have any plans in the works yet for the weekend? I’m actually working both days this weekend. I have 2 of my cashiers out with surgery and one away for the weekend, so I had to jump in and work extra.

My card today goes together really quick. I used some DSP from the annual catalog with a bundle from the mini catalog.  If you’d like to see a quick video of how I made this card, Click Here to go to my Instagram Reels. Here is my card for today.

Stampin' Up! Beautiful Butterflies CAS 1 creativestampingdesigns.com

I used the Stampin’ Up! Beautiful Butterflies Bundle along with the Thoughtful Designs Specialty Designer Series Paper for my card today.

Stampin' Up! Beautiful Butterflies CAS 2 creativestampingdesigns.com

Adhere 2 strips of Silver Foil Sheet to either side of the Thoughtful Designs DSP using Stampin’ Seal. Adhere the layered panel to a Basic White Thick card base using Stampin’ Seal.

Stampin' Up! Beautiful Butterflies CAS 3 creativestampingdesigns.com

Adhere an Adhesive Sheet to the back of a panel of Basic White. Using the Beautiful Butterflies Dies cut detailed butterfly from the panel of Basic White, the solid butterfly from a panel of Pretty Peacock and the butterfly body from a panel of Silver Foil. Adhere the detailed butterfly to the solid butterfly, then the butterfly body to the center of the butterfly. Adhere the butterfly to the card front using Stampin’ Dimensionals only on the center portion. Fluff the wings.

Stampin' Up! Beautiful Butterflies CAS 4 creativestampingdesigns.com

On a panel of Basic White, stamp the sentiment from the Stampin’ Up! Beautiful Butterflies Photopolymer Stamp Set in Pretty Peacock Ink. Cut the sentiment out using the Beautiful Butterflies Dies. Adhere the sentiment to the card front using Stampin’ Dimensionals. Add a few Adhesive-Backed Metallic Gems to the card front.

Stampin' Up! Beautiful Butterflies CAS 5 creativestampingdesigns.com

Stamp the sentiment from the Beautiful Butterflies stamp set in Pretty Peacock Ink on a panel of Basic White. Stamp the butterfly image from the Beautiful Butterflies stamp set in Versamark Ink on the panel. Sprinkle the butterfly with Silver Embossing Powder and set it using the Heat Tool. Adhere 2 strips of Thoughtful Designs DSP to either side of the panel. Adhere the Basic White panel to a Pretty Peacock mat then to the inside of the Basic White Thick card base.

Stampin' Up! Beautiful Butterflies CAS 6 creativestampingdesigns.com

Decorate a Basic White Medium Envelope to finish the card. Stamp the butterfly images from the Beautiful Butterflies stamp set in Pretty Peacock Ink on the envelope front. Adhere a panel of Thoughtful Designs DSP to the envelope flap.

Stampin' Up! Beautiful Butterflies CAS 7 creativestampingdesigns.com

Thank you for stopping by my blog today. I hope you like my card and will give it a try. Happy Stamping!!

*********************************************************************************************************

If you need any stamping supplies, I’d love to be your Demonstrator. Just click HERE to go directly to my online store or drop me an email if you have any questions. 
MY CURRENT HOST CODE IS:   ZZDPZRSF

Use this host code when placing an order with me. When you order $50 or greater you will receive a free gift from me! If your order is over $150, please do not use this code, but you’ll still get the free gift. The free gift is your choice of any 1 item valued up to $10.00 from the 2024 – 2025 Annual Catalog, January – April 2025 Mini Catalog or from the Online Exclusives!  For any orders $50 or more I will also send you my monthly class tutorials.  Click HERE or go to my Customer Rewards for more details and to see what this month’s tutorials are.
Please remember to use my current Host Code and make sure that you can see my name on the final checkout page listed as your Demonstrator when you order so that you know that you’re ordering with me, and you’ll get my rewards! 
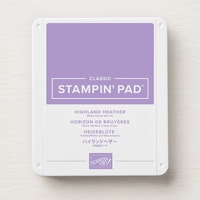
Happy Stamping, Karen

*********************************************************************************************************

Tara Carpenter and I have teamed up again for another fun Online Zoom Class!! We are offering a fun Online Class using the new Online Exclusive Year of Flowers bundle (which will be available March 4th). We’ll be making 6 different cards, 2 which will be fun folds, using this Bundle.

The class will be held on Zoom on Sunday March 23rd from 1pm – 5pm ET.

The class fee includes:

  • 6 complete Pre-Cut card kits with envelopes so they are ready to mail when you’re done.
  • Full pack of Stampin’ Up! Blooming Pearls
  • Full pack of Baker’s Twine Essential Pack
  • Zoom class with complete step by step instructions to complete each card as we go.
  • PDF with detailed directions and photos
  • A Link to the recorded class after we are done so you can watch it again and make more cards.

When you sign up for the class, you will see that you can add additional items needed to make the cards in the class if you do not already have them. These items are optional to add on, but we will be using the items to create the cards. We are offering the Stampin’ Up! Online Exclusive Year of Flowers Bundle at an additional 10% discount when you order it through me during sign up.

The class will be held on Zoom and anyone in the United States is welcome to purchase the class and join us! If you are unable to join us for the live event, but would still like to participate in the class, we will be recording the session so you can watch the replay any time and make the cards. We will also be emailing written tutorials with instructions and cardstock cuts so that you will have a reference too.

Class Cost: $35.00 + $9.00 priority shipping (additional products will be added to the cost for the products) and invoices will be sent out by March 3rd.

Class Signup Deadline: Sunday March 2nd at 5pm ET (this is so we have time to order all the bundles, embellishments and DSP being used on March 23rd)

Click Here to register for the class now!! Let me know if you have any questions.

*********************************************************************************************************

Final Week for the JOINING SPECIAL

Sale-A-Bration is an excellent time you to join Stampin’ Up!  In addition to the already great value of the Starter Kit, if you sign up as a Stampin’ Up! demonstrator during Sale-a-bration, you can choose from two incredible options:

Option 1: Join Stampin’ Up! during Sale-a-bration as a new demonstrator and get $125 worth of products PLUS a choice of 2 Stampin’ Write Marker Assortments AND the Handmade Designs Cling Stamp Set, an exclusive stamp set designed to work with the markers. That’s a $216 value all for just $99!

Option 2: Join Stampin’ Up! during Sale-A-Bration and get $125 worth of product PLUS an additional $30 worth of product of your choice for just $99. That’s a $155 value!

Two joining options so you can pick the one that you like the best!! 

There is never an obligation to sell. You can join just to enjoy the discount for yourself along with all the other Demonstrator benefits. Once you join, you’ll get at least a 20% discount on all of your Stampin’ Up! merchandise purchases and you get to order early from the upcoming catalogs!  You will also be able to attend the OnStage Events and any other events Stampin’ Up! has and you get to be a part of our Stampin’ Up! team!  

Unsure about this and want to talk? Contact me at creativestampingdesigns@gmail.com and we can talk. You can also find additional information Here at Join My Team. Being a part of the Stampin’ Up! Community is one of the best decisions I’ve ever made. I have made many friends along the way while doing what I love, Paper Crafting. This Joining offer is only good during Sale-a-bration which starts January 7 and ends on February 28. Why not give it a try? I’d love to have you on my team.

Final Week for Sale-a-bration

Ready for more? There are EVEN MORE PRODUCTS available to shop, earn, and redeem during Sale-A-Bration. We don’t want you to miss out on these great products and incredible deals, Click HERE for the Sale-A-Bration Additional Products Flyer.

Remember, you must use the item numbers in the flyer in order to redeem these products as Sale-A-Bration items. These products have different item numbers in the catalog, which won’t register as part of Sale-A-Bration.

We’ve included two kits as part of our Sale-A-Bration newly added products. Once the kits sell out, they will be discontinued. If they do not sell out during Sale-A-Bration, they may be discounted at a later date.

Note: The newly added products that are now redeemable during Sale-A-Bration are part of Stampin’ Up!’s existing product offering.

Sale-a-bration 2025 runs through Friday, February 28!  There are some awesome new products that you can earn for FREE with orders of $60+ and orders of $120+ placed during Sale-a-bration as well as a great host bonus and a joining special!

SHOP

  • Spend $60 or more and pick from 12 new products (5 stamp sets,3 designer series paper packs, 1 embossing folder, 1 kit, 1 pack of embellishments and 1 spool of ribbon!) that are available as free items!
  • Spend $120 or more and pick from 2 new items (1 stamp bundle and 1 stamp set) that are available as free items!

HOST

  • Get an additional $30 in FREE Stampin’ Rewards with any party or individual order of $300 or greater during Sale-a-bration!  You can spend your Stampin’ Rewards on any items currently available from Stampin’ Up! including (but not limited to) the host exclusive stamp sets!

*********************************************************************************************************

Daisy Daydream

Subscribe February 11 – March 10

Send sweet greetings with gorgeous cards featuring bees, honeycomb, and daisies.
• Makes 9 cards: 3 each of 3 designs with 9 coordinating envelopes
• Specialty gold foil and precut vellum accents
• Unique precut paper pieces
• Coordinating colors: Crumb Cake, Crushed Curry, Lemon Lime Twist, Lost Lagoon
(Classic Stampin’ Spot), Mossy Meadow, Very Vanilla

Kit comes in a beautiful box with a FREE additional stamp set!

Subscribe to the February Paper Pumpkin Kit between 11 January and 10 February by clicking here!

*********************************************************************************************************

Don’t miss the coordinating
Spring is in The Air Dies Add-On!

Make the most of your Paper Pumpkin kits with the Spring Is in the Air Dies add-on! Quickly and cleanly cut out a heart frame, flowering chive, honeycomb, or tiny bumblebee to elevate your crafting projects. These additional dies are designed to work with THREE Paper Pumpkin Kits: the Hearts for You Paper Pumpkin Kit, the Spring Is in the Air Paper Pumpkin Kit, and the Daisy Daydream Paper Pumpkin Kit. Pair these dies with other Stampin’ Up! products for even more creative options!

DETAILS
– 5 dies
– Largest die: 3″ x 3″ (7.6 x 7.6 cm)
– Use with a Stampin’ Cut & Emboss Machine (sold separately)

You must be a current Paper Pumpkin subscriber to purchase this item. To become a subscriber, visit paperpumpkin.com.

#166237 $12

Note: Supplies may be limited toward the end of the subscription period.

*********************************************************************************************************

Card stock cuts for this project:

  • Basic White Cardstock 3″ X 4″(butterfly), 1″ X 4″(sentiment), 4″ X 5 1/4″(inner liner)
  • Basic White Thick Cardstock 4 1/4″ X 11″(card base scored & folded at 5 1/2″)
  • Pretty Peacock Cardstock 3 1/2″X 4 1/2″(butterfly), 4 1/8″ X 5 3/8″(inner liner mat)
  • Thoughtful Designs Specialty designer Series Paper 3 1/4″ X 5 1/2″(card front), 2 – 1/4″ X 5 1/4″(inner liner), 2 1/4″ X 6″(envelope flap)
  • Silver Foil Paper 1″ x 2″(butterfly body), 2 – 1/4″ x 5 1/2″(card front)

*********************************************************************************************************

Product List