Stampin’ Up! Bee My Valentine for Amy’s Inkin’ Krew Team Blog Hop

Good Tuesday morning my stamping friends welcome to Amy’s Inkin’ Krew Team Blog Hop. It’s the 2nd Tuesday of the month so that means Blog Hop Day!! If you are starting with me, be sure to hop around to see everyone’s beautiful projects. If you’ve hopped over from Mary’s blog, welcome to my blog and thank you for stopping by. The theme this month is “Celebrate Summer”. We can interpret this however we want. If you’d like to see a quick video on how I made this card, Click Here to go to my Instagram Reels. Here’s my card for today.
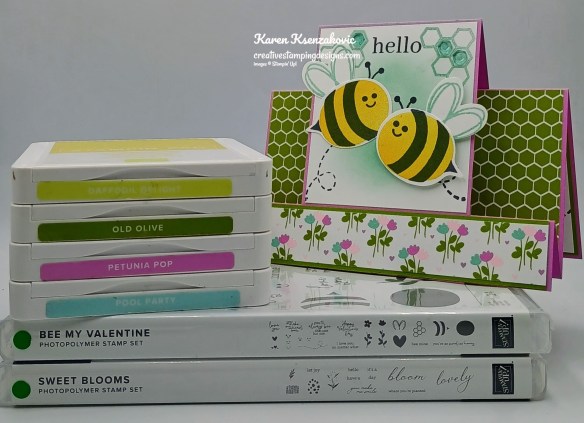
Stampin' Up! Bee My Valentine Fun Fold 1 creativestampingdesigns.com

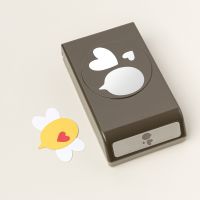
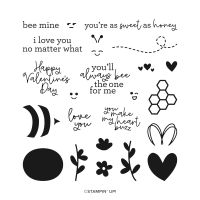
I used the Stampin’ Up! bee My Valentine Photopolymer Stamp Set along with the Cute As Can Bee Designer Series Paper, Stampin’ Up! Sweet Blooms Photopolymer Stamp Set and Bee Builder Punch for my card today.
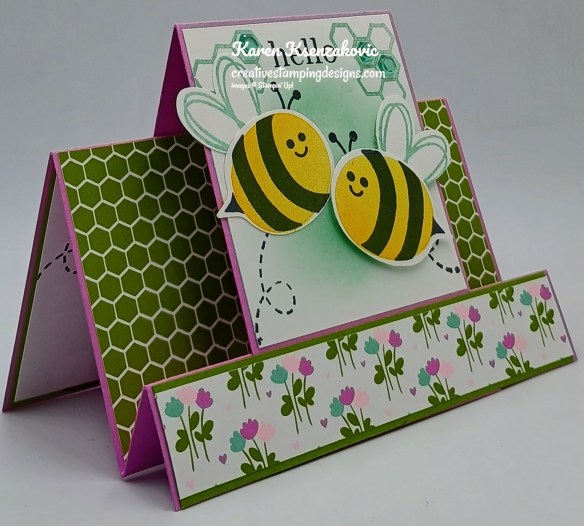
Stampin' Up! Bee My Valentine Fun Fold 2 creativestampingdesigns.com

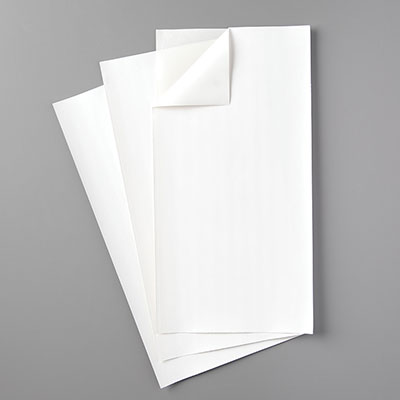
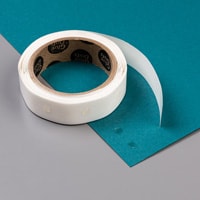
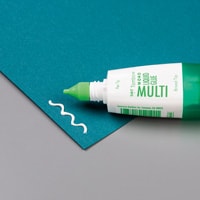
Fold the Petunia Pop card base on the 3″ & 7″ score lines as mountain folds and on the 6″ score line a valley fold. Adhere a panel of Cute as Can Bee DSP to the center section of the card base with Stampin’ Seal. Adhere the pop-up panel to the card base by adhering the longer part in the front adhering it to the bottom front panel with Tear & Tape. Adhere the shorter side to the back of the card base with Teat & Tape. Adhere a panel of Cute as Can Bee DSP to an Old Olive mat with Stampin’ Seal. Adhere the layered panel to the bottom of the card front, over the pop-up panel, with Liquid Glue.
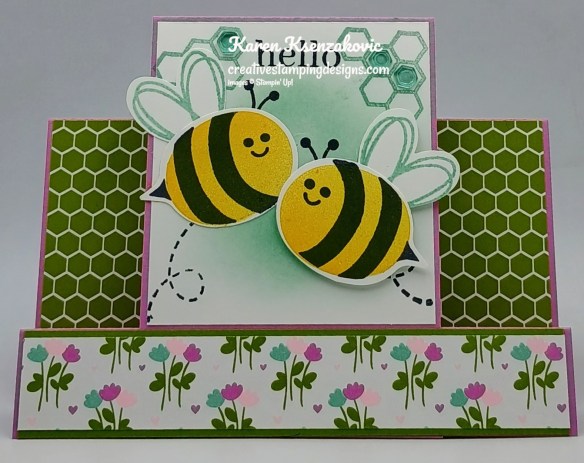
Stampin' Up! Bee My Valentine Fun Fold 3 creativestampingdesigns.com

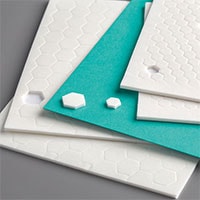
On a panel of Basic White, add Pool Party Ink with a Blending Brush. Stamp the sentiment from Sweet Blooms stamp set in Tuxedo Black Ink on the top of the panel. Stamp the beehive image from Bee My Valentine stamp set in Pool Party Ink on either side of the sentiment. Stamp the dotted line image from Bee My Valentine stamp set in tuxedo Black Ink on the panel. Adhere the Basic White pane to the pop-up Petunia Pop panel with Stampin’ Seal. On a panel of Basic White, stamp the bee stripes image from the Bee My Valentine stamp set in Tuxedo Black Ink 2 times. Stamp the bee body image from the Bee My Valentine stamp set in Daffodil Delight Ink over the striped images. Cut the bees out using the Bee Builder Punch. Stamp the face on the bee in Tuxedo Black Ink. On another panel of Basic White, stamp the outlined wing image 2 times and cut them out with the Bee Builder Punch. Adhere the wings to the back of the bee with a Glue Dot. Stamp the antennae image from the Bee My Valentine stamp set in Tuxedo Black Ink on the inked panel of Basic White. Adhere the bee images to the Basic White panel, one with Liquid Glue and the other with Stampin’ Dimensionals. Add a few of the Shades of Green Hexagons to the stamped beehive images.
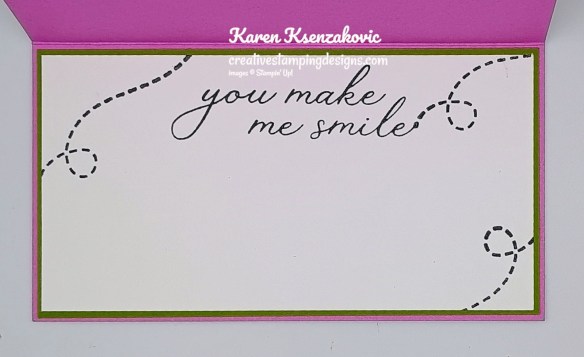
Stampin' Up! Bee My Valentine Fun Fold 4 creativestampingdesigns.com

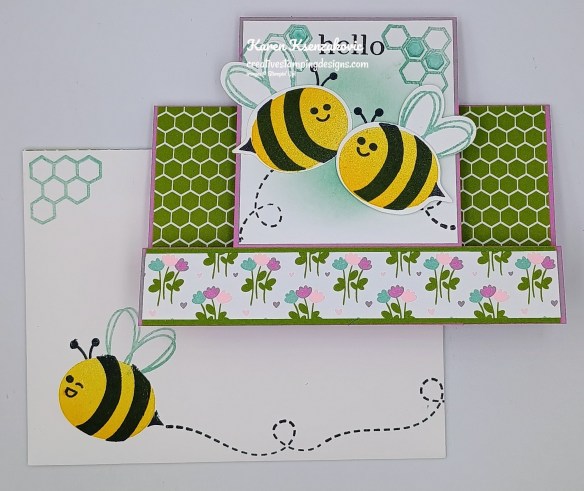
On a panel of Basic White, stamp the sentiment from Sweet Blooms stamp set in Tuxedo Black Ink. Stamp the dotted line image from the Bee My Valentine stamp set in Tuxedo Black Ink around the panel. Adhere the Basic White panel to an Old Olive mat then to the inside of the Petunia Pop card base.
Stampin' Up! Bee My Valentine Fun Fold 5 creativestampingdesigns.com

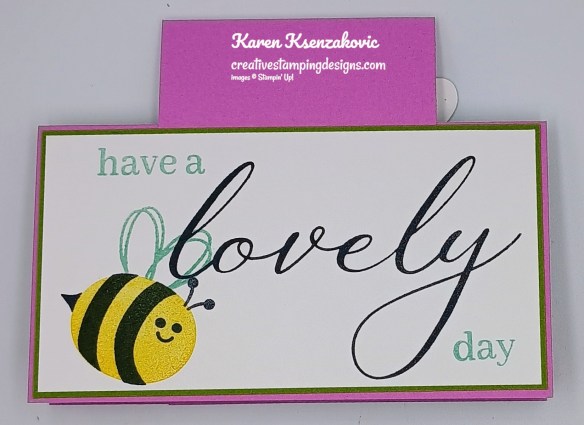
On a panel of Basic White, stamp the large sentiment from Sweet Blooms stamp set in tuxedo Black Ink. Stamp the small sentiments from Sweet Blooms stamp set in Pool Party Ink. Stamp the bee image from Bee My Valentine stamp set in Daffodil Delight, Tuxedo Black and Pool Party Inks the same as for the card front. Adhere the Basic White panel to an Old Olive mat then to the back of the Petunia Pop card base.
Stampin' Up! Bee My Valentine Fun Fold 6 creativestampingdesigns.com

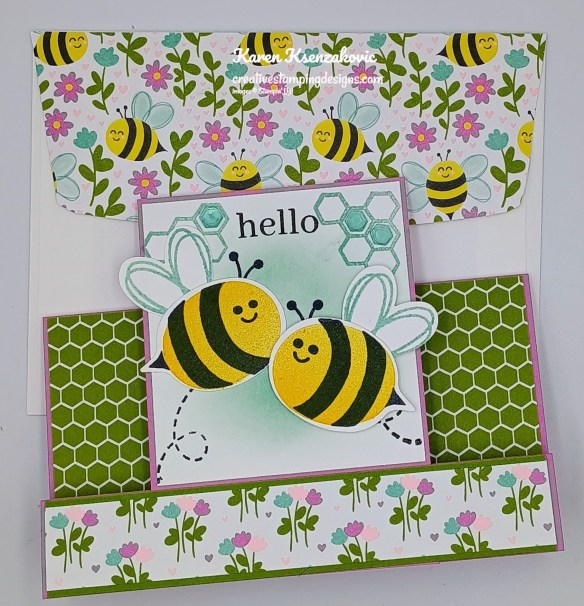
Decorate a Basic White Medium Envelope to complete your card. Stamp the bee stripes image in Tuxedo Black Ink on the envelope front. Stamp the bee body in Daffodil Delight Ink on top of the striped image. Stamp the dotted line, face and antennae images from the Bee My Valentine stamp set in tuxedo Black Ink. Stamp the wings and beehive images from the Bee My Valentine stamp set in Pool Party Ink. Adhere a panel of Cute As Can Bee DSP to the envelope flap.
Stampin' Up! Bee My Valentine Fun Fold 7 creativestampingdesigns.com

Thank you for stopping by my blog today.  Now that you’ve seen my card, let’s get on with the hop!  Click on the Next Blog button to move on to Ann Louise’s project or click the Previous Blog button to go back to see the project that Mary created. Happy Hopping.

Just in case you get lost along the way, here is a list of the team members involved in the hop today.

  1. Tara Carpenter
  2. Christie King
  3. Karen Finkle
  4. Mary Deatherage
  5. Karen Ksenzakovic You Are Here
  6. Ann Louise Fodgaard
  7. Amy Koenders

*********************************************************************************************************

If you need any stamping supplies, I’d love to be your Demonstrator. Just click HERE to go directly to my online store or drop me an email if you have any questions. 

*********************************************************************************************************

Full of Charm

Subscribe May 11 – June 10
Send your loved ones elevated cards with heartfelt sentiments!
• Makes 9 cards: 3 each of 3 designs with 9 coordinating envelopes
• Envelopes and card bases with decorative gold foil
• Precut paper pieces and unique sentiment labels
• Coordinating colors: Berry Burst, Cajun Craze, Early Espresso, Mossy Meadow,
Pretty Peacock (Classic Stampin’ Spot), Timid Tiger
Coordinates with the Floral Charm Suite Collection (item 166141)

Subscribe to the June Paper Pumpkin Kit between 11 May and 10 June by clicking here!

*********************************************************************************************************

Don’t miss the coordinating
Hugs Abloom Dies Add-On!
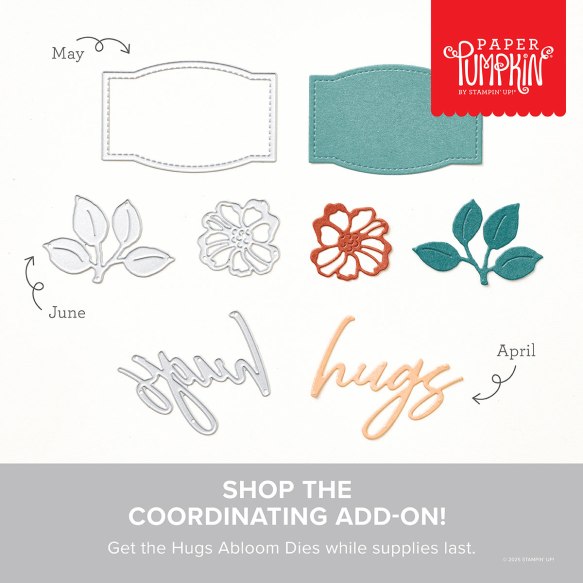
Make the most of your Paper Pumpkin kits with the Hugs Abloom Dies add-on! Quickly and cleanly cut out a flower, leaf sprig, sentiment label, or Hugs sentiment to elevate your crafting projects. These additional dies are designed to work with THREE Paper Pumpkin Kits: the Inked Occasions Paper Pumpkin Kit, the Mountain Majesties Paper Pumpkin Kit, and the Full of Charm Paper Pumpkin Kit. Pair these dies with other Stampin’ Up! products for even more creative options!

DETAILS
– 4 dies
– Largest die: 2-1/2″ x 1-1/4″ (6.4 x 3.2 cm)
– Use with a Stampin’ Cut & Emboss Machine (sold separately)

You must be a current Paper Pumpkin subscriber to purchase this item. To become a subscriber, visit www.stampinup.com/paperpumpkin.

Note: Supplies may be limited toward the end of the subscription period.

#166238 $12

*********************************************************************************************************

Card stock cuts for this project:

  • Basic White Cardstock 2 7.8″ x 3 1/8″(card front panel), 1 1/2″ x 3 1/2″(bees), 2″ x 3″(wings), 2 – 2 3/4″ x 5 1/4″(inner liner & back panel)
  • Old Olive Cardstock 1″ x 5 3/8″(bottom panel mat), 2 – 2 7/8″ x 5 3/8″(inner liner & back panel mats)
  • Petunia Pop Cardstock 5 1/2″ x 8″(card base scored & folded at 3″, 6″ & 7″), 3″ x 6″(pop up panel scored & folded t 4 1/4″)
  • Cute As Can Bee Designer Series Paper 7/8″ x 5 3/8″(bottom panel), 3″ x 5 3/8″ (card front panel), 2 1/4″ x 6″(envelope flap)

*********************************************************************************************************

Product List
Stampin’ Up! With You in Mind for The Happy Inkin’ Thursday Blog Hop

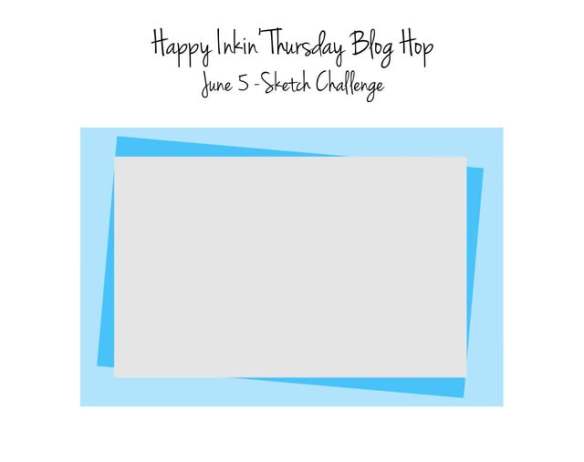
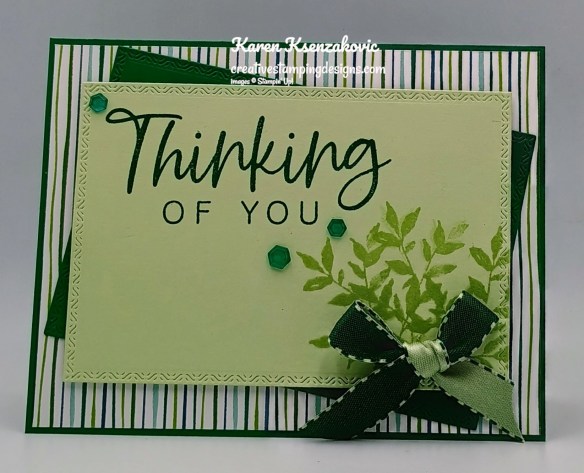
Good Thursday morning stamping friends and welcome to our Happy Inkin’ Thursday Blog Hop. If you are starting with me, thank you. I hope you will stop by everyone’s blog to see what they have created this week. If you are hopping over from Mary’s blog, thank you for stopping by. This week we have Sketch Challenge. If you’d like to see a quick video of how I made this card, Click Here to go to my Instagram Reels. Here is my card using this week’s sketch.

Stampin' Up! With You in Mind CAS 1 creativestampingdesigns.com

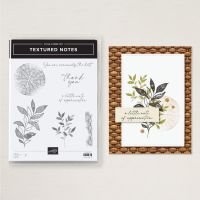
I used the Stampin’ Up! with You in Mind Photopolymer Stamp Set along with the Stampin’ Up! Textured Notes Bundle and Turtle-y Cute Designer Series Paper for my card today.

This is our sketch for this week.

Stampin' Up! With You in Mind CAS 2 creativestampingdesigns.com

Adhere a panel of Turtle-y Cute DSP to a Shaded Spruce card base with Liquid Glue.

Stampin' Up! With You in Mind CAS 3 creativestampingdesigns.com

Using the Textured Notes Dies, cut a panel of Shaded Spruce and Soft Sea Foam with the 2nd largest die. Adhere the Shaded Spruce die cut frame to the card front, on an angle with Stampin’ Seal. Stamp the sentient from With You in Mind stamp set in Shaded Spruce Ink on the Soft Sea Foam die cut frame. Stamp the small leaf image from the Stampin’ Up! Textured Notes Cling Stamp Set on the bottom of the frame in Soft Sea Foam Ink. Adhere the soft Sea Foam panel to the card front, straight with Stampin’ Dimensionals.

Stampin' Up! With You in Mind CAS 4 creativestampingdesigns.com

Tie a bow with the Shaded Spruce & Soft Sea Foam 1/2″ Bordered Ribbon and adhere it to the bottom of the stamped leaf image with a Glue Dot. Add a few Shades of Green Hexagons to the card front.

Stampin' Up! With You in Mind CAS 5 creativestampingdesigns.com

Stamp the sentiment from Textured Notes stamp set in Shaded Spruce Ink on a panel of Basic White. Stamp the small leaf image from Textured Notes stamp set in Shaded Spruce and Soft Sea Foam Inks on the bottom of the panel. Adhere the Basic White panel to a Soft Sea Foam mat then to the inside of the Shaded Spruce card base.

Stampin' Up! With You in Mind CAS 6 creativestampingdesigns.com

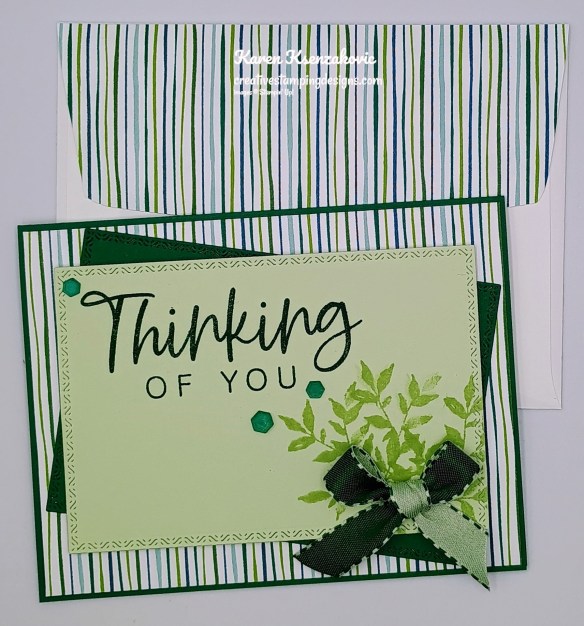
Decorate a Basic White Medium Envelope to complete your card. Stamp the small leaf image from Textured Notes stamp set in Shaded Spruce and Soft Sea Foam Inks on the bottom of the envelope front. Adhere a panel of Turtle-y Cute DSP to the envelope flap.

Stampin' Up! With You in Mind CAS 7 creativestampingdesigns.com

Thank you for stopping by my blog today.  Now that you’ve seen my card, let’s get on with the hop!  Click the button below to hop over to see what Tara has created. Happy Hoping!

Just in case you get lost along the way, here is a list of the team members involved in the hop today.

Amy Koenders

Mary Deatherage

Karen Ksenzakovic You Are Here

Tara Carpenter

Terry Lynn Bright

*********************************************************************************************************

If you need any stamping supplies, I’d love to be your Demonstrator. Just click HERE to go directly to my online store or drop me an email if you have any questions. 

*********************************************************************************************************

Full of Charm

Subscribe May 11 – June 10

Send your loved ones elevated cards with heartfelt sentiments!
• Makes 9 cards: 3 each of 3 designs with 9 coordinating envelopes
• Envelopes and card bases with decorative gold foil
• Precut paper pieces and unique sentiment labels
• Coordinating colors: Berry Burst, Cajun Craze, Early Espresso, Mossy Meadow,
Pretty Peacock (Classic Stampin’ Spot), Timid Tiger
Coordinates with the Floral Charm Suite Collection (item 166141)

Subscribe to the June Paper Pumpkin Kit between 11 May and 10 June by clicking here!

*********************************************************************************************************

Don’t miss the coordinating
Hugs Abloom Dies Add-On!

Make the most of your Paper Pumpkin kits with the Hugs Abloom Dies add-on! Quickly and cleanly cut out a flower, leaf sprig, sentiment label, or Hugs sentiment to elevate your crafting projects. These additional dies are designed to work with THREE Paper Pumpkin Kits: the Inked Occasions Paper Pumpkin Kit, the Mountain Majesties Paper Pumpkin Kit, and the Full of Charm Paper Pumpkin Kit. Pair these dies with other Stampin’ Up! products for even more creative options!

DETAILS
– 4 dies
– Largest die: 2-1/2″ x 1-1/4″ (6.4 x 3.2 cm)
– Use with a Stampin’ Cut & Emboss Machine (sold separately)

You must be a current Paper Pumpkin subscriber to purchase this item. To become a subscriber, visit www.stampinup.com/paperpumpkin.

Note: Supplies may be limited toward the end of the subscription period.

#166238 $12

*********************************************************************************************************

Card stock cuts for this project:

  • Basic White Cardstock 4″ x 5 1/4″(inner liner)
  • Shaded Spruce Cardstock 5 1/2″ x 8 1/2″(card base scored & folded at 4 1/4″), 3 1/2″ x 5″(card front panel)
  • Soft Sea Foam Cardstock 3 1/2″ x 5″(sentiment), 4 1/8″ x 5 3/8″(inner liner mat)
  • Turtle-y Cute Designer Series Paper 4 1/8″ x 5 3/8″(card front), 2 1/4″ x 6″(envelope flap)

*********************************************************************************************************

Product List

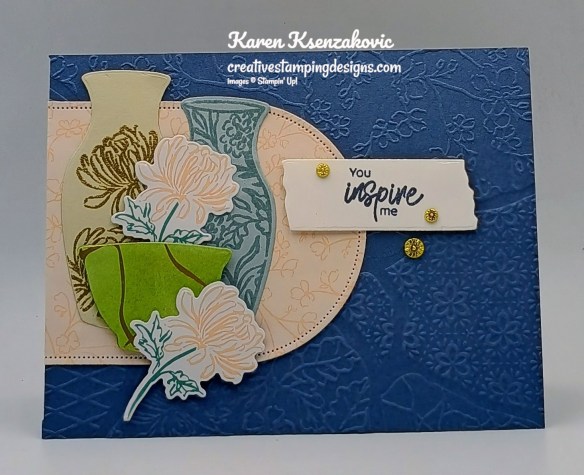
Stampin’ Up! Inspiring Imperfections for The Happy Inkin’ Thursday Blog Hop

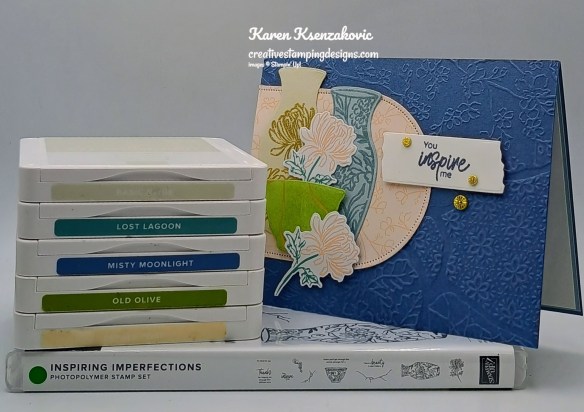
Good Thursday morning stamping friends and welcome to our Happy Inkin’ Thursday Blog Hop. If you are starting with me, thank you. I hope you will stop by everyone’s blog to see what they have created this week. If you are hopping over from Mary’s blog, thank you for stopping by. This week we have Color Challenge. If you’d like to see a quick video of how I made this card, Click Here to go to my Instagram Reels. Here is my card using this week’s colors.

Stampin' Up! Inspiring Imperfections Trio 1 creativestampingdesigns.com

I used the Stampin’ Up! Inspiring Imperfections Bundle along with the Kintsugi Inspirations Specialty Designer Series Paper, Joined Together 3D Embossing Folder and Everyday Arches Dies for my card today.

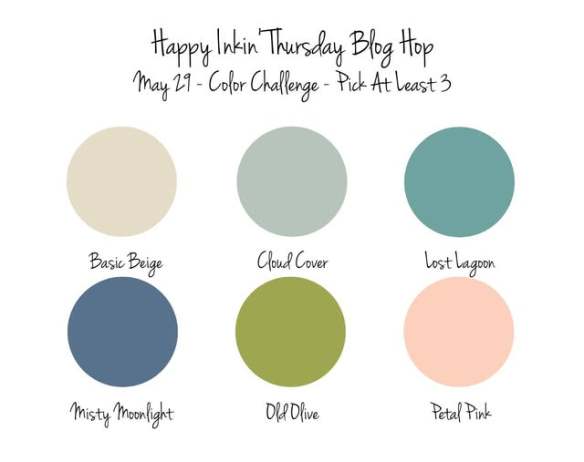
These are our colors for this week.

Stampin' Up! Inspiring Imperfections Trio 2 creativestampingdesigns.com

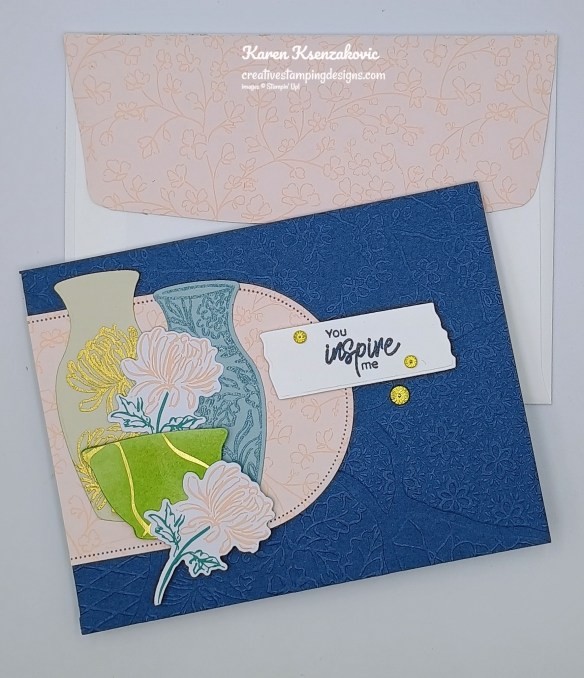
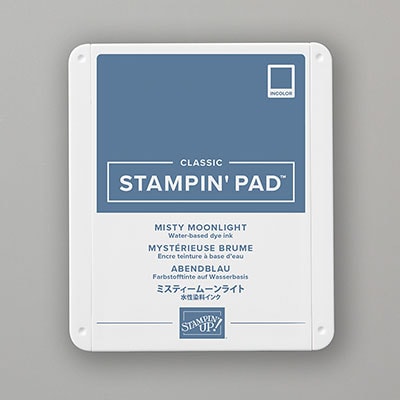
Emboss a Misty Moonlight card front, with the Joined Together EF. Using the Everyday Arches Dies, cut a panel of Kintsugi Inspirations DSP. Adhere the die cut panel to the card front hanging it off the left side of the card front. trim excess with Paper Snips. Adhere the layered panel to the Misty Moonlight card base with Liquid Glue.

Stampin' Up! Inspiring Imperfections Trio 3 creativestampingdesigns.com

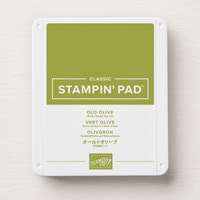
Using the Small Blending Brush, add Old Olive Ink to the panel of Kintsugi Inspirations DSP. On the panel of Cloud Cover, stamp the large vase image from the Stampin’ Up! Inspiring Imperfections Photopolymer Stamp Set in Versamark Ink. Sprinkle the image with Clear Embossing Powder and set it with Heat Tool. Using the Inspiring Imperfections Dies, cut the small bow from the Old Olive colored DSP, the large vase from the Cloud Cover and Basic Beige panels and the flowers from a panel of Kintsugi Inspirations DSP. On the Basic Beige vase, stamp the flower image from the Inspiring Imperfections stamp set in Versamark Ink. Sprinkle the image with Gold Embossing Powder and set it with the Heat Tool. Adhere the vases and flowers on the card front using Glue Dots and Stampin’ Dimensionals.

Stampin' Up! Inspiring Imperfections Trio 4 creativestampingdesigns.com

On the panel of Basic White, stamp the sentiment from the Inspiring Imperfections stamp set in Misty Moonlight Ink. Cut the sentiment out using the Inspiring Imperfections Dies. Adhere the sentiment to the card front with Stampin’ Dimensionals. Add a few Flower Accents to the card front.

Stampin' Up! Inspiring Imperfections Trio 5 creativestampingdesigns.com

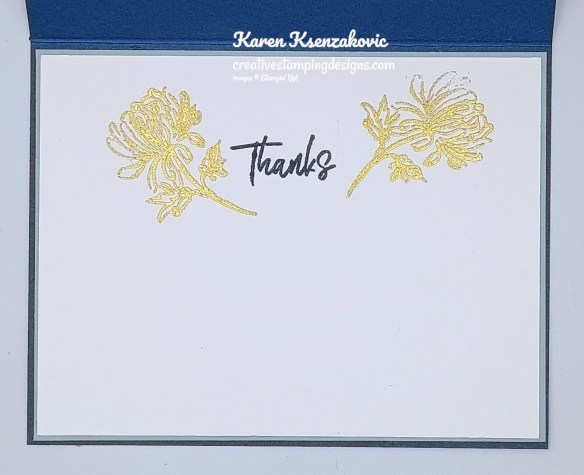
Stamp the sentiment from Inspiring Imperfections stamp set in Misty Moonlight Ink on a panel of Basic White. Stamp the flower image from the Inspiring Imperfections stamp set in Versamark Ink next to the sentiment. Sprinkle the images with Gold Embossing Powder and set it with the Heat Tool. Adhere the Basic White panel to a Cloud Cover mat then to the inside of the Misty Moonlight card base.

Stampin' Up! Inspiring Imperfections Trio 6 creativestampingdesigns.com

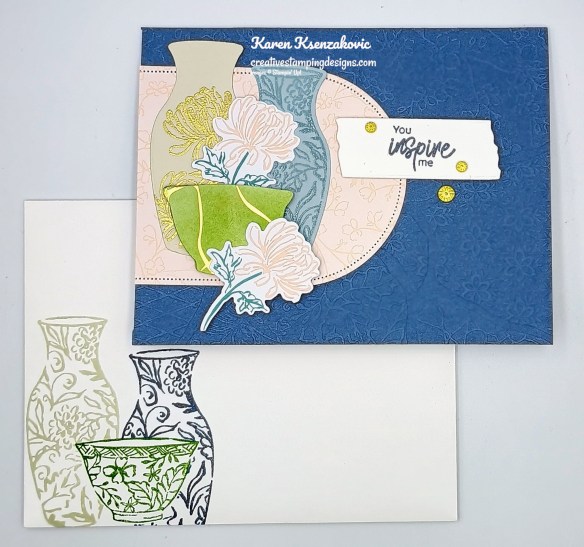
Decorate a Basic White Medium Envelope to complete your card. Stamp the large vase and bowl images from the Inspiring Imperfections stamp set in Basic Beige, Misty Moonlight and Old Olive Inks on the envelope front. Adhere a panel of Kintsugi Inspirations DSP to the envelope flap.

Stampin' Up! Inspiring Imperfections Trio 7 creativestampingdesigns.com

Thank you for stopping by my blog today.  Now that you’ve seen my card, let’s get on with the hop!  Click the button below to hop over to see what Tara has created. Happy Hopping!

Just in case you get lost along the way, here is a list of the team members involved in the hop today.

Amy Koenders

Mary Deatherage

Karen Ksenzakovic You Are Here

Tara Carpenter

Terry Lynn Bright

*********************************************************************************************************

If you need any stamping supplies, I’d love to be your Demonstrator. Just click HERE to go directly to my online store or drop me an email if you have any questions. 

*********************************************************************************************************

Full of Charm

Subscribe May 11 – June 10

Send your loved ones elevated cards with heartfelt sentiments!
• Makes 9 cards: 3 each of 3 designs with 9 coordinating envelopes
• Envelopes and card bases with decorative gold foil
• Precut paper pieces and unique sentiment labels
• Coordinating colors: Berry Burst, Cajun Craze, Early Espresso, Mossy Meadow,
Pretty Peacock (Classic Stampin’ Spot), Timid Tiger
Coordinates with the Floral Charm Suite Collection (item 166141)

Subscribe to the June Paper Pumpkin Kit between 11 May and 10 June by clicking here!

*********************************************************************************************************

Don’t miss the coordinating
Hugs Abloom Dies Add-On!

Make the most of your Paper Pumpkin kits with the Hugs Abloom Dies add-on! Quickly and cleanly cut out a flower, leaf sprig, sentiment label, or Hugs sentiment to elevate your crafting projects. These additional dies are designed to work with THREE Paper Pumpkin Kits: the Inked Occasions Paper Pumpkin Kit, the Mountain Majesties Paper Pumpkin Kit, and the Full of Charm Paper Pumpkin Kit. Pair these dies with other Stampin’ Up! products for even more creative options!

DETAILS
– 4 dies
– Largest die: 2-1/2″ x 1-1/4″ (6.4 x 3.2 cm)
– Use with a Stampin’ Cut & Emboss Machine (sold separately)

You must be a current Paper Pumpkin subscriber to purchase this item. To become a subscriber, visit www.stampinup.com/paperpumpkin.

Note: Supplies may be limited toward the end of the subscription period.

#166238 $12

*********************************************************************************************************

Card stock cuts for this project:

  • Basic Beige Cardstock 2″ x 3 1/2″(vase)
  • Basic White Cardstock 1″ x 2 1/2″(sentiment), 4″ x 5 1/4″(inner liner)
  • Cloud Cover Cardstock 2″ x 3 1/2″(vase), 4 1/8″ x 5 3/8″(inner liner mat)
  • Misty Moonlight Cardstock 5 1/2″ x 8 1/2″(card base scored & folded at 4 1/4″), 4 1/4″ x 5 1/2″(card front)
  • Kintsugi Inspirations Specialty Designer Series Paper 3″ x 6″(arch), 1 1/2″ x 3″(vase), 2 1/4″ x 6″(envelope flap)

*********************************************************************************************************

Product List
Stampin’ Up! Beautiful Butterflies for The Happy Inkin’ Thursday Blog Hop

Good Thursday morning stamping friends and welcome to our Happy Inkin’ Thursday Blog Hop. If you are starting with me, thank you. I hope you will stop by everyone’s blog to see what they have created this week. If you are hopping over from Akiko’s blog, thank you for stopping by. This week we have Sketch Challenge. If you’d like to see a quick video of how I made this card, Click Here to go to my Instagram Reels. Here is my card using this week’s sketch.

Stampin' Up! Beautiful Butterflies with Gingham 1 creativestampingdesigns.com

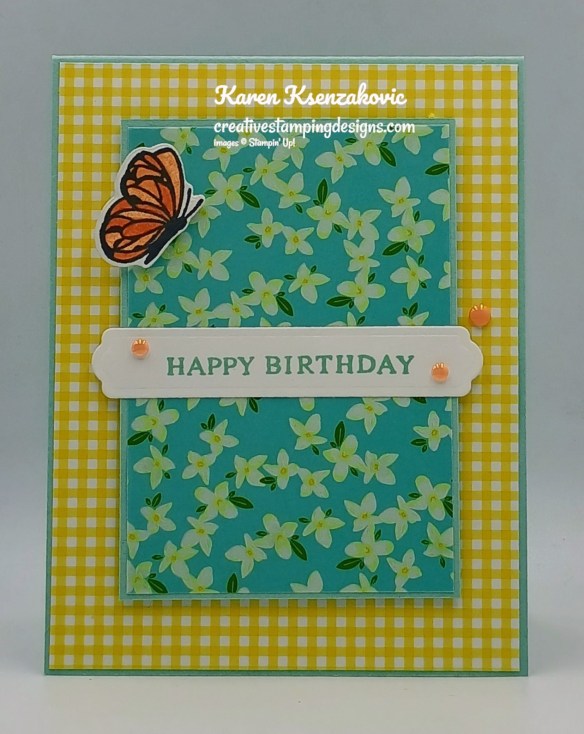
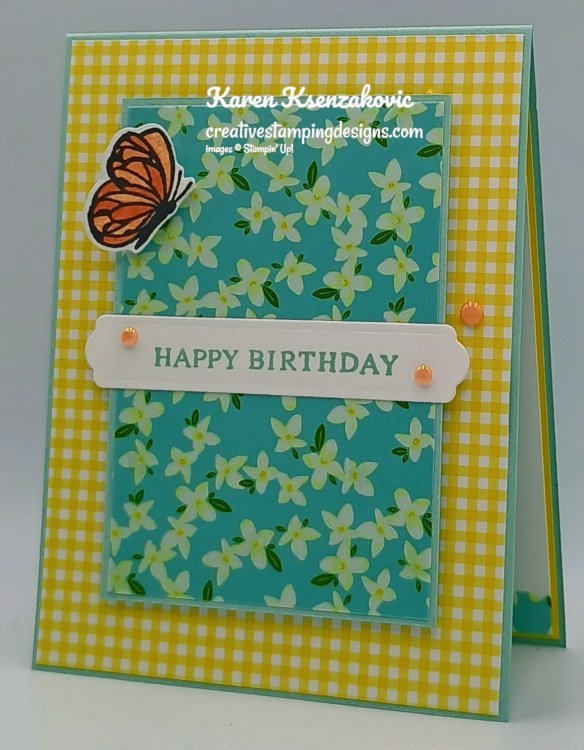
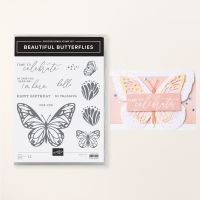
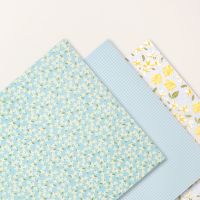
I used the Stampin’ Up! Beautiful Butterflies Photopolymer Stamp Set along with the Beautiful Butterflies Dies, Floral Delight Designer Series Paper and Floral & Gingham Vellum Specialty Paper for my card today.

This is our sketch for this week.

I played along with The Paper Players Clean & Simple Things that Fly challenge #738

Stampin' Up! Beautiful Butterflies with Gingham 2 creativestampingdesigns.com

Adhere a panel of Floral Delight DSP to a Pool Party card base with Liquid Glue. Adhere a panel of Floral & Gingham Vellum paper to a Pool Party mat with Stampin’ Seal and Glue Dots under the flowers. Adhere the layered panel to the card base with Stampin’ Dimensionals.

Stampin' Up! Beautiful Butterflies with Gingham 3 creativestampingdesigns.com

On a panel of Basic White, stamp the sentiment from the Beautiful Butterflies stamp set in Pool Party Ink. Cut the sentiment out using the Beautiful Butterflies Dies. Adhere the sentiment to the card front with Stampin’ Seal. Add a few 2025-2027 In-Color Flat Pearls to the card front.

Stampin' Up! Beautiful Butterflies with Gingham 4 creativestampingdesigns.com

On the panel of Basic White, stamp the small butterfly image from the Beautiful Butterflies stamp set in Tuxedo Black Ink. Color the image using Timid Tiger Stampin’ Bends Markers. Cut the butterfly out using the Beautiful Butterflies Dies. Adhere the butterfly to the card front with Stampin’ Dimensionals only on the body section of the butterfly.

Stampin' Up! Beautiful Butterflies with Gingham 5 creativestampingdesigns.com

Stamp the sentiment from Beautiful Butterflies stamp set on a panel of Basic White. Stamp the butterfly image from Beautiful Butterflies stamp set in Tuxedo Black Ink by the sentiment. Color the butterfly using Timid Tiger Stampin’ Blends Markers. Adhere a strip of Floral Delight DSP to the top of the panel and Floral & Gingham Vellum to the bottom of the panel. Adhere the Basic White panel to a Daffodil Delight mat then to the inside of the Pool Party card base.

Stampin' Up! Beautiful Butterflies with Gingham 6 creativestampingdesigns.com

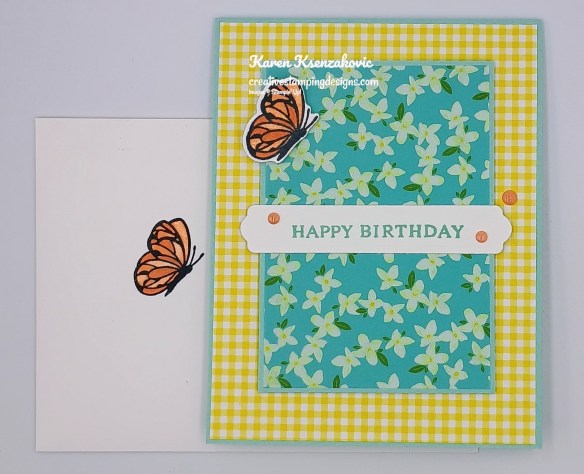
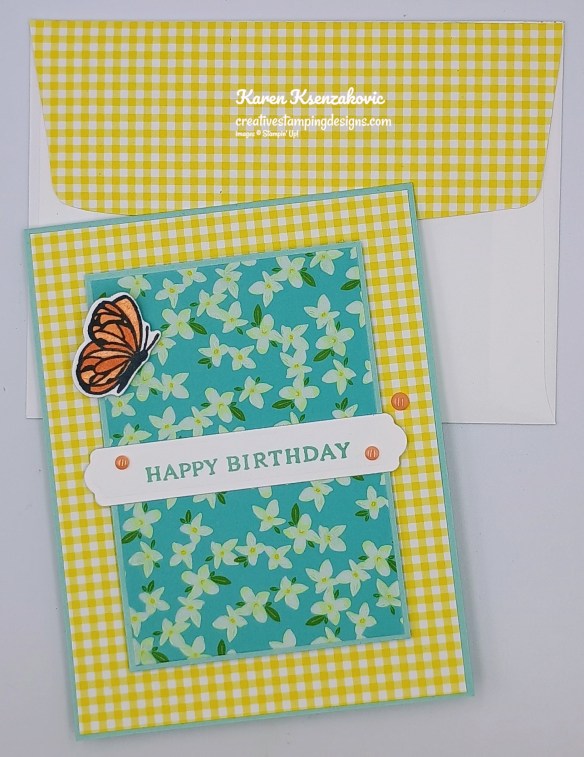
Decorate a Basic White Medium Envelope to complete your card. Stamp the butterfly image from Beautiful Butterflies stamp set in Tuxedo Black Ink on the envelope front. Color the image using Timid Tiger Stampin’ Blends Markers. Adhere a panel of Floral Delight DSP to the envelope flap.

Stampin' Up! Beautiful Butterflies with Gingham 7 creativestampingdesigns.com

Thank you for stopping by my blog today.  Now that you’ve seen my card, let’s get on with the hop!  Click the button below to hop over to see what Tara has created. Happy Hopping.

Just in case you get lost along the way, here is a list of the team members involved in the hop today.

Amy Koenders

Mary Deatherage

Akiko Sudano

Karen Ksenzakovic You Are Here

Tara Carpenter

Terry Lynn Bright

*********************************************************************************************************

If you need any stamping supplies, I’d love to be your Demonstrator. Just click HERE to go directly to my online store or drop me an email if you have any questions. 

*********************************************************************************************************

Full of Charm

Subscribe May 11 – June 10

Send your loved ones elevated cards with heartfelt sentiments!
• Makes 9 cards: 3 each of 3 designs with 9 coordinating envelopes
• Envelopes and card bases with decorative gold foil
• Precut paper pieces and unique sentiment labels
• Coordinating colors: Berry Burst, Cajun Craze, Early Espresso, Mossy Meadow,
Pretty Peacock (Classic Stampin’ Spot), Timid Tiger
Coordinates with the Floral Charm Suite Collection (item 166141)

Subscribe to the June Paper Pumpkin Kit between 11 May and 10 June by clicking here!

*********************************************************************************************************

Don’t miss the coordinating
Hugs Abloom Dies Add-On!

Make the most of your Paper Pumpkin kits with the Hugs Abloom Dies add-on! Quickly and cleanly cut out a flower, leaf sprig, sentiment label, or Hugs sentiment to elevate your crafting projects. These additional dies are designed to work with THREE Paper Pumpkin Kits: the Inked Occasions Paper Pumpkin Kit, the Mountain Majesties Paper Pumpkin Kit, and the Full of Charm Paper Pumpkin Kit. Pair these dies with other Stampin’ Up! products for even more creative options!

DETAILS
– 4 dies
– Largest die: 2-1/2″ x 1-1/4″ (6.4 x 3.2 cm)
– Use with a Stampin’ Cut & Emboss Machine (sold separately)

You must be a current Paper Pumpkin subscriber to purchase this item. To become a subscriber, visit www.stampinup.com/paperpumpkin.

Note: Supplies may be limited toward the end of the subscription period.

#166238 $12

*********************************************************************************************************

Card stock cuts for this project:

  • Basic White Cardstock 1 1/2″ x 5″(sentiment & butterfly), 4″ x 5 1/4″(inner liner)
  • Daffodil Delight Cardstock 4 1/8″ x 5 3/8″(inner liner mat)
  • Pool Party Cardstock 4 1/4″ x 11″(card base scored & folded at 5 1/2″), 3″ x 4 1/4″ (card front panel mat)
  • Floral Delight Designer Series Paper 4 1/8″ x 5 3/8″(card front), 1/4″ x 4″(inner liner), 2 1/4″ x 6″(envelope flap)
  • Floral & Gingham Vellum Specialty Paper 2 7/8″ x 4 1/8″(card front panel), 1/4″ x 4″(inner liner)

*********************************************************************************************************

Product List
Stampin’ Up! Notes & Totes for The Happy Inkin’ Thursday Blog Hop

Good Thursday morning stamping friends and welcome to our Happy Inkin’ Thursday Blog Hop. If you are starting with me, thank you. I hope you will stop by everyone’s blog to see what they have created this week. If you are hopping over from Mary’s blog, thank you for stopping by. This week we have Theme Challenge. If you’d like to see a quick video of how I made this card, Click Here to go to my Instagram Reels. Here is my card using this week’s theme.

Stampin' Up! Notes & Totes Fun Fold 1 creativestampingdesigns.com

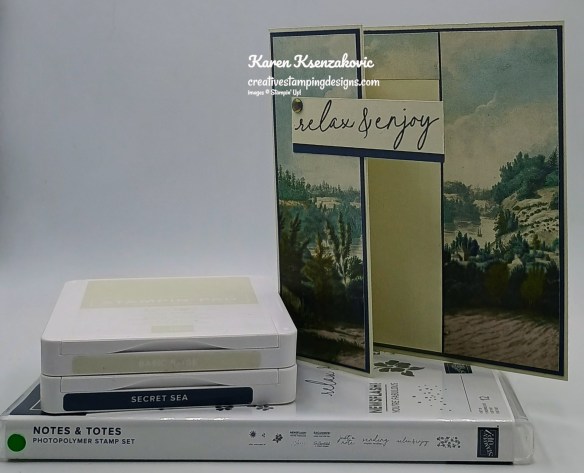
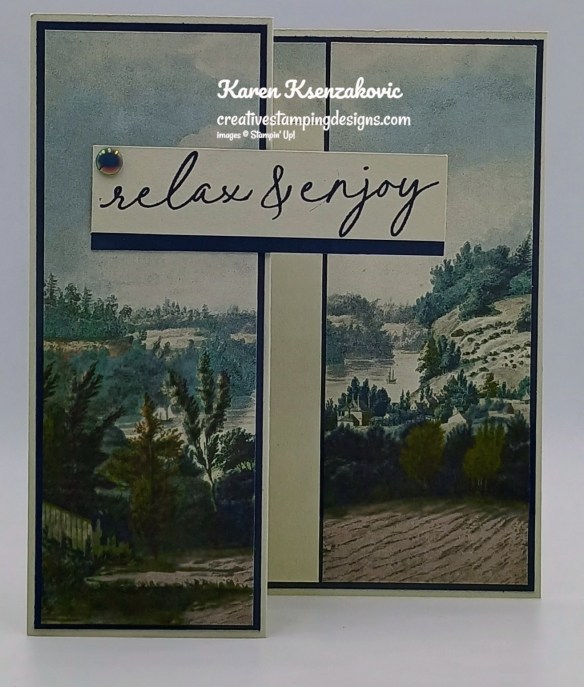
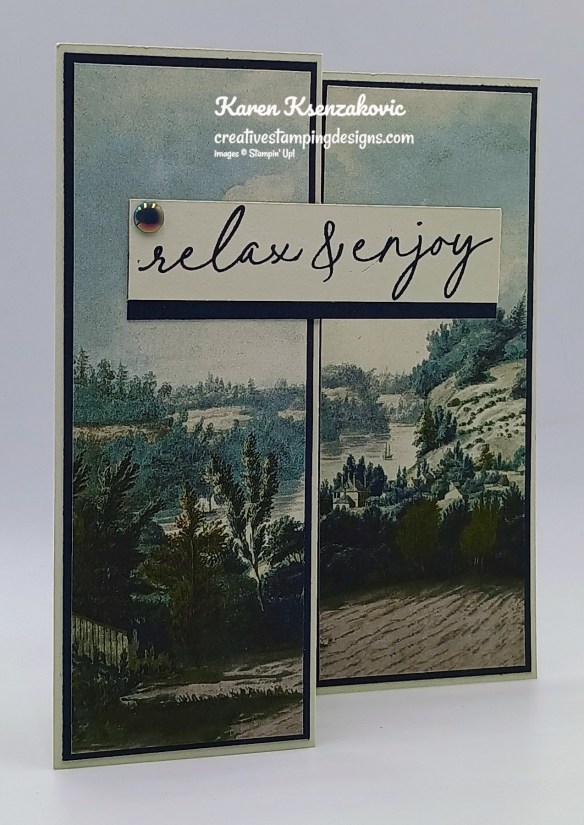
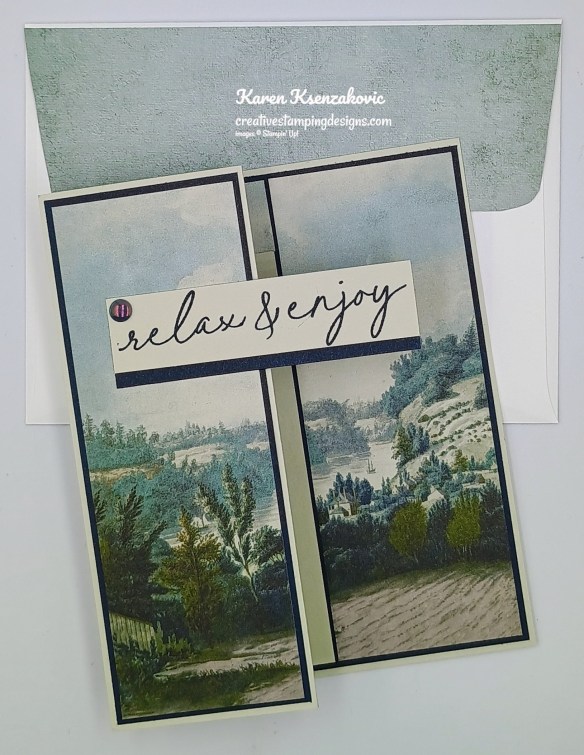
I used the Stampin’ Up! Notes & Totes Photopolymer Stamp Set for a super quick and easy card today along with the Beautiful Gallery 6 x 6 Designer Series Paper.

This is our theme for this week.

Stampin' Up! Notes & Totes Fun Fold 2 creativestampingdesigns.com

Adhere a panel of Beautiful Gallery DSP to a Secret Sea mat with Stampin’ Seal. Adhere the layered panel to the front of a Basic Beige card base with Stampin’ Seal.

Stampin' Up! Notes & Totes Fun Fold 3 creativestampingdesigns.com

On a panel of Basic Beige, stamp the sentiment from Notes & Totes stamp set in Secret Sea Ink. Adhere the sentiment to a Secret Sea mat using Stampin’ Seal. Adhere the sentiment to the card front with Liquid Glue. Add a 2025-2027 In-Color Flat Pearl to the sentiment.

Stampin' Up! Notes & Totes Fun Fold 4 creativestampingdesigns.com

Adhere a panel of Beautiful Gallery DSP to the right side of a Secret Sea mat with Stampin’ Seal.

Stampin' Up! Notes & Totes Fun Fold 5 creativestampingdesigns.com

Stamp the sentiment from Notes & Totes stamp set in Secret Sea Ink on a panel of Basic Beige. Adhere a strip of Beautiful Gallery DSP to the top of the Basic Beige panel. Adhere the panel of Basic Beige to the Secret Sea mat then to the inside of the Basic Beige card base.

Stampin' Up! Notes & Totes Fun Fold 6 creativestampingdesigns.com

Decorate a Basic White Medium Envelope to complete your card. Adhere a strip of Beautiful Gallery DSP to the envelope front and a panel the envelope flap.

Stampin' Up! Notes & Totes Fun Fold 7 creativestampingdesigns.com

Thank you for stopping by my blog today.  Now that you’ve seen my card, let’s get on with the hop!  Click the button below to hop over to see what Tara has created. Happy Hopping!

Just in case you get lost along the way, here is a list of the team members involved in the hop today.

Amy Koenders

Mary Deatherage

Karen Ksenzakovic You Are Here

Tara Carpenter

Terry Lynn Bright

*********************************************************************************************************

If you need any stamping supplies, I’d love to be your Demonstrator. Just click HERE to go directly to my online store or drop me an email if you have any questions. 

*********************************************************************************************************

Full of Charm

Subscribe May 11 – June 10

Send your loved ones elevated cards with heartfelt sentiments!
• Makes 9 cards: 3 each of 3 designs with 9 coordinating envelopes
• Envelopes and card bases with decorative gold foil
• Precut paper pieces and unique sentiment labels
• Coordinating colors: Berry Burst, Cajun Craze, Early Espresso, Mossy Meadow,
Pretty Peacock (Classic Stampin’ Spot), Timid Tiger
Coordinates with the Floral Charm Suite Collection (item 166141)

Subscribe to the June Paper Pumpkin Kit between 11 May and 10 June by clicking here!

*********************************************************************************************************

Don’t miss the coordinating
Hugs Abloom Dies Add-On!

Make the most of your Paper Pumpkin kits with the Hugs Abloom Dies add-on! Quickly and cleanly cut out a flower, leaf sprig, sentiment label, or Hugs sentiment to elevate your crafting projects. These additional dies are designed to work with THREE Paper Pumpkin Kits: the Inked Occasions Paper Pumpkin Kit, the Mountain Majesties Paper Pumpkin Kit, and the Full of Charm Paper Pumpkin Kit. Pair these dies with other Stampin’ Up! products for even more creative options!

DETAILS
– 4 dies
– Largest die: 2-1/2″ x 1-1/4″ (6.4 x 3.2 cm)
– Use with a Stampin’ Cut & Emboss Machine (sold separately)

You must be a current Paper Pumpkin subscriber to purchase this item. To become a subscriber, visit www.stampinup.com/paperpumpkin.

Note: Supplies may be limited toward the end of the subscription period.

#166238 $12

*********************************************************************************************************

Card stock cuts for this project:

  • Basic Beige Cardstock 5 1/2″ x 8 1/2″(card base scored & folded at 2 1/8″ & 4 1/4″), 3/4″ x 3 1/8″(sentiment), 2″ x 5 1/4″(inner liner)
  • Secret Sea Cardstock 2″ x 5 3/8″(card front mat), 1/2″ x 3 1/8″(sentiment mat), 4 1/8″ x 5 3/8″(inner liner mat)
  • Beautiful Gallery 56 x 6 Designer Series Paper 1 7/8″ x 5 1/4″(card front), 2″ x 5 1/4″(inner liner), 1/4″ x 6″ & 2 1/4″ x 6″(envelope)

*********************************************************************************************************

Product List
Stampin’ Up! The Right Word for Amy’s Inkin’ Krew Team Blog Hop

Good Tuesday morning my stamping friends welcome to Amy’s Inkin’ Krew Team Blog Hop. It’s the 2nd Tuesday of the month so that means Blog Hop Day!! If you are starting with me, be sure to hop around to see everyone’s beautiful projects. If you’ve hopped over from Tara’s blog, welcome to my blog and thank you for stopping by. The theme this month is “For the Boys/Men”. We can interpret this however we want. If you’d like to see a quick video on how I made this card, Click Here to go to my Instagram Reels. Here’s my card for today.

Stampin' Up! The Right Words Masculine 1 creativestampingdesigns.com

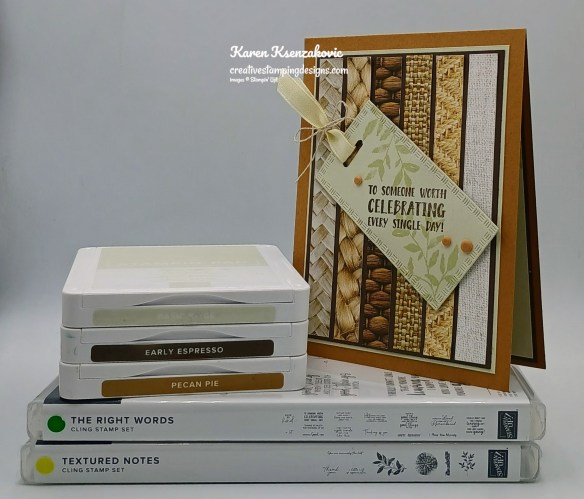
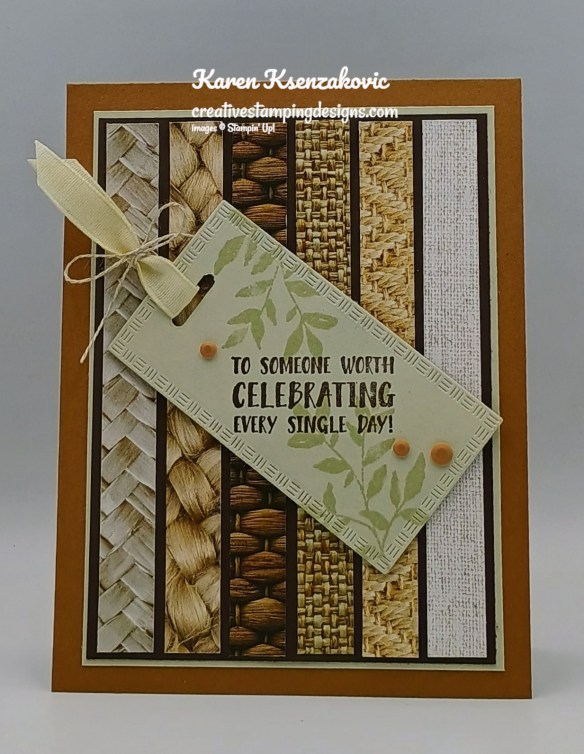
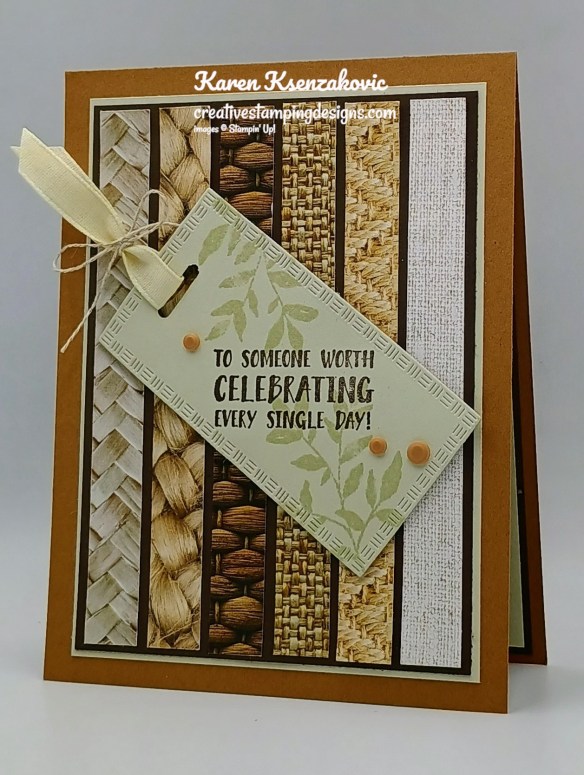
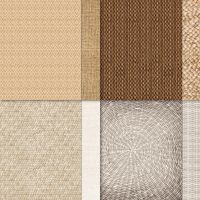
I used the Stampin’ Up! The Right Words Cling Stamp Set along with the Stampin’ Up! Online Exclusives Textured Notes Bundle and Woven Textures Designer Series Paper for my card today. If you have a lot of scraps laying around, this is the perfect way to use them up.

Stampin' Up! The Right Words Masculine 2 creativestampingdesigns.com

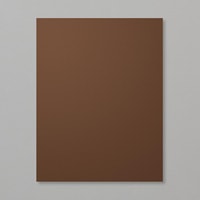
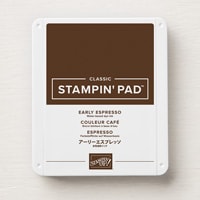
Adhere 6 strips of Woven Textures DSP to an Early Espresso mat using Stampin’ Seal. Adhere the layered panel to a Basic Beige mat using Stampin’ Seal.

Stampin' Up! The Right Words Masculine 3 creativestampingdesigns.com

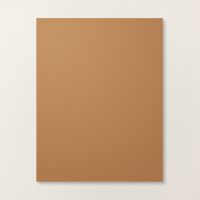
Adhere the matted panel to a Pecan Pie card base using Stampin’ Seal.

Stampin' Up! The Right Words Masculine 4 creativestampingdesigns.com

On a panel of Basic Beige, stamp the sentiment from The Right Words stamp set in Early Espresso Ink. Cut the sentiment out using the 3rd from smallest Textured Notes Dies. Stamp the small leaf image from the Stampin’ Up! Textured Notes Cling Stamp Set in Basic Beige Ink on the corners of the die cut panel. Using the Hoe Punch Assortment, punch a hole on the top of the panel. Thread a piece of the Basic Beige 3/8″ Classic Ribbon through the punched hole. Tie a piece of Linen Thread around the ribbon. Adhere the tag to the card front using Stampin’ Dimensionals. Add a few Neutral Matte Dots to the card front.

Stampin' Up! The Right Words Masculine 5 creativestampingdesigns.com

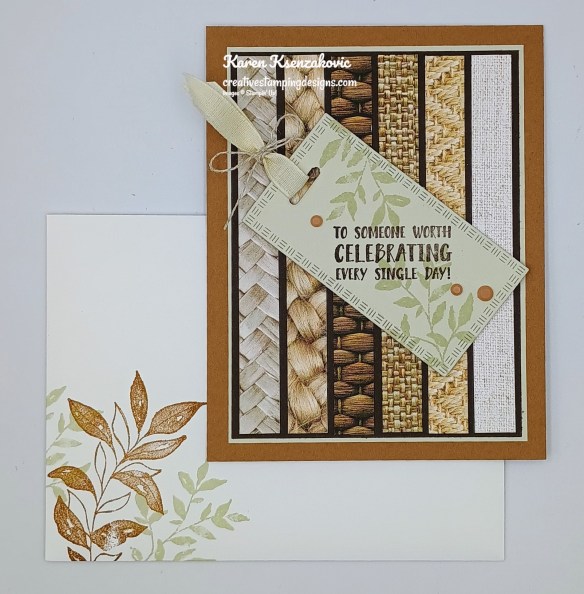
Stamp the sentiment from The Right Word stamp set in Early Espresso Ink on a panel of Basic Beige. Stamp the larger leaf image from Textured Notes stamp set in Pecan Pie Ink, stamping off once on scrap paper, on the top and bottom of the panel. Stamp the smaller leaf image from Textured Notes stamp set in Basic Beige Ink next to the Pecan Pie leaf image. Adhere the Basic Beige panel to an Early Espresso mat then to the inside of the Pecan Pie card base.

Stampin' Up! The Right Words Masculine 6 creativestampingdesigns.com

Decorate a Basic White Medium Envelope to complete your card. Stamp the larger leaf image from the Textured Notes stamp set in Pecan Pie Ink on the envelope front. Stamp the smaller leaf image from the Textured Notes stamp set in Basic Beige Ink. Adhere a panel of Woven Textures DSP to the envelope flap.

Stampin' Up! The Right Words Masculine 7 creativestampingdesigns.com

Thank you for stopping by my blog today.  Now that you’ve seen my card, let’s get on with the hop!  Click on the Next Blog button to move on to Ann Louise’s project or click the Previous Blog button to go back to see the project that Tara created. Happy Hopping.

Just in case you get lost along the way, here is a list of the team members involved in the hop today.

  1. Christie King
  2. Akiko Sudano
  3. Terry Lynn Bright
  4. Tara Carpenter
  5. Karen Ksenzakovic You Are Here
  6. Ann Louise Fodgaard
  7. Mary Deatherage
  8. Karen Finkle
  9. Amy Koenders

*********************************************************************************************************

If you need any stamping supplies, I’d love to be your Demonstrator. Just click HERE to go directly to my online store or drop me an email if you have any questions. 

*********************************************************************************************************

Full of Charm

Subscribe May 11 – June 10

Send your loved ones elevated cards with heartfelt sentiments!
• Makes 9 cards: 3 each of 3 designs with 9 coordinating envelopes
• Envelopes and card bases with decorative gold foil
• Precut paper pieces and unique sentiment labels
• Coordinating colors: Berry Burst, Cajun Craze, Early Espresso, Mossy Meadow,
Pretty Peacock (Classic Stampin’ Spot), Timid Tiger
Coordinates with the Floral Charm Suite Collection (item 166141)

Subscribe to the June Paper Pumpkin Kit between 11 May and 10 June by clicking here!

*********************************************************************************************************

Don’t miss the coordinating
Hugs Abloom Dies Add-On!

Make the most of your Paper Pumpkin kits with the Hugs Abloom Dies add-on! Quickly and cleanly cut out a flower, leaf sprig, sentiment label, or Hugs sentiment to elevate your crafting projects. These additional dies are designed to work with THREE Paper Pumpkin Kits: the Inked Occasions Paper Pumpkin Kit, the Mountain Majesties Paper Pumpkin Kit, and the Full of Charm Paper Pumpkin Kit. Pair these dies with other Stampin’ Up! products for even more creative options!

DETAILS
– 4 dies
– Largest die: 2-1/2″ x 1-1/4″ (6.4 x 3.2 cm)
– Use with a Stampin’ Cut & Emboss Machine (sold separately)

You must be a current Paper Pumpkin subscriber to purchase this item. To become a subscriber, visit www.stampinup.com/paperpumpkin.

Note: Supplies may be limited toward the end of the subscription period.

#166238 $12

*********************************************************************************************************

Card stock cuts for this project:

  • Basic Beige Cardstock 3 3/4″ x 5″(card front mat), 4″ x 4″(sentiment), 3 7/8″ x 5 1/8″(inner liner)
  • Early Espresso Cardstock 3 5/8″ x 4 7/8″(card front mat), 4″ x 5 1/4″(inner liner mat)
  • Pecan Pie Cardstock 4 1/4″ x 11″(card base scored & folded at 5 1/2″)
  • Woven Textures Designer Series Paper 6 – 1/2″ x 4 3/4″(card front panels), 2 1/4″ x 6″(envelope)

*********************************************************************************************************

Product List
Stampin’ Up! Blooming Phrases for The Happy Inkin’ Thursday Blog Hop

Good Thursday morning stamping friends and welcome to our Happy Inkin’ Thursday Blog Hop. If you are starting with me, thank you. I hope you will stop by everyone’s blog to see what they have created this week. If you are hopping over from Akiko’s blog, thank you for stopping by. This week we have Sketch Challenge. If you’d like to see a quick video of how I made this card, Click Here to go to my Instagram Reels. Here is my card using this week’s sketch.

Stampin' Up! Blooming Phases Cheers 1 creativestampingdesigns.com

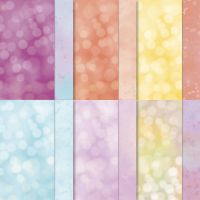
I used the Stampin’ Up! Online Exclusives Blooming Phrases Photopolymer Stamp Set, Beautiful Bokeh 6 x 6 Designer Series Paper and Stampin’ Up! cheers & Sips Photopolymer Stamp Set for my card today.

Here is our sketch for this week,

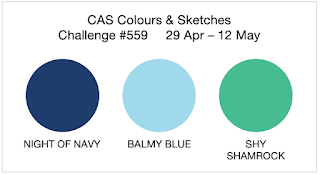
My colors are from the CAS Colour and Sketch Challenge #559

Stampin' Up! Blooming Phases Cheers 2 creativestampingdesigns.com

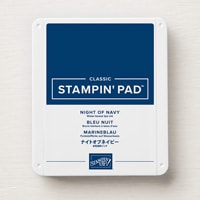
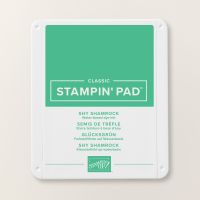
Stamp the sprig image from the Cheers & Sips stamp set in Shy Shamrock on the panel of Beautiful Bokeh DSP. Adhere the Beautiful Bokeh card front to a Shy Shamrock mat using Stampin’ Seal. Adhere the layered panel to a Night of Navy card base using Stampin’ Dimensionals.

Stampin' Up! Blooming Phases Cheers 3 creativestampingdesigns.com

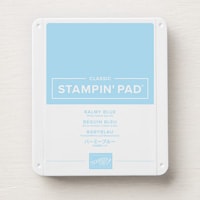
On a panel of Basic White, stamp the sentiments from Blooming Phrase stamp set in Night of Navy Ink. Stamp the leaf image from Blooming Phrases stamp set in Shy Shamrock Ink on the sentiments. Stamp the flower image from Blooming Phrases stamp set in Balmy Blue Ink on the end of the sentiments

Stampin' Up! Blooming Phases Cheers 4 creativestampingdesigns.com

Adhere the Basic White panel to the Beautiful Bokeh card front using Stampin’ Seal. Add a few Holographic Resin Dots to the corner of the panel

Stampin' Up! Blooming Phases Cheers 5 creativestampingdesigns.com

On a panel of Basic White, stamp the sentiments from Cheers & Sips stamp set in Night of Navy Ink. Stamp the glass image from Cheers & Sips stamp set in Balmy Blue Ink. Color the inside of the glass using Balmy Blue Stampin’ Blends Markers. Stamp the ice cube image from Cheers & Sips stamp set in Balmy Blue Ink inside the glass. Stamp the berry image from Cheers & Sips stamp set in Night of Navy Ink on the bottom of the glass. Adhere the Basic White panel to Balmy Blue and Shy Shamrock mats then to the inside of the Night of Navy card base.

Stampin' Up! Blooming Phases Cheers 6 creativestampingdesigns.com

Decorate a Basic White Medium Envelope to complete your card. Stamp the glass and ice images from Cheers & Sip stamp set in Balmy Blue Ink on the envelope front. Color the inside of the glass using the Balmy Blue Stampin’ Blends Marker. Stamp the berry image from Cheers & Sips stamp set in Night of Navy Ink on the bottom of the glass. Adhere a panel of Beautiful Bokeh DSP to the envelope flap.

Stampin' Up! Blooming Phases Cheers 7 creativestampingdesigns.com

Thank you for stopping by my blog today.  Now that you’ve seen my card, let’s get on with the hop!  Click the button below to hop over to see what Tara has created. Happy Hopping!

Just in case you get lost along the way, here is a list of the team members involved in the hop today.

Amy Koenders

Akiko Sudano

Karen Ksenzakovic You Are Here

Tara Carpenter

Terry Lynn Bright

*********************************************************************************************************

If you need any stamping supplies, I’d love to be your Demonstrator. Just click HERE to go directly to my online store or drop me an email if you have any questions. 

*********************************************************************************************************

Mountain Majesties

Subscribe April 11 – May 10

Create Father’s Day cards with layered mountain landscapes!
• Makes 9 cards: 3 each of 3 designs with 9 coordinating envelopes
• Precut vellum and paper pieces
• Watercolor card bases and coordinating envelopes
• Coordinating colors: Basic Black, Lost Lagoon, Misty Moonlight
(Classic Stampin’ Spot), Mossy Meadow, Pecan Pie, Petal Pink

Includes vellum pieces for layering and sentiments tailored to men!

Subscribe to the May Paper Pumpkin Kit between 11 April and 10 May by clicking here!

*********************************************************************************************************

Don’t miss the coordinating
Hugs Abloom Dies Add-On!

Make the most of your Paper Pumpkin kits with the Hugs Abloom Dies add-on! Quickly and cleanly cut out a flower, leaf sprig, sentiment label, or Hugs sentiment to elevate your crafting projects. These additional dies are designed to work with THREE Paper Pumpkin Kits: the Inked Occasions Paper Pumpkin Kit, the Mountain Majesties Paper Pumpkin Kit, and the Full of Charm Paper Pumpkin Kit. Pair these dies with other Stampin’ Up! products for even more creative options!

DETAILS
– 4 dies
– Largest die: 2-1/2″ x 1-1/4″ (6.4 x 3.2 cm)
– Use with a Stampin’ Cut & Emboss Machine (sold separately)

You must be a current Paper Pumpkin subscriber to purchase this item. To become a subscriber, visit www.stampinup.com/paperpumpkin.

Note: Supplies may be limited toward the end of the subscription period.

#166238 $12

*********************************************************************************************************

Card stock cuts for this project:

  • Basic White Cardstock 1 1/2″ x 5 1/4″(artwork), 3 7/8″ x 5 1/8″(inner liner)
  • Balmy Blue Cardstock 4″ x 5 1/4″(inner liner mat)
  • Night of Navy Cardstock 5 1/2″ x 8 1/2″(card base scored & folded at 4 1/4″)
  • Shy Shamrock Cardstock 2 – 4 1/8″ x 5 3/8″(card front & inner liner mats)
  • Beautiful Bokeh 6 x 6 Designer Series Paper 4″ x 5 1/4″(card front), 2 1/4″ x 6″(envelope)

*********************************************************************************************************

Product List
Stampin’ Up! Sweet Blooms for The Happy Inkin’ Thursday Blog Hop

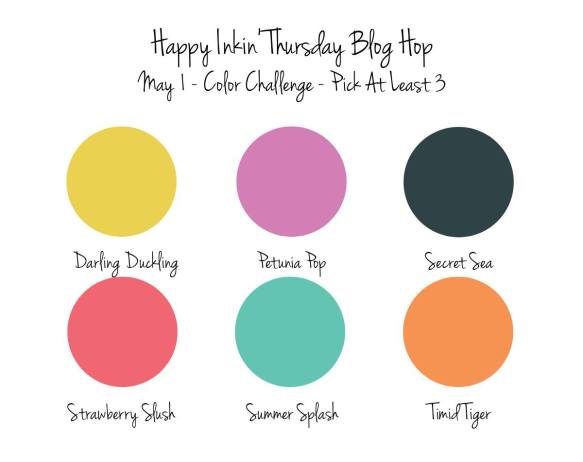
Good Thursday morning stamping friends Happy May!!!  Welcome to our Happy Inkin’ Thursday Blog Hop. If you are starting with me, thank you. I hope you will stop by everyone’s blog to see what they have created this week. If you are hopping over from Akiko’s blog, thank you for stopping by. This week we have Color Challenge. If you’d like to see a quick video of how I made this card, Click Here to go to my Instagram Reels. Here is my card using this week’s colors.

Stampin' Up! Sweet Floral Blooms 1 creativestampingdesigns.com

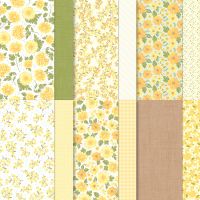
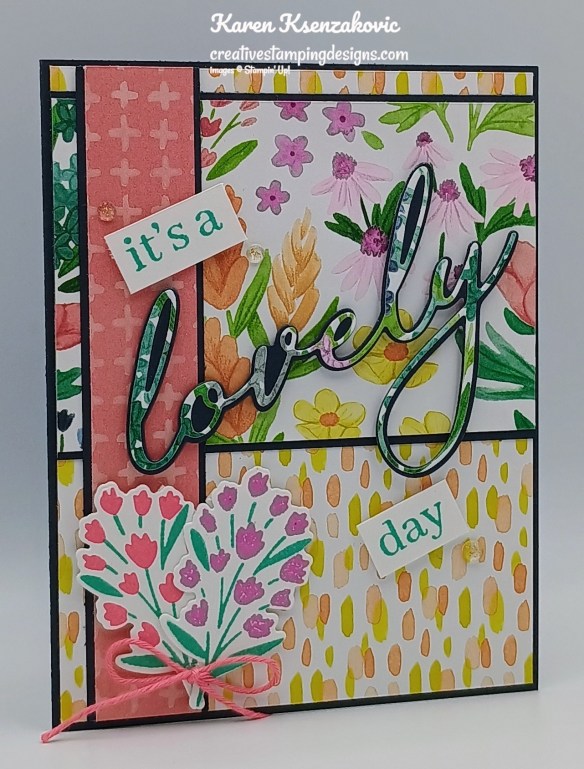
I used the Stampin’ Up! Sweet Blooms Bundle along with the Florals in Bloom Designer Series Paper for my card today. Both of these items will be available starting May 6th.

These are our colors for this week.

Stampin' Up! Sweet Floral Blooms 2 creativestampingdesigns.com

Adhere a panel of Florals in Bloom DSP to the front of a Secret Sea card base using Stampin’ Seal. Adhere 2 more panels of Florals in Bloom DSP to coordinating Secret Sea mats using Stampin’ Seal. Adhere the layered panels to the card front using Liquid Glue.

Stampin' Up! Sweet Floral Blooms 3 creativestampingdesigns.com

On a panel of Basic White, stamp the stem/leaf image from the Stampin’ Up! Sweet Blooms Photopolymer Stamp Set in Summer Splash Ink 2 times. Stamp the flower image from the Sweet Blooms stamp set on the stems in Petunia Pop and Strawberry Slush Inks. Cut the images out using the Sweet Blooms Dies. Cut a panel of Secret Sea using the sentiment mat die from the Sweet Blooms Dies. Cut the detailed sentiment from a panel of Florals in Bloom DSP using the Sweet Blooms Dies. Adhere the detailed sentiment to the mat. On a strip of Basic White, stamp the 2 sentiments from the Sweet Blooms stamp set in Summer Splash Ink. Trim them down using Paper Snips.

Stampin' Up! Sweet Floral Blooms 4 creativestampingdesigns.com

Adhere the Flowers to the bottom of the card front using Stampin’ Dimensionals. tie a small bow with a piece of Strawberry Slush Twine and adhere it to the stems of the flowers using a Glue Dot. Adhere the die cut sentiment to the card front using Stampin’ Dimensionals. Adhere the 2 trimmed sentiments above and below the die cut sentiment using Stampin’ Dimensionals. Add a few Strawberry Slush & Pretty in Pink Gems (available May 6th) to the card front.

Stampin' Up! Sweet Floral Blooms 5 creativestampingdesigns.com

Stamp the sentiment from Sweet Blooms stamp set in Summer Splash Ink on a panel of Basic White. Stamp the stem/leaf image from Sweet Blooms stamp set in Summer Splash Ink on the bottom of the panel 3 times. Stamp the flower image from Sweet Blooms stamp set, on the stems in Strawberry Slush, Timid Tiger and Petunia Pop Inks. Adhere the Basic White panel to a Summer Splash mat then to the inside of the Secret Sea card base.

Stampin' Up! Sweet Floral Blooms 6 creativestampingdesigns.com

Decorate a Basic White Medium Envelope to complete your card. Stamp the stem/leaf image from Sweet Blooms stamp set in Summer Splash Ink 3 times on the envelope front. Stamp the flower image from Sweet Blooms stamp set on the stems in Petunia Pop, Timid Tiger and Strawberry Slush Inks. Adhere a panel of Florals in Bloom DSP to the envelope flap.

Stampin' Up! Sweet Floral Blooms 7 creativestampingdesigns.com

Thank you for stopping by my blog today.  Now that you’ve seen my card, let’s get on with the hop!  Click the button below to hop over to see what Tara has created. Happy Hopping!

Just in case you get lost along the way, here is a list of the team members involved in the hop today.

Amy Koenders

Akiko Sudano

Karen Ksenzakovic You Are Here

Tara Carpenter

Terry Lynn Bright

*********************************************************************************************************

National Scrapbooking Day May 2-3

Stampin’ Up! is so excited to celebrate National Scrapbooking Day with the crafting community around the world! For 2 days only (May 2–3) Stampin’ Up! is offering 2x rewards on all purchases! What better way to celebrate one of our favorite crafting holidays? And the best part? This offer applies to ALL products, not just scrapbooking items!

Promotion Details:

  • Earn double rewards (2x rewards) for two days only, from May 2–3!
  • This offer begins at 12:00 midnight MT on May 2 and ends at 11:59 PM on May 3.
  • This offer applies to ALL products (excluding existing Paper Pumpkin subscriptions).
  • All orders qualify once the rewards threshold of $20 is met.
  • To participate, you must have a Stampin’ Up! account and be opted in to Stampin’ Rewards.

You can shop the online store right here and earn double Stampin’ Rewards points from Stampin’ Up! on orders of $20+ May 2-3!!! Let me know if you have any questions, I’m always here to help

*********************************************************************************************************

If you need any stamping supplies, I’d love to be your Demonstrator. Just click HERE to go directly to my online store or drop me an email if you have any questions. 

*********************************************************************************************************

Mountain Majesties

Subscribe April 11 – May 10

Create Father’s Day cards with layered mountain landscapes!
• Makes 9 cards: 3 each of 3 designs with 9 coordinating envelopes
• Precut vellum and paper pieces
• Watercolor card bases and coordinating envelopes
• Coordinating colors: Basic Black, Lost Lagoon, Misty Moonlight
(Classic Stampin’ Spot), Mossy Meadow, Pecan Pie, Petal Pink

Includes vellum pieces for layering and sentiments tailored to men!

Subscribe to the April Paper Pumpkin Kit between 11 April and 10 May by clicking here!

*********************************************************************************************************

Don’t miss the coordinating
Hugs Abloom Dies Add-On!

Make the most of your Paper Pumpkin kits with the Hugs Abloom Dies add-on! Quickly and cleanly cut out a flower, leaf sprig, sentiment label, or Hugs sentiment to elevate your crafting projects. These additional dies are designed to work with THREE Paper Pumpkin Kits: the Inked Occasions Paper Pumpkin Kit, the Mountain Majesties Paper Pumpkin Kit, and the Full of Charm Paper Pumpkin Kit. Pair these dies with other Stampin’ Up! products for even more creative options!

DETAILS
– 4 dies
– Largest die: 2-1/2″ x 1-1/4″ (6.4 x 3.2 cm)
– Use with a Stampin’ Cut & Emboss Machine (sold separately)

You must be a current Paper Pumpkin subscriber to purchase this item. To become a subscriber, visit www.stampinup.com/paperpumpkin.

Note: Supplies may be limited toward the end of the subscription period.

#166238 $12

*********************************************************************************************************

Card stock cuts for this project:

  • Basic White Cardstock 1/2″ x 3″(sentiment), 1 3/4″ x 5″(flowers), 4″ x 5 1/4″(inner liner)
  • Secret Sea Cardstock 5 1/2″ x 8 1/2″ (card base scored & folded at 4 1/4″), 1″ x 5 3/8″ & 3″ x 4 1/8″(card front panel mats), 3″ x 4 1/2″(sentiment mat)
  • Summer Splash Cardstock 4 1/8″ x 5 3/8″(inner liner mat)
  • Florals in Bloom Designer Series Paper 4 1/8″ x 5 3/8″(card front), 7/8″ x 5 3/8″ & 2 7/8″ x 4 1/8″(card front panels), 3″ x 4″(sentiment), 2 1/4″ x 6″(envelope flap)

*********************************************************************************************************

Product List
Stampin’ Up! The Right Words for The Happy Inkin’ Thursday Blog Hop

Good Thursday morning stamping friends and welcome to our Happy Inkin’ Thursday Blog Hop. If you are starting with me, thank you. I hope you will stop by everyone’s blog to see what they have created this week. If you are hopping over from Akiko’s blog, thank you for stopping by. This week we have Sketch Challenge. If you’d like to see a quick video of how I made this card, Click Here to go to my Instagram Reels. Here is my card using this week’s sketch.

Stampin' Up! The Right Words Birthday 1 creativestampingdesigns.com

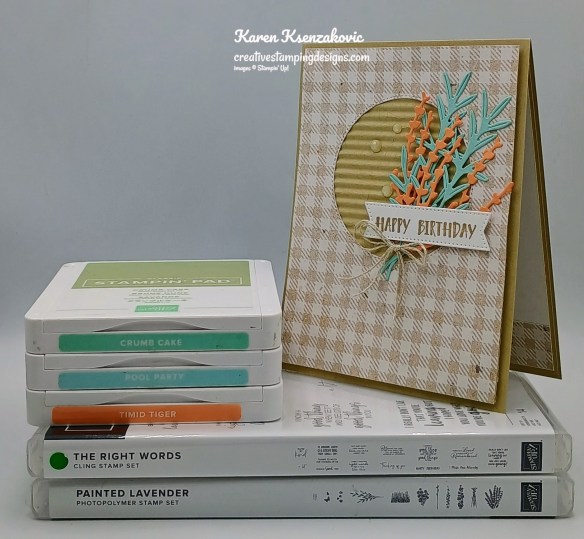
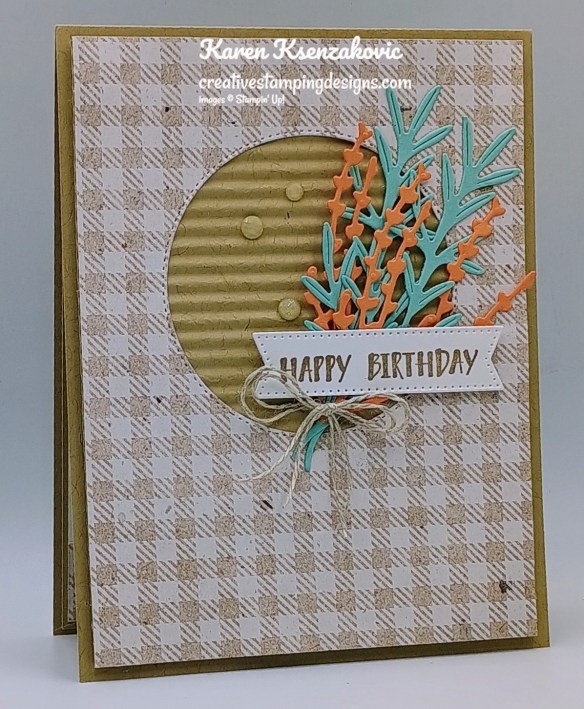
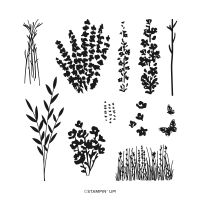
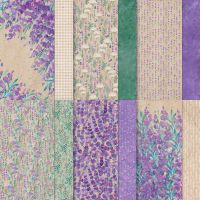
I used the new Stampin’ Up! The Right Words Cling Stamp Set (available May 6th), along with the Perennial Lavender Designer Series Paper, Mini Corrugated 3D Embossing Folder, Stylish Shapes Dies, Painted Lavender Dies and Stampin’ Up! Painted Lavender Photopolymer Stamp Set for my card today.

This is our sketch for this week

Stampin' Up! The Right Words Birthday 2 creativestampingdesigns.com

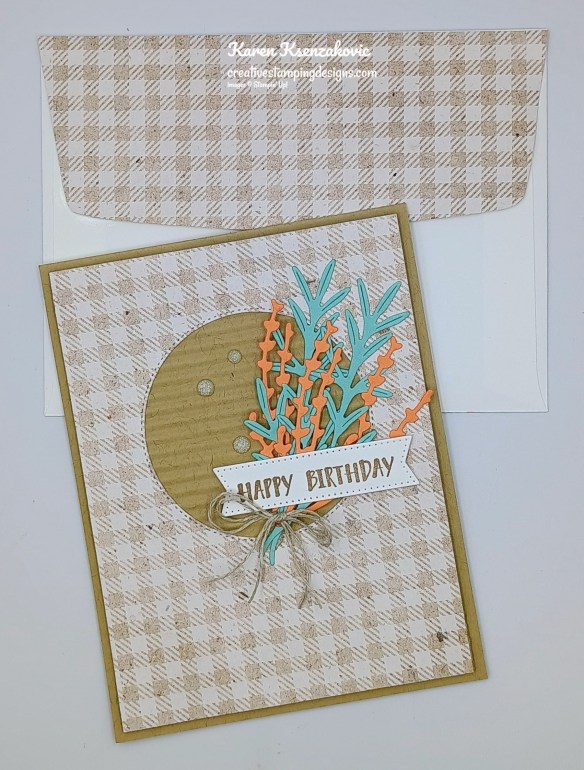
Emboss a panel of Crumb Cake using the Mini Corrugated EF. Using the 2nd largest Stylish Shapes Dies, cut the center of a Perennial Lavender DSP card front. Adhere the panel of Perennial Lavender DSP to the embossed panel of Crumb Cake using Liquid Glue. Adhere the layered panel to a Crumb Cake card base using Stampin’ Dimensionals.

Stampin' Up! The Right Words Birthday 3 creativestampingdesigns.com

Using the Painted Lavender Dies, cut the leaf die from a panel of Pool Party 2 times and the sprig die from a panel of Timid Tiger 3 times. Adhere the die cut pieces to the card front, over the die cut circle, using Glue Dots.

Stampin' Up! The Right Words Birthday 4 creativestampingdesigns.com

On a panel of Basic White, stamp the sentiment from The Right Words stamp set in Crumb Cake Ink. Cut the sentiment out using the banner die from the Painted Lavender Dies. Adhere the sentiment over the stems using Stampin’ Dimensionals. tie a double bow using Linen Thread and adhere it to the stems using a Glue Dot. Add a few Earth Tone Shimmer Gems to the card front.

Stampin' Up! The Right Words Birthday 5 creativestampingdesigns.com

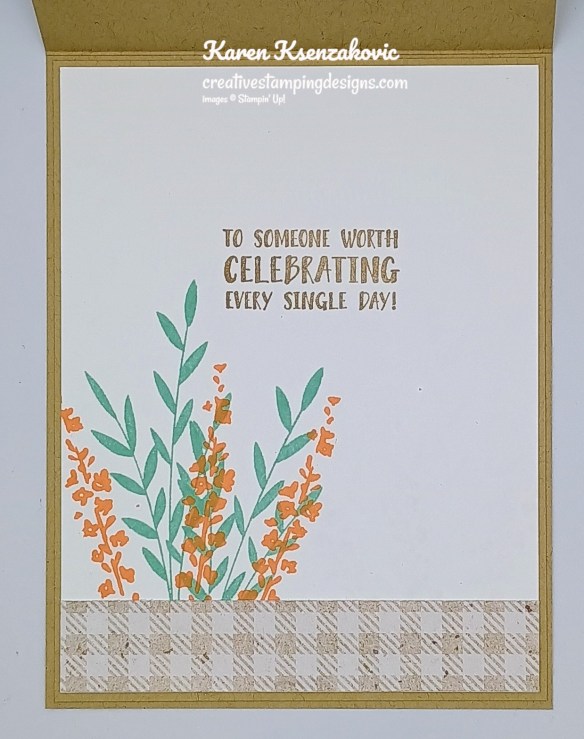
On a panel of Basic White, stamp the sentiment from The Right Words stamp set in Crumb Cake Ink. Stamp the leaf image from the Painted Lavender stamp set in Pool Party Ink on the bottom of the panel 2 times. Stamp the floral image from the Painted Lavender stamp set in timid Tiger Ink over the leaf image 3 times. Adhere a strip of Perennial Lavender DSP to the bottom of the panel. Adhere the Basic White panel to a Crumb Cake mat then to the inside of the Crumb Cake card base.

Stampin' Up! The Right Words Birthday 6 creativestampingdesigns.com

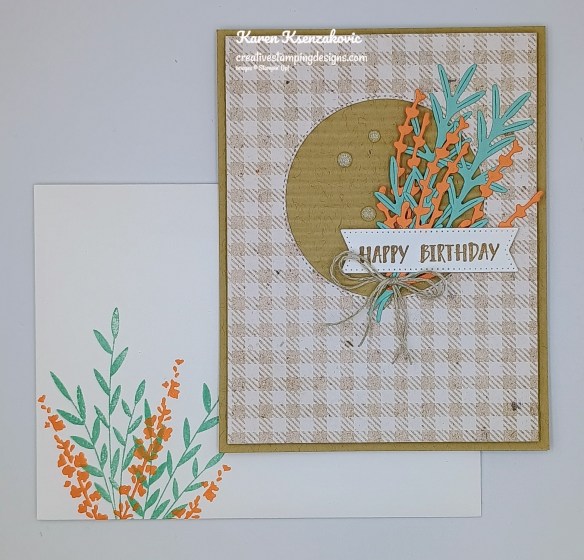
Decorate a Basic White Medium Envelope to complete your card. Stamp the leaf image from the Painted Lavender stamp set in Pool party Ink on the envelope front. Stamp the floral image from the Painted Lavender stamp set over the leaf image in Timid tiger Ink. Adhere a panel of Perennial Lavender DSP to the envelope flap.

Stampin' Up! The Right Words Birthday 7 creativestampingdesigns.com

Thank you for stopping by my blog today.  Now that you’ve seen my card, let’s get on with the hop!  Click the button below to hop over to see what Tara has created. Happy Hopping.

Just in case you get lost along the way, here is a list of the team members involved in the hop today.

Amy Koenders

Karen Finkle

Akiko Sudano

Karen Ksenzakovic You Are Here

Tara Carpenter

Terry Lynn Bright

*********************************************************************************************************

FREE SHIPPING Wednesday April 23 – Friday April 25th

Stampin’ Up! just let us know that they are offering everyone FREE SHIPPING for 3 Days, April 23 – April 25 on all orders of $75 or more before tax.

Here are the details.

  • All order types qualify for this promotion.
  • Free shipping is for three days only. Orders must be opened and closed April 23–25.
  • Free shipping automatically applies to your cart after the qualifying amount has been met, which is $75 USD (before tax).
  • Coupon codes and product credits will lower your order’s retail amount. Orders must meet the qualifying amount to be eligible for free shipping.
  • The additional cost for expedited shipping is not covered by this promotion.
  • Prepaid 3-, 6-, and 12-month Paper Pumpkin subscriptions and month-to-month subscriptions do not qualify for free shipping. Refills, past kits and add-ons do qualify toward free shipping, but you must be a subscriber to purchase. Subscriptions billed and shipped this month will be charged for the normal amount ($25.00 USD shipping included) + tax.

Get those orders ready and place them early. Stock up on all the cardstock and Last Chance products you’ve been wanting.

*********************************************************************************************************

Paper Pumpkin subscribers can save up to 75% OFF* on refills, past kits, and add-ons only while supplies last!

BONUS: When subscribers shop the sale, they’ll also get FREE SHIPPING on orders of $75+!

You can find the Past Kits, Refills, & Add-ons section on the website Here. Get ready to stock up and save!

*Discounts do not apply to monthly or prepaid subscriptions.

*********************************************************************************************************

Mountain Majesties

Subscribe April 11 – May 10

Create Father’s Day cards with layered mountain landscapes!
• Makes 9 cards: 3 each of 3 designs with 9 coordinating envelopes
• Precut vellum and paper pieces
• Watercolor card bases and coordinating envelopes
• Coordinating colors: Basic Black, Lost Lagoon, Misty Moonlight
(Classic Stampin’ Spot), Mossy Meadow, Pecan Pie, Petal Pink

Includes vellum pieces for layering and sentiments tailored to men!

Subscribe to the April Paper Pumpkin Kit between 11 April and 10 May by clicking here!

*********************************************************************************************************

Don’t miss the coordinating
Hugs Abloom Dies Add-On!

Make the most of your Paper Pumpkin kits with the Hugs Abloom Dies add-on! Quickly and cleanly cut out a flower, leaf sprig, sentiment label, or Hugs sentiment to elevate your crafting projects. These additional dies are designed to work with THREE Paper Pumpkin Kits: the Inked Occasions Paper Pumpkin Kit, the Mountain Majesties Paper Pumpkin Kit, and the Full of Charm Paper Pumpkin Kit. Pair these dies with other Stampin’ Up! products for even more creative options!

DETAILS
– 4 dies
– Largest die: 2-1/2″ x 1-1/4″ (6.4 x 3.2 cm)
– Use with a Stampin’ Cut & Emboss Machine (sold separately)

You must be a current Paper Pumpkin subscriber to purchase this item. To become a subscriber, visit www.stampinup.com/paperpumpkin.

Note: Supplies may be limited toward the end of the subscription period.

#166238 $12

*********************************************************************************************************

Card stock cuts for this project:

  • Basic White Cardstock 3/4″ x 3 1/2″(sentiment), 4″ x 5 1/4″(inner liner)
  • Crumb Cake Cardstock 4 1/4″ x 11″(card base scored and folded at 5 1/2″), 4″ x 5 1/4″(card front panel), 4 1/8″ x 5 3/8″(inner liner mat)
  • Pool Party Cardstock 3″ x 4″(die cuts)
  • Timid Tiger Cardstock 2″ x 2 1/2″(die cuts)
  • Perennial Lavender Designer Series Paper 4″ x 5 1/4″(card front), 3/4″ x 4″(inner liner), 2 1/4″ x 6″(envelope flap)

*********************************************************************************************************

Product List
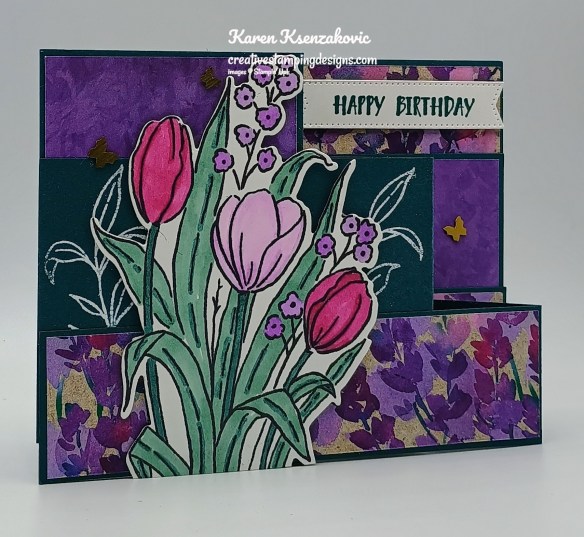
Stampin’ Up! Mixed Florals for The Happy Inkin’ Thursday Blog Hop

Good Thursday morning stamping friends and welcome to our Happy Inkin’ Thursday Blog Hop. If you are starting with me, thank you. I hope you will stop by everyone’s blog to see what they have created this week. If you are hopping over from Akiko’s blog, thank you for stopping by. This week we have Theme Challenge. If you’d like to see a quick video of how I made this card, Click Here to go to my Instagram Reels. Here is my card using this week’s theme.

Stampin' Up! Mixed Florals Fun Fold 1 cretivestampingdesigns.com

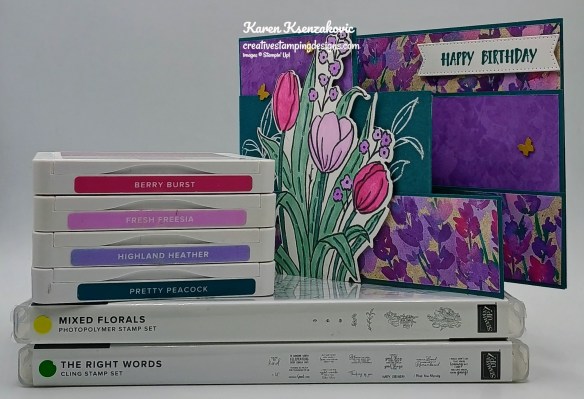
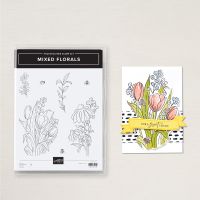
I used the Stampin’ Up! Online Exclusive Mixed Florals Bundle along with the Perennial Lavender Designer Series Paper, Stylish Shapes Dies and New Stampin’ Up! The Right Word Cling Stamp Set (available May 6th), for my fun fold card today.

We have a Fun Fold Theme this week.

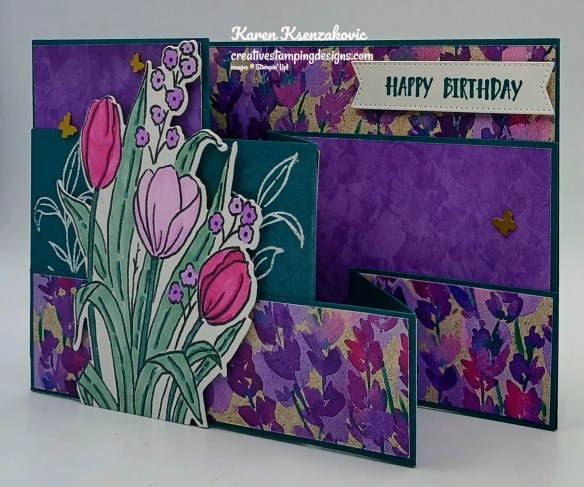
Stampin' Up! Mixed Florals Fun Fold 2 cretivestampingdesigns.com

Score and fold the 3 Pretty Peacock card bases as listed in the measurements below. On a panel of Basic White, stamp the tulip image from the Stampin’ Up! Mixed Florals Photopolymer Stamp Set in Tuxedo Black Ink. Color the image using Berry Burst, Fresh Freesia, Highland Heather, Lost Lagoon and Pretty Peacock Stampin’ Blends Markers. Cut the image out using the Mixed Florals Dies.
Stampin' Up! Mixed Florals Fun Fold 3 cretivestampingdesigns.com

Adhere the panels of Perennial Lavender DSP to the Pretty Peacock card bases. I listed below which piece goes on which part of the card bases. On the front of the center card base panel (4 1/4″ side), stamp the leaf image from the Mixed Florals stamp set in Versamark Ink 3 times. Sprinkle the image with White Embossing Powder, set it using the Heat Tool. Adhere the center card base to the large card base with the 4 1/4″ side in the front, about 1/4″ up from the bottom. Adhere the bottom card base with the 5 1/2″ side in the front, to the large card base on top of the center, lining up the bottom edge

Stampin' Up! Mixed Florals Fun Fold 4 cretivestampingdesigns.com

Adhere the die cut flowers to the front panel using Stampin’ Dimensionals, keeping top flowers below the top of the card base. Trim off the bottom of the flower stems/leaves using Paper Snips.

Stampin' Up! Mixed Florals Fun Fold 5 cretivestampingdesigns.com

Stamp the sentiment from The Right Word stamp set in Pretty Peacock Ink on a panel of Basic White. Cut the sentiment out using the Stylish Shapes Dies. Adhere the sentiment to the top back panel using Stampin’ Dimensionals. Add a few Brushed Brass Butterflies to the card front.

Stampin' Up! Mixed Florals Fun Fold 6 cretivestampingdesigns.com

On a panel of Basic White panel stamp the sentiment from The Right Word stamp set in Pretty Peacock Ink. Stamp the leaf image from the Mixed Florals stamp set in Pretty Peacock Ink multiple times on the side of the panel. Adhere a strip of Perennial Lavender DSP to the side of the panel. Adhere the Basic White panel to a Highland Heather mat then to the back of the Pretty Peacock card base.

Stampin' Up! Mixed Florals Fun Fold 7 cretivestampingdesigns.com

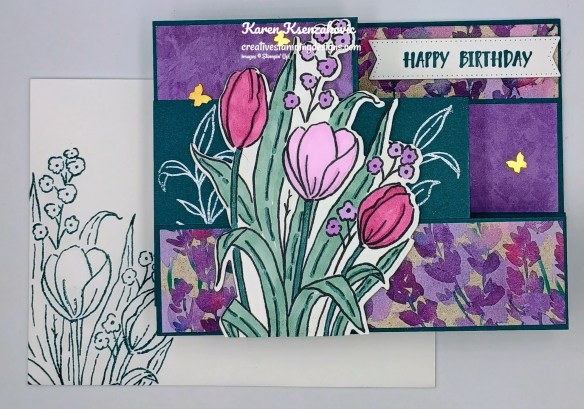
Decorate a Basic White Medium Envelope to complete the card. Stamp the tulip image from the Mixed Florals stamp set in Pretty Peacock Ink on the envelope front. Adhere a panel of Perennial Lavender DSP to the envelope flap.

Stampin' Up! Mixed Florals Fun Fold 8 cretivestampingdesigns.com

Thank you for stopping by my blog today.  Now that you’ve seen my card, let’s get on with the hop!  Click the button below to hop over to see what Tara has created. Happy Hopping!

Amy Koenders

Mary Deatherage

Karen Finkle

Akiko Sudano

Karen Ksenzakovic You Are Here

Tara Carpenter

Terry Lynn Bright

*********************************************************************************************************

Mountain Majesties

Subscribe April 11 – May 10

Create Father’s Day cards with layered mountain landscapes!
• Makes 9 cards: 3 each of 3 designs with 9 coordinating envelopes
• Precut vellum and paper pieces
• Watercolor card bases and coordinating envelopes
• Coordinating colors: Basic Black, Lost Lagoon, Misty Moonlight
(Classic Stampin’ Spot), Mossy Meadow, Pecan Pie, Petal Pink

Includes vellum pieces for layering and sentiments tailored to men!

Subscribe to the April Paper Pumpkin Kit between 11 April and 10 May by clicking here!

*********************************************************************************************************

Don’t miss the coordinating
Hugs Abloom Dies Add-On!

Make the most of your Paper Pumpkin kits with the Hugs Abloom Dies add-on! Quickly and cleanly cut out a flower, leaf sprig, sentiment label, or Hugs sentiment to elevate your crafting projects. These additional dies are designed to work with THREE Paper Pumpkin Kits: the Inked Occasions Paper Pumpkin Kit, the Mountain Majesties Paper Pumpkin Kit, and the Full of Charm Paper Pumpkin Kit. Pair these dies with other Stampin’ Up! products for even more creative options!

DETAILS
– 4 dies
– Largest die: 2-1/2″ x 1-1/4″ (6.4 x 3.2 cm)
– Use with a Stampin’ Cut & Emboss Machine (sold separately)

You must be a current Paper Pumpkin subscriber to purchase this item. To become a subscriber, visit www.stampinup.com/paperpumpkin.

Note: Supplies may be limited toward the end of the subscription period.

#166238 $12

*********************************************************************************************************

Card stock cuts for this project:

  • Basic White Cardstock 2 – 4″ x 5 1/4″ (flowers & inner liner), 1″ x 4″ (sentiment)
  • Highland Heather Cardstock 4 1/8″ X 5 3/8″(back panel mat)
  • Pretty Peacock Cardstock 4 1/4″ X 11″(large card base scored & folded at 2 3/4″& 5 1/2″), 2 3/4″ x 11″(center card base scored & folded at 4 1/4″ & 7″), 1 1/2″ X 11″(bottom card base scored & folded at 5 1/2″ & 8 1/4″)
  • Perennial Lavender Designer Series Paper 2 5/8″ x 4 1/8″(front of large card base), 4 1/8″ X 5 3/8″(back of large card base), 2 5/8″ X 2 5/8″ (center of center card base), 2 5/8″ x 3 7/8″(back of center card base), 1 3/8″ X 5 3/8″(front of bottom card base), 1 3/8″ X 2 5/8″(center of bottom card base), 1 3/8″ X 2 5/8″(back of bottom card base), 1/2″ X 4″(back panel), 2 1/4″ x 6″(envelope flap)

*********************************************************************************************************

Product List