
Good Tuesday morning my fellow stampers. How has your week started out?
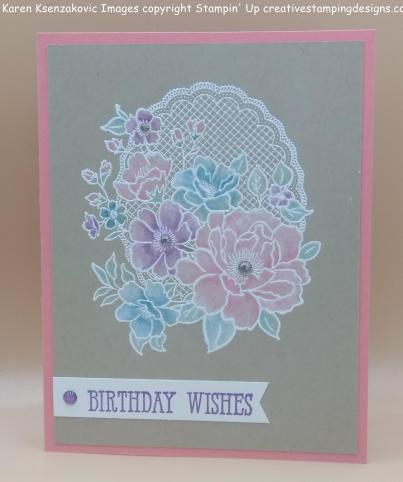
For today’s card I’ve done the White Wash Technique for you. I haven’t done this in a while and I just love how it turns out. Here’s my card.
I’ve played along with a few challenges for today’s card. 1st is ‘Just Us Girls‘ word week challenge # 477. Be sure to stop by to play along and see what everyone has made. Here is their challenge. This one was pretty easy and left a wide variety.
The next one is Paper Craft Crew Simple Stamping Theme Challenge #328. I don’t do simple that often, but I really enjoyed it with this card. This one was a little harder since I’m so used to using multiple layers. Here’s their challenge.
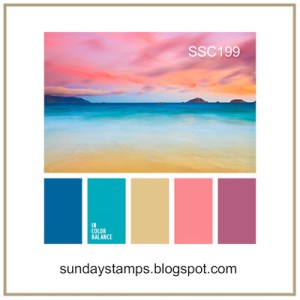
Last was the Sunday Stamps Natures Hues challenge #199. They had a some gorgeous colors to work with. Be sure to stop by and see what everyone has made and play along with their challenge. Here are their colors.
I started by stamping the large image from the Stampin’ Up Lovely Lattice Stamp Set, (Free Sale-A-Bration item), in Versamark Ink on a panel of Crumb Cake cardstock. I immediately sprinkled it with White Stampin’ Emboss Powder and heat set it using my Heat Tool. Using my Aqua Painter I colored the flowers with Craft Whisper White Ink and let it dry throughly. I actually let it go overnight to make sure it was good and dry.

Once it was dry, using my Blender Pens I added color to the flowers starting darker in the middle and blending it out to the edges. I used Flirty Flamingo, Gorgeous Grape and Pacific Point Inks for my flowers and Coastal Cabana Ink for my leaves.
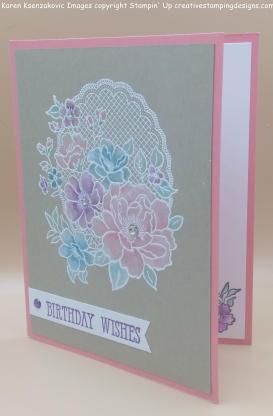
I stamped the sentiment from the Stampin’ Up Well Said Stamp Set in Gorgeous Grape Ink on a strip of Whisper White cardstock and made a banner out of it. I adhered the banner to the left side if the card front using Snail. I adhered the card front to a Flirty Flamingo card base using Multipurpose Liquid Glue. I adhered a Gorgeous Grape Glitter Enamel Dot to the sentiment banner and a few Clear Rhinestone Basic Jewels to the card front.

On the inside I stamped the sentiment from the Well Said stamp set in Gorgeous Grape Ink in the center of a Whisper White panel. I stamped the smaller flowers from the Lovely Lattice stamp set in Tuxedo Black Memento Ink in the corners and colored them in using my Blender Pen with the same colors as I did on the card front.
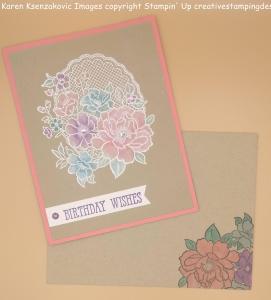

I finished my card by decorating a Medium Craft Envelope. Unfortunately these envelopes are no longer available, but it seemed to go beautifully with my card. I stamped the large flower image from the Lovely Lattice stamp set on the front of the envelope and colored it in the same as I did for the card front with my Blender Pen. I stamped the smaller flowers from the same stamp set on the envelope flap and colored them in the same as I did for the inner liner.
Thank you for stopping by my blog today. I hope you liked my card and will give it a try. Happy Stamping!!
If you need any stamping supplies, I’d be very happy to be your Demonstrator. Just click here to go directly to my online store or drop me an email if you have any questions.
MY CURRENT HOST CODE IS: EDKNVWRP
Happy Stamping, Karen!
****************************************************************************************************
SALE-A-BRATION COORDINATION ITEMS ARE AVAILABLE NOW THROUGH MARCH 31, 2019.



LIMITED-TIME PRODUCTS THAT COORDINATE PERFECTLY WITH SELECT SALE-A-BRATION PRODUCTS. VISIT MY ONLINE STORE HERE FOR MORE DETAILS.
****************************************************************************************************
Third release of SALE-A-BRATION items available. Click HERE to see items.
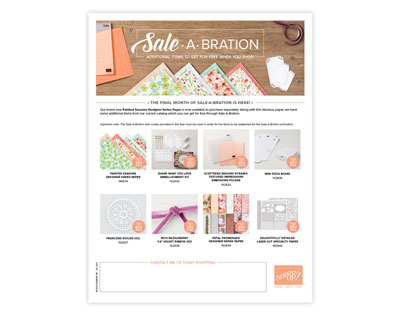
Delightfully Detailed Laser-Cut Specialty Paper, Mini Pizza Boxes, Pearlized Doilies, Petal Promenade Designer Series Paper, Rich Razzleberry 1/4″ (6.4 Mm) Velvet Ribbon, Scattered Sequins Dynamic Textured Impressions Embossing & Share What You Love Embellishment Kit.
****************************************************************************************************
ONLY 5 DAYS LEFT TO SUBSCRIBE!! DON’T MISS OUT ON THE FREE STAMP SET

Paper Pumpkin is turning six and we want to celebrate with you! After all, we could not have shared all these years of creativity if it weren’t for our subscribers.
To celebrate this fun occasion and to thank everyone who supports Paper Pumpkin month after month, we’re offering a specially-designed March kit and a FREE STAMP SET. Oh, yes. You read that right. In March, you will receive TWO stamp sets with your Paper Pumpkin kit.
There has never been a better time to give Paper Pumpkin a try. And because it’s our sixth birthday celebration, we’ll be pulling out all the stops. You’ll get an adorable kit, a special box, and most importantly, you’ll get TWO stamp sets instead of one.
$20 for a Paper Pumpkin kit is always a steal, but in March the deal is even better! There has never been a better time for you to join Paper Pumpkin.
Because it’s our birthday, we decided to create a kit that is perfect for making birthday cards!
The March kit features eight full-sized, mailable cards
Coordinating colors are Basic Black, Bermuda Bay, Daffodil Delight, Flirty Flamingo, and Poppy Parade
This kit has an element that is sure to “pop”!
The FREE stamp set is even bigger and better than your typical Paper Pumpkin stamp set and can be used on a variety of crafting projects.
A subscriber must have an active subscription by March 10, 2019 in order to receive the March kit.
The FREE stamp set coordinates with the March kit but it is not needed to complete the projects.
Supplies may be limited toward the end of the subscription period, so DON’T WAIT.
Click HERE to go to my store and subscribe.
****************************************************************************************************
April I will be starting my Online Host Club and I have a couple spots open. If you have a long wish list and you want to purchase Stampin’ Up supplies a little at a time, this might just be the perfect solution for you. For more information click HERE. If you are interested in joining in, please email me at creativestampingdesigns@gmail.com.
****************************************************************************************************
Card stock cuts for this project:
- Crumb Cake Cardstock 4″ X 5 1/4″ (card front artwork)
- Flirty Flaming Cardstock 8 1/2″ X 5 1/2″ (card base scored and folded at 4 1/4″)
- Whisper White Cardstock4″ X 5 1/4″ (inner liner)
****************************************************************************************************
Product List


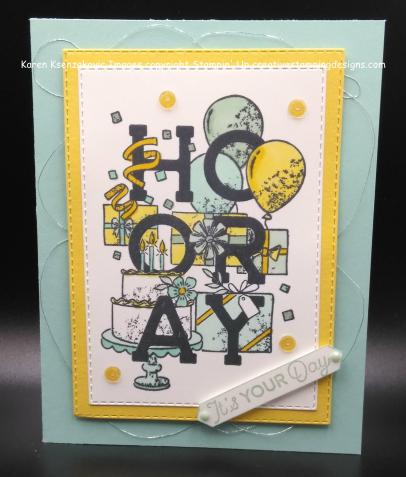


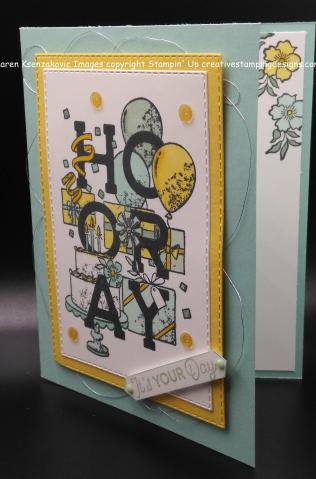
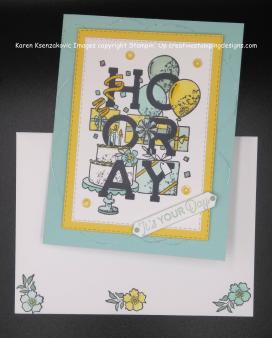
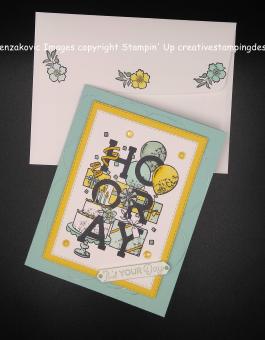


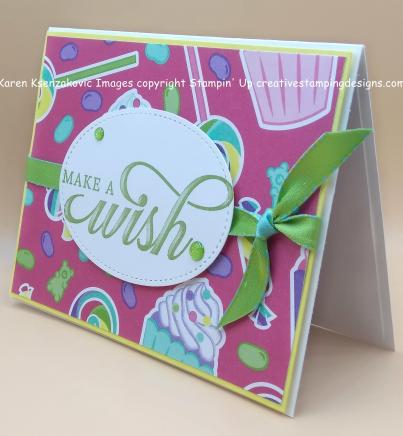 On a piece of Whisper White cardstock I stamped the sentiment from Stampin’ Up Life Is Grand Cling Stamp Set in Granny Apple Green Ink. Using my Big Shot I cut the sentiment out with the largest oval from the Stitched Shapes Framelits Dies. I adhered the sentiment to the card front using Stampin’ Dimensionals.
 I added a couple Granny Apple Green Glitter Enamel Dots to the stitched oval.
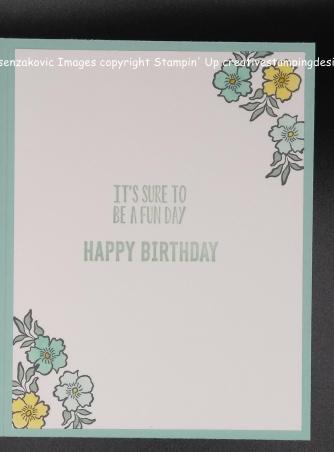
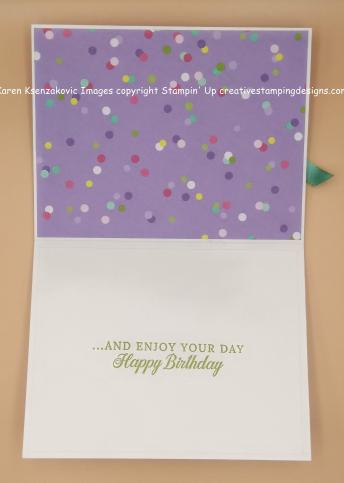 On the inside on a Whisper White cardstock panel I stamped the birthday sentiment from the Life Is Grand stamp set in Granny Apple Green Ink in the center. I adhered the Whisper White panel to the inside of the Thick Whisper White card base using Multipurpose Liquid Glue. To decorate the inside a little I added a panel of How Sweet It Is DSP.
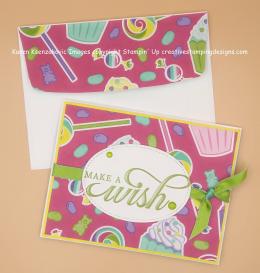


 For my card I also played along with 3 challenges. The first is
  Next I played along with
  Last is
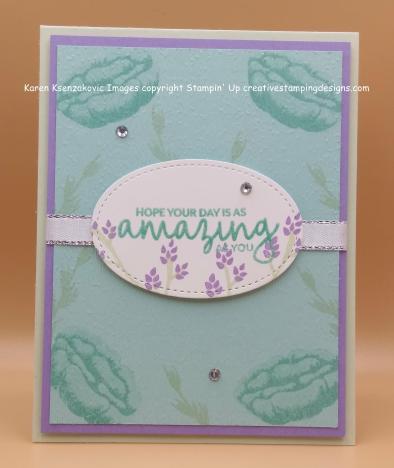
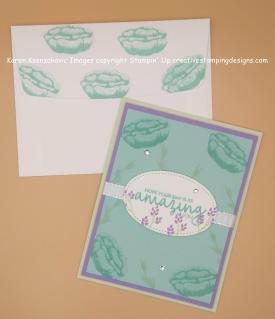
 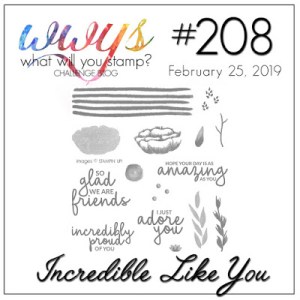 I started by stamping the sentiment from Incredible Like You stamp set in Pool Party Ink on a small piece of Whisper White cardstock. I immediately sprinkled it with Clear Stampin’ Emboss Powder and heat set it with my Heat Tool. You can emboss in any color when you use clear embossing powder. I then stamped the stems from the same stamp set in Soft Sea Foam Ink around the bottom of the sentiment, then stamped the flowers, from the same stamp set, on the stems in Highland Heather Ink. Using my Big Shot and the oval from the Stitched Shapes Framelits Dies, I cut the sentiment out and set it aside.
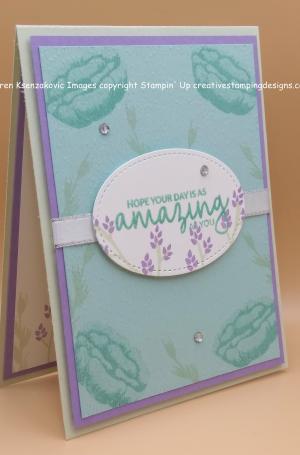 On a panel of Pool Party cardstock I stamped the flowers from the Incredible Like You stamp set in Pool Party Ink. I stamped the inside of the flower stamping off once then stamped the second part of the flower full strength Pool Party Ink. I stamped the leaf image from the same stamp set in Soft Sea Foam Ink randomly around. I ran the Pool Party panel through my Big Shot using the Subtle Dynamic Textured Impressions Embossing Folder to give it a little more texture.
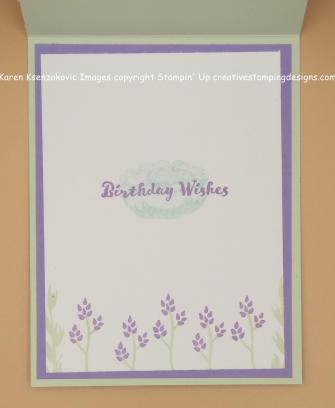 On the inside I stamped the stems and flowers from the Incredible Like You stamp set in Soft Sea Foam and Highland Heather Inks on the bottom of a Whisper White cardstock panel. I stamped the larger flower in the center of the Whisper White panel in Pool Party Ink, stamping the inside colored part off twice and the second part of the flower stamping off once. I stamped the sentiment from Stampin’ Up Itty Bitty Birthday Stamp Set in Highland Heather Ink over the top of the flower. I adhered the Whisper White panel to a Highland Heather mat using Snail and then to the inside of the Soft Sea Foam card base using Multipurpose Liquid Glue.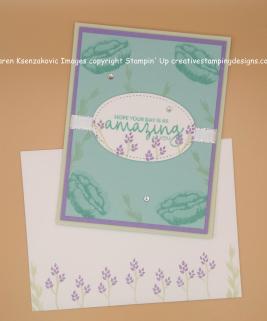


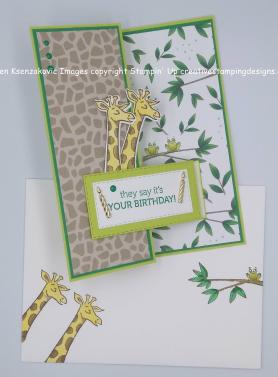
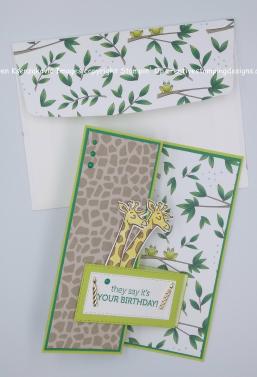
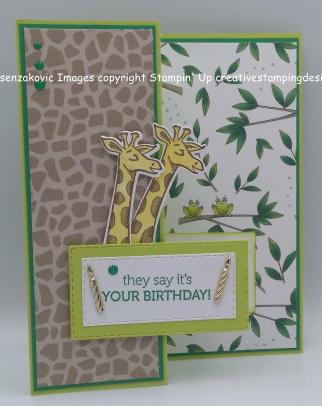 I started with a Lemon Lime Twist card base and scored and folded it at 4 1/4″ and 2 1/8″. Here’s what it looks like folded.
 I adhered 2 different panels of Animal Expedition Designer Series Paper to a Call Me Clover mats using Snail. I then adhered them both to the card base using Multipurpose Liquid Glue.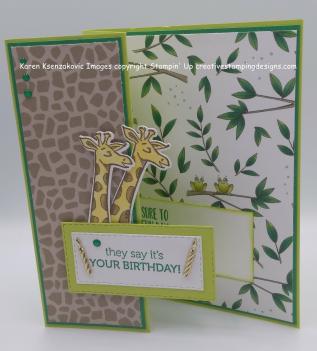
 On another small piece of Whisper White cardstock, I stamped the birthday sentiment from Stampin’ Up Itty Bitty Birthday Stamp Set in Call Me Clover Ink. Using my Big Shot again, I cut the sentiment out using the smallest Stitched Rectangle Framelit Die. Then using the next size up, I cut another Stitched Rectangle out in Lemon Lime Twist cardstock. I adhered the sentiment to the mat using Snail and then adhered it to the card front using Stampin’ Dimensionals. I added a few Call Me Clover Happiness Blooms Enamel Dots to the card front and the sentiment. I also added 2 Candle Embellishments to the sentiment. In case you can’t tell, the card was for a 2 year old.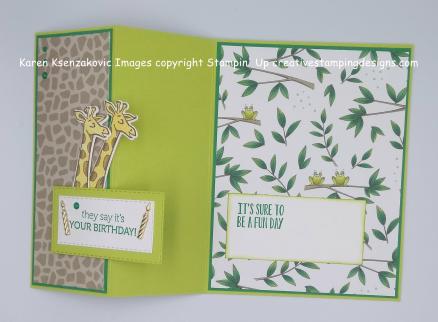


 I played along with
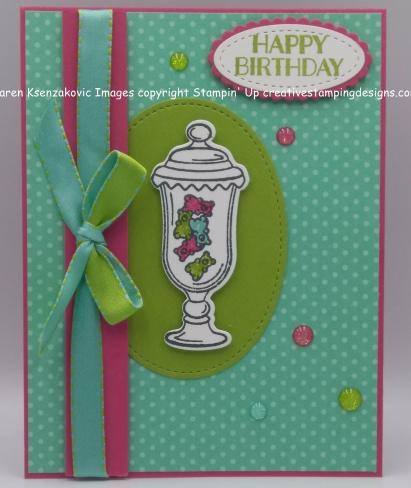
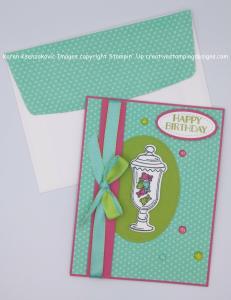
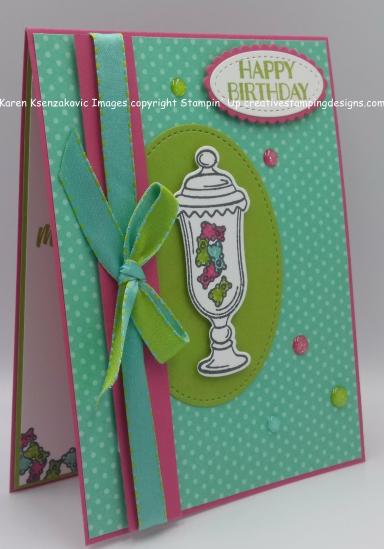 I started with a Melon Mambo card base and adhered a panel of How Sweet It Is Designer Series Paper using Multipurpose Liquid Glue. I took a strip of Melon Mambo cardstock and wrapped a piece of the Coastal Cabana/Granny Apple Green 3/8″ Reversible Ribbon around it and tied a bow. I adhered the strip to the left side of my card using Stampin’ Dimensionals.
 I stamped one of the candy jars from the Sweetest Thing stamp set in Tuxedo Black Memento Ink on a scrap piece of Whisper White cardstock. I then stamped the gummy bears, from the same stamp set, inside the jar in Tuxedo Black Memento Ink and colored them in with my Coastal Cabana, Granny Apple Green and Melon Mambo Stampin’ Write Markers. Using my Big Shot I cut the candy jar out with my Jar Of Sweets Framelits Dies. I adhered the jar, using Stampin’ Dimensionals, to an oval which I cut out using the largest Stitched Shapes Framelits Dies in Granny Apple Green cardstock. Using Multipurpose Liquid Glue, I adhered the oval just under the Melon Mambo strip. I stamped the sentiment in Granny Apple Green on another scrap of Whisper White cardstock and cut it out using the smallest oval from the Stitched Shapes Framelits Dies. I cut the smallest scalloped oval from the Layering Ovals Framelits Dies in Melon Mambo cardstock. I adhered the stitched oval to the center of the scalloped oval using Snail then to the card front using Stampin’ Dimensionals. I added a few Glitter Enamel Dots to the card front in Coastal Cabana, Granny Apple Green and Melon Mambo.
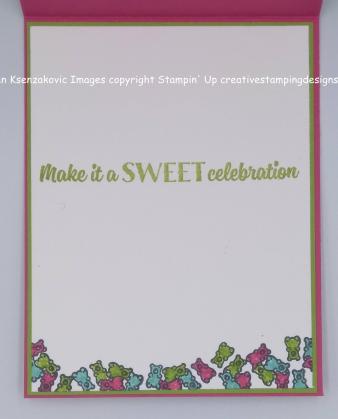 On the inside I stamped the sentiment from the Sweetest Thing stamp set in Granny Apple Green in the center of a Whisper White panel. I stamped the gummy bears from the same stamp set along the bottom of the panel and colored them in the same as I did on the card front. I adhered the Whisper White panel to a Granny Apple Green mat using Snail then adhered it to the inside of the Melon Mambo card base using Multipurpose Liquid Glue.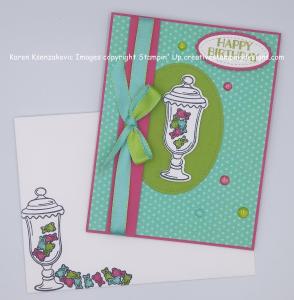


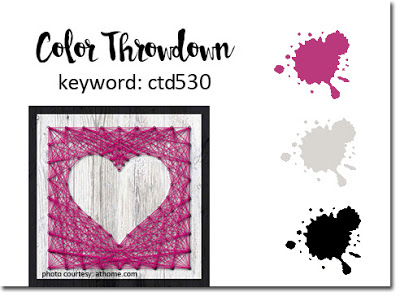
 I joined in with the
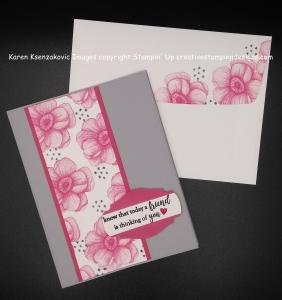
  I started with a Smoky Slate card front and ran it through my Big Shot using the Subtle Dynamic Textured Impressions Embossing Folder.
 Using the soon to be available from the Sale-A-Bration Coordination collection, Story Label Punch (available March 1st), I punched a label out in Melon Mambo cardstock. I stamped the sentiment from the Stampin’ Up Part Of My Story Stamp Set (Free Sale-A-Bration item) in Versamark Ink on a strip of Whisper White cardstock. I sprinkled it immediately with my Black Stampin’ Emboss Powder and heat set it with my Heat Tool. I adhered the sentiment to the label and trimmed the ends to the label. I added a Heart Epoxy Droplet, which I colored with my Dark Lovely Lipstick Stampin’ Blend Marker (that was the closest to Melon Mambo I could get). I adhered the label to the right of my artwork with Stampin’ Dimensionals.
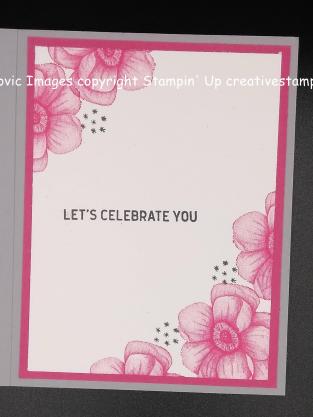 On the inside I stamped the flower from the Painted Seasons stamp set in Melon Mambo Ink on the two corners of a panel of Whisper White cardstock. I added a couple of the star clusters from the same stamp set in Tuxedo Black Memento Ink by the flowers. I stamped the sentiment from the Stampin’ Up Itty Bitty Birthdays Stamp Set in Tuxedo Black Memento Ink in the center of the panel. I adhered the Whisper White panel to a Melon Mambo mat using Snail and adhered it to the inside of the Smoky Slate card base using Multipurpose Liquid Glue.


 I joined in with 2 challenges today also. First I played along with
  Second I played along with
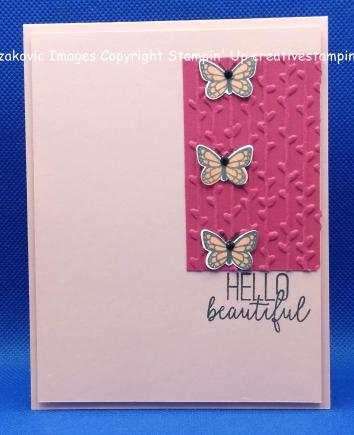
  I started with a Blushing Bride card front and stamped the sentiment from the Stampin’ Up Butterfly Gala Stamp Set in Tuxedo Black Memento Ink on the right side.
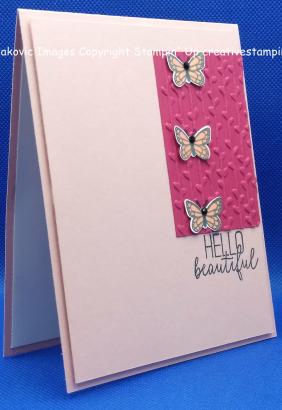 I took a small panel of Lovely Lipstick cardstock and ran it through my Big Shot with the Petal Pair Textured Impressions Embossing Folder. I adhered the embossed panel to the right side of the card front, up against the edge, using Multipurpose Liquid Glue.
 I stamped one of the small butterflies from the Butterfly Gala stamp set 3 times on a piece of Whisper White cardstock in Tuxedo Black Memento Ink. I then stamped the inside of each of the butterflies in Grapefruit Grove Ink. I punched the butterflies out using my Butterfly Duet Punch (which unfortunately is currently on backorder) and adhered them to the embossed panel using Glue Dots. I added a Black Faceted Dots to each of the butterflies and bent their wings up a little. I adhered the card front to a Blushing Bride card base using Stampin’ Dimensionals.
 On the inside I stamped the sentiment from the Stampin’ Up Bright Wishes Stamp Set in Tuxedo Black Memento Ink in the center of a Whisper White panel. I stamped 3 more butterflies from the Butterfly Gala stamp set in Tuxedo Black Memento Ink on a piece of Whisper White cardstock. I stamped the top portion of 2 of the butterflies and bottom portion of 1 butterfly in Lovely Lipstick Ink. I stamped the top portion of 1 butterfly and bottom portion of 2 butterflies in Grapefruit Grove Ink then punched all 3 butterflies out using the Butterfly Duet Punch. I adhered the butterflies around the sentiment using Multipurpose Liquid Glue.


 Good Tuesday morning my fellow stampers and welcome to Amy’s Inkin’ Krew Team Blog Hop. If you are starting with me, welcome and be sure to hop around and see all the beautiful projects that everyone has made. If you are hopping over from Amy Koenders blog, welcome to my blog. The 2nd Tuesday of every month this amazing group of ladies puts together a blog hop and you are guaranteed to see a lot of gorgeousness. This months theme is ‘Birthday’. I made a fun fold card for today’s blog hop. I saw this design on Pinterest, but can not remember who made it. Here is my card.
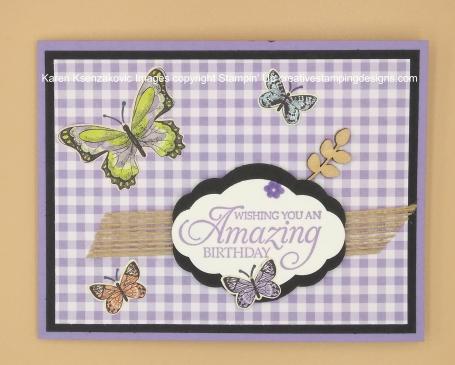 There are a lot of pieces to my card and all the measurements are found below. I started with a Highland Heather panel of Gingham Gala Designer Series Paper and adhered it to a Basic Black mat using Snail. I stamped the sentiment from the Stampin’ Up Humming Along Stamp Set in Highland Heather Ink on a scrap of Whisper White cardstock. I punched the sentiment out using the Pretty Label Punch. I punched out 2 more of the labels from my Basic Black cardstock.
 Using the Butterfly Duet Punch, I punched out some butterflies from a couple different Botanical Butterfly Designer Series Paper (Sale-A-Bration item). The great thing about this punch is it not only punches out the butterflies from the Butterfly Gala stamp set it also fits the butterflies on the Botanical Butterfly DSP which is a FREE item with a $50 during Sale-A-Bration. I adhered 2 small and 1 large butterfly to the card front and 1 small butterfly to the sentiment using Multipurpose Liquid Glue. I added one of the Butterfly Elements (another Sale-A-Bration item) behind the sentiment using Multipurpose Liquid Glue. I also added one of the Gingham Gala Adhesive-Backed Sequins to the sentiment. I adhered the card front to a Highland Heather card base using Multipurpose Liquid Glue.
 On the inside I adhered 2 panels of the Botanical Butterfly DSP to Basic Black mats using Snail and I adhered them both to either side of the card base using Multipurpose Liquid Glue.
 Using my Big Shot I cut out 4 stitched squares from the Stitched Shapes Framelits Dies in the Highland Heather Gingham Gala DSP. I adhered all 4 of them to a Basic Black mat and a Highland Heather mat both cut from my Layering Squared Framelits Dies, using Multipurpose Liquid Glue. I adhered a butterfly punched out from the Botanical Butterfly DSP, to each of the squares using Multipurpose Liquid Glue. I added a Gingham Gala Adhesive-Backed Sequins to each of the squares. I adhered a Basic Black strip of paper, which had been scored, to the inside only adhering it on the 2 end sections. I adhered each of the squares to a section of the Basic Black strip using Multipurpose Liquid Glue. Here is a top view of the inside.
 After I was all finished with the inside I realized that I didn’t leave a spot to put a sentiment or write, So I added another panel to the back.
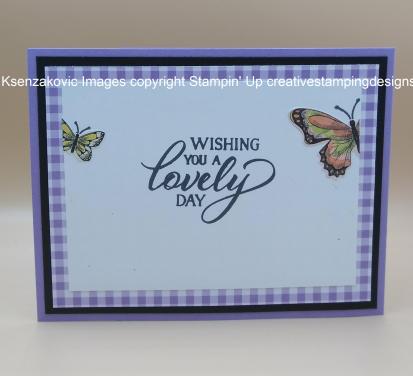 I adhered a panel of the Highland Heather Gingham Gala DSP to a Basic Black mat using Snail. On a panel of Whisper White cardstock I stamped the sentiment from the Stampin’ Up Forever Lovely Stamp Set in Tuxedo Black Memento Ink. I added a couple more of the butterflies punched out from the Botanical Butterfly DSP and adhered them to the Whisper White panel and cut off what over hung using my Paper Snips. I adhered the Whisper White panel to the card back using Snail and adhered it to the back of the card base using Multipurpose Liquid Glue.


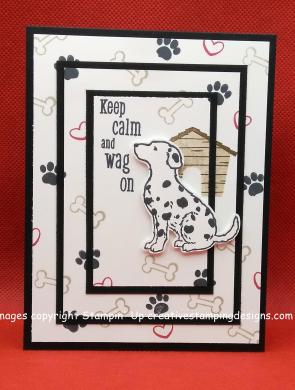 All the measurements for the layers are listed below. I started with a small piece of Whisper White cardstock and stamped the dog from the Happy Tails stamp set in Tuxedo Black Memento Ink on it. I stamped the spots on top of the dog in Tuxedo Black Ink also. I punched the dog out using the Dog Builder Punch and set it aside.
 Once all the layers were lined up and adhered together I added the punched dog to the top panel using Stampin’ Dimensionals.
 On the inside I stamped the paw prints from the Happy Tails stamp set in Tuxedo Black Memento Ink along the bottom of a Whisper White panel. I stamped the sentiments from the Stampin’ Up Itty Bitty Birthdays Stamp Set in Tuxedo Black Memento Ink in the center of the panel. I adhered the Whisper White panel to the inside of the Basic Black card base using Snail.


