Stampin’ Up! Layers of Beauty Anniversary

Good Wednesday morning stamping friends. We’re already halfway through the week and on our way to the weekend. I know this was a short week for some because of the weather. It’s a normal week for me, even though we got a lot of snow, the store was open Monday morning, just a couple hours later than normal to give everyone time to get in.

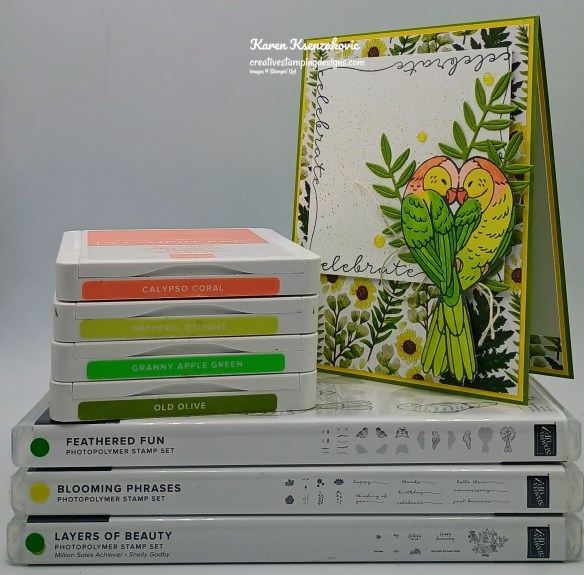
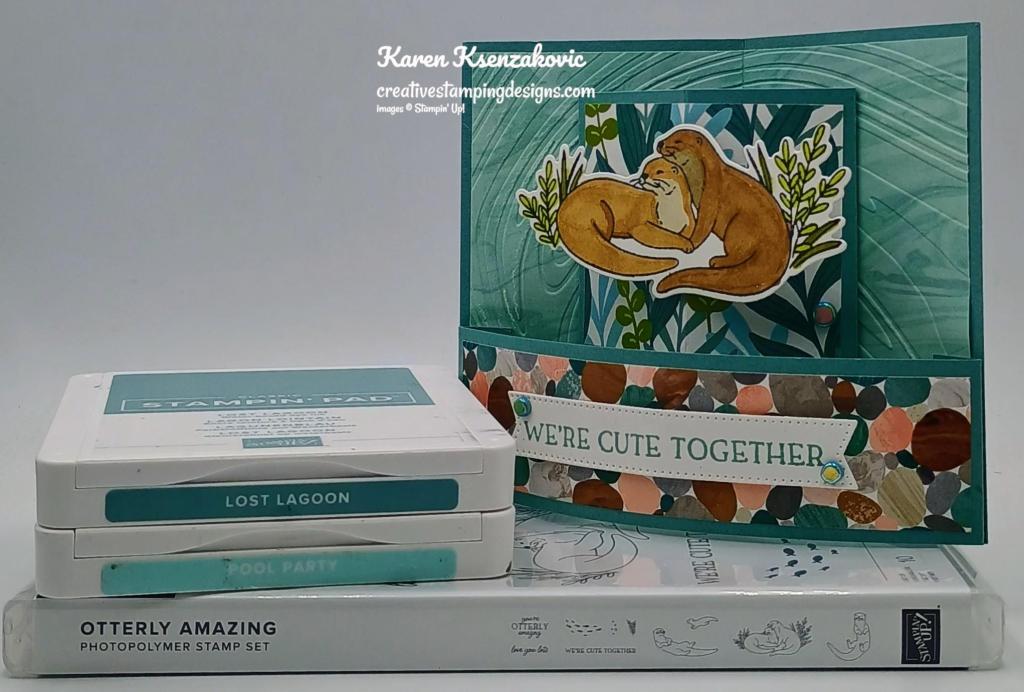
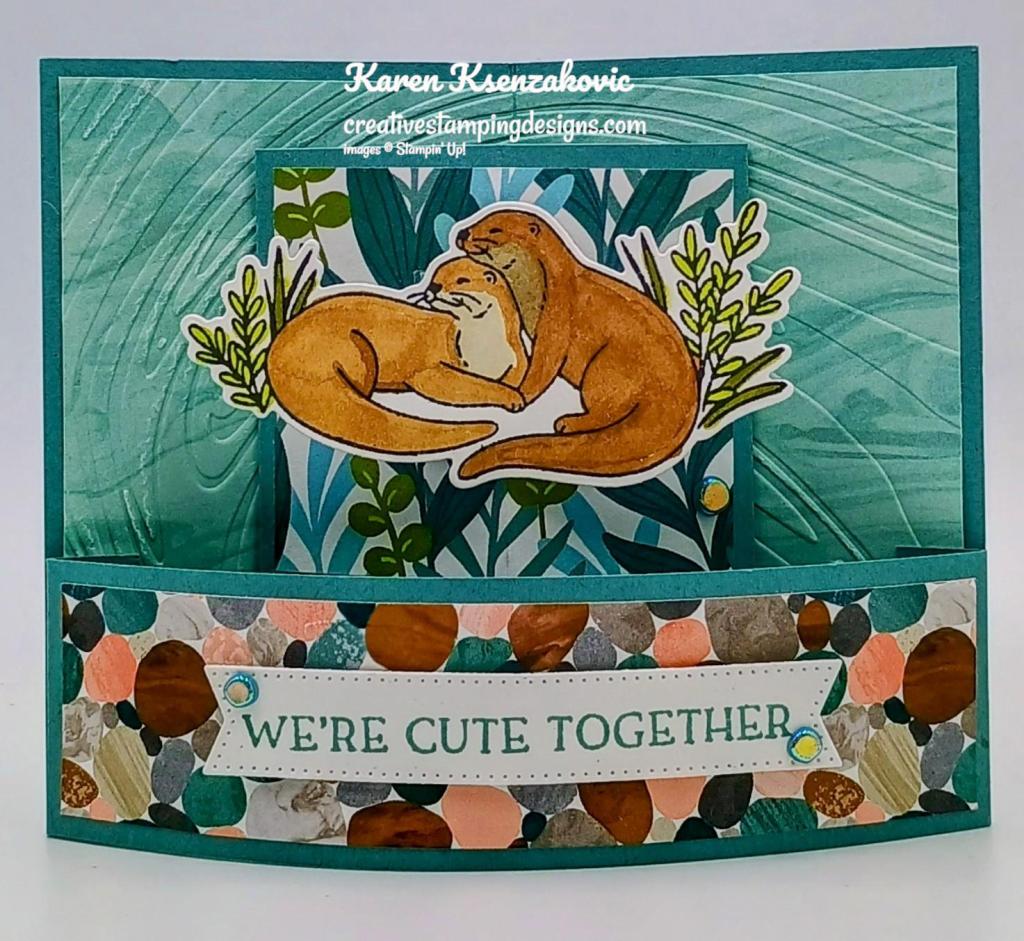
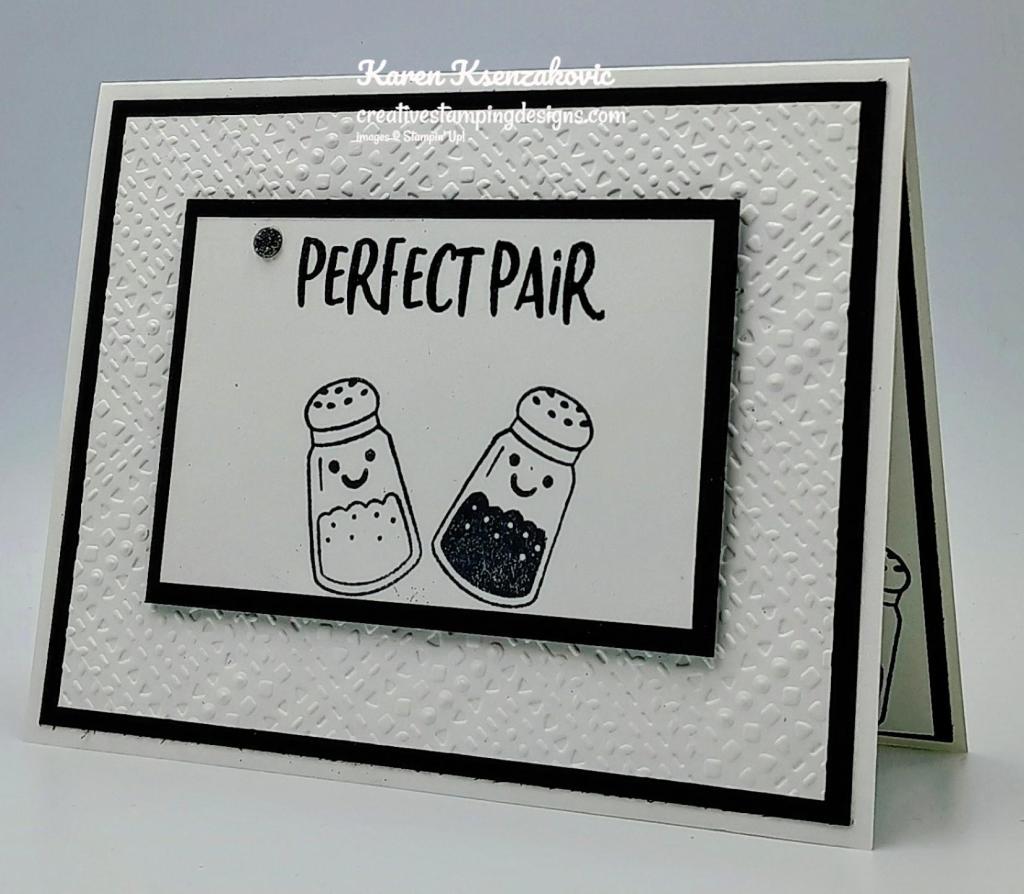
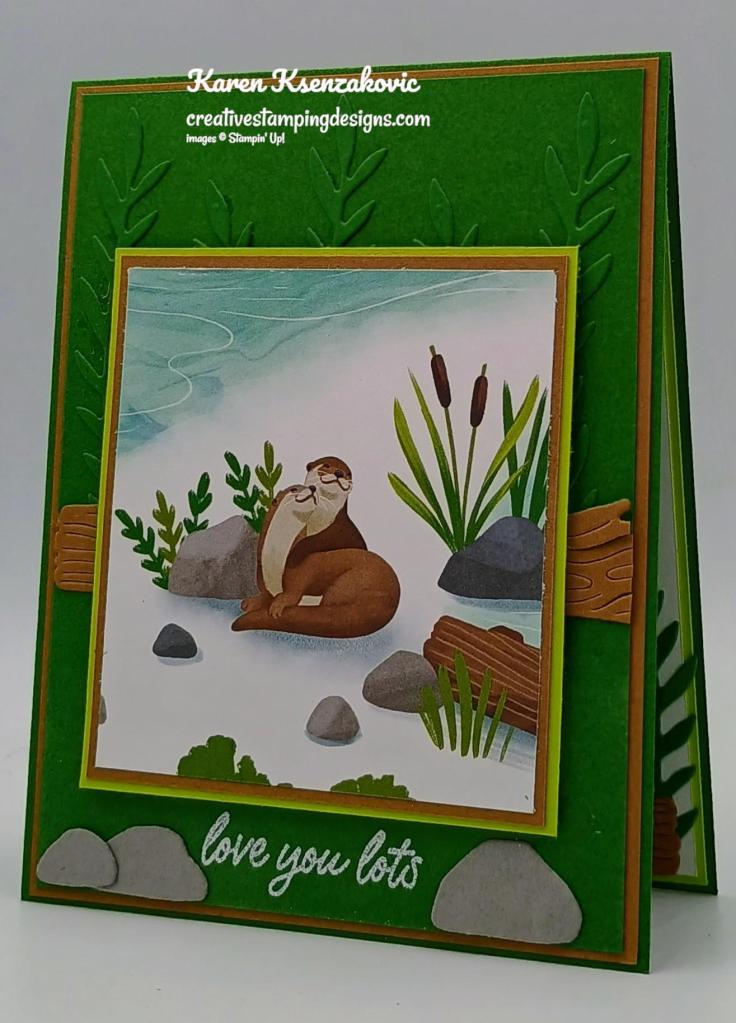
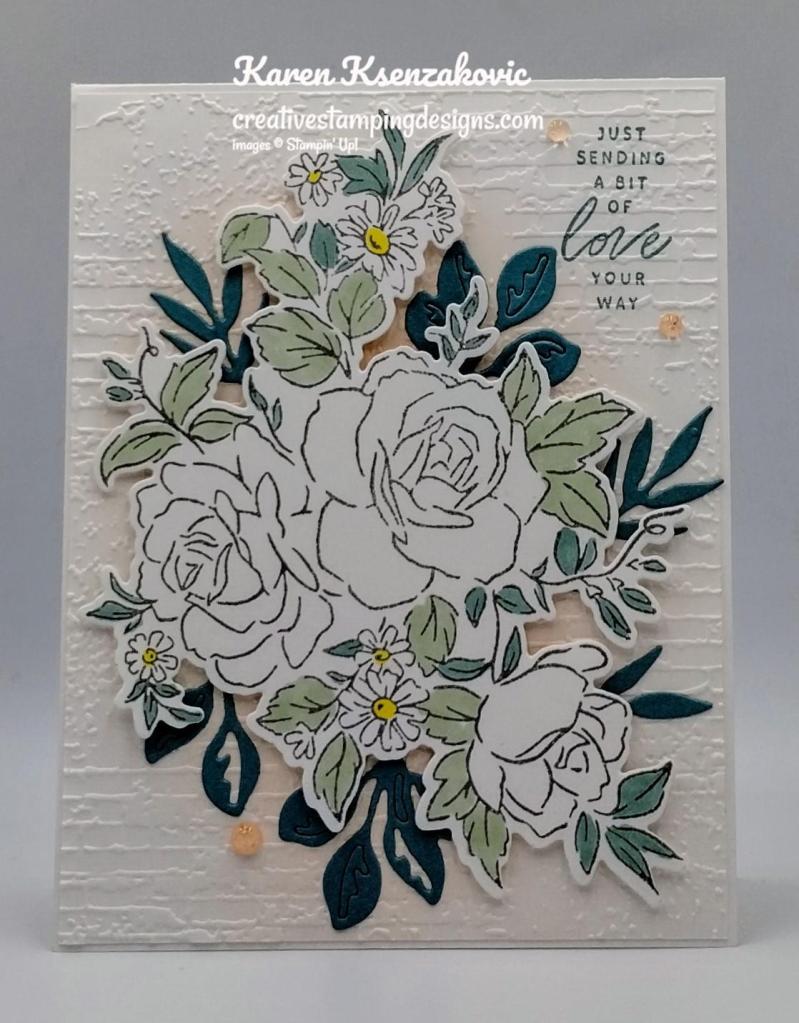
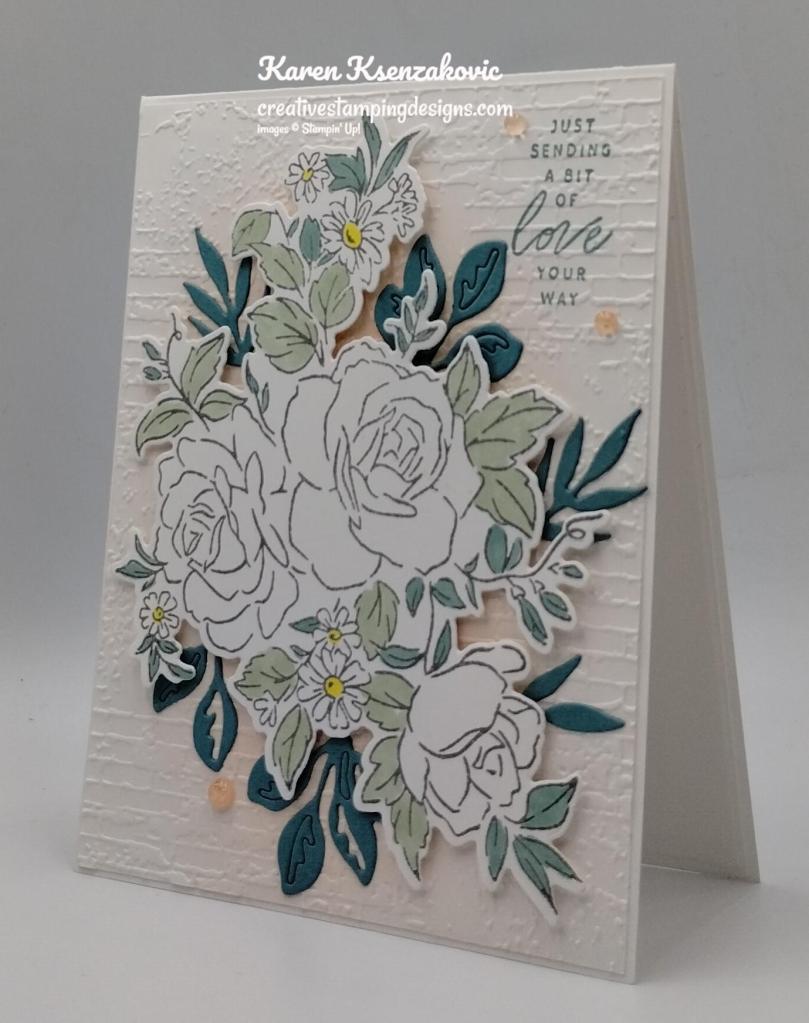
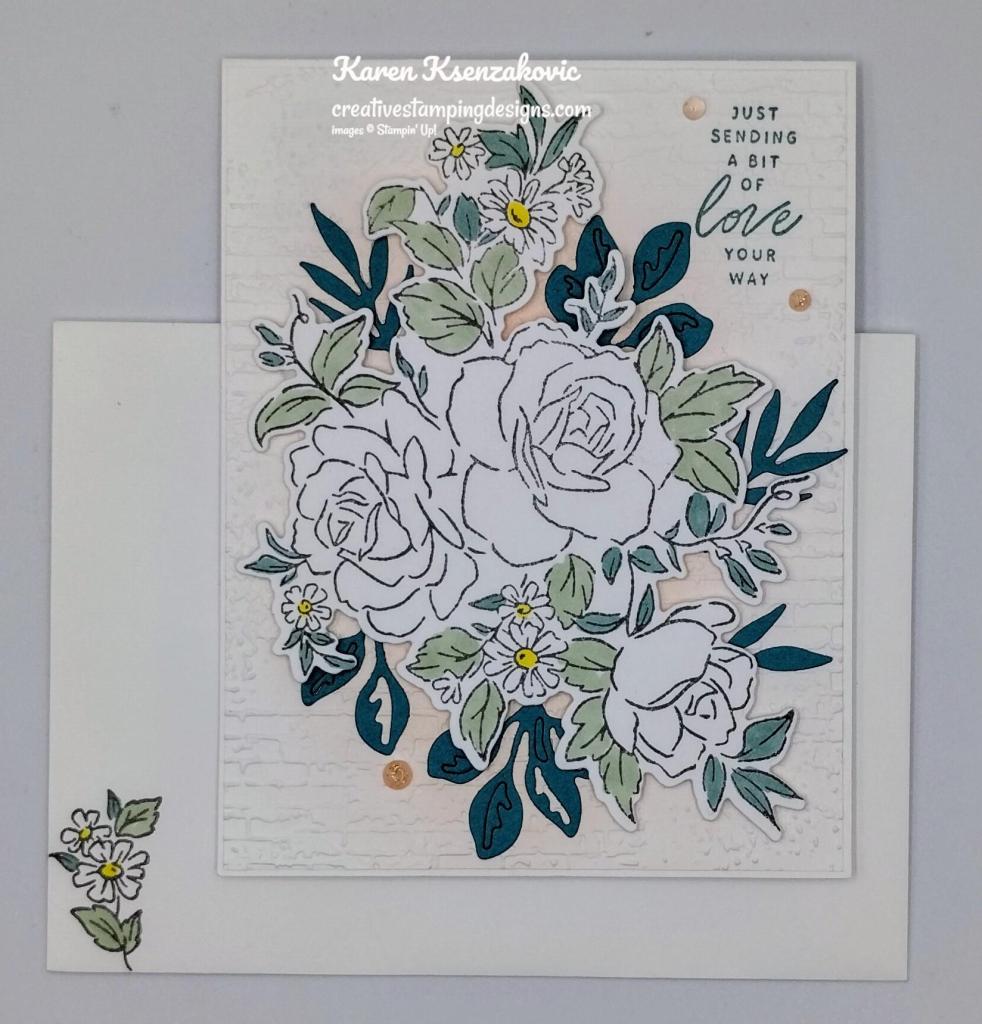
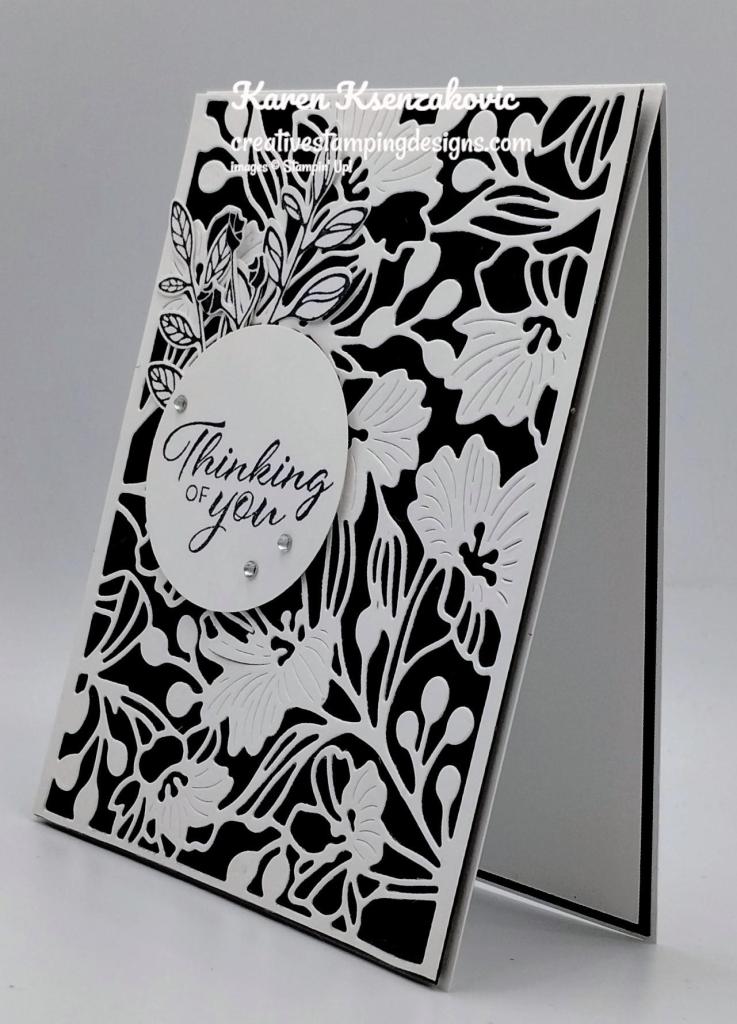
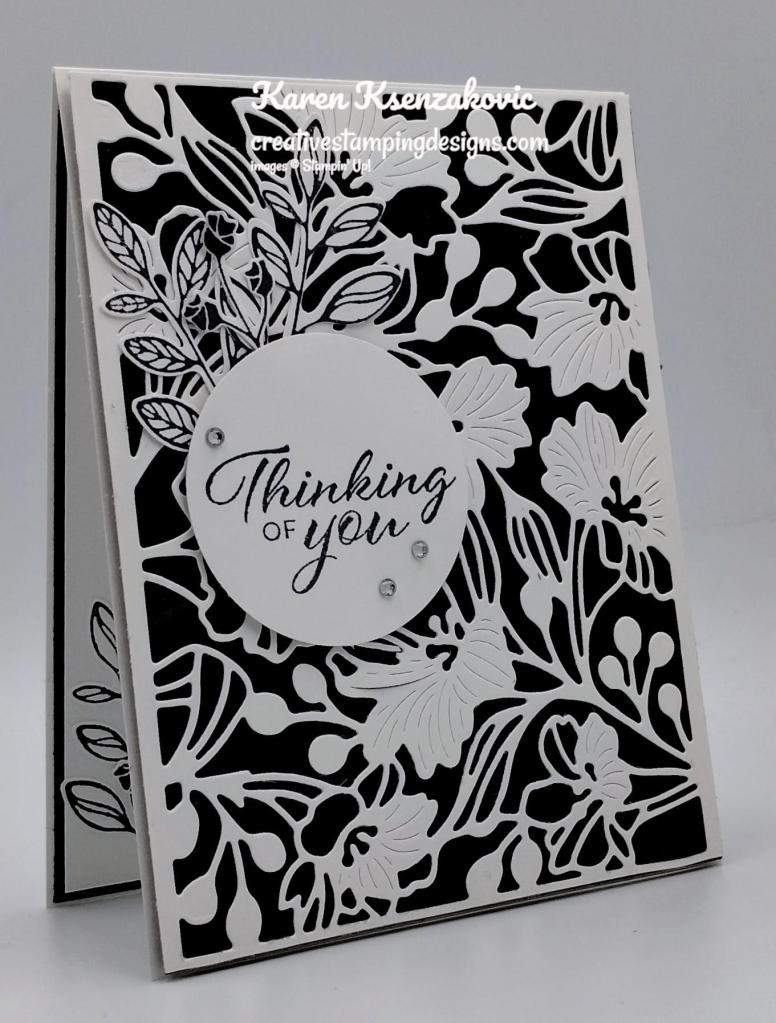
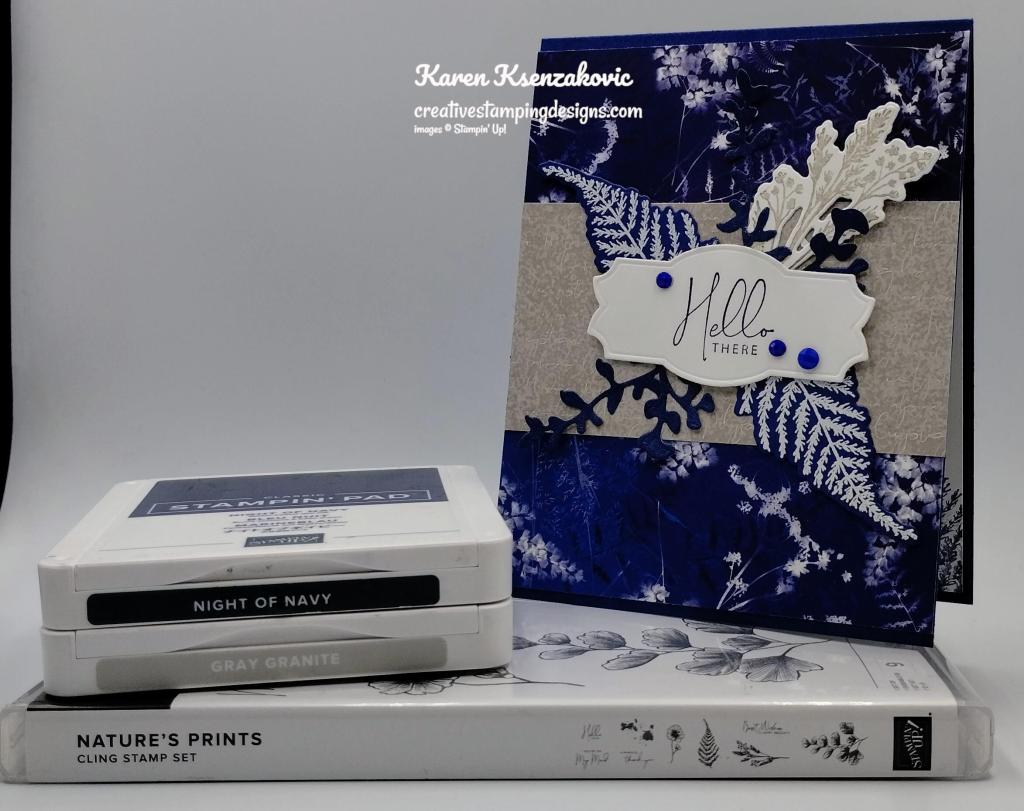
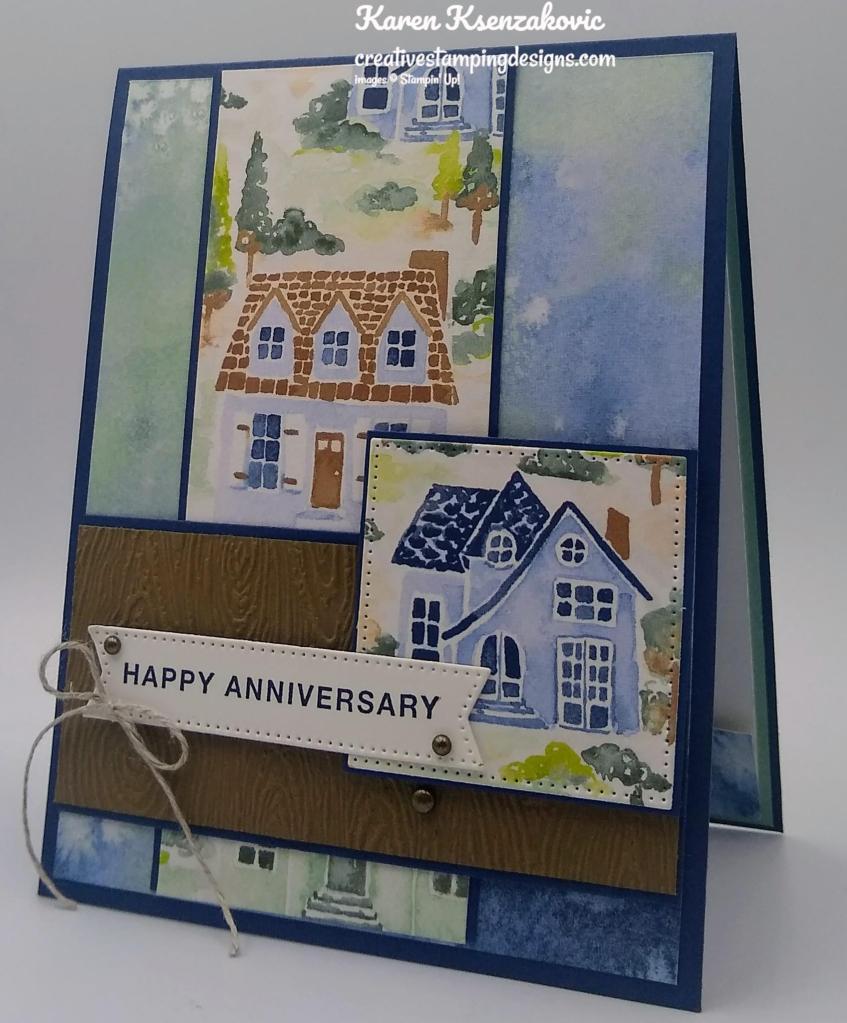
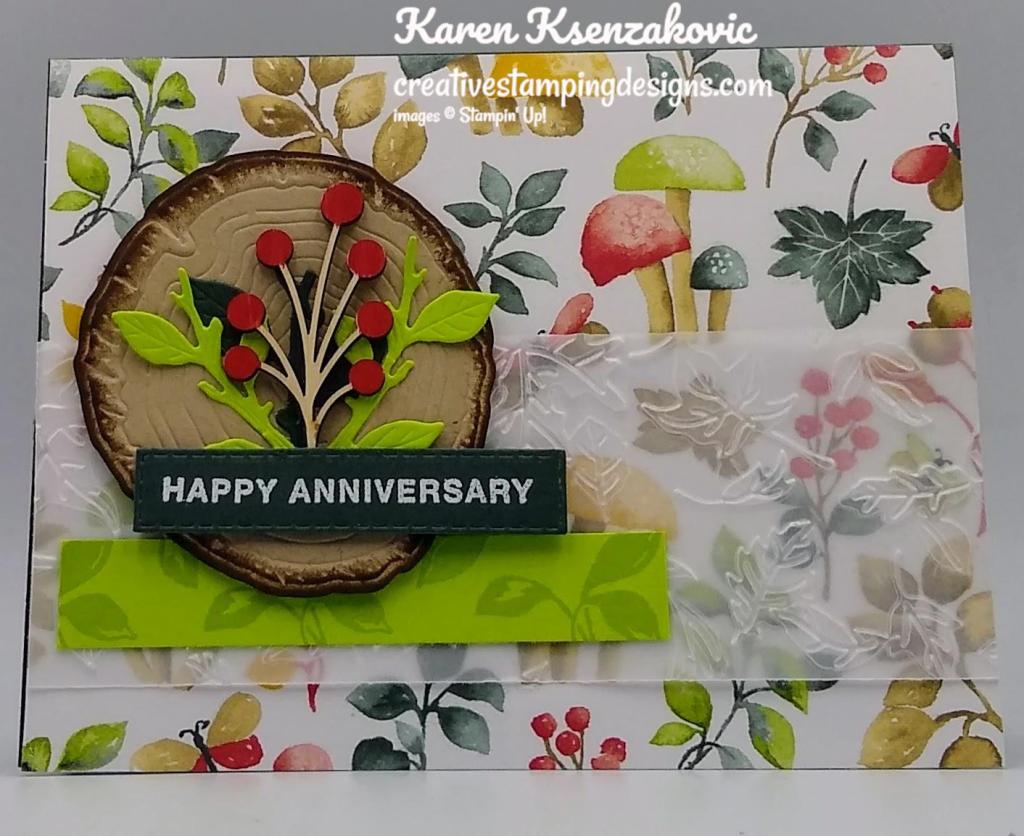
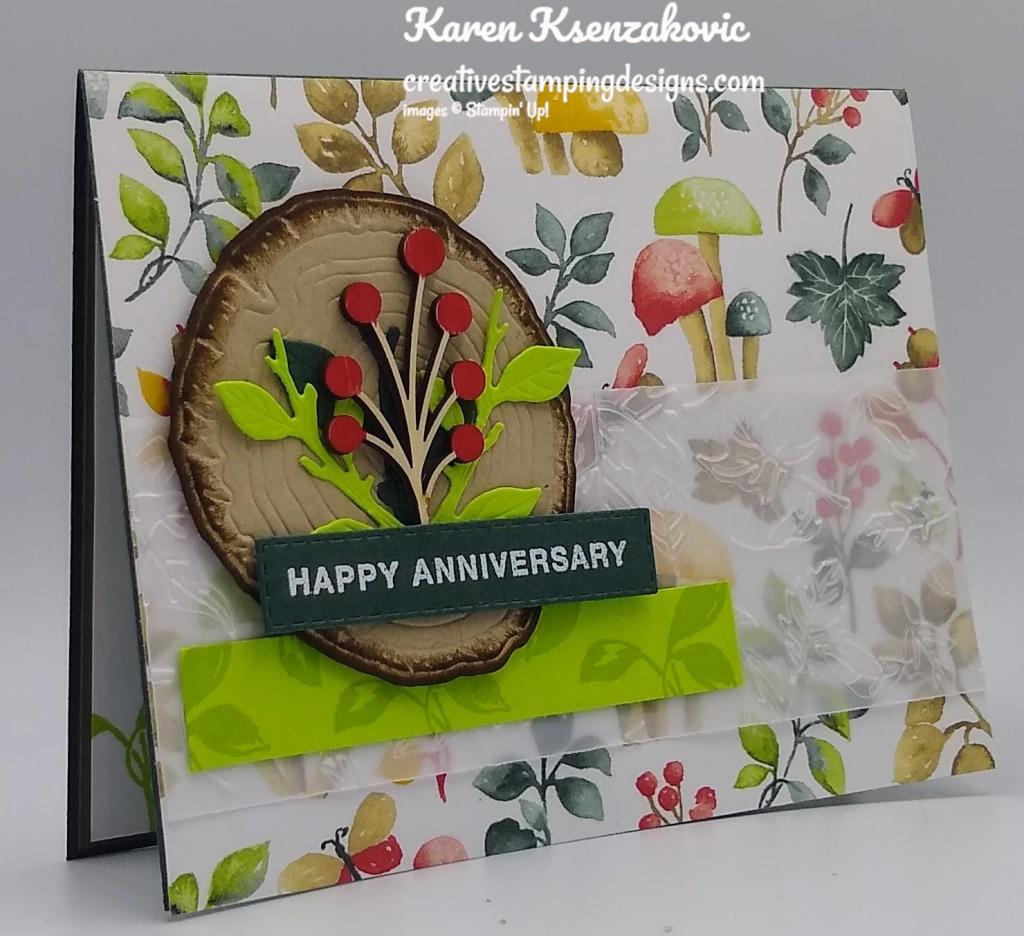
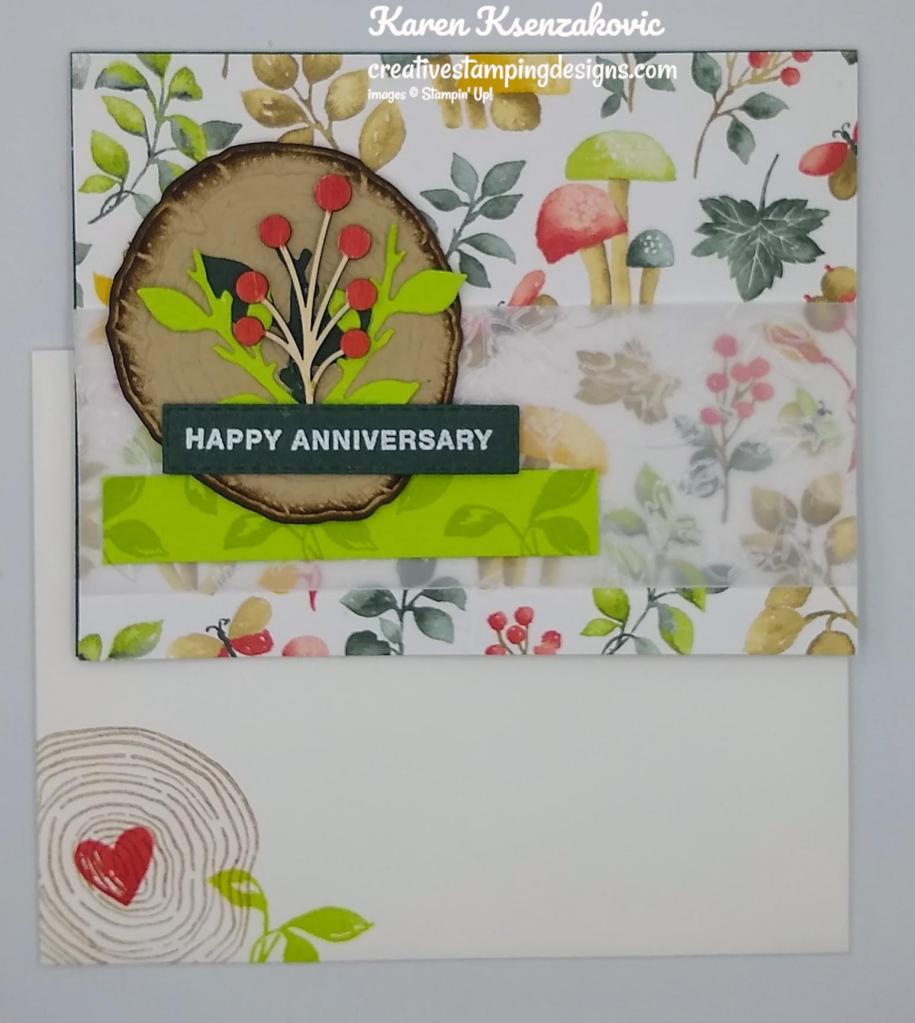
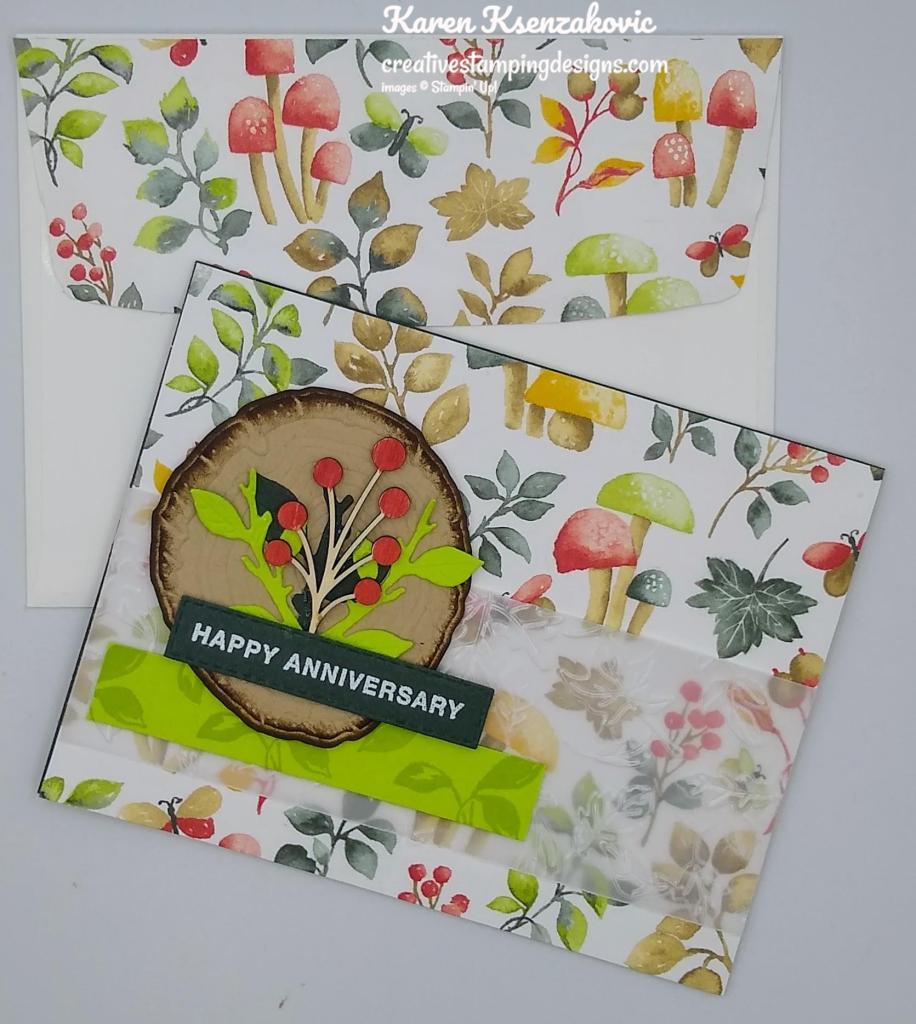
Today’s card I let the DSP do all the work for me. I love the Stampin’ Up! DSP, it gives me colors to use and makes card fronts all by itself. I did do a little bit of work on my card, but this adorable paper just made my whole card for me.  If you’d like to see a quick video on how I made this card, Click Here to go to my Instagram Reels. Here’s my card for today.

Stampin' Up! Layers of Beauty Anniversary 1 creativestampingdesigns.com

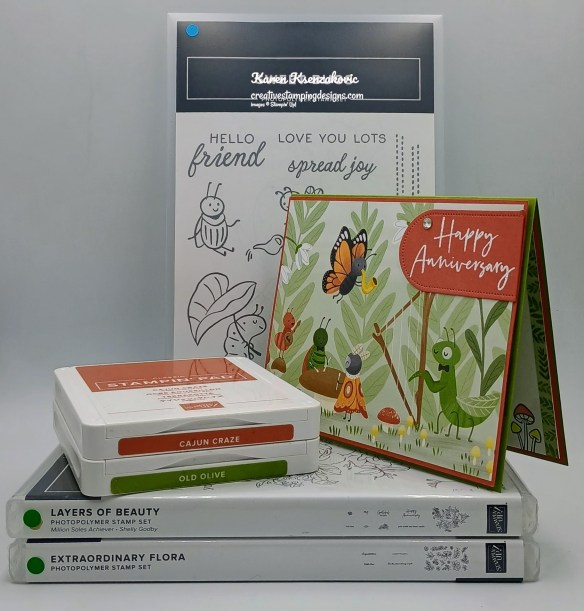
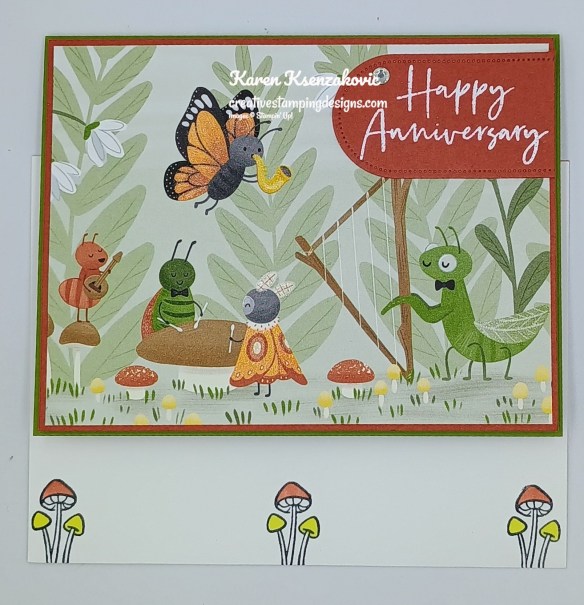
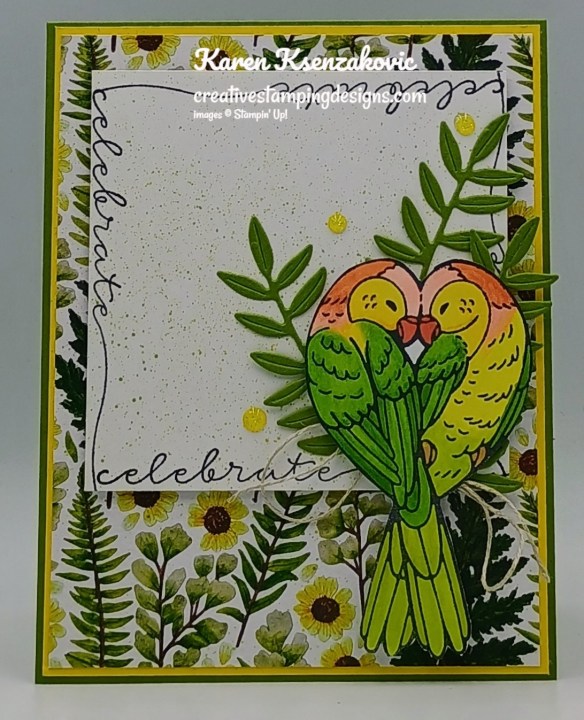
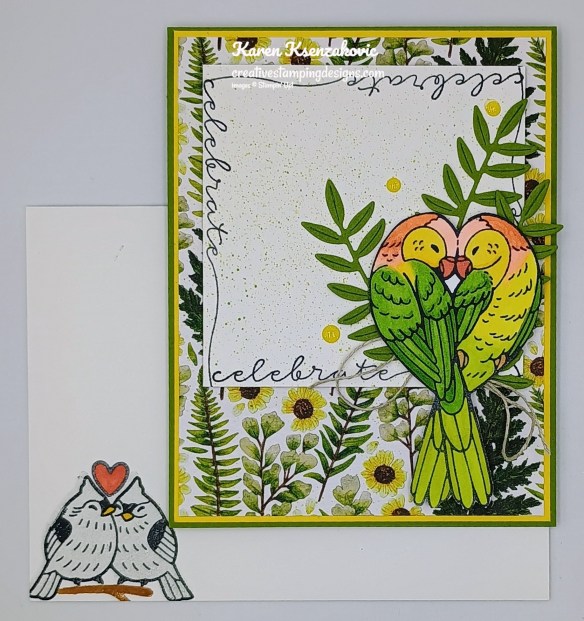
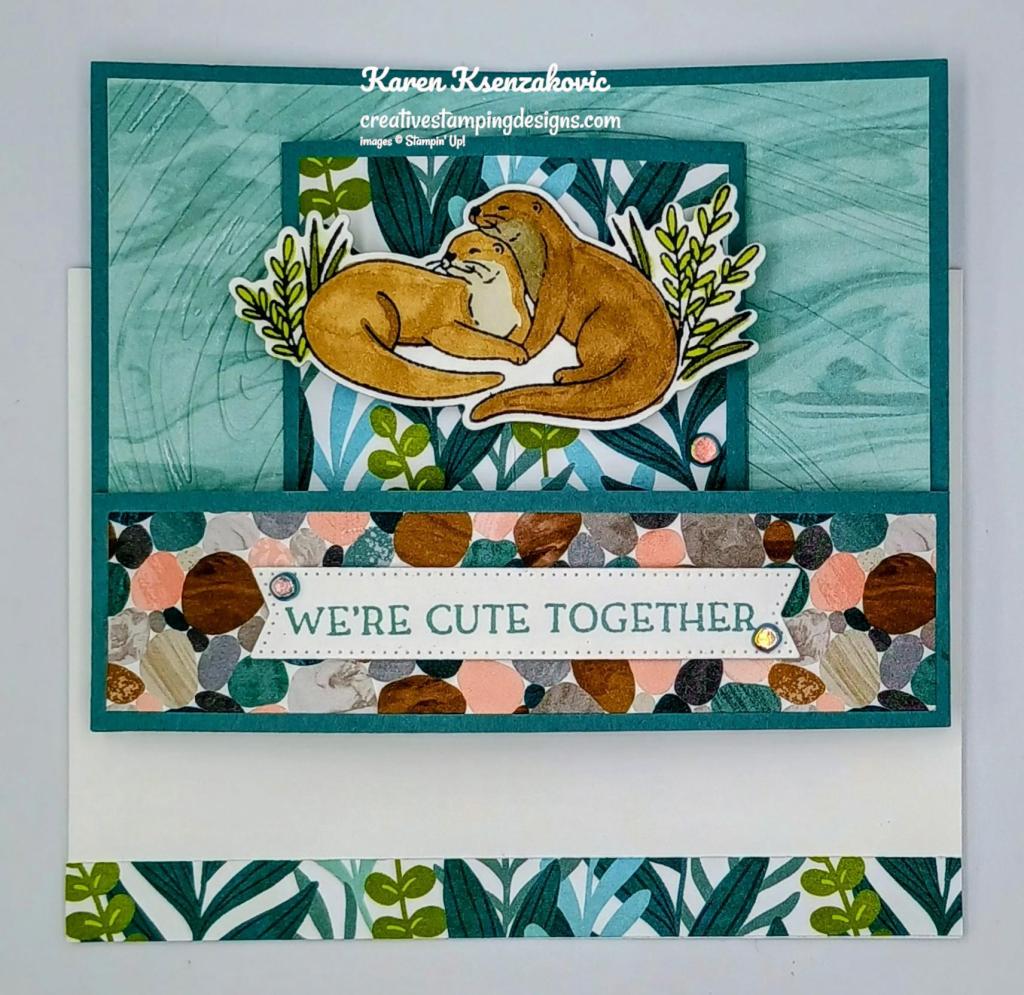
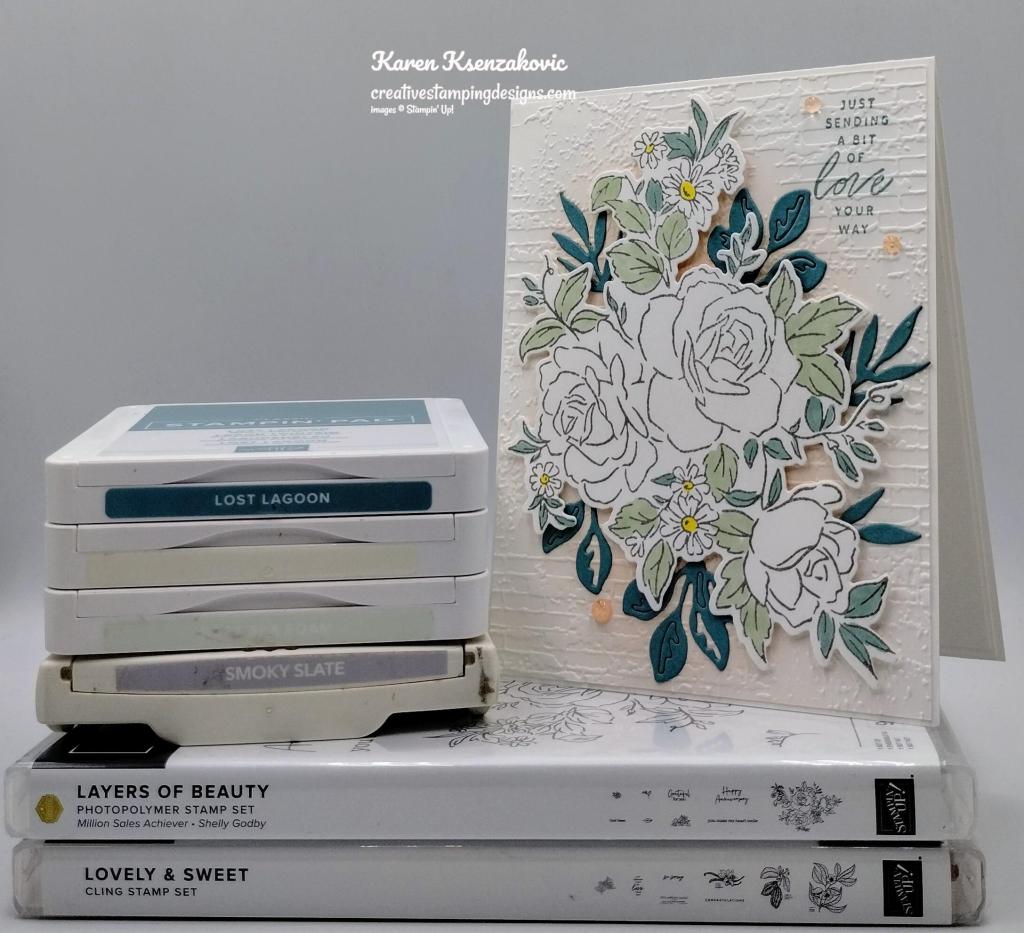
I used the adorable Cute as a Bug Designer Series Paper along with the Stampin’ Up! Layer’s of Beauty Stamp Set, Everyday Arches Dies, Stampin’ Up! Extraordinary Flora Stamp Set and Stampin’ Up! Sweet Bugs Stamp Set for my card today.

Stampin' Up! Layers of Beauty Anniversary 2 creativestampingdesigns.com

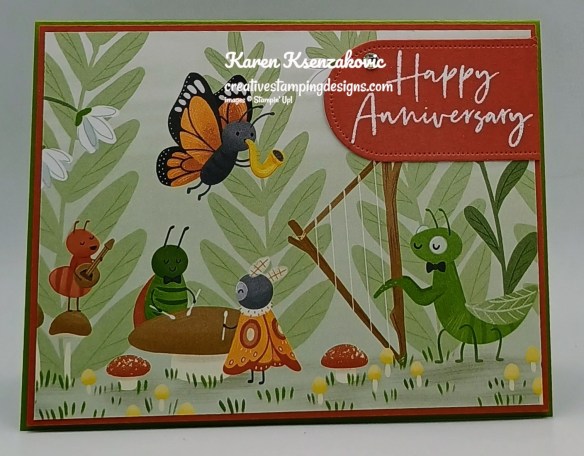
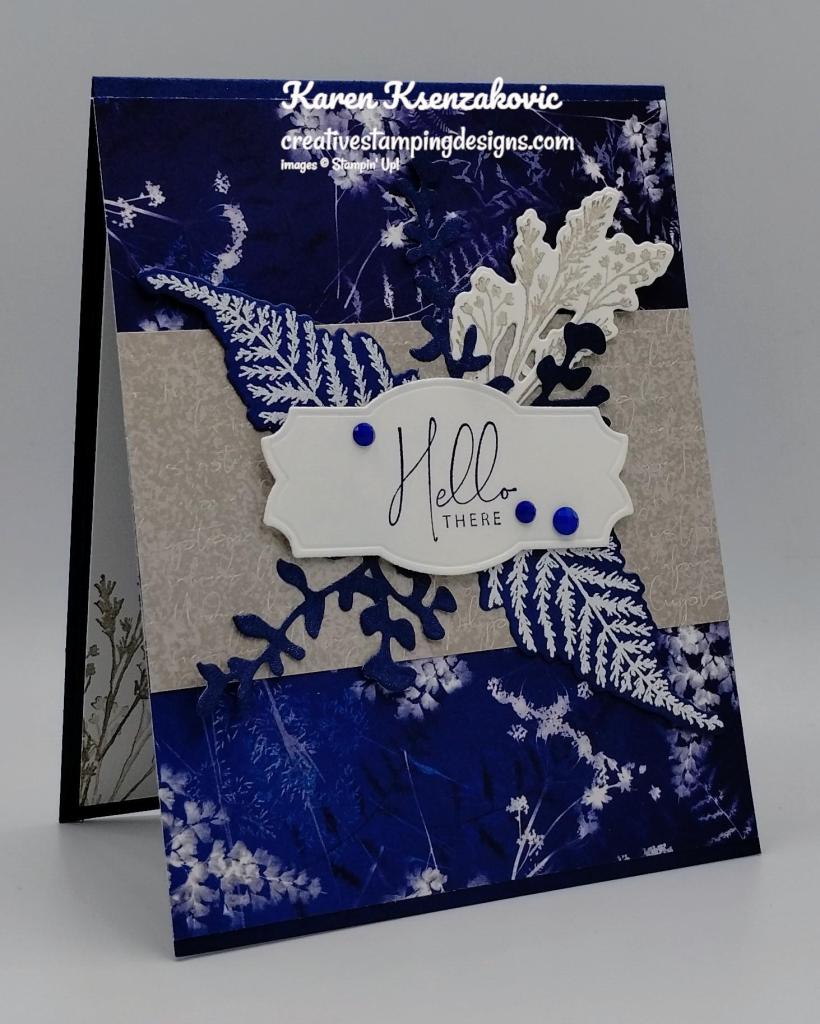
Adhere a panel of Cute as a Bug DSP to a Cajun Craze mat. Go over the wings of the bugs on the paper with a Clear Wink of Stella Glitter Brush.

Stampin' Up! Layers of Beauty Anniversary 3 creativestampingdesigns.com

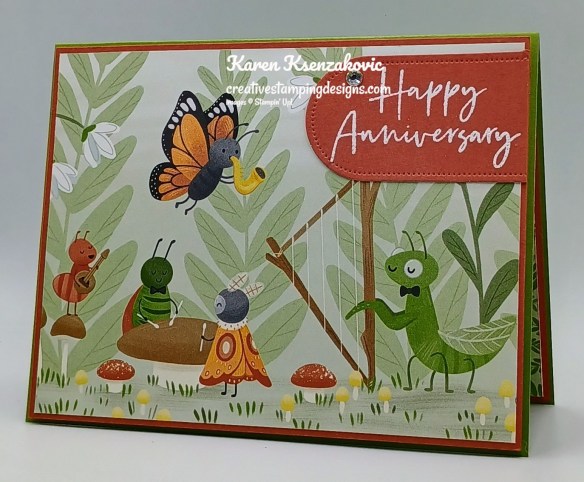
Stamp the sentiment from Layers of Beauty stamp set in Versamark Ink on a panel of Cajun Craze. Sprinkle the sentiment with White Embossing Powder and set it using the Heat Tool. Cut the sentiment out using the Everyday Arches Dies. Adhere the sentiment to the card front and trim off the excess with snips.

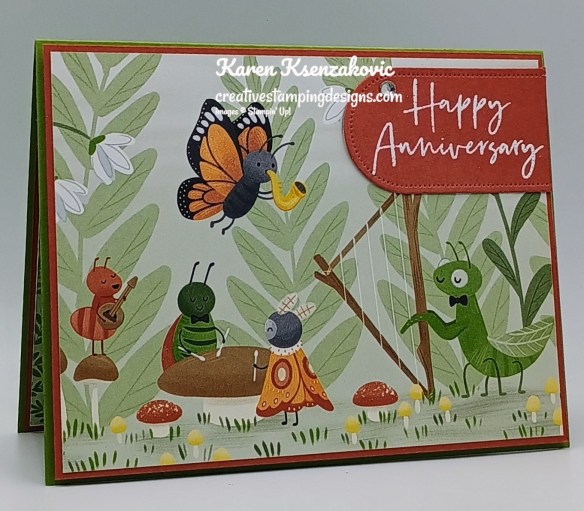
Adhere the layered card front to an Old Olive card base with Stampin’ Dimensionals. Add a Rhinestone Basic Jewel to the card front.

Stampin' Up! Layers of Beauty Anniversary 5 creativestampingdesigns.com

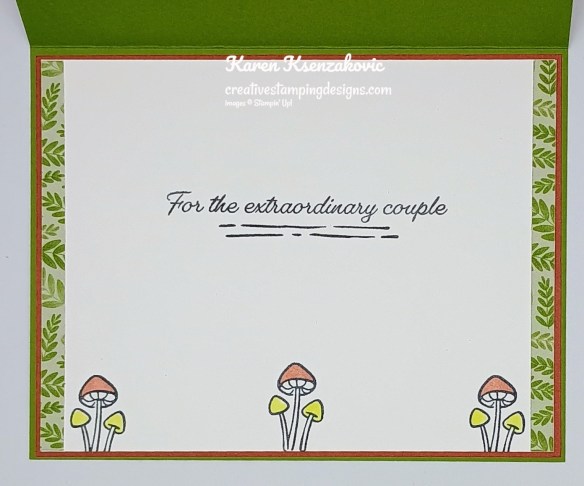
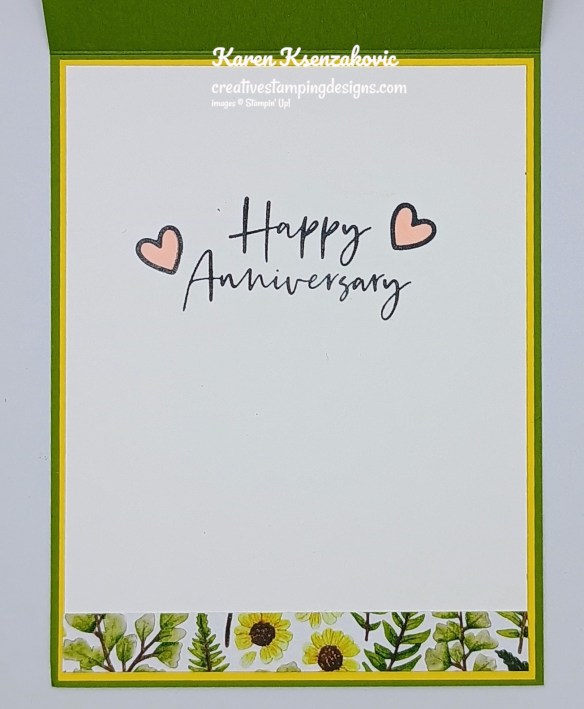
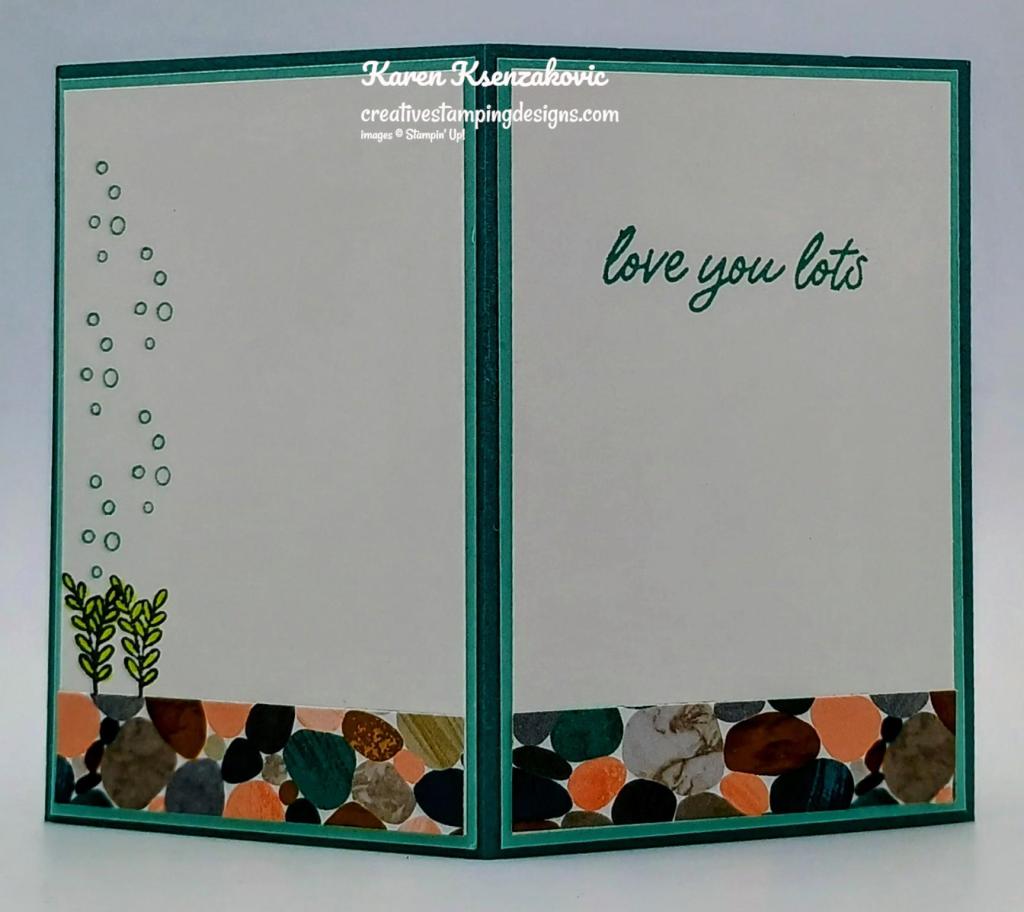
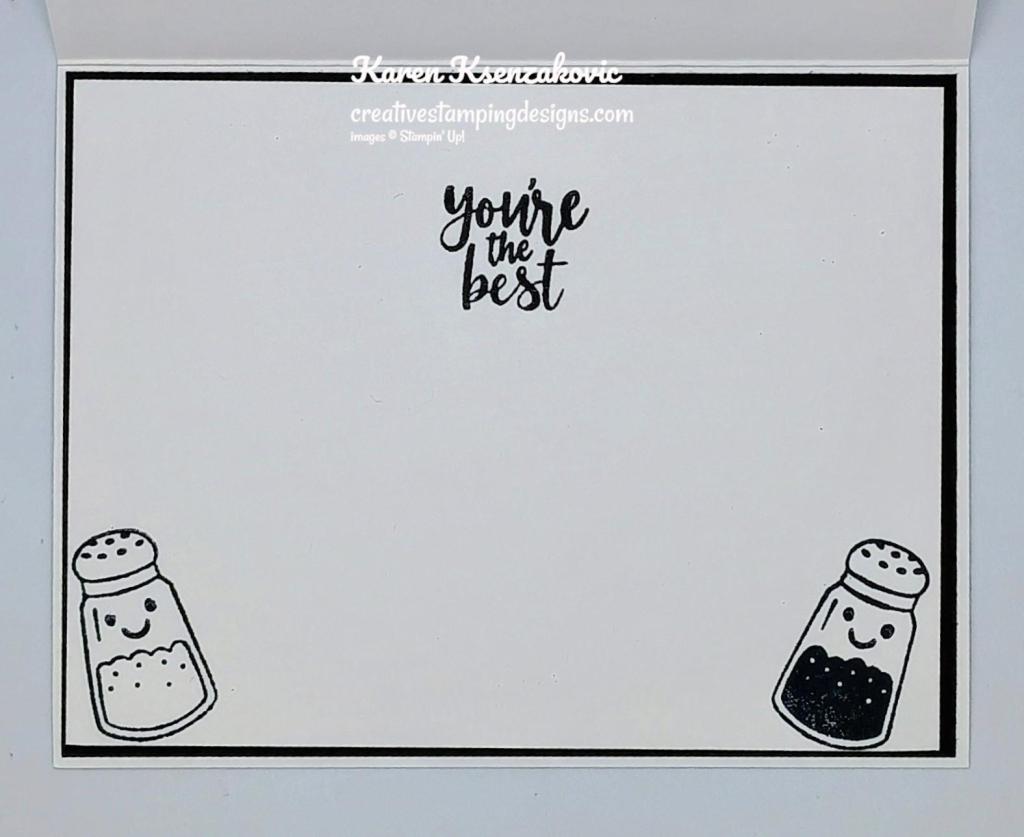
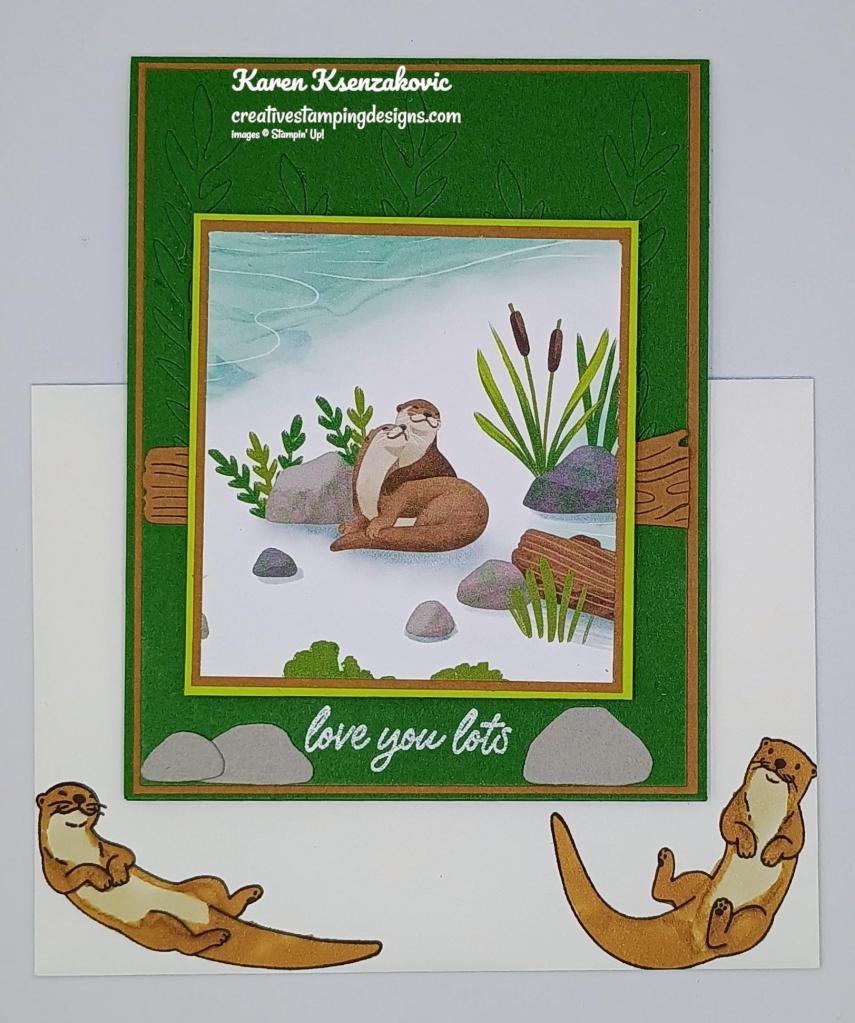
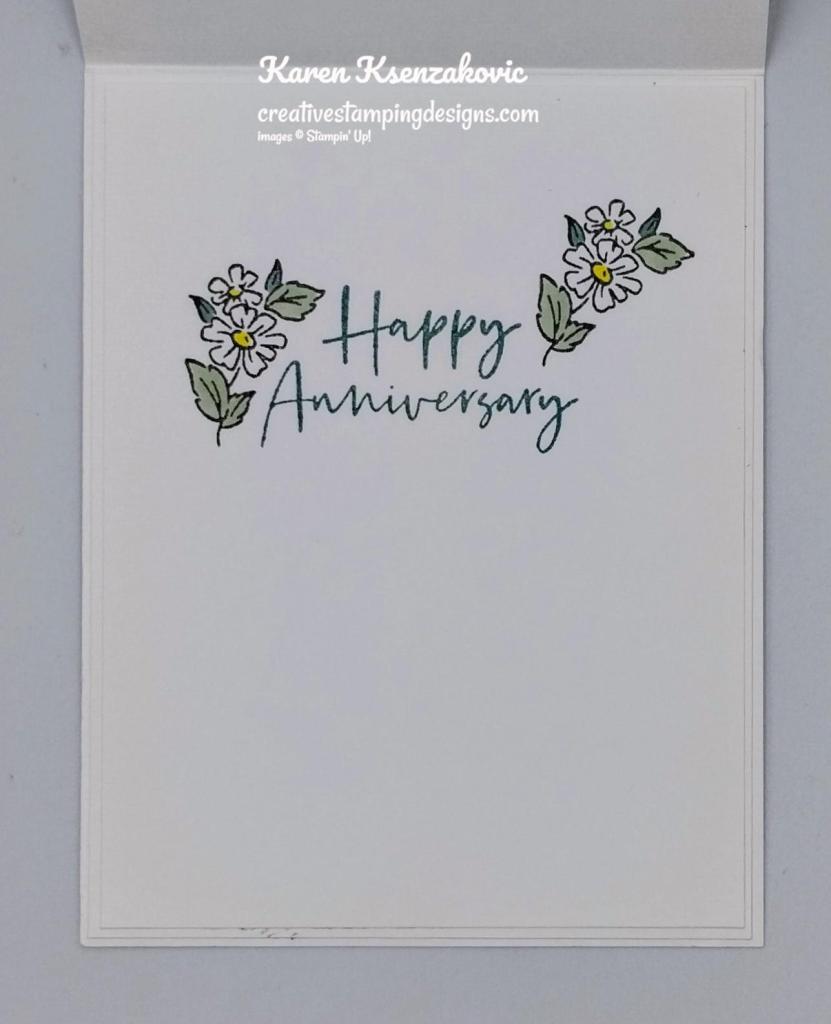
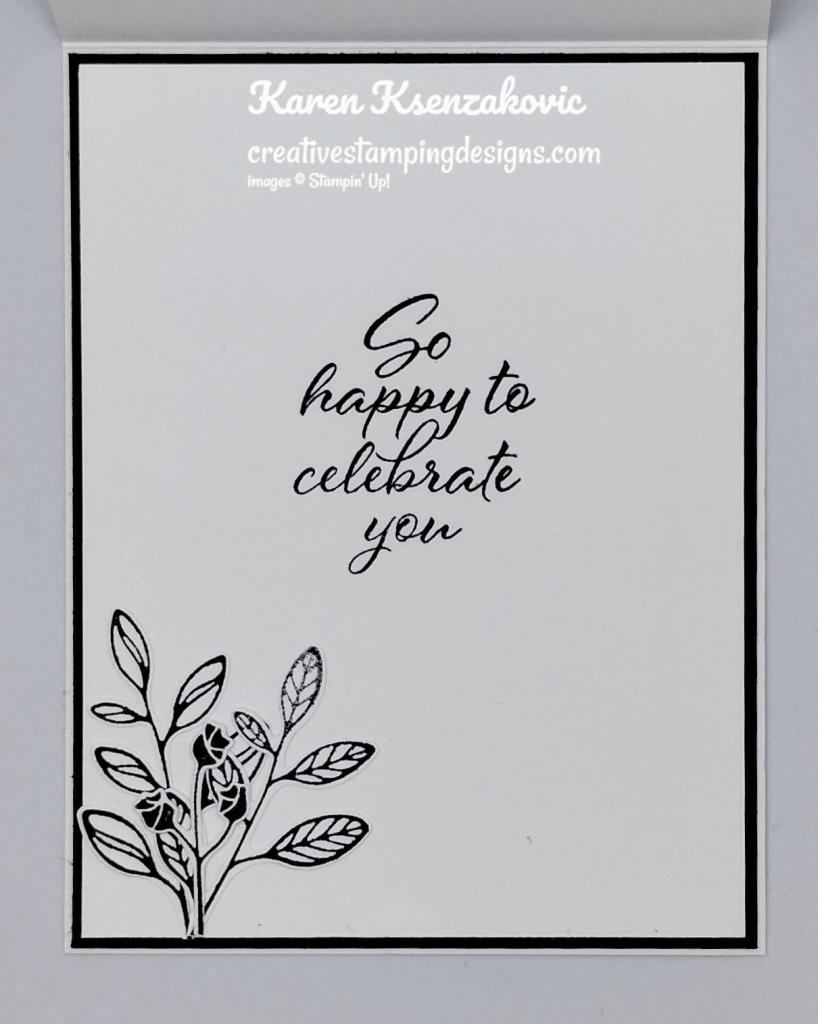
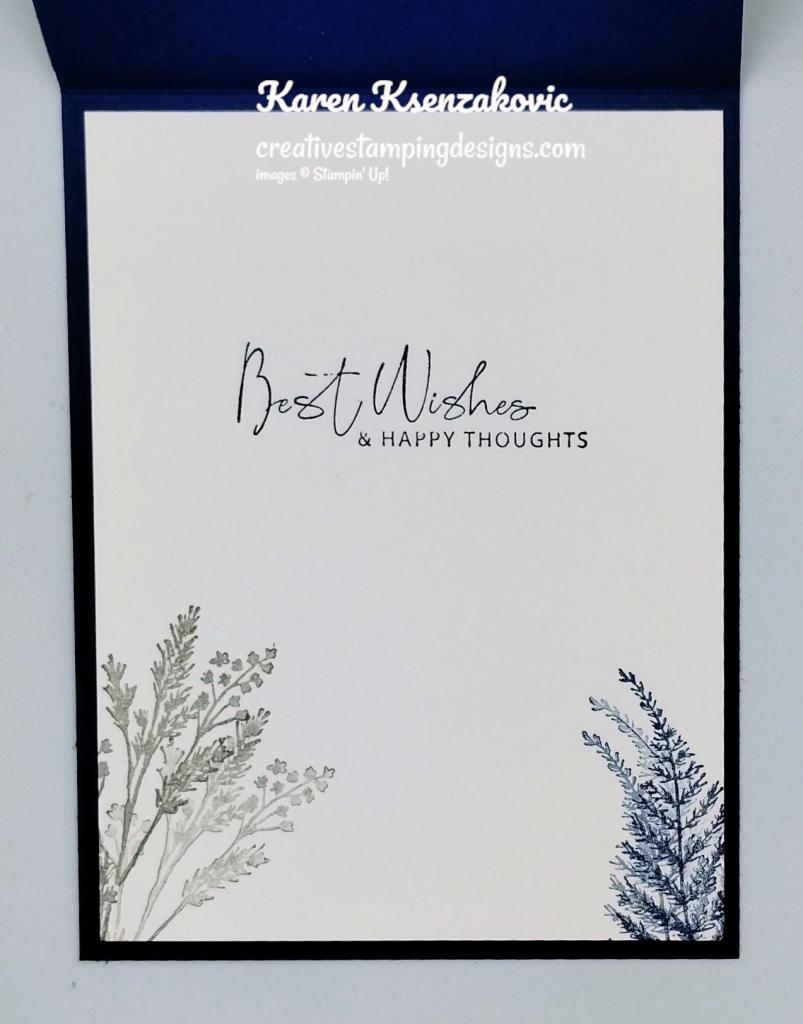
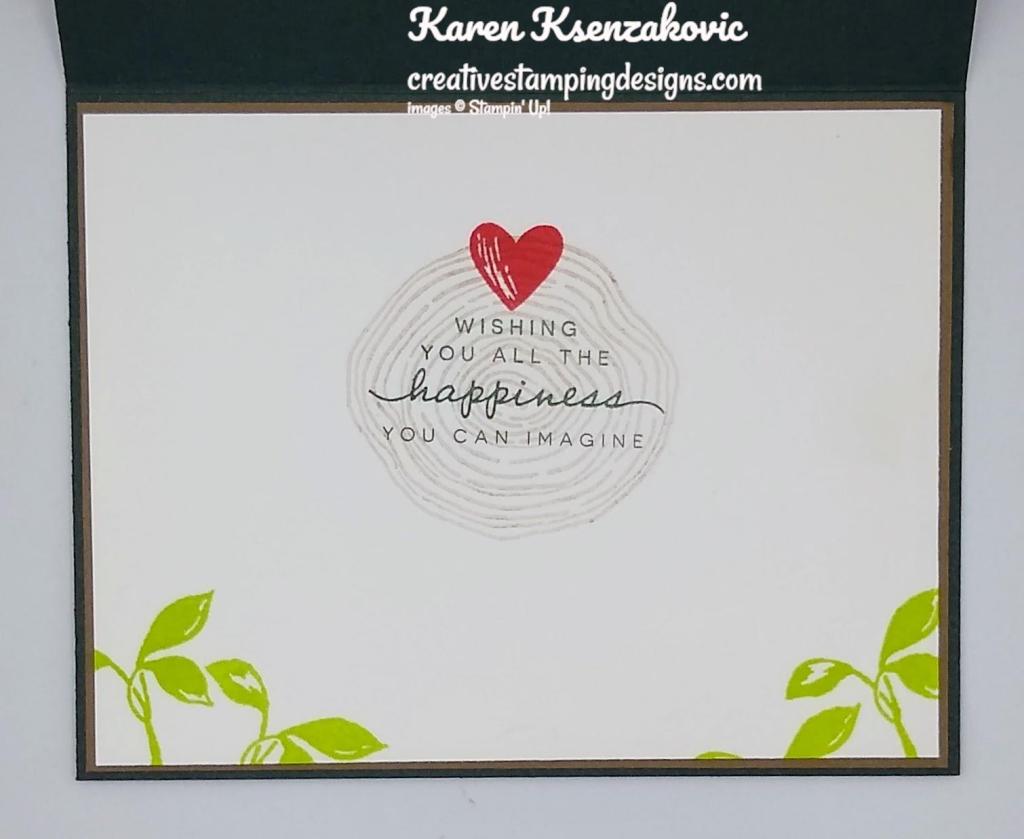
Stamp the sentiment from the Extraordinary Flora stamp set in Tuxedo Black Ink on a panel of Basic White. Adhere 2 strips of Cute as a Bug DSP to the sides of the panel. Stamp the toadstool image from the Sweet Bugs stamp set in Tuxedo Black Ink on the bottom of the panel. Color the images using Cajun Craze and Lemon Lolly Stampin’ Blends Markers. Adhere the Basic White panel to a Cajun Craze mat then to the inside of the Old Olive card base.

Stampin' Up! Layers of Beauty Anniversary 6 creativestampingdesigns.com

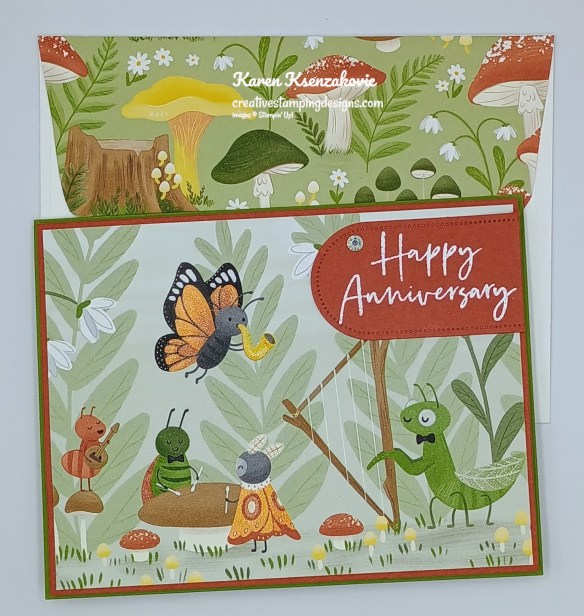
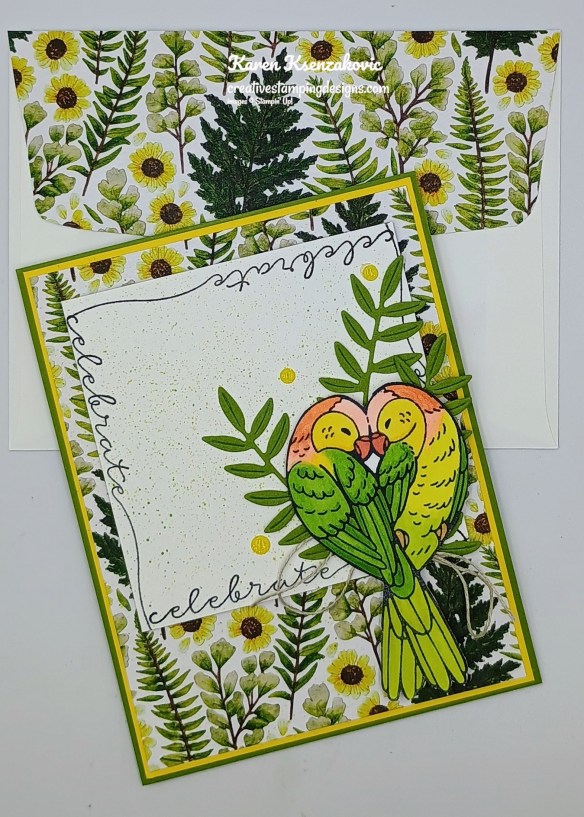
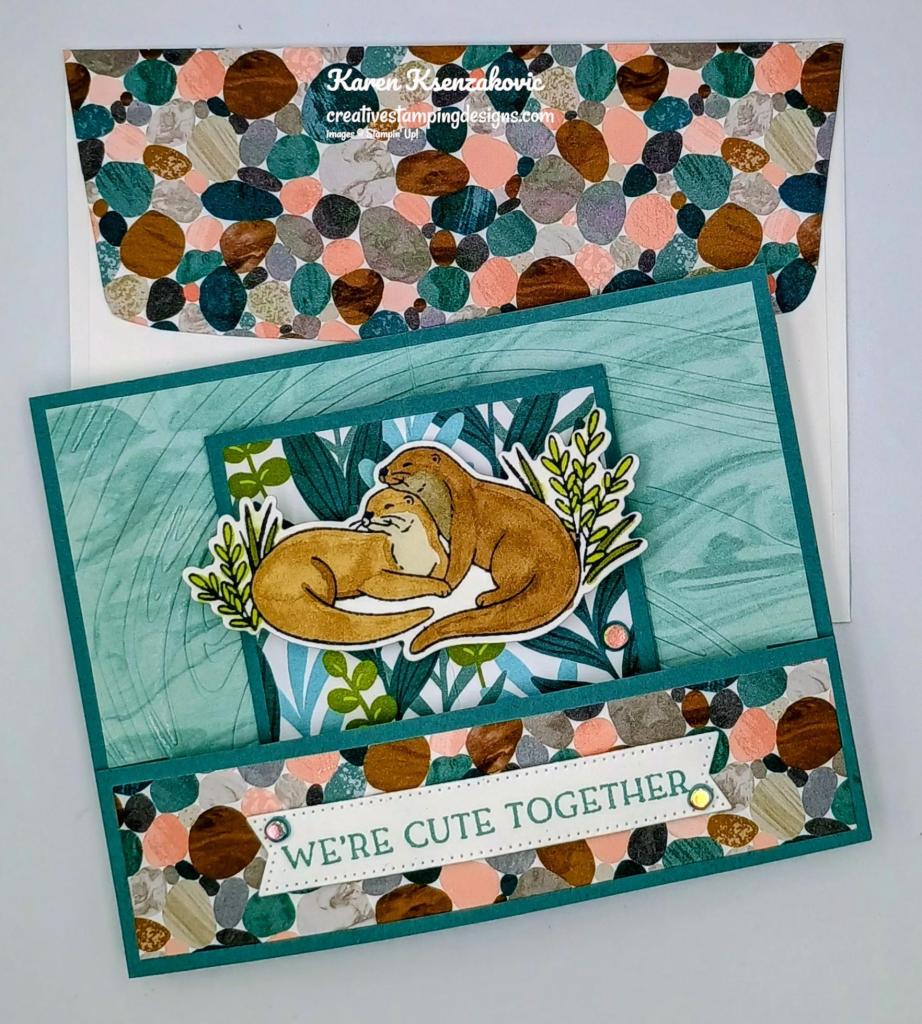
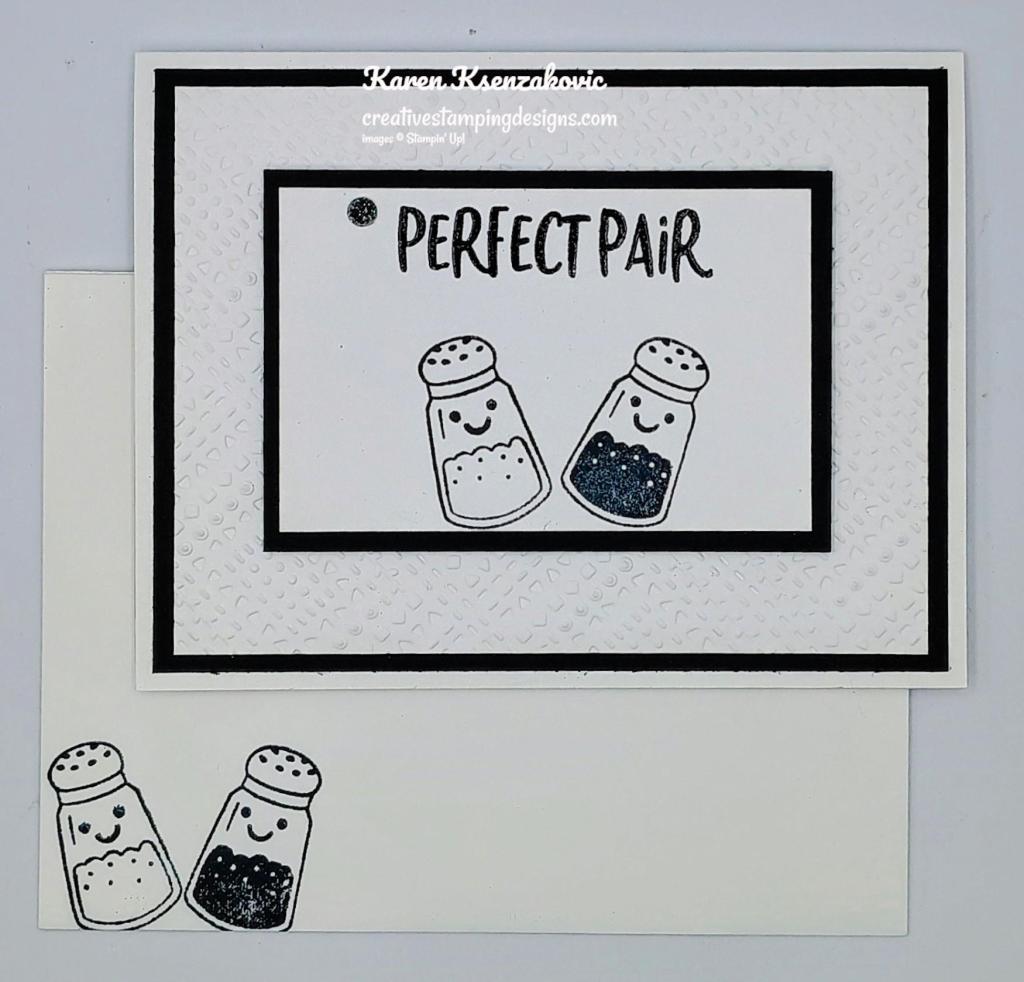
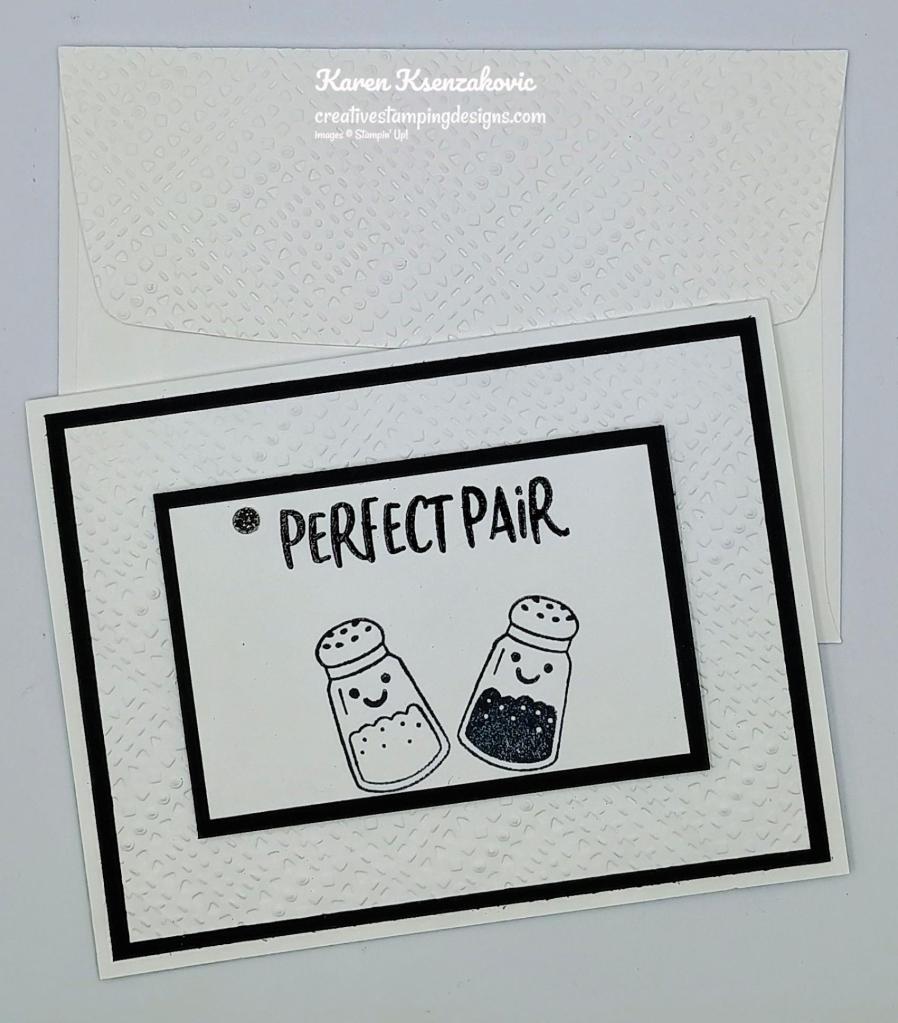
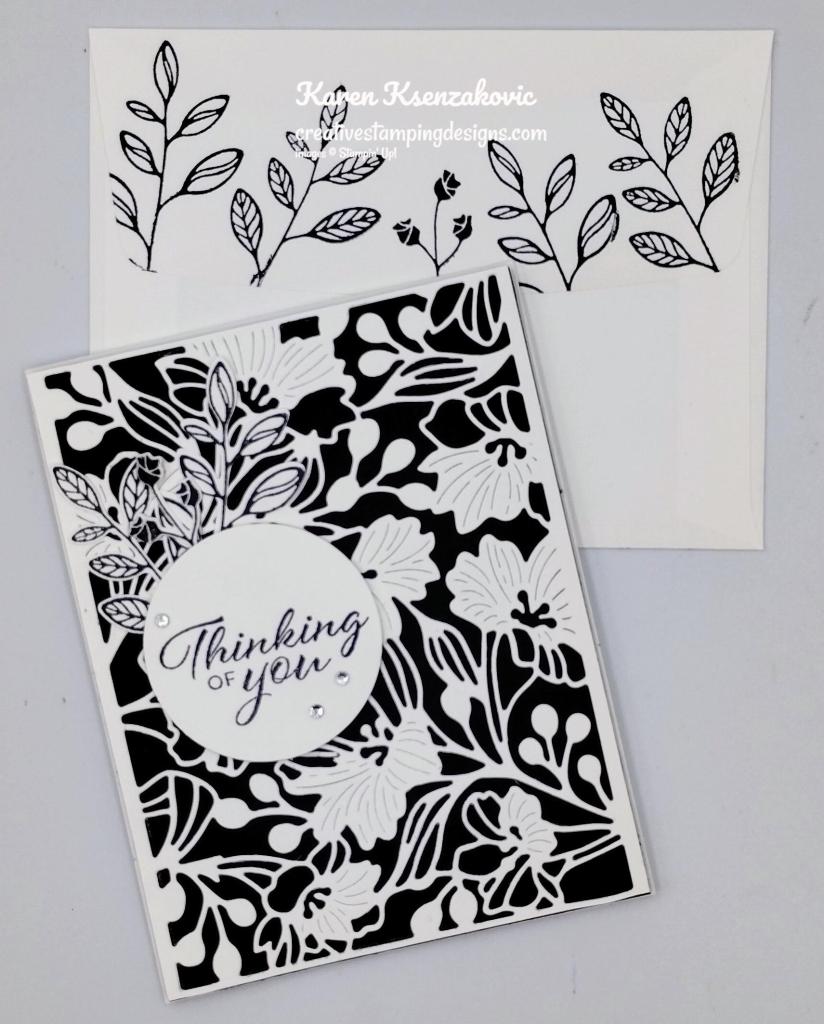
Decorate a Basic White Medium Envelope to finish your card. Stamp the toadstool image from the Sweet Bugs stamp set in Tuxedo Black Ink on the envelope front. Color the images with Cajun Craze and Lemon Lolly Stampin’ Blends Markers. Adhere a panel of Cute as a Bug DSP to the envelope flap.

Stampin' Up! Layers of Beauty Anniversary 7 creativestampingdesigns.com

Thank you for stopping by my blog today. I hope you like the card and will give it a try. Happy Stamping!!

*********************************************************************************************************

If you need any stamping supplies, I’d love to be your Demonstrator. Just click HERE to go directly to my online store or drop me an email if you have any questions. 

*********************************************************************************************************

Bonus Days Going on! Earn Through February 2 and Redeem February 3-28!!

It’s almost time for BONUS DAYS! Because do you know what’s a great deal? Getting rewarded for all the crafting supplies you’re already going to buy! When you shop between January 6 and February 2 and spend $50 USD, you will earn a $5 USD coupon! Make sure you save all your coupons because you can redeem them (and we mean ALL of them) between February 3 and 28. And don’t forget—each purchase earns you Stampin’ Rewards, so that’s even more bang for your buck! There’s no limit to how many coupons you can earn!

Details:

  • Earn a $5 USD coupon for every $50 USD spent (before shipping and tax).
  • All coupon codes will be emailed right after a qualifying purchase has been made. You must have a customer account with a valid email address to earn coupons when you shop.
  • If you earn multiple codes from a single order, you will receive one email with multiple codes. If you earn multiple codes from multiple orders, you will receive separate emails for each code earned.
  • All order types qualify for this promotion.
  • Orders started before the promotion begins will not count toward earning coupon codes. You must add items to your cart and complete your purchase during the earning period.
  • There is no limit to the number of coupon codes participants can earn per order or throughout the duration of the earning period.
  • Redemption Period: February 3–28, 2026
    • There is no limit to the number of coupon codes you can redeem on an order during the redemption period. If you’re redeeming multiple codes, you must put a space between each code.
    • You may only redeem coupon codes one time. You cannot redeem them after February 28.
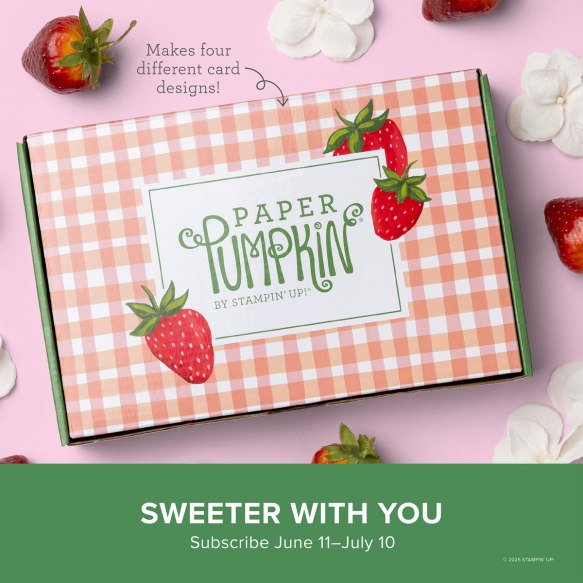
    • You can redeem Bonus Days coupon codes for month-to-month Paper Pumpkin subscriptions and new prepaid subscriptions.
    • Some restrictions apply. Coupons can’t be redeemed towards Starter Kits and you cannot use them on exchanges.
    • Redemption period ends:  February 28, 2026, at 11:59 p.m. (MT)

*********************************************************************************************************

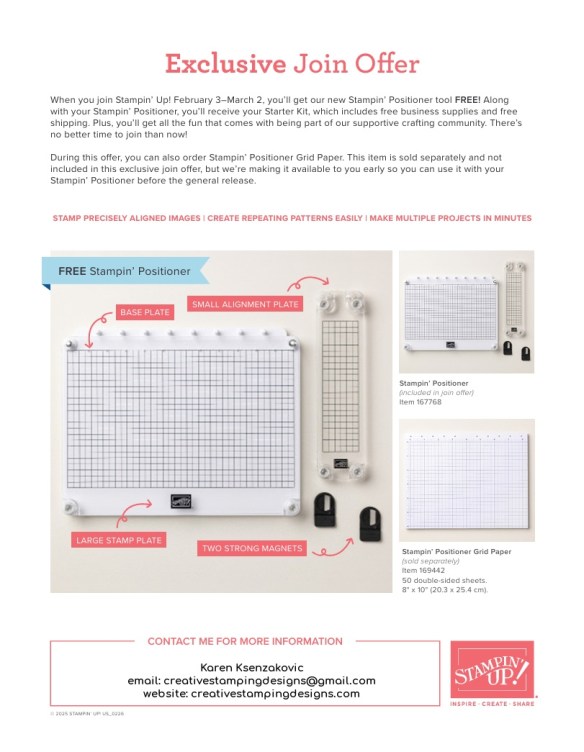
There’s an Awesome Joining Special Starting February 3rd – March 2nd

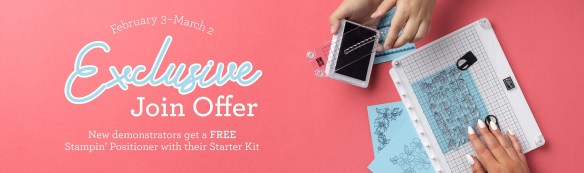
Stampin’ Up! announced an amazing new tool that will be available for FREE with the purchase of a Starter Kit between February 3-March 2!!  Anyone that purchases the Starter Kit during the promotion will get the awesome new Stampin’ Positioner with their Starter Kit absolutely FREE!!

Here are the Starter Kit promotion details:

  • Promotion Period: February 3–March 2
  • New team members who purchase their Starter Kit February 3–March 2 will also receive our new Stampin’ Positioner*.
  • New demonstrators who submit their Independent Demonstrator Agreement (IDA) before February 3 or after March 2 will not be eligible for this offer.
  • Joining deadline:  March 2, 2026, at 11:59 p.m. (MT)

*What’s the Stampin’ Positioner?

It’s Stampin’ Up!’s new stamping alignment tool that makes stamping easier and more accurate. It allows you to stamp precisely aligned images, create repeating patterns and Two-Step Stampin’ images easily, and make multiple projects in minutes.

Stampin’ Positioner Grid Paper will also be available for to order but it is not included as part of this exclusive join offer.

A few other things to know:

  • The Stampin’ Positioner WILL be available for purchase by everyone at a later date.  We have not been given any details on when that will be.
  • The Stampin’ Positioner is available for a limited time for current Demonstrators to purchase.

You can read more details about the joining offer on this PDF (click the image to open a full-size printable PDF):

We’d love to have you join our team!!  Once you join, you get at least a 20% discount on all of your Stampin’ Up! purchases and you get to preorder from the upcoming catalogs and promotions!! You can attend the Stampin’ Up! events too. There’s never an obligation to sell, you can join to enjoy the discount for yourself. Contact me if you have any questions and we can talk. I’d love to have you on my team. I’d be more than happy to answer any of your questions, contact me at creativestampingdesigns@gmail.com

You can read a bit more information about the benefits of being a Demonstrator and a part of our team here.  When you’re ready to join, you can get started here.  Let me know if you have any questions.

*********************************************************************************************************

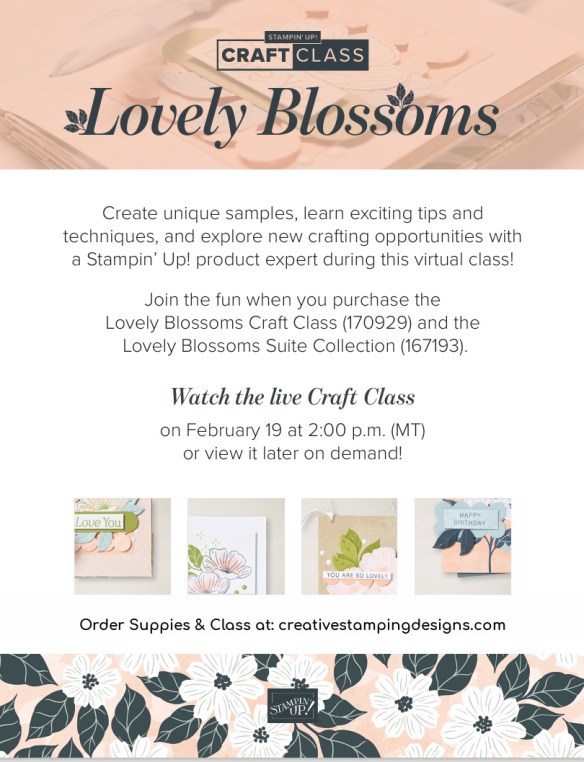
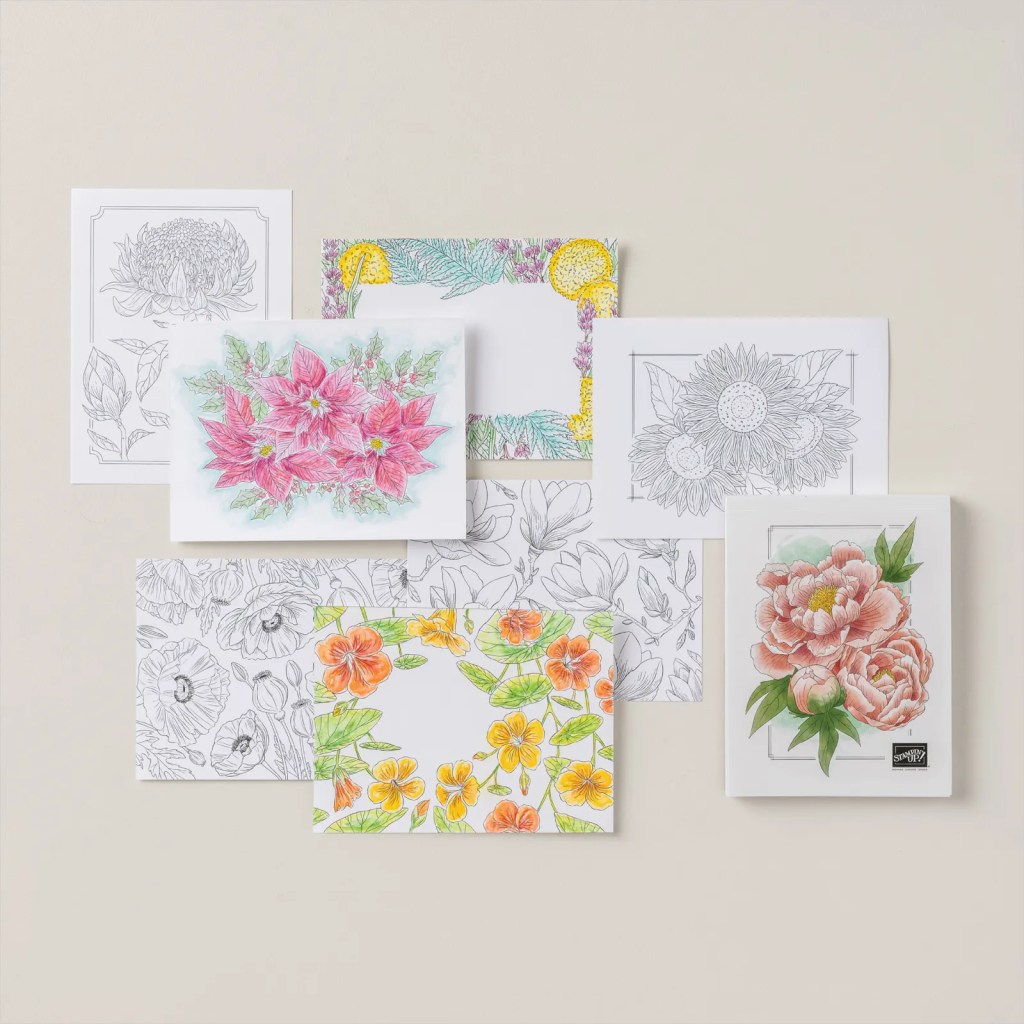
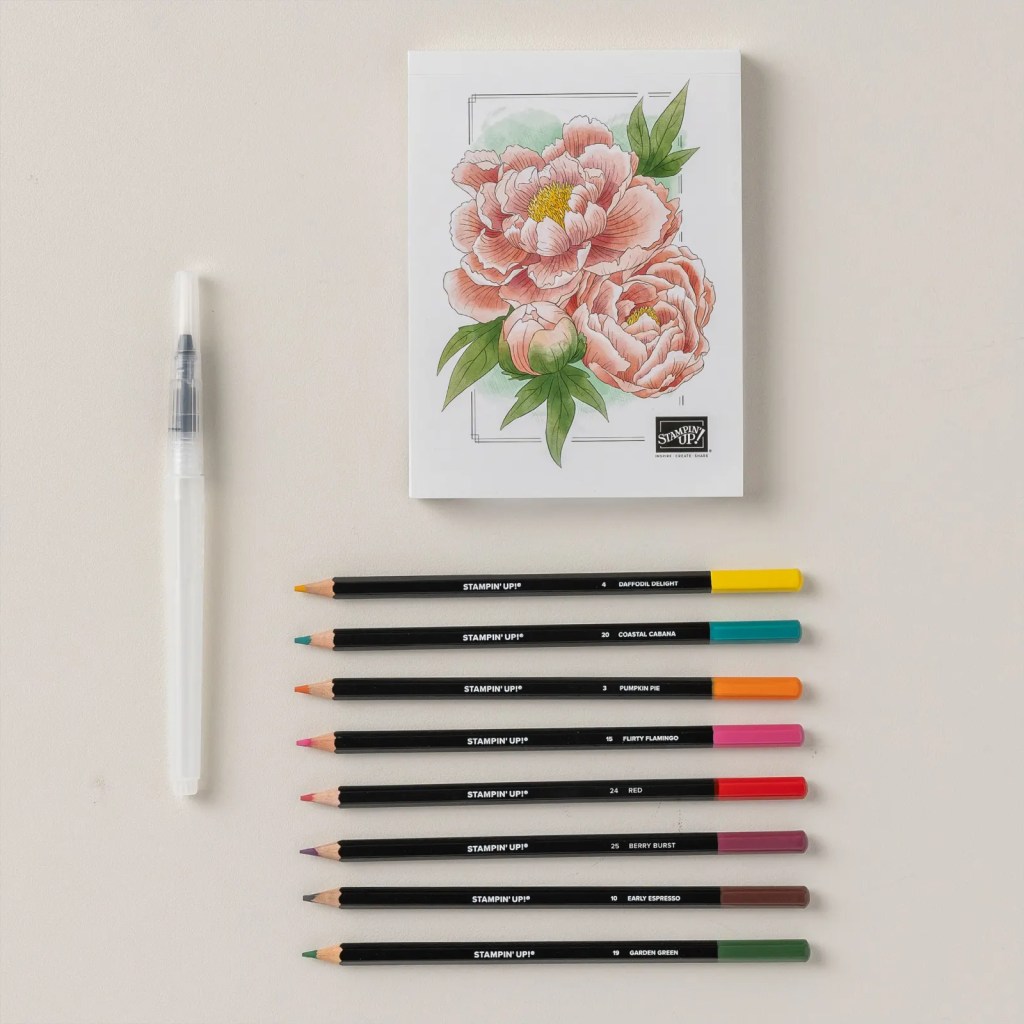
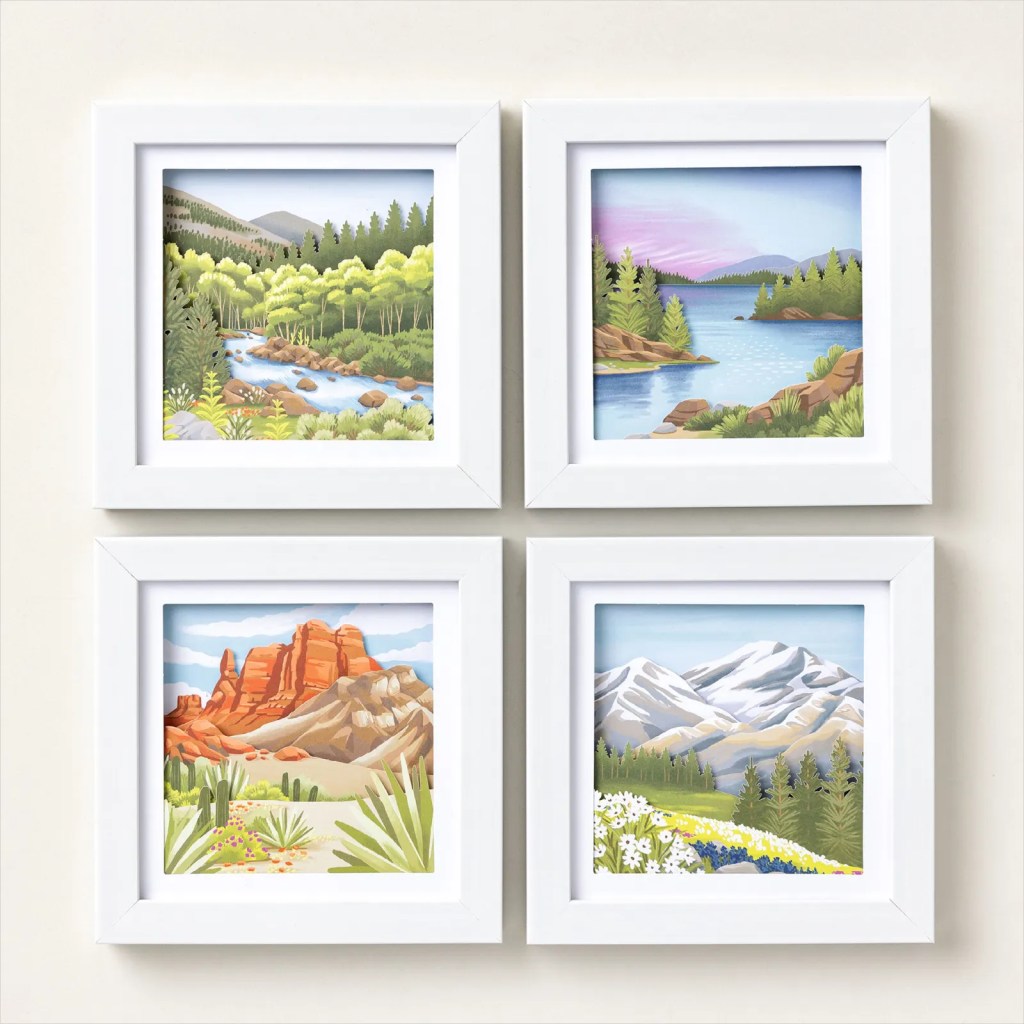
Lovely Blossoms Craft Class February 19

Get ready to craft like never before with the Lovely Blossoms Craft Classes. These classes are a great way for you to craft with the latest products!  During the virtual classes, you will:

  • Make unique projects using detailed instructions as you craft along with our Stampin’ Up! product experts.
  • Learn exciting tips and techniques to further your crafting experience.
  • Be inspired to continue crafting long after the class is over!

Here are the details:

  • Class: Lovely Blossoms Craft Class (170929)
  • Class Price: $25 (Suite not included)
  • Product: Lovely Blossoms Suite Collection (167193)
  • Who: Everyone
  • Available for Purchase: February 3
  • Livestream: February 19 at 2:00 p.m. (MT)
    • The class will be available for purchase before and after the livestream.
  • Where: An exclusive Facebook group
  • Video on Demand: Stampin’ Up! will record this live class, which will be available as a video on demand immediately after the livestream.

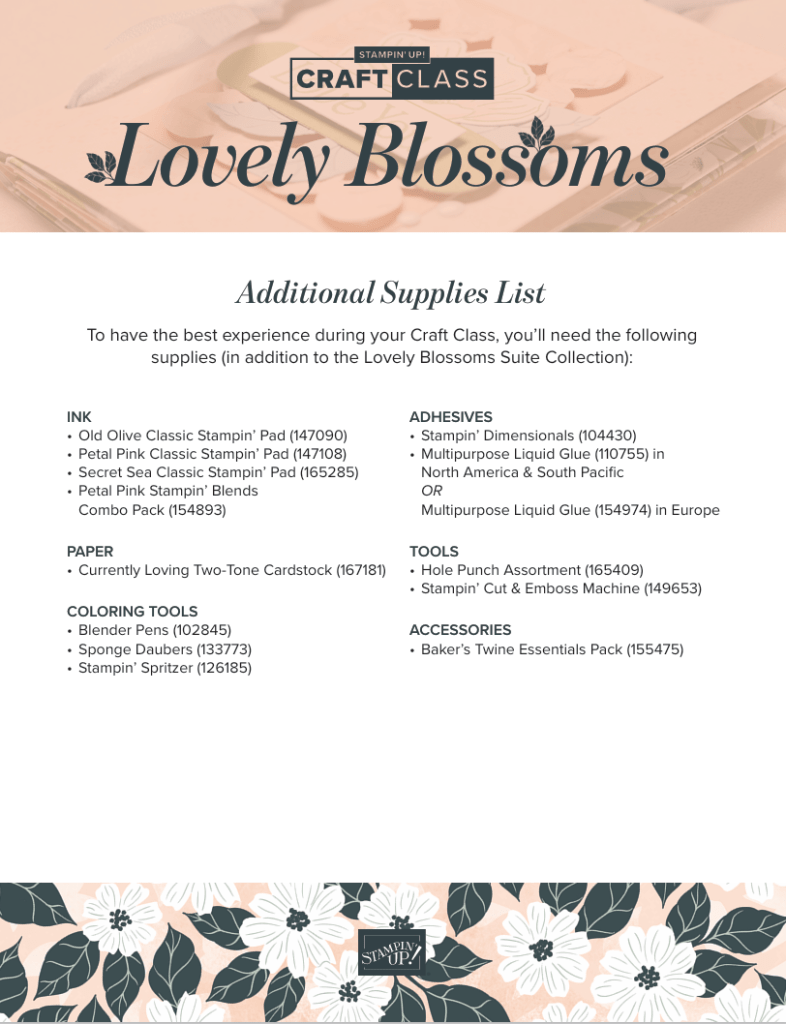
Here are some additional products that you’ll need to create the projects (click the image to open a full page, printable PDF):

Watch for the Lovely Blossoms Craft Class in the online store beginning February 3! And, if you haven’t already picked it up, get the suite ordered now so that you can purchase and join the class too!

*********************************************************************************************************

Card stock cuts for this project:

  • Basic White Cardstock 4″ x 5 1/4″(inner liner)
  • Cajun Craze Cardstock (2) – 4 1/8″ x 5 3/8″(card front & inner liner mats), 2″ x 3″(sentiment)
  • Old Olive Cardstock 5 1/2″ x 8 1/12″(card base scored & folded at 4 1/4″)
  • Sweet As A Bug Designer Series Paper 4″ x 5 1/4″(card front), (2) – 1/4″ x 4″(inner liner), 2 1/4″ x 6″(envelope flap)

*********************************************************************************************************

Product List

Stampin’ Up! Feathered Fun for The Happy Inkin’ Thursday Blog Hop

Good Thursday morning stamping friends and welcome to our Happy Inkin’ Thursday Blog Hop. If you are starting with me, thank you. I hope you will stop by everyone’s blog to see what they have created this week. If you are hopping over from Mary’s blog, thank you for stopping by. This week we have Theme Challenge. If you’d like to see a quick video of how I made this card, Click Here to go to my Instagram Reels. Here is my card using this week’s theme.

Stampin' Up! Feathered Fun Celebrate 1 creativestampingdesigns.com

I used the Stampin’ Up! Feathered Fun Photopolymer Stamp Set along with the Stampin’ Up! Blooming Phrases Photopolymer Stamp Set, Floral Impressions Designer Series Paper, Label Me Grateful Dies and Stampin’ Up! Layers of Beauty Photopolymer Stamp Set for my card today.

Our theme for this week is Birds.

Stampin' Up! Feathered Fun Celebrate 2 creativestampingdesigns.com

Adhere a panel of Floral Impressions DSP to a Daffodil Delight mat with Stampin’ Seal. Adhere the layered panel to an Old Olive card base with Liquid Glue. Cut 3 of the leaf dies using the Label Me Grateful Dies from a panel of Old Olive.

Stampin' Up! Feathered Fun Celebrate 3 creativestampingdesigns.com

On a panel of Basic White, stamp the sentiment from Blooming Phrases stamp set on all 4 sides in Tuxedo Black Ink. Using daffodil Delight and Granny Apple Green Stampin’ Blends Markers, tap the blends on a Bone Folder to splatter ink on the panel. Adhere the stamped panel to the card front with Stampin’ Dimensionals.

Stampin' Up! Feathered Fun Celebrate 4 creativestampingdesigns.com

On a panel of Basic White, stamp the love bird image from the Feathered Fun stamp set in Tuxedo Black Ink. Color the image with Calypso Coral, Daffodil Delight, Granny Apple Green, Lemon Lime Twist, Lemon Lolly, Pecan Pie and Timid Tiger Stampin’ Blends Markers. Fussy cut the birds with Paper Snips. Adhere the leaf die cuts to the side of the sentiment panel with Stampin’ Seal. Tie a bow with Linen Thread and adhere it to the bottom of the die cuts with a Glue Dot. Adhere the fussy cut birds over the leaves with Stampin’ Dimensionals. Add a few Low-Profile Sparkle Dots to the card front.

Stampin' Up! Feathered Fun Celebrate 5 creativestampingdesigns.com

On a panel of Basic White, stamp the sentiment from Layers of Beauty stamp set in Tuxedo Black Ink. Stamp the hear image from the Feathered Fun stamp set in Tuxedo Black Ink next to the sentiment. Color the hearts with Calypso Coral Stampin’ Blends Markers. Adhere a strip of Floral Impressions DSP to the bottom of the panel. Adhere the Basic White panel to a Daffodil Delight mat then to the inside of the Old Olive card base.

Stampin' Up! Feathered Fun Celebrate 6 creativestampingdesigns.com

Decorate a Basic White Medium Envelope to complete your card. Stamp the small bird and heart images from Feathered Fun stamp set in Tuxedo Black Ink on the bottom of the panel. Adhere a panel of Floral Impressions DSP to the envelope flap.

Stampin' Up! Feathered Fun Celebrate 7 creativestampingdesigns.com

Thank you for stopping by my blog today.  Now that you’ve seen my card, let’s get on with the hop!  Click the button below to hop over to see what Tara has created. Happy Hopping!

Just in case you get lost along the way, here is a list of the team members involved in the hop today.

Amy Koenders

Mary Deatherage

Karen Ksenzakovic You Are Here

Tara Carpenter

Terry Lynn Bright

*********************************************************************************************************

If you need any stamping supplies, I’d love to be your Demonstrator. Just click HERE to go directly to my online store or drop me an email if you have any questions. 

*********************************************************************************************************

Sweeter With You

Subscribe June 11 – July 10

Craft sweet handmade cards featuring sun-kissed strawberries and breezy gingham.
• Makes 8 cards: 2 each of 4 designs with 8 coordinating envelopes
• Precut paper pieces and vellum accents
• Hand-painted card base designs
• Coordinating colors: Garden Green (Classic Stampin’ Spot), Granny Apple Green,
Pool Party, Poppy Parade, Strawberry Slush, Timid Tiger

Subscribe to the June Paper Pumpkin Kit between 11 June and 10 July by clicking here!

*********************************************************************************************************

Don’t miss the coordinating
Circle of Seasons Dies Add-On!

Make the most of your Paper Pumpkin kits with the Circle of Seasons Dies add-on! Quickly and cleanly cut out a strawberry with a blossom, a circle, a leaf, or an acorn to elevate your crafting projects. These additional dies are designed to work with THREE Paper Pumpkin Kits: the Sweeter with You Paper Pumpkin Kit, the Farmhouse Florals Paper Pumpkin Kit, and the Fall for Toile Paper Pumpkin Kit. Pair these dies with other Stampin’ Up! products for even more creative options! This exclusive add-on (item 167277) coordinates with the three upcoming kits! Paper Pumpkin subscribers can purchase it beginning June 11. Add-on is available only while supplies last, so it’s best to shop early!

DETAILS
– 4 dies
– Largest die: 2-1/2″ x 1-1/4″ (6.4 x 3.2 cm)
– Use with a Stampin’ Cut & Emboss Machine (sold separately)

You must be a current Paper Pumpkin subscriber to purchase this item. To become a subscriber, visit www.stampinup.com/paperpumpkin.

Note: Supplies may be limited toward the end of the subscription period.

#167277 $12

*********************************************************************************************************

Card stock cuts for this project:

  • Basic Whiter Cardstock 3 1/2″ x 3 1/2″(sentiment), 2 1/4″ x 4″(artwork), 4″ x 5 1/4″(inner liner)
  • Daffodil Delight Cardstock (2) – 4 1/8″ x 5 3/8″(card front & inner liner mats)
  • Old Olive Cardstock 4 1/4″ x 11″(card base scored & folded at 5 1/2″), 3″ x 3 1/2″(die cuts)
  • Floral Impressions Designer Series Paper 4″ x 5 1/4″(card front), 1/2″ x 4″(inner liner), 2 1/4″ x 6″(envelope flap)

*********************************************************************************************************

Product List

Stampin’ Up! Otterly Amazing Bendy Front for Fun Fold Friday

Good Friday morning stamping friends and welcome to my fun fold Friday. I hope everyone had a wonderful week. Is anyone making plans for the weekend yet?

I played with the new Online Exclusive products for today’s card and made a fun fold with it. Here’s my card for today.

Stampin' Up! Otterly Amazing fun fold 1 creativestampingdesigns.com

I used the Stampin’ Up! Otterly Amazing Bundle along with the Otterly Adorable Designer Series Paper, Stylish Shapes Dies and So Swirly 3D Embossing Folder for my card today.

Stampin' Up! Otterly Amazing fun fold 2 creativestampingdesigns.com

Emboss a panel of Otterly Adorable DSP using the So Swirly EF. Adhere the embossed panel to the Lost Lagoon card base using Liquid Glue. Carefully score the DSP, lining up the score line from the card base in the Paper Trimmer and gently folding the layered panel into a valley fold. Adhere the smaller panel of Otterly Adorable DSP to the pop-up panel of Lost Lagoon using Liquid Glue. Carefully score the DSP by lining up the scored cardstock score line in the Paper Trimmer and gently folding the layered panel into a mountain fold. Adhere the bridge panel of Otterly Adorable DSP to the scored Lost Lagoon bridge, using Liquid Glue. Using a Bone Folder, gently curve the bridge from the back of the panel.

Stampin' Up! Otterly Amazing fun fold 3 creativestampingdesigns.com

On a panel of Basic White, stamp the otter image from the Stampin’ Up! Otterly Amazing Photopolymer Stamp Set in Tuxedo Black Ink. Color the image using Crumb Cake, Granny Apple Green, Lemon Lime Twist and Pecan Pie Stampin’ Blends Markers. Stamp the sentiment from the Otterly Amazing stamp set in Lost Lagoon Ink on the Basic White panel. Cut the otter image out using the Otterly Amazing Dies and the sentiment out using the Stylish Shapes Dies.

Stampin' Up! Otterly Amazing fun fold 4 creativestampingdesigns.com

Adhere the Layered pop-up panel to the card front using Tear & Tape on the folded ends. Line the score lines up and adhere the panel. Adhere the 2 – 1″ X 1″ panels that are scored @ 1/2″, to the pop-up panel. Adhere these by lining up the folded edges of the squares with the center score line. Adhere the otter image to the other edges of the squares. This will make them pop up. Adhere the bridge to the bottom front of the card base by using Tear & Tape on the folded edges of the bridge, lay both the card base and bridge flat to line them up. Add a few Riverside Irregular Pearls to the card front.

Stampin' Up! Otterly Amazing fun fold 5 creativestampingdesigns.com

On the 2 Basic white panel, stamp the sentiment from the Otterly Amazing stamp set on one of the panels in Lost Lagoon Ink. Stamp the greenery image from the Otterly Amazing stamp set in Tuxedo Black Ink on the other panel and color the image using Lemon Lime Twist Stampin’ Blends Markers. Stamp the bubble image from the Otterly Amazing stamp set in Lost Lagoon Ink above the greenery. Adhere 2 strips of Otterly Adorable DSP to the bottom of the panels. Adhere the Basic White panels to Pool Party mats then to the back of the Lost Lagoon card base.

Stampin' Up! Otterly Amazing fun fold 6 creativestampingdesigns.com

Finish the card by decorating a Basic White Medium Envelope. Adhere a strip of Otterly Adorable DSP to the envelope front and a panel to the envelope flap.

Stampin' Up! Otterly Amazing fun fold 7 creativestampingdesigns.com

Thank you for stopping by my blog today. I hope you like the card and will give it a try. Happy Stamping!!

*********************************************************************************************************

If you need any stamping supplies, I’d love to be your Demonstrator. Just click HERE to go directly to my online store or drop me an email if you have any questions. 

MY CURRENT HOST CODE IS:   4RTJCBH2

Use this host code when placing an order with me. When you order $50 or greater you will receive a free gift from me! If your order is over $150, please do not use this code, but you’ll still get the free gift. The free gift is your choice of any 1 item valued up to $10.00 from the 2024 – 2025 Annual Catalog, September – December 2024 Mini Catalog or from the Online Exclusives!  For any orders $50 or more I will also send you my monthly class tutorials.  Click HERE or go to my Customer Rewards for more details and to see what this month’s tutorials are.

Please remember to use my current Host Code and make sure that you can see my name on the final checkout page listed as your Demonstrator when you order so that you know that you’re ordering with me, and you’ll get my rewards! 

Happy Stamping, Karen

*********************************************************************************************************

New Online Exclusive Products Available

A new line of products for Online Exclusives are coming! You won’t find these items in any catalog. This is a great opportunity to spark creativity, expand a crafting collection, and discover new opportunities—all from the convenience of the online store.

*********************************************************************************************************

Filled With Joy

Subscribe October 11 – November 10

Celebrate Christmas with adorable stockings and gift tags!

Details:
• Makes 8 projects: 8 stockings with 8 gift tags
• Precut paper pieces
• Safety pins and specialty gold foil
• Coordinating colors: Flirty Flamingo, Pool Party, Poppy Parade
(Classic Stampin’ Spot), Shaded Spruce, Very Vanilla

Subscribe to Paper Pumpkin for a monthly, all-inclusive crafting kit that’s a fun surprise! Each kit includes a photopolymer stamp set, Classic Stampin’ Spot, and step by step instructions to complete exclusive paper craft projects, including cards, tags, and gift
packaging. And don’t miss the special add-on that coordinates with the next three months!

Subscribe to the November Paper Pumpkin Kit between 11 October and 10 November by clicking here!

*********************************************************************************************************

Don’t miss the coordinating
Merry Tags & More Dies Add-On!

Add dimension and detail to your cards, scrapbook pages, and gift tags with the Merry Tags & More Dies! With a leaf and tag shape and Merry sentiment, these dies are a great way to expand your crafting experience. They even coordinate with three Paper Pumpkin Kits: Nests of Christmas, Filled with Joy, and Notes from the Heart. Such easy coordination makes these dies a must-have for any paper craft. Paper Pumpkin subscribers can purchase it beginning 11 September. The add-on is available only while supplies last, so it’s best to shop early! Please note that the Stampin’ Cut and Emboss Machine is not included and can be purchased separately.

#165639 $12

Note: Supplies may be limited toward the end of the subscription period.

*********************************************************************************************************

Card stock cuts for this project:

  • Basic White Cardstock 4″ X 4″(artwork & sentiment), 2 – 2 1/4″ x 4″(back panels)
  • Lost Lagoon Cardstock 4 1/4″ x 5 1/2″(card base scored @ 2 3/4″), 1 1/2″ x 6 1/2″(front bridge scored & folded at 1/2″ & 6″), 2 1/2″ X 4″(Pop up scored & folded at 1/2″, 2″ & 3 1/2″), 2 – 1″ x 1″ (pop up mechanism scored @ 1/2″)
  • Pool Party Cardstock 2 – 2 5/8″ x 4 1/8″(back panel mats)
  • Otterly Amazing Designer Series Paper 4″ X 5 1/4″ (card front panel), 1 1/4″ X 5 1/4″(bridge), 2 1/4″ X 2 3/4″(pop up panel), 2 – 1/2″ X 2 1/2:(back panel), 2 1/4″ x 6″(envelope)

*********************************************************************************************************

Product List

Stampin’ Up! Perfect Pairs Salt & Pepper

Good Wednesday morning stamping friends. We’re halfway through the week and on the downhill to the weekend. Just a reminder that I have Double Creative Stamping Designs Rewards going on until Monday November 11th.

I played with a new Online Exclusive set for today’s card and made it a very simple black & white. If you’d like to see a quick video of how I made this card, Click Here to go to my Instagram Reels. Here is my card for today.

Stampin' Up! Perfect Pairs Salt & Pepper 1 creativestampingdesigns.com

I used the new Stampin’ Up! Online Exclusive Perfect Pairs Photopolymer Stamp Set along with the Dashing Designs 3D Embossing Folder and Stampin’ Up! Happiest Day Photopolymer Stamp Set for my card today.

Stampin' Up! Perfect Pairs Salt & Pepper 2 creativestampingdesigns.com

Emboss a Basic White card front using the Dashing Designs EF. Adhere the embossed panel to a Basic Black mat using Liquid Glue. Adhere the layered panel to a Basic White Thick card base using Liquid Glue.

Stampin' Up! Perfect Pairs Salt & Pepper 3 creativestampingdesigns.com

On a panel of Basic white, stamp the sentiment from the Perfect Pairs stamp set in Versamark Ink on the top of the panel. Sprinkle the sentiment with Black Embossing Powder and set it using the Heat Tool. Stamp the salt & pepper images from the Perfect Pairs stamp set on the Basic White panel in Tuxedo Black Ink. Stamp the face image from the Perfect Pairs stamp set in Tuxedo Black Ink on the salt & pepper shakers.

Stampin' Up! Perfect Pairs Salt & Pepper 4 creativestampingdesigns.com

Adhere the artwork to a Basic Black mat using Stampin’ Seal. Adhere the layered panel to the card front using Stampin’ Dimensionals. Add an Adhesive-Backed Sparkle Gem to the card front.

Stampin' Up! Perfect Pairs Salt & Pepper 5 creativestampingdesigns.com

On a panel of Basic White, stamp the sentiment from Happiest Day stamp set in Tuxedo Black Ink. Stamp the salt & pepper shaker images from the Perfect Pairs stamp set in Tuxedo Black Ink on the bottom of the panel. Stamp the face image from the Perfect Pairs stamp set in Tuxedo Black Ink on the salt & pepper shakers. Adhere the Basic White panel to a Basic Black mat then to the inside of the Basic White Thick card base.

Stampin' Up! Perfect Pairs Salt & Pepper 6 creativestampingdesigns.com

Finish the card by decorating a Basic White Medium Envelope. Stamp the salt & pepper shaker images from the Perfect Pairs stamp set in Tuxedo Black Ink on the envelope front. Stamp the face image from the Perfect Pairs stamp set on the salt & pepper shakers in Tuxedo Black Ink. Emboss a panel of Basic White using the Dashing Designs EF and adhere it to the envelope flap.

Stampin' Up! Perfect Pairs Salt & Pepper 7 creativestampingdesigns.com

Thank you for stopping by my blog today. I hope you like the card and will give it a try. Happy Stamping!!

*********************************************************************************************************

If you need any stamping supplies, I’d love to be your Demonstrator. Just click HERE to go directly to my online store or drop me an email if you have any questions. 

MY CURRENT HOST CODE IS:   4RTJCBH2

Use this host code when placing an order with me. When you order $50 or greater you will receive a free gift from me! If your order is over $150, please do not use this code, but you’ll still get the free gift. The free gift is your choice of any 1 item valued up to $10.00 from the 2024 – 2025 Annual Catalog, September-December 2024 Mini Catalog or from the Online Exclusives!  For any orders $50 or more I will also send you my monthly class tutorials.  Click HERE or go to my Customer Rewards for more details and to see what this month’s tutorials are.

Please remember to use my current Host Code and make sure that you can see my name on the final checkout page listed as your Demonstrator when you order so that you know that you’re ordering with me, and you’ll get my rewards! 

Happy Stamping, Karen

*********************************************************************************************************

2 New Kits Now Available

Kits by Stampin’ Up! are perfect for new crafters, busy crafters, or crafters who want quick and easy projects. All-inclusive project kits have everything you need in one box! Give as a gift or try them yourself. Kits are while supplies last. Order today!

Nature’s Paintings Kits

Embrace your creative side with the Nature’s Paintings Kit. This unique kit includes everything you need for a fun creative experience: a coloring book, watercolor pencils, and a water painter. All you need is some imagination and water! Create lovely, picturesque images using advanced coloring techniques with this craft kit. Or make something that’s never been seen before—like green flowers with purple leaves. Keep it realistic or color outside the lines—it’s up to you. And once you’re done, you can use your finished artwork to create a one-of-a-kind card front!

Kit includes:
* Predesigned projects
* Line art illustrations
* Step-by-step instructions
* 24 watercolor paper pages, 2 each of 12 designs
* 8 Watercolor Pencils
* 1 Water Painter
* Coloring Book: 4-1/2″ x 6″ x 1/2″ (11.4 x 15.2 x 1.3 cm)
* A 9-7/8″ x 6-1/2″ x 1-3/4″ (25.1 x 16.5 x 4.4 cm) printed designer box for storage or crafting on the go

Product colors: Berry Burst, Coastal Cabana, Daffodil Delight, Early Espresso, Flirty Flamingo, Garden Green, Pumpkin Pie, Red

164982 $25.00

+++++++++++++++++++++++++++++++++++++++++++++++++++++++++++++++++++++

Layered Landscapes Kit

Do you long for the great outdoors but don’t actually want to go outdoors? Then the Layered Landscapes Kit is perfect for you! DIY lovely home decor with this unique kit that includes four 7-1/8″ x 7-1/8″ x 3/4″ (18.1 x 18.1 x 1.9 cm) frames and precut paper pieces. You can either stand the frames up on their included easels or hang them on your wall. Either way, your houseguests are sure to love your new artwork!

Kit includes:
* Predesigned projects
* Step-by-step instructions
* Precut pieces (No prep work! Get right to crafting)
* 4 white frames
* Frame size: 7-1/8″ x 7-1/8″ x 3/4″ (18.1 x 18.1 x 1.9 cm)
* Enough adhesive to complete projects
* A 9-7/8″ x 6-1/2″ x 2-3/4″ (25.1 x 16.5 x 7 cm) printed designer box for storage or crafting on the go

Product colors: Balmy Blue, Basic Beige, Basic Gray, Berry Burst, Cajun Craze, Crumb Cake, Early Espresso, Gray Granite, Lemon Lime Twist, Misty Moonlight, Mossy Meadow, Night of Navy, Old Olive, Pecan Pie, Soft Sea Foam

164981 $25

*********************************************************************************************************

New Online Exclusive Products Now Available

A new line of products for Online Exclusives are now available! You won’t find these items in any catalog. This is a great opportunity to spark creativity, expand a crafting collection, and discover new opportunities—all from the convenience of the online store.

*********************************************************************************************************

Filled With Joy

Subscribe October 11 – November 10

Celebrate Christmas with adorable stockings and gift tags!

Details:
• Makes 8 projects: 8 stockings with 8 gift tags
• Precut paper pieces
• Safety pins and specialty gold foil
• Coordinating colors: Flirty Flamingo, Pool Party, Poppy Parade
(Classic Stampin’ Spot), Shaded Spruce, Very Vanilla

Subscribe to Paper Pumpkin for a monthly, all-inclusive crafting kit that’s a fun surprise! Each kit includes a photopolymer stamp set, Classic Stampin’ Spot, and step by step instructions to complete exclusive paper craft projects, including cards, tags, and gift
packaging. And don’t miss the special add-on that coordinates with the next three months!

Subscribe to the November Paper Pumpkin Kit between 11 October and 10 November by clicking here!

*********************************************************************************************************

Don’t miss the coordinating
Merry Tags & More Dies Add-On!

Add dimension and detail to your cards, scrapbook pages, and gift tags with the Merry Tags & More Dies! With a leaf and tag shape and Merry sentiment, these dies are a great way to expand your crafting experience. They even coordinate with three Paper Pumpkin Kits: Nests of Christmas, Filled with Joy, and Notes from the Heart. Such easy coordination makes these dies a must-have for any paper craft. Paper Pumpkin subscribers can purchase it beginning 11 September. The add-on is available only while supplies last, so it’s best to shop early! Please note that the Stampin’ Cut and Emboss Machine is not included and can be purchased separately.

#165639 $12

Note: Supplies may be limited toward the end of the subscription period.

*********************************************************************************************************

Card stock cuts for this project:

  • Basic Black Cardstock 4″ X 5 1/4″(card front mat), 2 1/2″ X 3 3/4″(artwork mat), 4 1/8″ X 5 3/8″(inner liner mat)
  • Basic White Cardstock 3 3/4″ x 5″ (card front), 2 1/4″ X 3 1/2″(artwork), 4″ X 5 1/4″(inner liner), 2 1/4″ X 6″(envelope flap)
  • Basic White Thick Cardstock 5 1/2″ X 8 1/2″(card base scored & folded at 4 1/4″)

*********************************************************************************************************

Product List

Stampin’ Up! Otterly Amazing Love

Good Saturday morning stamping friends and welcome to the weekend. I hope you have some plans in the works. I’ll be at work all day today.

I played with new Online Exclusive products that will be available to purchase on Tuesday November 5th for my card today. Here’s my card for today.

Stampin Up! Otterly Amazing Love 1 creativestampingdesigns.com

I used the Stampin’ Up! Online Exclusive Otterly Amazing Bundle along with the Otterly Adorable Designer Series Paper for my card today.

Stampin Up! Otterly Amazing Love 2 creativestampingdesigns.com

Using the Otterly Amazing Dies, cut 9 of the leaf dies from a panel of Garden Green, 2 of the logs from a panel of Pecan Pie and 3 rocks from a panel of Smoky Slate. Adhere 5 of the leaf die cut leaves to a Garden Green card front using Liquid Glue. Cut 1 of the logs in half using Paper Snips and adhere it to the center of either side of the Garden Green card front using Liquid Glue.

Stampin Up! Otterly Amazing Love 3 creativestampingdesigns.com

Stamp the sentiment from the Stampin’ Up! Otterly Amazing Photopolymer Stamp Set in Versamark Ink on the bottom of the panel. Sprinkle it with White Embossing Powder and set it using the Heat Tool. Adhere the Garden Green card front to a Pecan Pie mat using Stampin’ Seal. Adhere the layered panel to a Garden Green card base using Liquid Glue. Adhere the rocks on the bottom of the panel using Glue Dots.

Stampin Up! Otterly Amazing Love 4 creativestampingdesigns.com

Adhere a panel of Otterly Adorable DSP to a Pecan Pie mat using Stampin’ Seal. Adhere the layered panel to a Lemon Lime Twist mat using Stampin’ Seal. Adhered the layered panel to the card front, over the logs, using Stampin’ Dimensionals.

Stampin Up! Otterly Amazing Love 5 creativestampingdesigns.com

On a panel of Basic White, stamp the otter image from the Otterly Amazing stamp set in Tuxedo Black Ink on the bottom of the panel. Color the image using Crumb Cake and Pecan Pie Stampin’ Blends Markers. Adhere the die cut leaves to the bottom of the panel. Adhered the log to the bottom of the panel. Adhered the Basic White panel to a Lemon Lime Twist mat then to the inside of the Garden Green card base.

Stampin Up! Otterly Amazing Love 6 creativestampingdesigns.com

Finish the card by decorating a Basic White Medium Envelope. Stamp the 2 otter images from the Otterly Amazing stamp set in tuxedo Black Ink on the envelope front. color the images using Crumb Cake and Pecan Pie Stampin’ Blends Markers. Adhered a panel of Otterly Adorable DSP to the envelope flap.

Stampin Up! Otterly Amazing Love 7 creativestampingdesigns.com

Thank you for stopping by my blog today. I hope you like the card and will give it a try. Happy Stamping!!

*********************************************************************************************************

If you need any stamping supplies, I’d love to be your Demonstrator. Just click HERE to go directly to my online store or drop me an email if you have any questions. 

MY CURRENT HOST CODE IS:   4RTJCBH2

Use this host code when placing an order with me. When you order $50 or greater you will receive a free gift from me! If your order is over $150, please do not use this code, but you’ll still get the free gift. The free gift is your choice of any 1 item valued up to $10.00 from the 2024-2025Annual Catalog, or from the Online Exclusives!  Unfortunately, packs of cardstock are no longer an option for a free gift. Shipping has become too expensive to ship and it’s costing me as much to ship as the cardstock costs. For any orders $50 or more I will also send you my monthly class tutorials.  Click HERE or go to my Customer Rewards for more details and to see what this month’s tutorials are.

Please remember to use my current Host Code and make sure that you can see my name on the final checkout page listed as your Demonstrator when you order so that you know that you’re ordering with me, and you’ll get my rewards! 

Happy Stamping, Karen

*********************************************************************************************************

New Online Exclusive Products Coming Soon

A new line of products for Online Exclusives are coming! You won’t find these items in any catalog. This is a great opportunity to spark creativity, expand a crafting collection, and discover new opportunities—all from the convenience of the online store. These products will be available starting in November. Here’s a little sneak peek of some of the items. Click Here for a sneak peek of what’s coming.

*********************************************************************************************************

Filled With Joy

Subscribe October 11 – November 10

Celebrate Christmas with adorable stockings and gift tags!

Details:
• Makes 8 projects: 8 stockings with 8 gift tags
• Precut paper pieces
• Safety pins and specialty gold foil
• Coordinating colors: Flirty Flamingo, Pool Party, Poppy Parade
(Classic Stampin’ Spot), Shaded Spruce, Very Vanilla

Subscribe to Paper Pumpkin for a monthly, all-inclusive crafting kit that’s a fun surprise! Each kit includes a photopolymer stamp set, Classic Stampin’ Spot, and step by step instructions to complete exclusive paper craft projects, including cards, tags, and gift
packaging. And don’t miss the special add-on that coordinates with the next three months!

Subscribe to the November Paper Pumpkin Kit between 11 October and 10 November by clicking here!

*********************************************************************************************************

Don’t miss the coordinating
Merry Tags & More Dies Add-On!

Add dimension and detail to your cards, scrapbook pages, and gift tags with the Merry Tags & More Dies! With a leaf and tag shape and Merry sentiment, these dies are a great way to expand your crafting experience. They even coordinate with three Paper Pumpkin Kits: Nests of Christmas, Filled with Joy, and Notes from the Heart. Such easy coordination makes these dies a must-have for any paper craft. Paper Pumpkin subscribers can purchase it beginning 11 September. The add-on is available only while supplies last, so it’s best to shop early! Please note that the Stampin’ Cut and Emboss Machine is not included and can be purchased separately.

#165639 $12

Note: Supplies may be limited toward the end of the subscription period.

*********************************************************************************************************

Card stock cuts for this project:

  • Basic White Cardstock 4″ X 5 1/4″(inner liner)
  • Garden Green Cardstock 4 1/4″ x 11″(card base scored & folded at 5 1/2″), 2 – 4″ x 5 1/4″(card front panel & leaf die cuts)
  • Lemon Lime Twist Cardstock 3 1/4″ x 3 1/2″(card front mat), 4 1/8″ X 5 3/8″(inner liner mat)
  • Pecan Pie Cardstock 4 1/8″ x 5 3/8″(card front panel mat), 3 1/8″ X 3 3/8″(card front mat), 2″ x 3″(log die cuts)
  • Smoky Slate Cardstock 1″ x 2″(rocks)
  • Otterly adorable Designer Series Paper 3″ X 3 1/4″(card front), 2 1/4″ X 6″(envelope flap)

*********************************************************************************************************

Product List

Stampin’ Up! Layers of Beauty Anniversary

Good Saturday morning stamping friends and welcome to the weekend!! Happy JUNE!!! June used to be such a busy time of the year with the end of the school year and the beginning of summer vacation. Both my kids are in their 20’s now. so it’s not as busy as it used to be. Does anyone have any plans for this weekend? I’ll be working in the office today since it’s the 1st of the month. My plan is to go in early so I can finish up early and enjoy the rest of the weekend, especially since it’s supposed to be a nice one here in NJ.

For today’s card I have a class coming up on Tuesday and one of the ladies requested to make one of the cards I made a few weeks ago. Unfortunately, with having 7 or 8 ladies here it isn’t possible, so I tried to come up with an alternative. If you’d like to see a quick video of how I made this card, Click Here to go to my Instagram Reels. Here is my card for today

Stampin' Up! Layers of Beauty Anniversary 1 creativestampingdesigns.com

I used the Stampin’ Up! Layers of Beauty Photopolymer Stamp Set along with the Layers of Beauty Dies, Stampin’ Up! Lovely & Sweet Cling Stamp Set and Exposed Brick 3D Embossing Folder for my card today.

My colors are from Hand Stamped Sentiments Color Challenge #439.

I also played along with TGIF Theme Challenge #475 Happily Ever After.

Stampin' Up! Layers of Beauty Anniversary 2 creativestampingdesigns.com

I stamped the large flower image from the Layers of Beauty stamp set on a panel of Basic White in Smoky Slate Ink. I colored the leaves on the image in Lost Lagoon and Soft Seafoam Stampin’ Blends Markers. I colored the daisy centers with Lemon Lolly Stampin’ Blends Marker. I cut the image out using the Layers of Beauty Dies.

Stampin' Up! Layers of Beauty Anniversary 3 creativestampingdesigns.com

On a panel of Basic White, I added Petal Pink Ink using a Blending Brush in the center of the panel. I stamped the sentiment from Lovely & Sweet stamp set in Lost Lagoon Ink on the top of the panel. I embossed the panel using the Exposed Brick 3D EF. I adhered the embossed panel to a Basic White Thick card base using Liquid Glue.

Stampin' Up! Layers of Beauty Anniversary 4 creativestampingdesigns.com

From a panel of Lost Lagoon, I cut the leaves out using the Layers of Beauty Dies. I adhered the large floral image to the center of the card front using Stampin’ Dimensionals. I adhered the leaves using Liquid Glue under the large floral image. I added a few Petal Pink Foiled Gems to the card front.

Stampin' Up! Layers of Beauty Anniversary 5 creativestampingdesigns.com

On the inside, I stamped the sentiment from the Layers of Beauty stamp set in Lost Lagoon Ink on a panel of Basic White. I stamped the small flower image from the Layers of Beauty stamp set in Smoky Slate Ink on either side of the sentiment. I colored the image using Lemon Lolly, Lost Lagoon and Soft Seafoam Stampin’ Blends Markers. I adhered the Basic White panel to a Basic White mat then to the inside of the Basic White Thick card base.

Stampin' Up! Layers of Beauty Anniversary 6 creativestampingdesigns.com

To finish my card, I decorated a Basic White Medium Envelope. I stamped the small flower image from the Layers of Beauty stamp set in Smoky Slate Ink on the envelope front. I colored the image using Lost Lagoon, Lemon Lolly and Soft Sea Foam Stampin’ Blends Markers. I embossed a panel of Basic White using the Exposed Brick 3D EF and adhered it to the envelope flap.

Stampin' Up! Layers of Beauty Anniversary 7 creativestampingdesigns.com

Thank you for stopping by my blog today. I hope you like the card and will give it a try. Happy Stamping!!

*********************************************************************************************************

If you need any stamping supplies, I’d love to be your Demonstrator. Just click HERE to go directly to my online store or drop me an email if you have any questions. 

MY CURRENT HOST CODE IS:   PKXMFP73

Use this host code when placing an order with me. When you order $50 or greater you will receive a free gift from me! If your order is over $150, please do not use this code, but you’ll still get the free gift. The free gift is your choice of any 1 item valued up to $10.00 from the 2024-2025Annual Catalog, or from the Online Exclusives!  Unfortunately, packs of cardstock are no longer an option for a free gift. Shipping has become too expensive to ship and it’s costing me as much to ship as the cardstock costs. For any orders $50 or more I will also send you my monthly class tutorials.  Click HERE or go to my Customer Rewards for more details and to see what this month’s tutorials are.

Please remember to use my current Host Code and make sure that you can see my name on the final checkout page listed as your Demonstrator when you order so that you know that you’re ordering with me, and you’ll get my rewards! 

Happy Stamping, Karen

*********************************************************************************************************

In response to changing policies at Stampin’ Up – I’m adjusting my Ordering Gift policy as well.  I’m having to get a little more tough on the adding of Host codes when you place your order thru my Online Store.

Not to worry – you’re still going to get that $10 ordering gift for orders of $50 (before shipping & tax) or greater.  And the gift is still any 1 SU! product up to that $10 value – which includes some of our fun Host Sets!

But – if you DO NOT use the Host code for your orders of less than $150 (this is the RETAIL total before Shipping & Handling), then you’ll have two options:

  1. You’ll need to call Stampin’ Up! (1-800-Stamp-Up) and ask them to add it for you. They’re very helpful and will get it done quickly!  OR….
  2. If your order was over the $50 threshold but under $150, then…you’ll forfeit that $10 ordering gift and rewards – this is the Bummer Option – and I REALLY don’t want to do this, SO please remember to add my Current Host Code.

*********************************************************************************************************

I have updated my Retirement List. If you missed out on something from the 2023-2024 Annual Catalog, the January – April 2024 Mini Catalog or maybe even something a little older you might want to check out my list. I’m selling my retired items at 1/2the catalog prices. Click Here to go to my Retirement List.

*********************************************************************************************************

Coming in June!! 10% Off Stamp & Die Set Bundles and

Stampin’ Cut & Emboss Machines June 5-30!!

Everyone loves a good deal, which is why Stampin’ Up! is offering an additional 10% off all stamp and die bundles!  Between June 5-30, take advantage of the sale and add some new bundles to your collection!!  Plus, save 10% on the Stampin’ Cut & Emboss Machine and the Mini Stampin’ Cut & Emboss Machine!!  These machines make the perfect crafting partner for stamp and die bundles!

PROMOTION DETAILS

Sales Period: June 5-30, 2024
Ordering Deadline:  June 30, 2024 at 11:59 p.m. (MT)

  • Get an additional 10% discount on stamp and die bundles only. This excludes suite collections, stamp and punch bundles, bundles not yet released to customers, and any other bundles*.
  • Save 10% on Stampin’ Cut & Emboss Machine and Mini Stampin’ Cut & Emboss Machine (white and Boho Blue).
  • The 10% discount applies automatically to stamp and die bundles in all orders including Starter Kit orders placed between June 5-30, 2024.

*Please note Close to My Heart products are not included in this promotion.

YAY for a great sale!!  You can see the stamp and die set bundles in the online store right Here and the Stampin’ Cut & Emboss Machines Here (note that the machines only will be on sale, the accessories are note included).  Get your orders ready and save beginning June 5!

***As an added bonus, Demonstrators get the additional 10% discount on bundles and machines too!  So purchase the Starter Kit in May and get the free In Color items (see the details above) and then get the additional 10% discount on top of your Demonstrator discount on bundles and machines from June 5-30!!

*********************************************************************************************************

Life Is Sweet

Subscribe May 11 – June 10

Subscribe to Paper Pumpkin for a monthly, all-inclusive crafting kit that’s a fun surprise! Each kit includes a photopolymer stamp set, Classic Stampin’ Spot, and step by step instructions to complete exclusive paper craft projects, including cards, tags, and gift
packaging. And don’t miss the special add-on that coordinates with the next three months!

Celebrate the sweet things in life with textured, artistic cards. Featuring the new 2024–2026 In Colors!

  • Makes 9 cards: 3 each of 3 designs with 9 coordinating envelopes
  • Iridescent glimmer sentiments and precut paper pieces
  • Vellum accents, iridescent pearls, and linen thread
  • Coordinating colors: Poppy Parade, Peach Pie, Lemon Lolly, Shy Shamrock
    (Classic Stampin’ Spot), Pool Party, Pretty In Pink

Thanks and Beyond Add On Dies

Dies #164397 Price $12.00

This exclusive add-on coordinates with the three upcoming kits! Paper Pumpkin subscribers can purchase it beginning 11 March. The add-on is available only while supplies last, so it’s best to shop early!

Subscribe to the April Paper Pumpkin Kit between 11 March and 10 April by clicking here!

Note: Supplies may be limited toward the end of the subscription period.

*********************************************************************************************************

Card stock cuts for this project:

  • Basic White Cardstock 2 – 4 1/8″ X 5 3/8″ (card front & inner liner mat), 4″ X 5 1/4″(artwork & inner liner)
  • Basic White Thick Cardstock 4 1/4″ X 11″(card base scored & folded at 5 1/2″)

*********************************************************************************************************

Product List

Layers Of Beauty Bundle (English)

$56.50

Layers Of Beauty Photopolymer Stamp Set (English)

$20.00

Layers Of Beauty Dies

$30.00

Lovely & Sweet Cling Stamp Set (English)

$26.00

Basic White 8 1/2" X 11" Cardstock

$13.00

Basic White 8 1/2" X 11" Thick Cardstock

$11.25

Lost Lagoon 8-1/2" X 11" Cardstock

$11.50

Lost Lagoon Classic Stampin' Pad

$9.00

Petal Pink Classic Stampin' Pad

$9.00

Smoky Slate Classic Stampin' Pad

$9.00

Blending Brushes

$15.00

Lemon Lolly Stampin’ Blends Combo Pack

$11.00

Lost Lagoon Stampin’ Blends Combo Pack

$11.00

Soft Sea Foam Stampin' Blends Combo Pack

$11.00

Exposed Brick 3 D Embossing Folder

$11.00

Petal Pink & Pretty Peacock Foiled Gems

$8.00

Basic White Medium Envelopes

$11.00

Stampin' Cut & Emboss Machine

$130.00

Adhesive Sheets

$11.50

Mini Glue Dots

$7.25

Multipurpose Liquid Glue

$6.00

Mini Stampin' Dimensionals

$4.25

Stampin' Dimensionals

$4.25

Stampin' Seal

$8.00

Bone Folder

$8.00

Paper Snips

$12.00

Paper Trimmer

$28.00

Stampin’ Up! Layering Leaves Monochromatic

Good Monday morning stamping friends. How was everyone’s weekend? Were you able to enjoy some time outside? I was in all weekend, between working, the storms and the heat & humidity, I wanted nothing to do with outside. I did have to take Coraline for multiple walks though. For some reason when I’m home, she seems to need me to take her out walking every couple hours. When she’s home with my husband and daughter she sleeps all day.

I have a quick card for you today that could be a wedding card, an anniversary card, a birthday card or anything else you want to celebrate with someone. Here’s my card for today.

Stampin' Up! Layering Leaves Monochromatic 1 creativestampingdesigns.com

I used the Stampin’ Up! Layering Leaves Photopolymer Stamp Set along with the Gorgeous Garden Dies, 2″ Circle Punch and Bough Punch for my card today.

Stampin' Up! Layering Leaves Monochromatic 2 creativestampingdesigns.com

I started by cutting a Basic White card front using the Gorgeous Garden Dies.

Stampin' Up! Layering Leaves Monochromatic 3 creativestampingdesigns.com

I adhered the die cut card front to a Basic Black mat using Multipurpose Liquid Glue. I adhered the layered panel to a Basic White Thick card base using Stampin’ Dimensionals.

Stampin' Up! Layering Leaves Monochromatic 4 creativestampingdesigns.com

On panels of Basic White, I stamped 2 leaf images and the flower image from the Layering Leaves stamp set 2 times each in Tuxedo Black Ink. I cut the images out using the Bough Punch. I stamped the sentiment from the Layering Leaves stamp set in Tuxedo Black Ink on a panel of Basic White. I cut the sentiment out using the 2″ Circle Punch. I adhered the sentiment to the card front using Stampin’ Dimensionals. I adhered the leaves and flowers under the sentiment using Multipurpose Liquid Gue. I added a few Rhinestone Basic Jewels to the card front.

Stampin' Up! Layering Leaves Monochromatic 5 creativestampingdesigns.com

On the inside, I stamped the sentiment from Layereing Leaves stamp set in Tuxedo Black Ink on a panel of Basic White. I adhered the 2nd set of leaves and flowers to the bottom of the panel using Multipurpose Liquid Glue. I adhered the Basic White panel to a Basic Black mat then to the inside of the Basic White Thick card base.

Stampin' Up! Layering Leaves Monochromatic 6 creativestampingdesigns.com

To finish my card, I decorated a Basic White Medium Envelope. I stamped the leaf and flower images from the Layering Leaves stamp set in Tuxedo Black Ink on the envelope front and flap.

Stampin' Up! Layering Leaves Monochromatic 7 creativestampingdesigns.com

Thank you for stopping by my blog today. I hope you like my card and will give it a try. Happy Stamping!!

*********************************************************************************************************

If you need any stamping supplies, I’d love to be your Demonstrator. Just click HERE to go directly to my online store or drop me an email if you have any questions. 

MY CURRENT HOST CODE IS:   MHTQEVEX

Use this host code when placing an order with me. When you order $50 or greater you will receive a free gift from me! If your order is over $150, please do not use this code, but you’ll still get the free gift. The free gift is your choice of any 1 item valued up to $10.00 from the 2023-2024 Annual Catalog!  Unfortunately, packs of cardstock are no longer an option for a free gift. Shipping has become too expensive to ship and it’s costing me as much to ship as the cardstock costs. For any orders $50 or more I will also send you my monthly class tutorials.  Click HERE or go to my Customer Rewards for more details and to see what this month’s tutorials are.

Please remember to use my current Host Code and make sure that you can see my name on the final checkout page listed as your Demonstrator when you order so that you know that you’re ordering with me, and you’ll get my rewards! 

Happy Stamping, Karen

*********************************************************************************************************

In response to changing policies at Stampin’ Up – I’m adjusting my Ordering Gift policy as well.  I’m having to get a little more tough on the adding of Host codes when you place your order thru my Online Store.

Not to worry – you’re still going to get that $10 ordering gift for orders of $50 (before shipping & tax) or greater.  And the gift is still any 1 SU! product up to that $10 value – which includes some of our fun Host Sets!

But – if you DO NOT use the Host code for your orders of less than $150 (this is the RETAIL total before Shipping & Handling), then you’ll have two options:

  1. You’ll need to call Stampin’ Up! (1-800-Stamp-Up) and ask them to add it for you. They’re very helpful and will get it done quickly!  OR….
  2. If your order was over the $50 threshold but under $150, then…you’ll forfeit that $10 ordering gift and rewards – this is the Bummer Option – and I REALLY don’t want to do this, SO please remember to add my Current Host Code.

*********************************************************************************************************

Bonus Days Going On NOW!!!

We’re bringing back one of our favorite promotions—BONUS DAYS! Because do you know what’s a great deal? Getting rewarded for all the crafting supplies you’re already going to buy! When you shop between 6–31 July and spend $50 USD you will earn a $5 USD coupon! Make sure you save all your coupons because you can redeem them (and we mean ALL of them) between 1–31 August. There’s no limit to how many coupons you can earn! So, get your ready to earn and redeem coupons!

Ordering Deadlines

Earning Period: July 6th – July 31, 2023 at 11:59 p.m. (MT)

  • Earn a $5 USD coupon for every $50 USD spent (before shipping and tax).
  • All coupon codes will be emailed right after a qualifying purchase has been made.
  • If a participant earns multiple codes from a single order, they will receive one email with multiple codes. If they earn multiple codes from multiple orders, they will receive separate emails for each code earned.
  • All order types qualify for this promotion. Phone and email orders still require an email address.
  • Orders that are started before the promotion begins will not count toward earning coupon codes. For example, if you add items to your cart before 6 July and wait to purchase until that date or later, then those items will not qualify towards earning coupons. You must add items to your cart and complete your purchase during the earning period.
  • There is no limit to the number of coupon codes participants can earn per order or throughout the duration of the earning period.

Ordering Deadlines

Redemption Period: August1– August 31, 2023 at 11:59 p.m. (MT)

  • There is no limit to the number of coupon codes participants can redeem on an order during the redemption period. If using multiple codes, they must be separated by a space.
  • Coupons may be redeemed one time only.
  • Coupon codes may be redeemed for any product (excluding Starter Kits, demonstrator supply items, and Paper Pumpkin month-to-month subscriptions).
  • New prepaid Paper Pumpkin codes may be discounted using Bonus Days coupon codes.

*********************************************************************************************************

Blossom Wishes Kit Now Available

Introducing the newest addition to the Stampin’ Up! Kit’s Collection: Blossom Wishes! This kit is special for its trendy, slimline card design, and includes all the precut paper pieces for a fun card for a friend!

This kit includes: 

  • Enough supplies to create 8 cards—4 each of 2 designs
  • 8 coordinating envelopes.
  • Embossed card bases, printed die cuts, vellum blossoms, adhesive, and embellishments.
  • Precut sentiments in Dutch, English, French, and German.
  • Finished card size: 8-1/2″ x 3-1/2″ (21.6 x 8.9 cm), 6-1/4″ x 3-1/4″ (15.9 x 8.3 cm)
  • Coordinating colors: Lemon Lolly, Orchid Oasis, Petal Pink, Starry Sky, Sweet Sorbet, Wild Wheat

162431 $13.00 USD

*********************************************************************************************************

New Online Exclusives Now Available

Stampin’ Up! has some new Online Exclusive items that are available to order now!!  You won’t find these products in any catalog, they’ll only be listed in the online store.

The Online Exclusive product releases will continue throughout the year so there will be new products to shop from, in addition to new catalogs!

We got some new Online Exclusive items on July 6. Click HERE and head over to my Online Store to see the Online Exclusives Now.

*********************************************************************************************************

Meaningful Flowers

Subscribe Julu 11 – August 10

Discover messages of friendship and loyalty in the flowers from the August Paper Pumpkin Kit! This kit includes 8 cards, 4 each of 2 designs, and 8 coordinating envelopes. The kit is special because of the way it uses the meaning of flowers. On each card, you’ll find a small inscription of what the flowers represent. As you craft with the included vellum and watercolor paper pieces, you’ll know you’re sending a message of encouragement and loyalty to your recipients. The Meaningful Flowers Paper Pumpkin Kit is full of florals that are meant to spread hope, encouragement, and remind you of your favorite memories. The kit focuses specifically on forget-me-nots and lotuses. Their meaning is enscripted on the back of each card. Subscribe by 10 August to send beautiful paper crafts with thoughtful messages to those you love. 

And don’t wait, because anyone who subscribes to this month’s kit will get a FREE stamp set! This Distinktive stamp set is perfect for a variety of occasions! 

This kit includes:

  • 8 cards; 4 each of 2 designs
  • 8 coordinating envelopes
  • 1 photopolymer stamp set
  • 1 Pretty Peacock Ink Spot
  • Linen thread
  • Vellum and precut paper pieces
  • FREE Distinktive stamp set
  • Adhesives
  • Final card size: 4-1/4″ x 5-1/2″ (10.8 x 14 cm)

Coordinating Stampin’ Up! colors: Bubble Bath, Crushed Curry, Garden Green, Melon Mambo, Misty Moonlight, Orchid Oasis, Pretty Peacock, Tahitian Tide

Subscribe to the August Paper Pumpkin Kit between 11 July and 10 August by clicking here!

Note: Supplies may be limited toward the end of the subscription period.

*********************************************************************************************************

Card stock cuts for this project:

  • Basic White Cardstock 4 1/8″ X 5 3/8″(card front), 2 1/2″ X 2 1/2″ (sentiment), 2 – 1 3/4″ x 5 1/4″ (leaves), 1″ X 4″ (flowers), 4″ X 5 1/4″ (inner liner)
  • Basic White thick Cardstock 4 1/4″ X 11″ (card base scored & folded at 5 1/2″)
  • Basic Black Cardstock 2 – 4 1/8″ X 5 3/8″ (card front & inner liner mats)

*********************************************************************************************************

Product List

Stampin’ Up! Nature’s Prints

Good Sunday morning my stamping friends. How is everyone’s weekend going? I got out of work early yesterday and was able to enjoy a beautiful day until the thunderstorms rolled in around 6:30pm. This was Coraline’s first thunderstorm, and she did much better than I expected. She only barked a little at the thunder. I’ll be at the dog bakery all day today, which is ok since it’s supposed to be much cooler than yesterday.

Today’s card uses a bundle that will be carrying over to the new 2023-2024 Annual Catalog. The stamp set and dies will be available separately not as a bundle. If this is one of the bundles that you’ve been undecided about getting, now’s a great time to grab it while you can still get the bundle price. Here’d my card for today.

Stampin' Up! Nature's Prints 1 creativestampingdesigns.com

I used the Stampin’ Up! Nature’s Prints Bundle along with the Sun Prints Designer Series Paper for my card today.

Stampin' Up! Nature's Prints 2 creativestampingdesigns.com

I started by adhering a panel of Sun Prints DSP to a Night of Navy card base using Multipurpose Liquid Glue. I adhered a smaller panel of Sun Prints DSP to the top of the card front using Multipurpose Liquid Glue.

Stampin' Up! Nature's Prints 3 creativestampingdesigns.com

On a panel of Basic White cardstock, I stamped the floral image from the Stampin’ Up! Nature’s Prints Cling Stamp Set in Gray Granite Ink, stamping off once on scrap paper. I stamped the fern image from the Nature’s Prints stamp set in Versamark Ink on a panel of Night of Navy cardstock twice. I sprinkled it with White Embossing Powder and set it using my Heat Tool. I stamped the sentiment from the Nature’s Prints stamp set in Night of Navy Ink on a panel of Basic White cardstock. I cut the sentiment and images out using the Natural Prints Dies. I cut the sprig die cut pieces from a panel of Brushstroke Specialty Paper using the Natural Prints Dies.

Stampin' Up! Nature's Prints 4 creativestampingdesigns.com

I adhered the fern and floral images to the card front using Multipurpose Liquid Glue. I adhered the sentiment on top of the fern using Stampin’ Dimensionals. I adhered the sprigs under the sentiment using Multipurpose Liquid Glue. I added a few Solid Faceted Gems to the card front.

Stampin' Up! Nature's Prints 5 creativestampingdesigns.com

On the inside, I stamped the sentiment from the Nature’s Prints stamp set in Night of Navy Ink on a panel of Basic White. I stamped the floral/fern images from the Nature’s Prints stamp set in Gray Granite and Night of Navy Inks on the bottom of the panel. I adhered the Basic White panel to a Night of Navy mat then to the inside of the Night of Navy card base.

Stampin' Up! Nature's Prints 6 creativestampingdesigns.com

To finish my card, I decorated a Basic White Medium Envelope. I stamped the floral/fern images from the Nature’s Prints stamp set on the envelope front in Gray Granite and Night of Navy Inks. I adhered a panel of Sun Prints DSP to the envelope flap

Stampin' Up! Nature's Prints 7 creativestampingdesigns.com

Thank you for stopping by my blog today. I hope you like the card and will give it a try. Happy Stamping!!

*********************************************************************************************************

If you need any stamping supplies, I’d love to be your Demonstrator. Just click HERE to go directly to my online store or drop me an email if you have any questions. 

MY CURRENT HOST CODE IS:    XMVFTAU4

Use this host code when placing an order with me. When you order $50 or greater you will receive a free gift from me! If your order is over $150, please do not use this code, but you’ll still get the free gift. The free gift is your choice of any 1 item valued up to $10.00 from the 2022-2023 Annual Catalog or the January-April 2023 Mini Catalog!  Unfortunately, packs of cardstock are no longer an option for a free gift. Shipping has become too expensive to ship and it’s costing me as much to ship as the cardstock costs. For any orders $50 or more I will also send you my monthly class tutorials.  Click HERE or go to my Customer Rewards for more details and to see what this month’s tutorials are.

Please remember to use my current Host Code and make sure that you can see my name on the final checkout page listed as your Demonstrator when you order so that you know that you’re ordering with me, and you’ll get my rewards! 

Happy Stamping, Karen

*********************************************************************************************************

In response to changing policies at Stampin’ Up – I’m adjusting my Ordering Gift policy as well.  I’m having to get a little more tough on the adding of Host codes when you place your order thru my Online Store.

Not to worry – you’re still going to get that $10 ordering gift for orders of $50 (before shipping & tax) or greater.  And the gift is still any 1 SU! product up to that $10 value – which includes some of our fun Host Sets!

But – if you DO NOT use the Host code for your orders of less than $150 (this is the RETAIL total before Shipping & Handling), then you’ll have two options:

  1. You’ll need to call Stampin’ Up! (1-800-Stamp-Up) and ask them to add it for you. They’re very helpful and will get it done quickly!  OR….
  2. If your order was over the $50 threshold but under $150, then…you’ll forfeit that $10 ordering gift and rewards – this is the Bummer Option – and I REALLY don’t want to do this, SO please remember to add my Current Host Code.

*********************************************************************************************************

Stampin’ Up! Color Refresh Coming Soon!!!

Stampin’ Up! is all about creativity and sharing what we love with those we love. And that means providing a compelling selection of high-quality craft supplies in coordinating colors and designs. We’re always working to not only meet trends but set them. That means evaluating and even refreshing our current products—This year we’re refreshing our complete color collection!

Stampin’ Up! has announced that, in addition to the new 2023-2025 In Colors, we’ll be getting some new colors in the core color families (Brights, Neutrals, Regals and Subtles) with the new 2023-2024 Annual Catalog! You’ll find some new friends and returning favorites among our Brights, Neutrals, Regals, and Subtles. And you won’t want to miss our new 2023–2025 In Colors. We hope you’re as excited as we are to start crafting with these fresh new colors and to share them with your fellow crafting enthusiasts. 

New Core Family Colors from Stampin’ Up!

Stampin’ Up! has put together a quick video showing you the colors that are leaving and the new colors coming in, including the new In Colors!  You can see it here:

If you want a quick list of the retiring core colors, here they are:

  • Blushing Bride
  • Pear Pizzazz
  • Mint Macaron
  • Rich Razzleberry
  • So Saffron
  • Merry Merlot
  • Pacific Point
  • Mango Melody
  • Soft Suede
  • Sahara Sand
  • Bermuda Bay

2023-2025 In Colors!

Here is a peek at the new 2023-2025 In Colors!

They are really pretty!  Their names are:

  • Copper Clay
  • Wild Wheat
  • Boho Blue
  • Moody Mauve
  • Pebbled Path

The new and returning colors are so pretty!  Can’t wait to get them!!

2023-2024 Annual Catalog Coming Soon!!

The new catalog is awesome!! I’ve already started my list of all the new products I want to get. I will be ordering the New 2023-2024 Annual Catalogs on April 4th for my customers and will be shipping them out as soon as I get them. If you are a current customer of mine and have placed an order in 2022-2023, you will automatically be receiving a new catalog once I receive them. If you haven’t placed an order in the past year, I will not be automatically sending you one. If you have not ordered and/or would like to be a customer of mine and would like a copy of the 2023-2024 Annual Catalog, please send me an email at creativestampingdesigns@gmail.com requesting a catalog.

*********************************************************************************************************

Price Changes Coming With The 2023-2024 Annual Catalog

Stampin’ Up! let us know that some of the items in the new catalog will have higher prices when the catalog is launched on May 2.  The prices for all items that are carrying over will continue to be the current catalog prices through May 1.  So now is a great time to stock up on any favorites before the price increases happen in early May!  We have not been told any specifics on the amount that the prices will increase but we have been given a list of items that will increase in price with the new catalog.

Due to increased costs to produce these items, beginning May 2 new prices will be in effect within the following product categories:

  • Cardstock
  • Designer Series Paper
  • Specialty Paper
  • Notecards and Envelopes
  • Classic Stampin’ Ink Pads and Refills
  • Stampin’ Blends
  • Stampin’ Write Markers
  • Select Specialty Inks
  • Stampin’ Cut & Emboss Machines and plates
  • Embossing Folders
  • Punches
  • Take Your Pick products
  • Storage
  • Clear Blocks
  • Select tools
  • Select adhesives
  • Select stamp sets
  • Paper Pumpkin

To see the updated pricing, check the new 2023–2024 Annual Catalog.  I’ll be mailing out the catalogs in mid-April to my ordering customers so take a peek when it arrives in your mailbox.  So, the good news is that you will have time to order any last-minute items before the new pricing starts once you see the upcoming catalog!  

*********************************************************************************************************

All The Little Things

Subscribe March 11 – April 10

Good things take time, but you can start creating them now with the All the Little Things Paper Pumpkin kit! This kit includes nine cards, three each of three designs, with elegant designs and bright colors. The iridescent foil is the shining detail to bring your crafts together. You can make a card for anyone and for any occasion!

And don’t wait, because anyone who subscribes to this month’s kit will get a FREE box organizer! This organizer fits perfectly inside your Paper Pumpkin box and is great for keeping your supplies from past kits organized, so you know right where everything is! 

This kit includes:

  • 9 cards, 3 each of 3 designs, and 9 coordinating envelopes.
  • 1 photopolymer stamp set with celebratory sentiments.
  • 1 Shaded Spruce Stampin’ Spot.
  • Precut cherry blossom paper pieces with iridescent foil.
  • Unique embellishments and twine.
  • Adhesives to complete the projects.
  • Final card size: 5-1/2” x 4-1/4” (14 x 10.8 cm). 
  • Coordinating Stampin’ Up! colors: Balmy Blue, Basic Black, Calypso Coral, Granny Apple Green, Petal Pink, Poppy Parade, Shaded Spruce.
  • FREE box organizer

Subscribe to the April Paper Pumpkin Kit between 11 March 2023 and 10 April 2023 by clicking here!

Note: Supplies may be limited toward the end of the subscription period.

*********************************************************************************************************

Card stock cuts for this project:

  • Basic White Cardstock 3 1/4″ X 2″ (floral image), 3 1/4″ x 2″ (sentiment), 4″ x 5 1/4″ (inner liner)
  • Night of Navy Cardstock 4 1/4″ X 11″ (card base scored & folded at 5 1/2″), 2 1/2″ X 4 1/4″ (fern), 4 1/8″ x 5 3/8″ (inner liner mat)
  • Sun Prints Designer Series Paper 4 1/4″ X 5 1/4″ (card front), 2 1/4″ X 4 1/4″ (card front panel), 2 1/4″ X 6″ (envelope flap)
  • Brushstroke Specialty Paper 1″ X 6″(sprigs)

*********************************************************************************************************

Product List

Stampin’ Up! Ringed With Nature Layered Anniversary

Good Saturday morning my stamping friends and welcome to the weekend. Does anyone have any fun plans? I have off today, and we have a couple visitors coming over to meet Coraline. My plans other than that is to hopefully get to my card table for a bit.

My card today I made while I was virtually attending my Open Stamp Night with my team members. Every month we have an open stamp night where we can get together virtually and stamp or just chat with each other. It’s always a lot of fun getting together from all over the United States. We have members that live on the east coast, west coast and center US. Since everyone lives all over, this is the best way we could get together every month. I’d love for you to join in with us, it’s a lot of fun. Interested? Ask me how. Here’s today’s card.

Stampin' Up! Ringed With Love Anniversary 1 creativestampingdesigns.com

I used the Stampin’ Up! Ringed With Nature Photopolymer Stamp Set along with the Rings of Love Sale-a-bration Designer Series Paper for my card today.

Stampin' Up! Ringed With Love Anniversary 2 creativestampingdesigns.com

I started by adhering a panel of Rings of Love DSP to a Night of Navy card base. I adhered a panel of the Rings of Love DSP to a Night of Navy mat and then to the card front using Multipurpose Liquid Glue. I embossed a panel of Soft Suede cardstock using the Timber 3D Embossing Folder. I adhered the embossed panel to a Night of Navy mat and then to the card front using Multipurpose Liquid Glue.

Stampin' Up! Ringed With Love Anniversary 3 creativestampingdesigns.com

I cut one of the housed from the Rings of Love DSP using the Stylish Shapes Dies. I adhered it to a Night of Navy mat and then to the card front using Stampin’ Dimensionals.

Stampin' Up! Ringed With Love Anniversary 4 creativestampingdesigns.com

On a panel of Basic White cardstock, I stamped the sentiment from the Ringed With Nature stamp set in Night of Navy Ink. I cut the sentiment using the Stylish Shapes Dies. I adhered the sentiment to the card front using Stampin’ Dimensionals. I tied a small bow using Linen Thread and adhered it to the sentiment using a Glue Dot. I added a few Rustic Metallic Adhesive-Backed Dots to the card front.

Stampin' Up! Ringed With Love Anniversary 5 creativestampingdesigns.com

On the inside, I stamped the sentiment from the Stampin’ Up! Forever Fern Cling Stamp Set in Night of Navy Ink on a Basic White panel. I adhered a strip of the Rings of Love DSP to the bottom of the panel. I adhered the Basic White panel to a Mint Macaron mat and then to the inside of the Night of Navy card base.

Stampin' Up! Ringed With Love Anniversary 6 creativestampingdesigns.com

To finish my card, I decorated a Basic White Medium Envelope. I stamped the house image from the Ringed With Nature stamp set in Night of Navy Ink on the envelope front. I stamped the bottom by stamping off once on scrap paper and the roof full strength. I adhered a panel of Rings of Love DSP to the envelope flap.

Stampin' Up! Ringed With Love Anniversary 7 creativestampingdesigns.com

Thank you for stopping by my blog today. I hope you liked my card and will give it a try. This beautiful Rings of Love DSP will only be available until August 31 or while supplies last. Happy Stamping!!

*********************************************************************************************************

If you need any stamping supplies, I’d love to be your Demonstrator. Just click HERE to go directly to my online store or drop me an email if you have any questions. 

MY CURRENT HOST CODE IS:   QY4S2TZX

Use this host code when placing an order with me. When you order $50 or greater you will receive a free gift from me! If your order is over $150, please do not use this code, but you’ll still get the free gift. The free gift is your choice of any 1 item valued up to $10.00 from the 2021-2022 Annual Catalog or the January – June 2022 Mini Catalog!   For any orders $50 or more I will also send you my monthly class tutorials.  Click HERE or go to my Customer Rewards for more details and to see what this month’s tutorials are.

Please remember to use my current Host Code and make sure that you can see my name on the final checkout page listed as your Demonstrator when you order so that you know that you’re ordering with me and you’ll get my rewards! 

Happy Stamping, Karen

*********************************************************************************************************

Coming Soon!!! Starting September 1, 2022

Some things are great on their own but become epic when they are paired with something else: cereal and milk, toast and butter, Fred Astaire and Ginger Rogers. We may be biased, but our favorite combo is our stamp sets and dies—and that’s what the Perfect Partners promotion is all about! 

We created six new dies that coordinate with stamp sets in the 2022–2023 Annual Catalog and the July–December 2022 Mini Catalog. These coordinating dies will only be available during this promotion and will not be offered in any catalog.  

These stamp sets and dies are available separately or as a bundle. By buying the bundle, you and your customers will save 10% off the retail price. 

Put these wonderful stamp sets and dies together for more papercrafting fun!

Interested in Being Able to Order Them Now? Join My Team!!

Being a demonstrator, you are able to order products ahead of customers. You get to attend the Stampin’ Up! events and be a part of an awesome team and community. There is no obligation to sell or blog, you can join as a Hobby Demonstrator just to enjoy the discount. For just $99 you get to pick $125 in product of your choice. Stampin’ Up! includes a past Paper Pumpkin Kit along with some business items in case you want to make it a business. This all ships for FREE. After that all your future orders you get to enjoy a 20% discount. Ask me how!!

If you join during Sale-a-bration you will receive this awesome Making Plans Collection absolutely free. It includes a July 2022-December 2023 Making Plans Planner including an 8″ X 9 1/2″ Faux Leather Carrying Case, 5 1/2″ X 8 1/2″ Planer Pages, Monthly Divider Pages and Sticker Sheets. It also includes 3 – Creative Journals that are 5 3/4″ X 8″ and a Making Plans Photopolymer Stamp Set. Contact me for more information at creativestampingdesigns@gmail.com. I’d love to have you on my team. You can join as a hobby demonstrator just to enjoy the discount for yourself. No obligations to sell, hold classes or have a blog.

*********************************************************************************************************

New Sale-a-bration Items Added

Stampin’ Up! has added some additional items that you can earn for FREE with orders beginning at $50 during Sale-a-bration!  You can see the new items Here. There are some really great new items to pick from!  You’ll see them added to the list of options that you can pick for free with orders of $50+ as you go through the checkout process.  Let me know if you have any questions.  Happy Shopping!

*********************************************************************************************************

The Back To School Sales Tax Holiday is going on until September. For those of you living in Massachusetts, yours is going on now. New Jersey is from August 27th – September 5th!! Be sure to check the list.

The good news is that some items in the Stampin’ Up! Catalogs qualify for the sales tax holidays!  The list of sales tax holidays by state and items in that state that qualify Here on a printable PDF. Check it out to see when your state has the Sales Tax Holiday.

*********************************************************************************************************

Spooky Treats

Subscribe August 11 – September 10

Get your Halloween crafting on with the Spooky Treats Paper Pumpkin Kit. This month’s kit includes everything you need to make 18 absolutely adorable (and just the right amount of spooky) treat boxes—that’s 6 each of 3 unique designs! No need to let the season creep up on you; subscribe and order your kit today.


Plus, we’re putting the TREAT in trick-or-treat with a special GIVEAWAY on social media starting 5 September at 9:00am (MT)! Simply follow @PaperPumpkin on Instagram or the Paper Pumpkin page on Facebook, like either post, and mention three friends in the comments for your chance to win one of two personalized JBL speakers. You’ll have to be quick because the giveaway closes 8 September at 4:00pm (MT). Don’t miss out on this fang-tastic opportunity!

This kit includes:

  • This month’s kit contains enough elements to create 18 treat boxes—6 each of 3 designs. This all-inclusive kit includes printed box bases and tops, die-cut paper pieces, adhesives, and more!
  • The Spooky Treats Paper Pumpkin Kit includes an Orchid Oasis Classic Stampin’ Spot!
  • This kit’s stamp set puts the TREAT in trick-or-treat with fun, Halloween-themed sentiments and designs. Embrace the spooky season with ghost, bat, spider, and star images.
  • This kit also includes a special peek-through box top on one of the box designs.

Finished box size: 2-1/2″ x 3″ x 1″ (6.4 x 7.6 x 2.5 cm)

Coordinating Stampin’ Up! colors: Basic Black, Gray Granite, Orchid Oasis, Fresh Freesia, Crushed Curry, Pumpkin Pie

Subscribe to the August Paper Pumpkin Kit between 11 August and 10 September at paperpumpkin.com!

Note: Supplies may be limited toward the end of the subscription period.

*********************************************************************************************************

Card stock cuts for this project:

  • Basic White Cardstock 1″ X 4″ (sentiment), 4″ X 5 1/4″ (inner liner)
  • Mint Macaron Cardstock 4 1/8″ x 5 3/8″ (inner liner mat)
  • Night of Navy Cardstock 4 1/4″ X 11″ (card base scored & folded at 5 1/2″), 2 1/8″ x 5 1/4″, 1 7/8″ X 4″ & 2″ X 2″ (card front panel mats)
  • Soft Suede Cardstock 1 3/4″ X 4″ (card front panel)
  • Rings of Love Designer Series Paper 4″ X 5 1/4″(card front), 2″ X 5 1/4″ & 3″ X 3″(card front panels), 3/4″ X 4″ (inner liner strip), 2 1/4″ x 6″ (envelope flap)

*********************************************************************************************************

Product List

Stampin’ Up! Ringed With Nature for The Happy Inkin’ Thursday Blog Hop

Good Thursday morning my stamping friends welcome to our Happy Inkin’ Thursday Blog Hop. I hope everyone is doing well today. If you are hopping over from Akiko’s blog, thank you for stopping by. This week we have a Sketch Challenge. Here is my card using this week’s Sketch.

I used the Stampin’ Up! Ringed With Nature Bundle along with the Sale-a-bration Rings of Love Designer Series Paper for my card today.

This is this week’s sketch.

I started by adhering a panel of Rings of Love DSP to an Evening Evergreen card bases. I embossed a panel of Vellum paper using the Leaf Fall 3D Embossing Folder and adhered it to the card front. On a strip of Parakeet Party cardstock, I stamped the leaf image from the Stampin’ Up! Ringed With Nature Photopolymer Stamp Set in Parakeet Party Ink. I adhered the strip to the card front on the Vellum panel.

Using the tree Rings Dies and Tree Rings Hybrid Embossing Folder, I cut a panel of Crumb Cake cardstock. I took the largest tree ring die and brushed Soft Suede Ink around the edge using my Spong Dauber. I adhered the die to the card front using Stampin’ Dimensionals. On a strip of Evening Evergreen cardstock I stamped the sentiment from the Ringed With Nature stamp set in Versamark Ink. I sprinkled it with my White Embossing Powder and set it using my Heat Tool. I cut the sentiment out using the smallest die from the Stitched Rectangle Dies. I adhered the sentiment to the card front using Stampin’ Dimensionals.

I cut 2 of the thinner leaf dies from the Tree Rings Dies from a panel of Parakeet Party cardstock, I cut one of the larger leaf dies from a panel of Evening Evergreen cardstock. I adhered the leaf dies just under the sentiment using Multipurpose Liquid Glue. I colored the berries on one of the sprig Textural Elements using my Poppy Parade Stampin’ Blends Markers. I adhered the sprig on top of the leaves just under the sentiment using Multipurpose Liquid Glue.

On the inside I stamped the tree ring image from the Ringed With Nature stamp set in Soft Suede Ink, stamping off twice on scrap paper, on a Basic White panel. I stamped the sentiment from the Stampin’ Up! Happiness Abounds Photopolymer Stamp Set in Evening Evergreen Ink over the tree rings. I stamped the heart image from the Ringed With Nature stamp set in Poppy Parade Ink on top of the sentiment. I stamped the leaf image from the Ringed With Nature stamp set in Parakeet Party Ink on the bottom of the panel. I adhered the Basic White panel to a Soft Suede mat and then to the inside of the Evening Evergreen card base.

To complete my card, I decorated a Basic White Medium Envelope. I stamped the tree ring image from the Ringed With Nature stamp set in soft Suede Ink, stamping off once on scrap paper, on the envelope front. I stamped the heart image from the Ringed With Nature stamp set in Poppy Parade Ink on top of the tree ring image. I stamped the leaf image in Parakeet Party next to the tree ring. I adhered a panel of Rings of Love DSP to the envelope flap.

Thank you for stopping by my blog today. I hope you liked my card and will give it a try. Now that you’ve seen my card, take a minute to hop through and see everyone’s projects today. If you click on the Next Blog button, you’ll go to Tara’s page. Or you can just click on the names below to go directly to all their blogs! Happy Hopping!!

Amy Koenders:

Mary Deatherage:

Kristi Gray:

Sue Prather:

Karen Finkle:

Akiko Sudano:

Karen Ksenzakovic: You Are Here

Tara Carpenter:

Terry Lynn Bright:

*********************************************************************************************************

If you need any stamping supplies, I’d love to be your Demonstrator. Just click HERE to go directly to my online store or drop me an email if you have any questions. 

MY CURRENT HOST CODE IS:   RGVNBY93

Use this host code when placing an order with me. When you order $50 or greater you will receive a free gift from me! If your order is over $150, please do not use this code, but you’ll still get the free gift. The free gift is your choice of any 1 item valued up to $10.00 from the 2021-2022 Annual Catalog or the January – June 2022 Mini Catalog!   For any orders $50 or more I will also send you my monthly class tutorials.  Click HERE or go to my Customer Rewards for more details and to see what this month’s tutorials are.

Please remember to use my current Host Code and make sure that you can see my name on the final checkout page listed as your Demonstrator when you order so that you know that you’re ordering with me and you’ll get my rewards! 

Happy Stamping, Karen

*********************************************************************************************************

The Back To School Sales Tax Holiday is going on until August. For those of you living in Alabama, Arkansas, Florida, Illinois, Massachusetts, Missouri, New Mexico, Ohio, Puerto Rico, South Carolina, Tennessee, Texas, Virginia and West Virginia…you’ve got sales tax holidays coming up!!

The good news is that some items in the Stampin’ Up! Catalogs qualify for the sales tax holidays!  The list of sales tax holidays by state and items in that state that qualify Here on a printable PDF. Check it out to see when your state has the Sales Tax Holiday.

*********************************************************************************************************

Sweet Sunflowers

Subscribe July 11 – August 10

Here comes the sun(flower) for a crafting experience you won’t forget! The Sweet Sunflowers Paper Pumpkin Kit has so much in store—elegant watercolor designs hand-crafted by our in-house artists, TWO Classic Stampin’ Spots for a Two-Step stamping experience, and the all-new twist technique to make your floral designs come alive with depth and detail! 
And the August Paper Pumpkin Kit includes the Gold Foil Honeycomb Sheets as a FREE gift that will add the perfect golden accent to any card or project. We can’t wait to see the bee-utiful projects you’ll create! 

Item Number: 161120

This kit includes:

  • All the supplies you need to create 9 cards: 3 each of 3 designs; and coordinating envelopes.
  • An all-occasion stamp set to express words of gratitude, friendship, greetings and beautiful wildflower designed images.
  • Specialty Vellum honeycomb shape pre-cut pieces.
  • 2 Classic Stampin’ Spots (Crushed Curry and Soft Suede) for a Two-Step stamping experience with a twist!
  • Paper pieces and embellishments with watercolor designs and images.
  • Mini Stampin’ Dimensionals.
  • FREE GIFT: 8 Gold Foil Honeycomb Sheets

Completed card size: 5-1/2″ x 4-1/4″ (14 x 10.8 cm)

Coordinating Stampin’ Up! colors: Blackberry Bliss, Crushed Curry, Evening Evergreen, Melon Mambo, Mossy Meadow, Night of Navy, Pumpkin Pie, Soft Suede

Subscribe to the July Paper Pumpkin Kit between 11 July and 10 August at paperpumpkin.com!

Note: Supplies may be limited toward the end of the subscription period.

*********************************************************************************************************

If you join during Sale-a-bration you will receive this awesome Making Plans Collection absolutely free. It includes a July 2022-December 2023 Making Plans Planner including an 8″ X 9 1/2″ Faux Leather Carrying Case, 5 1/2″ X 8 1/2″ Planer Pages, Monthly Divider Pages and Sticker Sheets. It also includes 3 – Creative Journals that are 5 3/4″ X 8″ and a Making Plans Photopolymer Stamp Set. Contact me for more information at creativestampingdesigns@gmail.com. I’d love to have you on my team. You can join as a hobby demonstrator just to enjoy the discount for yourself. No obligations to sell, hold classes or have a blog.

*********************************************************************************************************

Card stock cuts for this project:

  • Basic White Cardstock 4″ X 5 1/4″ (inner liner)
  • Crumb Cake Cardstock 3 1/2″ x 3 1/2″ (tree ring die)
  • Evening Evergreen Cardstock 8 1/2″ x 5 1/2″ (card base scored & folded at 4 1/4″), 3″ x 1″ (leaves). 2″ x 1 1/4″ (sentiment)
  • Parakeet Party Cardstock 3 1/2″ x 1/2″ (card front strip). 3″ x 1 1/2″ (leaves)
  • Soft Suede Cardstock 4 1/8″ x 5 3/8″ (inner liner mat)
  • Rings of Love Designer Series Paper 4 1/4″ x 5 1/2″ (card front), 2 1/4″ x 6″(envelope flap)
  • Vellum Paper 2″ x 5 1/2″ (card front panel)

*********************************************************************************************************

Product List

Paper Snips

[103579]
$11.00

Stamparatus

[146276]
$49.00