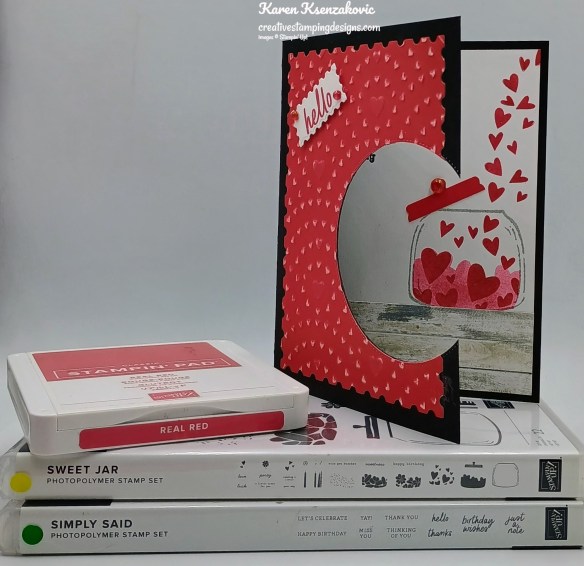
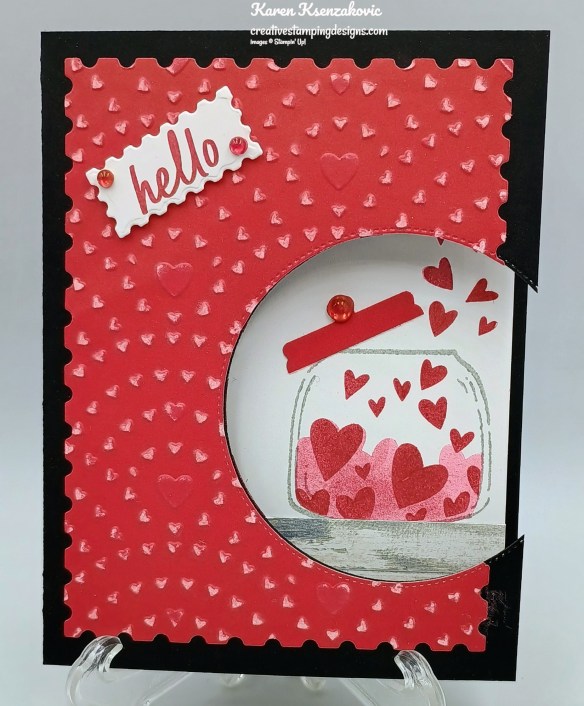
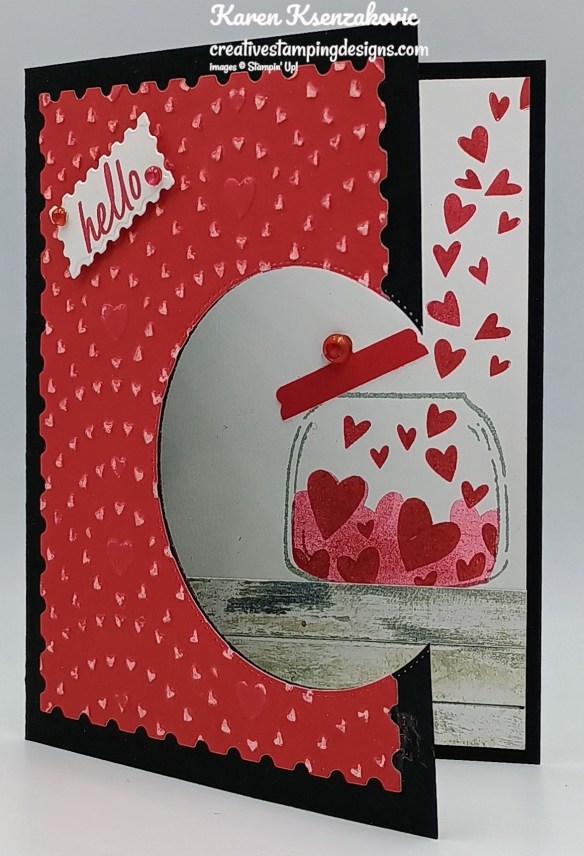
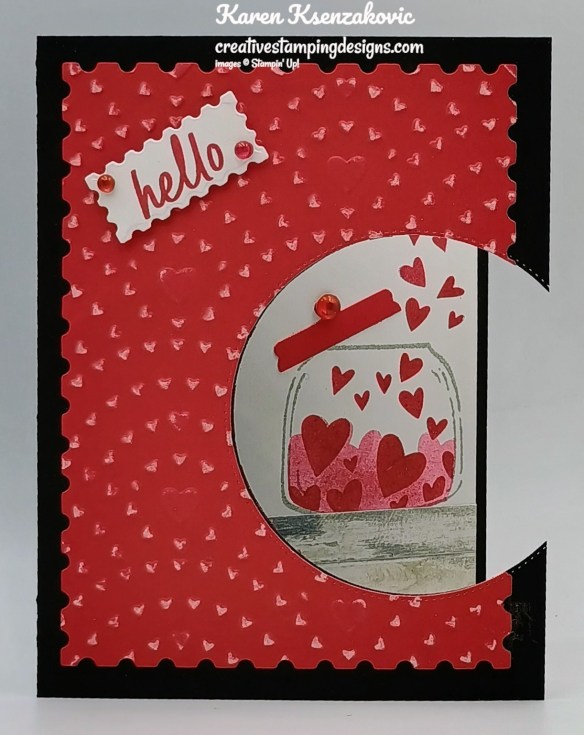
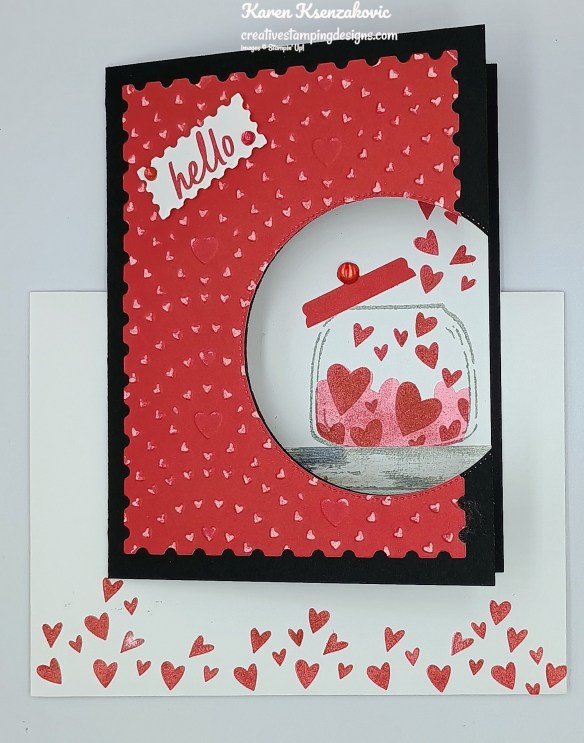
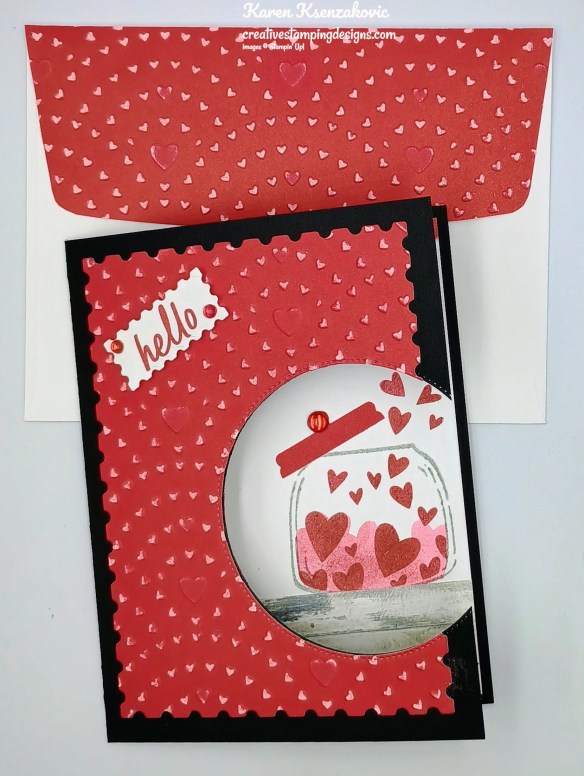
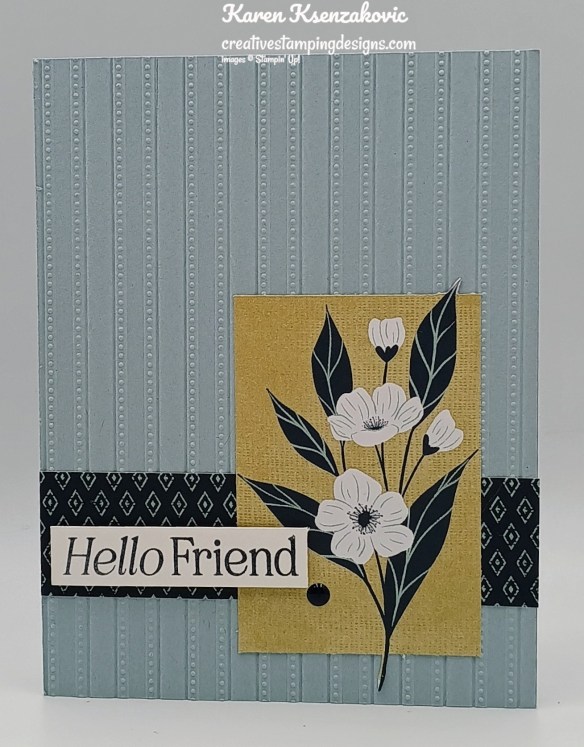
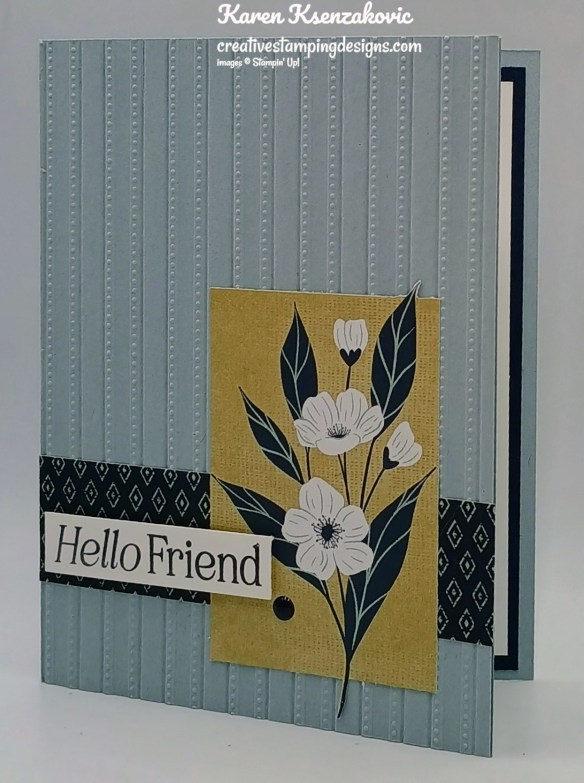
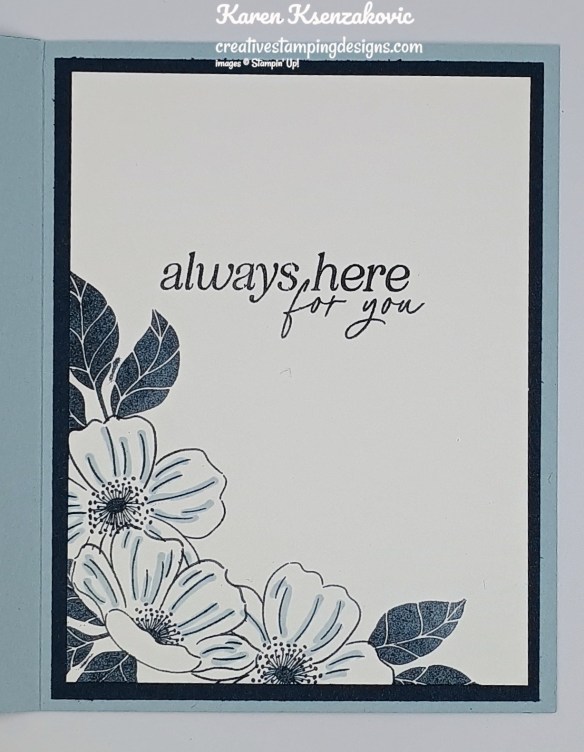
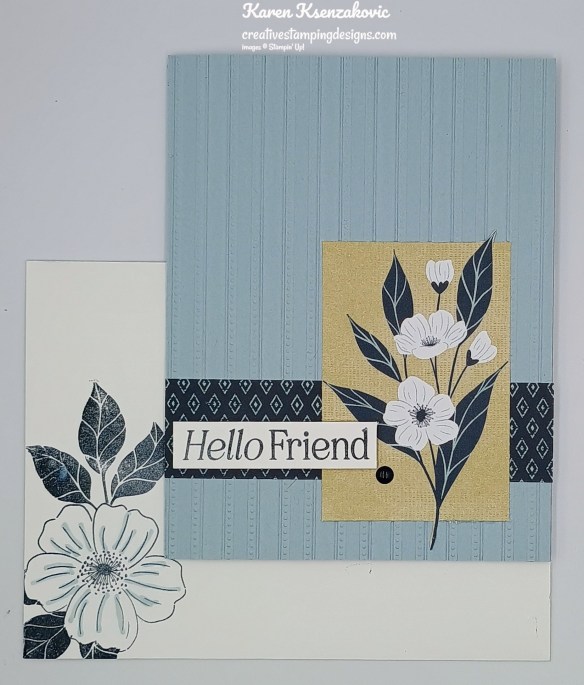
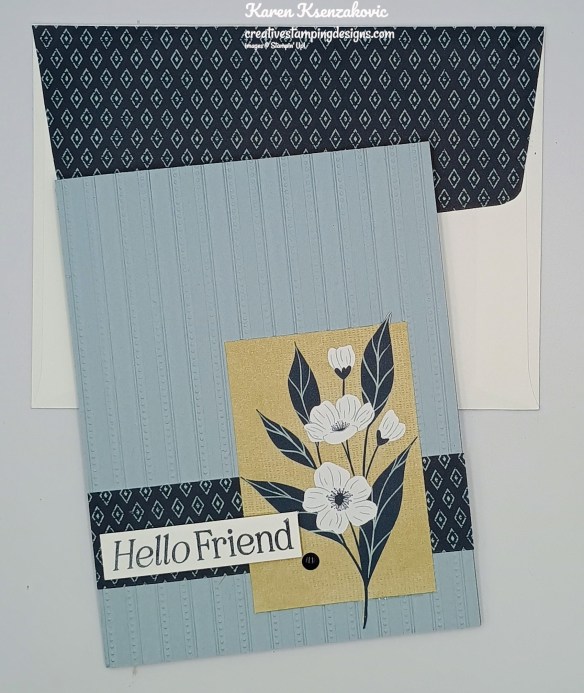
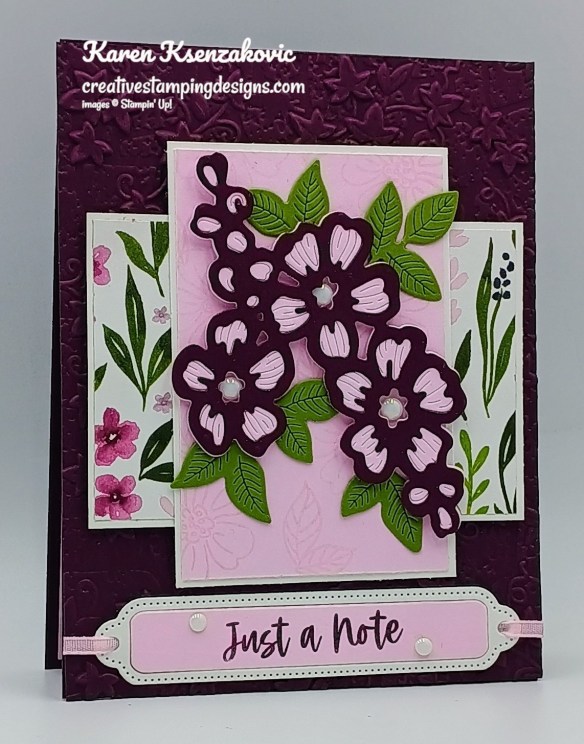
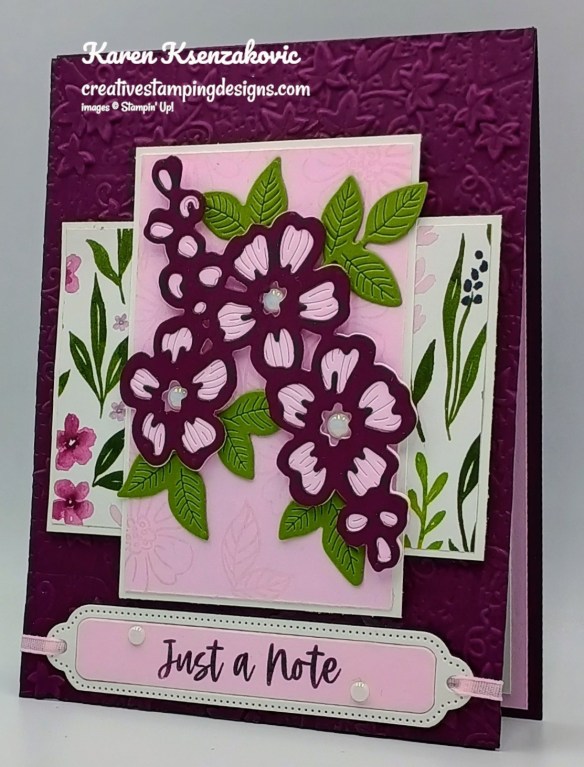
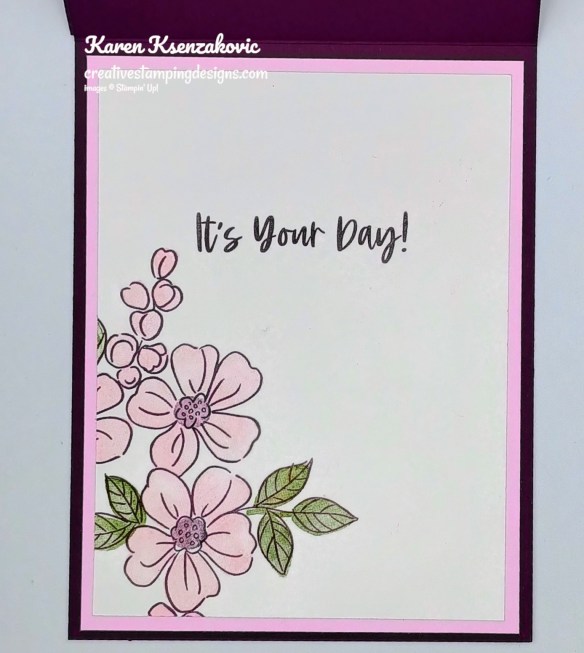
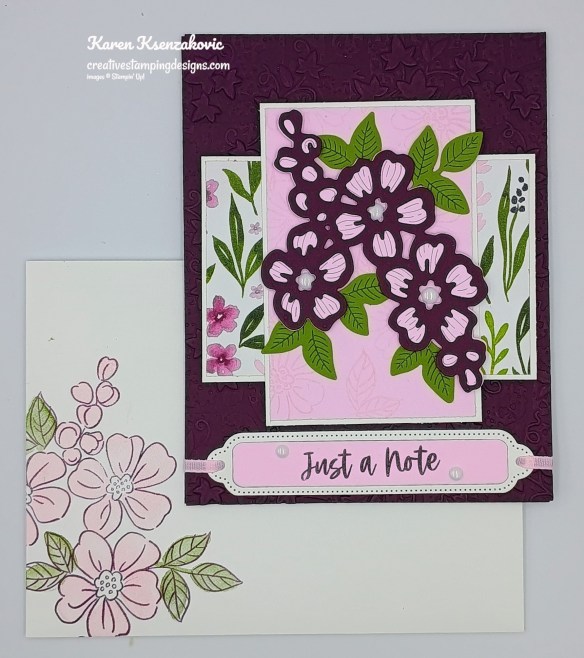
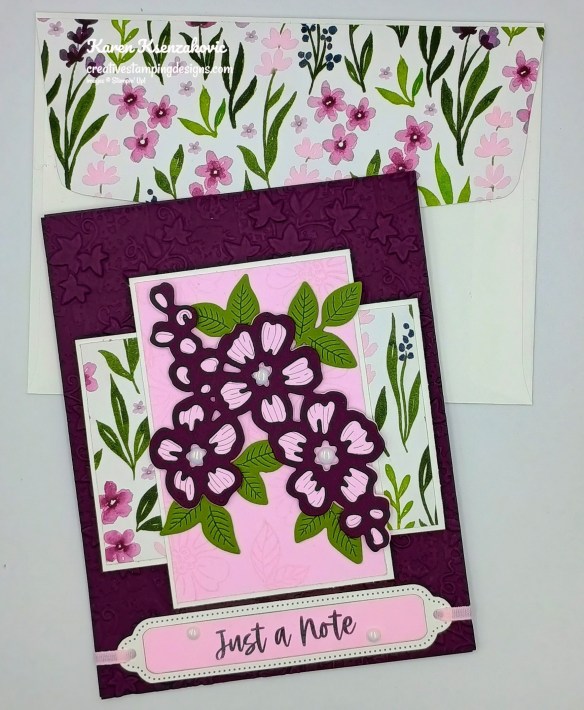
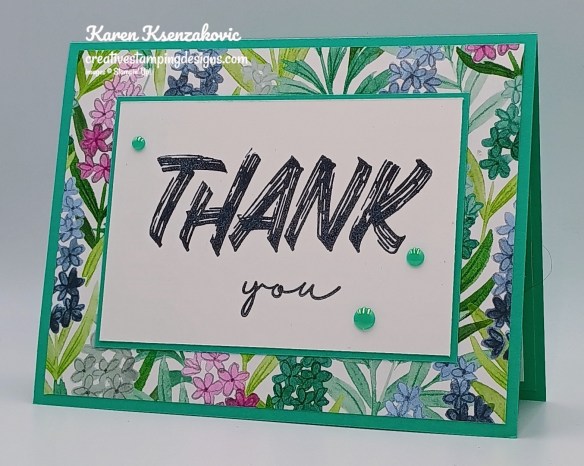
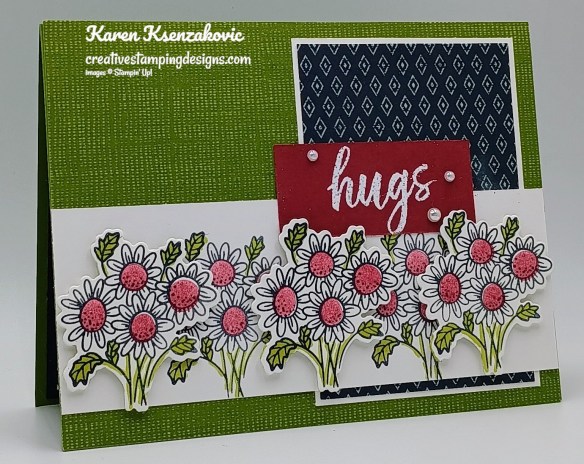
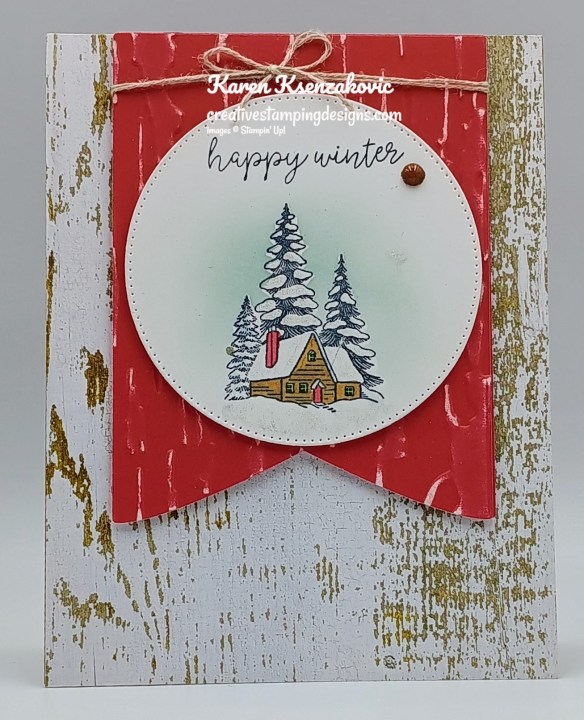
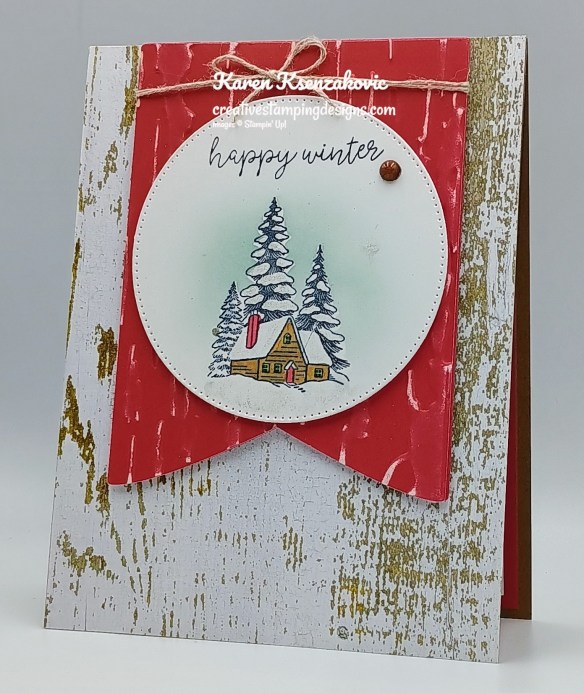
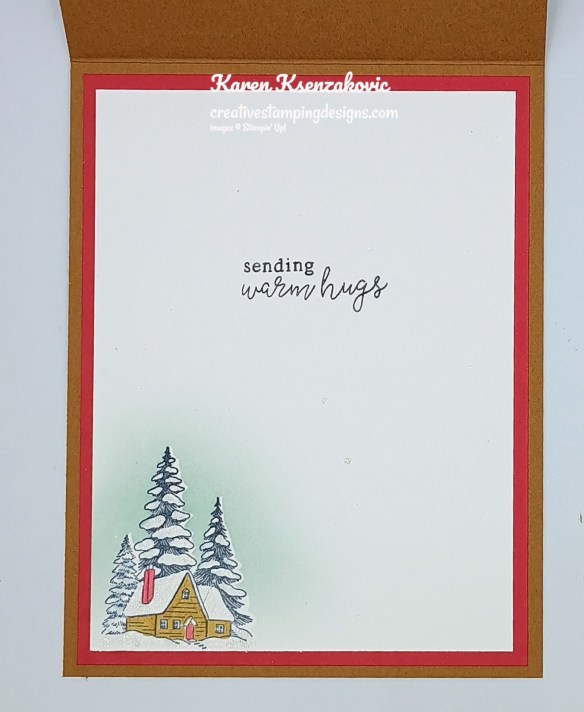
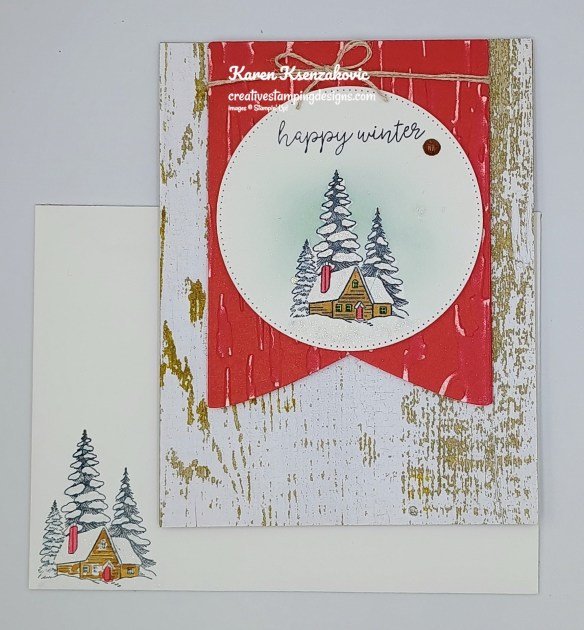
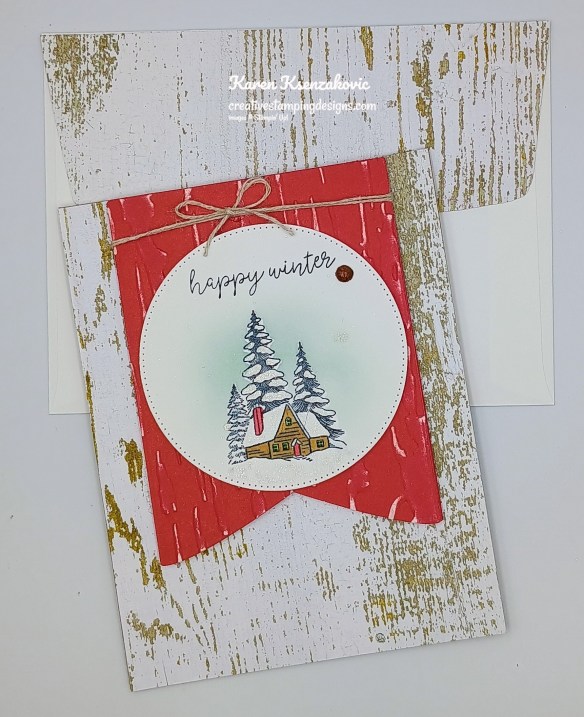
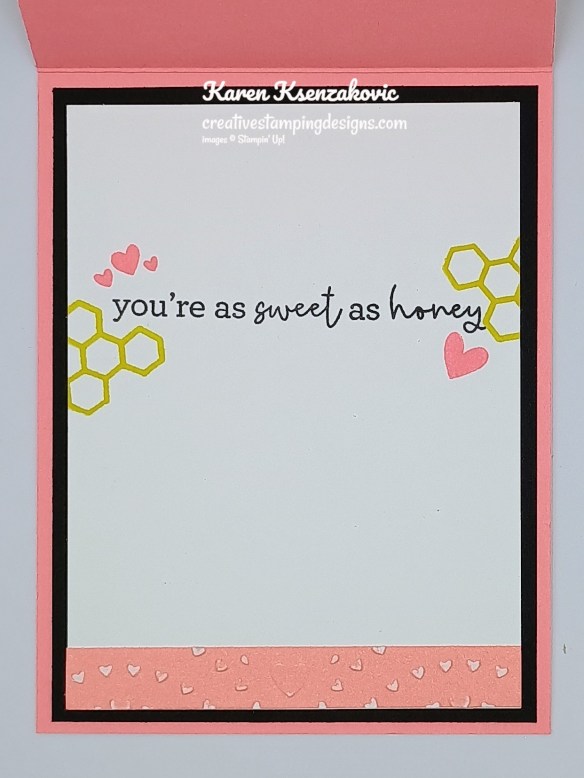
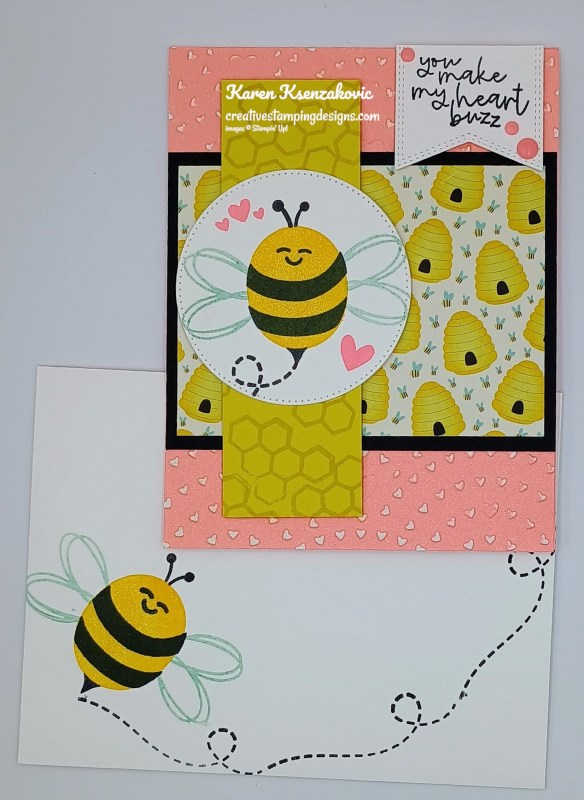
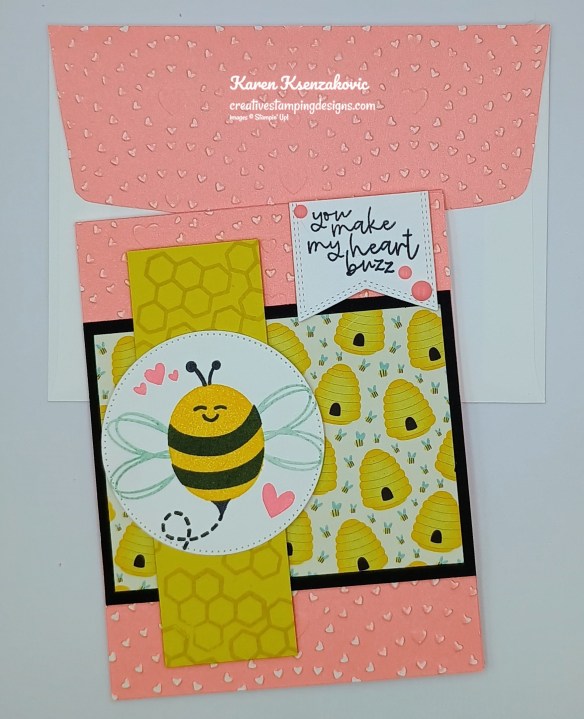
Hello stamping friends, this is my 2nd post today. If you are looking for my card, you can find it HERE.
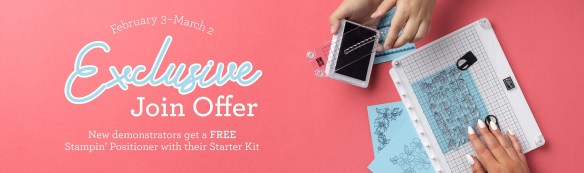
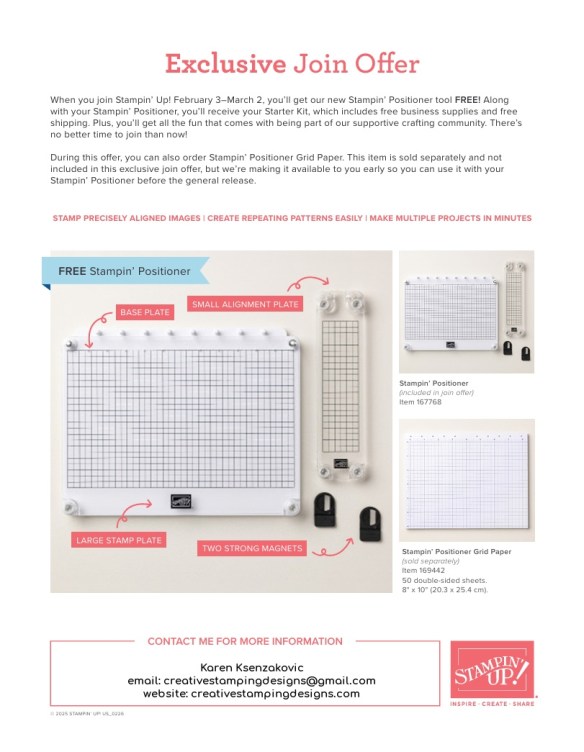
Stampin’ Up! just announced an amazing new tool that will be available for FREE with the purchase of a Starter Kit between February 2-March 3!! Anyone that purchases the Starter Kit during the promotion will get the awesome new Stampin’ Positioner with their Starter Kit absolutely FREE!!

Here are the Starter Kit promotion details:
- Promotion Period: February 3–March 2
- New team members who purchase their Starter Kit February 3–March 2 will also receive our new Stampin’ Positioner*.
- New demonstrators who submit their Independent Demonstrator Agreement (IDA) before February 3 or after March 2 will not be eligible for this offer.
- Joining deadline: March 2, 2026, at 11:59 p.m. (MT)
*What’s the Stampin’ Positioner?
It’s Stampin’ Up!’s new stamping alignment tool that makes stamping easier and more accurate. It allows you to stamp precisely aligned images, create repeating patterns and Two-Step Stampin’ images easily, and make multiple projects in minutes.
Stampin’ Positioner Grid Paper will also be available for to order but it is not included as part of this exclusive join offer.
A few other things to know:
- The Stampin’ Positioner WILL be available for purchase by everyone at a later date. We have not been given any details on when that will be.
- The Stampin’ Positioner is available for a limited time for current Demonstrators to purchase.
You can read more details about the joining offer on this PDF (click the image to open a full-size printable PDF):
We’d love to have you join our team!! Once you join, you get at least a 20% discount on all of your Stampin’ Up! purchases and you get to preorder from the upcoming catalogs and promotions!! There’s never an obligation to sell, you can join to enjoy the discount for yourself. Contact me if you have any questions and we can talk.
You can read a bit more information about the benefits of being a Demonstrator and a part of our team here. When you’re ready to join, you can get started here. Let me know if you have any questions.
*********************************************************************************************************
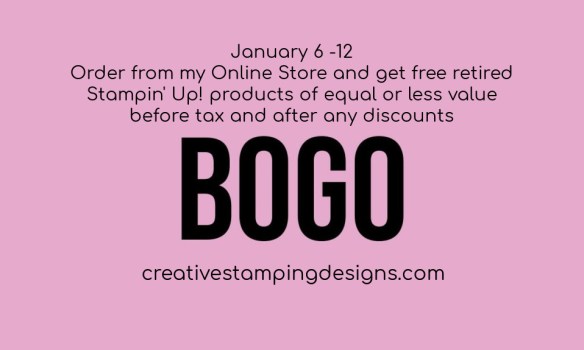
Bonus Days Going on! Earn Through February 2 and Redeem February 3-28!!

It’s almost time for BONUS DAYS! Because do you know what’s a great deal? Getting rewarded for all the crafting supplies you’re already going to buy! When you shop between January 6 and February 2 and spend $50 USD, you will earn a $5 USD coupon! Make sure you save all your coupons because you can redeem them (and we mean ALL of them) between February 3 and 28. And don’t forget—each purchase earns you Stampin’ Rewards, so that’s even more bang for your buck! There’s no limit to how many coupons you can earn!
Details:
- Earn a $5 USD coupon for every $50 USD spent (before shipping and tax).
- All coupon codes will be emailed right after a qualifying purchase has been made. You must have a customer account with a valid email address to earn coupons when you shop.
- If you earn multiple codes from a single order, you will receive one email with multiple codes. If you earn multiple codes from multiple orders, you will receive separate emails for each code earned.
- All order types qualify for this promotion.
- Orders started before the promotion begins will not count toward earning coupon codes. You must add items to your cart and complete your purchase during the earning period.
- There is no limit to the number of coupon codes participants can earn per order or throughout the duration of the earning period.
*********************************************************************************************************
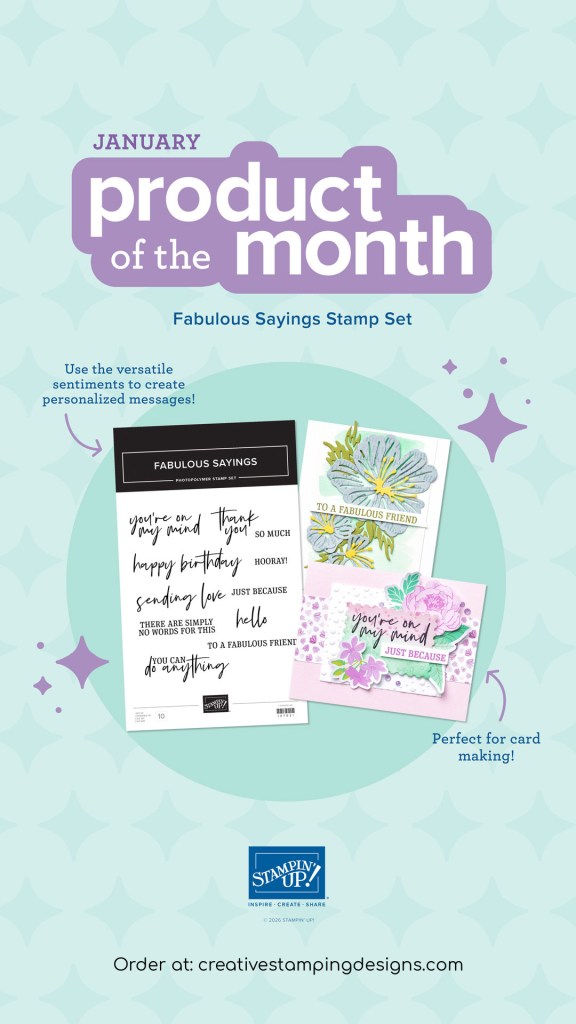
New Stampin’ Up! Product of The Month

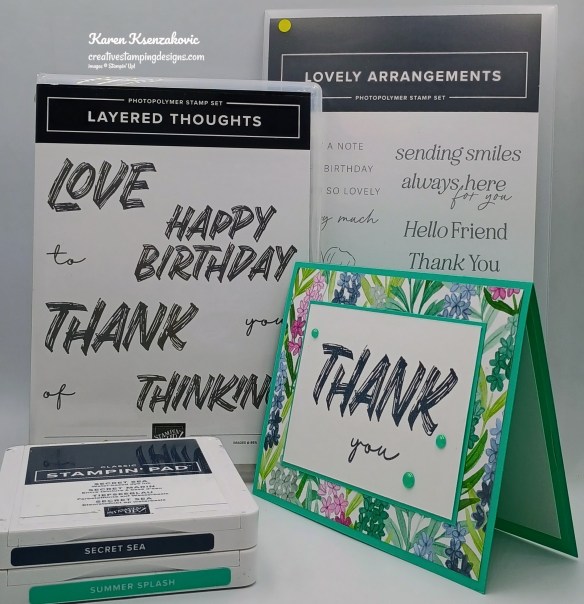
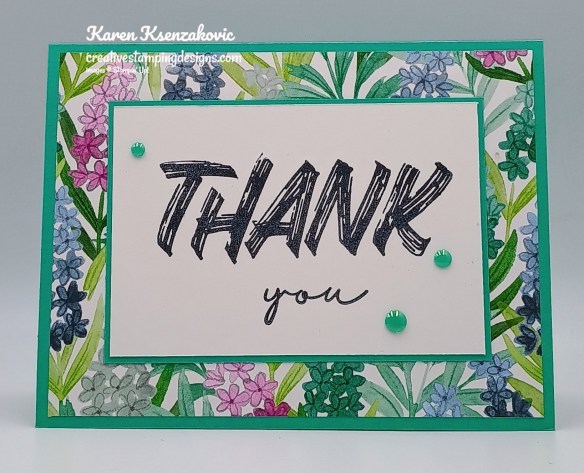
Send thoughtful messages with style using the Fabulous Sayings Stamp Set! This versatile stamp set features all-occasion sentiment stamps for birthdays, thank-you notes, love, friendship, and support cards. The mix of a handwritten script with a classic serif font pair beautifully with a wide range of card making and paper crafting styles. The Fabulous Sayings Stamp Set is the exclusive Product of the Month for January 2026! Only available until stocks run out—don’t wait to get yours! This is a Two-Step Stampin’ set; it allows you to layer two or more images to create one final image with extra texture and dimension in the colors you want.
DETAILS
– January 2026 Product of the Month
– 11 photopolymer stamps
– Suggested clear blocks (sold separately): c, h
– Two-Step
PRODUCT OF THE MONTH
– Is a new exclusive product released each month!
– Can be unlocked for just $5 with orders over $75 (after discounts and rewards).
– Is only available while supplies last—they can sell out quickly!
– Is limited to one per customer (including language versions).
*********************************************************************************************************
3 New Kits Available
Do you know someone who would like to get started making cards and projects, but doesn’t know where to start? The Kits Collections is the perfect place to start. Our kits are all inclusive and come with complete instructions. You can find all our kits in my Online Store Here. Just shop Kits Collection.
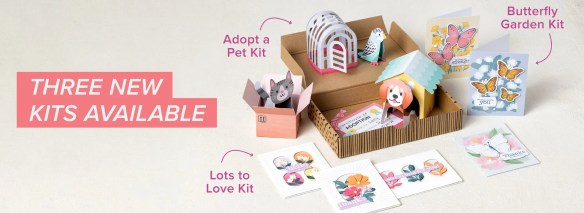
Kits Collections include designed projects that come in a range of project types. They are perfect for new crafters, busy crafters, or crafters who want quick and easy projects.
Lots To Love Kit

Design thoughtful cards without the fuss! The Lots to Love Kit has everything you need to craft sweet handmade cards enhanced with colorful accents and fun botanical touches. Each kit comes with printed card bases and envelopes, laser-cut card fronts, precut paper pieces and sentiments, and dot embellishments. Whether you’re saying thanks or just saying hello, this kit lets you create meaningful cards with ease.
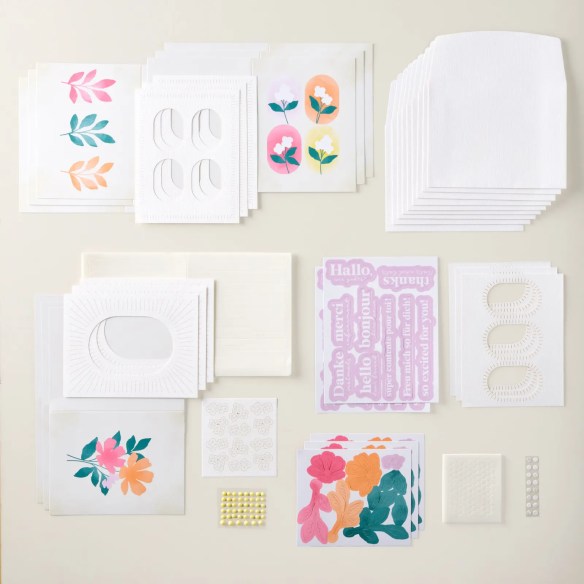
DETAILS
– Makes 9 cards: 3 each of 3 designs
– Folded card size: 5-1/2″ x 4-1/4″ (14 x 10.8 cm)
– Colors: Basic Beige, Darling Duckling, Fresh Freesia, Pretty Peacock, Strawberry Slush, Timid Tiger
– Sentiments printed in English, French, and German
Kit includes one of each item listed below.
– Step-by-step instructions
– 9 printed envelopes
– 9 printed card bases
– 9 laser-cut card fronts
– Precut paper pieces and sentiments
– Darling Duckling dot embellishments
– Adhesive
#167263
++++++++++++++++++++++++++++++++++++++++++++++++++++++++++++++++++++++
Butterfly Garden Kit

Create uplifting cards filled with messages of hope and support using the Butterfly Garden Kit. Featuring hand-illustrated butterflies and heartfelt sentiments, it’s perfect for sending encouragement to friends and loved ones. The kit includes everything you need to craft meaningful cards that truly brighten someone’s day.
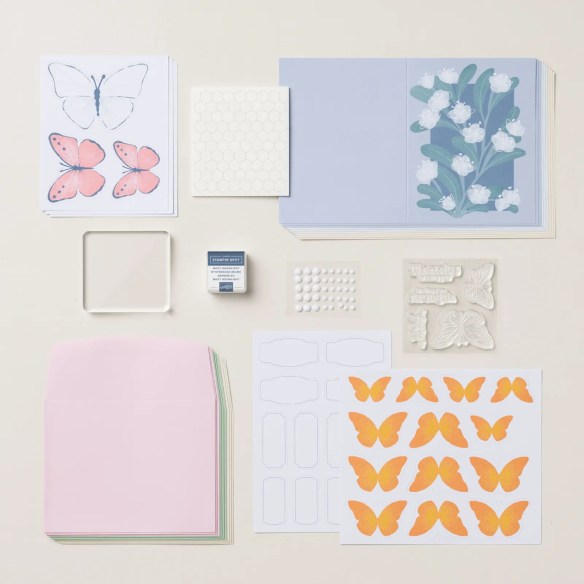
DETAILS
– Makes 9 cards: 3 each of 3 designs
– Folded card size: 5-1/2″ x 4-1/4″ (14 x 10.8 cm)
– Colors: Crushed Curry, Flirty Flamingo, Garden Green, Misty Moonlight, Pretty Peacock, Timid Tiger

Kit includes one of each item listed below.
– Butterfly Garden Photopolymer Stamp Set
– Clear stamp block
– Misty Moonlight Classic Stampin’ Spot
– Step-by-step instructions
– 9 printed envelopes
– 9 card bases
– Precut paper pieces
– White dot embellishments
– Adhesive
#167266
++++++++++++++++++++++++++++++++++++++++++++++++++++++++++++++++++++++
Adopt A Pet Kit
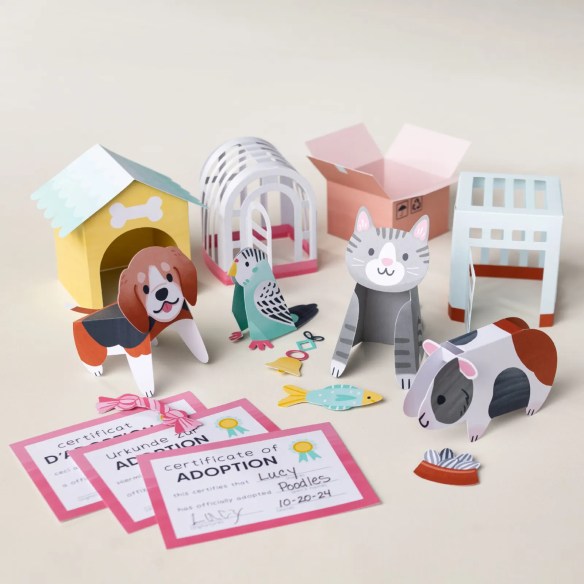
For the pet lover in your life, the Adopt a Pet Kit is a total tail-wagger. Build adorable homes, craft playful pets, and fill out your own certificate of adoption for a creative experience that’s full of heart. This kit is paws-itively perfect for celebrating every furry friend.

DETAILS
– Makes 4 projects: 1 each of 4 designs
– Largest box size: 4-3/8″ x 3-1/2″ x 4-1/2″
– Colors: Basic Gray, Cajun Craze, Coastal Cabana, Crushed Curry, Secret Sea, Strawberry Slush
– Sentiments printed in English, French, and German
Kit includes one of each item listed below.
– Step-by-step instructions
– 4 boxes to construct
#167256
*********************************************************************************************************
If you need any stamping supplies, I’d love to be your Demonstrator. Just click HERE to go directly to my online store or drop me an email if you have any questions.


![Sweet Jar Bundle (English) [ 165507 ]](https://assets1.tamsnetwork.com/images/EC042017NF/165507s.jpg "Sweet Jar Bundle (English) [ 165507 ]")
![Sweet Jar Photopolymer Stamp Set (English) [ 165501 ]](https://assets1.tamsnetwork.com/images/EC042017NF/165501s.jpg "Sweet Jar Photopolymer Stamp Set (English) [ 165501 ]")
![Sweet Jar Builder Punch [ 165506 ]](https://assets1.tamsnetwork.com/images/EC042017NF/165506s.jpg "Sweet Jar Builder Punch [ 165506 ]")
![Simply Said Mix & Match Photopolymer Stamp Set (English) [ 163756 ]](https://assets1.tamsnetwork.com/images/EC042017NF/163756s.jpg "Simply Said Mix & Match Photopolymer Stamp Set (English) [ 163756 ]")
![Basic Black 8-1/2" X 11" Cardstock [ 121045 ]](https://assets1.tamsnetwork.com/images/EC042017NF/121045s.jpg "Basic Black 8-1/2\" X 11\" Cardstock [ 121045 ]")
![Basic White 8 1/2" X 11" Cardstock [ 166780 ]](https://assets1.tamsnetwork.com/images/EC042017NF/166780s.jpg "Basic White 8 1/2\" X 11\" Cardstock [ 166780 ]")
![Real Red 12" X 12" (30.5 X 30.5 Cm) Two Tone Cardstock [ 166696 ]](https://assets1.tamsnetwork.com/images/EC042017NF/166696s.jpg "Real Red 12\" X 12\" (30.5 X 30.5 Cm) Two Tone Cardstock [ 166696 ]")
![Real Red Classic Stampin' Pad [ 147084 ]](https://assets1.tamsnetwork.com/images/EC042017NF/147084s.jpg "Real Red Classic Stampin' Pad [ 147084 ]")
![Smoky Slate Classic Stampin' Pad [ 147113 ]](https://assets1.tamsnetwork.com/images/EC042017NF/147113s.jpg "Smoky Slate Classic Stampin' Pad [ 147113 ]")
![Tuxedo Black Memento Ink Pad [ 132708 ]](https://assets1.tamsnetwork.com/images/EC042017NF/132708s.jpg "Tuxedo Black Memento Ink Pad [ 132708 ]")
![Hearts Of Love 3 D Embossing Folder [ 167071 ]](https://assets1.tamsnetwork.com/images/EC042017NF/167071s.jpg "Hearts Of Love 3 D Embossing Folder [ 167071 ]")
![Perennial Postage Dies [ 162607 ]](https://assets1.tamsnetwork.com/images/EC042017NF/162607s.jpg "Perennial Postage Dies [ 162607 ]")
![Stylish Shapes Dies [ 159183 ]](https://assets1.tamsnetwork.com/images/EC042017NF/159183s.jpg "Stylish Shapes Dies [ 159183 ]")
![Holographic Resin Dots [ 165598 ]](https://assets1.tamsnetwork.com/images/EC042017NF/165598s.jpg "Holographic Resin Dots [ 165598 ]")
![Basic White Medium Envelopes [ 159236 ]](https://assets1.tamsnetwork.com/images/EC042017NF/159236s.jpg "Basic White Medium Envelopes [ 159236 ]")


![Tear & Tape Adhesive [ 154031 ]](https://assets1.tamsnetwork.com/images/EC042017NF/154031s.jpg "Tear & Tape Adhesive [ 154031 ]")

![Take Your Pick [ 144107 ]](https://assets1.tamsnetwork.com/images/EC042017NF/144107s.jpg "Take Your Pick [ 144107 ]")


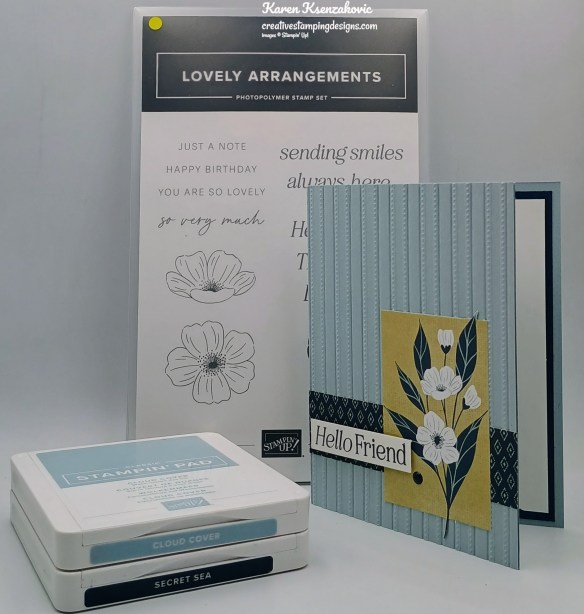

![Lovely Arrangements Photopolymer Stamp Set (English) [ 167169 ]](https://assets1.tamsnetwork.com/images/EC042017NF/167169s.jpg "Lovely Arrangements Photopolymer Stamp Set (English) [ 167169 ]")
![Cloud Cover 8 1/2" X 11" Cardstock [ 165621 ]](https://assets1.tamsnetwork.com/images/EC042017NF/165621s.jpg "Cloud Cover 8 1/2\" X 11\" Cardstock [ 165621 ]")
![Secret Sea 8 1/2" X 11" Cardstock [ 165624 ]](https://assets1.tamsnetwork.com/images/EC042017NF/165624s.jpg "Secret Sea 8 1/2\" X 11\" Cardstock [ 165624 ]")
![Lovely Blossoms 12" X 12" (30.5 X 30.5 Cm) Designer Series Paper [ 167168 ]](https://assets1.tamsnetwork.com/images/EC042017NF/167168s.jpg "Lovely Blossoms 12\" X 12\" (30.5 X 30.5 Cm) Designer Series Paper [ 167168 ]")
![Secret Sea Classic Stampin' Pad [ 165285 ]](https://assets1.tamsnetwork.com/images/EC042017NF/165285s.jpg "Secret Sea Classic Stampin' Pad [ 165285 ]")
![Lovely Stripes 3 D Embossing Folder [ 167179 ]](https://assets1.tamsnetwork.com/images/EC042017NF/167179s.jpg "Lovely Stripes 3 D Embossing Folder [ 167179 ]")
![Moody Palette Glossy Dots [ 167180 ]](https://assets1.tamsnetwork.com/images/EC042017NF/167180s.jpg "Moody Palette Glossy Dots [ 167180 ]")

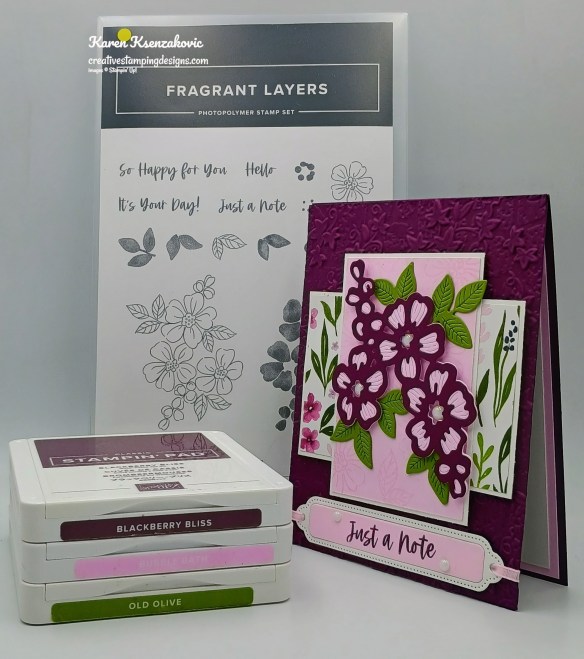
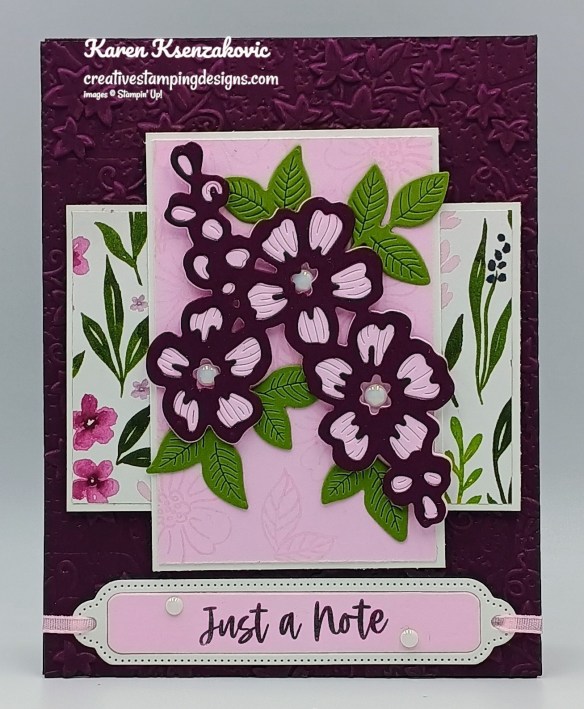
![Fragrant Layers Bundle (English) [ 167155 ]](https://assets1.tamsnetwork.com/images/EC042017NF/167155s.jpg "Fragrant Layers Bundle (English) [ 167155 ]")
![Fragrant Layers Photopolymer Stamp Set (English) [ 167150 ]](https://assets1.tamsnetwork.com/images/EC042017NF/167150s.jpg "Fragrant Layers Photopolymer Stamp Set (English) [ 167150 ]")
![Fragrant Layers Dies [ 167154 ]](https://assets1.tamsnetwork.com/images/EC042017NF/167154s.jpg "Fragrant Layers Dies [ 167154 ]")
![Blackberry Bliss 8-1/2" X 11" Cardstock [ 133675 ]](https://assets1.tamsnetwork.com/images/EC042017NF/133675s.jpg "Blackberry Bliss 8-1/2\" X 11\" Cardstock [ 133675 ]")
![Bubble Bath 8 1/2" X 11" Cardstock [ 161718 ]](https://assets1.tamsnetwork.com/images/EC042017NF/161718s.jpg "Bubble Bath 8 1/2\" X 11\" Cardstock [ 161718 ]")
![Old Olive 8-1/2" X 11" Cardstock [ 100702 ]](https://assets1.tamsnetwork.com/images/EC042017NF/100702s.jpg "Old Olive 8-1/2\" X 11\" Cardstock [ 100702 ]")
![Celebratory Sips 12" X 12" (30.5 X 30.5 Cm) Designer Series Paper [ 165586 ]](https://assets1.tamsnetwork.com/images/EC042017NF/165586s.jpg "Celebratory Sips 12\" X 12\" (30.5 X 30.5 Cm) Designer Series Paper [ 165586 ]")
![Blackberry Bliss Classic Stampin' Pad [ 147092 ]](https://assets1.tamsnetwork.com/images/EC042017NF/147092s.jpg "Blackberry Bliss Classic Stampin' Pad [ 147092 ]")
![Bubble Bath Classic Stampin' Pad [ 161664 ]](https://assets1.tamsnetwork.com/images/EC042017NF/161664s.jpg "Bubble Bath Classic Stampin' Pad [ 161664 ]")
![Old Olive Classic Stampin' Pad [ 147090 ]](https://assets1.tamsnetwork.com/images/EC042017NF/147090s.jpg "Old Olive Classic Stampin' Pad [ 147090 ]")
![Stone & Vine 3 D Embossing Folder [ 166990 ]](https://assets1.tamsnetwork.com/images/EC042017NF/166990s.jpg "Stone & Vine 3 D Embossing Folder [ 166990 ]")
![Bubble Bath 1/8" (3.2 Mm) Faux Linen Ribbon [ 167075 ]](https://assets1.tamsnetwork.com/images/EC042017NF/167075s.jpg "Bubble Bath 1/8\" (3.2 Mm) Faux Linen Ribbon [ 167075 ]")
![Pearls Of Beauty [ 167098 ]](https://assets1.tamsnetwork.com/images/EC042017NF/167098s.jpg "Pearls Of Beauty [ 167098 ]")


![Layered Thoughts Photopolymer Stamp Set (English) [ 169093 ]](https://assets1.tamsnetwork.com/images/EC042017NF/169093s.jpg "Layered Thoughts Photopolymer Stamp Set (English) [ 169093 ]")
![Summer Splash 8 1/2" X 11 Cardstock [ 163797 ]](https://assets1.tamsnetwork.com/images/EC042017NF/163797s.jpg "Summer Splash 8 1/2\" X 11 Cardstock [ 163797 ]")
![Florals In Bloom 12" X 12" (30.5 X 30.5 Cm) Designer Series Paper [ 165175 ]](https://assets1.tamsnetwork.com/images/EC042017NF/165175s.jpg "Florals In Bloom 12\" X 12\" (30.5 X 30.5 Cm) Designer Series Paper [ 165175 ]")
![2024 2026 In Color™ Flat Pearls [ 165266 ]](https://assets1.tamsnetwork.com/images/EC042017NF/165266s.jpg "2024 2026 In Color™ Flat Pearls [ 165266 ]")

![Delicate Framing Bundle (English) [ 167309 ]](https://assets1.tamsnetwork.com/images/EC042017NF/167309s.jpg "Delicate Framing Bundle (English) [ 167309 ]")
![Delicate Framing Photopolymer Stamp Set (English) [ 167024 ]](https://assets1.tamsnetwork.com/images/EC042017NF/167024s.jpg "Delicate Framing Photopolymer Stamp Set (English) [ 167024 ]")
![Delicate Framing Dies [ 167026 ]](https://assets1.tamsnetwork.com/images/EC042017NF/167026s.jpg "Delicate Framing Dies [ 167026 ]")
![Basic White 8 1/2" X 11" Thick Cardstock [ 159229 ]](https://assets1.tamsnetwork.com/images/EC042017NF/159229s.jpg "Basic White 8 1/2\" X 11\" Thick Cardstock [ 159229 ]")
![Petal Pink 8-1/2" X 11" Cardstock [ 146985 ]](https://assets1.tamsnetwork.com/images/EC042017NF/146985s.jpg "Petal Pink 8-1/2\" X 11\" Cardstock [ 146985 ]")
![Petal Pink Classic Stampin' Pad [ 147108 ]](https://assets1.tamsnetwork.com/images/EC042017NF/147108s.jpg "Petal Pink Classic Stampin' Pad [ 147108 ]")
![Small Blending Brushes [ 160518 ]](https://assets1.tamsnetwork.com/images/EC042017NF/160518s.jpg "Small Blending Brushes [ 160518 ]")
![Cloud Cover 5/8" (1.6 Cm) Textured Ribbon [ 167182 ]](https://assets1.tamsnetwork.com/images/EC042017NF/167182s.jpg "Cloud Cover 5/8\" (1.6 Cm) Textured Ribbon [ 167182 ]")


![Pop Up Petals Bundle (English) [ 168010 ]](https://assets1.tamsnetwork.com/images/EC042017NF/168010s.jpg "Pop Up Petals Bundle (English) [ 168010 ]")
![Pop Up Petals Photopolymer Stamp Set (English) [ 167041 ]](https://assets1.tamsnetwork.com/images/EC042017NF/167041s.jpg "Pop Up Petals Photopolymer Stamp Set (English) [ 167041 ]")
![Pop Up Petals Dies [ 167043 ]](https://assets1.tamsnetwork.com/images/EC042017NF/167043s.jpg "Pop Up Petals Dies [ 167043 ]")
![Greenery Lane Photopolymer Stamp Set (English) [ 166870 ]](https://assets1.tamsnetwork.com/images/EC042017NF/166870s.jpg "Greenery Lane Photopolymer Stamp Set (English) [ 166870 ]")
![Cherry Cobbler 8-1/2" X 11" Cardstock [ 119685 ]](https://assets1.tamsnetwork.com/images/EC042017NF/119685s.jpg "Cherry Cobbler 8-1/2\" X 11\" Cardstock [ 119685 ]")
![Cherry Cobbler Classic Stampin' Pad [ 147083 ]](https://assets1.tamsnetwork.com/images/EC042017NF/147083s.jpg "Cherry Cobbler Classic Stampin' Pad [ 147083 ]")
![Versamark Pad [ 102283 ]](https://assets1.tamsnetwork.com/images/EC042017NF/102283s.jpg "Versamark Pad [ 102283 ]")
![Basics Wow! Embossing Powder [ 165679 ]](https://assets1.tamsnetwork.com/images/EC042017NF/165679s.jpg "Basics Wow! Embossing Powder [ 165679 ]")
![Heat Tool (Us And Canada) [ 129053 ]](https://assets1.tamsnetwork.com/images/EC042017NF/129053s.jpg "Heat Tool (Us And Canada) [ 129053 ]")
![Old Olive Stampin' Blends Combo Pack [ 154892 ]](https://assets1.tamsnetwork.com/images/EC042017NF/154892s.jpg "Old Olive Stampin' Blends Combo Pack [ 154892 ]")
![Iridescent Pearl Basic Jewels [ 158987 ]](https://assets1.tamsnetwork.com/images/EC042017NF/158987s.jpg "Iridescent Pearl Basic Jewels [ 158987 ]")


![Winter Scenes Cling Stamp Set (English) [ 166088 ]](https://assets1.tamsnetwork.com/images/EC042017NF/166088s.jpg "Winter Scenes Cling Stamp Set (English) [ 166088 ]")
![Snowflake Kisses Photopolymer Stamp Set (English) [ 166018 ]](https://assets1.tamsnetwork.com/images/EC042017NF/166018s.jpg "Snowflake Kisses Photopolymer Stamp Set (English) [ 166018 ]")
![Pecan Pie 8 1/2" X 11" Cardstock [ 161717 ]](https://assets1.tamsnetwork.com/images/EC042017NF/161717s.jpg "Pecan Pie 8 1/2\" X 11\" Cardstock [ 161717 ]")
![Real Red 8-1/2" X 11" Cardstock [ 102482 ]](https://assets1.tamsnetwork.com/images/EC042017NF/102482s.jpg "Real Red 8-1/2\" X 11\" Cardstock [ 102482 ]")
![Country Woods 12" X 12" (30.5 X 30.5 Cm) Designer Series Paper [ 163393 ]](https://assets1.tamsnetwork.com/images/EC042017NF/163393s.jpg "Country Woods 12\" X 12\" (30.5 X 30.5 Cm) Designer Series Paper [ 163393 ]")
![Pool Party Classic Stampin' Pad [ 147107 ]](https://assets1.tamsnetwork.com/images/EC042017NF/147107s.jpg "Pool Party Classic Stampin' Pad [ 147107 ]")
![Pecan Pie Stampin’ Blends Combo Pack [ 161674 ]](https://assets1.tamsnetwork.com/images/EC042017NF/161674s.jpg "Pecan Pie Stampin’ Blends Combo Pack [ 161674 ]")
![Real Red Stampin' Blends Combo Pack [ 154899 ]](https://assets1.tamsnetwork.com/images/EC042017NF/154899s.jpg "Real Red Stampin' Blends Combo Pack [ 154899 ]")
![Clear Wink Of Stella Glitter Brush [ 141897 ]](https://assets1.tamsnetwork.com/images/EC042017NF/141897s.jpg "Clear Wink Of Stella Glitter Brush [ 141897 ]")
![Birch Wood 3 D Embossing Folder [ 164069 ]](https://assets1.tamsnetwork.com/images/EC042017NF/164069s.jpg "Birch Wood 3 D Embossing Folder [ 164069 ]")
![Party Banners Dies [ 165264 ]](https://assets1.tamsnetwork.com/images/EC042017NF/165264s.jpg "Party Banners Dies [ 165264 ]")
![Linen Thread [ 104199 ]](https://assets1.tamsnetwork.com/images/EC042017NF/104199s.jpg "Linen Thread [ 104199 ]")
![Streaked Dots [ 165902 ]](https://assets1.tamsnetwork.com/images/EC042017NF/165902s.jpg "Streaked Dots [ 165902 ]")


![Bee My Valentine Photopolymer Stamp Set (English) [ 162547 ]](https://assets1.tamsnetwork.com/images/EC042017NF/162547s.jpg "Bee My Valentine Photopolymer Stamp Set (English) [ 162547 ]")
![Darling Duckling 8 1/2" X 11" Cardstock [ 165622 ]](https://assets1.tamsnetwork.com/images/EC042017NF/165622s.jpg "Darling Duckling 8 1/2\" X 11\" Cardstock [ 165622 ]")
![Flirty Flamingo 8-1/2" X 11" Cardstock [ 141416 ]](https://assets1.tamsnetwork.com/images/EC042017NF/141416s.jpg "Flirty Flamingo 8-1/2\" X 11\" Cardstock [ 141416 ]")
![Flirty Flamingo 12" X 12" (30.5 X 30.5 Cm) Two Tone Cardstock [ 166667 ]](https://assets1.tamsnetwork.com/images/EC042017NF/166667s.jpg "Flirty Flamingo 12\" X 12\" (30.5 X 30.5 Cm) Two Tone Cardstock [ 166667 ]")
![Turtle Y Cute 12" X 12" (30.5 X 30.5 Cm) Designer Series Paper [ 165221 ]](https://assets1.tamsnetwork.com/images/EC042017NF/165221s.jpg "Turtle Y Cute 12\" X 12\" (30.5 X 30.5 Cm) Designer Series Paper [ 165221 ]")
![Daffodil Delight Classic Stampin' Pad [ 147094 ]](https://assets1.tamsnetwork.com/images/EC042017NF/147094s.jpg "Daffodil Delight Classic Stampin' Pad [ 147094 ]")
![Darling Duckling Classic Stampin' Pad [ 165277 ]](https://assets1.tamsnetwork.com/images/EC042017NF/165277s.jpg "Darling Duckling Classic Stampin' Pad [ 165277 ]")
![Flirty Flamingo Classic Stampin' Pad [ 147052 ]](https://assets1.tamsnetwork.com/images/EC042017NF/147052s.jpg "Flirty Flamingo Classic Stampin' Pad [ 147052 ]")
![Nested Essentials Dies [ 161597 ]](https://assets1.tamsnetwork.com/images/EC042017NF/161597s.jpg "Nested Essentials Dies [ 161597 ]")
![Rainbow Adhesive Backed Dots [ 162758 ]](https://assets1.tamsnetwork.com/images/EC042017NF/162758s.jpg "Rainbow Adhesive Backed Dots [ 162758 ]")