Good Friday morning my stamping friends and welcome to my Fun Fold Friday. How was everyone’s week? Does anyone have plans for the weekend? I hope that anyone that’s a Mother can find some special time for yourself, maybe do some stamping. I’ll be at work all day tomorrow and most likely on Sunday too.
Today’s card I made on my Facebook Live video on Wednesday. If you were able to join me or watched the replay, thank you. If you’d like to watch my video and stamp along, the measurements are below along with the links to my Facebook page and my YouTube channel. Here’s my card for today.
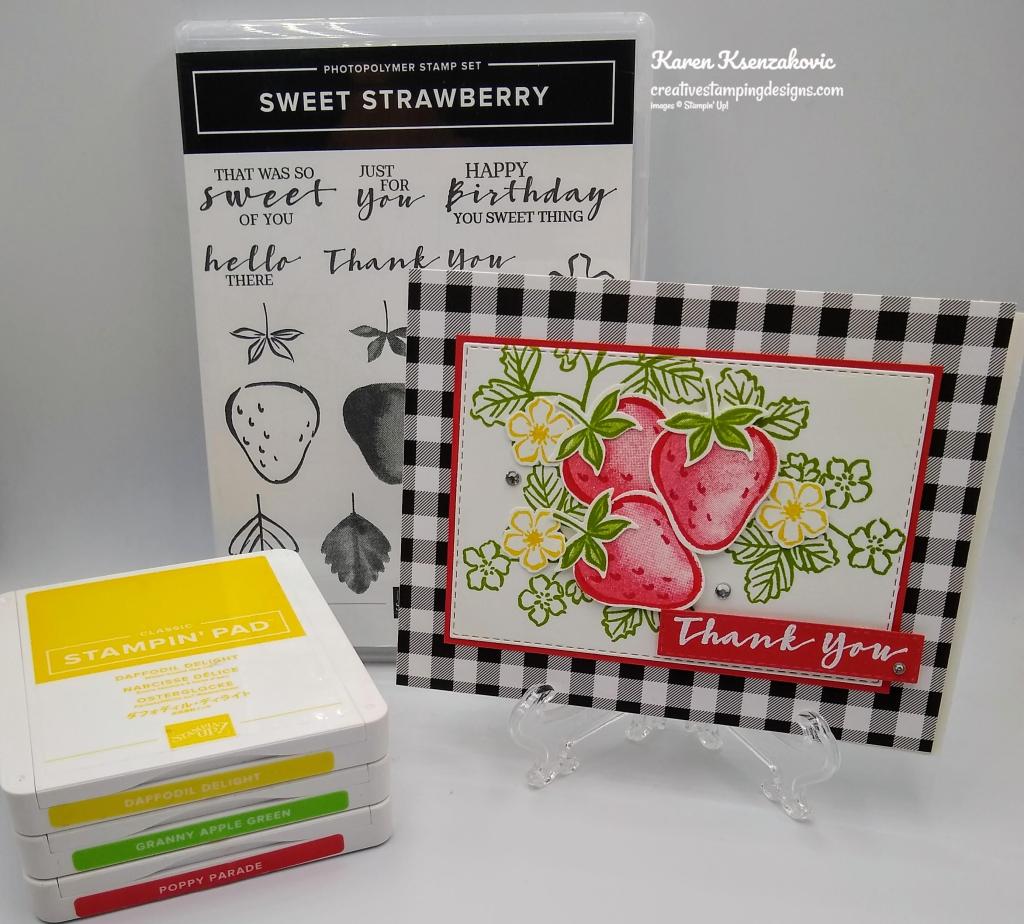
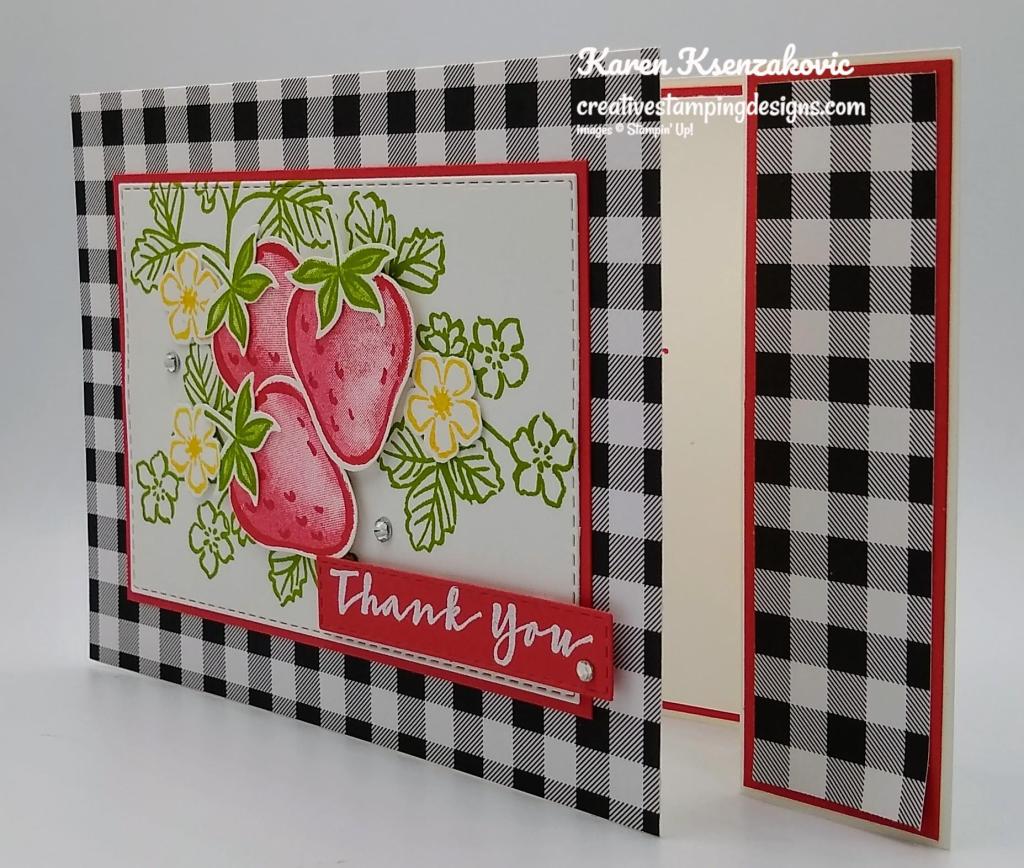
I used the Stampin’ Up! Sweet Strawberry Bundle for my fun fold card today. Unfortunately the Strawberry Builder Punch is not orderable right now, but hopefully it’ll be back by the end of the month. I also used the Pattern Party Host Designer Series Paper that is only available to Hosts or if you place an order of $150 or more and use your Stampin’ Rewards to purchase it. This is such an awesome pack of DSP with 48 sheets of colored designs on one side and black & white prints on the other. I’d be happy to help you earn this beautiful pack of DSP. Drop me an email at creativestampingdesigns@gmail.com if you are interested in learning how.
I started with the card front. I cut a panel of Basic White cardstock using the 3rd largest Stitched Rectangle Dies. I stamped the stem & leaf image from the Stampin’ Up! Sweet Strawberry Photopolymer Stamp Set in Granny Apple Green Ink 3 times on the panel. On a panel of Basic White cardstock, I stamped the outline strawberry image from the Sweet Strawberry stamp set 3 times in Poppy Parade Ink. I stamped the strawberry fill image over the outline image in Poppy Parade Ink, stamping off once. I stamped the outline strawberry top image in Granny Apple Green Ink 3 times on the panel of Basic White cardstock. I stamped the strawberry top fill image on top of the outlined image in Granny Apple Green Ink, stamping off once. I stamped the smallest flower image from the Sweet Strawberry stamp set 3 times on a panel of Basic White cardstock in Daffodil Delight Ink. I punched all the images out using my Strawberry Builder Punch.
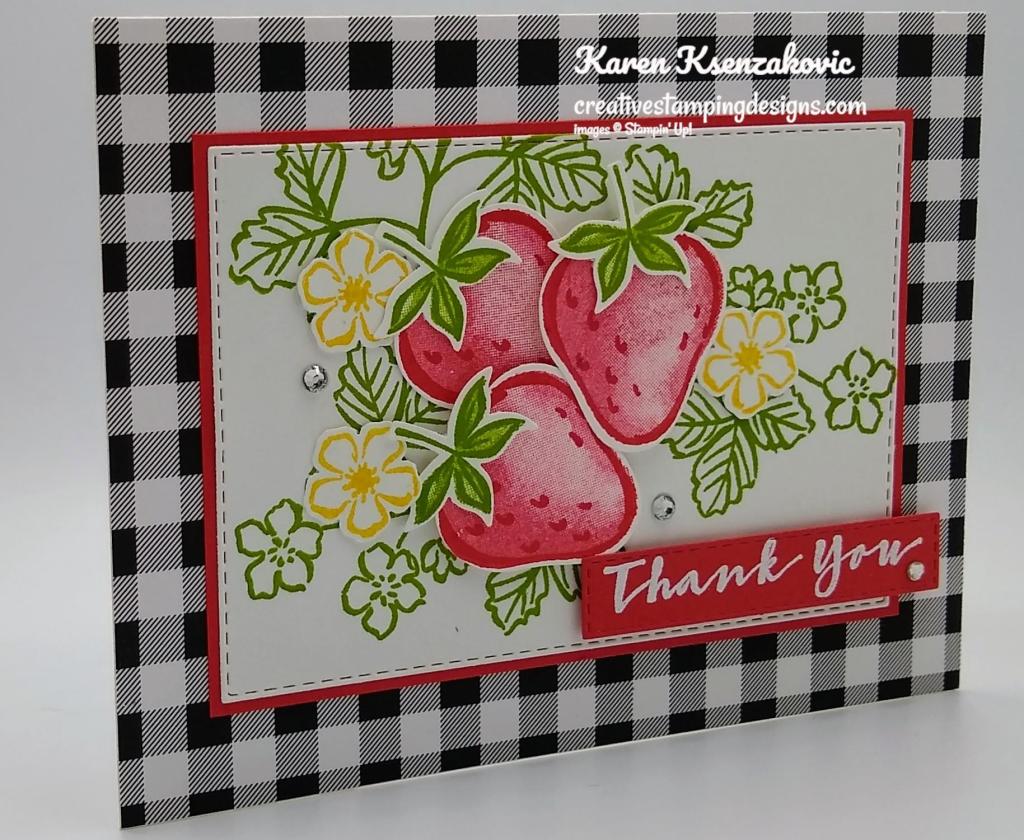
I adhered the strawberry tops to the strawberries using Glue Dots. I adhered the bottom strawberry to the Basic White panel using Multipurpose Liquid Glue and the other 2 strawberries using Stampin’ Dimensionals. I adhered the flowers to the panel using Glue Dots. I adhered the artwork to a Poppy Parade mat using Stampin’ Seal. On a strip of Poppy Parade cardstock I stamped the sentiment from the Sweet Strawberry stamp set in Versamark Ink. I immediately sprinkled it with my White Embossing Powder and set it using my Heat Tool. I cut the sentiment out using the smallest narrow Stitched Rectangle Dies. I adhered the sentiment to the artwork using Stampin’ Dimensionals.
I adhered a panel of the Pattern Party Host DSP to a Basic White card front using Multipurpose Liquid Glue. I adhered the matted artwork to the card front using Stampin’ Dimensionals. I added a few Rhinestone Basic Jewels to the card front.

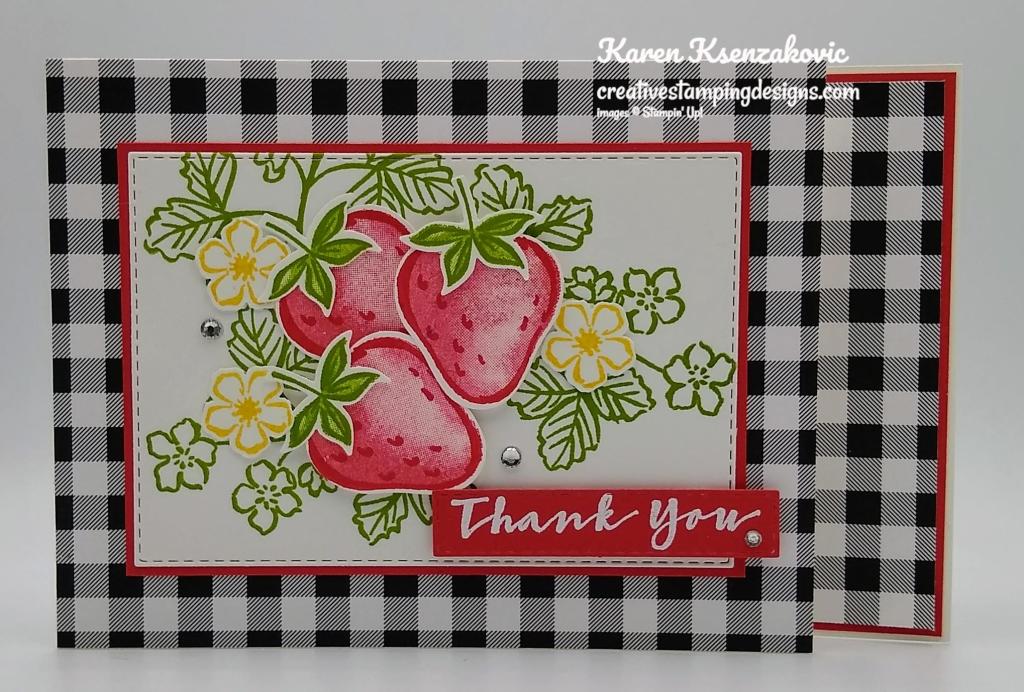
For the card base I scored a panel of Thick Basic White cardstock at 1 3/8″ & 2 3/4″. I turned the cardstock around and scored the other end at 1 3/8″ & 2 3/4″ to make small ‘Z’ folds on either side of the card base. I adhered a panel of the Pattern Party DSP to a Poppy Parade mat using Stampin’ Seal and then to the right edge of the card base using Multipurpose Liquid Glue. I adhered the card front to the left edge of the card base using Multipurpose Liquid Glue.
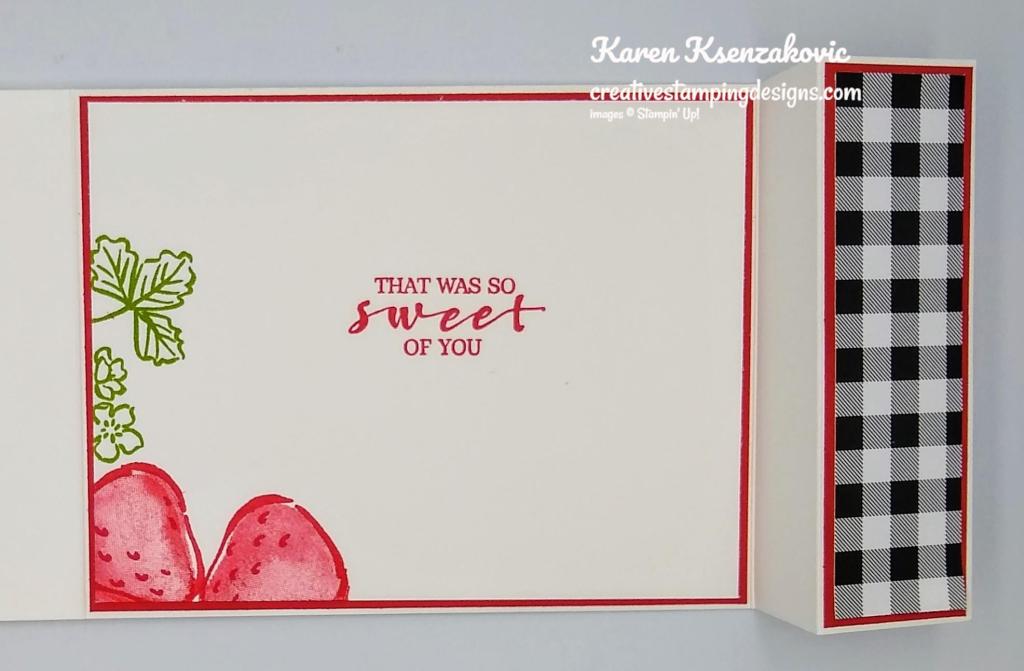
On the inside I stamped the sentiment from the Sweet Strawberry stamp set in Poppy Parade Ink in the center of a Basic White panel. I stamped the outline strawberry image from the Sweet Strawberry stamp set in Poppy Parade Ink twice on the bottom of the panel. I stamped the strawberry fill image over the outline image in Poppy Parade Ink, stamping off once. I stamped the stem and leaves image from the Sweet Strawberry stamp set in Granny Apple Green Ink on the side of the panel. I adhered the Basic White panel to a Poppy Parade mat using Stampin’ Seal and then to the inside of the card base using Multipurpose Liquid Glue.
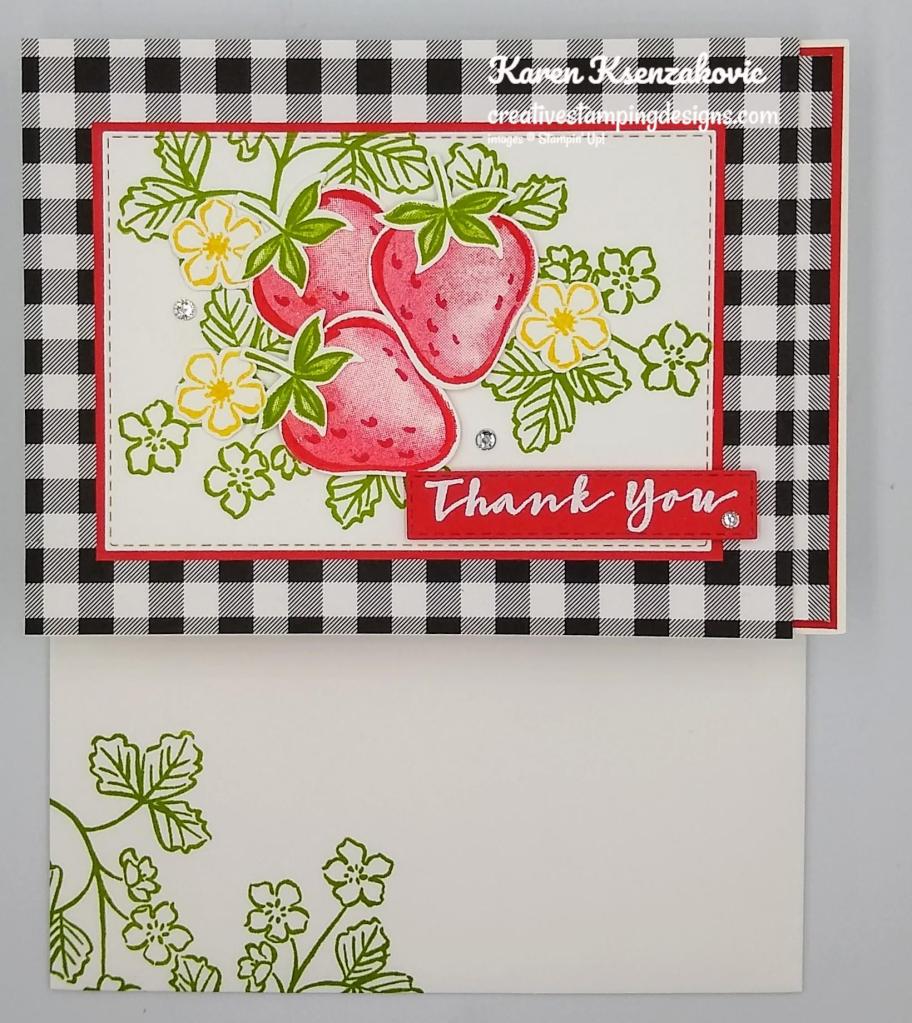
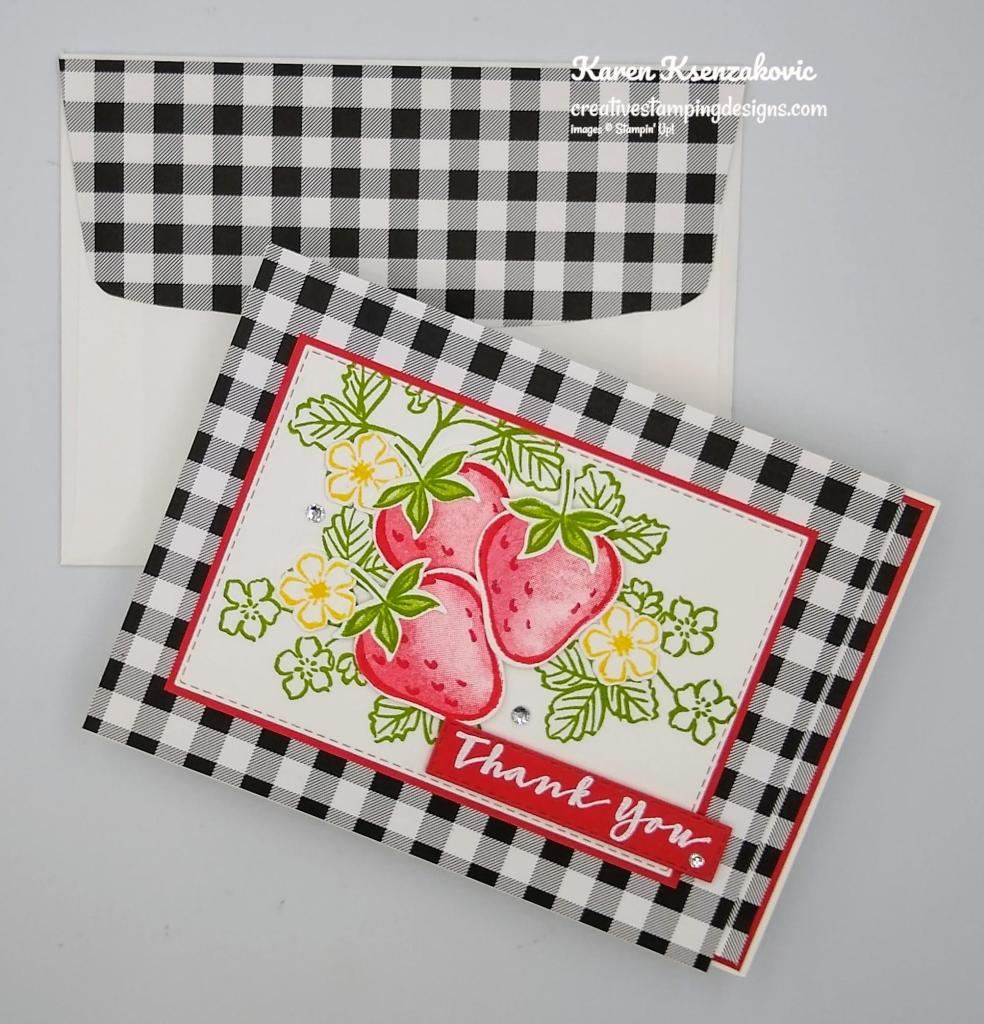
To finish my card I stamped the stem and leaf image from the Sweet Strawberry stamp set in Granny Apple Green Ink on the front of a Basic White Medium Envelope. I adhered a panel of the Pattern Party DSP to the envelope flap.
Thank you for stopping by my blog today. I hope you liked my card and will give it a try. The list of measurements are below if you’d like to stamp along while watching the video. You can watch my video on my Facebook page Here.
You can also view the video on my YouTube channel Here. Happy Stamping!!
*********************************************************************************************************
If you need any stamping supplies, I’d love to be your Demonstrator. Just click HERE to go directly to my online store or drop me an email if you have any questions.
MY CURRENT HOST CODE IS: QH7JDXHB
Use this host code when you order $50 or greater and receive a free gift from me! If your order is over $150, please do not use this code, but you’ll still get the free gift. The free gift is your choice of any 1 item valued up to $10.00 from the 2020-2021 Annual Catalog or the January-June 2021 Mini Catalog! For any orders $50 or more I will also send you my monthly class tutorials. Click HERE or go to my Customer Rewards for more details and to see what this months tutorials are.
Click HERE to shop the clearance rack.
Please remember to use my current Host Code and make sure that you can see my name on the final checkout page listed as your Demonstrator when you order so that you know that you’re ordering with me and you’ll get my rewards!
Happy Stamping, Karen!
*********************************************************************************************************
Stampin’ Up! Join + Promotion May 4-31

May is a fabulous time to join Stampin’ Up! because you’ll get even MORE FREE products in your customizable Starter Kit! From May 4–31, you will get $125 USD $155 worth of products for only $99 + free business supplies + free shipping + all the fun being a part of Stampin’ Up!!
PROMOTION DATES: 4–31 MAY 2021
- New demonstrators who purchase their Starter Kit between May 4 and May 31 will be able to redeem $155 of Starter Kit eligible products for $99.
- New demonstrators who submit their Independent Demonstrator Agreement (IDA) before May 4 or after May 31 will not be eligible for this offer.
- A new demonstrator can select any eligible Stampin’ Up! products up to the stated value.
- The Starter Kit also includes business resources like catalogs, brochures, order forms, and postcards at no additional charge.
- The Starter Kit also includes a FREE past Paper Pumpkin kit.
- The Starter Kit promotion begins May 4.
- Deadline to purchase the Starter Kit and receive the extra $30 in free products: May 31, 2021 at 11:50 PM (MT).
In addition to the amazing added value to the Starter Kit, when you join Stampin’ Up! you get to be a part of our amazing community of crafters! Plus, you get to enjoy sharing simple and fun crafting experiences with others, early access to products, and exclusive access to training events! Demonstrators also get at least a 20% discount on all of the products that they purchase and there is no requirement to sell to anyone. There is no risk and no penalty if you decide that being a Demonstrator isn’t right for you. With this great deal, there is no reason not to join in May!!
If you have any questions about joining or being a Stampin’ Up! Demonstrator, please drop me a note at creativestampingdesigns@gmail.com. If you want to read more about becoming a Demonstrator and the benefits of joining, head over to my Stampin’ Up! page HERE.
*********************************************************************************************************
Stampin’ Up! Connect, Craft & Collect $25 Stampin’ Rewards Bonus May 4 – June 14!!
From May 4 – June 14, 2021, qualifying Stampin’ Up! orders and parties over $250 will receive $25 in BONUS Stampin’ Rewards! YAY for more free goodies to kick off a new catalog!!
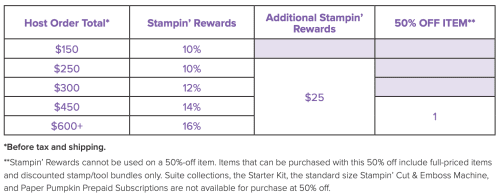
Stampin’ Rewards can be spent on any merchandise in either of the current catalogs, including the host exclusive items on pages 170-171 in the new Annual Catalog and page 88 in the January-June Mini Catalog!
PROMOTION DATES: MAY 4 – JUNE 14, 2021
- Workshop orders, customer orders, and online orders all qualify for the extra $25 in Stampin’ Rewards if they reach the $250 level.
- The order must reach the qualifying amount of $250 in merchandise prior to shipping and tax.
- The extra $25 rewards are only valid once per order no matter how high the order total.
- Starter Kit orders do not qualify for this promotion.
- Stampin’ Rewards can not be used on a 50% off item.
- Deadline to submit an order and receive the extra $25 in free Stampin’ Rewards: June 14, 2021 at 11:50 PM (MT).
If you have any questions or would like me to set up a host code for you to see if you can collect $250 in orders for yourself, please drop me a note at creativestampingdesigns@gmail.com. I’ll be happy to do that for you!
Looking For The BEST Deal???
Join during May AND then place an order of $250+!! You can “double dip” and get $30 additional free merchandise with your Starter Kit AND $25 extra in host cash to spend when you place orders of $250+ before June 14!!
If you have any questions, drop me a note at creativestampingdesigns@gmail.com.
*********************************************************************************************************
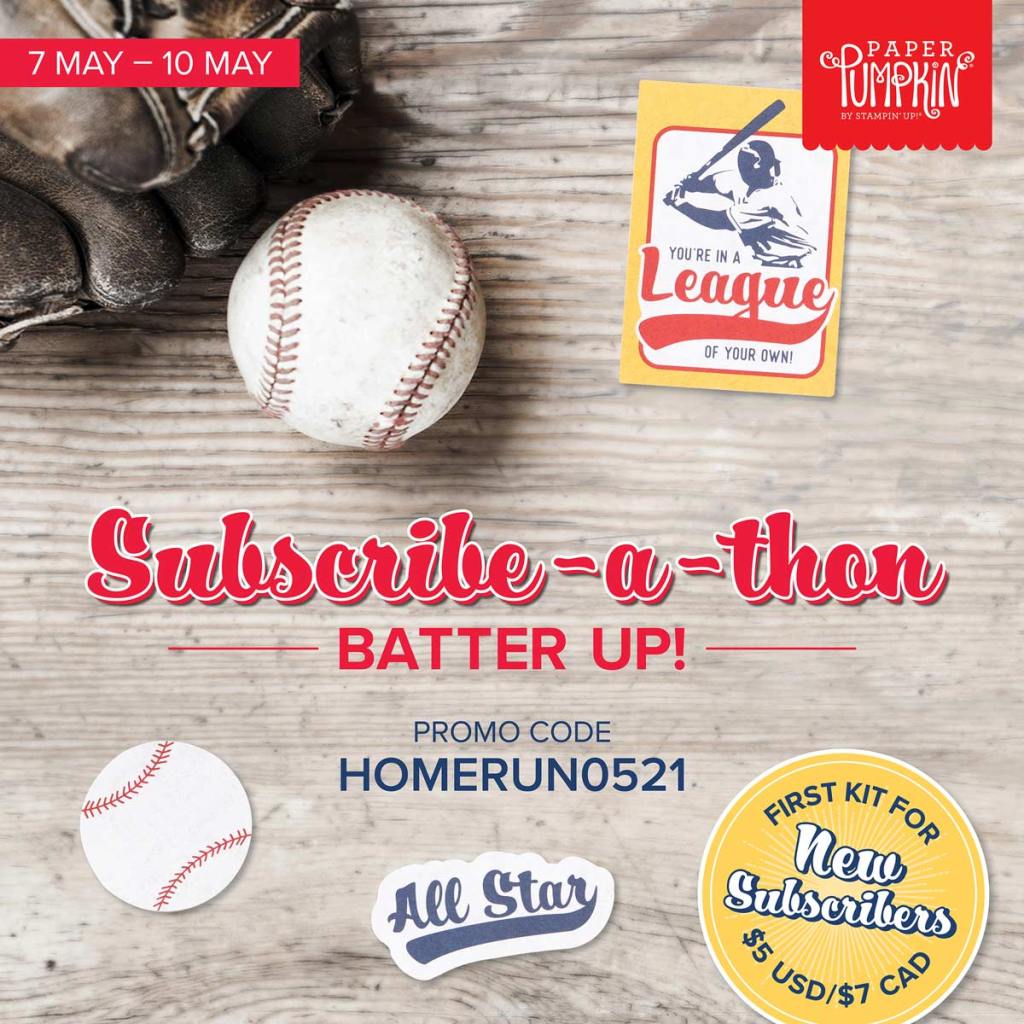
THE PAPER PUMPKIN SUBSCRIBE-A-THON STARTS TODAY – MAY10TH
How it Works
Paper Pumpkin has a LIMITED SUPPLY of Batter Up! kits to offer at this special SUBSCRIBE-A-THON rate.
- The SUBSCRIBE-A-THON will start on 7 May 2021 at 12:01 AM (MT).
- The SUBSCRIBE-A-THON promotion price for new subscribers is only $5.00 USD | $7.00 CAD! (shipping included)
- The sale will continue until all allocated kits are sold out, or until the May subscription period ends on 10 May—whichever comes first. If the allocated kits are sold out prior to the subscription period, the sale will end and the subscription price will return to normal.
- Once 7 May hits, enter the code HOMERUN0521 before the sale ends to receive this special introductory price!
- This promotion price will only apply to new month-to-month subscriptions; prepaid subscriptions are not eligible for the discount.
Whether you’re crafting for a father, grandfather, nephew, or brother, we’ve got all your bases covered with the Batter Up! Paper Pumpkin Kit! This month’s kit is the perfect pick for making masculine masterpieces.
Then again, we know that grass-stained pants and sliding into home aren’t just for the boys—this month’s kit is a triple threat! Designed with men, sport-lovin’ ladies, and baseball fanatics in mind, anyone would bounce from their spot in the bleachers if they received a classic card from the Batter Up! kit. After all, this month’s kit was made for celebrating the all-stars, MVPs, and the greats—no matter what team they play on!
Step up to the plate, take a swing, and knock it out of the park! With the Batter Up! Paper Pumpkin Kit, it’s your turn to go to bat for all the people who’ve gone to bat for you. This month’s timeless kit with a “throwback” theme contains enough grand slam supplies to create nine cards—and coordinating envelopes—featuring classic colors, pinwheel and pinstripe patterns, and vintage-washed paper pieces. There’s no “batter” way to root, root, root for your home team and honor the all-stars in your life!
A beloved baseball-themed kit would be incomplete without the sport’s signature, sticky snack—the official bubble gum of the MLB! A favorite in the field, the Batter Up! Paper Pumpkin Kit contains a couple sticks of the chewy staple; chew while you craft, slide a piece into a card, or save it for later.
Details About The May Kit
- Kit contains enough supplies to create 9 cards—3 each of 3 designs—and coordinating envelopes. The all-inclusive kit includes printed card bases, die-cut paper pieces, embellishments, adhesive, and more!
- Card size: 4-1/4″ x 5-1/2″ (10.8 x 14 cm)
- Envelope size: 4-1/2″ x 5-3/4″ (11.4 x 14.6 cm)
- Coordinating colors: Basic White, Bumblebee, Night of Navy, Pacific Point, Real Red, Smoky Slate, Soft Suede
- Comes with the official bubble gum of the MLB—a ballpark favorite! Chew while you craft, slide a piece into a card, or save it for later.
Subscribe to the May 2021 Paper Pumpkin Kit between May 7th – May 10th to get this special promotion price at paperpumpkin.com!
Note: Supplies may be limited toward the end of the subscription period.
*********************************************************************************************************
Card stock cuts for this project:
- Basic White Cardstock 4 1/4″ X 5 1/2″ (card front), 2 – 4″ X 5 1/4″ (stitched rectangle & inner liner), 1 1/2″ X 6″ (strawberries & stems), 3/4″ X 4″ (flowers)
- Thick Basic White Cardstock 4 1/4″ X 11″ (card base scored and folded as listed above)
- Poppy Parade Cardstock 3 1/8″ x 4 1/2″ (card front panel mat), 1″ X 3″ (sentiment), 1 1/4″ X 4 1/8″ (side panel mat), 4 1/8″ X 5 3/8″ (inner liner mat)
- Pattern Party Host Designer Series Paper 4 1/4″ X 5 1/2″ (card front), 1 1/8″ X 4″ (side panel), 2 1/2″ X 6″ (envelope flap)
*********************************************************************************************************
Product List


 Host Designer Series Paper")


")


")