

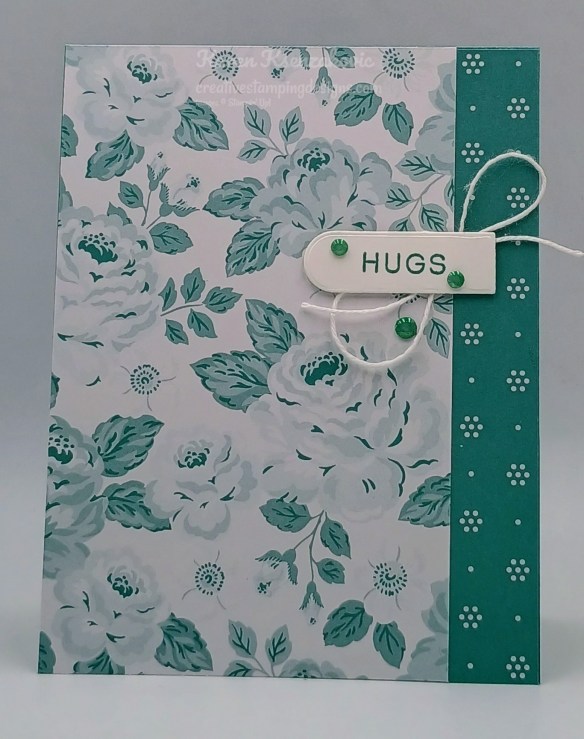
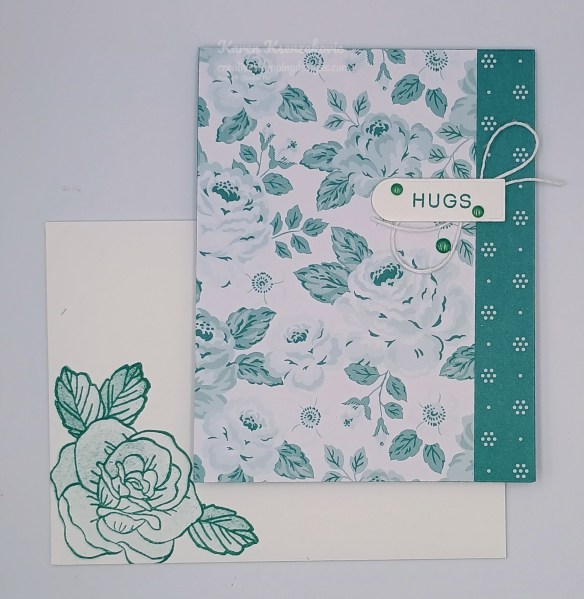
Good Thursday morning stamping friends welcome to our Happy Inkin’ Thursday Blog Hop. If you are starting with me, thank you, I hope you will stop by everyone’s blog to see the awesome projects they have created this week. If you are hopping over from Mary’s blog, thank you for stopping by. This week we have a Theme Challenge to work with. If you’d like to see a quick video on how I made this card, Click Here to go to my Instagram Reels. Here is my card using this week’s theme.
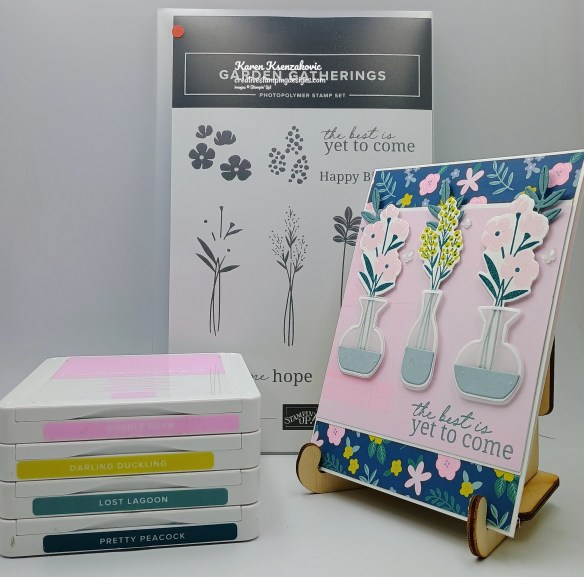
I used the Stamin’ Up! Garden Gatherings Bundle, Everyday Essentials Designer Series Paper and Vellum Specialty Paper for my card today.
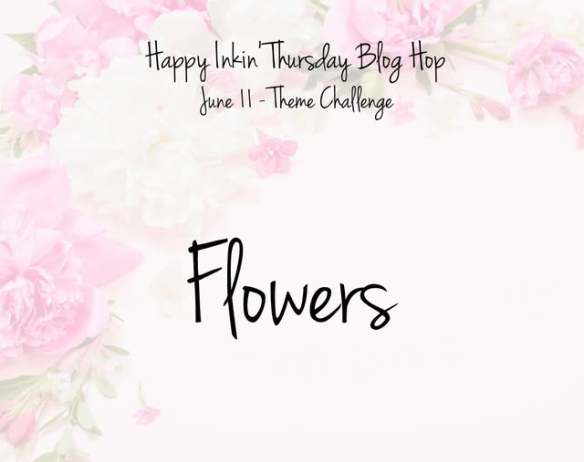
This is our theme for this week
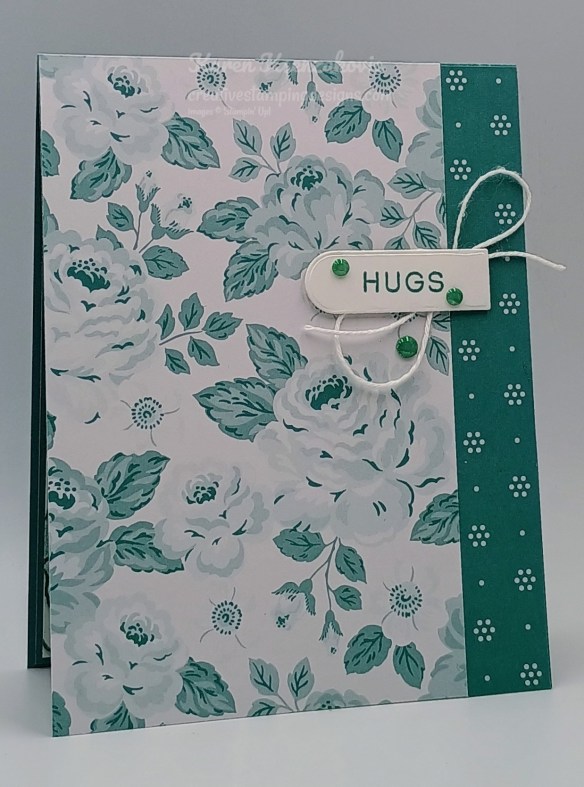
Adhere a panel of Everyday Essentials DSP to a Basic White Thick card base. Stamp the sentiment from Garden Gatherings stamp set in Lost Lagoon Ink on the bottom of the panel of Everyday Essentials DSP.
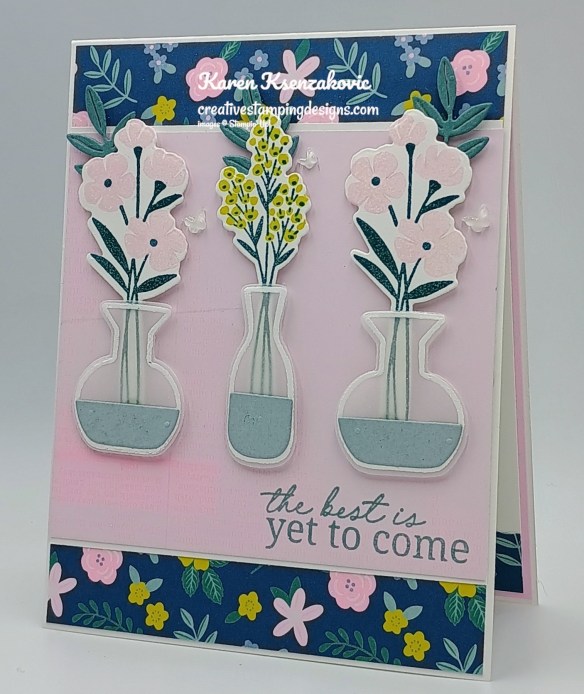
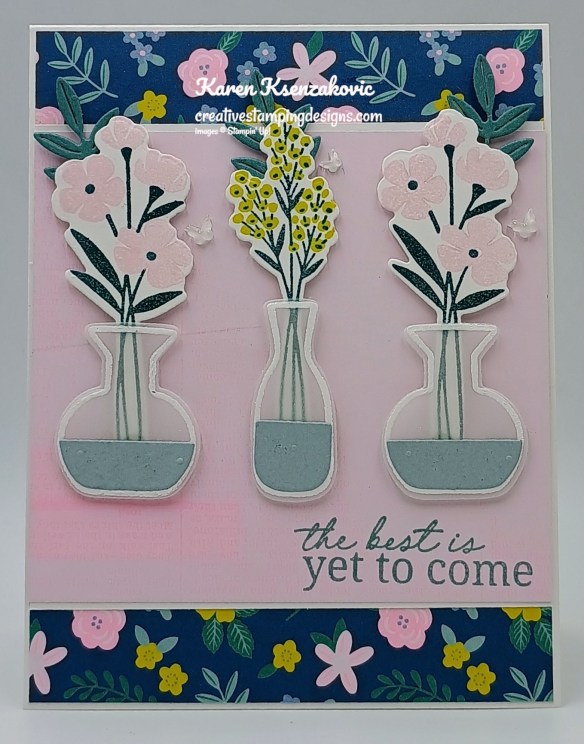
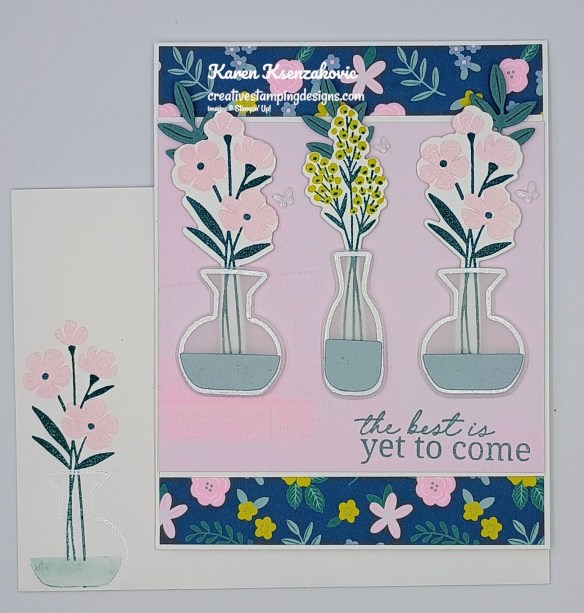
Adhere the stamp panel of DSP to a Basic Whtie mat. Adhere the layered panel to the card front. On a panel of Vellum, stamp the vase images from the Garden Gatherings stamp set in Versamark Ink. Sprinkle the images with White Embossing Powder and set them with the Heat Tool. Using the Garden Gatherings Dies, cut out the vases, the water dies from a panel of Cloud Cover, and the leaf die 3 times from a panel of Lost Lagoon. Adhere the water to the bottom of the vases.
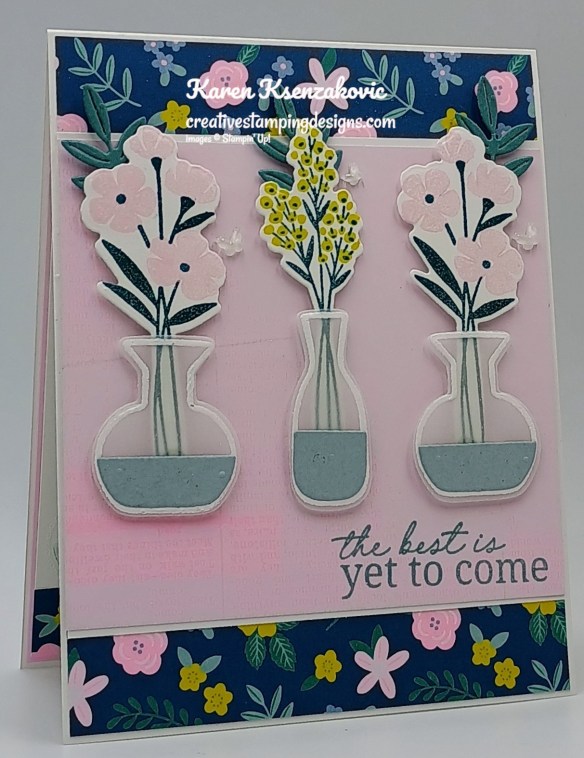
Stamp the stem images from the Garden Gatherings stamp set in Pretty Peacock Ink 2 times for the one and once for the other. Stamp the larger flower image from the Garden Gatherings stamp set on the 2 stems in Bubble Bath Ink and the smaller flower from the Garden Gatherings stamp set on the other stem in Darling Duckling Ink. Cut the flower images out using the Garden Gatherings Dies. Adhere the die cut flowers and leaf to the back of the vases. Adhere the layered flowers & vases to the card front with Stampin’ Dimensionals. Add a few 2026-2028 In-Color Butterflies to the card front.
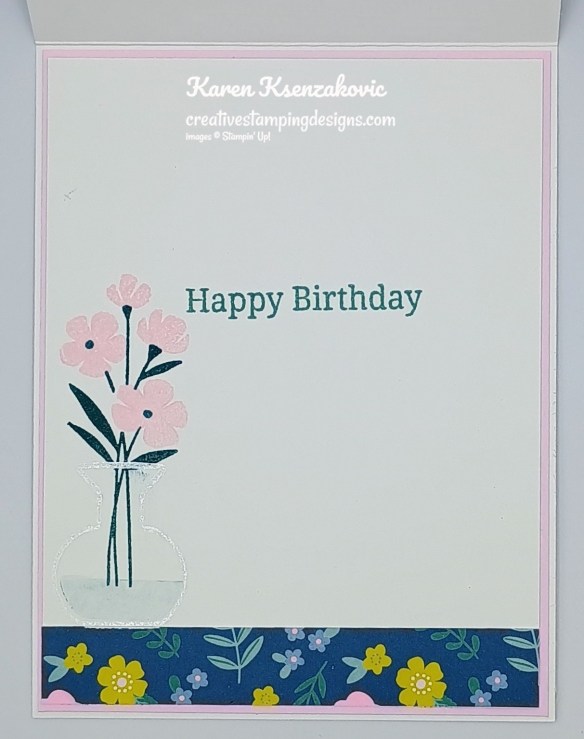
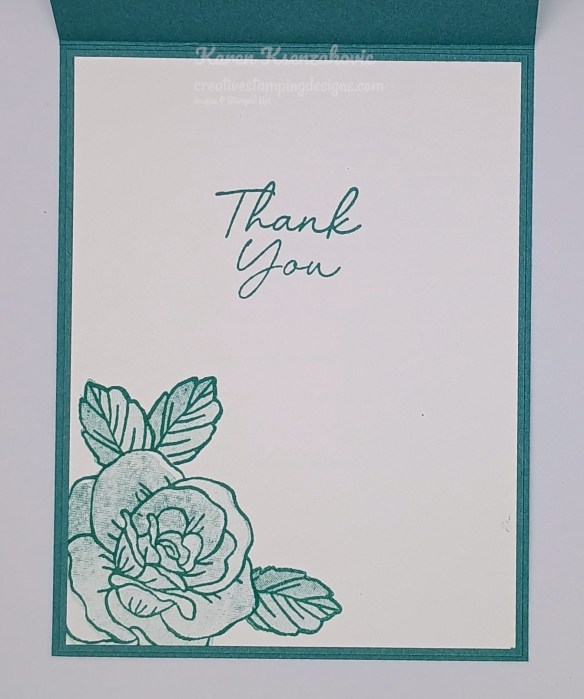
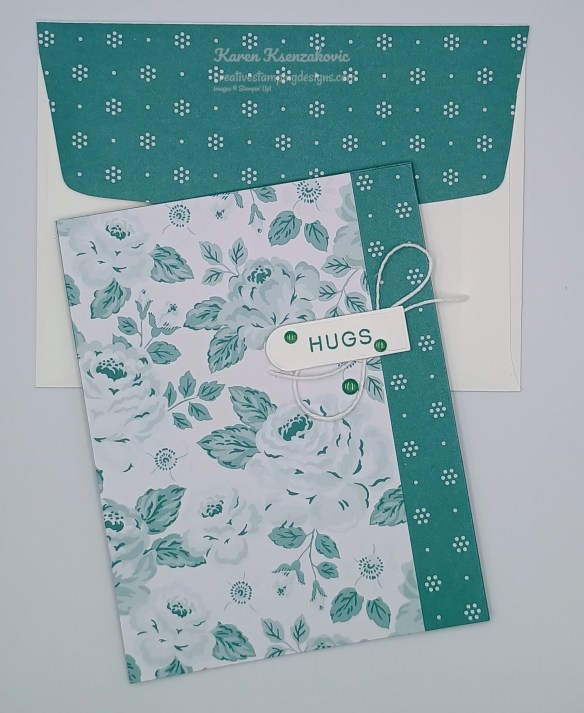
Stamp the sentiment from the Garden Gatherings stamp set in Lost Lagoon Ink on a panel of Basic White. Adhere a panel of Everyday Essentials DSP to the bottom of the panel. Stamp the vase image from the Garden Gatherings stamp set in Versamark Ink on the bottom of the panel, sprinkle the image with Whtie Embossing Powder and set it with the Heat Tool. Stamp the stem image from the Garden Gatherings stamp set in Pretty Peacock Ink and the larger flower image in Bubble Bath Ink. Adhere the Basic White panel to a Bubble Bath mat then to the inside of the Basic White Thick card base.
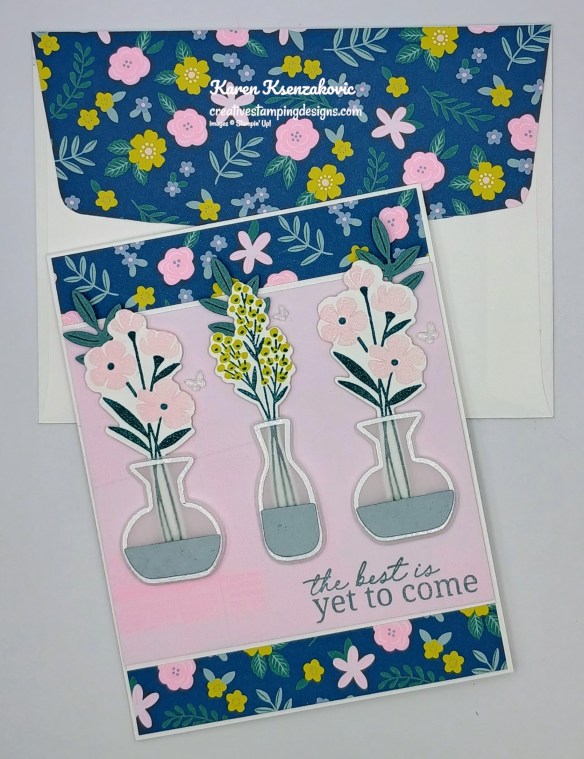
Decorate a Basic White Medium Envelope to complete the card. Stamp the vase and flower images from the Garden Gatherings stamp set on the envelope front the same as for the card. Adhere a panel of Everyday Essentials DSP to the envelope flap.
Thank you for stopping by my blog today. Now that you’ve seen my card, let’s get on with the hop! Click the next button below to hop over to see what Tara has created. Happy Hopping

Just in case you get lost along the way, here is a list of the team members involved in the hop today.
Karen Ksenzakovic You Are Here
********************************************************************************************************
If you need any stamping supplies, I’d love to be your Demonstrator. Just click HERE to go directly to my online store or drop me an email if you have any questions.
*********************************************************************************************************
FREE SHIPPING from Stampin’ Up! June 11-13
Here are the free shipping details:
- Sales Period: June 11–13
- Ordering Deadline: June 13 at 11:59 p.m. (MT)
- All order types qualify for this promotion.
- Free shipping is for three days only. You must place your orders between June 11 and 13 to qualify.
- Free shipping automatically applies to the shopper’s cart after the qualifying amount has been met, which is $75 (before tax).
- All orders must meet the qualifying amount to be eligible for free shipping. Coupon codes and Stampin’ Rewards will lower the total amount of an order.
- Craft Classes do not have shipping charges. Purchasing a Craft Class will increase the total cart amount but will not contribute to the free shipping qualifying amount.
- The additional cost for expedited shipping is NOT covered by this promotion.
- Prepaid 3-, 6-, and 12-month Paper Pumpkin subscriptions and month-to-month subscriptions do not qualify for free shipping. Refills, past kits, and add-ons do qualify toward free shipping, but you must be a subscriber to purchase. Subscriptions billed and shipped this month will be charged for the normal amount + tax.
- Don’t forget that you can add the product of the month to your cart with an order of $75+ too!
YAY for free shipping!! Get your orders ready and get them placed through my online store between June 11-13!! Happy shopping!!
*********************************************************************************************************
Card stock cuts for this project:
- Basic White Cardstock 3 7/8″ x 4 1/8″(mat), 4″ x 4″(artwork), 4″ x 5 1/4″ (inner liner)
- Basic White Thick Cardstock 4 1/4″ x 11″(card base scored & folded at 5 1/2″)
- Bubble Bath Cardstock 4 1/8″ x 5 3/8″ (mat)
- Cloud Cover Cardstock 1″ x 4″(die cuts)
- Lost Lagoon Cardstock 2 1/4″ x 2 1/2″(die cuts)
- Everyday Essentials Designer Series Paper 4 1/8″ x 5 3/8″(card front), 3 3/4″ x 4 1/8″(card front panel), 5/8″ x 4″(inner liner), 2 1/4″ x 6″(envelope)
- Vellum 2 1/2″ x 4″(die cuts)
*********************************************************************************************************
Product List
![Garden Gatherings Bundle (English) [ 167611 ]](https://assets1.tamsnetwork.com/images/EC042017NF/167611s.jpg "Garden Gatherings Bundle (English) [ 167611 ]")
![Garden Gatherings Photopolymer Stamp Set (English) [ 167609 ]](https://assets1.tamsnetwork.com/images/EC042017NF/167609s.jpg "Garden Gatherings Photopolymer Stamp Set (English) [ 167609 ]")
![Garden Gatherings Dies [ 167610 ]](https://assets1.tamsnetwork.com/images/EC042017NF/167610s.jpg "Garden Gatherings Dies [ 167610 ]")
![Basic White 8 1/2" X 11" Cardstock [ 166780 ]](https://assets1.tamsnetwork.com/images/EC042017NF/166780s.jpg "Basic White 8 1/2\" X 11\" Cardstock [ 166780 ]")
![Basic White 8 1/2" X 11" Thick Cardstock [ 159229 ]](https://assets1.tamsnetwork.com/images/EC042017NF/159229s.jpg "Basic White 8 1/2\" X 11\" Thick Cardstock [ 159229 ]")
![Bubble Bath 8 1/2" X 11" Cardstock [ 161718 ]](https://assets1.tamsnetwork.com/images/EC042017NF/161718s.jpg "Bubble Bath 8 1/2\" X 11\" Cardstock [ 161718 ]")
![Cloud Cover 8 1/2" X 11" Cardstock [ 165621 ]](https://assets1.tamsnetwork.com/images/EC042017NF/165621s.jpg "Cloud Cover 8 1/2\" X 11\" Cardstock [ 165621 ]")
![Everyday Essentials Mix & Match 12" X 12" (30.5 X 30.5 Cm) Designer Series Paper [ 167702 ]](https://assets1.tamsnetwork.com/images/EC042017NF/167702s.jpg "Everyday Essentials Mix & Match 12\" X 12\" (30.5 X 30.5 Cm) Designer Series Paper [ 167702 ]")
![Vellum 12" X 12" (30.5 X 30.5 Cm) Specialty Paper [ 167099 ]](https://assets1.tamsnetwork.com/images/EC042017NF/167099s.jpg "Vellum 12\" X 12\" (30.5 X 30.5 Cm) Specialty Paper [ 167099 ]")
![Bubble Bath Classic Stampin' Pad [ 161664 ]](https://assets1.tamsnetwork.com/images/EC042017NF/161664s.jpg "Bubble Bath Classic Stampin' Pad [ 161664 ]")
![Darling Duckling Classic Stampin' Pad [ 165277 ]](https://assets1.tamsnetwork.com/images/EC042017NF/165277s.jpg "Darling Duckling Classic Stampin' Pad [ 165277 ]")
![Lost Lagoon Classic Stampin' Pad [ 161678 ]](https://assets1.tamsnetwork.com/images/EC042017NF/161678s.jpg "Lost Lagoon Classic Stampin' Pad [ 161678 ]")
![Pretty Peacock Classic Stampin’ Pad [ 150083 ]](https://assets1.tamsnetwork.com/images/EC042017NF/150083s.jpg "Pretty Peacock Classic Stampin’ Pad [ 150083 ]")
![Versamark Pad [ 102283 ]](https://assets1.tamsnetwork.com/images/EC042017NF/102283s.jpg "Versamark Pad [ 102283 ]")
![Basics Wow! Embossing Powder [ 165679 ]](https://assets1.tamsnetwork.com/images/EC042017NF/165679s.jpg "Basics Wow! Embossing Powder [ 165679 ]")
![Heat Tool (Us And Canada) [ 129053 ]](https://assets1.tamsnetwork.com/images/EC042017NF/129053s.jpg "Heat Tool (Us And Canada) [ 129053 ]")
![2026–2028 In Color™ Butterflies [ 167656 ]](https://assets1.tamsnetwork.com/images/EC042017NF/167656s.jpg "2026–2028 In Color™ Butterflies [ 167656 ]")
![Basic White Medium Envelopes [ 159236 ]](https://assets1.tamsnetwork.com/images/EC042017NF/159236s.jpg "Basic White Medium Envelopes [ 159236 ]")
![Stampin' Cut & Emboss Machine [ 149653 ]](https://assets1.tamsnetwork.com/images/EC042017NF/149653s.jpg "Stampin' Cut & Emboss Machine [ 149653 ]")
![Mini Glue Dots [ 103683 ]](https://assets1.tamsnetwork.com/images/EC042017NF/103683s.jpg "Mini Glue Dots [ 103683 ]")
![Multipurpose Liquid Glue [ 110755 ]](https://assets1.tamsnetwork.com/images/EC042017NF/110755s.jpg "Multipurpose Liquid Glue [ 110755 ]")
![Stampin' Dimensionals [ 104430 ]](https://assets1.tamsnetwork.com/images/EC042017NF/104430s.jpg "Stampin' Dimensionals [ 104430 ]")
![Stampin' Seal [ 152813 ]](https://assets1.tamsnetwork.com/images/EC042017NF/152813s.jpg "Stampin' Seal [ 152813 ]")
![Paper Trimmer [ 152392 ]](https://assets1.tamsnetwork.com/images/EC042017NF/152392s.jpg "Paper Trimmer [ 152392 ]")
![Bone Folder [ 102300 ]](https://assets1.tamsnetwork.com/images/EC042017NF/102300s.jpg "Bone Folder [ 102300 ]")
![Take Your Pick [ 144107 ]](https://assets1.tamsnetwork.com/images/EC042017NF/144107s.jpg "Take Your Pick [ 144107 ]")


![Scalloped Blooms Bundle (English) [ 167647 ]](https://assets1.tamsnetwork.com/images/EC042017NF/167647s.jpg "Scalloped Blooms Bundle (English) [ 167647 ]")
![Scalloped Blooms Photopolymer Stamp Set (English) [ 167639 ]](https://assets1.tamsnetwork.com/images/EC042017NF/167639s.jpg "Scalloped Blooms Photopolymer Stamp Set (English) [ 167639 ]")
![Scalloped Blooms Dies [ 167646 ]](https://assets1.tamsnetwork.com/images/EC042017NF/167646s.jpg "Scalloped Blooms Dies [ 167646 ]")
![Boutique Blossoms Photopolymer Stamp Set [ 167652 ]](https://assets1.tamsnetwork.com/images/EC042017NF/167652s.jpg "Boutique Blossoms Photopolymer Stamp Set [ 167652 ]")
![Lost Lagoon 8-1/2" X 11" Cardstock [ 133679 ]](https://assets1.tamsnetwork.com/images/EC042017NF/133679s.jpg "Lost Lagoon 8-1/2\" X 11\" Cardstock [ 133679 ]")
![Lost Lagoon Stampin’ Blends Combo Pack [ 161680 ]](https://assets1.tamsnetwork.com/images/EC042017NF/161680s.jpg "Lost Lagoon Stampin’ Blends Combo Pack [ 161680 ]")
![Pearls Of Beauty [ 167098 ]](https://assets1.tamsnetwork.com/images/EC042017NF/167098s.jpg "Pearls Of Beauty [ 167098 ]")

