Stampin’ Up! Christmas Banners for The Card Concepts

Good Wednesday morning my stamping friends. I hope everyone’s week is going well. We’re halfway through and on our way to the weekend.

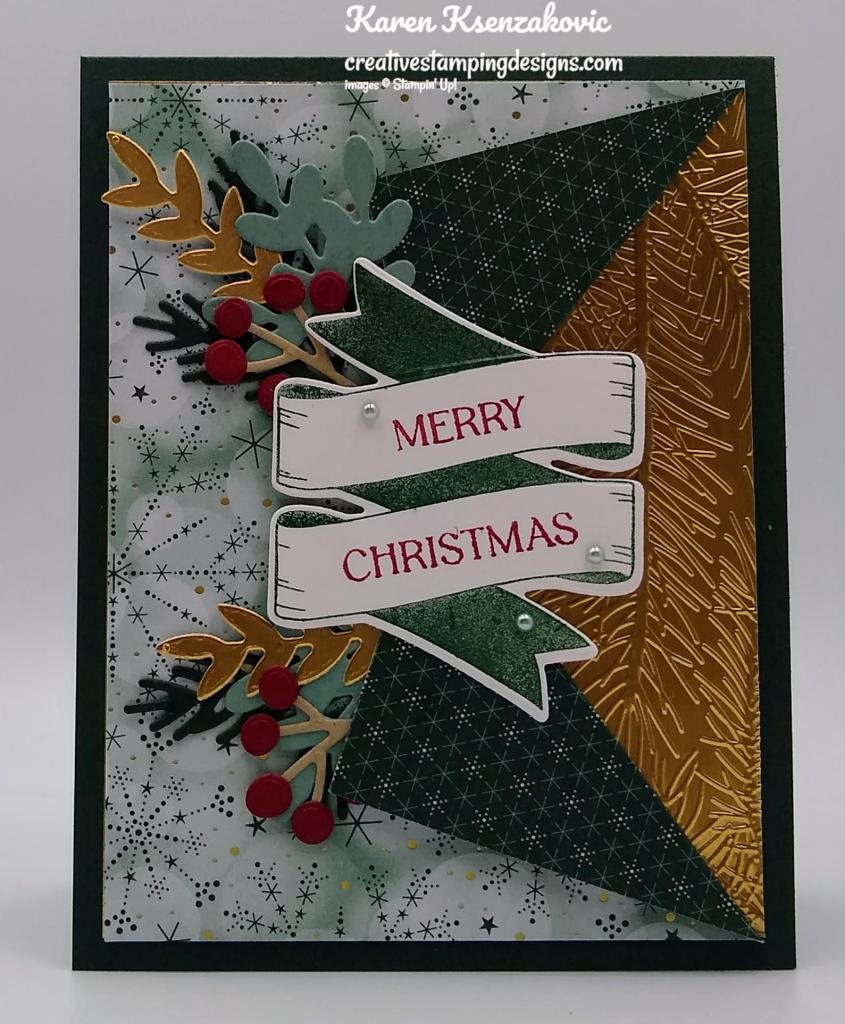
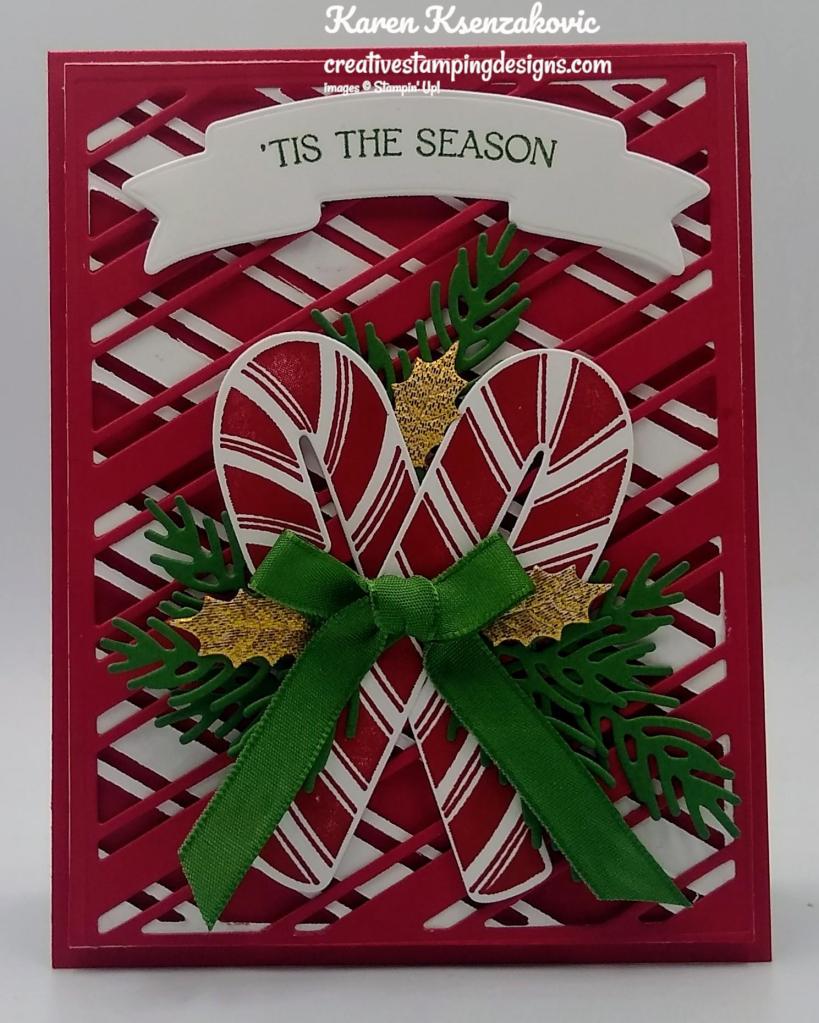
It’s time for an inspiration challenge from The Card Concepts. The inspiration photos are Happy Thanksgiving or Merry Christmas.  You get to pick which photo you want to work with, 184a or 184b. Here is my card that was inspired from the challenge photo.

Stampin' Up! Banners For You CAS 1 creativestampingdesigns.com

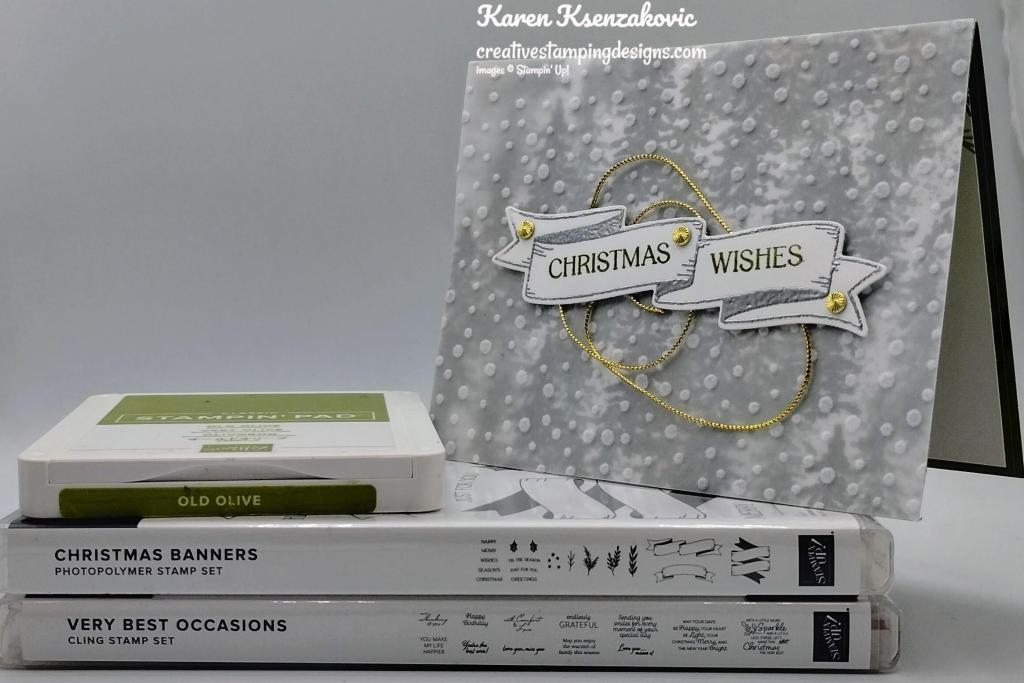
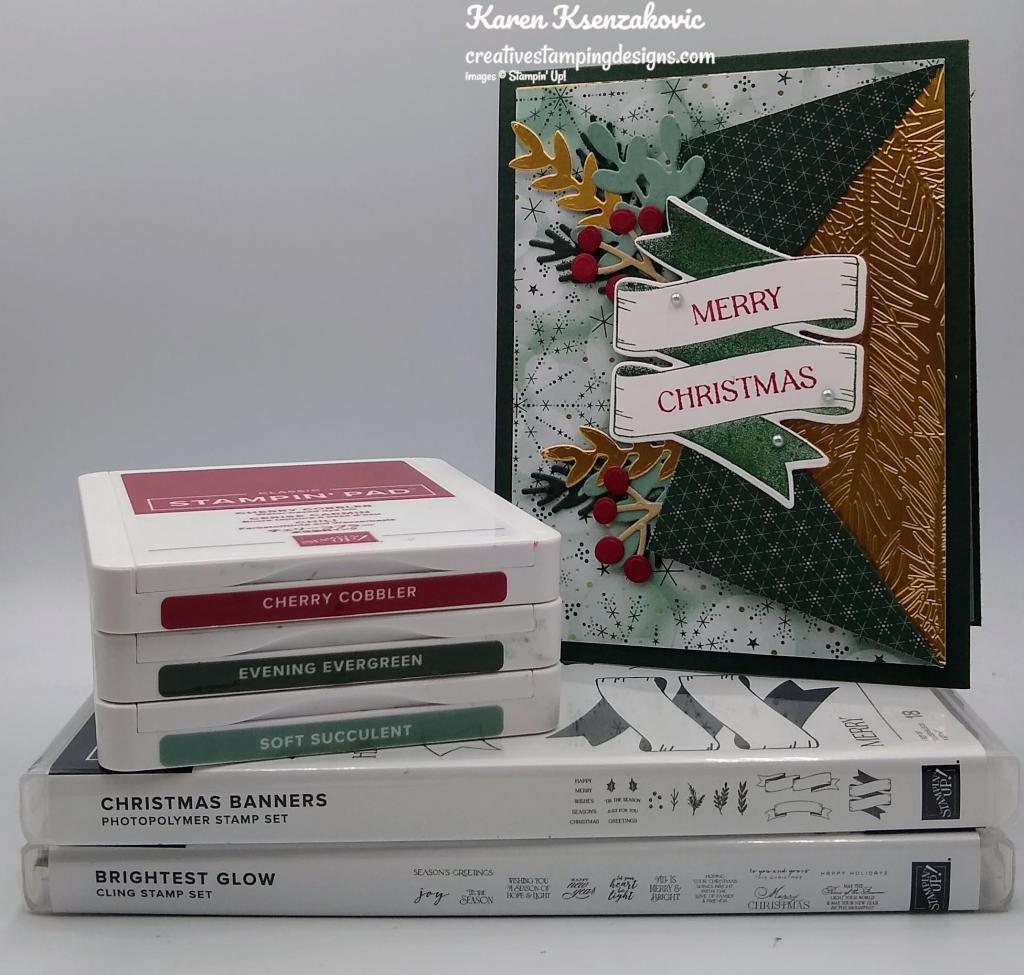
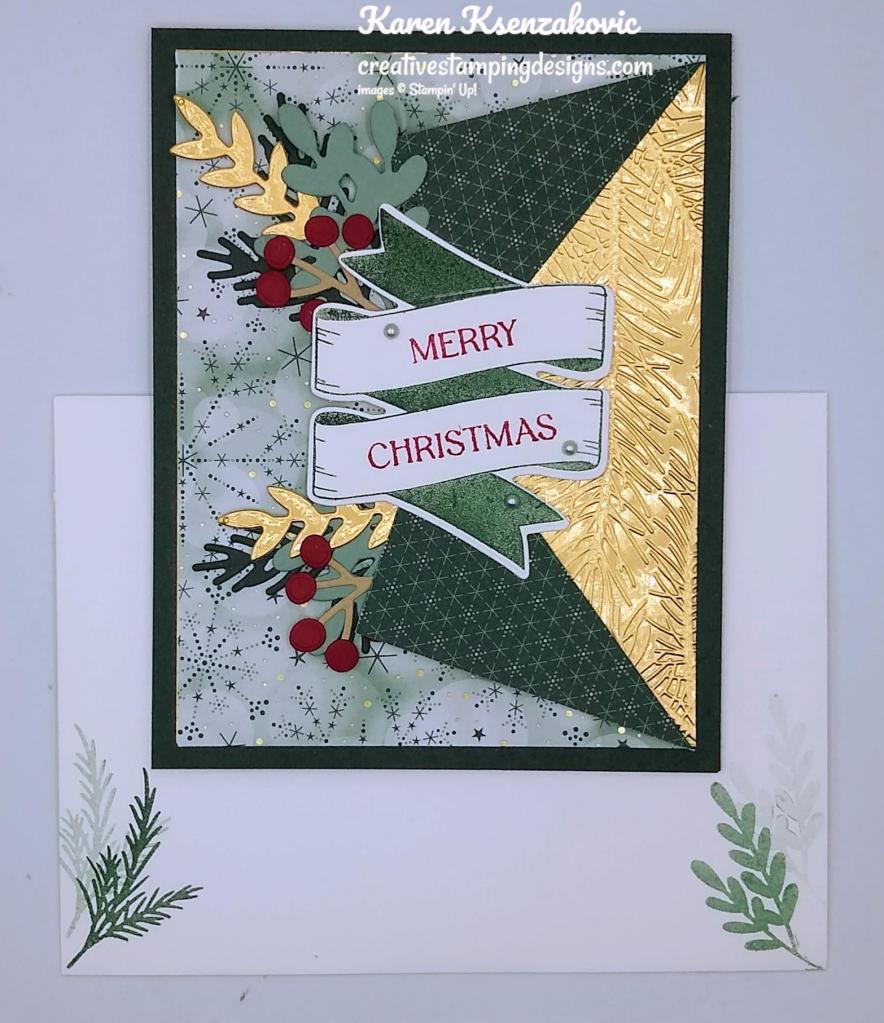
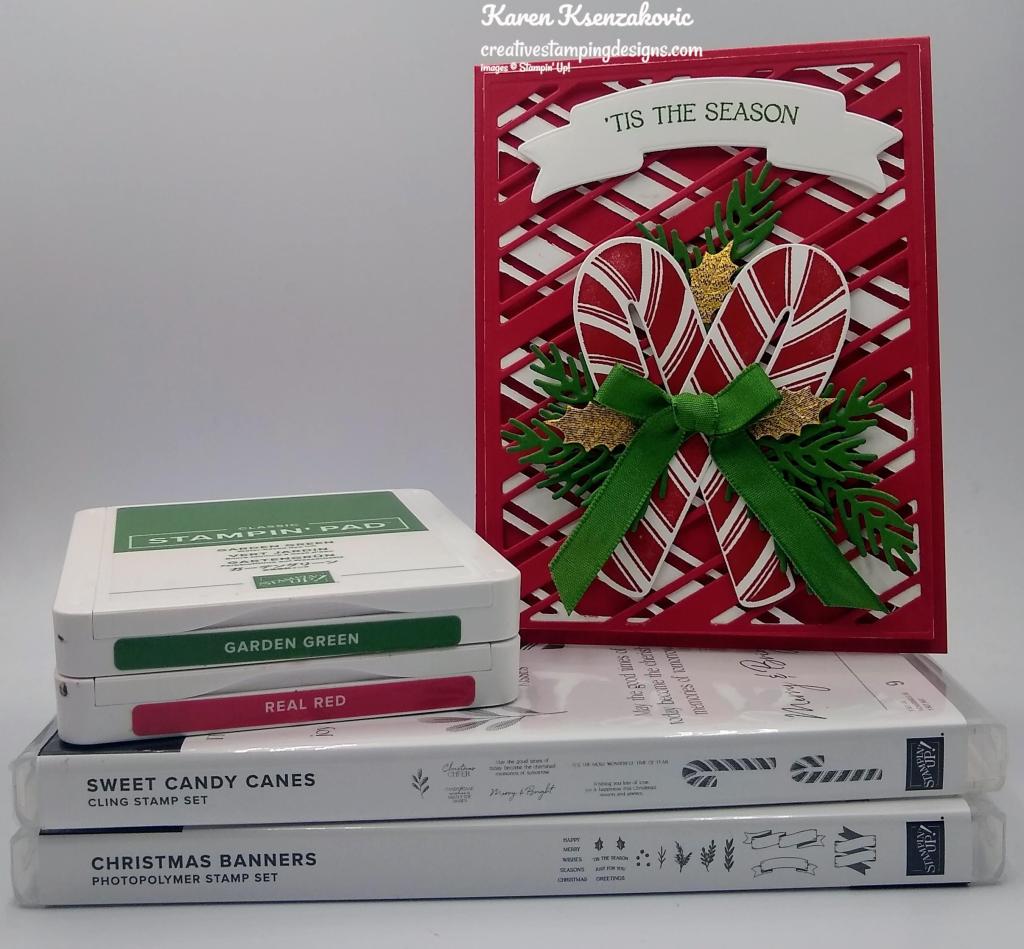
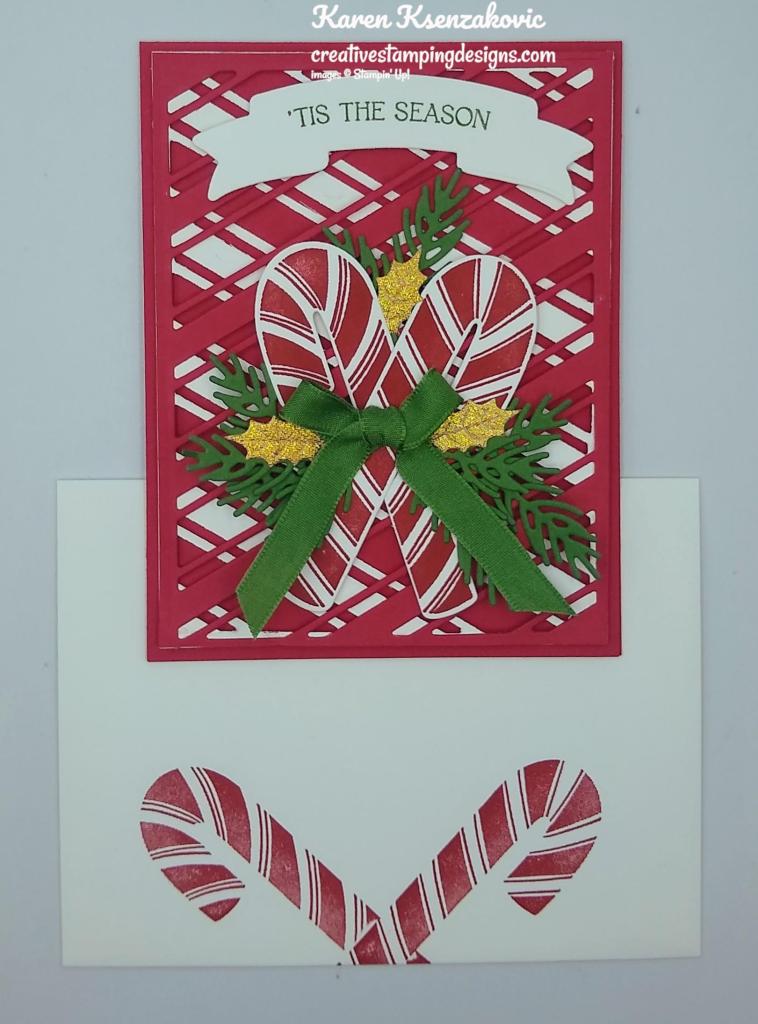
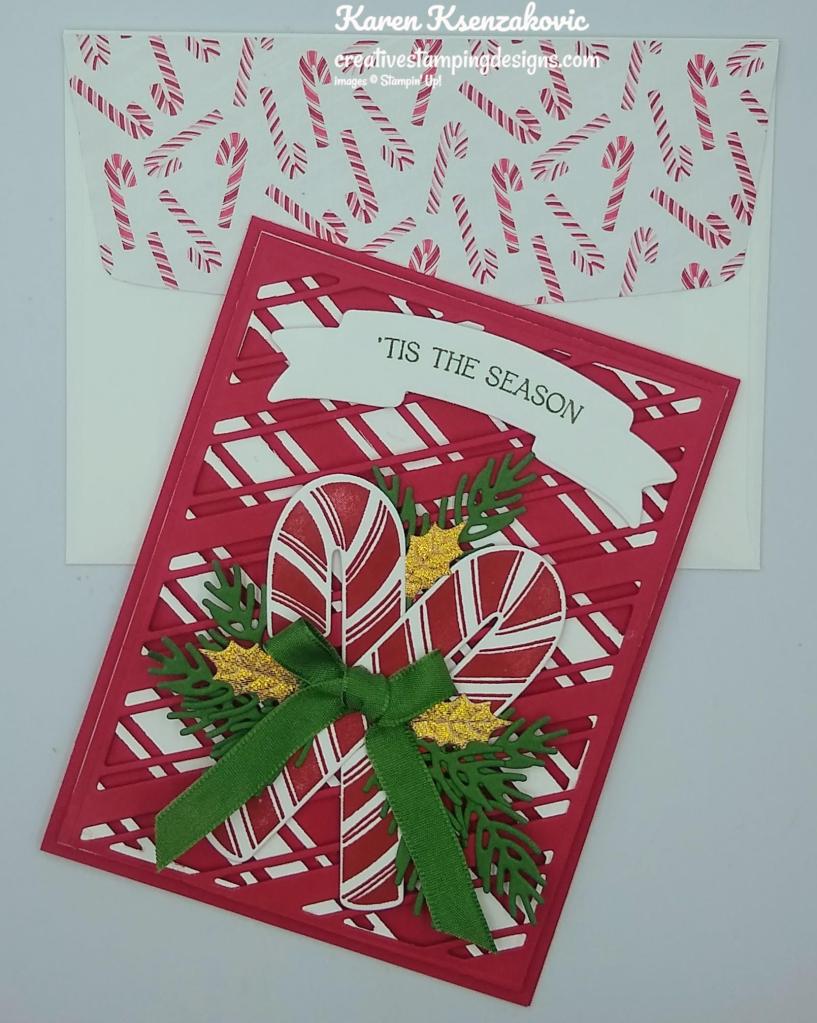
I used the Stampin’ Up! Christmas Banners Bundle and the Stampin’ Up! Very Best Occasions Cling Stamp Set along with the Boughs of Holly Designer Series Paper and the Snowflake Vellum Specialty Paper for my Clean and Layered card today. I went with inspiration photo 184b, Merry Christmas and was inspired by the pine tree, snowflakes and colors.

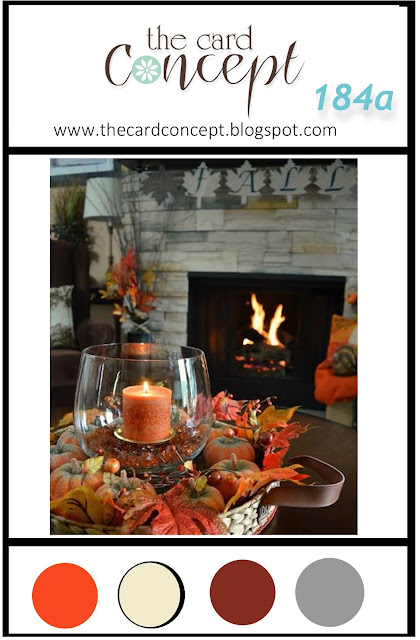
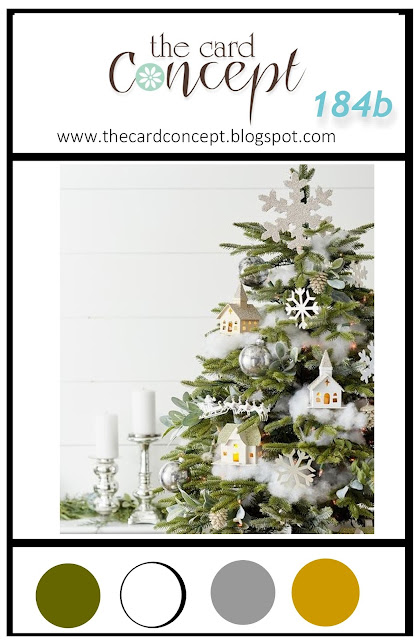
I hope you will take a moment to visit The Card Concepts and join us for our challenge #184a or 184b.  How are you inspired by the photos?

Stampin' Up! Banners For You CAS 2 creativestampingdesigns.com

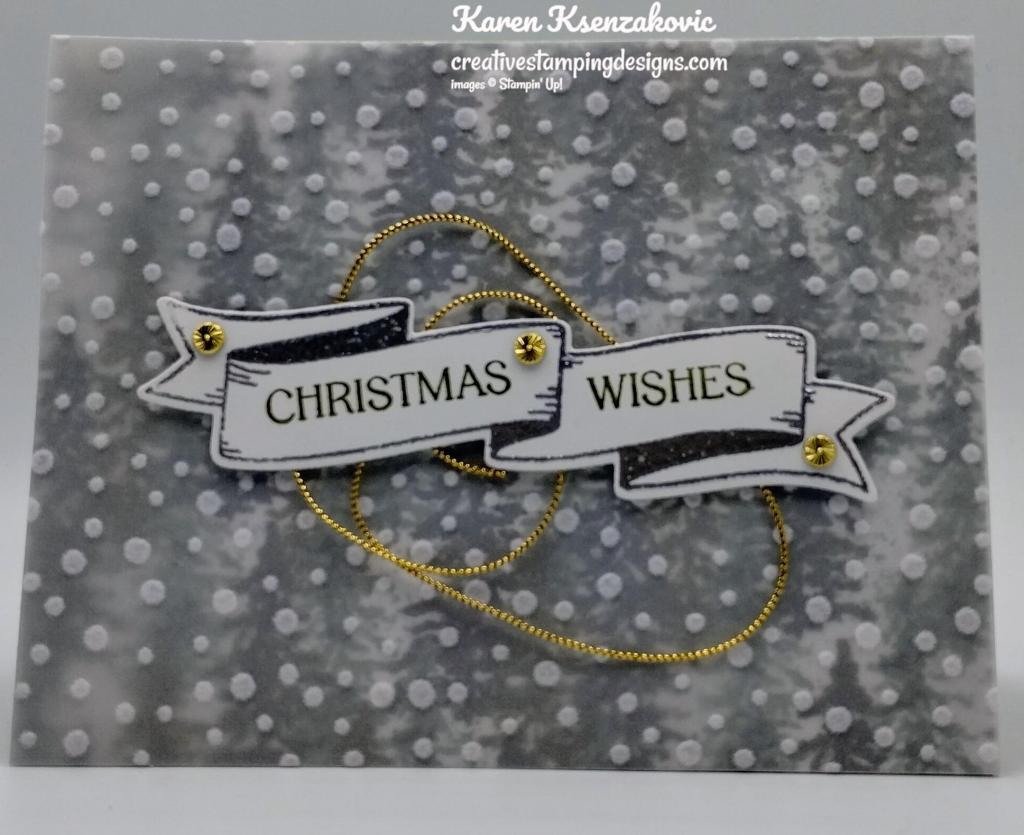
I started by adhering a panel of Boughs of Holly DSP to an Old Olive card base. I adhered a panel of Snowflake Vellum paper over the pine tree paper using a small amount of Stampin’ Seal just under where the sentiment was going to go.

Stampin' Up! Banners For You CAS 3 creativestampingdesigns.com

On a panel of Basic White cardstock, I stamped the banner image from Christmas Banners stamp set in Versamark Ink. I sprinkled it with my Silver Embossing Powder and set it using my Heat Tool. I cut the image out using my Christmas Banners Dies. I stamped the sentiment from the Christmas Banners stamp set in Old Olive Ink.

Stampin' Up! Banners For You CAS 4 creativestampingdesigns.com

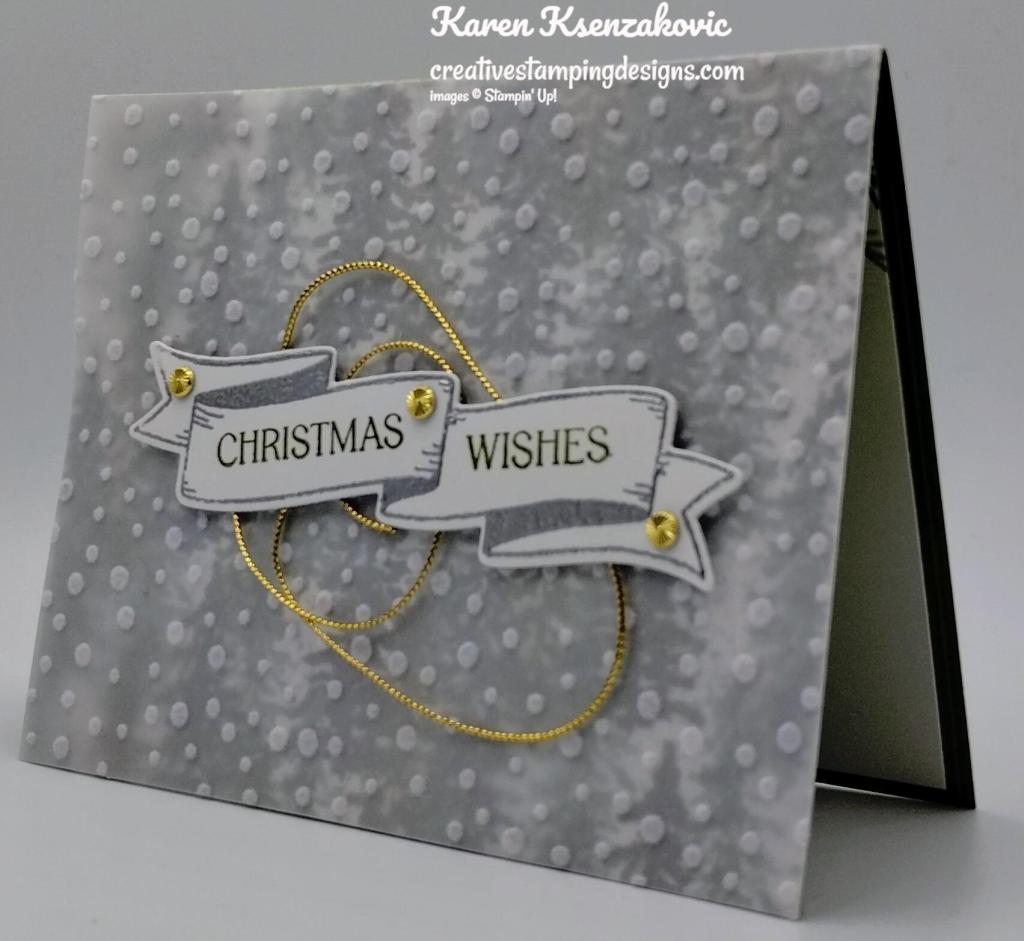
I adhered some of the Gold Simply Elegant Trim to the card front using a small amount of Stampin’ Seal. I adhered the sentiment using Stampin’ Dimensionals over the trim. I added a few Gold Adhesive-Backed Swirls to the banner.

Stampin' Up! Banners For You CAS 5
 creativestampingdesigns.com

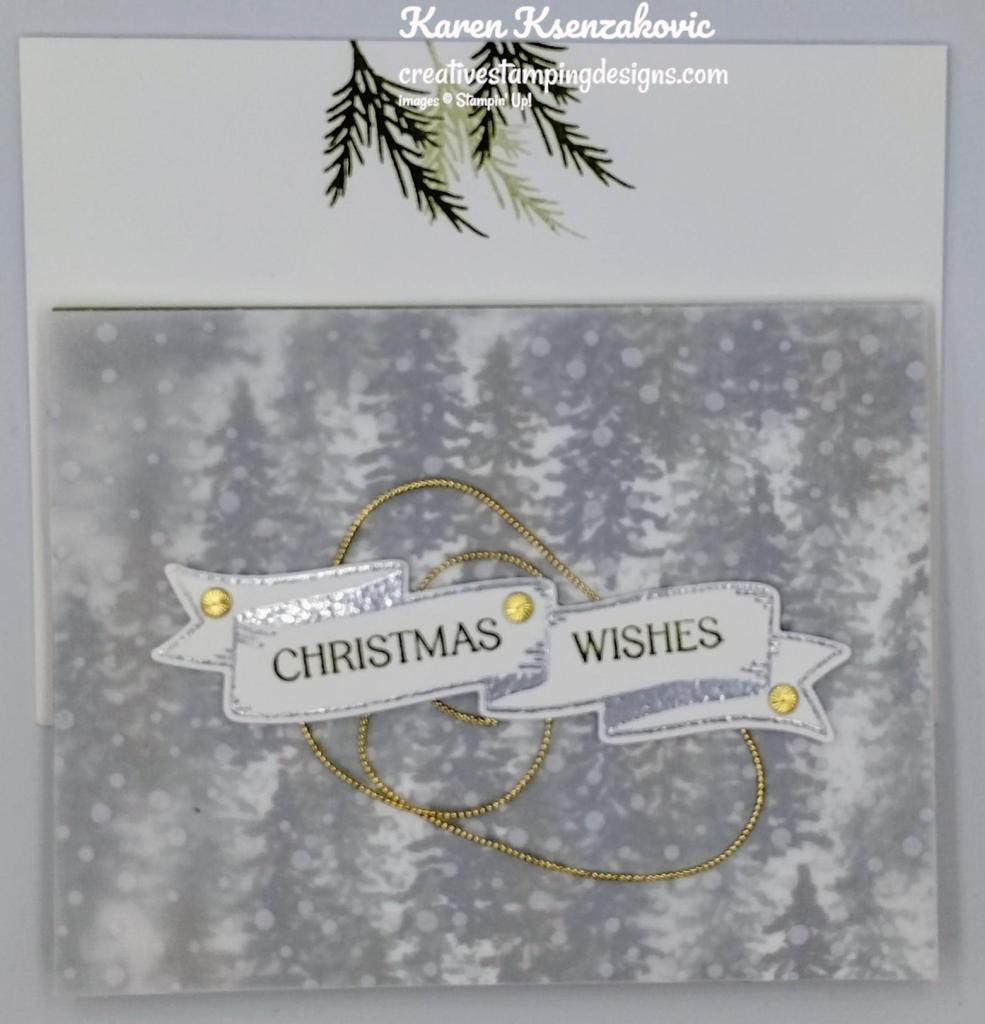
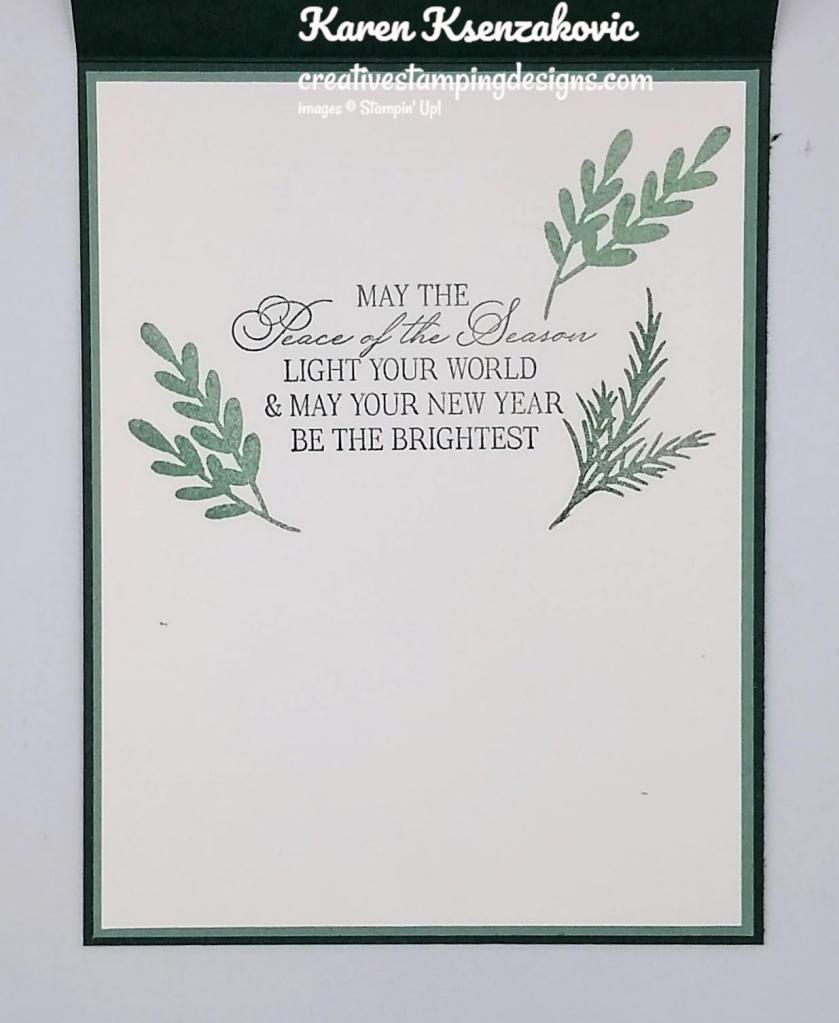
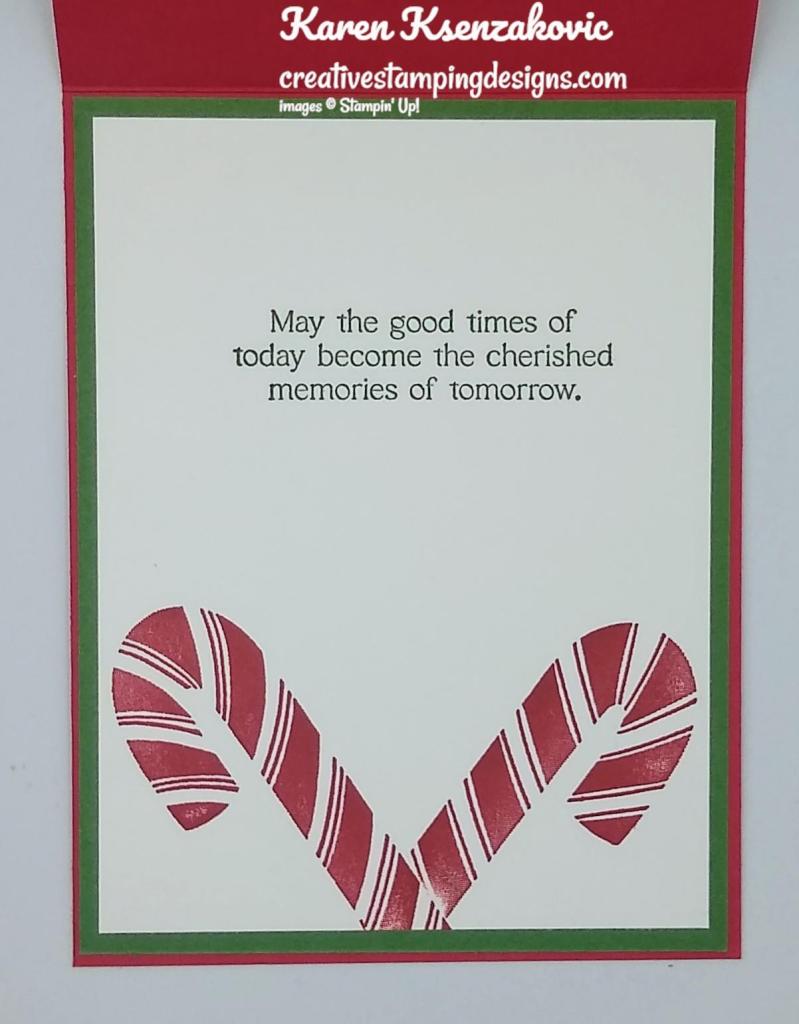
On the inside, I stamped the sentiment from Very Best Occasions stamp set in Old Olive Ink on a Basic White panel. I stamped the pine bough image from the Christmas Banners stamp set in Old Olive Ink on the top of the panel. I adhered the Basic White panel to an Old Olive mat then to the inside of the Old Olive card base.

Stampin' Up! Banners For You CAS 6 creativestampingdesigns.com

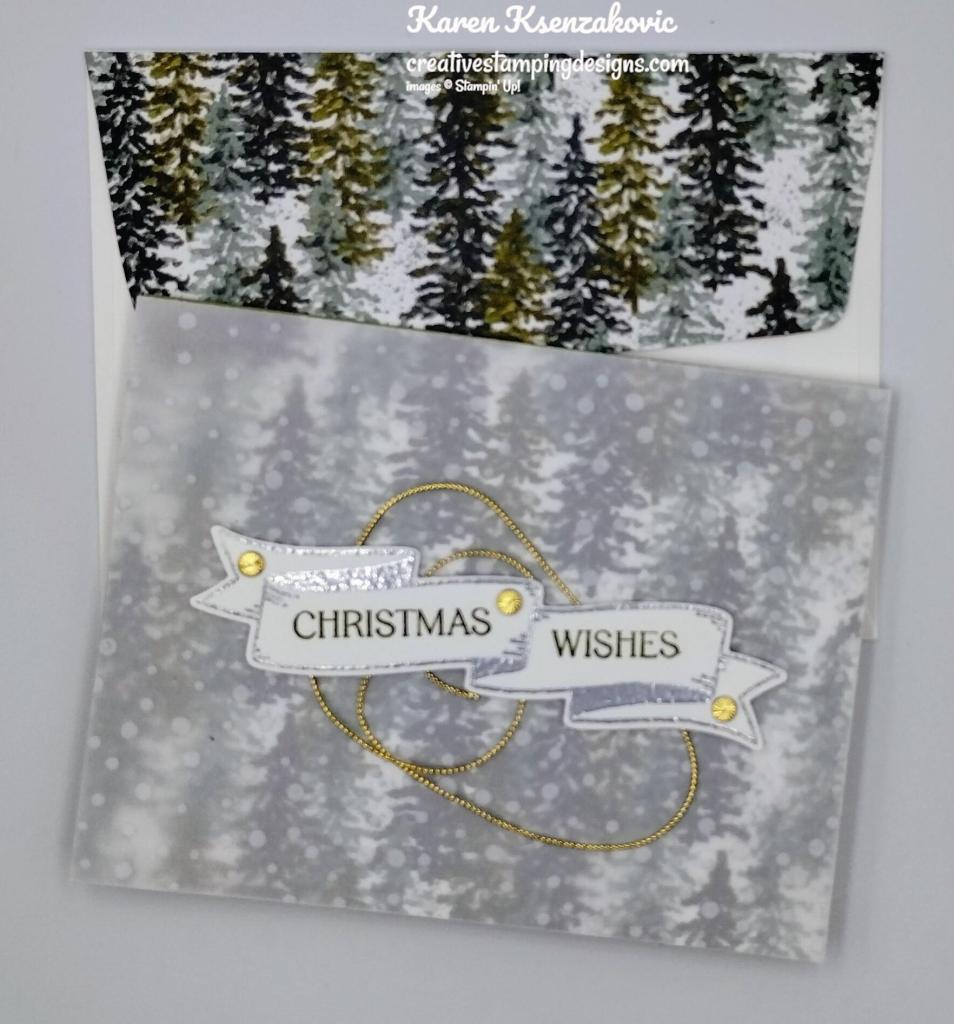
To complete my card, I decorated a Basic White Medium Envelope. I stamped the pine bough image from the Christmas Banners stamp set on the top of the envelope front. I adhered a panel of Boughs of Holly DSP to the envelope flap.

Stampin' Up! Banners For You CAS 7 creativestampingdesigns.com

Thank you for stopping by my blog today. I hope you like my card and will give it a try. Happy Stamping!!

*********************************************************************************************************

If you need any stamping supplies, I’d love to be your Demonstrator. Just click HERE to go directly to my online store or drop me an email if you have any questions. 

MY CURRENT HOST CODE IS:   7UP2RPAX

Use this host code when placing an order with me. When you order $50 or greater you will receive a free gift from me! If your order is over $150, please do not use this code, but you’ll still get the free gift. The free gift is your choice of any 1 item valued up to $10.00 from the 2022-2023 Annual Catalog or the July – December 2022 Mini Catalog!   For any orders $50 or more I will also send you my monthly class tutorials.  Click HERE or go to my Customer Rewards for more details and to see what this month’s tutorials are.

Please remember to use my current Host Code and make sure that you can see my name on the final checkout page listed as your Demonstrator when you order so that you know that you’re ordering with me and you’ll get my rewards! 

Happy Stamping, Karen

*********************************************************************************************************

Run don’t walk to get your hands on these awesome deals. You’re going to want to save, save, save on these awesome deals.

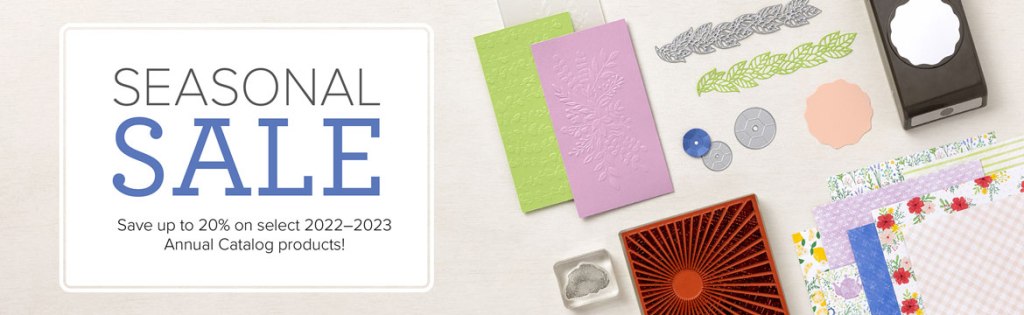
Create more by spending less during the Seasonal Sale! Between 15 and 18 November 2022, select products from the 2022–2023 Annual Catalog will be on sale with the following discounts:

  • 10% off all punches
  • 15% of all stamps (Host stamp sets are not included in this sale)
  • 20% off all dies
  • 20% off all embossing folders
  • 20% off all non-specialty Designer Series Paper

With the season of giving upon us, this is a great opportunity to buy gifts for your fellow crafting enthusiasts, or to stock up on supplies for all your upcoming handmade projects. Remember, this sale is for four days only! Don’t miss out!

You won’t want to miss our fabulous Seasonal Sale. So, get a head start on your festive gift giving and get those shopping lists ready! Click Here for a printable PDF.

*********************************************************************************************************

DOUBLE CREATIVE STAMPING DESIGNS REWARDS!!!

It’s my birthday week so I decided to give my customers a gift. Any orders over $50 starting today, Tuesday November 15th – Saturday November 19th, I’m going to give you Double Creatives Stamping Designs Rewards. If you place and order of $50 you’ll receive 2 rewards, $100 you’ll receive 4 rewards, $150 you’ll receive 6 rewards etc. I love giving gifts so this is my little gift to you. Don’t forget for any orders under $150 you MUST use my Current Host Code 7UP2RPAX in order to get double rewards and 1 free gift from me valued up to $10.

*********************************************************************************************************

Good Thing Come In Small Packages

Subscribe November 11 – December 10

Create fun gift card holders to help you celebrate your special occasions all year long! Personalize each gift with these reversible boxes and paper bands for a unique design every time. This kit comes with enough supplies for you to make 16 different gift card holders—2 each of 8 designs. It also has an all-occasion stamp set and enough paper pieces to make your craft really pop! No matter what the occasion or who the recipient is, this is a coordinated paper craft that everyone will love and appreciate! 

Plus, this month you can take your crafting even further with a special add-on! Give a gift card and a personalized card with the Good Things Cards & Envelopes add-on. You get 16 cards (4 each of 4 designs) and 16 coordinating envelopes. Add-ons are live during the subscription period but will only be available while supplies last, so don’t wait! 

This kit includes:

  • Good Things Come in Small Packages Photopolymer Stamp Set
  • Garden Green Classic Stampin’ Spot
  • 16 gift card holders: 2 each of 8 reversible designs
  • Precut paper pieces, twine, and belly bands to customize all your crafts.
  • Enough adhesive for each project!

Finished box size: 3-5/8″ x 2-1/2″ x 1/2″ (9.2 x 6.4 x 1.3 cm)

Coordinating Stampin’ Up! colors: Balmy Blue, Basic Gray, Blushing Bride, Calypso Coral, Crushed Curry, Garden Green, Tahitian Tide

Subscribe to the November Paper Pumpkin Kit between 11 November and 10 December at paperpumpkin.com!

Note: Supplies may be limited toward the end of the subscription period.

ADD-ON

Good Things Cards & Envelopes Add-on

Add-on number: 163134

Available starting: 11 November

Price: $10.00 USD / $13.75 CAD

The add-on includes:

  • 16 cards, 4 each of 4 designs, and 16 coordinating envelopes
  • Card size: 4-1/4″ x 5-1/2″ (10.8 x 14 cm)
  • Coordinating Stampin’ Up! colors: Balmy Blue, Basic Gray, Blushing Bride, Garden Green

*********************************************************************************************************

Card stock cuts for this project:

  • Basic White Cardstock 1 3/4″ X 5 1/2″(sentiment), 4″ X 5 1/4″ (inner liner)
  • Old Olive Cardstock 8 1/2″ X 5 1/2″ (card base scored & folded at 4 1/4″), 4 1/8″ X 5 3/8″ (inner liner mat)
  • Boughs of Holly Designer Series Paper 4 1/4″ X 5 1/2″(card front), 2 1/4″ X 6″ (envelope)
  • Sowflake Vellum Specialty Paper 4 1/4″ X 5 1/2″ (card front)

*********************************************************************************************************

Product List

Stampin’ Up! Christmas Banners Fun Fold Video Tutorial

Good Friday morning my stamping friends welcome to my Fun Fold Friday. How was everyone’s week? Has anyone made any plans for the long weekend yet? I’ll be working all day tomorrow and Sunday.

Today’s card I made on my Facebook Live video on Wednesday. If you were able to join me or watched the replay, thank you. If you’d like to watch my video and stamp along, the measurements are below along with the links to my Facebook page and my YouTube channel. Here is my card for today.

Stampin' Up! Christmas Banners Fun Fold 1 creativestampingdesigns.com

I used the Stampin’ Up! Christmas Banners Bundle along with the Stampin’ Up! Brightest Glow Cling Stamp Set and the Lights Aglow 6 X 6 Designer Series Paper for my card today.

Stampin' Up! Christmas Banners Fun Fold 2 creativestampingdesigns.com

I started by embossing a panel of Brushed Metallic Paper using the Wintry 3D Embossing Folder. For anyone that watched my video and wanted the Snowflakes, check out my Instagram Reel. I made one with the snowflake embossing folder. I cut a panel of Lights Aglow DSP on the right side in the center at the 2 5/8″, I cut in 2″. I scored from the bottom right corner to the 2″ mark and from the top right corner to the 2″ mark.

Stampin' Up! Christmas Banners Fun Fold 3 creativestampingdesigns.com

I folded the 2 corners on the score lines. I adhered the folded DSP panel to the Brushed Metallic embossed panel using Multipurpose Liquid Glue. I adhered the layered panel to an Evening Evergreen card base using Multipurpose Liquid Glue. On a panel of Basic White cardstock I stamped the banner image from the Stampin’ Up! Christmas Banners Photopolymer Stamp Set in Evening Evergreen Ink. I stamped the sentiment from the Christmas Banners stamp set in Cherry Cobbler Ink. I cut the banner out using the Christmas Banner Dies. I adhered the banner to the card front using Stampin’ Dimensionals.

Stampin' Up! Christmas Banners Fun Fold 4 creativestampingdesigns.com

From panels of Cherry Cobbler, Crumb Cake, Evening Evergreen, Soft Succulent and Brushed Metallic cardstocks, I cut the berries, branches, pine boughs and sprigs using the Christmas Banner Dies. I arranged the die cut pieces under the banner the way I liked them using Multipurpose Liquid Glue. I added a few Festive Pearls to the banner.

Stampin' Up! Christmas Banners Fun Fold 5 creativestampingdesigns.com

On the inside I stamped the sentiment from the Brightest Glow stamp set in Evening Evergreen Ink on a Basic White panel. I stamped the pine bough and sprig images from the Christmas Banners stamp set in Evening Evergreen and Soft Succulent Ink around the sentiment. I adhered the Basic White panel to a Soft Succulent mat then to the inside of the Evening Evergreen card base.

Stampin' Up! Christmas Banners Fun Fold 6 creativestampingdesigns.com

To finish my card, I decorated a Basic White Medium Envelope. I stamped the pine bough and sprig images from the Christmas Banners stamp set on the envelope front in Evening Evergreen and Soft Succulent Inks. I adhered a panel of Lights Aglow DSP to the envelope flap.

Stampin' Up! Christmas Banners Fun Fold 7 creativestampingdesigns.com

Thank you for stopping by my blog today. I hope you liked my card and will give it a try. I hope you will CASE this card and please feel free to post it in the comments of my Facebook page under my post. I’d love to see your take on the card. The list of measurements are below if you’d like to stamp along while watching the video. You can watch my video on my Facebook page Here.

You can also view the video on my YouTube channel Here. If you watch this on my YouTube channel, please remember to subscribe so that you will get notified when a new video goes live. Happy Stamping!!

*********************************************************************************************************

If you need any stamping supplies, I’d love to be your Demonstrator. Just click HERE to go directly to my online store or drop me an email if you have any questions. 

MY CURRENT HOST CODE IS:   CD74ZSKH

Use this host code when placing an order with me. When you order $50 or greater you will receive a free gift from me! If your order is over $150, please do not use this code, but you’ll still get the free gift. The free gift is your choice of any 1 item valued up to $10.00 from the 2022-2023 Annual Catalog or the July – December 2022 Mini Catalog!   For any orders $50 or more I will also send you my monthly class tutorials.  Click HERE or go to my Customer Rewards for more details and to see what this month’s tutorials are.

Please remember to use my current Host Code and make sure that you can see my name on the final checkout page listed as your Demonstrator when you order so that you know that you’re ordering with me and you’ll get my rewards! 

Happy Stamping, Karen

*********************************************************************************************************

Final Week of Stampin’ Up! Weekly Deals!!!

Every week in the month of September Stampin’ Up! will be offering a selection of discounted products. Discounts and product selection will vary from week to week.

Head over to my Online Store Here to see the Weekly Deals for this week.

  • New products added each week on 1, 8, 15, and 22 September.
  • Week 1: Sept 1−7, Week 2: Sept 8−14, Week 3: Sept 15−21, Week 4: Sept 22−28
  • Promotion ends 28 September.
  • Product options and discounts vary based on inventory availability.
  • All order types qualify for this promotion
  • Discounted items can be added to a Starter Kit.
  • Get the most up-to-date product information on the online store beginning 1 September.

*********************************************************************************************************

World Card Making Day Events – Save The Date, October 1!

INKIN’ KREW WORLD CARD MAKING DAY EVENT –

9 AM ET UNTIL 9 PM ET, SATURDAY, OCTOBER 1!

We’re doing it again!!  Our team will be hosting a fun all-day event on Saturday, October 1 for World Card Making Day!  Our event will feature card making presentations live on the event Facebook page as well as some fun giveaways!

Stampin’ Up! is also hosting an event online and we’re scheduling our event so that it runs before and after the Stampin’ Up! event!  Most of us will be using one of the three bundles from the Stampin’ Up! event for our projects so you will come away from the day with tons of ideas for those three bundles!

All are welcome to join us!  We’ll be setting up a Facebook page to host the event and we’ll be sharing the link to the page in late September.  Keep an eye out on my Facebook page and blog for more details!  No registration required for our group, just request to join the Facebook page when you see it in late September!  Can’t wait to stamp with you all then!!

FREE VIRTUAL, CRAFT-ALONG EVENT WITH STAMPIN’ UP!

Stampin’ Up! is also hosting a free, virtual card making event on October 1!  In just under three hours, Stampin’ Up will make three unique cards and will share the instructions with you.  Everyone is invited and welcome, and registration is not required.  Mark your calendars now!

To make the most of this experience, you can order the Cottage Rose Bundle from the 2022–2023 Annual Catalog, the Cottage Wreaths Bundle from the July–December 2022 Mini Catalog, or the Warm Welcome Bundle which you can get early from the January–June 2023 Mini Catalog!!  The bundles aren’t required to attend the event, but if you’d like to make the projects presented, you’ll want to get the bundles!

If you haven’t seen the Warm Welcome bundle yet, here it is!

When you order any bundle, you’ll get a FREE gift of Iridescent Pearl Basic Jewels! (Note that even if you order all three bundles, you’ll only receive one Iridescent Pearls gift.) 

Check out the Product Flyer with all the bundles’ ordering information. You can still attend this event without ordering the bundles, but it will be a lot more fun to craft together if you have one or more bundles! Order early to get your products in time for our World Card Making Day Creative Event.

*This date is subject to change. If you are registered for the event, we’ll automatically notify you by email as soon as it becomes available.

Click Here to go to my Online Store to order any of these awesome bundles.

Details for the Stampin’ Up! Event

Who: Anyone!

When: 1 October from 2:00–5:00 p.m. (MT)

Where: Online

Price of Event: Free

Registration Dates*: 11 August–1 October

Language of Event: The event will be in English with language interpretation voiceover and subtitles in English, French, German, and Dutch

*You don’t have to register for this event but registering will keep you informed of all the fun crafting in store!

Click here to register.

*********************************************************************************************************

Available Now!!

Some things are great on their own but become epic when they are paired with something else: cereal and milk, toast and butter, Fred Astaire and Ginger Rogers. We may be biased, but our favorite combo is our stamp sets and dies—and that’s what the Perfect Partners promotion is all about! 

We created six new dies that coordinate with stamp sets in the 2022–2023 Annual Catalog and the July–December 2022 Mini Catalog. These coordinating dies will only be available during this promotion and will not be offered in any catalog.  

These stamp sets and dies are available separately or as a bundle. By buying the bundle, you and your customers will save 10% off the retail price. 

Put these wonderful stamp sets and dies together for more papercrafting fun!

*********************************************************************************************************

Ho Ho Ho

Subscribe September 11 – October 10

‘Tis the season to make your own Christmas cards with the Ho Ho Ho Paper Pumpkin Kit! This kit contains whimsical designs of Santa and his reindeer in a classic Christmas color palette which is sure to match various styles of holiday décor and look great on mantles everywhere. 
Each kit contains enough supplies to create 9 festive cards—3 each of 3 designs—and 9 coordinating envelopes. These cards are sure to bring the warm holiday spirit. 
And word from the North Pole is that this kit coordinates with next month’s Paper Pumpkin tag kit and the special add-on product! With so much coordination between products, you’ll have a breeze at creating a cohesive look for all your holiday gifting needs. Make this season the most wonderful time of the year for your loved ones—and for yourself!

This kit includes:

  • Ho Ho Ho Photopolymer Stamp Set
  • Early Espresso Classic Stampin’ Spot
  • Printed card bases
  • Printed envelopes
  • Printed die cuts
  • Die-cut labels
  • Iridescent foil die-cut snowflakes
  • Vellum
  • Vanilla expoy dots
  • Adhesive dots
  • Mini Dimensionals

Card size: 4-1/4″ x 5-1/2″ (10.8 x 14 cm) 

Coordinating Stampin’ Up! colors: Bermuda Bay, Cherry Cobbler, Crumb Cake, Early Espresso, Shaded Spruce, Sweet Sorbet, Very Vanilla

Subscribe to the October Paper Pumpkin Kit between 11 September and 10 October at paperpumpkin.com!

Note: Supplies may be limited toward the end of the subscription period.

*********************************************************************************************************

Card stock cuts for this project:

  • Basic White Cardstock 2 – 4″ X 5 1/4″ (sentiment & inner liner)
  • Cherry Cobbler Cardstock 2″ X 2″ (berries)
  • Crumb Cake Cardstock 3″ X 1″ (branch)
  • Evening Evergreen Cardstock 4 1/4″ X 11″ (card base scored & folded at 5 1/2″), 1 1/2″ X 5 1/2″ (pine boughs)
  • Soft Succulent Cardstock 2″ X 4 1/4″ (sprigs), 4 1/8″ X 5 3/8″(inner liner mat)
  • Brushed Metallic Paper 4″ X 5 1/4″ (card front panel), 1″ X 4″ (sprigs)
  • Lighs Aglow 6 X 6 Designer Series Paper 4″ X 5 1/4″ (card front), 2 1/4″ X 6″ (envelope)

*********************************************************************************************************

Product List

Stampin’ Up! Sweet Candy Cane Christmas

Good Wednesday morning my stamping friends. Well, here we are halfway through another week. I can’t believe the end of July is this weekend. I feel like July just started.

I made my 1st Christmas card for today. It cooled off a bit here, so I decided that I would make one. I have to get started some time, right? Also, we have out Stamp Camp Card Class next week and since everyone couldn’t be here last month for Christmas in July, we’re doing Christmas in August theme. The ladies will be making a version of this card next week. Here’s my card for today.

Stampin' Up! Sweetest Candy Canes Christmas 1 creativestampingdesigns.com

I used the Stampin’ Up! Sweet Candy Canes Bundle along with the Stampin’ Up! Christmas Banners Bundle for my card today.

Stampin' Up! Sweetest Candy Canes Christmas 2 creativestampingdesigns.com

I started by cutting panels of Basic White and Real Red cardstock using the striped die from the Candy Canes Dies. I adhered the 2 panels together using Multipurpose Liquid Glue. I adhered the layered panel to a Real Red card base using Stampin’ Dimensionals.

Stampin' Up! Sweetest Candy Canes Christmas 3 creativestampingdesigns.com

On a panel of Basic White cardstock, I stamped the 2 candy cane images from the Stampin’ Up! Sweet Candy Cane Cling Stamp Set in Real Red Ink. I cut the candy canes out using my Candy Cane Dies. I adhered the candy canes together using a Glue Dot and adhered them to the card front using Stampin’ Dimensionals. From a panel of Garden Green cardstock, I cut 5 of the pine boughs die from the Christmas Banners Dies. I adhered the pine boughs around the candy canes using Glue Dots. I tied a small bow using the Garden Green ribbon from the Real Red & Garden Green 3/8″ Ribbon Combo Pack. I adhered the bow to the candy canes using a Glue Dot.

Stampin' Up! Sweetest Candy Canes Christmas 4 creativestampingdesigns.com

I adhered a few of the Gold Holly Leaves to the pine boughs using Glue Dots. On the Basic White panel, I stamped the sentiment out using the Stampin’ Up! Christmas Banners Photopolymer Stamp Set. I cut the sentiment out using the Christmas Banners Dies. I adhered the sentiment to the top of the card front using Stampin’ Dimensionals.

Stampin' Up! Sweetest Candy Canes Christmas 5 creativestampingdesigns.com

On the inside, I stamped the sentiment from the Sweet Candy Cane stamp set in Garden Green Ink on a Basic White panel. I stamped the candy cane images from the Sweet Candy Cane stamp set in Real Red Ink on the bottom of the panel. I adhered the Basic White panel to a Garden Green mat and then to the inside of the Real Red card base.

Stampin' Up! Sweetest Candy Canes Christmas 6 creativestampingdesigns.com

To finish my card, I decorated a Basic White Medium Envelope. I stamped the candy canes from the Sweet Candy Cane stamp set in Real Red Ink on the envelope front. I adhered a panel of Sweetest Christmas Designer Series Paper to the envelope flap.

Stampin' Up! Sweetest Candy Canes Christmas 7 creativestampingdesigns.com

Thank you for stopping by my blog today. I hope you liked my card and will give it a try. Happy Stamping!!

*********************************************************************************************************

If you need any stamping supplies, I’d love to be your Demonstrator. Just click HERE to go directly to my online store or drop me an email if you have any questions. 

MY CURRENT HOST CODE IS:   RGVNBY93

Use this host code when placing an order with me. When you order $50 or greater you will receive a free gift from me! If your order is over $150, please do not use this code, but you’ll still get the free gift. The free gift is your choice of any 1 item valued up to $10.00 from the 2021-2022 Annual Catalog or the January – June 2022 Mini Catalog!   For any orders $50 or more I will also send you my monthly class tutorials.  Click HERE or go to my Customer Rewards for more details and to see what this month’s tutorials are.

Please remember to use my current Host Code and make sure that you can see my name on the final checkout page listed as your Demonstrator when you order so that you know that you’re ordering with me and you’ll get my rewards! 

Happy Stamping, Karen

*********************************************************************************************************

The Back To School Sales Tax Holiday is going on until August. For those of you living in Alabama, Arkansas, Florida, Illinois, Massachusetts, Mississippi, Missouri, New Mexico, Ohio, Puerto Rico, South Carolina, Tennessee, Texas, Virginia and West Virginia…you’ve got sales tax holidays coming up!! Florida, Mississippi and Tennessee all start this week.

The good news is that some items in the Stampin’ Up! Catalogs qualify for the sales tax holidays!  The list of sales tax holidays by state and items in that state that qualify Here on a printable PDF. Check it out to see when your state has the Sales Tax Holiday.

*********************************************************************************************************

Sweet Sunflowers

Subscribe July 11 – August 10

Here comes the sun(flower) for a crafting experience you won’t forget! The Sweet Sunflowers Paper Pumpkin Kit has so much in store—elegant watercolor designs hand-crafted by our in-house artists, TWO Classic Stampin’ Spots for a Two-Step stamping experience, and the all-new twist technique to make your floral designs come alive with depth and detail! 
And the August Paper Pumpkin Kit includes the Gold Foil Honeycomb Sheets as a FREE gift that will add the perfect golden accent to any card or project. We can’t wait to see the bee-utiful projects you’ll create! 

Item Number: 161120

This kit includes:

  • All the supplies you need to create 9 cards: 3 each of 3 designs; and coordinating envelopes.
  • An all-occasion stamp set to express words of gratitude, friendship, greetings and beautiful wildflower designed images.
  • Specialty Vellum honeycomb shape pre-cut pieces.
  • 2 Classic Stampin’ Spots (Crushed Curry and Soft Suede) for a Two-Step stamping experience with a twist!
  • Paper pieces and embellishments with watercolor designs and images.
  • Mini Stampin’ Dimensionals.
  • FREE GIFT: 8 Gold Foil Honeycomb Sheets

Completed card size: 5-1/2″ x 4-1/4″ (14 x 10.8 cm)

Coordinating Stampin’ Up! colors: Blackberry Bliss, Crushed Curry, Evening Evergreen, Melon Mambo, Mossy Meadow, Night of Navy, Pumpkin Pie, Soft Suede

Subscribe to the July Paper Pumpkin Kit between 11 July and 10 August at paperpumpkin.com!

Note: Supplies may be limited toward the end of the subscription period.

*********************************************************************************************************

If you join during Sale-a-bration you will receive this awesome Making Plans Collection absolutely free. It includes a July 2022-December 2023 Making Plans Planner including an 8″ X 9 1/2″ Faux Leather Carrying Case, 5 1/2″ X 8 1/2″ Planer Pages, Monthly Divider Pages and Sticker Sheets. It also includes 3 – Creative Journals that are 5 3/4″ X 8″ and a Making Plans Photopolymer Stamp Set. Contact me for more information at creativestampingdesigns@gmail.com. I’d love to have you on my team. You can join as a hobby demonstrator just to enjoy the discount for yourself. No obligations to sell, hold classes or have a blog.

*********************************************************************************************************

Card stock cuts for this project:

  • Basic White Cardstock 4″ X 5 1/4″ (card front panel), 4 1/2″ x 4 1/4″ (candy canes & sentiment). 3 7/8″ X 5 1/8″ (inner liner)
  • Garden Green Cardstock 2 1/2″ X 4 1/2″ (pine boughs), 4 1/8″ X 5 3/8″ (inner liner mat)
  • Real Red Cardstock 4 1/4″ X 11″ (card base scored & folded at 5 1/2″), 4″ x 5 1/4″ (card front)
  • Sweetest Christmas Designer Series Paper 2 1/4″ X 6″ (envelope flap)

*********************************************************************************************************

Product List