
Good Friday morning stamping friends. HAPPY FRIDAY!!! How was everyone’s week? Sorry no fun fold today, I had a little accident and wasn’t able to work on cards and get one done. I’ll have one done for you tomorrow since I’m doing better today. I did want to remind you of a couple things coming to an end and didn’t want you to miss out.
Stampin’ Up! JOINING Special ENDS TONIGHT!!
Why not consider joining the Stampin’ Up! community and saving a minimum of 20% off everything you buy? You can even add the new upcoming Online Exclusive products to your starter kit. If you love to do paper crafting as much as I do, or would like to start doing it, now’s a perfect time to join and get more for your money. Are you new to stamping and don’t know where to start, but would like to join to save? Ask me for help, I’m here to help and assist you anyway that I can. Remember, there’s never an obligation to sell and if you find this isn’t for you, you can drop at any time with no penalties.
Sale-A-Bration is an excellent time you to join Stampin’ Up! In addition to the already great value of the Starter Kit, if you sign up as a Stampin’ Up! demonstrator during Sale-a-bration, you can choose from two incredible options:
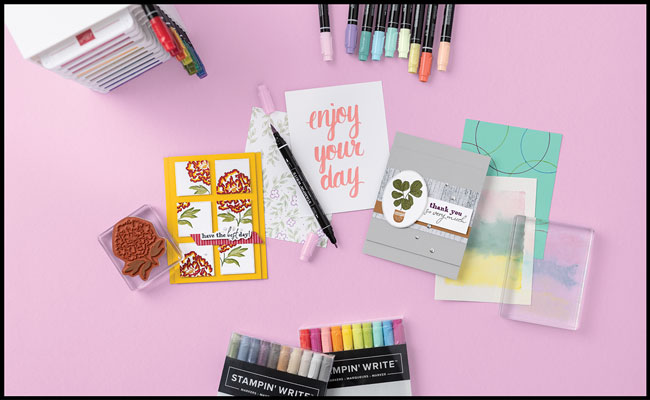
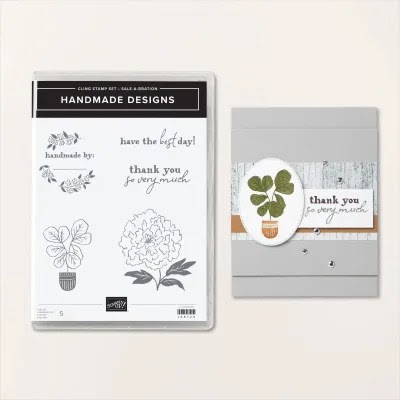
Option 1: Join Stampin’ Up! during Sale-a-bration as a new demonstrator and get $125 worth of products PLUS a choice of 2 Stampin’ Write Marker Assortments AND the Handmade Designs Cling Stamp Set, an exclusive stamp set designed to work with the markers. That’s a $216 value all for just $99!
Option 2: Join Stampin’ Up! during Sale-A-Bration and get $125 worth of product PLUS an additional $30 worth of product of your choice for just $99. That’s a $155 value!
Two joining options so you can pick the one that you like the best!!
There is never an obligation to sell. You can join just to enjoy the discount for yourself along with all the other Demonstrator benefits. Once you join, you’ll get at least a 20% discount on all of your Stampin’ Up! merchandise purchases and you get to order early from the upcoming catalogs! You will also be able to attend the OnStage Events and any other events Stampin’ Up! has and you get to be a part of our Stampin’ Up! team!
Unsure about this and want to talk? Contact me at creativestampingdesigns@gmail.com and we can talk. You can also find additional information Here at Join My Team. Being a part of the Stampin’ Up! Community is one of the best decisions I’ve ever made. I have made many friends along the way while doing what I love, Paper Crafting. This Joining offer ENDS TONIGHT. Why not give it a try? I’d love to have you on my team.
Sale-a-bration Ends TONIGHT!!
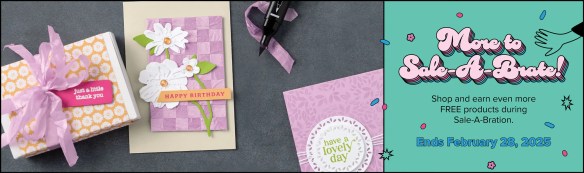
Ready for more? There are EVEN MORE PRODUCTS available to shop, earn, and redeem during Sale-A-Bration. We don’t want you to miss out on these great products and incredible deals, Click HERE for the Sale-A-Bration Additional Products Flyer.
Remember, you must use the item numbers in the flyer in order to redeem these products as Sale-A-Bration items. These products have different item numbers in the catalog, which won’t register as part of Sale-A-Bration.
We’ve included two kits as part of our Sale-A-Bration newly added products. Once the kits sell out, they will be discontinued. If they do not sell out during Sale-A-Bration, they may be discounted at a later date.
Note: The newly added products that are now redeemable during Sale-A-Bration are part of Stampin’ Up!’s existing product offering.
Sale-a-bration 2025 ends tonight, Friday, February 28! There are some awesome new products that you can earn for FREE with orders of $60+ and orders of $120+ placed during Sale-a-bration as well as a great host bonus and a joining special!
SHOP
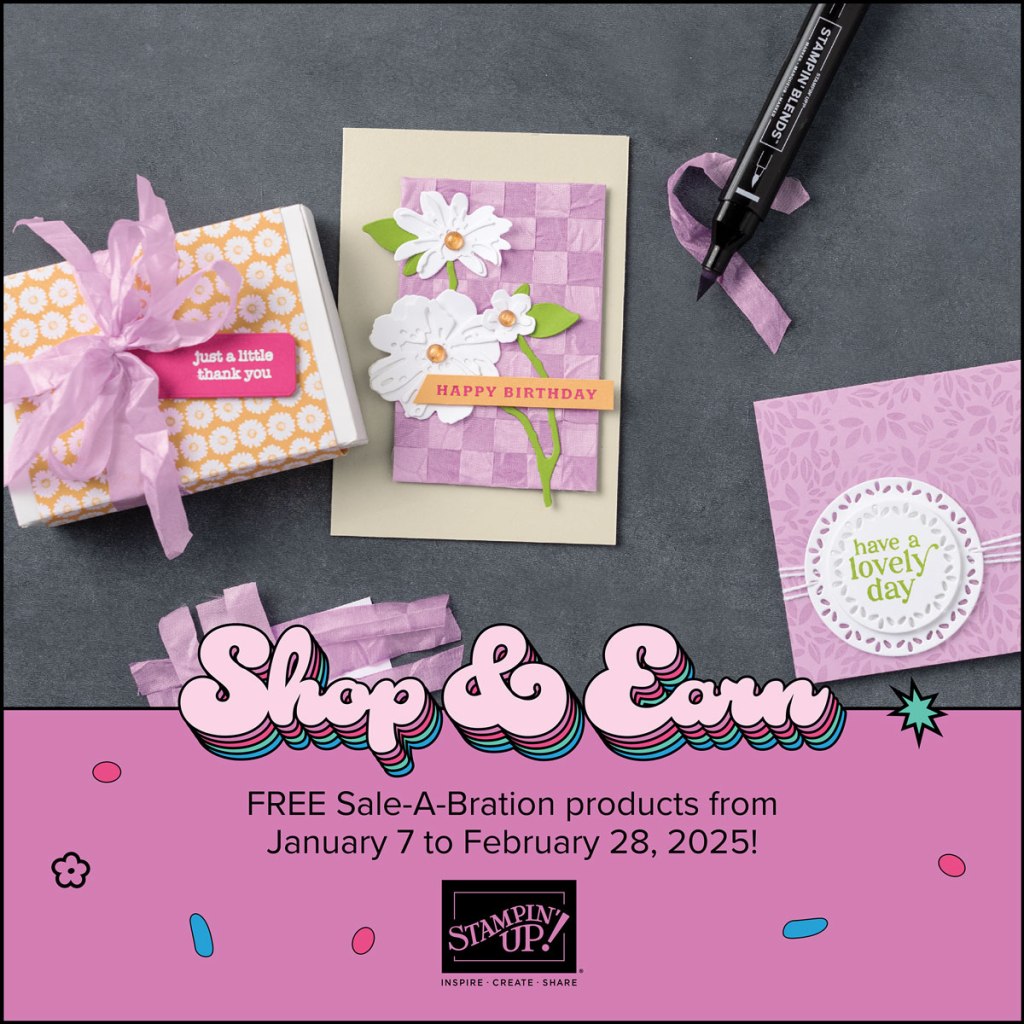
- Spend $60 or more and pick from 12 new products (5 stamp sets,3 designer series paper packs, 1 embossing folder, 1 kit, 1 pack of embellishments and 1 spool of ribbon!) that are available as free items!
- Spend $120 or more and pick from 2 new items (1 stamp bundle and 1 stamp set) that are available as free items!
HOST
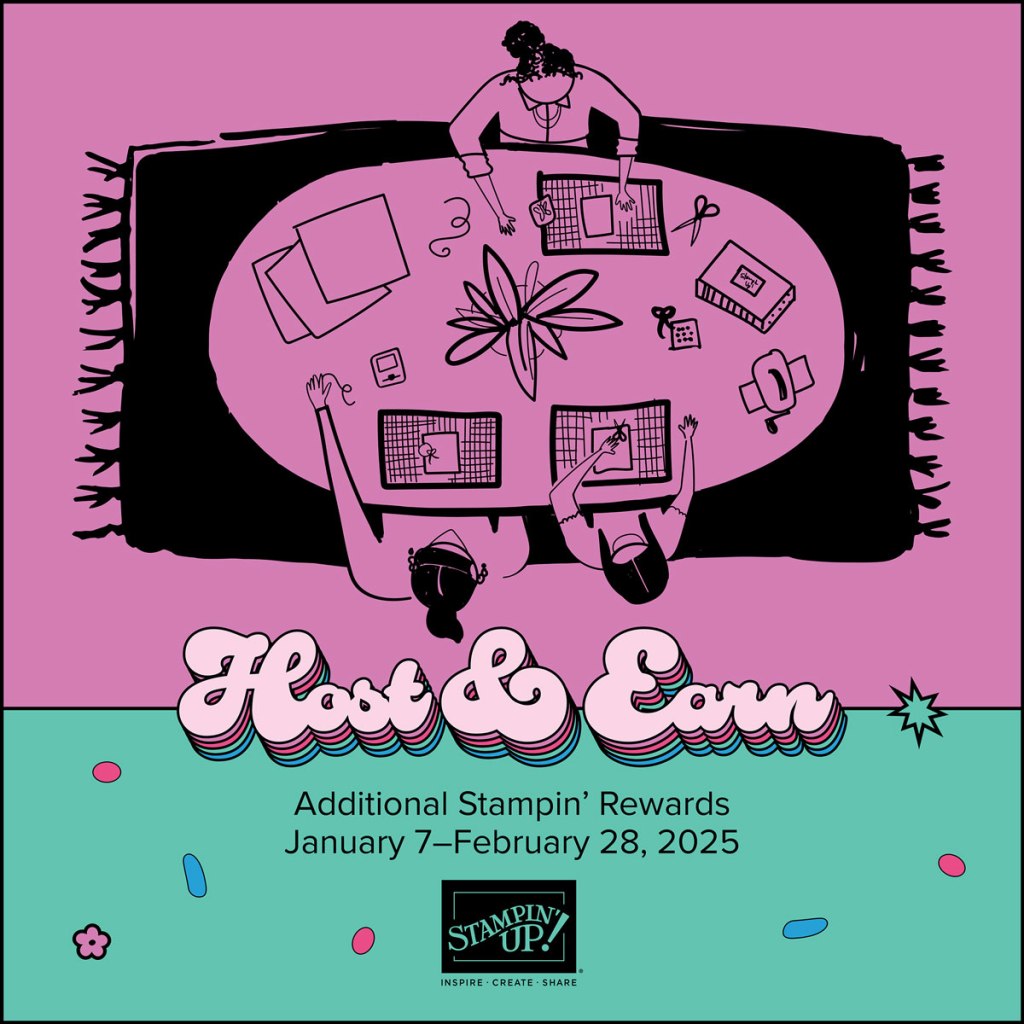
- Get an additional $30 in FREE Stampin’ Rewards with any party or individual order of $300 or greater during Sale-a-bration! You can spend your Stampin’ Rewards on any items currently available from Stampin’ Up! including (but not limited to) the host exclusive stamp sets!
*********************************************************************************************************
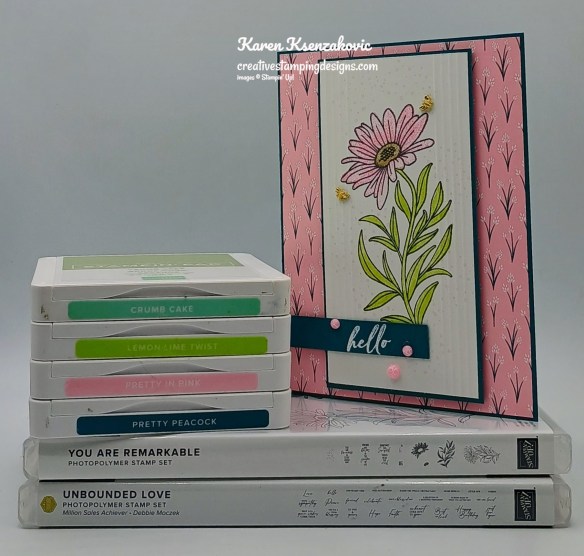
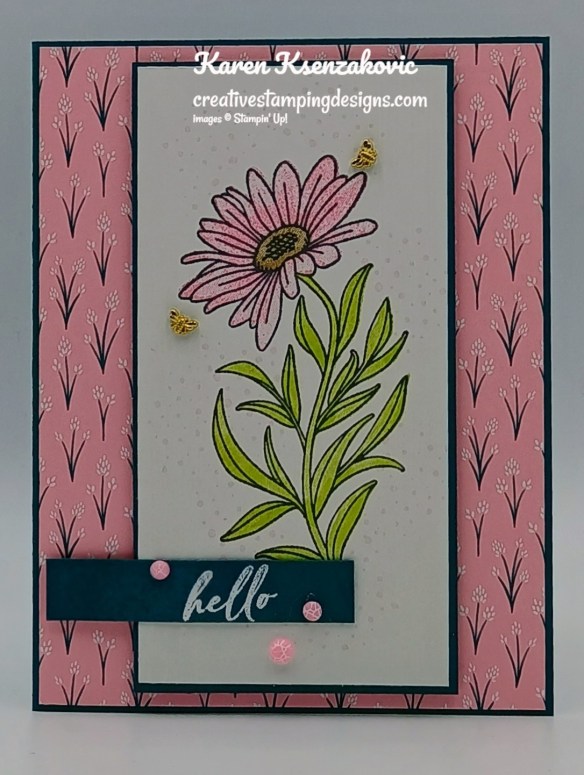
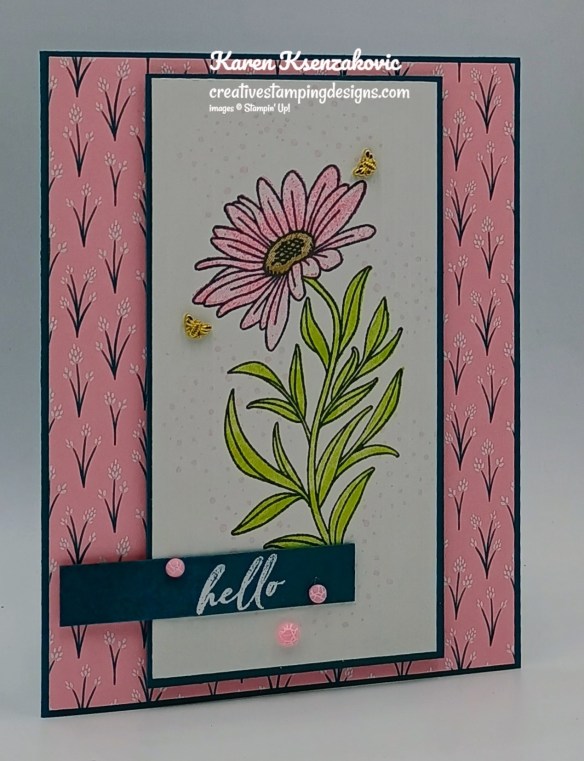
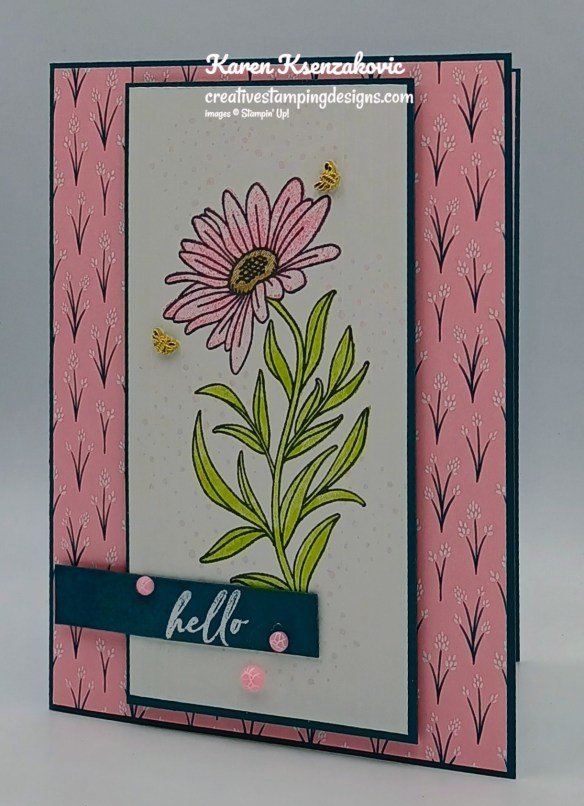
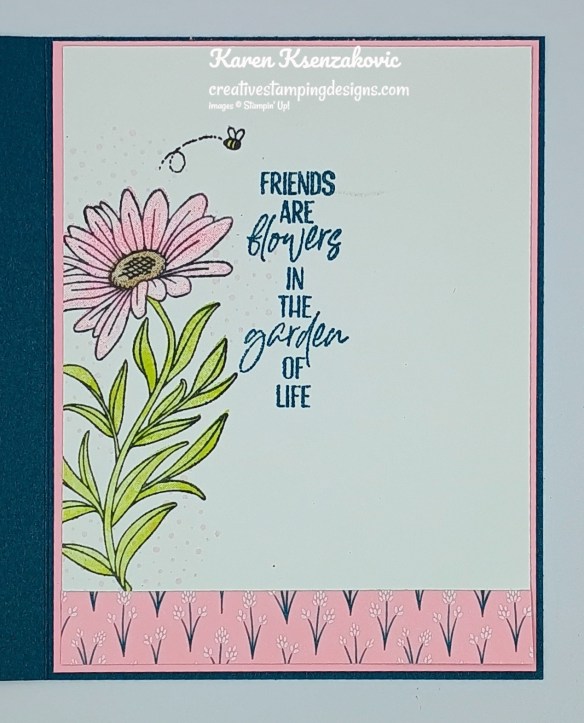
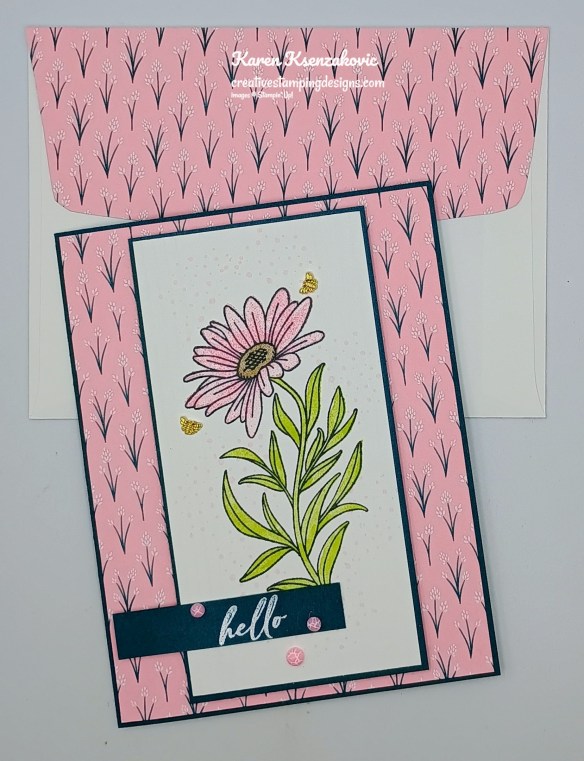
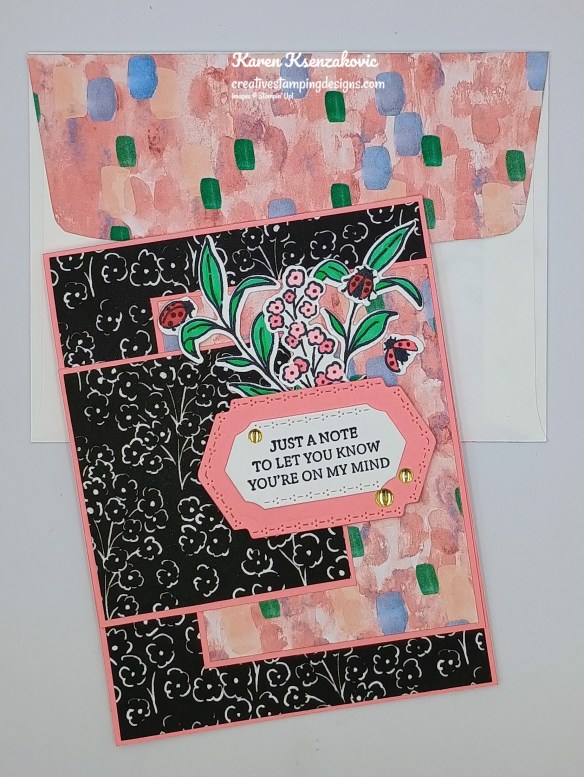
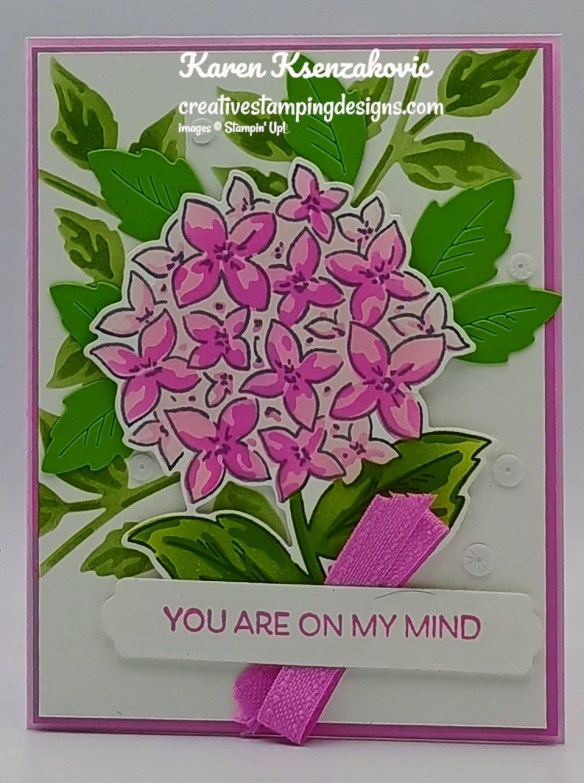
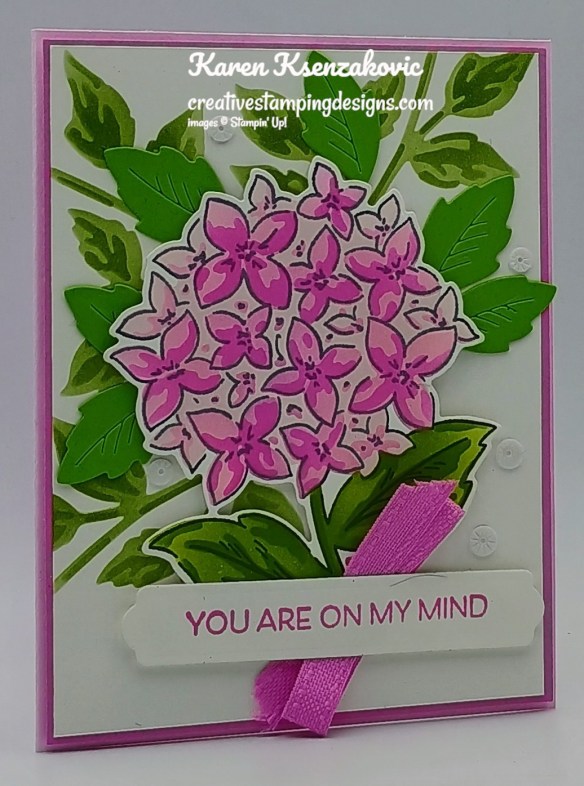
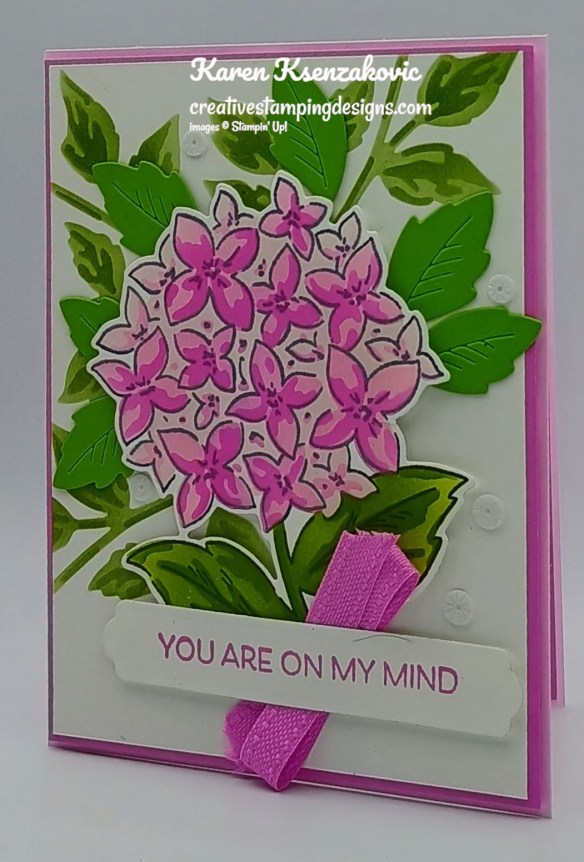
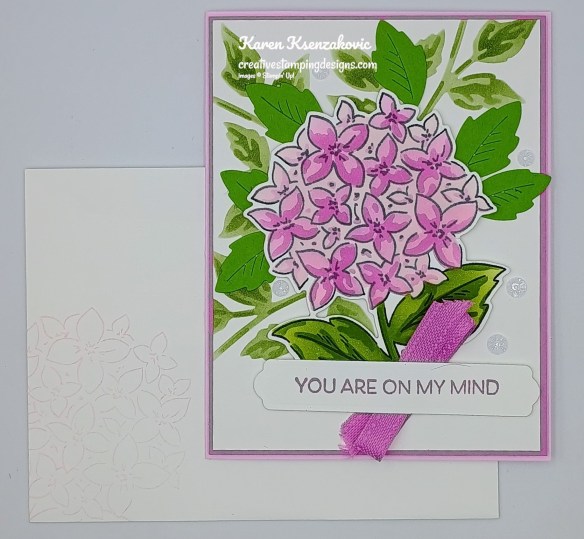
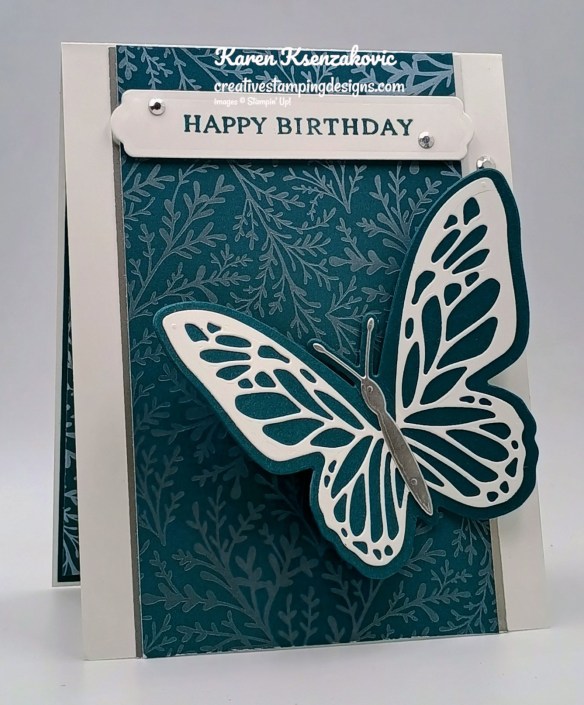
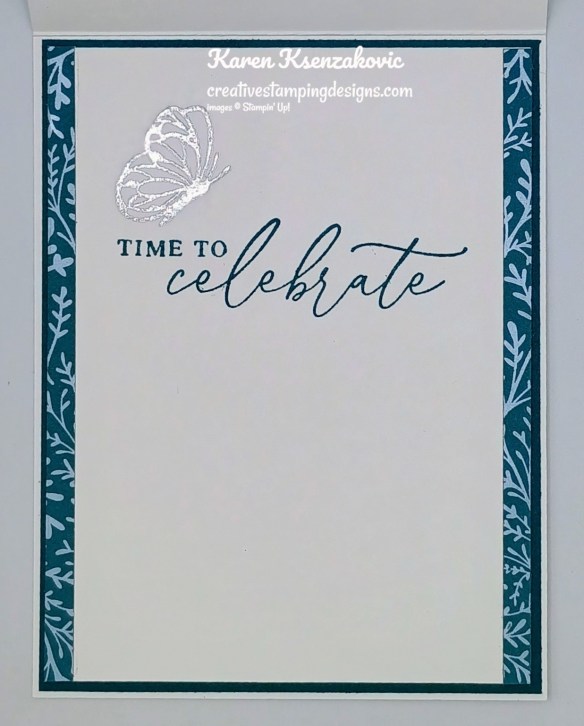
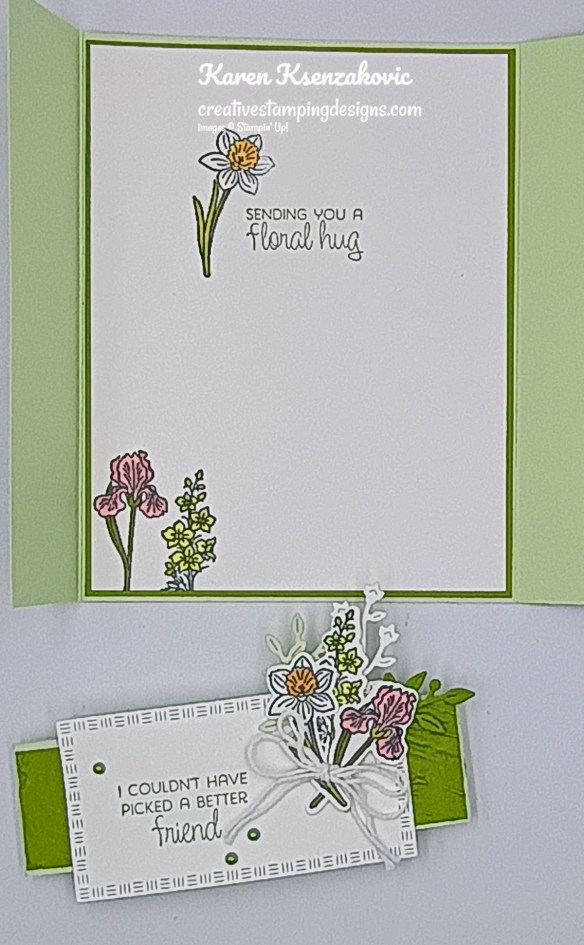
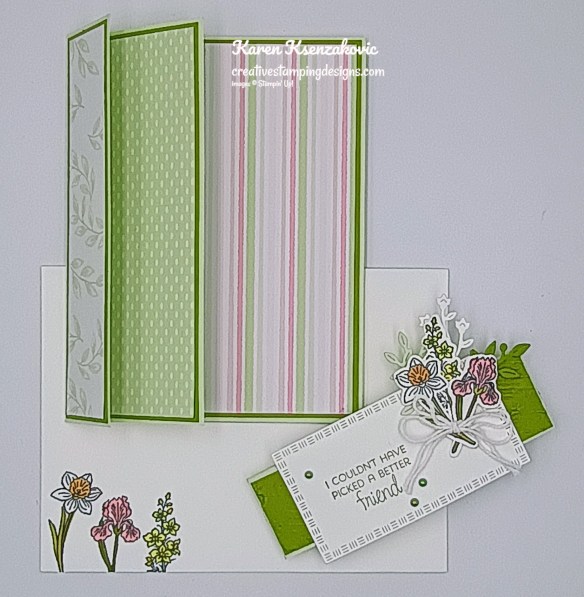
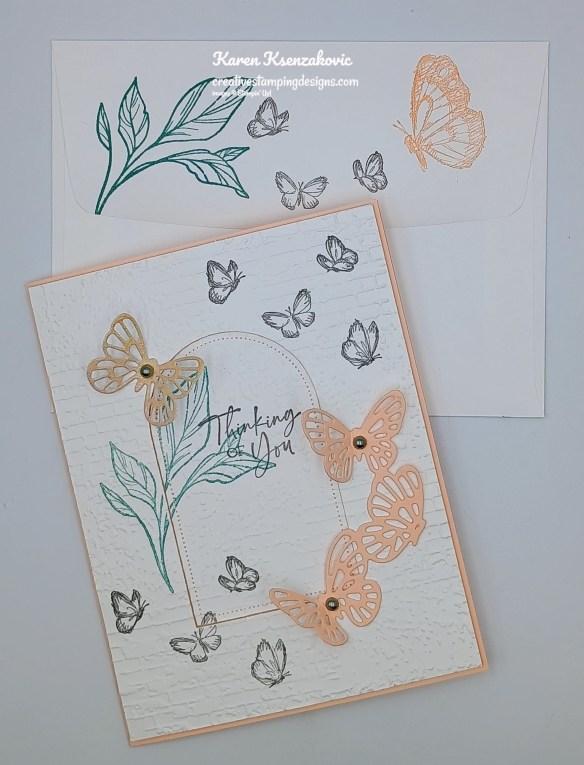
Tara Carpenter and I have teamed up again for another fun Online Zoom Class!! We are offering a fun Online Class using the new Online Exclusive Year of Flowers bundle (which will be available March 4th). We’ll be making 6 different cards, 2 which will be fun folds, using this Bundle. If you’d like to see the stamp set being used, Click Here for a card I made using it.
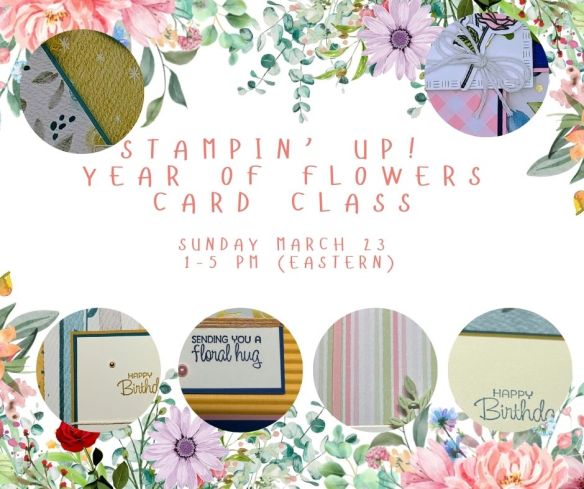
The class will be held on Zoom on Sunday March 23rd from 1pm – 5pm ET.
The class fee includes:
- 6 complete Pre-Cut card kits with envelopes so they are ready to mail when you’re done.
- Full pack of Stampin’ Up! Blooming Pearls
- Full pack of Baker’s Twine Essential Pack
- Zoom class with complete step by step instructions to complete each card as we go.
- PDF with detailed directions and photos
- A Link to the recorded class after we are done so you can watch it again and make more cards.
When you sign up for the class, you will see that you can add additional items needed to make the cards in the class if you do not already have them. These items are optional to add on, but we will be using the items to create the cards. We are offering the Stampin’ Up! Online Exclusive Year of Flowers Bundle at an additional 10% discount when you order it through me during sign up.
The class will be held on Zoom and anyone in the United States is welcome to purchase the class and join us! If you are unable to join us for the live event, but would still like to participate in the class, we will be recording the session so you can watch the replay any time and make the cards. We will also be emailing written tutorials with instructions and cardstock cuts so that you will have a reference too.
Class Cost: $35.00 + $9.00 priority shipping (additional products will be added to the cost for the products) and invoices will be sent out by March 3rd.
Class Signup Deadline: Sunday March 2nd at 5pm ET (this is so we have time to order all the bundles, embellishments and DSP being used on March 23rd)
Click Here to register for the class now!! Let me know if you have any questions.
*********************************************************************************************************
Start Thinking About Stocking Up on the 2023-2025 In-Colors Before They’re Gone
As we all know, the beautiful 2023-2025 In Colors will likely be retiring at the end of this catalog on April 30. Right now is a great time to start stocking up on ink refills, markers and card stock in your favorite colors so that you’re not left scrambling for them when the retiring list is announced.
Plus you’ll earn free Sale-a-bration items when you order $60 or greater in merchandise! The retiring list is usually posted in later March or early April and the In Color items on that list become available only while supplies last. So, order yours now so that you’re guaranteed to get them!! Head over to my ONLINE STORE and shop the In-Colors
*********************************************************************************************************
Don’t Forget To Shop The Online Exclusives
There are a lot of new Online Exclusives that are available to order from Stampin’ Up! and there will be NEW ones coming in March too!! Go check out my Online Store for the NEW Online Exclusive products available. Get those orders placed early so you don’t miss out on the pretty new suite, new bundles and Designer Series Paper. Most of the Online Exclusive are while supplies last.
Did you know that you can add the new Online Exclusive products that will be coming in March to your starter kit? This is one of the great perks of being a demonstrator, you get to order products early!!!
*********************************************************************************************************
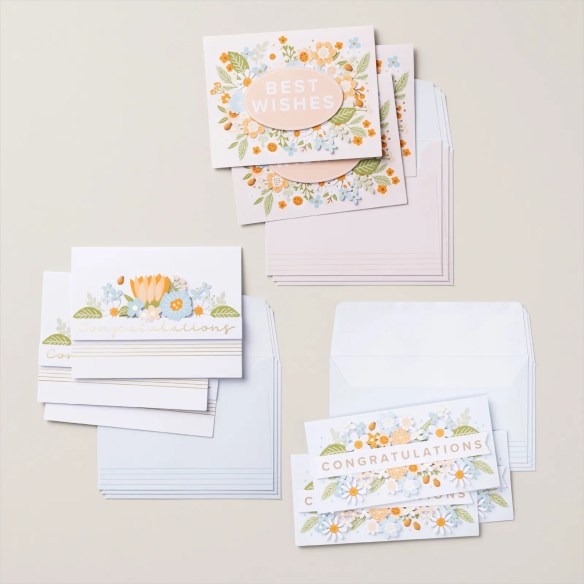
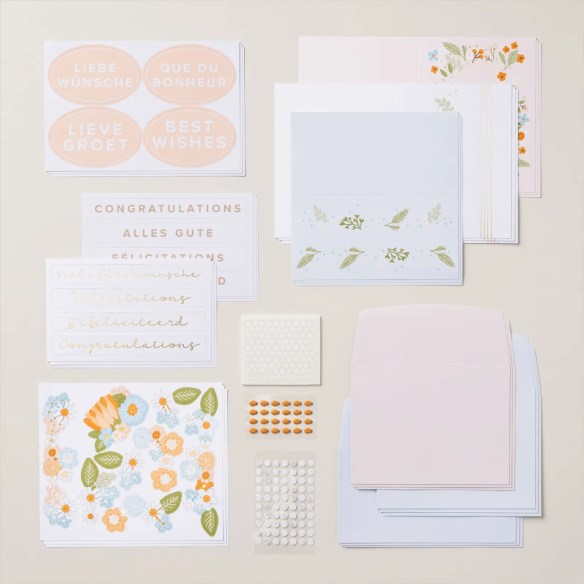
Stampin’ Up! January 2025 Scrapbook Brochure Items Available
Stampin’ Up! is happy to announce their January 2025 Scrapbooking Brochure! Whether you’re a scrapbooking expert or brand new to the craft, we hope you love making, keeping, and sharing the meaningful moments in your life! These new scrapbooking products are available to order now!!
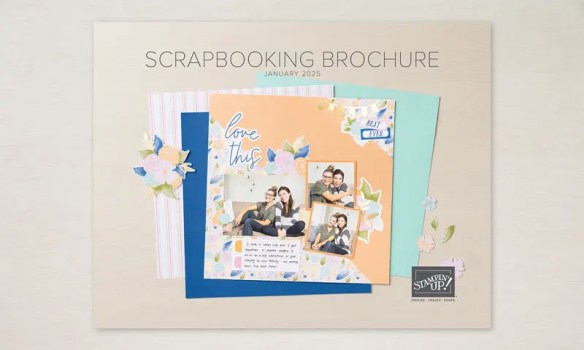
Products will be available like the current Online Exclusive releases, meaning that some products will be reordered when inventory is low, and others will only be available while supplies last.
To check the status of product availability, visit the online store.
- If a product in this brochure appears on the online store and is orderable, then it’s available at that time.
- If a product in this brochure appears on the online store with a label “currently unavailable,” then it’s currently out of stock but will be restocked and will be available to order again after we have received additional inventory.
- If a product in this brochure doesn’t appear on the online store, then it’s no longer available in that market and will not be restocked. In this case, the product in that market is discontinued.
*********************************************************************************************************
Last Chance Products Updated

Stampin’ Up! is updated the last chance products list in earlier this month! Be sure to scroll through all of the Last Chance items as there are several new things on the later pages that have been discounted!
The Last Chance products category now includes ALL products that are retiring, including Online Exclusives and Kits so you’ll know if the products that you’re looking at will be around for a bit or if they’re going away soon!
Products in the Last Chance category are available only while supplies last and will NOT be restocked.
Head over to my Online Store Here. and Start Shopping!!!
*********************************************************************************************************
If you need any stamping supplies, I’d love to be your Demonstrator. Just click HERE to go directly to my online store or drop me an email if you have any questions.
MY CURRENT HOST CODE IS: RSQGVJPH
Use this host code when placing an order with me. When you order $50 or greater you will receive a free gift from me! If your order is over $150, please do not use this code, but you’ll still get the free gift. The free gift is your choice of any 1 item valued up to $10.00 from the 2024 – 2025 Annual Catalog, January – April 2025 Mini Catalog or from the Online Exclusives! For any orders $50 or more I will also send you my monthly class tutorials. Click HERE or go to my Customer Rewards for more details and to see what this month’s tutorials are.
Please remember to use my current Host Code and make sure that you can see my name on the final checkout page listed as your Demonstrator when you order so that you know that you’re ordering with me, and you’ll get my rewards!
Happy Stamping, Karen


")


 Designer Series Paper")


")


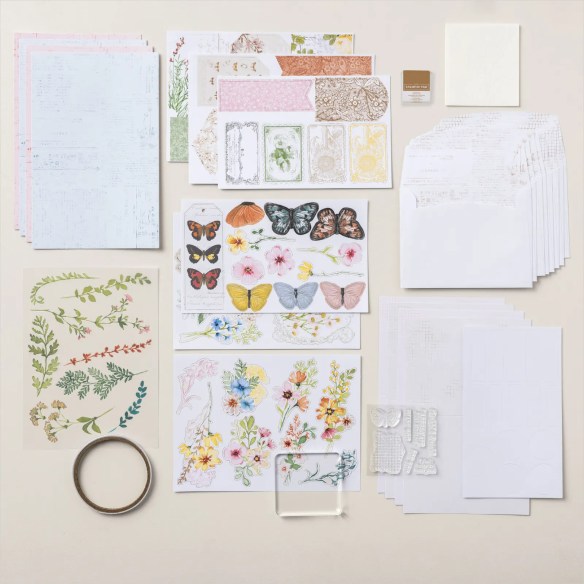


")
")


 Designer Series Paper")


")


 Bordered Ribbon")


 Woven Ribbon")


")
")

 Specialty Designer Series Paper")
 Foil Sheets")


 Specialty Designer Series Paper")


")
")


 Specialty Paper")


")
")


 Designer Series Paper")


