
Good Wednesday morning stamping friends. We’re halfway through the week and on out way to the weekend. There’s a lot coming up this week with Stampin’ Up!, so be sure to read below to see what’s coming soon.
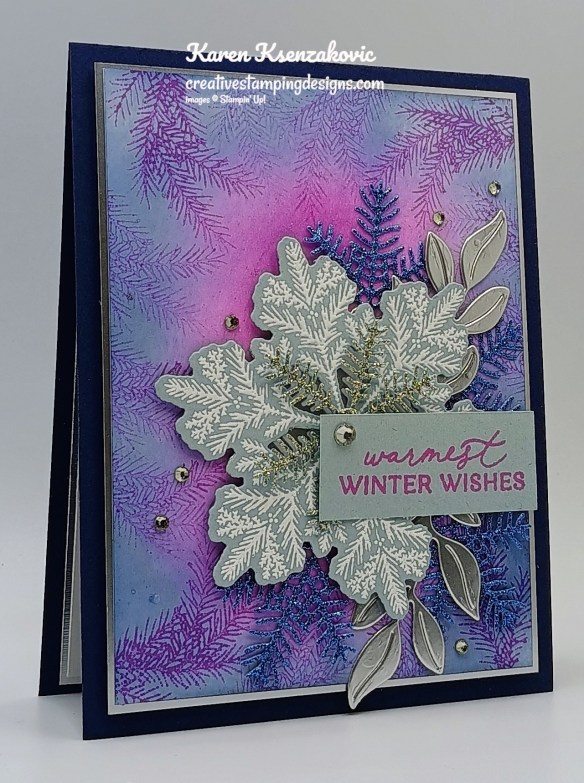
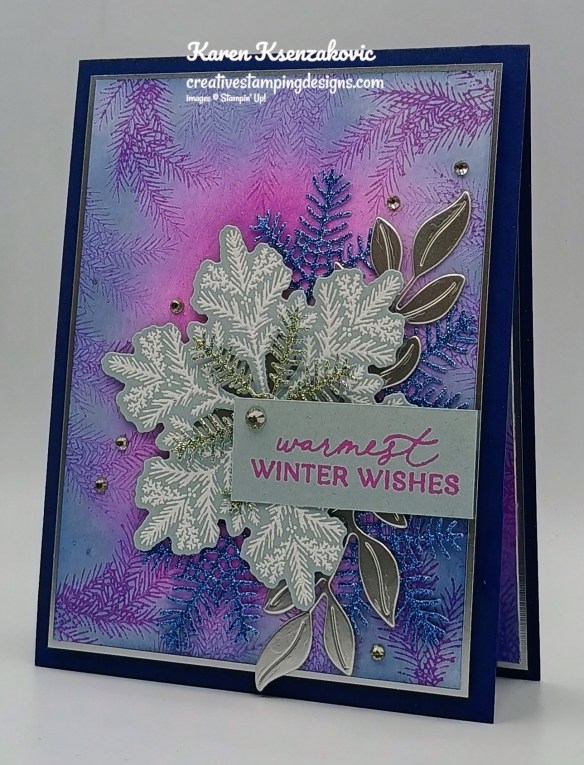
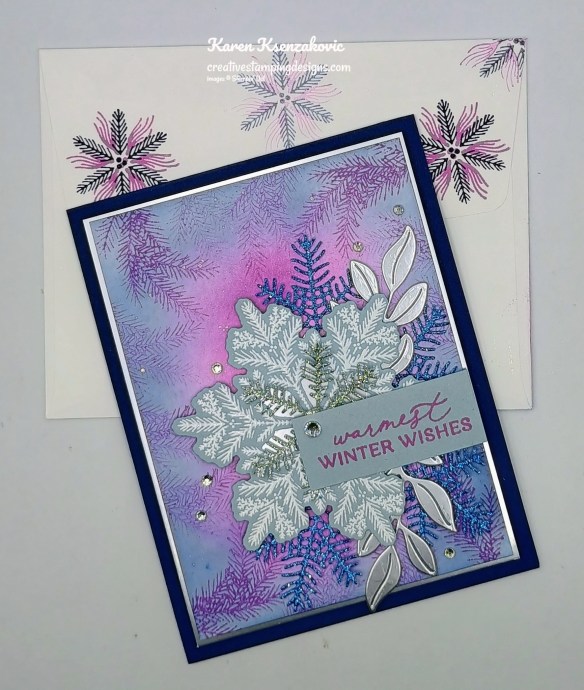
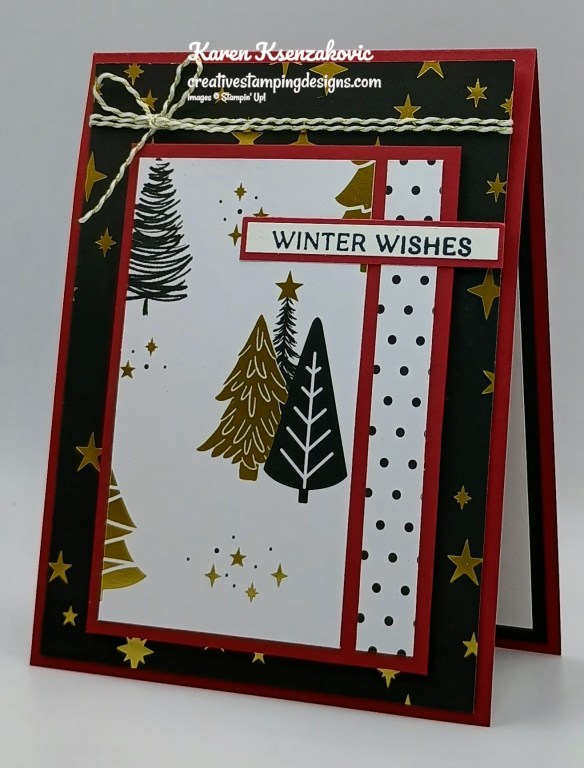
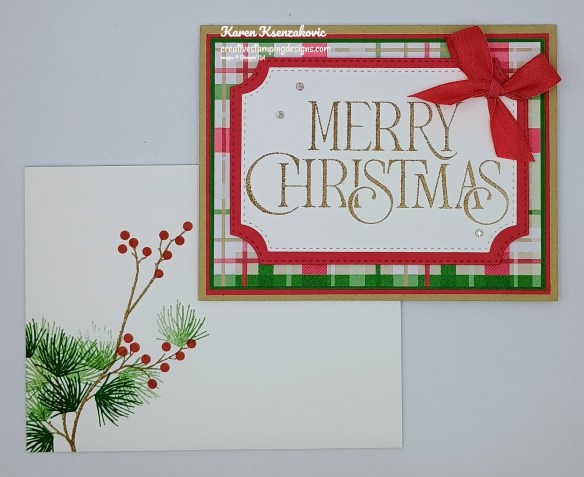
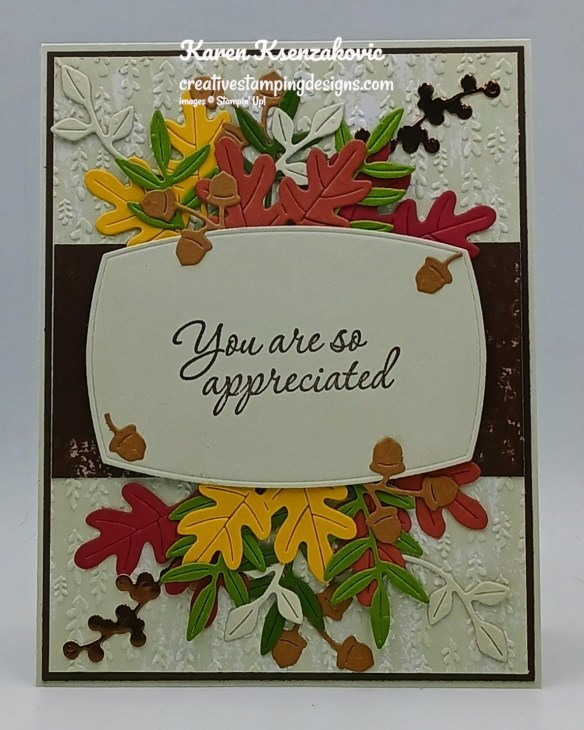
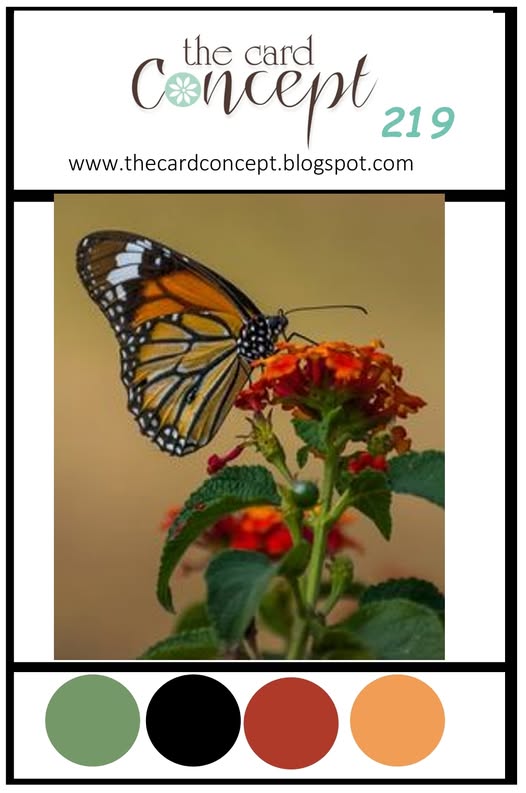
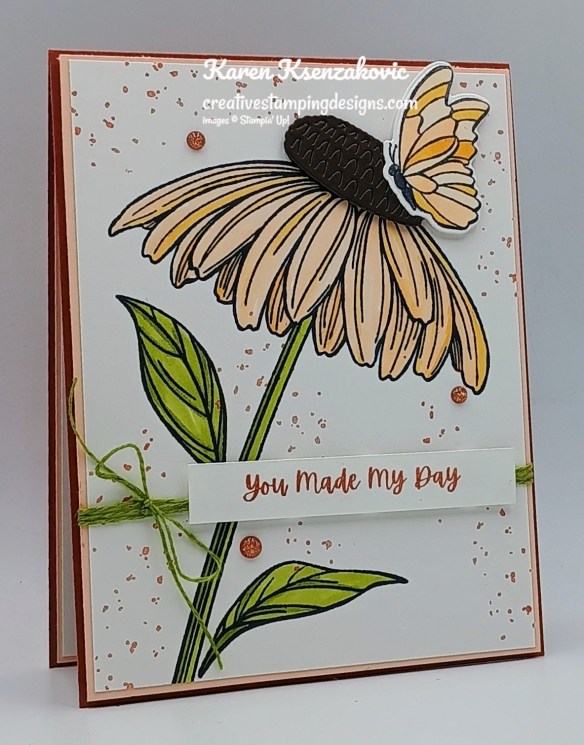
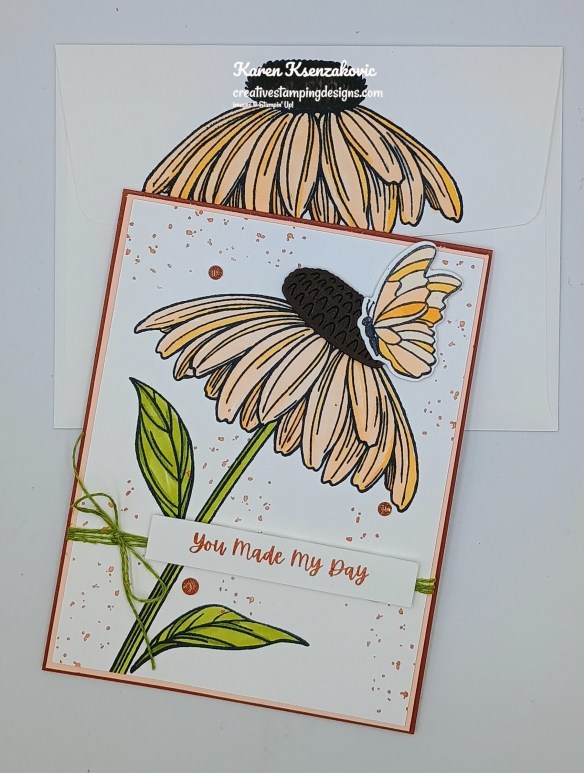
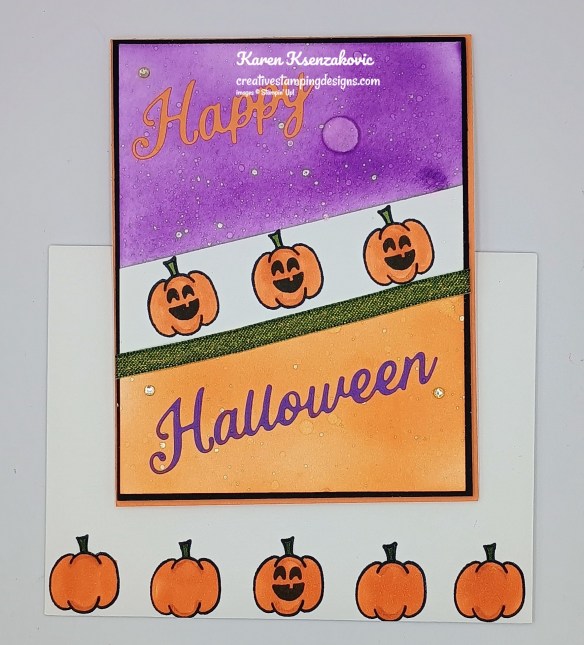
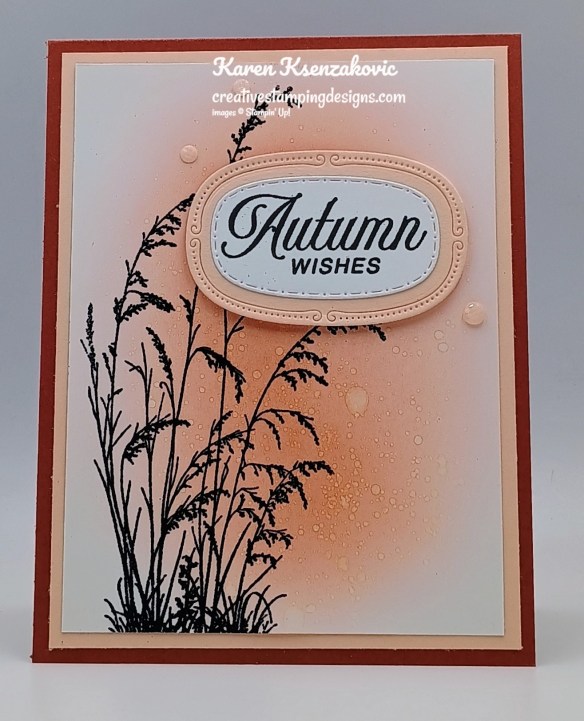
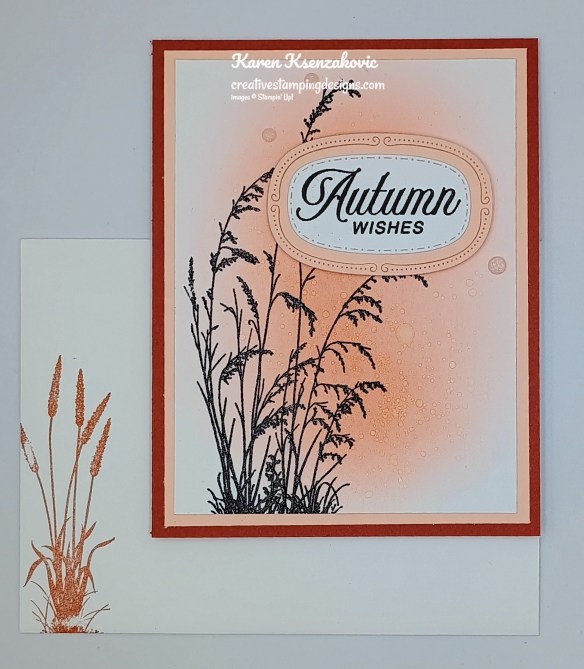
I played along with a color challenge for today’s card. It took me a bit to come up with an idea, but I finally did. If you’d like to see a quick video of how I made this card, Click Here to go to my Instagram Reels. Here’s my card for today.
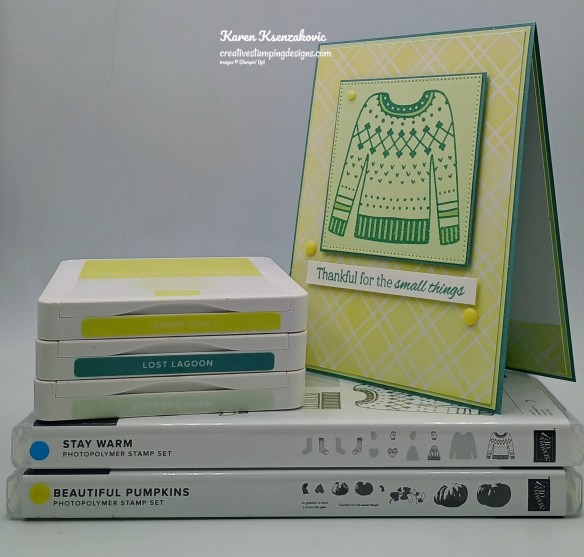
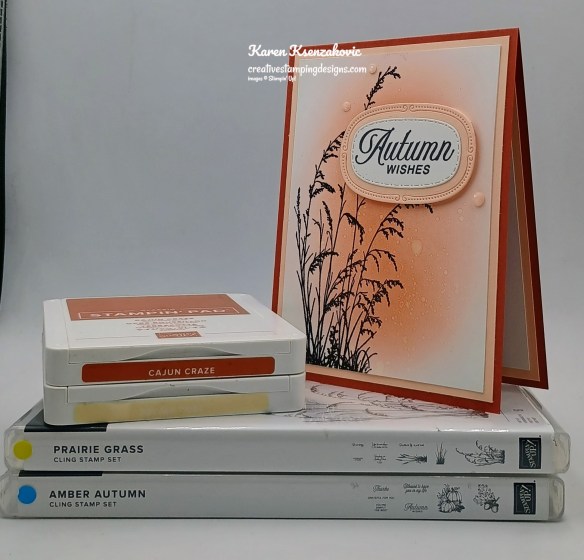
I used the Stampin’ Up! Stay Warm Photopolymer Stamp Set along with the Stampin’ Up! Beautiful Pumpkins Photopolymer Stamp Set and Irresistible Designs Specialty Designer Series Paper for my card today.
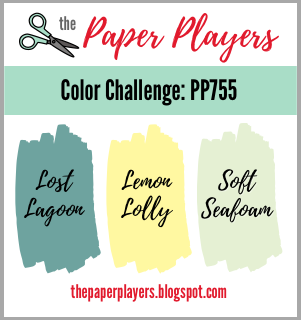
My colors are from The Paper Players Color Challenge #755
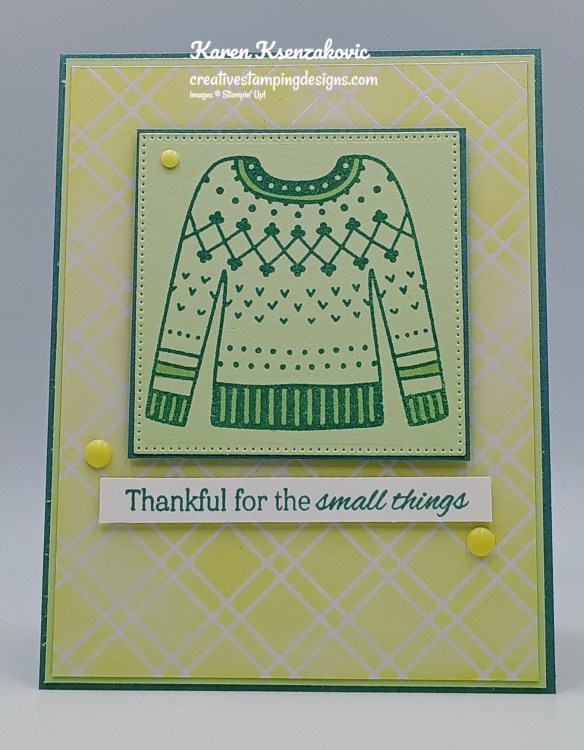
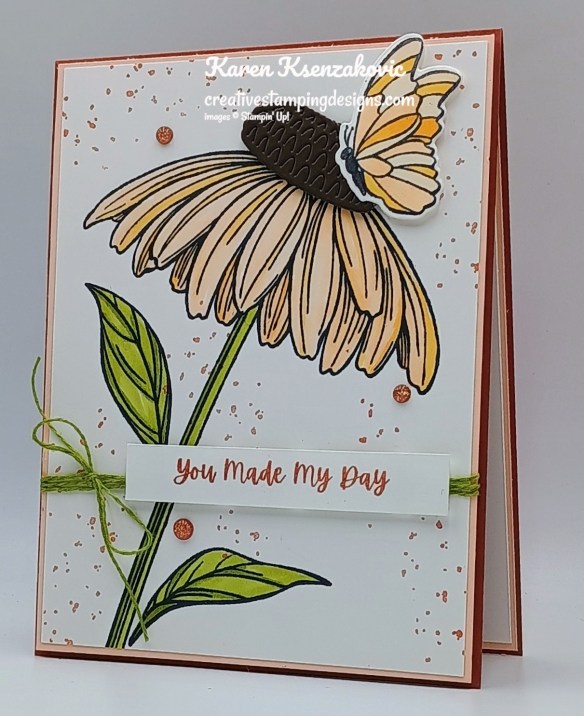
Using the Blending Brush, add Lemon Lolly Ink to an Irresistible Designs DSP card front. Adhere the card front panel to a soft Sea Foam mat with Stampin’ Seal. Adhere the layered panel to a Lost Lagoon card base with Stampin’ Seal.
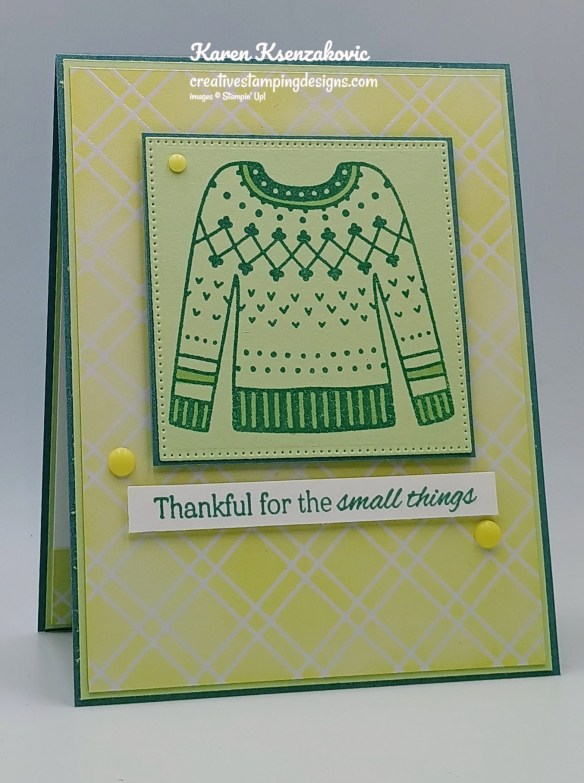
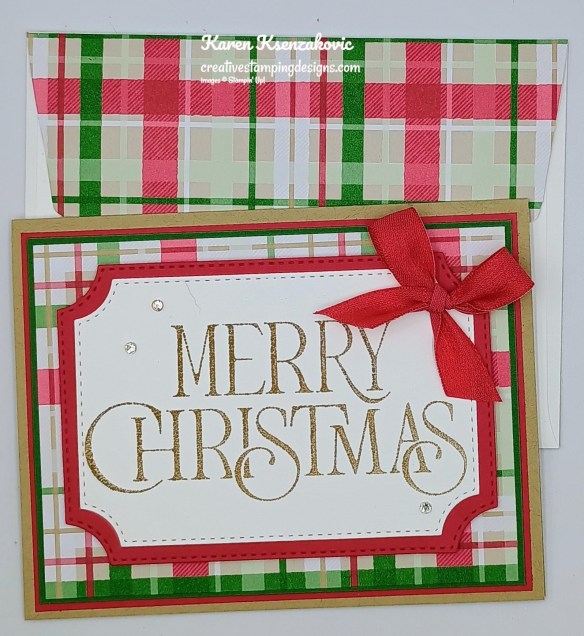
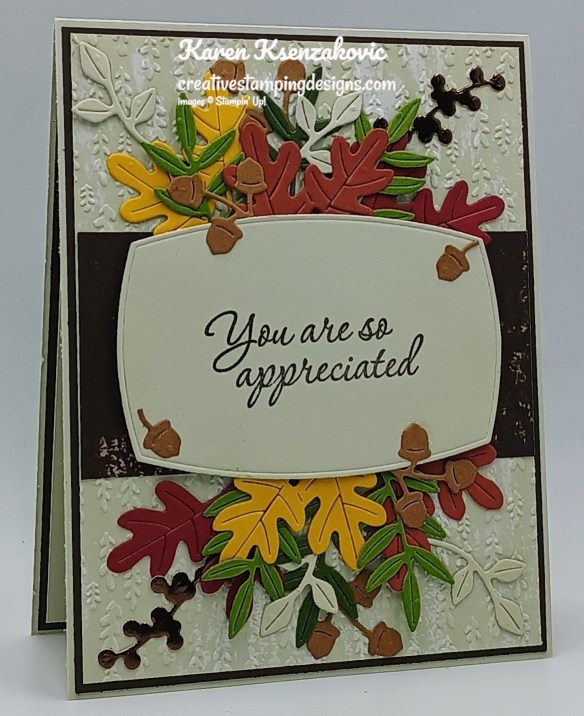
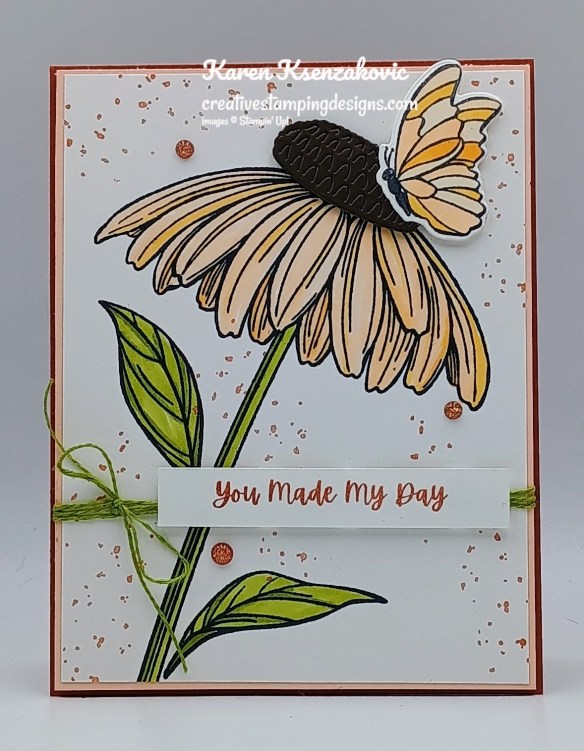
On a panel of Soft Sea Foam stamp the sweater image from the Stay Warm stamp set in Lost Lagoon Ink. Color the stripes on the bottom of the sweater, sleeves and collar in Soft Sea Foam Stampin’ Blends Markers. Cut the image out using the largest Stylish Shapes Dies. Adhere the die cut panel to a Lost Lagoon mat with Stampin’ Seal. Adhere the layered panel to the card front with Stampin’ Dimensionals.
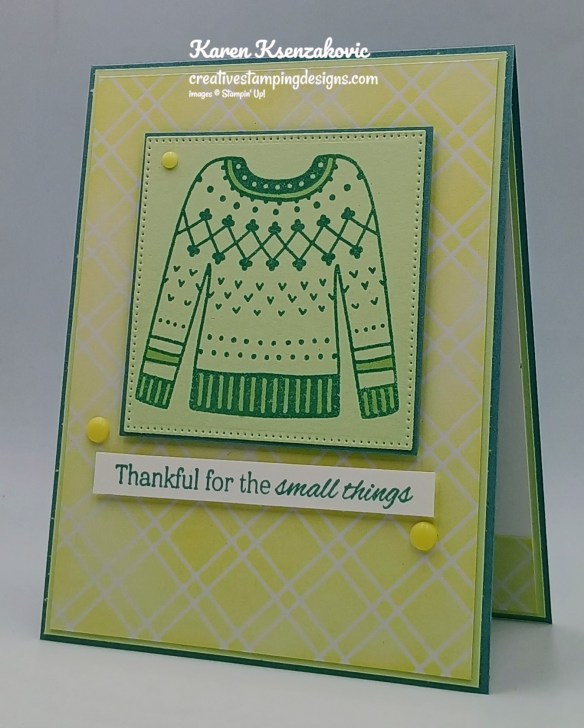
Stamp the sentiment from the Beautiful Pumpkins stamp set in Lost Lagoon Ink on a strip of Basic White. Adhere the sentiment to the card front with Stampin’ Dimensionals. Add a few Rainbow Adhesive Backed Dots to the card front.
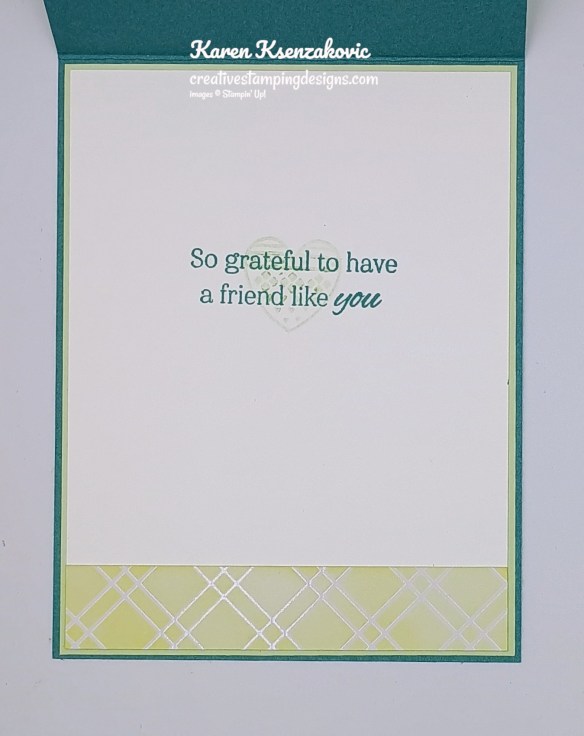
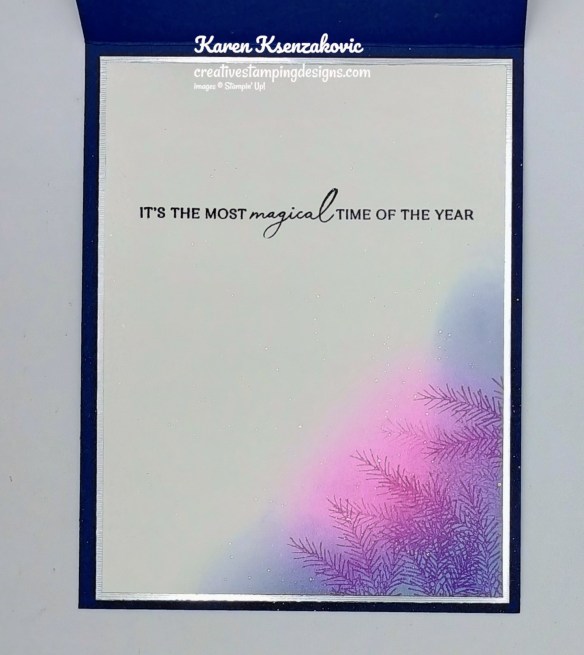
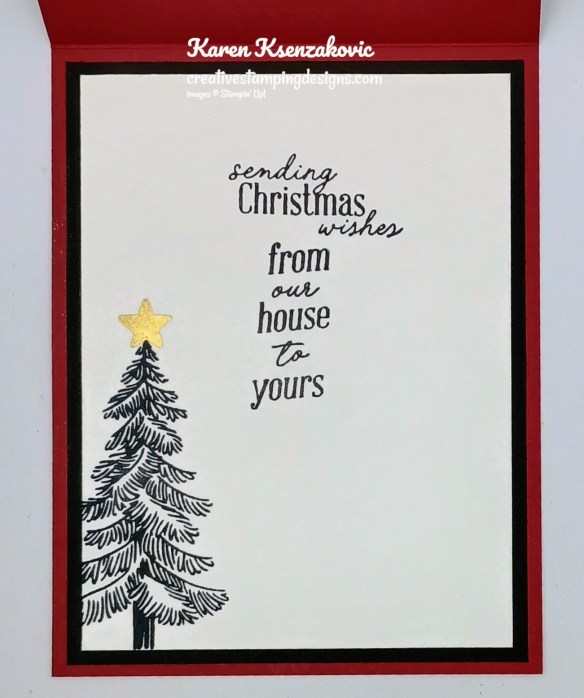
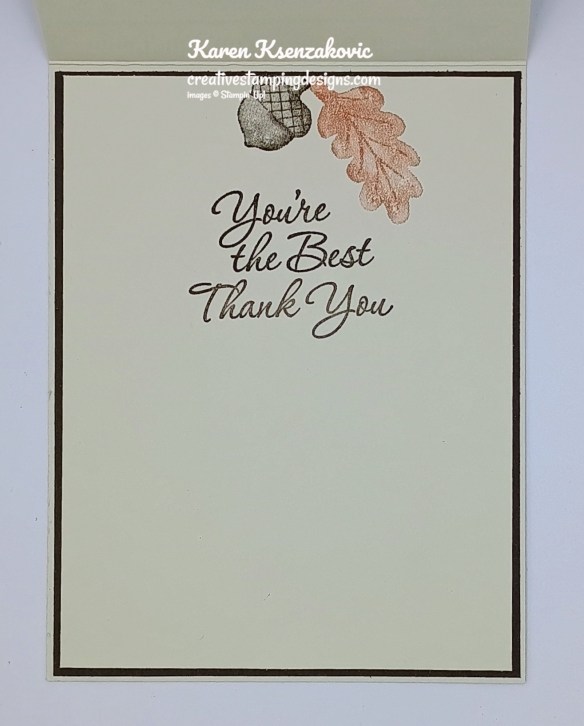
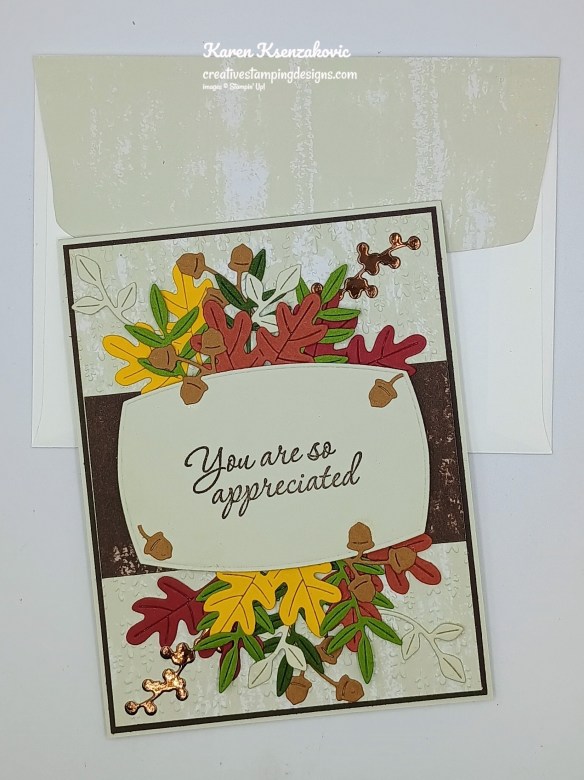
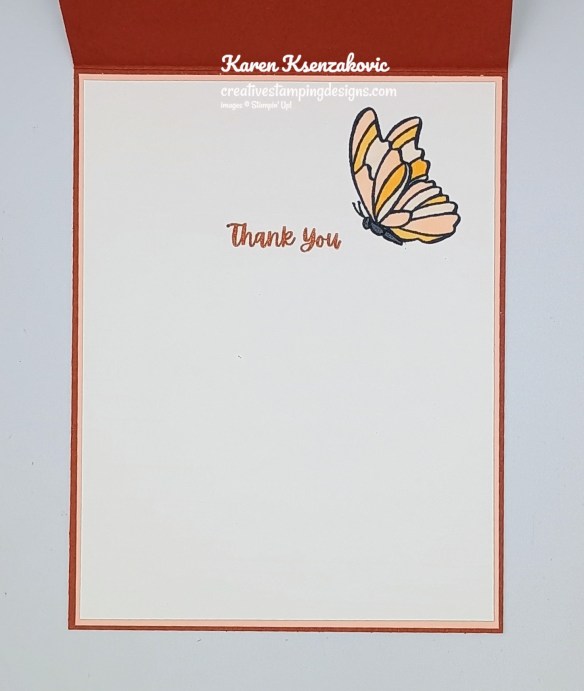
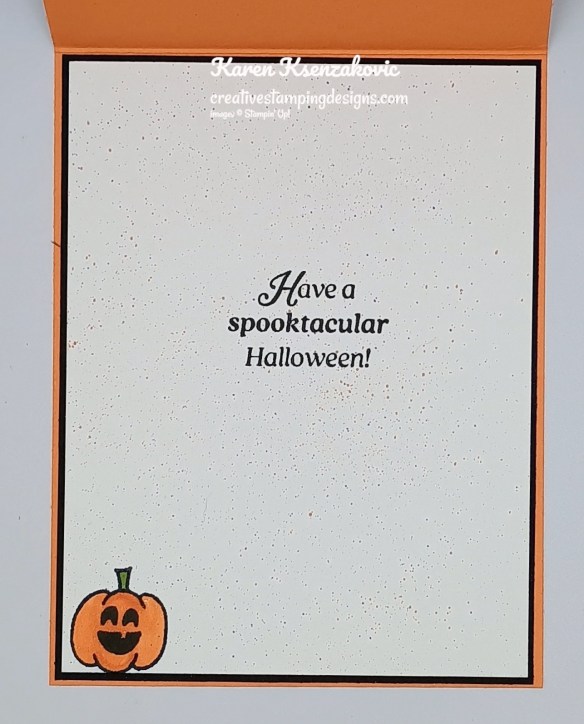
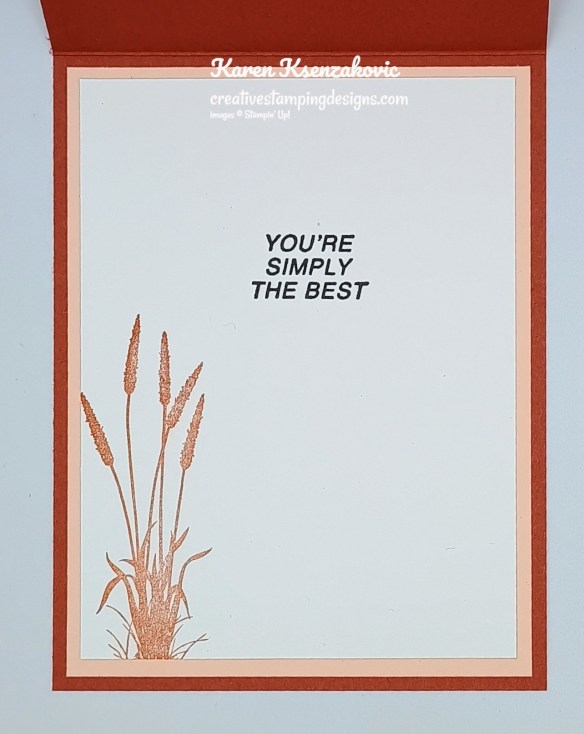
Stamp the sentiment from the Beautiful Pumpkins stamp set in Lost Lagoon Ink on a panel of Basic White. Adhere a panel of Irresistible Designs DSP to the bottom of the panel. Stamp the heart image from the Stay Warm stamp set in Soft Sea Foam Ink, stamping off once on scrap paper, over the sentiment. Adhere the Basic White panel to a Soft Sea Foam mat then to the inside of the Lost Lagoon card base.
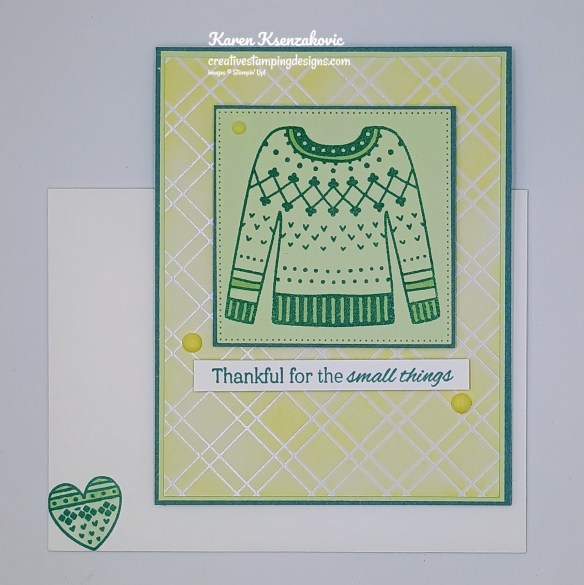
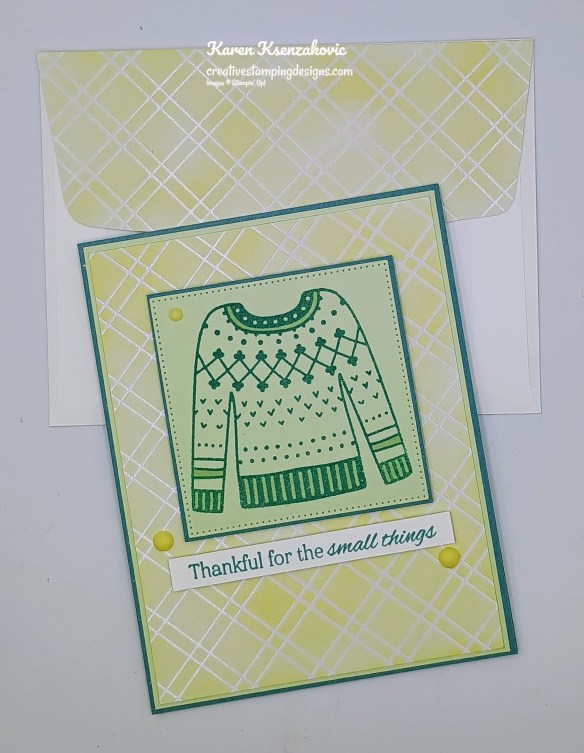
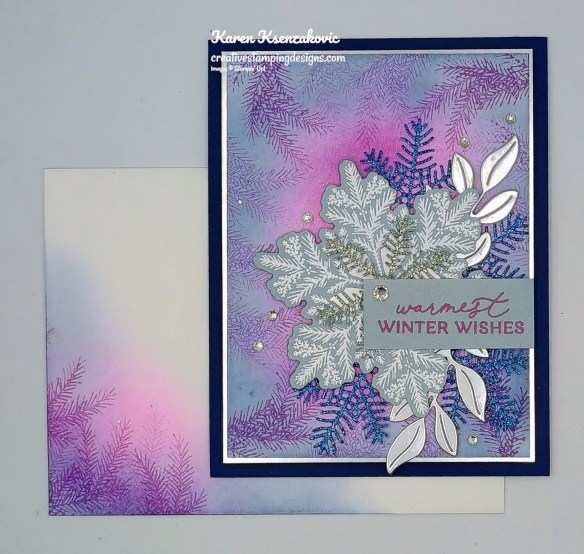
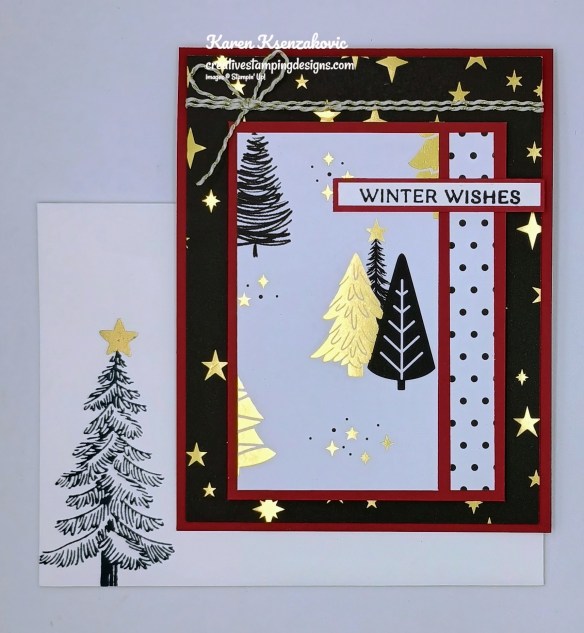
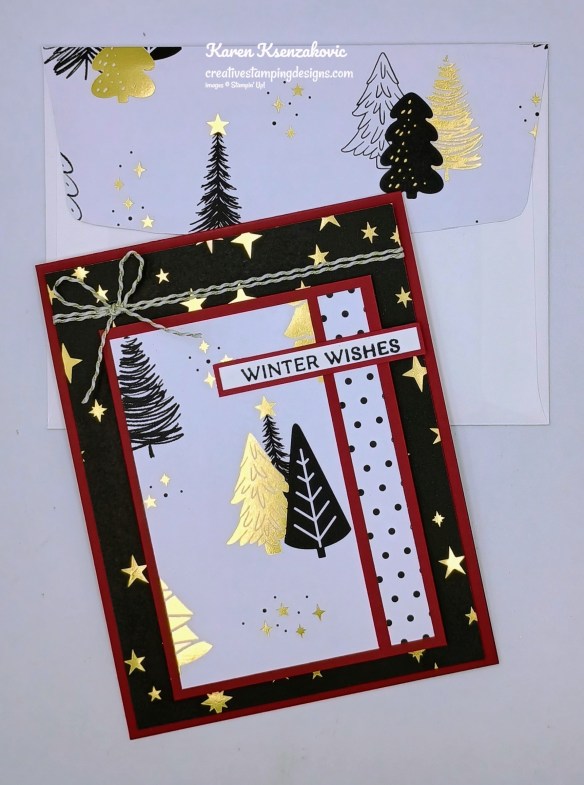
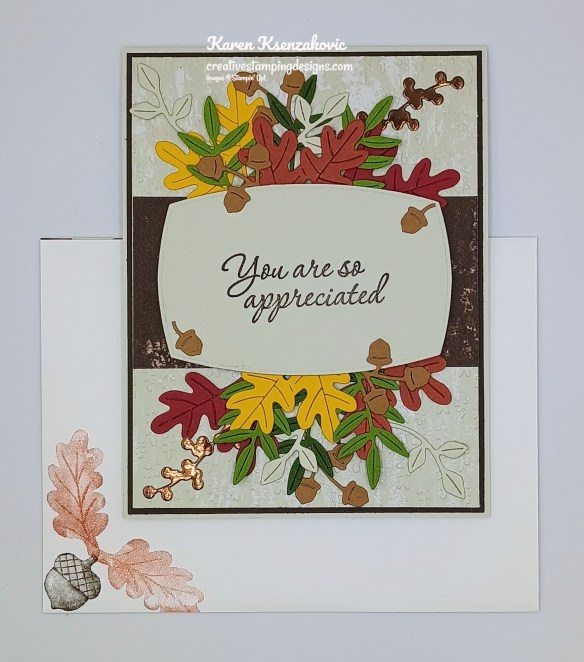
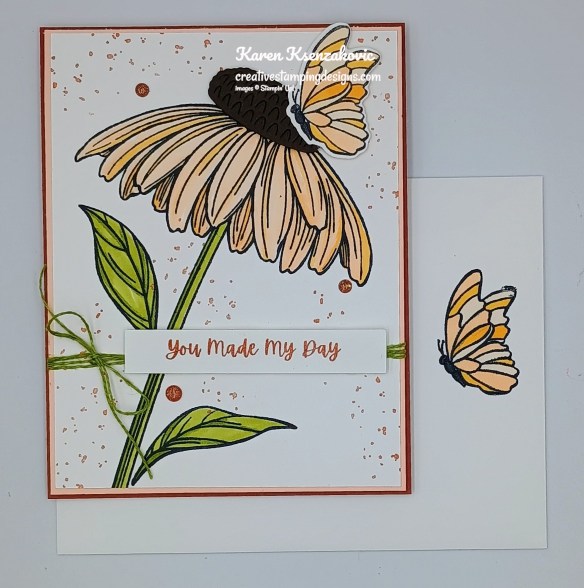
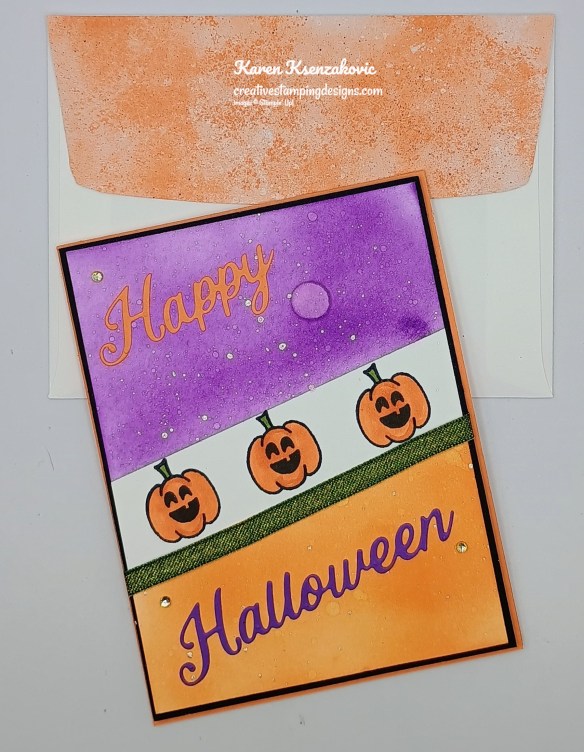
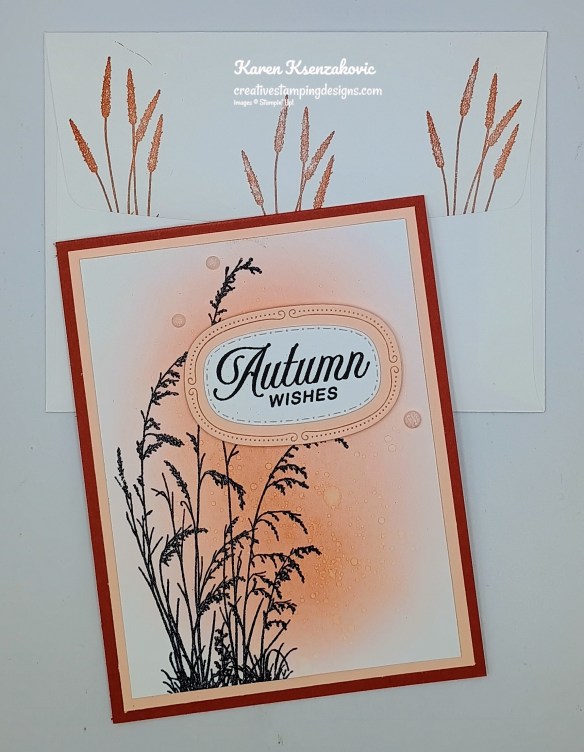
Decorate a Basic White Medium Envelope to finish your card. Stamp the heart image from the Stay Warm stamp set in Lost Lagoon Ink on the envelope front. Color the image with Soft Sea Foam Stampin’ Blends Markers. Adhere a panel of Irresistible Designs DSP to the envelope flap.
Thank you for stopping by my blog today. I hope you like the card and will give it a try. Happy Stamping!!
*********************************************************************************************************
If you need any stamping supplies, I’d love to be your Demonstrator. Just click HERE to go directly to my online store or drop me an email if you have any questions.
*********************************************************************************************************
15% off Sale – One Day Only Thursday September 18
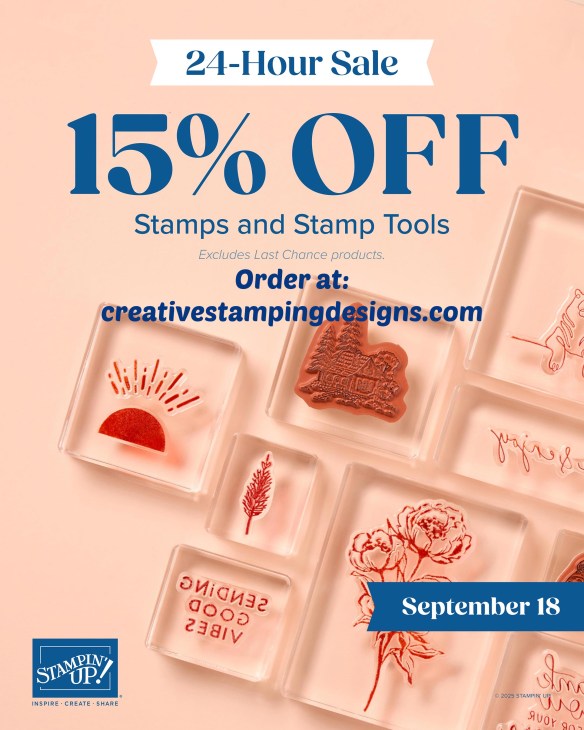
Have you ever found yourself staring at multiple stamp sets and stamp tools unable to decide which one to get? Well, great news! On September 18, you can get all the stamps and stamp tools you’ve been wanting at an amazing 15% discount. Act fast—this stamp-tacular sale only lasts for one day!
Stamp Set Sale details:
- Sales period: September 18, 2025, from 12:00 a.m. to 11:59 p.m. (MT)
- This stamp sale only happens once a year!
- The sale will run for 24 hours.
- The 15% discount will apply to all stamps and stamp tools*.
- Bundles are not included in this sale.
- Stamp sets and tools are only available while supplies last.
- See and shop all qualifying products right here in the online store.
*Excludes Last Chance Products.
YAY!! Get your lists ready and get your orders placed on the 18th! Happy shopping!
*********************************************************************************************************
Available September 23 – 12 Days of Crafting Advent Calendar
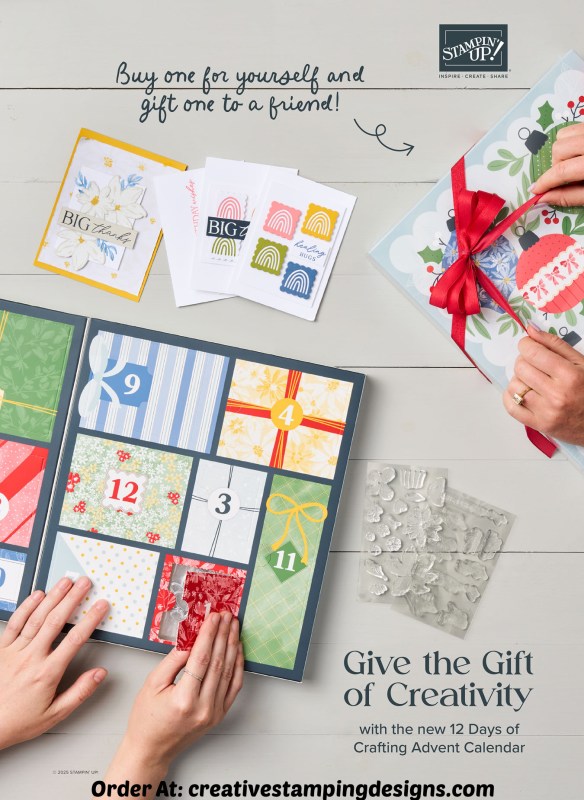
Introducing the 12 Days of Crafting Advent Calendar, a brand-new calendar full of products you can craft with all year long! Every day of this calendar contains never-before-seen dies, paper, embellishments, and even more items you won’t find in any of our catalogs or in the online store, so make sure to buy one before they’re all gone!
And did I mention that these make the perfect gifts for that friend in your life who loves to craft? After all, there’s nothing better than giving the gift of crafting! Stampin’ Up! only has a limited number of calendars in store, so don’t wait—order yours beginning September 23!
Advent Calendar Details:
- Item: 12 Days of Crafting Advent Calendar (167335)
- Price: $99
- Includes: Exclusive dies, paper, embellishments, and more
- Ordering Begins: September 23, 2025
- Available only while supplies last.
Here is a quick video from Stampin’ Up! giving you a few more details about the calendar:
Put a note on your calendar to get your 12 Days Of Crafting Advent Calendars beginning on September 23…and you’ll have your holiday shopping done early!
*********************************************************************************************************
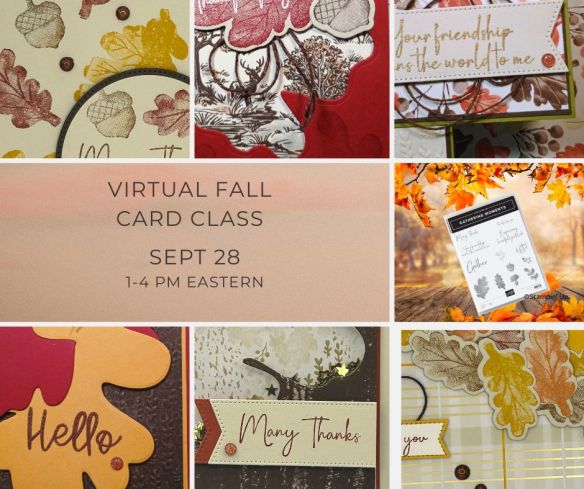
Coming in October – Stampin’ Up! Craft Class

Get ready to craft like never before with Craft Classes! You can now purchase virtual classes to watch live or on demand. These classes are a great way for you to craft with the latest products!
During the virtual classes, you’ll:
- Make unique projects using detailed instructions as you craft along with experienced instructors.
- Learn exciting tips and techniques to further your crafting experience.
- Be inspired to continue crafting long after the class is over!
The first class will stream live on October 23, and will feature projects made with the Traditions of Christmas Suite Collection. The class will be available for purchase before and after the live stream.
Here are the class details:
- Available for Purchase: October 1
- Price: $30 (Suite not included)
- Live Stream: October 23 at 2:00 p.m. (MT)
- Where: An exclusive Facebook page
- Class: Traditions of Christmas Craft Class (170073)
- You can watch live or view the on-demand recording at your convenience.
- Product: Traditions of Christmas Suite Collection (165877)
- Language: The class will be presented in English.
- Video on Demand: Stampin’ Up! will record this live class, which will be available as a video on demand right after the live stream. Videos with English, French, German, and Dutch captioning will be available through the Facebook page one week after the live stream.
Look for the class in the online store beginning October 1!! As a little bonus, the class will be considered a regular store item so you’ll earn Stampin’ Rewards from Stampin’ Up! (if you’ve opted in to the program) when you purchase it and the class fee will count toward your order total for your Creative Stamping Designs Reward Points from me!!
*********************************************************************************************************
Cozy Christmas October Paper Pumpkin
Subscribe September 11 – October 10

Create heartfelt Christmas cards with classic charm and flocked accents.
• Makes 9 cards: 3 each of 3 designs with 9 coordinating envelopes
• Precut paper pieces with soft, stitched-look flocking
• Shiny red sequin embellishments
• Coordinating colors: Basic Beige, Cherry Cobbler, Garden Green, Pecan Pie
(Classic Stampin’ Spot), Real Red
Coordinating box delivers even more holiday magic!
Subscribe to the October Paper Pumpkin Kit between 11 September and 10 October by clicking here!
Don’t miss the coordinating
Abundant Joy Dies Add-On!

Make the most of your Paper Pumpkin kits with the Abundant Joy Dies add-on! Quickly and cleanly cut out a gift tag, a flower, sprigs of greenery, or the word Joy to elevate your crafting projects. These additional dies are designed to work with THREE Paper Pumpkin Kits: the Cozy Christmas Paper Pumpkin Kit, the Wrapped in Cheer Paper Pumpkin Kit, and the Watercolor in Bloom Paper Pumpkin Kit. Pair these dies with other Stampin’ Up! products for even more creative options!
DETAILS
– 6 dies
– Largest die: 2-7/8″ x 1-1/2″
#167855 $12.00
*********************************************************************************************************
Card stock cuts for this project:
- Basic White Cardstock 3/8″ x 3 1/4″(sentiment), 4″ x 5 1/4″(inner liner)
- Lost Lagoon Cardstock 4 1/4″ x 11″(card base scored & folded at 5 1/2″), 3″ x 3″(artwork mat)
- Soft Sea Foam Cardstock (2) – 4 1/8″ x 5 3/8″(card front & inner liner mats), 3 1/4″ x 3 1/4″(artwork)
- Irresistible Designs Specialty Designer Series Paper 4″ x 5 1/4″(card front), 3/4″ x 4″(inner liner), 2 1/4″ x 6″(envelope flap)
*********************************************************************************************************
Product List
![Stay Warm Photopolymer Stamp Set [ 165959 ]](https://assets1.tamsnetwork.com/images/EC042017NF/165959s.jpg "Stay Warm Photopolymer Stamp Set [ 165959 ]")
![Beautiful Pumpkins Photopolymer Stamp Set (English) [ 166009 ]](https://assets1.tamsnetwork.com/images/EC042017NF/166009s.jpg "Beautiful Pumpkins Photopolymer Stamp Set (English) [ 166009 ]")
![Basic White 8 1/2" X 11" Cardstock [ 166780 ]](https://assets1.tamsnetwork.com/images/EC042017NF/166780s.jpg "Basic White 8 1/2\" X 11\" Cardstock [ 166780 ]")
![Lost Lagoon 8-1/2" X 11" Cardstock [ 133679 ]](https://assets1.tamsnetwork.com/images/EC042017NF/133679s.jpg "Lost Lagoon 8-1/2\" X 11\" Cardstock [ 133679 ]")
![Soft Sea Foam 8-1/2" X 11" Cardstock [ 146988 ]](https://assets1.tamsnetwork.com/images/EC042017NF/146988s.jpg "Soft Sea Foam 8-1/2\" X 11\" Cardstock [ 146988 ]")
![Irresistible Designs 12" X 12" (30.5 X 30.5 Cm) Specialty Designer Series Paper [ 165305 ]](https://assets1.tamsnetwork.com/images/EC042017NF/165305s.jpg "Irresistible Designs 12\" X 12\" (30.5 X 30.5 Cm) Specialty Designer Series Paper [ 165305 ]")
![Lemon Lolly Classic Stampin' Pad [ 161666 ]](https://assets1.tamsnetwork.com/images/EC042017NF/161666s.jpg "Lemon Lolly Classic Stampin' Pad [ 161666 ]")
![Blending Brushes [ 153611 ]](https://assets1.tamsnetwork.com/images/EC042017NF/153611s.jpg "Blending Brushes [ 153611 ]")
![Lost Lagoon Classic Stampin' Pad [ 161678 ]](https://assets1.tamsnetwork.com/images/EC042017NF/161678s.jpg "Lost Lagoon Classic Stampin' Pad [ 161678 ]")
![Soft Sea Foam Stampin' Blends Combo Pack [ 154902 ]](https://assets1.tamsnetwork.com/images/EC042017NF/154902s.jpg "Soft Sea Foam Stampin' Blends Combo Pack [ 154902 ]")
![Stylish Shapes Dies [ 159183 ]](https://assets1.tamsnetwork.com/images/EC042017NF/159183s.jpg "Stylish Shapes Dies [ 159183 ]")
![Rainbow Adhesive Backed Dots [ 162758 ]](https://assets1.tamsnetwork.com/images/EC042017NF/162758s.jpg "Rainbow Adhesive Backed Dots [ 162758 ]")
![Basic White Medium Envelopes [ 159236 ]](https://assets1.tamsnetwork.com/images/EC042017NF/159236s.jpg "Basic White Medium Envelopes [ 159236 ]")


![Take Your Pick [ 144107 ]](https://assets1.tamsnetwork.com/images/EC042017NF/144107s.jpg "Take Your Pick [ 144107 ]")


![Delicate Pines Bundle (English) [ 166074 ]](https://assets1.tamsnetwork.com/images/EC042017NF/166074s.jpg "Delicate Pines Bundle (English) [ 166074 ]")
![Delicate Pines Photopolymer Stamp Set (English) [ 166067 ]](https://assets1.tamsnetwork.com/images/EC042017NF/166067s.jpg "Delicate Pines Photopolymer Stamp Set (English) [ 166067 ]")
![Delicate Pines Dies [ 166073 ]](https://assets1.tamsnetwork.com/images/EC042017NF/166073s.jpg "Delicate Pines Dies [ 166073 ]")
![Cloud Cover 8 1/2" X 11" Cardstock [ 165621 ]](https://assets1.tamsnetwork.com/images/EC042017NF/165621s.jpg "Cloud Cover 8 1/2\" X 11\" Cardstock [ 165621 ]")
![Night Of Navy 8-1/2" X 11" Cardstock [ 100867 ]](https://assets1.tamsnetwork.com/images/EC042017NF/100867s.jpg "Night Of Navy 8-1/2\" X 11\" Cardstock [ 100867 ]")
![Peaceful Garden 12" X 12" (30.5 X 30.5 Cm) Glimmer Paper [ 165929 ]](https://assets1.tamsnetwork.com/images/EC042017NF/165929s.jpg "Peaceful Garden 12\" X 12\" (30.5 X 30.5 Cm) Glimmer Paper [ 165929 ]")
![Silver 12" X 12" (30.5 X 30.5 Cm) Foil Sheets [ 163387 ]](https://assets1.tamsnetwork.com/images/EC042017NF/163387s.jpg "Silver 12\" X 12\" (30.5 X 30.5 Cm) Foil Sheets [ 163387 ]")
![Night Of Navy Classic Stampin' Pad [ 147110 ]](https://assets1.tamsnetwork.com/images/EC042017NF/147110s.jpg "Night Of Navy Classic Stampin' Pad [ 147110 ]")
![Petunia Pop Classic Stampin Pad [ 163811 ]](https://assets1.tamsnetwork.com/images/EC042017NF/163811s.jpg "Petunia Pop Classic Stampin Pad [ 163811 ]")
![Small Blending Brushes [ 160518 ]](https://assets1.tamsnetwork.com/images/EC042017NF/160518s.jpg "Small Blending Brushes [ 160518 ]")
![Clear Wink Of Stella Glitter Brush [ 141897 ]](https://assets1.tamsnetwork.com/images/EC042017NF/141897s.jpg "Clear Wink Of Stella Glitter Brush [ 141897 ]")
![Versamark Pad [ 102283 ]](https://assets1.tamsnetwork.com/images/EC042017NF/102283s.jpg "Versamark Pad [ 102283 ]")
![Basics Wow! Embossing Powder [ 165679 ]](https://assets1.tamsnetwork.com/images/EC042017NF/165679s.jpg "Basics Wow! Embossing Powder [ 165679 ]")
![Heat Tool (Us And Canada) [ 129053 ]](https://assets1.tamsnetwork.com/images/EC042017NF/129053s.jpg "Heat Tool (Us And Canada) [ 129053 ]")
![Rhinestone Basic Jewels [ 144220 ]](https://assets1.tamsnetwork.com/images/EC042017NF/144220s.jpg "Rhinestone Basic Jewels [ 144220 ]")

![Pine Tree Trimmings Photopolymer Stamp Set (English) [ 166040 ]](https://assets1.tamsnetwork.com/images/EC042017NF/166040s.jpg "Pine Tree Trimmings Photopolymer Stamp Set (English) [ 166040 ]")
![Basic Black 8-1/2" X 11" Cardstock [ 121045 ]](https://assets1.tamsnetwork.com/images/EC042017NF/121045s.jpg "Basic Black 8-1/2\" X 11\" Cardstock [ 121045 ]")
![Cherry Cobbler 8-1/2" X 11" Cardstock [ 119685 ]](https://assets1.tamsnetwork.com/images/EC042017NF/119685s.jpg "Cherry Cobbler 8-1/2\" X 11\" Cardstock [ 119685 ]")
![Modern Christmas 12" X 12" (30.5 X 30.5 Cm) Specialty Designer Series Paper [ 165990 ]](https://assets1.tamsnetwork.com/images/EC042017NF/165990s.jpg "Modern Christmas 12\" X 12\" (30.5 X 30.5 Cm) Specialty Designer Series Paper [ 165990 ]")
![Tuxedo Black Memento Ink Pad [ 132708 ]](https://assets1.tamsnetwork.com/images/EC042017NF/132708s.jpg "Tuxedo Black Memento Ink Pad [ 132708 ]")
![Metallics Wow! Embossing Powder [ 165678 ]](https://assets1.tamsnetwork.com/images/EC042017NF/165678s.jpg "Metallics Wow! Embossing Powder [ 165678 ]")
![Black & White & Gold Baker's Twine [ 166005 ]](https://assets1.tamsnetwork.com/images/EC042017NF/166005s.jpg "Black & White & Gold Baker's Twine [ 166005 ]")

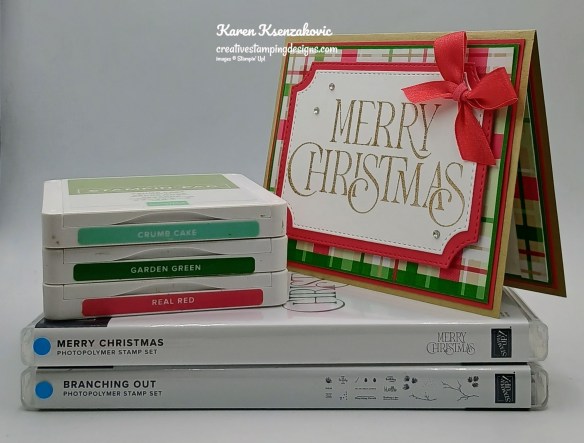
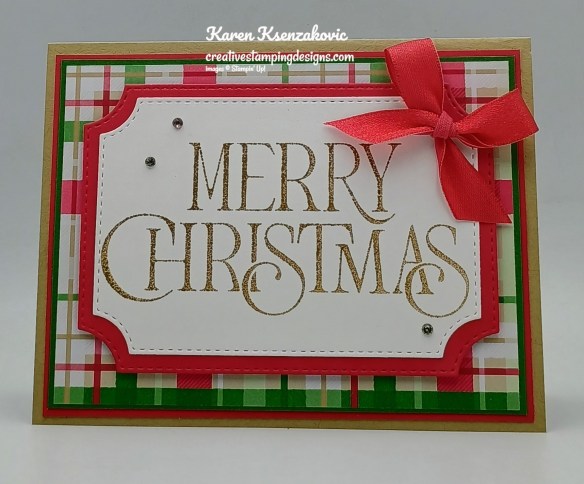


![Merry Christmas Photopolymer Stamp Set (English) [ 165831 ]](https://assets1.tamsnetwork.com/images/EC042017NF/165831s.jpg "Merry Christmas Photopolymer Stamp Set (English) [ 165831 ]")
![Branching Out Bundle (English) [ 165776 ]](https://assets1.tamsnetwork.com/images/EC042017NF/165776s.jpg "Branching Out Bundle (English) [ 165776 ]")
![Branching Out Photopolymer Stamp Set (English) [ 165771 ]](https://assets1.tamsnetwork.com/images/EC042017NF/165771s.jpg "Branching Out Photopolymer Stamp Set (English) [ 165771 ]")
![Branching Out Dies [ 165775 ]](https://assets1.tamsnetwork.com/images/EC042017NF/165775s.jpg "Branching Out Dies [ 165775 ]")
![Crumb Cake 8-1/2" X 11" Cardstock [ 120953 ]](https://assets1.tamsnetwork.com/images/EC042017NF/120953s.jpg "Crumb Cake 8-1/2\" X 11\" Cardstock [ 120953 ]")
![Garden Green 8-1/2" X 11" Cardstock [ 102584 ]](https://assets1.tamsnetwork.com/images/EC042017NF/102584s.jpg "Garden Green 8-1/2\" X 11\" Cardstock [ 102584 ]")
![Real Red 8-1/2" X 11" Cardstock [ 102482 ]](https://assets1.tamsnetwork.com/images/EC042017NF/102482s.jpg "Real Red 8-1/2\" X 11\" Cardstock [ 102482 ]")
![Crumb Cake Classic Stampin' Pad [ 147116 ]](https://assets1.tamsnetwork.com/images/EC042017NF/147116s.jpg "Crumb Cake Classic Stampin' Pad [ 147116 ]")
![Garden Green Classic Stampin' Pad [ 147089 ]](https://assets1.tamsnetwork.com/images/EC042017NF/147089s.jpg "Garden Green Classic Stampin' Pad [ 147089 ]")
![Real Red Classic Stampin' Pad [ 147084 ]](https://assets1.tamsnetwork.com/images/EC042017NF/147084s.jpg "Real Red Classic Stampin' Pad [ 147084 ]")
![Real Red 1/2" (1.3 Cm) Shiny Ribbon [ 165876 ]](https://assets1.tamsnetwork.com/images/EC042017NF/165876s.jpg "Real Red 1/2\" (1.3 Cm) Shiny Ribbon [ 165876 ]")


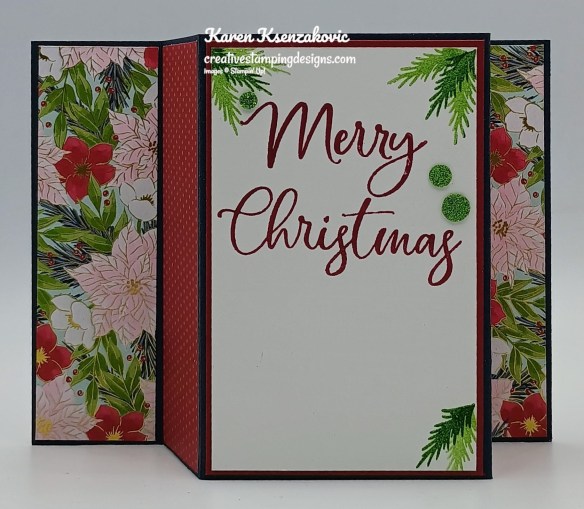

![Christmas Greenery Bundle [ 165873 ]](https://assets1.tamsnetwork.com/images/EC042017NF/165873s.jpg "Christmas Greenery Bundle [ 165873 ]")
![Christmas Greenery Photopolymer Stamp Set [ 165870 ]](https://assets1.tamsnetwork.com/images/EC042017NF/165870s.jpg "Christmas Greenery Photopolymer Stamp Set [ 165870 ]")
![Christmas Greenery Dies [ 165872 ]](https://assets1.tamsnetwork.com/images/EC042017NF/165872s.jpg "Christmas Greenery Dies [ 165872 ]")
![Traditional Labels Photopolymer Stamp Set (English) [ 165854 ]](https://assets1.tamsnetwork.com/images/EC042017NF/165854s.jpg "Traditional Labels Photopolymer Stamp Set (English) [ 165854 ]")
![Old Olive 8-1/2" X 11" Cardstock [ 100702 ]](https://assets1.tamsnetwork.com/images/EC042017NF/100702s.jpg "Old Olive 8-1/2\" X 11\" Cardstock [ 100702 ]")
![Secret Sea 8 1/2" X 11" Cardstock [ 165624 ]](https://assets1.tamsnetwork.com/images/EC042017NF/165624s.jpg "Secret Sea 8 1/2\" X 11\" Cardstock [ 165624 ]")
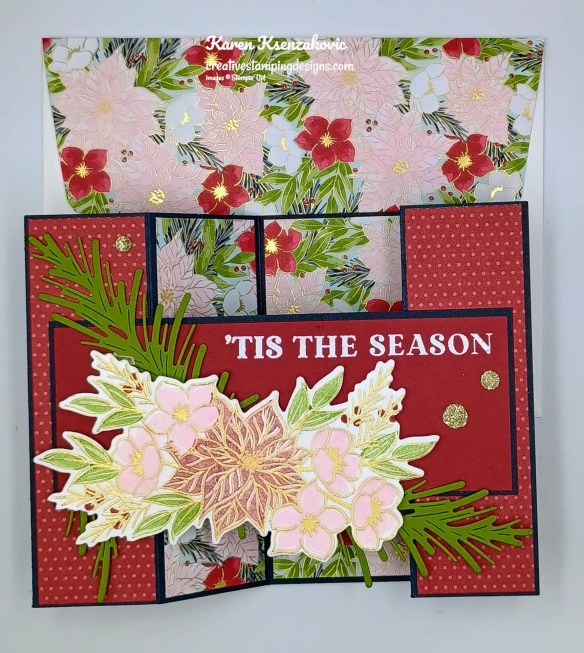
![Traditions Of Christmas 12" X 12" (30.5 X 30.5 Cm) Specialty Designer Series Paper [ 165853 ]](https://assets1.tamsnetwork.com/images/EC042017NF/165853s.jpg "Traditions Of Christmas 12\" X 12\" (30.5 X 30.5 Cm) Specialty Designer Series Paper [ 165853 ]")
![Bubble Bath Classic Stampin' Pad [ 161664 ]](https://assets1.tamsnetwork.com/images/EC042017NF/161664s.jpg "Bubble Bath Classic Stampin' Pad [ 161664 ]")
![Cherry Cobbler Classic Stampin' Pad [ 147083 ]](https://assets1.tamsnetwork.com/images/EC042017NF/147083s.jpg "Cherry Cobbler Classic Stampin' Pad [ 147083 ]")
![Old Olive Classic Stampin' Pad [ 147090 ]](https://assets1.tamsnetwork.com/images/EC042017NF/147090s.jpg "Old Olive Classic Stampin' Pad [ 147090 ]")
![Traditional Sparkling Sequins [ 165875 ]](https://assets1.tamsnetwork.com/images/EC042017NF/165875s.jpg "Traditional Sparkling Sequins [ 165875 ]")


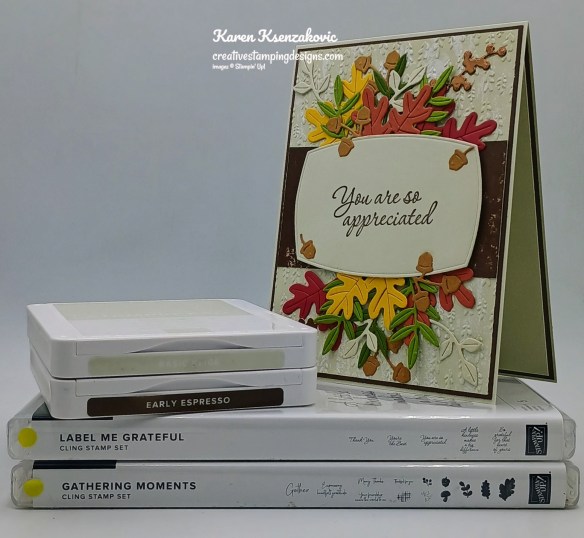


![Label Me Grateful Bundle (English) [ 166112 ]](https://assets1.tamsnetwork.com/images/EC042017NF/166112s.jpg "Label Me Grateful Bundle (English) [ 166112 ]")
![Label Me Grateful Cling Stamp Set (English) [ 166108 ]](https://assets1.tamsnetwork.com/images/EC042017NF/166108s.jpg "Label Me Grateful Cling Stamp Set (English) [ 166108 ]")
![Label Me Grateful Dies [ 166111 ]](https://assets1.tamsnetwork.com/images/EC042017NF/166111s.jpg "Label Me Grateful Dies [ 166111 ]")
![Gathering Moments Cling Stamp Set (English) [ 165970 ]](https://assets1.tamsnetwork.com/images/EC042017NF/165970s.jpg "Gathering Moments Cling Stamp Set (English) [ 165970 ]")
![Basic Beige 8 1/2" X 11" Cardstock [ 164511 ]](https://assets1.tamsnetwork.com/images/EC042017NF/164511s.jpg "Basic Beige 8 1/2\" X 11\" Cardstock [ 164511 ]")
![Cajun Craze 8-1/2" X 11" Cardstock [ 119684 ]](https://assets1.tamsnetwork.com/images/EC042017NF/119684s.jpg "Cajun Craze 8-1/2\" X 11\" Cardstock [ 119684 ]")
![Crushed Curry 8-1/2" X 11" Cardstock [ 131199 ]](https://assets1.tamsnetwork.com/images/EC042017NF/131199s.jpg "Crushed Curry 8-1/2\" X 11\" Cardstock [ 131199 ]")
![Early Espresso 8-1/2" X 11" Cardstock [ 119686 ]](https://assets1.tamsnetwork.com/images/EC042017NF/119686s.jpg "Early Espresso 8-1/2\" X 11\" Cardstock [ 119686 ]")
![Mossy Meadow 8-1/2" X 11" Cardstock [ 133676 ]](https://assets1.tamsnetwork.com/images/EC042017NF/133676s.jpg "Mossy Meadow 8-1/2\" X 11\" Cardstock [ 133676 ]")
![Pecan Pie 8 1/2" X 11" Cardstock [ 161717 ]](https://assets1.tamsnetwork.com/images/EC042017NF/161717s.jpg "Pecan Pie 8 1/2\" X 11\" Cardstock [ 161717 ]")
![Gathering Together 12" X 12" (30.5 X 30.5 Cm) Specialty Designer Series Paper [ 165969 ]](https://assets1.tamsnetwork.com/images/EC042017NF/165969s.jpg "Gathering Together 12\" X 12\" (30.5 X 30.5 Cm) Specialty Designer Series Paper [ 165969 ]")
![Earthen Toned Metallic 12" X 12" (30.5 X 30.5 Cm) Specialty Paper [ 165901 ]](https://assets1.tamsnetwork.com/images/EC042017NF/165901s.jpg "Earthen Toned Metallic 12\" X 12\" (30.5 X 30.5 Cm) Specialty Paper [ 165901 ]")
![Cajun Craze Classic Stampin' Pad [ 147085 ]](https://assets1.tamsnetwork.com/images/EC042017NF/147085s.jpg "Cajun Craze Classic Stampin' Pad [ 147085 ]")
![Early Espresso Classic Stampin' Pad [ 147114 ]](https://assets1.tamsnetwork.com/images/EC042017NF/147114s.jpg "Early Espresso Classic Stampin' Pad [ 147114 ]")


![Coneflower Celebration Bundle (English) [ 165251 ]](https://assets1.tamsnetwork.com/images/EC042017NF/165251s.jpg "Coneflower Celebration Bundle (English) [ 165251 ]")
![Coneflower Celebrations Photopolymer Stamp Set (English) [ 165247 ]](https://assets1.tamsnetwork.com/images/EC042017NF/165247s.jpg "Coneflower Celebrations Photopolymer Stamp Set (English) [ 165247 ]")
![Coneflower Celebrations Dies [ 165250 ]](https://assets1.tamsnetwork.com/images/EC042017NF/165250s.jpg "Coneflower Celebrations Dies [ 165250 ]")
![Petal Pink 8-1/2" X 11" Cardstock [ 146985 ]](https://assets1.tamsnetwork.com/images/EC042017NF/146985s.jpg "Petal Pink 8-1/2\" X 11\" Cardstock [ 146985 ]")
![Old Olive Stampin' Blends Combo Pack [ 154892 ]](https://assets1.tamsnetwork.com/images/EC042017NF/154892s.jpg "Old Olive Stampin' Blends Combo Pack [ 154892 ]")
![Peach Pie Stampin’ Blends Combo Pack [ 163827 ]](https://assets1.tamsnetwork.com/images/EC042017NF/163827s.jpg "Peach Pie Stampin’ Blends Combo Pack [ 163827 ]")
![Petal Pink Stampin' Blends Combo Pack [ 154893 ]](https://assets1.tamsnetwork.com/images/EC042017NF/154893s.jpg "Petal Pink Stampin' Blends Combo Pack [ 154893 ]")
![Stampin’ Blends Deep Combo Pack [ 158152 ]](https://assets1.tamsnetwork.com/images/EC042017NF/158152s.jpg "Stampin’ Blends Deep Combo Pack [ 158152 ]")
![Cajun Craze & Gold Dots [ 165984 ]](https://assets1.tamsnetwork.com/images/EC042017NF/165984s.jpg "Cajun Craze & Gold Dots [ 165984 ]")
![Early Espresso & Old Olive Linen Thread Pack [ 165986 ]](https://assets1.tamsnetwork.com/images/EC042017NF/165986s.jpg "Early Espresso & Old Olive Linen Thread Pack [ 165986 ]")


![Choose Happy Photopolymer Stamp Set (English) [ 163701 ]](https://assets1.tamsnetwork.com/images/EC042017NF/163701s.jpg "Choose Happy Photopolymer Stamp Set (English) [ 163701 ]")
![Gorgeous Grape 8-1/2" X 11" Cardstock [ 146987 ]](https://assets1.tamsnetwork.com/images/EC042017NF/146987s.jpg "Gorgeous Grape 8-1/2\" X 11\" Cardstock [ 146987 ]")
![Timid Tiger 8 1/2" X 11" Cardstock [ 165626 ]](https://assets1.tamsnetwork.com/images/EC042017NF/165626s.jpg "Timid Tiger 8 1/2\" X 11\" Cardstock [ 165626 ]")
![2025–2027 In Color™ 6" X 6" (15.2 X 15.2 Cm) Designer Series Paper [ 165300 ]](https://assets1.tamsnetwork.com/images/EC042017NF/165300s.jpg "2025–2027 In Color™ 6\" X 6\" (15.2 X 15.2 Cm) Designer Series Paper [ 165300 ]")
![Gorgeous Grape Classic Stampin' Pad [ 147099 ]](https://assets1.tamsnetwork.com/images/EC042017NF/147099s.jpg "Gorgeous Grape Classic Stampin' Pad [ 147099 ]")
![Timid Tiger Classic Stampin' Pad [ 165278 ]](https://assets1.tamsnetwork.com/images/EC042017NF/165278s.jpg "Timid Tiger Classic Stampin' Pad [ 165278 ]")
![Mossy Meadow Stampin' Blends Combo Pack [ 154890 ]](https://assets1.tamsnetwork.com/images/EC042017NF/154890s.jpg "Mossy Meadow Stampin' Blends Combo Pack [ 154890 ]")
![Timid Tiger Stampin’ Blends Combo Pack [ 165291 ]](https://assets1.tamsnetwork.com/images/EC042017NF/165291s.jpg "Timid Tiger Stampin’ Blends Combo Pack [ 165291 ]")
![Mossy Meadow & Gold 1/4" (6.4 Mm) [ 166158 ]](https://assets1.tamsnetwork.com/images/EC042017NF/166158s.jpg "Mossy Meadow & Gold 1/4\" (6.4 Mm) [ 166158 ]")


![Prairie Grass Cling Stamp Set (English) [ 166168 ]](https://assets1.tamsnetwork.com/images/EC042017NF/166168s.jpg "Prairie Grass Cling Stamp Set (English) [ 166168 ]")
![Charming Shimmer Faceted Dots [ 166139 ]](https://assets1.tamsnetwork.com/images/EC042017NF/166139s.jpg "Charming Shimmer Faceted Dots [ 166139 ]")


