Good Friday morning stamping friends Happy November and welcome to my Fun Fold Friday. How was everyone’s Halloween? Did you get a lot of trick or treaters? We had an all-time high in years, we had 16 this year. Since my kids have grown, there aren’t many kids that like to come down out block. Are you ready for the weekend? Is anyone starting to make plans yet?
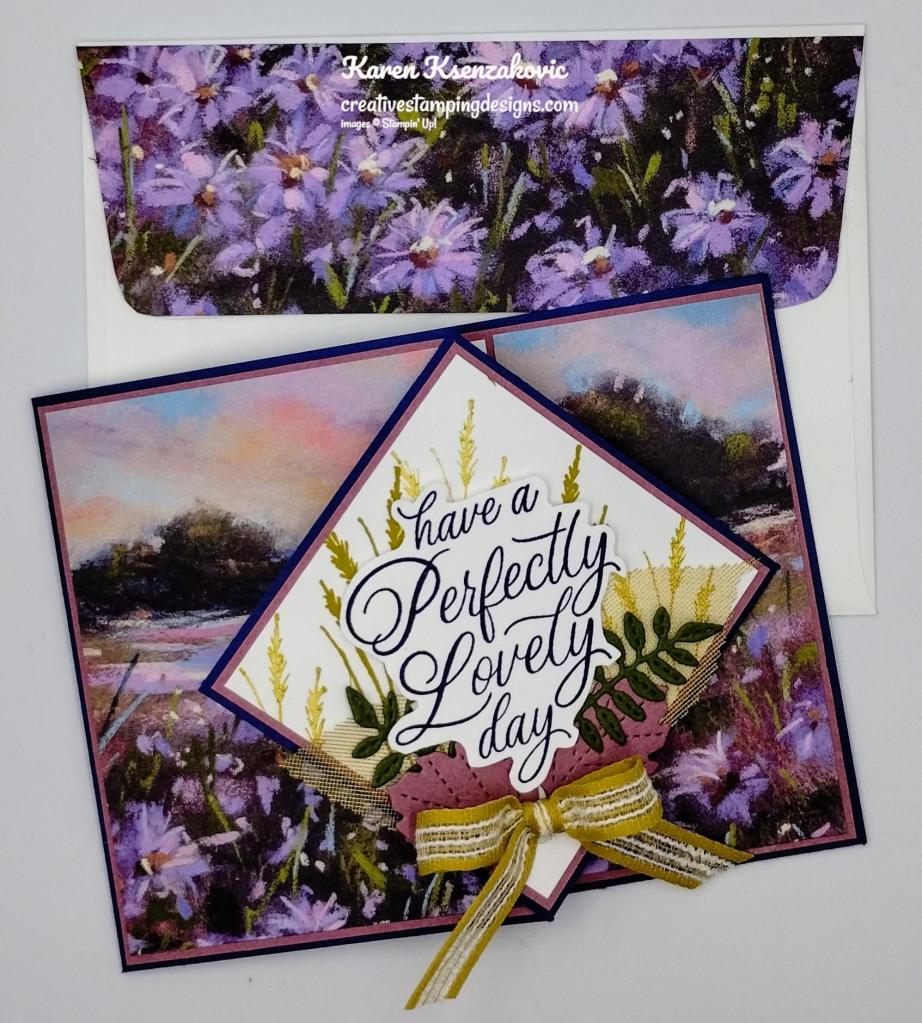
Today’s card I made on YouTube Live on Wednesday. If you were able to join me or watched the replay, thank you. If you’d like to watch my video and stamp along, the measurements are below, just above the supply list, along with the link to my YouTube channel. Here’s my card for today.
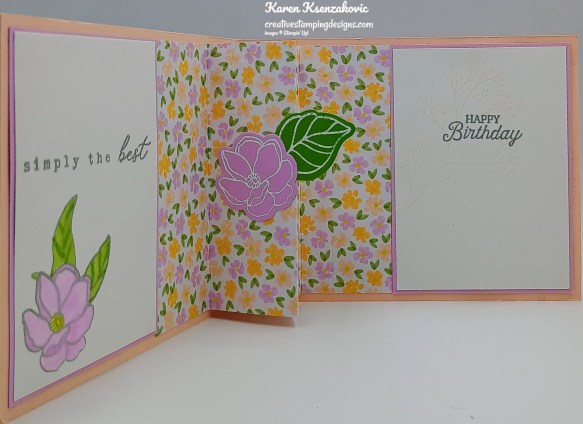
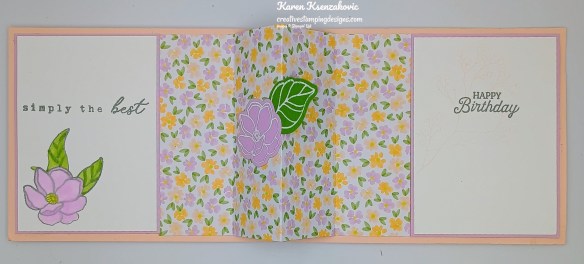
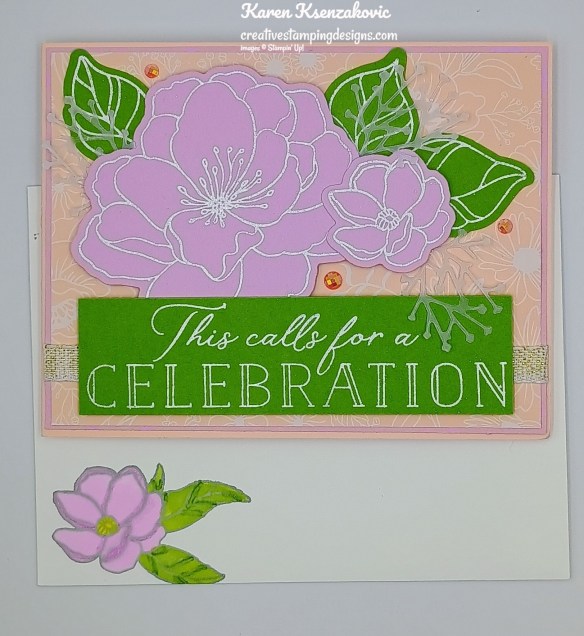
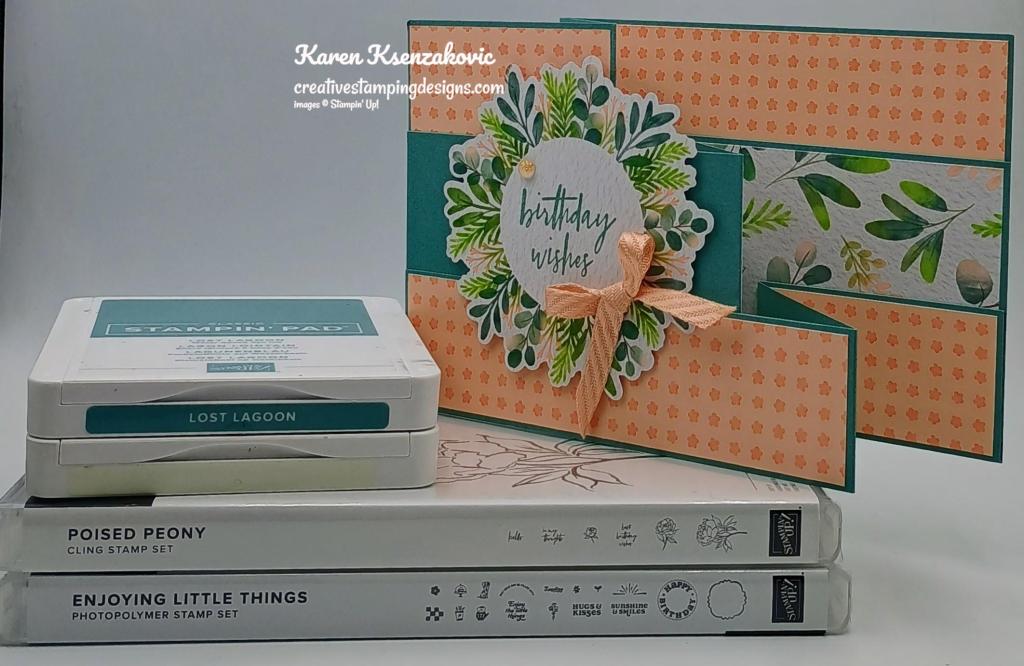
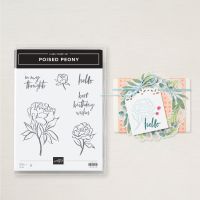
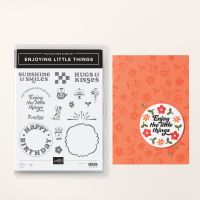
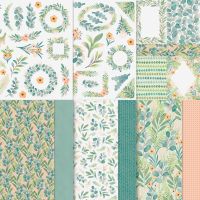
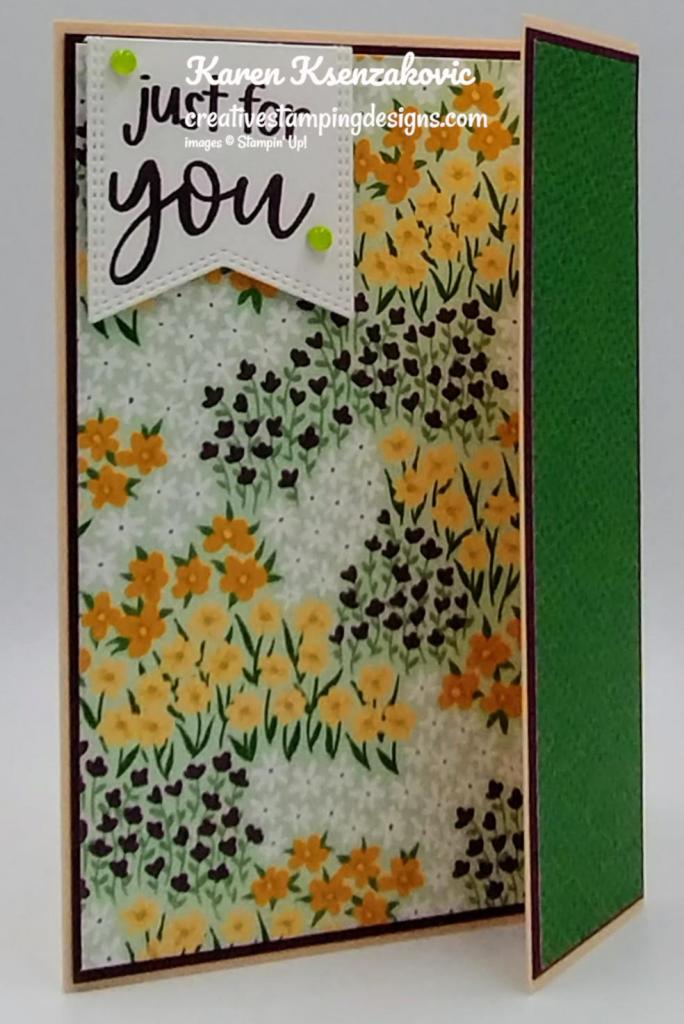
I used the Stampin’ Up! Poised Peony Cling Stamp Set along with the Frames & Flowers Specialty Designer Series Paper and Stampin’ Up! Enjoying Little Things Photopolymer Stamp Set for my Triple Z Fold card today.
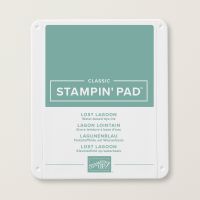
Start by scoring and folding all the Lost Lagoon card base panels.
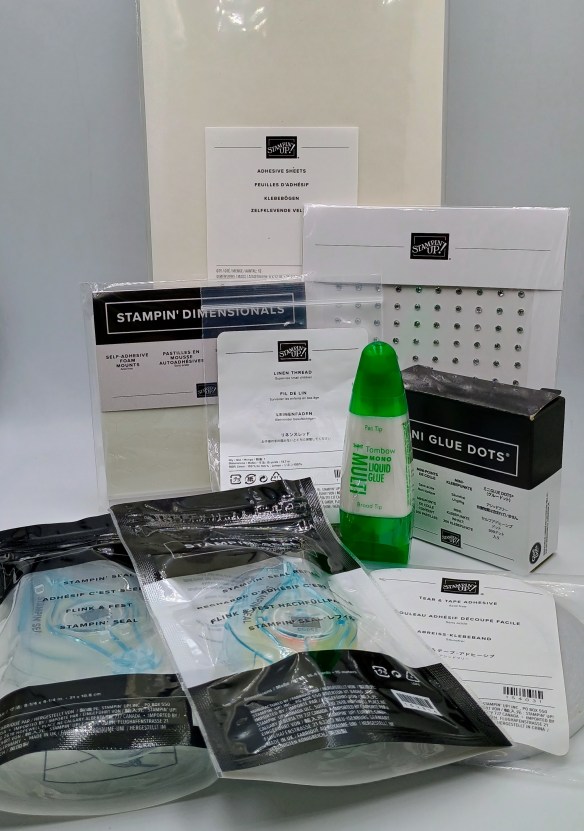
Adhere the Frames & Flowers DSP to each of the card base panels using Liquid Glue. Adhere the center 2 3/4″ X 11″ card base panel to the 4 1/4″ X 11″ card base panel using Tear & Tape. Adhere the bottom 1 1/2″ x 11″ card base panel to the top of the other panels using Tear & Tape.
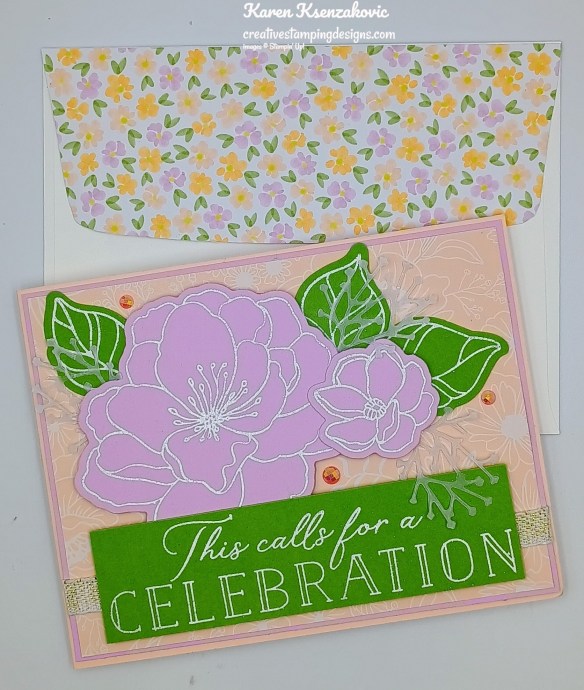
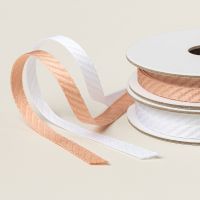
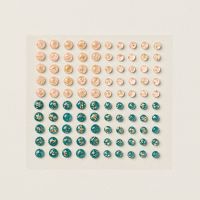
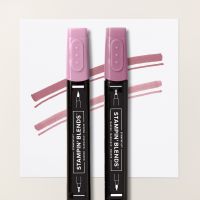
On 1 of the wreaths from the Frames & Flowers DSP, stamp the sentiment from the Poised Peony stamp set in Lost Lagoon Ink. Adhere the wreath to the card front using Stampin’ Dimensionals. Tie a small bow using the Petal Pink 1/4″ Diagonal Trim. Adhere the bow on the wreath using a Glue Dot. Add a Petal Pink Foiled Gem by the sentiment.
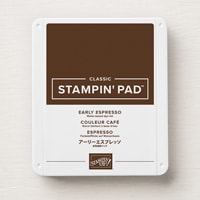
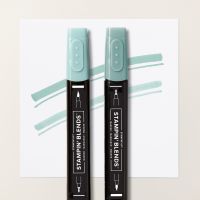
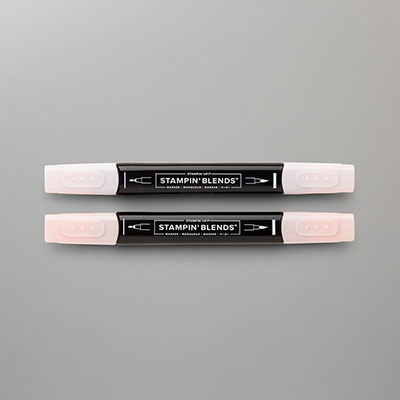
On a panel of Basic White, stamp the medium peony image from the Poised Peony stamp set in Early Espresso Ink. Color the image using Lost Lagoon and Petal Pink Stampin’ Blends Markers. Adhere the image to the center section of the center card base panel
On a panel of Basic White, stamp the sentiments from the Enjoying Little Things stamp set in Lost Lagoon Ink. Stamp the medium peony image from the Poised Peony stamp set in Early Espresso Ink on the bottom of the panel. Color the image using Lost Lagoon and Petal Pink Stampin’ Blends Markers. Adhere the Basic White panel to a Petal Pink mat. Adhere the layered panel to the back of the card.
Finish the card by decorating a Basic White Medium Envelope. Stamp the large peony image from the Poised Peony stamp set in Early Espresso Ink on the envelope front. Color the image using Lost Lagoon and Petal Pink Stampin’ Blends Markers. Adhere a panel of Frames & Flowers DSP to the envelope flap.
Thank you for stopping by my blog today. I hope you liked my card and will give it a try. I hope you will CASE this card and please feel free to post it in the comments of my Facebook page under my post. I’d love to see your take it. The list of measurements are below if you’d like to stamp along while watching the video. You can watch my video on my YouTube Channel Here.
If you watch this on my YouTube channel, please remember to subscribe so that you will get notified when a new video goes live. Thank you to those that have subscribed already. Happy Stamping!!
If you need any stamping supplies, I’d love to be your Demonstrator. Just click HERE to go directly to my online store or drop me an email if you have any questions.
MY CURRENT HOST CODE IS: 4RTJCBH2
Use this host code when placing an order with me. When you order $50 or greater you will receive a free gift from me! If your order is over $150, please do not use this code, but you’ll still get the free gift. The free gift is your choice of any 1 item valued up to $10.00 from the 2024 – 2025 Annual Catalog, September-December 2024 Mini Catalog or from the Online Exclusives! For any orders $50 or more I will also send you my monthly class tutorials. Click HERE or go to my Customer Rewards for more details and to see what this month’s tutorials are.
Please remember to use my current Host Code and make sure that you can see my name on the final checkout page listed as your Demonstrator when you order so that you know that you’re ordering with me, and you’ll get my rewards!
A new line of products for Online Exclusives are coming! You won’t find these items in any catalog. This is a great opportunity to spark creativity, expand a crafting collection, and discover new opportunities—all from the convenience of the online store. These products will be available starting in November. Here’s a little sneak peek of some of the items. Click Here for a sneak peek of what’s coming.
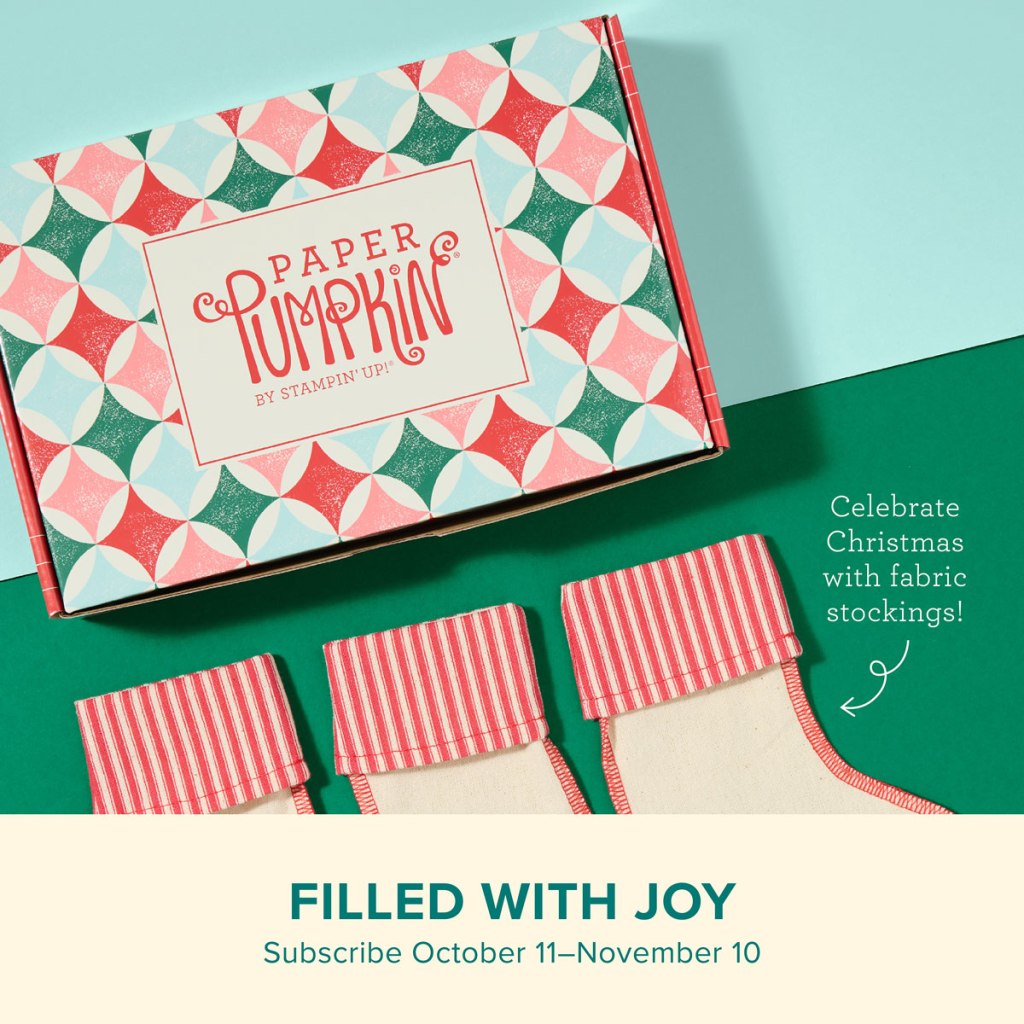
Celebrate Christmas with adorable stockings and gift tags!
Details: • Makes 8 projects: 8 stockings with 8 gift tags • Precut paper pieces • Safety pins and specialty gold foil • Coordinating colors: Flirty Flamingo, Pool Party, Poppy Parade (Classic Stampin’ Spot), Shaded Spruce, Very Vanilla
Subscribe to Paper Pumpkin for a monthly, all-inclusive crafting kit that’s a fun surprise! Each kit includes a photopolymer stamp set, Classic Stampin’ Spot, and step by step instructions to complete exclusive paper craft projects, including cards, tags, and gift packaging. And don’t miss the special add-on that coordinates with the next three months!
Subscribe to the November Paper Pumpkin Kit between 11 October and 10 November by clicking here!
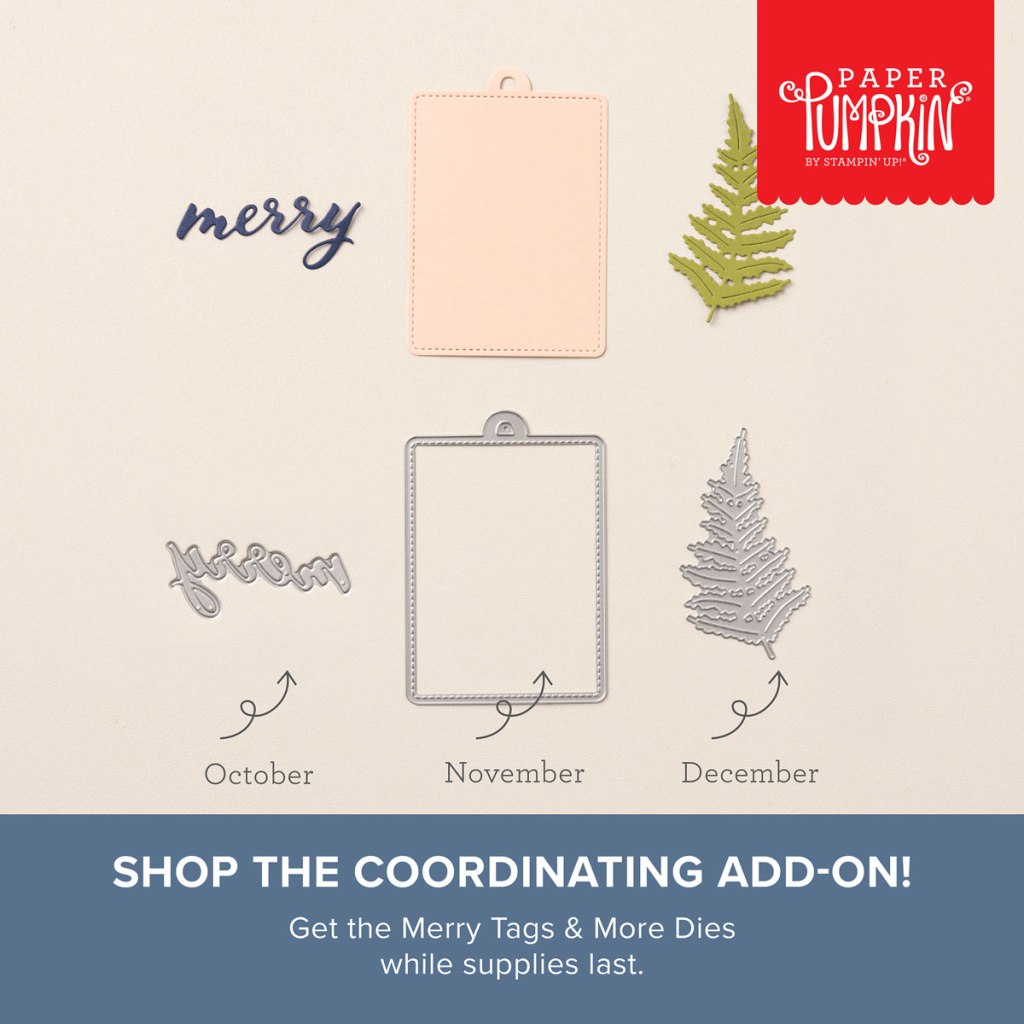
Don’t miss the coordinating Merry Tags & More Dies Add-On!
Add dimension and detail to your cards, scrapbook pages, and gift tags with the Merry Tags & More Dies! With a leaf and tag shape and Merry sentiment, these dies are a great way to expand your crafting experience. They even coordinate with three Paper Pumpkin Kits: Nests of Christmas, Filled with Joy, and Notes from the Heart. Such easy coordination makes these dies a must-have for any paper craft. Paper Pumpkin subscribers can purchase it beginning 11 September. The add-on is available only while supplies last, so it’s best to shop early! Please note that the Stampin’ Cut and Emboss Machine is not included and can be purchased separately.
#165639 $12
Note: Supplies may be limited toward the end of the subscription period.
Basic White Cardstock 2 5/8″ X 2 5/8″(inside panel), 4″ x 5 1/4″(back panel)
Lost Lagoon Cardstock 4 1/4″ X 11″(large card base scored & folded at 2 3/4″ & 5 1/2″), 2 3/4″ x 11″(center card base scored & folded at 4 1/4″ & 7″), 1 1/2″ X 11″(bottom card base scored & folded at 5 1/2″ & 8 1/4″)
Frames & Flowers Designer Series Paper 2 – 2 5/8″ x 4 1/8″ & 4 1/8″ X 5 3/8″(large card base panels), 2 5/8″ X 3 7/8″(center card base panel), 1 3/8″ X 5 3/8″ & 2 – 1 3/8″ X 2 5/8″ (bottom card base panels), 2 1/4″ x 6″(envelope flap)
Good Friday morning stamping friends and welcome to my Fun Fold Friday. Are you ready for the weekend? Is anyone starting to make plans yet?
Today’s card I made on YouTube Live on Wednesday. If you were able to join me or watched the replay, thank you. If you’d like to watch my video and stamp along, the measurements are below, just above the supply list, along with the link to my YouTube channel. Here’s my card for today.
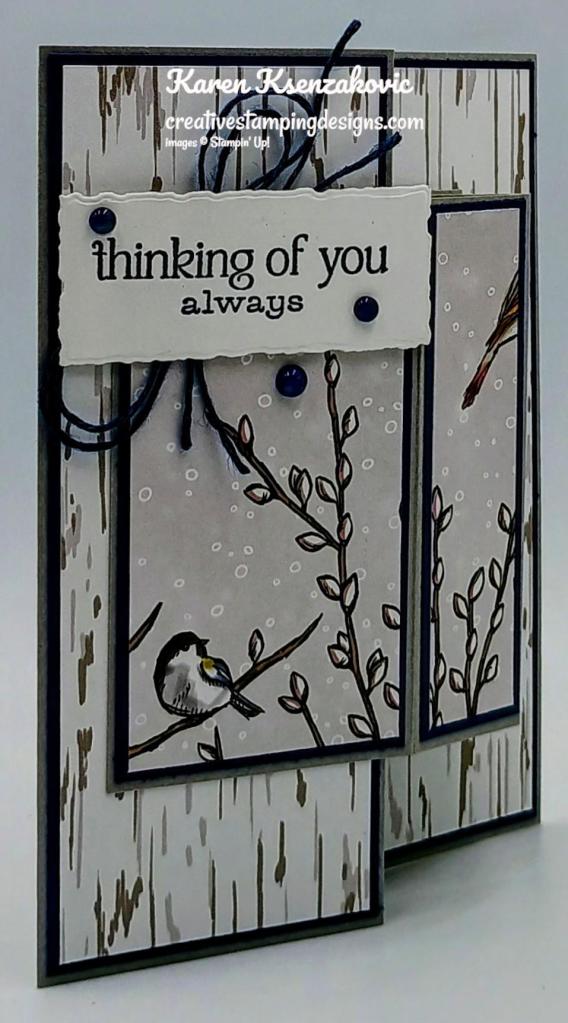
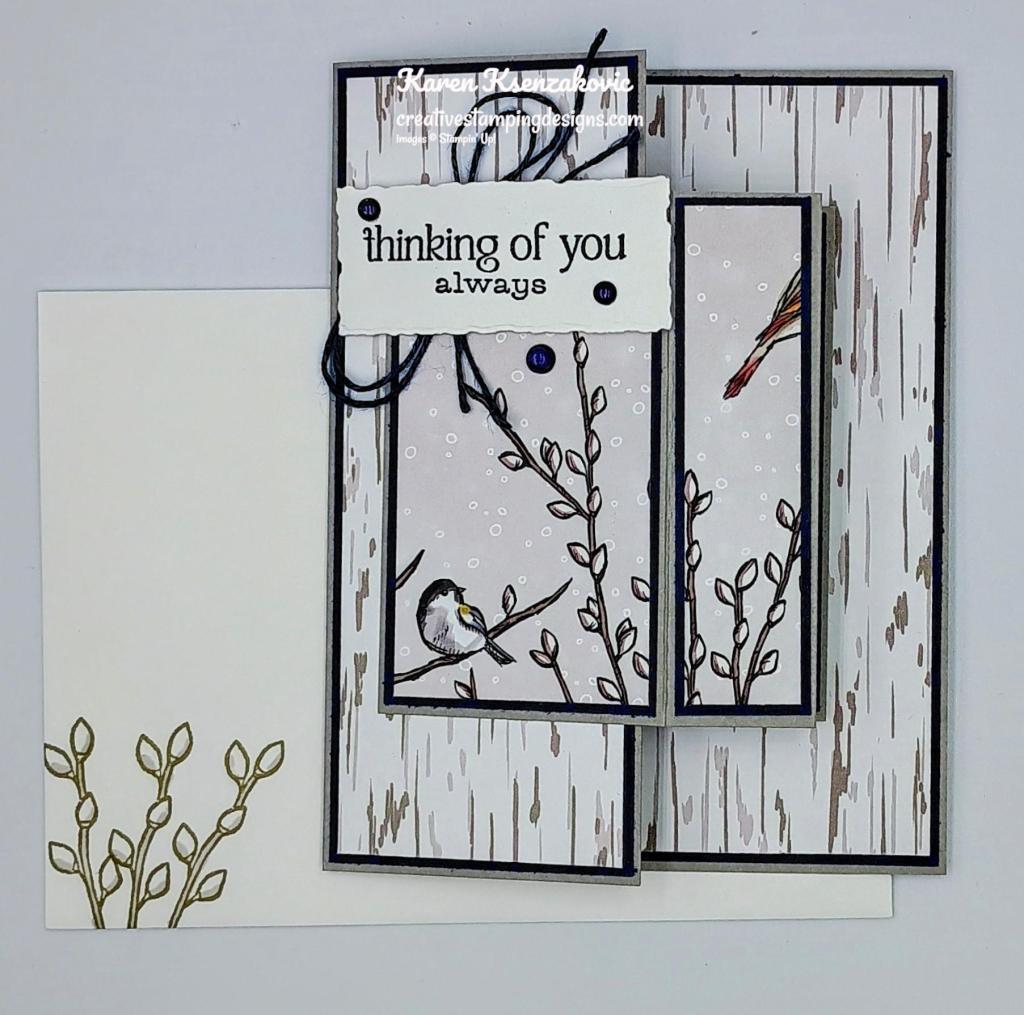
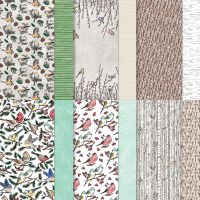
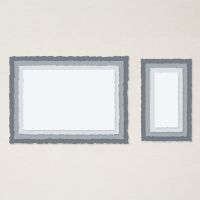
I used the Stampin’ Up! Winterly Tree Tops Cling Stamp Set along with the Deckled Rectangle Dies, Nests of Winter Designer Series Paper and the Stampin’ Up! Unbounded Love Photopolymer Stamp Set for my card today.
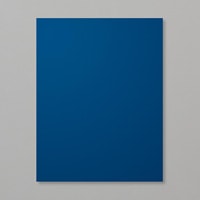
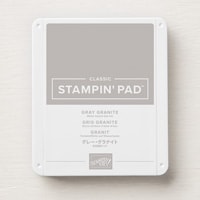
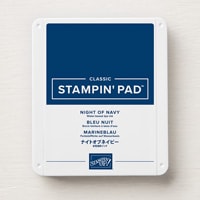
Adhere the panels of Nests of Winter DSP to coordinating Night of Navy mats using Stampin’ Seal. Adhere the 2 larger layered panels to the large Gray Granite card base using Liquid Glue. Adhere the smaller layered panels to the smaller Gray Granite card base using Liquid Glue keeping them in the order of the pattern if there is a pattern. Adhere the small card base to the larger card base using Stampin’ Seal +. To adhere the small card base, line up the first score line with the edge of the front of the large card base. Close the card and flip it over. Open the card back and add Stampin’ Seal + to the back of the small card base, close the large card base pressing it flat.
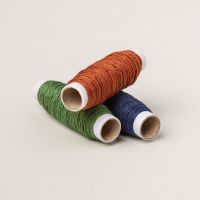
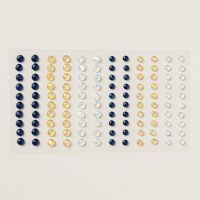
Stamp the sentiment from the Winterly Tree Tops stamp set in Night of Navy Ink on a panel of Basic White. Cut the sentiment out using the smallest Deckled Rectangle Dies. Tie a double bow using the Natural Tones Linen Thread and adhere it to the card front using a Glue Dot. Adhere the sentiment over the bow using Stampin’ Dimensionals. Add A few Night of Navy Opal Rounds Assortment to the card front.
Stamp the sentiments from the Unbounded Love stamp set in Night of Navy Ink on the 2 panels of Basic White. Adhere strips of to the bottom of the panels. Adhered the basic White panels to Night of Navy mats then to the inside of the small gray granite card base.
Finish the card by decorating a Basic White Medium Envelope. Stamp the pussy willow image from the Winterly Tree Tops stamp set on the envelope front in Gray Granite Ink. Adhere a panel of to the envelope flap.
Thank you for stopping by my blog today. I hope you liked my card and will give it a try. I hope you will CASE this card and please feel free to post it in the comments of my Facebook page under my post. I’d love to see your take it. The list of measurements are below if you’d like to stamp along while watching the video. You can watch my video on my YouTube Channel Here.
If you watch this on my YouTube channel, please remember to subscribe so that you will get notified when a new video goes live. Thank you to those that have subscribed already. Happy Stamping!!
If you need any stamping supplies, I’d love to be your Demonstrator. Just click HERE to go directly to my online store or drop me an email if you have any questions.
MY CURRENT HOST CODE IS: EMDXSBC9
Use this host code when placing an order with me. When you order $50 or greater you will receive a free gift from me! If your order is over $150, please do not use this code, but you’ll still get the free gift. The free gift is your choice of any 1 item valued up to $10.00 from the 2024-2025Annual Catalog, or from the Online Exclusives! Unfortunately, packs of cardstock are no longer an option for a free gift. Shipping has become too expensive to ship and it’s costing me as much to ship as the cardstock costs. For any orders $50 or more I will also send you my monthly class tutorials. Click HERE or go to my Customer Rewards for more details and to see what this month’s tutorials are.
Please remember to use my current Host Code and make sure that you can see my name on the final checkout page listed as your Demonstrator when you order so that you know that you’re ordering with me, and you’ll get my rewards!
Starter Kit Special – Get an extra $30 Your Starter Kit October 1 – 31
Hey, friend! Stampin’ Up! has a fantastic offer for anyone who becomes a demonstrator! Join my team between October 1–31and you can choose $155 worth of product in your Starter Kit for only $99! Starter Kits normally include $125 worth of product for $99, so that’s an extra $30 worth of product at no additional cost. This offering also includes free shipping and free business supplies! That’s MORE product for EVEN MORE fun!Click Here for all the details.
Interested but you are not really sure about wanting to commit? Contact me and we can talk, and you can ask me any questions at creativestampingdesigns@gmail.com.
Read more information about becoming a demonstrator Here.
A new line of products for Online Exclusives are coming! You won’t find these items in any catalog. This is a great opportunity to spark creativity, expand a crafting collection, and discover new opportunities—all from the convenience of the online store. These products will be available starting in November, BUTyou can add these new items to your Starter Kit if you join in October. Here’s a little sneak peek of some of the items that you can add to your Starter kit and get them before customers and start to play. Click Here for a sneak peek of what’s coming.
From October 1-31 All Kits from the Kits Collection will be on sale for up to 30% off
Save up to 30% off on all your favorite kits October 1–31! Our kits come with everything you need to create a unique paper craft. We have crafting options for card kits, treat packaging, home decor, and so much more! Kits are only available while supplies last.
Here are the details for the sale:
Promotion Period: October 1-31!
ALL kits from the kits collection qualify for the discount.
There is no limit on how many kits you can order, as long as product is available.
Orders must be opened and placed during the promotion dates. Orders opened before October 1 will not qualify for the sale.
Kits on sale will NOT qualify for the Stampin’ Rewards 50% off.
Kits can be added to a Starter Kit at their discounted rate.
Stampin’ Up! World Card Making Day Event – Last Day for Registration
It’s time to celebrate one of my favorite days of the year—World Card Making Day! Join Stampin’ Up! on October 5 as they celebrate this day with a creative virtual event. They’ll create five simple cards and show you some additional fun projects! Crafters of all skill levels are invited and welcome to join. And the event and registration are FREE! Mark your calendars now and join the event on October 5!
World Card Making Day Event Details:
Who: Everyone is invited!
When: October 5, 2024, from 2:00 to 3:00 p.m. (MT)
Where: Online
Price of Event: Free
Registration Dates: September 3–October 4, 2024, at 2:00 p.m. (MT)
You must register for this event in order to receive a link to view it. Also, those who register will receive a gift after the event ends. Register so that you don’t miss out on the event link and a special registration gift!
Language of Event: Most of the event will be presented in English with language interpretation voiceover and subtitles available in English, French, German, and Dutch.
Video on Demand: We will record our stream of this event. Anyone who has the event link will be able to watch the recorded event starting October 8.
Hashtag: You post about the World Card Making Day event on social media using #SUWorldCardMakingDay2024. If you post with the hashtag, you’ll see your post appear on the event webpage as you watch the event!
New Paper Pumpkin Subscribers – Receive 40% off Your 1st Kit
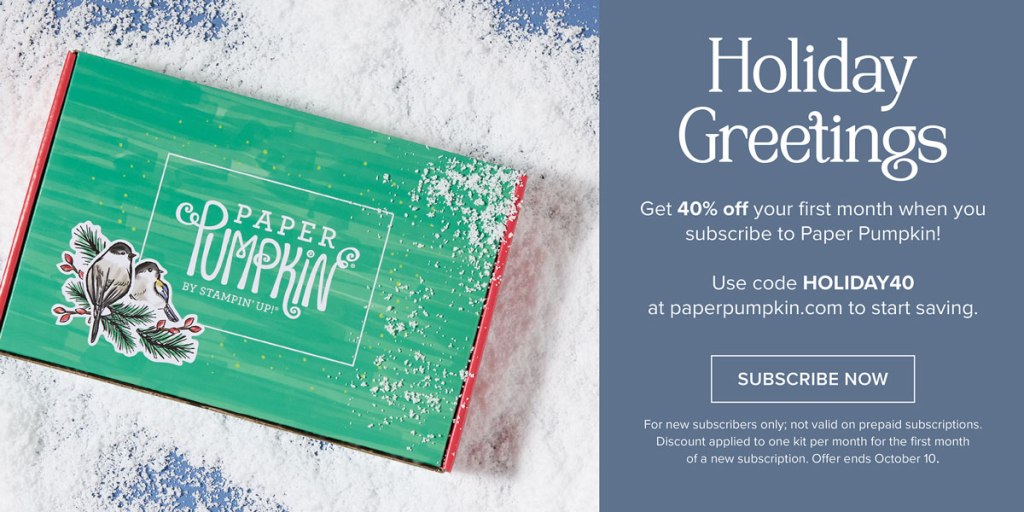
Santa Claus is comin’ to town a bit early this year—and he’s brought a holiday Paper Pumpkin sale! Starting September 11, 2024, at 12:01 a.m. (MT) until October 10, 2024, at 11:50 p.m. (MT), anyone who signs up for our monthly Paper Pumpkin subscription as a new subscriber will receive 40% off their first kit. That’s right, 40% OFF!
Where This Discount Is Applied This discount will be applied to one kit in the first kit shipment of the Paper Pumpkin subscription, which means new subscribers will get 40% off the October Nests of Christmas Paper Pumpkin Kit. After that, each month’s kit will return to the regular price of $25.00.
Qualifying for This Discount This offer is only for new month-to-month subscribers and is not valid on purchased or redeemed prepaid subscriptions. So if you have previously used an email address for a Paper Pumpkin subscription, you won’t qualify as a new subscriber to receive this discount. Also, anyone who signs up as a new subscriber to Paper Pumpkin but cancels by October 10 will not receive any kits or discounts.
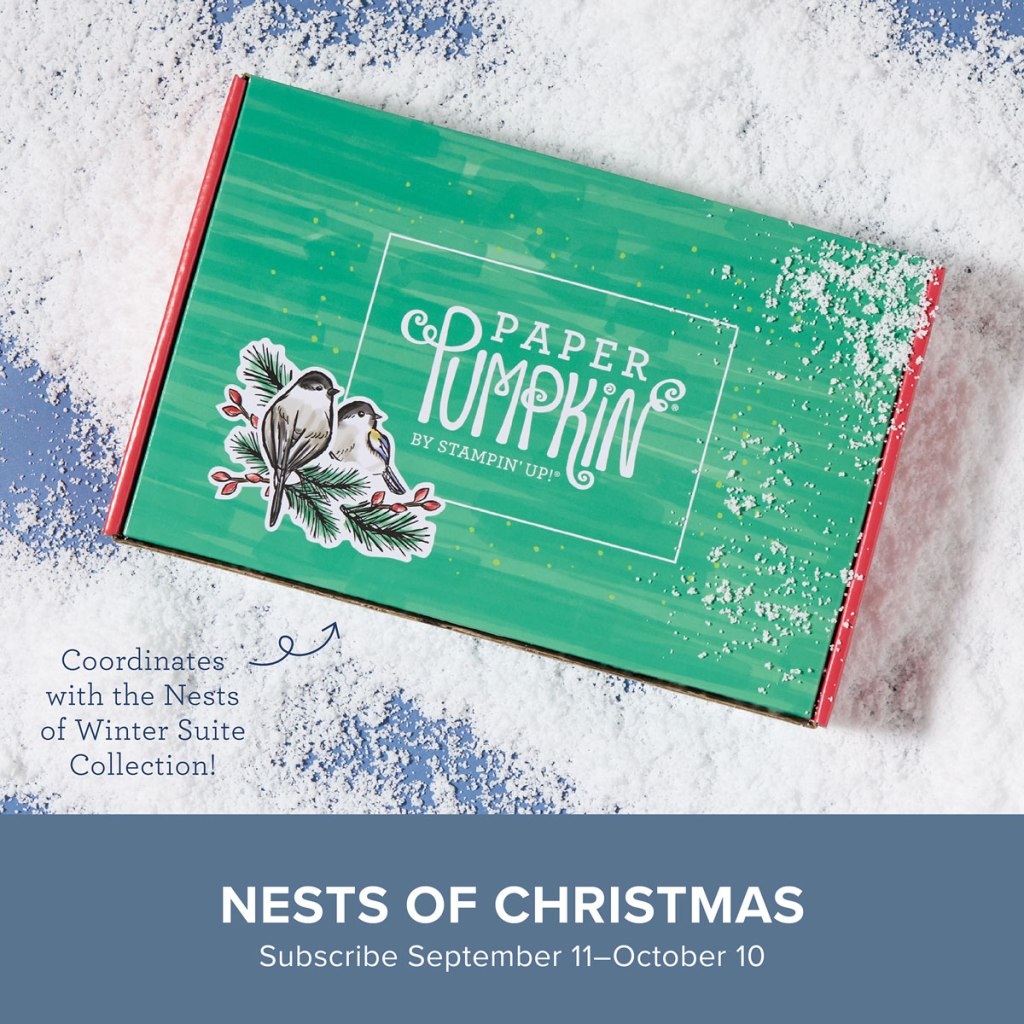
Nests of Christmas
Subscribe September 11 – October 10
Spread Christmas cheer with this cozy, all-inclusive crafting kit! Coordinates with the Nests of Winter Suite Collection (item 164072)!
About the Kit: • Makes 10 cards: 5 each of 2 designs with 10 coordinating envelopes • Tri-fold card bases and precut grosgrain ribbon • Precut labels with specialty green foil • Coordinating colors: Basic Black, Coastal Cabana, Granny Apple Green, Night of Navy, Real Red, Shaded Spruce (Classic Stampin’ Spot)
Subscribe to Paper Pumpkin for a monthly, all-inclusive crafting kit that’s a fun surprise! Each kit includes a photopolymer stamp set, Classic Stampin’ Spot, and step by step instructions to complete exclusive paper craft projects, including cards, tags, and gift packaging. And don’t miss the special add-on that coordinates with the next three months!
Don’t miss the coordinating Merry Tags & More Dies Add-On!
Add dimension and detail to your cards, scrapbook pages, and gift tags with the Merry Tags & More Dies! With a leaf and tag shape and Merry sentiment, these dies are a great way to expand your crafting experience. They even coordinate with three Paper Pumpkin Kits: Nests of Christmas, Filled with Joy, and Notes from the Heart. Such easy coordination makes these dies a must-have for any paper craft. Paper Pumpkin subscribers can purchase it beginning 11 September. The add-on is available only while supplies last, so it’s best to shop early! Please note that the Stampin’ Cut and Emboss Machine is not included and can be purchased separately.
#165639 $12
Subscribe to the September Paper Pumpkin Kit between 11 September and 10 October by clicking here!
Note: Supplies may be limited toward the end of the subscription period.
Basic White Cardstock 1 1/2″ x 3″(sentiment), 2 – 2 1/4″ X 3 1/4″(inner liners)
Gray Granite Cardstock 5 1/2″ X 6 1/2″ (card base scored & folded at 4 1/4″), 3 1/2″ X 10 1/2″(small card base scored & folded at 2″, 3″, 5 1/2″ & 8″)
Night of Navy Cardstock 2 1/8″ X 5 3/8″ & 4 1/8″ X 5 3/8″(larger dsp mats), 1 7/8″ X 3 3/8″, 7/8″ X 3 3/8″, 4 – 2 3/8″ X 3 3/8″(dsp & inner liner mats)
Nests of Winter Designer Series Paper 2″ X 5 1/4″ & 4″ X 5 1/4″(large card base panels), 1 3/4″ X 3 1/4″, 3/4″ X 3 1/4″, 2 – 2 1/4″ X 3 1/4″(small card base panels), 2 1/4″ X 6″(envelope)
Good Friday morning stamping friends and welcome to my Fun Fold Friday. Are you ready for the weekend? I can’t believe we’re done with September already. Before you know it, It’ll be Thanksgiving weekend and Christmas. Time just flies by too quickly.
Today’s card I made on YouTube Live on Wednesday. If you were able to join me or watched the replay, thank you. If you’d like to watch my video and stamp along, the measurements are below, just above the supply list, along with the link to my YouTube channel. Here’s my card for today.
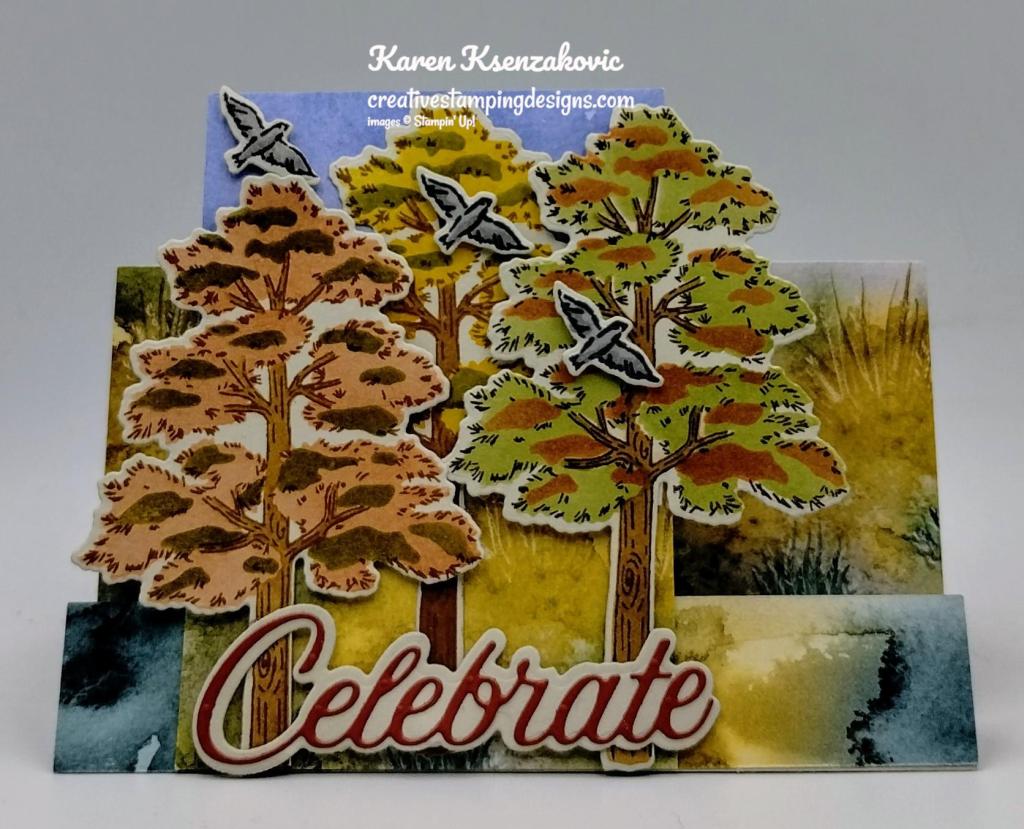
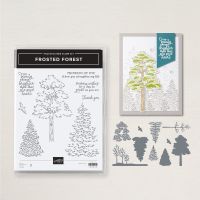
I used the Stampin’ Up! Online Exclusive Frosted Forest Bundle and the Stampin’ Up! Online Exclusive So Sincere Cling Stamp Set along with the Thoughtful Journey 6 X 6 Designer Series Paper and Wanted To Say Dies for my card today.
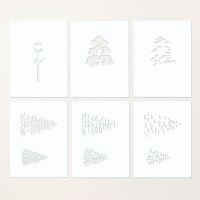
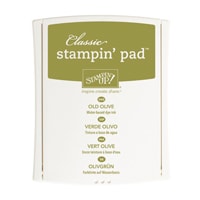
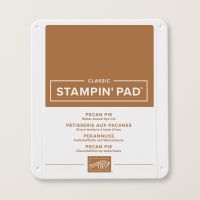
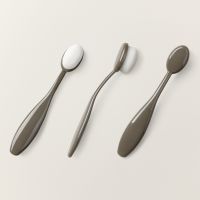
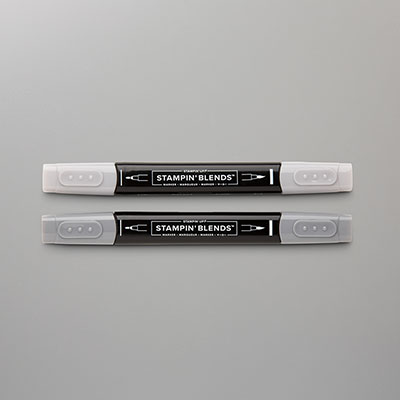
Stamp the tree image from the Stampin’ Up! Frosted Forest Photopolymer Stamp Set 3 times on a panel of Basic Beige in Pecan Pie Ink. Using the Frosted Forest Decorative Masks and Small Blending Brushes, add Pecan Pie, Cajun Craze, Crushed Curry and Old Olive Ink to the trees. Stamp 3 of the bird image from the Frosted Forest stamp set in Tuxedo Black Ink on the panel and color them using Smoky Slate Stampin’ Blends Markers. Cut the images out using the Frosted Forest Dies.
Score and fold a Basic Beige card base at 3″, 6″ & 7″. Adhere panels of Thoughtful Journey DSP to the card base using Liquid Glue. Score and fold the small card base at 4 1/4″. Adhere a panel of Thoughtful Journey DSP to the front of the small card base using Liquid Glue. Adhere the small card base to the larger card base using Tear & Tape Adhesive, by lining up the bottom front, closing the card base and adhering the folded edge on the back using Tear & Tape. Adhere the trees to the small card base using Stampin’ Seal and Stampin’ Dimensionals.
From the panel of Basic Beige, cut the sentiment mat using the Wanted to Say Dies. from a panel of Cajun Craze, cut the detailed sentiment using the Wanted to Say Dies. Adhere the detailed sentiment to the mat. Adhere the sentiment to the card front using Stampin’ Dimensionals. Adhere the birds using Stampin’ Dimensionals.
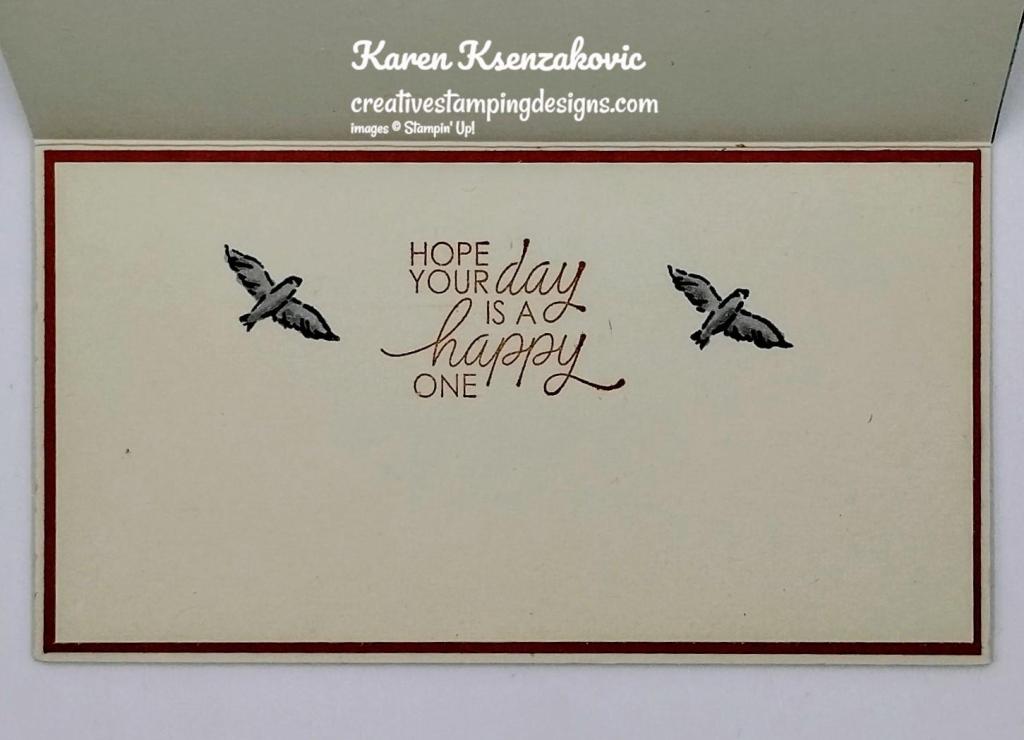
On a panel of Basic Beige, stamp the sentiment from So Sincere stamp set in Cajun Craze Ink. Stamp the bird image from Frosted Forest stamp set in Tuxedo Black Ink and color them using Smoky Slate Stampin’ Blends Markers. Adhere the Basic Beige panel to a Cajun Craze mat then to the inside of the Basic Beige card base.
On another panel of Basic Beige, stamp the sentiment from the Frosted Forest stamp set in Cajun Craze Ink. from panels of Pecan Pie and Old Olive, cut the tree die using the Frosted Forest Dies. Snip the trees off the Old Olive die cut and adhere the Old Olive to the bottom of the Pecan Pie die cut. Adhere the die cut panel to the bottom of the Basic Beige panel. Adhere the Basic Beige panel to a Cajun Craze mat then to the back of the Basic Beige card base.
Finish the card by decorating a Basic white Medium Envelope. Stamp the tree image from the Frosted Forest stamp set on the envelope front in Pecan Pie Ink. Using the Frosted Forest Decorative Masks and the Small Blending Brushes, add Pecan Pie, Cajun Craze and Old Olive Ink to the tree. Adhere a panel of Thoughtful Journey DSP to the envelope flap.
Thank you for stopping by my blog today. I hope you liked my card and will give it a try. I hope you will CASE this card and please feel free to post it in the comments of my Facebook page under my post. I’d love to see your take it. The list of measurements are below if you’d like to stamp along while watching the video. You can watch my video on my YouTube Channel Here.
If you watch this on my YouTube channel, please remember to subscribe so that you will get notified when a new video goes live. Thank you to those that have subscribed already. Happy Stamping!!
If you need any stamping supplies, I’d love to be your Demonstrator. Just click HERE to go directly to my online store or drop me an email if you have any questions.
MY CURRENT HOST CODE IS: EPRVU3FN
Use this host code when placing an order with me. When you order $50 or greater you will receive a free gift from me! If your order is over $150, please do not use this code, but you’ll still get the free gift. The free gift is your choice of any 1 item valued up to $10.00 from the 2024-2025Annual Catalog, or from the Online Exclusives! Unfortunately, packs of cardstock are no longer an option for a free gift. Shipping has become too expensive to ship and it’s costing me as much to ship as the cardstock costs. For any orders $50 or more I will also send you my monthly class tutorials. Click HERE or go to my Customer Rewards for more details and to see what this month’s tutorials are.
Please remember to use my current Host Code and make sure that you can see my name on the final checkout page listed as your Demonstrator when you order so that you know that you’re ordering with me, and you’ll get my rewards!
The Stampin’ Up! Clearance Rack has been updated with a few new goodies!!!!
Head over to my Online Store quickly to get your hands on some great deals. But hurry!! A lot of items have sold out already. Clearance Rack deals are only while supplies last! Click Here to head over to my Online Store.
Don’t forget to use my Current Host Code EPRVU3FN when checking out.
Stampin’ Up! World Card Making Day Event – Free Registration Open
It’s time to celebrate one of my favorite days of the year—World Card Making Day! Join Stampin’ Up! on October 5 as they celebrate this day with a creative virtual event. They’ll create five simple cards and show you some additional fun projects! Crafters of all skill levels are invited and welcome to join. And the event and registration are FREE! Mark your calendars now and join the event on October 5!
World Card Making Day Event Details:
Who: Everyone is invited!
When: October 5, 2024, from 2:00 to 3:00 p.m. (MT)
Where: Online
Price of Event: Free
Registration Dates: September 3–October 4, 2024, at 2:00 p.m. (MT)
You must register for this event in order to receive a link to view it. Also, those who register will receive a gift after the event ends. Register so that you don’t miss out on the event link and a special registration gift!
Language of Event: Most of the event will be presented in English with language interpretation voiceover and subtitles available in English, French, German, and Dutch.
Video on Demand: We will record our stream of this event. Anyone who has the event link will be able to watch the recorded event starting October 8.
Hashtag: You post about the World Card Making Day event on social media using #SUWorldCardMakingDay2024. If you post with the hashtag, you’ll see your post appear on the event webpage as you watch the event!
Registration for this event begins on Tuesday, September 3 so look for the link to register beginning then!!
New Paper Pumpkin Subscribers – Receive 40% off Your 1st Kit
Santa Claus is comin’ to town a bit early this year—and he’s brought a holiday Paper Pumpkin sale! Starting September 11, 2024, at 12:01 a.m. (MT) until October 10, 2024, at 11:50 p.m. (MT), anyone who signs up for our monthly Paper Pumpkin subscription as a new subscriber will receive 40% off their first kit. That’s right, 40% OFF!
Where This Discount Is Applied This discount will be applied to one kit in the first kit shipment of the Paper Pumpkin subscription, which means new subscribers will get 40% off the October Nests of Christmas Paper Pumpkin Kit. After that, each month’s kit will return to the regular price of $25.00.
Qualifying for This Discount This offer is only for new month-to-month subscribers and is not valid on purchased or redeemed prepaid subscriptions. So if you have previously used an email address for a Paper Pumpkin subscription, you won’t qualify as a new subscriber to receive this discount. Also, anyone who signs up as a new subscriber to Paper Pumpkin but cancels by October 10 will not receive any kits or discounts.
Nests of Christmas
Subscribe September 11 – October 10
Spread Christmas cheer with this cozy, all-inclusive crafting kit! Coordinates with the Nests of Winter Suite Collection (item 164072)!
About the Kit: • Makes 10 cards: 5 each of 2 designs with 10 coordinating envelopes • Tri-fold card bases and precut grosgrain ribbon • Precut labels with specialty green foil • Coordinating colors: Basic Black, Coastal Cabana, Granny Apple Green, Night of Navy, Real Red, Shaded Spruce (Classic Stampin’ Spot)
Subscribe to Paper Pumpkin for a monthly, all-inclusive crafting kit that’s a fun surprise! Each kit includes a photopolymer stamp set, Classic Stampin’ Spot, and step by step instructions to complete exclusive paper craft projects, including cards, tags, and gift packaging. And don’t miss the special add-on that coordinates with the next three months!
Don’t miss the coordinating Merry Tags & More Dies Add-On!
Add dimension and detail to your cards, scrapbook pages, and gift tags with the Merry Tags & More Dies! With a leaf and tag shape and Merry sentiment, these dies are a great way to expand your crafting experience. They even coordinate with three Paper Pumpkin Kits: Nests of Christmas, Filled with Joy, and Notes from the Heart. Such easy coordination makes these dies a must-have for any paper craft. Paper Pumpkin subscribers can purchase it beginning 11 September. The add-on is available only while supplies last, so it’s best to shop early! Please note that the Stampin’ Cut and Emboss Machine is not included and can be purchased separately.
#165639 $12
Subscribe to the September Paper Pumpkin Kit between 11 September and 10 October by clicking here!
Note: Supplies may be limited toward the end of the subscription period.
Good Friday morning stamping friends and welcome to my Fun Fold Friday. Are you ready for the weekend? Is anyone starting to make plans yet? I’ll be working all day tomorrow and Sunday.
Today’s card I made on YouTube Live on Wednesday. If you were able to join me or watched the replay, thank you. If you’d like to watch my video and stamp along, the measurements are below, just above the supply list, along with the link to my YouTube channel. Here’s my card for today.
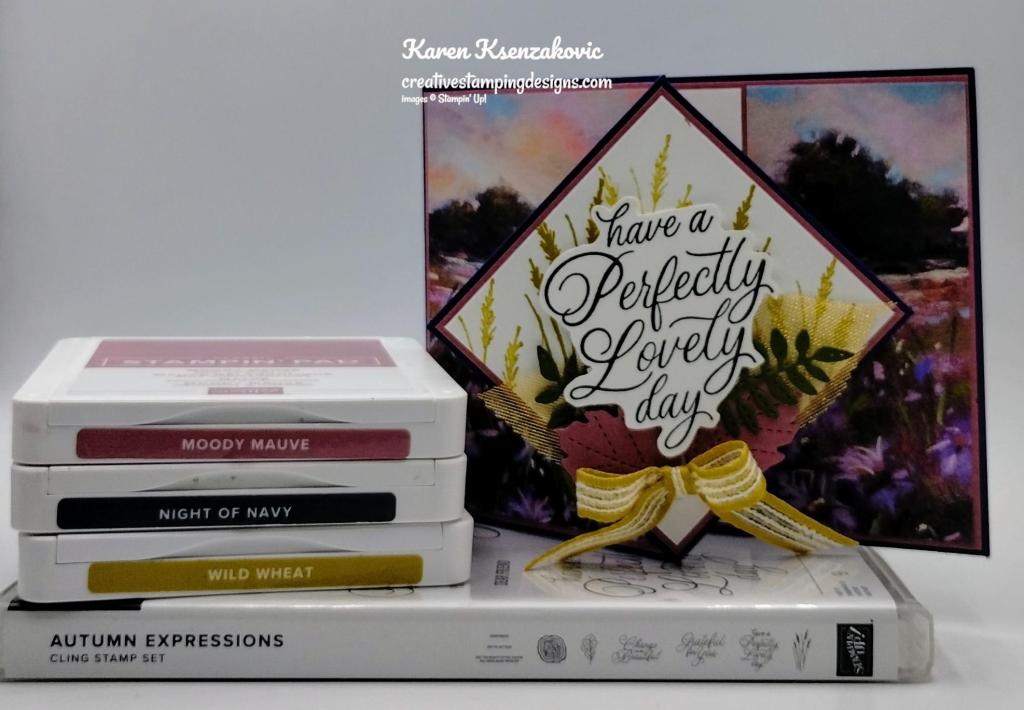
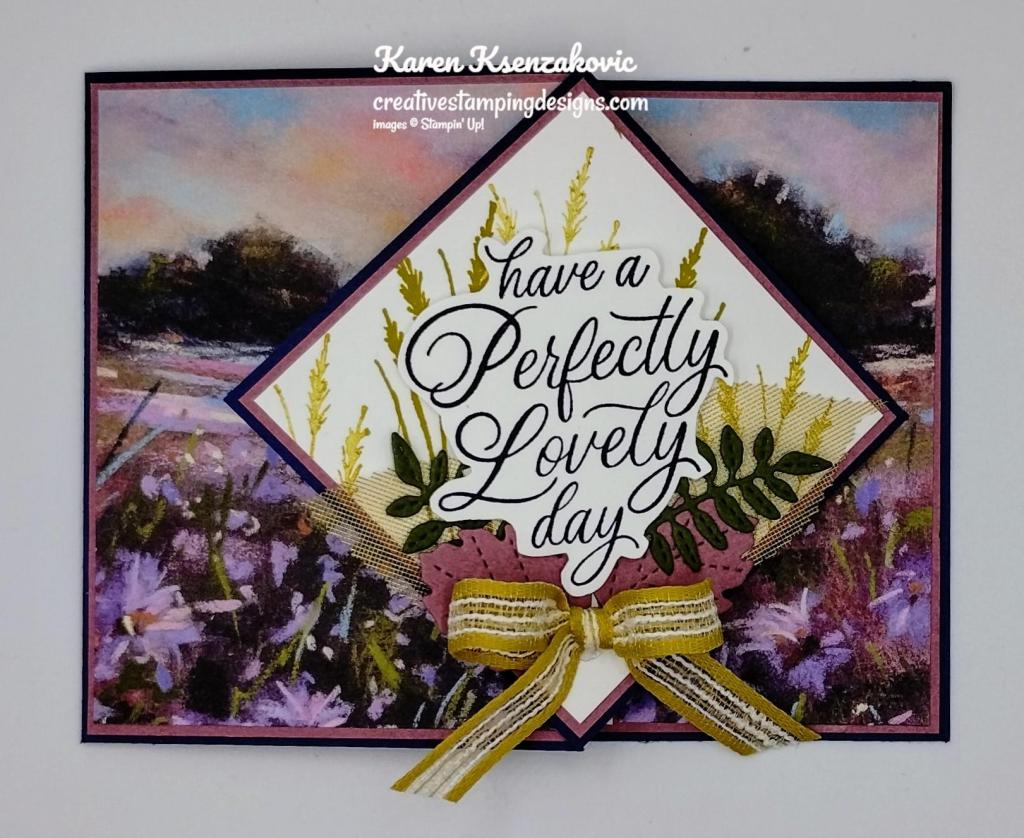
I used the NEW Stampin’ Up! Autumn Expressions Bundle along with the Splendid Autumn 6 X 6 Designer Series Paper for my card today. These items will be available starting on September 4th from the September-December 2024 Mini Catalog.
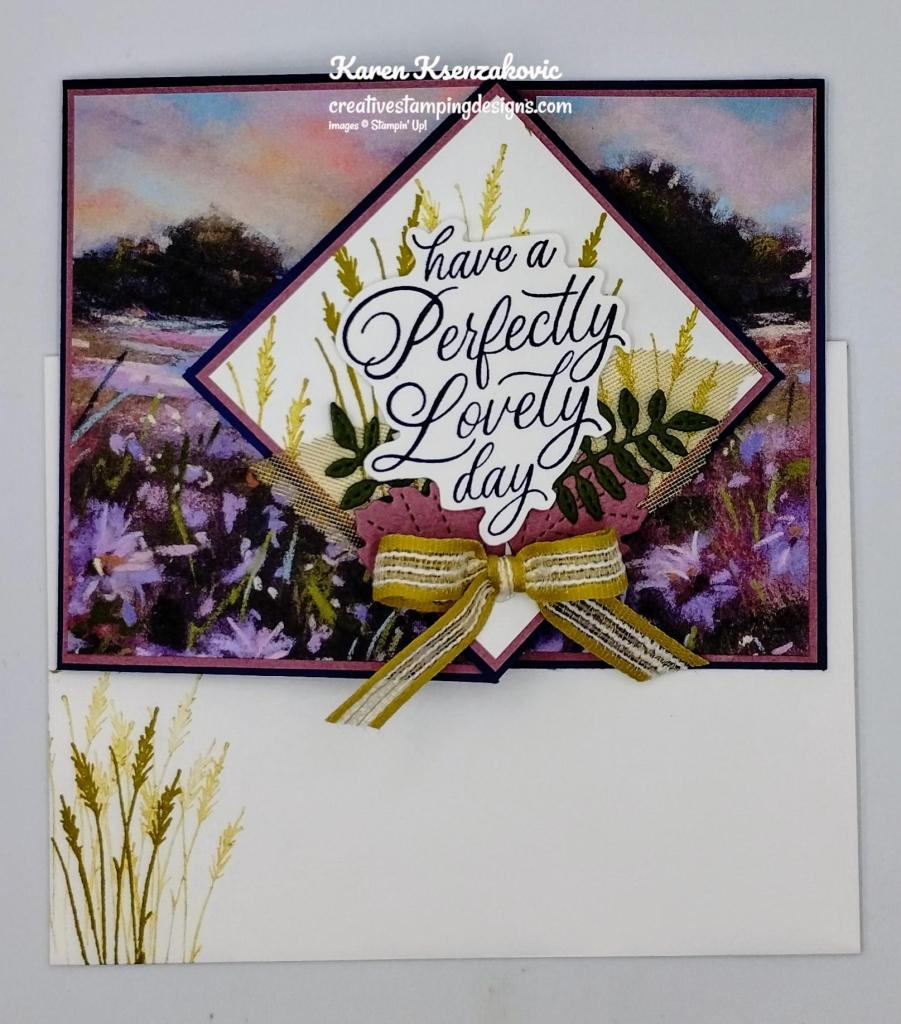
Score & fold a Night of Navy card base at 5 1/2″ & 8 3/4″. On the 4 1/4″ edge of the small, scored section make a little mark in the center at 2 1/8″. Cut from the 2 1/8″ mark to the score line going up and down to make the triangle. Fold the card base in half at the 5 1/2″ score line and fold it back at the 8 3/4″ score line to make a ‘Z’ fold card. Adhere a 3″ X 3″ panel of Night of Navy on the front section over the triangle so it’s a diamond.
Adhere a panel of Splendid Autumn DSP to a Moody Mauve mat using Stampin Seal. Adhere the layered panel to the front of the Night of Navy card base, under the triangle, using Liquid Glue.
On a panel of Basic White, stamp the wheat image from the Stampin’ Up! Autumn Expressions Cling Stamp Set in Wild Wheat Ink, stamp some full strength and some stamped off once. Adhere the Basic White panel to a Moody Mauve mat, then to the Night of Navy diamond on the card front. On a panel of Basic White, stamp the sentiment from the Autumn Expressions stamp set in Night of Navy Ink. Fussy cut the sentiment using Paper Snips. Adhere the sentiment to the center of the stamped Basic White panel using Stampin’ Dimensionals. Using the Autumn Expressions Dies, cut the leaf dies from panels of Moody Mauve and Mossy Meadow. Adhere a Woven Golden Leaf (available Sept 4th) and 1 of each of the die cut leaves under each side of the sentiment using Glue Dots. Tie a small bow using the Wild Wheat Rustic Stripped 3/8″ Ribbon (available Sept 4th). Adhere the bow to the bottom of the diamond under the sentiment using a Glue Dot.
For the inside, adhere a panel of Splendid Autumn DSP to a Moody Mauve mat. Adhere the layered panel to the inside left of the Night of Navy card base. Adhere the 2″ X 4″ panel of Splendid Autumn DSP to the right side of the 4 1/8″ X 5 3/8″ panel of Moody Mauve. Adhere the layered panel to the inside of the Night of Navy card base. On a panel of Basic White, stamp the sentiment from the Autumn Expressions stamp set in Night of Navy Ink. Stamp the wheat image from the Autumn Expressions stamp set in Wild Wheat Ink on the bottom of the panel. Adhered the Basic Whtie panel to the inside of the Night of Navy card base on the Moody Mauve mat.
To finish the card, decorated a Basic White Medium Envelope. Stamp the wheat image from the Autumn Expressions stamp set in Wild Wheat Ink on the envelope front, some stamped full strength and some stamped off once. Adhere a panel of Splendid Autumn DSP to the envelope flap.
Thank you for stopping by my blog today. I hope you liked my sneak peek of my card and will give it a try. I hope you will CASE this card and please feel free to post it in the comments of my Facebook page under my post. I’d love to see your take it. The list of measurements are below if you’d like to stamp along while watching the video. You can watch my video on my YouTube Channel Here.
If you watch this on my YouTube channel, please remember to subscribe so that you will get notified when a new video goes live. Thank you to those that have subscribed already. Happy Stamping!!
If you need any stamping supplies, I’d love to be your Demonstrator. Just click HERE to go directly to my online store or drop me an email if you have any questions.
MY CURRENT HOST CODE IS: KFUKW3ZY
Use this host code when placing an order with me. When you order $50 or greater you will receive a free gift from me! If your order is over $150, please do not use this code, but you’ll still get the free gift. The free gift is your choice of any 1 item valued up to $10.00 from the 2024-2025Annual Catalog, or from the Online Exclusives! Unfortunately, packs of cardstock are no longer an option for a free gift. Shipping has become too expensive to ship and it’s costing me as much to ship as the cardstock costs. For any orders $50 or more I will also send you my monthly class tutorials. Click HERE or go to my Customer Rewards for more details and to see what this month’s tutorials are.
Please remember to use my current Host Code and make sure that you can see my name on the final checkout page listed as your Demonstrator when you order so that you know that you’re ordering with me, and you’ll get my rewards!
September-December 2024 Mini Catalog Paper and Ribbon Shares Open for Ordering
I’m offering a Designer Series Paper share from the September-December 2024 Mini Catalog and I’d love to have you join!! I’m placing my share order early on September 4th and I’m going to use the expedited shipping option so I should be able to have the shares cut, bundled and back out to you during the week of September 9. Wouldn’t you love to have all of the gorgeous new Designer Series Papers in the Stampin’ Up! September-December 2024 Mini Catalog? What is a Paper Share you ask? It’s a sample of each of the new Designer Series Papers from the September-December 2024 Mini Catalog. Shares give you a good working sample of all of the papers so that you can decide which ones to order in full packs! If you were to purchase all of the DSP in the new Catalog, it would cost you over $135.00 plus shipping and if you were to purchase all the ribbon it would cost you over $60.00.
New Designer Series Paper Share – $21.00 plus $9.00 for Priority Mail Shipping
How my shares work: I order full packs of all of the Designer Series Papers listed below, I cut them into 6″ X 6″ pieces (or 6″ X 12″ pieces for double shares) and give you one panel of each design from each pack on the list. I pack up the paper in a cellophane bag with labels listing the Name, Item # and Colors in the pack and mail it back out to you just as quickly as I can!
New Designer Series Paper Share – $21.00 plus $9.00 for Priority Mail shipping
You will receive one 6X6 sheet of each design from the following DSP packs (the number after the name indicates how many 6×6 sheets of that paper pack you will receive):
Nests of Winter (6)
Regal Winter (6)
Regal Distressed Patterns (3)
Reindeer Days (6)
Season of Elegance (6)
Sentimental Christmas (6)
Snowy Scenes (6)
A Little Bit Festive (3)
Festive Glimmer (3)
Splendid Autumn 6X6 (12)
Take A Bow 6X6 (4)
In all, you’ll receive 61 – 6” X 6” sheets of designer or specialty paper!
Double DSP Share – $42.00 + $9.00 Shipping by Priority Mail – if you’d like double shares of the designer paper, I’m offering those too! I’ll cut the 12″ X 12″ designer paper sheets into 6″ X 12″ so that you’ll be able to get 3 full A2 size card fronts from each sheet and you’ll get double sheets of the 6″ X 6″ since they’re already precut.
New Ribbon Share – $17.00 plus $9.00 Priority Mail Shipping
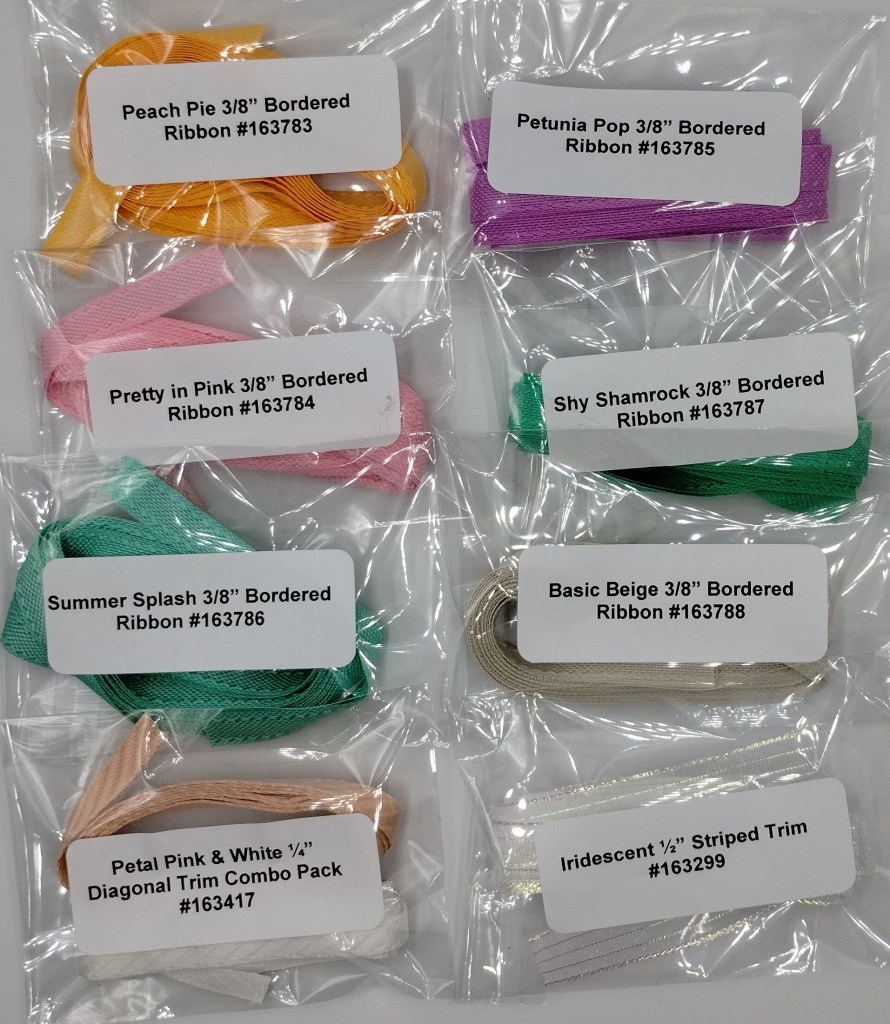
All ribbons will come individually wrapped and labeled with the name and number of the product. Please note that ribbons are being divided differently, you will be getting one fourth of a roll of each of the Ribbons.
One-Fourth of a Roll of each:
Blackberry Bliss & Gold Textured Ribbon
Cherry Cobbler & Gold Satin Ribbon
Natural Tones Linen Thread
Pool Party Pompom Ribbon
Real Red & White Baker’s Twine
Shaded Spruce Satin & Sheer Ribbon
Wild Wheat Rustic Striped Ribbon
Double Ribbon Share – $34.00 + $9.00 Priority Mail Shipping – If you’d like double shares of the Ribbon, you will be getting 1/2 of the roll or each ribbon.
If you would like the Designer Series Paper Share & the Ribbon Share the cost will be:
$38.00 for a single share + $9.00 shipping
$76.00 for a double share + $9.00 shipping.
Anyone is welcome to join in my share (please note, I can only ship to addresses within the US). If you’d like to join, email the following information to creativestampingdesigns@gmail.com
Your first and last name
Your mailing address for paper to be shipped to.
The email address that is connected to your PayPal account or let me know if you’d like to use Zelle. I will accept Zelle or PayPal for payment. ***You do not need to have a PayPal account to pay the invoice, you can choose to pay by credit card without having a PayPal account. If you’d like to use Zelle, email me and I’ll give you the number associated with my account.
Deadline to sign up for my share is Sunday September 1st at 5:00 PM ET.
Redemption Period: August 1-31, 2024 Ordering Deadline: August 31, 2024 at 11:59 p.m. (MT)
There is no limit to the number of coupon codes you can redeem on an order during the redemption period. If using multiple codes, they must be separated by a space.
Coupon codes may be redeemed one time only. They cannot be redeemed after the August 31.
Coupon codes may be redeemed for any product (excluding Starter Kits). They cannot be used on exchanges.
Bonus Days coupon codes can be applied to month-to-month Paper Pumpkin subscriptions and new prepaid subscriptions.
Designer Series Papew Sale – 15% off August 6th-31st
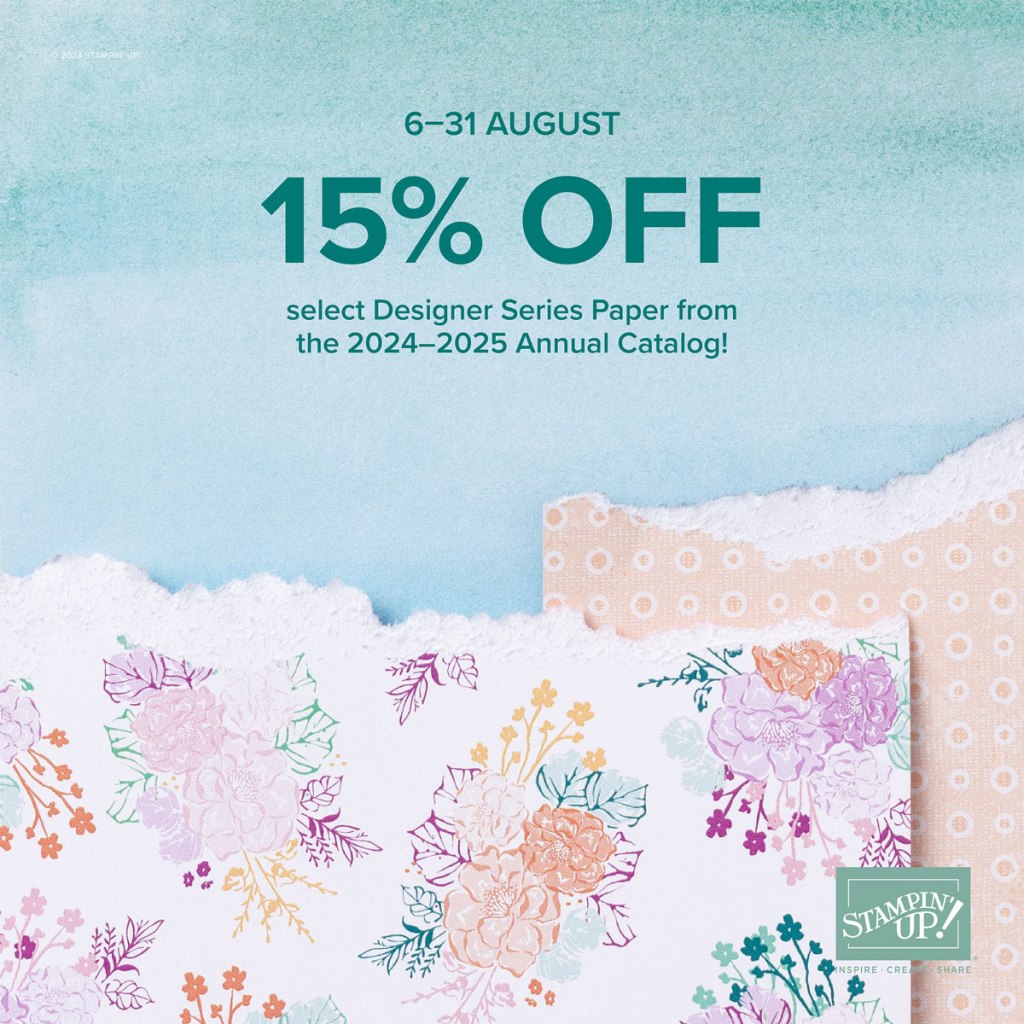
Between August 6-31, you can shop select Designer Series Paper from the 2024–2025 Annual Catalog at 15% off! This is the perfect time to stock up and save on some of your favorite paper.
Designer Series Paper Sale Details:
Sales Period: August 6-31, 2024
Ordering Deadlines: August 31 at 11:59 p.m. (MT)
The fourteen paper packs included in the sale can be found listed in This Flyer
Only the select packs of papers listed on the flyer are included in the sale.
You CAN redeem your Bonus Days coupons when you order the sale papers!
You must open and close the order during the allotted dates to receive the discount.
There are NO limits on ordering. However, product is only available while supplies last.
Designer Series Paper purchased with Stampin’ Rewards or as part of a Starter Kit WILL qualify for the discount.
Head over to my Online Store beginning August 6 and get 15% off your favorite packs of paper!!
Subscribe to Paper Pumpkin for a monthly, all-inclusive crafting kit that’s a fun surprise! Each kit includes a photopolymer stamp set, Classic Stampin’ Spot, and step by step instructions to complete exclusive paper craft projects, including cards, tags, and gift packaging. And don’t miss the special add-on that coordinates with the next three months!
Share your love for all things autumn with this kit! Don’t miss the whimsical, water colored ephemera pack with this month’s Paper Pumpkin!
• Makes 9 cards, 3 each of 3 designs • Project includes printed cards and coordinating envelopes • Laser cut card fronts, ephemera pack, and embellishments • Coordinating colors: Cajun Craze (Classic Stampin’ Spot), Crushed Curry, Poppy Parade, Pumpkin Pie, Very Vanilla, Wild Wheat
Don’t miss the coordinating Every Celebration Dies Add-On!
This exclusive add-on (item 164991) coordinates with the three upcoming kits! Paper Pumpkin subscribers can purchase it beginning 11 July. The add-on is available only while supplies last, so it’s best to shop early!
Subscribe to the September Paper Pumpkin Kit between 11 August and 10 September by clicking here!
Note: Supplies may be limited toward the end of the subscription period.
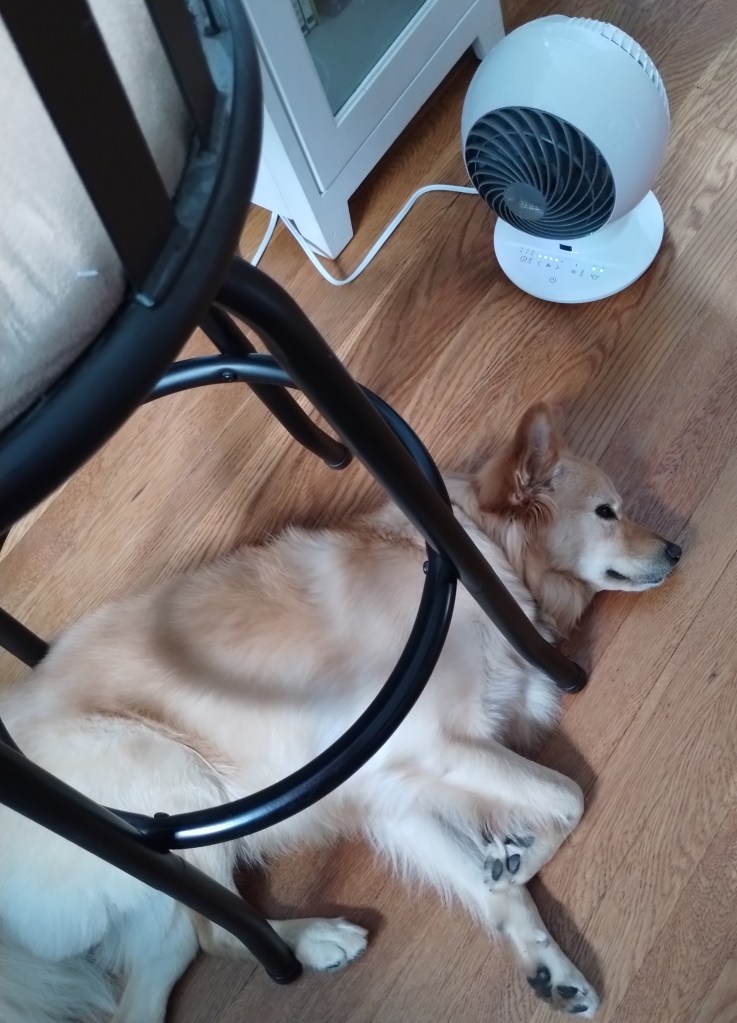
Good Friday morning stamping friends and welcome to my Fun Fold Friday. Did everyone have a nice 4th? It was a very relaxing day here at our house. My niece came over in the morning with her dog and we went out walking for a few miles with the dogs. By the time we got home they were both hot and exhausted. Here’s a picture of what Coraline did after her walk. Smart pup, laid down right in front of the fan.
A few of my husband’s friends came over in the afternoon and we barbequed hamburgers and wings. I was even able to get a little crafting time in for myself. All was good here until the fireworks started going off all around out area. Coraline does not do well with them at all. I even gave her a calming treat, which only helped for a short time. She was a very nervous puppy. Gidget on the other hand had no clue what was going on.
Today’s card I made on YouTube Live on Wednesday. If you were able to join me or watched the replay, thank you. If you’d like to watch my video and stamp along, the measurements are below, just above the supply list, along with the link to my YouTube channel. Here’s my card for today.
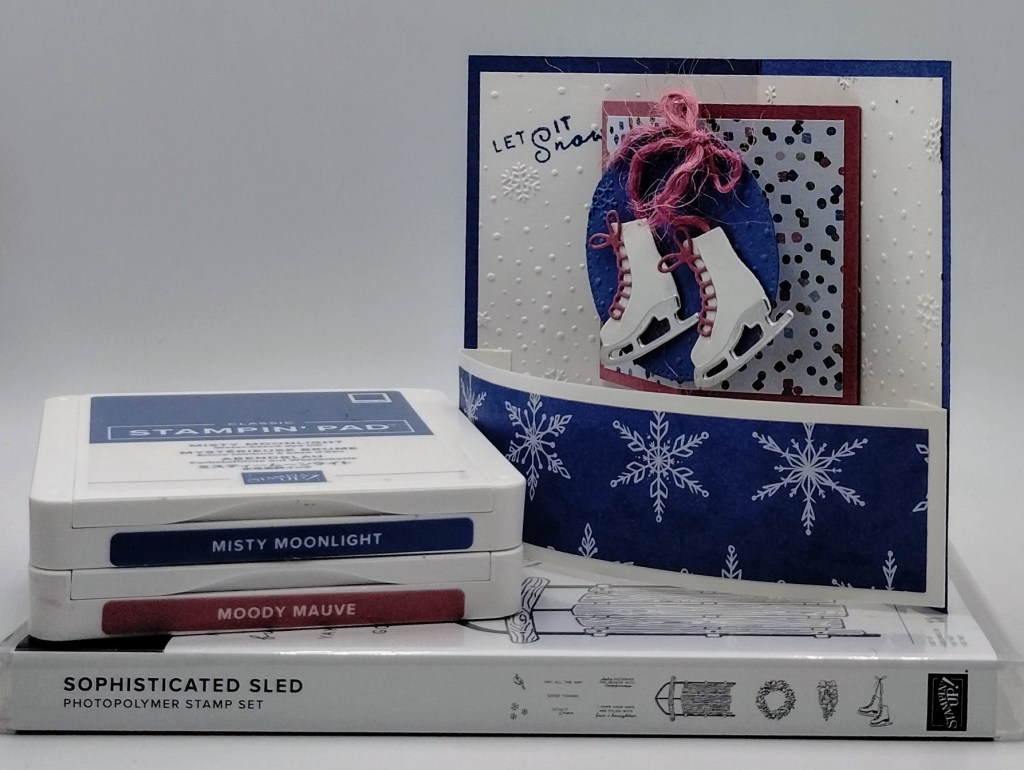
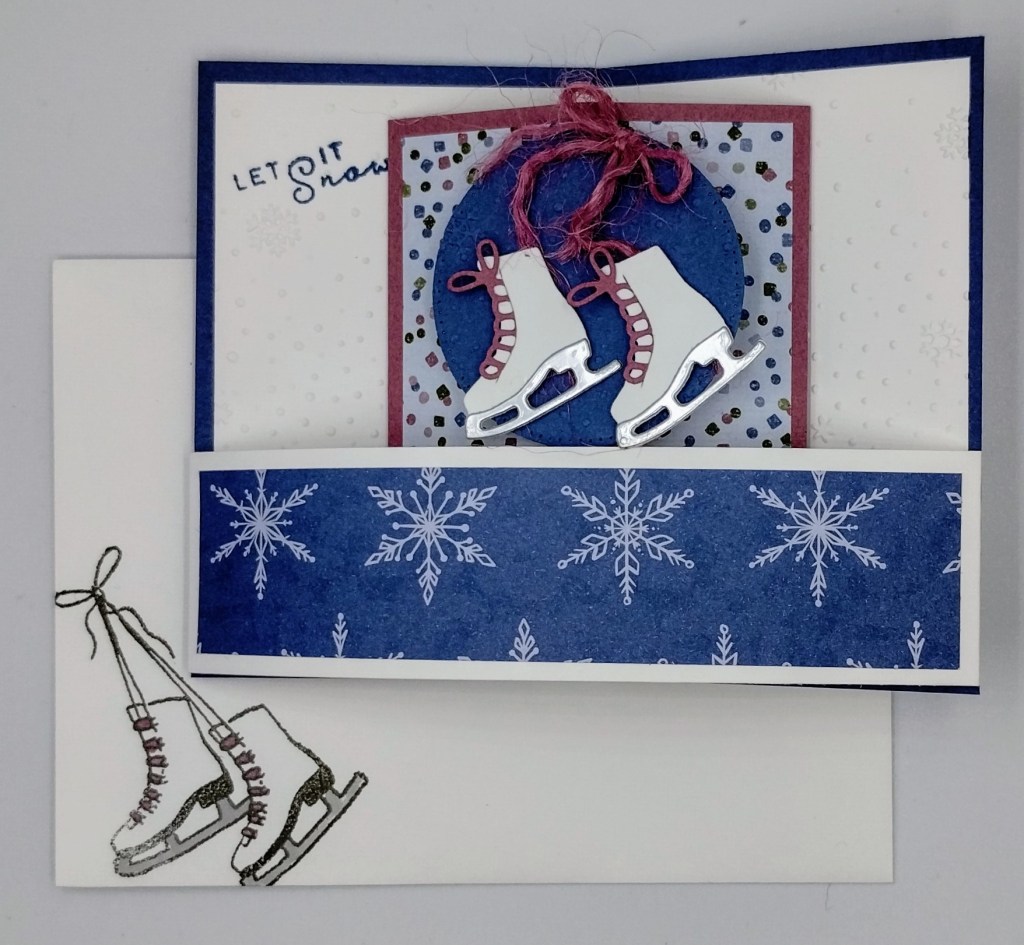
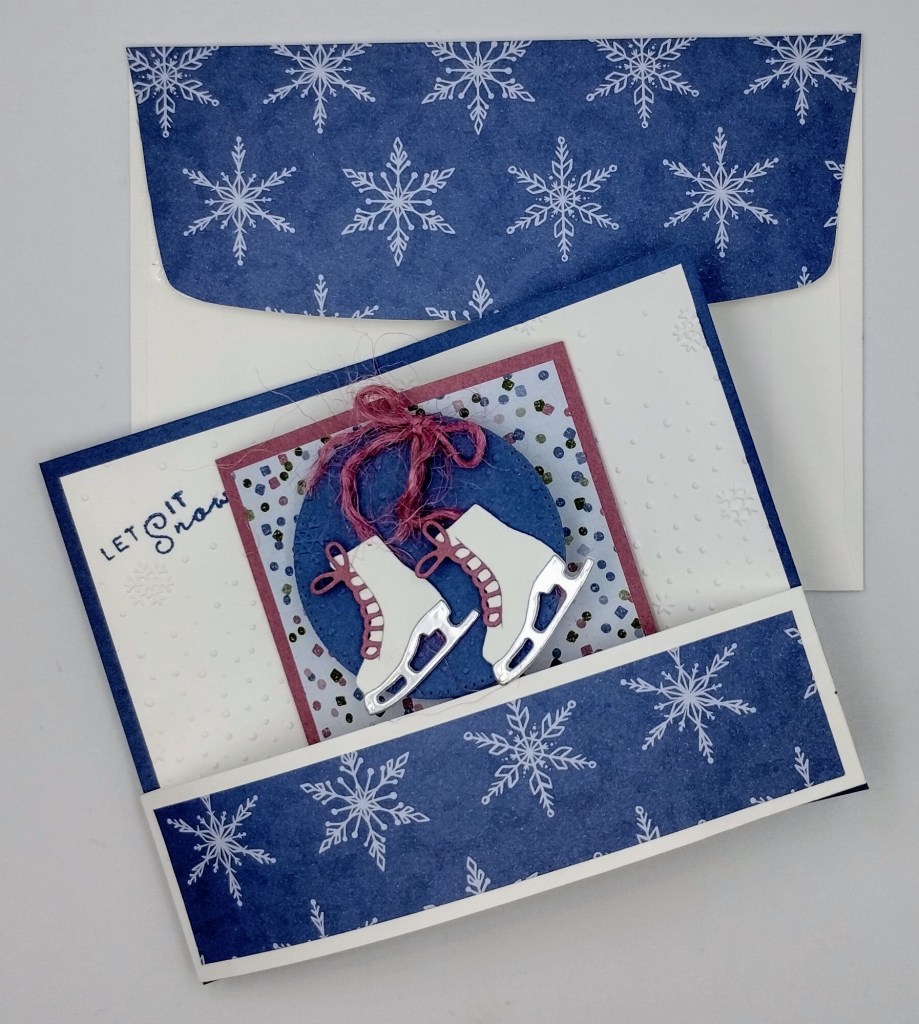
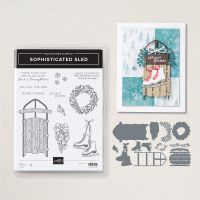
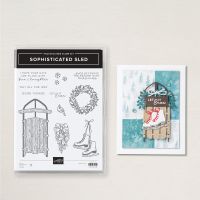
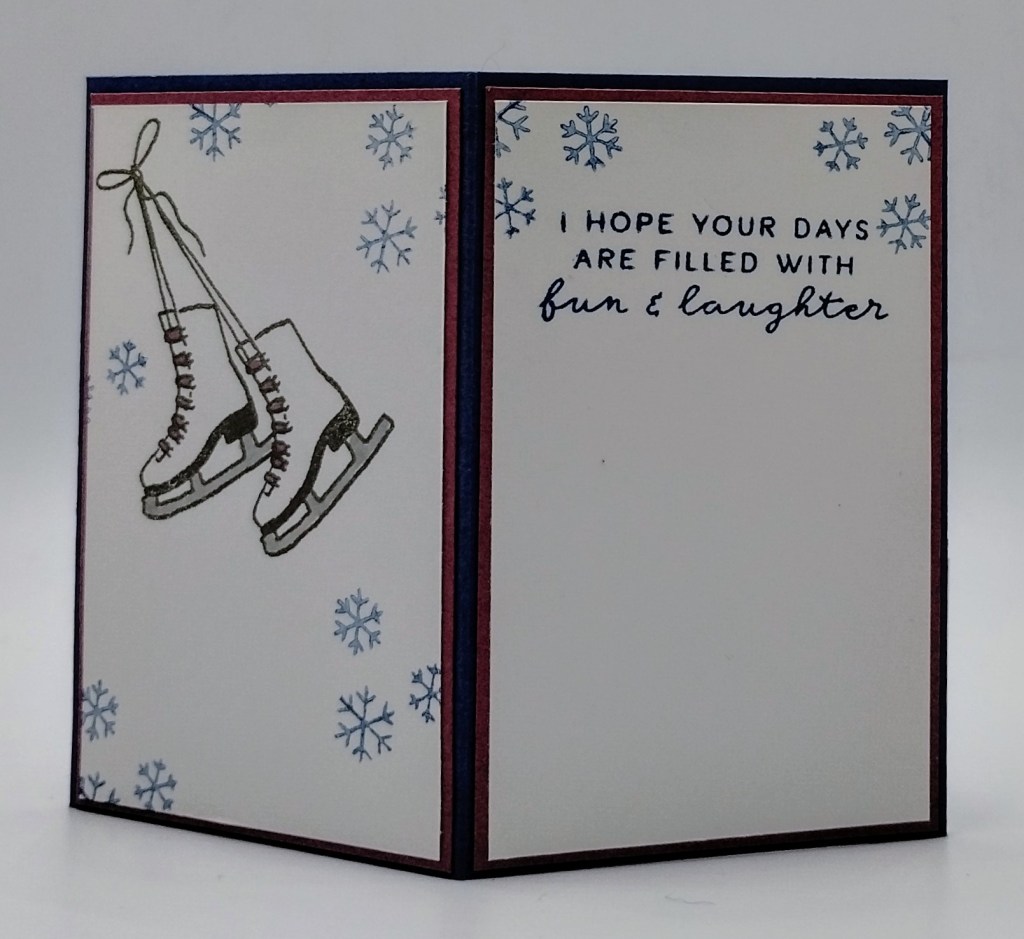
I used the Stampin’ Up! Sophisticated Sled Bundle along with the Iconic Celebrations 6 X 6 Designer Series Paper,Stylish Shapes Dies and Snowflake Sky 3D Embossing Folder for my card today
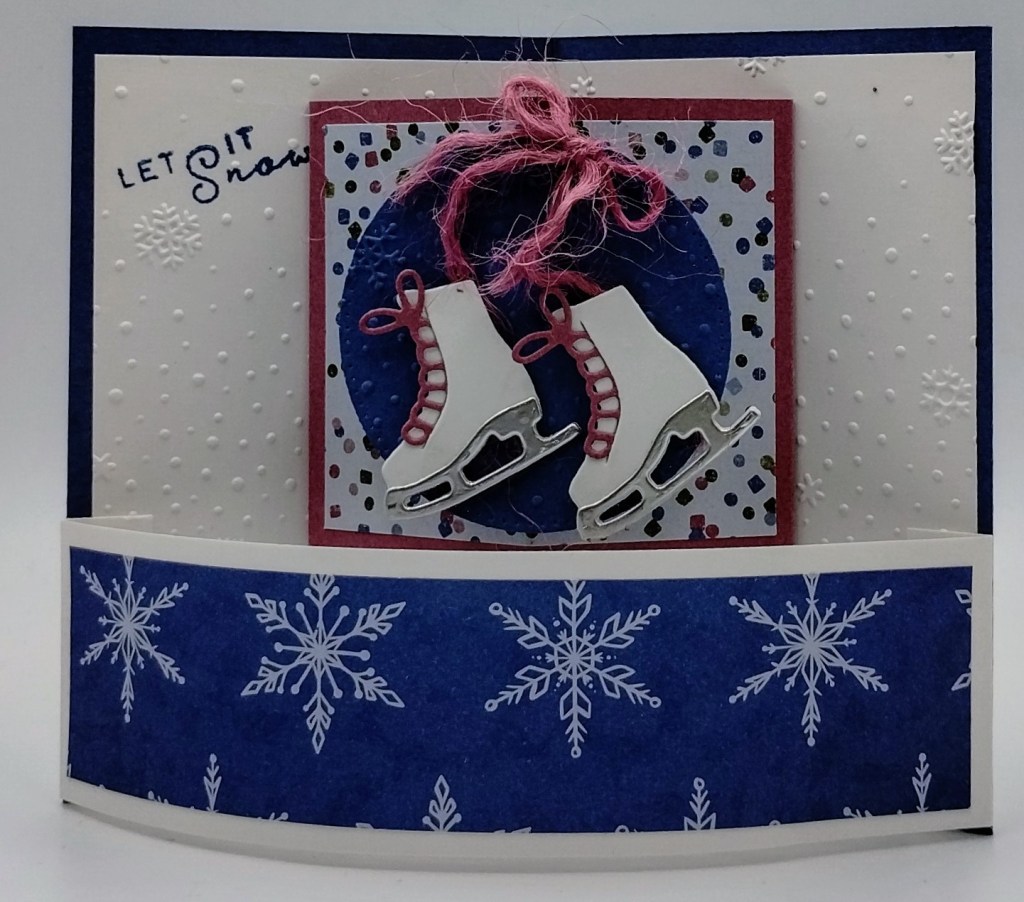
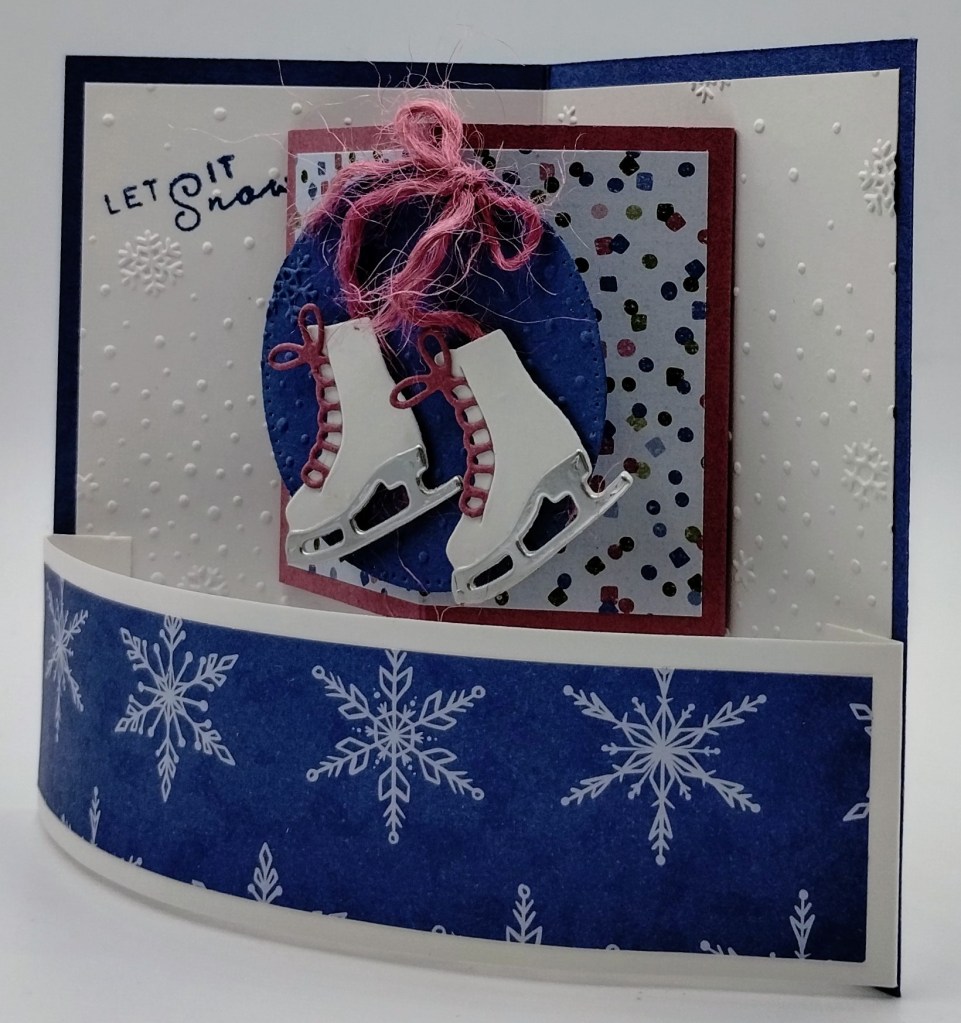
I started by stamping the sentiment from the Stampin’ Up! Sophisticated Sled Photopolymer Stamp Set in Misty Moonlight Ink on the top of a Basic White panel. I embossed the panel using the Snowflake Sky EF. I adhered the Basic White panel to a Misty Moonlight card base using Liquid Glue. I put the layered panel in my Paper Trimmer and lined up the score lines on the Misty Moonlight panel and scored the Basic White panel. I carefully folded the card base in half on the score lines. Adhere the panel of Iconic Celebrations DSP to the scored panel of Moody Mauve using Liquid Gue. I put the layered panel in my Paper Trimmer and lined up the score lines on the Moody Mauve panel and scored the DSP panel. I carefully folded the panel in half on the score lines. I folded the 2 sides back on the side score lines and adhered it to the card base, lining up the center score line on the layered panel with the score line on the card base, using Tear & Tape Adhesive.
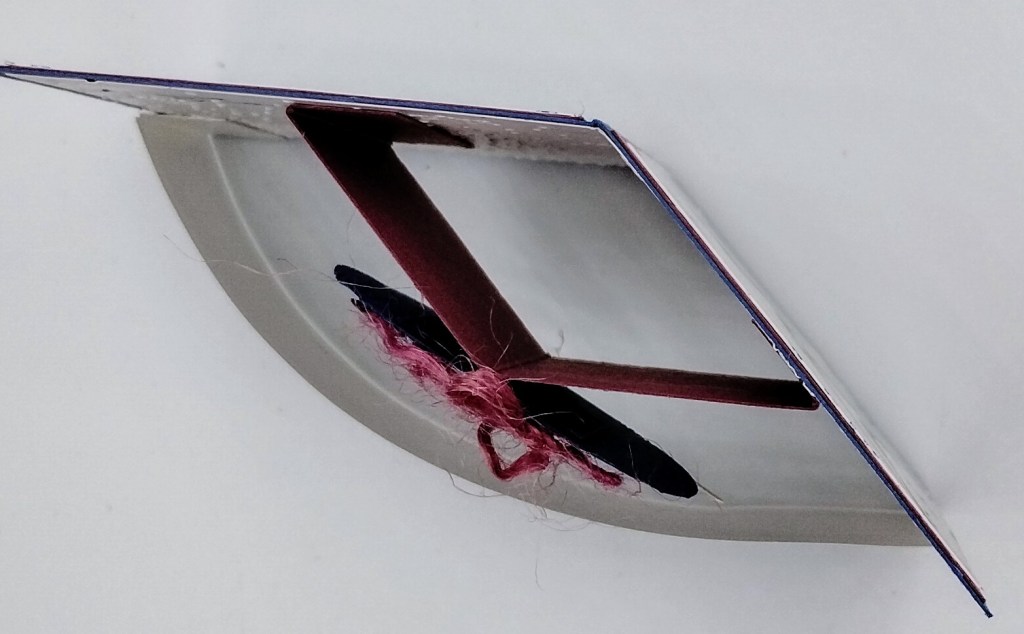
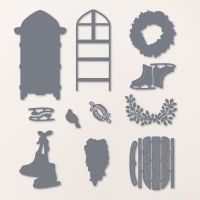
Take the 2 1″ X 1″ scored pieces and fold them in half. Adhere them to the DSP lining up the folded edged with the score line of the DSP using Tear & Tape. Cut the Misty Moonlight panel using the 3rd largest circle die from the Stylish Shapes Dies. Emboss the circle using the Snowflake Sky EF. Adhere the die cut circle to the 2 folded pieces using Tear & Tape. Using the Sophisticated Sled Dies, cut the skates from a panel of Basic White, laces from a panel of Moody Mauve and the blades from a panel of Silver Foil paper. Adhere the blades to the bottom of the skates using Liquid Glue. Insert the laces to the skates and add a couple Stampin’ Dimensionals to the back to hold them in place. Adhered a piece of 2023-2025 In-Color Jute Trim to the back of the skates using Glue Dots. Tie a bow with another piece on the top. Adhere the skates to the embossed circle. Adhere the panel of Iconic Celebrations DSP to the Basic White panel. Fold the ends on the score lines. Using a Bone Folder, curve the back of the layered panel. Adhered the layered panel to the bottom of the card base using Tear & Tape.
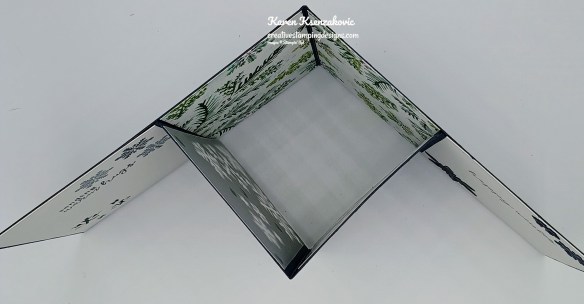
Here is a top view of how it should look.
On the back, stamp the sentiment from the Sophisticated Sled stamp set on a panel of Basic White in Misty Moonlight Ink. Stamp the skates’ image from the Sophisticated Sled stamp set on the other panel of Basic White in Pebbled Path Ink. Color the image using Moody Mauve and Smoky Slate Stampin’ Blends Markers. Stamp the snowflake image from the Sophisticated Sled stamp set in Misty Moonlight Ink, stamping off once on scrap paper, around the image and sentiment. Adhered the Basic White panels to Moody Mauve mat then to the back of the Misty Moonlight card base.
To finish my card, I decorated a Basic White Medium Envelope. Stamp the skates’ image form the Sophisticated Sled stamp set in Pebbled path Ink on the envelope front. Color the image using Moody Mauve and Smoky Slate Stampin Blends Markers. Adhere a panel of Iconic Celebrations DSP to the envelope flap.
Thank you for stopping by my blog today. I hope you liked my sneak peek of my card and will give it a try. I hope you will CASE this card and please feel free to post it in the comments of my Facebook page under my post. I’d love to see your take it. The list of measurements are below if you’d like to stamp along while watching the video. You can watch my video on my YouTube Channel Here.
If you watch this on my YouTube channel, please remember to subscribe so that you will get notified when a new video goes live. Thank you to those that have subscribed already. Happy Stamping!!
If you need any stamping supplies, I’d love to be your Demonstrator. Just click HERE to go directly to my online store or drop me an email if you have any questions.
MY CURRENT HOST CODE IS: D9NW3RJ3
Use this host code when placing an order with me. When you order $50 or greater you will receive a free gift from me! If your order is over $150, please do not use this code, but you’ll still get the free gift. The free gift is your choice of any 1 item valued up to $10.00 from the 2024-2025Annual Catalog, or from the Online Exclusives! Unfortunately, packs of cardstock are no longer an option for a free gift. Shipping has become too expensive to ship and it’s costing me as much to ship as the cardstock costs. For any orders $50 or more I will also send you my monthly class tutorials. Click HERE or go to my Customer Rewards for more details and to see what this month’s tutorials are.
Please remember to use my current Host Code and make sure that you can see my name on the final checkout page listed as your Demonstrator when you order so that you know that you’re ordering with me, and you’ll get my rewards!
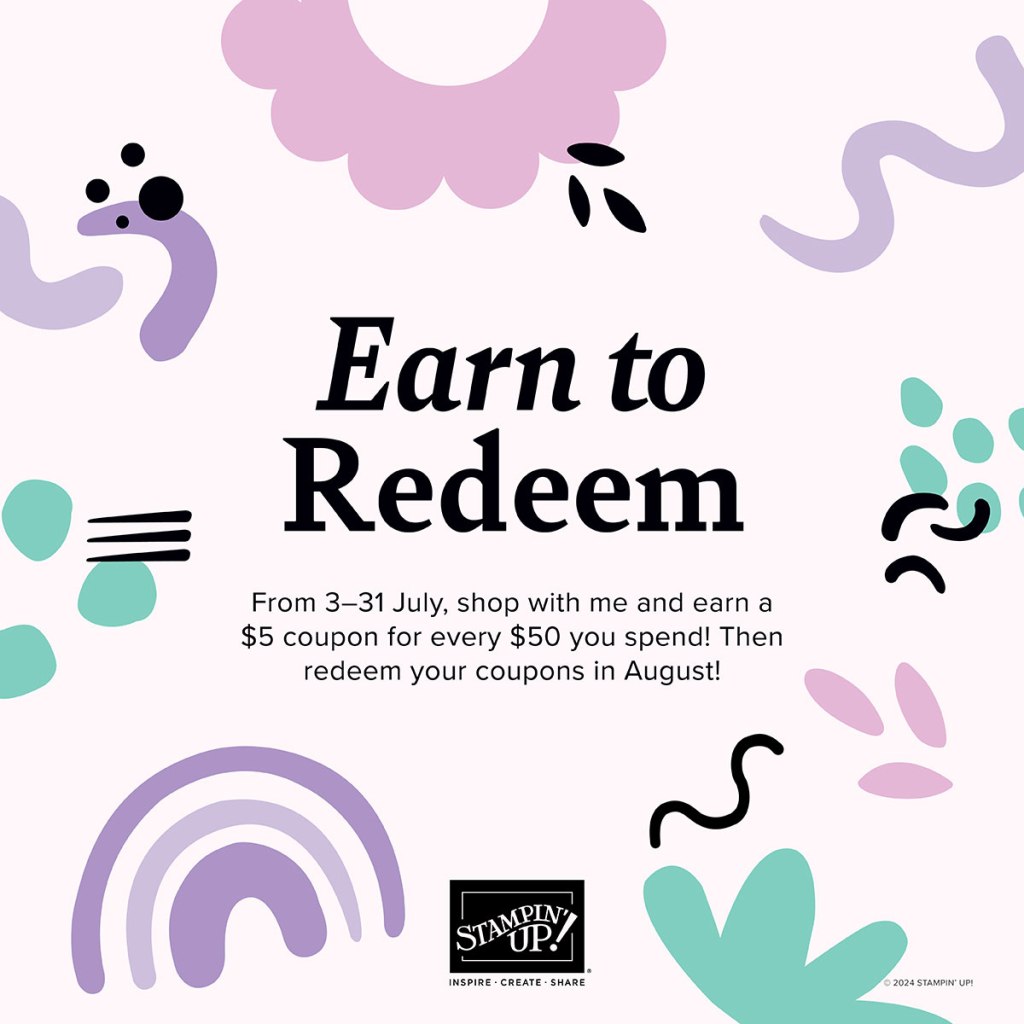
It’s almost time for one of your favorite promotions—BONUS DAYS! Because getting rewarded for all the crafting supplies you’re already going to buy is awesome! When you shop between July 3-31, for every $50 that you spend in one order, you will earn a $5 coupon! Make sure you save all your coupons because you can redeem them between August 1-31.
There’s no limit to how many coupons you can earn! And, as an added bonus, you’ll earn Creative Stamping Designs Reward points (my personal customer reward program) from me when you order $50+ too!!
Bonus Days Promotion Details:
Earning Period: July 3-31, 2024 Ordering Deadline: July 31, 2024 at 11:59 p.m. (MT)
Earn a $5 coupon for every $50 spent (before shipping and tax).
All coupon codes will be emailed right after a qualifying purchase has been made. You must have a valid email address to earn coupons when you shop.
If you earn multiple codes from a single order, you will receive one email with multiple codes. If you earn multiple codes from multiple orders, you will receive separate emails for each code earned.
All order types qualify for this promotion. Phone and email orders still require an email address.
Orders started before the promotion begins will not count toward earning coupon codes. You must add items to your cart and complete your purchase during the earning period.
There is no limit to the number of coupon codes you can earn per order or throughout the duration of the earning period.
Starter Kit orders are excluded from this offer.
For workshop orders, each customer who reaches a qualifying amount will receive a coupon code to their provided email address.
Redemption Period: August 1-31, 2024 Ordering Deadline: August 31, 2024 at 11:59 p.m. (MT)
There is no limit to the number of coupon codes you can redeem on an order during the redemption period. If using multiple codes, they must be separated by a space.
Coupon codes may be redeemed one time only. They cannot be redeemed after the August 31.
Coupon codes may be redeemed for any product (excluding Starter Kits). They cannot be used on exchanges.
Bonus Days coupon codes can be applied to month-to-month Paper Pumpkin subscriptions and new prepaid subscriptions.
Get your wish lists ready and earn those coupon codes in July! Then redeem them on your orders in August! Let me know if you have any questions.
Stampin’ Up! has some New Online Exclusive items that are available to order now! You won’t find these products in any catalog. These products are a new opportunity to spark creativity, expand a crafting collection, and discover new opportunities—all from the convenience of the online store. Click HERE to go to my Online Store to see what’s available with the Online Exclusive Products.
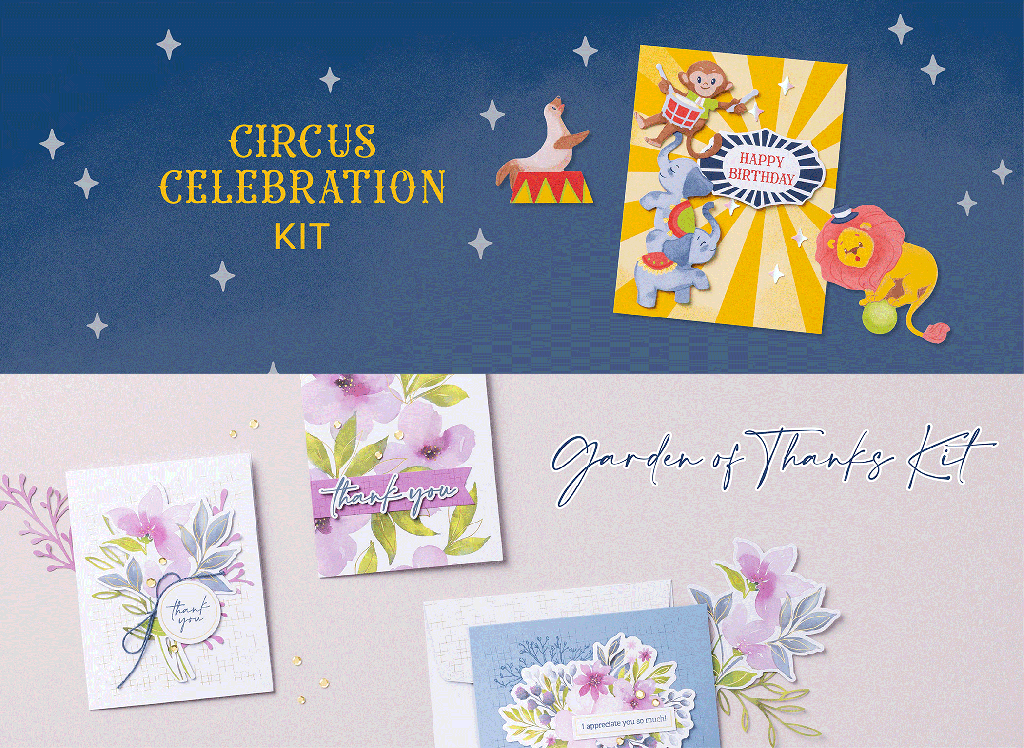
Kits Collection by Stampin’ Up! is all about making crafting fun, accessible, and inclusive! We’re always working hard to design a collection full of different product options to allow you oodles of options when it comes to finding that perfect project or gift.
Garden of Thanks Kit
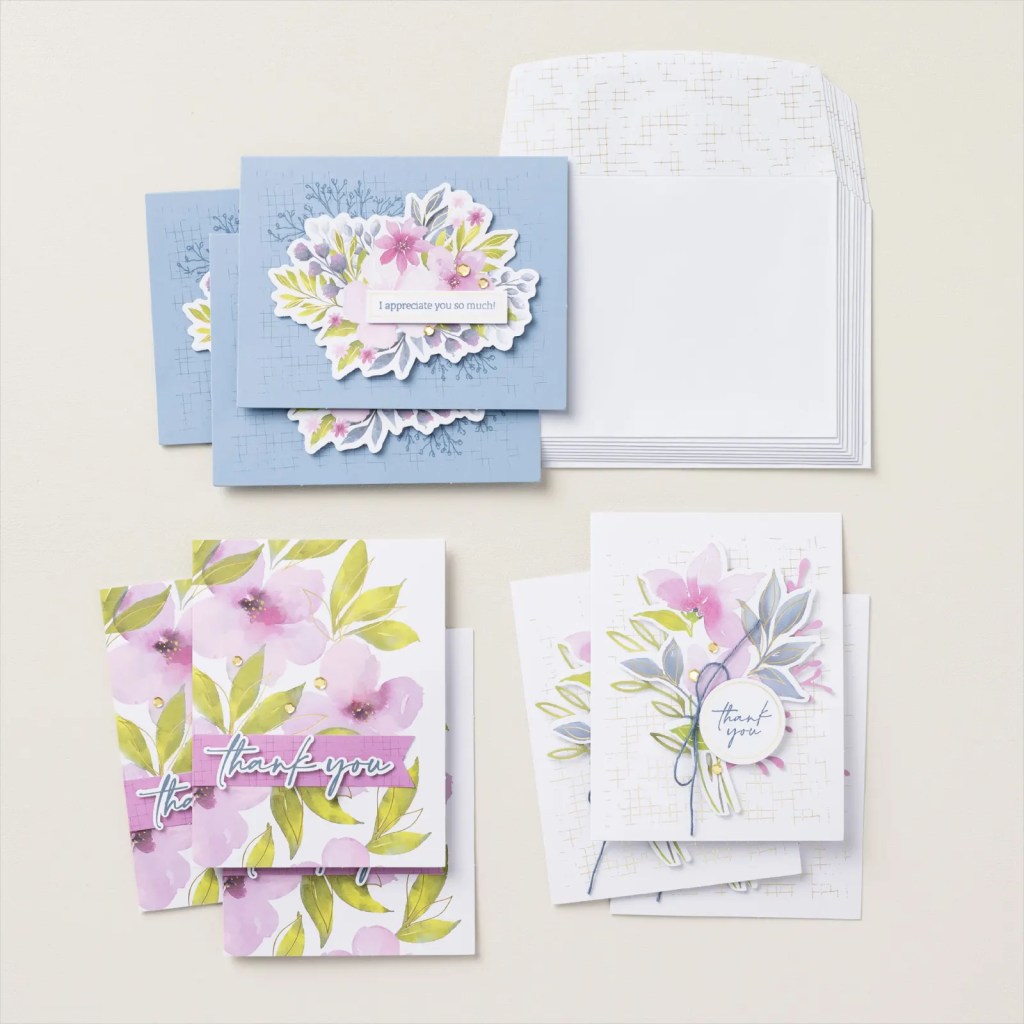
Make your gratitude gorgeous with the Garden of Thanks Kit! This DIY card making kit is centered around saying thanks in the most beautiful way. You can create three thank you cards each in three purple watercolor floral designs. Whether you want to convey your sincere thanks or love purple and blue flower gardens, this card kit is for you! Available in French.
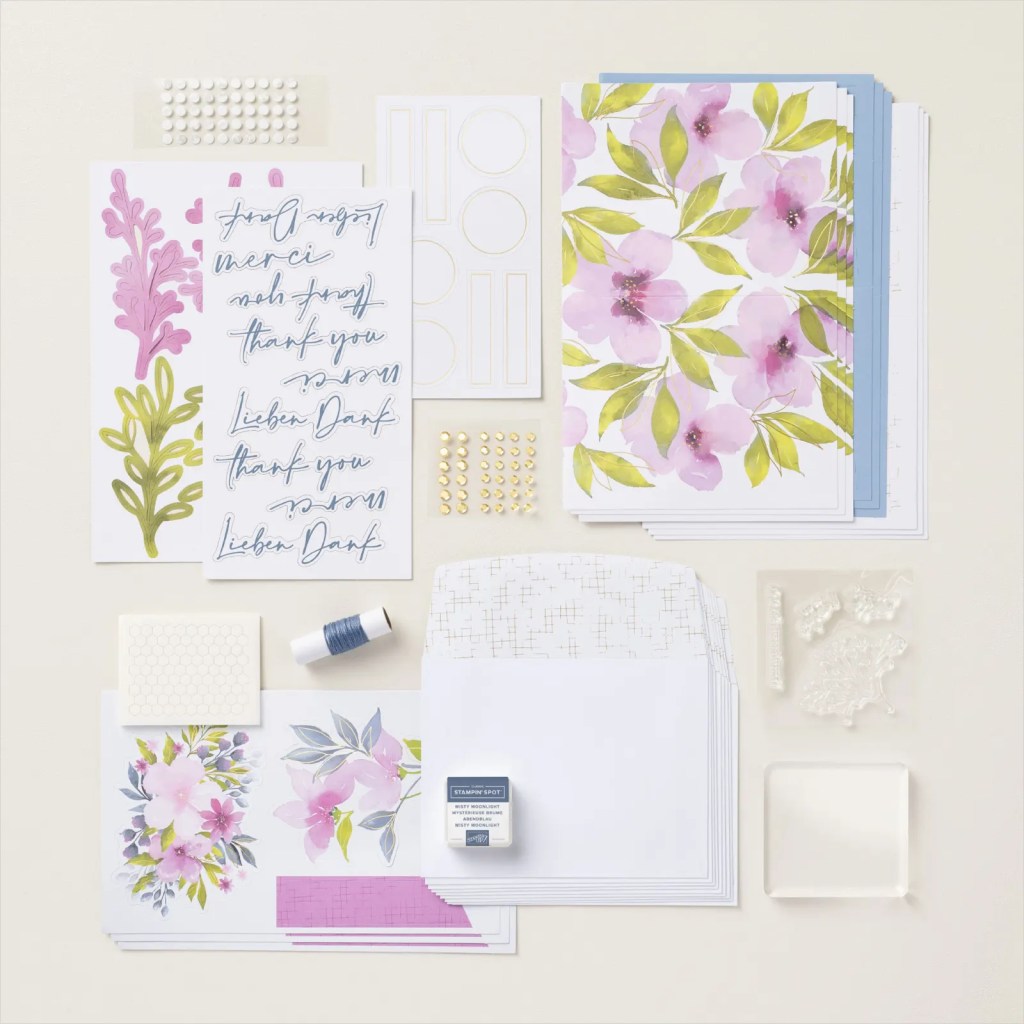
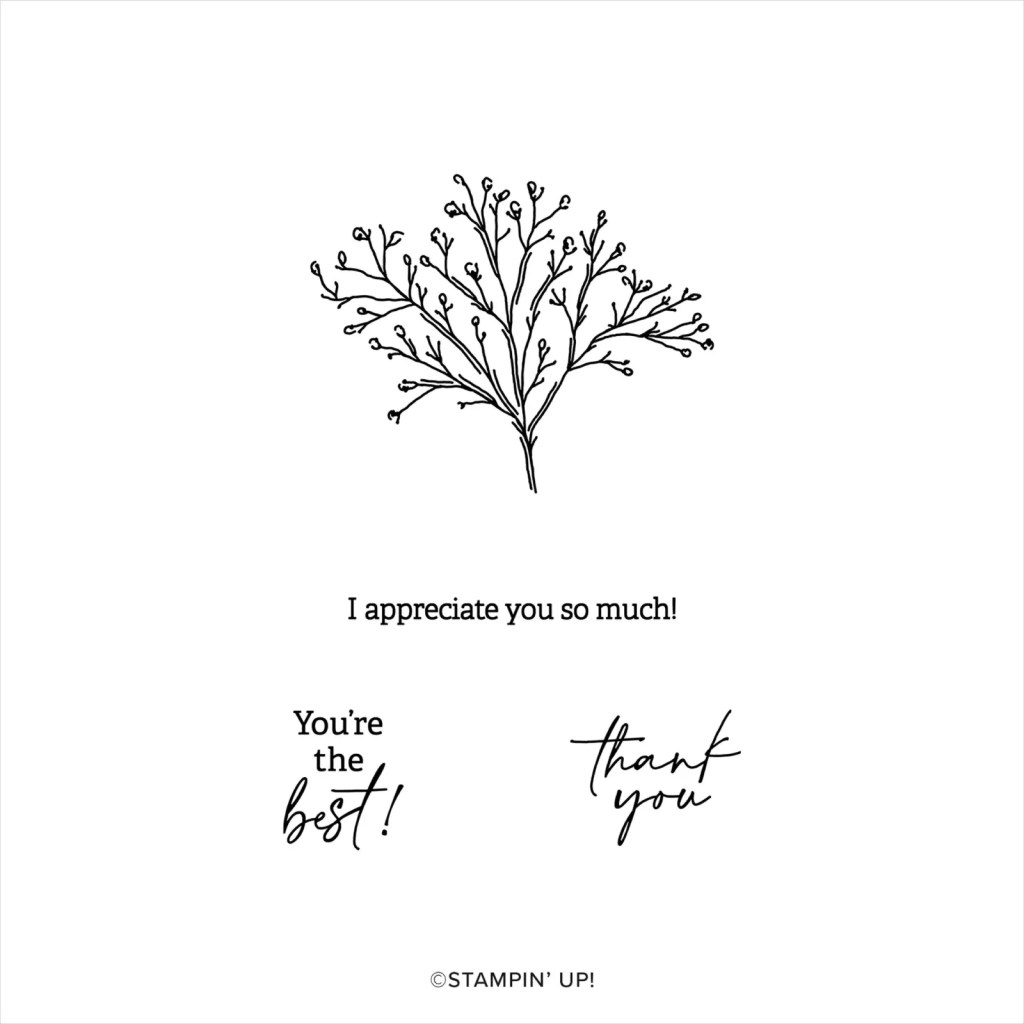
Kit includes: * Garden of Thanks Photopolymer Stamp Set * Clear Stamp Block * Misty Moonlight Classic Stampin’ Spot * Predesigned projects * Step-by-step instructions * Precut pieces (No prep work! Get right to crafting) * Makes 9 cards: 3 each of 3 designs * Folded card size: 5-1/2″ x 4-1/4″ (14 x 10.8 cm) * 9 preprinted envelopes * Enough adhesive to complete projects * Misty Moonlight Baker’s Twine * Specialty gold foil * Gold sequins * A 9-7/8″ x 6-1/2″ x 2-3/4″ (25.1 x 16.5 x 7 cm) printed designer box for storage or crafting on the go
Product colors: Berry Burst, Boho Blue, Bubble Bath, Lemon Lime Twist, Misty Moonlight, Old Olive, Petunia Pop
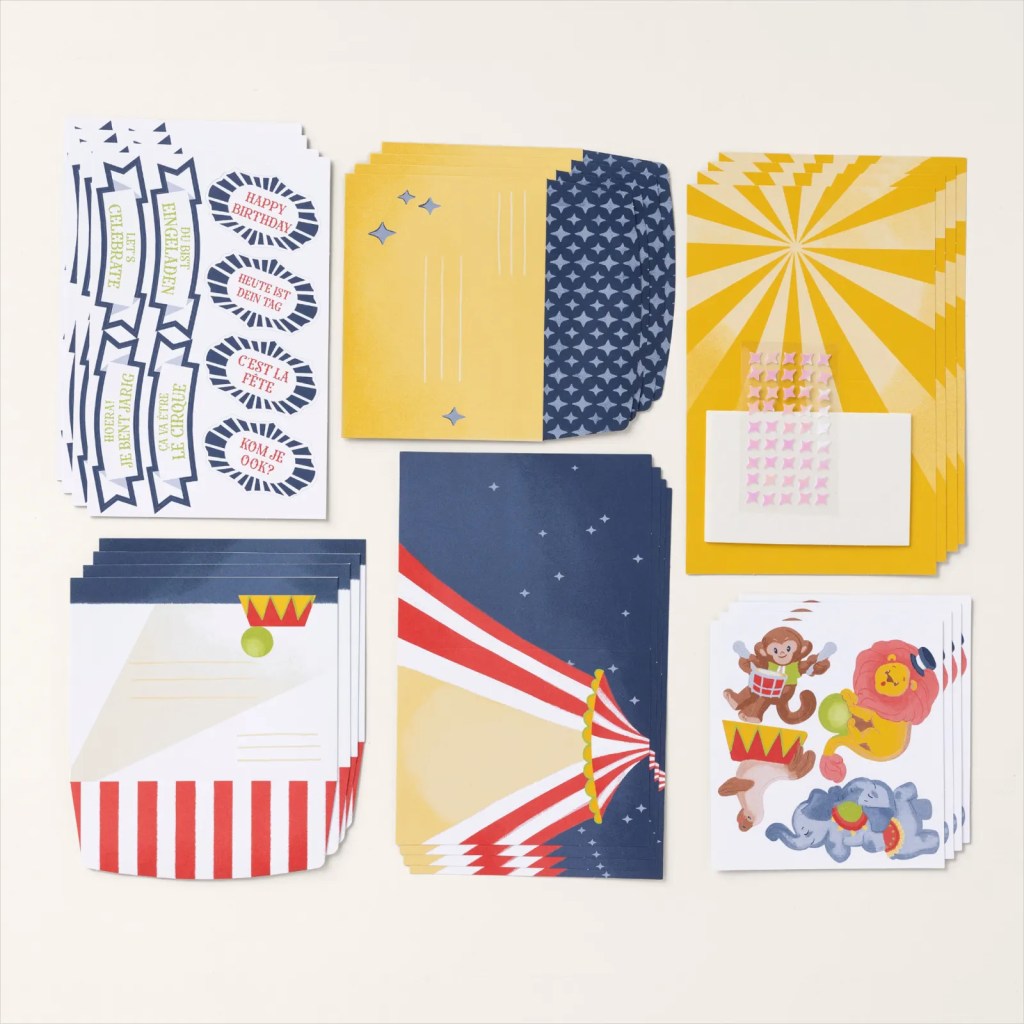
Make magical birthday cards with the Circus Celebrations Kit! This DIY card making kit has all the pieces you need to create four birthday cards in two circus-themed designs with adorable animals doing tricks for your audience. The playful designs are perfect to celebrate birthdays for all ages. This is a stamp-free kit making it even easier to craft than most so it’s great for beginners!
Kit includes: * Predesigned projects * Step-by-step instructions * Precut pieces (No prep work! Get right to crafting) * Makes 8 cards: 4 each of 2 designs * Folded card size: 5-1/2″ x 4-1/4″ (14 x 10.8 cm) * 8 preprinted envelopes * Enough adhesive to complete projects * Printed die cuts * A 9-7/8″ x 6-1/2″ x 2-3/4″ (25.1 x 16.5 x 7 cm) printed designer box for storage or crafting on the go
Product colors: Copper Clay, Crushed Curry, Granny Apple Green, Night of Navy, Poppy Parade
Subscribe to Paper Pumpkin for a monthly, all-inclusive crafting kit that’s a fun surprise! Each kit includes a photopolymer stamp set, Classic Stampin’ Spot, and step by step instructions to complete exclusive paper craft projects, including cards, tags, and gift packaging. And don’t miss the special add-on that coordinates with the next three months!
With the July Paper Pumpkin, Painted Petals, you can craft beautiful cards with unique watercolor designs and pretty layers!
• Makes 9 cards: 3 each of 3 designs • Project includes printed cards and coordinating envelopes • Precut paper pieces and embellishments • Coordinating colors: Calypso Coral, Gray Granite (Classic Stampin’ Spot), Melon Mambo, Mossy Meadow, Old Olive Kit comes in a beautiful coordinating box
Don’t miss the coordinating Every Celebration Dies Add-On!
This exclusive add-on (item 164991) coordinates with the three upcoming kits! Paper Pumpkin subscribers can purchase it beginning 11 July. The add-on is available only while supplies last, so it’s best to shop early!
Subscribe to the July Paper Pumpkin Kit between 11 June and 10 July by clicking here!
Note: Supplies may be limited toward the end of the subscription period.
Basic White Cardstock 4″ X 5 1/4″(card front), 1 1/2″ X 6 1/2″(curved mat scored & folded at 1/2″ & 6″), 1 1/2″ X 2 1/2″(skates), 2 – 2 1/2″ X 4″ (back panels)
Misty Moonlight Cardstock 4 1/4″ X 5 1/2″ (card base scored at 2 3/4″), 2 1/2″ X 2 1/2″(circle), 2 – 1″ x 1″ (pop up mechanisms scored @ 1/2″)
Moody Mauve Cardstock 2 1/2″ X 4″ (Card front pop up scored @ 1/2″, 2″ & 3 1/2″), 2 – 2 5/8″ X 4 1/8″ (back panel mats), scrap for laces)
Iconic Celebrations 6 X 6 Designer Series Paper 1 1/4″X 5 1/4″(curved card front panel), 2 1/4″ X 2 3/4″(card front pop-up panel), 2 1/4″ X 6″ (envelope flap)
Good Friday morning stamping friends and welcome to my Fun Fold Friday. Can you believe it’s the last day of May already? Are you ready for the weekend? Is anyone starting to make plans yet?
Today’s card I made on YouTube Live on Wednesday. If you were able to join me or watched the replay, thank you. If you’d like to watch my video and stamp along, the measurements are below, just above the supply list, along with the link to my YouTube channel. Here’s my card for today.
I used the Stampin’ Up! Attention Shoppers Bundle along with the To Market Designer Series Paper and Nested Essentials Dies for today’s card.
I adhered one of the 1″ X 5 1/4″ panels, one of the 3 1/2″ X 5 1/4″ panels and the 1 1/2″ X 5 1/4″ panel of To Market DSP to coordinating Blackberry Bliss mats using Stampin’ Seal. I adhered the layered panels to a Petal Pink card base using Liquid Glue.
On a panel of Basic White, I stamped the sentiment from the Stampin’ Up! Attention Shoppers Photopolymer Stamp Set in Blackberry Bliss Ink. I cut the sentiment out using the 2nd largest banner die from the Nested Essentials Dies. I trimmed the banner to the size I wanted using the Paper Trimmer. I adhered the sentiment to the top of the card front using Stampin’ Dimensionals.
I wrapped the belly band around the card base and adhered it together using Tear & Tape. On a panel of Basic White, I stamped the flowers, bottle and cake images from the Attention Shoppers stamp set in Tuxedo Black Ink. I cut the images out using the Attentions Shoppers Dies. I colored the images using Blackberry Bliss, Crumb Cake, Lemon Lime Twist, Lemon Lolly, Petal Pink and Pumpkin Pie Stampin’ Blends Markers. Using the Attentions Shoppers Dies, I cut the shopping card out from a panel of Silver Foil. I adhered the images to the back of the shopping card using Liquid Glue. I adhered the shopping cart to the belly band using Stampin’ Dimensionals. I added a few Transparent Adhesive-Backed Dots to the card front.
On the inside I adhered the last 2 panels of To Market DSP to Blackberry Bliss mat using Stampin’ Seal. I adhered the layered panels to the Petal Pink card base using Liquid Gue. On a panel of Basic White, I stamped the sentiments from Attention Shoppers stamp set in Blackberry Bliss Ink. I stamped the gift bag image from Attention Shoppers stamp set in Tuxedo Black Ink on the bottom of the panel and colored it using Blackberry Bliss and Petal Pink Stampin’ Blends Markers. I adhered the Basic Whtie panel to a Blackberry Bliss mat then to the inside of the Petal Pink card base.
To finish my card, I decorated a Basic White Medium Envelope. I stamped the gift bag image from the Attention Shoppers stamp set in Tuxedo Black Ink on the envelope front. I colored the image using Blackberry Bliss and Petal Pink Stampin’ Blends Markers. I adhered a panel of To Market DSP to the envelope flap.
Thank you for stopping by my blog today. I hope you liked my sneak peek of my card and will give it a try. I hope you will CASE this card and please feel free to post it in the comments of my Facebook page under my post. I’d love to see your take it. The list of measurements are below if you’d like to stamp along while watching the video. You can watch my video on my YouTube Channel HERE.
If you watch this on my YouTube channel, please remember to subscribe so that you will get notified when a new video goes live. Thank you to those that have subscribed already. Happy Stamping!!
If you need any stamping supplies, I’d love to be your Demonstrator. Just click HERE to go directly to my online store or drop me an email if you have any questions.
MY CURRENT HOST CODE IS: PKXMFP73
Use this host code when placing an order with me. When you order $50 or greater you will receive a free gift from me! If your order is over $150, please do not use this code, but you’ll still get the free gift. The free gift is your choice of any 1 item valued up to $10.00 from the 2024-2025Annual Catalog, or from the Online Exclusives! Unfortunately, packs of cardstock are no longer an option for a free gift. Shipping has become too expensive to ship and it’s costing me as much to ship as the cardstock costs. For any orders $50 or more I will also send you my monthly class tutorials. Click HERE or go to my Customer Rewards for more details and to see what this month’s tutorials are.
Please remember to use my current Host Code and make sure that you can see my name on the final checkout page listed as your Demonstrator when you order so that you know that you’re ordering with me, and you’ll get my rewards!
In response to changing policies at Stampin’ Up – I’m adjusting my Ordering Gift policy as well. I’m having to get a little more tough on the adding of Host codes when you place your order thru my Online Store.
Not to worry – you’re still going to get that $10 ordering gift for orders of $50 (before shipping & tax) or greater. And the gift is still any 1 SU! product up to that $10 value – which includes some of our fun Host Sets!
But – if you DO NOT use the Host code for your orders of less than $150 (this is the RETAIL total before Shipping & Handling), then you’ll have two options:
You’ll need to call Stampin’ Up! (1-800-Stamp-Up) and ask them to add it for you. They’re very helpful and will get it done quickly! OR….
If your order was over the $50 threshold but under $150, then…you’ll forfeit that $10 ordering gift and rewards – this is the Bummer Option – and I REALLY don’t want to do this, SO please remember to add my Current Host Code.
Did you know that when you become a demonstrator, you not only get your 20% discount, but when you order a bundle at the 10% discount or maybe a clearance item, you get your 20% on top of the discounted price. With the special coming up in June your bundles are 10% off, you will get an additional 10% off PLUS your 20% OFF. What’s not to LOVE about that? This is another one of the great perks of being a demonstrator. Also coming in June there are new Online Exclusives that demonstrators get to preorder before customers. Am I making you think about joining NOW? You only have 3 days left to join and get the 2024-2026 In-Colors items for free.
Exciting News! Between 1–31 May, anyone who becomes a Stampin’ Up! demonstrator will receive four 2024–2026 In Color products in their Starter Kit for FREE!
In addition to the 2024-2026 In-Color products, new demonstrators will pick $125 USD worth of products of their choice. That’s $207 in products for only $99 and it all ships for FREE. You will also receive free business supplies in case you want to make this a business. Not to mention all the fun that comes with being a part of our wonderful crafting community.
When you join as a new demonstrator, all In Color products will be automatically added to their Starter Kit. Click Here for a PDF printable flyer of all the products you’ll get.
STARTER KIT SPECIAL DETAILS
Promotion Start Date: May 1, 2024
Deadline to Join: May 31, 2024 at 11:59 PM MT
In addition to the regular $125 worth of products of your choice for just $99, new demonstrators will receive the following products (an $82 value!!) in their Starter Kit at no additional cost:
2024–2026 In Color Classic Stampin’ Pad Bundle
2024–2026 In Color 8-1/2″ x 11″ Card Stock
2024–2026 In Color 6″ x 6″ Designer Series Paper
2024–2026 In Color Stampin’ Write Markers
All Starter Kits ship for FREE!!
If you’d like to join our team, we’d love to have you! Once you join, you’ll get at least a 20% discount on all of your Stampin’ Up! purchases and you can preorder from the upcoming catalogs!
We welcome all types of Demonstrators from those only purchasing to get the discount for themselves to those who want to run a business and those anywhere in between! We’re a relaxed group that loves to stamp with no pressure to sell!
Demonstrators get lots of perks including at least a 20% discount on all orders that you place as a Demonstrator, invitations to Stampin’ Up! Demonstrator events and preordering from upcoming catalogs and promotions!
There is no commitment and no penalty if you decide that being a Demonstrator isn’t right for you. Why not give it a try? We have a fun Facebook page where we chat a lot and we do virtual meetings monthly and in-person meetings quarterly.
What a great time to join and get all the new 2024-2026 In-Color products. Contact me @ creativestampingdesigns@gmail.com. I would love to have you on my team. Contact me today about joining May 1st.
I have updated my Retirement List. If you missed out on something from the 2023-2024 Annual Catalog, the January – April 2024 Mini Catalog or maybe even something a little older you might want to check out my list. I’m selling my retired items at 1/2the catalog prices. Click Here to go to my Retirement List.
Coming in June!! 10% Off Stamp & Die Set Bundles and
Stampin’ Cut & Emboss Machines June 5-30!!
Everyone loves a good deal, which is why Stampin’ Up! is offering an additional 10% off all stamp and die bundles! Between June 5-30, take advantage of the sale and add some new bundles to your collection!! Plus, save 10% on the Stampin’ Cut & Emboss Machine and the Mini Stampin’ Cut & Emboss Machine!! These machines make the perfect crafting partner for stamp and die bundles!
PROMOTION DETAILS
Sales Period: June 5-30, 2024 Ordering Deadline: June 30, 2024 at 11:59 p.m. (MT)
Get an additional 10% discount on stamp and die bundles only. This excludes suite collections, stamp and punch bundles, bundles not yet released to customers, and any other bundles*.
Save 10% on Stampin’ Cut & Emboss Machine and Mini Stampin’ Cut & Emboss Machine (white and Boho Blue).
The 10% discount applies automatically to stamp and die bundles in all orders including Starter Kit orders placed between June 5-30, 2024.
*Please note Close to My Heart products are not included in this promotion.
YAY for a great sale!! You can see the stamp and die set bundles in the online store right Here and the Stampin’ Cut & Emboss Machines Here (note that the machines only will be on sale, the accessories are note included). Get your orders ready and save beginning June 5!
***As an added bonus, Demonstrators get the additional 10% discount on bundles and machines too! So purchase the Starter Kit in May and get the free In Color items (see the details above) and then get the additional 10% discount on top of your Demonstrator discount on bundles and machines from June 5-30!!
Subscribe to Paper Pumpkin for a monthly, all-inclusive crafting kit that’s a fun surprise! Each kit includes a photopolymer stamp set, Classic Stampin’ Spot, and step by step instructions to complete exclusive paper craft projects, including cards, tags, and gift packaging. And don’t miss the special add-on that coordinates with the next three months!
Celebrate the sweet things in life with textured, artistic cards. Featuring the new 2024–2026 In Colors!
Makes 9 cards: 3 each of 3 designs with 9 coordinating envelopes
Iridescent glimmer sentiments and precut paper pieces
Vellum accents, iridescent pearls, and linen thread
Coordinating colors: Poppy Parade, Peach Pie, Lemon Lolly, Shy Shamrock (Classic Stampin’ Spot), Pool Party, Pretty In Pink
Thanks and Beyond Add On Dies
Dies #164397 Price $12.00
This exclusive add-on coordinates with the three upcoming kits! Paper Pumpkin subscribers can purchase it beginning 11 March. The add-on is available only while supplies last, so it’s best to shop early!
Subscribe to the April Paper Pumpkin Kit between 11 March and 10 April by clicking here!
Note: Supplies may be limited toward the end of the subscription period.
Good Friday morning stamping friends and welcome to my Fun Fold Friday. Are you ready for the weekend? Does anyone have plans for Easter Sunday yet?
Today’s card I made on YouTube Live on Wednesday and it’s a sneak peek of some new product coming in the 2024-2025 Annual Catalog. If you were able to join me or watched the replay, thank you. If you’d like to watch my video and stamp along, the measurements are below, just above the supply list, along with the link to my YouTube channel. Here’s my card for today.
I used the Stampin’ Up! Thoughtful Wishes Bundle and Thoughtful Journey 6 X 6 Designer Series Paper for my card today. Both items will be available starting May 1st. If you’d like to get this beautiful DSP and awesome bundle early, you can add it to a starter kit starting on April 2nd. Contact me and I’ll tell you how.
I started by adhering the 4 smaller panels of Thoughtful Journey DSP to the 4 Petunia Pop mats (available May 1st) using Liquid Glue. I adhered the 4 layered panels to the Pool Party card base using Liquid Glue. I adhered the longer panel of Thoughtful Journey DSP to the longer Petunia Pop mat then to a panel of Pool Party using Liquid Glue and set it aside.
On the panel of Basic White, I stamped the tall leaf image from the Stampin’ Up! Thoughtful Wishes Cling Stamp Set in Lost Lagoon Ink on the side of the panel. I stamped the row of flowers image from the Thoughtful Wishes stamp set in Pebbled Path Ink along the bottom of the panel. I colored the images using Lost Lagoon and Petunia Pop Stampin’ Blends Markers. I stamped the splotch image from the Thoughtful Wishes stamp set in Pool Party Ink, stamping off once on scrap paper, around the leaf image. On a small panel of Thoughtful Journey DSP, I stamped the sentiment from the Thoughtful Wishes stamp set in Pebbled Path Ink. I adhered the sentiment to the top of the Basic White panel using Liquid Glue. I adhered the Basic White panel to a Petunia Pop mat then to the center of the Pool Party card base.
On a panel of Basic White, I stamped the tall leaf image from the Thoughtful Journey stamp set in Lost Lagoon Ink. I colored the image using the Lost Lagoon Stampin’ Blends Marker. I cut the image out using the Thoughtful Wishes Dies. From panels of Lost Lagoon and Petunia Pop, I cut the stand along flower die from the Thoughtful Wishes Dies. I snipped the flowers off the Petunia Pop die using Paper Snips and adhered them to the Lost Lagoon die using Liquid Glue. Using the Thoughtful Wishes Dies, I cut the branch die from a panel of Wild Wheat. I adhered the 3 die cut pieces to the right side of the card front using Glue Dots. I adhered the layered bridge panel to the Pool Party card base using Liquid Glue only on the ends.
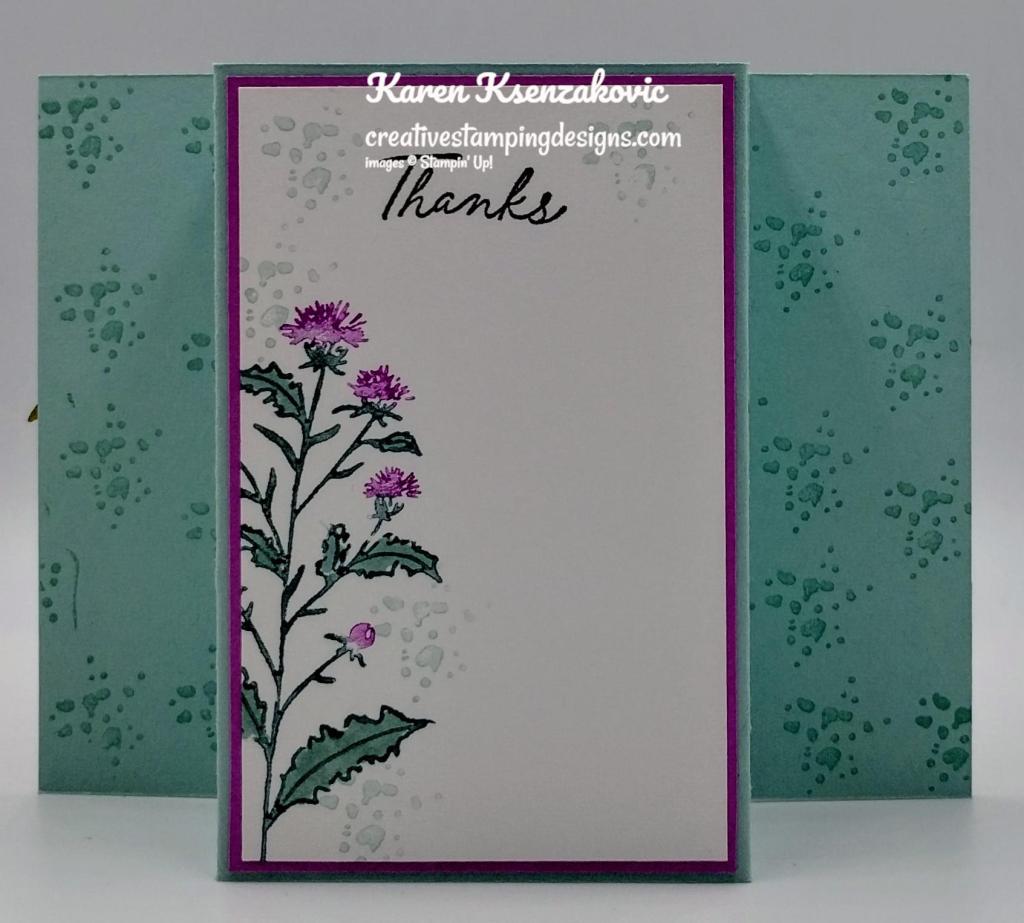
On the back, I stamped the sentiment from the Thoughtful Wishes stamp set in Pebbled Path Ink on a Basic White panel. I stamped the thistle image from the Thoughtful Wishes stamp set by added ink to the stamp using Lost Lagoon and Petunia Pop Stampin’ Write Markers. I huffed on the stamp to reactivate the ink and stamped it on the side of the Basic White panel. I colored the leaves in using Lost Lagoon Stampin’ Blends Markers. I stamped the splotch image from the Thoughtful Wishes stamp set in Pool Party Ink, stamping off once on scrap paper, around the thistle image. I adhered the Basic White panel to a Petunia Pop mat then to the back of the Pool Party card base. I stamped the splotch image from the Thoughtful Wishes in Pool Party Ink on the back panels of the Pool Party card base.
To finish my card, I decorated a Basic White Medium Envelope. I stamped the tall leaf image from the Thoughtful Wishes stamp set in Lost Lagoon Ink on the envelope front and flap. I stamped the row of flowers image from the Thoughtful Wishes stamp set on the envelope front in Pebbled Path Ink. I colored the images using Lost Lagoon and Petunia Pop Stampin’ Blends Markers. I stamped the thistle image from the Thoughtful Wishes stamp set on the envelope flap, inking the stamp the same as I did for the card back. I stamped the splotch image around the flowers and leaves in Pool Party Ink, stamping off once on scrap paper.
Thank you for stopping by my blog today. I hope you liked my sneak peek of my card and will give it a try. I hope you will CASE this card and please feel free to post it in the comments of my Facebook page under my post. I’d love to see your take it. The list of measurements are below if you’d like to stamp along while watching the video. You can watch my video on my YouTube Channel Here.
If you watch this on my YouTube channel, please remember to subscribe so that you will get notified when a new video goes live. Thank you to those that have subscribed already. Happy Stamping!!
If you need any stamping supplies, I’d love to be your Demonstrator. Just click HERE to go directly to my online store or drop me an email if you have any questions.
MY CURRENT HOST CODE IS: GVPUUBAZ
Use this host code when placing an order with me. When you order $50 or greater you will receive a free gift from me! If your order is over $150, please do not use this code, but you’ll still get the free gift. The free gift is your choice of any 1 item valued up to $10.00 from the 2023-2024 Annual Catalog, the January-April 2024 Mini Catalog or from the Online Exclusives! Unfortunately, packs of cardstock are no longer an option for a free gift. Shipping has become too expensive to ship and it’s costing me as much to ship as the cardstock costs. For any orders $50 or more I will also send you my monthly class tutorials. Click HERE or go to my Customer Rewards for more details and to see what this month’s tutorials are.
Please remember to use my current Host Code and make sure that you can see my name on the final checkout page listed as your Demonstrator when you order so that you know that you’re ordering with me, and you’ll get my rewards!
In response to changing policies at Stampin’ Up – I’m adjusting my Ordering Gift policy as well. I’m having to get a little more tough on the adding of Host codes when you place your order thru my Online Store.
Not to worry – you’re still going to get that $10 ordering gift for orders of $50 (before shipping & tax) or greater. And the gift is still any 1 SU! product up to that $10 value – which includes some of our fun Host Sets!
But – if you DO NOT use the Host code for your orders of less than $150 (this is the RETAIL total before Shipping & Handling), then you’ll have two options:
You’ll need to call Stampin’ Up! (1-800-Stamp-Up) and ask them to add it for you. They’re very helpful and will get it done quickly! OR….
If your order was over the $50 threshold but under $150, then…you’ll forfeit that $10 ordering gift and rewards – this is the Bummer Option – and I REALLY don’t want to do this, SO please remember to add my Current Host Code.
Subscribe to Paper Pumpkin for a monthly, all-inclusive crafting kit that’s a fun surprise! Each kit includes a photopolymer stamp set, Classic Stampin’ Spot, and step by step instructions to complete exclusive paper craft projects, including cards, tags, and gift packaging. And don’t miss the special add-on that coordinates with the next three months!
Send elegant words of encouragement and support to those you love.
Makes 9 cards: 3 each of 3 designs with 9 coordinating envelopes
This exclusive add-on coordinates with the three upcoming kits! Paper Pumpkin subscribers can purchase it beginning 11 March. The add-on is available only while supplies last, so it’s best to shop early!
Subscribe to the April Paper Pumpkin Kit between 11 March and 10 April by clicking here!
Note: Supplies may be limited toward the end of the subscription period.
Good Friday morning stamping friends and welcome to my Fun Fold Friday. Are you ready for the weekend? I sure am. It has taken me all week to get back to my ‘normal’ routine. I think the plane flight last week really threw me off. I have been suffering with migraines all week.
Today’s card I made on YouTube Live on Wednesday and it’s a sneak peek of some new product coming in the 2024-2025 Annual Catalog. If you were able to join me or watched the replay, thank you. If you’d like to watch my video and stamp along, the measurements are below, just above the supply list, along with the link to my YouTube channel. Here’s my card for today.
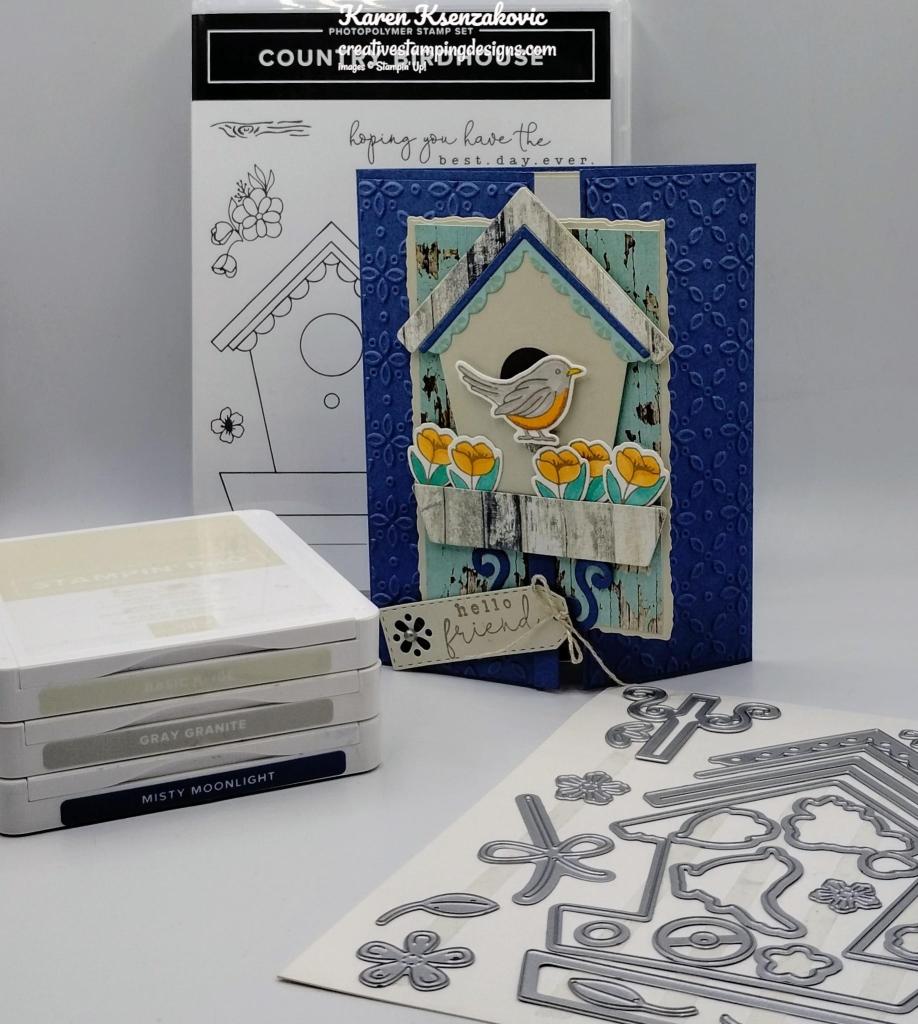
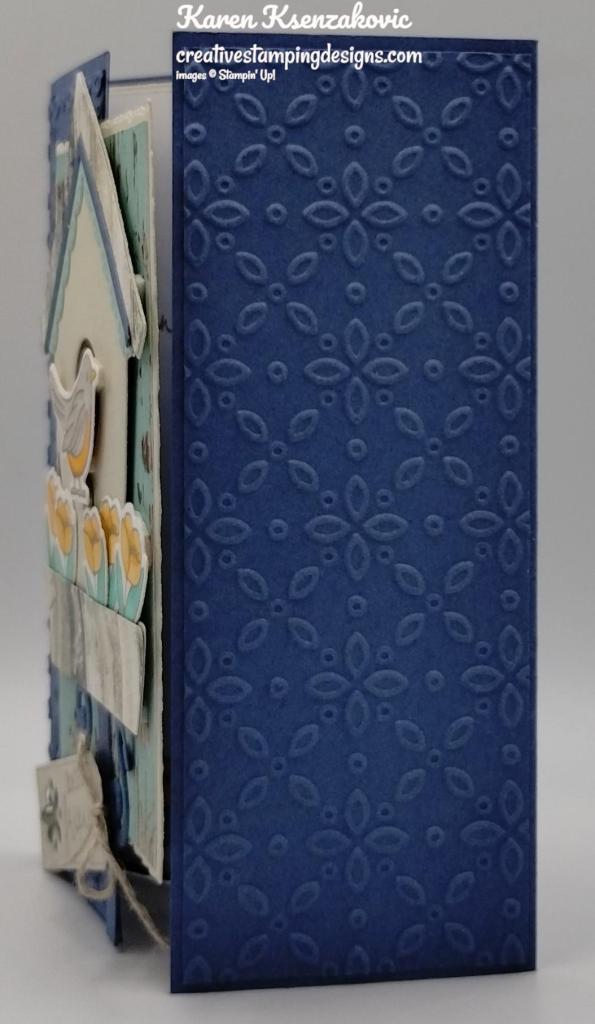
I used the brand new Stampin’ Up! Country Birdhouse Bundle along with the Country Wood Designer Series Paper and Eyelet 3D Embossing Folder for my card today. These products will be available to purchase starting on May 1st. If you’d like to get your hands on them early, you can join as a demonstrator and put them in your starter kit starting on April 2nd. I also used the Designer Tags Dies, Deckled Circles Dies and Deckled Rectangle Dies.
I started by cutting all the parts out for the birdhouse using the Country Birdhouse Dies and Country Wood DSP, Basic Beigh, Misty Moonlight and Poo Party cardstock.
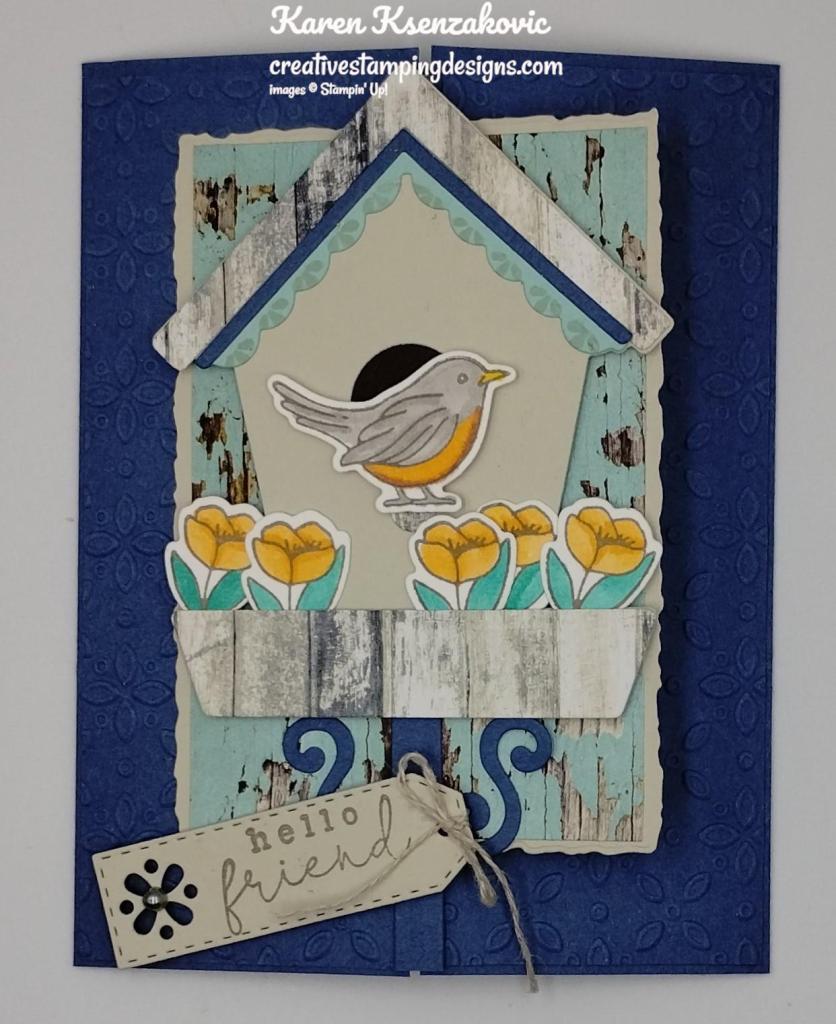
I embossed 2 Misty Moonlight card front panels using the new Eyelet EF. I adhered the embossed panels to a Misty Moonlight card base using Liquid Glue.
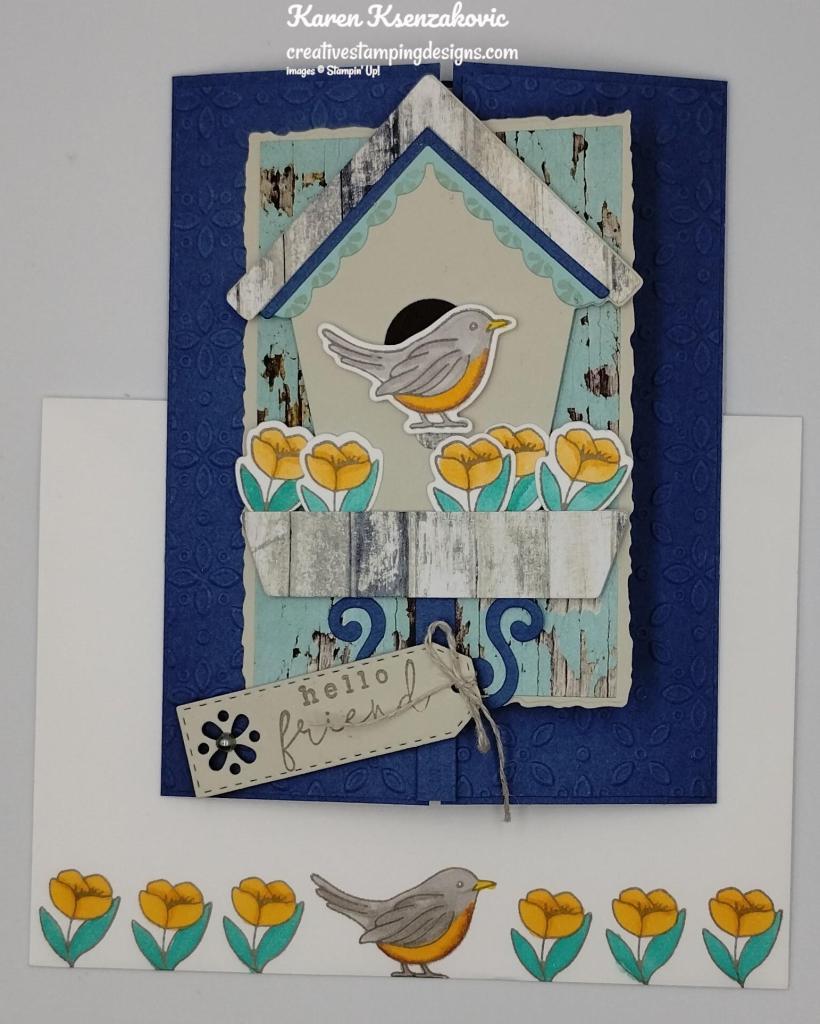
I put the pieces of the birdhouse together using Liquid Glue. I adhered a panel of Country Wood DSP to a Basic Beige mat that I cut using the 3rd largest Deckled Rectangle Dies. I adhered the birdhouse to the layered panel using Stampin’ Dimensionals. I adhered the card front panel to the left side of the card base using Liquid Glue. On a panel of Basic White, I stamped the bird image from the Stampin’ Up! Country Birdhouse Photopolymer Stamp Set in Gray Granite Ink. I stamped the flower image from the Country Birdhouse stamp set in Gray Granite Ink 5 times. I colored the images using Cajun Craze, Daffodil Delight, Gray Granite, Peach Pie and Summer Splash Stampin’ Blends Markers. On the panel of Basic Beige, I stamped the sentiment from the Country Birdhouse stamp set in Gray Granite Ink. I cut the sentiment out using the Designer Tags Dies. I tied a bow using Linen Thread to the tag. I adhered the sentiment to the bottom of the card front using Stampin Dimensionals. I added a Basic Gray & Smoky Slate Pearl (available May 1) to the sentiment flower center.
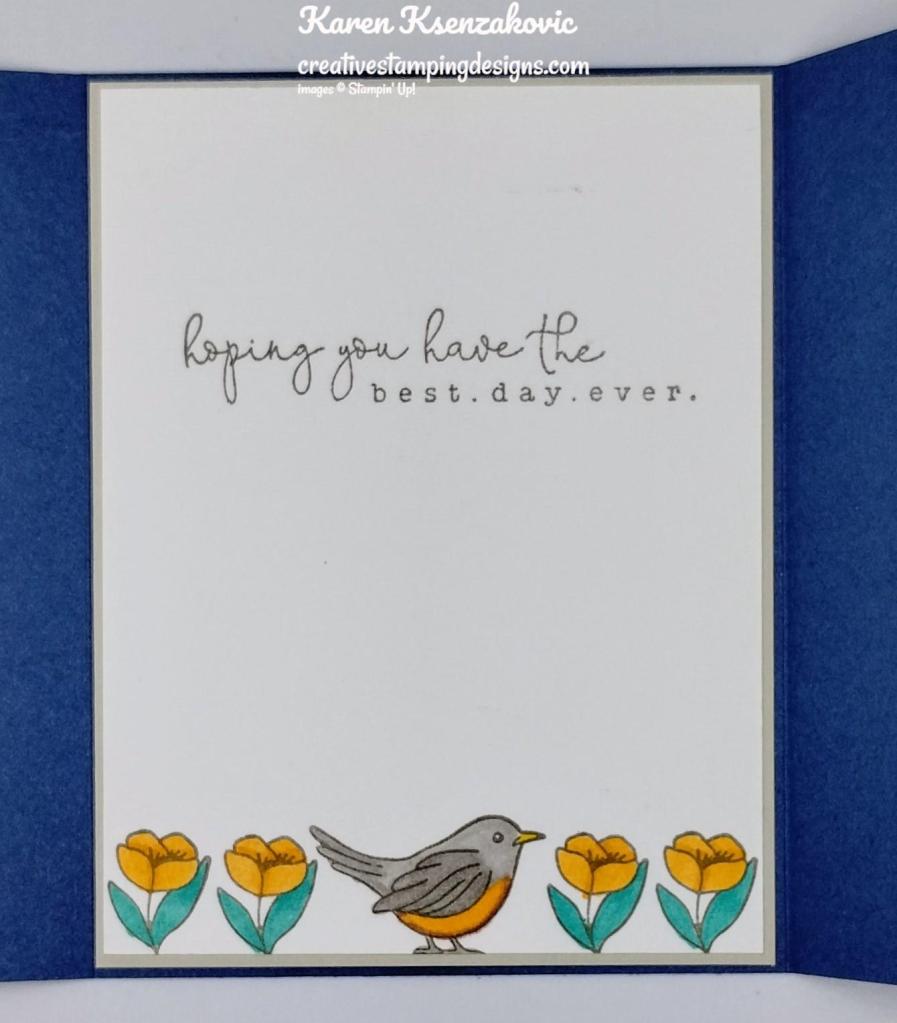
On the inside, I stamped the sentiment from the Country Birdhouse stamp set in Gray Granite Ink. I stamped the bird and flower images from the Country Birdhouse stamp set in Gray granite Ink on the bottom of the panel. I colored the images using Cajun Craze, Daffodil Delight, Gray Granite, Peach Pie and Summer Splash Stampin’ Blends Markers. I adhered the Basic Whit panel to a Basic Beige mat then to the inside of the Misty Moonlight card base.
To finish mu card, I decorated a Basic Whtie Medium Envelope. I stamped the bird and flower images from the Country Birdhouse stamp set in Gray Granite Ink on the envelope front and colored the images the same as I did for the card. I adhered a panel of Country Wood DSP to the envelope flap.
Thank you for stopping by my blog today. I hope you liked my sneak peek of my card and will give it a try. I hope you will CASE this card and please feel free to post it in the comments of my Facebook page under my post. I’d love to see your take it. The list of measurements are below if you’d like to stamp along while watching the video. You can watch my video on my YouTube Channel Here.
If you watch this on my YouTube channel, please remember to subscribe so that you will get notified when a new video goes live. Thank you to those that have subscribed already. Happy Stamping!!
If you need any stamping supplies, I’d love to be your Demonstrator. Just click HERE to go directly to my online store or drop me an email if you have any questions.
MY CURRENT HOST CODE IS: AHZBFDC4
Use this host code when placing an order with me. When you order $50 or greater you will receive a free gift from me! If your order is over $150, please do not use this code, but you’ll still get the free gift. The free gift is your choice of any 1 item valued up to $10.00 from the 2023-2024 Annual Catalog, the January-April 2024 Mini Catalog or from the Online Exclusives! Unfortunately, packs of cardstock are no longer an option for a free gift. Shipping has become too expensive to ship and it’s costing me as much to ship as the cardstock costs. For any orders $50 or more I will also send you my monthly class tutorials. Click HERE or go to my Customer Rewards for more details and to see what this month’s tutorials are.
Please remember to use my current Host Code and make sure that you can see my name on the final checkout page listed as your Demonstrator when you order so that you know that you’re ordering with me, and you’ll get my rewards!
In response to changing policies at Stampin’ Up – I’m adjusting my Ordering Gift policy as well. I’m having to get a little more tough on the adding of Host codes when you place your order thru my Online Store.
Not to worry – you’re still going to get that $10 ordering gift for orders of $50 (before shipping & tax) or greater. And the gift is still any 1 SU! product up to that $10 value – which includes some of our fun Host Sets!
But – if you DO NOT use the Host code for your orders of less than $150 (this is the RETAIL total before Shipping & Handling), then you’ll have two options:
You’ll need to call Stampin’ Up! (1-800-Stamp-Up) and ask them to add it for you. They’re very helpful and will get it done quickly! OR….
If your order was over the $50 threshold but under $150, then…you’ll forfeit that $10 ordering gift and rewards – this is the Bummer Option – and I REALLY don’t want to do this, SO please remember to add my Current Host Code.
Subscribe to Paper Pumpkin for a monthly, all-inclusive crafting kit that’s a fun surprise! Each kit includes a photopolymer stamp set, Classic Stampin’ Spot, and step by step instructions to complete exclusive paper craft projects, including cards, tags, and gift packaging. And don’t miss the special add-on that coordinates with the next three months!
Send elegant words of encouragement and support to those you love.
Makes 9 cards: 3 each of 3 designs with 9 coordinating envelopes
This exclusive add-on coordinates with the three upcoming kits! Paper Pumpkin subscribers can purchase it beginning 11 March. The add-on is available only while supplies last, so it’s best to shop early!
Subscribe to the April Paper Pumpkin Kit between 11 March and 10 April by clicking here!
Note: Supplies may be limited toward the end of the subscription period.
Good Friday morning stamping friends and welcome to my Fun Fold Friday. Happy March!!! Are you starting to make plans for the weekend yet? Last night I went to a fund raiser with all the ladies I work with from the Hungry Hound Dog Bakery. It’s a lady’s night out and we’ve gone the past few years, it’s for Pediatric Brain Cancer. It’s a silent auction and there’s always a theme. Last night’s theme was Boots and Bling. We all wore different color blingy Cowboy hats that lit up. We laughed and had such a good time. The fund raiser was a huge success too. Here’s a picture of our group that won for the best group category.
Today’s card I made on YouTube Live on Wednesday. If you were able to join me or watched the replay, thank you. If you’d like to watch my video and stamp along, the measurements are below, just above the supply list, along with the link to my YouTube channel. Here’s my card for today.
I used the Stampin’ Up! Online Exclusive Simply Zinnia Bundle along with the Online Exclusive Flowering Zinnias Designer Series Paper for my card today. This suite will be available starting in March.
I started by adhering a panel of Flowering Zinnias DSP to a Basic White mat using Stampin’ Seal. I adhered the layered panel to a Blueberry Bushel mat using Liquid Glue. I adhered the layered card front to a Blueberry Bushel card base using Liquid Glue only on the bottom half of the panel.
I adhered the smaller panel of Flowering Zinnias to a Basic White mat using Liquid Glue. I adhered the card base together using Liquid Glue on the 1 1/4″ section to make a binder look. I adhered the layered panel to the 1 1/4″ section of the card base using Liquid Glue. On a panel of Basic White, I stamped the large zinnia image from the Stampin’ Up! Simply Zinnia Cling Stamp Set in Pebbled Path Ink. I cut the image out using the Simply Zinnia Dies. I colored the image using Azure Afternoon, Flirty Flamingo, Highland Heather, Lemon Lime Twist and Lemon Lolly Stampin’ Blends Markers. I adhered the die cut image to the card front using Stampin’ Dimensionals.
I stamped the sentiment from the Simply Zinnia stamp set in Pebbled Path Ink on a panel of Basic White. Using my Banner Pick A Punch, I cut both ends. I adhered the sentiment to the card front using Stampin’ Dimensionals. I added a few Adfhesive-Back Shining Sequins (available March 5) to the card front.
For the inside, I adhered a Basic White panel to a Mango Melody mat then to the inside of the Blueberry Bushel card base. I stamped the smaller zinnia and the leaf images from the Simply Zinnia stamp set in Pebbled Path Ink on a panel of Basic White. I cut the images out using the Simply Zinnia Dies. I colored the images using Lemon Lime Twist, Lemon Lolly and Mango Melody Stampin’ Blends Markers. I adhered the zinnia to the bottom of the Basic White panel using Stampin’ Dimensionals. I adhered the leaves under the flower using Glue Dots. I added 1 of the Adhesive-Backed Shining Sequins to the center of the zinnia.
To finish my card, I decorated a Basic White Medium Envelope. I stamped the large zinnia image from the Simply Zinnia stamp set in Pebbled Path Ink on the envelope front. I colored the image using Azure Afternoon, Flirty Flamingo, Highland Heather, Lemon Lime Twist and Lemon Lolly Stampin’ Blends Markers. I adhered a panel of Flowering Zinnias DSP to the envelope flap.
Thank you for stopping by my blog today. I hope you liked my trifold card and will give it a try. I hope you will CASE this card and please feel free to post it in the comments of my Facebook page under my post. I’d love to see your take it. The list of measurements are below if you’d like to stamp along while watching the video. You can watch my video on my YouTube Channel Here.
If you watch this on my YouTube channel, please remember to subscribe so that you will get notified when a new video goes live. Thank you to those that have subscribed already. Happy Stamping!!
If you need any stamping supplies, I’d love to be your Demonstrator. Just click HERE to go directly to my online store or drop me an email if you have any questions.
MY CURRENT HOST CODE IS: AHZBFDC4
Use this host code when placing an order with me. When you order $50 or greater you will receive a free gift from me! If your order is over $150, please do not use this code, but you’ll still get the free gift. The free gift is your choice of any 1 item valued up to $10.00 from the 2023-2024 Annual Catalog, the January-April 2024 Mini Catalog or from the Online Exclusives! Unfortunately, packs of cardstock are no longer an option for a free gift. Shipping has become too expensive to ship and it’s costing me as much to ship as the cardstock costs. For any orders $50 or more I will also send you my monthly class tutorials. Click HERE or go to my Customer Rewards for more details and to see what this month’s tutorials are.
Please remember to use my current Host Code and make sure that you can see my name on the final checkout page listed as your Demonstrator when you order so that you know that you’re ordering with me, and you’ll get my rewards!
In response to changing policies at Stampin’ Up – I’m adjusting my Ordering Gift policy as well. I’m having to get a little more tough on the adding of Host codes when you place your order thru my Online Store.
Not to worry – you’re still going to get that $10 ordering gift for orders of $50 (before shipping & tax) or greater. And the gift is still any 1 SU! product up to that $10 value – which includes some of our fun Host Sets!
But – if you DO NOT use the Host code for your orders of less than $150 (this is the RETAIL total before Shipping & Handling), then you’ll have two options:
You’ll need to call Stampin’ Up! (1-800-Stamp-Up) and ask them to add it for you. They’re very helpful and will get it done quickly! OR….
If your order was over the $50 threshold but under $150, then…you’ll forfeit that $10 ordering gift and rewards – this is the Bummer Option – and I REALLY don’t want to do this, SO please remember to add my Current Host Code.
Share nature’s beauty with lovely all-occasion cards! • Makes 9 cards: 3 each of 3 designs with 9 coordinating envelopes • Precut vellum pieces & wood embellishments • Coordinates with the Meandering Meadows Suite Collection (item 162745) • Coordinating colors: Granny Apple Green, Garden Green (Classic Stampin’ Spot), Balmy Blue, Night of Navy, Gorgeous Grape, Fresh Freesia
Don’t miss the coordinatingLove of Spring Dies add-on!
The dies will coordinate with the January, February and March Paper Pumpkin Kit.
The Love of Spring Dies Add-On—available only while supplies last!
Item # 164396 $12.00
This exclusive add-on coordinates with the three upcoming kits! Paper Pumpkin subscribers can purchase it beginning 11 December. The add-on is available only while supplies last, so it’s best to shop early!
Subscribe to the February Paper Pumpkin Kit between 11 January and 10 February by clicking here!
Note: Supplies may be limited toward the end of the subscription period.
Basic White Cardstock 4 1/4″ X 5 1/2″ (flowers & leaves), 2 – 4″ X 4″(card front mat & inner liner), 1 1/8 X 4 1/8″ (side panel mat),3/4″ X 4″ (sentiment)
Blueberry Bushel Cardstock 4 1/4″ x 11″ (card base scored & folded at 5 1/2″, 6 3/4″ & 8 7/8″), 4 1/8″ x 4 1/8″ (card front mat)
Melon Mambo Cardstock 4 189″ x 4 1/8″ (inner liner mat)
Flowering Zinnias Designer Series Paper 3 7/8″ X 3 7/8″ (card front), 1″ X 4″ (side panel), 2 1/4″ X 6″ (envelope flap)
Good Friday morning stamping friends and welcome to my Fun Fold Friday. Are you starting to make plans for the weekend yet? I’m off this weekend and my daughter and I are planning a little something.
Today’s card I made on YouTube Live on Wednesday. If you were able to join me or watched the replay, thank you. If you’d like to watch my video and stamp along, the measurements are below, just above the supply list, along with the link to my YouTube channel. Here’s my card for today.
I used the Stampin’ Up! Hot Air Balloon Bundle along with the Lighter Than Air 6 X 6 Designer Series Paper and Sale-a-bration Sunny Days Designer Series Paper for my card today.
I started by adhering a panel of Lighter Than Air DSP to a Fresh Freesia mat using Stampin’ Seal. I adhered the layered panel to a large Pool Party card base using Liquid Glue. I adhered a panel of Sunny Days DSP to a Fresh Freesia mat using Stampin’ Seal. I adhered the layered panel to the front of a small card base using Liquid Glue.
On a panel of Basic White, I stamped the balloon image from the Stampin’ Up! Hot Air Balloon Photopolymer Stamp Set in Petal Pink and Pool Party Inks. I stamped one part of the balloon full strength ink and the second part I stamped off once on scrap paper. I stamped the balloon basket from the Hot Air Balloon stamp set in Pecan Pie Ink below the balloons. From a panel of Balmy Blue, I cut the solid heart balloon using the Hot Air Balloon Dies. From a panel of Azure Afternoon, I cut the heart detailed balloon using the Hot Air Balloon Dies. I adhered the detailed heart to the solid heart. I adhered the balloon to the stamped panel using Stampin’ Dimensionals. from a scrap of Pecan Pie, I cut the balloon basket using the Hot Air Balloon Dies and adhered it under the balloon using a Stampin’ Dimensional. I cut a few clouds using the Hot Air Balloon Dies from a panel of Basic White. I adhered the clouds using Glue Dots and Liquid Glue to the Basic White panel. I adhered the Basic White panel to a Fresh Freesia mat then to the left side of the large card bae using Liquid Glue.
I cut 4 of the solid heart balloons using the Hot Air Balloon Dies. I folded them in half and adhered them together. I adhered the open ends to the small card front using Liquid Glue. I cut a balloon basket using the Hot Air Balloon Dies from a scrap of Pecan Pie. I adhered the basket under the balloon using a Glue Dot. On a panel of Basic White, I stamped the sentiment from the Hot Air Balloon stamp set in Pool Party Ink. I cut the sentiment out using the Hot Air Balloon Dies. I adhered the sentiment to the small card front using Stampin’ Dimensionals. I added a few Rainbow Adhesive-Backed Dots to the card front.
On the inside, I stamped the sentiment from the Hot Air Balloon stamp set in Pool Party Ink on a panel of Basic White. I stamped the balloon image from the Hot Air Balloon next to the sentiment in Fresh Freesia Ink, part stamped full strength and part stamped off once on scrap paper. I added a few of the die cut clouds to the panel. I adhered the Basic White panel to a Fresh Freesia mat then to the inside of the small card base.
To finish my card, I decorated a Basic White Medium Envelope. I stamped the balloon image from the Hot Air Balloon stamp set on the envelope front. I adhered a panel of Lighter Than Air DSP to the envelope flap.
Thank you for stopping by my blog today. I hope you liked my trifold card and will give it a try. I hope you will CASE this card and please feel free to post it in the comments of my Facebook page under my post. I’d love to see your take it. The list of measurements are below if you’d like to stamp along while watching the video. You can watch my video on my YouTube Channel Here.
If you watch this on my YouTube channel, please remember to subscribe so that you will get notified when a new video goes live. Thank you to those that have subscribed already. Happy Stamping!!
If you need any stamping supplies, I’d love to be your Demonstrator. Just click HERE to go directly to my online store or drop me an email if you have any questions.
MY CURRENT HOST CODE IS: T9JKA3XQ
Use this host code when placing an order with me. When you order $50 or greater you will receive a free gift from me! If your order is over $150, please do not use this code, but you’ll still get the free gift. The free gift is your choice of any 1 item valued up to $10.00 from the 2023-2024 Annual Catalog, the January-April 2024 Mini Catalog or from the Online Exclusives! Unfortunately, packs of cardstock are no longer an option for a free gift. Shipping has become too expensive to ship and it’s costing me as much to ship as the cardstock costs. For any orders $50 or more I will also send you my monthly class tutorials. Click HERE or go to my Customer Rewards for more details and to see what this month’s tutorials are.
Please remember to use my current Host Code and make sure that you can see my name on the final checkout page listed as your Demonstrator when you order so that you know that you’re ordering with me, and you’ll get my rewards!
In response to changing policies at Stampin’ Up – I’m adjusting my Ordering Gift policy as well. I’m having to get a little more tough on the adding of Host codes when you place your order thru my Online Store.
Not to worry – you’re still going to get that $10 ordering gift for orders of $50 (before shipping & tax) or greater. And the gift is still any 1 SU! product up to that $10 value – which includes some of our fun Host Sets!
But – if you DO NOT use the Host code for your orders of less than $150 (this is the RETAIL total before Shipping & Handling), then you’ll have two options:
You’ll need to call Stampin’ Up! (1-800-Stamp-Up) and ask them to add it for you. They’re very helpful and will get it done quickly! OR….
If your order was over the $50 threshold but under $150, then…you’ll forfeit that $10 ordering gift and rewards – this is the Bummer Option – and I REALLY don’t want to do this, SO please remember to add my Current Host Code.
Stampin’ Up! has added 2 new kits this month. I’m loving these already!!!
Kits by Stampin’ Up! are perfect for new crafters, busy crafters, or crafters who want quick and easy projects. All-inclusive project kits have everything you need in one box! Give as a gift or try them yourself. Kits are while supplies last. Order today!
BIRTHDAY SPARKLE KIT
Create glittering birthday cards and gift tags with the Birthday Sparkle Kit! This kit includes six cards and six gift tags. Create each project with the included stamp set, die-cut paper pieces, and twine. It also includes other elements such as glitter stickers, pressed wood picks, coordinating envelopes, and gold foil paper pieces! It’s easy to create each project for your recipient or get ahead on your crafting for the year by making quick multiples. Either way, you’ve got a special paper craft that your recipients will love!
Kit includes: *Birthday Sparkle Photopolymer Stamp Set *Clear Stamp Block *Early Espresso Stampin’ Spot *Predesigned projects *Step-by-step instructions *Precut pieces (No prep work! Get right to crafting) *Make 6 cards and 6 gift tags *Cards: 3 each of 2 designs; folded card 5-1/2″ x 4-1/4″ (14 x 10.8 cm) *Gift tags: 3 each of 2 designs; largest tag 2-1/4″ x 3-1/2″ (5.7 x 8.9 cm) * 6 preprinted envelopes *Enough adhesive to complete projects *Gold glitter stickers and pressed wood picks. *Baker’s Twine in Early Espresso and White *A 9-7/8″ x 6-1/2″ x 2-3/4″ (25.1 x 16.5 x 7 cm) printed designer box for storage or crafting on the go
Product colors: Basic White, Crumb Cake, Early Espresso, gold glitter
Calling all plant lovers! The Happy Houseplants Kit is an adorable home decor crafting kit! This kit comes with four 6″ x 6″ (15.2 x 15.2 cm) white frames and precut paper pieces for you to curl and assemble inside the frame. You’ll end up with four coordinated houseplant decor pieces. They can stand by themselves, or you can hang them on your wall. Either way, your houseguests will be amazed that you created it yourself!
Kit includes: * Predesigned projects * Step-by-step instructions * Precut pieces (No prep work! Get right to crafting) * 4 white frames * Frame size: 7-1/8″ x 7-1/8″ x 7/16″ (18.1 x 18.1 x 1.1 cm) * Enough adhesive to complete projects * A 7-3/4″ x 7-1/2″ x 3″ (19.7 x 19 x 7.6 cm) printed designer box for storage or crafting on the go
Product colors: Calypso Coral, Garden Green, Granny Apple Green, Lemon Lime Twist, Pecan Pie
You can see a flyer with some of the new Online Exclusives that will be available to order beginning March 5 Here. If you want to get your hands on the Online Exclusives early, the Demonstrator preorder starts on February 1! So if you join as a Demonstrator, you can either add the new products to your Starter Kit beginning February 1 or add them to a Demonstrator order in February!
Go check out my Online Store for the NEW Online Exclusive products available. Get those orders placed early so you don’t miss out on the pretty new suite and new bundles.
Receiving training information and accessing resources to help you through your first year and beyond
Bonus: Since it’s Sale-A-Bration, now is an excellent time to join and take advantage of the Join offer!
Sale-A-Bration is an excellent time you to join Stampin’ Up! In addition to the already great value of the Starter Kit, if you sign up as a Stampin’ Up! demonstrator during Sale-a-bration, you can choose from two incredible options:
Option 1: Purchase the $99 Starter Kit during Sale-a-bration, pick $125 worth of Stampin’ Up! merchandise of your choice and get the Stampin’ Glass Mat Studio ($60 value!) for FREE with your Starter Kit!
Option 2: Purchase the $99 Starter Kit during Sale-a-bration, pick $155 worth of Stampin’ Up! merchandise of your choice. That’s $30 additional merchandise for FREE when you purchase your Starter Kit!
Two joining options so you can pick the one that you like the best!!
There is never an obligation to sell. You can join just to enjoy the discount for yourself along with all the other Demonstrator benefits. Once you join, you’ll get at least a 20% discount on all of your Stampin’ Up! merchandise purchases and you get to order early from the upcoming catalogs! You will also be able to attend the OnStage Events and any other events Stampin’ Up! has and you get to be a part of our Stampin’ Up! team!
Unsure about this and want to talk? Contact me at creativestampingdesigns@gmail.com and we can talk. You can also find additional information Here at Join My Team. Being a part of the Stampin’ Up! Community is one of the best decisions I’ve ever made. I have made many friends along the way while doing what I love, Paper Crafting. This Joining offer is only good during Sale-a-bration which starts January 4 and ends on February 29.
SHOP
Spend $50 or more and pick from 11 new products (4 stamp sets, 5 designer series paper packs, a pack of gems and a spool of ribbon!) that are available as free items!
Spend $100 or more and pick from 3 new items (1 die set, 1 stamp and embossing folder bundle and 1 stamp set) that are available as free items!
HOST
Get an additional $30 in FREE Stampin’ Rewards with any party or individual order of $300 or greater during Sale-a-bration! You can spend your Stampin’ Rewards on any items currently available from Stampin’ Up! including (but not limited to) the host exclusive stamp sets!
Celebrate Easter and Spring with adorable cards and treat boxes! • Makes 9 projects: 3 each of 3 designs • Projects include printed cards, coordinating envelopes, and gift boxes • Precut paper pieces, baker’s twine, and embellishments • Coordinating colors: Petal Pink, Daffodil Delight, Granny Apple Green, Berry Burst, Early Espresso (Classic Stampin’ Spot), Crumb Cake
Don’t miss the coordinatingLove of Spring Dies add-on!
The dies will coordinate with the January, February and March Paper Pumpkin Kit.
The Love of Spring Dies Add-On—available only while supplies last!
Item # 164396 $12.00
This exclusive add-on coordinates with the three upcoming kits! Paper Pumpkin subscribers can purchase it beginning 11 December. The add-on is available only while supplies last, so it’s best to shop early!
Subscribe to the February Paper Pumpkin Kit between 11 January and 10 February by clicking here!
Note: Supplies may be limited toward the end of the subscription period.