Stampin’ Up! Elements of Text with Natural Botanicals

Good Wednesday morning stamping friends. Are you all starting the prep for your Thanksgiving dinners? I’ll be making my pies tonight and starting to prep some of the veggies. My daughter bought me tickets to a concert for my birthday. We went last night into NYC to see Pentatonix. I absolutely love the group, and the concert was beyond fantastic. There was a lot of audience participation, which was awesome. The only tough part was when they told us to get up to dance and sing along, which is really hard in Madison Square Garden in a sold-out show. I’m always amazed listening to them and there not being a band or any music playing. They performed their Christmas songs, a song from Wicked, and a song from their new Netflix movie Meet Me Nest Christmas.

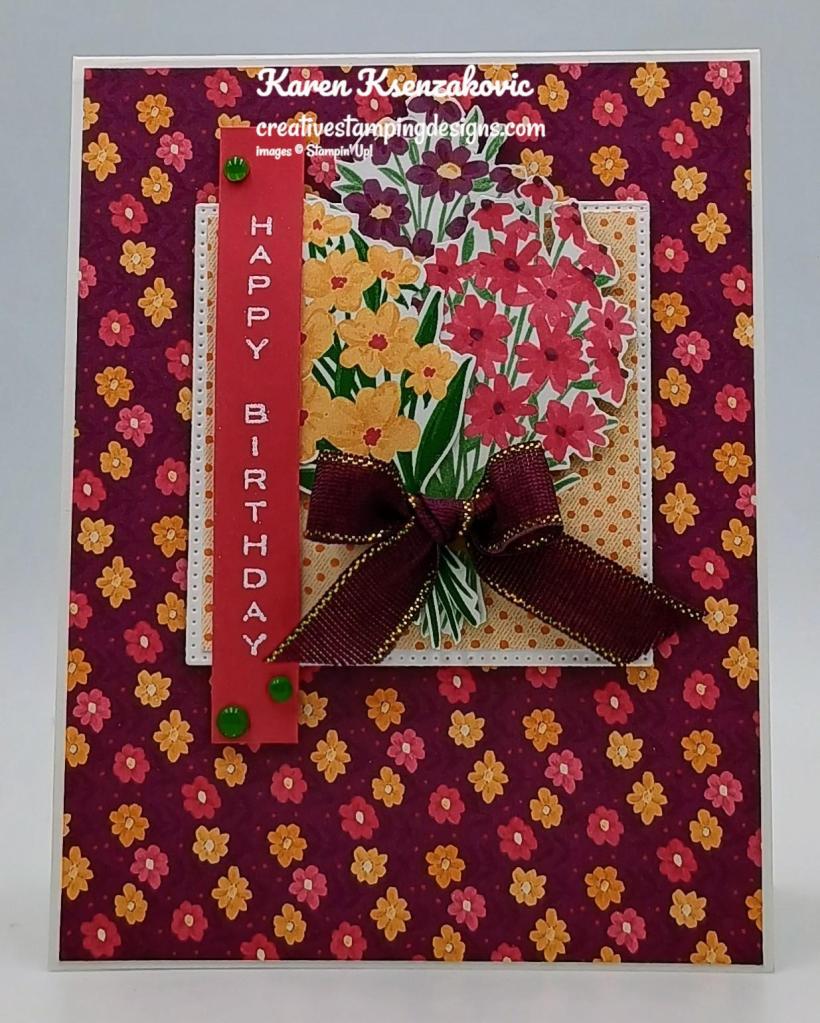
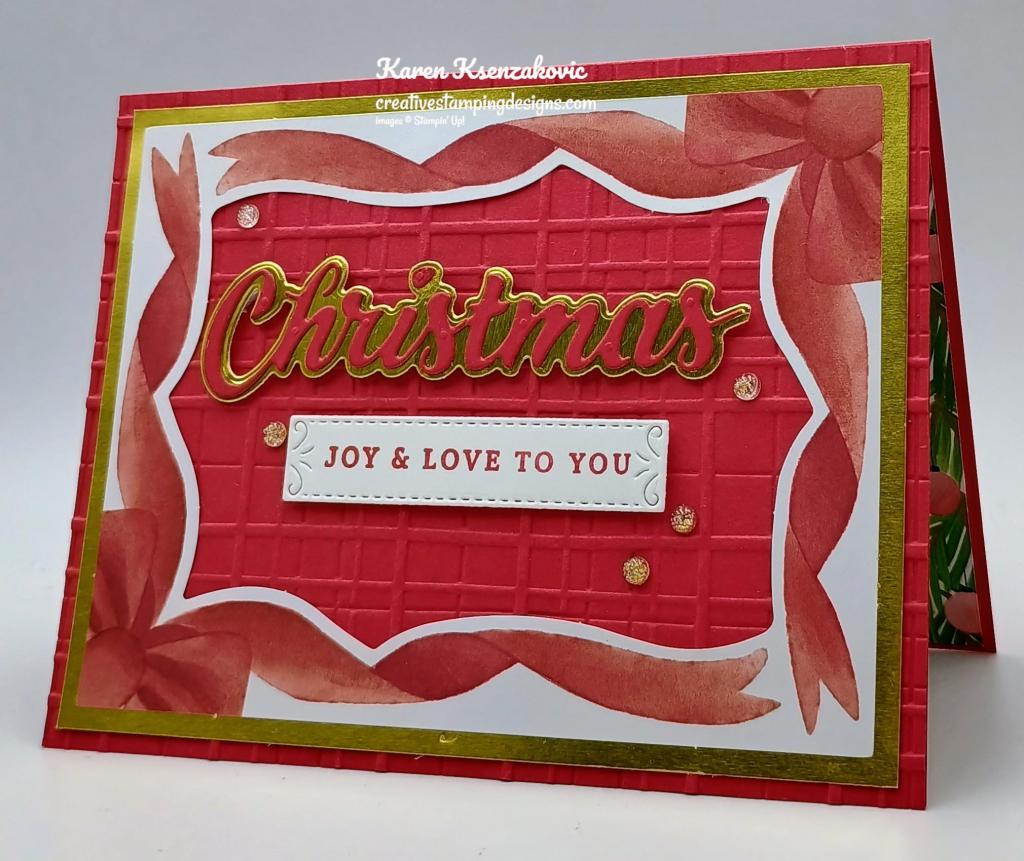
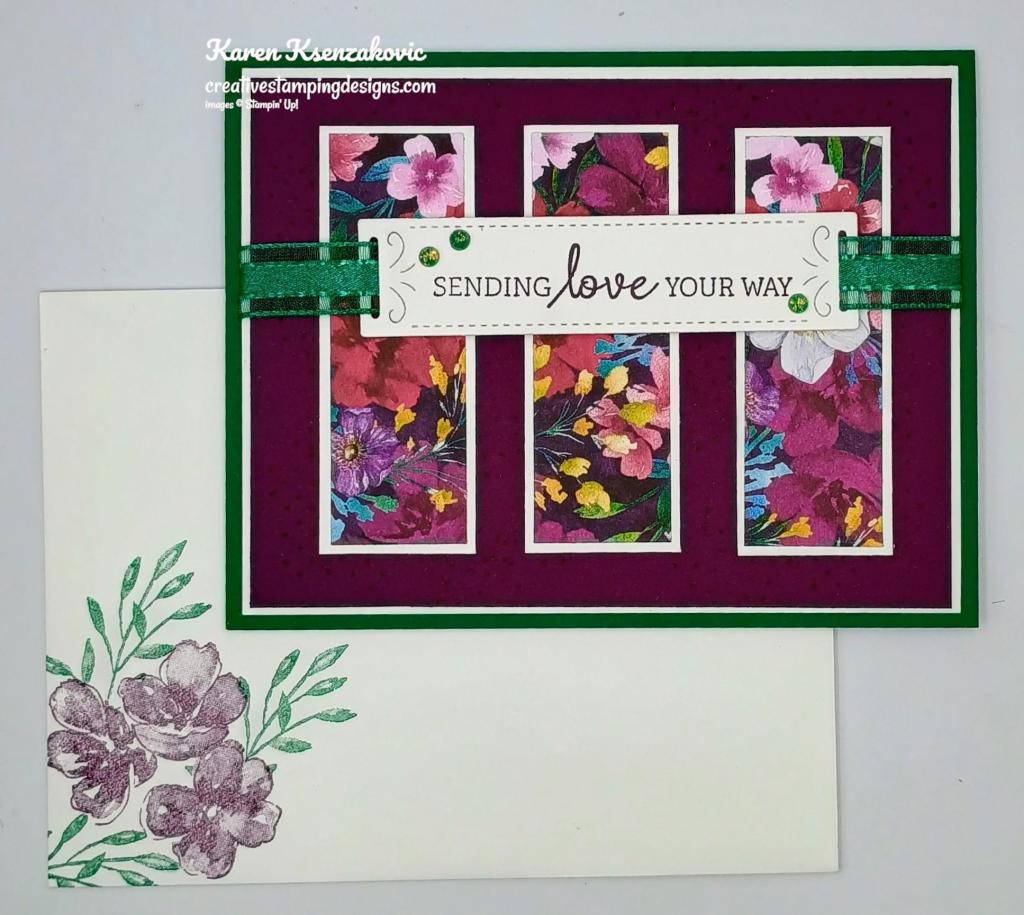
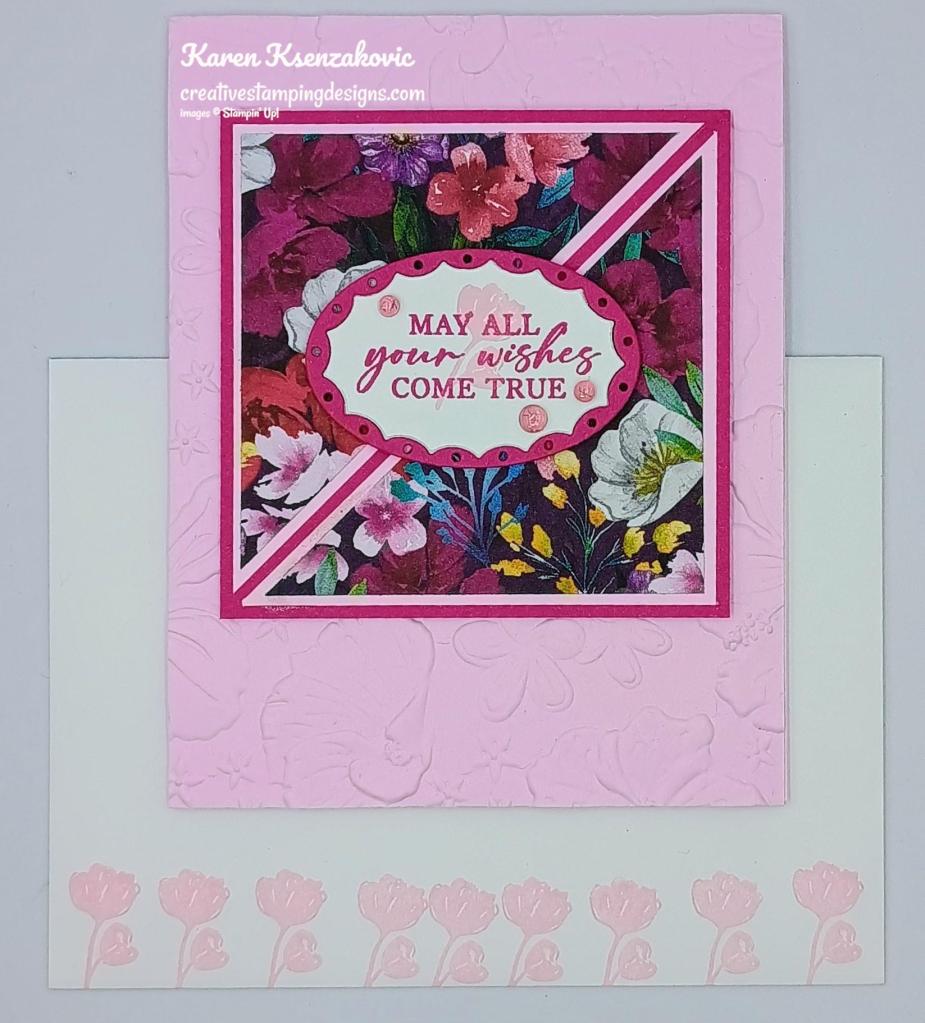
Today I played with all new Online Exclusives and January-April 2025 Mini Catalog products. These items will be available starting January 7, 2025, unless you are a demonstrator. If you’d like to see a quick video of how I made this card, Click Here to go to my Instagram Reels. Here is my card for today.

Stampin' Up! Elements of Text Natural Botanicals 1 creativestampingdesigns.com

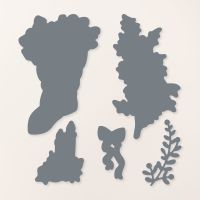
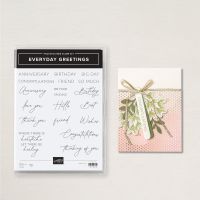
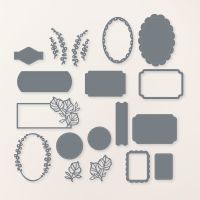
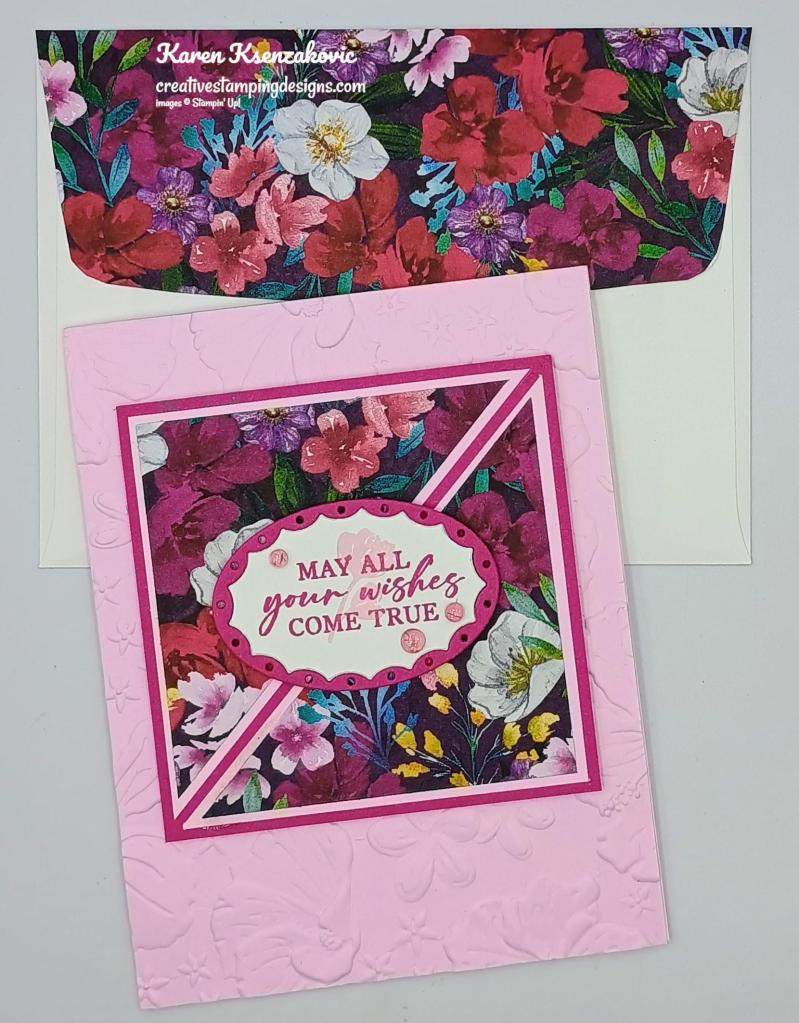
I used the Stampin’ Up! Online Exclusive Elements of Text Cling Stamp Set along with the Stampin’ Up! Natural Botanicals Photopolymer Stamp Set and Stampin’ Up! Online Exclusive Everyday Arches Photopolymer Stamp Set for my card today. All these products will be available starting January 7, 2025. If you’d like to get your hands on them early, contact me and I can tell you how.
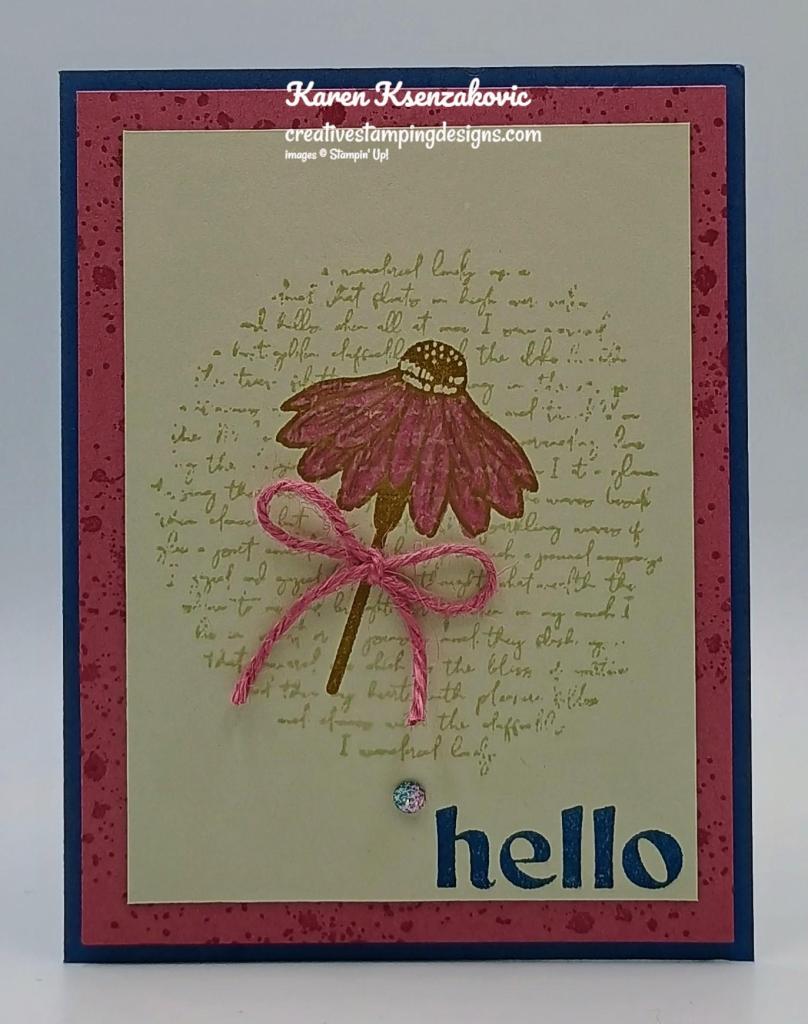
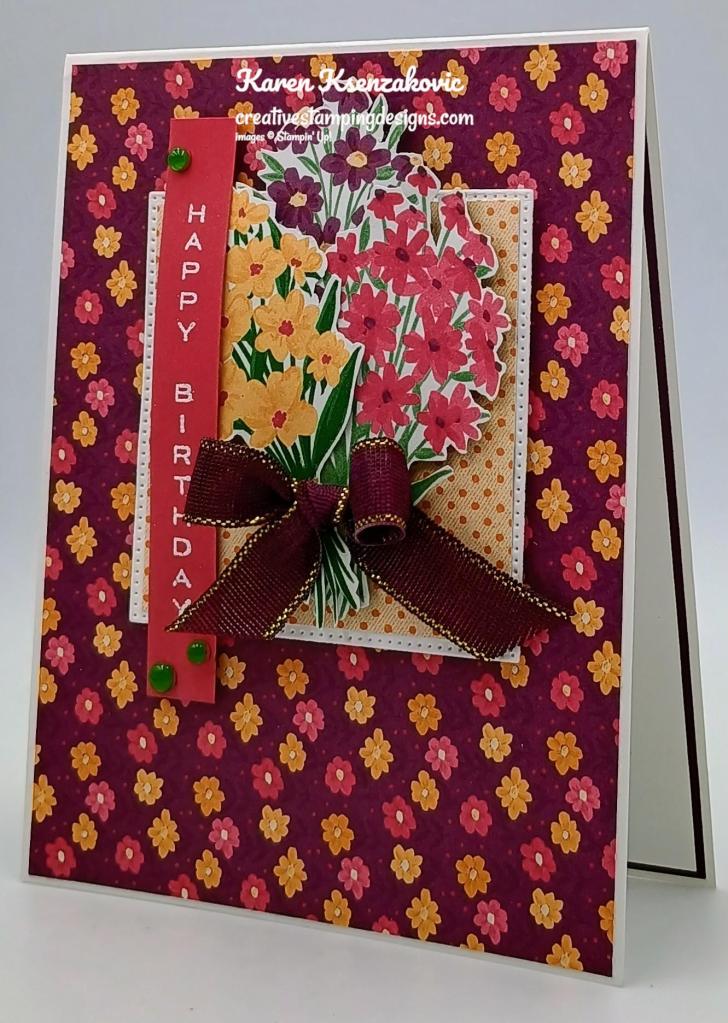
Stampin' Up! Elements of Text Natural Botanicals 2 creativestampingdesigns.com

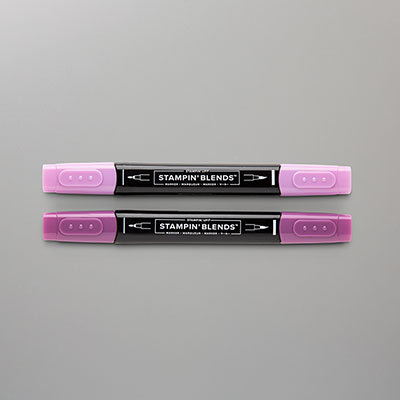
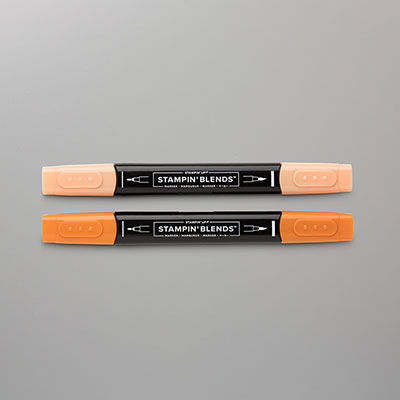
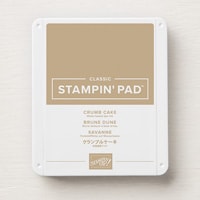
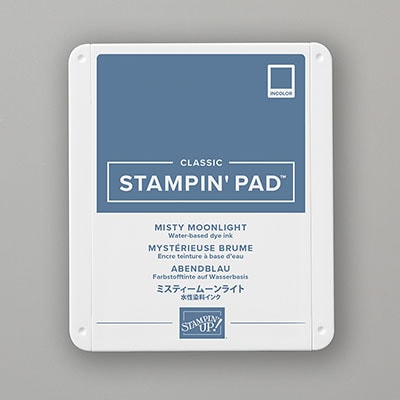
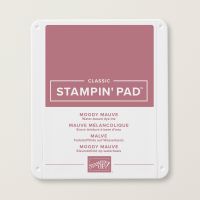
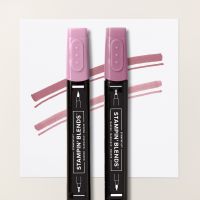
Stamp the circle text image from the Elements of Text stamp set in Basic Beige Ink on a Basic Beige card front. Stamp the flower image from the Natural Botanicals stamp set in Crumb Cake Ink on top of the script image. Color the flower using Moody Mauve Stampin’ Blends Markers. Stamp the sentiment from Everyday Arches stamp set in Misty Moonlight Ink on the bottom of the panel.

Stampin' Up! Elements of Text Natural Botanicals 3 creativestampingdesigns.com

Stamp a Moody Mauve mat with the splatter image from the Elements of Text stamp set in Moody Mauve Ink. Adhere the Basic Beige card front to the stamped Moody Mauve mat using Stampin’ Seal.
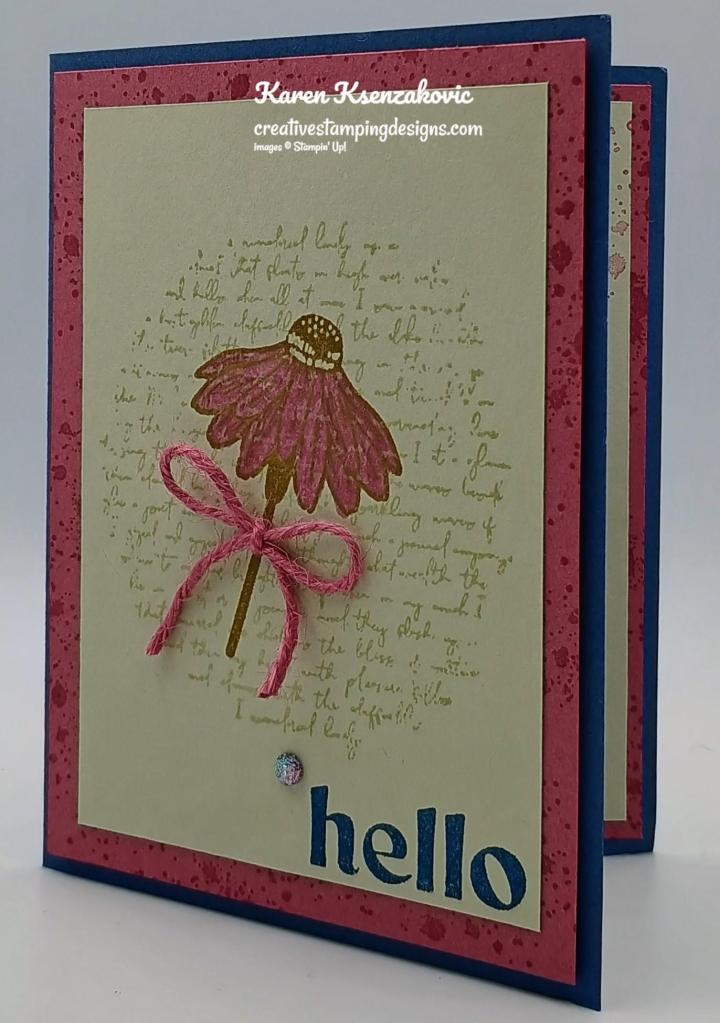
Stampin' Up! Elements of Text Natural Botanicals 4 creativestampingdesigns.com

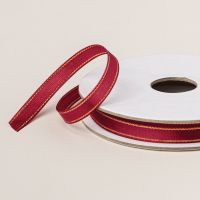
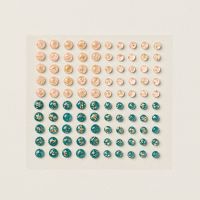
Adhere the layered panel to a Misty Moonlight card base using Stampin’ Dimensionals. Tie a small bow using the 2023-2025 In-Color Jute Trim. Adhere the bow to the stem of the flower using a Glue Dot. Add a Two-Tone Sparkle Gem (available Jan 7) to the card front

Stampin' Up! Elements of Text Natural Botanicals 5 creativestampingdesigns.com

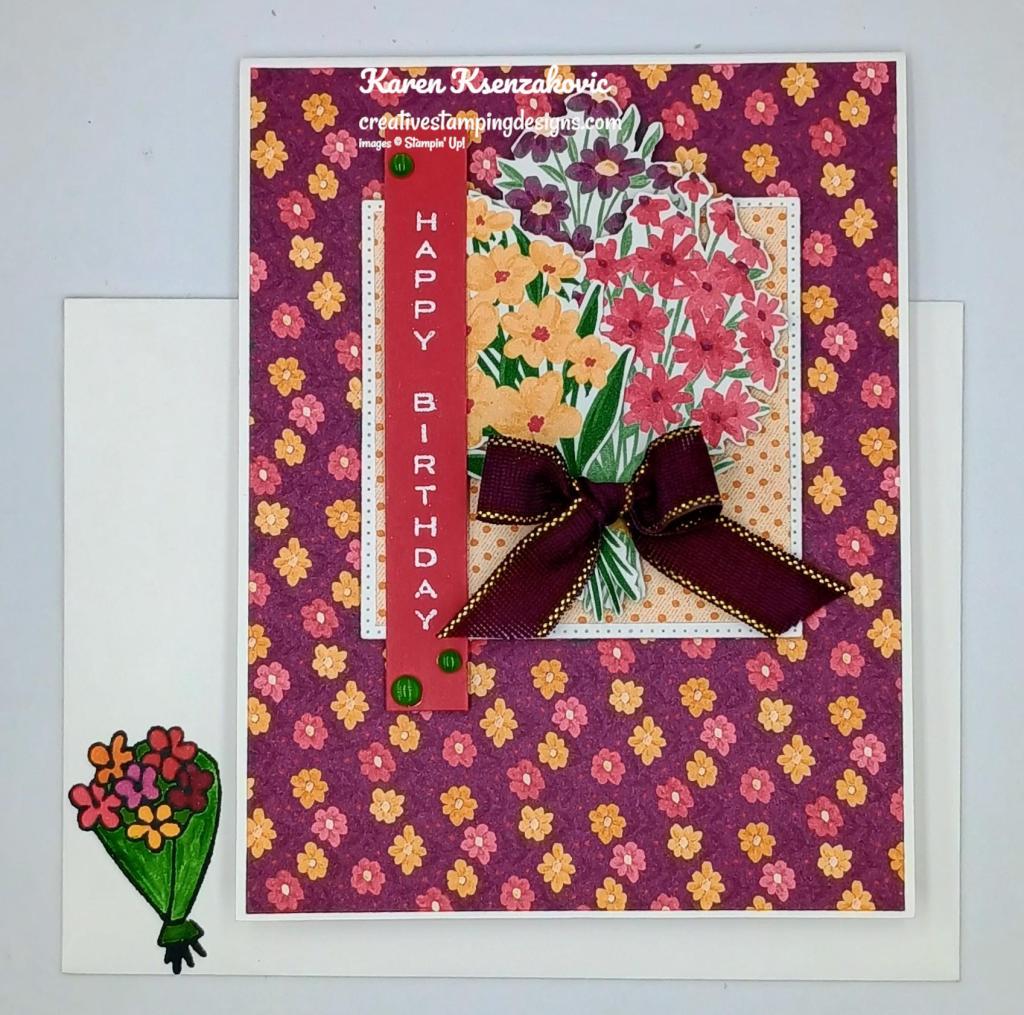
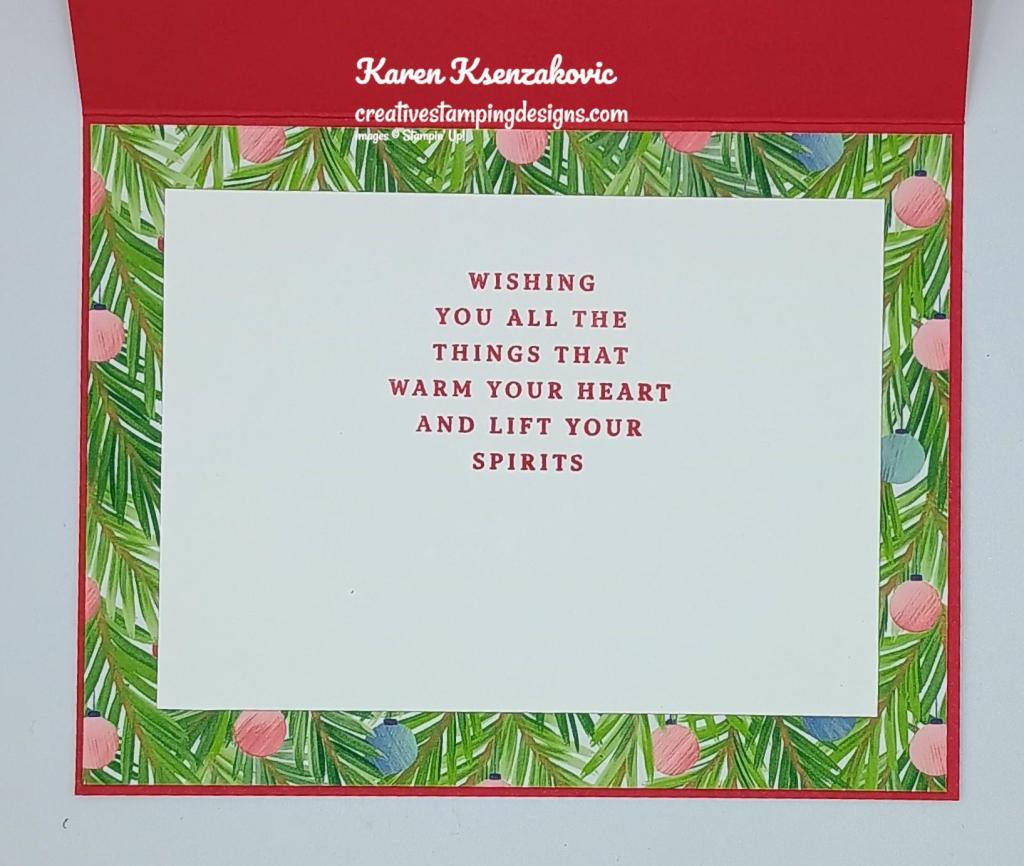
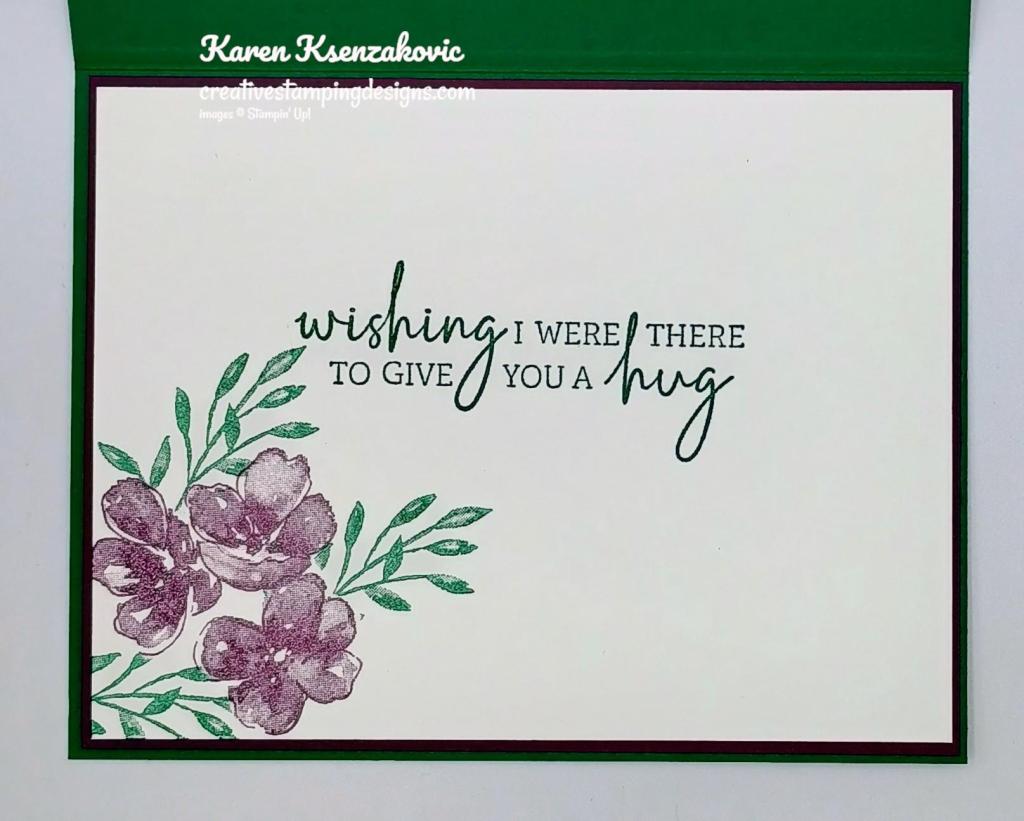
On a panel of Basic Beige, stamp the sentiments from the Everyday Arches stamp set in Misty Moonlight Ink. Stamp the flower image from the Natural Botanicals stamp set in Crumb Cake Ink on the bottom of the panel. Color the image using Moody Mauve Stampin’ Blends Markers. Stamp the splatter image from the Elements of Text stamp set in Moody Mauve Ink on the Moody Mauve mat. Adhere the Basic Beige panel to the Moody Mauve mat then to the inside of the Misty Moonlight card base.
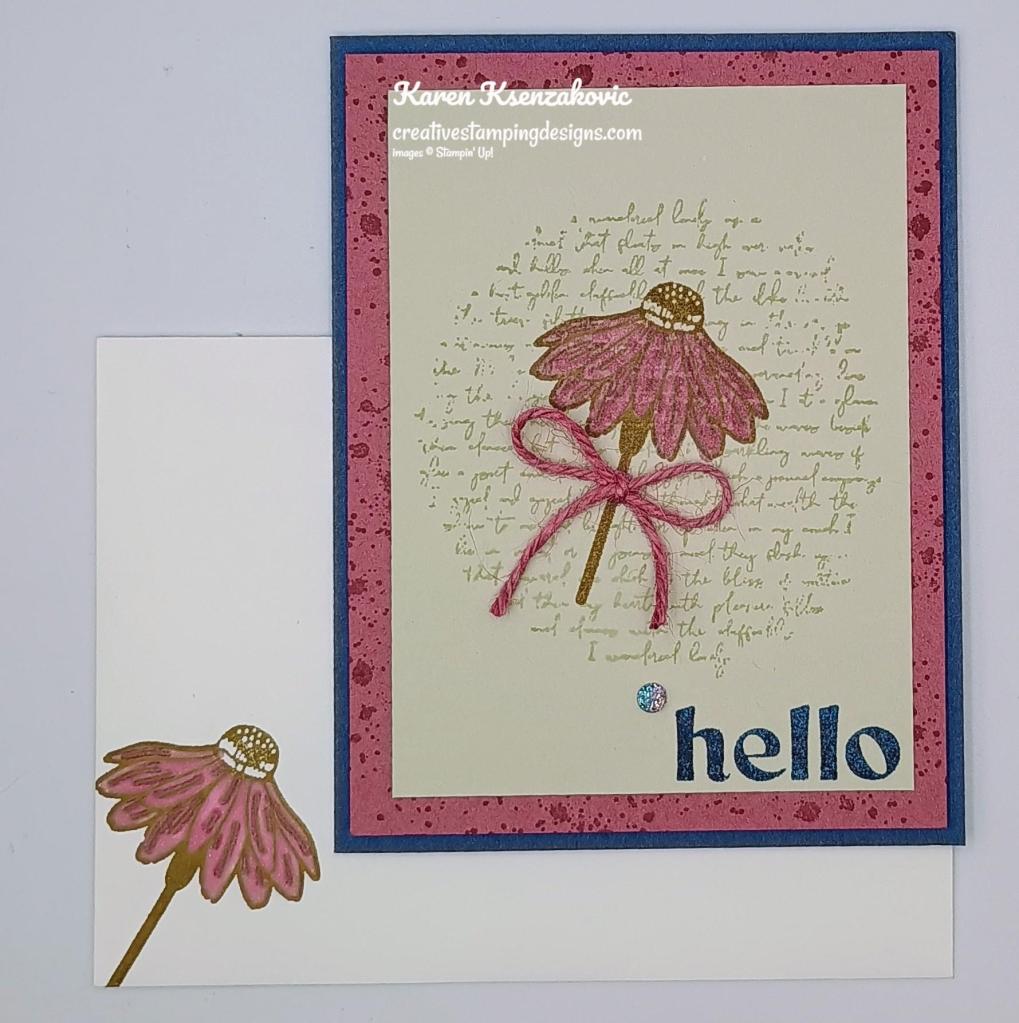
Stampin' Up! Elements of Text Natural Botanicals 6 creativestampingdesigns.com

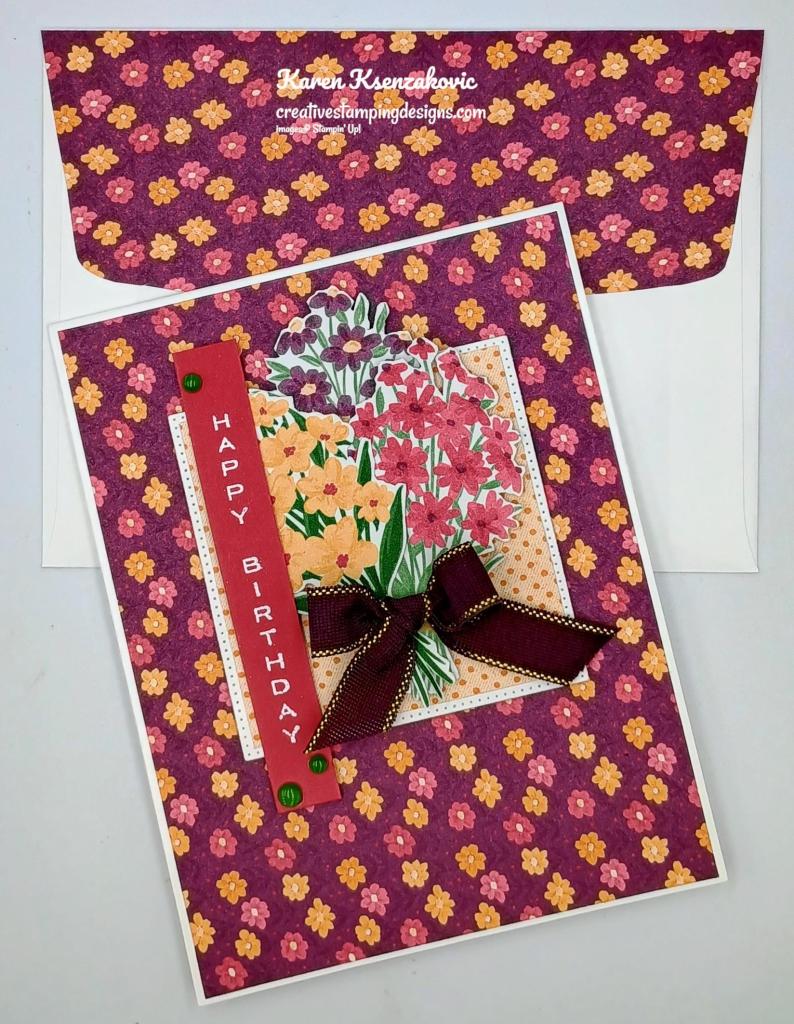
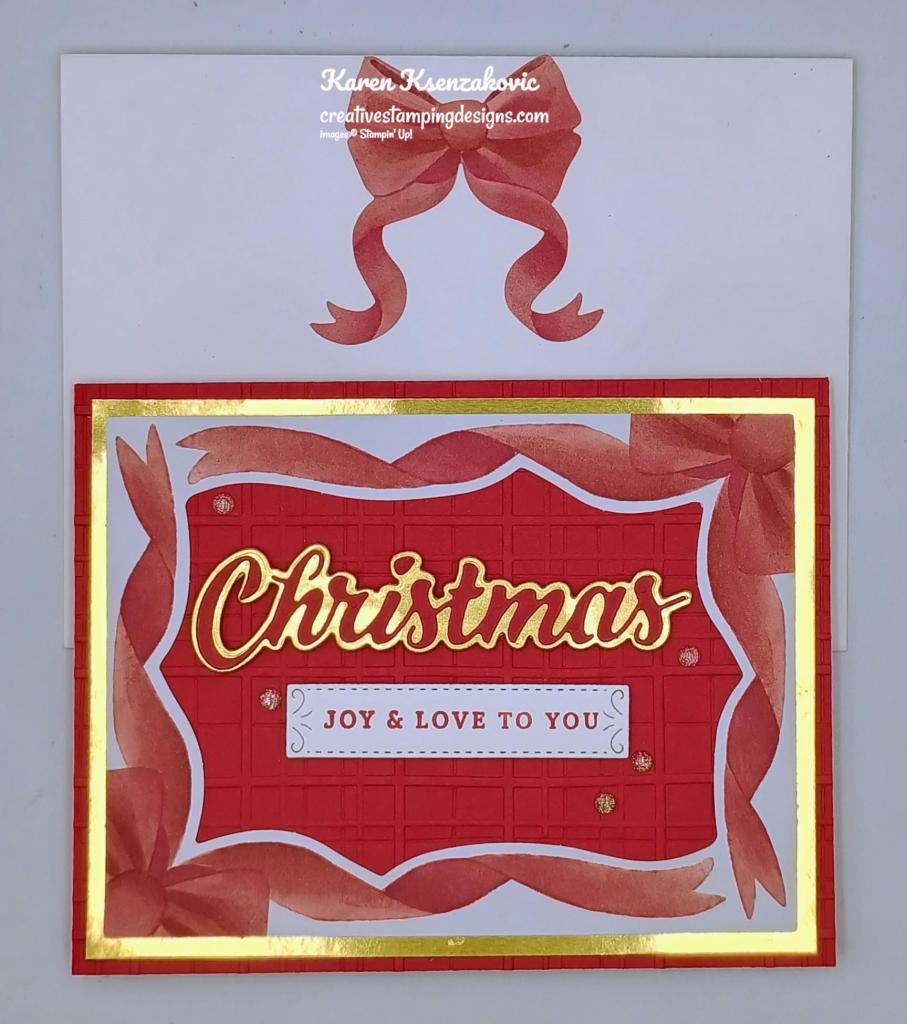
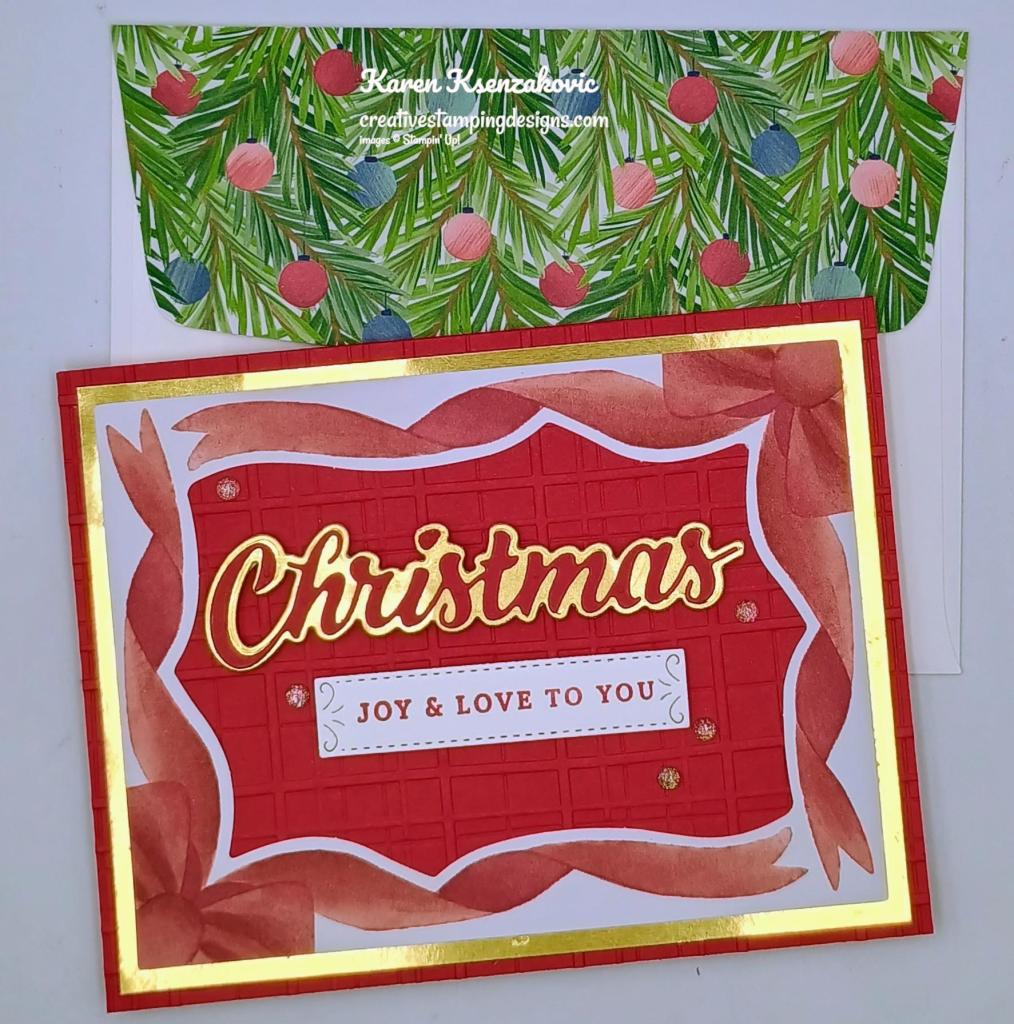
Finish the card by decorating a Basic White Medium Envelope. Stamp the flower image from the Natural Botanicals stamp set in Crumb Cake Ink on the envelope front. Color the image using Moody Mauve Stampin’ Blends Markers. Stamp the splotch image from the Elements of Text stamp set on the envelope flap in Moody Mauve Ink.

Stampin' Up! Elements of Text Natural Botanicals 7 creativestampingdesigns.com

Thank you for stopping by my blog today. I hope you like the card and will give it a try. Happy Stamping!!

*********************************************************************************************************

If you need any stamping supplies, I’d love to be your Demonstrator. Just click HERE to go directly to my online store or drop me an email if you have any questions. 

MY CURRENT HOST CODE IS:   4RTJCBH2

Use this host code when placing an order with me. When you order $50 or greater you will receive a free gift from me! If your order is over $150, please do not use this code, but you’ll still get the free gift. The free gift is your choice of any 1 item valued up to $10.00 from the 2024 – 2025 Annual Catalog, September – December 2024 Mini Catalog or from the Online Exclusives!  For any orders $50 or more I will also send you my monthly class tutorials.  Click HERE or go to my Customer Rewards for more details and to see what this month’s tutorials are.

Please remember to use my current Host Code and make sure that you can see my name on the final checkout page listed as your Demonstrator when you order so that you know that you’re ordering with me, and you’ll get my rewards! 

Happy Stamping, Karen

*********************************************************************************************************

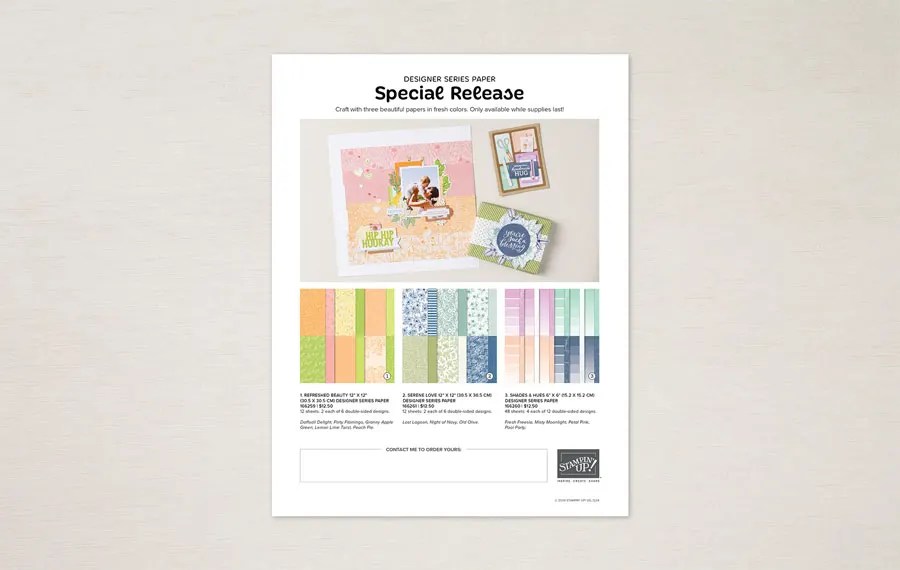
Special Release – Designer Series Paper – December 3
As a special release, Stampin’ Up! is offering three previously released Designer Series Papers with a twist: they’ve recolored them!!

Here are the details:

  • The new Designer Series Papers will be available to order beginning December 3!
  • You can shop two ways: they can either shop from the flyer in the Marketing Toolkit or shop the online store in the Online Exclusives category.
  • Stampin’ Up! refreshed these previous Designer Series Papers:
    • Serene Love is recolored from True Love.
    • Refreshed Beauty is recolored from Blackberry Beauty.
    • Shades & Hues is recolored from Color Theory.
  • Available while supplies last.

Click this image for more details about the papers that will be available to order beginning December 3:
*********************************************************************************************************

January – April 2025 Mini Catalog and Sale-A-bration 2025 Brochure Coming Soon!!
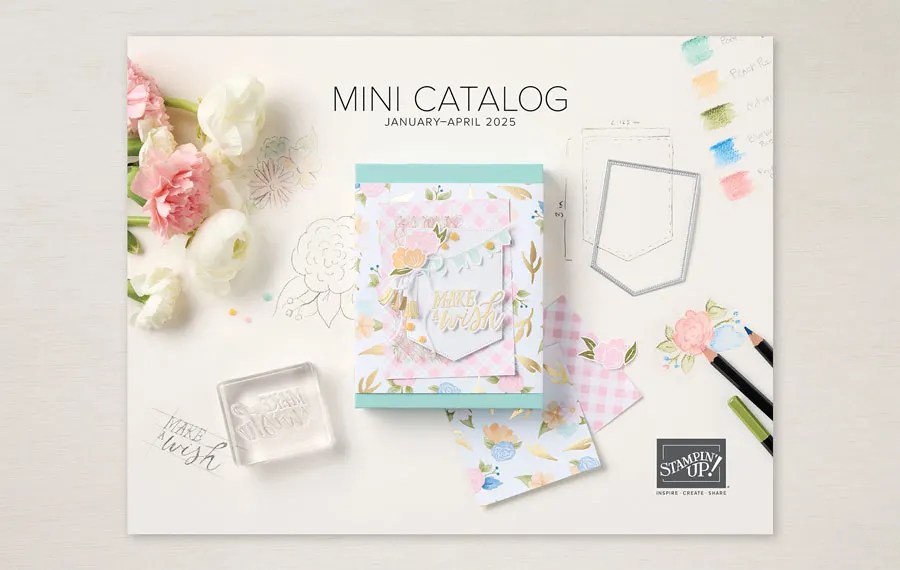
WooHoo!!! The new January-April 2025 Mini Catalog and Sale-a-bration 2025 Brochure arrived! I packed them up and mailed them out to my current customers just as quickly as possible! They will be arriving in your mailboxes very soon!!

If you’ve ordered from me within the last year, you’ll automatically be on my mailing list for the new catalogs.  If you are not a current customer of mine but would like to be and would like to get a copy of the upcoming catalog, simply place an order through my online store and I’ll mail you a copy of the catalog too!

*********************************************************************************************************

New Online Exclusive Products Now Available

Don’t forget to check out the Online Exclusive page in my Online Store. A new line of products for Online Exclusives are now available! You won’t find these items in any catalog. This is a great opportunity to spark creativity, expand a crafting collection, and discover new opportunities—all from the convenience of the online store.

*********************************************************************************************************

Notes From The Heart

Subscribe November 11 – December 10
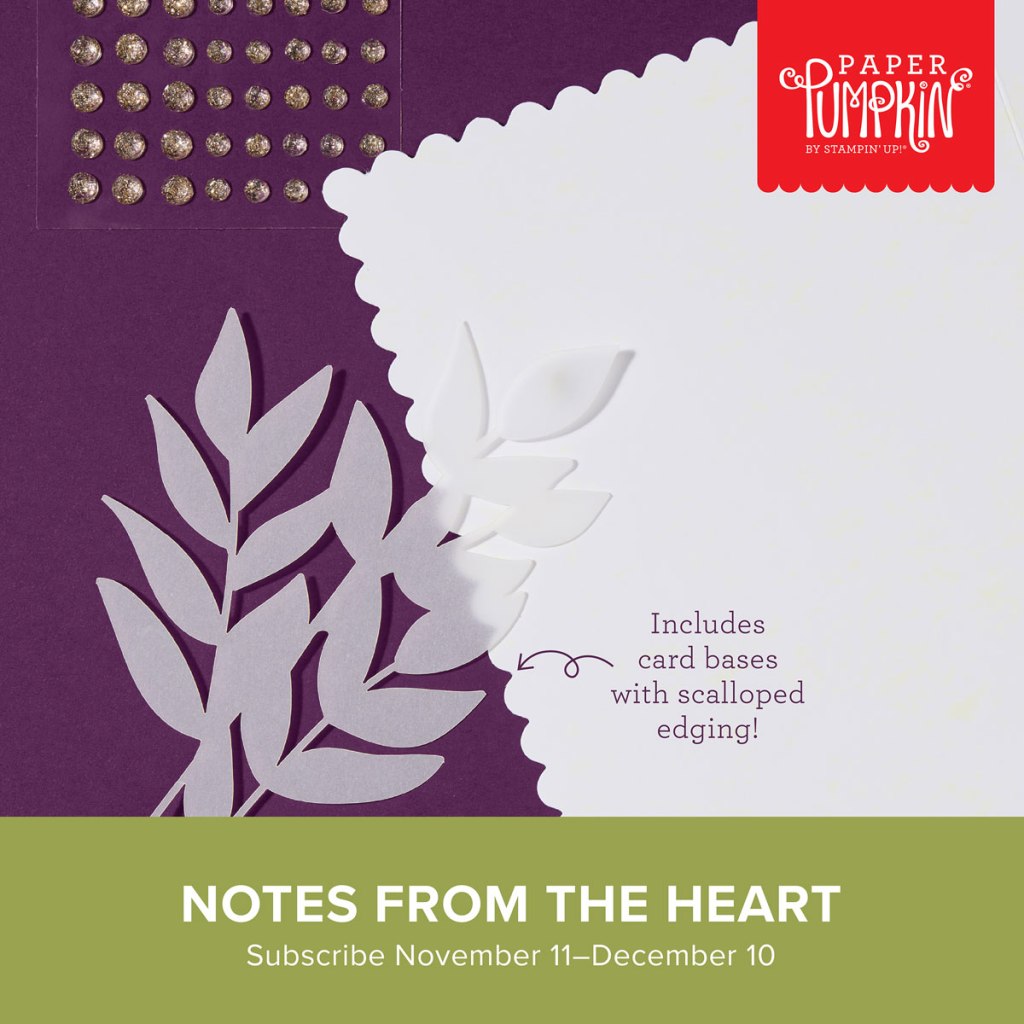
Create cards with hand-sketched botanical designs.
• Makes 9 projects: 3 each of 3 designs
• Precut vellum pieces and sparkling gems
• Scalloped card bases and coordinating envelopes
• Coordinating colors: Blackberry Bliss (Classic Stampin’ Spot), Flirty Flamingo,
Old Olive, Pecan Pie, Pretty in Pink, Very Vanilla

Subscribe to Paper Pumpkin for a monthly, all-inclusive crafting kit that’s a fun surprise! Each kit includes a photopolymer stamp set, Classic Stampin’ Spot, and step by step instructions to complete exclusive paper craft projects, including cards, tags, and gift
packaging. And don’t miss the special add-on that coordinates with the next three months!

Subscribe to the December Paper Pumpkin Kit between 11 November and 10 December by clicking here!

*********************************************************************************************************

Don’t miss the coordinating
Merry Tags & More Dies Add-On!
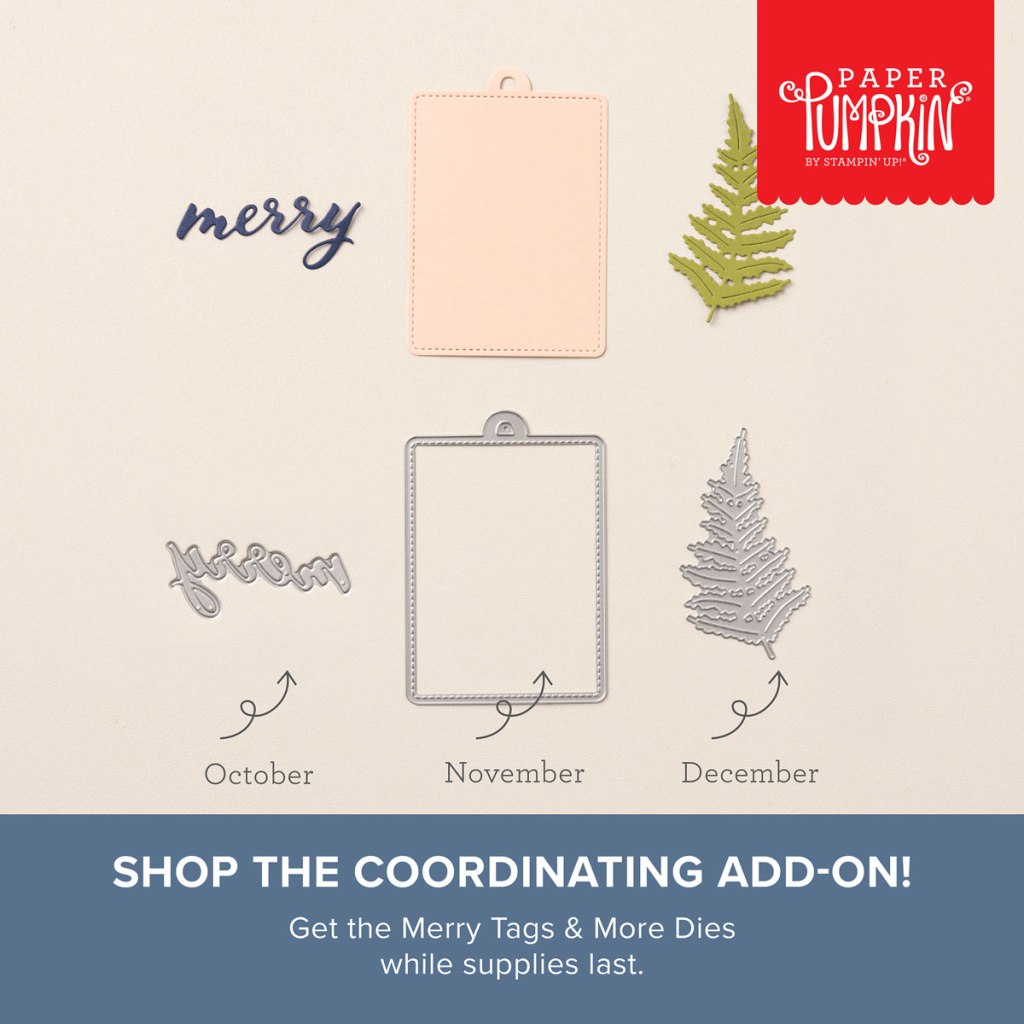
Add dimension and detail to your cards, scrapbook pages, and gift tags with the Merry Tags & More Dies! With a leaf and tag shape and Merry sentiment, these dies are a great way to expand your crafting experience. They even coordinate with three Paper Pumpkin Kits: Nests of Christmas, Filled with Joy, and Notes from the Heart. Such easy coordination makes these dies a must-have for any paper craft. Paper Pumpkin subscribers can purchase it beginning 11 September. The add-on is available only while supplies last, so it’s best to shop early! Please note that the Stampin’ Cut and Emboss Machine is not included and can be purchased separately.

#165639 $12

Note: Supplies may be limited toward the end of the subscription period.

*********************************************************************************************************

Card stock cuts for this project:

  • Basic Beige Cardstock 3 1/2″ X 4 3/4″(card front), 3 3/4″ X 5″(inner liner)
  • Misty Moonlight Cardstock 5 1/2″X 8 1/2″(card base scored & folded at 4 1/4″)
  • Moody Mauve Cardstock 2 – 4″ X 5 1/4″(card front & inner liner mat)

*********************************************************************************************************

Product List
Stampin’ Up! So Sincere for The Happy Inkin’ Thursday Blog Hop

Good Thursday morning stamping friends and welcome to our Happy Inkin’ Thursday Blog Hop. If you are starting with me, thank you, I hope you will stop by everyone’s blog to see what they have created this week. If you are hopping over from Akiko’s blog, thank you for stopping by. This week we have Sketch Challenge. If you’d like to see a quick video of how I made this card, Click Here to go to my Instagram Reels. Here is my card using this week’s sketch.

Stampin' Up! So Sincere Birthday 1 creativestampingdesigns.com

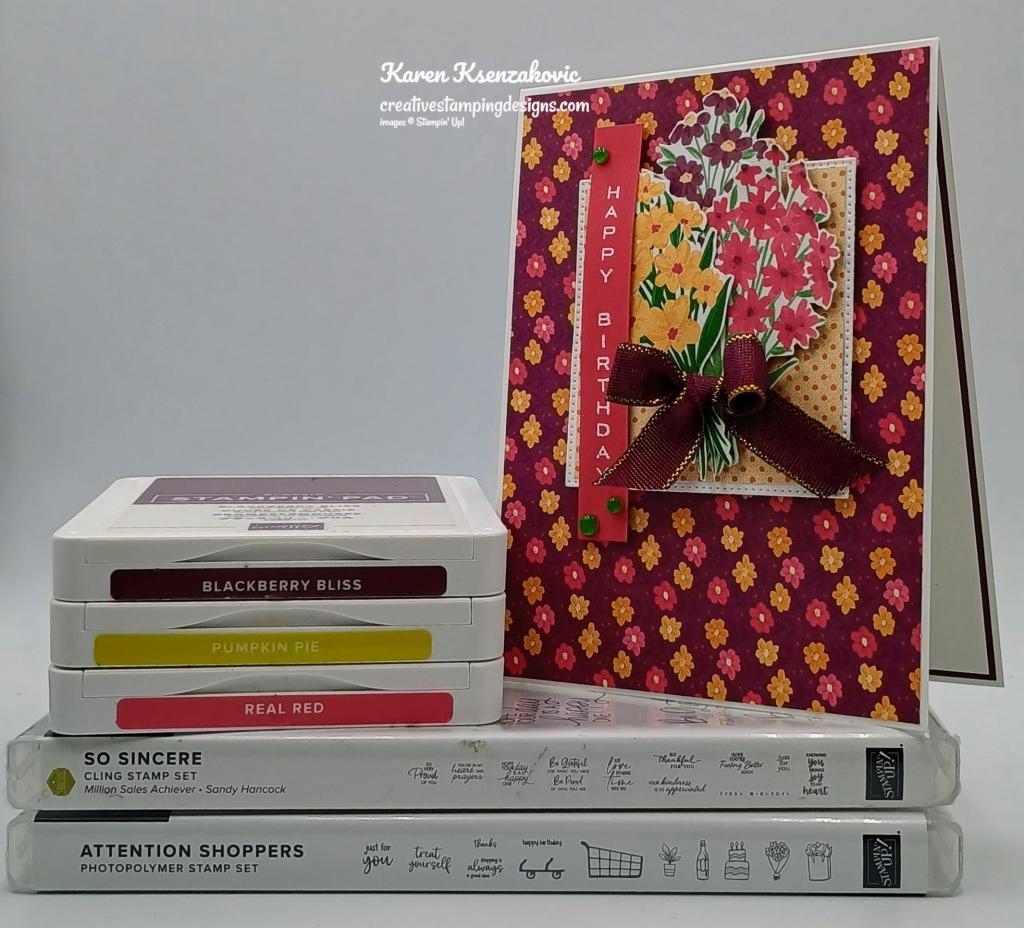
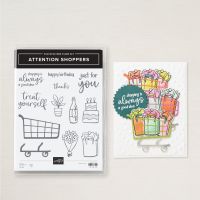
I used the Stampin’ Up! so Sincere Cling Stamp Set along with the To Market Designer Series Paper, Stylish Shapes Dies and Stampin’ Up! Attention Shoppers Photopolymer Stamp Set for my card today.

This is our sketch for this week.

Stampin' Up! So Sincere Birthday 2 creativestampingdesigns.com

Adhere a panel of To market DSP to a Basic white thick card base using Liquid Glue. Cut the largest square using the Stylish Shapes Dies from a panel of Basic White. Adhere a pane of To Market DSP to the die cut square using Stampin’ Seal. Adhere the layered panel to the card front using Stampin’ Dimensionals.

Stampin' Up! So Sincere Birthday 3 creativestampingdesigns.com

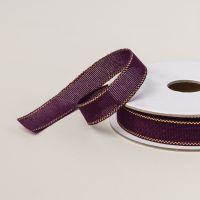
From a panel of To Market DSP fussy cut 3 of the bouquets of flowers using Paper Snips. Adhere the flowers to the layered panel using Glue Dots and Stampin’ Dimensionals. Tie a small bow using the Blackberry Bliss & Gold 1/2″ Textured Ribbon and adhere it to the flower’s stems using a Glue Dot.

Stampin' Up! So Sincere Birthday 4 creativestampingdesigns.com

Stamp the sentiment from So Sincere stamp set in Versamark Ink on a panel of Real Red. Sprinkle the sentiment using White Embossing Powder and set it using the Heat Tool. Adhere the sentiment to the card front using Stampin’ Dimensionals and Glue Dots. Add a few Transparent Adhesive-Backed Dots to the card front.

Stampin' Up! So Sincere Birthday 5 creativestampingdesigns.com

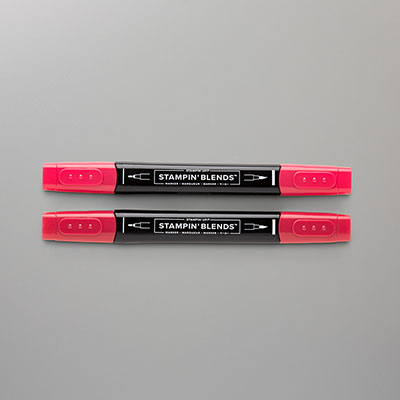
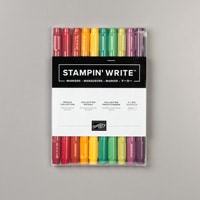
Stamp the sentiment from So Sincere stamp set in Blackberry Bliss Ink on a panel of Basic White. Stamp the flower image from Attention Shoppers stamp set in Tuxedo Black Ink on the bottom of the panel. Color the image using Blackberry Bliss, Pumpkin Pie and Real Red Stampin’ Blends Markers. Color the flower paper using the Garden Green Stampin’ Write Marker. Adhere the Basic White Panel to a Blackberry Bliss mat then to the inside of the Basic White Thick card base.

Stampin' Up! So Sincere Birthday 6 creativestampingdesigns.com

Complete the card by decorating a Basic White Medium Envelope. Stamp the flower image from the Attention Shoppers stamp set in Tuxedo Black Ink on the envelope front. Color the image the same as for the card. Adhere a panel of To Market DSP to the envelope flap.

Stampin' Up! So Sincere Birthday 7 creativestampingdesigns.com

Thank you for stopping by my blog today.  Now that you’ve seen my card, let’s get on with the hop!  Click the button below to hop over to see what Tara has created. Happy Hopping!

Just in case you get lost along the way, here is a list of the team members involved in the hop today.

Amy Koenders

Mary Deatherage

Karen Finkle

Akiko Sudano

Karen Ksenzakovic You Are Here

Tara Carpenter

Terry Lynn Bright

Carol Buckalew

*********************************************************************************************************

If you need any stamping supplies, I’d love to be your Demonstrator. Just click HERE to go directly to my online store or drop me an email if you have any questions. 

MY CURRENT HOST CODE IS:   4RTJCBH2

Use this host code when placing an order with me. When you order $50 or greater you will receive a free gift from me! If your order is over $150, please do not use this code, but you’ll still get the free gift. The free gift is your choice of any 1 item valued up to $10.00 from the 2024 – 2025 Annual Catalog, September – December 2024 Mini Catalog or from the Online Exclusives!  For any orders $50 or more I will also send you my monthly class tutorials.  Click HERE or go to my Customer Rewards for more details and to see what this month’s tutorials are.

Please remember to use my current Host Code and make sure that you can see my name on the final checkout page listed as your Demonstrator when you order so that you know that you’re ordering with me, and you’ll get my rewards! 

Happy Stamping, Karen

*********************************************************************************************************

2 New Kits Now Available

Kits by Stampin’ Up! are perfect for new crafters, busy crafters, or crafters who want quick and easy projects. All-inclusive project kits have everything you need in one box! Give as a gift or try them yourself. Kits are while supplies last. Order today!

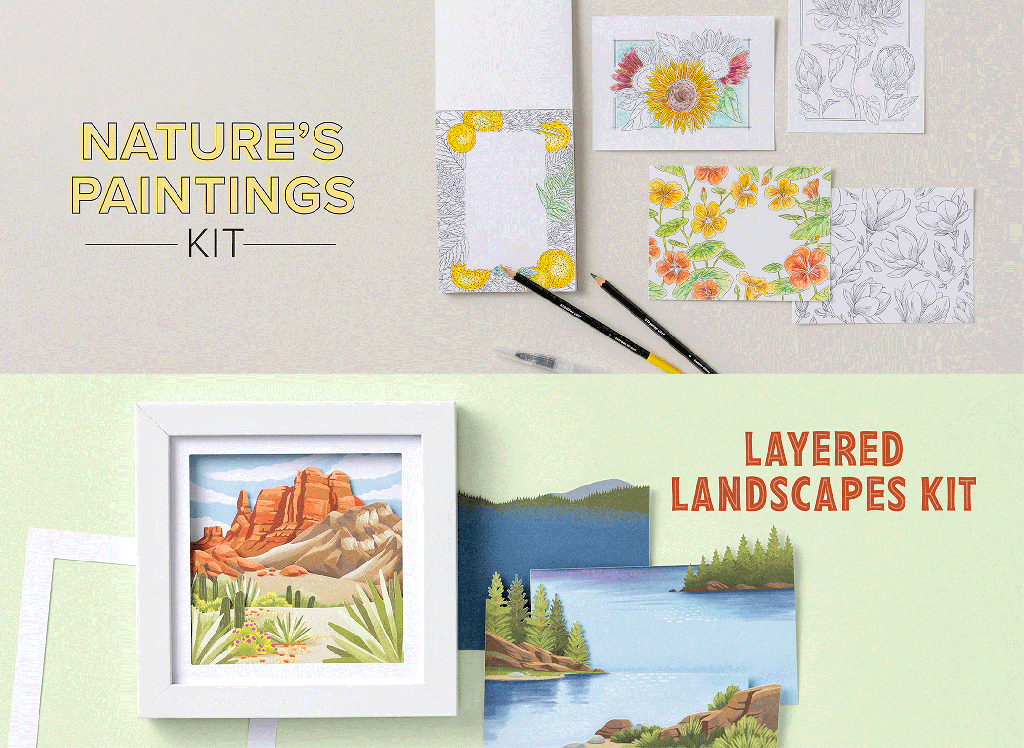
Nature’s Paintings Kits

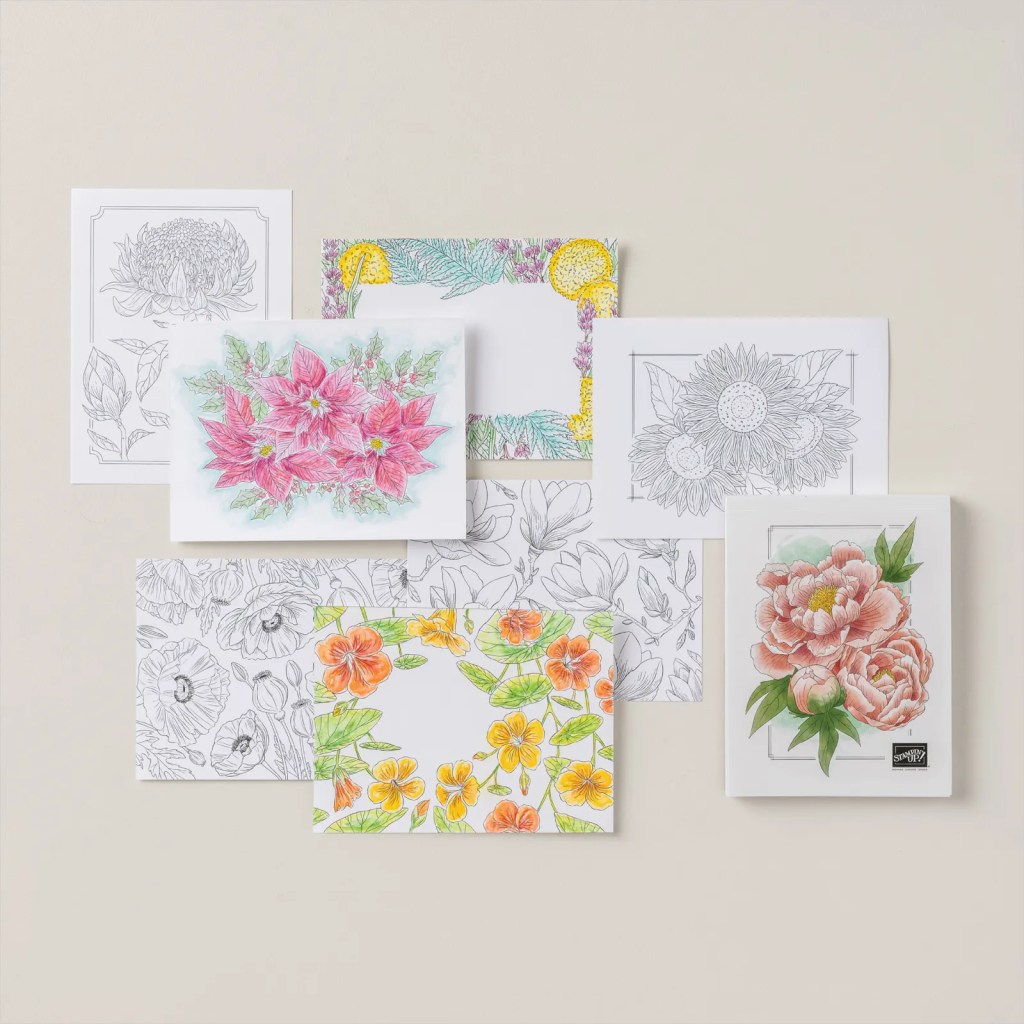
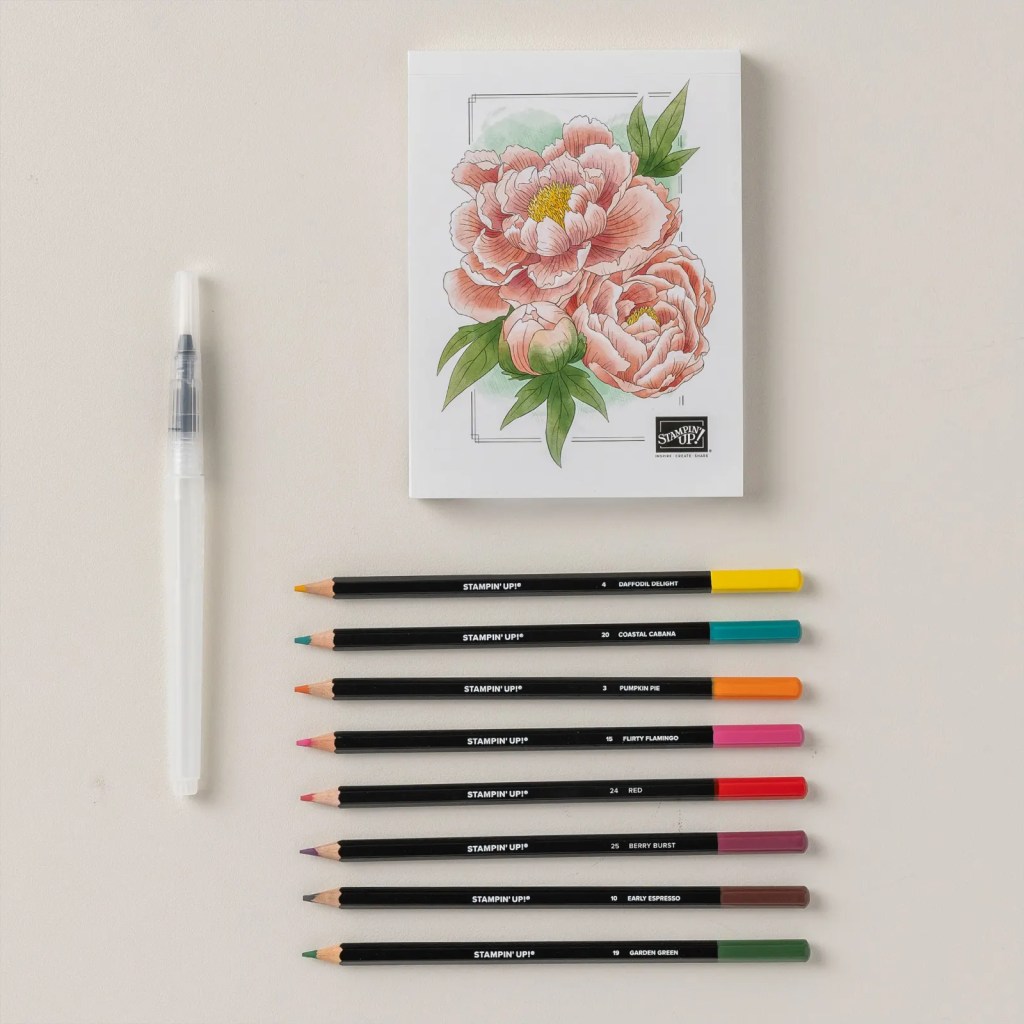
Embrace your creative side with the Nature’s Paintings Kit. This unique kit includes everything you need for a fun creative experience: a coloring book, watercolor pencils, and a water painter. All you need is some imagination and water! Create lovely, picturesque images using advanced coloring techniques with this craft kit. Or make something that’s never been seen before—like green flowers with purple leaves. Keep it realistic or color outside the lines—it’s up to you. And once you’re done, you can use your finished artwork to create a one-of-a-kind card front!

Kit includes:
* Predesigned projects
* Line art illustrations
* Step-by-step instructions
* 24 watercolor paper pages, 2 each of 12 designs
* 8 Watercolor Pencils
* 1 Water Painter
* Coloring Book: 4-1/2″ x 6″ x 1/2″ (11.4 x 15.2 x 1.3 cm)
* A 9-7/8″ x 6-1/2″ x 1-3/4″ (25.1 x 16.5 x 4.4 cm) printed designer box for storage or crafting on the go

Product colors: Berry Burst, Coastal Cabana, Daffodil Delight, Early Espresso, Flirty Flamingo, Garden Green, Pumpkin Pie, Red

164982 $25.00

+++++++++++++++++++++++++++++++++++++++++++++++++++++++++++++++++++++

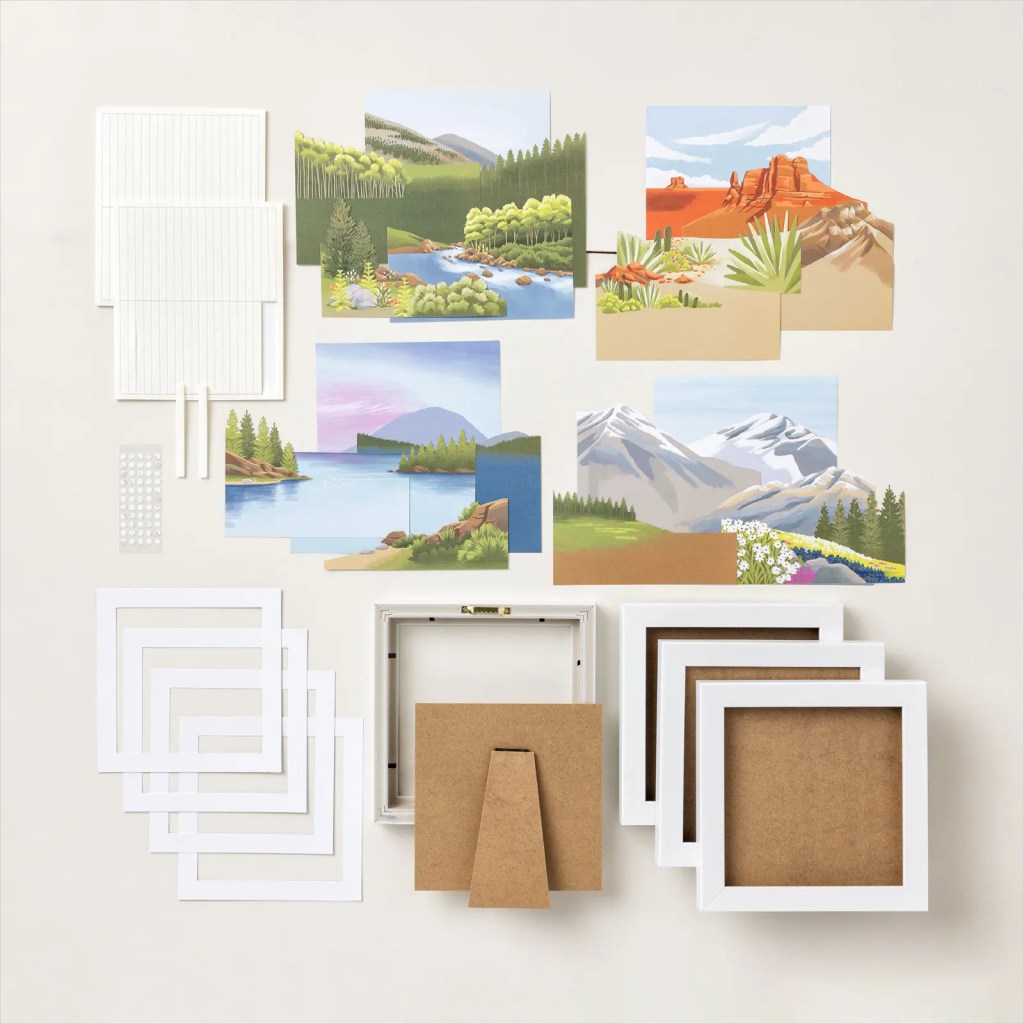
Layered Landscapes Kit

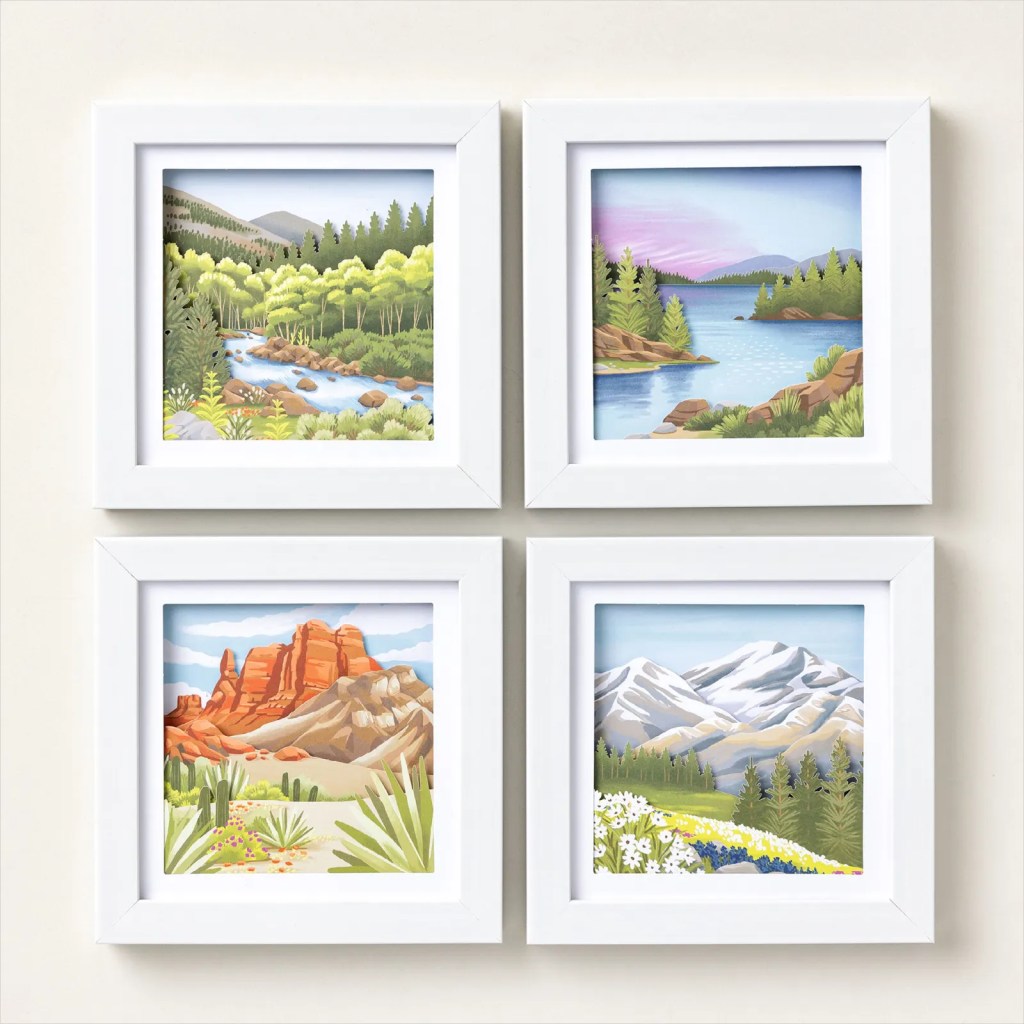
Do you long for the great outdoors but don’t actually want to go outdoors? Then the Layered Landscapes Kit is perfect for you! DIY lovely home decor with this unique kit that includes four 7-1/8″ x 7-1/8″ x 3/4″ (18.1 x 18.1 x 1.9 cm) frames and precut paper pieces. You can either stand the frames up on their included easels or hang them on your wall. Either way, your houseguests are sure to love your new artwork!

Kit includes:
* Predesigned projects
* Step-by-step instructions
* Precut pieces (No prep work! Get right to crafting)
* 4 white frames
* Frame size: 7-1/8″ x 7-1/8″ x 3/4″ (18.1 x 18.1 x 1.9 cm)
* Enough adhesive to complete projects
* A 9-7/8″ x 6-1/2″ x 2-3/4″ (25.1 x 16.5 x 7 cm) printed designer box for storage or crafting on the go

Product colors: Balmy Blue, Basic Beige, Basic Gray, Berry Burst, Cajun Craze, Crumb Cake, Early Espresso, Gray Granite, Lemon Lime Twist, Misty Moonlight, Mossy Meadow, Night of Navy, Old Olive, Pecan Pie, Soft Sea Foam

164981 $25

*********************************************************************************************************

New Online Exclusive Products Now Available

A new line of products for Online Exclusives are now available! You won’t find these items in any catalog. This is a great opportunity to spark creativity, expand a crafting collection, and discover new opportunities—all from the convenience of the online store.

*********************************************************************************************************

Filled With Joy

Subscribe October 11 – November 10

Celebrate Christmas with adorable stockings and gift tags!

Details:
• Makes 8 projects: 8 stockings with 8 gift tags
• Precut paper pieces
• Safety pins and specialty gold foil
• Coordinating colors: Flirty Flamingo, Pool Party, Poppy Parade
(Classic Stampin’ Spot), Shaded Spruce, Very Vanilla

Subscribe to Paper Pumpkin for a monthly, all-inclusive crafting kit that’s a fun surprise! Each kit includes a photopolymer stamp set, Classic Stampin’ Spot, and step by step instructions to complete exclusive paper craft projects, including cards, tags, and gift
packaging. And don’t miss the special add-on that coordinates with the next three months!

Subscribe to the November Paper Pumpkin Kit between 11 October and 10 November by clicking here!

*********************************************************************************************************

Don’t miss the coordinating
Merry Tags & More Dies Add-On!

Add dimension and detail to your cards, scrapbook pages, and gift tags with the Merry Tags & More Dies! With a leaf and tag shape and Merry sentiment, these dies are a great way to expand your crafting experience. They even coordinate with three Paper Pumpkin Kits: Nests of Christmas, Filled with Joy, and Notes from the Heart. Such easy coordination makes these dies a must-have for any paper craft. Paper Pumpkin subscribers can purchase it beginning 11 September. The add-on is available only while supplies last, so it’s best to shop early! Please note that the Stampin’ Cut and Emboss Machine is not included and can be purchased separately.

#165639 $12

Note: Supplies may be limited toward the end of the subscription period.

*********************************************************************************************************

Card stock cuts for this project:

  • Basic White Cardstock 3″ X 3″(card front panel mat), 4″ x 5 1/4″ (inner liner)
  • Basic White Thick Cardstock 4 1/4″ X 11″(card base scored at 5 1/2″)
  • Blackberry Bliss Cardstock 4 1/8″ X 5 3/8″(inner liner mat)
  • Real Red Cardstock 1/2″ x 3 3/4″(sentiment)
  • To Market Designer Series Paper 4 1/8″ X 5 3/8″(card front), 2 5/8″ X 2 5/8″(card front panel), 2 1/4″ x 6″(envelope flap)

*********************************************************************************************************

Product List
Stampin’ Up! Perfect Pairs Salt & Pepper

Good Wednesday morning stamping friends. We’re halfway through the week and on the downhill to the weekend. Just a reminder that I have Double Creative Stamping Designs Rewards going on until Monday November 11th.

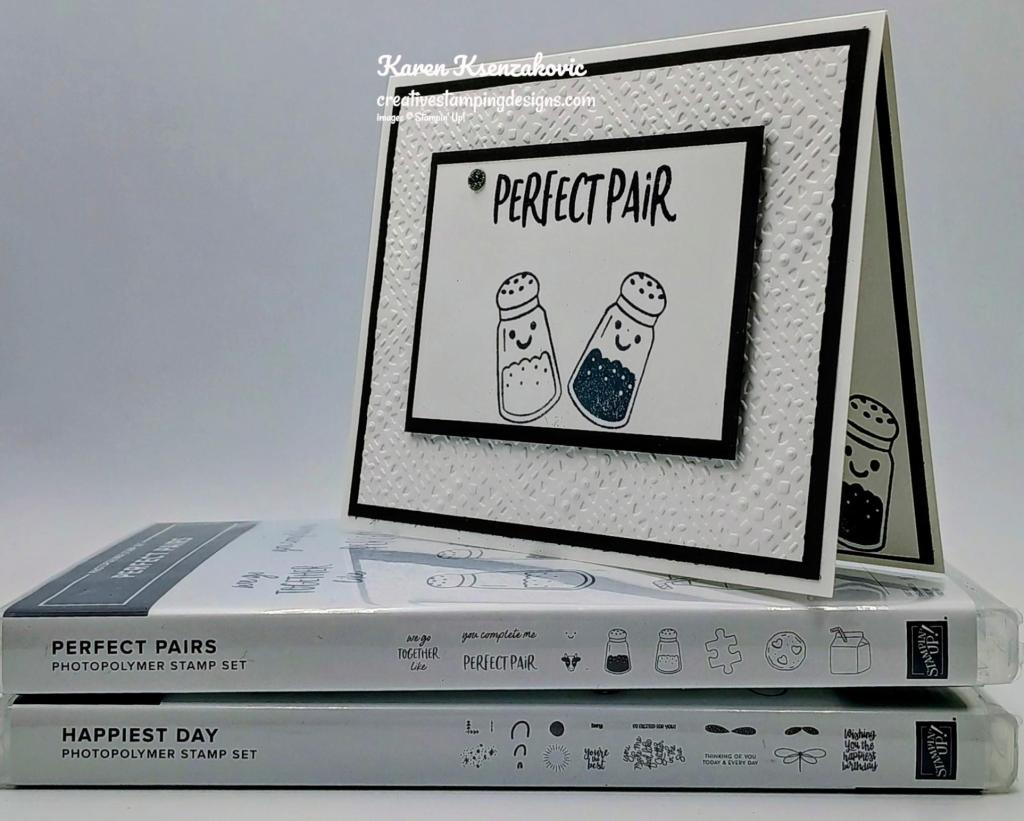
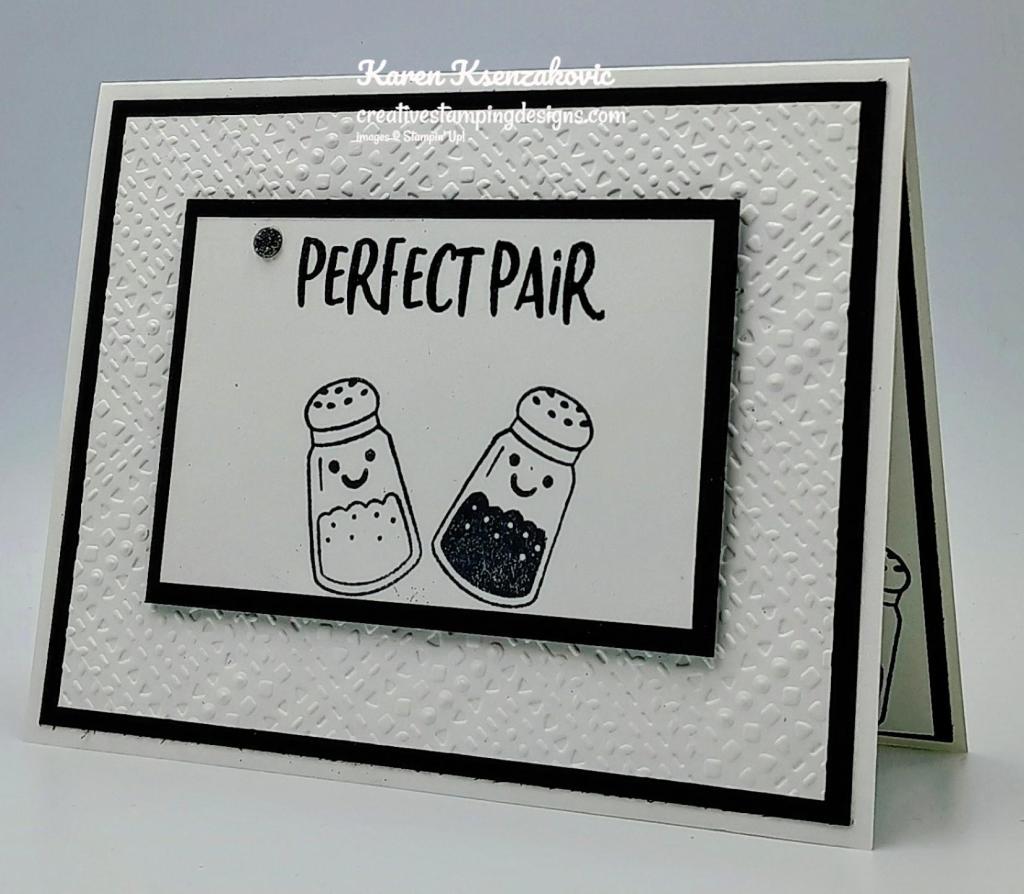
I played with a new Online Exclusive set for today’s card and made it a very simple black & white. If you’d like to see a quick video of how I made this card, Click Here to go to my Instagram Reels. Here is my card for today.

Stampin' Up! Perfect Pairs Salt & Pepper 1 creativestampingdesigns.com

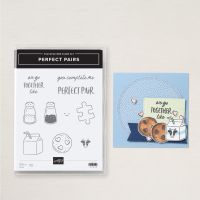
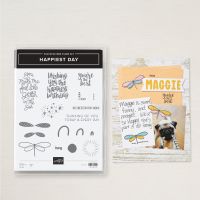
I used the new Stampin’ Up! Online Exclusive Perfect Pairs Photopolymer Stamp Set along with the Dashing Designs 3D Embossing Folder and Stampin’ Up! Happiest Day Photopolymer Stamp Set for my card today.

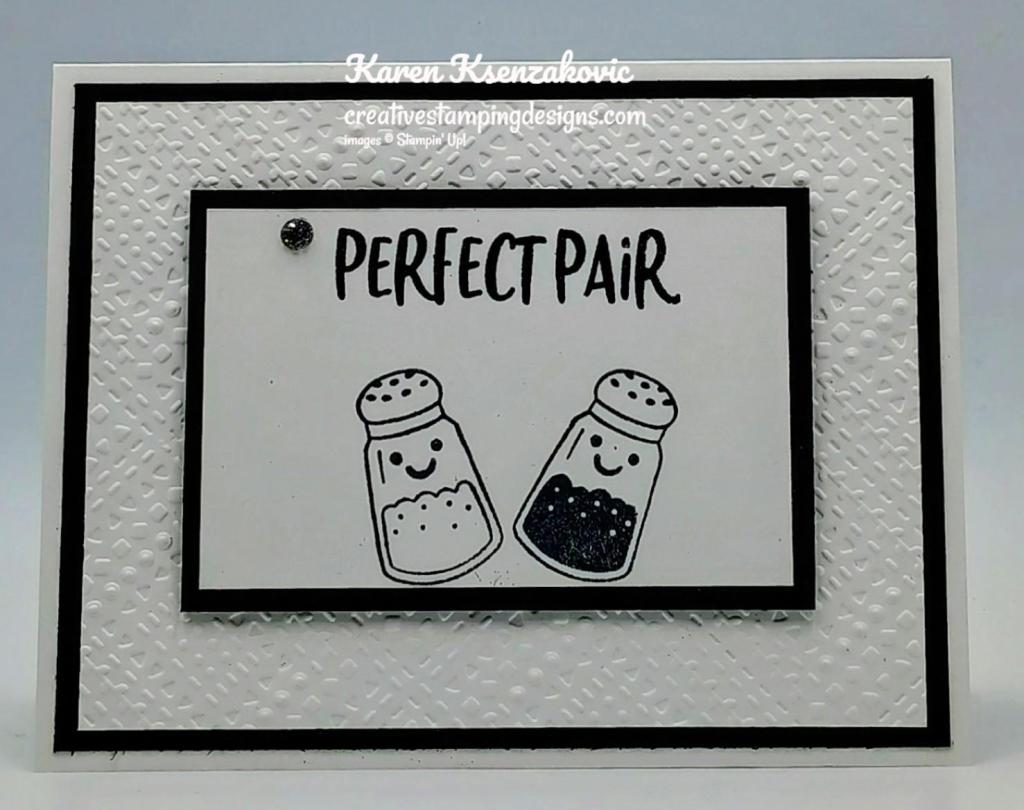
Stampin' Up! Perfect Pairs Salt & Pepper 2 creativestampingdesigns.com

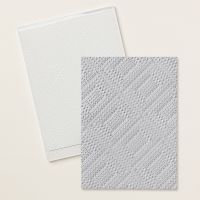
Emboss a Basic White card front using the Dashing Designs EF. Adhere the embossed panel to a Basic Black mat using Liquid Glue. Adhere the layered panel to a Basic White Thick card base using Liquid Glue.

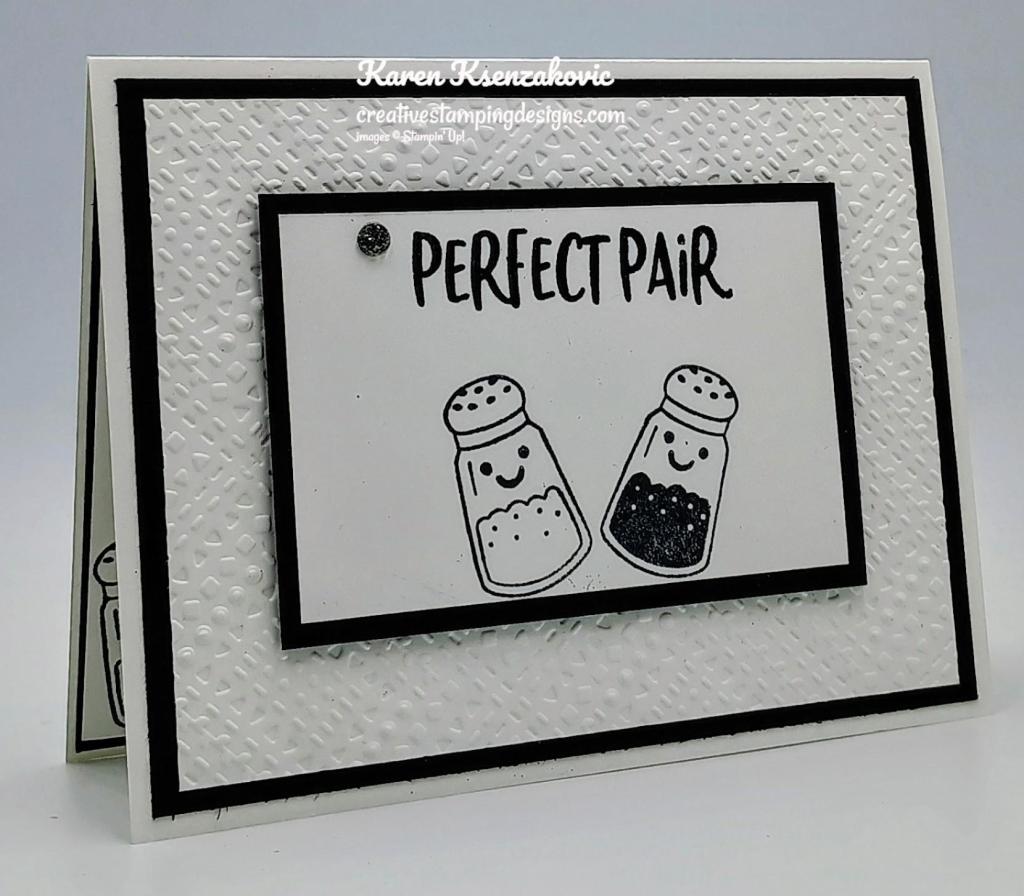
Stampin' Up! Perfect Pairs Salt & Pepper 3 creativestampingdesigns.com

On a panel of Basic white, stamp the sentiment from the Perfect Pairs stamp set in Versamark Ink on the top of the panel. Sprinkle the sentiment with Black Embossing Powder and set it using the Heat Tool. Stamp the salt & pepper images from the Perfect Pairs stamp set on the Basic White panel in Tuxedo Black Ink. Stamp the face image from the Perfect Pairs stamp set in Tuxedo Black Ink on the salt & pepper shakers.

Stampin' Up! Perfect Pairs Salt & Pepper 4 creativestampingdesigns.com

Adhere the artwork to a Basic Black mat using Stampin’ Seal. Adhere the layered panel to the card front using Stampin’ Dimensionals. Add an Adhesive-Backed Sparkle Gem to the card front.

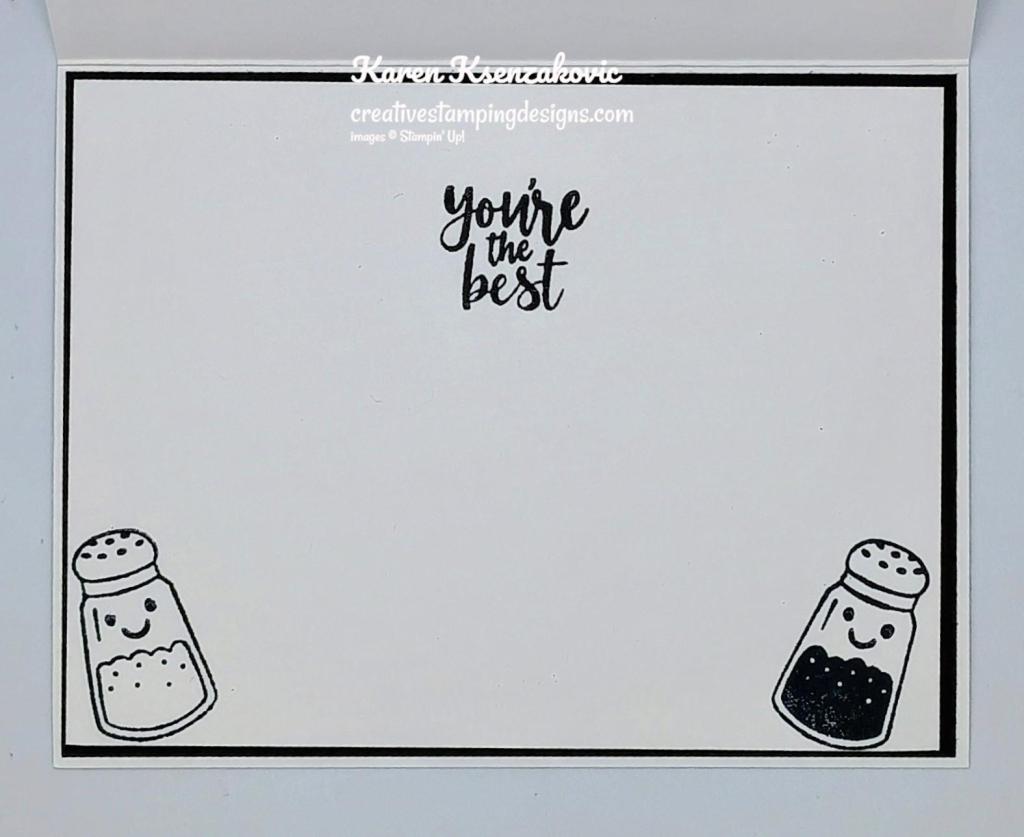
Stampin' Up! Perfect Pairs Salt & Pepper 5 creativestampingdesigns.com

On a panel of Basic White, stamp the sentiment from Happiest Day stamp set in Tuxedo Black Ink. Stamp the salt & pepper shaker images from the Perfect Pairs stamp set in Tuxedo Black Ink on the bottom of the panel. Stamp the face image from the Perfect Pairs stamp set in Tuxedo Black Ink on the salt & pepper shakers. Adhere the Basic White panel to a Basic Black mat then to the inside of the Basic White Thick card base.

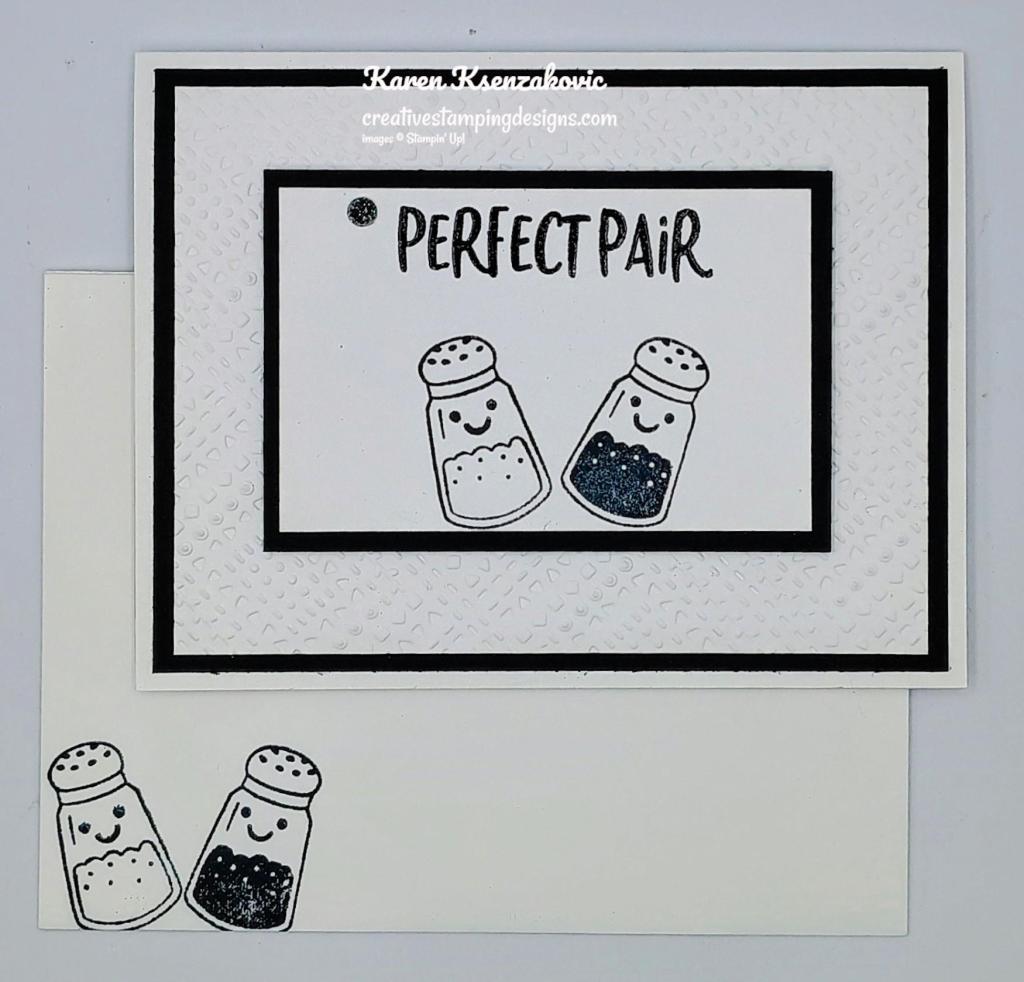
Stampin' Up! Perfect Pairs Salt & Pepper 6 creativestampingdesigns.com

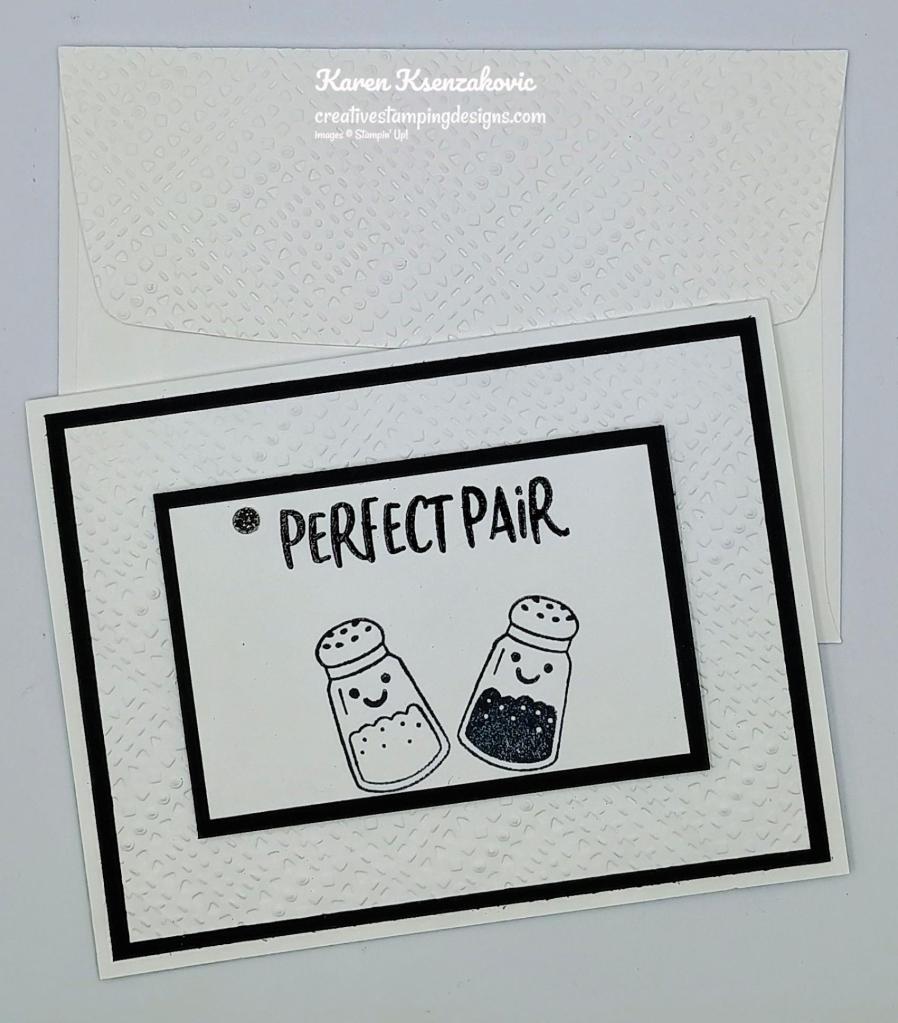
Finish the card by decorating a Basic White Medium Envelope. Stamp the salt & pepper shaker images from the Perfect Pairs stamp set in Tuxedo Black Ink on the envelope front. Stamp the face image from the Perfect Pairs stamp set on the salt & pepper shakers in Tuxedo Black Ink. Emboss a panel of Basic White using the Dashing Designs EF and adhere it to the envelope flap.

Stampin' Up! Perfect Pairs Salt & Pepper 7 creativestampingdesigns.com

Thank you for stopping by my blog today. I hope you like the card and will give it a try. Happy Stamping!!

*********************************************************************************************************

If you need any stamping supplies, I’d love to be your Demonstrator. Just click HERE to go directly to my online store or drop me an email if you have any questions. 

MY CURRENT HOST CODE IS:   4RTJCBH2

Use this host code when placing an order with me. When you order $50 or greater you will receive a free gift from me! If your order is over $150, please do not use this code, but you’ll still get the free gift. The free gift is your choice of any 1 item valued up to $10.00 from the 2024 – 2025 Annual Catalog, September-December 2024 Mini Catalog or from the Online Exclusives!  For any orders $50 or more I will also send you my monthly class tutorials.  Click HERE or go to my Customer Rewards for more details and to see what this month’s tutorials are.

Please remember to use my current Host Code and make sure that you can see my name on the final checkout page listed as your Demonstrator when you order so that you know that you’re ordering with me, and you’ll get my rewards! 

Happy Stamping, Karen

*********************************************************************************************************

2 New Kits Now Available

Kits by Stampin’ Up! are perfect for new crafters, busy crafters, or crafters who want quick and easy projects. All-inclusive project kits have everything you need in one box! Give as a gift or try them yourself. Kits are while supplies last. Order today!

Nature’s Paintings Kits

Embrace your creative side with the Nature’s Paintings Kit. This unique kit includes everything you need for a fun creative experience: a coloring book, watercolor pencils, and a water painter. All you need is some imagination and water! Create lovely, picturesque images using advanced coloring techniques with this craft kit. Or make something that’s never been seen before—like green flowers with purple leaves. Keep it realistic or color outside the lines—it’s up to you. And once you’re done, you can use your finished artwork to create a one-of-a-kind card front!

Kit includes:
* Predesigned projects
* Line art illustrations
* Step-by-step instructions
* 24 watercolor paper pages, 2 each of 12 designs
* 8 Watercolor Pencils
* 1 Water Painter
* Coloring Book: 4-1/2″ x 6″ x 1/2″ (11.4 x 15.2 x 1.3 cm)
* A 9-7/8″ x 6-1/2″ x 1-3/4″ (25.1 x 16.5 x 4.4 cm) printed designer box for storage or crafting on the go

Product colors: Berry Burst, Coastal Cabana, Daffodil Delight, Early Espresso, Flirty Flamingo, Garden Green, Pumpkin Pie, Red

164982 $25.00

+++++++++++++++++++++++++++++++++++++++++++++++++++++++++++++++++++++

Layered Landscapes Kit

Do you long for the great outdoors but don’t actually want to go outdoors? Then the Layered Landscapes Kit is perfect for you! DIY lovely home decor with this unique kit that includes four 7-1/8″ x 7-1/8″ x 3/4″ (18.1 x 18.1 x 1.9 cm) frames and precut paper pieces. You can either stand the frames up on their included easels or hang them on your wall. Either way, your houseguests are sure to love your new artwork!

Kit includes:
* Predesigned projects
* Step-by-step instructions
* Precut pieces (No prep work! Get right to crafting)
* 4 white frames
* Frame size: 7-1/8″ x 7-1/8″ x 3/4″ (18.1 x 18.1 x 1.9 cm)
* Enough adhesive to complete projects
* A 9-7/8″ x 6-1/2″ x 2-3/4″ (25.1 x 16.5 x 7 cm) printed designer box for storage or crafting on the go

Product colors: Balmy Blue, Basic Beige, Basic Gray, Berry Burst, Cajun Craze, Crumb Cake, Early Espresso, Gray Granite, Lemon Lime Twist, Misty Moonlight, Mossy Meadow, Night of Navy, Old Olive, Pecan Pie, Soft Sea Foam

164981 $25

*********************************************************************************************************

New Online Exclusive Products Now Available

A new line of products for Online Exclusives are now available! You won’t find these items in any catalog. This is a great opportunity to spark creativity, expand a crafting collection, and discover new opportunities—all from the convenience of the online store.

*********************************************************************************************************

Filled With Joy

Subscribe October 11 – November 10

Celebrate Christmas with adorable stockings and gift tags!

Details:
• Makes 8 projects: 8 stockings with 8 gift tags
• Precut paper pieces
• Safety pins and specialty gold foil
• Coordinating colors: Flirty Flamingo, Pool Party, Poppy Parade
(Classic Stampin’ Spot), Shaded Spruce, Very Vanilla

Subscribe to Paper Pumpkin for a monthly, all-inclusive crafting kit that’s a fun surprise! Each kit includes a photopolymer stamp set, Classic Stampin’ Spot, and step by step instructions to complete exclusive paper craft projects, including cards, tags, and gift
packaging. And don’t miss the special add-on that coordinates with the next three months!

Subscribe to the November Paper Pumpkin Kit between 11 October and 10 November by clicking here!

*********************************************************************************************************

Don’t miss the coordinating
Merry Tags & More Dies Add-On!

Add dimension and detail to your cards, scrapbook pages, and gift tags with the Merry Tags & More Dies! With a leaf and tag shape and Merry sentiment, these dies are a great way to expand your crafting experience. They even coordinate with three Paper Pumpkin Kits: Nests of Christmas, Filled with Joy, and Notes from the Heart. Such easy coordination makes these dies a must-have for any paper craft. Paper Pumpkin subscribers can purchase it beginning 11 September. The add-on is available only while supplies last, so it’s best to shop early! Please note that the Stampin’ Cut and Emboss Machine is not included and can be purchased separately.

#165639 $12

Note: Supplies may be limited toward the end of the subscription period.

*********************************************************************************************************

Card stock cuts for this project:

  • Basic Black Cardstock 4″ X 5 1/4″(card front mat), 2 1/2″ X 3 3/4″(artwork mat), 4 1/8″ X 5 3/8″(inner liner mat)
  • Basic White Cardstock 3 3/4″ x 5″ (card front), 2 1/4″ X 3 1/2″(artwork), 4″ X 5 1/4″(inner liner), 2 1/4″ X 6″(envelope flap)
  • Basic White Thick Cardstock 5 1/2″ X 8 1/2″(card base scored & folded at 4 1/4″)

*********************************************************************************************************

Product List
Stampin’ Up! Festive Peaceful Seasons

Good Monday morning stamping friends and welcome to a new week. How was everyone’s weekend? I was able to get some fall clean up done around the outside of my house yesterday morning. Then I finally had a little time in my craft studio. I needed to get a card designed and kits cutup for our retreat next week. I’m trying to get myself caught up and maybe ahead.

I have another quick Christmas card for you today. This one played with a fun pack of Mix & Match DSP that came with all kinds of punch outs. If you’d like to see a quick video of how I made this card, Click Here to go to my Instagram Reels. Here is my card for today.

Stampin' Up! Festive Peaceful Season 1 creativestampingdesigns.com

I used the Stampin’ Up! Peaceful Season Bundle along with the Forever Plaid 3D Embossing Folder, A Little Bit Festive Mix &Match Specialty Designer Series Paper and Gold Foil Sheets for my card today.

Stampin' Up! Festive Peaceful Season 2 creativestampingdesigns.com

Emboss a panel of Real Red using the Forever Plaid EF. Adhere the embossed panel to a Real Red card base using Liquid Glue.

Stampin' Up! Festive Peaceful Season 3 creativestampingdesigns.com

Adhere one of the frames from A Little Bit Festive DSP to a Gold Foil mat using Stampin’ Seal. Adhere the layered panel to the Real Red card base using Liquid Glue. Using the Peaceful Season Dies, cut the detailed sentiment from a panel of Real Red and the sentiment mat from Gold Foil. Adhere the detailed sentiment to the Gold Foil mat.

Stampin' Up! Festive Peaceful Season 4 creativestampingdesigns.com

On a panel of Basic White, stamp the sentiment from the Stampin’ Up! Peaceful Season Photopolymer Stamp Set in Real Red Ink. Cut the sentiment out using the Peaceful Season Dies. Adhere the layered sentiment to the center of the card front using Stampin’ Dimensionals. Adhere the stamped sentiment below the layered sentiment using Stampin’ Dimensionals. Add a few Iridescent Foil Gems to the card front.

Stampin' Up! Festive Peaceful Season 5 creativestampingdesigns.com

On a panel of Basic White stamp the sentiment from the Peaceful Season stamp set in Real Red Ink. Adhere the Basic white panel to A Little Bit Festive DSP mat then to the inside of the Real Red card base.

Stampin' Up! Festive Peaceful Season 6 creativestampingdesigns.com

Finish the card by decorating a Basic white Medium Envelope. Adhere one of the pieces from A Little Bit Festive DSP to the envelope front. Adhere a panel of A Little Bit Festive DSP to the envelope flap.

Stampin' Up! Festive Peaceful Season 7 creativestampingdesigns.com

Thank you for stopping by my blog today. I hope you like the card and will give it a try. Happy Stamping!!

*********************************************************************************************************

If you need any stamping supplies, I’d love to be your Demonstrator. Just click HERE to go directly to my online store or drop me an email if you have any questions. 

MY CURRENT HOST CODE IS:   4RTJCBH2

Use this host code when placing an order with me. When you order $50 or greater you will receive a free gift from me! If your order is over $150, please do not use this code, but you’ll still get the free gift. The free gift is your choice of any 1 item valued up to $10.00 from the 2024-2025Annual Catalog, or from the Online Exclusives!  Unfortunately, packs of cardstock are no longer an option for a free gift. Shipping has become too expensive to ship and it’s costing me as much to ship as the cardstock costs. For any orders $50 or more I will also send you my monthly class tutorials.  Click HERE or go to my Customer Rewards for more details and to see what this month’s tutorials are.

Please remember to use my current Host Code and make sure that you can see my name on the final checkout page listed as your Demonstrator when you order so that you know that you’re ordering with me, and you’ll get my rewards! 

Happy Stamping, Karen

*********************************************************************************************************

New Online Exclusive Products Coming Soon

A new line of products for Online Exclusives are coming! You won’t find these items in any catalog. This is a great opportunity to spark creativity, expand a crafting collection, and discover new opportunities—all from the convenience of the online store. These products will be available starting in November. Here’s a little sneak peek of some of the items. Click Here for a sneak peek of what’s coming.

*********************************************************************************************************

Filled With Joy

Subscribe October 11 – November 10

Celebrate Christmas with adorable stockings and gift tags!

Details:
• Makes 8 projects: 8 stockings with 8 gift tags
• Precut paper pieces
• Safety pins and specialty gold foil
• Coordinating colors: Flirty Flamingo, Pool Party, Poppy Parade
(Classic Stampin’ Spot), Shaded Spruce, Very Vanilla

Subscribe to Paper Pumpkin for a monthly, all-inclusive crafting kit that’s a fun surprise! Each kit includes a photopolymer stamp set, Classic Stampin’ Spot, and step by step instructions to complete exclusive paper craft projects, including cards, tags, and gift
packaging. And don’t miss the special add-on that coordinates with the next three months!

Subscribe to the November Paper Pumpkin Kit between 11 October and 10 November by clicking here!

*********************************************************************************************************

Don’t miss the coordinating
Merry Tags & More Dies Add-On!

Add dimension and detail to your cards, scrapbook pages, and gift tags with the Merry Tags & More Dies! With a leaf and tag shape and Merry sentiment, these dies are a great way to expand your crafting experience. They even coordinate with three Paper Pumpkin Kits: Nests of Christmas, Filled with Joy, and Notes from the Heart. Such easy coordination makes these dies a must-have for any paper craft. Paper Pumpkin subscribers can purchase it beginning 11 September. The add-on is available only while supplies last, so it’s best to shop early! Please note that the Stampin’ Cut and Emboss Machine is not included and can be purchased separately.

#165639 $12

Note: Supplies may be limited toward the end of the subscription period.

*********************************************************************************************************

Card stock cuts for this project:

  • Basic White Cardstock 1″ x 2 3/4″(sentiment), 3 1/4″ X 4 1/2″(inner liner)
  • Real Red Cardstock 5 1/2″ X 8 1/2″(card base scored & folded at 4 1/4″), 4 1/4″ X 5 1/2″(card front), 1″ X 3 3/4″(detailed sentiment)
  • A Little Bit Festive Mix & Match Designer Series Paper 4 1/8″ X 5 3/8″(inner liner mat), 2 1/4″ X 6″(envelope flap), pieces for card front & envelope
  • Gold Foil Sheet 4″ X 5 1/4″(card front mat), 1″ X 3 3/4″(sentiment mat)

*********************************************************************************************************

Product List
Stampin’ Up! Merriest Trees CAS for The Happy Inkin’ Thursday Blog Hop

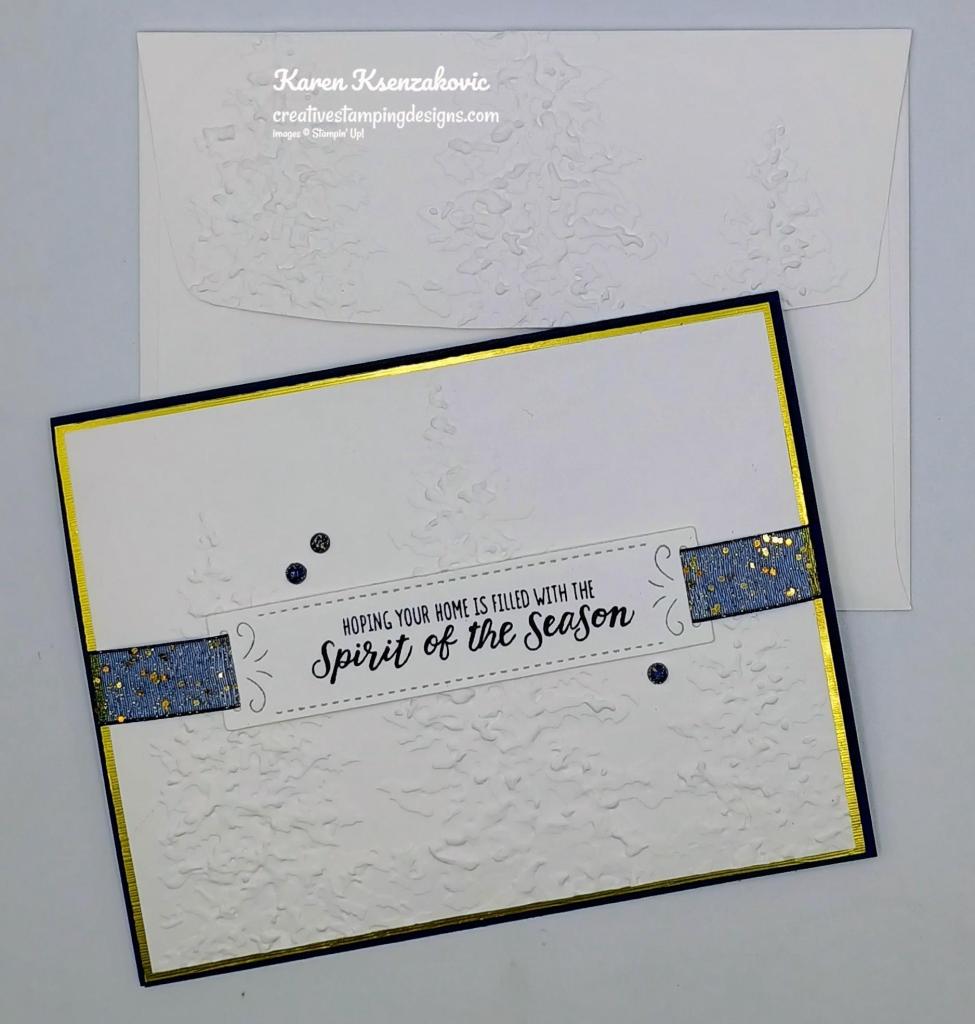
Good Thursday morning stamping friends and HAPPY HALLOWEEN!!  Welcome to our Happy Inkin’ Thursday Blog Hop. If you are starting with me, thank you, I hope you will stop by everyone’s blog to see what they have created this week. If you are hopping over from Akiko’s blog, thank you for stopping by. This week we have Theme Challenge. If you’d like to see a quick video of how I made this card, Click Here to go to my Instagram Reels. Here is my card using this week’s theme.

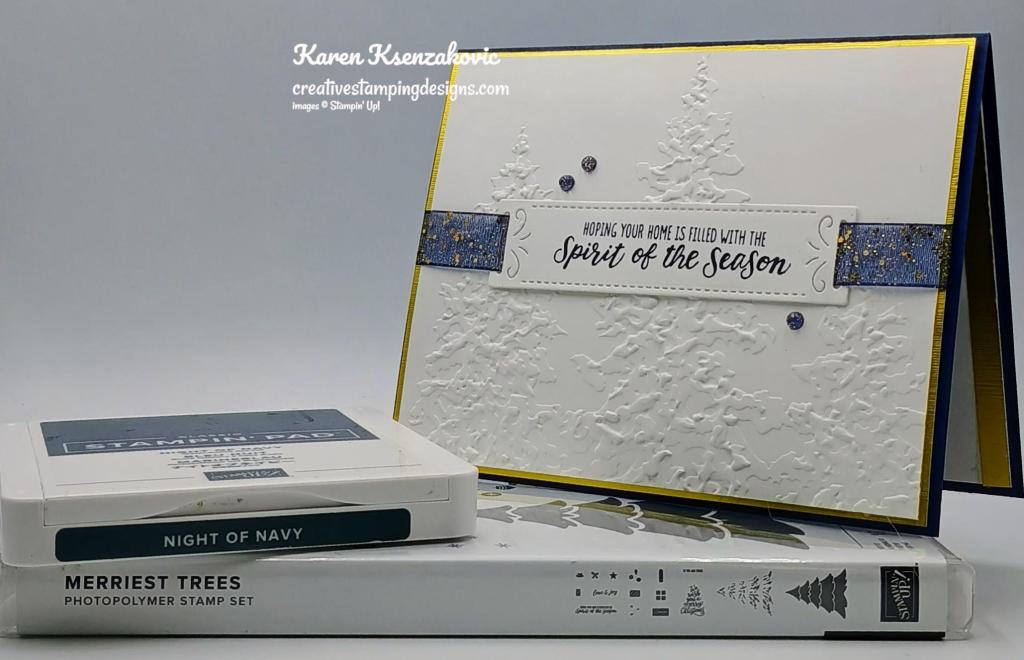
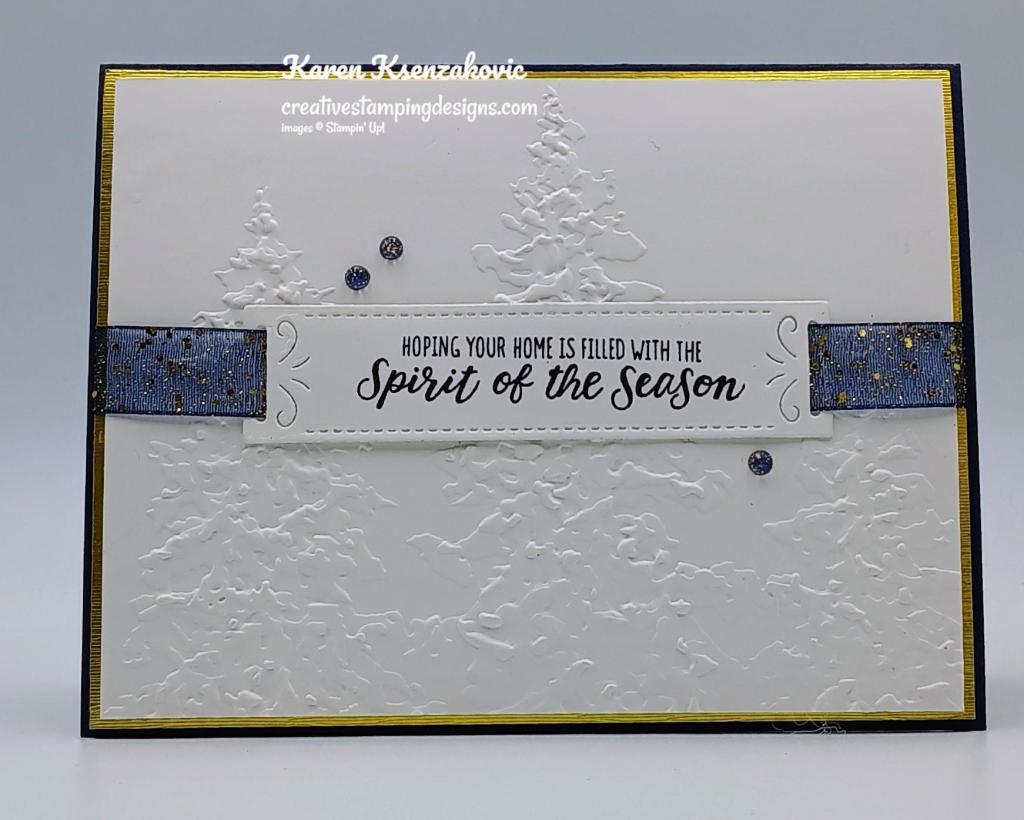
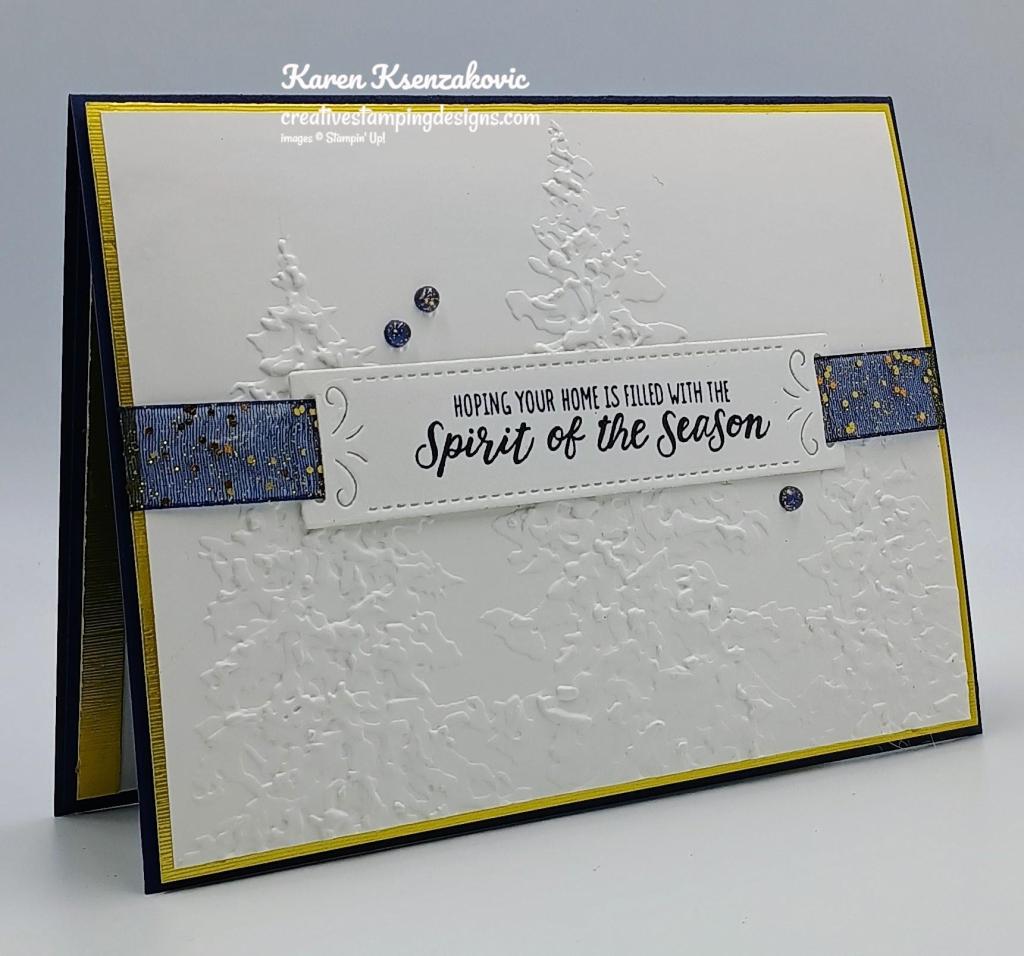
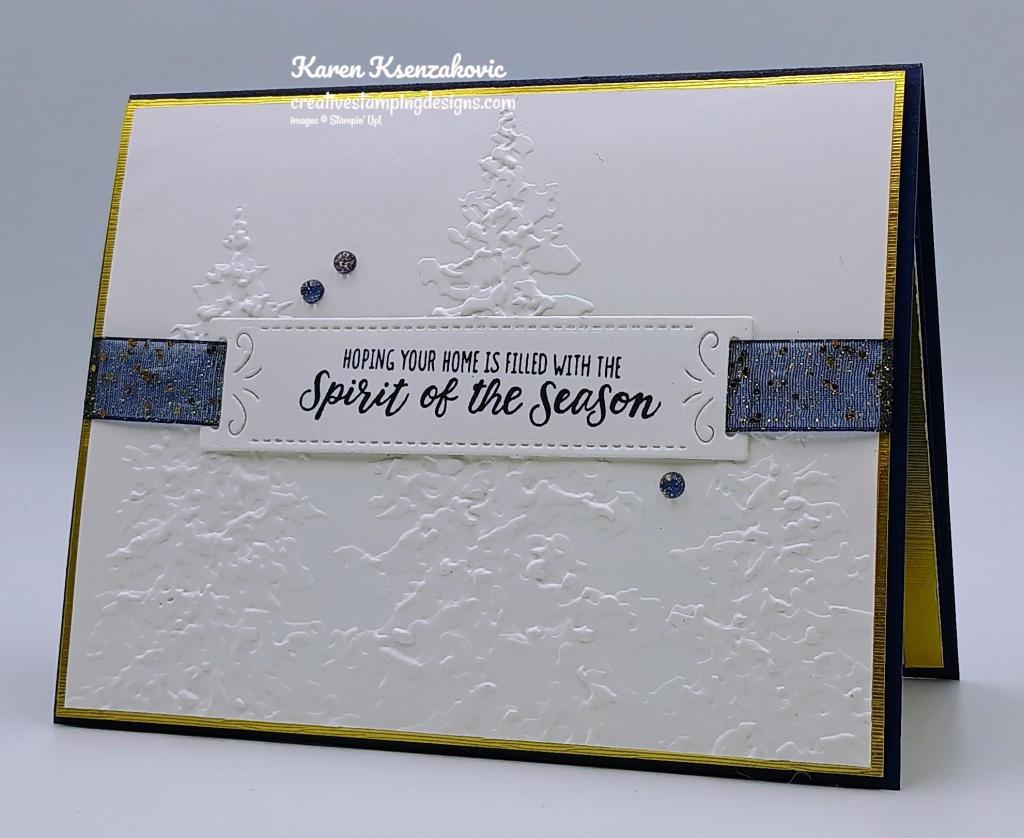
I used the Stampin’ Up! Merriest Trees Photopolymer Stamp Set along with the Painted Trees 3D Embossing Folder, Peaceful Season Dies and Online Exclusive Brushed Silver and Gold Specialty Paper (which will be available November 5th) for my super simple card today. This is another one of those cards that you can make a lot of in a short amount of time.

This is our theme for this week.

Stampin' Up! Merriest Trees CAS 2 creativestampingdesigns.com

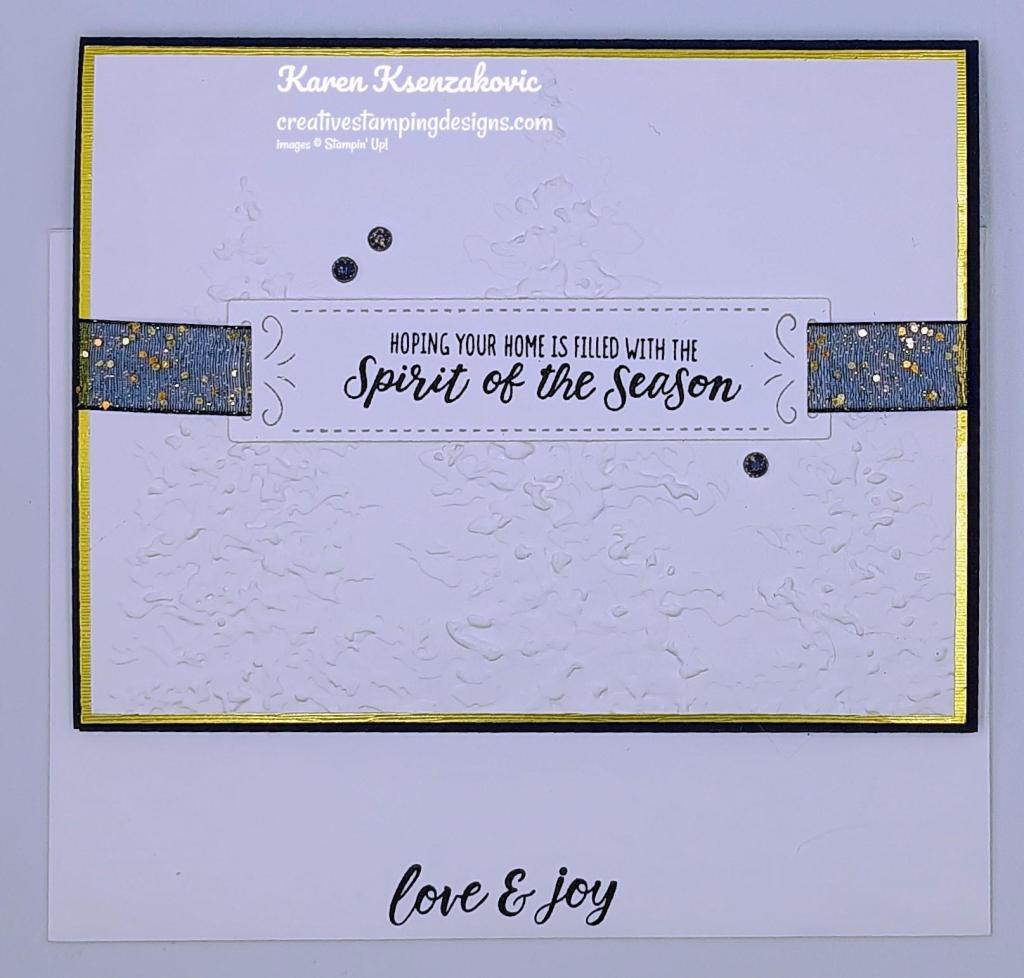
Start by embossing a Basic White card front using the Painted Trees EF. Adhere the embossed panel to a Brushed Gold Foil Paper Mat using Liquid Glue.

Stampin' Up! Merriest Trees CAS 3 creativestampingdesigns.com

On a panel of Basic White, stamp the sentiment from Merriest Trees stamp set in Night of Navy Ink. Cut the sentiment out using the Peaceful Season Dies. Thread a piece of Night of Navy & gold 1/2″ Glittered Ribbon through the sentiment. Adhere the sentiment to the card front using Glue Dots. Wrap the ribbon behind the layered panel and secure with Stampin’ Seal.

Stampin' Up! Merriest Trees CAS 4 creativestampingdesigns.com

Adhere the layered panel to a Night of Navy card base using Stampin’ Dimensionals. Add a few Regal Foiled Adhesive-Backed Dots to the card front.

Stampin' Up! Merriest Trees CAS 5 creativestampingdesigns.com

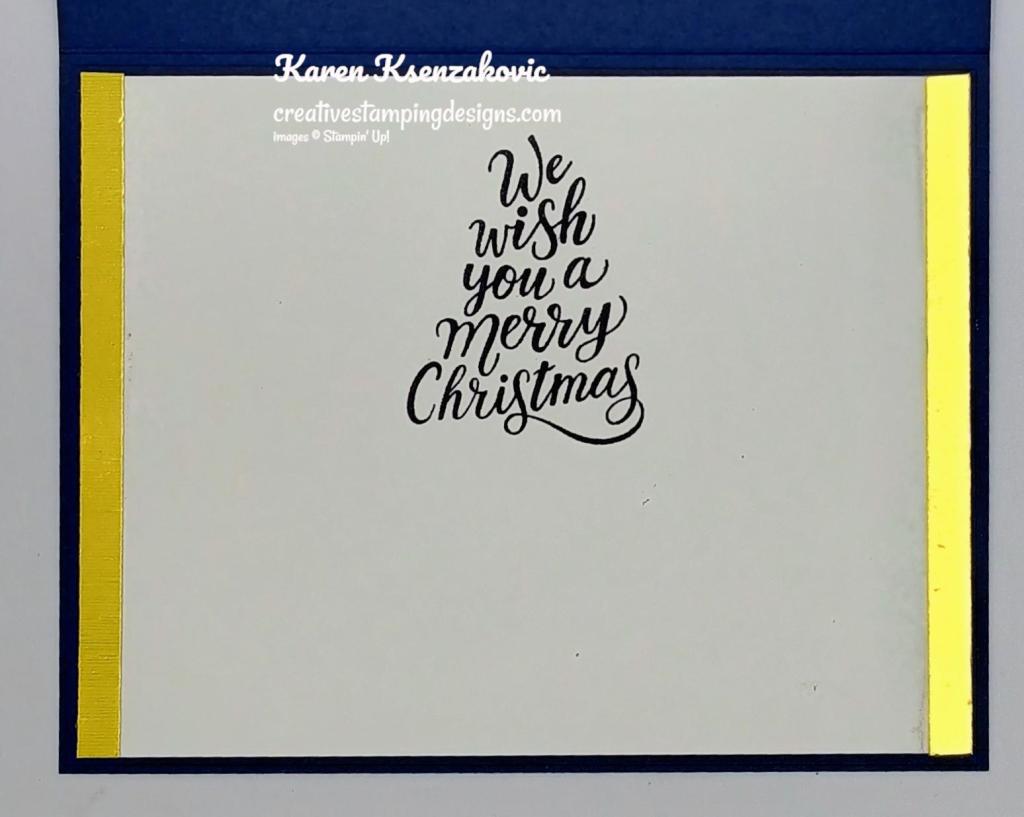
Stamp the sentiment from Merriest Trees stamp set in Night of Navy Ink on a panel of Basic White. Adhere 2 strips of Brushed Gold Foil Paper to either side of the panel. Adhere the Basic White panel to a Night of Navy mat then to the inside of the Night of Navy card base.

Stampin' Up! Merriest Trees CAS 6 creativestampingdesigns.com

Complete the card by decorating a Basic White Medium Envelope. Stamp the sentiment from the Merriest Trees stamp set in Night of Navy Ink on the envelope front. Emboss a panel of Basic White using the Painted Trees EF and adhere it to the envelope flap.

Stampin' Up! Merriest Trees CAS 7 creativestampingdesigns.com

Thank you for stopping by my blog today.  Now that you’ve seen my card, let’s get on with the hop!  Click the button below to hop over to see what Tara has created today. Happy Hopping!!

Just in case you get lost along the way, here is a list of the team members involved in the hop today.

Amy Koenders

Mary Deatherage

Jaimie Babarczy

Karen Finkle

Akiko Sudano

Karen Ksenzakovic You Are Here

Tara Carpenter

Terry Lynn Bright

Carol Buckalew

*********************************************************************************************************

If you need any stamping supplies, I’d love to be your Demonstrator. Just click HERE to go directly to my online store or drop me an email if you have any questions. 

MY CURRENT HOST CODE IS:   4RTJCBH2

Use this host code when placing an order with me. When you order $50 or greater you will receive a free gift from me! If your order is over $150, please do not use this code, but you’ll still get the free gift. The free gift is your choice of any 1 item valued up to $10.00 from the 2024-2025Annual Catalog, or from the Online Exclusives!  Unfortunately, packs of cardstock are no longer an option for a free gift. Shipping has become too expensive to ship and it’s costing me as much to ship as the cardstock costs. For any orders $50 or more I will also send you my monthly class tutorials.  Click HERE or go to my Customer Rewards for more details and to see what this month’s tutorials are.

Please remember to use my current Host Code and make sure that you can see my name on the final checkout page listed as your Demonstrator when you order so that you know that you’re ordering with me, and you’ll get my rewards! 

Happy Stamping, Karen

*********************************************************************************************************

LAST DAY for Starter Kit Special – Get an extra $30 Your Starter Kit

Hey, friend! Stampin’ Up! has a fantastic offer for anyone who becomes a demonstrator! Join my team between October 1–31and you can choose $155 worth of product in your Starter Kit for only $99! Starter Kits normally include $125 worth of product for $99, so that’s an extra $30 worth of product at no additional cost. This offering also includes free shipping and free business supplies! That’s MORE product for EVEN MORE fun!  Click Here for all the details.

Interested but you are not really sure about wanting to commit? Contact me and we can talk, and you can ask me any questions at creativestampingdesigns@gmail.com.

Read more information about becoming a demonstrator Here.

*********************************************************************************************************

New Online Exclusive Products Coming Soon

A new line of products for Online Exclusives are coming! You won’t find these items in any catalog. This is a great opportunity to spark creativity, expand a crafting collection, and discover new opportunities—all from the convenience of the online store. These products will be available starting in November, BUT you can add these new items to your Starter Kit if you join in October. Here’s a little sneak peek of some of the items that you can add to your Starter kit and get them before customers and start to play. Click Here for a sneak peek of what’s coming.

*********************************************************************************************************

LAST DAY of Kits Collection sale for up to 30% off

Did you know as a demonstrator you can get up to 30% off all the kits AND get your 20% demo discount on top of that. What a GREAT way to save!!!

Save up to 30% off on all your favorite kits October 1–31! Our kits come with everything you need to create a unique paper craft. We have crafting options for card kits, treat packaging, home decor, and so much more! Kits are only available while supplies last.

Here are the details for the sale:

  • Promotion Period:  October 1-31!
  • ALL kits from the kits collection qualify for the discount.
  • There is no limit on how many kits you can order, as long as product is available.
  • Orders must be opened and placed during the promotion dates. Orders opened before October 1 will not qualify for the sale.
  • Kits on sale will NOT qualify for the Stampin’ Rewards 50% off.
  • Kits can be added to a Starter Kit at their discounted rate.
  • Ordering deadline:  October 31 at 11:59 p.m. (MT)

*********************************************************************************************************

Filled With Joy

Subscribe October 11 – November 10

Celebrate Christmas with adorable stockings and gift tags!

Details:
• Makes 8 projects: 8 stockings with 8 gift tags
• Precut paper pieces
• Safety pins and specialty gold foil
• Coordinating colors: Flirty Flamingo, Pool Party, Poppy Parade
(Classic Stampin’ Spot), Shaded Spruce, Very Vanilla

Subscribe to Paper Pumpkin for a monthly, all-inclusive crafting kit that’s a fun surprise! Each kit includes a photopolymer stamp set, Classic Stampin’ Spot, and step by step instructions to complete exclusive paper craft projects, including cards, tags, and gift
packaging. And don’t miss the special add-on that coordinates with the next three months!

Subscribe to the November Paper Pumpkin Kit between 11 October and 10 November by clicking here!

*********************************************************************************************************

Don’t miss the coordinating
Merry Tags & More Dies Add-On!

Add dimension and detail to your cards, scrapbook pages, and gift tags with the Merry Tags & More Dies! With a leaf and tag shape and Merry sentiment, these dies are a great way to expand your crafting experience. They even coordinate with three Paper Pumpkin Kits: Nests of Christmas, Filled with Joy, and Notes from the Heart. Such easy coordination makes these dies a must-have for any paper craft. Paper Pumpkin subscribers can purchase it beginning 11 September. The add-on is available only while supplies last, so it’s best to shop early! Please note that the Stampin’ Cut and Emboss Machine is not included and can be purchased separately.

#165639 $12

Note: Supplies may be limited toward the end of the subscription period.

*********************************************************************************************************

Card stock cuts for this project:

  • Basic White Cardstock 2 – 4″ X 5 1/4″(card front & inner liner), 1 1/4″ X 4″ (sentiment)
  • Night of Navy Cardstock 5 1/2″ X 8 1/2″(card base scored & folded at 4 1/4″), 4 1/8″ X 5 3/8″(inner liner mat)
  • Brushed Silver & Gold Foil Specialty Paper 4 1/8″ X 5 3/8″(card front mat), 2 – 1/4″ x 4″(inner liner)

*********************************************************************************************************

Product List
Stampin’ Up! Sentimental Wishes

Good Wednesday morning stamping friends. Happy Halloween Eve!! Can you believe we’re at the end of another month already? The end of the month means that things will be ending tomorrow for you. The kits collection sale ends tomorrow along with the Starter Kit joining special. We just got information about our next OnStage event yesterday and it sounds like it’s going to be another fun one. If you join now, you too can register to go. These events are always so much fun and we come home with lots of goodies.

I have another quick card for you today. I’m finding that when I’m making Christmas cards, the quicker the better. If you’d like to see a quick video of how I made this card, Click Here to go to my Instagram Reels. Here is my card for today.

Stampin' Up! Sentimental Wishes Squares 1 creativestampingdesigns.com

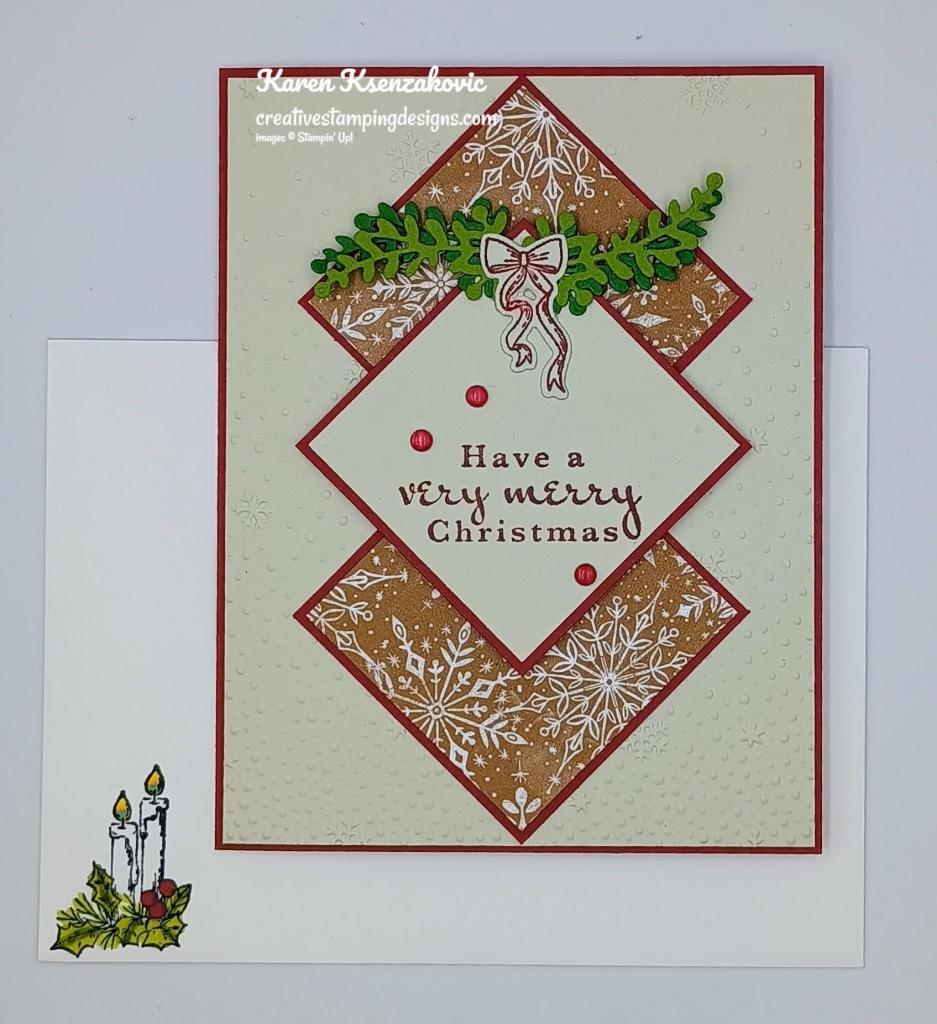
I used the Stampin’ Up! Sentimental Wishes Bundle along with the Sentimental Christmas Designer Series Paper and Snowflake Sky 3D Embossing Folder for my card today.

Stampin' Up! Sentimental Wishes Squares 2 creativestampingdesigns.com

Emboss a Basic Beige card front using the Snowflake Sky EF. Adhere the embossed panel to a Cherry Cobbler card base using Liquid Glue.

Stampin' Up! Sentimental Wishes Squares 3 creativestampingdesigns.com

Adhere 2 panels of Sentimental Christmas DSP to Cherry Cobbler mats using Stampin’ Seal. Adhere the layered panels to the top and bottom of the card front using Liquid Glue. On a panel of Basic Beige, stamp the sentiment from the Stampin’ Up! Sentimental Wishes Cling Stamp Set in Cherry Cobbler Ink. Adhere the sentiment to a Cherry Cobbler mat using Stampin’ Seal. Adhered the layered sentiment to the center of the card front using Stampin’ Dimensionals.

Stampin' Up! Sentimental Wishes Squares 4 creativestampingdesigns.com

On a panel of Basic Beige, stamp the bow image from the Sentimental Wishes stamp set in Cherry Cobbler Ink. Cut the bow out using the Sentimental Wishes Dies. Cut the greenery from panels of Garden Green and Old Olive using the Sentimental Wishes Dies. Adhere the greenery to the top of the sentiment using Liquid Glue. Adhere the bow over the greenery using Liquid Glue. Add a few Cherry Cobbler & Pearl Adhesive-Backed Berries to the card front.

Stampin' Up! Sentimental Wishes Squares 5 creativestampingdesigns.com

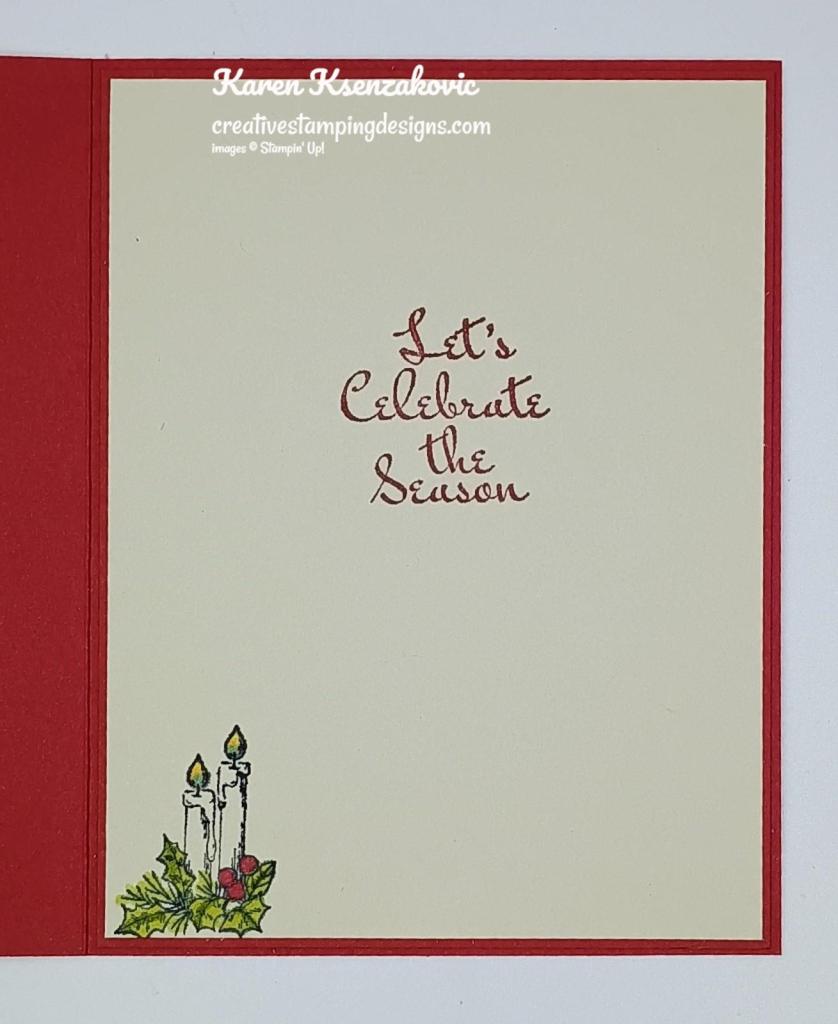
Stamp the sentiment from the Sentimental Wishes stamp set in Cherry Cobbler Ink on a panel of Basic Beige. On the bottom of the panel, stamp the candle image from the Sentimental Wishes stamp set in Tuxedo Black Ink. color the image using Cherry Cobbler and Old Olive Stampin’ Blends Markers. Adhered the Basic Beige panel to a Cherry Cobbler mat then to the inside of the Cherry Cobbler card base.

Stampin' Up! Sentimental Wishes Squares 6 creativestampingdesigns.com

Finish the card by decorating a Basic White Medium Envelope. Stamp the candle image from the Sentimental Wishes stamp set in Tuxedo Black Ink on the envelope front. Color the image using Cherry Cobbler and Old Olive Stampin’ Blends Markers. Adhered a panel of Sentimental Christmas DSP to the envelope flap.

Stampin' Up! Sentimental Wishes Squares 7 creativestampingdesigns.com

Thank you for stopping by my blog today. I hope you like the card, and you’ll give it a try. Happy Stamping!!

*********************************************************************************************************

If you need any stamping supplies, I’d love to be your Demonstrator. Just click HERE to go directly to my online store or drop me an email if you have any questions. 

MY CURRENT HOST CODE IS:   4RTJCBH2

Use this host code when placing an order with me. When you order $50 or greater you will receive a free gift from me! If your order is over $150, please do not use this code, but you’ll still get the free gift. The free gift is your choice of any 1 item valued up to $10.00 from the 2024 – 2025 Annual Catalog, September-December 2024 Mini Catalog or from the Online Exclusives!  For any orders $50 or more I will also send you my monthly class tutorials.  Click HERE or go to my Customer Rewards for more details and to see what this month’s tutorials are.

Please remember to use my current Host Code and make sure that you can see my name on the final checkout page listed as your Demonstrator when you order so that you know that you’re ordering with me, and you’ll get my rewards! 

Happy Stamping, Karen

*********************************************************************************************************

Final Days for Starter Kit Special – Get an extra $30 in Your Starter Kit October 1 – 31

Hey, friend! Stampin’ Up! has a fantastic offer for anyone who becomes a demonstrator! Join my team between October 1–31 and you can choose $155 worth of product in your Starter Kit for only $99! Starter Kits normally include $125 worth of product for $99, so that’s an extra $30 worth of product at no additional cost. This offering also includes free shipping and free business supplies! That’s MORE product for EVEN MORE fun!  Click Here for all the details.

Interested but you are not really sure about wanting to commit? Contact me and we can talk, and you can ask me any questions at creativestampingdesigns@gmail.com.

Read more information about becoming a demonstrator Here.

*********************************************************************************************************

New Online Exclusive Products Coming Soon

A new line of products for Online Exclusives are coming! You won’t find these items in any catalog. This is a great opportunity to spark creativity, expand a crafting collection, and discover new opportunities—all from the convenience of the online store. These products will be available starting in November, BUT you can add these new items to your Starter Kit if you join in October. Here’s a little sneak peek of some of the items that you can add to your Starter kit and get them before customers and start to play. Click Here for a sneak peek of what’s coming.

*********************************************************************************************************

Final Days for Kits Collection will be on sale – up to 30% off

Did you know as a demonstrator you can get up to 30% off all the kits AND get your 20% demo discount on top of that. What a GREAT way to save!!!

Save up to 30% off on all your favorite kits October 1–31! Our kits come with everything you need to create a unique paper craft. We have crafting options for card kits, treat packaging, home decor, and so much more! Kits are only available while supplies last.

Here are the details for the sale:

  • Promotion Period:  October 1-31!
  • ALL kits from the kits collection qualify for the discount.
  • There is no limit on how many kits you can order, as long as product is available.
  • Orders must be opened and placed during the promotion dates. Orders opened before October 1 will not qualify for the sale.
  • Kits on sale will NOT qualify for the Stampin’ Rewards 50% off.
  • Kits can be added to a Starter Kit at their discounted rate.
  • Ordering deadline:  October 31 at 11:59 p.m. (MT)

*********************************************************************************************************

Craft & Give Back with Sentimental Christmas 12″ X 12″ Designer Series Paper

With each purchase of the Sentimental Christmas Designer Series Paper, we’ll donate $3 to support children’s literacy around the world. We hope you’ll join us in making a difference this holiday season.

Item #164209 $12.50

*********************************************************************************************************

Filled With Joy

Subscribe October 11 – November 10

Celebrate Christmas with adorable stockings and gift tags!

Details:
• Makes 8 projects: 8 stockings with 8 gift tags
• Precut paper pieces
• Safety pins and specialty gold foil
• Coordinating colors: Flirty Flamingo, Pool Party, Poppy Parade
(Classic Stampin’ Spot), Shaded Spruce, Very Vanilla

Subscribe to Paper Pumpkin for a monthly, all-inclusive crafting kit that’s a fun surprise! Each kit includes a photopolymer stamp set, Classic Stampin’ Spot, and step by step instructions to complete exclusive paper craft projects, including cards, tags, and gift
packaging. And don’t miss the special add-on that coordinates with the next three months!

Subscribe to the November Paper Pumpkin Kit between 11 October and 10 November by clicking here!

*********************************************************************************************************

Don’t miss the coordinating
Merry Tags & More Dies Add-On!

Add dimension and detail to your cards, scrapbook pages, and gift tags with the Merry Tags & More Dies! With a leaf and tag shape and Merry sentiment, these dies are a great way to expand your crafting experience. They even coordinate with three Paper Pumpkin Kits: Nests of Christmas, Filled with Joy, and Notes from the Heart. Such easy coordination makes these dies a must-have for any paper craft. Paper Pumpkin subscribers can purchase it beginning 11 September. The add-on is available only while supplies last, so it’s best to shop early! Please note that the Stampin’ Cut and Emboss Machine is not included and can be purchased separately.

#165639 $12

Note: Supplies may be limited toward the end of the subscription period.

*********************************************************************************************************

Card stock cuts for this project:

  • Basic Beige Cardstock 4 1/8″ x 5 3/8″(card front), 2 1/8″ X 2 1/8″(sentiment), 1″ X 2″ (bow), 4″ x 5 1/4″(inner liner)
  • Cherry Cobbler Cardstock 5 1/2″ x 8 1/2″(card base scored & folded at 4 1/4″), 3 – 2 1/4″ x 2 1/4″(card front panel mats), 4 1/8″ X 5 3/8″(inner liner mat)
  • Garden Green Cardstock 1 1/4″ x 3″(greenery)
  • Old Olive Cardstock 1 1/4″ X 3″(greenery)
  • Sentimental Christmas Designer Series Paper 2 – 2 1/8″: x 2 1/8″(card front panels), 2 1/4″ X 6″(envelope flap)

*********************************************************************************************************

Product List
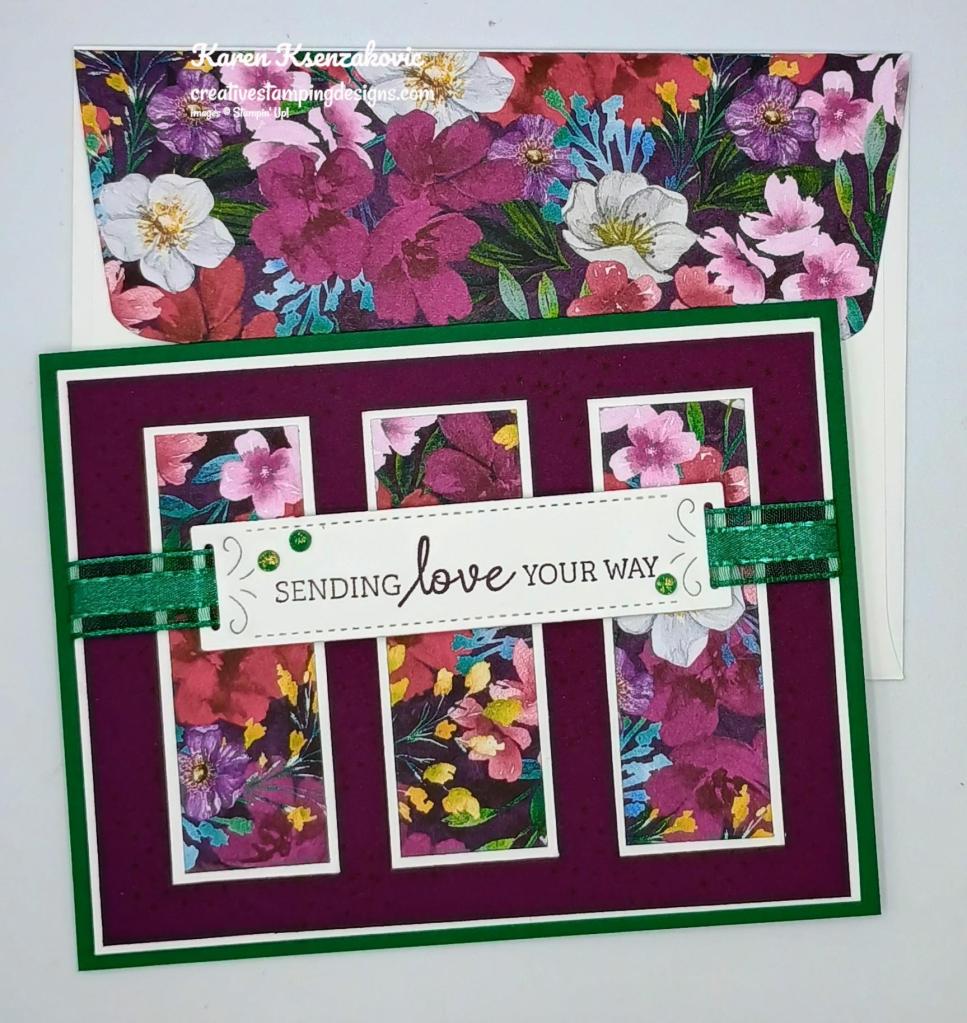
Stampin’ Up! Regal Flora Panels

Good Monday morning stamping friends and welcome to a new week. Today will be our last day visiting all the parks. We left today for hoping around to all the parks throughout the day. We’ll visit our favorite rides, grab a bite to eat and I’m planning on making 1 last stop to Germany in Epcot to get one more caramel apple. Yesterday we were at Animal Kingdom all day, we went on Kilimanjaro Safari first thing, and we were able to see more animals than we ever saw before. We stayed until the park closed, stopped at our hotel to freshen up and went to Epcot at night to see Luminous The Symphony of Us, which was spectacular. Disney definitely knows how to do fireworks.

Today’s card is the 3rd card made with the One Sheet Wonder, where I took a piece of 6 X 6 DSP and cut it up to make 4 cards. If you’d like to see a quick video of how I made this card, Click Here to go to my Instagram Reels. Here is my card for today.

Stampin' Up! Regal Flora Panels 1 creativestampingdesigns.com

I used the Stampin’ Up! Regal Flora Cling Stamp Set along with the Peaceful Season Dies and Regal Winter Designer Series Paper for my card today.

Stampin' Up! Regal Flora Panels 2 creativestampingdesigns.com

Stamp the dotted image from the Regal Flora stamp set in Blackberry Bliss Ink on a Blackberry Bliss card front. Adhere a Blackberry Bliss card front to a Basic White mat using Stampin’ Seal.

Stampin' Up! Regal Flora Panels 3 creativestampingdesigns.com

For the 3rd One Sheet Wonder card you are going to take one of the 3″ X3″ panels of Regal Winter DSP and cut it into 3 1″ strips using the Paper Trimmer. Adhere the 3 1″ strips of DSP to 3 Basic White mats using Stampin’ Seal. Adhere the 3 layered panels to the Blackberry Bliss card front using Liquid Glue.

Stampin' Up! Regal Flora Panels 4 creativestampingdesigns.com

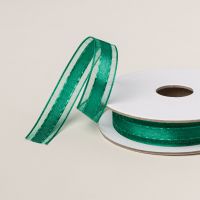
On a panel of Basic White, stamp the sentiment from the Regal Flora stamp set in Blackberry Bliss Ink. Cut the sentiment out using the Peaceful Seasons Dies. Thread a piece of Shaded Spruce 1/2″ Satin & Sheer Ribbon through the die cut sentiment. Adhere the sentiment to the card front using Stampin’ Dimensionals and adhere the ribbon to the back of the layered card front using Stampin’ Seal. Adhere the layered panel to a Shaded Spruce card base using Liquid Glue. Add a few Regal Flora Adhesive-Backed Dots to the card front.

Stampin' Up! Regal Flora Panels 5 creativestampingdesigns.com

On a panel of Basic White, stamp the sentiment from the Regal Flora stamp set in Shaded Spruce Ink. Stamp the trio of flower image from the Regal Flora stamp set on the bottom of the panel in Blackberry Bliss Ink, stamping off once on scrap paper. Stamp the leaf image from the Regal Flora stamp set in Shaded Spruce Ink around the flowers, stamping off once on scrap paper. Adhere the Basic White panel to a Blackberry Bliss mat then to the inside of the Shaded Spruce card base.

Stampin' Up! Regal Flora Panels 6 creativestampingdesigns.com

Finish the card by decorating a Basic White Medium Envelope. Stamp the trio of flower image from the Regal Flora stamp set in Blackberry Bliss Ink, stamping off once on scrap paper, on the envelope front. Stamp the leaf image from the Regal Flora stamp set in Shaded Spruce Ink, stamping off once on scrap paper, around the flowers. Adhere a panel of Regal Winter DSP to the envelope flap.

Stampin' Up! Regal Flora Panels 7 creativestampingdesigns.com

Thank you for stopping by my blog today. I hope you like the card, and you’ll give it a try. Happy Stamping!!

*********************************************************************************************************

If you need any stamping supplies, I’d love to be your Demonstrator. Just click HERE to go directly to my online store or drop me an email if you have any questions. 

MY CURRENT HOST CODE IS:   EMDXSBC9

Use this host code when placing an order with me. When you order $50 or greater you will receive a free gift from me! If your order is over $150, please do not use this code, but you’ll still get the free gift. The free gift is your choice of any 1 item valued up to $10.00 from the 2024-2025Annual Catalog, or from the Online Exclusives!  Unfortunately, packs of cardstock are no longer an option for a free gift. Shipping has become too expensive to ship and it’s costing me as much to ship as the cardstock costs. For any orders $50 or more I will also send you my monthly class tutorials.  Click HERE or go to my Customer Rewards for more details and to see what this month’s tutorials are.

Please remember to use my current Host Code and make sure that you can see my name on the final checkout page listed as your Demonstrator when you order so that you know that you’re ordering with me, and you’ll get my rewards! 

Happy Stamping, Karen

*********************************************************************************************************

Starter Kit Special – Get an extra $30 Your Starter Kit October 1 – 31

Hey, friend! Stampin’ Up! has a fantastic offer for anyone who becomes a demonstrator! Join my team between October 1–31and you can choose $155 worth of product in your Starter Kit for only $99! Starter Kits normally include $125 worth of product for $99, so that’s an extra $30 worth of product at no additional cost. This offering also includes free shipping and free business supplies! That’s MORE product for EVEN MORE fun!  Click Here for all the details.

Interested but you are not really sure about wanting to commit? Contact me and we can talk, and you can ask me any questions at creativestampingdesigns@gmail.com.

Read more information about becoming a demonstrator Here.

*********************************************************************************************************

New Online Exclusive Products Coming Soon

A new line of products for Online Exclusives are coming! You won’t find these items in any catalog. This is a great opportunity to spark creativity, expand a crafting collection, and discover new opportunities—all from the convenience of the online store. These products will be available starting in November, BUT you can add these new items to your Starter Kit if you join in October. Here’s a little sneak peek of some of the items that you can add to your Starter kit and get them before customers and start to play. Click Here for a sneak peek of what’s coming.

*********************************************************************************************************

From October 1-31 All Kits from the Kits Collection will be on sale for up to 30% off

Did you know as a demonstrator you can get up to 30% off all the kits AND get your 20% demo discount on top of that. What a GREAT way to save!!!

Save up to 30% off on all your favorite kits October 1–31! Our kits come with everything you need to create a unique paper craft. We have crafting options for card kits, treat packaging, home decor, and so much more! Kits are only available while supplies last.

Here are the details for the sale:

  • Promotion Period:  October 1-31!
  • ALL kits from the kits collection qualify for the discount.
  • There is no limit on how many kits you can order, as long as product is available.
  • Orders must be opened and placed during the promotion dates. Orders opened before October 1 will not qualify for the sale.
  • Kits on sale will NOT qualify for the Stampin’ Rewards 50% off.
  • Kits can be added to a Starter Kit at their discounted rate.
  • Ordering deadline:  October 31 at 11:59 p.m. (MT)

*********************************************************************************************************

Filled With Joy

Subscribe October 11 – November 10

Celebrate Christmas with adorable stockings and gift tags!

Details:
• Makes 8 projects: 8 stockings with 8 gift tags
• Precut paper pieces
• Safety pins and specialty gold foil
• Coordinating colors: Flirty Flamingo, Pool Party, Poppy Parade
(Classic Stampin’ Spot), Shaded Spruce, Very Vanilla

Subscribe to Paper Pumpkin for a monthly, all-inclusive crafting kit that’s a fun surprise! Each kit includes a photopolymer stamp set, Classic Stampin’ Spot, and step by step instructions to complete exclusive paper craft projects, including cards, tags, and gift
packaging. And don’t miss the special add-on that coordinates with the next three months!

Subscribe to the November Paper Pumpkin Kit between 11 October and 10 November by clicking here!

*********************************************************************************************************

Don’t miss the coordinating
Merry Tags & More Dies Add-On!

Add dimension and detail to your cards, scrapbook pages, and gift tags with the Merry Tags & More Dies! With a leaf and tag shape and Merry sentiment, these dies are a great way to expand your crafting experience. They even coordinate with three Paper Pumpkin Kits: Nests of Christmas, Filled with Joy, and Notes from the Heart. Such easy coordination makes these dies a must-have for any paper craft. Paper Pumpkin subscribers can purchase it beginning 11 September. The add-on is available only while supplies last, so it’s best to shop early! Please note that the Stampin’ Cut and Emboss Machine is not included and can be purchased separately.

#165639 $12

Note: Supplies may be limited toward the end of the subscription period.

*********************************************************************************************************

Card stock cuts for this project:

  • Basic White Cardstock 3 – 1 1/8″ X 3 1/8″ (dsp mats), 4 1/8″ X 5 3/8″(card front mat), 4″ X 5 1/4″(inner liner)
  • Blackberry Bliss Cardstock 4″ X 5 1/4″(card front), 4 1/8″ x 5 3/8″(inner liner mat)
  • Shaded Spruce Cardstock 5 1/2″ X 8 1/2″ (card base scored & folded at 4 1/4″)
  • Regal Winter Designer Series Paper 3″ X 3″ (artwork), 2 1/4″ X 6″(envelope flap)

*********************************************************************************************************

Product List
Stampin’ Up! Everyday Greetings

Good Sunday morning stamping friends. Hope you are all having a wonderful weekend. Today we’re off to Animal Kingdom. We’ll be hopping to other parks today also since Animal Kingdom closes a little earlier than the others. I’m not sure which ones yet. I know we are having a late lunch at Yak & Yeti in Animal Kingdom and plan on going to see fireworks at Epcot. Yesterday was such a fun day at Hollywood Studios, I think that’s my favorite park. We had a wonderful dinner at Mama Melrose’s followed by the Fantasmic show.

Today’s card is the 2nd one I made with the One Sheet Wonder where I cut up a piece of 6 x 6 DSP to make 4 cards with it. If you’d like to see a quick video of how I made this card, Click Here to go to my Instagram Reels. Here is my card for today.

Stampin' Up! Everyday Greetings 1 creativestampingdesigns.com

I used the Stampin’ Up! Online Exclusive Everyday Greetings Photopolymer Stamp Set along with the Stampin’ Up! Regal Flora Cling Stamp Set, Unbounded Love Dies, Regal Winter Designer Series Paper, Regal Distressed Specialty Designer Series Paper and Textured Metallic Specialty Paper for my card today.

Stampin' Up! Everyday Greetings 2 creativestampingdesigns.com

Adhere a panel of Regal Winter DSP to a Regal Distressed DSP using Stampin’ Seal. Adhere the layered panel to a Cherry Cobbler card base using Stampin’ Seal.

Stampin' Up! Everyday Greetings 3 creativestampingdesigns.com

For the 2nd One Sheet Wonder card, you are going to adhere a 3″ X 3″ panel of Regal Winter DSP to a Gold Textured Metallic mat using Stampin’ Seal. Adhere the layered panel to the card front using Stampin’ Dimensionals. Add a piece of Cherry Cobbler & Gold 1/4″ Satin Ribbon to the panel using Stampin’ Seal.

Stampin' Up! Everyday Greetings 4 creativestampingdesigns.com

On a panel of Basic White, stamp the sentiment from the Everyday Greetings stamp set in Versamark Ink. Sprinkle the sentiment with Gold Embossing Powder, shake off excess and set it using the Heat Tool. Cut the sentiment out using the Unbounded Love Dies. Adhere the sentiment to the artwork over the ribbon using Stampin’ Dimensionals. Add a few Pretty Peacock Foiled Gems to the card front.

Stampin' Up! Everyday Greetings 5 creativestampingdesigns.com

Stamp the sentiment from the Everyday Greetings stamp set in Cherry Cobbler Ink on a panel of Basic White. Stamp the floral image from the Regal Flora stamp set in Cherry Cobbler Ink on the bottom of the panel, once full strength and once stamped off on scrap paper. Stamp the leafy image from the Regal Flora stamp set in Pretty Peacock Ink around the floral images. Adhere the Basic White panel to a Pretty Peacock mat then to the inside of the Cherry Cobbler card base.

Stampin' Up! Everyday Greetings 6 creativestampingdesigns.com

Finish the card by decorating a Basic White Medium Envelope. Stamp the flower image from the Regal Flora stamp set in Cherry Cobbler Ink on the envelope front, once full strength and once stamped off on scrap paper. Stamp the leafy image from the Regal Flora stamp set around the flowers in Pretty Peacock Ink. Adhere a panel of Regal Winter DSP to the envelope flap.

Stampin' Up! Everyday Greetings 7 creativestampingdesigns.com

Thank you for stopping by my blog today. I hope you like the card, and you’ll give it a try. Happy Stamping!!

*********************************************************************************************************

If you need any stamping supplies, I’d love to be your Demonstrator. Just click HERE to go directly to my online store or drop me an email if you have any questions. 

MY CURRENT HOST CODE IS:   EMDXSBC9

Use this host code when placing an order with me. When you order $50 or greater you will receive a free gift from me! If your order is over $150, please do not use this code, but you’ll still get the free gift. The free gift is your choice of any 1 item valued up to $10.00 from the 2024-2025Annual Catalog, or from the Online Exclusives!  Unfortunately, packs of cardstock are no longer an option for a free gift. Shipping has become too expensive to ship and it’s costing me as much to ship as the cardstock costs. For any orders $50 or more I will also send you my monthly class tutorials.  Click HERE or go to my Customer Rewards for more details and to see what this month’s tutorials are.

Please remember to use my current Host Code and make sure that you can see my name on the final checkout page listed as your Demonstrator when you order so that you know that you’re ordering with me, and you’ll get my rewards! 

Happy Stamping, Karen

*********************************************************************************************************

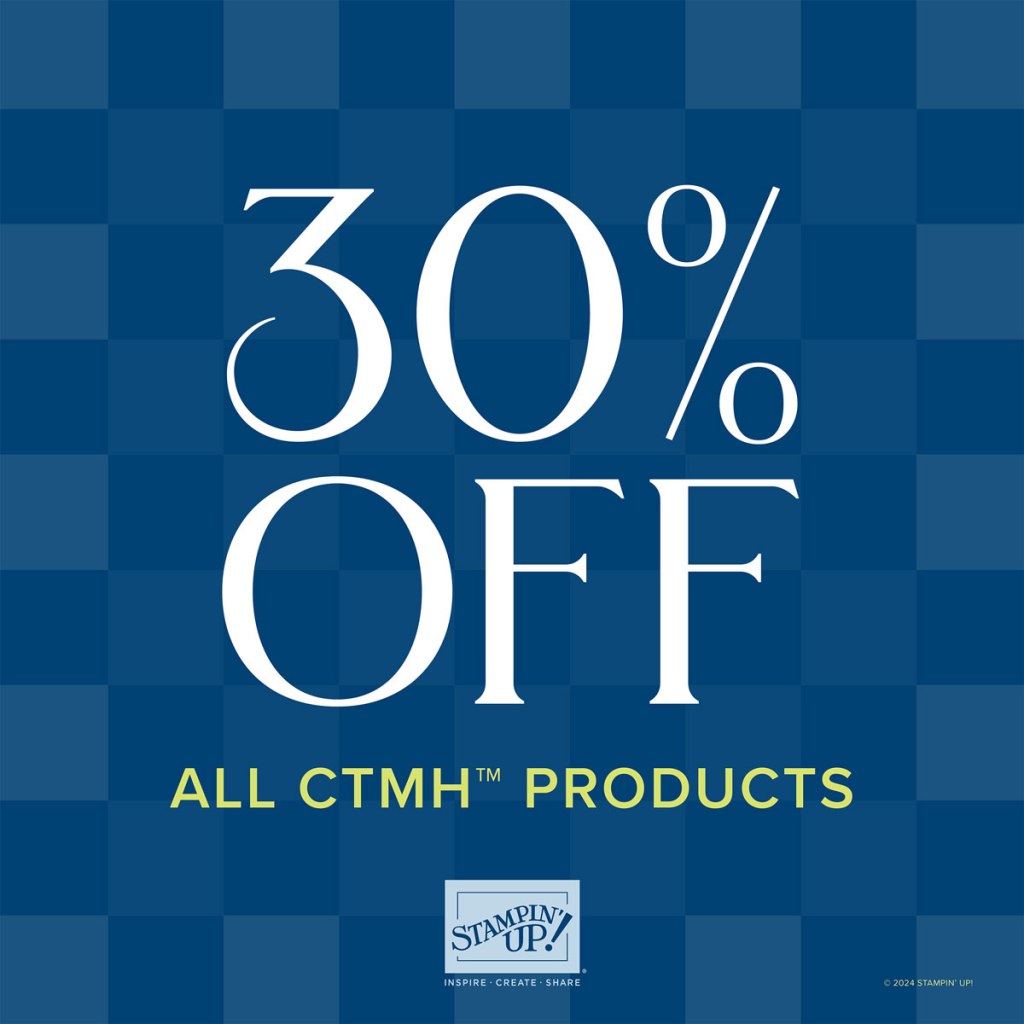
It’s time to shop ‘til you drop! Starting October 16 at 12:00 a.m. (MT), you can purchase all* CTMH products for 30% off. That’s right—30%! And don’t wait too long—products are available only while supplies last.

*This sale does not include the September Scrapbooking Brochure and any future scrapbooking brochures. It also excludes any Stampin’ Up! scrapbooking products outside of the CTMH product category in the online store. 

*********************************************************************************************************

Starter Kit Special – Get an extra $30 Your Starter Kit October 1 – 31

Hey, friend! Stampin’ Up! has a fantastic offer for anyone who becomes a demonstrator! Join my team between October 1–31and you can choose $155 worth of product in your Starter Kit for only $99! Starter Kits normally include $125 worth of product for $99, so that’s an extra $30 worth of product at no additional cost. This offering also includes free shipping and free business supplies! That’s MORE product for EVEN MORE fun!  Click Here for all the details.

Interested but you are not really sure about wanting to commit? Contact me and we can talk, and you can ask me any questions at creativestampingdesigns@gmail.com.

Read more information about becoming a demonstrator Here.

*********************************************************************************************************

New Online Exclusive Products Coming Soon

A new line of products for Online Exclusives are coming! You won’t find these items in any catalog. This is a great opportunity to spark creativity, expand a crafting collection, and discover new opportunities—all from the convenience of the online store. These products will be available starting in November, BUT you can add these new items to your Starter Kit if you join in October. Here’s a little sneak peek of some of the items that you can add to your Starter kit and get them before customers and start to play. Click Here for a sneak peek of what’s coming.

*********************************************************************************************************

From October 1-31 All Kits from the Kits Collection will be on sale for up to 30% off

Did you know as a demonstrator you can get up to 30% off all the kits AND get your 20% demo discount on top of that. What a GREAT way to save!!!

Save up to 30% off on all your favorite kits October 1–31! Our kits come with everything you need to create a unique paper craft. We have crafting options for card kits, treat packaging, home decor, and so much more! Kits are only available while supplies last.

Here are the details for the sale:

  • Promotion Period:  October 1-31!
  • ALL kits from the kits collection qualify for the discount.
  • There is no limit on how many kits you can order, as long as product is available.
  • Orders must be opened and placed during the promotion dates. Orders opened before October 1 will not qualify for the sale.
  • Kits on sale will NOT qualify for the Stampin’ Rewards 50% off.
  • Kits can be added to a Starter Kit at their discounted rate.
  • Ordering deadline:  October 31 at 11:59 p.m. (MT)

*********************************************************************************************************

Filled With Joy

Subscribe October 11 – November 10

Celebrate Christmas with adorable stockings and gift tags!

Details:
• Makes 8 projects: 8 stockings with 8 gift tags
• Precut paper pieces
• Safety pins and specialty gold foil
• Coordinating colors: Flirty Flamingo, Pool Party, Poppy Parade
(Classic Stampin’ Spot), Shaded Spruce, Very Vanilla

Subscribe to Paper Pumpkin for a monthly, all-inclusive crafting kit that’s a fun surprise! Each kit includes a photopolymer stamp set, Classic Stampin’ Spot, and step by step instructions to complete exclusive paper craft projects, including cards, tags, and gift
packaging. And don’t miss the special add-on that coordinates with the next three months!

Subscribe to the November Paper Pumpkin Kit between 11 October and 10 November by clicking here!

*********************************************************************************************************

Don’t miss the coordinating
Merry Tags & More Dies Add-On!

Add dimension and detail to your cards, scrapbook pages, and gift tags with the Merry Tags & More Dies! With a leaf and tag shape and Merry sentiment, these dies are a great way to expand your crafting experience. They even coordinate with three Paper Pumpkin Kits: Nests of Christmas, Filled with Joy, and Notes from the Heart. Such easy coordination makes these dies a must-have for any paper craft. Paper Pumpkin subscribers can purchase it beginning 11 September. The add-on is available only while supplies last, so it’s best to shop early! Please note that the Stampin’ Cut and Emboss Machine is not included and can be purchased separately.

#165639 $12

Note: Supplies may be limited toward the end of the subscription period.

*********************************************************************************************************

Card stock cuts for this project:

  • Basic White Cardstock 2″ X 4″ (sentiment), 4″ X 5 1/4″(inner liner)
  • Cherry Cobbler Cardstock 5 1/2″ X 8 1/2″(card base scored & folded at 4 1/4″)
  • Pretty Peacock Cardstock 4 1/8″ X 5 3/8″ (inner liner mat)
  • Regal Winter Designer Series Paper 3″ X 3″ (artwork), 4″ X 5 1/4″(card front), 2 1/4″ X 6″(envelope flap)
  • Regal Distressed Specialty Designer Series Paper 4 1/8″ X 5 3/8″(card front mat)
  • Textured Metallic Specialty Paper 3 1/8″ X 3 1/8″(artwork mat)

*********************************************************************************************************

Product List
Stampin’ Up! Unbounded Love Birthday

Good Saturday morning stamping friends and welcome to the weekend!! I hope you all have some fun plans in the works. It’s off to Hollywood Studios for us today, so it will be another long full day. We have reservations for dinner at Mama Mel Rosa’s and we scheduled a few lightening Lane passes already. Yesterday was a fun day in Universal Studios. My daughter loves Harry Potter and she really enjoyed that section.

Today’s card is the first of a set of 4 cards I made with a One Sheet Wonder. I took a piece of 6 X 6 Designer Series Paper and cut it up to make 4 cards. If you’d like to see a quick video of how I made this card, Click Here to go to my Instagram Reels. Here is my card for today.

Stampin' Up! Unbounded Love Birthday 1 creativestampingdesigns.com

I used the Stampin’ Up! Unbounded Love Bundle along with the Stampin’ Up! Regal Flora Cling Stamp Set, Regal Winter Designer Series Paper and new Online Exclusive Happy Hibiscus Hybrid Embossing Folder for my card today.

Stampin' Up! Unbounded Love Birthday 2 creativestampingdesigns.com

Start by embossing a Bubble Bath card front using the Happy Hibiscus EF. Adhere the embossed panel to a Bubble Bath card base using Liquid Glue.

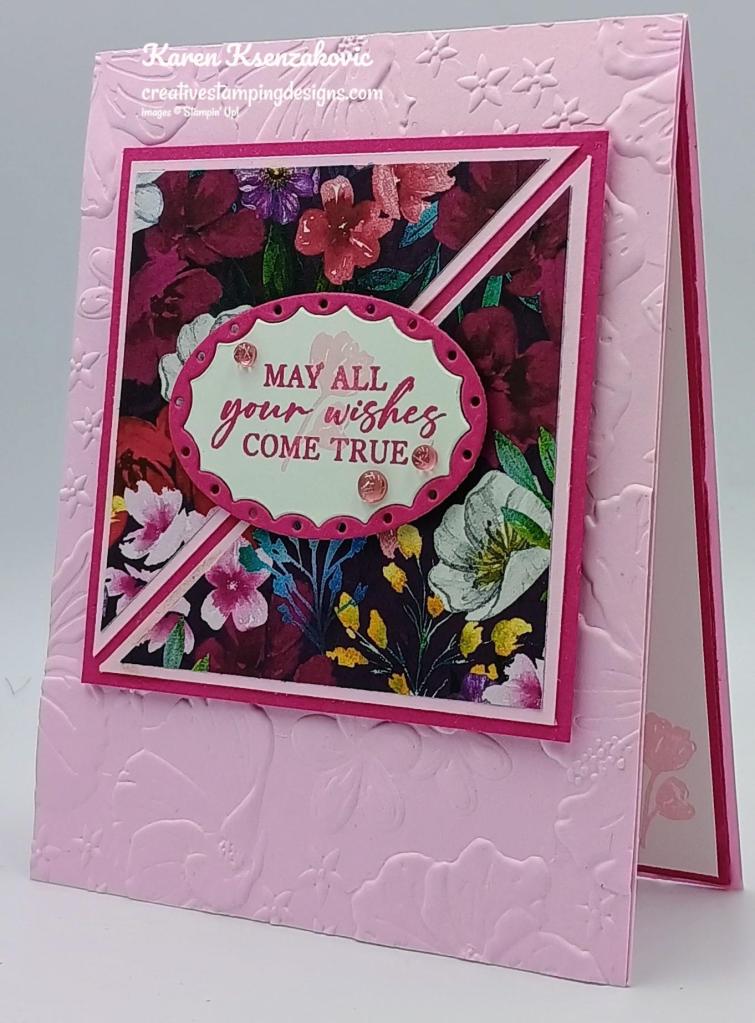
Stampin' Up! Unbounded Love Birthday 3 creativestampingdesigns.com

For the first One Sheet Wonder card you are going to take one of the 3″ X 3″ pieces of Regal Winter DSP and cut it on an angle using the Paper Trimmer. Adhere the 2 triangles to 2 triangle Bubble Bath mats using Liquid Glue. Adhere the 2 triangle layered panels to a Berry Burst mat using Liquid Glue. Adhere the layered panel to the card front using Stampin’ Dimensionals.

Stampin' Up! Unbounded Love Birthday 4 creativestampingdesigns.com

On a panel of Basic White, stamp the sentiment from the Stampin’ Up! Unbounded Love Photopolymer Stamp Set in Berry Burst Ink. Stamp the small flower image from the Regal Flora stamp set in Bubble Bath Ink over the sentiment. Cut the sentiment out using the Unbounded Love Dies. From a panel of Berry Burst, cut the same Unbounded Love Die. Fit the sentiment into the Berry Burst die cut. Use Stampin’ Dimensionals to adhere the 2 pieces to the center of the card front. Add a few Berry Burst Tinsel Gems to the card front.

Stampin' Up! Unbounded Love Birthday 5 creativestampingdesigns.com

Stamp the sentiment from the Unbounded Love stamp set in Berry Burst Ink on a panel of Basic White. Stamp the small flower image from the Regal Flora stamp set in Bubble Bath Ink along the bottom of the panel. Adhered the Basic White panel to a Berry Burst mat then to the inside of the Bubble Bath card base.

Stampin' Up! Unbounded Love Birthday 6 creativestampingdesigns.com

Finish the card by decorating a Basic White Medium Envelope. Stamp the small flower image from the Regal Flora stamp set in Bubble Bath Ink along the envelope front. Adhere a panel of Regal Winter DSP to the envelope flap.

Stampin' Up! Unbounded Love Birthday 7 creativestampingdesigns.com

Thank you for stopping by my blog today. I hope you like the card, and you’ll give it a try. Happy Stamping!!

*********************************************************************************************************

If you need any stamping supplies, I’d love to be your Demonstrator. Just click HERE to go directly to my online store or drop me an email if you have any questions. 

MY CURRENT HOST CODE IS:   EMDXSBC9

Use this host code when placing an order with me. When you order $50 or greater you will receive a free gift from me! If your order is over $150, please do not use this code, but you’ll still get the free gift. The free gift is your choice of any 1 item valued up to $10.00 from the 2024-2025Annual Catalog, or from the Online Exclusives!  Unfortunately, packs of cardstock are no longer an option for a free gift. Shipping has become too expensive to ship and it’s costing me as much to ship as the cardstock costs. For any orders $50 or more I will also send you my monthly class tutorials.  Click HERE or go to my Customer Rewards for more details and to see what this month’s tutorials are.

Please remember to use my current Host Code and make sure that you can see my name on the final checkout page listed as your Demonstrator when you order so that you know that you’re ordering with me, and you’ll get my rewards! 

Happy Stamping, Karen

*********************************************************************************************************

It’s time to shop ‘til you drop! Starting October 16 at 12:00 a.m. (MT), you can purchase all* CTMH products for 30% off. That’s right—30%! And don’t wait too long—products are available only while supplies last.

*This sale does not include the September Scrapbooking Brochure and any future scrapbooking brochures. It also excludes any Stampin’ Up! scrapbooking products outside of the CTMH product category in the online store. 

*********************************************************************************************************

Starter Kit Special – Get an extra $30 Your Starter Kit October 1 – 31

Hey, friend! Stampin’ Up! has a fantastic offer for anyone who becomes a demonstrator! Join my team between October 1–31and you can choose $155 worth of product in your Starter Kit for only $99! Starter Kits normally include $125 worth of product for $99, so that’s an extra $30 worth of product at no additional cost. This offering also includes free shipping and free business supplies! That’s MORE product for EVEN MORE fun!  Click Here for all the details.

Interested but you are not really sure about wanting to commit? Contact me and we can talk, and you can ask me any questions at creativestampingdesigns@gmail.com.

Read more information about becoming a demonstrator Here.

*********************************************************************************************************

New Online Exclusive Products Coming Soon

A new line of products for Online Exclusives are coming! You won’t find these items in any catalog. This is a great opportunity to spark creativity, expand a crafting collection, and discover new opportunities—all from the convenience of the online store. These products will be available starting in November, BUT you can add these new items to your Starter Kit if you join in October. Here’s a little sneak peek of some of the items that you can add to your Starter kit and get them before customers and start to play. Click Here for a sneak peek of what’s coming.

*********************************************************************************************************

From October 1-31 All Kits from the Kits Collection will be on sale for up to 30% off

Did you know as a demonstrator you can get up to 30% off all the kits AND get your 20% demo discount on top of that. What a GREAT way to save!!!

Save up to 30% off on all your favorite kits October 1–31! Our kits come with everything you need to create a unique paper craft. We have crafting options for card kits, treat packaging, home decor, and so much more! Kits are only available while supplies last.

Here are the details for the sale:

  • Promotion Period:  October 1-31!
  • ALL kits from the kits collection qualify for the discount.
  • There is no limit on how many kits you can order, as long as product is available.
  • Orders must be opened and placed during the promotion dates. Orders opened before October 1 will not qualify for the sale.
  • Kits on sale will NOT qualify for the Stampin’ Rewards 50% off.
  • Kits can be added to a Starter Kit at their discounted rate.
  • Ordering deadline:  October 31 at 11:59 p.m. (MT)

*********************************************************************************************************

Filled With Joy

Subscribe October 11 – November 10

Celebrate Christmas with adorable stockings and gift tags!

Details:
• Makes 8 projects: 8 stockings with 8 gift tags
• Precut paper pieces
• Safety pins and specialty gold foil
• Coordinating colors: Flirty Flamingo, Pool Party, Poppy Parade
(Classic Stampin’ Spot), Shaded Spruce, Very Vanilla

Subscribe to Paper Pumpkin for a monthly, all-inclusive crafting kit that’s a fun surprise! Each kit includes a photopolymer stamp set, Classic Stampin’ Spot, and step by step instructions to complete exclusive paper craft projects, including cards, tags, and gift
packaging. And don’t miss the special add-on that coordinates with the next three months!

Subscribe to the November Paper Pumpkin Kit between 11 October and 10 November by clicking here!

*********************************************************************************************************

Don’t miss the coordinating
Merry Tags & More Dies Add-On!

Add dimension and detail to your cards, scrapbook pages, and gift tags with the Merry Tags & More Dies! With a leaf and tag shape and Merry sentiment, these dies are a great way to expand your crafting experience. They even coordinate with three Paper Pumpkin Kits: Nests of Christmas, Filled with Joy, and Notes from the Heart. Such easy coordination makes these dies a must-have for any paper craft. Paper Pumpkin subscribers can purchase it beginning 11 September. The add-on is available only while supplies last, so it’s best to shop early! Please note that the Stampin’ Cut and Emboss Machine is not included and can be purchased separately.

#165639 $12

Note: Supplies may be limited toward the end of the subscription period.

*********************************************************************************************************

Card stock cuts for this project:

  • Basic White Cardstock 1 3/4″ X 2 3/4″(sentiment), 4″ X 5 1/4″(inner liner)
  • Berry Burst Cardstock 3 1/2″ X 3 1/2″ artwork mat), 1 3/4″ X 2 3/4″(sentiment mat), 4 1/8″ X 5 3/8″(inner liner mat)
  • Bubble Bath Cardstock 4 1/4″ X 11″(card base scored & folded at 5 1/2″), 4 1/4″ X 5 1/2″(card front), 3 1/4″ X 3 1/4″(dsp mats cut on a diagonal)
  • Regal Winter Designer Series Paper 3″ X 3″(card front panel), 2 1/4″ X 6″(envelope flap)

*********************************************************************************************************

Product List
Stampin’ Up! Christmas Labels Cocoa

Good Wednesday morning stamping friends from sunny Disney World. We arrived safely yesterday morning. We had a pretty relaxed day since we were up from 2am to catch our 6am flight. I was able to relax a bit by the pool while my family did a Target run for things we forgot, like sunscreen. After about an hour of baking, I decided to take a walk around the hotel grounds, so I know my way around. After they got back it was off to Disney Springs for the night. Today we’re off to Magic Kingdom for the day and it’s supposed to be a beautiful day in the 70’s.

I have a super quick card for you today. If you haven’t seen this pack of DSP yet, you need to check it out. It helps you put cards like mine together in just a few minutes. If you’d like to see a quick video on how I made this card, Click Here to go to my Instagram Reels. Here’s my card for today.
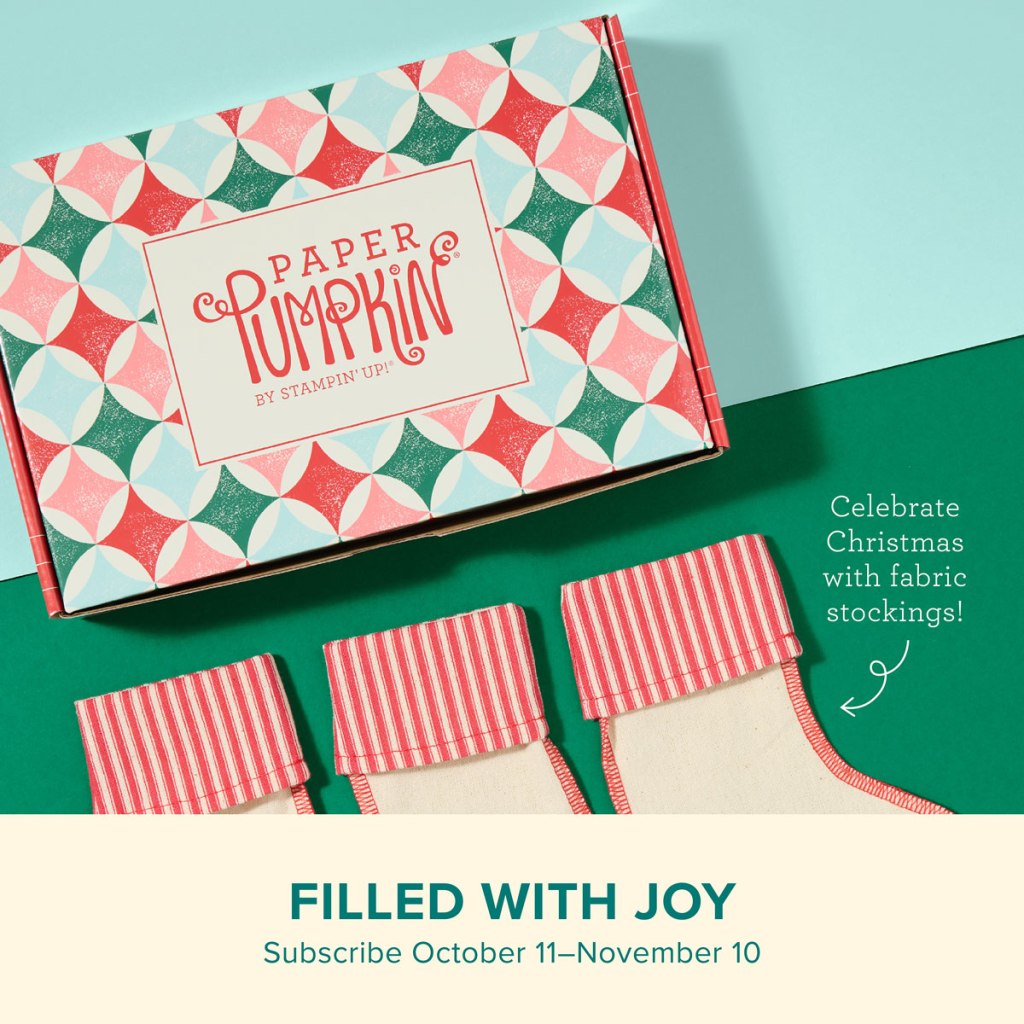
Stampin' Up! Christmas Labels Cocoa 1 creativestampingdesigns.com

For today’s card, I used the Stampin’ Up! Christmas Labels Bundle along with the Snowflake Sky 3D Embossing Folder and A Little Bit Festive Specialty Designer Series Paper. This is such a fun pack of DSP. It comes with 3 sheets of DSP and 3 sheets of punch out pieces to make beautiful cards.
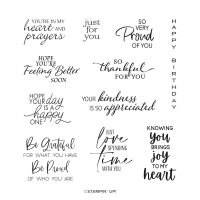
Stampin' Up! Christmas Labels Cocoa 2 creativestampingdesigns.com

Emboss a panel of Basic White using the Snowflake Sky EF. Adhere the embossed panel to a Basic White Thick card base using Liquid Glue.

Stampin' Up! Christmas Labels Cocoa 3 creativestampingdesigns.com

Adhere the hot cocoa cup and gingerbread package images from the A Little Bit Festive DSP to the bottom of the card front using Liquid Glue. Adhere the gingerbread man and gingerbread tree to the card front using Stampin’ Dimensionals.

Stampin' Up! Christmas Labels Cocoa 4 creativestampingdesigns.com

On a panel of Basic White, stamp the sentiment from the Stampin’ Up! Christmas Labels Photopolymer Stamp Set in Real Red Ink. Cut the sentiment out using the Christmas Labels Dies. Adhere the sentiment using Stampin’ Dimensionals. Add a few Iridescent Adhesive-Back Discs to the card front.

Stampin' Up! Christmas Labels Cocoa 5 creativestampingdesigns.com

For the inside, stamp the sentiment from the Christmas Labels stamp set in Real Red Ink on a panel of Basic White. Adhere the gingerbread house image from A Little Bit Festive DSP to the bottom of the panel. Adhere the Basic White panel to a Real Red mat then to the inside of the Basic White Thick card base. Add a few Iridescent Adhesive-Back Discs.

Stampin' Up! Christmas Labels Cocoa 6 creativestampingdesigns.com

Finish the card by decorating a Basic White Medium Envelope. Adhere a strip of A Little Bit Festive DSP to the envelope front and a panel to the envelope flap.

Stampin' Up! Christmas Labels Cocoa 7 creativestampingdesigns.com

Thank you for stopping by my blog today. I hope you like the card and will give it a try. Happy Stamping!!

*********************************************************************************************************

If you need any stamping supplies, I’d love to be your Demonstrator. Just click HERE to go directly to my online store or drop me an email if you have any questions. 
MY CURRENT HOST CODE IS:   EMDXSBC9

Use this host code when placing an order with me. When you order $50 or greater you will receive a free gift from me! If your order is over $150, please do not use this code, but you’ll still get the free gift. The free gift is your choice of any 1 item valued up to $10.00 from the 2024-2025Annual Catalog, or from the Online Exclusives!  Unfortunately, packs of cardstock are no longer an option for a free gift. Shipping has become too expensive to ship and it’s costing me as much to ship as the cardstock costs. For any orders $50 or more I will also send you my monthly class tutorials.  Click HERE or go to my Customer Rewards for more details and to see what this month’s tutorials are.
Please remember to use my current Host Code and make sure that you can see my name on the final checkout page listed as your Demonstrator when you order so that you know that you’re ordering with me, and you’ll get my rewards! 

Happy Stamping, Karen

*********************************************************************************************************

It’s time to shop ‘til you drop! Starting October 16 at 12:00 a.m. (MT), you can purchase all* CTMH products for 30% off. That’s right—30%! And don’t wait too long—products are available only while supplies last.

*This sale does not include the September Scrapbooking Brochure and any future scrapbooking brochures. It also excludes any Stampin’ Up! scrapbooking products outside of the CTMH product category in the online store. 

*********************************************************************************************************

Starter Kit Special – Get an extra $30 Your Starter Kit October 1 – 31

Hey, friend! Stampin’ Up! has a fantastic offer for anyone who becomes a demonstrator! Join my team between October 1–31and you can choose $155 worth of product in your Starter Kit for only $99! Starter Kits normally include $125 worth of product for $99, so that’s an extra $30 worth of product at no additional cost. This offering also includes free shipping and free business supplies! That’s MORE product for EVEN MORE fun!  Click Here for all the details.

Interested but you are not really sure about wanting to commit? Contact me and we can talk, and you can ask me any questions at creativestampingdesigns@gmail.com.

Read more information about becoming a demonstrator Here.

*********************************************************************************************************

New Online Exclusive Products Coming Soon

A new line of products for Online Exclusives are coming! You won’t find these items in any catalog. This is a great opportunity to spark creativity, expand a crafting collection, and discover new opportunities—all from the convenience of the online store. These products will be available starting in November, BUT you can add these new items to your Starter Kit if you join in October. Here’s a little sneak peek of some of the items that you can add to your Starter kit and get them before customers and start to play. Click Here for a sneak peek of what’s coming.

*********************************************************************************************************

From October 1-31 All Kits from the Kits Collection will be on sale for up to 30% off

Save up to 30% off on all your favorite kits October 1–31! Our kits come with everything you need to create a unique paper craft. We have crafting options for card kits, treat packaging, home decor, and so much more! Kits are only available while supplies last.

Here are the details for the sale:

  • Promotion Period:  October 1-31!
  • ALL kits from the kits collection qualify for the discount.
  • There is no limit on how many kits you can order, as long as product is available.
  • Orders must be opened and placed during the promotion dates. Orders opened before October 1 will not qualify for the sale.
  • Kits on sale will NOT qualify for the Stampin’ Rewards 50% off.
  • Kits can be added to a Starter Kit at their discounted rate.
  • Ordering deadline:  October 31 at 11:59 p.m. (MT)

*********************************************************************************************************

Filled With Joy

Subscribe October 11 – November 10

Celebrate Christmas with adorable stockings and gift tags!

Details:
• Makes 8 projects: 8 stockings with 8 gift tags
• Precut paper pieces
• Safety pins and specialty gold foil
• Coordinating colors: Flirty Flamingo, Pool Party, Poppy Parade
(Classic Stampin’ Spot), Shaded Spruce, Very Vanilla

Subscribe to Paper Pumpkin for a monthly, all-inclusive crafting kit that’s a fun surprise! Each kit includes a photopolymer stamp set, Classic Stampin’ Spot, and step by step instructions to complete exclusive paper craft projects, including cards, tags, and gift
packaging. And don’t miss the special add-on that coordinates with the next three months!

Subscribe to the November Paper Pumpkin Kit between 11 October and 10 November by clicking here!

*********************************************************************************************************

Don’t miss the coordinating
Merry Tags & More Dies Add-On!

Add dimension and detail to your cards, scrapbook pages, and gift tags with the Merry Tags & More Dies! With a leaf and tag shape and Merry sentiment, these dies are a great way to expand your crafting experience. They even coordinate with three Paper Pumpkin Kits: Nests of Christmas, Filled with Joy, and Notes from the Heart. Such easy coordination makes these dies a must-have for any paper craft. Paper Pumpkin subscribers can purchase it beginning 11 September. The add-on is available only while supplies last, so it’s best to shop early! Please note that the Stampin’ Cut and Emboss Machine is not included and can be purchased separately.

#165639 $12

Note: Supplies may be limited toward the end of the subscription period.

*********************************************************************************************************

Card stock cuts for this project:

  • Basic White Cardstock 4 1/4″ X 5 1/2″ (card front), 2 1/2″ X 3″(sentiment) 4″ X 5 1/4″(inner liner)
  • Basic White Thick Cardstock 4 1/4″ X 11″(card base scored & folded at 5 1/2″)
  • Real Red Cardstock 4 1/8″ X 5 3/8″(inner liner mat)
  • A Little Bit Festive Specialty Designer Series Paper 1/4″ X 6″ & 2 1/4″ X 6″(envelope), pieces for card front & inner liner)

*********************************************************************************************************

Product List