
Good Tuesday morning stamping friends. I hope your week has started off well. Today’s a big day for demonstrators. We get to preorder products from the new 2025-2026 Annual Catalog along with the catalogs. If you’re a customer of mine, I’ll be sending them out just as soon as I receive them.
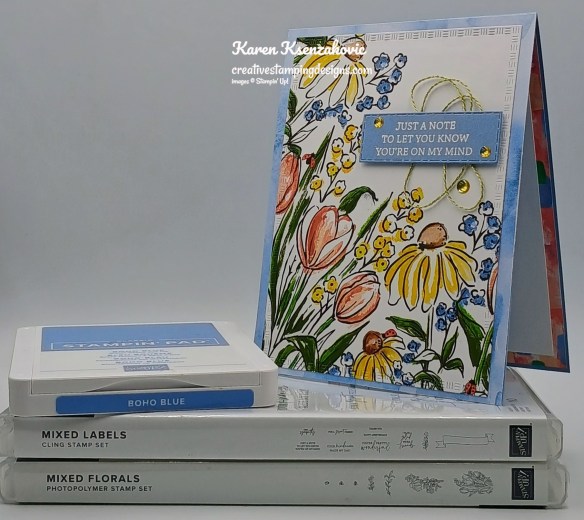
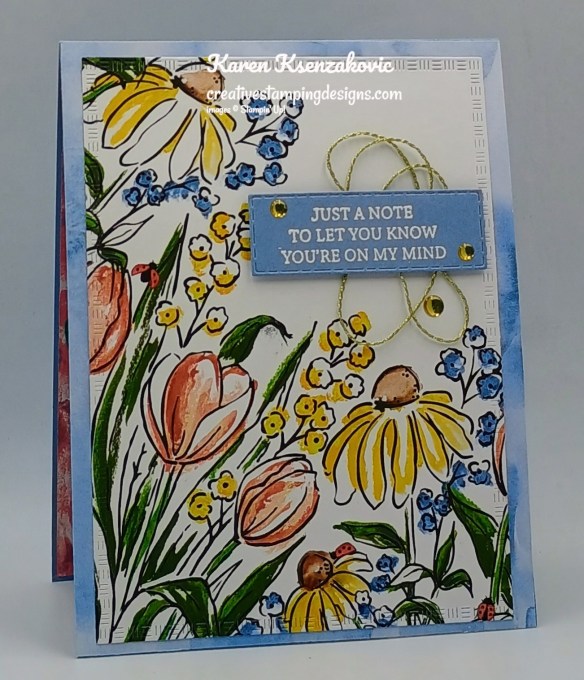
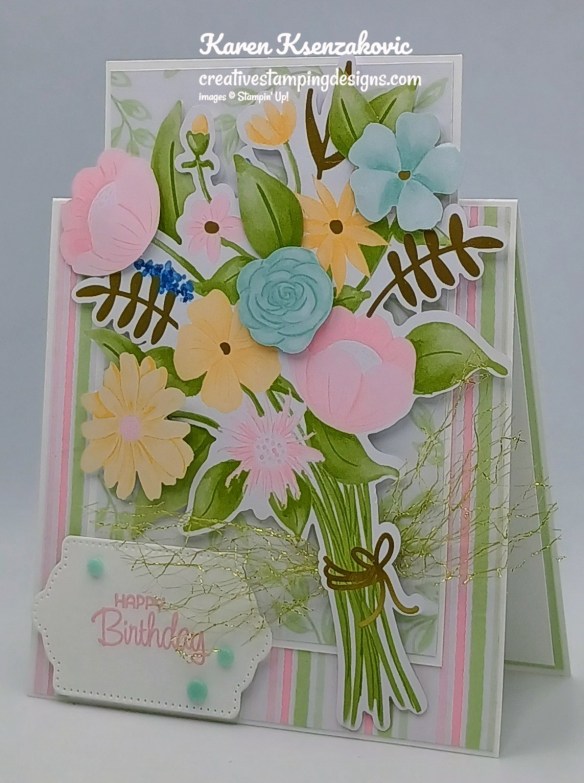
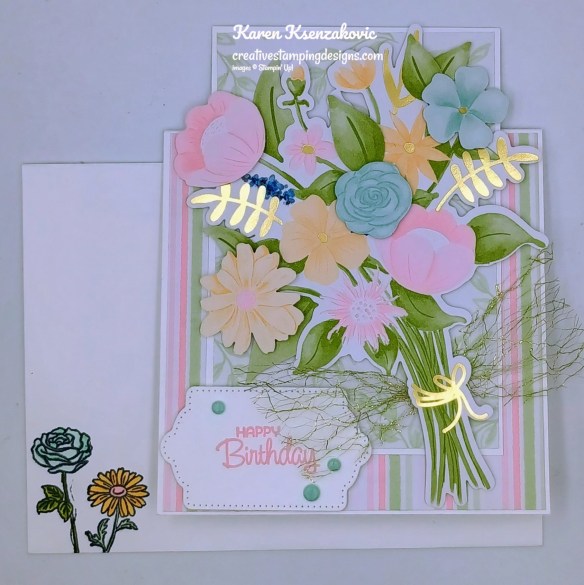
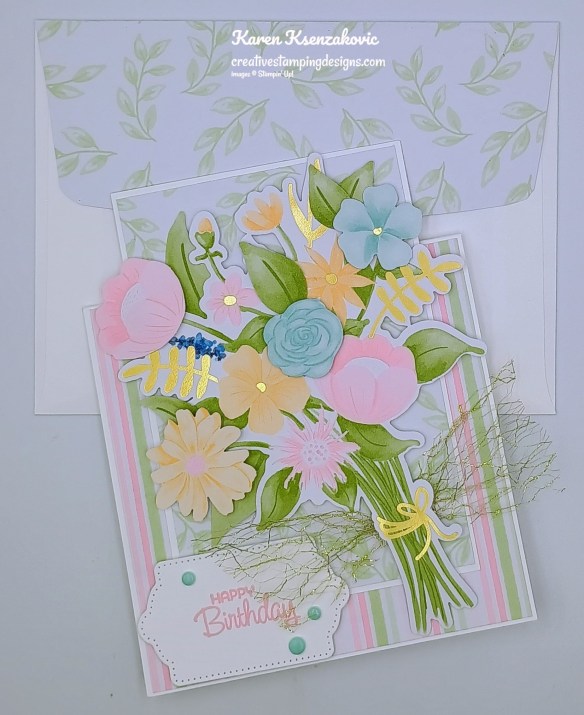
I played with one of my favorite Online Exclusive bundles for today’s card. I’ve used this set so much already and it’s still a fairly new one. Here’s my card for today.

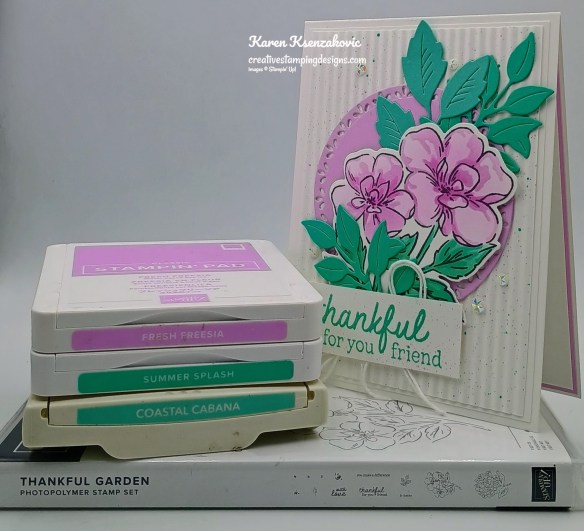
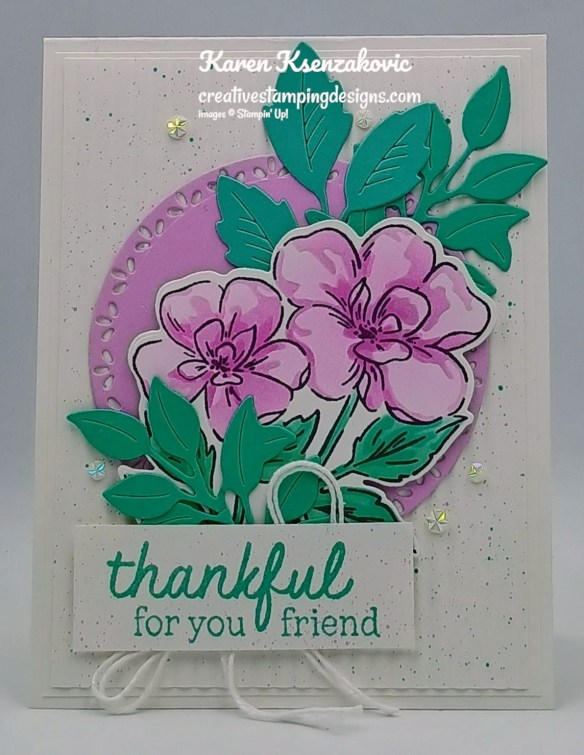
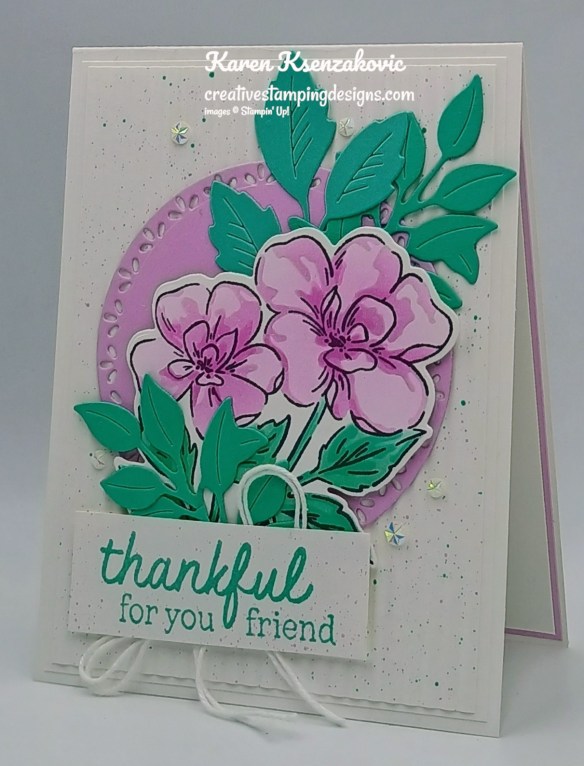
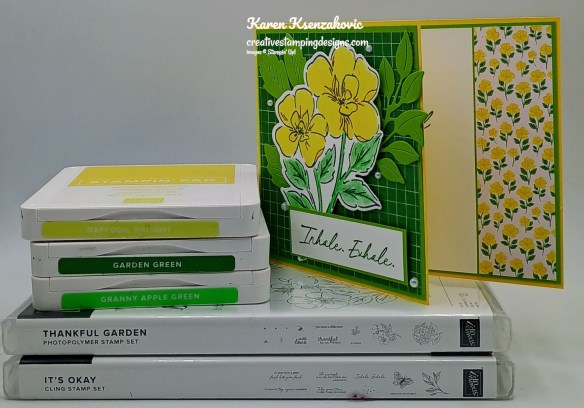
I used the Stampin’ Up! Online Exclusive Thankful Garden Bundle and Textured Notes Dies along with the Country Woods Designer Series Paper, Birch Wood 3D Embossing Folder and Stampin’ Up! Everyday Details Cling Stamp Set for my card today.
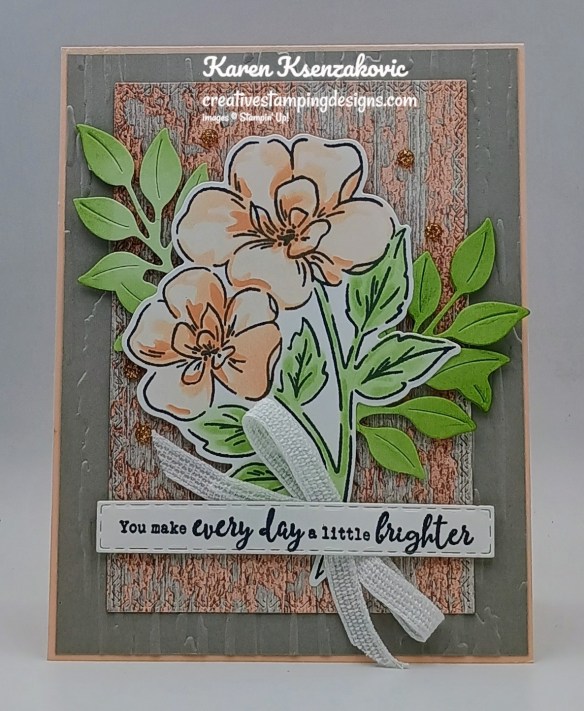
Emboss a Gray Granite card front using the Birch Wood EF. Adhere the embossed panel to a Petal Pink card base using Liquid Glue. Cut a panel of Country Woods DSP using the Textured Notes Dies. Adhere the die cut panel to the card front using Liquid Glue.

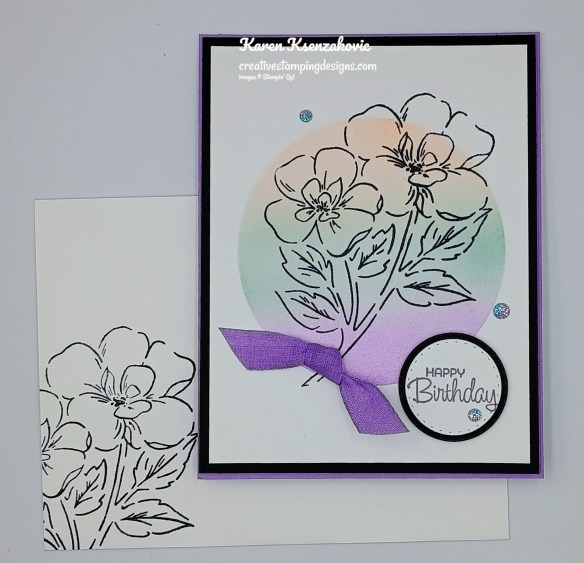
On a panel of Basic White, stamp the flower image from the Stampin’ Up! Thankful Garden Photopolymer Stamp Set in Tuxedo Black Ink. Using the Thankful Garden Decorative Masks and Small Blending Brushes add Petal Pink Ink with masks #1,2 & 3. Using Decorative Masks #4 & 5 add Soft Sea Foam Ink with the Small Blending Brushes. Cut the image out using the Thankful Garden Dies. Cut a panel of Soft Sea Foam using the large leaf die from the Thankful Garden Dies. Using the Small Blending Brush, add Soft Sea Foam Ink on the leaves. Adhere the leaves and flowers to the card front using Stampin’ Dimensionals.
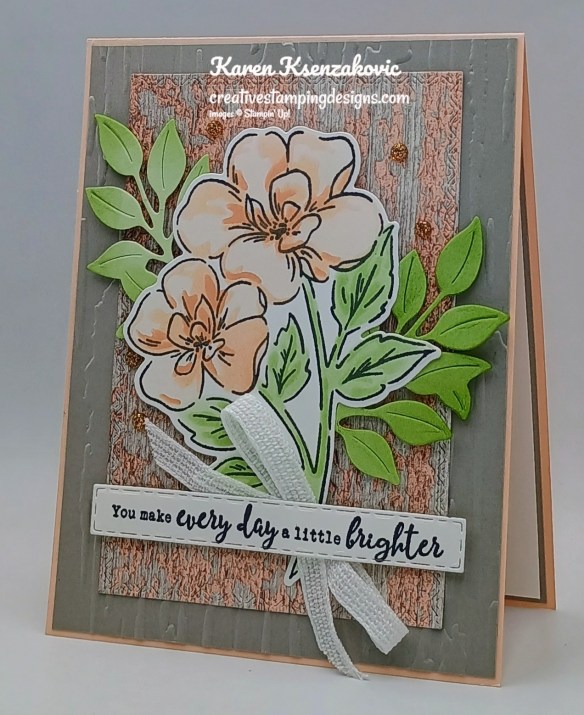
On a panel of Basic White, stamp the sentiment from Everyday Details stamp set in Tuxedo Black Ink. Cut the sentiment out using the narrow die from the Textured Notes Dies. Loop a piece of White 1/4″ Ribbon and adhere it to the flower stem using a Glue Dot. Adhere the sentiment over the ribbon using Stampin’ Dimensionals. Add a few Adhesive-Backed Sparkle Gems to the card front.

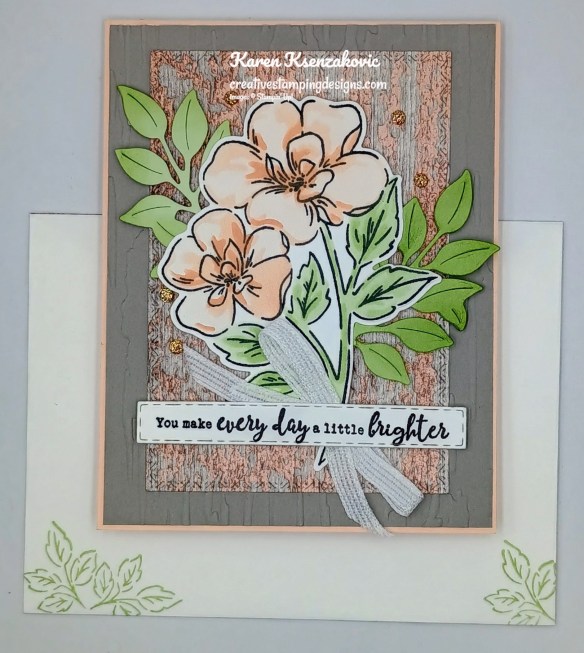
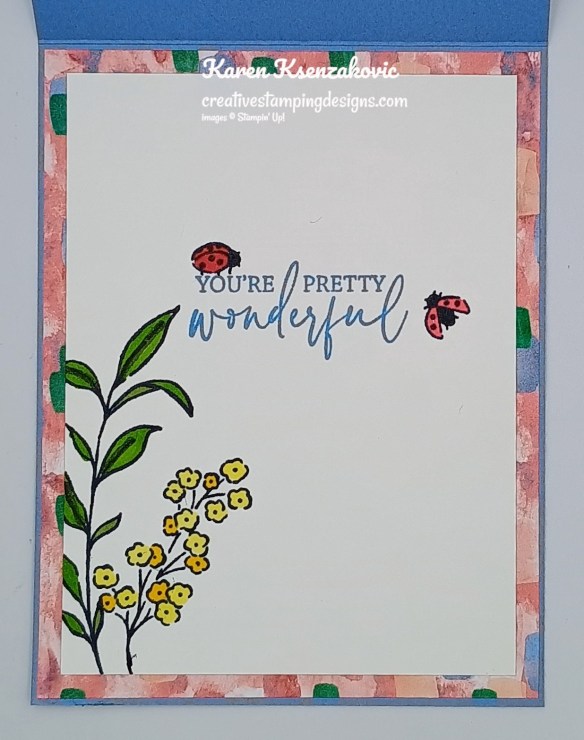
On a panel of Basic White, stamp the sentiment from the Thankful Garden stamp set in Tuxedo Black Ink. Stamp the flower image from the Thankful Garden stamp set in Petal Pink Ink, stamping off once on scrap paper, on the side of the panel. Adhere the Basic White panel to a Gray Granite mat then to the inside of the Petal Pink card base.
Decorate a Basic White Medium Envelope to finish your card. Stamp the leaf image form the Thankful Garden stamp set in Soft Sea Foam Ink on the envelope front. Adhere a panel of Country Woods DSP to the envelope flap.

Thank you for stopping by my blog today. I hope you like my card and will give it a try. Happy Stamping!!
*********************************************************************************************************
If you need any stamping supplies, I’d love to be your Demonstrator. Just click HERE to go directly to my online store or drop me an email if you have any questions.
MY CURRENT HOST CODE IS: RSQGVJPH
Use this host code when placing an order with me. When you order $50 or greater you will receive a free gift from me! If your order is over $150, please do not use this code, but you’ll still get the free gift. The free gift is your choice of any 1 item valued up to $10.00 from the 2024 – 2025 Annual Catalog, January – April 2025 Mini Catalog or from the Online Exclusives! For any orders $50 or more I will also send you my monthly class tutorials. Click HERE or go to my Customer Rewards for more details and to see what this month’s tutorials are.
Please remember to use my current Host Code and make sure that you can see my name on the final checkout page listed as your Demonstrator when you order so that you know that you’re ordering with me, and you’ll get my rewards!
Happy Stamping, Karen
*********************************************************************************************************
Our Online Zoom Class Registration Ends Today
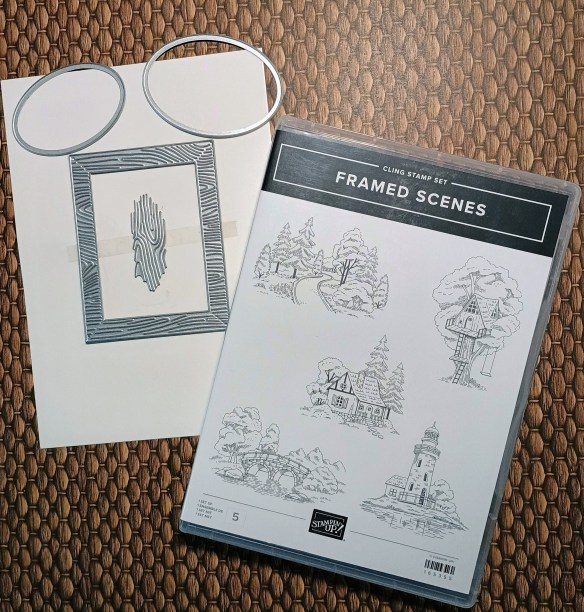
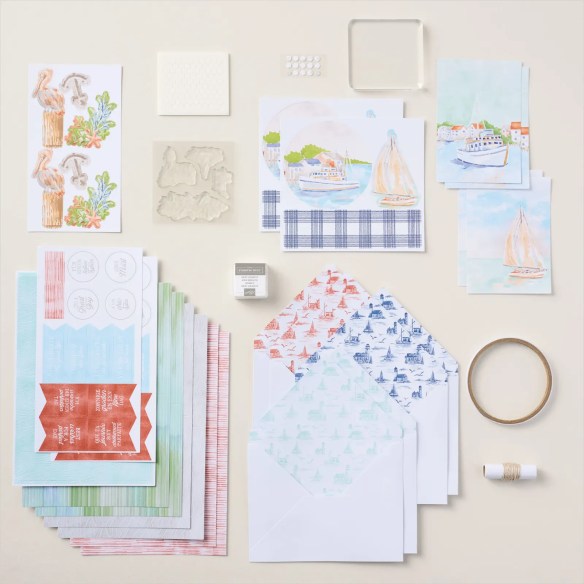
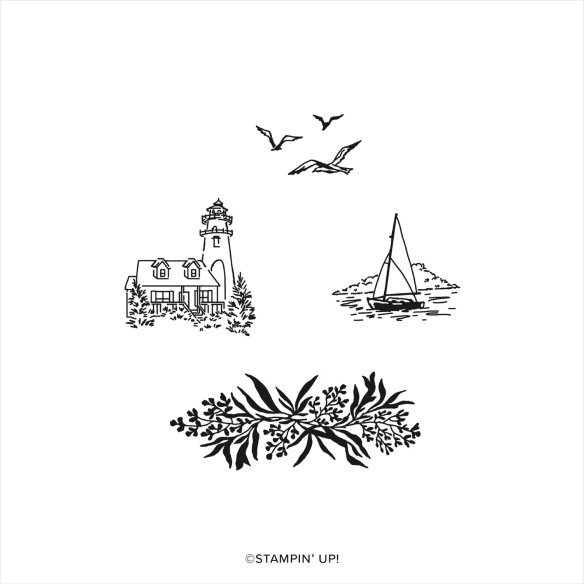
Tara and I are teaming up to do a Masculine Online Zoom Class on Sunday April 27th featuring the Stampin’ Up! Framed Scenes Bundle. I always seem to struggle with masculine cards, and I know a lot of others do too. We will be making 6 different cards featuring the bundle which is pictured below.
The class will be held on Zoom on Sunday April 27th from 1pm – 5pm ET.
The class fee includes:
- 6 complete Pre-Cut card kits with envelopes so they are ready to mail when you’re done.
- Full pack of Natural Matte Dots
- Full pack of Linen Thread
- Zoom class with complete step by step instructions to complete each card as we go.
- PDF with detailed directions and photos
- A Link to the recorded class after we are done so you can watch it again and make more cards.
When you sign up for the class, you will see that you can add additional items needed to make the cards in the class if you do not already have them. These items are optional to add on, but we will be using the items to create the cards. We are offering the Stampin’ Up! Online Exclusive Framed Scenes Bundle at an additional 10% discount when you order it through me during sign up.
The class will be held on Zoom and anyone in the United States is welcome to purchase the class and join us! If you are unable to join us for the live event, but would still like to participate in the class, we will be recording the session so you can watch the replay any time and make the cards. We will also be emailing written tutorials with instructions and cardstock cuts so that you will have a reference too.
Class Cost: $35.00 + $9.00 priority shipping (additional products will be added to the cost for the products) and invoices will be sent out by March 27th.
Class Sign up Deadline: Tuesday March 25th at 5pm ET
Click Here to register for the class now!! Let me know if you have any questions.
*********************************************************************************************************
Start Thinking About Stocking Up on the 2023-2025 In-Colors Before They’re Gone
As we all know, the beautiful 2023 – 2025 In Colors will be retiring at the end of this catalog on April 30. Now is a great time to start stocking up on ink refills, markers and card stock in your favorite colors so that you’re not left scrambling for them when the retiring list is announced.
The retiring list is usually posted in later March or early April and the In Color items on that list become available only while supplies last. So, order yours now so that you’re guaranteed to get them!! Head over to my ONLINE STORE and shop the In-Colors
*********************************************************************************************************
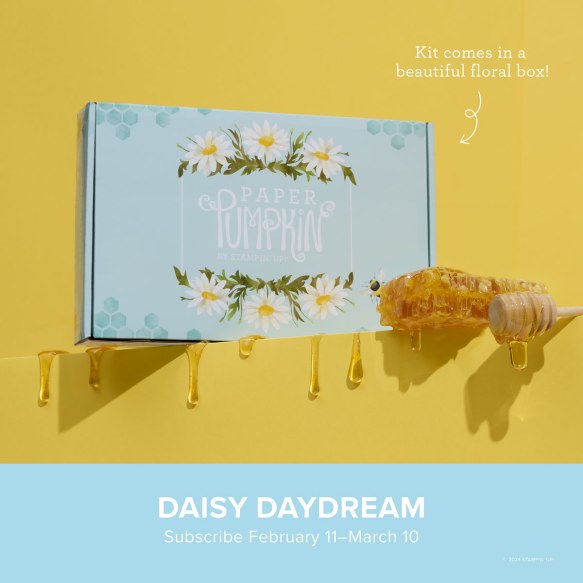
Inked Occasions
Subscribe March 11 – April 10
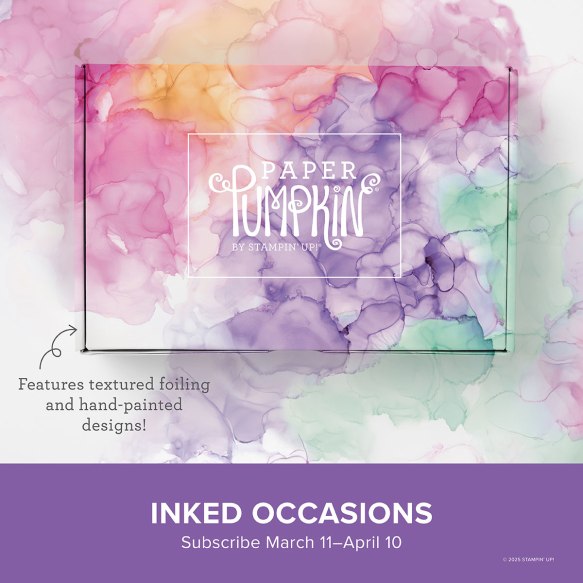
Craft stunning cards with hand-painted, alcohol ink designs!
• Makes 9 cards: 3 each of 3 designs with 9 coordinating envelopes
• Textured gold foil on the card bases and sentiments
• Precut paper pieces and butterfly embellishments
• Coordinating colors: Berry Burst (Classic Stampin’ Spot), Flirty Flamingo,
Fresh Freesia, Gorgeous Grape, Peach Pie, Pool Party
Cards come in a beautiful coordinating box!
Subscribe to the April Paper Pumpkin Kit between 11 March and 10 April by clicking here!
*********************************************************************************************************
Don’t miss the coordinating
Hugs Abloom Dies Add-On!

Make the most of your Paper Pumpkin kits with the Hugs Abloom Dies add-on! Quickly and cleanly cut out a flower, leaf sprig, sentiment label, or Hugs sentiment to elevate your crafting projects. These additional dies are designed to work with THREE Paper Pumpkin Kits: the Inked Occasions Paper Pumpkin Kit, the Mountain Majesties Paper Pumpkin Kit, and the Full of Charm Paper Pumpkin Kit. Pair these dies with other Stampin’ Up! products for even more creative options!
DETAILS
– 4 dies
– Largest die: 2-1/2″ x 1-1/4″ (6.4 x 3.2 cm)
– Use with a Stampin’ Cut & Emboss Machine (sold separately)
You must be a current Paper Pumpkin subscriber to purchase this item. To become a subscriber, visit www.stampinup.com/paperpumpkin.
Note: Supplies may be limited toward the end of the subscription period.
#166238 $12
*********************************************************************************************************
Card stock cuts for this project:
- Basic White Cardstock 3 1/4″ X 4 1/4′(flower), 1″ X 4″(sentiment), 4″ X 5 1/4″(inner liner)
- Gray Granite Cardstock 2 – 4 1/8″ X 5 3/8″(card front & inner liner mat)
- Petal Pink Cardstock 4 1/4″ X 11″(card base scored & folded at 5 1/2″)
- Soft Sea Foam Cardstock 2 3/4″ X 4 1/4″(leaves)
*********************************************************************************************************
Product List
")
")


")


 Designer Series Paper")


 Ribbon")


")


 Designer Series Paper")


")


")
")


")


 Designer Series Paper")


")
")
")


 Woven Ribbon")


")


 Designer Series Paper")


")
")

 Designer Series Paper")


")

 Specialty Designer Series Paper")


 Open Weave Trim")


")


 Designer Series Paper")
 Specialty Paper")


