Good Thursday morning my fellow stampers. Well today’s the big day. The new 2019 Occasions Catalog is live and with every $50 order you get a FREE Sale-A-Bration item. This is my favorite Stampin’ Up time of year. I don’t know about you, but I LOVE free items.
I still have an opening for my online Host Club for January, February and March. I’m doing it during Sale-A-Bration. Everyone loves to get free items, why not be the host for a month and get extra free items. Are you interested in building your Stampin’ Up supplies a little at a time and want to be able to receive host benefits? An Online Host Club might be the perfect solution for you! With the new Occasions and Sale-A-Bration Catalogs starting on today, this is a great time to join!
You sign up for a 3 month term and commit to:
- A $50.00 minimum order each month (which will get you a free Sale-A-Bration item)
- Place your order by the 20th of each month
- Using the Host code for each month provided to you in an email sent out at the beginning of each month
A random draw will determine your host month and you are guaranteed:
- a $150.00 Workshop order during your host month
- $15.00 minimum of Host Dollars to spend on the exclusive Host Stamp Sets, or any other current Stampin’ Up! product during your host month
- At the end of the 3 months you will get a gift from me.
If you are interested in joining, please contact me ASAP. This is a great way to earn some free products and build your Stampin’ Up supplies.
Now on to my card for today. For today I used some of the new DSP from the Occasions Catalog and a couple of the FREE items you can earn from Sale-A-Bration. Take a look.
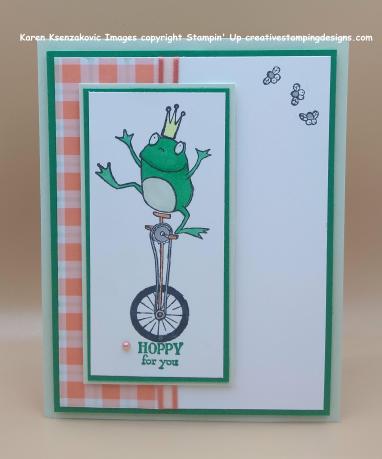 I started with a piece of Grapefruit Grove Gingham Gala 6 X 6 Designer Series Paper. Using my Soft Sea Foam Stampin’ Blends Marker I drew lines between the checks to make it look like plaid. I adhered a small piece of the DSP to the left side of a Whisper White card front using Snail. I wrapped a piece of the Grapefruit Grove 1/4″ Organdy Ribbon around the card front on the seem. I adhered the card front to a Call Me Clover mat using Multipurpose Liquid Glue. In the upper right corner of the Whisper White panel, I stamped the flies from the So Hoppy Together stamp set in Tuxedo Black Memento Ink and colored them in using my Smoky Slate Stampin’ Blends Marker.

On a small piece of Whisper White cardstock, I stamped the Frog riding the unicycle from Stampin’ Up So Hoppy Together stamp set in Tuxedo Black Memento Ink. I stamped the sentiment from the same stamp set in Call Me Clover Ink below the wheel. I colored the frog and unicycle in using my Basic Black, Call Me Clover, Pineapple Punch, Smoky Slate and Soft Sea Foam Stampin’ Blends Markers and my Grapefruit Grove Stampin’ Write Marker. I adhered the artwork to a Call Me Clover mat using Snail and then to a Soft Sea Foam mat using Multipurpose Liquid Glue.
 I adhered the matted artwork to the card front using Stampin’ Dimensionals and the card front to a Soft Sea Foam card base using Stampin’ Dimensionals. I added 1 Grapefruit Grove Share What You Love Artisan Pearl next to the sentiment.
 On the inside Whisper White panel I stamped the frog from So Hoppy Together stamp set on the bottom portion of the panel and the flies from the same set by the frog. I colored it in the same as I did for the front of the card. I adhered a small strip of the Gingham Gala 6 X 6 DSP to the bottom of the panel. I stamped the sentiment from the Postcard Pals stamp set in Call Me Clover in the center of the panel. I adhered the Whisper White panel to a Call Me Clover mat using Snail, then adhered it to the Soft Sea Foam card base using Multipurpose Liquid Glue.


To finish my card, I decorated a Medium Whisper White Envelope. I stamped the frog from the So Happy Together stamp set on both sides of the envelope front and colored them in the same as I did on the card. I adhered a piece of the Gingham Gala 6 X 6 DSP to the envelope flap.
Thank you for stopping by my blog today. This was really a fun card to make and I hope you will give it a try. Happy Stamping.
****************************************************************************************************
If you need any stamping supplies, I’d be very happy to be your Demonstrator. Just click here to go directly to my online store or drop me an email if you have any questions.
MY CURRENT HOST CODE IS: Q2B3H6HZ
Happy Stamping, Karen!
****************************************************************************************************
Paper Pumpkin and Animal Expedition Go Wild for Valentine’s Day
January’s Paper Pumpkin Kit is a Valentine Kit called Be Mine. It combines everything you love about Paper Pumpkin-style treat packaging with adorable critter coordination in the popular Animal Expedition Kit!
About the Kit
January’s Paper Pumpkin kit is a Valentine kit coordinates with the Animal Expedition Suite. Here are a few more details:
- Makes 24 adorable Valentine’s treat packages
- Coordinating colors: Crumb Cake, Flirty Flamingo, Lemon Lime Twist, Melon Mambo, Petal Pink, and Pool Party
Subscribers must have an active subscription by January 10, 2019 to receive the Be Mine, Valentine kit.
Supplies are limited, so don’t wait—subscribe today!
In the event of supplies running out, Stampin’ Up! will end the subscription period early and stop taking new subscribers for January.
If you’re interested in subscribing to Paper Pumpkin yourself, you can either sign up for a subscription where you are billed monthly for your kit or you can purchase a prepaid subscription in my online store. Just click here to go directly to my online store. To see more information and sign up for the monthly subscription click here.
****************************************************************************************************
Card stock cuts for this project:
- Call Me Clover Cardstock 2″ X 4 1/8″ (artwork mat), 3 15/16″ X 5 3/16″ (card front mat), 4″ x 5 1/4″ (inner liner mat)
- Soft Sea Foam Cardstock 8 1/2″ X 5 1/2″ (card base scored and folded at 4 1/4″), 2 18/” X 4 1/4″ (artwork 2nd mat)
- Whisper White Cardstock 1 7/8″ X 4″ (artwork), 3 3/4″ X 5″ (inner liner)
- Gingham Gala 6 X 6 Designer Series Paper (1 1/2″ X 5″) strip on card front), piece for envelope flap
****************************************************************************************************
Product List

 The other challenge I joined in with is Colour and Sketches #305. Stop by to see what everyone has made at Colour and Sketches and to play along with them .. Here is their sketch.
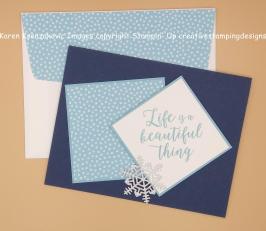
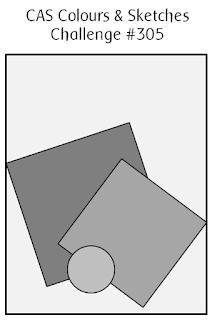 I’ve made a very clean and simple card today for the 2 challenges. I don’t usually do simple, but every once in a while I like to add one in. Take a look.
 I started by cutting 2 mats in Balmy Blue cardstock. On the larger mat I adhered a piece of Subtles 6 X 6 Designer Series Paper in Balmy Blue using Snail. I adhered the matted DSP to a Night of Navy card base using Multipurpose Liquid Glue.
 On a panel of Whisper White cardstock I stamped the sentiment from the Stampin’ Up Colorful Seasons stamp set in Balmy Blue Ink. I adhered the stamped panel to the smaller Balmy Blue mat using Snail. I then adhered it to the Night of Navy card base, using Stampin’ Dimensionals, over lapping the matted DSP panel.
 On the inside I stamped the larger snowflake from the Colorful Seasons stamp set in Balmy Blue Ink, stamping off once, across a Whisper White panel. I stamped the sentiment from the same stamp set in Night of Navy Ink over the snowflakes. I adhered the Whisper White panel to the inside of the Night of Navy card base using Multipurpose Liquid Glue.


 The next one I played along with is Global Design Project Color Challenge #173. Be sure to stop by
  Here is what I came up with for the 2 challenges Take a look
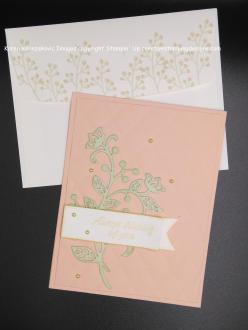
 I started with a Petal Pink card front and using my Big Shot I embossed it with my Tufted Dynamic Textured Impressions Embossing Folder. I then cut out the largest flourish from the Flourish Thinlits Dies in Soft Sea Foam cardstock 2 times. I adhered the one flourish on top of the second to make it a little thicker. I sponged the die cut with my Soft Sea Foam Ink then adhered it to the card front using Multipurpose Liquid Glue. I added some Wink Of Stella to the flowers on the die cut.
 On a small strip of Whisper White cardstock I stamped the sentiment from the Stampin’ Up Accented Blooms stamp set in So Saffron Ink. I cut the strip into a banner using my Triple Banner Punch and sponged the edges with the So Saffron Ink. I adhered the banner to the card front using Stampin’ Dimensionals.
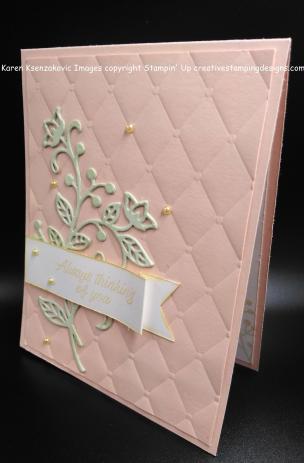 I added a few So Saffron Share What You Love Artisan Pearls to the card front and the banner. I adhered the card front to a Petal Pink card base using Multipurpose Liquid Glue.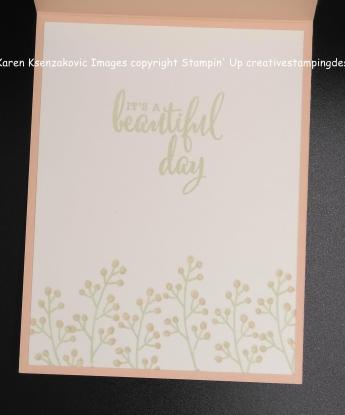



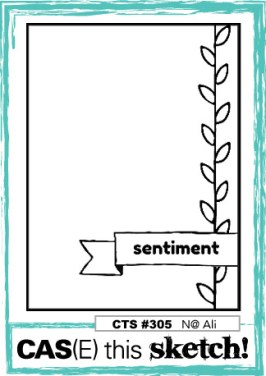
 Here is the CAS(E) This Sketch Challenge # 303.
 Here is what I came up with for the 2 challenges. Take a look.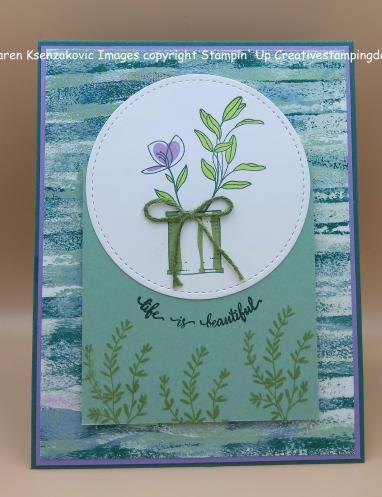
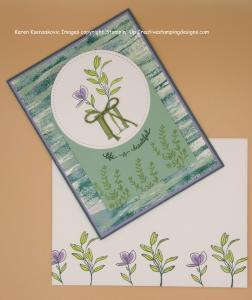
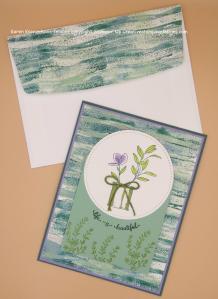
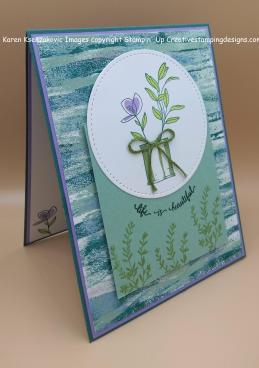 On a piece of Whisper White cardstock I stamped 2 of the plant images from the Stampin’ Up Seasoned With Kindness Host Exclusive stamp set. I first stamped the outlines in Tranquil Tide Ink. I then stamped the inside of the leaves in Lemon Lime Twist Ink and the inside of the flower in Highland Heather Ink. I stamped the inside of the flower-pot in Pear Pizzazz Ink. I did all the stamping using my Stamparatus. It made lining everything up very easy. Using my Big Shot I cut the artwork out using the circle from the Stitched Shapes Framelits Dies.
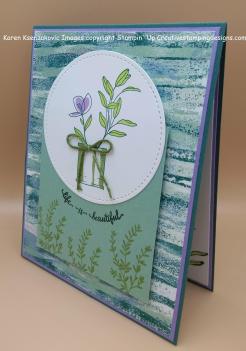 I adhered the circle to a small piece of Mint Macaron cardstock using Snail. I stamped the sentiment from the Stampin’ Up Easter Beauty stamp set in Tranquil Tide Ink around the bottom of the circle. I stamped another plant image from the Seasoned With Kindness stamp set in Pear Pizzazz Ink along the bottom of the Mint Macaron panel. I adhered the artwork to the card front using Stampin’ Dimensionals. I then took a piece of Whisper White Bakers Twine and colored it using my Pear Pizzazz Ink. I tied a small bow and attached it to the flower pot using a Glue Dot.
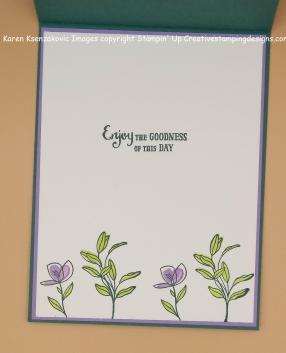 On the inside I stamped the plant images from the Seasoned With Kindness stamp set along the bottom of a Whisper White panel the same way I stamped them on the card front. I stamped the sentiment from the same stamp set in Tranquil Tide Ink in the center of the panel and adhered it to a Highland Heather mat using Snail. I then adhered it to the Tranquil Tide card base using Multipurpose Liquid Glue.