Stampin’ Up! Season of Chic Double Z Fold

Good Saturday morning stamping friends and welcome to the weekend. Does anyone have any plans? It’s supposed to be a beautiful day here in NJ with temperatures in the low 80’s today. I’ll be at work all day, but hopefully it’ll still be nice when I get out so I can go walking.

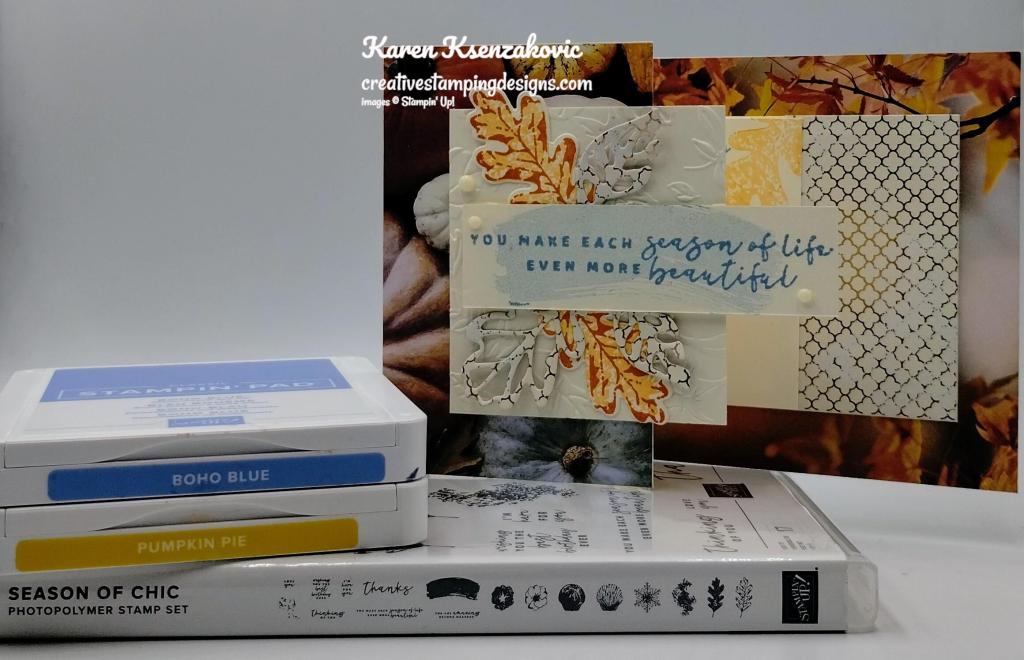
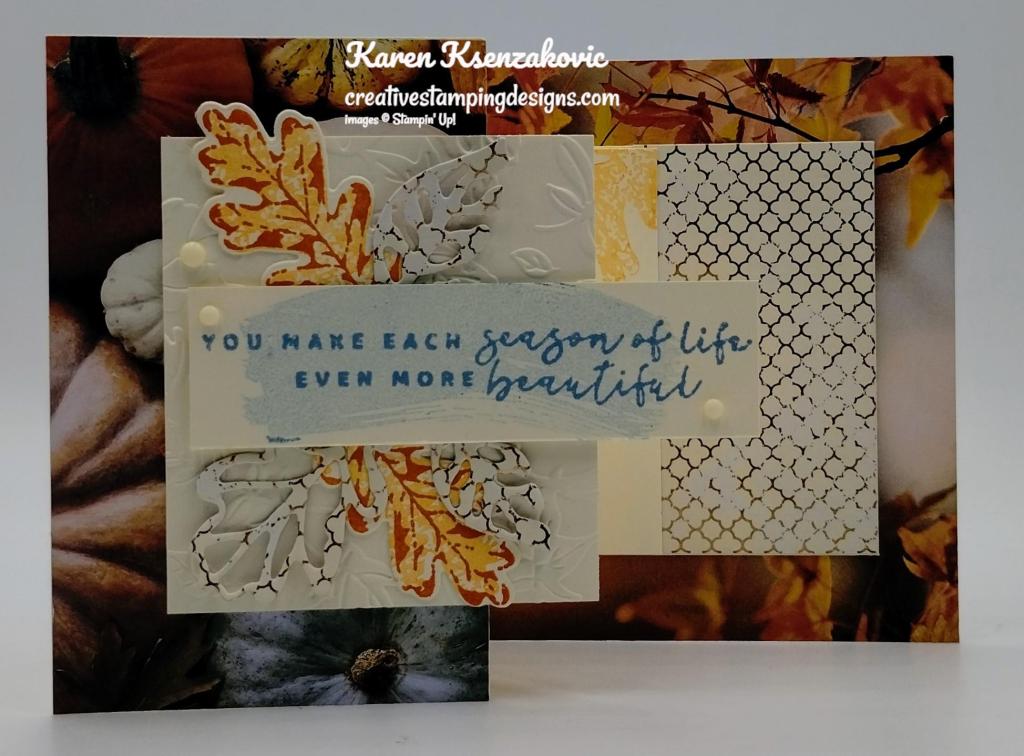
I pulled out one of my favorite sets from the Annual Catalog for today’s card. If you’d like to see a quick video how I made my card, Click Here for my Instagram Reels. Here’s my card for today.
Stampin' Up! Season Of Chic Fun Fold 1 creativestampingdesigns.com

I used the Stampin’ Up! Season of Chic Photopolymer Stamp Set along with the All About Autumn 6 X 6 Designer Series Paper, Chic Dies and Leaf Fall 3D Embossing Folder for my card today.

I played along with the Inspire. Create. Challenge #154 – CASE The Designer.

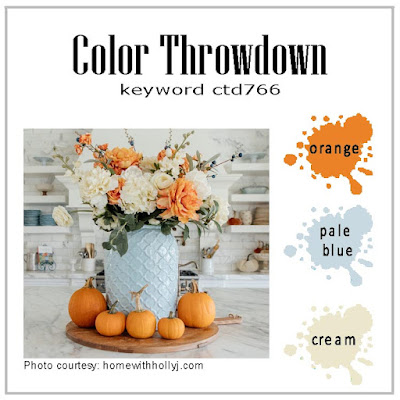
My colors are from the Color Throwdown Challenge #766.

I also joined in on the TGIF Challenge #444 Theme Challenge

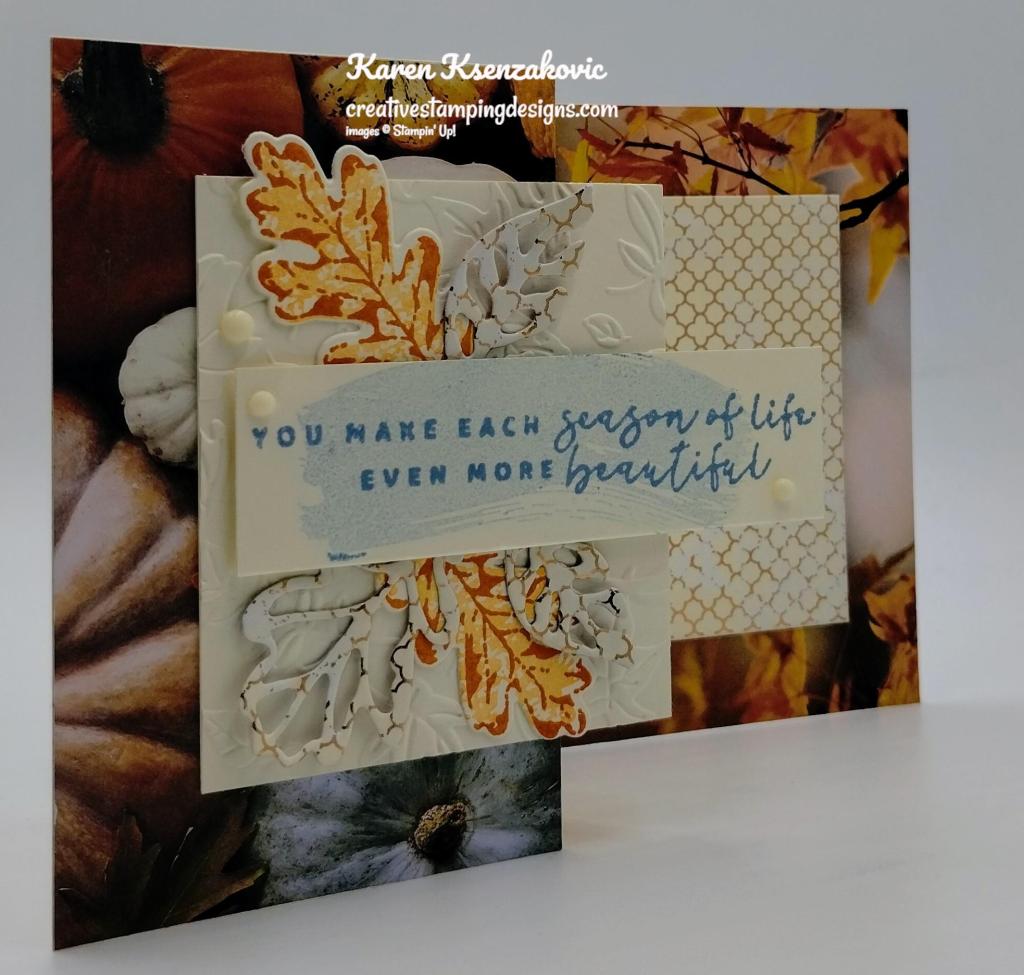
Stampin' Up! Season Of Chic Fun Fold 2 creativestampingdesigns.com

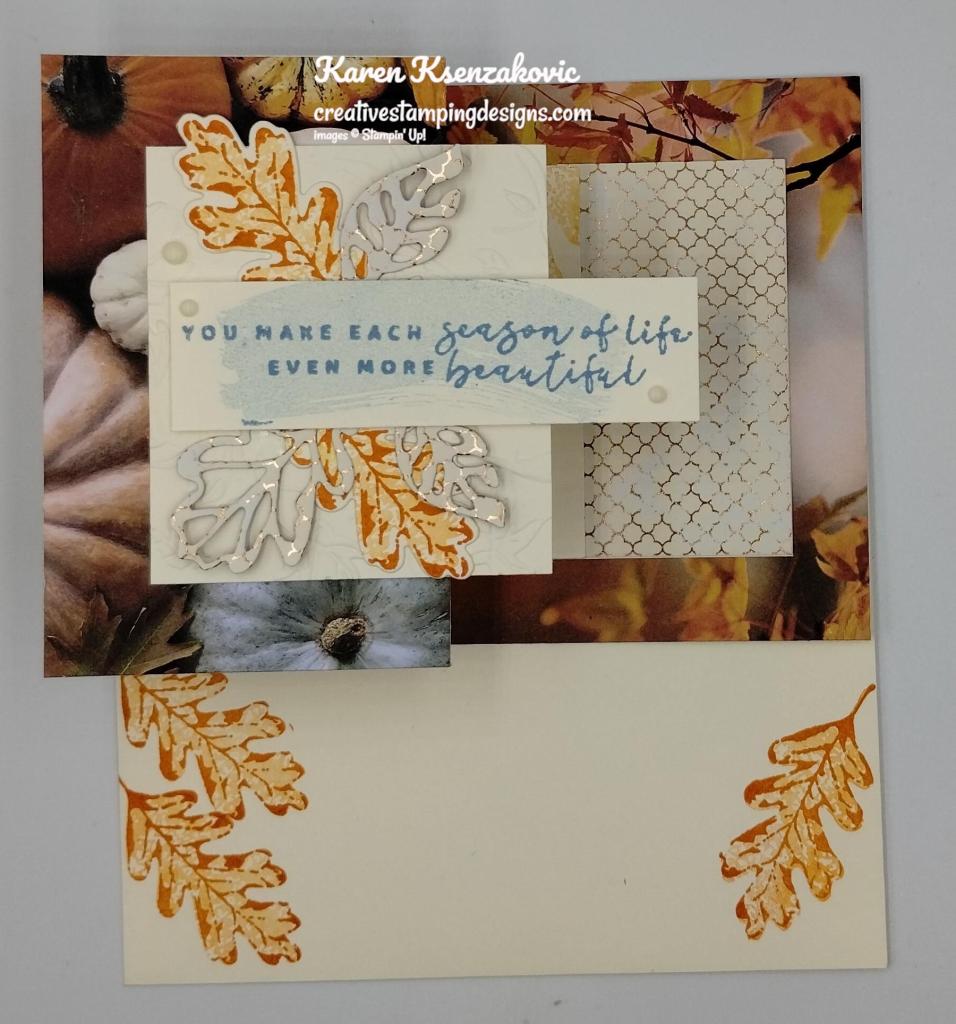
I started by adhering a panel of All About Autumn DSP to the large card front using Multipurpose Liquid Glue. I embossed a small panel of Very Vanilla using the Leaf Fall EF and adhered it to the front of the small card base using Multipurpose Liquid Glue. I adhered a larger panel of All About Autumn DSP to the inside of the large card base using Multipurpose Liquid Glue.

Stampin' Up! Season Of Chic Fun Fold 3 creativestampingdesigns.com

On a panel of Very Vanilla, I stamped the swish image from the Season of Chic stamp set in Boho Blue Ink, stamping off once on scrap paper. I stamped the sentiment from the Season of Chic stamp set in Boho Blue Ink over the swish image. On a panel of Very Vanilla, I stamped the outline leaf image from the Season of Chic stamp set in Pumpkin Pie Ink 2 times. I stamped the solid fill leaf image from the Season of Chic stamp set in Pumpkin Pie Ink, stamping off once on scrap paper, over the outline images. I cut the leaves out using the Chic Dies. I cut 3 of the details leaves out from a panel of All About Autumn DSP using the Chic Dies.

Stampin' Up! Season Of Chic Fun Fold 4 creativestampingdesigns.com

I adhered the small card base to the large card base using Multipurpose Liquid Glue. I adhered the sentiment to the small card front using Stampin’ Dimensionals. I adhered the leaves under the sentiment using Multipurpose Liquid Glue. I added a few Very Vanilla Classic Matte Dots to the card front.

Stampin' Up! Season Of Chic Fun Fold 5 creativestampingdesigns.com

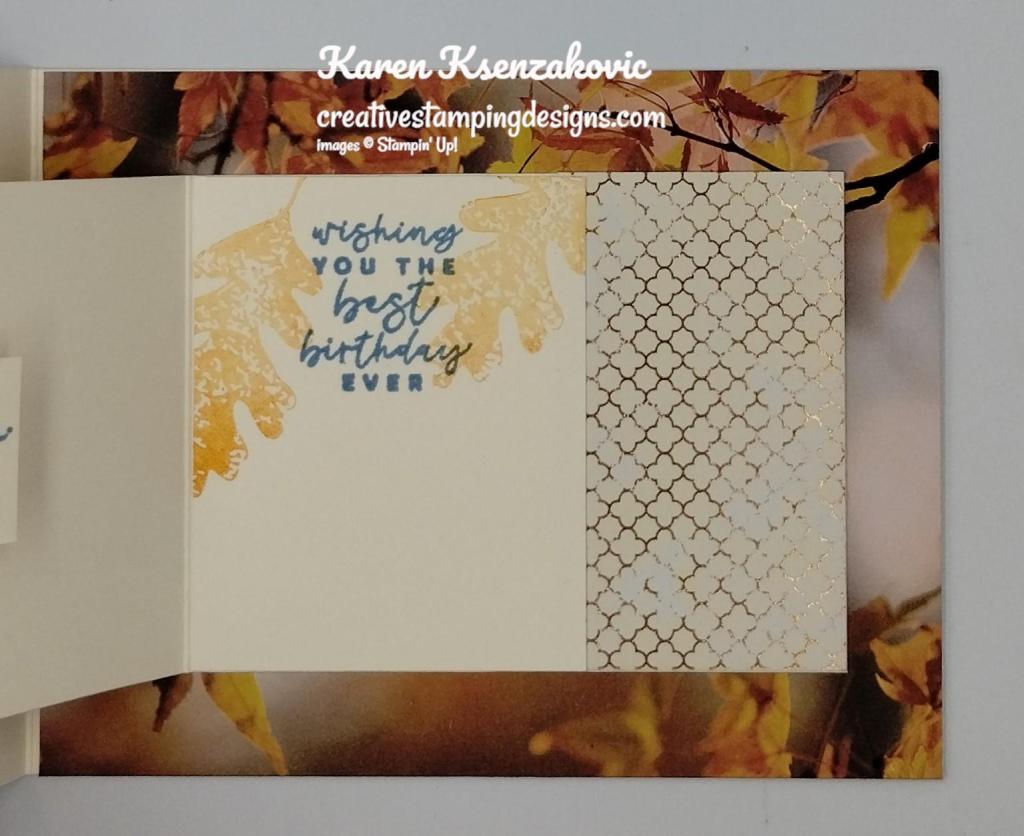
I stamped the sentiment from the Season of Chic stamp set in Boho Blue Ink on a panel of Very Vanilla. I stamped the solid leaf image from the Season of Chic stamp set in Pumpkin Pie Ink on either side of the sentiment, stamping off once on scrap paper. I adhered a panel of All About Autumn DSP to the right side inside the small card base. I adhered the Very Vanilla panel to the inside of the small card base.

Stampin' Up! Season Of Chic Fun Fold 6 creativestampingdesigns.com

To finish my card, I decorated a Very Vanilla Medium Envelope. I stamped the outline leaf image from the Season of Chic stamp set in Pumpkin Pie Ink on the envelope front. I stamped the solid leaf image from the Season of Chic stamps et in Pumpkin Pie Ink, stamping off once on scrap paper, over the outline image. I adhered a panel of All About Autumn DSP to the envelope flap.

Stampin' Up! Season Of Chic Fun Fold 7 creativestampingdesigns.com

Thank you for stopping by my blog today. I hope you like the card and will give it a try. Happy Stamping!!

*********************************************************************************************************

If you need any stamping supplies, I’d love to be your Demonstrator. Just click HERE to go directly to my online store or drop me an email if you have any questions. 

MY CURRENT HOST CODE IS:   WRAGYZRS

Use this host code when placing an order with me. When you order $50 or greater you will receive a free gift from me! If your order is over $150, please do not use this code, but you’ll still get the free gift. The free gift is your choice of any 1 item valued up to $10.00 from the 2023-2024 Annual Catalog!  Unfortunately, packs of cardstock are no longer an option for a free gift. Shipping has become too expensive to ship and it’s costing me as much to ship as the cardstock costs. For any orders $50 or more I will also send you my monthly class tutorials.  Click HERE or go to my Customer Rewards for more details and to see what this month’s tutorials are.

Please remember to use my current Host Code and make sure that you can see my name on the final checkout page listed as your Demonstrator when you order so that you know that you’re ordering with me, and you’ll get my rewards! 

Happy Stamping, Karen

*********************************************************************************************************

In response to changing policies at Stampin’ Up – I’m adjusting my Ordering Gift policy as well.  I’m having to get a little more tough on the adding of Host codes when you place your order thru my Online Store.

Not to worry – you’re still going to get that $10 ordering gift for orders of $50 (before shipping & tax) or greater.  And the gift is still any 1 SU! product up to that $10 value – which includes some of our fun Host Sets!

But – if you DO NOT use the Host code for your orders of less than $150 (this is the RETAIL total before Shipping & Handling), then you’ll have two options:

  1. You’ll need to call Stampin’ Up! (1-800-Stamp-Up) and ask them to add it for you. They’re very helpful and will get it done quickly!  OR….
  2. If your order was over the $50 threshold but under $150, then…you’ll forfeit that $10 ordering gift and rewards – this is the Bummer Option – and I REALLY don’t want to do this, SO please remember to add my Current Host Code.

*********************************************************************************************************

Final Days for Joining Special October 3 – October 31

If you’ve been thinking about joining the Stampin’ Up! community October is the perfect time. You can add new Online Exclusive products to your Starter Kit, and still have more money to spend. This is really an awesome deal and I’d love to have you on my team. The added free registration to OnStage is a great bonus and then you can order the Bee Mine Suite collection for your 1st order.

We want to celebrate our 35th anniversary in style! From October 3 – October 31, anyone who joins our fun crafting community as a new demonstrator can choose either 35% OFF the cost of their Starter Kit or get 35% MORE product with their Starter Kit! What a deal!

Promotion Period: 3–31 October

New demonstrators can choose one of the following options for your Starter Kit:

Option 1: Get 35% OFF the normal cost of a Stampin’ Up! Starter Kit. Those who select this option will receive $125 USD worth of product for only $64.35 USD!

Option 2: Get 35% MORE product with their Starter Kit. Those who select this option will receive $168.75 USD worth of product by spending $99 USD!

No matter which option you choose for your Starter Kit, both provide free business supplies and free shipping on your Starter Kit—not to mention all the fun that comes with being part of Stampin’ Up!

FREE OnStage @Home Registration

It gets better! Those who sign up for a Starter Kit during this offer will also be automatically registered for FREE* to our virtual OnStage event on 11 Novembera $77 USD value!

  • Those who sign up for this offer have the opportunity to watch the event independently, gathered together with other demonstrators, or with their Team Leader.
  • Demonstrators who join during this promotion will be automatically added to the OnStage attendees; they do not need to register separately.
  • Demonstrators who join during this promotion will also receive an email with all the information about this event.

*Please note that free registration will not include the gift box.

Stampin’ Up! events are always SO much fun!!  Bonus that you can join and attend your first even for free!!

Come join my team.

We welcome all types of Demonstrators from those only purchasing to get the discount for themselves to those who want to run a business and anywhere in between!  There’s never any pressure to sell! We’re a group that loves to stamp and share what you create. Demonstrators get lots of perks including at least a 20% discount on all orders that you place as a Demonstrator, invitations to Stampin’ Up! Demonstrator events and preordering from upcoming catalogs and promotions (like the new Online Exclusives coming in November!!)!  The new Online Exclusive items ARE available to pick as part of your Starter Kit (or you can order them later and get your 20% discount!). 

*********************************************************************************************************

Warm Wishes

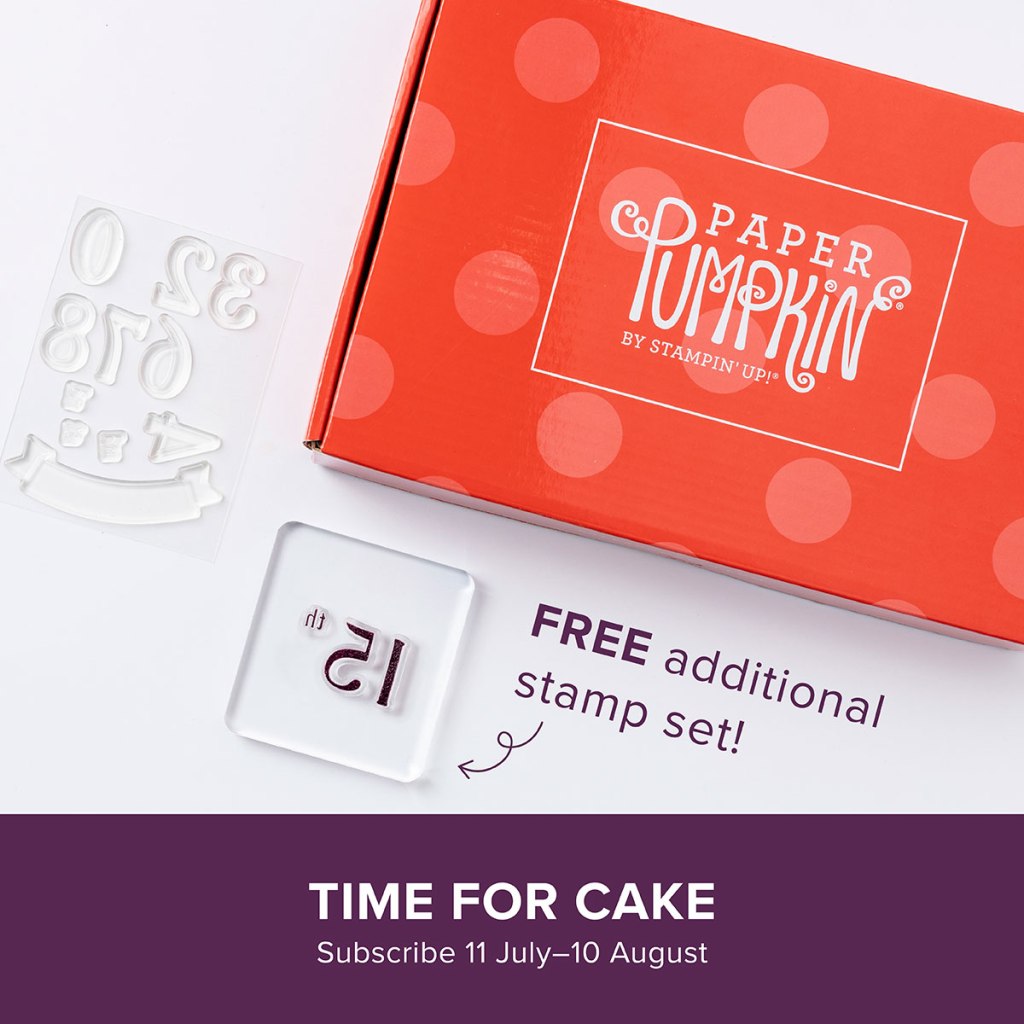
Subscribe October 11 – November 10

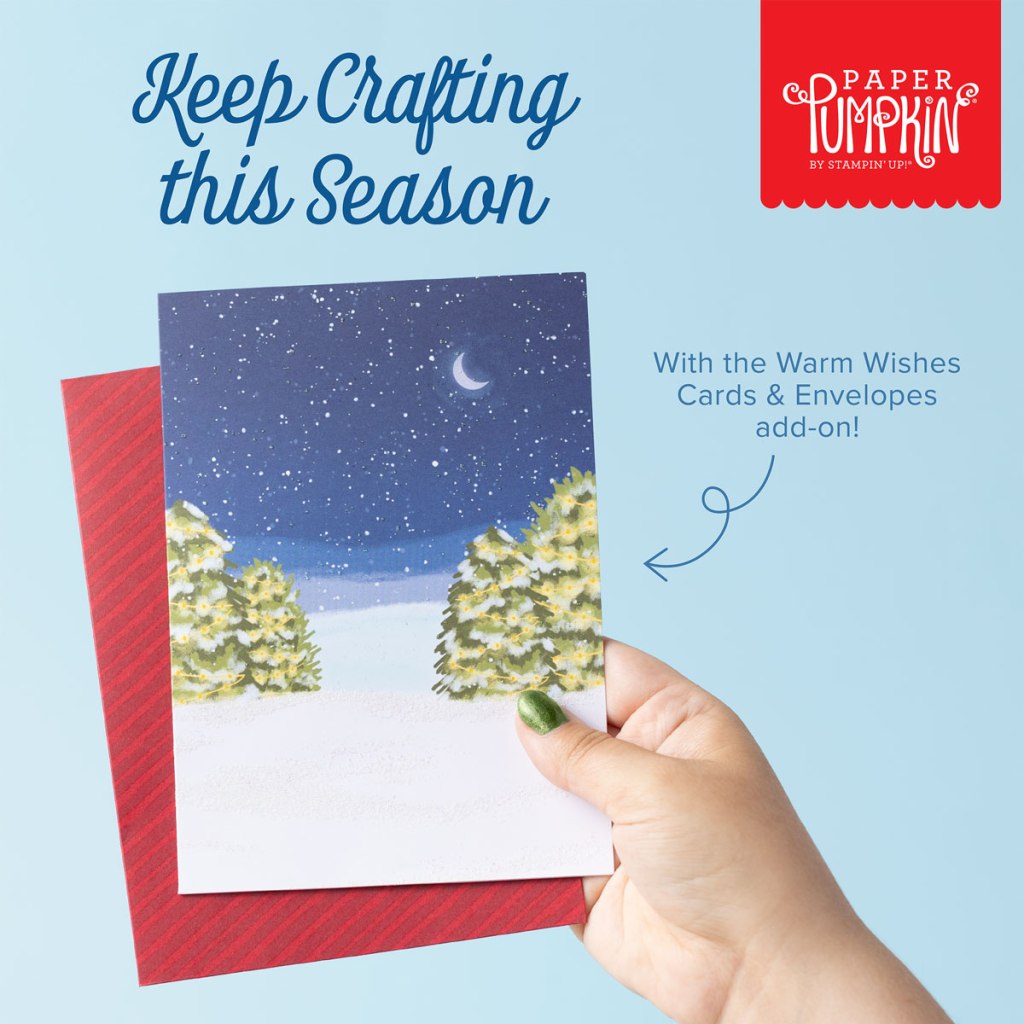
Light up the Christmas season with this month’s Paper Pumpkin kit! With traditional Christmas home designs and warm Christmas wishes, spread the light of Christmas with a gift box. Plus, you can get the Warm Wishes Cards & Envelopes Add-On to take your Christmas crafting even further (available while supplies last). This month’s kit coordinates with the October Home for the Holidays Paper Pumpkin Kit! If you can’t get enough of this traditional Christmas scene and need more cozy crafts, then make sure to check the October Refill’s availability and spend more time crafting this holiday season!

This month’s kit comes with everything you need to make traditional Christmas treat packaging boxes that you can fill up with all sorts of small goodies, treats, gifts, and more. Subscribe today so you can take part in spreading the light of Christmas around you!

This kit includes:

  • 8 boxes; 4 each of 2 designs
  • 1 Mossy Meadow Stampin’ Spot
  • Iridescent glitter accents on paper
  • Precut paper pieces
  • Linen thread
  • Treat bags
  • Warm Wishes photopolymer stamp set
  • Completed box size: 4-1/4″ x 4-1/2″ x 1-1/2″ (10.8 x 11.4 x 3.8 cm) and 4/1/4″ x 3-3/4″ x 1-1/2″ (10.8 x 9.5 x 3.8 cm)
  • Coordinating Stampin’ Up! colors: Balmy Blue, Blueberry Bushel, Cherry Cobbler, Crushed Curry, Daffodil Delight, Lemon Lolly, Mossy Meadow, Night of Navy, Old Olive, Pecan Pie, Real Red

ADD-ON DETAILS

Warm Wishes Cards & Envelopes
Available for purchase starting 11 October; only while supplies last.
Item number: 163985
$14.00 USD

This add-on includes:
• 20 Cards & Envelopes 
• Iridescent glitter accents on paper
• Folded card size: 5″ x 7″ (12.7 x 17.8 cm)

Subscribe to the November Paper Pumpkin Kit between 11 October and 10 November by clicking here!

Note: Supplies may be limited toward the end of the subscription period.

*********************************************************************************************************

Card stock cuts for this project:

  • Very Vanilla Cardstock 2 3/4″ X 3″ (small card front panel), 1″ X 3 5/8″ (sentiment). 2 3/8″ X 3″ (inner liner), 2: x 4 1/4″ (leaves)
  • Very Vanilla thick Cardstock 4 1/4″ X 11″ (large card base scored & folded at 2 3/4″ & 5 1/2″), 3″ X 9 1/4″ (small card base scored & folded at 2 3/4″ & 5 1/4″)
  • All About Autumn 6 X 6 Designer Series Paper 2 1/4″ X 4 1/4″ (card front panel), 4 1/4″ X 5 1/2″ (inside large card base panel), 1 3/4″ X 3″ (inside small card base panel), 2″ X 2 1/2″ (leaves), 2 1/4″ X 6″ (envelope flap)

*********************************************************************************************************

Product List

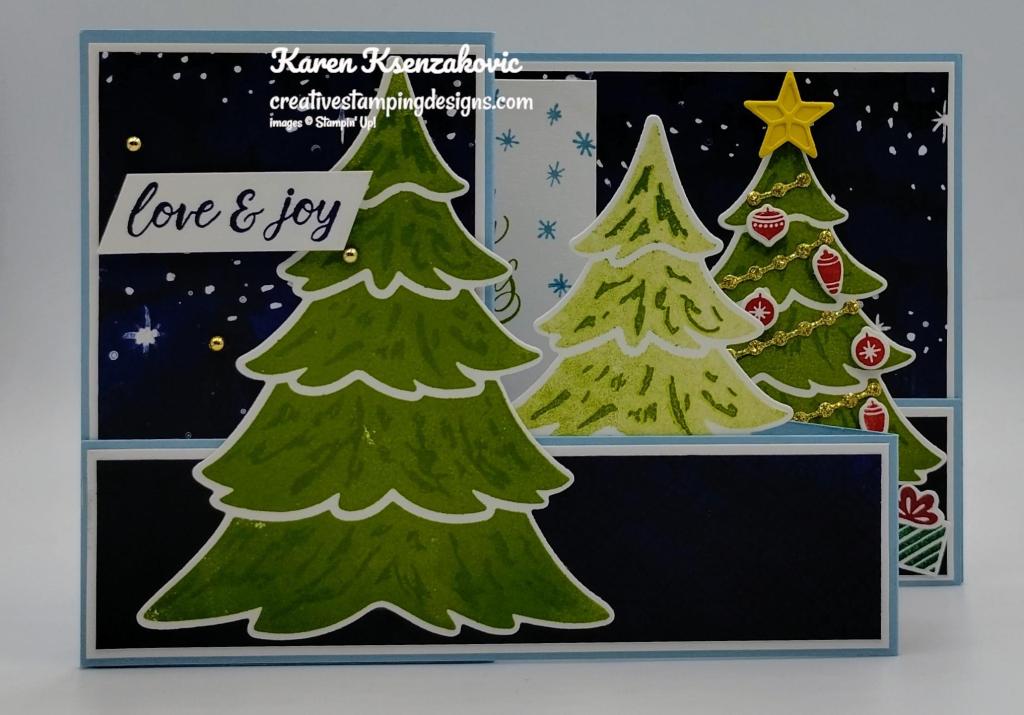
Stampin’ Up! Merriest Trees for Fun Fold Friday

Good Friday morning stamping friends and welcome to my Fun Fold Friday. I hope you are ready for the weekend. I’ll be working all day tomorrow. I think I heard it’s supposed to start cooling down here in NJ.

Today’s card I made on YouTube Live on Wednesday. If you were able to join me or watched the replay, thank you. If you’d like to watch my video and stamp along, the measurements are below, just above the supply list, along with the link to my YouTube channel. Here is my card for today.

Stampin' Up! Merriest Trees Fun Fold 1 creativestampingdesigns.com

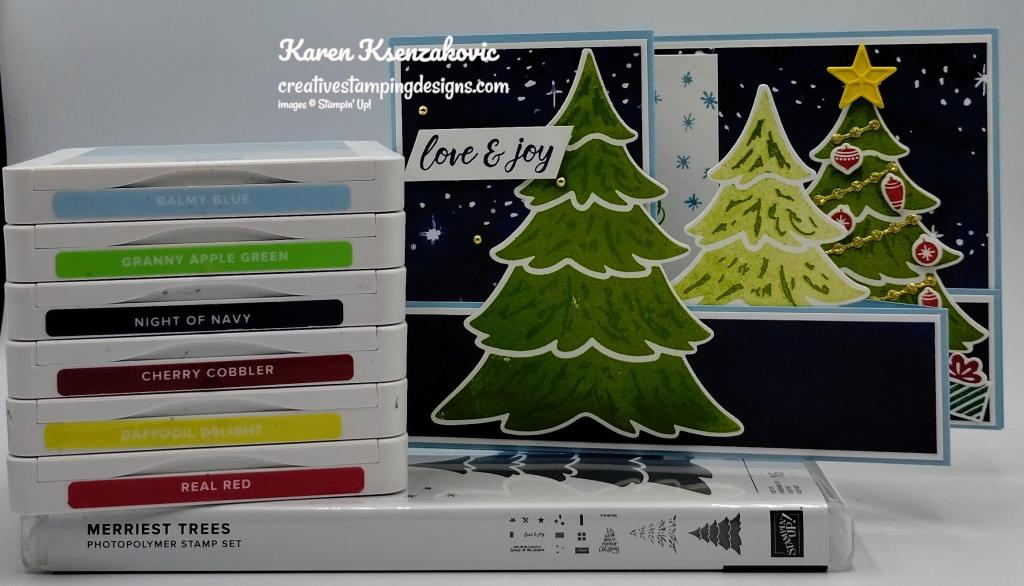
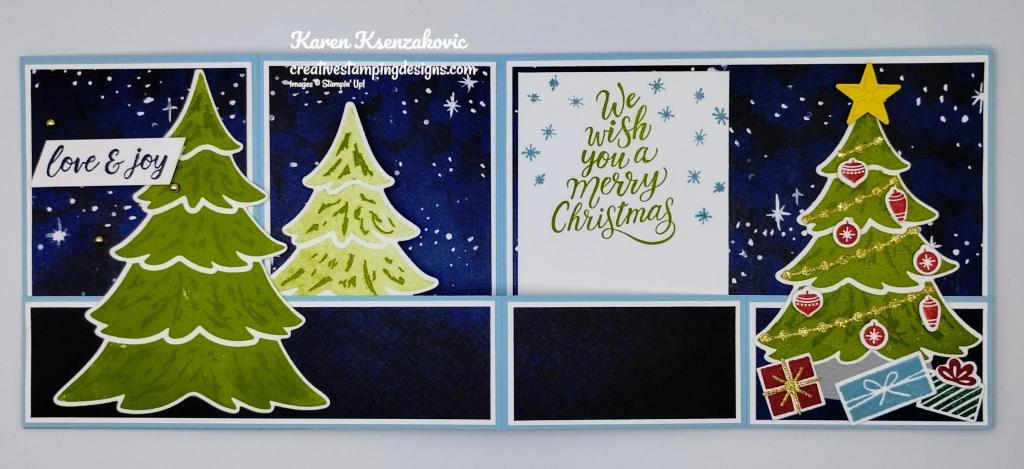
I used the Stampin’ Up! Merriest Trees Bundle along with the O Holy Night Designer Series Paper and Online Exclusive Silver & Gold Adhesive Backed Glimmer Paper for my card today.

Stampin' Up! Merriest Trees Fun Fold 2 creativestampingdesigns.com

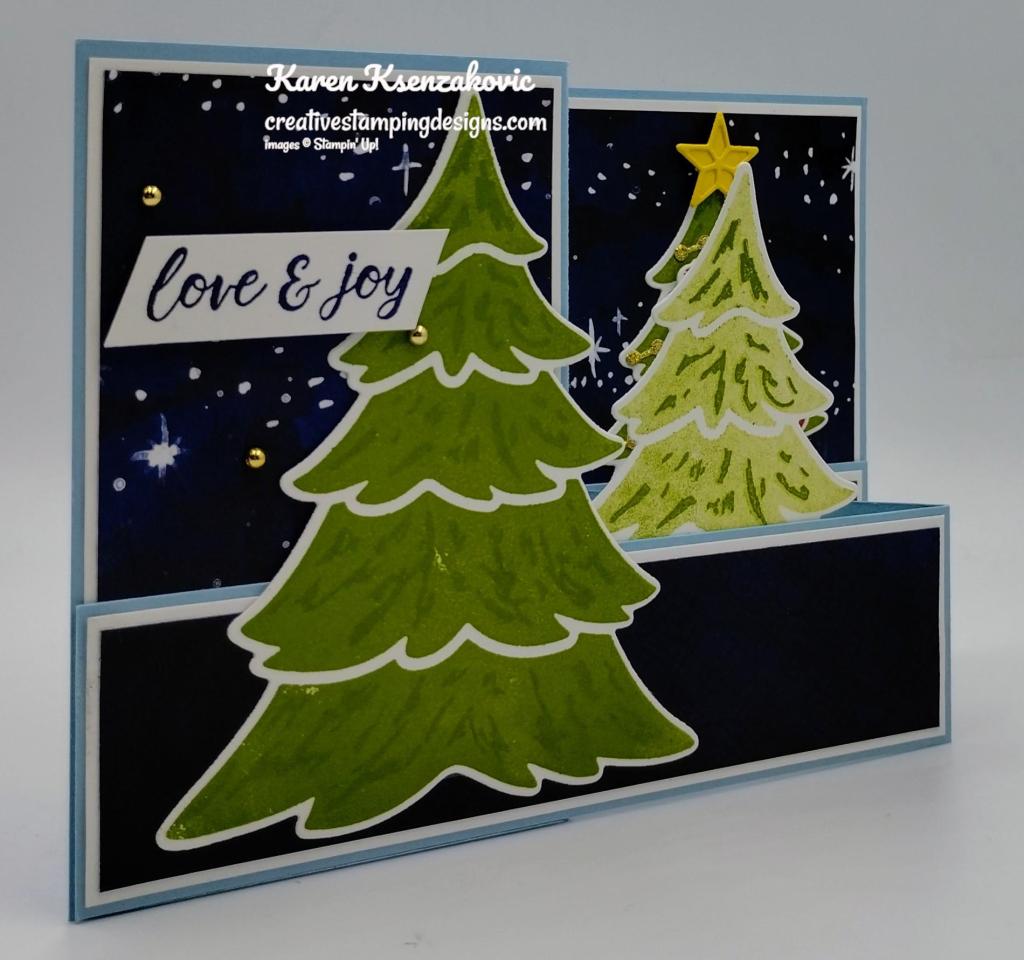
I started by adhering all the panels of O Holy Night DSP to coordinating Basic White mat using Stampin’ Seal. I adhered the layered panels to the Balmy Blue card base and card base strip using Multipurpose Liquid Glue. I folded the card base and card base strip on the score lines for a ‘Z’ fold card. The larger section of the card base strip goes in the front and the larger section of the card base goes in the back. I adhered the 1 1/2″ ‘Z’ fold strip to the bottom of the Balmy Blue card base using Tear & Tape. On a panel of Basic White, I stamped the solid tree image from the Stampin’ Up! Merriest Trees Photopolymer Stamp Set in Granny Apple Green Ink 4 times. Some were stamped in full strength, and some were stamped off once on scrap paper. I stamped the details tree image from the Merriest Trees stamp set in Granny Apple Green Ink over the solid tree images. I cut the trees out using the different sizes of Merriest Trees Dies.

Stampin' Up! Merriest Trees Fun Fold 3 creativestampingdesigns.com

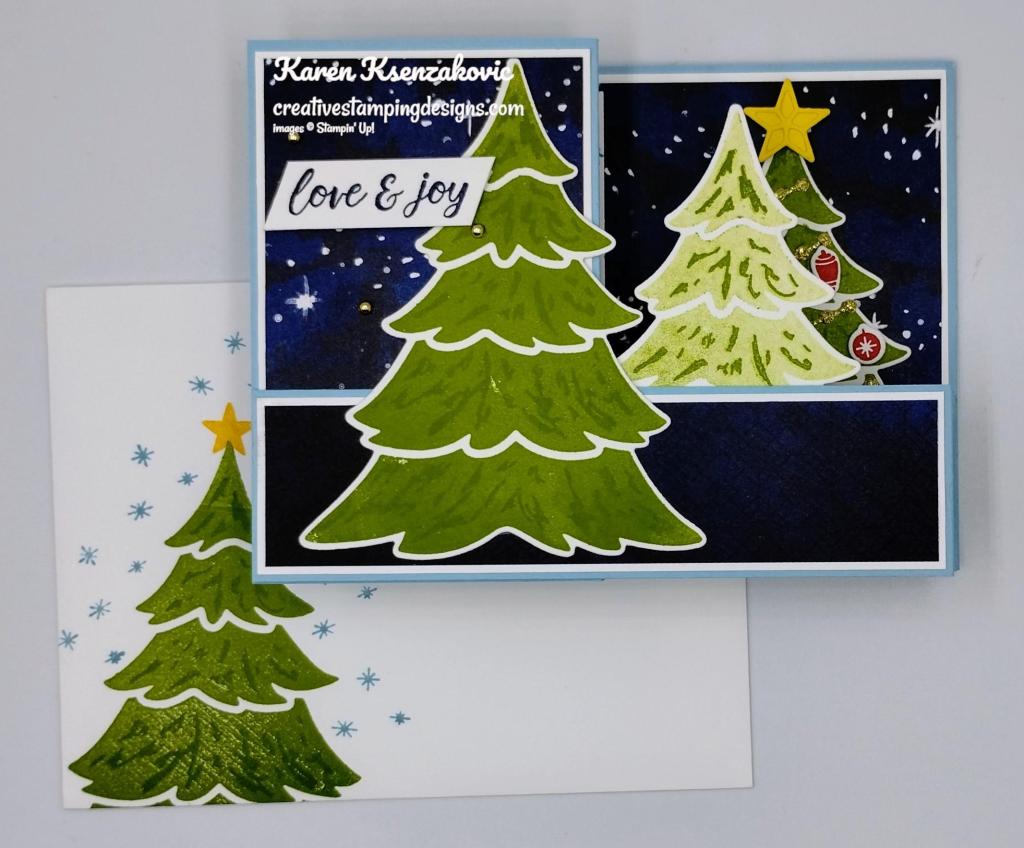
I adhered the largest die cut tree to the front of the card base using Tear & Tape just on the bottom. I stamped the sentiment from the Merriest Trees stamp set in Night of Navy Ink on a strip of Basic White. I cut the 2 ends on an angle using the Paper Trimmer.

Stampin' Up! Merriest Trees Fun Fold 4 creativestampingdesigns.com

I adhered the stamped off die cut tree to the back of the ‘Z’ fold strip using Tear & Tape.

Stampin' Up! Merriest Trees Fun Fold 5 creativestampingdesigns.com

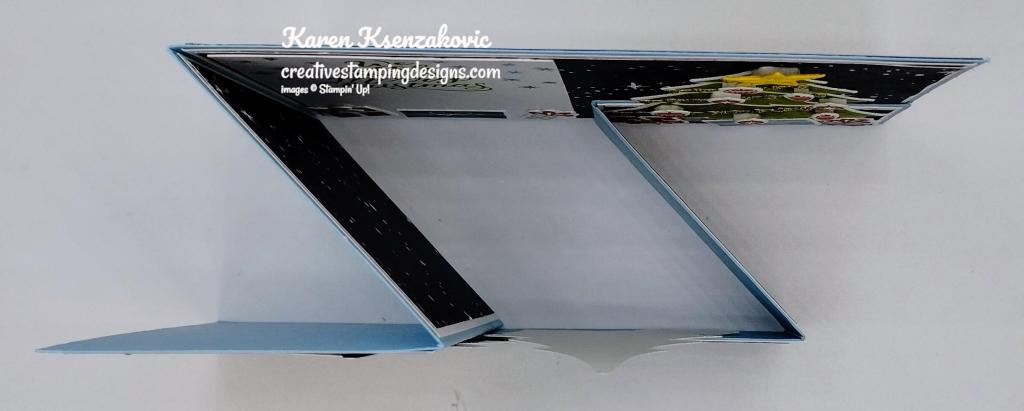
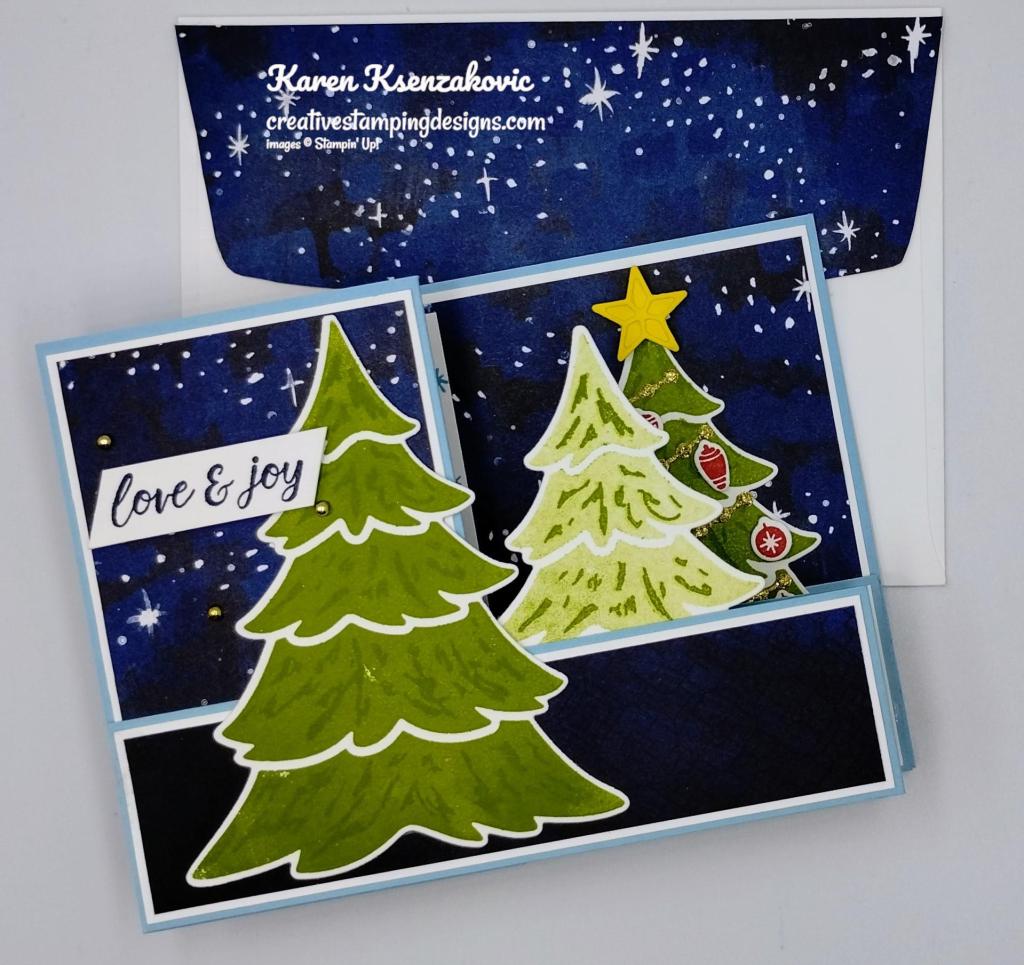
Here is a top view of how the card should look when adhered together.

Stampin' Up! Merriest Trees Fun Fold 6 creativestampingdesigns.com

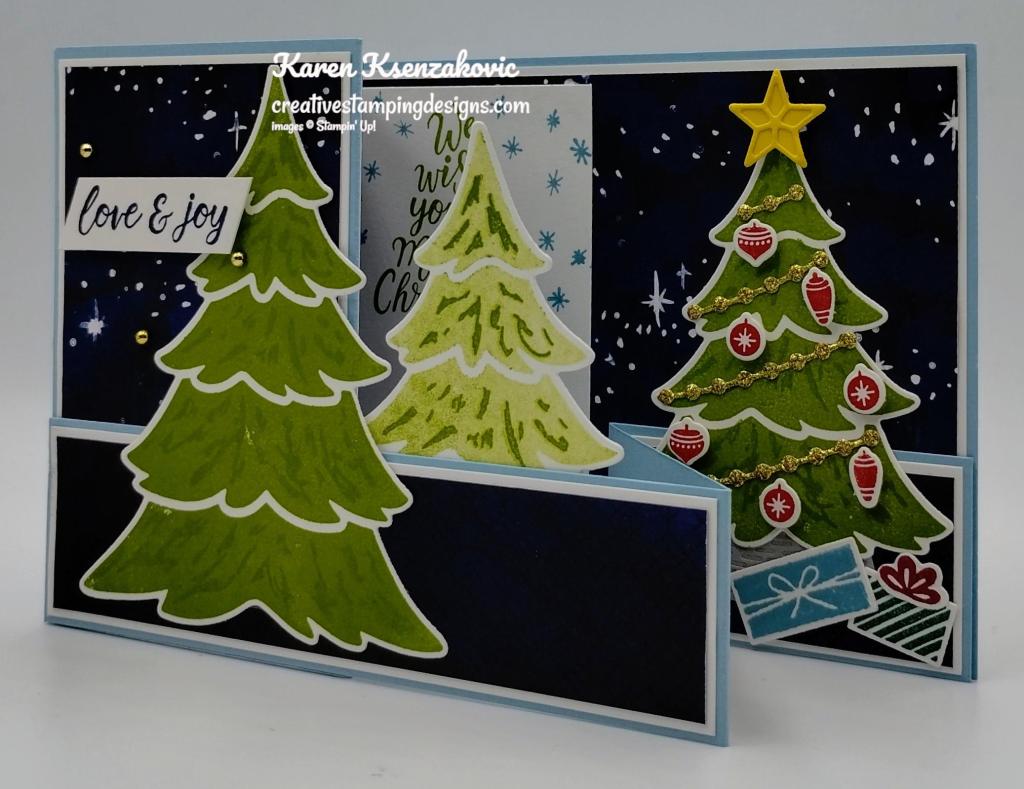
On a panel of Basic White, I stamped the ornament image from the Merriest Trees stamp set 4 times in Real Red Ink. I stamped the different present images and bows from the Merriest Trees stamp set in Cherry Cobbler, Balmy Blue and Shaded Spruce Inks on the panel. I cut all the images out using the Merriest Trees Dies. Using the Merriest Trees Dies, I cut the garland die from a panel of Gold Adhesive Backed Glimmer Paper, the solid & detailed star dies from a panel of Daffodil Delight and the tree base from a panel of Smoky Slate. I decorated one of the die cut trees with the garland and ornaments. I adhered the tree to the tree base using Glue Dots. I adhered the tree to the back section of the card base using Tear & Tape. I adhered the detailed star to the solid star. I adhered it to the top of the tree using a Stampin’ Dimensional. I adhered the packages under the tree. On a panel of Basic White, I stamped the sentiment from the Merriest Trees stamp set in Granny Apple Green Ink. I stamped the star image around the sentiment in Balmy Blue Ink. I adhered the Basic White panel to the inside of the Balmy Blue card base.

Stampin' Up! Merriest Trees Fun Fold 7 creativestampingdesigns.com

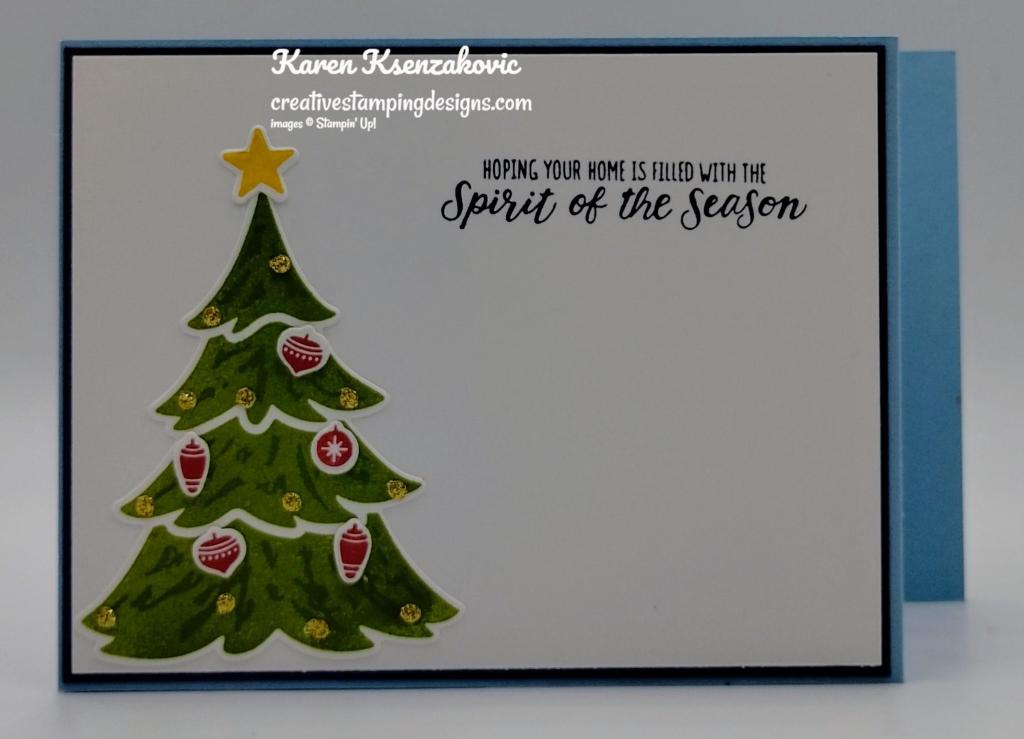
I did not do this part on the video. On the back of the card, I put a panel where I could write a message. I stamped the sentiment from the Merriest Trees stamp set in Night of Navy Ink on a panel of Basic White. I had an extra tree, star and ornaments from what I cut for the card front, so I adhered them to the Basic White panel. I adhered the Basic Whtie panel to a Night of Navy mat then to the back of the Balmy Blue card base.

Stampin' Up! Merriest Trees Fun Fold 8 creativestampingdesigns.com

To finish my card, I decorated a Basic White Medium Envelope. I stamped the solid and detailed tree images from the Merriest Trees stamp set in Granny Apple Green Ink on the envelope front. I stamped the star image from the Merriest Trees stamp set in Daffodil Delight Ink on top of the tree. I stamped the star image from the Merriest Trees stamp set in Balmy Blue Ink around the tree. I adhered a panel of O Holy Night DSP to the envelope flap.

Stampin' Up! Merriest Trees Fun Fold 9 creativestampingdesigns.com

Thank you for stopping by my blog today. I hope you liked my card and will give it a try. I hope you will CASE this card and please feel free to post it in the comments of my Facebook page under my post. I’d love to see your take on the card. The list of measurements are below if you’d like to stamp along while watching the video. You can watch my video on my YouTube Channel Here.

If you watch this on my YouTube channel, please remember to subscribe so that you will get notified when a new video goes live. Thank you to those that have subscribed already. Happy Stamping!!

*********************************************************************************************************

If you need any stamping supplies, I’d love to be your Demonstrator. Just click HERE to go directly to my online store or drop me an email if you have any questions. 

MY CURRENT HOST CODE IS:   P6UQN4GZ

Use this host code when placing an order with me. When you order $50 or greater you will receive a free gift from me! If your order is over $150, please do not use this code, but you’ll still get the free gift. The free gift is your choice of any 1 item valued up to $10.00 from the 2023-2024 Annual Catalog!  Unfortunately, packs of cardstock are no longer an option for a free gift. Shipping has become too expensive to ship and it’s costing me as much to ship as the cardstock costs. For any orders $50 or more I will also send you my monthly class tutorials.  Click HERE or go to my Customer Rewards for more details and to see what this month’s tutorials are.

Please remember to use my current Host Code and make sure that you can see my name on the final checkout page listed as your Demonstrator when you order so that you know that you’re ordering with me, and you’ll get my rewards! 

Happy Stamping, Karen

*********************************************************************************************************

In response to changing policies at Stampin’ Up – I’m adjusting my Ordering Gift policy as well.  I’m having to get a little more tough on the adding of Host codes when you place your order thru my Online Store.

Not to worry – you’re still going to get that $10 ordering gift for orders of $50 (before shipping & tax) or greater.  And the gift is still any 1 SU! product up to that $10 value – which includes some of our fun Host Sets!

But – if you DO NOT use the Host code for your orders of less than $150 (this is the RETAIL total before Shipping & Handling), then you’ll have two options:

  1. You’ll need to call Stampin’ Up! (1-800-Stamp-Up) and ask them to add it for you. They’re very helpful and will get it done quickly!  OR….
  2. If your order was over the $50 threshold but under $150, then…you’ll forfeit that $10 ordering gift and rewards – this is the Bummer Option – and I REALLY don’t want to do this, SO please remember to add my Current Host Code.

*********************************************************************************************************

Christmas Everywhere Kit Available

Share the joy of Christmas with everyone, everywhere with the Christmas Everywhere Kit! Featuring trees from around the world, this kit comes with everything you need to quickly create 9 cards—3 each of 3 designs—so you can send the special people in your life warm Christmas wishes wherever they are! 

This kit includes: 

  • Enough supplies to create 9 cards—3 each of 3 designs
  • 9 coordinating envelopes
  • Christmas Everywhere photopolymer stamp set
  • One Lost Lagoon Ink Spot
  • Printed card bases, printed die-cut labels and images with red glitter, adhesive, and a clear block
  • Finished card size: 5-1/2″ x 4-1/4″ (14 x 10.8 cm)
  • Coordinating colors: Granny Apple Green, Lost Lagoon, Pecan Pie, Pretty Peacock, Real Red

*********************************************************************************************************

Online Exclusive New Designer Series Paper Available

Surprise, surprise! We’re offering a special release of five beautiful new Designer Series Paper options! These papers include fabulous holiday prints, gorgeous seasonal styles, and some spectacular timeless designs. 

We originally created these papers to be part of our second Sale-A-Bration offering. However, since our next release of new Online Exclusive products won’t happen until November (and you won’t be able to find any of these papers in a catalog), we’ve adjusted our strategy and decided to release these paper options starting 6 September! That way, you have the chance to get ahead on Christmas cards, seasonal crafts, and much more. These products are available while supplies last—you don’t want to miss out! 

Sales Period: Starting 6 September

  • The special release paper options will be available in the Online Exclusives category in the online store.
  • Products will only be available while supplies last. Once products run out, they will no longer be visible in the online store.

*********************************************************************************************************

Home for the Holidays

Subscribe September 11 – October 10

Create dazzling traditional Christmas cards with the Home for the Holidays Paper Pumpkin Kit! This kit includes eight beautiful cards—four each of two designs. Whether you want to send a few to your loved ones or fill your home with some extra special Christmas cheer, this kit has everything you need to make some sparkly, festive cards. Keep reading to learn more!

One extra fun feature of the Home for the Holidays Paper Pumpkin Kit is the bottle of glitter glue! You can use this glue to add shimmery, shiny details to the Christmas scenes on their cards. You can add some glitter to the trees, houses, snow, and more. There are endless possibilities you will have with this glue and the kit.

Bring some inspiration to your creations with the coordinating box design! This box could help create a cute village Christmas scene with your cards, and more. You could even use the box as a photo op prop! This is a fun way to make the most of the kit. Don’t let the Christmas crafts end once you finish with this kit! Since the Home for the Holidays Kit perfectly coordinates with the November Paper Pumpkin Kit, you and you will be able to extend your holiday crafting experience even further. So make sure your subscription is up to date!

This kit includes:

  • All the supplies you’ll need to create 8 sparkly and dazzling Christmas cards—4 each of 2 designs—and eight coordinating envelopes.
  • A coordinating photopolymer stamp set with endearing holiday sentiments and festive designs.
  • A Real Red Stampin’ Spot
  • A bottle of Glitter Glue
  • Beautiful Christmasy-themed precut pieces

Finished folded card size: 4-1/4″ x 5-1/2″ (10.8 x 14 cm)

Coordinating Stampin’ Up! colors: Balmy Blue, Blueberry Bushel, Cherry Cobbler, Crumb Cake, Crushed Curry, Daffodil Delight, Lemon Lolly, Mossy Meadow, Night of Navy, Old Olive, Pecan Pie, Real Red

Subscribe to the August Paper Pumpkin Kit between 11 September and 10 October by clicking here!

Note: Supplies may be limited toward the end of the subscription period.

*********************************************************************************************************

Card stock cuts for this project:

  • Basic White Cardstock 2 – 2 5/8″ X 4 1/8″, 4 1/8″ X 5 3/8″ (large card base mats), 1 3/8″ X 5 3/8″ & 2 – 1 3/8″ x 2 5/8″ (card base strip mats), 2 3/8″ X 3 7/8″ (inner liner), 4 1/4″ X 11″ (trees), 1/2″ X 2″ (sentiment), 4″ X 3″ (ornaments, presents, bows & star), 4″ X 5 1/4″ (back panel)
  • Balmy Blue Cardstock 4 1/4″ X 11″ (card base scored & folded at 2 3/4″ & 5 1/2″), 1 1/2″ X 11″ (card base strip scored & folded @ 2 3/4″ & 5 1/2″)
  • Daffodil Delight Cardstsock 1″ X 1 3/4″ (star)
  • Night of Navy Cardstock 4 1/8″ X 5 3/8″ (back panel mat)
  • Smoky Slate Cardstock 1 1/4″ X 1 3/4″ (tree stand)
  • O Holy Night Designer Series Paper 2 – 2 1/2″ X 4″, 4″ X 5 1/4″ (large card base panels), 2 – 1 1/4″ x 2 1/2″ & 1 1/4″ X 5 1/4″ (card base strip panels), 2 1/4″ X 6″ (envelope flap)
  • Silver & Gold Adhesive Back Glimmer Paper 1 1/2″ X 3″ (garland & present ribbon)

*********************************************************************************************************

Product List

Stampin’ Up! Timeless Charm for Fun Fold Friday

Good Friday morning stamping friends and welcome to my Fun Fold Friday. I hope you are ready for the weekend. I’ll be working all weekend, Saturday at the hardware store and Sunday at the Hungry Hound the dog bakery. I haven’t worked a Sunday in a while and I’m actually looking forward to it. Here’s to hoping it’ll be a nice day and there will be lots of puppies visiting. I attached a link in case you are ever curious or what the dog bakery is and if you ever place an order, tell them Karen sent you.

Today’s card I made on YouTube Live on Wednesday. If you were able to join me or watched the replay, thank you. If you’d like to watch my video and stamp along, the measurements are below, just above the supply list, along with the link to my YouTube channel. Here is my card for today.

Stampin' Up! Timeless Charm Fun Fold 1 creativestampingdesigns.com

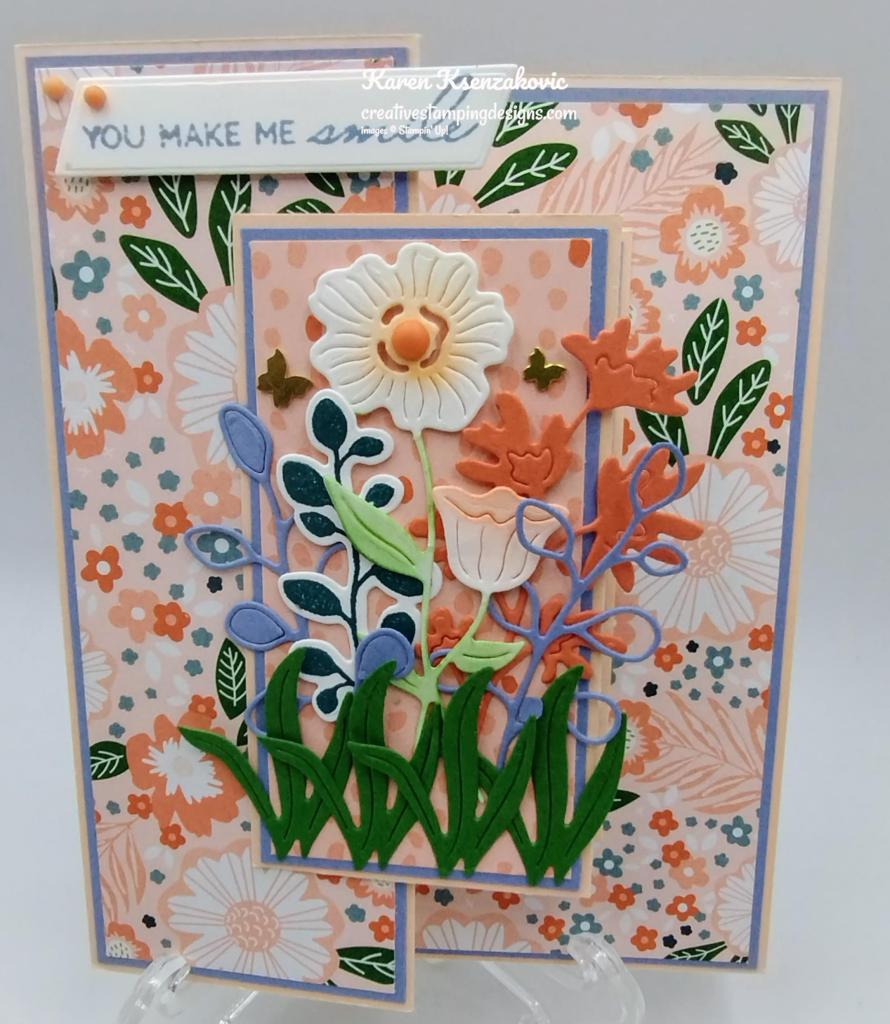
I used the Stampin’ Up! Timeless Charm Bundle, which are Online Exclusive products, along with the Stampin’ Up! Timeless Arrangements Photopolymer Stamp Set and Garden Wald 6 X 6 Designer Series Paper which will be available starting September 6th, for my card today.

Stampin' Up! Timeless Charm Fun Fold 2 creativestampingdesigns.com

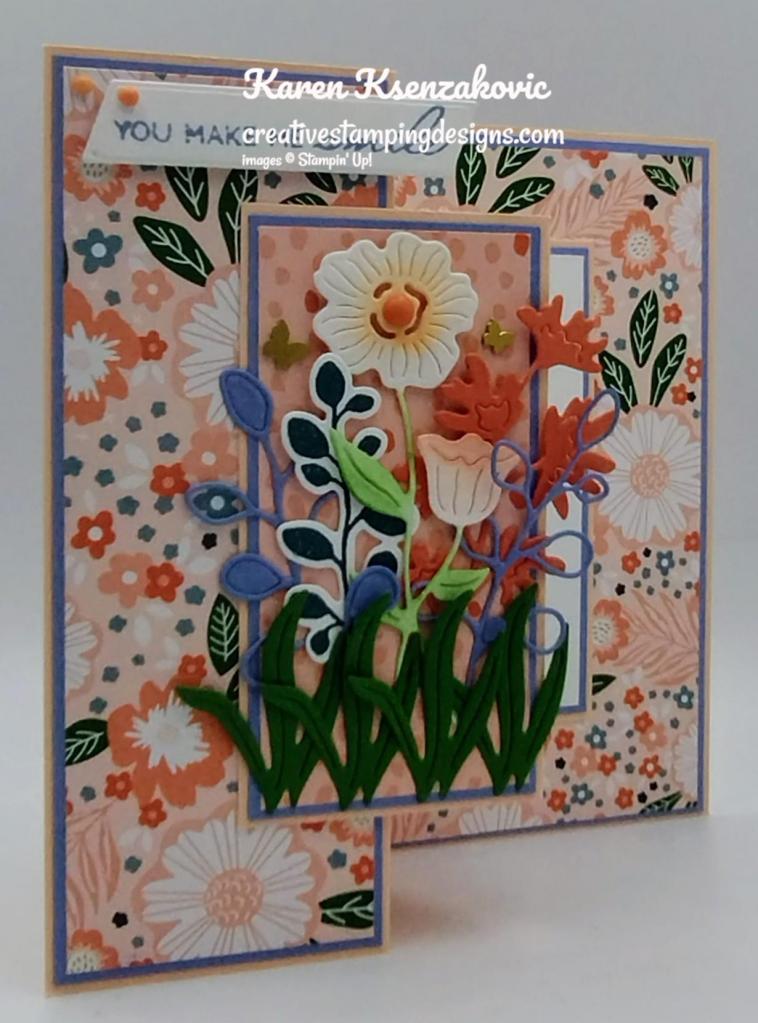
I started by adhering the panels of Garden Walk DSP to the coordinating Boho Blue mats using Multipurpose Liquid Glue. I adhered the front layered panel to the front of the Petal Pink card bae using Multipurpose Liquid Glue. I adhered the larger layered panel to the inside back of the Petal Pink card base using Multipurpose Liquid Glue. I adhered the smaller layered panel to the front of the small Petal Pink card base using multipurpose Liquid Glue. Using the Timeless Charm Dies, I cut the grass from a panel of Garden Green, the solid small flower die from a panel of Calypso Coral and the open leaf die from a panel of Boho Blue. On a panel of Basic White, I stamped the solid leaf image from the Stampin’ Up! Timeless Charm Cling Stamp Set in Pretty Peacock Ink. I cut the image and tall flower using the Timeless Charm Dies.

Stampin' Up! Timeless Charm Fun Fold 3 creativestampingdesigns.com

I adhered the grass dies to the bottom of the small card front using Multipurpose Liquid Glue only on the bottom. Using my Small Blending Brushes, I added some Garden Green, Petal Pink and Calypso Coral Inks to the tall Basic White flower. I adhered the flower to the small card front using Stampin’ Dimensionals, tucking the stems behind the grass. I adhered the other die cut pieces to the card front using small amounts of Multipurpose Liquid Glue. On as strip of Basic White, I stamped the sentiment from the Timeless Arrangements stamp set in Boho Blue Ink. I cut the sentiment out using the Something Fancy Dies. I adhered the small card base to the larger card base using Tear & Tape on the front section and Multipurpose Liquid Glue on the back section. I adhered the sentiment to the top of the card front using Stampin’ Dimensionals. I added a few Ombre Matte Decorative Dots to the car front and a couple Brushed Brass Butterflies near the flowers.

Stampin' Up! Timeless Charm Fun Fold 4 creativestampingdesigns.com

Here is the view from the top so you can see how it should look.

Stampin' Up! Timeless Charm Fun Fold 5 creativestampingdesigns.com

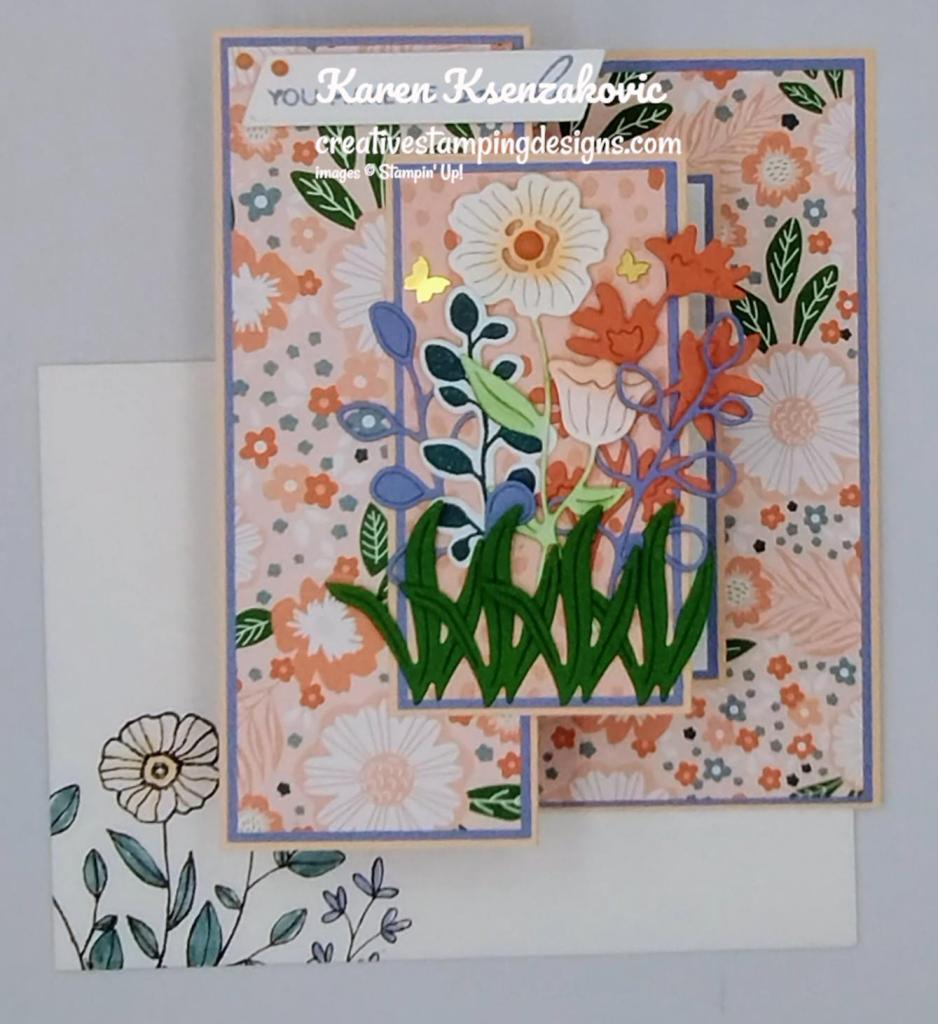
On the inside, I stamped the sentiment from the Timeless Arrangements stamp set in Boho Blue Ink on a panel of Basic White. I stamped the flower and leafy images from the Timeless Charm stamp set on the other Basic White panel in Tuxedo Black Ink and Boho Blue Ink. I colored the flower and leafy images using Boho Blue, Petal Pink and Pretty Peacock Stampin’ Blends Markers. I adhered the Basic White panel to Boho Blue mats then to the small Petal Pink card base.

Stampin' Up! Timeless Charm Fun Fold 6 creativestampingdesigns.com

To finish my card, I decorated a Basic White Medium Envelope. I stamped the flower and leafy images from the Timeless Charm stamp set in Tuxedo Black Ink on the Envelope front. I colored the images using Boho Blue, Petal Pink and Pretty Peacock Stampin’ Blends Markers. I adhered a panel of Garden Walk DSP to the envelope flap.

Stampin' Up! Timeless Charm Fun Fold 7 creativestampingdesigns.com

Thank you for stopping by my blog today. I hope you liked my card and will give it a try. I hope you will CASE this card and please feel free to post it in the comments of my Facebook page under my post. I’d love to see your take on the card. The list of measurements are below if you’d like to stamp along while watching the video. You can watch my video on my YouTube Channel Here.

If you watch this on my YouTube channel, please remember to subscribe so that you will get notified when a new video goes live. Thank you to those that have subscribed already. Happy Stamping!!

*********************************************************************************************************

If you need any stamping supplies, I’d love to be your Demonstrator. Just click HERE to go directly to my online store or drop me an email if you have any questions. 

MY CURRENT HOST CODE IS:   4G2N3MDT

Use this host code when placing an order with me. When you order $50 or greater you will receive a free gift from me! If your order is over $150, please do not use this code, but you’ll still get the free gift. The free gift is your choice of any 1 item valued up to $10.00 from the 2023-2024 Annual Catalog!  Unfortunately, packs of cardstock are no longer an option for a free gift. Shipping has become too expensive to ship and it’s costing me as much to ship as the cardstock costs. For any orders $50 or more I will also send you my monthly class tutorials.  Click HERE or go to my Customer Rewards for more details and to see what this month’s tutorials are.

Please remember to use my current Host Code and make sure that you can see my name on the final checkout page listed as your Demonstrator when you order so that you know that you’re ordering with me, and you’ll get my rewards! 

Happy Stamping, Karen

*********************************************************************************************************

In response to changing policies at Stampin’ Up – I’m adjusting my Ordering Gift policy as well.  I’m having to get a little more tough on the adding of Host codes when you place your order thru my Online Store.

Not to worry – you’re still going to get that $10 ordering gift for orders of $50 (before shipping & tax) or greater.  And the gift is still any 1 SU! product up to that $10 value – which includes some of our fun Host Sets!

But – if you DO NOT use the Host code for your orders of less than $150 (this is the RETAIL total before Shipping & Handling), then you’ll have two options:

  1. You’ll need to call Stampin’ Up! (1-800-Stamp-Up) and ask them to add it for you. They’re very helpful and will get it done quickly!  OR….
  2. If your order was over the $50 threshold but under $150, then…you’ll forfeit that $10 ordering gift and rewards – this is the Bummer Option – and I REALLY don’t want to do this, SO please remember to add my Current Host Code.

*********************************************************************************************************

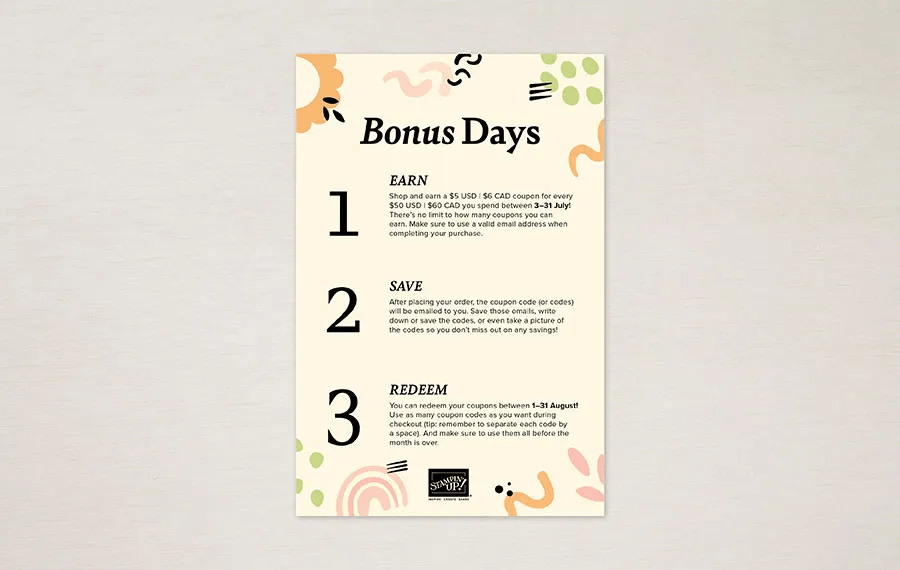
You can start redeeming your Bonus Days Coupons today, August 1 – August 31st. Redeem 1 coupon code or all your codes on an order.

Ordering Deadlines

Redemption Period: August1– August 31, 2023 at 11:59 p.m. (MT)

  • There is no limit to the number of coupon codes participants can redeem on an order during the redemption period. If using multiple codes, they must be separated by a space.
  • Coupons may be redeemed one time only.
  • Coupon codes may be redeemed for any product (excluding Starter Kits, demonstrator supply items, and Paper Pumpkin month-to-month subscriptions).
  • New prepaid Paper Pumpkin codes may be discounted using Bonus Days coupon codes.

*********************************************************************************************************

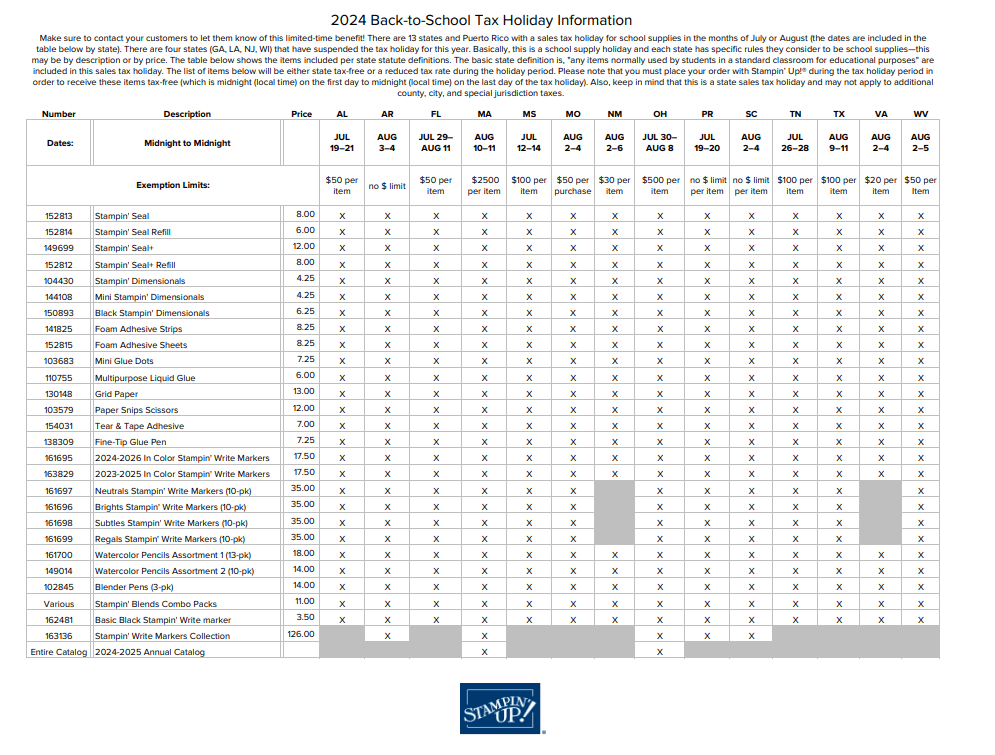
Sales Tax Holiday Going On!!!

Thirteen states are having Back-to-School Sales Tax Holidays this year and some Stampin’ Up! items qualify for the tax break in those states!

The states with upcoming tax holidays are:  Alabama, Arkansas, Florida, Massachusetts, Mississippi, Missouri, New Jersey, New Mexico, Ohio, South Carolina, Tennessee, Texas, and West Virginia.  So, if you live in one of those states, take a second to download the spreadsheet Click Here and mark your calendar! The last one is New Jersey starting on August 26th.

Please note that you must place your order with Stampin’ Up! during the tax holiday period in your state in order to receive these items tax-free (which is midnight on the first day to midnight on the last day of the tax holiday).  Also, keep in mind that this is a state sales tax holiday; the state statute may not apply to county, city, and special jurisdiction taxes.

For those wondering about Georgia, Louisiana, Virginia, and Wisconsin, those states have suspended the sales tax holiday again this year.

*********************************************************************************************************

September-December 2023 Mini Catalog Paper Shares Ordering Is Open

Do you want all of the gorgeous new designer papers in the Stampin’ Up! September-December 2023 Mini Catalog but can’t afford everything?  I’m doing a Designer Series Paper Share! What is a Paper Share you ask? It’s a sample of each of the new Designer Series Papers from the Stampin’ Up! September-December 2023 Minil Catalog.  If you were to purchase all of the DSP in the new Annual Catalog, it would cost you over $170.00 plus shipping.

New Designer Series Paper Share – $30.00 plus $8.50 for Priority Mail Shipping

I’m offering a Designer Series Paper share from the Stampin’ Up! September-December 2023 Mini Catalog and I’d love to have you join!!  I’m placing my share order early on September 6th and I’m going to use the expedited shipping option so I should be able to have the shares cut, bundled and back out to you during the week of September 11th.

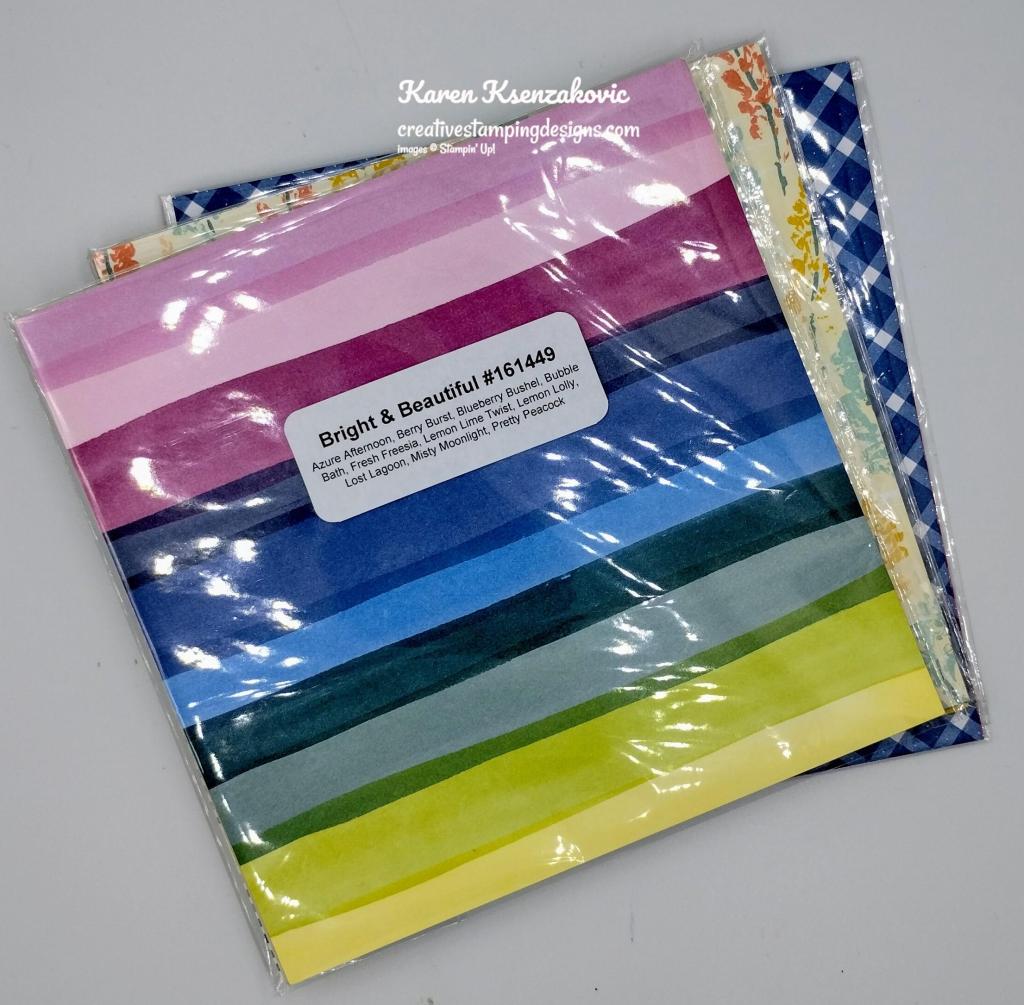
How my shares work:  I order full packs of all of the Designer Series Papers listed below, I cut them into 6″ x 6″ pieces (or 6″ x 12″ pieces for double shares) and give you one panel of each design from each pack on the list.  I pack up the paper in a cellophane bag with labels listing the NameItem # and Colors in the pack and mail it back out to you just as quickly as I can!  Shares give you a good working sample of all of the papers so that you can decide which ones to order in full packs!

Here are the Designer Series Paper Shares that I am offering from the new Mini Catalog!

New Designer Series Paper Share – $30.00 plus $8.50 for Priority Mail shipping

You will receive one 6×6 sheet of each design from the following DSP packs (the number after the name indicates how many 6×6 sheets of that paper pack you will receive):

  • A Walk In The Forest – 6
  • All About Autumn 6″ X 6″ – 12
  • Beary Christmas – 6
  • Melon Mambo & Granny Apple Green Foil Sheets – 2
  • Garden Walk 6″ X 6″ – 8
  • Glow-In-The Dark 6″ X 6″ Specialty Paper – 1
  • Joy Of Christmas – 6
  • Joyful Specialty Paper – 4
  • Merry Bold & Bright – 6
  • O Holy Night – 6
  • Oxidized Copper Specialty Paper – 2
  • Shining Brightly Specialty Paper – 6
  • Snowflake Magic Specialty Paper – 3
  • Them Bones – 6
  • Winter Meadow – 6

In all, you’ll receive 80 – 6” x 6” sheets of designer or specialty paper!

Double DSP Share – $60 + $8.50 Shipping by Priority Mail – if you’d like double shares of the designer paper, I’m offering those too!  I’ll cut the 12″ x 12″ designer paper sheets into 6″ × 12″ so that you’ll be able to get 3 full A2 size card fronts from each sheet and you’ll get double sheets of the 6″ x 6″ since they’re already precut.

Anyone is welcome to join in my share (please note, I can only ship to addresses within the US).  If you’d like to join, email the following information to creativestampingdesigns@gmail.com

  • Your first and last name
  • The email address that is connected to your PayPal account. I only accept PayPal for payment.  ***You do not need to have a PayPal account to pay the invoice, you can choose to pay by credit card without having a PayPal account.

Deadline to sign up for my share is Monday, September 4th at 5:00 PM ET.

Let me know if you have any questions.  Thanks!

*********************************************************************************************************

With Love & Gratitude

Subscribe August 11 – September 10

Express your love and gratitude in elegant style with the September Paper Pumpkin Kit inspired by Shelli! This kit includes eight treat packages (you can also use for small gifts) and eight miniature note cards with matching envelopes and specialty gold foil embellishments. Whether you’re needing a hostess gift, a sweet surprise for dinner guests, or have another reason to give love and thanks, this kit has you covered.

The With Love & Gratitude Paper Pumpkin Kit offers the perfect way to give thanks to the special people in your life. The kit design is an elegant representation of the blessings of autumn and the gratitude that comes along with the season. The combination of graceful pumpkin designs and elegant colors, plus specialty gold foil embellishments make this kit a stand-out offering with Shelli written all over it! Subscribe by 10 September to get your kit full of iconic autumn images, love, and gratitude!

What’s better than a box full of crafts you can use to express your love and gratitude? How about the kit packaged in a custom, matching box that’s just as beautiful? The With Love & Gratitude comes with a custom box you can use to store all kinds of things: your finished treat packages and cards, crafting supplies, or you can fill it individual notes with all the reasons you have to be grateful—write each one down and fill up the box, then pull out a note of inspiration whenever you it!

This kit includes:

  • 8 treat packages
  • 8 note cards
  • 8 coordinating envelopes
  • 1 photopolymer stamp set
  • 1 Lost Lagoon Ink Stampin’ Spot
  • Specialty gold foil, precut embellishments
  • Adhesives
  • Finished treat packaging: 3-1/2″ x 5″ x 2″ (8.9 x 12.7 x 5.1 cm)
  • Final card size: 3-1/2″ x 3-1/2″ (8.9 x 8.9 cm)

Coordinating Stampin’ Up! colors: Copper Clay, Crumb Cake, gold foil, Lost Lagoon, Mossy Meadow, Pebbled Path

Subscribe to the September Paper Pumpkin Kit between 11 August and 10 September by clicking here!

Note: Supplies may be limited toward the end of the subscription period.

Plus, don’t miss the Thoughts of Thanks Journal! It matches both the design and intent of the kit, giving you an even more personal way to document and express your gratitude. It’s available as an add-on, but only while supplies last!

ADD-ON DETAILS

Thoughts of Thanks Journal
Available starting: 11 August, while supplies last

Price: $15.00 USD | $21.00 CAD

Item number: 163270

This add-on includes:

  • 8″ x 10″ (20.3 x 25.4 cm) journal
  • 2 specialty gold foil sticker sheets
  • Gold-clip page marker

Available for purchase separately on the online store starting 11 August, while supplies last.

Paper Pumpkin add-ons are cash-and-carry items, like retired Paper Pumpkin kits. See the Cash-and-Carry Sales Policy in the Policies Document for more information. 

*********************************************************************************************************

Card stock cuts for this project:

  • Basic White Cardstock 2″ X 4″(die cuts), 1″ X 3″ (sentiment), 2 – 1 7/8″ X 3 1/2″ (inner liners)
  • Boho Blue Cardstock 2″ X 5 3/8″ (front panel mat), 1 7/8″ X 3 5/8″ (small front panel mat), 2 – 2″ x 3 5/8″(inner liner mats), 4 1/8″ X 5 3/8″ (back panel mat)
  • Calypso Coral Cardstock 1 3/4″ X 3″ (die cut)
  • Garden Green Cardstock 1 1/2″ X 5″ (grass)
  • Petal Pink Cardstock 8 1/2″ X 5 1/2′ (card base scored & folded at 2 1/8″ & 4 1/4″), 3 3/4″ X 6 1/4″ (small card base scored & folded at 2 1/8″ & 4 1/4″)
  • Garden Walk 6 X 6 Designer Series Paper (1 7/8″ X 5 1/4″ (front panel), 1 3/4″
    X 3 1/2″ (small front panel), 4″ X 5 1/4″ (back panel), 2 1/4″ X 6″ (envelope flap)

*********************************************************************************************************

Product List

Stampin’ Up! Queen Bee for Fun Fold Friday

Good Friday morning my stamping friends welcome to my Fun Fold Friday. How was everyone’s week? Any plans for the weekend yet? I have off of work tomorrow, but I’ll be working all day on Sunday. Tomorrow would have been a very special day if my dad were still here. It’s his 100th birthday. I’m sure he’ll be enjoying it up in heaven with my mom and all his siblings and family members.

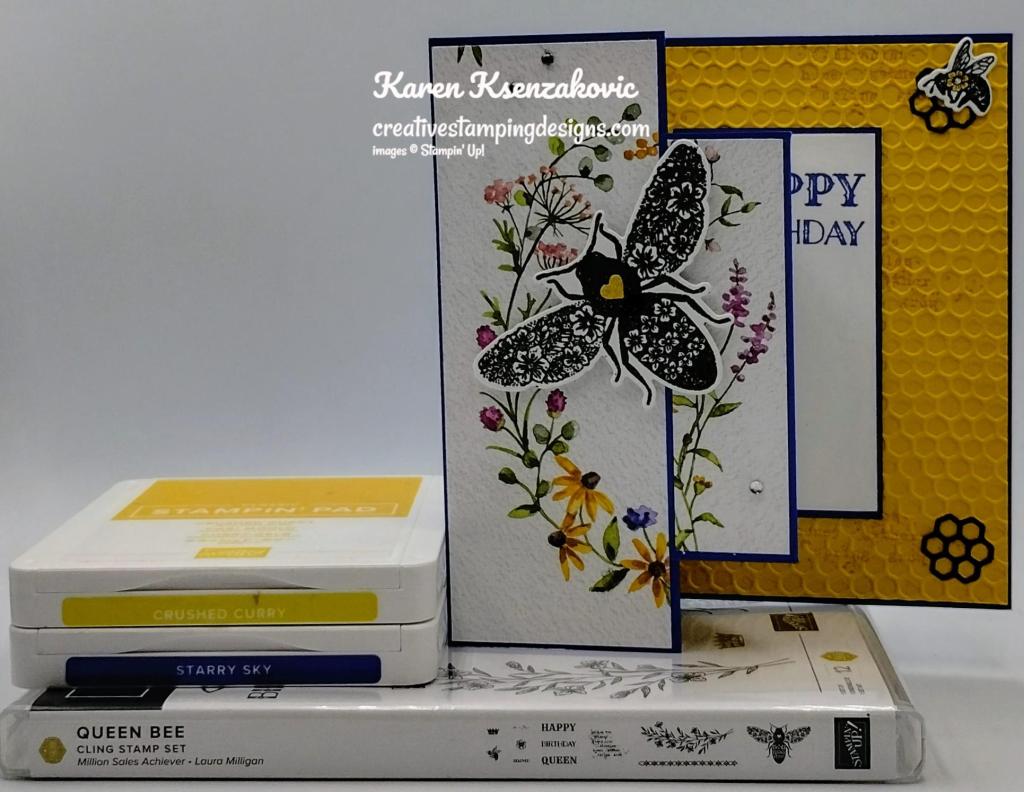
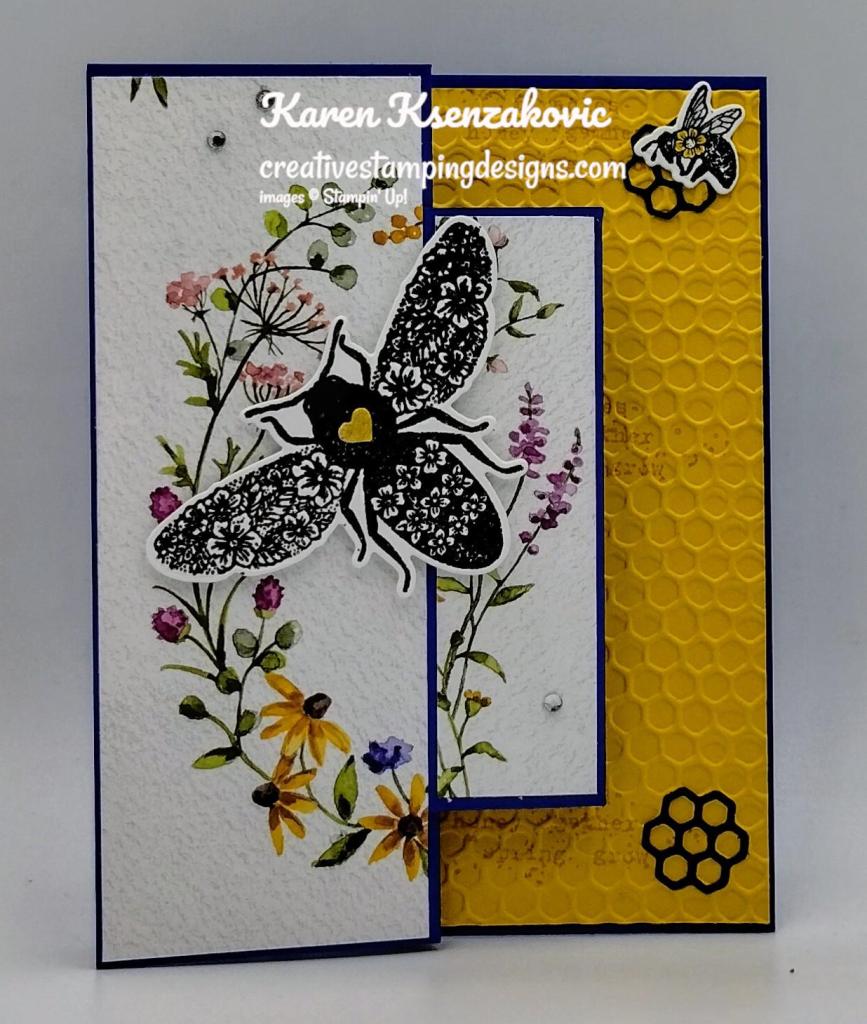
Today’s card I made on my Facebook Live video on Wednesday. If you were able to join me or watched the replay, thank you. If you’d like to watch my video and stamp along, the measurements are below along with the links to my Facebook page and my YouTube channel. Here is my card for today.

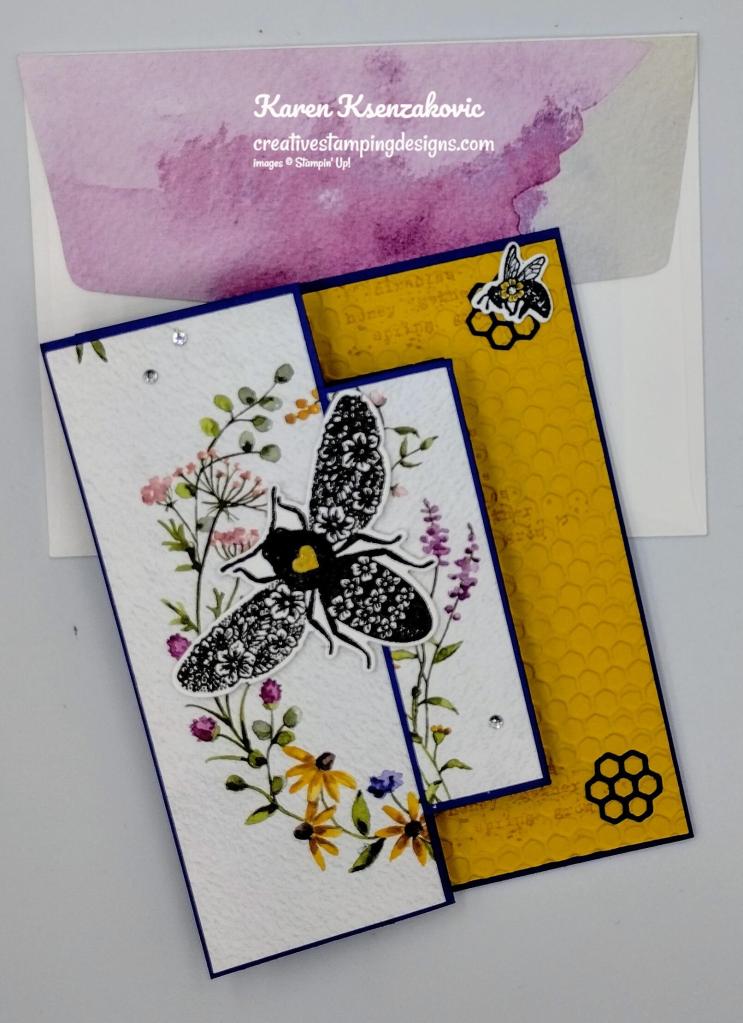
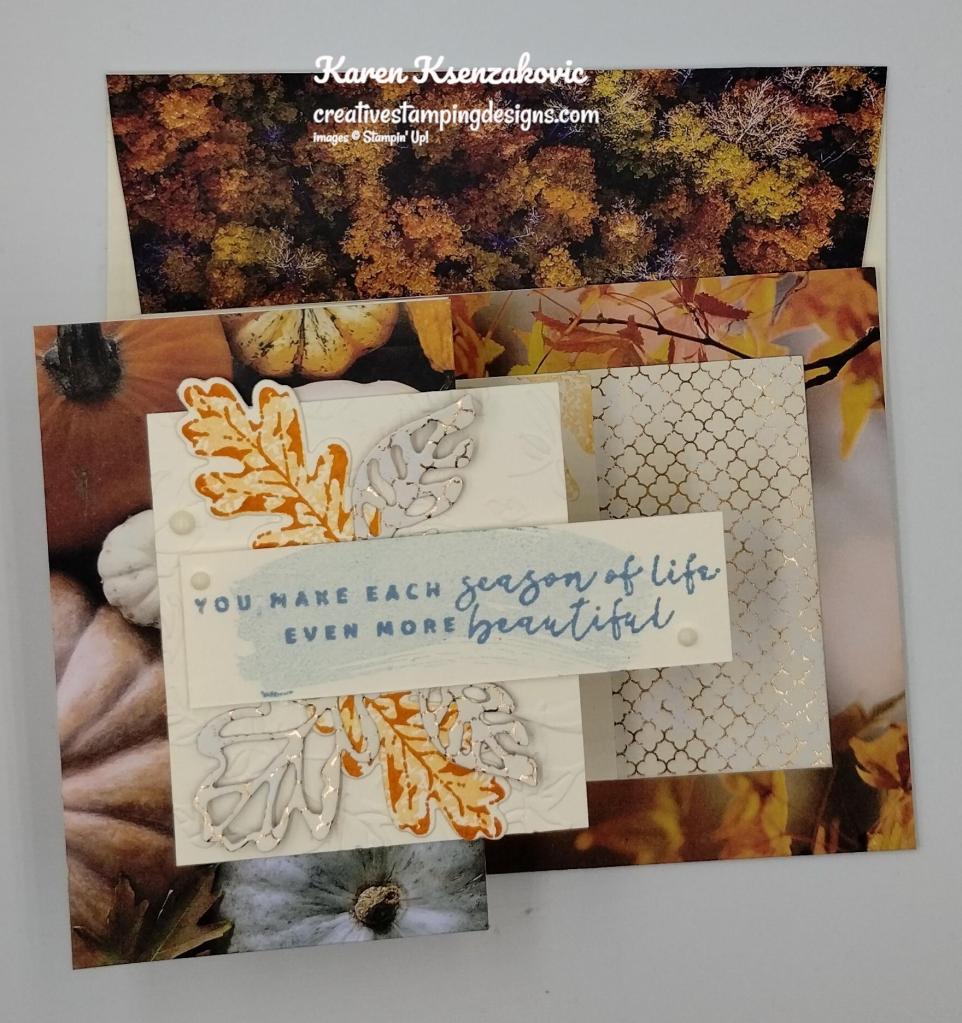
Stampin' Up! Queen Bee Fun Fold 1 creativestampingdesigns.com

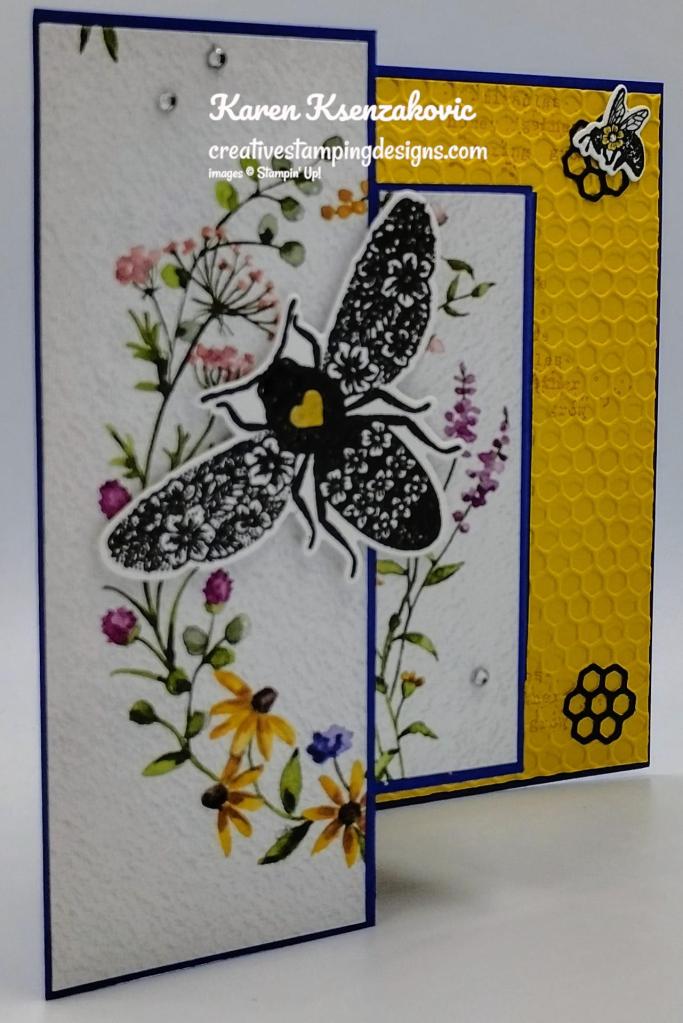
I used the Stampin’ Up! Queen Bee Bundle, Sale-a-bration Dainty Flowers Designer Series Paper and the Hive 3D Embossing Folder.

Stampin' Up! Queen Bee Fun Fold 2 creativestampingdesigns.com

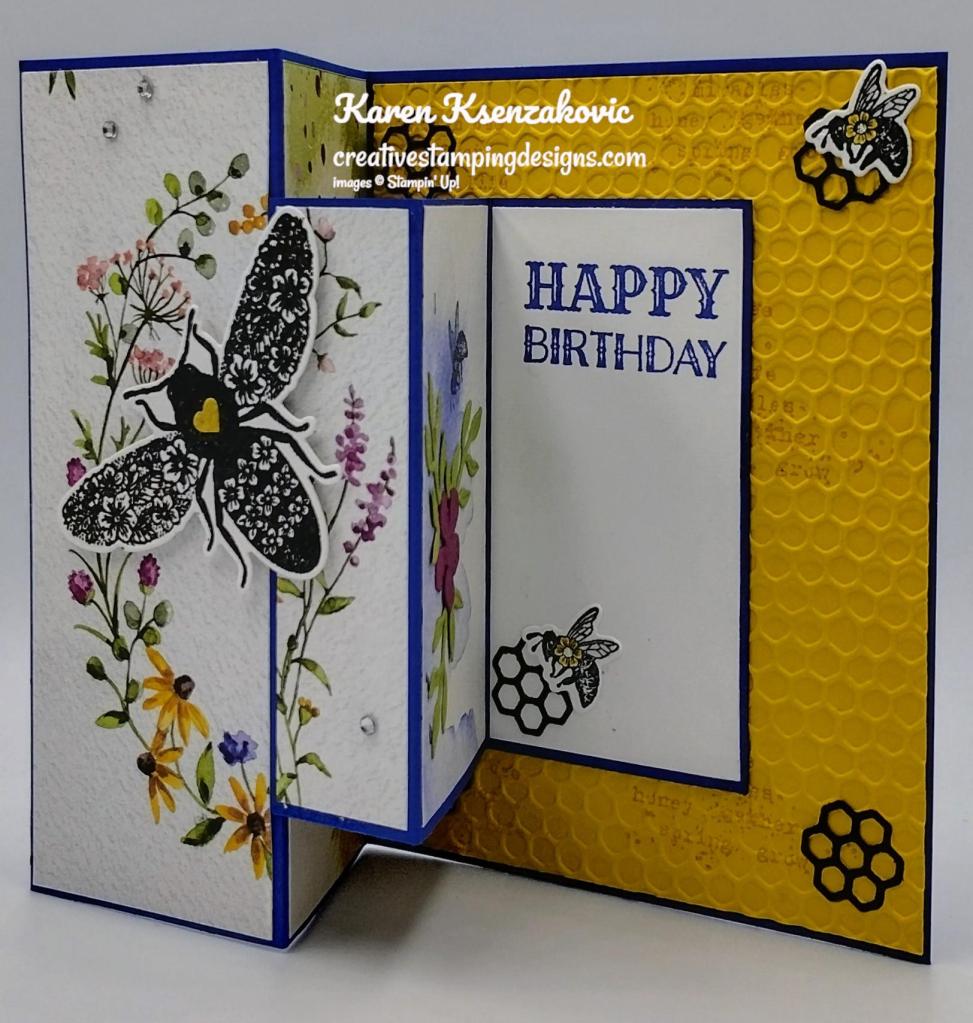
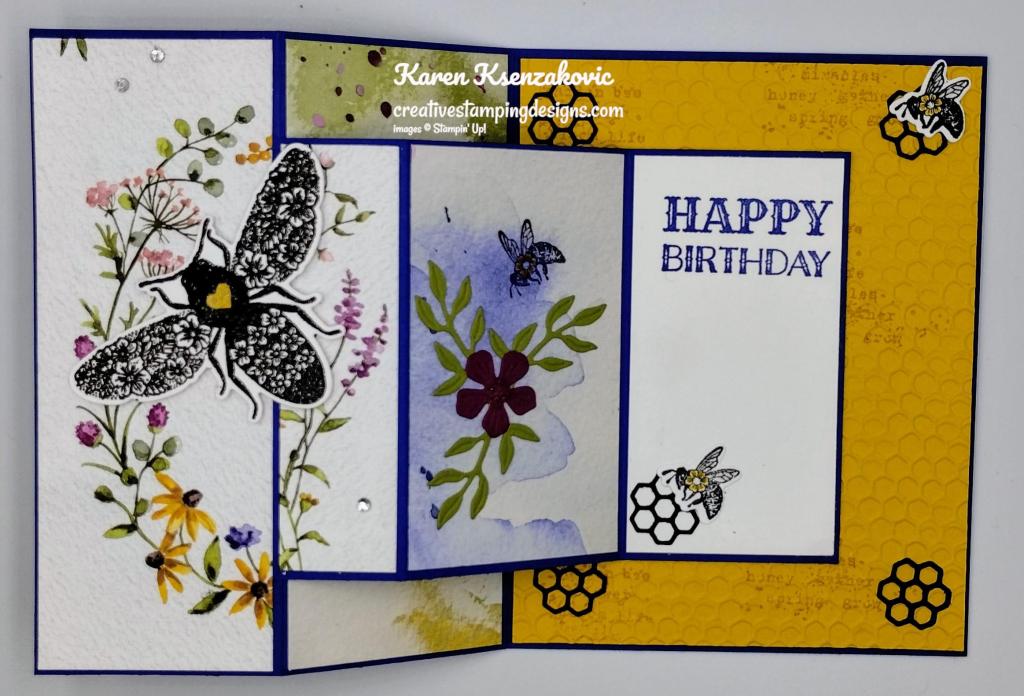
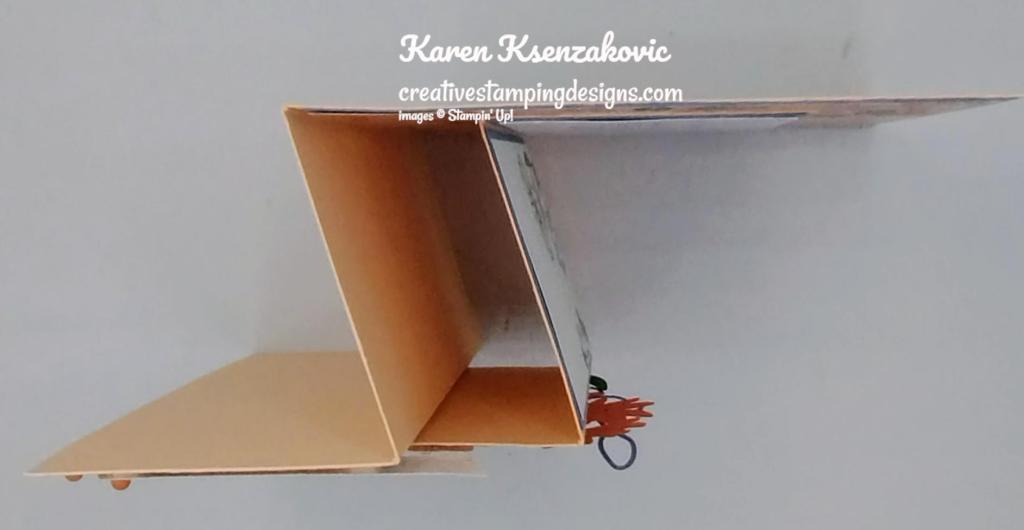
I started by scoring and folding the large and small card bases as listed below. I randomly stamped a panel of Crushed Curry cardstock using the newsprint stamp from the Stampin’ Up! Queen Bee Cling Stamp Set in Crushed Curry Ink. I embossed a panel of Crushed Curry using the Hive 3D Embossing Folder. I adhered the embossed panel to the back of the card base using Multipurpose Liquid Glue. I adhered the small card base to the center back of the large card base and the front of the large card base using Multipurpose Liquid Glue.

Stampin' Up! Queen Bee Fun Fold 3 creativestampingdesigns.com

I adhered a panel of Dainty Flowers DSP to the front of the card base using Multipurpose Liquid Glue. I adhered a small panel of the Dainty Flowers DSP to the front of the small card base using Multipurpose Liquid Glue. On a panel of Basic White cardstock, I stamped the large bee image from the Queen Bee stamp set in Versamark Ink. I sprinkled it with my Black Embossing Powder and set it using my Heat Tool. I cut the bee out using my Queen Bee Dies. I adhered the bee using Stampin’ Dimensionals.

Stampin' Up! Queen Bee Fun Fold 4 creativestampingdesigns.com

From a scrap of Dainty Flowers DSP, I cut the tiny heart die from the Queen Bee Dies and adhered it to the large bee. I added a few Rhinestones Basic Jewels to the card front.

Stampin' Up! Queen Bee Fun Fold 5 creativestampingdesigns.com

On the inside, I adhered a panel of Dainty Flowers DSP to the center of the large card base. I adhered a panel of the Dainty Flowers DSP to the center panel of the small card base using Multipurpose Liquid Glue. I cut 3 of the small leaf dies from the Queen Bee Dies from a panel of Old Olive cardstock. I cut the larger flower die from the Queen Bee Dies from a scrap of Rich Razzleberry cardstock. I adhered the leaves to the center of the small card base using Multipurpose Liquid Glue. I adhered the flower using a Glue Dot. I stamped the small bee image from the Queen Bee stamp set in Tuxedo Black Ink on the center panel. On a panel of Basic White cardstock, I stamped the sentiments from the Queen Bee stamp set in Stary Sky Ink. I adhered the Basic White panel to the back section of the small card base using Multipurpose Liquid Glue. I cut 5 of the beehives dies from the Queen Bee Dies from a panel of Basic Black cardstock. I adhered the hives randomly to the back of the card base and the Basic White panel using Multipurpose Liquid Glue. On the panel of Basic White cardstock, I stamped the small bee image from the Queen Bee stamp set in Tuxedo Black Ink. I cut the bees out using the Queen Bee Dies. I adhered the bees to the hives using Multipurpose Liquid Glue. I brushed the wings of all the small bees and the flower center using my Clear Wink of Stella to give it a little shimmer.

Stampin' Up! Queen Bee Fun Fold 6 creativestampingdesigns.com

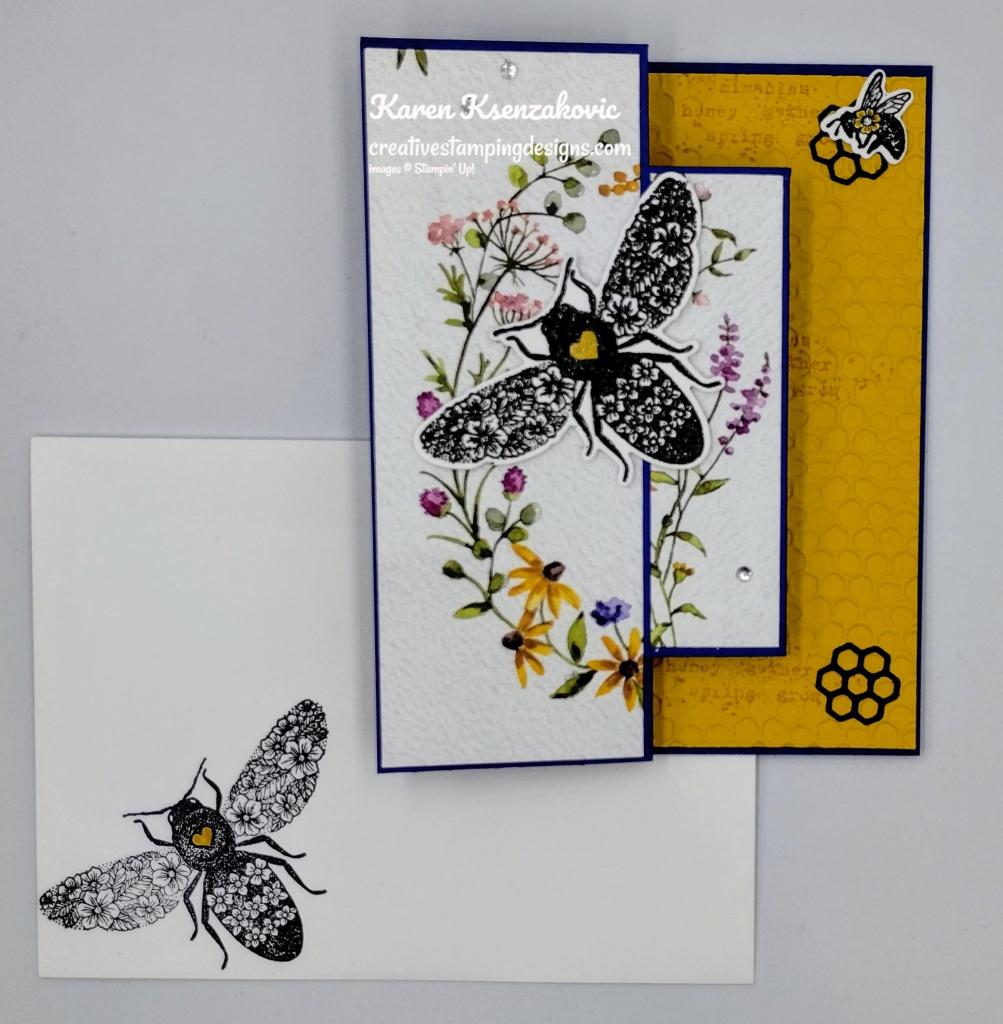
To finish my card, I decorated a Basic White Medium Envelope. I stamped the large bee image from the Queen Bee stamp set on the envelope front in Tuxedo Black Ink. I colored the heart on the bee using my Crushed Curry Stampin’ Write Marker. I adhered a panel of Dainty Flowers DSP to the envelope flap.

Stampin' Up! Queen Bee Fun Fold 7 creativestampingdesigns.com

Thank you for stopping by my blog today. I hope you liked my card and will give it a try. I hope you will CASE this card and please feel free to post it in the comments of my Facebook page under my post. I’d love to see your take on the card. The list of measurements are below if you’d like to stamp along while watching the video. You can watch my video on my Facebook page Here.
You can also view the video on my YouTube channel Here. If you watch this on my YouTube channel, please remember to subscribe so that you will get notified when a new video goes live. I’m hoping to start doing YouTube lives soon, thanks to all that have subscribed. Happy Stamping!!

*********************************************************************************************************

If you need any stamping supplies, I’d love to be your Demonstrator. Just click HERE to go directly to my online store or drop me an email if you have any questions. 

MY CURRENT HOST CODE IS:   222EBX64

Use this host code when placing an order with me. When you order $50 or greater you will receive a free gift from me! If your order is over $150, please do not use this code, but you’ll still get the free gift. The free gift is your choice of any 1 item valued up to $10.00 from the 2022-2023 Annual Catalog or the January-April 2023 Mini Catalog!  Unfortunately, packs of cardstock are no longer an option for a free gift. Shipping has become too expensive to ship and it’s costing me as much to ship as the cardstock costs. For any orders $50 or more I will also send you my monthly class tutorials.  Click HERE or go to my Customer Rewards for more details and to see what this month’s tutorials are.

Please remember to use my current Host Code and make sure that you can see my name on the final checkout page listed as your Demonstrator when you order so that you know that you’re ordering with me, and you’ll get my rewards! 
Happy Stamping, Karen

*********************************************************************************************************

In response to changing policies at Stampin’ Up – I’m adjusting my Ordering Gift policy as well.  I’m having to get a little more tough on the adding of Host codes when you place your order thru my Online Store.

Not to worry – you’re still going to get that $10 ordering gift for orders of $50 (before shipping & tax) or greater.  And the gift is still any 1 SU! product up to that $10 value – which includes some of our fun Host Sets!

But – if you DO NOT use the Host code for your orders of less than $150 (this is the RETAIL total before Shipping & Handling), then you’ll have two options:

  1. You’ll need to call Stampin’ Up! (1-800-Stamp-Up) and ask them to add it for you. They’re very helpful and will get it done quickly!  OR….
  2. If your order was over the $50 threshold but under $150, then…you’ll forfeit that $10 ordering gift and rewards – this is the Bummer Option – and I REALLY don’t want to do this, SO please remember to add my Current Host Code.

*********************************************************************************************************

Amazing Joining Special during Sale-a-bration January 5 – February 28

Stampin’ Up! has an amazingly awesome joining special. You get to choose what you want. All the options ship for free and include a past Paper Pumpkin Kit along with some business supplies in case you want to make this a business. There is No Obligation to sell, you do NOT have to use this as a business, you can join just to enjoy the discount for yourself. I would LOVE to have you on my team. Join as a hobby demonstrator and enjoy all the benefits of a business demonstrator.

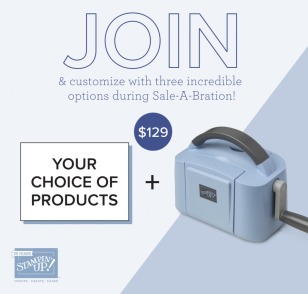
Option #1 This exclusive Boho Blue Mini Stampin’ Cut & Emboss Machine ($63 value) + Your choice of $175 of Stampin’ Up! products for only $129.00. The Boho Blue is one of the new In-Colors coming for 2023-2025.

Option #2 The original White Mini Stampin’ Cut & Emboss Machine (a $63 value), + Your choice of $175 of Stampin’ Up! products for only $129.00

Option #3. Your choice of $175 of Stampin’ Up! products for only $99.00.

If you have a LONG shopping list, this is a great way to get everything you always want at a discount. Enjoy at least a 20% discount on the products you purchase. Why wait, this is such an awesome deal, and it only sticks around until February 28th. Join now and start enjoying that discount right away!!! Contact me at creativestampingdesigns@gmail.com and we can talk about you joining. We have people on our team from all over the United States. We get together monthly via Zoom; we have team Facebook pages where we share what we make and ask questions. This was one of the best decisions I’ve ever made, I’ve made a lot of new friends from all over.

*********************************************************************************************************

Saying Thanks Kit Now Available

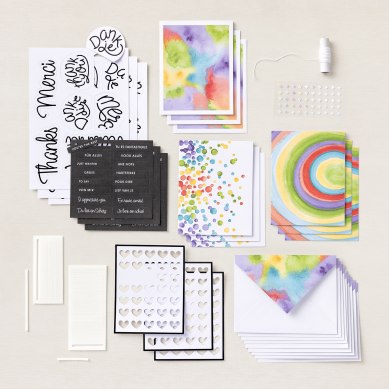
We invite you to say thank you to the people who make your day, every day with Saying Thanks all-inclusive card kit! This month’s kit has everything you need to show appreciation to family and friends who light up your life! Make nine bright, colorful cards in no time to say thank you, recognize friends, and share your gratitude with a bright watercolor wash that won’t go unnoticed! You’ll never miss an opportunity to express gratitude with this colorful kit!

This kit includes: 

  • Enough supplies to create 9 cards—3 each of 3 designs—and 9 coordinating envelopes.
  • Printed die-cut words, precut pieces, and enough adhesive to complete projects.
  • White baker’s twine and iridescent diamond sequins.
  • Finished card size: 5-1/2″ x 4-1/4″ (14 x 10.8 cm).
  • Coordinating colors: Basic Black, Daffodil Delight, Gorgeous Grape, Granny Apple Green, Poppy Parade, Tahitian Tide.

#162361 $13.00 USD | $18.00 CAD

Each kit comes with precut die cuts in Dutch, English, French and German

*********************************************************************************************************

Sunshine & Smiles

Subscribe January 11 – February 10

Make cloudy days a little brighter with the Sunshine & Smiles Paper Pumpkin Kit! This kit includes nine sweet and sunny cards—three each of three designs. If someone you know is weathering a storm, this kit is just what you’ll need to create cards that are sure to brighten their day!

PEEK THROUGH CARDS

Catch a glimpse of sunshine through those springtime showers with this kit’s playful peek-through cards! Each card includes an open window in the front, perfect for adding a touch of dimension and layering! You and your customers will have fun crafting with these cards—rain or shine!

AND for the first time ever, we’ve got a coordinating die add-on! (Stampin’ Cut & Emboss Machine sold separately). Keep reading to learn more!

This kit includes:

  • Everything you need to create 9 radiant cards—3 each of 3 designs—and 9 coordinating envelopes.
  • A sweet springtime photopolymer stamp set.
  • A Mango Melody Stampin’ Spot
  • A fun peek-through window scene on each card!
  • Cute precut critters and labels, fun raindrop embellishments, and more! 

Finished card size: 5-1/2″ x 4-1/4″ (14 x 10.8 cm)

Coordinating Stampin’ Up! colors: Balmy Blue, Cajun Craze, Coastal Cabana, Daffodil Delight, Flirty Flamingo, Mango Melody, Old Olive, Shaded Spruce

Don’t forget! This kit perfectly coordinates with the Rain or Shine Suite Collection (item number: 160556).

Subscribe to the February Paper Pumpkin Kit between 11 January 2022 and 10 February 2023 by clicking here!

Note: Supplies may be limited toward the end of the subscription period.

ADD-ON

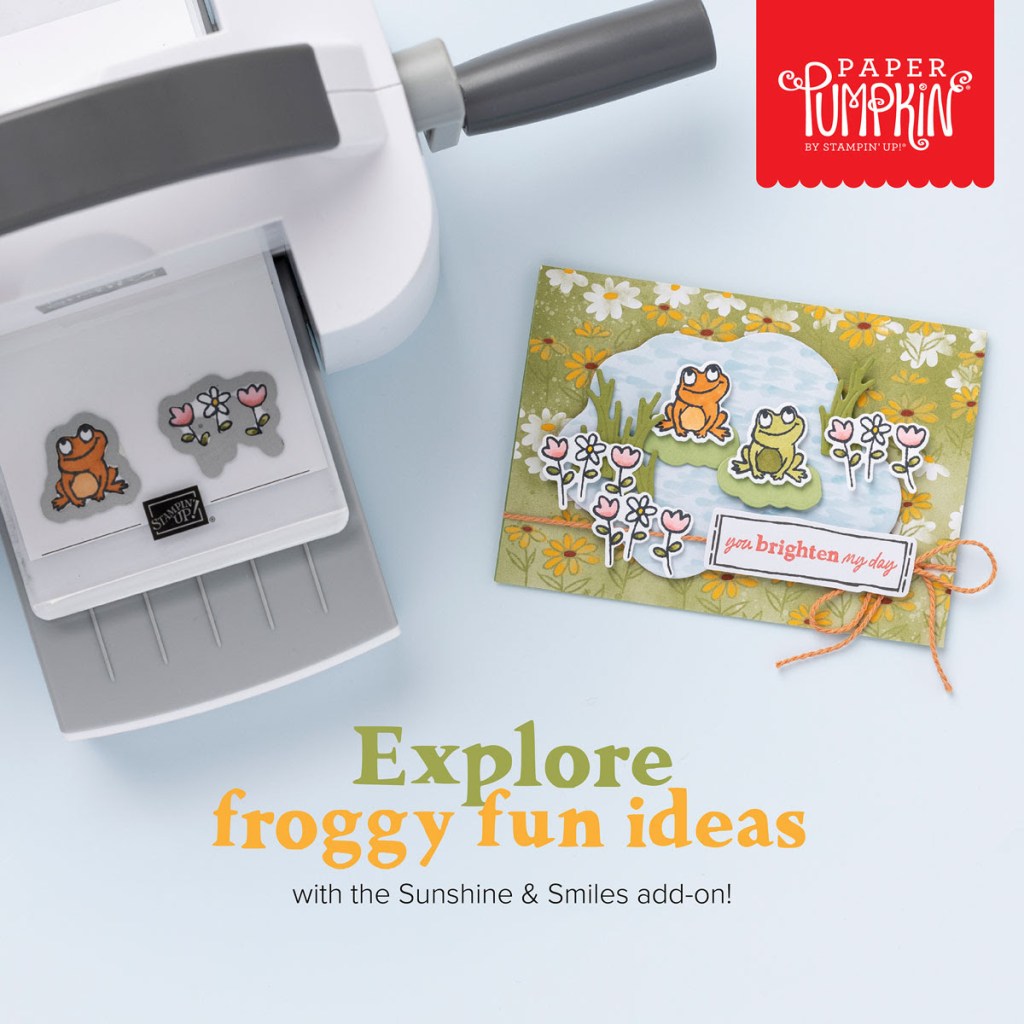
Sunshine & Smiles Dies (Available for purchase starting 11 January, while supplies last)

Item number: 162486

$6.00 USD / $8.25 CAD

This add-on includes:

  • One coordinating frog-shaped die: 1-1/8″ x 7/8″ (2.9 x 2.2 cm)
  • One coordinating flower bouquet die: 1-1/8″ x 7/8″ (2.9 x 2.2 cm)

Note: Stampin’ Cut & Emboss Machine sold separately.

*********************************************************************************************************

Card stock cuts for this project:

  • Basic White Cardstock 4″ X 3 1/4″ (bees), 1 7/8″ x 3 5/8″ (inner liner)
  • Basic Black Cardstock 1″ x 4 1/4″ (hives)
  • Crushed Curry Cardstock 4 1/8″ x 5 3/8″ (embossed panel)
  • Old Olive Cardstock 1 1/4″ x 3 1/2″ (leaves)
  • Rich Razzleberry Cardstock scrap for flower
  • Starry Sky Cardstock 8 1/2″ X 5 1/2″ (large card base scored & folded at 2 1/8″ & 4 1/4″), 3 3/4″ X 6 1/4″ (small card base scored & folded at 2 1/8″ x 4 1/4″)
  • Dainty Flowers Designer Series Paper 2 – 2″ x 5 3/8″, 1″ X 3 5/8″ & 2″ x 3 5/8″ (card base panels), 2 1/4″ X 6″ (envelope flap)

*********************************************************************************************************

Product List