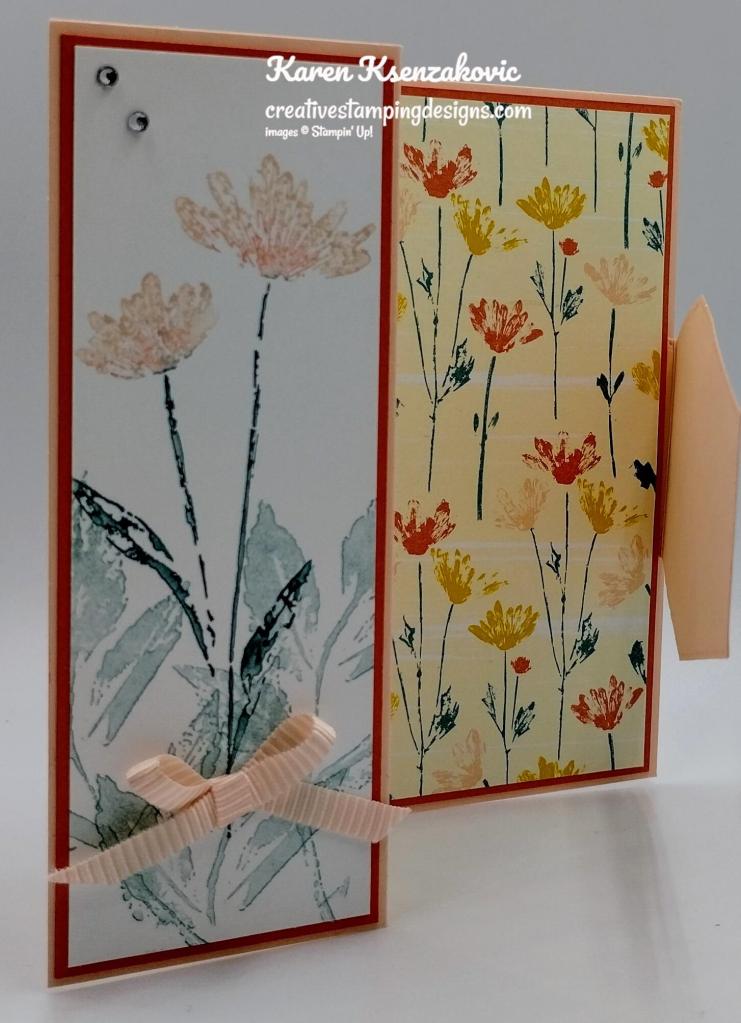
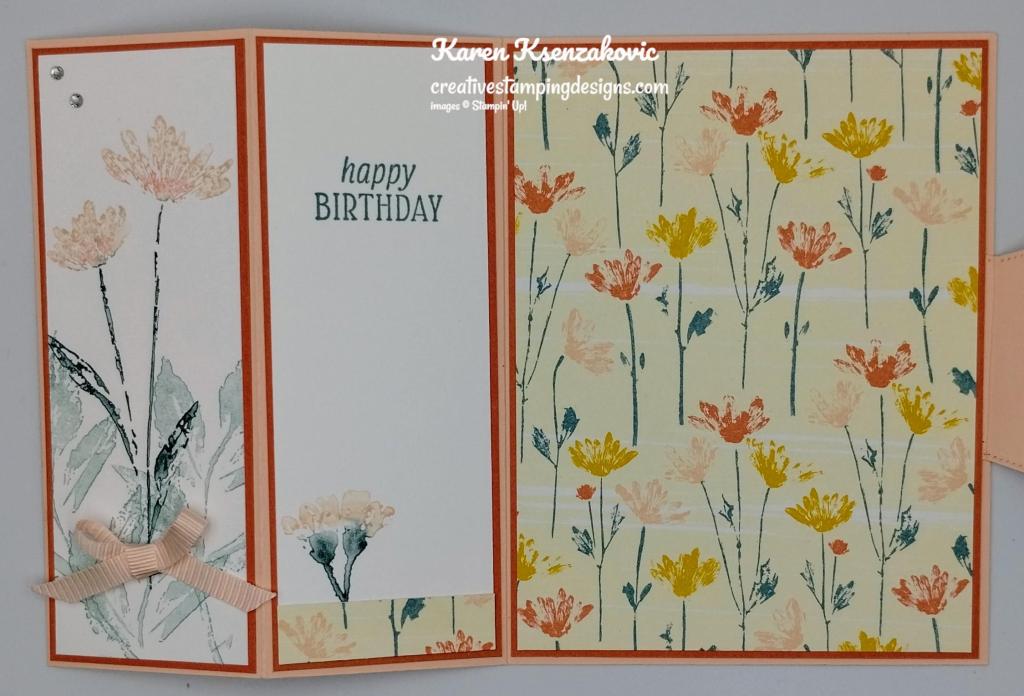
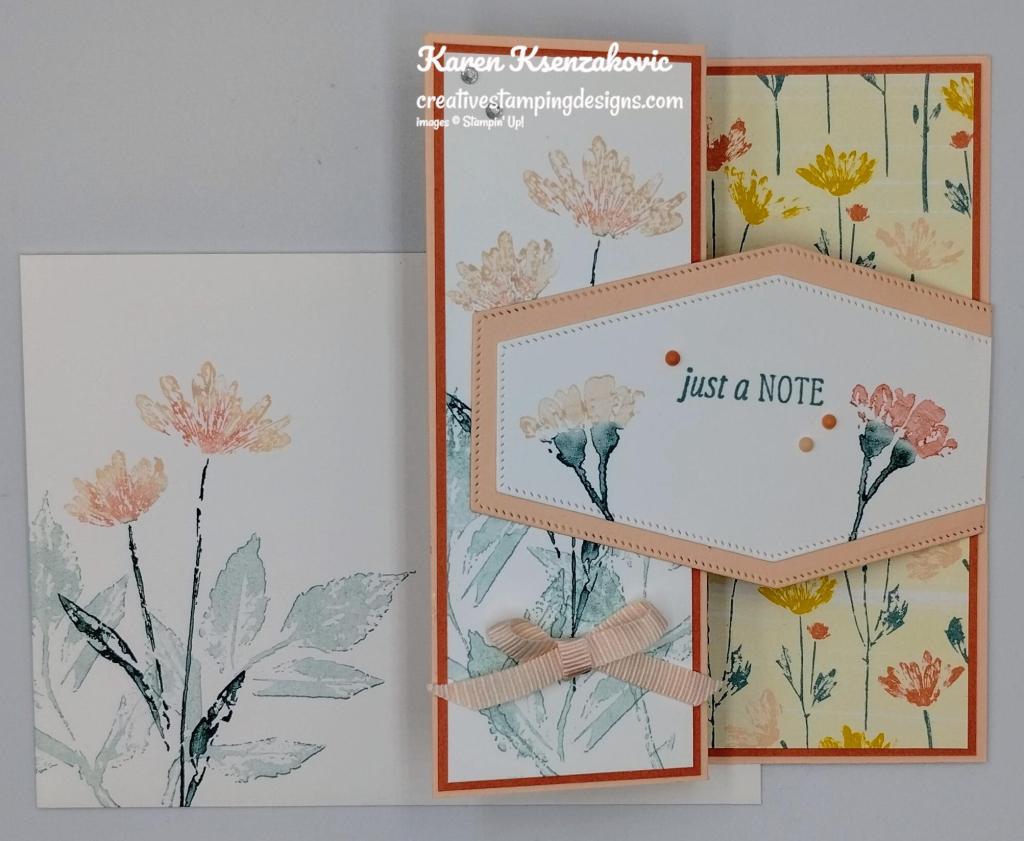
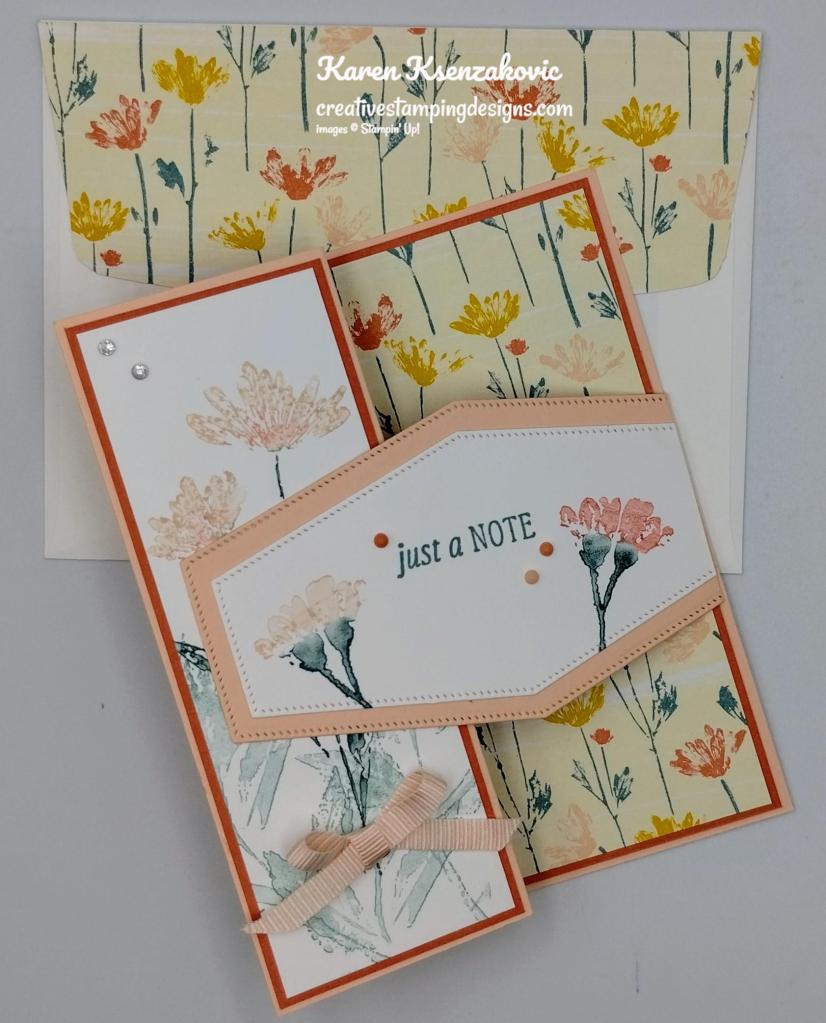
Stampin’ Up! Circle Sayings CAS Birthday

Good Saturday morning stamping friends and welcome to the weekend. I hope you have some plans for the weekend. I’ll be working all day today and last I saw we’re expecting rain all day today. We’ll see what happens, it’s NJ and they don’t always get the weather correct. Tomorrow I have my in-person quarterly meeting. I always look forward to these meetings and getting together with team members.

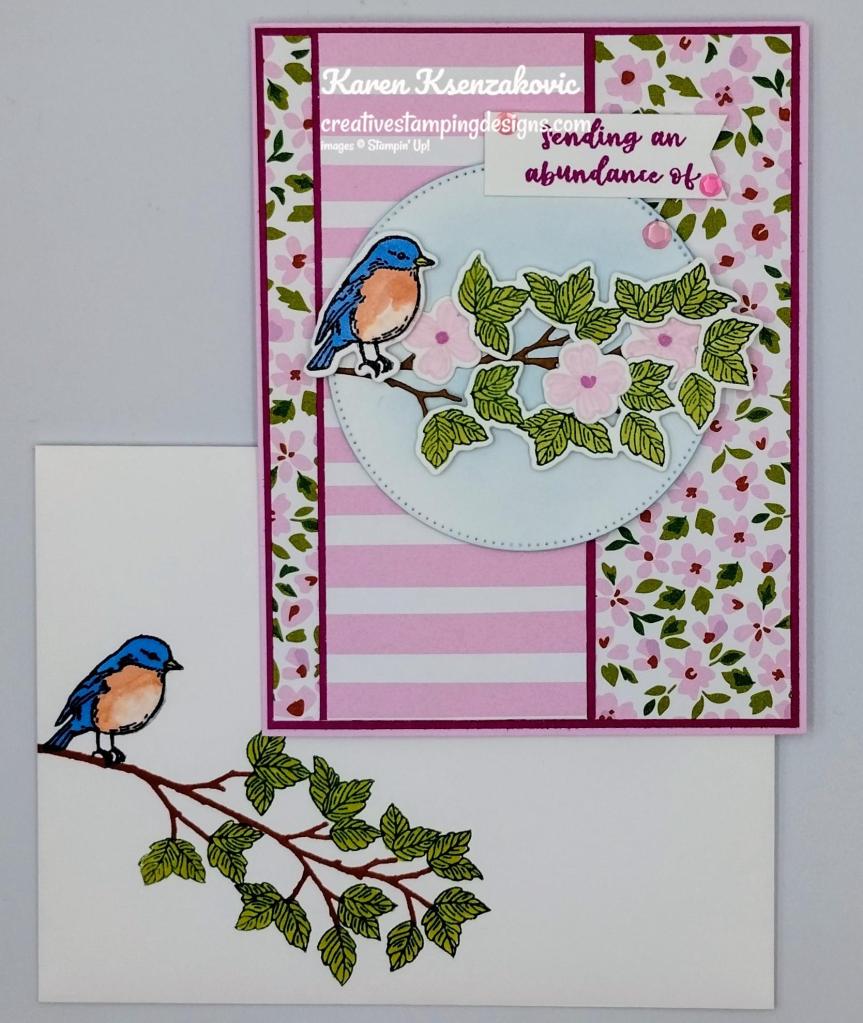
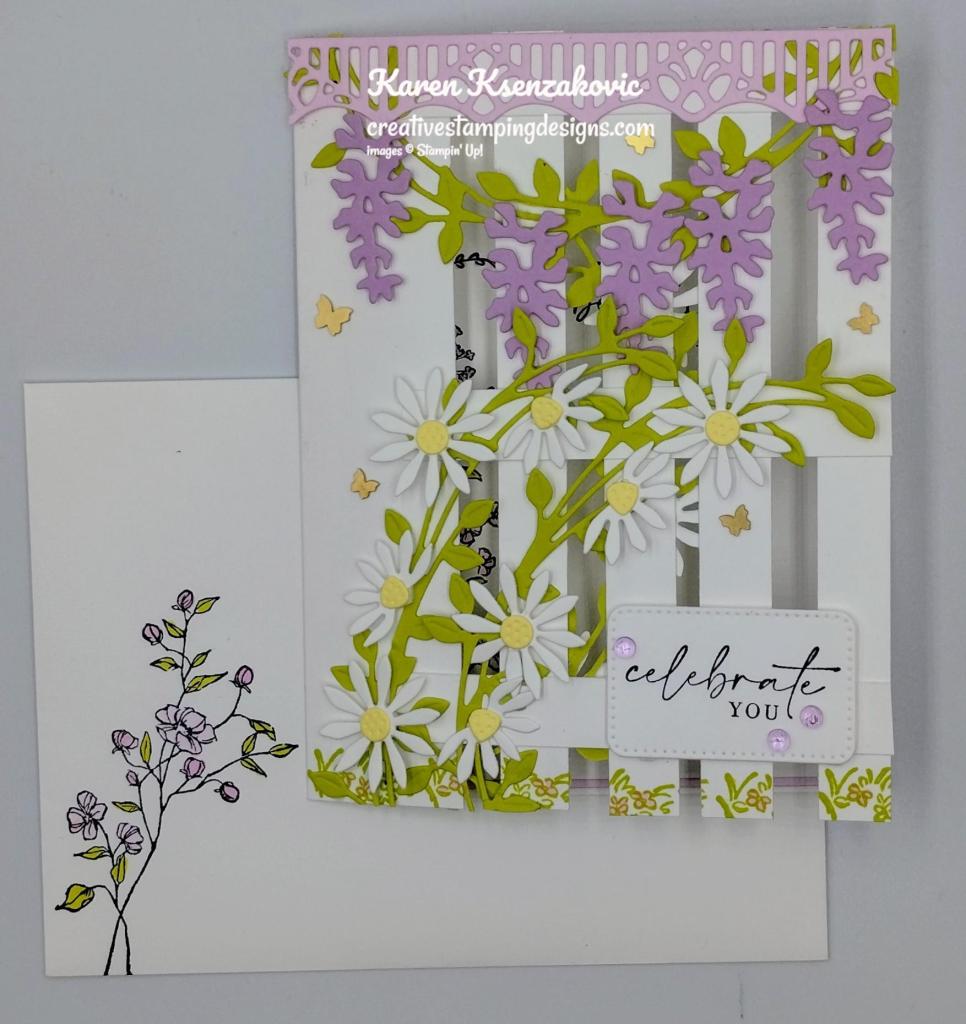
I have a quick birthday card for you today using one of my favorite sets from the new catalog. Here’s my card for today.
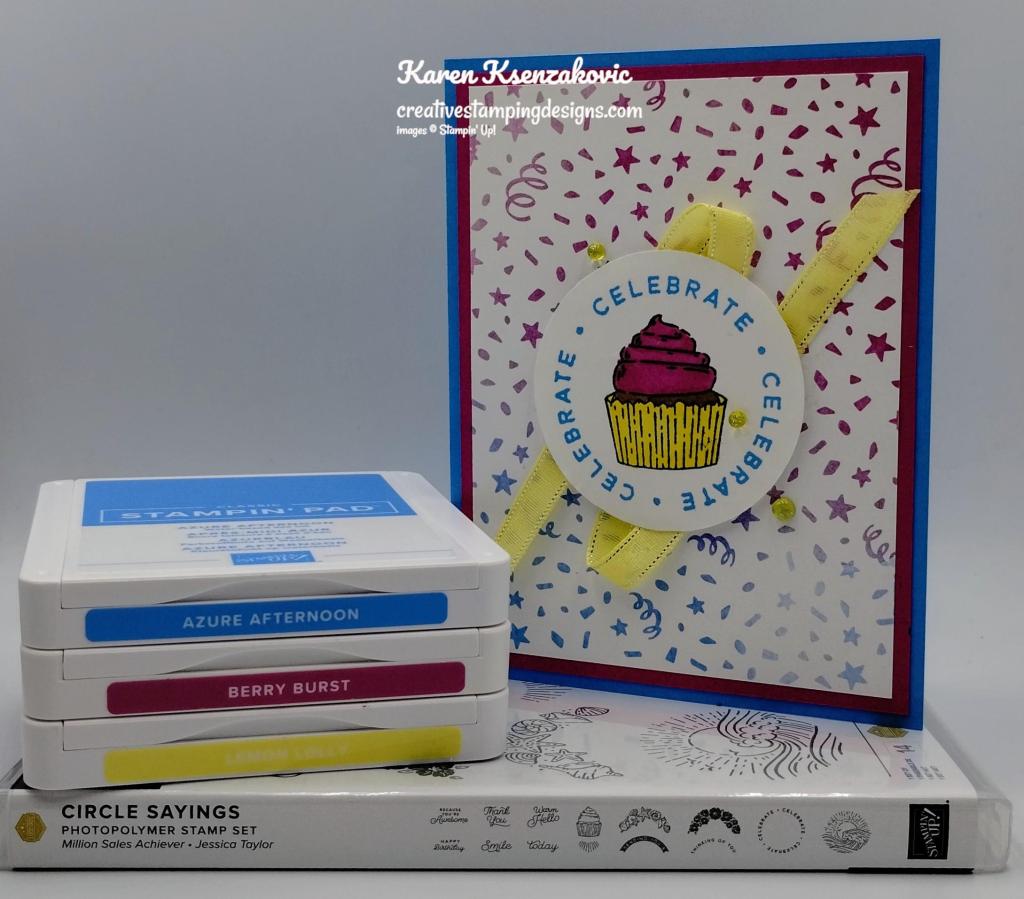
Stampin' Up! Circle Sayings CAS Birthday 1 creativestampingdesigns.com

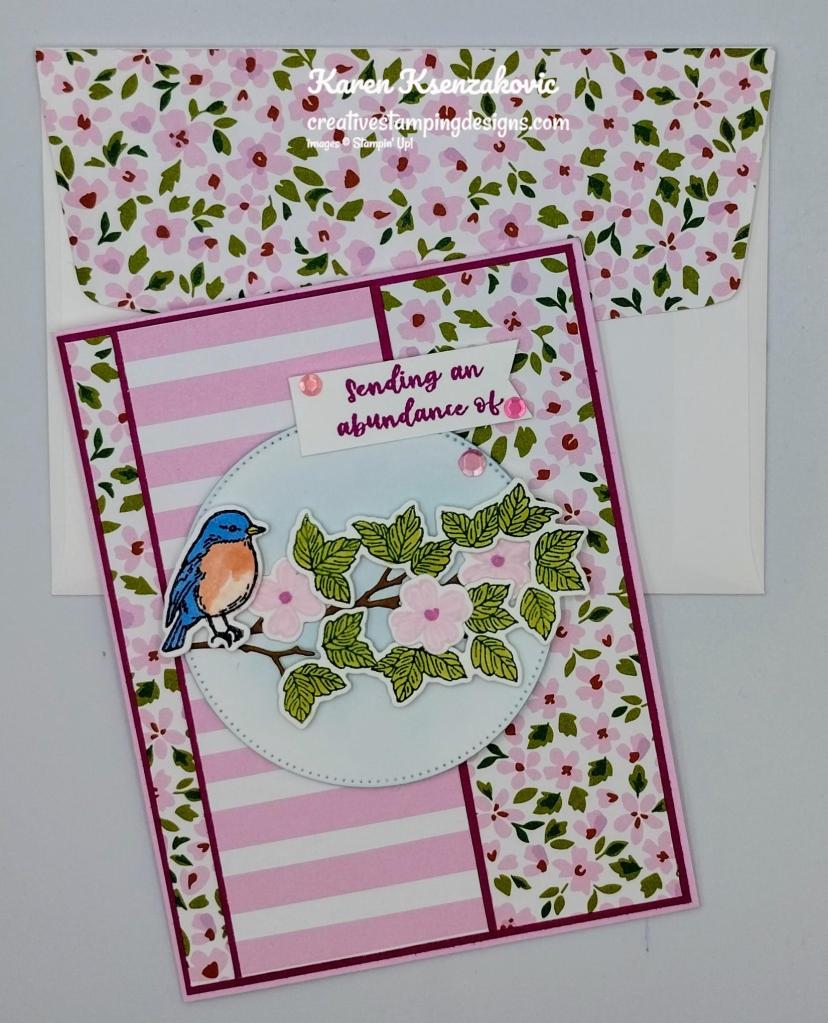
I used the Stampin’ Up! Circle Sayings Bundle along with the Bright & Beautiful 6 X 6 Designer Series Paper for my card today.
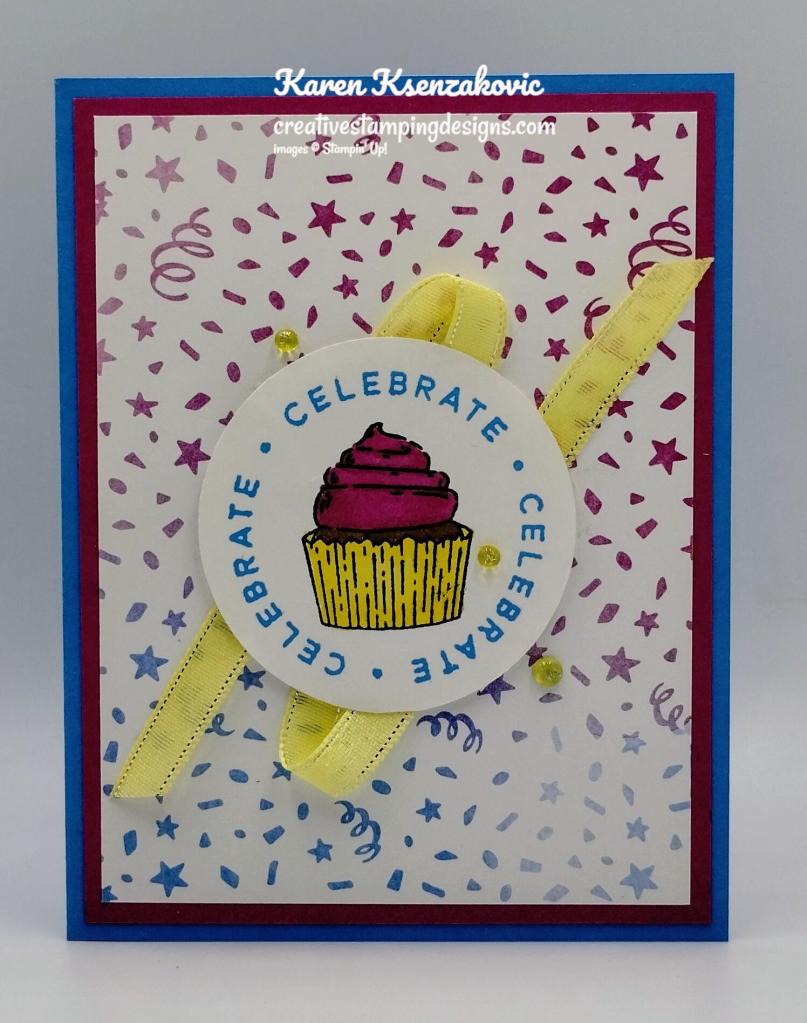
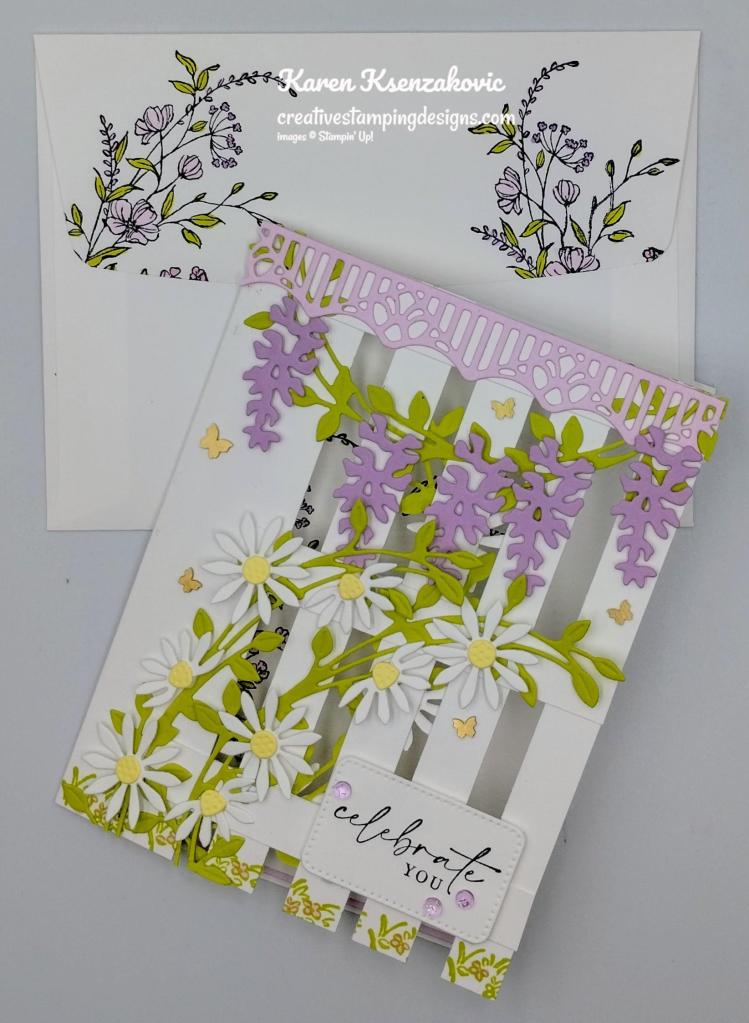
Stampin' Up! Circle Sayings CAS Birthday 2 creativestampingdesigns.com

I started by adhering a panel of Bright & Beautiful DSP to a Berry Burst mat using Stampin’ Seal. I adhered the layered panel to an Azure Afternoon card base using Multipurpose Liquid Glue.
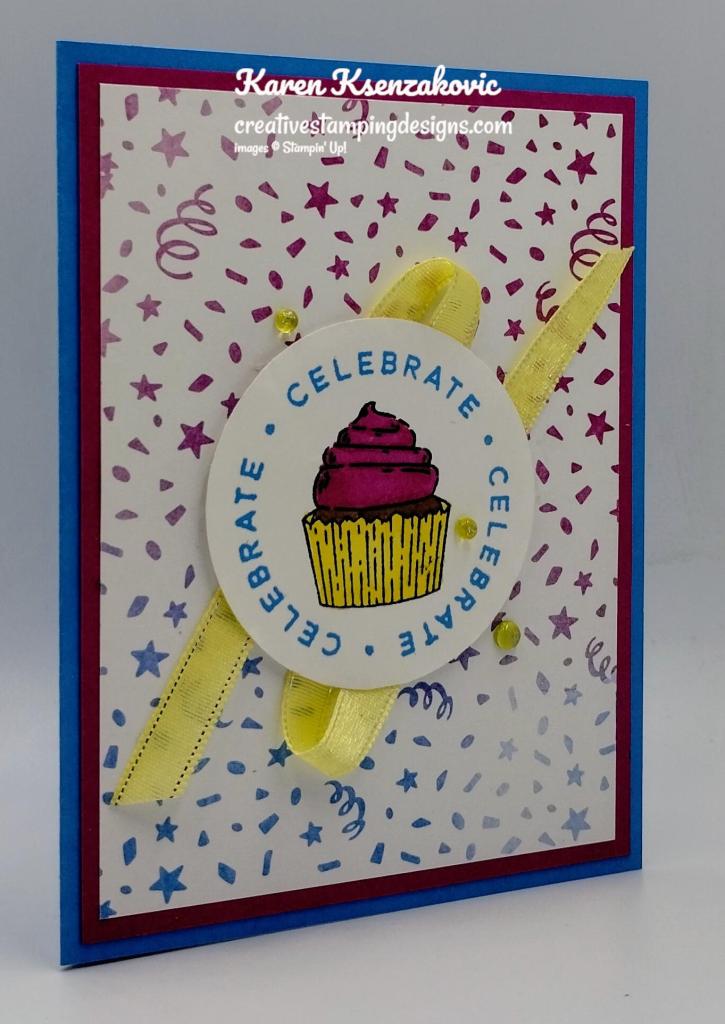
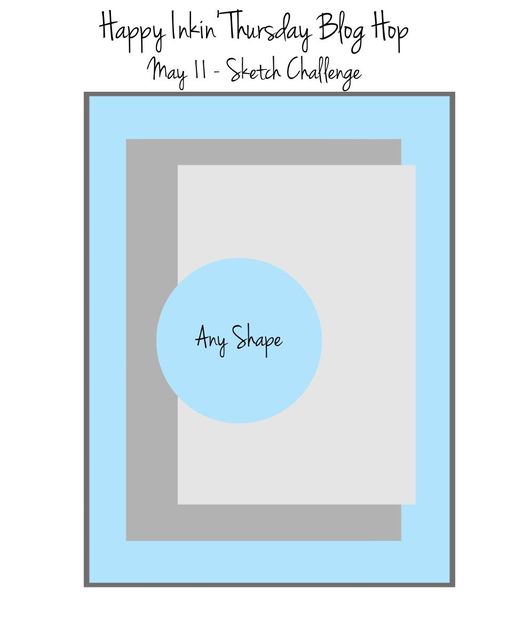
Stampin' Up! Circle Sayings CAS Birthday 3 creativestampingdesigns.com

On a panel of Basic White, I stamped the circle sentiment from the Stampin’ Up! Circle Sayings Photopolymer Stamp Set in Azure Afternoon Ink. I stamped the cupcake image from the Circle Sayings stamp set in Tuxedo Black Ink inside the sentiment. I colored the image using Berry Burst, Lemon Lolly and Pecan Pie Stampin’ Blends Markers. I cut the image out using the 2 3/8″ Circle Punch.

Stampin' Up! Circle Sayings CAS Birthday 4 creativestampingdesigns.com

I adhered a piece of 3/8″ Lemon Lolly Sheer Ribbon from the Sheer Ribbon Combo Pack, to the card front using Stampin’ Seal. I adhered the punched sentiment over the ribbon using Stampin’ Dimensionals. I added a few Tinsel Gems Four-Pack to the card front.

Stampin' Up! Circle Sayings CAS Birthday 5 creativestampingdesigns.com

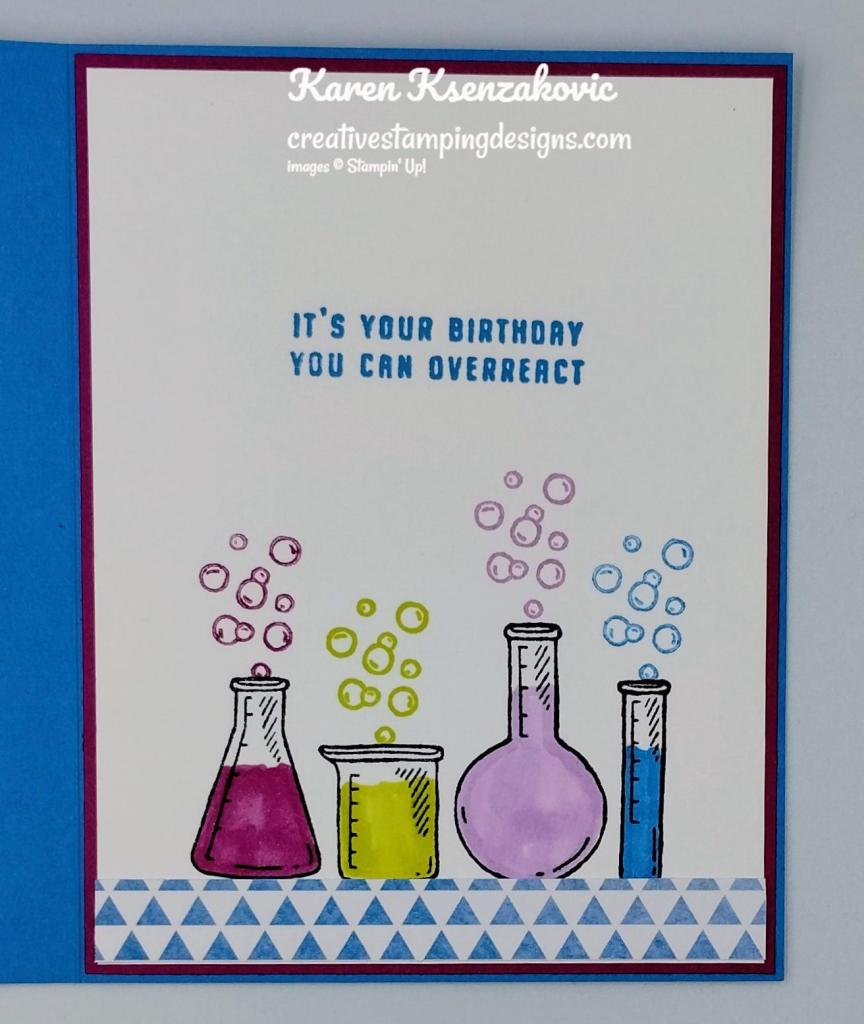
On the inside I stamped the sentiment from the Circle Sayings stamp set in Azure Afternoon Ink on a panel of Basic White. I adhered a strip of Bright & Beautiful DSP to the top of the panel. I stamped the cupcake image from the Circle Sayings stamp set in Tuxedo Black Ink on the bottom of the panel. I colored the image using Berry Burst, Lemon Lolly and Pecan Pie Stampin’ Blends Markers. I adhered the Basic Whtie panel to a Berry Burst mat then to the inside of the Azure Afternoon card base.

To finish my card, I decorated a Basic White Medium Envelope. I stamped the cupcake image from the Circle Sayings stamp set in Tuxedo Black Ink on the envelope front. I colored the image using Berry Burst, Lemon Lolly and Pecan Pie Stampin’ Blends Markers. I adhered a panel of Bright & Beautiful DSP to the envelope flap.

Thank you for stopping by my blog today. I hope you like the card and will give it a try. Happy Stamping!!

*********************************************************************************************************

If you need any stamping supplies, I’d love to be your Demonstrator. Just click HERE to go directly to my online store or drop me an email if you have any questions. 

MY CURRENT HOST CODE IS:   GVEBWYZ6

Use this host code when placing an order with me. When you order $50 or greater you will receive a free gift from me! If your order is over $150, please do not use this code, but you’ll still get the free gift. The free gift is your choice of any 1 item valued up to $10.00 from the 2022-2023 Annual Catalog or the January-April 2023 Mini Catalog!  Unfortunately, packs of cardstock are no longer an option for a free gift. Shipping has become too expensive to ship and it’s costing me as much to ship as the cardstock costs. For any orders $50 or more I will also send you my monthly class tutorials.  Click HERE or go to my Customer Rewards for more details and to see what this month’s tutorials are.

Please remember to use my current Host Code and make sure that you can see my name on the final checkout page listed as your Demonstrator when you order so that you know that you’re ordering with me, and you’ll get my rewards! 

Happy Stamping, Karen

*********************************************************************************************************

In response to changing policies at Stampin’ Up – I’m adjusting my Ordering Gift policy as well.  I’m having to get a little more tough on the adding of Host codes when you place your order thru my Online Store.

Not to worry – you’re still going to get that $10 ordering gift for orders of $50 (before shipping & tax) or greater.  And the gift is still any 1 SU! product up to that $10 value – which includes some of our fun Host Sets!

But – if you DO NOT use the Host code for your orders of less than $150 (this is the RETAIL total before Shipping & Handling), then you’ll have two options:

  1. You’ll need to call Stampin’ Up! (1-800-Stamp-Up) and ask them to add it for you. They’re very helpful and will get it done quickly!  OR….
  2. If your order was over the $50 threshold but under $150, then…you’ll forfeit that $10 ordering gift and rewards – this is the Bummer Option – and I REALLY don’t want to do this, SO please remember to add my Current Host Code.

*********************************************************************************************************

June 1st through June 30th, we have an amazing joining special going on. June is a fabulous time to join Stampin’ Up! You will get even more FREE products in your customizable Starter Kit! If you sign up between 1–30 June, you can get $125 USD | $165 CAD $155 USD worth of products for only $99 USD + free business supplies + free shipping + all the fun being a part of Stampin’ Up!

STARTER KIT+ PROMOTION DETAILS:

  • When you purchase you Starter Kit, you will be able to redeem $155 of Starter Kit eligible products for just  $99.
  • New demonstrators who submit their Independent Demonstrator Agreement (IDA) before June 1 or after June 30 will not  be eligible for this offer.
  • This offer begins June 1, 2023 and ends at 11:50 PM MT on June 30, 2023.

There is Never an Obligation to sell, you do NOT have to use this as a business, you can join just to enjoy the discount for yourself. I would LOVE to have you on my team. Join as a hobby demonstrator and enjoy all the benefits. All your future orders will be eligible for at least a 20% discount on products ordered. PLUS if you are a demonstrator and there is a special, like the upcoming 15% discount on Designer Series Paper, you will get your 20% discount on top of the 15%. Now that’s an awesome deal. This is a great way to get everything you want on your wish list at a discounted price. Enjoy at least a 20% discount on the future products you purchase. Join now and start enjoying that discount right away!!! Contact me at creativestampingdesigns@gmail.com and we can talk about you joining. We have people on our team from all over the United States. We get together monthly via Zoom; we have team Facebook pages where we share what we make and ask questions. This was one of the best decisions I’ve ever made, I’ve made a lot of new friends from all over.

Joining Stampin’ Up! as a demonstrator offers some fabulous opportunities, including:

  • Becoming part of our wonderful community
  • Attending exclusive demonstrator-only events
  • Having early access to products
  • Receiving a copy of our catalogs early
  • Getting a 20% discount on our magnificent coordinating products
  • Joining our exclusive demonstrator-only Facebook group
  • Having the opportunity to earn a supplemental income if you choose to make it a business.
  • Accessing our demonstrator-only weekly newsletter: Succeed Weekly
  • Receiving training information and accessing resources to help you through your first year and beyond.

I would LOVE to have you on my team. Don’t wait until the last minute, contact me today and we can talk about you joining!

*********************************************************************************************************

SAVE 15% ON SELECT DESIGNER SERIES PAPERS!

We all love beautiful Designer Series Paper, and in June, you can enjoy a 15% discount on select Designer Series Papers from our new 2023–2024 Annual Catalog and Online Exclusives. Whether you’re a scrapbooker, a card maker or simply a paper lover, this is a great time to stock up and save on gorgeous paper, so you have artistic and versatile paper designs on hand for your next projects! Click HERE for a printable PDF flyer.

SALES PERIOD: 1–30 JUNE
  • All order types qualify for this promotion.
  • There is no limit to how many packages of Designer Series Paper may be purchased during this promotion.
  • Only select Designer Series Papers are available at a 15% discount during this promotion.
  • Orders must be placed—and closed—during the promotion period for the 15% discount to apply.
  • Designer Series Paper ordered as part of a Starter Kit or with Stampin’ Rewards qualify for the 15% discount.
  • Designer Series Papers are from the new 2023–2024 Annual Catalog (p. 129–132) and Online Exclusives.
ORDER DEADLINES
  • 30 June 2023; 11:59 PM (MT)

*********************************************************************************************************

Spanish Translated Stamp Set Bundle Available In The New Catalog!

Do you speak Spanish? Or know someone who does?  Stampin’ Up! is excited to share that they have the new Texturas Naturales (161785), a Spanish stamp set, bundle and suite collection in their 2023–2024 Annual Catalog!

You can find the Spanish translated items in my online store Here 

*********************************************************************************************************

Welcome Inn

Subscribe May 11 – June 10

Show hospitality to all your guests with the Welcome Inn Paper Pumpkin Kit! This kit includes nine elegant and detailed cards—three each of three designs. Whether you’re hosting friends and family, or want to invite someone over, this kit has what you need to create sophisticated and elevated cards!

You can also pair this kit with a coordinating die add-on! (Available while supplies last. Stampin’ Cut & Emboss Machine sold separately). Keep reading to learn more!

The Welcome Inn Paper Pumpkin Kit perfectly coordinates with the Countryside Inn Suite Collection (item number 161474) from the 2023–2024 Annual Catalog! You can use the stamps and paper from both the suite and kit to create cards that are stylish and refined. You can create these elegant hospitality cards using the suite’s Countryside Inn 12″ x 12″ (30.5 x 30.5 cm) Designer Series Paper and the kit’s beautiful floral cards. There are endless creative possibilities of this kit and suite coordination!

This kit includes:

  • All the supplies you’ll need to create 9 elegant and sophisticated cards—3 each of 3 designs—and 9 coordinating envelopes.
  • A coordinating photopolymer stamp set with floral designs and friendly, hospitality-themed sentiments.
  • A Night of Navy Stampin’ Spot and beautiful embellishments
  • Lovely floral details and precut vases

Finished card size: 4-1/4″ x 5-1/2″ (10.8 x 14 cm)

Coordinating Stampin’ Up! colors: Balmy Blue, Boho Blue, Calypso Coral, Daffodil Delight, Early Espresso, Misty Moonlight, Night of Navy, Old Olive

Don’t forget! This kit perfectly coordinates with the Countryside Inn Suite Collection (Item number: 161474).

Subscribe to the May Paper Pumpkin Kit between 11 May 2023 and 10 June 2023 by clicking here!

Note: Supplies may be limited toward the end of the subscription period.
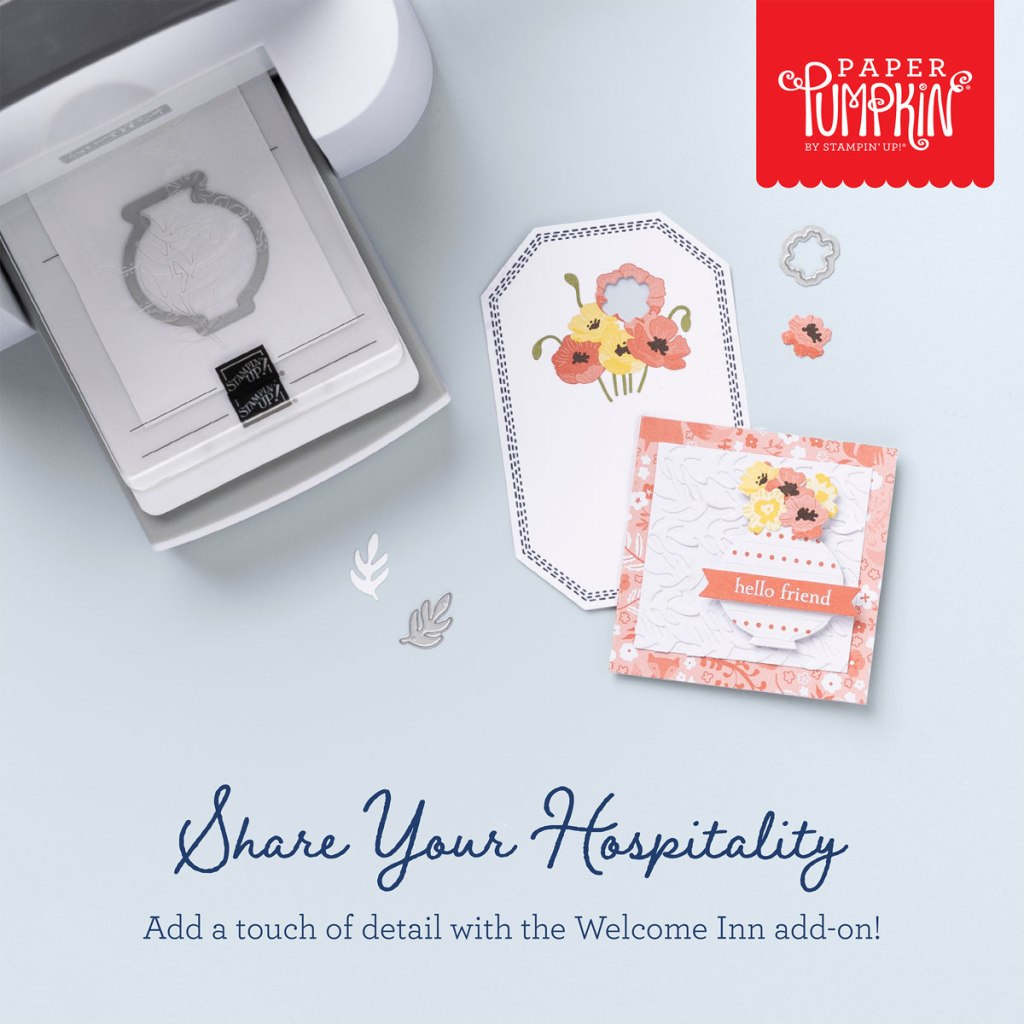
ADD-ON

Welcome Inn Dies (Available for purchase starting 11 May, while supplies last).

Item number: 163192

$6.00 USD / $8.25 CAD

This add-on includes:

  • One coordinating vase die: 1-1/2″ x 1-1/2″ (3.8 x 3.8 cm)
  • One coordinating flower die
  • One beautiful leaf die

Note: Stampin’ Cut & Emboss Machine sold separately.

*********************************************************************************************************

Card stock cuts for this project:

  • Basic White Cardstock 2 3/4″ X 2 3/4″ (sentiment/artwork), 3 3/4″ X 5″ (inner liner)
  • Azure Afternoon Cardstock 8 1/2″ X 5 1/2″ (card base scored & folded at 4 1/4″)
  • Berry Burst Cardstock 2 – 4″ X 5 1/4″ (card front & inner liner mats)
  • Bright & Beautiful Designer Series Paper 3 3/4″ X 5″ (card front), 1″ X 3 3/4″ (inner liner strip), 2 1/4″ X 6″ (envelpoe flap)

*********************************************************************************************************

Product List

Stampin’ Up! So Refreshing for Fun Fold Friday

Good Friday morning stamping friends. How was your week? It’s been a busy one for me, with Memorial Day, the end of the month, the 1st of the month, I’ve been working every day. I usually have 2 days during the week off, not this week. I did have Memorial Day off.

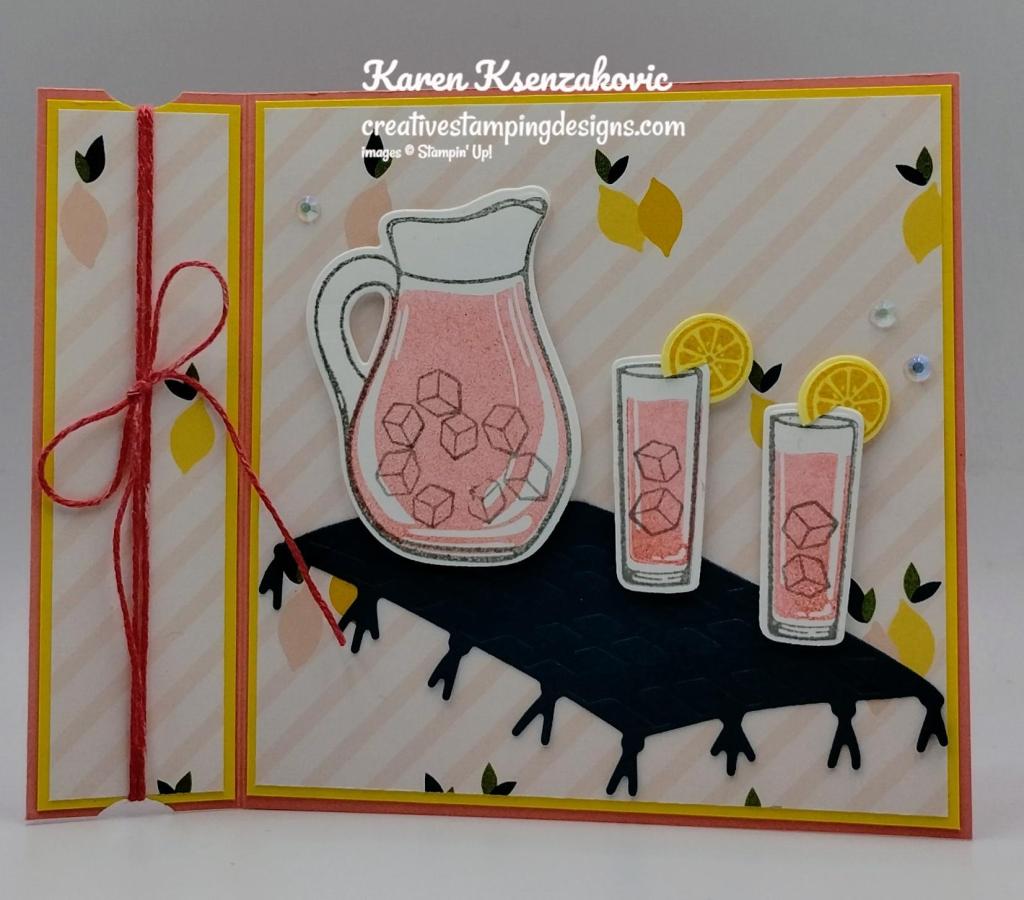
I wasn’t able to do my live on Wednesday since I got stuck at work later than planned. I do have a simple fun fold today using a new bundle that I just got. Here’s my card for today.

Stampin' Up! So Refreshing Fun Fold 1 creativestampingdesigns.com

I used the Stampin’ Up! So Refreshing Bundle along with the Delightfully Eclectic Designer Series Paper for my card today.

Stampin' Up! So Refreshing Fun Fold 2 creativestampingdesigns.com

I started by adhering the book end of the Flirty Flamingo card base together using Multipurpose Liquid Glue. I adhered a larger and smaller panel of Delightfully Eclectic DSP to Daffodil Delight mats using Stampin’ Seal. I adhered the layered panels to the Flirty Flamingo card base using Multipurpose Liquid Glue

Stampin' Up! So Refreshing Fun Fold 3 creativestampingdesigns.com

I colored a piece of White Baker’s Twine using the Flirty Flamingo Stampin’ Blends Marker. I wrapped the twine around the left side of the card base twice and tied a bow. On a panel of Basic White, I stamped the pitcher and glass images from the Stampin’ Up! So Refreshing Photopolymer Stamp Set in Smoky Slate Ink. I stamped the liquid image from the So Refreshing stamp set in Flirty Flamingo Ink, stamping off once on scrap paper, inside the outlined images. I stamped the ice cube image from the So Refreshing stamp set in Smoky Slate Ink.

Stampin' Up! So Refreshing Fun Fold 4 creativestampingdesigns.com

I cut the images out using the So Refreshing Dies. On a scrap of Lemon Lolly cardstock, I stamped the lemon slice image from the So Refreshing stamp set in Daffodil Delight Ink twice. I cut the images out using the So Refreshing Dies. I cut the tablecloth/blanket die from the So Refreshing Dies from a panel of Pretty Peacock cardstock. I adhered the tablecloth to the card front using Multipurpose Liquid Glue. I cut a slit in the lemon slice using my Paper Snips and slid them onto the glasses. I adhered the pitcher and glasses to the card front using Stampin’ Dimensionals. I added a few Iridescent Rhinestones Basic Jewels to the card front.

Stampin' Up! So Refreshing Fun Fold 5 creativestampingdesigns.com

On the inside, I stamped the sentiment from the So Refreshing stamp set in Smoky Slate Ink on a panel of Basic White. I adhered a strip of Delightfully Eclectic DSP to the side of the panel. I stamped the lemon image from the So Refreshing stamp set on the bottom of the panel in Daffodil Delight Ink. I adhered the Basic Whtie panel to a Daffodil Delight mat then to the inside of the Flirty Flamingo card base.

Stampin' Up! So Refreshing Fun Fold 6 creativestampingdesigns.com

To finish my card, I decorated a Basic White Medium Envelope. I stamped the pitcher, ice and glass images from the So Refreshing stamp set on the envelope front in Smoky Slate Ink. I stamped the liquid image in Flirty Flamingo Ink, stamping off once on scrap paper. I adhered a panel of Delightfully Eclectic DSP to the envelope flap.

Stampin' Up! So Refreshing Fun Fold 7 creativestampingdesigns.com

Thank you for stopping by my blog today. I hope you like the card and will give it a try. Happy Stamping!!

*********************************************************************************************************

If you need any stamping supplies, I’d love to be your Demonstrator. Just click HERE to go directly to my online store or drop me an email if you have any questions. 

MY CURRENT HOST CODE IS:   GVEBWYZ6

Use this host code when placing an order with me. When you order $50 or greater you will receive a free gift from me! If your order is over $150, please do not use this code, but you’ll still get the free gift. The free gift is your choice of any 1 item valued up to $10.00 from the 2022-2023 Annual Catalog or the January-April 2023 Mini Catalog!  Unfortunately, packs of cardstock are no longer an option for a free gift. Shipping has become too expensive to ship and it’s costing me as much to ship as the cardstock costs. For any orders $50 or more I will also send you my monthly class tutorials.  Click HERE or go to my Customer Rewards for more details and to see what this month’s tutorials are.

Please remember to use my current Host Code and make sure that you can see my name on the final checkout page listed as your Demonstrator when you order so that you know that you’re ordering with me, and you’ll get my rewards! 

Happy Stamping, Karen

*********************************************************************************************************

In response to changing policies at Stampin’ Up – I’m adjusting my Ordering Gift policy as well.  I’m having to get a little more tough on the adding of Host codes when you place your order thru my Online Store.

Not to worry – you’re still going to get that $10 ordering gift for orders of $50 (before shipping & tax) or greater.  And the gift is still any 1 SU! product up to that $10 value – which includes some of our fun Host Sets!

But – if you DO NOT use the Host code for your orders of less than $150 (this is the RETAIL total before Shipping & Handling), then you’ll have two options:

  1. You’ll need to call Stampin’ Up! (1-800-Stamp-Up) and ask them to add it for you. They’re very helpful and will get it done quickly!  OR….
  2. If your order was over the $50 threshold but under $150, then…you’ll forfeit that $10 ordering gift and rewards – this is the Bummer Option – and I REALLY don’t want to do this, SO please remember to add my Current Host Code.

*********************************************************************************************************

June 1st through June 30th, we have an amazing joining special going on. June is a fabulous time to join Stampin’ Up! You will get even more FREE products in your customizable Starter Kit! If you sign up between 1–30 June, you can get $125 USD | $165 CAD $155 USD worth of products for only $99 USD + free business supplies + free shipping + all the fun being a part of Stampin’ Up!

STARTER KIT+ PROMOTION DETAILS:

  • When you purchase you Starter Kit, you will be able to redeem $155 of Starter Kit eligible products for just  $99.
  • New demonstrators who submit their Independent Demonstrator Agreement (IDA) before June 1 or after June 30 will not  be eligible for this offer.
  • This offer begins June 1, 2023 and ends at 11:50 PM MT on June 30, 2023.

There is Never an Obligation to sell, you do NOT have to use this as a business, you can join just to enjoy the discount for yourself. I would LOVE to have you on my team. Join as a hobby demonstrator and enjoy all the benefits. All your future orders will be eligible for at least a 20% discount on products ordered. PLUS if you are a demonstrator and there is a special, like the upcoming 15% discount on Designer Series Paper, you will get your 20% discount on top of the 15%. Now that’s an awesome deal. This is a great way to get everything you want on your wish list at a discounted price. Enjoy at least a 20% discount on the future products you purchase. Join now and start enjoying that discount right away!!! Contact me at creativestampingdesigns@gmail.com and we can talk about you joining. We have people on our team from all over the United States. We get together monthly via Zoom; we have team Facebook pages where we share what we make and ask questions. This was one of the best decisions I’ve ever made, I’ve made a lot of new friends from all over.

Joining Stampin’ Up! as a demonstrator offers some fabulous opportunities, including:

  • Becoming part of our wonderful community
  • Attending exclusive demonstrator-only events
  • Having early access to products
  • Receiving a copy of our catalogs early
  • Getting a 20% discount on our magnificent coordinating products
  • Joining our exclusive demonstrator-only Facebook group
  • Having the opportunity to earn a supplemental income if you choose to make it a business.
  • Accessing our demonstrator-only weekly newsletter: Succeed Weekly
  • Receiving training information and accessing resources to help you through your first year and beyond.

I would LOVE to have you on my team. Don’t wait until the last minute, contact me today and we can talk about you joining!

*********************************************************************************************************

SAVE 15% ON SELECT DESIGNER SERIES PAPERS!

We all love beautiful Designer Series Paper, and in June, you can enjoy a 15% discount on select Designer Series Papers from our new 2023–2024 Annual Catalog and Online Exclusives. Whether you’re a scrapbooker, a card maker or simply a paper lover, this is a great time to stock up and save on gorgeous paper, so you have artistic and versatile paper designs on hand for your next projects! Click HERE for a printable PDF flyer.

SALES PERIOD: 1–30 JUNE
  • All order types qualify for this promotion.
  • There is no limit to how many packages of Designer Series Paper may be purchased during this promotion.
  • Only select Designer Series Papers are available at a 15% discount during this promotion.
  • Orders must be placed—and closed—during the promotion period for the 15% discount to apply.
  • Designer Series Paper ordered as part of a Starter Kit or with Stampin’ Rewards qualify for the 15% discount.
  • Designer Series Papers are from the new 2023–2024 Annual Catalog (p. 129–132) and Online Exclusives.
ORDER DEADLINES
  • 30 June 2023; 11:59 PM (MT)

*********************************************************************************************************

Spanish Translated Stamp Set Bundle Available In The New Catalog!

Do you speak Spanish? Or know someone who does?  Stampin’ Up! is excited to share that they have the new Texturas Naturales (161785), a Spanish stamp set, bundle and suite collection in their 2023–2024 Annual Catalog!

You can find the Spanish translated items in my online store Here 

*********************************************************************************************************

Welcome Inn

Subscribe May 11 – June 10

Show hospitality to all your guests with the Welcome Inn Paper Pumpkin Kit! This kit includes nine elegant and detailed cards—three each of three designs. Whether you’re hosting friends and family, or want to invite someone over, this kit has what you need to create sophisticated and elevated cards!

You can also pair this kit with a coordinating die add-on! (Available while supplies last. Stampin’ Cut & Emboss Machine sold separately). Keep reading to learn more!

The Welcome Inn Paper Pumpkin Kit perfectly coordinates with the Countryside Inn Suite Collection (item number 161474) from the 2023–2024 Annual Catalog! You can use the stamps and paper from both the suite and kit to create cards that are stylish and refined. You can create these elegant hospitality cards using the suite’s Countryside Inn 12″ x 12″ (30.5 x 30.5 cm) Designer Series Paper and the kit’s beautiful floral cards. There are endless creative possibilities of this kit and suite coordination!

This kit includes:

  • All the supplies you’ll need to create 9 elegant and sophisticated cards—3 each of 3 designs—and 9 coordinating envelopes.
  • A coordinating photopolymer stamp set with floral designs and friendly, hospitality-themed sentiments.
  • A Night of Navy Stampin’ Spot and beautiful embellishments
  • Lovely floral details and precut vases

Finished card size: 4-1/4″ x 5-1/2″ (10.8 x 14 cm)

Coordinating Stampin’ Up! colors: Balmy Blue, Boho Blue, Calypso Coral, Daffodil Delight, Early Espresso, Misty Moonlight, Night of Navy, Old Olive

Don’t forget! This kit perfectly coordinates with the Countryside Inn Suite Collection (Item number: 161474).

Subscribe to the May Paper Pumpkin Kit between 11 May 2023 and 10 June 2023 by clicking here!

Note: Supplies may be limited toward the end of the subscription period.

ADD-ON

Welcome Inn Dies (Available for purchase starting 11 May, while supplies last).

Item number: 163192

$6.00 USD / $8.25 CAD

This add-on includes:

  • One coordinating vase die: 1-1/2″ x 1-1/2″ (3.8 x 3.8 cm)
  • One coordinating flower die
  • One beautiful leaf die

Note: Stampin’ Cut & Emboss Machine sold separately.

*********************************************************************************************************

Card stock cuts for this project:

  • Basic White Cardstock 2 1/4″ X 5 1/4″ (pitcher & glasses), 4″ X 4″ (inner liner)
  • Daffodil Delight Cardstock 1 1/8″ X 4 1/8″ (side panel mat), 2 – 4 1/8″ X 4 1/8″ (card front & inner liner mats)
  • Flirty Flamingo Cardstock 4 1/4″ x 11″ (card base scored & folded at 5 1/2″ & 6 3/4″)
  • Lemon Lolly Cardstock scrap for lemon slices
  • Pretty Peacock Cardstock 2″ X 4 1/4″ (tablecloth)
  • Delightfully Eclectic Designer Series Paper 1″ X 4″ & 4″ X 4″ (side & card front panels), 3/4″ X 4″ (inner liner strip), 2 1/4″ X 6″ (envelope flap)

*********************************************************************************************************

Product List

Stampin’ Up! Zany Zoo Birthday for Happy Inkin’ Thursday Blog Hop

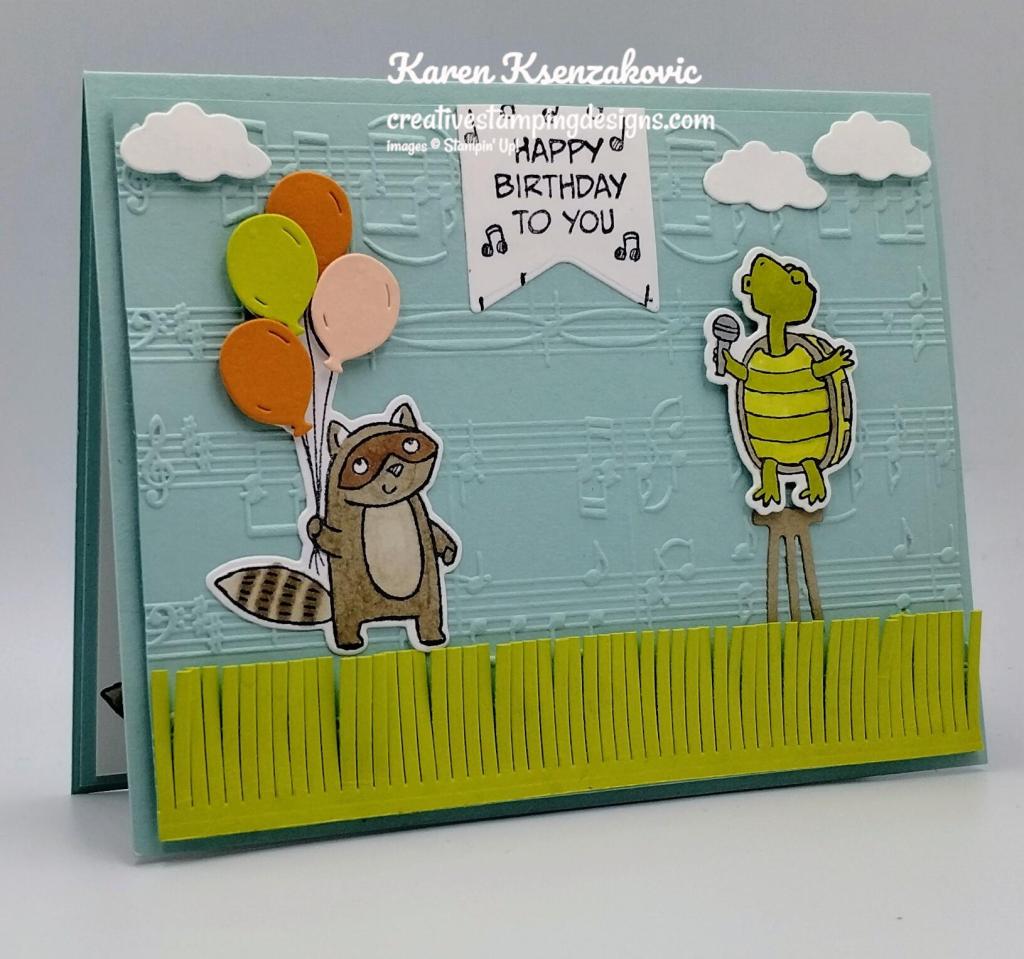
Good Thursday morning my stamping friends and Happy June!!! Welcome to our Happy Inkin’ Thursday Blog Hop. If you are starting with me, thank you, I hope you will stop by everyone’s blog to see what they have created this week. If you are hopping over from Akiko’s blog, thank you for stopping by. This week we have Color Challenge. Here is my card using this week’s colors.

Stampin' Up! Zany Zoo Birthday 1 creativestampingdesigns.com

I used the Stampin’ Up! Zany Zoo Bundle along with the Merry Melody 3D Embossing Folder and Beautiful Balloons Dies for my card today.

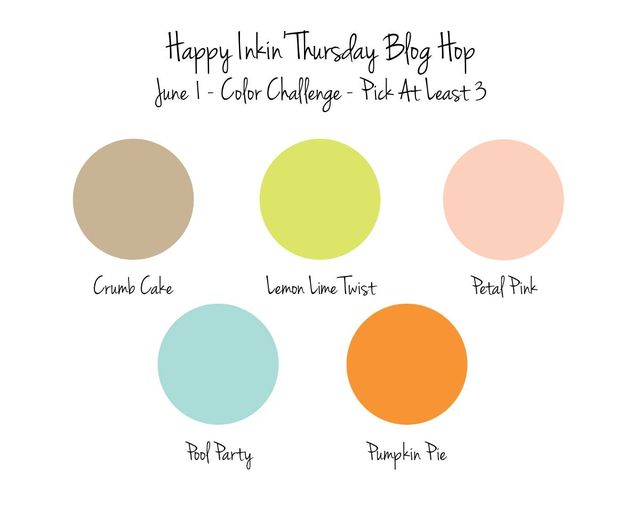
Here are our colors for this week.

Stampin' Up! Zany Zoo Birthday 2 creativestampingdesigns.com

I started by embossing a Pool Party card front using the Merry Melody 3D Embossing Folder. Using the Beautiful Ballons Dies, I cut a panel of Lemon Lime Twist to make grass. I fluffed the grass a bit and adhered it to the card front using Multipurpose Liquid Glue just on the bottom of the panel. Using the Zany Zoo Dies, I cut a panel of Crumb Cake to make the stool, a panel of Basic White to make the clouds and Lemon Lime Twist, Petal Pink and Pumpkin Pie to make balloons.

Stampin' Up! Zany Zoo Birthday 3 creativestampingdesigns.com

I stamped the turtle and raccoon images from the Stampin’ Up! Zany Zoo Cling Stamp Set in Tuxedo Black Ink on a panel of Basic White. I colored the images using Bronze, Crumb Cake Lemon Lime Twist and Smoky Slater Stampin’ Blends Markers. I cut the images using the Zany Zoo Dies. I adhered the racoon and stool to the card front using Multipurpose Liquid Glue. I adhered the turtle on the stool using Stampin’ Dimensionals. I adhered the balloons and clouds using Stampin’ Dimensionals.

Stampin' Up! Zany Zoo Birthday 4 creativestampingdesigns.com

On a small panel of Basic White, I stamped the sentiment from the Zany Zoo stamp set in Tuxedo Black Ink. I stamped the music note image from the Zany Zoo stamp set in Tuxedo Black Ink around the sentiment. I cut the sentiment out using the banner die from the Zany Zoo Dies. I adhered the sentiment to the top of the card front using Multipurpose Liquid Glue. I adhered the card front to a Pool Party card base using Stampin’ Dimensionals.

Stampin' Up! Zany Zoo Birthday 5 creativestampingdesigns.com

On the inside, I stamped the sentiment from the Zany Zoo stamp set in Tuxedo Black In on a panel of Basic Whtie. I stamped the turtle, racoon and music note images from the Zany Zoo stamp set in Tuxedo Black Ink on the panel. I colored the images using Bronze, Crumb Cake, Lemon Lime Twist, Petal Pink, Pumpkin Pie and Smoky Slate Stampin’ Blends Markers. I adhered the Basic Whtie panel to a Pool Party mat then to the inside of the Pool Party card base.

Stampin' Up! Zany Zoo Birthday 6 creativestampingdesigns.com

To complete my card, I decorated a Basic White Medium Envelope. I stamped the singing turtle and music note images from the Zany Zoo stamp set on the envelope front in Tuxedo Black Ink. I colored the image using Crumb Cake, Lemon Lime Twist Stampin’ Blends Markers. I stamped the music noter image from the Zany Zoo stamp set in Tuxedo Black Ink on the envelope flap.

Stampin' Up! Zany Zoo Birthday 7 creativestampingdesigns.com

Thank you for stopping by my blog today. I hope you liked my card and will give it a try. Now that you’ve seen my card, take a minute to hop through and see everyone’s projects today. If you click on the Next Blog button, you’ll go to Tara’s page. Or you can just click on the names below to go directly to all their blogs! Happy Hopping!

Amy Koenders

Mary Deatherage

Jaimie Babarczy

Karen Finkle

Akiko Sudano

Karen Ksenzakovic You Are Here

Tara Carpenter

Terry Lynn Bright

Carol Buckalew

*********************************************************************************************************

If you need any stamping supplies, I’d love to be your Demonstrator. Just click HERE to go directly to my online store or drop me an email if you have any questions. 

MY CURRENT HOST CODE IS:   GVEBWYZ6

Use this host code when placing an order with me. When you order $50 or greater you will receive a free gift from me! If your order is over $150, please do not use this code, but you’ll still get the free gift. The free gift is your choice of any 1 item valued up to $10.00 from the 2022-2023 Annual Catalog or the January-April 2023 Mini Catalog!  Unfortunately, packs of cardstock are no longer an option for a free gift. Shipping has become too expensive to ship and it’s costing me as much to ship as the cardstock costs. For any orders $50 or more I will also send you my monthly class tutorials.  Click HERE or go to my Customer Rewards for more details and to see what this month’s tutorials are.

Please remember to use my current Host Code and make sure that you can see my name on the final checkout page listed as your Demonstrator when you order so that you know that you’re ordering with me, and you’ll get my rewards! 

Happy Stamping, Karen

*********************************************************************************************************

In response to changing policies at Stampin’ Up – I’m adjusting my Ordering Gift policy as well.  I’m having to get a little more tough on the adding of Host codes when you place your order thru my Online Store.

Not to worry – you’re still going to get that $10 ordering gift for orders of $50 (before shipping & tax) or greater.  And the gift is still any 1 SU! product up to that $10 value – which includes some of our fun Host Sets!

But – if you DO NOT use the Host code for your orders of less than $150 (this is the RETAIL total before Shipping & Handling), then you’ll have two options:

  1. You’ll need to call Stampin’ Up! (1-800-Stamp-Up) and ask them to add it for you. They’re very helpful and will get it done quickly!  OR….
  2. If your order was over the $50 threshold but under $150, then…you’ll forfeit that $10 ordering gift and rewards – this is the Bummer Option – and I REALLY don’t want to do this, SO please remember to add my Current Host Code.

*********************************************************************************************************

Stampin’ Up! Joining Promotion Starts Today June 1 – 30

June is a fabulous time to join Stampin’ Up! since you’ll get even more FREE products in your 100% customizable Starter Kit!  Between June 1-30, those who sign up can get $125 $155 worth of products for only $99 (plus applicable taxes) + free business supplies + free shipping + all the fun being a part of Stampin’ Up!

STARTER KIT+ PROMOTION DETAILS:

  • When you purchase you Starter Kit, you will be able to redeem $155 of Starter Kit eligible products for just  $99.
  • New demonstrators who submit their Independent Demonstrator Agreement (IDA) before June 1 or after June 30 will not  be eligible for this offer.
  • This offer begins June 1, 2023 and ends at 11:50 PM MT on June 30, 2023.

*********************************************************************************************************

SAVE 15% ON SELECT DESIGNER SERIES PAPERS STARTS TODAY!

We all love beautiful Designer Series Paper, and in June, you can enjoy a 15% discount on select Designer Series Papers from our new 2023–2024 Annual Catalog and Online Exclusives. Whether you’re a scrapbooker, a card maker or simply a paper lover, this is a great time to stock up and save on gorgeous paper, so you have artistic and versatile paper designs on hand for your next projects! Click HERE for a printable PDF flyer.

SALES PERIOD: 1–30 JUNE
  • All order types qualify for this promotion.
  • There is no limit to how many packages of Designer Series Paper may be purchased during this promotion.
  • Only select Designer Series Papers are available at a 15% discount during this promotion.
  • Orders must be placed—and closed—during the promotion period for the 15% discount to apply.
  • Designer Series Paper ordered as part of a Starter Kit or with Stampin’ Rewards qualify for the 15% discount.
  • Designer Series Papers are from the new 2023–2024 Annual Catalog (p. 129–132) and Online Exclusives.
ORDER DEADLINES
  • 30 June 2023; 11:59 PM (MT)

*********************************************************************************************************

Welcome Inn

Subscribe May 11 – June 10

Show hospitality to all your guests with the Welcome Inn Paper Pumpkin Kit! This kit includes nine elegant and detailed cards—three each of three designs. Whether you’re hosting friends and family, or want to invite someone over, this kit has what you need to create sophisticated and elevated cards!

You can also pair this kit with a coordinating die add-on! (Available while supplies last. Stampin’ Cut & Emboss Machine sold separately). Keep reading to learn more!

The Welcome Inn Paper Pumpkin Kit perfectly coordinates with the Countryside Inn Suite Collection (item number 161474) from the 2023–2024 Annual Catalog! You can use the stamps and paper from both the suite and kit to create cards that are stylish and refined. You can create these elegant hospitality cards using the suite’s Countryside Inn 12″ x 12″ (30.5 x 30.5 cm) Designer Series Paper and the kit’s beautiful floral cards. There are endless creative possibilities of this kit and suite coordination!

This kit includes:

  • All the supplies you’ll need to create 9 elegant and sophisticated cards—3 each of 3 designs—and 9 coordinating envelopes.
  • A coordinating photopolymer stamp set with floral designs and friendly, hospitality-themed sentiments.
  • A Night of Navy Stampin’ Spot and beautiful embellishments
  • Lovely floral details and precut vases

Finished card size: 4-1/4″ x 5-1/2″ (10.8 x 14 cm)

Coordinating Stampin’ Up! colors: Balmy Blue, Boho Blue, Calypso Coral, Daffodil Delight, Early Espresso, Misty Moonlight, Night of Navy, Old Olive

Don’t forget! This kit perfectly coordinates with the Countryside Inn Suite Collection (Item number: 161474).

Subscribe to the May Paper Pumpkin Kit between 11 May 2023 and 10 June 2023 by clicking here!

Note: Supplies may be limited toward the end of the subscription period.

ADD-ON

Welcome Inn Dies (Available for purchase starting 11 May, while supplies last).

Item number: 163192

$6.00 USD / $8.25 CAD

This add-on includes:

  • One coordinating vase die: 1-1/2″ x 1-1/2″ (3.8 x 3.8 cm)
  • One coordinating flower die
  • One beautiful leaf die

Note: Stampin’ Cut & Emboss Machine sold separately.

*********************************************************************************************************

Card stock cuts for this project:

  • Basic White Cardstock 3″ X 4″ (animal images), 3″ X 3″ (sentiment & clouds), 4″ X 5 1/4″(inner liner)
  • Crumb Cake Cardstock 1″ X 1″ (stool)
  • Lemon Lime Twist Cardstock 1″ X 4″ (grass), 1″ X 1″ (balloon)
  • Petal Pink Cardstock 1″ X 1″ (balloon)
  • Pool Party Cardstock 8 1/2″ X 5 1/2″ (card base scored & folded at 4 1/4″), 4″ X 5 1/4″ (card front), 4 1/8″ X 5 3/8″ (inner liner mat)
  • Pumpkin Pie Cardstock 1 1/2″ X 1″ (balloons)

*********************************************************************************************************

Product List

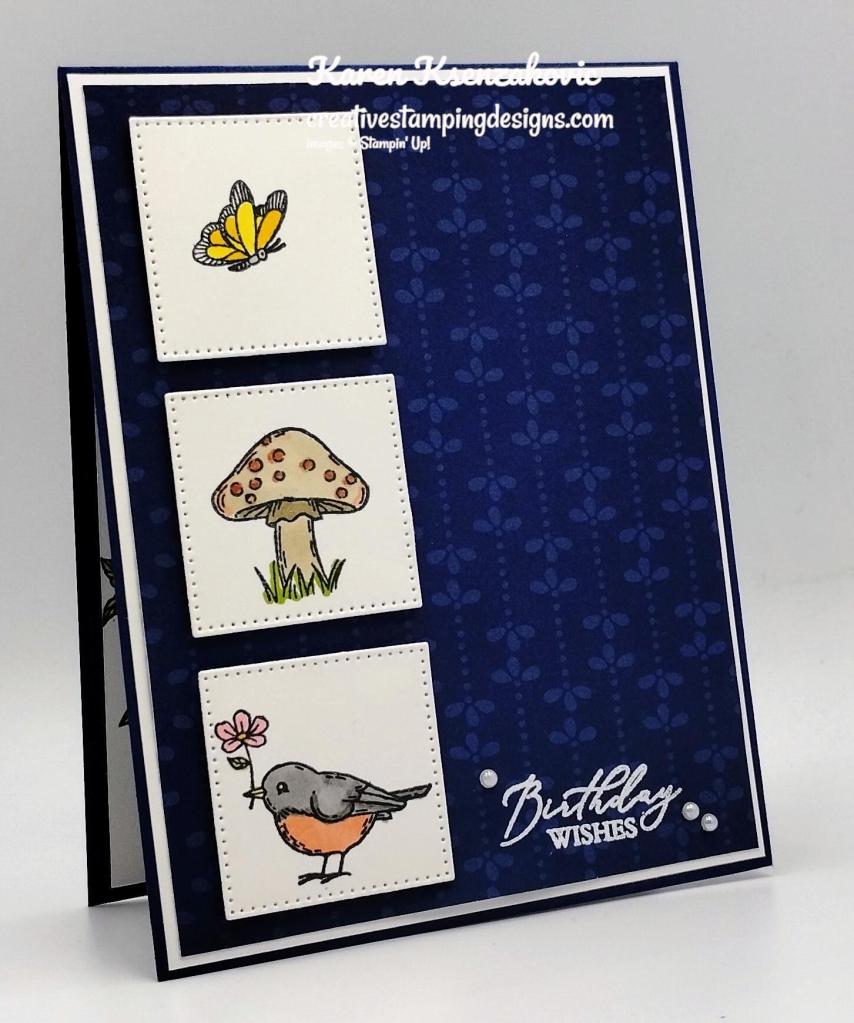
Stampin’ Up! Happy Hedgehogs Birthday

Good Sunday morning my stamping friends. How is your weekend going? I hope you are finding time for yourself and doing some fun activities. It was super busy yesterday at the hardware store, selling grills, charcoal and paint. I’m hoping it’s busy at the dog bakery today, so the day flies by.

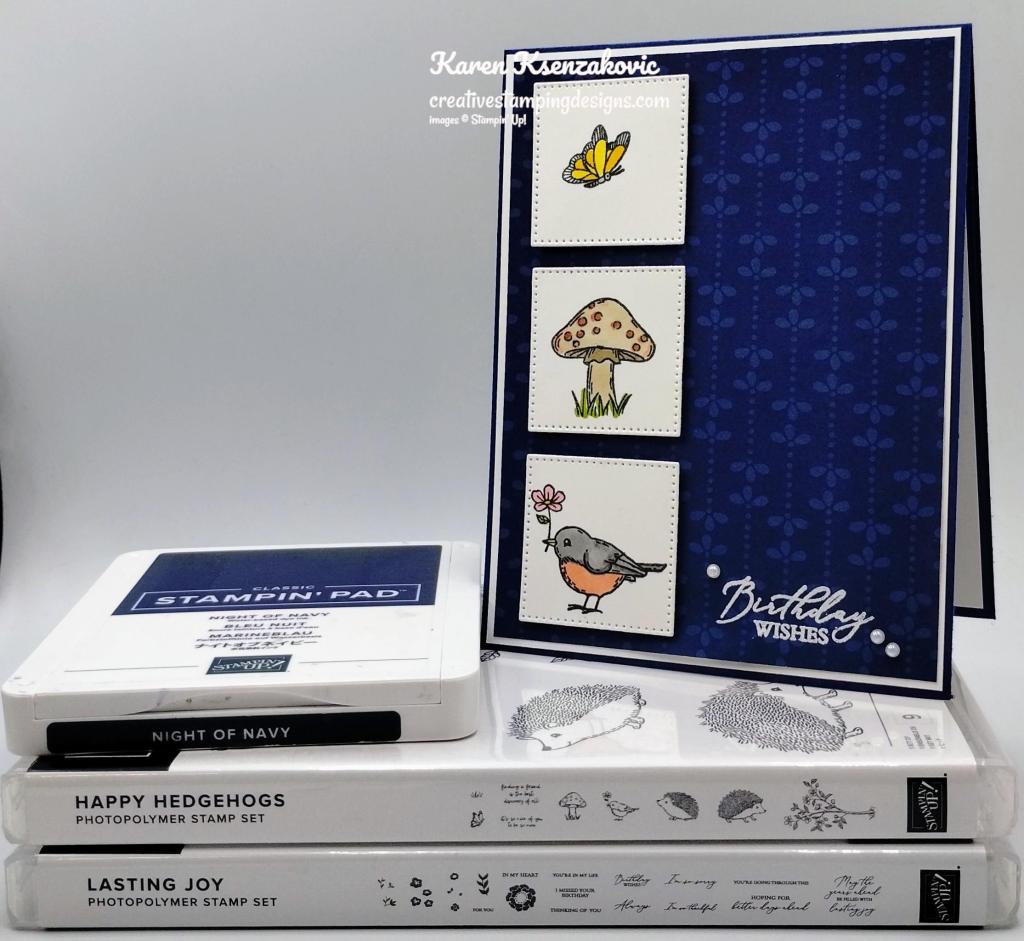
I was going through my stamp sets for today’s card and pulled an older one out that I like to play with. Here’s my card for today.

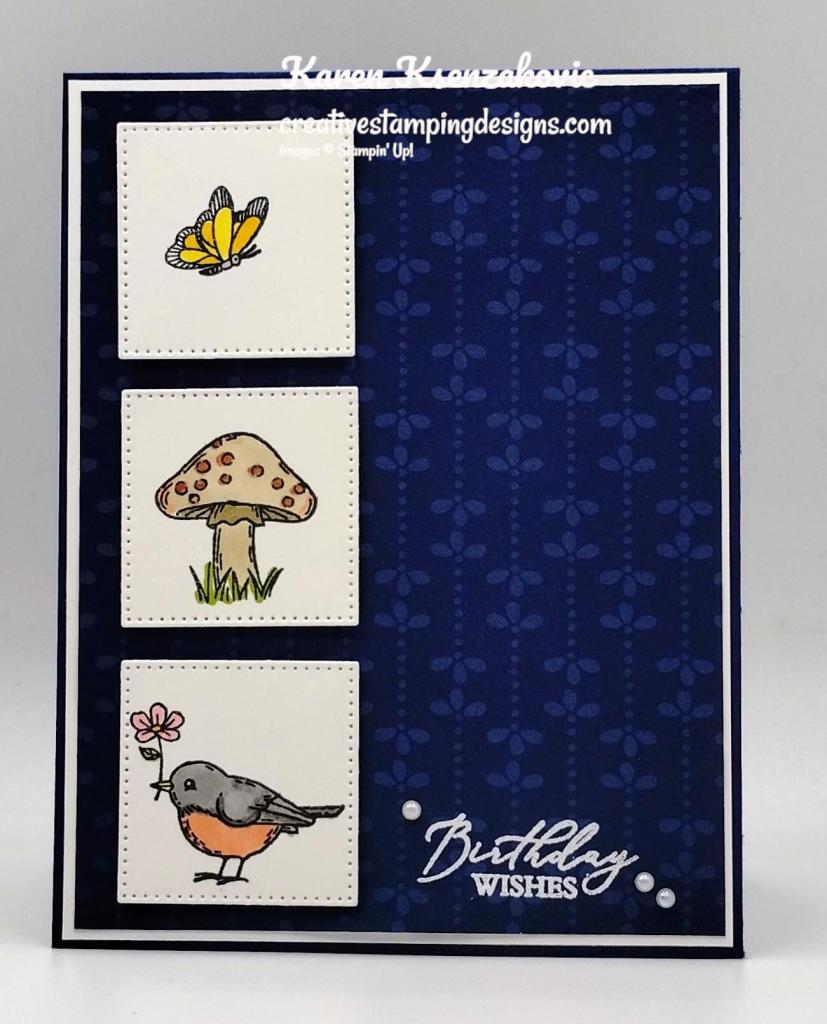
Stampin; Up! Happy Hedgehogs Birthday 1 creativestampingdesigns.com

I used the Stampin’ Up! Happy Hedgehogs Photopolymer Stamp Set along with the Stampin’ Up! Lasting Joy Photopolymer Stamp Set, Countryside Inn Designer Series Paper and Stylish Shapes Dies for my card today.

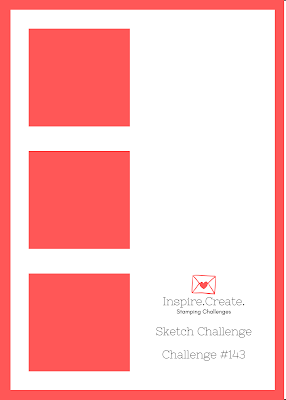
My design is from Inspire. Create. Challenge #143.

I also played along with TGIF Challenge #422.

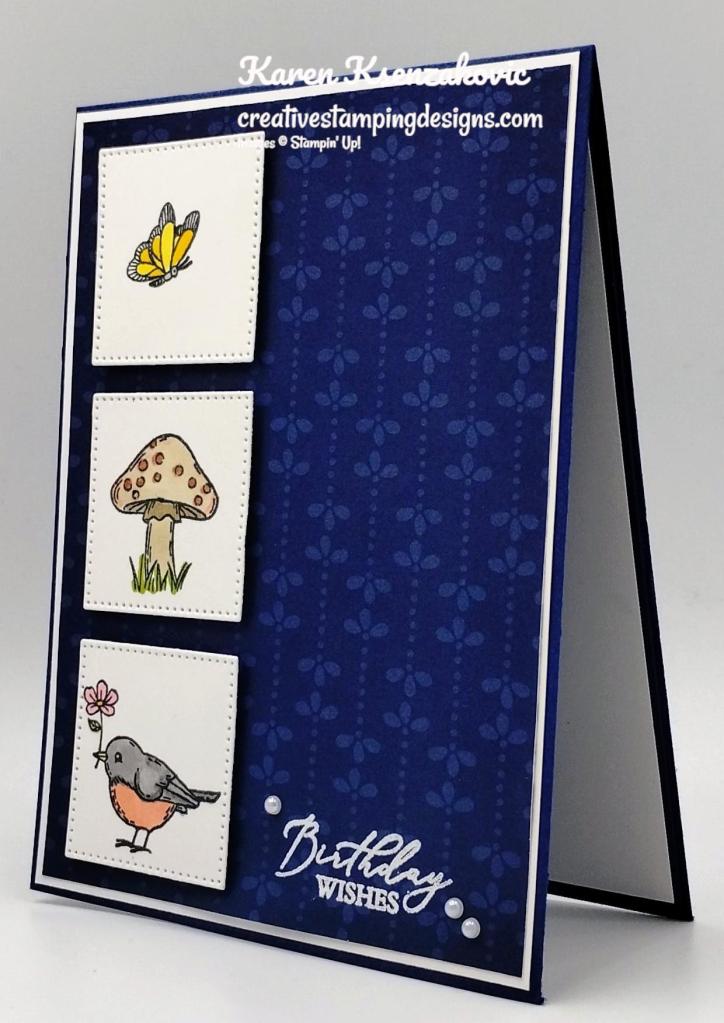
Stampin; Up! Happy Hedgehogs Birthday 2 creativestampingdesigns.com

I started by adhering a panel of Countryside Inn DSP to a Basic White mat using Stampin’ Seal. I adhered the layered panel to a Night of Navy card base using Multipurpose Liquid Glue.

Stampin; Up! Happy Hedgehogs Birthday 3 creativestampingdesigns.com

I stamped the sentiment from the Lasting Joy stamp set in Versamark Ink on the bottom of the card front. I sprinkled it with White Embossing Powder and set it using the Heat Tool.

Stampin; Up! Happy Hedgehogs Birthday 4 creativestampingdesigns.com

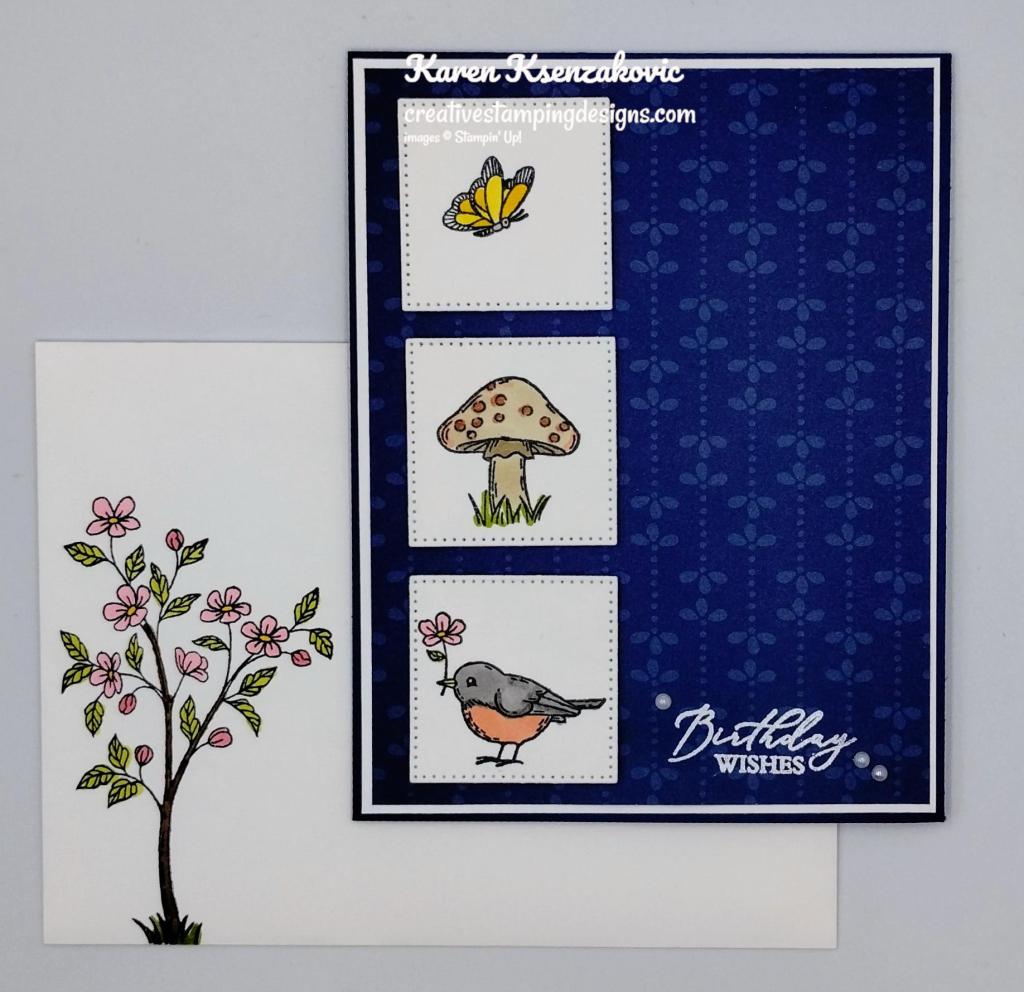
I cut 3 of the 2nd smallest squares from the Stylish Shapes Dies from a panel of Basic White. I stamped the butterfly, mushroom and bird images from the Happy Hedgehog stamp set in Tuxedo Black Ink on the panels. I colored the images using Calypso Coral, Crumb Cake, Daffodil Delight, Flirty Flamingo, Granny Apple Green and Smoky Slate Stampin’ Blends Markers. I adhered the images to the card front using Stampin’ Dimensionals. I added a few Iridescent Pearl Basic Jewels to the card front.

Stampin; Up! Happy Hedgehogs Birthday 5 creativestampingdesigns.com

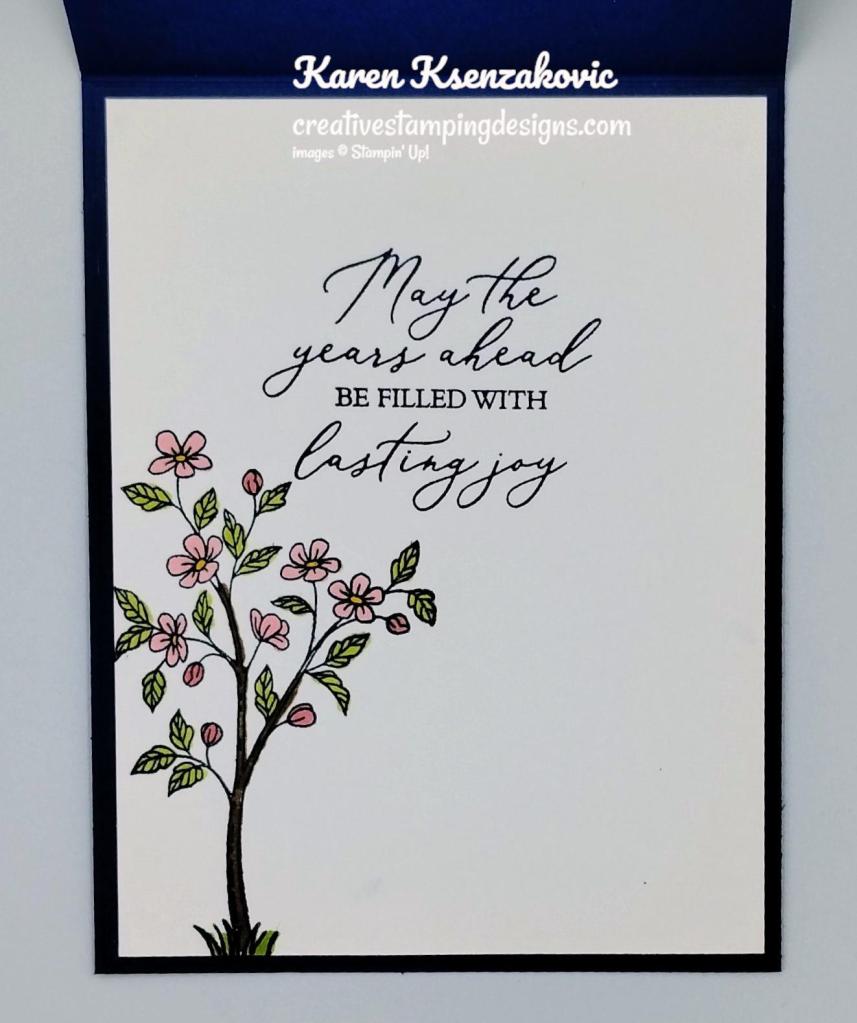
On the inside, I stamped the sentiment from Lasting Joy stamp set in Night of Navy Ink on a panel of Basic White. I stamped the tree image from the Happy Hedgehogs stamp set in Tuxedo Black Ink on the bottom of the panel. I colored the image with Daffodil Delight, Flirty Flamingo, Granny Apple Green and Pecan Pie Stampin’ Blends Markers. I adhered the Basic White panel to a Night of Navy mat then to the inside of the Night of Navy card base.

Stampin; Up! Happy Hedgehogs Birthday 6 creativestampingdesigns.com

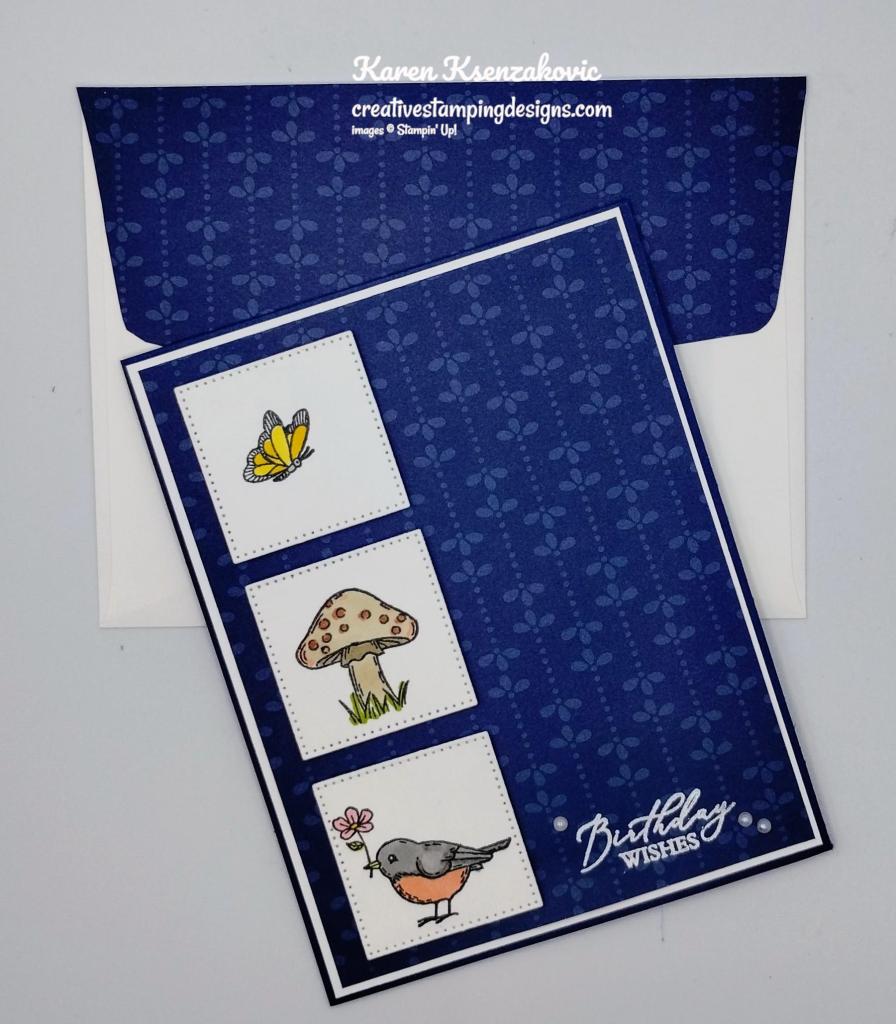
To finish my card, I decorated a Basic White Medium Envelope. I stamped the tree image from the Happy Hedgehogs stamp set in Tuxedo Black Ink on the envelope front. I colored it with Daffodil Delight, Flirty Flamingo, Granny Apple Green and Pecan Pie Stampin’ Blends Markers. I adhered a panel of Countryside Inn DSP to the envelope flap.

Stampin; Up! Happy Hedgehogs Birthday 7 creativestampingdesigns.com

Thank you for stopping by my blog today. I hope you like the card and will give it a try. Happy Stamping!!

*********************************************************************************************************

If you need any stamping supplies, I’d love to be your Demonstrator. Just click HERE to go directly to my online store or drop me an email if you have any questions. 

MY CURRENT HOST CODE IS:   GVEBWYZ6

Use this host code when placing an order with me. When you order $50 or greater you will receive a free gift from me! If your order is over $150, please do not use this code, but you’ll still get the free gift. The free gift is your choice of any 1 item valued up to $10.00 from the 2022-2023 Annual Catalog or the January-April 2023 Mini Catalog!  Unfortunately, packs of cardstock are no longer an option for a free gift. Shipping has become too expensive to ship and it’s costing me as much to ship as the cardstock costs. For any orders $50 or more I will also send you my monthly class tutorials.  Click HERE or go to my Customer Rewards for more details and to see what this month’s tutorials are.

Please remember to use my current Host Code and make sure that you can see my name on the final checkout page listed as your Demonstrator when you order so that you know that you’re ordering with me, and you’ll get my rewards! 

Happy Stamping, Karen

*********************************************************************************************************

In response to changing policies at Stampin’ Up – I’m adjusting my Ordering Gift policy as well.  I’m having to get a little more tough on the adding of Host codes when you place your order thru my Online Store.

Not to worry – you’re still going to get that $10 ordering gift for orders of $50 (before shipping & tax) or greater.  And the gift is still any 1 SU! product up to that $10 value – which includes some of our fun Host Sets!

But – if you DO NOT use the Host code for your orders of less than $150 (this is the RETAIL total before Shipping & Handling), then you’ll have two options:

  1. You’ll need to call Stampin’ Up! (1-800-Stamp-Up) and ask them to add it for you. They’re very helpful and will get it done quickly!  OR….
  2. If your order was over the $50 threshold but under $150, then…you’ll forfeit that $10 ordering gift and rewards – this is the Bummer Option – and I REALLY don’t want to do this, SO please remember to add my Current Host Code.

*********************************************************************************************************

COMING SOON!! SAVE 15% ON SELECT DESIGNER SERIES PAPERS!

We all love beautiful Designer Series Paper, and in June, you can enjoy a 15% discount on select Designer Series Papers from our new 2023–2024 Annual Catalog and Online Exclusives. Whether you’re a scrapbooker, a card maker or simply a paper lover, this is a great time to stock up and save on gorgeous paper, so you have artistic and versatile paper designs on hand for your next projects! Click HERE for a printable PDF flyer.

SALES PERIOD: 1–30 JUNE
  • All order types qualify for this promotion.
  • There is no limit to how many packages of Designer Series Paper may be purchased during this promotion.
  • Only select Designer Series Papers are available at a 15% discount during this promotion.
  • Orders must be placed—and closed—during the promotion period for the 15% discount to apply.
  • Designer Series Paper ordered as part of a Starter Kit or with Stampin’ Rewards qualify for the 15% discount.
  • Designer Series Papers are from the new 2023–2024 Annual Catalog (p. 129–132) and Online Exclusives.
ORDER DEADLINES
  • 30 June 2023; 11:59 PM (MT)

*********************************************************************************************************

Welcome Inn

Subscribe May 11 – June 10

Show hospitality to all your guests with the Welcome Inn Paper Pumpkin Kit! This kit includes nine elegant and detailed cards—three each of three designs. Whether you’re hosting friends and family, or want to invite someone over, this kit has what you need to create sophisticated and elevated cards!

You can also pair this kit with a coordinating die add-on! (Available while supplies last. Stampin’ Cut & Emboss Machine sold separately). Keep reading to learn more!

The Welcome Inn Paper Pumpkin Kit perfectly coordinates with the Countryside Inn Suite Collection (item number 161474) from the 2023–2024 Annual Catalog! You can use the stamps and paper from both the suite and kit to create cards that are stylish and refined. You can create these elegant hospitality cards using the suite’s Countryside Inn 12″ x 12″ (30.5 x 30.5 cm) Designer Series Paper and the kit’s beautiful floral cards. There are endless creative possibilities of this kit and suite coordination!

This kit includes:

  • All the supplies you’ll need to create 9 elegant and sophisticated cards—3 each of 3 designs—and 9 coordinating envelopes.
  • A coordinating photopolymer stamp set with floral designs and friendly, hospitality-themed sentiments.
  • A Night of Navy Stampin’ Spot and beautiful embellishments
  • Lovely floral details and precut vases

Finished card size: 4-1/4″ x 5-1/2″ (10.8 x 14 cm)

Coordinating Stampin’ Up! colors: Balmy Blue, Boho Blue, Calypso Coral, Daffodil Delight, Early Espresso, Misty Moonlight, Night of Navy, Old Olive

Don’t forget! This kit perfectly coordinates with the Countryside Inn Suite Collection (Item number: 161474).

Subscribe to the May Paper Pumpkin Kit between 11 May 2023 and 10 June 2023 by clicking here!

Note: Supplies may be limited toward the end of the subscription period.

ADD-ON

Welcome Inn Dies (Available for purchase starting 11 May, while supplies last).

Item number: 163192

$6.00 USD / $8.25 CAD

This add-on includes:

  • One coordinating vase die: 1-1/2″ x 1-1/2″ (3.8 x 3.8 cm)
  • One coordinating flower die
  • One beautiful leaf die

Note: Stampin’ Cut & Emboss Machine sold separately.

*********************************************************************************************************

Card stock cuts for this project:

  • Basic White Cardstock 1 3/4″ X 5 1/4″ (artwork panels), 4 1/8″ X 5 3/8″ (card front mat), 4″ X 5 1/4″ (inner liner)
  • Night of Navy Cardstock 4 1/4″ X 11″ (card base scored & folded at 5 1/2″), 4 1/8″ X 5 3/8″ (inner liner mat)
  • Countryside Inn Designer Series Paper 4″ X 5 1/4″ (card front), 2 1/4″ X 6″ (envelope flap)

*********************************************************************************************************

Product List

Stampin’ Up! Inked & Tiled for Fun Fold Friday

Good Friday morning my stamping friends welcome to my fun fold Friday. How was everyone’s week? I hope you are ready for a long weekend. I’ll be at work, but I do have off on Monday and we’re planning on having a picnic/birthday all day. Today is my daughter’s birthday and every year we celebrate on Memorial Day. This year she has to share her celebration with Coraline, my puppy. Coraline turned 1 today.

Today’s card I made on my Facebook Live video on Wednesday. I was a little bit of a hot mess, but I made it through. It just wasn’t my day for a live starting with having technical difficulties. If you were able to join me or watched the replay, thank you. If you’d like to watch my video and stamp along, the measurements are below along with the links to my Facebook page and my YouTube channel. Here is my card for today.

Stampin' Up! Inked & Tiled Fun Fold 1 creativestampingdesigns.com

I used the Stampin’ Up! Inked & Tiled Cling Stamp Set along with the Inked Botanicals 6 X 6 Designer Series Paper and Nested Essentials Dies for my card today.

Stampin' Up! Inked & Tiled Fun Fold 2 creativestampingdesigns.com

I started by cutting the 3″ X 5 1/4″ panel of Petal Pink cardstock using the largest Nested Essentials Dies. I folded the panel on the 1″ score line, placed the die above the fold line so that it wouldn’t cut the fold and ran it through the Stampin’ Cut & Emboss Machine. I adhered the die cut panel to the back of the card base using Multipurpose Liquid Glue, so that it would fold over the Z-Fold.

Stampin' Up! Inked & Tiled Fun Fold 3 creativestampingdesigns.com

On a panel of Basic White, I stamped the leaf image from the Inked & Tiled stamp set in Lost Lagoon Ink 3 time, stamping off twice on scrap paper before stamping on the panel each time. I stamped the flower image from the Inked & Tiled stamp set over the leaf images. I inked the flower image using Lost Lagoon Stampin’ Write Marker for the stem and leaves, Petal Pink Stampin’ Write Marker for the flowers and I used Calypso Coral Stampin’ Write Markers for highlights on the flowers. I gave it a couple huffs to reactivate the ink before stamping. I adhered the Basic White panel to a Calypso Coral mat using Stampin’ Seal. I adhered the layered panel to the Petal Pink card base using Multipurpose Liquid Glue. I tied a small bow with the1/4″ Petal Pink Ribbon from the Ribbon Duo Combo Pack and adhered it to the stem using a Glue Dot. I added a couple Rhinestone Basic Jewels on the top of the panel.

Stampin' Up! Inked & Tiled Fun Fold 4 creativestampingdesigns.com

I cut a panel of Basic White cardstock using the 2nd largest die from the Nested Essentials Dies. I stamped the sentiment from the Inked & Tiled stamp set in Lost Lagoon Ink. I stamped the small flower image from the Inked & Tiled stamp set on either side of the sentiment. I used Lost Lagoon Stampin’ Write Markers for the stems and Calypso Coral & Petal Pink Stampin’ Write Markers for the flowers. I adhered the sentiment panel to the Petal Pink flap using Stampin’ Seal. I added a few Ombre Matte Decorative Dots to the panel.

Stampin' Up! Inked & Tiled Fun Fold 5 creativestampingdesigns.com

On the inside, I stamped the sentiment from the Inked & Tiled stamp set in Lost Lagoon Ink on a panel of Basic White. I stamped the small flower image from the Inked & Tiled stamp set on the bottom of the panel. I inked it using Lost Lagoon and Petal Pink Stampin’ Write Markers. I adhered a strip of Inked Botanicals DSP to the bottom of the panel. I adhered the Basic White panel to a Calypso Coral mat then to the inside left side of the Petal Pink card base. I adhered a panel of Inked Botanical DSP to a Calypso Coral mat using Stampin’ Seal. I adhered the layered panel to the inside back of the Petal Pink card base using Multipurpose Liquid Glue.

Stampin' Up! Inked & Tiled Fun Fold 6 creativestampingdesigns.com

To finish my card, I decorated a Basic White Medium Envelope. I stamped the leaf image from the Inked & Tiled stamp set in Lost Lagoon Ink twice on the envelope front, stamping off twice on scrap paper each time. I stamped the flower image from the Inked & Tiled stamp set over the leaf images. I inked the flower using Lost Lagoon, Petal Pink and Calypso Coral Stampin’ Write Markers. I adhered a panel of Inked Botanicals DSP to the envelope flap.

Stampin' Up! Inked & Tiled Fun Fold 7 creativestampingdesigns.com

Thank you for stopping by my blog today. I hope you liked my card and will give it a try. I hope you will CASE this card and please feel free to post it in the comments of my Facebook page under my post. I’d love to see your take on the card. The list of measurements are below if you’d like to stamp along while watching the video. You can watch my video on my Facebook page Here.

You can also view the video on my YouTube channel Here. If you watch this on my YouTube channel, please remember to subscribe so that you will get notified when a new video goes live. I’m hoping to be doing my live on YouTube next week, thanks to all that have subscribed. Happy Stamping!!

*********************************************************************************************************

If you need any stamping supplies, I’d love to be your Demonstrator. Just click HERE to go directly to my online store or drop me an email if you have any questions. 

MY CURRENT HOST CODE IS:   BR9XGSTC

Use this host code when placing an order with me. When you order $50 or greater you will receive a free gift from me! If your order is over $150, please do not use this code, but you’ll still get the free gift. The free gift is your choice of any 1 item valued up to $10.00 from the 2022-2023 Annual Catalog or the January-April 2023 Mini Catalog!  Unfortunately, packs of cardstock are no longer an option for a free gift. Shipping has become too expensive to ship and it’s costing me as much to ship as the cardstock costs. For any orders $50 or more I will also send you my monthly class tutorials.  Click HERE or go to my Customer Rewards for more details and to see what this month’s tutorials are.

Please remember to use my current Host Code and make sure that you can see my name on the final checkout page listed as your Demonstrator when you order so that you know that you’re ordering with me, and you’ll get my rewards! 

Happy Stamping, Karen

*********************************************************************************************************

In response to changing policies at Stampin’ Up – I’m adjusting my Ordering Gift policy as well.  I’m having to get a little more tough on the adding of Host codes when you place your order thru my Online Store.

Not to worry – you’re still going to get that $10 ordering gift for orders of $50 (before shipping & tax) or greater.  And the gift is still any 1 SU! product up to that $10 value – which includes some of our fun Host Sets!

But – if you DO NOT use the Host code for your orders of less than $150 (this is the RETAIL total before Shipping & Handling), then you’ll have two options:

  1. You’ll need to call Stampin’ Up! (1-800-Stamp-Up) and ask them to add it for you. They’re very helpful and will get it done quickly!  OR….
  2. If your order was over the $50 threshold but under $150, then…you’ll forfeit that $10 ordering gift and rewards – this is the Bummer Option – and I REALLY don’t want to do this, SO please remember to add my Current Host Code.

*********************************************************************************************************

COMING SOON!! SAVE 15% ON SELECT DESIGNER SERIES PAPERS!

We all love beautiful Designer Series Paper, and in June, you can enjoy a 15% discount on select Designer Series Papers from our new 2023–2024 Annual Catalog and Online Exclusives. Whether you’re a scrapbooker, a card maker or simply a paper lover, this is a great time to stock up and save on gorgeous paper, so you have artistic and versatile paper designs on hand for your next projects! Click HERE for a printable PDF flyer.

SALES PERIOD: 1–30 JUNE
  • All order types qualify for this promotion.
  • There is no limit to how many packages of Designer Series Paper may be purchased during this promotion.
  • Only select Designer Series Papers are available at a 15% discount during this promotion.
  • Orders must be placed—and closed—during the promotion period for the 15% discount to apply.
  • Designer Series Paper ordered as part of a Starter Kit or with Stampin’ Rewards qualify for the 15% discount.
  • Designer Series Papers are from the new 2023–2024 Annual Catalog (p. 129–132) and Online Exclusives.
ORDER DEADLINES
  • 30 June 2023; 11:59 PM (MT)

*********************************************************************************************************

Welcome Inn

Subscribe May 11 – June 10

Show hospitality to all your guests with the Welcome Inn Paper Pumpkin Kit! This kit includes nine elegant and detailed cards—three each of three designs. Whether you’re hosting friends and family, or want to invite someone over, this kit has what you need to create sophisticated and elevated cards!

You can also pair this kit with a coordinating die add-on! (Available while supplies last. Stampin’ Cut & Emboss Machine sold separately). Keep reading to learn more!

The Welcome Inn Paper Pumpkin Kit perfectly coordinates with the Countryside Inn Suite Collection (item number 161474) from the 2023–2024 Annual Catalog! You can use the stamps and paper from both the suite and kit to create cards that are stylish and refined. You can create these elegant hospitality cards using the suite’s Countryside Inn 12″ x 12″ (30.5 x 30.5 cm) Designer Series Paper and the kit’s beautiful floral cards. There are endless creative possibilities of this kit and suite coordination!

This kit includes:

  • All the supplies you’ll need to create 9 elegant and sophisticated cards—3 each of 3 designs—and 9 coordinating envelopes.
  • A coordinating photopolymer stamp set with floral designs and friendly, hospitality-themed sentiments.
  • A Night of Navy Stampin’ Spot and beautiful embellishments
  • Lovely floral details and precut vases

Finished card size: 4-1/4″ x 5-1/2″ (10.8 x 14 cm)

Coordinating Stampin’ Up! colors: Balmy Blue, Boho Blue, Calypso Coral, Daffodil Delight, Early Espresso, Misty Moonlight, Night of Navy, Old Olive

Don’t forget! This kit perfectly coordinates with the Countryside Inn Suite Collection (Item number: 161474).

Subscribe to the May Paper Pumpkin Kit between 11 May 2023 and 10 June 2023 by clicking here!

Note: Supplies may be limited toward the end of the subscription period.

ADD-ON

Welcome Inn Dies (Available for purchase starting 11 May, while supplies last).

Item number: 163192

$6.00 USD / $8.25 CAD

This add-on includes:

  • One coordinating vase die: 1-1/2″ x 1-1/2″ (3.8 x 3.8 cm)
  • One coordinating flower die
  • One beautiful leaf die

Note: Stampin’ Cut & Emboss Machine sold separately.

*********************************************************************************************************

Card stock cuts for this project:

  • Basic White Cardstock 2 – 1 7/8″ X 5 1/4″ (card front & inner line), 2 1/2″ X 5″ (sentiment)
  • Calypso Coral Cardstock 2 – 2″ X 5 3/8″ (card front & inner liner mats), 4 1/8″ x 5 3/8″ (back panel mat)
  • Petal Pink Cardstock 8 1/2″ x 5 1/2″ (card base scored & folded at 2 1/8″ & 4 1/4″), 3″ x 5 1/4″ (front flap scored & folded at 1″)
  • Inked Botanicals 6 X 6 Designer Series Paper 1/2″ X 4″ (inner liner strip), 4″ X 5 1/4″ (back panel), 2 1/4″ X 6″ (envelope flap)

*********************************************************************************************************

Product List

Stampin’ Up! Sea Turtle Birthday and DSP Sale Coming In June

Good Tuesday morning my stamping friends and Happy World Turtle Day!!! My daughter LOVES turtles and has a very large collection of them. She wants to swim with the turtles one day and I told her I’d do that with her. How many turtle lovers are out there?

In honor of World Turtle Day, I’ve made a turtle card for today. Now I’m not sure which card my daughter will get for her birthday at the end of the week. She loves Chemistry and Turtles, and I’ve made both birthday cards. Here’s my card for today.

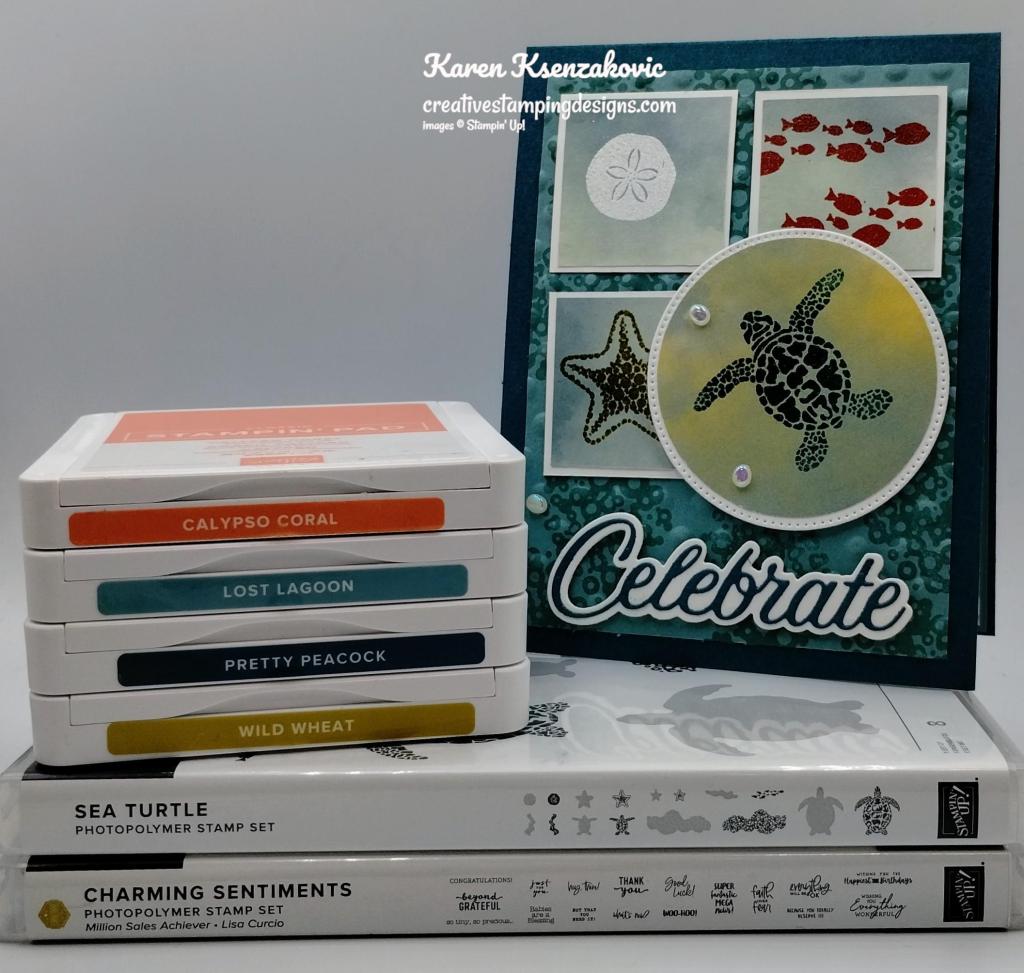
Stampin' Up! Sea Turtle Birthday 1 creativestampingdesigns.com

I used the Stampin’ Up! Sea Turtle Photopolymer Stamp Set along with the Stampin’ Up! Charming Sentiments Photopolymer Stamp Set, Basics 3 D Embossing Folder and the Hello Irresistible 6 X 6 Designer Series Paper for my card today.

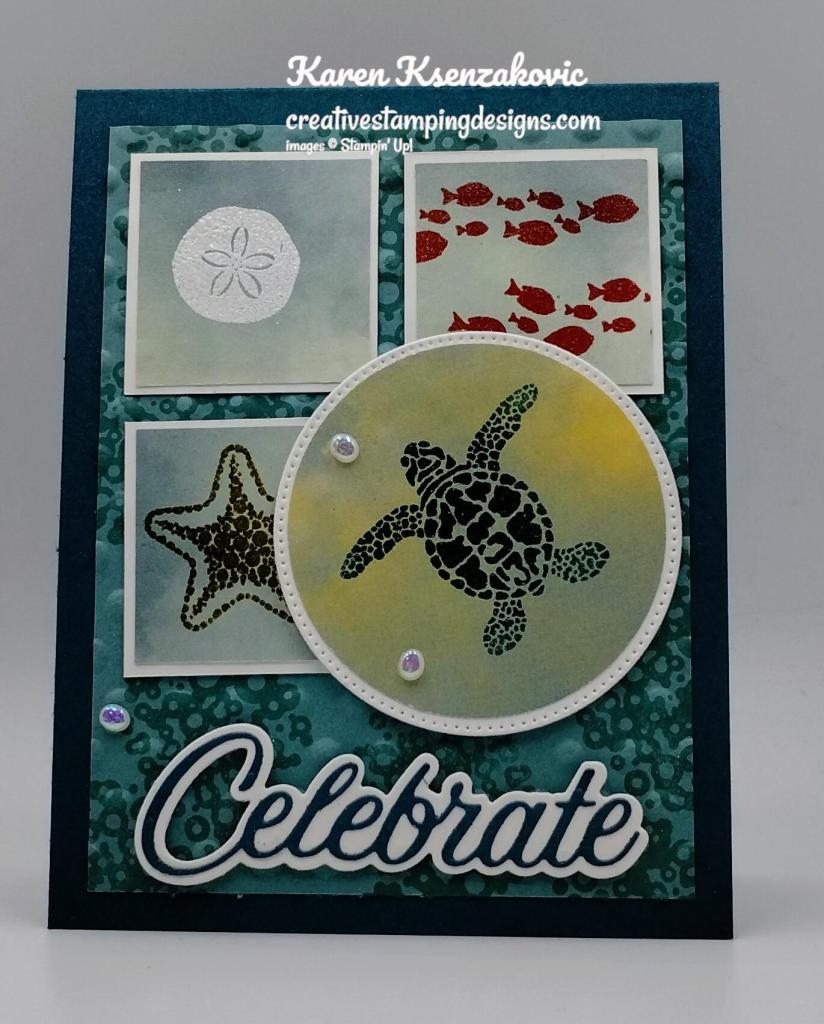
Stampin' Up! Sea Turtle Birthday 2 creativestampingdesigns.com

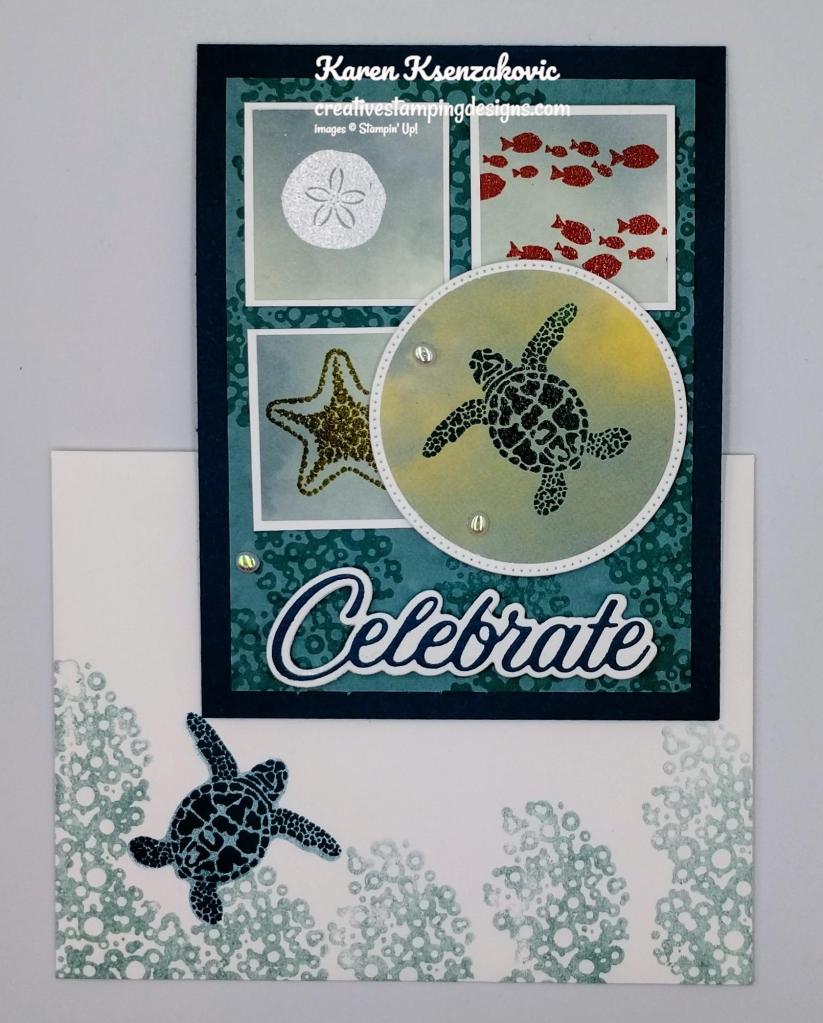
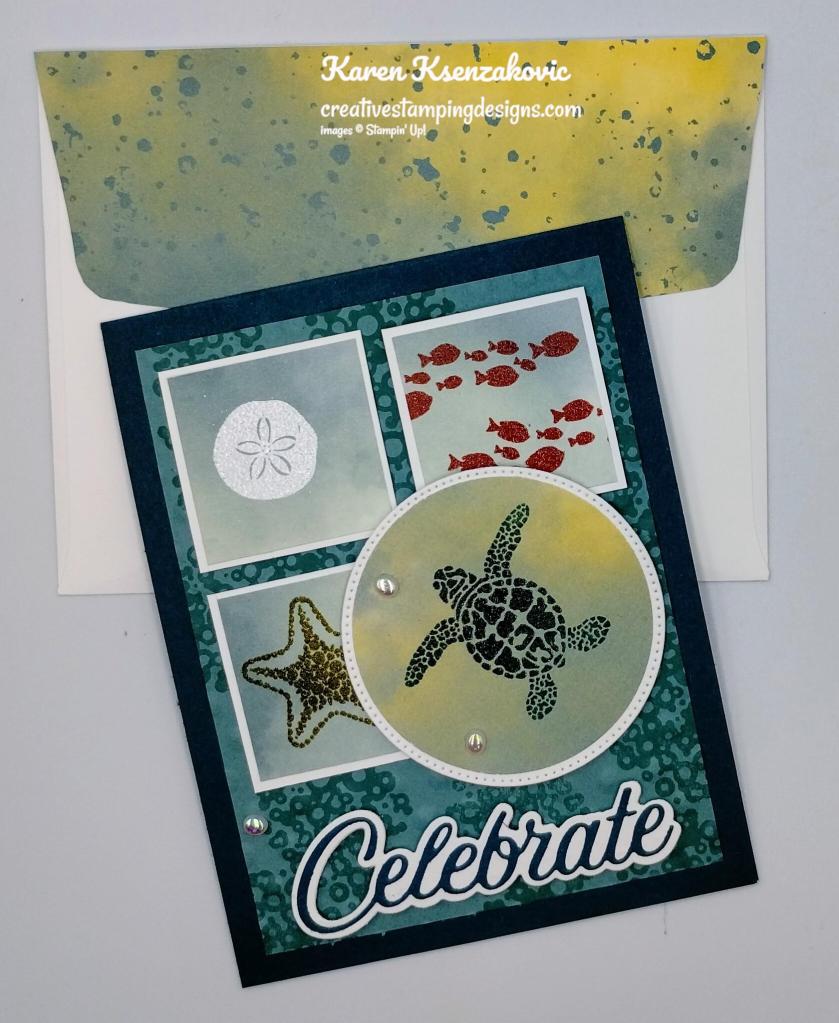
I started by randomly stamping the bubble image from the Sea Turtle stamp set in Lost Lagoon Ink on the Lost Lagoon card front. I embossed the panel using the Basics 3D Embossing Folder. I adhered the embossed panel to a Pretty Peacock card base using Multipurpose Liquid Glue.

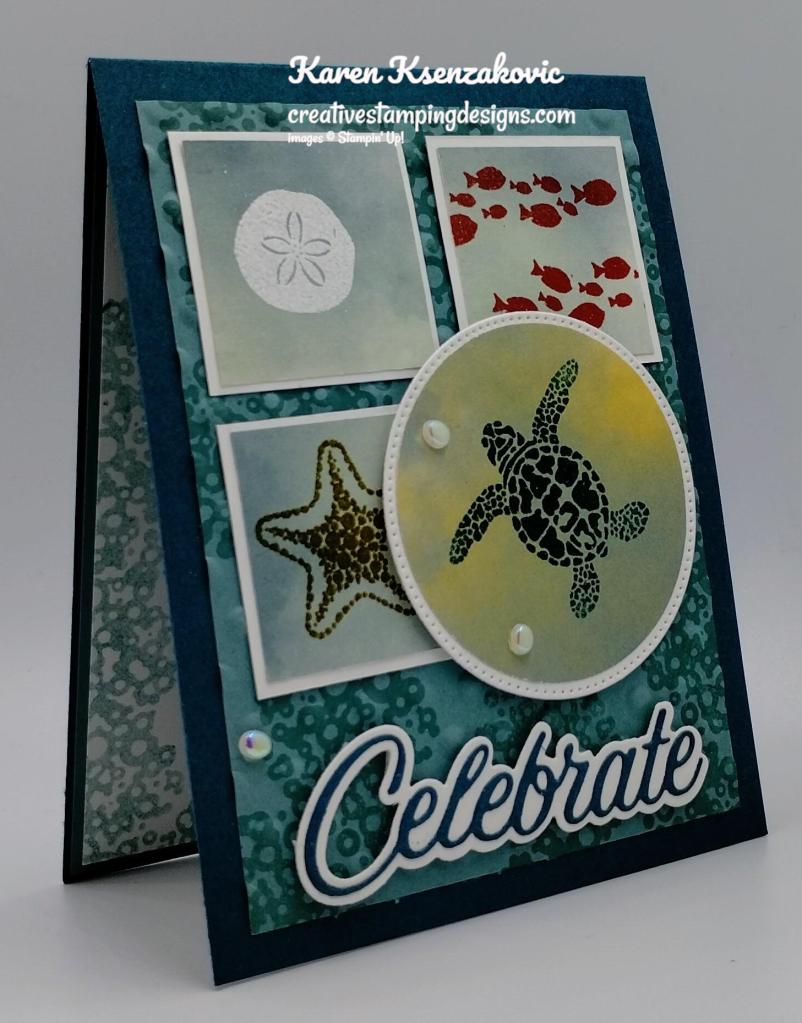
Stampin' Up! Sea Turtle Birthday 3 creativestampingdesigns.com

On a square panel of Hello Irresistible DSP, I stamped the sand dollar image from the Sea Turtle stamp set in Versamark Ink. I sprinkled it with White Embossing Powder and set it using the Heat Tool. I stamped the fish image from the Sea Turtle stamp set on another panel of the Hello Irresistible DSP, in Calypso Coral Ink. I sprinkled it with Clear Embossing Powder and set it using the Heat Tool. I stamped the starfish image from the Sea Turtle stamp set in Wild Wheat Ink on the last square of Hello Irresistible DSP. I sprinkled the image with Clear Embossing Powder and set it using the Heat Tool. I adhered the 3 squares to 3 Basic White mats using Stampin’ Seal. I adhered the layered panels to the card front using Multipurpose Liquid Glue.

Stampin' Up! Sea Turtle Birthday 4 creativestampingdesigns.com

Using the 2 3/8″ Circle Punch, I punched a panel of Hello Irresistible DSP. I stamped the small detail turtle image from the Sea Turtle stamp set in Pretty Peacock Ink. I sprinkled the image with Clear Embossing Powder and set it using the Heat Tool. I cut a panel of Basic White cardstock using the Stylish Shapes Dies. I adhered the punched circle to the Basic Whtie circle mat using Stampin’ Seal. I adhered the layered circle to the card front using Stampin’ Dimensionals. From a panel of Basic White cardstock, I cut the sentiment mat using the Wanted To Say Dies. From a panel of Pretty Peacock cardstock, I cut the sentiment from the Wanted To Say Dies. I adhered the sentiment to the mat using Multipurpose Liqui Glue. I adhered the layered sentiment to the bottom of the card front using Stampin’ Dimensionals. I added a few Flat Adhesive Backed Pearls to the card front.

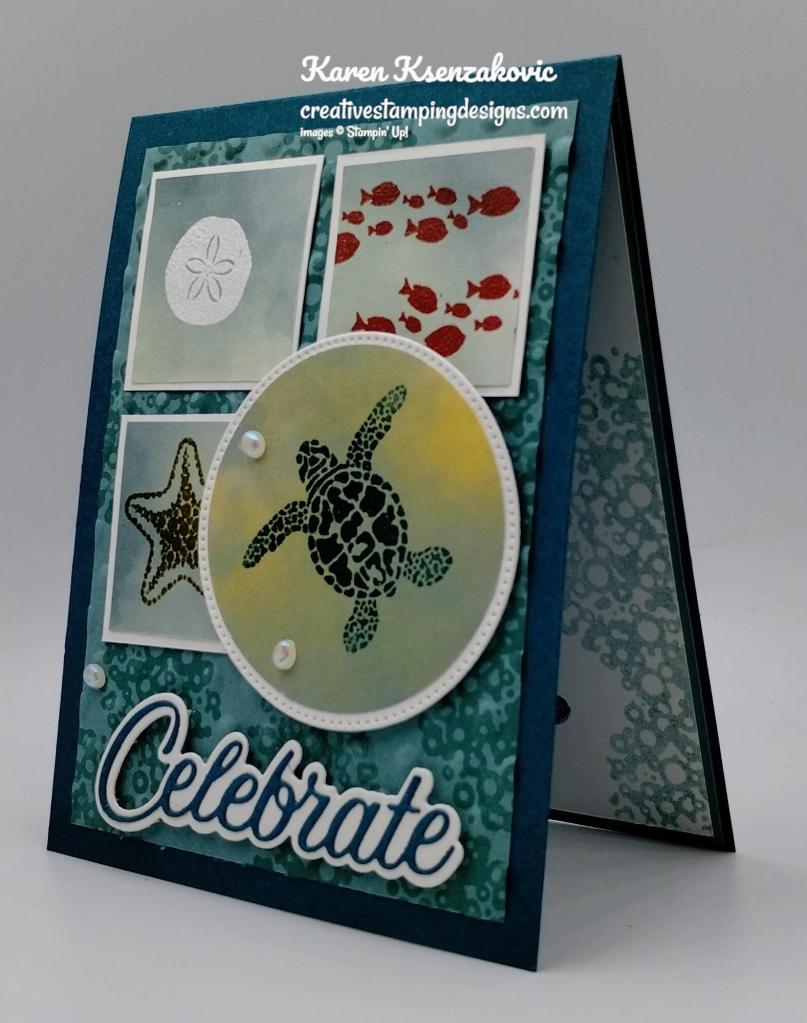
Stampin' Up! Sea Turtle Birthday 5 creativestampingdesigns.com

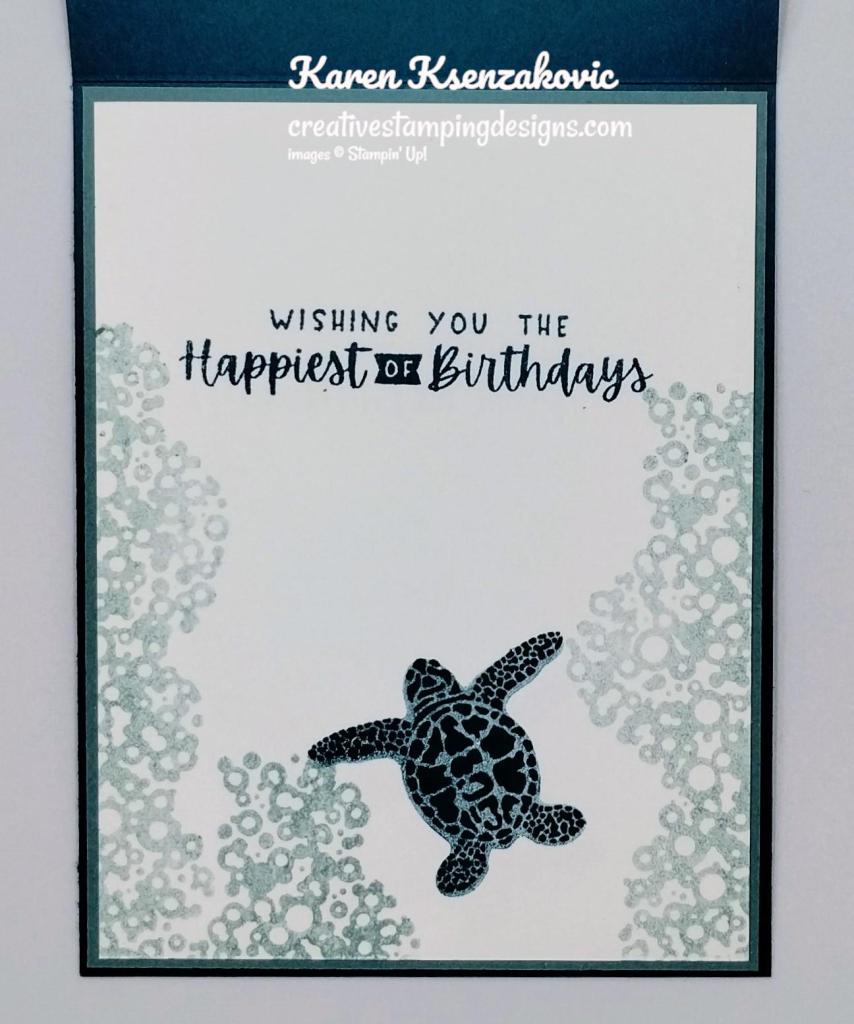
On the inside, I stamped the sentiment from the Charming Sentiments stamp set in Pretty Peacock Ink on a panel of Basic White. I stamped the bubble image from the Sea Turtle stamp set in Lost Lagoon Ink, stamping off once on scrap paper, on the sides of the panel. I stamped the small detail turtle image from the Sea Turtle stamp set in Pretty Peacock Ink on the bottom of the panel. I flipped the image over and stamped the solid turtle image in Pretty Peacock Ink over the detailed image, stamping off once on scrap paper. I adhered the Basic White panel to a Lost Lagoon mat then to the inside of the Pretty Peacock card base.

Stampin' Up! Sea Turtle Birthday 6 creativestampingdesigns.com

To finish my card, I decorated a Basic White Medium Envelope. I stamped the bubble image from the Sea Turtle stamp set on the envelope front in Lost Lagoon Ink, stamping off once on scrap paper. I stamped the small detail turtle image from the Sea Turtle stamp set in Pretty Peacock Ink. I flipped the stamp over and stamped the solid turtle image in Pretty Peacock Ink over the detailed image, stamping off once on scrap paper. I adhered a panel of Hello Irresistible DSP to the envelope flap.

Stampin' Up! Sea Turtle Birthday 7 creativestampingdesigns.com

Thank you for stopping by my blog today. I hope you like the card and will give it a try. Happy Stamping!!

*********************************************************************************************************

If you need any stamping supplies, I’d love to be your Demonstrator. Just click HERE to go directly to my online store or drop me an email if you have any questions. 

MY CURRENT HOST CODE IS:   BR9XGSTC

Use this host code when placing an order with me. When you order $50 or greater you will receive a free gift from me! If your order is over $150, please do not use this code, but you’ll still get the free gift. The free gift is your choice of any 1 item valued up to $10.00 from the 2022-2023 Annual Catalog or the January-April 2023 Mini Catalog!  Unfortunately, packs of cardstock are no longer an option for a free gift. Shipping has become too expensive to ship and it’s costing me as much to ship as the cardstock costs. For any orders $50 or more I will also send you my monthly class tutorials.  Click HERE or go to my Customer Rewards for more details and to see what this month’s tutorials are.

Please remember to use my current Host Code and make sure that you can see my name on the final checkout page listed as your Demonstrator when you order so that you know that you’re ordering with me, and you’ll get my rewards! 

Happy Stamping, Karen

*********************************************************************************************************

In response to changing policies at Stampin’ Up – I’m adjusting my Ordering Gift policy as well.  I’m having to get a little more tough on the adding of Host codes when you place your order thru my Online Store.

Not to worry – you’re still going to get that $10 ordering gift for orders of $50 (before shipping & tax) or greater.  And the gift is still any 1 SU! product up to that $10 value – which includes some of our fun Host Sets!

But – if you DO NOT use the Host code for your orders of less than $150 (this is the RETAIL total before Shipping & Handling), then you’ll have two options:

  1. You’ll need to call Stampin’ Up! (1-800-Stamp-Up) and ask them to add it for you. They’re very helpful and will get it done quickly!  OR….
  2. If your order was over the $50 threshold but under $150, then…you’ll forfeit that $10 ordering gift and rewards – this is the Bummer Option – and I REALLY don’t want to do this, SO please remember to add my Current Host Code.

*********************************************************************************************************

COMING SOON!! SAVE 15% ON SELECT DESIGNER SERIES PAPERS!

We all love beautiful Designer Series Paper, and in June, you can enjoy a 15% discount on select Designer Series Papers from our new 2023–2024 Annual Catalog and Online Exclusives. Whether you’re a scrapbooker, a card maker or simply a paper lover, this is a great time to stock up and save on gorgeous paper, so you have artistic and versatile paper designs on hand for your next projects! Click HERE for a printable PDF flyer.

SALES PERIOD: 1–30 JUNE
  • All order types qualify for this promotion.
  • There is no limit to how many packages of Designer Series Paper may be purchased during this promotion.
  • Only select Designer Series Papers are available at a 15% discount during this promotion.
  • Orders must be placed—and closed—during the promotion period for the 15% discount to apply.
  • Designer Series Paper ordered as part of a Starter Kit or with Stampin’ Rewards qualify for the 15% discount.
  • Designer Series Papers are from the new 2023–2024 Annual Catalog (p. 129–132) and Online Exclusives.
ORDER DEADLINES
  • 30 June 2023; 11:59 PM (MT)

*********************************************************************************************************

Welcome Inn

Subscribe May 11 – June 10

Show hospitality to all your guests with the Welcome Inn Paper Pumpkin Kit! This kit includes nine elegant and detailed cards—three each of three designs. Whether you’re hosting friends and family, or want to invite someone over, this kit has what you need to create sophisticated and elevated cards!

You can also pair this kit with a coordinating die add-on! (Available while supplies last. Stampin’ Cut & Emboss Machine sold separately). Keep reading to learn more!

The Welcome Inn Paper Pumpkin Kit perfectly coordinates with the Countryside Inn Suite Collection (item number 161474) from the 2023–2024 Annual Catalog! You can use the stamps and paper from both the suite and kit to create cards that are stylish and refined. You can create these elegant hospitality cards using the suite’s Countryside Inn 12″ x 12″ (30.5 x 30.5 cm) Designer Series Paper and the kit’s beautiful floral cards. There are endless creative possibilities of this kit and suite coordination!

This kit includes:

  • All the supplies you’ll need to create 9 elegant and sophisticated cards—3 each of 3 designs—and 9 coordinating envelopes.
  • A coordinating photopolymer stamp set with floral designs and friendly, hospitality-themed sentiments.
  • A Night of Navy Stampin’ Spot and beautiful embellishments
  • Lovely floral details and precut vases

Finished card size: 4-1/4″ x 5-1/2″ (10.8 x 14 cm)

Coordinating Stampin’ Up! colors: Balmy Blue, Boho Blue, Calypso Coral, Daffodil Delight, Early Espresso, Misty Moonlight, Night of Navy, Old Olive

Don’t forget! This kit perfectly coordinates with the Countryside Inn Suite Collection (Item number: 161474).

Subscribe to the May Paper Pumpkin Kit between 11 May 2023 and 10 June 2023 by clicking here!

Note: Supplies may be limited toward the end of the subscription period.

ADD-ON

Welcome Inn Dies (Available for purchase starting 11 May, while supplies last).

Item number: 163192

$6.00 USD / $8.25 CAD

This add-on includes:

  • One coordinating vase die: 1-1/2″ x 1-1/2″ (3.8 x 3.8 cm)
  • One coordinating flower die
  • One beautiful leaf die

Note: Stampin’ Cut & Emboss Machine sold separately.

*********************************************************************************************************

Card stock cuts for this project:

  • Basic White Cardstock 3 – 1 5/8″ X 1 5/8″ (artwork mats), 2 3/4″ X 2 3/4″ (circle mat), 1 1/4″ X 3 1/2″ (sentiment mat), 4″ x 5 1/4″ (inner liner)
  • Lost Lagoon Cardstock 3 3/4″ X 5″ (card front), 4 1/8″ x 5 3/8″ (inner liner mat)
  • Pretty Peacock Cardstock 4 1/4″ X 11″ (card base scored & folded at 5 1/2″), 1″ X 3 1/4″ (sentiment)
  • Hello Irresistible 6 X 6 Designer Series Paper 3 – 1 1/2″ X 1 1/2″ (artwork panels), 2 1/2″ x 2 1/2″ (circle), 2 1/4″ X 6″ (envelope flap)

*********************************************************************************************************

Product List

Stampin’ Up! It’s A Science Fun Fold

Good Friday morning my stamping friends welcome to my fun fold Friday. How was everyone’s week? What kind of plans do you have for the weekend? I’ll be at work all day Saturday and Sunday. Saturday night my daughter, niece, nephew and I will be attending the High School Tricky Tray. Even though my kids are no longer in school, we still like to support some of their events.

Today’s card I made on my Facebook Live video on Wednesday. If you were able to join me or watched the replay, thank you. If you’d like to watch my video and stamp along, the measurements are below along with the links to my Facebook page and my YouTube channel. Here is my card for today.

Stampin' Up! It's A Science Fun Fold 1 creativestampingdesigns.com

I used the Stampin’ Up! It’s A Science Cling Stamp Set along with the Bright & Beautiful 6 X 6 Designer Series Paper, Wanted To Say Dies and Stylish Shapes Dies for my card today.

Stampin' Up! It's A Science Fun Fold 2 creativestampingdesigns.com

I started by adhering a panel of Bright & Beautiful DSP to an Azure Afternoon mat using Stampin’ Seal. I adhered the layered panel to the front of the Bubble Bath card base using Multipurpose Liquid Glue. I cut the detailed sentiment from a panel of Azure Afternoon cardstock using the Wanted To Say Dies. I cut the sentiment mat from a panel of Basic White using the Wanted To Say Dies. I adhered the detailed sentiment to the mat. I adhered the layered sentiment to the card front using Stampin’ Dimensionals. I added a few Opaque Ovals to the card front.

Stampin' Up! It's A Science Fun Fold 3 creativestampingdesigns.com

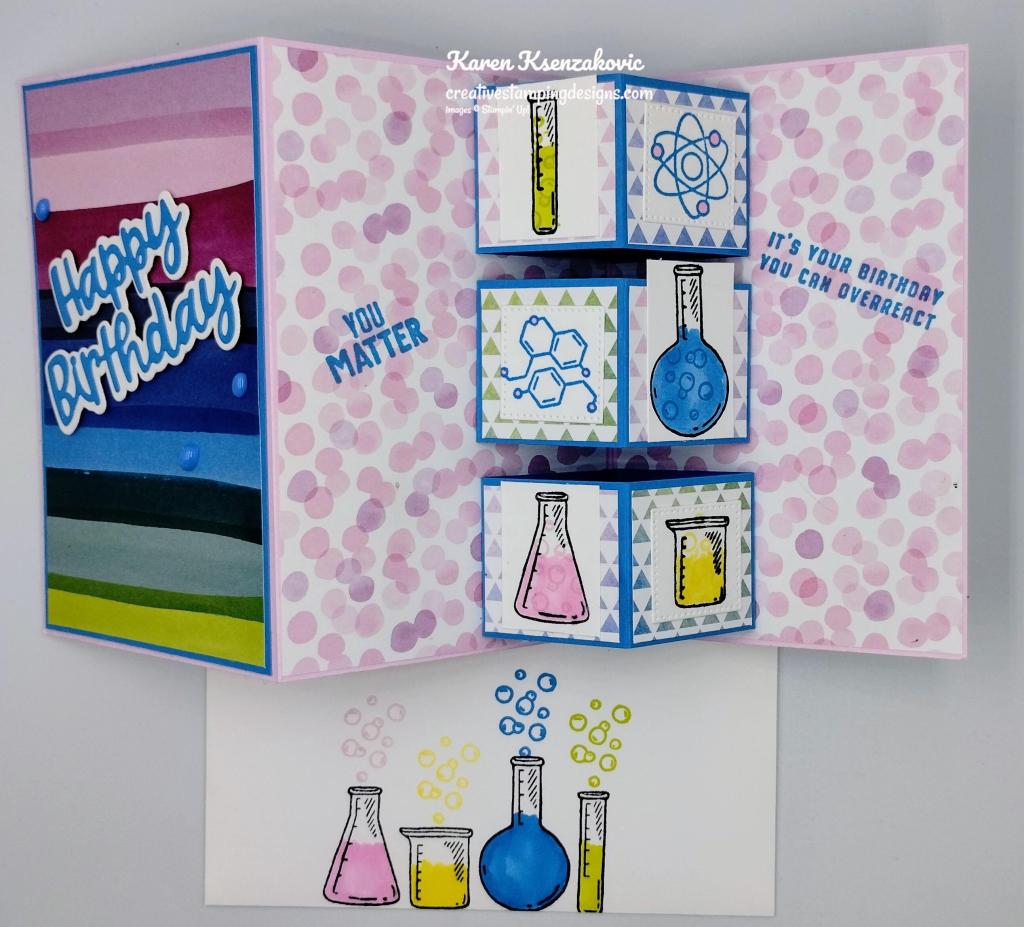
I adhered 2 panels of Bright & Beautiful DSP to the inside of the Bubble Bath card base. I scored & folded the 3 -1 1/2″ x 6″ panels of Azure Afternoon cardstock. I used Tear & Tape on the 2 ends of each panel folding them flat to the inside panels. I adhered the 3 blocks lining up the center score lines with the score line of the card base. I adhered the 6 square panels of Bright & Beautiful DSP to the blocks using Multipurpose Liquid Glue.

Stampin' Up! It's A Science Fun Fold 4 creativestampingdesigns.com

I stamped 3 of the beaker images from It’s A Science stamp set on the Basic White panels using my Basic Black Stampin’ Write Marker. I stamped the last beaker on the Basic White panel using my Basic Black Stampin’ Write Marker. I stamped the compound and atom images from It’s A Science stamp set in Azure Afternoon Ink on the Basic White panel. I cut the beaker, compound and atom images using the smallest square from the Stylish Shapes Dies. I colored the images using Azure Afternoon, Bubble Bath, Lemon Lime Twist and Lemon Lolly Stampin’ Blends Markers. I stamped the bubble image from It’s A Science stamp set in coordinating colors on the beaker images. I adhered the 6 images to the blocks using Stampin’ Seal. I stamped the sentiments from It’s A Science stamp set in Azure Afternoon Ink on the DSP panels.

Stampin' Up! It's A Science Fun Fold 5 creativestampingdesigns.com

On the back, I stamped the sentiment from It’s A Science stamp set in Azure Afternoon Ink on a panel of Basic White. I stamped the telescope image from It’s A Science stamp set in Tuxedo Black Ink on the bottom of the panel. I colored it with Azure Afternoon, Lemon Lime Twist and Lemon Lolly Stampin’ Blends Markers. I adhered 2 strips of Bright & Beautiful DSP to the top and bottom of the panel. I adhered the Basic White panel to an Azure Afternoon mat then to the back of the Bubble Bath card base.

Stampin' Up! It's A Science Fun Fold 6 creativestampingdesigns.com

To finish my card, I decorated a Basic White Medium Envelope. I stamped the beaker image from It’s A Science stamp set in Tuxedo Black Ink on the envelope front. I colored the images using Azure Afternoon, Bubble Bath, Lemon Lime Twist and Lemon Lolly Stampin’ Blends Markers. I stamped the bubble image from It’s A Science stamp set in coordinating color inks above the beakers. I adhered a panel of Bright & Beautiful DSP to the envelope flap.

Stampin' Up! It's A Science Fun Fold 7 creativestampingdesigns.com

Thank you for stopping by my blog today. I hope you liked my card and will give it a try. I hope you will CASE this card and please feel free to post it in the comments of my Facebook page under my post. I’d love to see your take on the card. The list of measurements are below if you’d like to stamp along while watching the video. You can watch my video on my Facebook page Here.

You can also view the video on my YouTube channel Here. If you watch this on my YouTube channel, please remember to subscribe so that you will get notified when a new video goes live. I’m hoping to start doing YouTube lives soon, thanks to all that have subscribed. Happy Stamping!!

*********************************************************************************************************

If you need any stamping supplies, I’d love to be your Demonstrator. Just click HERE to go directly to my online store or drop me an email if you have any questions. 

MY CURRENT HOST CODE IS:   BR9XGSTC

Use this host code when placing an order with me. When you order $50 or greater you will receive a free gift from me! If your order is over $150, please do not use this code, but you’ll still get the free gift. The free gift is your choice of any 1 item valued up to $10.00 from the 2022-2023 Annual Catalog or the January-April 2023 Mini Catalog!  Unfortunately, packs of cardstock are no longer an option for a free gift. Shipping has become too expensive to ship and it’s costing me as much to ship as the cardstock costs. For any orders $50 or more I will also send you my monthly class tutorials.  Click HERE or go to my Customer Rewards for more details and to see what this month’s tutorials are.

Please remember to use my current Host Code and make sure that you can see my name on the final checkout page listed as your Demonstrator when you order so that you know that you’re ordering with me, and you’ll get my rewards! 

Happy Stamping, Karen

*********************************************************************************************************

In response to changing policies at Stampin’ Up – I’m adjusting my Ordering Gift policy as well.  I’m having to get a little more tough on the adding of Host codes when you place your order thru my Online Store.

Not to worry – you’re still going to get that $10 ordering gift for orders of $50 (before shipping & tax) or greater.  And the gift is still any 1 SU! product up to that $10 value – which includes some of our fun Host Sets!

But – if you DO NOT use the Host code for your orders of less than $150 (this is the RETAIL total before Shipping & Handling), then you’ll have two options:

  1. You’ll need to call Stampin’ Up! (1-800-Stamp-Up) and ask them to add it for you. They’re very helpful and will get it done quickly!  OR….
  2. If your order was over the $50 threshold but under $150, then…you’ll forfeit that $10 ordering gift and rewards – this is the Bummer Option – and I REALLY don’t want to do this, SO please remember to add my Current Host Code.

*********************************************************************************************************

Welcome Inn

Subscribe May 11 – June 10

Show hospitality to all your guests with the Welcome Inn Paper Pumpkin Kit! This kit includes nine elegant and detailed cards—three each of three designs. Whether you’re hosting friends and family, or want to invite someone over, this kit has what you need to create sophisticated and elevated cards!

You can also pair this kit with a coordinating die add-on! (Available while supplies last. Stampin’ Cut & Emboss Machine sold separately). Keep reading to learn more!

The Welcome Inn Paper Pumpkin Kit perfectly coordinates with the Countryside Inn Suite Collection (item number 161474) from the 2023–2024 Annual Catalog! You can use the stamps and paper from both the suite and kit to create cards that are stylish and refined. You can create these elegant hospitality cards using the suite’s Countryside Inn 12″ x 12″ (30.5 x 30.5 cm) Designer Series Paper and the kit’s beautiful floral cards. There are endless creative possibilities of this kit and suite coordination!

This kit includes:

  • All the supplies you’ll need to create 9 elegant and sophisticated cards—3 each of 3 designs—and 9 coordinating envelopes.
  • A coordinating photopolymer stamp set with floral designs and friendly, hospitality-themed sentiments.
  • A Night of Navy Stampin’ Spot and beautiful embellishments
  • Lovely floral details and precut vases

Finished card size: 4-1/4″ x 5-1/2″ (10.8 x 14 cm)

Coordinating Stampin’ Up! colors: Balmy Blue, Boho Blue, Calypso Coral, Daffodil Delight, Early Espresso, Misty Moonlight, Night of Navy, Old Olive

Don’t forget! This kit perfectly coordinates with the Countryside Inn Suite Collection (Item number: 161474).

Subscribe to the May Paper Pumpkin Kit between 11 May 2023 and 10 June 2023 by clicking here!

Note: Supplies may be limited toward the end of the subscription period.

ADD-ON

Welcome Inn Dies (Available for purchase starting 11 May, while supplies last).

Item number: 163192

$6.00 USD / $8.25 CAD

This add-on includes:

  • One coordinating vase die: 1-1/2″ x 1-1/2″ (3.8 x 3.8 cm)
  • One coordinating flower die
  • One beautiful leaf die

Note: Stampin’ Cut & Emboss Machine sold separately.

*********************************************************************************************************

CONFETTI BIRTHDAY KIT

Shake up someone’s special day with a happy, handcrafted shaker card! The Confetti Birthday Kit, the newest addition to the Kits Collection by Stampin’ Up!, comes with everything you need to quickly create confetti shaker cards—a total of 9 cards in 3 lively designs. Celebrate in style with bright, bold colors, confetti, and birthday greetings full of joy!

This month’s kit includes: 

  • Enough supplies to create 9 cards—3 each of 3 designs
  • 9 coordinating envelopes
  • Confetti Birthday photopolymer stamp set
  • One Blueberry Bushel Ink Spot
  • Printed card bases, card fronts, self-adhesive cellophane shaker bags, die-cut pieces, holographic foil labels, adhesive, embellishments, and a clear block
  • Finished card size: 5-1/2″ x 4-1/4″ (14 x 10.8 cm)
  • Coordinating colors: Blueberry Bushel, Coastal Cabana, Crushed Curry, Flirty Flamingo, Lemon Lime Twist, Poppy Parade

#162390 $23.00 USD

*********************************************************************************************************

Card stock cuts for this project:

  • Basic White Cardstock 3 1/4″ X 5 1/4″ (back panel), 3″ X 4 1/2″ (sentiment mat & artwork), 2 – 1″ X 1 3/8″ & 1″ X 1 5/8″ (beakers)
  • Azure Afternoon Cardstock 2 – 3 3/8″ X 5 3/8″ (card front & back mats), 3 – 1 1/2″ X 6″ (inside blocks scored & folded at 1 1/2″, 3′ & 4 1/2″), 1 3/4″ X 3 1/4″ (sentiment)
  • Bubble Bath Cardstock 5 1/2″ X 10″ (card base scored & 3 1/2″ & 7″)
  • Bright & Beautiful 6 X 6 Designer Series Paper 3 1$” X 5 1/4″ (card front), 2 – 3 3/8″ X 5 3/8″ (inner card base panels), 6 – 1 3/8″ X 1 3/8″ (block panels), 2 – 5/8″ X 3 1/4″ (back panel strips), 2 1/4″ x 6″ (envelope flap)

*********************************************************************************************************

Product List

Stampin’ Up! Seasonal Branches

Good Sunday morning my stamping friends and Happy Mother’s Day to all. I hope you are able to spend the day doing something special for yourself. You need to sit back, relax, craft and let others wait on you. My ideal day would be to spend it in my craft room getting lost in creating. I don’t have to work today so that’s a good thing. I won’t be spending it crafting though. Last year I gave my husband an extreme race car driving experience for his birthday. We went in August for him to drive, but unfortunately there were thunderstorms, and he couldn’t drive. He rescheduled for today not realizing it was Mother’s Day. So that’s where I’ll be today. It’s a 2-hour drive there and we’ll be there for at least 3-4 hours and a 2-hour drive home. It’s supposed to be a beautiful day to be outside.

Today’s card I made at our monthly Team Stamping Studio. We do a mystery stamping at the end of the business part. I was asked to lead the mystery stamping this month. I gave everyone the measurements and talked them through creating cards. All the cards are similar, but different. Here’s my card for today.

Stampin' Up! Seasonal Branches 1 creativestampingdesigns.com

I used the Stampin’ Up! Seasonal Branches Bundle along with the Delightfully Eclectic Designer Series Paper and Stylish Shapes Dies for my card today.

Stampin' Up! Seasonal Branches 2 creativestampingdesigns.com

I started by adhering a panel of Delightfully Eclectic DSP to a Berry Burst mat using Stampin’ Seal. I adhered the layered panel to a Bubble Bath card base using Multipurpose Liquid Glue. I adhered a smaller panel of Delightfully Eclectic DSP to a Berry Burst mat using Stampin’ Seal. I adhered that layered panel to the card front using Multipurpose Liquid Glue.

Stampin' Up! Seasonal Branches 3 creativestampingdesigns.com

I cut the largest circle from the Stylish Shapes Dies from a panel of Basic White. Using my Blending Brush I added some Balmy Blue Ink to it. I cut the larger branch from the Seasonal Branches Dies from a panel of Pecan Pie and adhered it to the circle using Multipurpose Liquid Glue. I stamped the leaves from the Stampin’ Up! Seasonal Branches Photopolymer Stamp Set in Garden Green Ink on the Basic White panel. I stamped the single flower image from the Seasonal Branches stamp set in Bubble Bath Ink on the Basic White panel. I colored the flowers using Bubble Bath and Berry Burst Stampin’ Blends Markers. I colored the leaves with Old Olive Stampin’ Blends Markers. I cut the leaves and flowers using the Seasonal Branches Dies. I adhered a couple of the flowers to the branch using Glue Dots and the leaves using Stampin’ Dimensionals. I added another flower using a Stampin’ Dimensional. I stamped the bird image from the Seasonal Branches stamp set in Tuxedo Black Ink on the Basic Whtie panel. I colored the bird with Azure Afternoon and Calypso Boral Stampin’ Blends Markers. I cut the bird with the Seasonal Branches Dies and adhered it to the branch using Stampin’ Dimensionals.

Stampin' Up! Seasonal Branches 4 creativestampingdesigns.com

I adhered the artwork to the card front using Stampin’ Dimensionals. I stamped the sentiment from the Seasonal Branches stamp set in Berry Burst Ink on a panel of Basic Whtie. I used the Banner Pick A Punch to cut the end of the sentiment. I adhered the sentiment to the card front using Stampin’ Dimensionals. I added a few of the Adhesive-Backed Sequins Trio to the card front.

Stampin' Up! Seasonal Branches 5 creativestampingdesigns.com

On the inside, I stamped the sentiment from the Seasonal Branches stamp set in Berry Burst Ink on a panel of Basic Whtie. I stamped the branch image from the Seasonal Branches stamp set in Pecan Pie Ink on the side of the panel. I stamped the leaves from the Seasonal Branches stamp set in Garden Green Ink on the branch and colored them using Old Olive Stampin’ Blends Markers. I adhered 2 of the flowers I had die cut on the branch. I adhered a strip of the Delightfully Eclectic DSP to the top of the panel. I adhered the Basic White panel to a Berry Burst mat then to the inside of the Bubble Bath card base.

Stampin' Up! Seasonal Branches 6 creativestampingdesigns.com

To finish my card, I decorated a Basic Whtie Medium Envelope. I stamped the branch image from the Seasonal Branches stamp set on the envelope front in Pecan Pie Ink. I stamped the leaves on the branch in Garden Green Ink and colored them with Old Olive Stampin’ Blends Markers. I stamped the bird image in Tuxedo Black Ink and colored it using Azure Afternoon and Calypso Coral Stampin’ Blends Markers. I adhered a panel of Delightfully Eclectic DSP to the envelope flap.

Stampin' Up! Seasonal Branches 7 creativestampingdesigns.com

Thank you for stopping by my blog today. I hope you like the card and will give it a try. Happy Stamping!!

*********************************************************************************************************

If you need any stamping supplies, I’d love to be your Demonstrator. Just click HERE to go directly to my online store or drop me an email if you have any questions. 

MY CURRENT HOST CODE IS:    BR9XGSTC

Use this host code when placing an order with me. When you order $50 or greater you will receive a free gift from me! If your order is over $150, please do not use this code, but you’ll still get the free gift. The free gift is your choice of any 1 item valued up to $10.00 from the 2022-2023 Annual Catalog or the January-April 2023 Mini Catalog!  Unfortunately, packs of cardstock are no longer an option for a free gift. Shipping has become too expensive to ship and it’s costing me as much to ship as the cardstock costs. For any orders $50 or more I will also send you my monthly class tutorials.  Click HERE or go to my Customer Rewards for more details and to see what this month’s tutorials are.

Please remember to use my current Host Code and make sure that you can see my name on the final checkout page listed as your Demonstrator when you order so that you know that you’re ordering with me, and you’ll get my rewards! 

Happy Stamping, Karen

*********************************************************************************************************

In response to changing policies at Stampin’ Up – I’m adjusting my Ordering Gift policy as well.  I’m having to get a little more tough on the adding of Host codes when you place your order thru my Online Store.

Not to worry – you’re still going to get that $10 ordering gift for orders of $50 (before shipping & tax) or greater.  And the gift is still any 1 SU! product up to that $10 value – which includes some of our fun Host Sets!

But – if you DO NOT use the Host code for your orders of less than $150 (this is the RETAIL total before Shipping & Handling), then you’ll have two options:

  1. You’ll need to call Stampin’ Up! (1-800-Stamp-Up) and ask them to add it for you. They’re very helpful and will get it done quickly!  OR….
  2. If your order was over the $50 threshold but under $150, then…you’ll forfeit that $10 ordering gift and rewards – this is the Bummer Option – and I REALLY don’t want to do this, SO please remember to add my Current Host Code.

*********************************************************************************************************

Welcome Inn

Subscribe May 11 – June 10

Show hospitality to all your guests with the Welcome Inn Paper Pumpkin Kit! This kit includes nine elegant and detailed cards—three each of three designs. Whether you’re hosting friends and family, or want to invite someone over, this kit has what you need to create sophisticated and elevated cards!

You can also pair this kit with a coordinating die add-on! (Available while supplies last. Stampin’ Cut & Emboss Machine sold separately). Keep reading to learn more!

The Welcome Inn Paper Pumpkin Kit perfectly coordinates with the Countryside Inn Suite Collection (item number 161474) from the 2023–2024 Annual Catalog! You can use the stamps and paper from both the suite and kit to create cards that are stylish and refined. You can create these elegant hospitality cards using the suite’s Countryside Inn 12″ x 12″ (30.5 x 30.5 cm) Designer Series Paper and the kit’s beautiful floral cards. There are endless creative possibilities of this kit and suite coordination!

This kit includes:

  • All the supplies you’ll need to create 9 elegant and sophisticated cards—3 each of 3 designs—and 9 coordinating envelopes.
  • A coordinating photopolymer stamp set with floral designs and friendly, hospitality-themed sentiments.
  • A Night of Navy Stampin’ Spot and beautiful embellishments
  • Lovely floral details and precut vases

Finished card size: 4-1/4″ x 5-1/2″ (10.8 x 14 cm)

Coordinating Stampin’ Up! colors: Balmy Blue, Boho Blue, Calypso Coral, Daffodil Delight, Early Espresso, Misty Moonlight, Night of Navy, Old Olive

Don’t forget! This kit perfectly coordinates with the Countryside Inn Suite Collection (Item number: 161474).

Subscribe to the May Paper Pumpkin Kit between 11 May 2023 and 10 June 2023 by clicking here!

Note: Supplies may be limited toward the end of the subscription period.

ADD-ON

Welcome Inn Dies (Available for purchase starting 11 May, while supplies last).

Item number: 163192

$6.00 USD / $8.25 CAD

This add-on includes:

  • One coordinating vase die: 1-1/2″ x 1-1/2″ (3.8 x 3.8 cm)
  • One coordinating flower die
  • One beautiful leaf die

Note: Stampin’ Cut & Emboss Machine sold separately.

*********************************************************************************************************

New Branded Merchandise Available in the Stampin’ Up! Online Store

Stampin’ Up! has some new Branded Merchandise that you can pick up in the online store now!  Check out the pretty new grid paper and the awesome decal!

Stampin' Up! In Color Grid Paper

2023–2025 IN COLOR GRID PAPER

Keep your workspace clean and organized with the 2023–2025 In Color Grid Paper! This paper will protect your workspace when you craft while adding a fun pop of color. It has metric and imperial measurements on it to help you with alignment when crafting. Available while supplies last.

  • Size: 11″ x 17″
  • Includes imperial & metric measurements
  • QTY: 25 Sheets per pack (5 sheets of 5 colors)
  • Product colors: Boho Blue, Copper Clay, Moody Mauve, Pebbled Path, Wild Wheat
  • Item number:  162439
  • Price:  $9.00
Stampin' Up! Decal

STAMPIN’ UP! LOGO VINYL DECAL

Show off your Stampin’ Up! spirit with the new Logo Vinyl Decal! Adhere the decal to a variety of clean surfaces. Put it on your water bottle, your computer, or even your car! Available while supplies last.

  • 2 printed vinyl decals
  • Sizes: 4-3/8″ x 6″ and 3-3/8″ x 4-1/2″
  • Product colors: Basic White
  • Item number:  162441
  • Price:  $6.00

You can see all of the branded merchandise in the online store Here.

*********************************************************************************************************

CONFETTI BIRTHDAY KIT

Shake up someone’s special day with a happy, handcrafted shaker card! The Confetti Birthday Kit, the newest addition to the Kits Collection by Stampin’ Up!, comes with everything you need to quickly create confetti shaker cards—a total of 9 cards in 3 lively designs. Celebrate in style with bright, bold colors, confetti, and birthday greetings full of joy!

This month’s kit includes: 

  • Enough supplies to create 9 cards—3 each of 3 designs
  • 9 coordinating envelopes
  • Confetti Birthday photopolymer stamp set
  • One Blueberry Bushel Ink Spot
  • Printed card bases, card fronts, self-adhesive cellophane shaker bags, die-cut pieces, holographic foil labels, adhesive, embellishments, and a clear block
  • Finished card size: 5-1/2″ x 4-1/4″ (14 x 10.8 cm)
  • Coordinating colors: Blueberry Bushel, Coastal Cabana, Crushed Curry, Flirty Flamingo, Lemon Lime Twist, Poppy Parade

#162390 $23.00 USD

*********************************************************************************************************

Card stock cuts for this project:

  • Basic White Cardstock 2 – 4″ X 5 1/4″ (artwork & inner liner), 3/2″ X 2″ (sentiment)
  • Berry Burst Cardstock 2 – 4 1/8″ X 5 3/8″ (card front & inner liner mats), 2 1/8″ X 5 1/4″ (dsp mat)
  • Bubble Bath Cardstock 8 1/2″ X 5 1/2″ (card base scored & folded at 4 1/4″)
  • Pecan Pie Cardstock 1″ X 3″ (branch)
  • Delightfully Eclectic Designer Series Paper 4″ X 5 1/4″ (card front), 2″ X 5 1/4″ (card front panel), 3/4″ X 4″ (inner liner strip), 2 1/4″ X 6″ (envelope flap)

*********************************************************************************************************

Product List

Paper Snips

[103579]
$11.00

Stampin’ Up! Dainty Delight Trellis Card for Fun Fold Friday

Good Friday morning my stamping friends welcome to my fun fold Friday. I hope you all had a good week. Do you have plans for the weekend yet? I’ll be at work all day tomorrow as usual. It’s supposed to be nice out, so maybe it will be super busy, and the day will just fly by.

Today’s card I made on my Facebook Live video on Wednesday. If you were able to join me or watched the replay, thank you. If you’d like to watch my video and stamp along, the measurements are below along with the links to my Facebook page and my YouTube channel. This is not really a ‘fun fold’ card today, but I’m considering it a fancy ‘fold’. Here is my card for today.

Stampin' Up! Dainty Delight Trellis 1 creativestamppingdesigns.com

I used the Stampin’ Up! Dainty Delight Cling Stamp Set along with the Dainty Delight Dies, Lazy Days Dies and the new Nested Essentials Dies for my card today.

Stampin' Up! Dainty Delight Trellis 2 creativestamppingdesigns.com

I started by stamping the small grass image from the Dainty Delight stamp set in Lemon Lime Twist Ink along the bottom front of the Basic White Thick card base. I opened the card base and cut 6 – 1/2″ strips from the front of the card base using my Paper Trimmer. I folded the card base and set 4 of the strips down lining them up evenly to make the fence. I placed a block on them to hold them in place to adhere them. I took 1 of the strips and adhered it towards the bottom using tiny drops of Multipurpose Liquid Glue. I then adhered the center strip the same way. I cut an extra strip of Basic White for the top and adhered it closer to the top the same way. I trimmed off the excess using Paper Snips.

Stampin' Up! Dainty Delight Trellis 3 creativestamppingdesigns.com

From a panel of Bubble Bath cardstock, I cut the porch top die from the Lazy Days Dies. From a panel of Lemon Lime Twist, I cut the vine from the Dainty Delight Dies. I adhered one of the vines to the top of the card front using small amounts of Multipurpose Liquid Glue on the leaves. I adhered the porch top die to the top of the card front. From a panel of Fresh Freesia cardstock, I cut 5 of the flower dies from the Dainty Delight Dies to make Wisteria. I adhered the flowers to the vine using Stampin’ Dimensionals. From a panel of Basic White I cut the 2 daisy dies from the Dainty Delight Dies. I cut the daisy centers from a panel of Lemon Lolly cardstock. I adhered the flower centers to the daisies using Glue Dots. I adhered 2 more of the vines to the card front. I adhered the daisies to the vines using Mini Stampin’ Dimensionals.

Stampin' Up! Dainty Delight Trellis 4 creativestamppingdesigns.com

I stamped the sentiment from the Dainty Delight stamp set in Tuxedo Black Ink on a panel of Basic White. I cut the sentiment out using the smallest rectangle die from the Nested Essentials Dies. I adhered the sentiment to the card front using Stampin’ Dimensionals. I added some Brushed Brass Butterflies around the flowers and Tinsel Gems Three Pack to the sentiment.

Stampin' Up! Dainty Delight Trellis 5 creativestamppingdesigns.com

On the inside, I stamped the sentiment from Dainty Delight stamp set in Tuxedo Black Ink on a Basic White panel. I stamped the larger floral image from the Dainty Delight stamp set in Tuxedo Black Ink on the side of the panel. I colored the image in using Bubble Bath, Fresh Freesia and Lemon Lime Twist Stampin’ Blends Markers. I adhered the Basic Whtie panel to a Bubble Bath mat then to the inside of the Basic White Thick cardbase.

Stampin' Up! Dainty Delight Trellis 6 creativestamppingdesigns.com

To finish my card, I decorated a Basic White Medium Envelope. I stamped the floral images from the Dainty Delight stamp set in Tuxedo Black Ink on the envelope front and flap. I colored the images using Bubble Bath, Fresh Freesia and Lemon Lime Twist Stampin’ Blends Markers.

Stampin' Up! Dainty Delight Trellis 7 creativestamppingdesigns.com

Thank you for stopping by my blog today. I hope you liked my card and will give it a try. I hope you will CASE this card and please feel free to post it in the comments of my Facebook page under my post. I’d love to see your take on the card. The list of measurements are below if you’d like to stamp along while watching the video. You can watch my video on my Facebook page Here.

You can also view the video on my YouTube channel Here. If you watch this on my YouTube channel, please remember to subscribe so that you will get notified when a new video goes live. I’m hoping to start doing YouTube lives soon, thanks to all that have subscribed. Happy Stamping!!

*********************************************************************************************************

If you need any stamping supplies, I’d love to be your Demonstrator. Just click HERE to go directly to my online store or drop me an email if you have any questions. 

MY CURRENT HOST CODE IS:   BR9XGSTC

Use this host code when placing an order with me. When you order $50 or greater you will receive a free gift from me! If your order is over $150, please do not use this code, but you’ll still get the free gift. The free gift is your choice of any 1 item valued up to $10.00 from the 2022-2023 Annual Catalog or the January-April 2023 Mini Catalog!  Unfortunately, packs of cardstock are no longer an option for a free gift. Shipping has become too expensive to ship and it’s costing me as much to ship as the cardstock costs. For any orders $50 or more I will also send you my monthly class tutorials.  Click HERE or go to my Customer Rewards for more details and to see what this month’s tutorials are.

Please remember to use my current Host Code and make sure that you can see my name on the final checkout page listed as your Demonstrator when you order so that you know that you’re ordering with me, and you’ll get my rewards! 

Happy Stamping, Karen

*********************************************************************************************************

In response to changing policies at Stampin’ Up – I’m adjusting my Ordering Gift policy as well.  I’m having to get a little more tough on the adding of Host codes when you place your order thru my Online Store.

Not to worry – you’re still going to get that $10 ordering gift for orders of $50 (before shipping & tax) or greater.  And the gift is still any 1 SU! product up to that $10 value – which includes some of our fun Host Sets!

But – if you DO NOT use the Host code for your orders of less than $150 (this is the RETAIL total before Shipping & Handling), then you’ll have two options:

  1. You’ll need to call Stampin’ Up! (1-800-Stamp-Up) and ask them to add it for you. They’re very helpful and will get it done quickly!  OR….
  2. If your order was over the $50 threshold but under $150, then…you’ll forfeit that $10 ordering gift and rewards – this is the Bummer Option – and I REALLY don’t want to do this, SO please remember to add my Current Host Code.

*********************************************************************************************************

Welcome Inn

Subscribe May 11 – June 10

Show hospitality to all your guests with the Welcome Inn Paper Pumpkin Kit! This kit includes nine elegant and detailed cards—three each of three designs. Whether you’re hosting friends and family, or want to invite someone over, this kit has what you need to create sophisticated and elevated cards!

You can also pair this kit with a coordinating die add-on! (Available while supplies last. Stampin’ Cut & Emboss Machine sold separately). Keep reading to learn more!

The Welcome Inn Paper Pumpkin Kit perfectly coordinates with the Countryside Inn Suite Collection (item number 161474) from the 2023–2024 Annual Catalog! You can use the stamps and paper from both the suite and kit to create cards that are stylish and refined. You can create these elegant hospitality cards using the suite’s Countryside Inn 12″ x 12″ (30.5 x 30.5 cm) Designer Series Paper and the kit’s beautiful floral cards. There are endless creative possibilities of this kit and suite coordination!

This kit includes:

  • All the supplies you’ll need to create 9 elegant and sophisticated cards—3 each of 3 designs—and 9 coordinating envelopes.
  • A coordinating photopolymer stamp set with floral designs and friendly, hospitality-themed sentiments.
  • A Night of Navy Stampin’ Spot and beautiful embellishments
  • Lovely floral details and precut vases

Finished card size: 4-1/4″ x 5-1/2″ (10.8 x 14 cm)

Coordinating Stampin’ Up! colors: Balmy Blue, Boho Blue, Calypso Coral, Daffodil Delight, Early Espresso, Misty Moonlight, Night of Navy, Old Olive

Don’t forget! This kit perfectly coordinates with the Countryside Inn Suite Collection (Item number: 161474).

Subscribe to the May Paper Pumpkin Kit between 11 May 2023 and 10 June 2023 by clicking here!

Note: Supplies may be limited toward the end of the subscription period.

ADD-ON

Welcome Inn Dies (Available for purchase starting 11 May, while supplies last).

Item number: 163192

$6.00 USD / $8.25 CAD

This add-on includes:

  • One coordinating vase die: 1-1/2″ x 1-1/2″ (3.8 x 3.8 cm)
  • One coordinating flower die
  • One beautiful leaf die

Note: Stampin’ Cut & Emboss Machine sold separately.

*********************************************************************************************************

CONFETTI BIRTHDAY KIT

Shake up someone’s special day with a happy, handcrafted shaker card! The Confetti Birthday Kit, the newest addition to the Kits Collection by Stampin’ Up!, comes with everything you need to quickly create confetti shaker cards—a total of 9 cards in 3 lively designs. Celebrate in style with bright, bold colors, confetti, and birthday greetings full of joy!

This month’s kit includes: 

  • Enough supplies to create 9 cards—3 each of 3 designs
  • 9 coordinating envelopes
  • Confetti Birthday photopolymer stamp set
  • One Blueberry Bushel Ink Spot
  • Printed card bases, card fronts, self-adhesive cellophane shaker bags, die-cut pieces, holographic foil labels, adhesive, embellishments, and a clear block
  • Finished card size: 5-1/2″ x 4-1/4″ (14 x 10.8 cm)
  • Coordinating colors: Blueberry Bushel, Coastal Cabana, Crushed Curry, Flirty Flamingo, Lemon Lime Twist, Poppy Parade

#162390 $23.00 USD

*********************************************************************************************************

New Branded Merchandise Available in the Stampin’ Up! Online Store

Stampin’ Up! has some new Branded Merchandise that you can pick up in the online store now!  Check out the pretty new grid paper and the awesome decal!

Stampin' Up! In Color Grid Paper

2023–2025 IN COLOR GRID PAPER

Keep your workspace clean and organized with the 2023–2025 In Color Grid Paper! This paper will protect your workspace when you craft while adding a fun pop of color. It has metric and imperial measurements on it to help you with alignment when crafting. Available while supplies last.

  • Size: 11″ x 17″
  • Includes imperial & metric measurements
  • QTY: 25 Sheets per pack (5 sheets of 5 colors)
  • Product colors: Boho Blue, Copper Clay, Moody Mauve, Pebbled Path, Wild Wheat
  • Item number:  162439
  • Price:  $9.00
Stampin' Up! Decal

STAMPIN’ UP! LOGO VINYL DECAL

Show off your Stampin’ Up! spirit with the new Logo Vinyl Decal! Adhere the decal to a variety of clean surfaces. Put it on your water bottle, your computer, or even your car! Available while supplies last.

  • 2 printed vinyl decals
  • Sizes: 4-3/8″ x 6″ and 3-3/8″ x 4-1/2″
  • Product colors: Basic White
  • Item number:  162441
  • Price:  $6.00

You can see all of the branded merchandise in the online store Here.

*********************************************************************************************************

Card stock cuts for this project:

  • Basic White Cardstock 2 1/4″ X 5 1/2″ (daisies), 1 1/2″ X 2″ (sentiment), 1/2″ X 5 1/2″ (extra strip)
  • Basic White Thick Cardstock 8 1/2″ X 5 1/2″ (card base scored & folded at 4 1/4″)
  • Bubble Bath Cardstock 1″ X 4 1/4″ (die cut panel), 4 1/8″ X 5 3/8″ (inner liner mat)
  • Fresh Freesia Cardstock 2″ X 4″ (hanging flowers)
  • Lemon Lime Twist Cardstock 5 1/2″ X 5 1/2″ (vines)
  • Lemon Lolly cardstock 1″ X 2″ (daisy centers)

*********************************************************************************************************

Product List

Stampin’ Up! It’s A Science for The Happy Inkin’ Thursday Blog Hop

Good Thursday morning my stamping friends welcome to our Happy Inkin’ Thursday Blog Hop. If you are starting with me, thank you. I hope you will stop by everyone’s blog to see what they have created this week. If you are hopping over from Akiko’s blog, thank you for stopping by. This week we have Sketch Challenge. Here is my card using this week’s sketch.

Stampin' Up! It's A Science Birthday 1 creativestampingdesigns.com

I used the Stampin’ Up! It’s A Science Cling Stamp Set along with the Bright & Beautiful 6 X 6 Designer Series Paper for my card today.

This is our sketch for this week.

Stampin' Up! It's A Science Birthday 2 creativestampingdesigns.com

I started by adhering a panel of Bright & Beautiful DSP to an Azure Afternoon card base using Multipurpose Liquid Glue. On a panel of Berry Burst cardstock, I stamped the organic compound and atom images from It’s A Science stamp set in Berry Burst Ink randomly. I adhered the Berry Burst panel to an Azure Afternoon mat using Stampin’ Seal. I adhered the layered panel to the card front using Multipurpose Liquid Glue.

Stampin' Up! It's A Science Birthday 3 creativestampingdesigns.com

On a panel of Basic White, I stamped the sentiment from It’s A Science stamp set in Azure Afternoon Ink on the top of the panel. I stamped the beaker image from It’s A Science stamp set in Tuxedo Black Ink on the bottom of the panel. I colored the images in using Azure Afternoon, Berry Burst, Fresh Freesia and Lemon Lime Twist Stampin’ Blends Markers. I adhered the artwork to an Azure Afternoon mat using Stampin’ Seal. I adhered the layered panel to the card front using Stampin’ Dimensionals.

Stampin' Up! It's A Science Birthday 4 creativestampingdesigns.com

On a small panel of Basic White, I stamped the microscope image from It’s A Science stamp set in Tuxedo Black Ink. I colored the image using Smoky Slate Stampin’ Blends Markers. I fussy cut the microscope using Paper Snips. I adhered the microscope to the card front using Stampin’ Dimensionals. I added a couple Classic Matte Dots to the microscope and Tinsel Gems Four Pack to the card front.

Stampin' Up! It's A Science Birthday 5 creativestampingdesigns.com

On the inside, I stamped the sentiment from It’s A Science stamp set in Azure Afternoon Ink on a panel of Basic White. I stamped the beaker image from It’s A Science stamp set in Tuxedo Black Ink on the bottom of the panel. I colored the beakers using Azure Afternoon, Berry Burst, Fresh Freesia and Lemon Lime Twist Stampin’ Blends Markers. I stamped the bubble image from It’s A Science stamp set above each beaker in the coordinating color inks. I adhered a strip of Bright & Beautiful DSP to the bottom of the panel. I adhered the Basic White panel to a Berry Burst mat then to the inside of the Azure Afternoon card base.
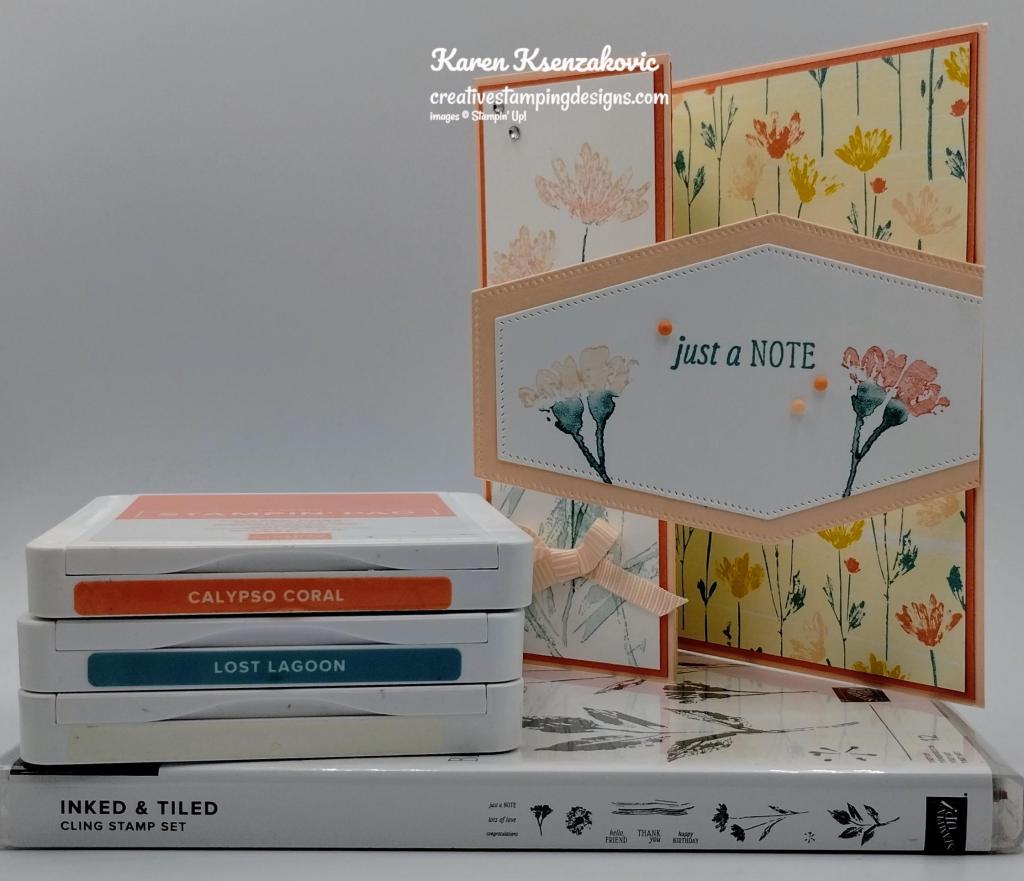
Stampin' Up! It's A Science Birthday 6 creativestampingdesigns.com

To complete my card, I decorated a Basic White Medium Envelope. I stamped the beaker image from It’s A Science stamp set in Tuxedo Black Ink on the front of the envelope. I colored the images the same as I did on the card and stamped the bubbles in the coordinating inks above the beakers. I adhered a panel of Bright & Beautiful DSP to the envelope flap.

Stampin' Up! It's A Science Birthday 7 creativestampingdesigns.com

Thank you for stopping by my blog today. I hope you liked my card and will give it a try. Now that you’ve seen my card, take a minute to hop through and see everyone’s projects today. If you click on the Next Blog button, you’ll go to Tara’s page. Or you can just click on the names below to go directly to all their blogs! Happy Hopping!

Amy Koenders

Mary Deatherage

Jaimie Babarczy

Karen Finkle

Akiko Sudano

Karen Ksenzakovic You Are Here

Tara Carpenter

Terry Lynn Bright

Carol Buckalew

*********************************************************************************************************

If you need any stamping supplies, I’d love to be your Demonstrator. Just click HERE to go directly to my online store or drop me an email if you have any questions. 

MY CURRENT HOST CODE IS:    BR9XGSTC

Use this host code when placing an order with me. When you order $50 or greater you will receive a free gift from me! If your order is over $150, please do not use this code, but you’ll still get the free gift. The free gift is your choice of any 1 item valued up to $10.00 from the 2022-2023 Annual Catalog or the January-April 2023 Mini Catalog!  Unfortunately, packs of cardstock are no longer an option for a free gift. Shipping has become too expensive to ship and it’s costing me as much to ship as the cardstock costs. For any orders $50 or more I will also send you my monthly class tutorials.  Click HERE or go to my Customer Rewards for more details and to see what this month’s tutorials are.

Please remember to use my current Host Code and make sure that you can see my name on the final checkout page listed as your Demonstrator when you order so that you know that you’re ordering with me, and you’ll get my rewards! 

Happy Stamping, Karen

*********************************************************************************************************

In response to changing policies at Stampin’ Up – I’m adjusting my Ordering Gift policy as well.  I’m having to get a little more tough on the adding of Host codes when you place your order thru my Online Store.

Not to worry – you’re still going to get that $10 ordering gift for orders of $50 (before shipping & tax) or greater.  And the gift is still any 1 SU! product up to that $10 value – which includes some of our fun Host Sets!

But – if you DO NOT use the Host code for your orders of less than $150 (this is the RETAIL total before Shipping & Handling), then you’ll have two options:

  1. You’ll need to call Stampin’ Up! (1-800-Stamp-Up) and ask them to add it for you. They’re very helpful and will get it done quickly!  OR….
  2. If your order was over the $50 threshold but under $150, then…you’ll forfeit that $10 ordering gift and rewards – this is the Bummer Option – and I REALLY don’t want to do this, SO please remember to add my Current Host Code.

*********************************************************************************************************

Welcome Inn

Subscribe May 11 – June 10

Show hospitality to all your guests with the Welcome Inn Paper Pumpkin Kit! This kit includes nine elegant and detailed cards—three each of three designs. Whether you’re hosting friends and family, or want to invite someone over, this kit has what you need to create sophisticated and elevated cards!

You can also pair this kit with a coordinating die add-on! (Available while supplies last. Stampin’ Cut & Emboss Machine sold separately). Keep reading to learn more!

The Welcome Inn Paper Pumpkin Kit perfectly coordinates with the Countryside Inn Suite Collection (item number 161474) from the 2023–2024 Annual Catalog! You can use the stamps and paper from both the suite and kit to create cards that are stylish and refined. You can create these elegant hospitality cards using the suite’s Countryside Inn 12″ x 12″ (30.5 x 30.5 cm) Designer Series Paper and the kit’s beautiful floral cards. There are endless creative possibilities of this kit and suite coordination!

This kit includes:

  • All the supplies you’ll need to create 9 elegant and sophisticated cards—3 each of 3 designs—and 9 coordinating envelopes.
  • A coordinating photopolymer stamp set with floral designs and friendly, hospitality-themed sentiments.
  • A Night of Navy Stampin’ Spot and beautiful embellishments
  • Lovely floral details and precut vases

Finished card size: 4-1/4″ x 5-1/2″ (10.8 x 14 cm)

Coordinating Stampin’ Up! colors: Balmy Blue, Boho Blue, Calypso Coral, Daffodil Delight, Early Espresso, Misty Moonlight, Night of Navy, Old Olive

Don’t forget! This kit perfectly coordinates with the Countryside Inn Suite Collection (Item number: 161474).

Subscribe to the May Paper Pumpkin Kit between 11 May 2023 and 10 June 2023 by clicking here!

Note: Supplies may be limited toward the end of the subscription period.

ADD-ON

Welcome Inn Dies (Available for purchase starting 11 May, while supplies last).

Item number: 163192

$6.00 USD / $8.25 CAD

This add-on includes:

  • One coordinating vase die: 1-1/2″ x 1-1/2″ (3.8 x 3.8 cm)
  • One coordinating flower die
  • One beautiful leaf die

Note: Stampin’ Cut & Emboss Machine sold separately.

*********************************************************************************************************

CONFETTI BIRTHDAY KIT

Shake up someone’s special day with a happy, handcrafted shaker card! The Confetti Birthday Kit, the newest addition to the Kits Collection by Stampin’ Up!, comes with everything you need to quickly create confetti shaker cards—a total of 9 cards in 3 lively designs. Celebrate in style with bright, bold colors, confetti, and birthday greetings full of joy!

This month’s kit includes: 

  • Enough supplies to create 9 cards—3 each of 3 designs
  • 9 coordinating envelopes
  • Confetti Birthday photopolymer stamp set
  • One Blueberry Bushel Ink Spot
  • Printed card bases, card fronts, self-adhesive cellophane shaker bags, die-cut pieces, holographic foil labels, adhesive, embellishments, and a clear block
  • Finished card size: 5-1/2″ x 4-1/4″ (14 x 10.8 cm)
  • Coordinating colors: Blueberry Bushel, Coastal Cabana, Crushed Curry, Flirty Flamingo, Lemon Lime Twist, Poppy Parade

#162390 $23.00 USD

*********************************************************************************************************

Card stock cuts for this project:

  • Basic White Cardstock 4″ x 3″ (card front panel), 2 1/4″ X 3″ (microscope). 4″ X 5 1/4″ (inner liner)
  • Azure Afternoon Cardstock 8 1/2″ X 5 1/2″ (card base scored & folded at 4 1/4″), 3 1/4″ X 4 1/2″ (berry burst mat), 2 3/8″ X 3 1/8″ (artwork mat)
  • Berry Burst Cardstock 3 1/8″ X 4 3/8″ (card front panel), 4 1/89″ X 5 3/8″ (inner liner mat)
  • Bright & Beautiful 6 X 6 Designer Series Paper 4 1/4″ X 5 1/2″ (card front), 1/2″ X 4″ (inner liner strip), 2 1/4″ X 6″ (envelope flap)

*********************************************************************************************************

Product List