Good Thursday morning my fellow stampers. We’re almost through the week. After having 2 short weeks this one feels extra long to me. I really think we should have 3 day work weeks and 4 day weekends all the time.
For today’s card I pulled out another set from the Annual Catalog called Dandelion Wishes. Take a look
 I started with Thick Very Vanilla card base and adhered a panel of Garden Impressions Designer Series Paper to the front using Snail. I took a small piece of Very Vanilla cardstock and stamped the triple dandelion image and the flying dandelion pieces image from the Stampin’ Up Dandelion Wishes stamp set in Pacific Point Ink. I immediately sprinkled it with Clear Stampin’ Emboss Powder and heat set it using my Heat Tool.
 I adhered the artwork to a Pacific Point panel using Snail. I stamped the sentiment from the Stampin’ Up Humming Along stamp set in Versamark Ink below the artwork. I sprinkled it with my White Stampin’ Emboss Powder and heat set it using my Heat Tool. I wrapped a piece of Very Vanilla 5/8″ Polka Dot Tulle Ribbon around the artwork and tied a bow.
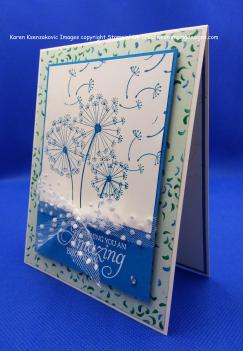 I adhered the artwork to the card front using Stampin’ Dimensionals. I then added a couple Clear Rhinestone Basic Jewels to the card front.
 On the inside I stamped the dandelion image from the Dandelion Wishes stamp set in Soft Sea Foam Ink in the center of a Very Vanilla panel. I stamped the sentiment with the Stampin’ Up Seasoned With Kindness stamp set over the dandelion image in Pacific Point Ink. I adhered the Very Vanilla panel to a Pacific Point mat using Snail then to the Thick Very Vanilla card base using Multipurpose Liquid Glue.
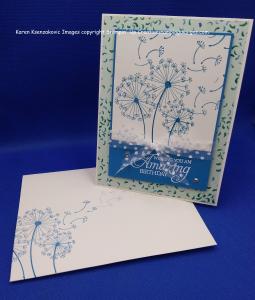
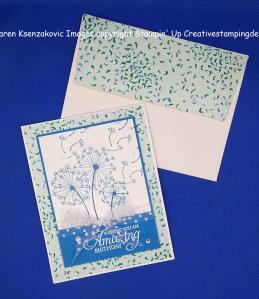
To finish my card I decorated a Medium Very Vanilla Envelope. I stamped the dandelion image from Dandelion Wishes stamp set on the envelope front. I adhered a piece of Garden Impressions DSP to the envelope flap.
Thank you for stopping by my blog today. I hope you like my quick and easy card and will give it a try. Happy Stamping.
If you need any stamping supplies, I’d be very happy to be your Demonstrator. Just click here to go directly to my online store or drop me an email if you have any questions.
MY CURRENT HOST CODE IS: Q2B3H6HZ
Happy Stamping, Karen!
****************************************************************************************************
Paper Pumpkin and Animal Expedition Go Wild for Valentine’s Day
Today is the last day to sign up for the Paper Pumpkin Subscription to be sure to get the January Valentine Kit.
January’s Paper Pumpkin Kit is a Valentine Kit called Be Mine. It combines everything you love about Paper Pumpkin-style treat packaging with adorable critter coordination in the popular Animal Expedition Kit!
About the Kit
January’s Paper Pumpkin kit is a Valentine kit coordinates with the Animal Expedition Suite. Here are a few more details:
- Makes 24 adorable Valentine’s treat packages
- Coordinating colors: Crumb Cake, Flirty Flamingo, Lemon Lime Twist, Melon Mambo, Petal Pink, and Pool Party
Subscribers must have an active subscription by January 10, 2019 to receive the Be Mine, Valentine kit.
Supplies are limited, so don’t wait—subscribe today!
In the event of supplies running out, Stampin’ Up! will end the subscription period early and stop taking new subscribers for January.
If you’re interested in subscribing to Paper Pumpkin yourself, you can either sign up for a subscription where you are billed monthly for your kit or you can purchase a prepaid subscription in my online store. Just click here to go directly to my online store. To see more information and sign up for the monthly subscription click here.
****************************************************************************************************
Card stock cuts for this project:
- Thick Very Vanilla Cardstock 4 1/4″ X 11″ (card base scored and folded at 5 1/2″)
- Pacific Point Cardstock 3 3/8″ X 4 5/8″ (artwork mat), 4 1/8″ X 5 3/8″ (inner liner mat)
- Very Vanilla Cardstock 3 1/4″ X 3 1/4″ (artwork), 4″ X 5 1/4″ (inner liner)
- Garden Impressions Designer Series Paper 4 1/8″ X 5 3/8″ (card front), piece for envelope flap
****************************************************************************************************
Product List


 Here is the CAS(E) This Sketch Challenge # 303.
 Here is what I came up with for the 2 challenges. Take a look.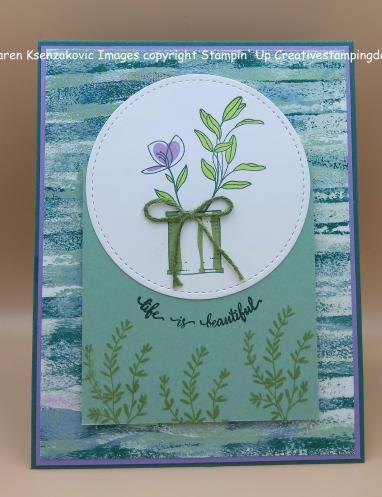
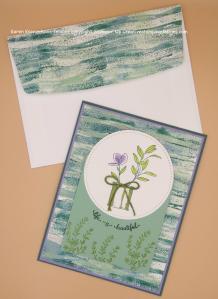
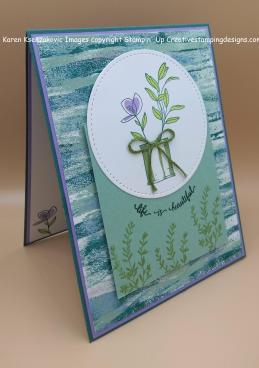 On a piece of Whisper White cardstock I stamped 2 of the plant images from the Stampin’ Up Seasoned With Kindness Host Exclusive stamp set. I first stamped the outlines in Tranquil Tide Ink. I then stamped the inside of the leaves in Lemon Lime Twist Ink and the inside of the flower in Highland Heather Ink. I stamped the inside of the flower-pot in Pear Pizzazz Ink. I did all the stamping using my Stamparatus. It made lining everything up very easy. Using my Big Shot I cut the artwork out using the circle from the Stitched Shapes Framelits Dies.
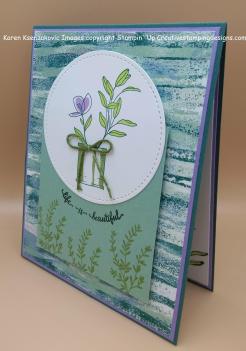 I adhered the circle to a small piece of Mint Macaron cardstock using Snail. I stamped the sentiment from the Stampin’ Up Easter Beauty stamp set in Tranquil Tide Ink around the bottom of the circle. I stamped another plant image from the Seasoned With Kindness stamp set in Pear Pizzazz Ink along the bottom of the Mint Macaron panel. I adhered the artwork to the card front using Stampin’ Dimensionals. I then took a piece of Whisper White Bakers Twine and colored it using my Pear Pizzazz Ink. I tied a small bow and attached it to the flower pot using a Glue Dot.
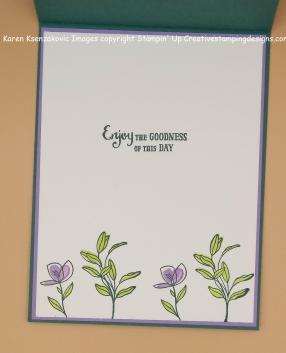 On the inside I stamped the plant images from the Seasoned With Kindness stamp set along the bottom of a Whisper White panel the same way I stamped them on the card front. I stamped the sentiment from the same stamp set in Tranquil Tide Ink in the center of the panel and adhered it to a Highland Heather mat using Snail. I then adhered it to the Tranquil Tide card base using Multipurpose Liquid Glue.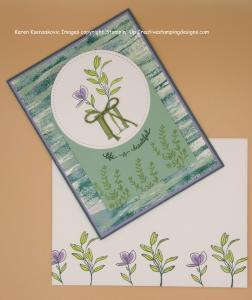




 Here is what I came up with for the combined challenge. Sometimes we get so hung up with the new catalogs that come out that we forget about the Annual Catalog that still has some beautiful stamp sets. I thought this would make a perfect Father’s Day card. Take a look.
 I started with a panel of Very Vanilla cardstock. I stamped the barn image from the Stampin’ Up Heartland stamp set in Early Espresso Ink. Using my Aqua Painter I water colored the sky in Balmy Blue Ink. I lightly colored the trees and bushes in with Calypso Coral and So Saffron Inks and the windmill in with Smoky Slate Ink, all using my Aqua Painter. I adhered the artwork panel to an Early Espresso mat using Snail.
 On a small panel of Very Vanilla cardstock I stamped the little boy and the ducks from the Heartland stamp set in Early Espresso Ink. Again using my Aqua Painter, I colored the ducks in So Saffron and Calypso Coral Inks. I colored the little boy in with my Balmy Blue and Ivory Stampin’ Blends Markers and I colored the stick in with my Early Espresso Stampin’ Write Marker. Using my Big Shot I cut the image out using my Layering Circles Framelits Dies. I edged the circle using my Early Espresso Stampin’ Write Marker.
 On the inside I stamped the barn image from the Heartland stamp set in Early Espresso Ink, stamping off twice, in the center of a Very Vanilla panel. I stamped the sentiment from the Stampin’ Up Colorful Seasons stamp set in Early Espresso Ink. I adhered the Very Vanilla panel to an Early Espresso mat using Snail. I then adhered it to the Smoky Slate card base using Multipurpose Liquid Glue.


 Here is what I came up with for this Sketch and Thank you Challenge. Take a look.
 I started with a Calypso Coral card front and using my Big Shot I embossed it with the Swirls & Curls Textured Impressions Embossing Folder. I adhered the card front to a Calypso Coral card base using Multipurpose Liquid Glue.
 On a piece of Whisper White cardstock I stamped the image from the Stampin’ Up Bee Thankful stamp set in Tuxedo Black Memento Ink. I colored the image in using my Calypso Coral, Daffodil Delight and Granny Apple Green Stampin’ Blends Markers. To get the shading on the thanks, I first colored with my Light Calypso Coral Stampin’ Blends Marker. I then colored the bottom with the Dark Calypso Coral Stampin’ Blends Marker and then blended it with my Light Calypso Coral Stampin’ Blends Marker. I adhered the artwork to a Granny Apple Green mat using Snail. I adhered a piece of the Daffodil Delight 1/4″ Organdy Ribbon across the bottom of the artwork. I adhered the artwork to the card front using Stampin’ Dimensionals.
 On a scrap piece of Whisper White cardstock I stamped the so much sentiment from the Stampin’ Up A Big Thank You stamp set in Calypso Coral Ink. I cut the ends on an angle using my Paper Snips and adhered it below the artwork using Mini Stampin’ Dimensionals. I added a Granny Apple Green Glitter Enamel Dot to the small strip.


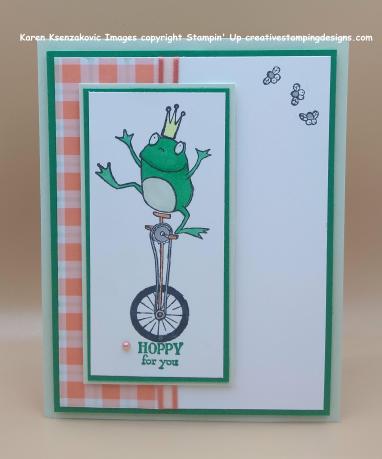 I started with a piece of Grapefruit Grove Gingham Gala 6 X 6 Designer Series Paper. Using my Soft Sea Foam Stampin’ Blends Marker I drew lines between the checks to make it look like plaid. I adhered a small piece of the DSP to the left side of a Whisper White card front using Snail. I wrapped a piece of the Grapefruit Grove 1/4″ Organdy Ribbon around the card front on the seem. I adhered the card front to a Call Me Clover mat using Multipurpose Liquid Glue. In the upper right corner of the Whisper White panel, I stamped the flies from the So Hoppy Together stamp set in Tuxedo Black Memento Ink and colored them in using my Smoky Slate Stampin’ Blends Marker.
 I adhered the matted artwork to the card front using Stampin’ Dimensionals and the card front to a Soft Sea Foam card base using Stampin’ Dimensionals. I added 1 Grapefruit Grove Share What You Love Artisan Pearl next to the sentiment.
 On the inside Whisper White panel I stamped the frog from So Hoppy Together stamp set on the bottom portion of the panel and the flies from the same set by the frog. I colored it in the same as I did for the front of the card. I adhered a small strip of the Gingham Gala 6 X 6 DSP to the bottom of the panel. I stamped the sentiment from the Postcard Pals stamp set in Call Me Clover in the center of the panel. I adhered the Whisper White panel to a Call Me Clover mat using Snail, then adhered it to the Soft Sea Foam card base using Multipurpose Liquid Glue.


 Their challenge was to use Glossy Paper. Here is what I came up with. Take a look.
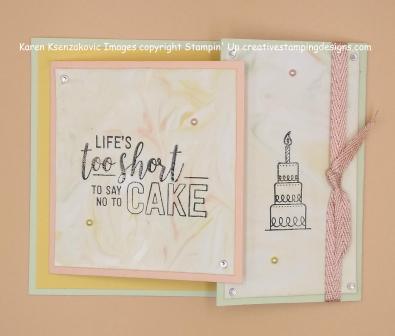 I started with 2 pieces of Glossy White cardstock and did the Shaving Cream Technique on them using Petal Pink, So Saffron and Soft Sea Foam Stampin’ Ink Refills. Once the paper was dry, I stamped the sentiment and the cake from Stampin’ Up Amazing Life stamp set in Tuxedo Black Memento Ink on them and let the ink dry completely. Once they were dry I adhered the panel with the sentiment onto the Petal Pink cardstock and the panel with the cake onto the Soft Sea Foam cardstock.
 I adhered the So Saffron panel to the Soft Sea Foam panel using Multipurpose Liquid Glue. I then adhered the Petal Pink cardstock to a So Saffron panel using Multipurpose Liquid Glue.
 I wrapped a piece of Petal Pink Metallic Ribbon around the Soft Sea Foam side and tied a knot. I secured the knot with a Glue Dot. I added some Share What You Love Artisan Pearls and Clear Rhinestone Basic Jewels to the Glossy White artwork panels.
 On the inside on a Whisper White panel I stamped the Happy Birthday from the Amazing Life stamp set in Tuxedo Black Memento Ink in the center. I stamped the scroll from the same stamp set above the sentiment in Soft Sea Foam Ink. I adhered the Whisper White panel to the inside of the Petal Pink using Multipurpose Liquid Glue.


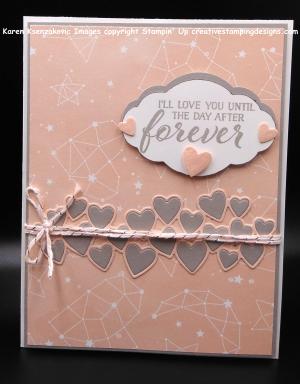
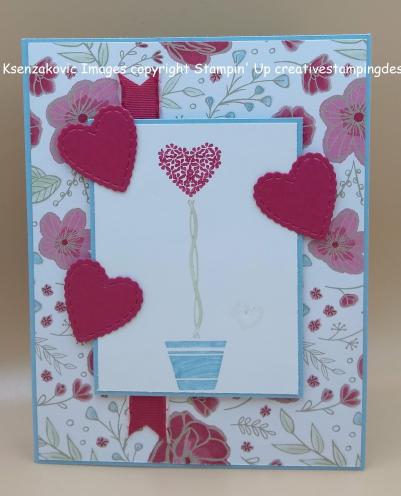 I started with a Balmy Blue card base and adhered a piece of the beautiful All My Love Designer Series Paper to the front using Snail. I then adhered a piece 1/2″ Lovely Lipstick Ribbon from All My Love Ribbon Combo Pack (available in just 2 days).
 Using my Big Shot I cut out 3 of the smallest hearts from the Be Mine Stitched Framelits Dies in Lovely Lipstick cardstock. I adhered the heats to the card front using Stampin’ Dimensionals.
 On the inside on a Whisper White panel, I stamped the heart from the Vertical Greetings stamp set in Lovely Lipstick Ink stamping off 3 times to get a very light image. I stamped the sentiment from the Stampin’ Up Forever Lovely stamp set (available January 3, 2019), in Lovely Lipstick Ink. I adhered the Whisper White panel to a Lovely Lipstick mat using Snail then to the Balmy Blue card base using Multipurpose Liquid Glue.