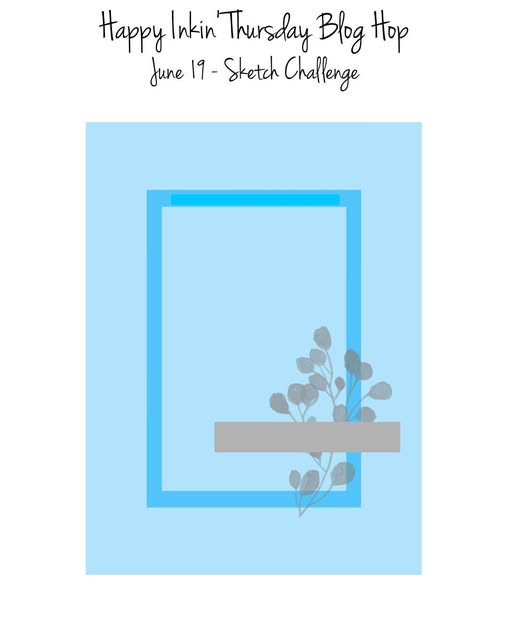
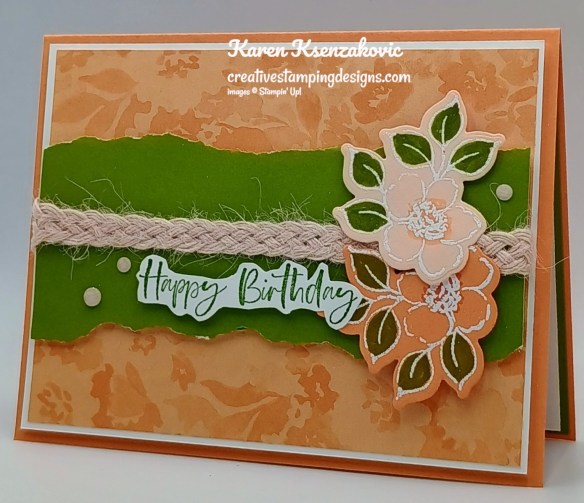
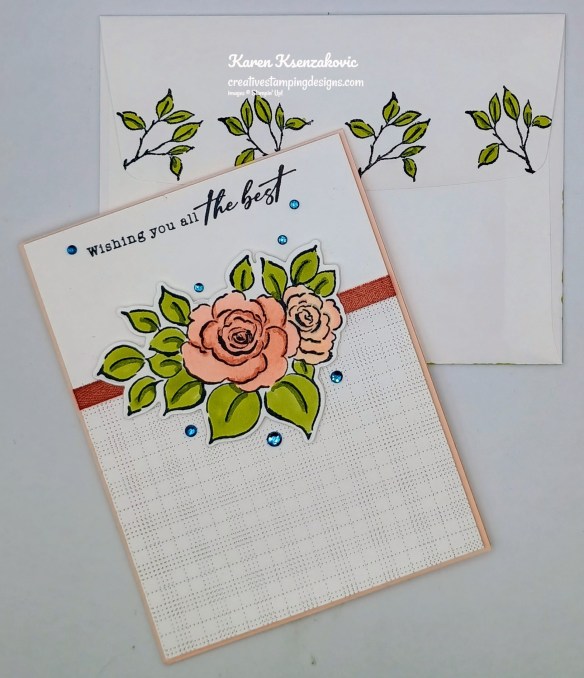
Good Thursday morning stamping friends Happy Juneteenth!! It also happens to be my son’s 30th birthday, I’m not sure where the time went that he could be 30 already. Welcome to our Happy Inkin’ Thursday Blog Hop. If you are starting with me, thank you. I hope you will stop by everyone’s blog to see what they have created this week. If you are hopping over from Mary’s blog, thank you for stopping by. This week we have Sketch Challenge. If you’d like to see a quick video of how I made this card, Click Here to go to my Instagram Reels. Here is my card using this week’s sketch.
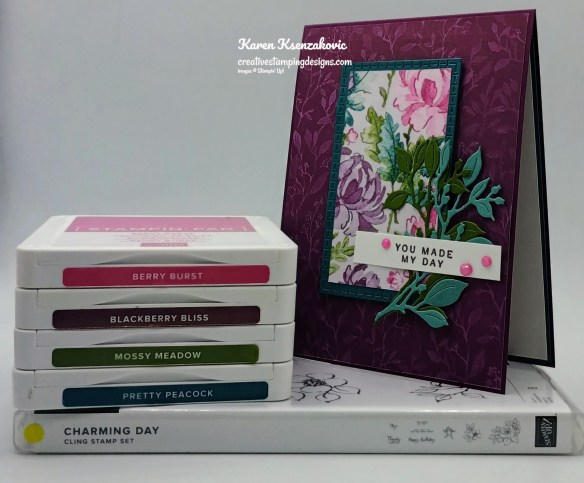
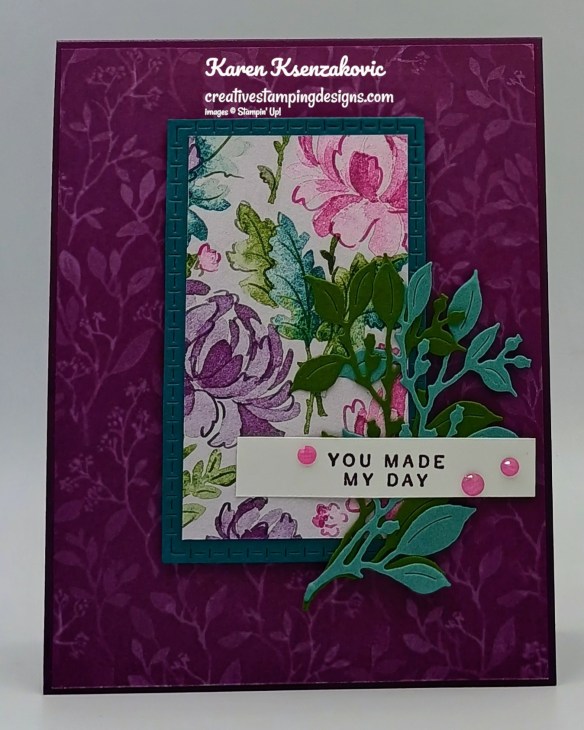
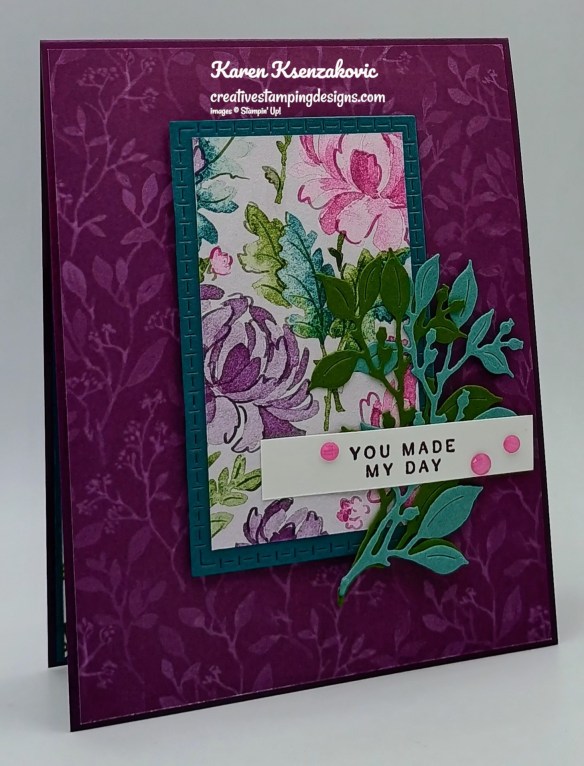
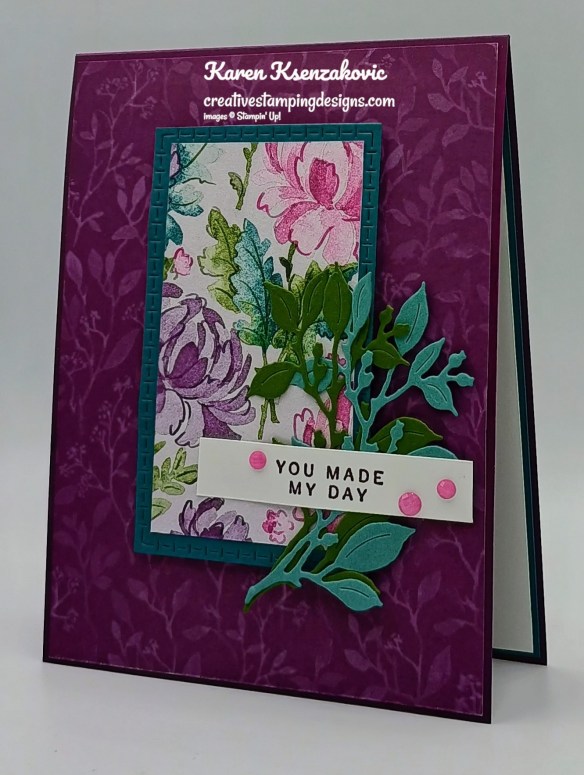
I used the Stampin’ Up! Charming Day Bundle along with the Floral Charm Designer Series Paper (both available July 1st) and Textured Notes Dies for my card today.
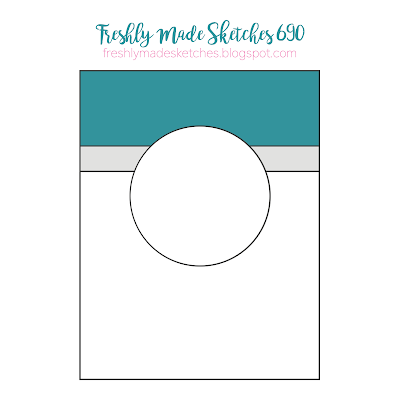
This is our sketch for this week.
Adhere a panel of Floral Charm DSP to a Blackberry Bliss card base with Stampin’ Seal.
Cut a panel of Pretty Peacock using the Textured Notes Dies. Adhere a panel of Floral Charm DSP to the center of the die cut frame.2
Using the larger leaf die from the Charming Day Dies, cut 1 from a panel of Lost Lagoon and 1 from a panel of Mossy Meadow. Adhere the die cuts to the card front with Glue Dots. Stamp the sentiment from Charming Day stamp set in Blackberry Bliss Ink on a panel of Basic White. Adhere the sentiment to the card front, over the die cuts, with Stampin’ Seal and a Stampin’ Dimensional. Add a few Charming Shimmer Faceted Gems to the card front.
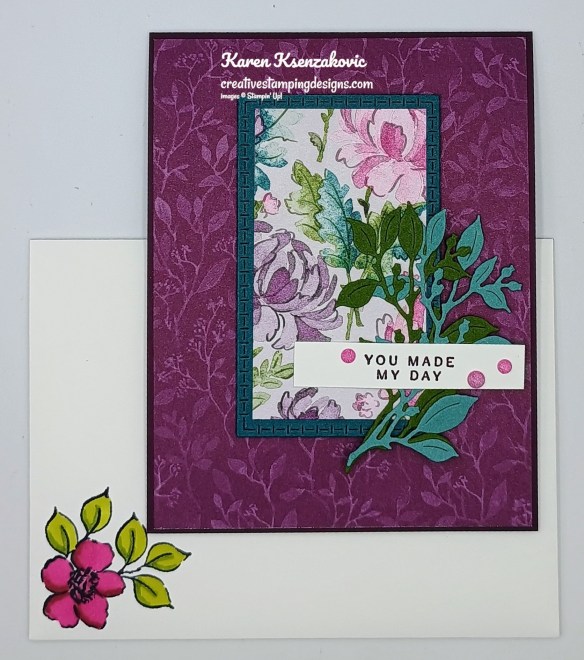
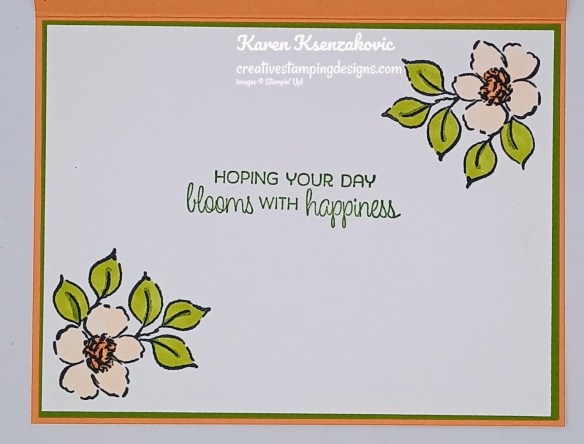
On a panel of Basic White, stamp the sentiment from Charming Day stamp set in Blackberry Bliss Ink. stamp the small flower image from Charming Day stamp set in Tuxedo Black Ink on the top corner. Stamp the leaf image from Charming Day stamp set in Mossy Meadow Ink on the bottom corner. Color the images using Berry Burst, Blackberry Bliss, Old Olive and Mossy Meadow Stampin’ Blends Markers. Adhere the Basic White panel to a Pretty Peacock mat then to the inside of the Blackberry Bliss card base.
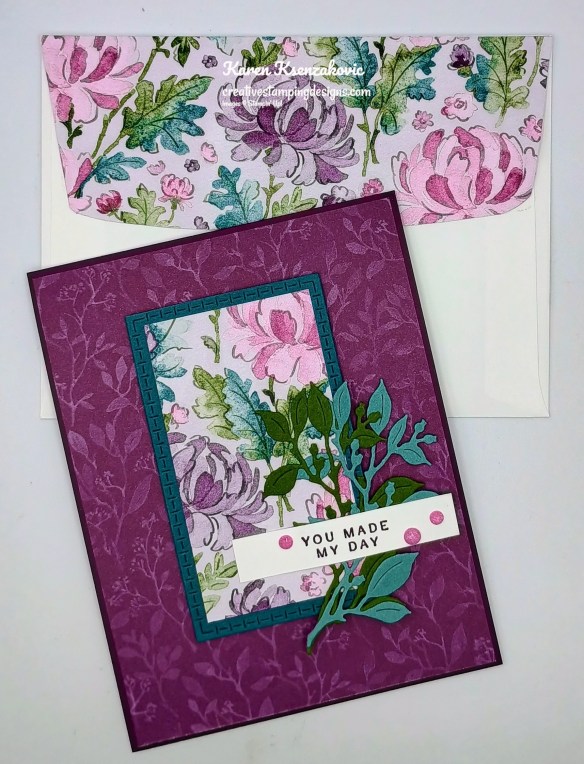
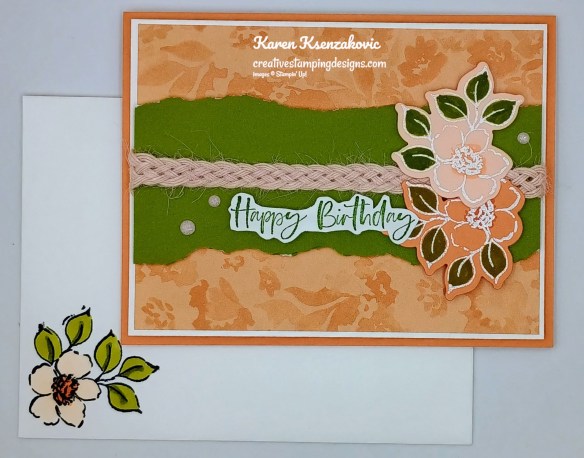
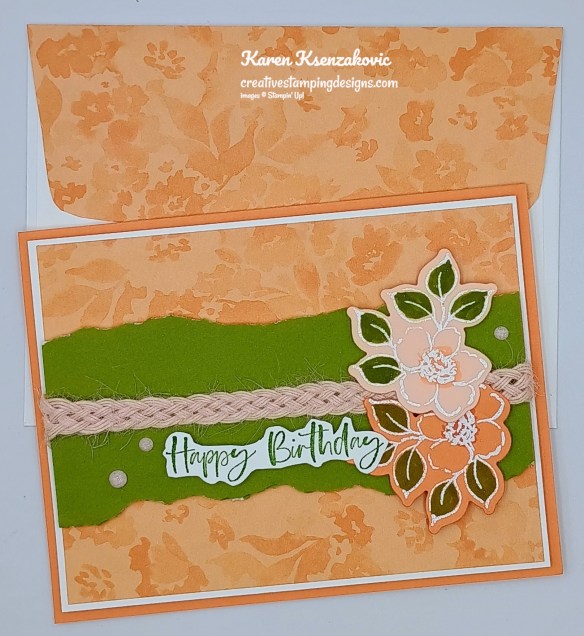
Decorate a Basic White Medium Envelope to complete your card. Stamp the small flower image from the Charming Day stamp set in Tuxedo Black Ink on the envelope front. Color the image with Berry Burst, Blackberry Bliss, Old Olive and Mossy Meadow Stampin’ Blends Markers. Adhere a panel of Floral Charm DSP to the envelope flap.
Thank you for stopping by my blog today. Now that you’ve seen my card, let’s get on with the hop! Click the button below to hop over to see what Tara has created. Happy Hoping!!
Just in case you get lost along the way, here is a list of the team members involved in the hop today.
If you need any stamping supplies, I’d love to be your Demonstrator. Just click HERE to go directly to my online store or drop me an email if you have any questions.
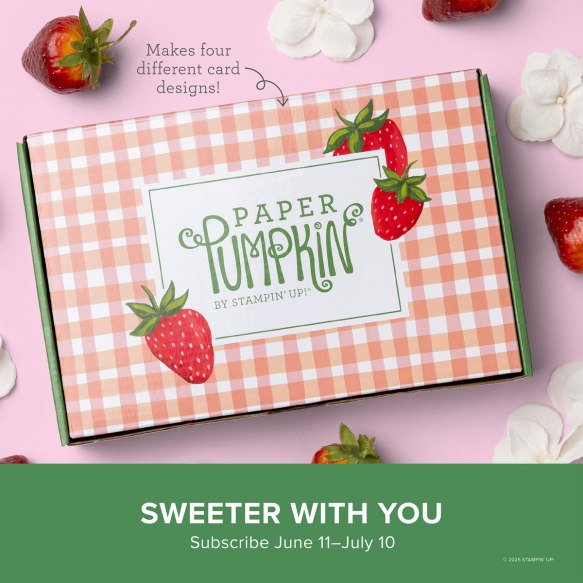
Craft sweet handmade cards featuring sun-kissed strawberries and breezy gingham. • Makes 8 cards: 2 each of 4 designs with 8 coordinating envelopes • Precut paper pieces and vellum accents • Hand-painted card base designs • Coordinating colors: Garden Green (Classic Stampin’ Spot), Granny Apple Green, Pool Party, Poppy Parade, Strawberry Slush, Timid Tiger
Subscribe to the June Paper Pumpkin Kit between 11 June and 10 July by clicking here!
Don’t miss the coordinating Circle of Seasons Dies Add-On!
Make the most of your Paper Pumpkin kits with the Circle of Seasons Dies add-on! Quickly and cleanly cut out a strawberry with a blossom, a circle, a leaf, or an acorn to elevate your crafting projects. These additional dies are designed to work with THREE Paper Pumpkin Kits: the Sweeter with You Paper Pumpkin Kit, the Farmhouse Florals Paper Pumpkin Kit, and the Fall for Toile Paper Pumpkin Kit. Pair these dies with other Stampin’ Up! products for even more creative options! This exclusive add-on (item 167277) coordinates with the three upcoming kits! Paper Pumpkin subscribers can purchase it beginning June 11. Add-on is available only while supplies last, so it’s best to shop early!
DETAILS – 4 dies – Largest die: 2-1/2″ x 1-1/4″ (6.4 x 3.2 cm) – Use with a Stampin’ Cut & Emboss Machine (sold separately)
You must be a current Paper Pumpkin subscriber to purchase this item. To become a subscriber, visit www.stampinup.com/paperpumpkin.
Note: Supplies may be limited toward the end of the subscription period.
Good Wednesday morning stamping friends. It’s the middle of the week already and there are less than 2 weeks left of the Suite Sale. I hope you are grabbing those items you want at 50% off.
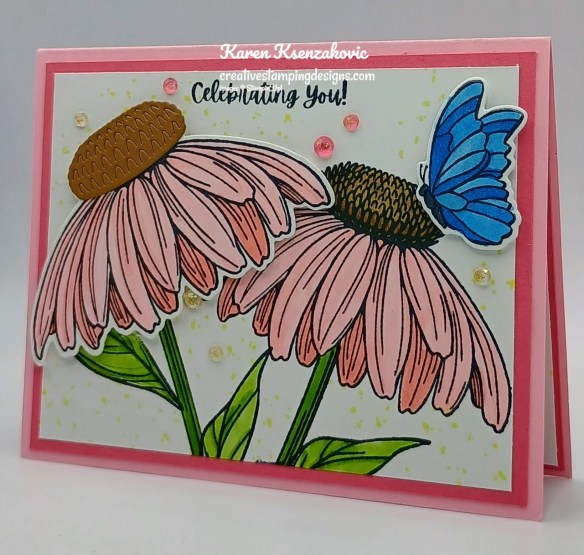
I played with a bundle for today’s card that I just received. I was very excited to get this one and honestly didn’t realize just how big the flower was. I’m loving it!! If you’d like to see a quick video of how I made this card, Click Here to go to my Instagram Reels. Here’s my card for today.
I used the Stampin’ Up! Coneflower Celebrations Bundle for my card today.
On a panel of Basic White, stamp the coneflower and butterfly images from the Stampin’ Up! Coneflower Celebrations Photopolymer Stamp Set in Tuxedo Black Ink. Color the coneflowers with Pecan Pie and Pretty in Pink Stampin’ Blends Markers. Color the butterfly with Azure Afternoon Stampin’ Blends Markers. Cut the images out with the Coneflower Celebrations Dies. Cut the flower center using the Coneflower Celebrations Dies from a panel of Pecan Pie. Adhere the flower center to the top of the die cut flower with Stampin’ Seal.
On another panel of Basic White, stamp the coneflower image from the Coneflower Celebrations stamp set in Tuxedo Black Ink on the right side of the panel. Color the image with Pecan Pie and Pretty in Pink Stampin’ Blends Markers. Stamp the stem image from the Coneflower Celebrations stamp set on the flower in Tuxedo Black Ink. Stamp the stem image again next to the flower image. Stamp the leaf images on the stems in Tuxedo Black Ink. Color the stem and leaves in Granny Apple Green Stampin’ Blends Markers. Randomly stamp the splatter image from the Coneflower Celebrations stamp set in Lemon Lolly Ink around the card front. Stamp the sentiment from the Coneflower Celebrations stamp set in Tuxedo Black Ink on the top of the panel.
Adhere the card front to a Strawberry Slush mat with Stampin’ Seal. Adhere the layered panel to a Pretty in Pink card base with Stampin’ Seal. Adhere the flower to the card front, overlapping the stamped flower a little, with Stampin’ Dimensionals. Adhere the butterfly to the card front on the stamped flower with Stampin’ Dimensionals. Add a few Strawberry Slush & Pretty in Pink Gems to the card front.
Stamp the sentiment from Coneflower Celebrations stamp set in Tuxedo Black Ink on a panel of Basic White. Stamp the butterfly image from the Coneflower Celebrations stamp set next to the sentiment in Tuxedo Black Ink. Color the butterfly with Azure Afternoon Stampin’ Blends Markers. Randomly stamp the splatter image from the Coneflower Celebrations stamp set in Lemon Lolly Ink around the sentiment and butterfly. Adhere the Basic White pane to a Strawberry Slush mat then to the inside of the Pretty in Pink card base.
Decorate a Basic White Medium Envelope to finish your card. Stamp the coneflower image on the envelope front in Tuxedo Black Ink and color the image with Pecan Pie and Pretty in Pink Stampin’ Blends Markers. Stamp the butterfly image from Coneflower Celebrations stamp set in Tuxedo Black Ink on the envelope flap. Color the image with Azure Afternoon Stampin’ Blends Markers. Randomly stamp the splatter image from the Coneflower Celebrations stamp set in Lemon Lolly Ink on the envelope front and flap.
Thank you for stopping by my blog today. I hope you like the card and will give it a try. Happy Stamping!!
If you need any stamping supplies, I’d love to be your Demonstrator. Just click HERE to go directly to my online store or drop me an email if you have any questions.
June 3-30, all available suites and suite products from the 2025–2026 Annual Catalog and Online Exclusives are buy one, get one 50% off! If you’ve had your eye on a new suite from the annual catalog or you really like the look of a stamp set from an Online Exclusives suite, you don’t have to choose—you can get both!
Here are the promotion details:
All available suites and suite products from the 2025–2026 Annual Catalog and Online Exclusives are buy one, get one 50% off.
When you shop the sale, the 50% off discount will apply to the lower-priced item (for example, if you buy a suite collection and a stamp set from a suite, the suite would be full price, and the stamp set would be 50% off).
Suite collections are available if all items are in stock; if all items are not in stock, you can still shop the available suite products.
You don’t have to buy a suite and suite products all from the same suite collection for the discount to apply. You can buy any suite products from any suite.
The discount will appear in your cart once you’ve added two items within the sale parameters to your cart.
Products are available only while supplies last.
See and shop all qualifying suites in the Online Store
The sale begins June 3, 2025 at 12:01 AM MT.
The sale ends June 30, 2025 at 11:59 PM MT.
Let me know if you have any questions. YAY for an awesome sale! Get your lists ready and get your orders placed between June 3-30!!
Craft sweet handmade cards featuring sun-kissed strawberries and breezy gingham. • Makes 8 cards: 2 each of 4 designs with 8 coordinating envelopes • Precut paper pieces and vellum accents • Hand-painted card base designs • Coordinating colors: Garden Green (Classic Stampin’ Spot), Granny Apple Green, Pool Party, Poppy Parade, Strawberry Slush, Timid Tiger
Subscribe to the June Paper Pumpkin Kit between 11 June and 10 July by clicking here!
Don’t miss the coordinating Circle of Seasons Dies Add-On!
Make the most of your Paper Pumpkin kits with the Circle of Seasons Dies add-on! Quickly and cleanly cut out a strawberry with a blossom, a circle, a leaf, or an acorn to elevate your crafting projects. These additional dies are designed to work with THREE Paper Pumpkin Kits: the Sweeter with You Paper Pumpkin Kit, the Farmhouse Florals Paper Pumpkin Kit, and the Fall for Toile Paper Pumpkin Kit. Pair these dies with other Stampin’ Up! products for even more creative options! This exclusive add-on (item 167277) coordinates with the three upcoming kits! Paper Pumpkin subscribers can purchase it beginning June 11. Add-on is available only while supplies last, so it’s best to shop early!
DETAILS – 4 dies – Largest die: 2-1/2″ x 1-1/4″ (6.4 x 3.2 cm) – Use with a Stampin’ Cut & Emboss Machine (sold separately)
You must be a current Paper Pumpkin subscriber to purchase this item. To become a subscriber, visit www.stampinup.com/paperpumpkin.
Note: Supplies may be limited toward the end of the subscription period.
Good Tuesday morning stamping friends. I hope your week has started off well.
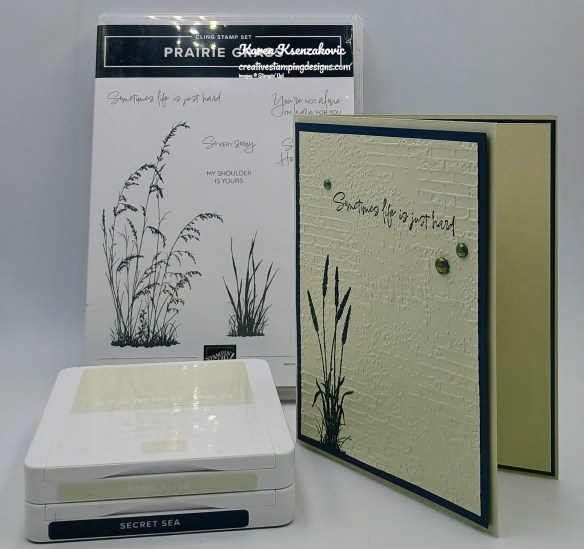
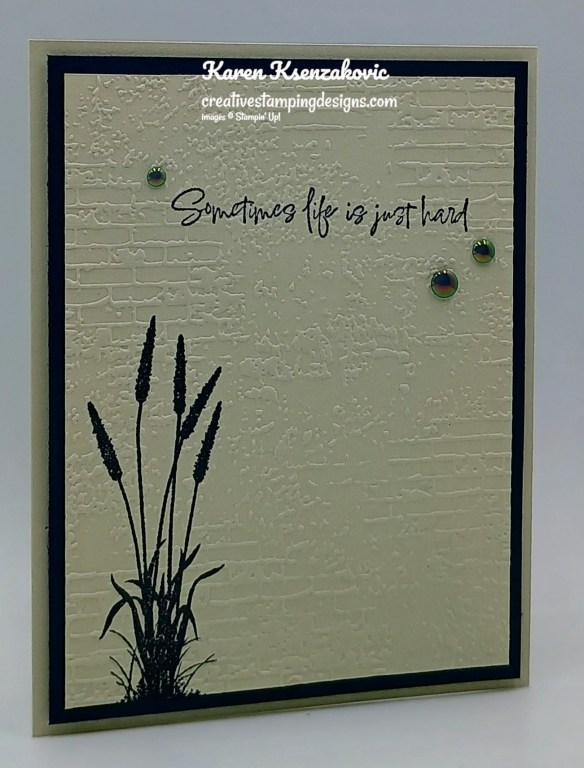
I have a sneak peek for you today of a new Online Exclusive set that will be available starting July 1st. This was one of those sets that I knew I needed as soon as I saw it. If you’d like to see a quick video of how I made this card, Click Here to go to my Instagram Reels. Here’s my card for today.
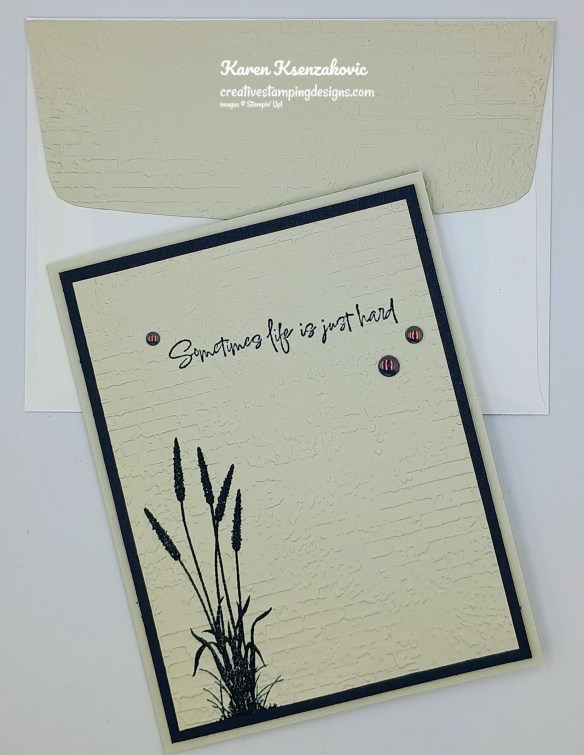
I used the new Stampin’ Up! Prairie Grass Cling Stamp Set (available July 1) along with the Exposed Brick 3D Embossing Folder for my card today.
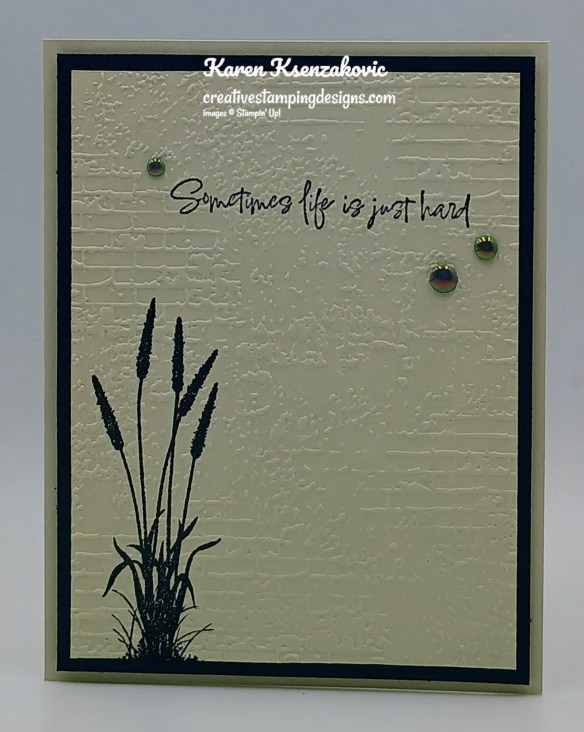
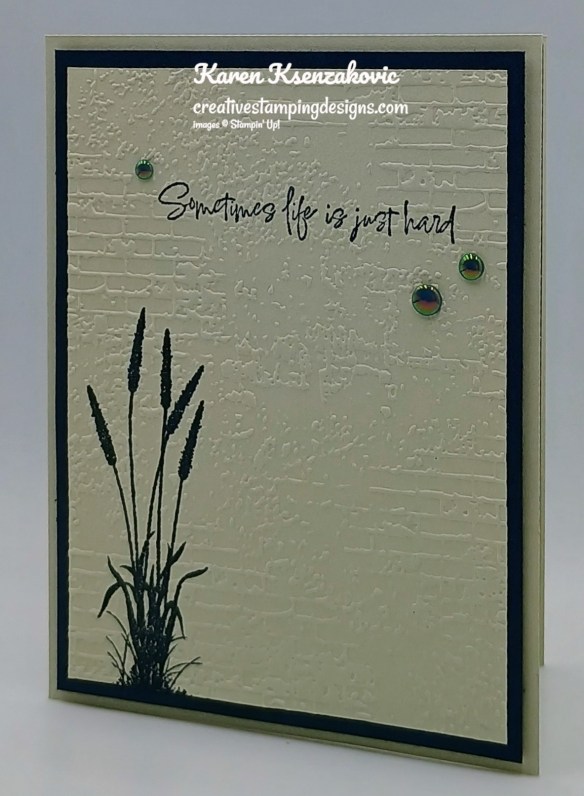
Stamp the cattail image from the Prairie Grass stamp set in Secret Sea Ink on the bottom of a Basic Beige card front. Stamp the sentiment from Prairie Grass stamp set in Secret Sea Ink on the top of the panel.
Emboss the card front using the Exposed Brick EF. Adhere the embossed panel to a Secret Sea mat with Liquid Glue.
Adhere the layered panel to a Basic Beige card base with Stampin’ Dimensionals. Add a few 2025 – 2027 In-Color Flat Pearls to the card front.
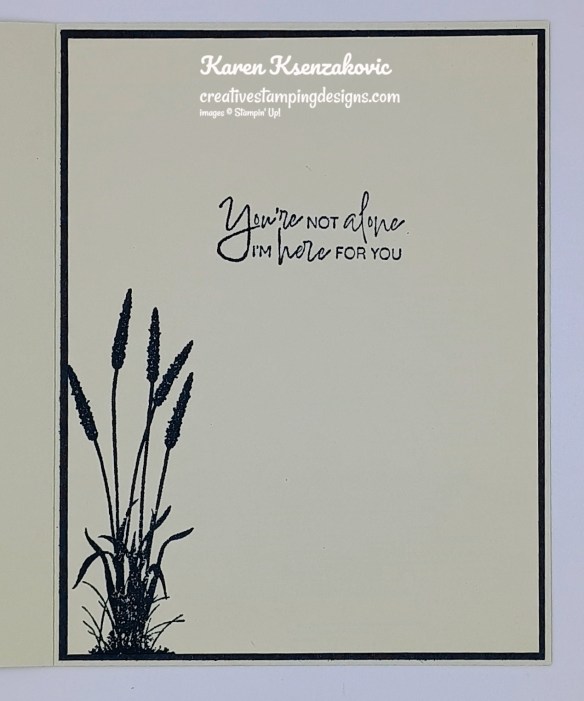
Stamp the sentiment from Prairie Grass stamp set in Secret Sea Ink on a panel of Basic Beige. Stamp the cattail image from Prairie Grass stamp set in Secret Sea Ink on the bottom of the panel. Adhere the Basic Beige panel to a Secret Sea mat then to the inside of the Basic Beige card base.
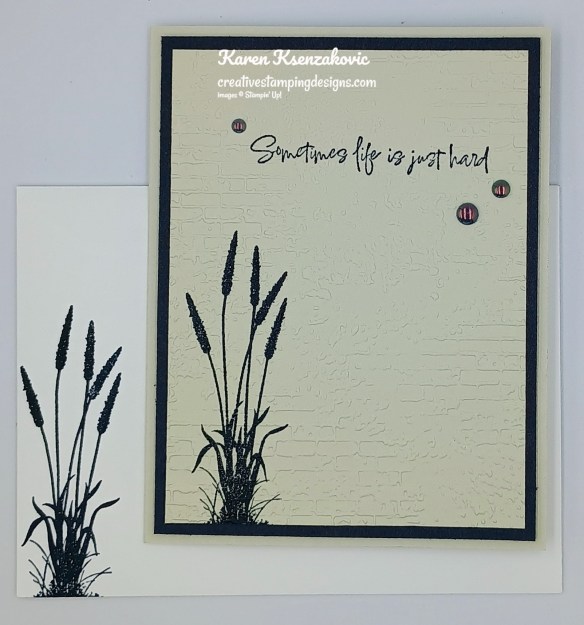
Decorate a Basic White Medium Envelope to finish the card. Stamp the cattail image from Prairie Grass stamp set in Secret Sea Ink on the envelope front. Emboss a panel of Basic Beige using the Exposed Brick EF. Adhere the embossed panel to the envelope flap.
Thank you for stopping by my blog today. I hope you like the card and will give it a try. Happy Stamping!!
If you need any stamping supplies, I’d love to be your Demonstrator. Just click HERE to go directly to my online store or drop me an email if you have any questions.
June 3-30, all available suites and suite products from the 2025–2026 Annual Catalog and Online Exclusives are buy one, get one 50% off! If you’ve had your eye on a new suite from the annual catalog or you really like the look of a stamp set from an Online Exclusives suite, you don’t have to choose—you can get both!
Here are the promotion details:
All available suites and suite products from the 2025–2026 Annual Catalog and Online Exclusives are buy one, get one 50% off.
When you shop the sale, the 50% off discount will apply to the lower-priced item (for example, if you buy a suite collection and a stamp set from a suite, the suite would be full price, and the stamp set would be 50% off).
Suite collections are available if all items are in stock; if all items are not in stock, you can still shop the available suite products.
You don’t have to buy a suite and suite products all from the same suite collection for the discount to apply. You can buy any suite products from any suite.
The discount will appear in your cart once you’ve added two items within the sale parameters to your cart.
Products are available only while supplies last.
See and shop all qualifying suites in the Online Store
The sale begins June 3, 2025 at 12:01 AM MT.
The sale ends June 30, 2025 at 11:59 PM MT.
Let me know if you have any questions. YAY for an awesome sale! Get your lists ready and get your orders placed between June 3-30!!
Craft sweet handmade cards featuring sun-kissed strawberries and breezy gingham. • Makes 8 cards: 2 each of 4 designs with 8 coordinating envelopes • Precut paper pieces and vellum accents • Hand-painted card base designs • Coordinating colors: Garden Green (Classic Stampin’ Spot), Granny Apple Green, Pool Party, Poppy Parade, Strawberry Slush, Timid Tiger
Subscribe to the June Paper Pumpkin Kit between 11 June and 10 July by clicking here!
Don’t miss the coordinating Circle of Seasons Dies Add-On!
Make the most of your Paper Pumpkin kits with the Circle of Seasons Dies add-on! Quickly and cleanly cut out a strawberry with a blossom, a circle, a leaf, or an acorn to elevate your crafting projects. These additional dies are designed to work with THREE Paper Pumpkin Kits: the Sweeter with You Paper Pumpkin Kit, the Farmhouse Florals Paper Pumpkin Kit, and the Fall for Toile Paper Pumpkin Kit. Pair these dies with other Stampin’ Up! products for even more creative options! This exclusive add-on (item 167277) coordinates with the three upcoming kits! Paper Pumpkin subscribers can purchase it beginning June 11. Add-on is available only while supplies last, so it’s best to shop early!
DETAILS – 4 dies – Largest die: 2-1/2″ x 1-1/4″ (6.4 x 3.2 cm) – Use with a Stampin’ Cut & Emboss Machine (sold separately)
You must be a current Paper Pumpkin subscriber to purchase this item. To become a subscriber, visit www.stampinup.com/paperpumpkin.
Note: Supplies may be limited toward the end of the subscription period.
Basic Beige Cardstock 5 1/2″ x 8 1/2″(card base scored & folded at 4 1/4″), 3 3/4″ x 5″(card front), 4″ x 5 1/4″(inner liner), 2 1/4″ x 6″(envelope flap)
Secret Sea Cardstock 4″ x 5 1/4″(card front mat), 4 1/8″ x 5 3/8″(inner liner mat)
Good Monday morning stamping friends, welcome to a new week. How was your weekend? Did you do anything special for Father’s Day? It was a rainy weekend here, again, in NJ. Seems like it’s been raining every weekend. My husband made homemade pizza yesterday in his pizza oven. He made homemade pizza crust in the morning so it would be ready by dinner time. My basil is huge already, so we had fresh basil on it with fresh mozzarella and whatever other toppings we wanted. I think that was one of the best gifts I’ve given him, especially since we all enjoy it.
Today’s card is one that we made Tuesday night at our Stamping Studio. We did some mystery stamping where Jaimie gave us some measurements and talked us through putting our cards together. I decided to use some new products coming July 1st for my card. Here’s my card for today.
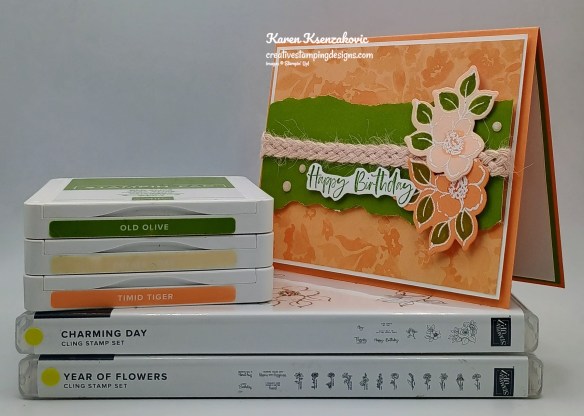
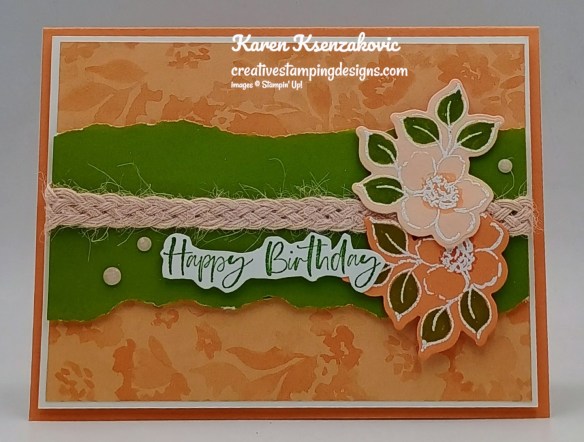
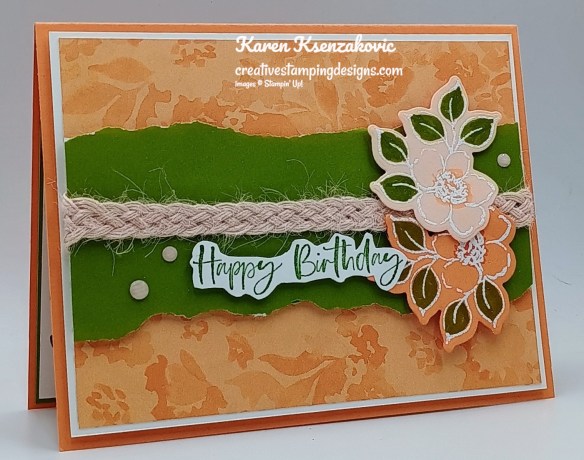
I used the new Stampin’ Up! Online Exclusive Floral Charm Suite Collection, available July 1 and the Stampin’ Up! Year of Flowers Cling Stamp Set for my card today.
Adhere a panel of Floral Charm Designer Series Paper to a Basic White mat with Stampin’ Seal. Adhere the layered panel to a Timid Tiger card base with Stampin’ Dimensionals.
Tear the panel of Old Olive Two-Tone Cardstock on the top and bottom. Adhere a piece of the Petal Pink 5/16″ Braided Trim around the panel and adhere it on the back with Tear & Tape. Adhere the torn panel to the card front with Stampin’ Dimensionals. Stamp the sentiment from the Stampin’ Up! Charming Day Cling Stamp Set in Old Olive Ink on a panel of Basic White. Fussy cut the sentiment with Paper Snips.
Stamp the smaller flower image from the Charming Day stamp setin Versamark Ink on a panel of Petal Pink and Timid Tiger. Sprinkle the images with White Embossing Powder and set it using the Heat Tool. Using Old Olive, Petal Pink and Timid Tiger Stampin’ Write Markers, color the leaves and flower centers. Cut the images out with the Charming Day Dies. Adhere the flowers to the card front with Stampin’ Dimensionals over the ribbon. Adhere the sentiment next to the flowers with Stampin’ Dimensionals. Add a few Charming Shimmer Faceted Dots to the card front.
Stamp the sentiment from the Year of The Flowers stamp set in Old Olive Ink on a panel of Basic White. Stamp the small flower image from the Charming Day stamp set in Tuxedo Black Ink on the corners of the Basic White panel. Color the images with Old Olive, Petal Pink and Timid Tiger Stampin’ Blends Markers. Adhere the Basic White panel to an Old Olive mat then to the inside of the Timid Tiger card base.
Decorate a Basic White Medium Envelope to finish your card. Stamp the small flower image from the Charming Day stamp set in Tuxedo Black Ink on the envelope front. Color the image with Old Olive, Petal Pink and Timid Tiger Stampin’ Blends Markers. Adhere a panel of Floral Charm DSP to the envelope flap.
Thank you for stopping by my blog today. I hope you like the card and will give it a try. Happy Stamping!!
If you need any stamping supplies, I’d love to be your Demonstrator. Just click HERE to go directly to my online store or drop me an email if you have any questions.
June 3-30, all available suites and suite products from the 2025–2026 Annual Catalog and Online Exclusives are buy one, get one 50% off! If you’ve had your eye on a new suite from the annual catalog or you really like the look of a stamp set from an Online Exclusives suite, you don’t have to choose—you can get both!
Here are the promotion details:
All available suites and suite products from the 2025–2026 Annual Catalog and Online Exclusives are buy one, get one 50% off.
When you shop the sale, the 50% off discount will apply to the lower-priced item (for example, if you buy a suite collection and a stamp set from a suite, the suite would be full price, and the stamp set would be 50% off).
Suite collections are available if all items are in stock; if all items are not in stock, you can still shop the available suite products.
You don’t have to buy a suite and suite products all from the same suite collection for the discount to apply. You can buy any suite products from any suite.
The discount will appear in your cart once you’ve added two items within the sale parameters to your cart.
Products are available only while supplies last.
See and shop all qualifying suites in the Online Store
The sale begins June 3, 2025 at 12:01 AM MT.
The sale ends June 30, 2025 at 11:59 PM MT.
Let me know if you have any questions. YAY for an awesome sale! Get your lists ready and get your orders placed between June 3-30!!
Craft sweet handmade cards featuring sun-kissed strawberries and breezy gingham. • Makes 8 cards: 2 each of 4 designs with 8 coordinating envelopes • Precut paper pieces and vellum accents • Hand-painted card base designs • Coordinating colors: Garden Green (Classic Stampin’ Spot), Granny Apple Green, Pool Party, Poppy Parade, Strawberry Slush, Timid Tiger
Subscribe to the June Paper Pumpkin Kit between 11 June and 10 July by clicking here!
Don’t miss the coordinating Circle of Seasons Dies Add-On!
Make the most of your Paper Pumpkin kits with the Circle of Seasons Dies add-on! Quickly and cleanly cut out a strawberry with a blossom, a circle, a leaf, or an acorn to elevate your crafting projects. These additional dies are designed to work with THREE Paper Pumpkin Kits: the Sweeter with You Paper Pumpkin Kit, the Farmhouse Florals Paper Pumpkin Kit, and the Fall for Toile Paper Pumpkin Kit. Pair these dies with other Stampin’ Up! products for even more creative options! This exclusive add-on (item 167277) coordinates with the three upcoming kits! Paper Pumpkin subscribers can purchase it beginning June 11. Add-on is available only while supplies last, so it’s best to shop early!
DETAILS – 4 dies – Largest die: 2-1/2″ x 1-1/4″ (6.4 x 3.2 cm) – Use with a Stampin’ Cut & Emboss Machine (sold separately)
You must be a current Paper Pumpkin subscriber to purchase this item. To become a subscriber, visit www.stampinup.com/paperpumpkin.
Note: Supplies may be limited toward the end of the subscription period.
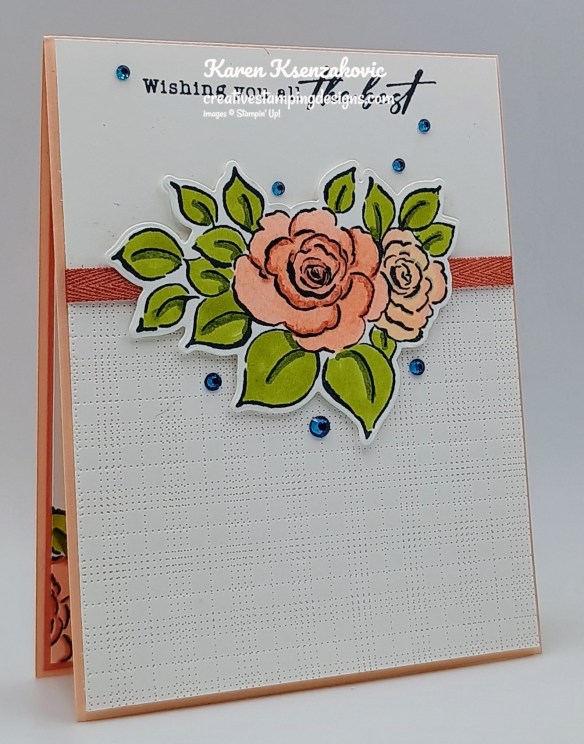
Good Sunday morning stamping friends. Is anyone doing anything special for Father’s Day? We don’t have any plans here. My husband wants to make homemade pizza in his pizza oven for dinner, so I don’t’ even have to cook. I’m hoping to get some time in my card studio today and maybe get myself a little ahead. We’ll see what the day brings, we’re supposed to get more rain, so it’s a perfect crafting day for me.
I played with a new Online Exclusive bundle coming July 1st for my card today. If you’d like to see a quick video of how I made this card, Click Here to go to my Instagram Reels. Here’s my card for today.
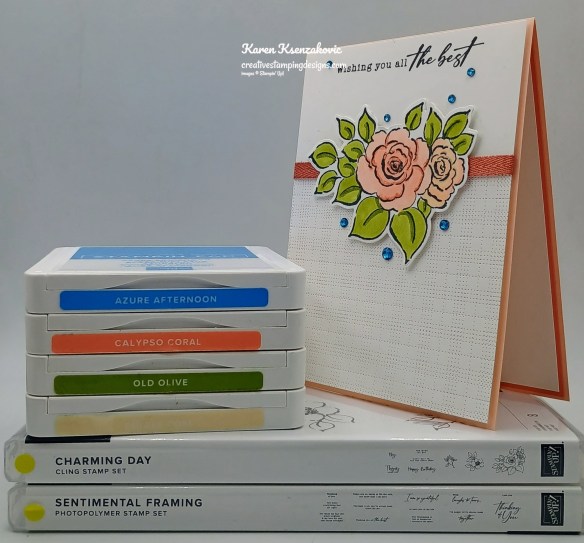
I used the new Stampin’ Up! charming Day Bundle (available July 1st) along with the Stampin’ Up! Sentimental Framing Photopolymer Stamp Set and Patterns of Friendship Die for my card today.
Using the Pattern of Friendship Die, emboss the bottom section of a Basic White card front first up and down then again side to side. Stamp the sentiment from Sentimental Framing stamp set in Tuxedo Black Ink on the top of the panel.
With the Dark Calypso Coral Stampin’ Blends Marker, color a piece of the White 1/4 Ribbon from the Misty Moonlight & White 1/4″ Starter Ribbon Pack. Adhere the ribbon to the card front, adhering it on the back with Stampin’ Seal. Adhere the Basic White card front to a Petal Pink card base with Stampin’ Dimensionals.
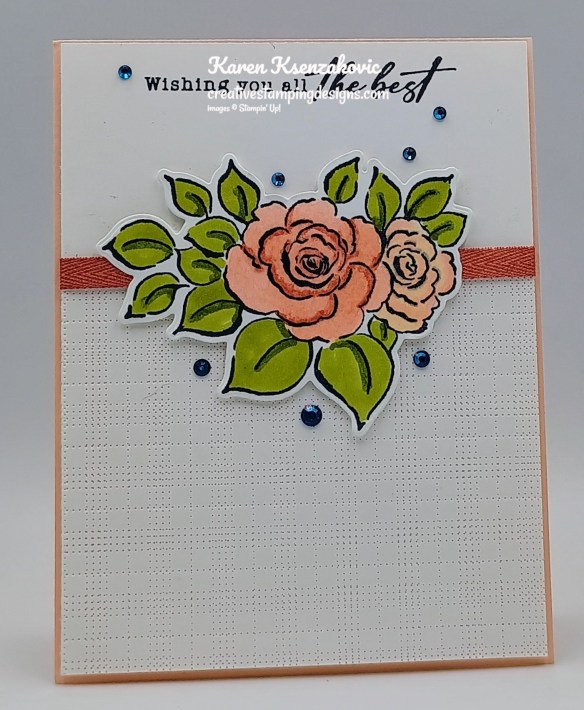
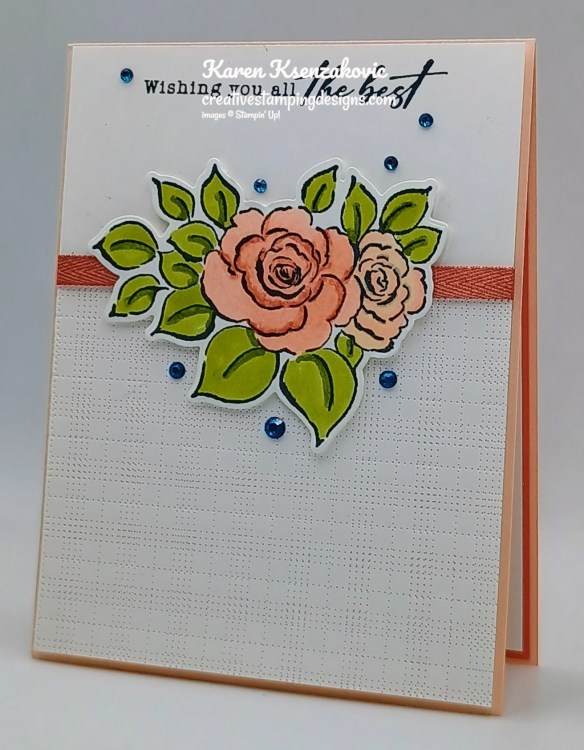
Stamp the large flower image from the Stampin’ Up! Charming Day Cling Stamp Set in Tuxedo Black Ink on a panel of Basic White. Color the image with Calypso Coral, Old Olive and Petal Pink Stampin’ Blends Markers. Cut the image out using the Charming Day Dies. Adhere the flower to the card front over the ribbon with Stampin’ Dimensionals. Color some Rhinestone Basic Jewels using the Dark Azure Afternoon Stampin’ Blends Marker. Adhere the Rhinestones to the card front.
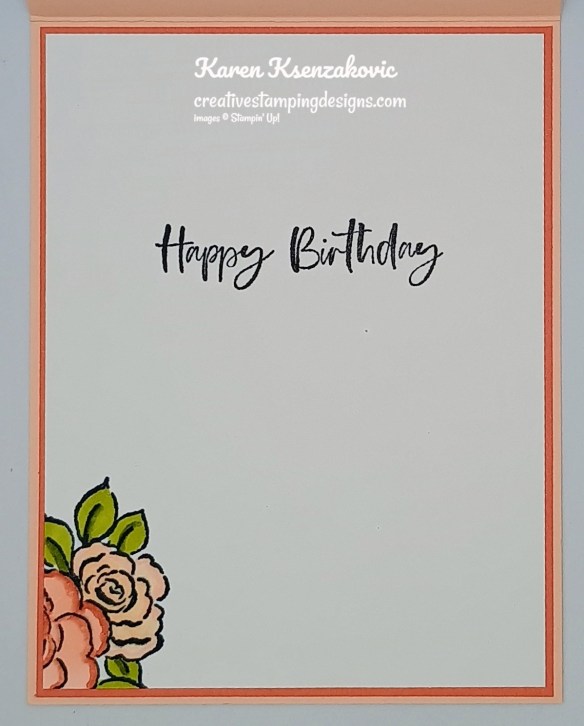
On a panel of Basic White, stamp the sentiment from the Charming Day stamp set in Tuxedo Black Ink. Stamp part of the flower image from the Charming Day stamp set in Tuxedo Black Ink on the bottom of the panel. Color the image with Calypso Coral, Old Olive and Petal Pink Stampin’ Blends Markers. Adhere the Basic White panel to a Calypso Coral mat then to the inside of the Petal Pink card base.
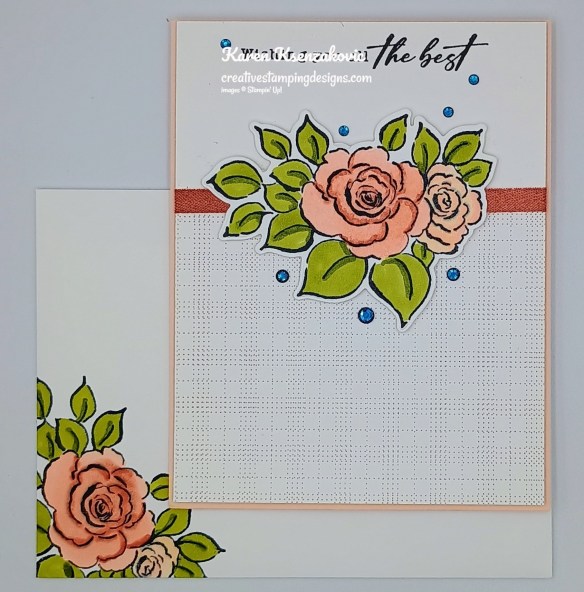
Decorate a Basic White Medium Envelope to finish your card. Stamp the flower image from the Charming Day stamp set in Tuxedo Black Ink on the envelope front and the leaf image on the envelope flap. Color the images with Calypso Coral, Old Olive and Petal Pink Stampin’ Blends Markers.
Thank you for stopping by my blog today. I hope you like the card and will give it a try. Happy Stamping!!
If you need any stamping supplies, I’d love to be your Demonstrator. Just click HERE to go directly to my online store or drop me an email if you have any questions.
June 3-30, all available suites and suite products from the 2025–2026 Annual Catalog and Online Exclusives are buy one, get one 50% off! If you’ve had your eye on a new suite from the annual catalog or you really like the look of a stamp set from an Online Exclusives suite, you don’t have to choose—you can get both!
Here are the promotion details:
All available suites and suite products from the 2025–2026 Annual Catalog and Online Exclusives are buy one, get one 50% off.
When you shop the sale, the 50% off discount will apply to the lower-priced item (for example, if you buy a suite collection and a stamp set from a suite, the suite would be full price, and the stamp set would be 50% off).
Suite collections are available if all items are in stock; if all items are not in stock, you can still shop the available suite products.
You don’t have to buy a suite and suite products all from the same suite collection for the discount to apply. You can buy any suite products from any suite.
The discount will appear in your cart once you’ve added two items within the sale parameters to your cart.
Products are available only while supplies last.
See and shop all qualifying suites in the Online Store
The sale begins June 3, 2025 at 12:01 AM MT.
The sale ends June 30, 2025 at 11:59 PM MT.
Let me know if you have any questions. YAY for an awesome sale! Get your lists ready and get your orders placed between June 3-30!!
Craft sweet handmade cards featuring sun-kissed strawberries and breezy gingham. • Makes 8 cards: 2 each of 4 designs with 8 coordinating envelopes • Precut paper pieces and vellum accents • Hand-painted card base designs • Coordinating colors: Garden Green (Classic Stampin’ Spot), Granny Apple Green, Pool Party, Poppy Parade, Strawberry Slush, Timid Tiger
Subscribe to the June Paper Pumpkin Kit between 11 June and 10 July by clicking here!
Don’t miss the coordinating Circle of Seasons Dies Add-On!
Make the most of your Paper Pumpkin kits with the Circle of Seasons Dies add-on! Quickly and cleanly cut out a strawberry with a blossom, a circle, a leaf, or an acorn to elevate your crafting projects. These additional dies are designed to work with THREE Paper Pumpkin Kits: the Sweeter with You Paper Pumpkin Kit, the Farmhouse Florals Paper Pumpkin Kit, and the Fall for Toile Paper Pumpkin Kit. Pair these dies with other Stampin’ Up! products for even more creative options! This exclusive add-on (item 167277) coordinates with the three upcoming kits! Paper Pumpkin subscribers can purchase it beginning June 11. Add-on is available only while supplies last, so it’s best to shop early!
DETAILS – 4 dies – Largest die: 2-1/2″ x 1-1/4″ (6.4 x 3.2 cm) – Use with a Stampin’ Cut & Emboss Machine (sold separately)
You must be a current Paper Pumpkin subscriber to purchase this item. To become a subscriber, visit www.stampinup.com/paperpumpkin.
Note: Supplies may be limited toward the end of the subscription period.
Good Saturday morning stamping friends and welcome to the weekend!!! It’s Flag Day in the US. Did you know that this day commemorates the date in 1777 when the United States approved the design for its first national flag? Be sure to be flying those flags high today. Whatever your plans for today or the weekend are, I hope you all have fun.
Today’s card is another one that we made at our quarterly team meeting last Sunday. We are all having so much fun creating with this Online Exclusive Suite. If you’re liking what you have seen lately, you might want to register for our Online Class at the end of this month, but today’s the last day to do that. Today’s card was designed by one of my amazing team members, Nicole Bloxom. Nicole will actually be joining Tara and me for our August Class as a presenter, which I’m really looking forward to. Here’s my card for today designed by Nicole.
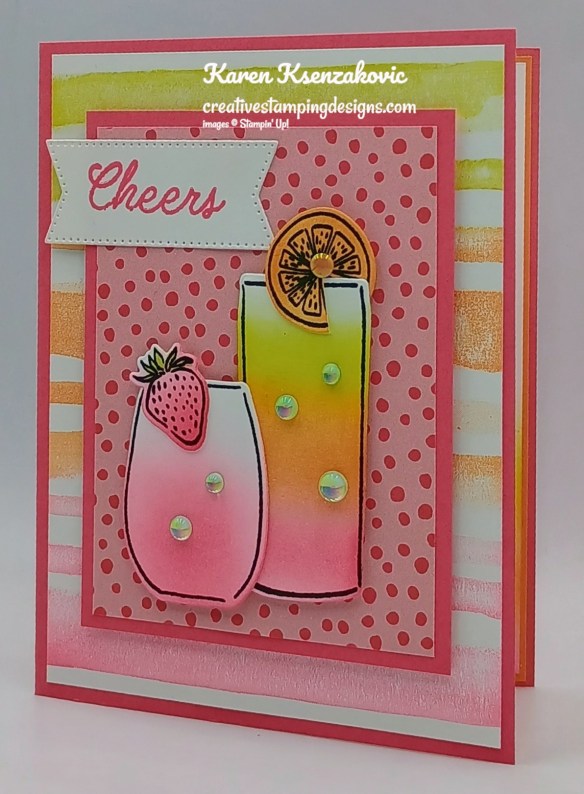
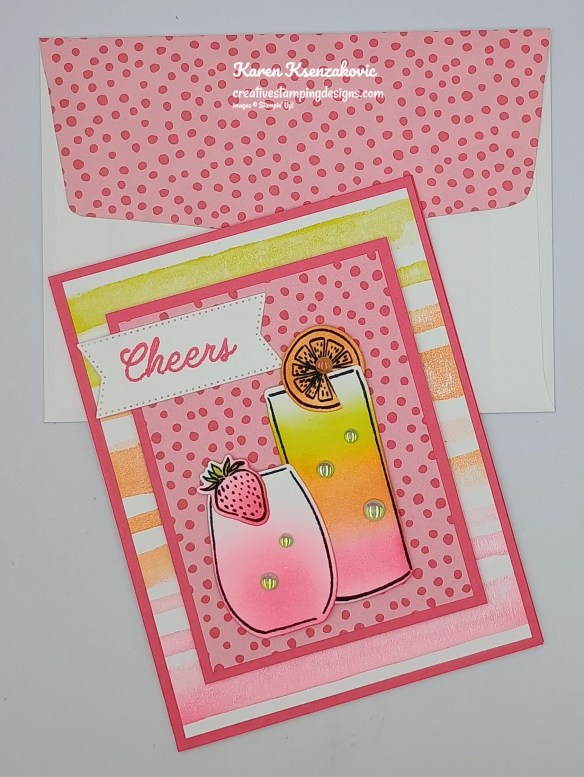
I used the Stampin’ Up! Online Exclusive Cheers & Sips Bundle along with the Celebratory Sips Designer Series Paper, Stampin’ Up! Painted Stripes Cling Stamp Set, Stampin’ Up! Beautiful Butterflies Photopolymer Stamp Set and Stylish Shapes Dies for my card today.
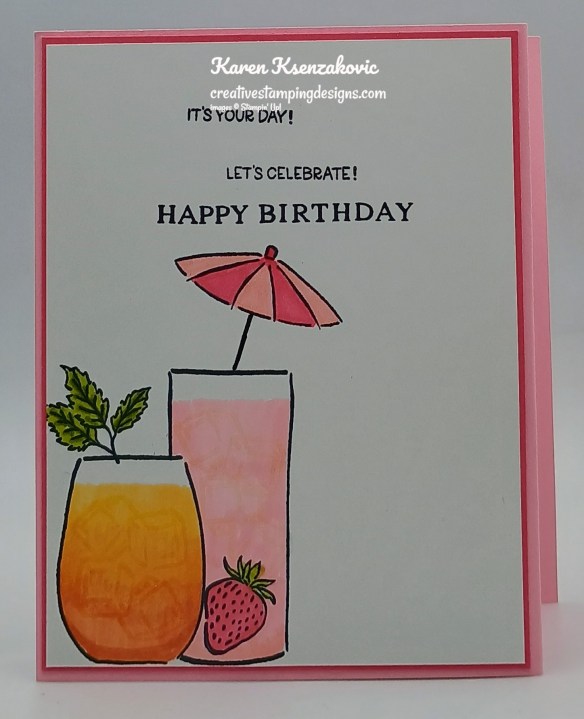
Add Darling Duckling, Timid Tiger and Strawberry Slush Inks to the Painted Stripes stamp set using Blending Brushes. Starting at the top with Darling Duckling, then Timid Tiger in the center and Strawberry Slush on the bottom. Stamp the image on a Basic White card front. Adhere the stamped panel to a Strawberry Slush card base with Stampin’ Seal. Adhere a panel of Celebratory Sips DSP to a Strawberry Slush mat with Stampin’ Seal. Adhere the layered panel to the card front with Stampin’ Dimensionals.
On a panel of Basic White, stamp the 2 glass images and the strawberry and citrus images from the Stampin’ Up! Cheers & Sips Photopolymer Stamp Set in Tuxedo Black Ink. Using the Blending Brushes add Strawberry Slush Ink to the smaller glass and the strawberry images along with on the bottom of the tall glass image. Add Timid Tiger and Darling Duckling Inks with the Blending Brushes to the tall glass image and Timid Tiger to the citrus image. Cut all the images out with the Cheers & Sips Dies. Cut a slit in the citrus slice and adhere it to the tall glass with a Glue Dot. Adhere the strawberry to the small glass with a Glue Dot. Adhere the glasses to the card front with Stampin’ Dimensionals.
Stamp the sentiment from the Cheers & Sips stamp set in Strawberry Slush Ink on a panel of Basic White. Cut the sentiment out using the Stylish Shapes Dies. Adhere the sentiment to the card front with Stampin’ Seal. Add a Timid Tiger 2025-2027 In-Color Flat Pearl to the citrus slice. Add a few Holographic Resin Dots to the glasses.
Stamp the sentiment from the Beautiful Butterflies stamp set in Strawberry Slush Ink on a panel of Basic White. Using the Blending Brushes, add Darling Duckling, Timid Tiger and Strawberry Slush Inks to the bottom of the panel. Adhere the Basic White panel to a Timid Tiger mat then to the inside of the Strawberry Slush card base.
Decorate a Basic White Medium Envelope to finish your card. Stamp the tall glass image from the Cheers & Sips stamp set in Tuxedo Black Ink on the envelope front. Add Darling Duckling, Timid Tiger and Strawberry Slush Inks to the glass with the Blending Brushes. Adhere a panel of Celebratory Sips DSP to the envelope flap.
Thank you for stopping by my blog today. I hope you like the card and will give it a try. Happy Stamping!!
If you need any stamping supplies, I’d love to be your Demonstrator. Just click HERE to go directly to my online store or drop me an email if you have any questions.
Tara Carpenter and I are teaming up to offer a fun online class using Stampin’ Up! Online Exclusive Cheers & Sips Bundle. We will be creating 6 different cards during the class including 2 fun folds.
The class fee includes:
Stampin’ Up! Holographic Resin Dots (full pack)
Stampin’ Up! Gold Striped Mesh Ribbon (full pack)
Pre-cut card kits to complete each card
Zoom class with complete instructions to complete each card
PDF with detailed directions
During sign up you will have the option to add additional items to your order that you can take advantage of at no additional shipping cost. These items are optional, however if you want to recreate the cards you will need them.
The class will be held Sunday June 29th from 1 to 5 pm Eastern Time via Zoom. This allows anyone in the United States to participate live! Can’t join us live… no worries, we will record the session so it can be replayed at any time.
We will email written directions that will include directions, cardstock cuts as well as photos to help you create each card.
We are not including the bundle in the price of the class. You can purchase the bundle through me at an additional 10% discount of the Online Exclusive price (see below).
Class Cost $35 + $9 (Priority Shipping)
Additional purchased items will be included in the above shipping price. We will invoice you through PayPal by June 15tth to insure we can get the products delivered, packaged up and out to you with enough time.
Deadline: Saturday June 14th (this is so we have time to order all the bundles, embellishments and DSP being used)
Click Here to register for the class now!! Let me know if you have any questions
June 3-30, all available suites and suite products from the 2025–2026 Annual Catalog and Online Exclusives are buy one, get one 50% off! If you’ve had your eye on a new suite from the annual catalog or you really like the look of a stamp set from an Online Exclusives suite, you don’t have to choose—you can get both!
Here are the promotion details:
All available suites and suite products from the 2025–2026 Annual Catalog and Online Exclusives are buy one, get one 50% off.
When you shop the sale, the 50% off discount will apply to the lower-priced item (for example, if you buy a suite collection and a stamp set from a suite, the suite would be full price, and the stamp set would be 50% off).
Suite collections are available if all items are in stock; if all items are not in stock, you can still shop the available suite products.
You don’t have to buy a suite and suite products all from the same suite collection for the discount to apply. You can buy any suite products from any suite.
The discount will appear in your cart once you’ve added two items within the sale parameters to your cart.
Products are available only while supplies last.
See and shop all qualifying suites in the Online Store
The sale begins June 3, 2025 at 12:01 AM MT.
The sale ends June 30, 2025 at 11:59 PM MT.
Let me know if you have any questions. YAY for an awesome sale! Get your lists ready and get your orders placed between June 3-30!!
Craft sweet handmade cards featuring sun-kissed strawberries and breezy gingham. • Makes 8 cards: 2 each of 4 designs with 8 coordinating envelopes • Precut paper pieces and vellum accents • Hand-painted card base designs • Coordinating colors: Garden Green (Classic Stampin’ Spot), Granny Apple Green, Pool Party, Poppy Parade, Strawberry Slush, Timid Tiger
Subscribe to the June Paper Pumpkin Kit between 11 June and 10 July by clicking here!
Don’t miss the coordinating Circle of Seasons Dies Add-On!
Make the most of your Paper Pumpkin kits with the Circle of Seasons Dies add-on! Quickly and cleanly cut out a strawberry with a blossom, a circle, a leaf, or an acorn to elevate your crafting projects. These additional dies are designed to work with THREE Paper Pumpkin Kits: the Sweeter with You Paper Pumpkin Kit, the Farmhouse Florals Paper Pumpkin Kit, and the Fall for Toile Paper Pumpkin Kit. Pair these dies with other Stampin’ Up! products for even more creative options! This exclusive add-on (item 167277) coordinates with the three upcoming kits! Paper Pumpkin subscribers can purchase it beginning June 11. Add-on is available only while supplies last, so it’s best to shop early!
DETAILS – 4 dies – Largest die: 2-1/2″ x 1-1/4″ (6.4 x 3.2 cm) – Use with a Stampin’ Cut & Emboss Machine (sold separately)
You must be a current Paper Pumpkin subscriber to purchase this item. To become a subscriber, visit www.stampinup.com/paperpumpkin.
Note: Supplies may be limited toward the end of the subscription period.
Good Friday afternoon stamping friends and welcome to my fun fold Friday. I hope you all had a wonderful week and are looking forward to the weekend.
Today’s card is a card we made at our quarterly team meeting Sunday. This card was designed by one of my awesome team members Carmelita Austin and she loves making fun fold cards. I did change things up a little with my card, which I always like to do. Here’s my card for today.
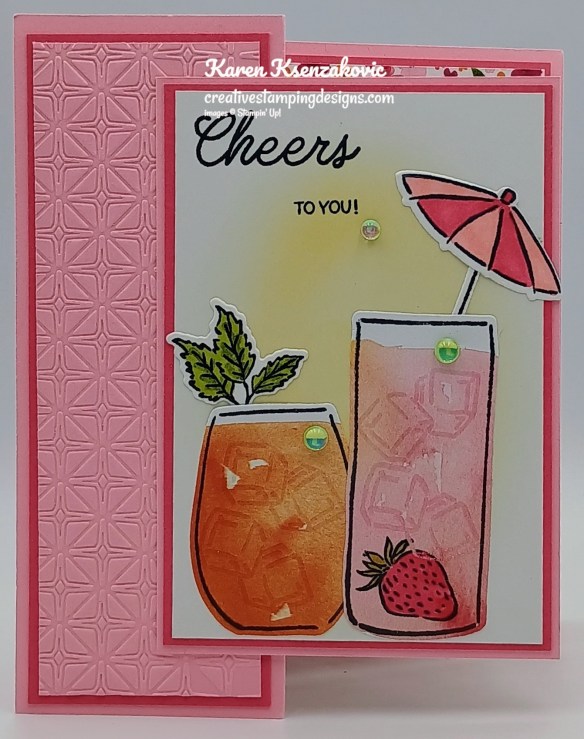
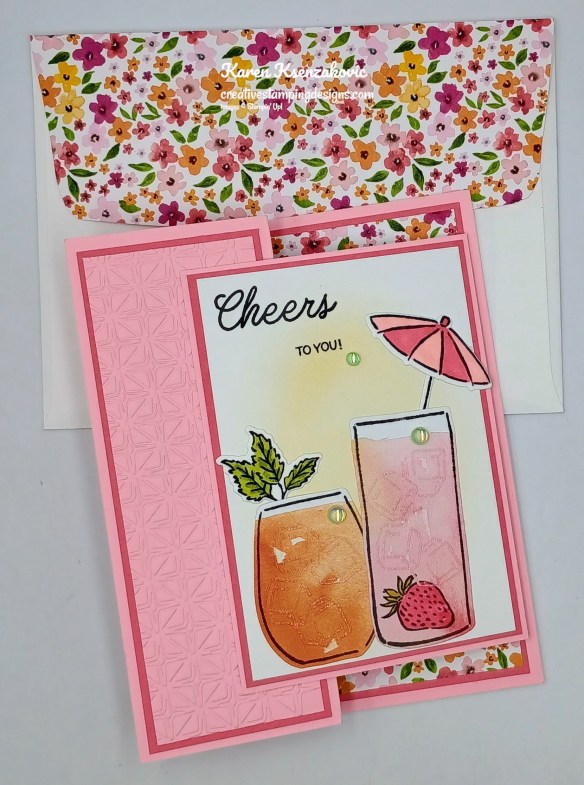
I used the Stampin’ Up! Cheers & Sips Bundle along with the Glass & Garden Embossing Folder,Celebratory Sips Designer Series Paper and Beautiful Butterflies Photopolymer Stamp Set for my card today.
Emboss the panel of Pretty in Pink with the Glass & Garden EF. Adhere the embossed panel to a Strawberry Slush mat with Liquid Glue. Adhere the layered panel to the front of the Pretty in Pink card base with Liquid Glue.
On a Basic White panel use the Blending Brush to add a little Peach Pie Ink. Stamp the sentiment from the Stampin’ Up! Cheers & Sips Photopolymer Stamp Set in Tuxedo Black Ink. From a block panel of Celebratory Sips DSP, stamp the 2 glass images from Cheers & Sips stamp set. Cut the images out with the Cheers & Sips Dies. On a panel of Basic White stamp the umbrella, umbrella stick & mint images from the Cheers & Sips stamp set in Tuxedo Black Ink. Color the images with Old Olive, Pretty in Pink and Strawberry Slush Stampin’ Blends Markers. Cut the images out with the Cheers & Sips Dies. Stamp the strawberry image in the tall glass die cut in Tuxedo Black Ink and color it with Old Olive and Strawberry Slush Stampin’ Blends Markers. Stamp the ice cube image from the Cheers & Sips stamp set in Versamark Ink inside the 2 die cut glass images. Sprinkle them with Clear Embossing Powder and set them with the Heat Tool. Adhere the mint to the back of the small glass with a Glue Dot. Adhere the umbrella to the umbrella stick then to the back of the tall glass with Glue Dots. Adhere the glasses to the Basic White panel with Liquid Glue. Adhere the Basic White panel to a Strawberry Slush mat and a Pretty in Pink mat with Stampin’ Seal. Adhere the layered panel to the embossed panel with Liquid Glue. Add a few Holographic Resin Dots to the card front.
Adhere the panels of Celebratory Sips DSP to the coordinating Strawberry Slush mats with Stampin’ Seal. Adhere the narrow-layered panel to the inside left of the Pretty in Pink card base with Liquid Glue. Adhere the larger layered panel to the inside right of the Pretty in Pink card base with Liquid Glue.
Adhere the last layered panel to the Pretty in Pink mat with Stampin’ Seal. Fold the 1″ x 5″ pop up mechanism on the score lines and adhere the 2 ends together to make a cube. Adhere the Pretty in Pink pop up mechanism to the center of the inside card with Tear & Tape (only on 2 sides). Adhere the layered panel to the pop-up mechanism.
Here is the view from the top of how it will look.
On a panel of Basic White, stamp the sentiments from Cheers & Sups stamp set in Tuxedo Black Ink. Stamp the sentiment from Beautiful Butterflies stamp set in Tuxedo Black Ink below the other 2 sentiments. Stamp the glasses, strawberry, mint and umbrella images from Cheers & Sips stamp set in Tuxedo Black Ink on the bottom of the panel. Color the images with Old Olive, Peach Pie, Pretty in Pink, Strawberry Slush and Timid Tiger Stampin’ Blends Markers. Adhere the Basic White panel to a Strawberry Slush mat then to the back of the Pretty in Pink card base.
Decorate a Basic White Medium Envelope to finish your card. Stamp the glass, strawberry, umbrella and mint images from the Cheers & Sips stamp set in Tuxedo Black Ink on the envelope front. Color the images with Old Olive, Pretty in Pink, Strawberry Slush and Timid Tiger Stampin’ Blends Markers. Stamp the ice cube image from the Cheers & Sips stamp set in Versamark Ink inside the glasses, sprinkle them with Clear Embossing Powder and set them with the Heat Tool. Adhere a panel of Celebratory Sips DSP to the envelope flap.
Thank you for stopping by my blog today. I hope you like the card and will give it a try. Happy Stamping!!
If you need any stamping supplies, I’d love to be your Demonstrator. Just click HERE to go directly to my online store or drop me an email if you have any questions.
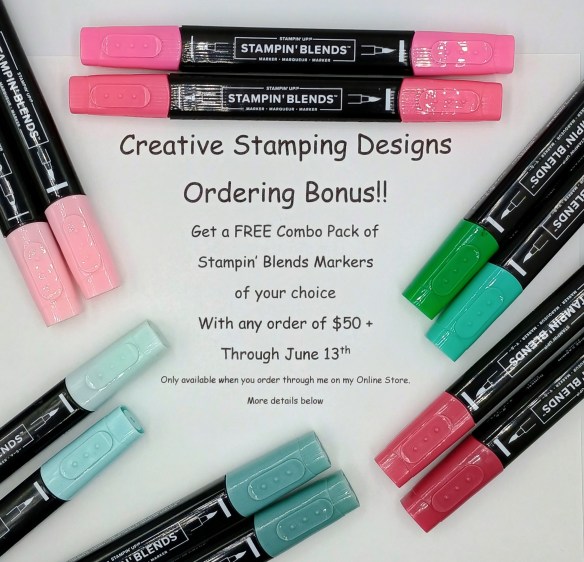
LAST DAY to Get a Free Stampin’ Blends Combo Pack from me with any order of $50+
To kick this amazing Suite Sale off, I’m offering a little bonus to help you with coloring all those pretty stamped images. With any order of 50+ (before tax & shipping and after Stampin’ Rewards) placed through my Online Store between June 3 – Friday June 13th, you’ll get your choice of a FREECombo Pack of Stampin’ Blends Markers. Once you have placed your order, I will send you an email asking which color combo pack you would like. You must send me your selection by June 14th or I will pick a color pack for you. I’ll be placing my order for the blends on June 14th.
All Suite & Bundle Sale June 3rd – 30th
June 3-30, all available suites and suite products from the 2025–2026 Annual Catalog and Online Exclusives are buy one, get one 50% off! If you’ve had your eye on a new suite from the annual catalog or you really like the look of a stamp set from an Online Exclusives suite, you don’t have to choose—you can get both!
Here are the promotion details:
All available suites and suite products from the 2025–2026 Annual Catalog and Online Exclusives are buy one, get one 50% off.
When you shop the sale, the 50% off discount will apply to the lower-priced item (for example, if you buy a suite collection and a stamp set from a suite, the suite would be full price, and the stamp set would be 50% off).
Suite collections are available if all items are in stock; if all items are not in stock, you can still shop the available suite products.
You don’t have to buy a suite and suite products all from the same suite collection for the discount to apply. You can buy any suite products from any suite.
The discount will appear in your cart once you’ve added two items within the sale parameters to your cart.
Products are available only while supplies last.
See and shop all qualifying suites in the Online Store
The sale begins June 3, 2025 at 12:01 AM MT.
The sale ends June 30, 2025 at 11:59 PM MT.
Let me know if you have any questions. YAY for an awesome sale! Get your lists ready and get your orders placed between June 3-30!!
Tara Carpenter and I are teaming up to offer a fun online class using Stampin’ Up! Online Exclusive Cheers & Sips Bundle. We will be creating 6 different cards during the class including 2 fun folds.
The class fee includes:
Stampin’ Up! Holographic Resin Dots (full pack)
Stampin’ Up! Gold Striped Mesh Ribbon (full pack)
Pre-cut card kits to complete each card
Zoom class with complete instructions to complete each card
PDF with detailed directions
During sign up you will have the option to add additional items to your order that you can take advantage of at no additional shipping cost. These items are optional, however if you want to recreate the cards you will need them.
The class will be held Sunday June 29th from 1 to 5 pm Eastern Time via Zoom. This allows anyone in the United States to participate live! Can’t join us live… no worries, we will record the session so it can be replayed at any time.
We will email written directions that will include directions, cardstock cuts as well as photos to help you create each card.
We are not including the bundle in the price of the class. You can purchase the bundle through me at an additional 10% discount of the Online Exclusive price (see below).
Class Cost $35 + $9 (Priority Shipping)
Additional purchased items will be included in the above shipping price. We will invoice you through PayPal by June 15tth to insure we can get the products delivered, packaged up and out to you with enough time.
Deadline: Saturday June 14th (this is so we have time to order all the bundles, embellishments and DSP being used)
Click Here to register for the class now!! Let me know if you have any questions.
Craft sweet handmade cards featuring sun-kissed strawberries and breezy gingham. • Makes 8 cards: 2 each of 4 designs with 8 coordinating envelopes • Precut paper pieces and vellum accents • Hand-painted card base designs • Coordinating colors: Garden Green (Classic Stampin’ Spot), Granny Apple Green, Pool Party, Poppy Parade, Strawberry Slush, Timid Tiger
Subscribe to the June Paper Pumpkin Kit between 11 June and 10 July by clicking here!
Don’t miss the coordinating Circle of Seasons Dies Add-On!
Make the most of your Paper Pumpkin kits with the Circle of Seasons Dies add-on! Quickly and cleanly cut out a strawberry with a blossom, a circle, a leaf, or an acorn to elevate your crafting projects. These additional dies are designed to work with THREE Paper Pumpkin Kits: the Sweeter with You Paper Pumpkin Kit, the Farmhouse Florals Paper Pumpkin Kit, and the Fall for Toile Paper Pumpkin Kit. Pair these dies with other Stampin’ Up! products for even more creative options! This exclusive add-on (item 167277) coordinates with the three upcoming kits! Paper Pumpkin subscribers can purchase it beginning June 11. Add-on is available only while supplies last, so it’s best to shop early!
DETAILS – 4 dies – Largest die: 2-1/2″ x 1-1/4″ (6.4 x 3.2 cm) – Use with a Stampin’ Cut & Emboss Machine (sold separately)
You must be a current Paper Pumpkin subscriber to purchase this item. To become a subscriber, visit www.stampinup.com/paperpumpkin.
Note: Supplies may be limited toward the end of the subscription period.
Basic White Cardstock 2 7/8″ x 4 1/4″(front panel), scraps for umbrella and mint, 4″ x 5 1/4″ (back panel)
Pretty in Pink Cardstock 5 1/2″ x 8 1/2″(card base scored & folded at 2 1/8″ & 4 1/4″), 1 3/4″ x 5 1/8″(embossed panel), 3 1/8″ x 4 1/2″(front panel mat), 3 1/8″ x 4″(pop up panel mat), 1″ x 5″(pop up mechanism scored & folded at 1″, 2″, 3″ & 4″)
Strawberry Slush Cardstock 2 – 1 7/8″ x 5 1/4″(embossed panel mat & inside panel mat), 3″ x 4 3/8″(front panel mat), 3″ X 3 7/8″(pop up panel mat), 4″ x 5 1/4″(inside panel mat), 4 1/8″ x 5 3/8″(back panel mat)
Celebratory Sips Designer Series Paper 1 3/4″ x 5 1/8″(inside left panel), 2 7/8″ x 3 3/4″(pop up panel), 3 7/8″ x 5 1/8″(inside panel, 2 1/4″ x 6″(envelope flap), blocks panel for glasses
Good Thursday morning stamping friends and welcome to our Happy Inkin’ Thursday Blog Hop. If you are starting with me, thank you. I hope you will stop by everyone’s blog to see what they have created this week. If you are hopping over from Mary’s blog, thank you for stopping by. This week we have Designer Series Paper Challenge. If you’d like to see a quick video of how I made this card, Click Here to go to my Instagram Reels. Here is my card using this week’s theme.
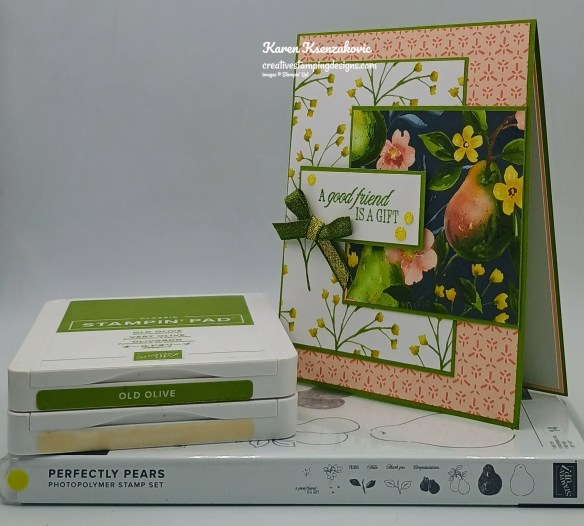
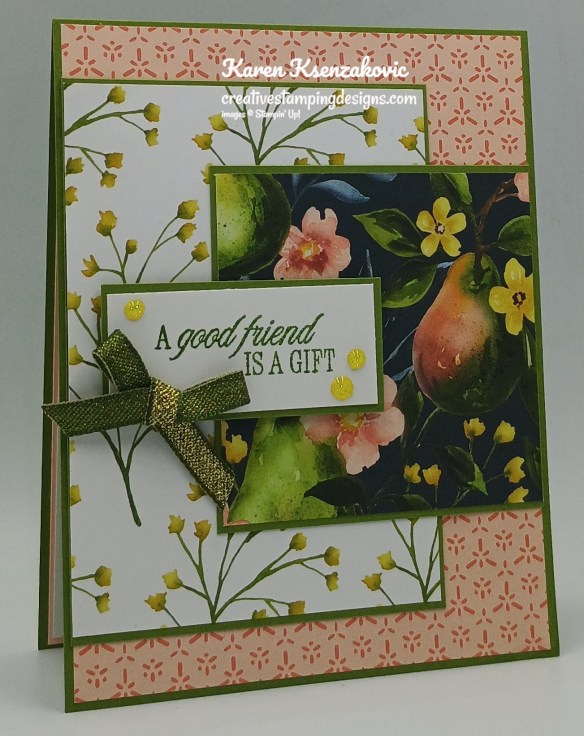
I used the new Stampin’ Up! Perfectly Pears Photopolymer Stamp Set along with the Painterly Pears Designer Series Paper for my card today.
Adhere a panel of Painterly Pears DSP to an Old Olive card base with Stampin’ Seal. Adhere 2 more panels of Painterly Pears DSP to the coordinating mats with Stampin’ Seal.
Adhere the 2 layered panels to the card front with Liquid Glue on either side of the card front.
Stamp the sentiment from Perfectly Pears stamp set in Old Olive Ink on a panel of Basic White. Adhere the sentiment to an Old Olive mat with Stampin’ Seal. Adhere the layered sentiment to the card front with Stampin’ Dimensionals. Tie a small bow with the new 1/4″ Mossy Meadow & Gold Trim (available July 1). Adhere the bow to the sentiment with a Glue Dot. Add a few Low-Profile Sparkle Dots (available July 1) to the card front.
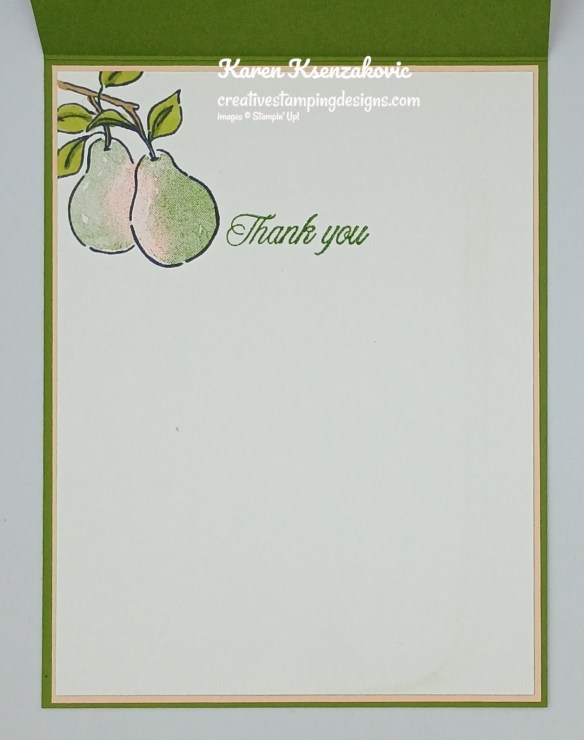
Stamp the sentiment from Perfectly Pears stamp set in Old Olive Ink on a panel of Basic White. Stamp the outlined pear image from Perfectly Pears stamp set in Tuxedo Black Ink on the top of the panel. Color the leaves and stem with Old Olive and Pecan Pie Stampin’ Blends Markers. Stamp the solid pear image from the Perfectly Pears stamp set inside the outlines image by inking up the stamp using Sponge Daubers with Old Olive and Petal Pink Inks. Adhere the Basic White panel to a Petal Pink mat then to the inside of the Old Olive card base.
Decorate a Basic White Medium Envelope to complete your card. Stamp the pear image from the Perfectly Pears stamp set in Tuxedo Black Ink on the envelope front. Color the image the same as for the card. Adhere a panel of Painterly Pears DSP to the envelope flap.
Thank you for stopping by my blog today. Now that you’ve seen my card, let’s get on with the hop! Click the button below to hop over to see what Tara has created. Happy Hoping!!
Just in case you get lost along the way, here is a list of the team members involved in the hop today.
If you need any stamping supplies, I’d love to be your Demonstrator. Just click HERE to go directly to my online store or drop me an email if you have any questions.
Craft sweet handmade cards featuring sun-kissed strawberries and breezy gingham. • Makes 8 cards: 2 each of 4 designs with 8 coordinating envelopes • Precut paper pieces and vellum accents • Hand-painted card base designs • Coordinating colors: Garden Green (Classic Stampin’ Spot), Granny Apple Green, Pool Party, Poppy Parade, Strawberry Slush, Timid Tiger
Subscribe to the June Paper Pumpkin Kit between 11 June and 10 July by clicking here!
Don’t miss the coordinating Circle of Seasons Dies Add-On!
Make the most of your Paper Pumpkin kits with the Circle of Seasons Dies add-on! Quickly and cleanly cut out a strawberry with a blossom, a circle, a leaf, or an acorn to elevate your crafting projects. These additional dies are designed to work with THREE Paper Pumpkin Kits: the Sweeter with You Paper Pumpkin Kit, the Farmhouse Florals Paper Pumpkin Kit, and the Fall for Toile Paper Pumpkin Kit. Pair these dies with other Stampin’ Up! products for even more creative options! This exclusive add-on (item 167277) coordinates with the three upcoming kits! Paper Pumpkin subscribers can purchase it beginning June 11. Add-on is available only while supplies last, so it’s best to shop early!
DETAILS – 4 dies – Largest die: 2-1/2″ x 1-1/4″ (6.4 x 3.2 cm) – Use with a Stampin’ Cut & Emboss Machine (sold separately)
You must be a current Paper Pumpkin subscriber to purchase this item. To become a subscriber, visit www.stampinup.com/paperpumpkin.
Note: Supplies may be limited toward the end of the subscription period.
Basic White Cardstock 1″ x 2 1/4″(sentiment), 4″ x 5 1/4″(inner liner)
Old Olive Cardstock 5 1/2″ x 8 1/2″(card base scored & folded at 4 1/4″), 3 1/4″ x 4 1/2″(card front panel mat), 3″ x 3″(card front panel mat), 1 1/8″ x 2 3/8″(sentiment mat)
Petal Pink Cardstock 4 1/8″ x 5 3/8″(inner liner mat)
Painterly Pears Designer Series Paper 4 1/8″ x 5 3/8″(card front), 3 1/8″ x 4 3/8″(card front panel), 2 7/7″ x 2 7/8″(card front panel), 2 1/4″ x 6″(envelope flap)
Good Wednesday morning my stamping friends. How is everyone doing today? We’re halfway through the week and on our way to the weekend already.
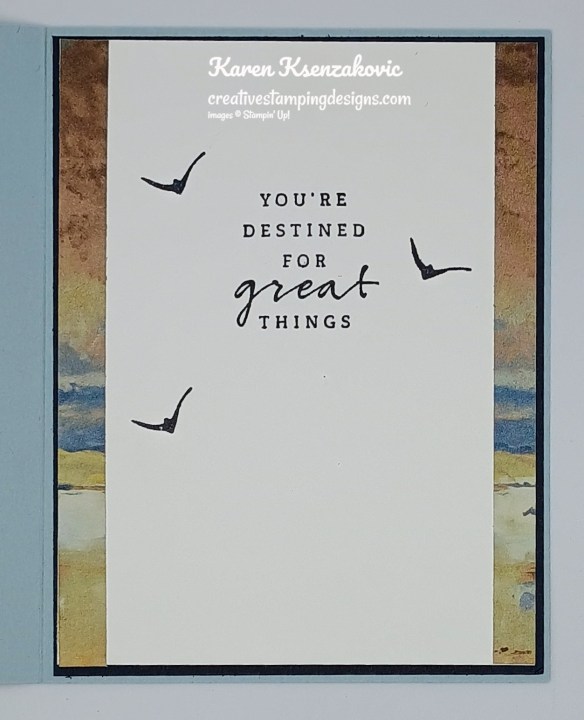
Today’s card is for the inspiration challenge from The Card Concepts. The inspiration photo #218 is Summer Days. If you’d like to see a quick video of how I made this card, Click Here to go to my Instagram Reels. Here’s my card for today.
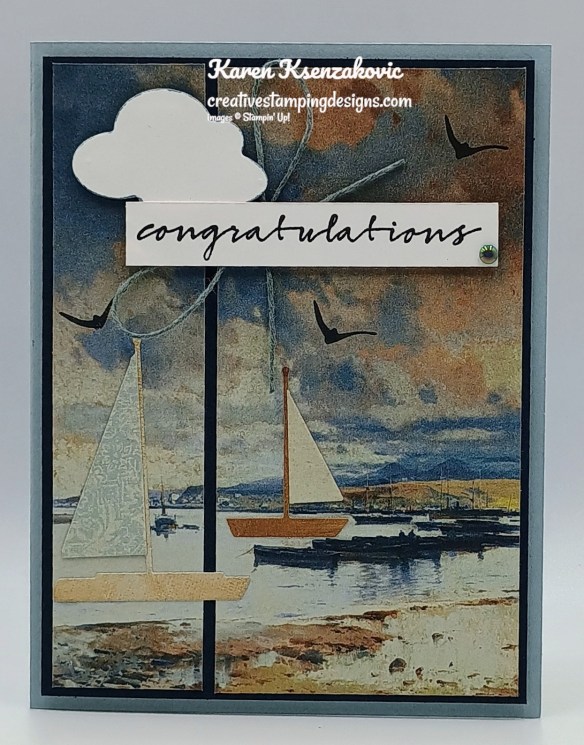
I used the Stampin’ Up! Online Exclusive Sunrise Sailing Bundle along with the Beautiful Gallery 6 x 6 Designer Series Paper. I was inspired by the theme ‘Summer Days’ along with the colors for my Clean & Layered card today.
I hope you will take a moment to visit The Card Concepts and join us for our challenge 218. How are you inspired by the photos?
Cut the panel of Beautiful Gallery DSP into 1 1/4″ & 2 1/2″ panels with your Paper Trimmer. Adhere the 2 panels to a Secret Sea mat with Stampin’ Seal, leaving a little space in between the panels. Adhere the layered panel to a Cloud Cover card base with Stampin’ Dimensionals. Stamp the bird image from the Stampin’ Up! Sunrise Sailing Photopolymer Stamp Set in Secret Sea Ink on the card front panel a few times.
From scraps of Beautiful Gallery DSP, cut the medium and small sailboats using the Sunrise Sailing Dies. Cut each of them 2 times and using Paper Snips, trim the sails off one and adhere them to the other sailboats. Adhere the sailboats to the card front with Liquid Glue.
On a panel of Basic White, stamp the sentiment from the Sunrise Sailing stamp set in Secret Sea Ink. Cut the small cloud using the Sunrise Sailing Dies from a panel of Basic White. Adhere the cloud to the card front with Stampin’ Dimensionals. Color a piece of White Baker’s Twine with the Cloud Cover Stampin’ Blends Marker. Tie a bow with the twine and adhere it next to the cloud with a Glue Dot. Adhere the sentiment over the bow with Stampin’ Dimensionals. Add a 2025 – 2027 In-Color Flat Pearl to the sentiment.
Stamp the sentiment and bird image from Sunrise Sailing stamp set in Secret Sea Ink on a panel of Basic White. Adhere 2 strips of Beautiful Gallery DSP to the sides of the panel. Adhere the Basic White panel to a Secret Sea mat then to the inside of the Cloud Cover card base.
Decorate a Basic White Medium Envelope for complete your card. Stamp the water image from Sunrise Sailing stamp set in Cloud Cover Ink on the envelope front. Stamp the outlined sailboat image on the water in Secret Sea Ink along with the birds. Stamp the solid sailboat image in Pecan Pie Ink over the outlined image. Stamp the sail stripes in Cloud Cover Ink. Emboss a panel of Cloud Cover using the Sunrise Sailing Hybrid Embossing Folder. Adhere the embossed panel to the envelope flap.
Thank you for stopping by my blog today. I hope you like the card and will give it a try. Happy Stamping!!
If you need any stamping supplies, I’d love to be your Demonstrator. Just click HERE to go directly to my online store or drop me an email if you have any questions.
Get a Free Stampin’ Blends Combo Pack from me through Friday June 13th with any order of $50+
To kick this amazing Suite Sale off, I’m offering a little bonus to help you with coloring all those pretty stamped images. With any order of 50+ (before tax & shipping and after Stampin’ Rewards) placed through my Online Store between June 3 – Friday June 13th, you’ll get your choice of a FREECombo Pack of Stampin’ Blends Markers. Once you have placed your order, I will send you an email asking which color combo pack you would like. You must send me your selection by June 14th or I will pick a color pack for you. I’ll be placing my order for the blends on June 14th.
All Suite & Bundle Sale June 3rd – 30th
June 3-30, all available suites and suite products from the 2025–2026 Annual Catalog and Online Exclusives are buy one, get one 50% off! If you’ve had your eye on a new suite from the annual catalog or you really like the look of a stamp set from an Online Exclusives suite, you don’t have to choose—you can get both!
Here are the promotion details:
All available suites and suite products from the 2025–2026 Annual Catalog and Online Exclusives are buy one, get one 50% off.
When you shop the sale, the 50% off discount will apply to the lower-priced item (for example, if you buy a suite collection and a stamp set from a suite, the suite would be full price, and the stamp set would be 50% off).
Suite collections are available if all items are in stock; if all items are not in stock, you can still shop the available suite products.
You don’t have to buy a suite and suite products all from the same suite collection for the discount to apply. You can buy any suite products from any suite.
The discount will appear in your cart once you’ve added two items within the sale parameters to your cart.
Products are available only while supplies last.
See and shop all qualifying suites in the Online Store
The sale begins June 3, 2025 at 12:01 AM MT.
The sale ends June 30, 2025 at 11:59 PM MT.
Let me know if you have any questions. YAY for an awesome sale! Get your lists ready and get your orders placed between June 3-30!!
Tara Carpenter and I are teaming up to offer a fun online class using Stampin’ Up! Online Exclusive Cheers & Sips Bundle. We will be creating 6 different cards during the class including 2 fun folds.
The class fee includes:
Stampin’ Up! Holographic Resin Dots (full pack)
Stampin’ Up! Gold Striped Mesh Ribbon (full pack)
Pre-cut card kits to complete each card
Zoom class with complete instructions to complete each card
PDF with detailed directions
During sign up you will have the option to add additional items to your order that you can take advantage of at no additional shipping cost. These items are optional, however if you want to recreate the cards you will need them.
The class will be held Sunday June 29th from 1 to 5 pm Eastern Time via Zoom. This allows anyone in the United States to participate live! Can’t join us live… no worries, we will record the session so it can be replayed at any time.
We will email written directions that will include directions, cardstock cuts as well as photos to help you create each card.
We are not including the bundle in the price of the class. You can purchase the bundle through me at an additional 10% discount of the Online Exclusive price (see below).
Class Cost $35 + $9 (Priority Shipping)
Additional purchased items will be included in the above shipping price. We will invoice you through PayPal by June 15tth to insure we can get the products delivered, packaged up and out to you with enough time.
Deadline: Saturday June 14th (this is so we have time to order all the bundles, embellishments and DSP being used)
Click Here to register for the class now!! Let me know if you have any questions.
Craft sweet handmade cards featuring sun-kissed strawberries and breezy gingham. • Makes 8 cards: 2 each of 4 designs with 8 coordinating envelopes • Precut paper pieces and vellum accents • Hand-painted card base designs • Coordinating colors: Garden Green (Classic Stampin’ Spot), Granny Apple Green, Pool Party, Poppy Parade, Strawberry Slush, Timid Tiger
Subscribe to the June Paper Pumpkin Kit between 11 June and 10 July by clicking here!
Don’t miss the coordinating Circle of Seasons Dies Add-On!
Make the most of your Paper Pumpkin kits with the Circle of Seasons Dies add-on! Quickly and cleanly cut out a strawberry with a blossom, a circle, a leaf, or an acorn to elevate your crafting projects. These additional dies are designed to work with THREE Paper Pumpkin Kits: the Sweeter with You Paper Pumpkin Kit, the Farmhouse Florals Paper Pumpkin Kit, and the Fall for Toile Paper Pumpkin Kit. Pair these dies with other Stampin’ Up! products for even more creative options! This exclusive add-on (item 167277) coordinates with the three upcoming kits! Paper Pumpkin subscribers can purchase it beginning June 11. Add-on is available only while supplies last, so it’s best to shop early!
DETAILS – 4 dies – Largest die: 2-1/2″ x 1-1/4″ (6.4 x 3.2 cm) – Use with a Stampin’ Cut & Emboss Machine (sold separately)
You must be a current Paper Pumpkin subscriber to purchase this item. To become a subscriber, visit www.stampinup.com/paperpumpkin.
Note: Supplies may be limited toward the end of the subscription period.
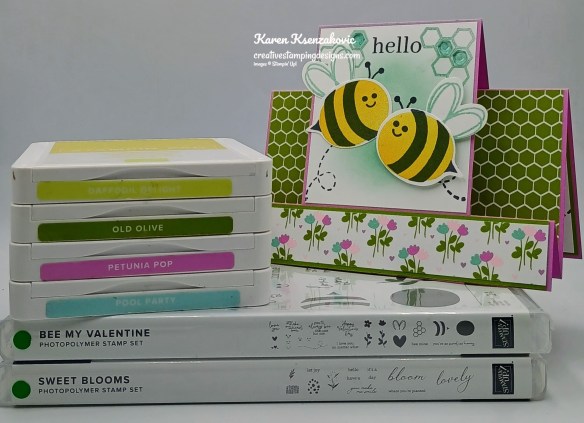
Good Tuesday morning my stamping friends welcome to Amy’s Inkin’ Krew Team Blog Hop. It’s the 2nd Tuesday of the month so that means Blog Hop Day!! If you are starting with me, be sure to hop around to see everyone’s beautiful projects. If you’ve hopped over from Mary’s blog, welcome to my blog and thank you for stopping by. The theme this month is “Celebrate Summer”. We can interpret this however we want. If you’d like to see a quick video on how I made this card, Click Here to go to my Instagram Reels. Here’s my card for today.
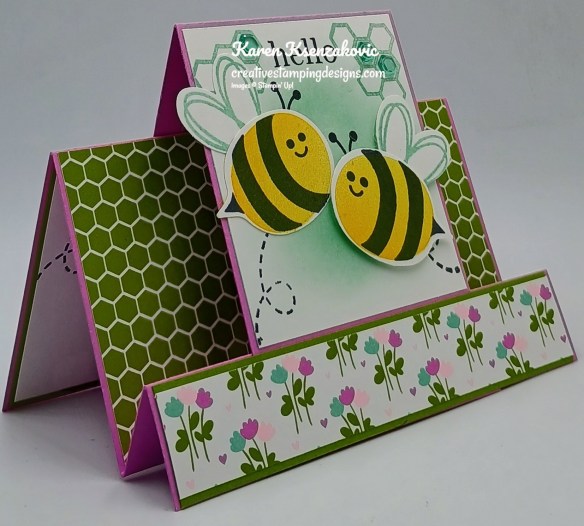
I used the Stampin’ Up! bee My Valentine Photopolymer Stamp Set along with the Cute As Can Bee Designer Series Paper,Stampin’ Up! Sweet Blooms Photopolymer Stamp Set and Bee Builder Punch for my card today.
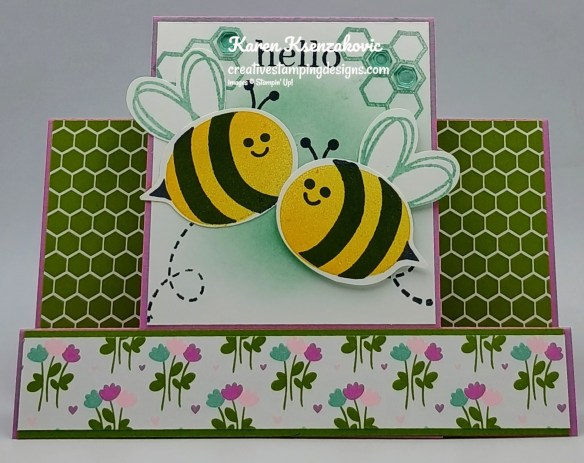
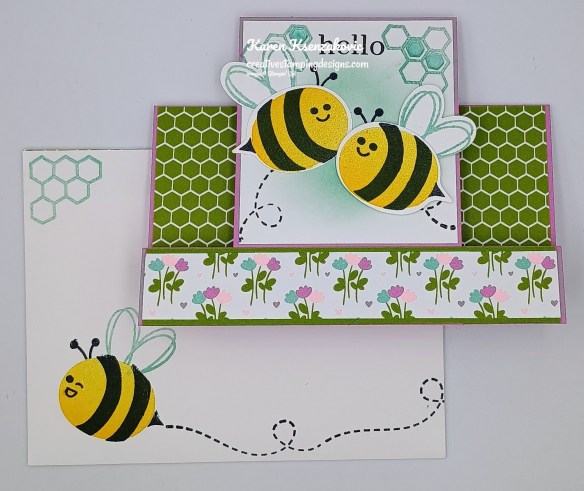
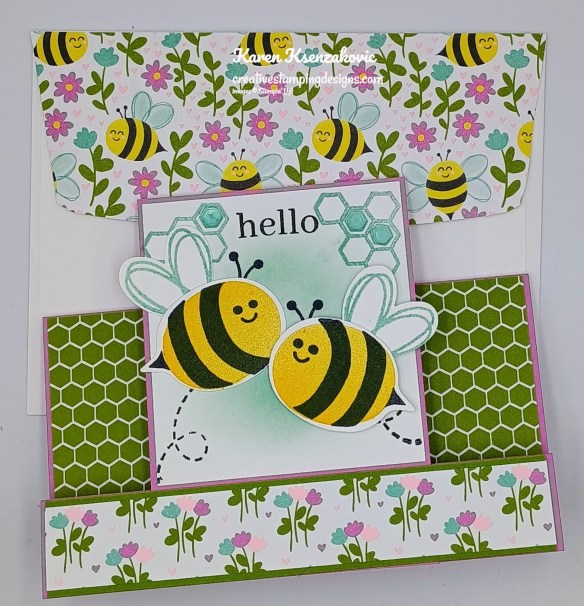
Fold the Petunia Pop card base on the 3″ & 7″ score lines as mountain folds and on the 6″ score line a valley fold. Adhere a panel of Cute as Can Bee DSP to the center section of the card base with Stampin’ Seal. Adhere the pop-up panel to the card base by adhering the longer part in the front adhering it to the bottom front panel with Tear & Tape. Adhere the shorter side to the back of the card base with Teat & Tape. Adhere a panel of Cute as Can Bee DSP to an Old Olive mat with Stampin’ Seal. Adhere the layered panel to the bottom of the card front, over the pop-up panel, with Liquid Glue.
On a panel of Basic White, add Pool Party Ink with a Blending Brush. Stamp the sentiment from Sweet Blooms stamp set in Tuxedo Black Ink on the top of the panel. Stamp the beehive image from Bee My Valentine stamp set in Pool Party Ink on either side of the sentiment. Stamp the dotted line image from Bee My Valentine stamp set in tuxedo Black Ink on the panel. Adhere the Basic White pane to the pop-up Petunia Pop panel with Stampin’ Seal. On a panel of Basic White, stamp the bee stripes image from the Bee My Valentine stamp set in Tuxedo Black Ink 2 times. Stamp the bee body image from the Bee My Valentine stamp set in Daffodil Delight Ink over the striped images. Cut the bees out using the Bee Builder Punch. Stamp the face on the bee in Tuxedo Black Ink. On another panel of Basic White, stamp the outlined wing image 2 times and cut them out with the Bee Builder Punch. Adhere the wings to the back of the bee with a Glue Dot. Stamp the antennae image from the Bee My Valentine stamp set in Tuxedo Black Ink on the inked panel of Basic White. Adhere the bee images to the Basic White panel, one with Liquid Glue and the other with Stampin’ Dimensionals. Add a few of the Shades of Green Hexagons to the stamped beehive images.
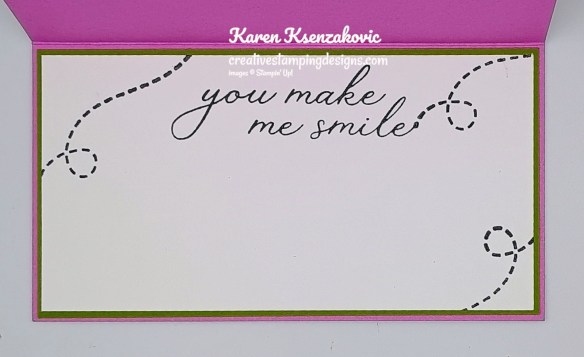
On a panel of Basic White, stamp the sentiment from Sweet Blooms stamp set in Tuxedo Black Ink. Stamp the dotted line image from the Bee My Valentine stamp set in Tuxedo Black Ink around the panel. Adhere the Basic White panel to an Old Olive mat then to the inside of the Petunia Pop card base.
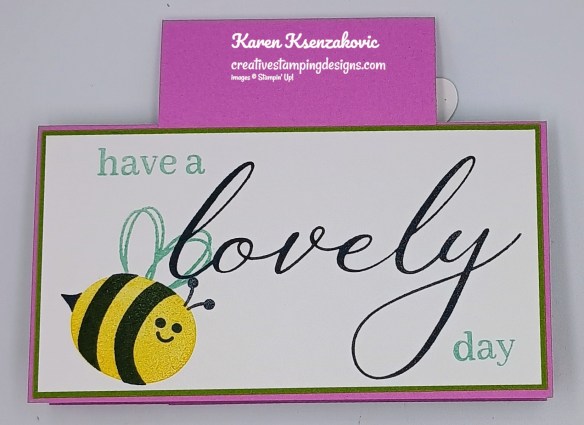
On a panel of Basic White, stamp the large sentiment from Sweet Blooms stamp set in tuxedo Black Ink. Stamp the small sentiments from Sweet Blooms stamp set in Pool Party Ink. Stamp the bee image from Bee My Valentine stamp set in Daffodil Delight, Tuxedo Black and Pool Party Inks the same as for the card front. Adhere the Basic White panel to an Old Olive mat then to the back of the Petunia Pop card base.
Decorate a Basic White Medium Envelope to complete your card. Stamp the bee stripes image in Tuxedo Black Ink on the envelope front. Stamp the bee body in Daffodil Delight Ink on top of the striped image. Stamp the dotted line, face and antennae images from the Bee My Valentine stamp set in tuxedo Black Ink. Stamp the wings and beehive images from the Bee My Valentine stamp set in Pool Party Ink. Adhere a panel of Cute As Can Bee DSP to the envelope flap.
Thank you for stopping by my blog today. Now that you’ve seen my card, let’s get on with the hop! Click on the Next Blog button to move on to Ann Louise’s project or click the Previous Blog button to go back to see the project that Mary created. Happy Hopping.
Just in case you get lost along the way, here is a list of the team members involved in the hop today.
If you need any stamping supplies, I’d love to be your Demonstrator. Just click HERE to go directly to my online store or drop me an email if you have any questions.
Send your loved ones elevated cards with heartfelt sentiments! • Makes 9 cards: 3 each of 3 designs with 9 coordinating envelopes • Envelopes and card bases with decorative gold foil • Precut paper pieces and unique sentiment labels • Coordinating colors: Berry Burst, Cajun Craze, Early Espresso, Mossy Meadow, Pretty Peacock (Classic Stampin’ Spot), Timid Tiger Coordinates with the Floral Charm Suite Collection (item 166141)
Subscribe to the June Paper Pumpkin Kit between 11 May and 10 June by clicking here!
Don’t miss the coordinating Hugs Abloom Dies Add-On!
Make the most of your Paper Pumpkin kits with the Hugs Abloom Dies add-on! Quickly and cleanly cut out a flower, leaf sprig, sentiment label, or Hugs sentiment to elevate your crafting projects. These additional dies are designed to work with THREE Paper Pumpkin Kits: the Inked Occasions Paper Pumpkin Kit, the Mountain Majesties Paper Pumpkin Kit, and the Full of Charm Paper Pumpkin Kit. Pair these dies with other Stampin’ Up! products for even more creative options!
DETAILS – 4 dies – Largest die: 2-1/2″ x 1-1/4″ (6.4 x 3.2 cm) – Use with a Stampin’ Cut & Emboss Machine (sold separately)
You must be a current Paper Pumpkin subscriber to purchase this item. To become a subscriber, visit www.stampinup.com/paperpumpkin.
Note: Supplies may be limited toward the end of the subscription period.


![Basic White 8 1/2" X 11" Cardstock [ 166780 ]](https://assets1.tamsnetwork.com/images/EC042017NF/166780s.jpg "Basic White 8 1/2\" X 11\" Cardstock [ 166780 ]")
![Blackberry Bliss 8-1/2" X 11" Cardstock [ 133675 ]](https://assets1.tamsnetwork.com/images/EC042017NF/133675s.jpg "Blackberry Bliss 8-1/2\" X 11\" Cardstock [ 133675 ]")
![Lost Lagoon 8-1/2" X 11" Cardstock [ 133679 ]](https://assets1.tamsnetwork.com/images/EC042017NF/133679s.jpg "Lost Lagoon 8-1/2\" X 11\" Cardstock [ 133679 ]")
![Mossy Meadow 8-1/2" X 11" Cardstock [ 133676 ]](https://assets1.tamsnetwork.com/images/EC042017NF/133676s.jpg "Mossy Meadow 8-1/2\" X 11\" Cardstock [ 133676 ]")
![Pretty Peacock 8-1/2" X 11" Cardstock [ 150880 ]](https://assets1.tamsnetwork.com/images/EC042017NF/150880s.jpg "Pretty Peacock 8-1/2\" X 11\" Cardstock [ 150880 ]")
![Blackberry Bliss Classic Stampin' Pad [ 147092 ]](https://assets1.tamsnetwork.com/images/EC042017NF/147092s.jpg "Blackberry Bliss Classic Stampin' Pad [ 147092 ]")
![Mossy Meadow Classic Stampin' Pad [ 147111 ]](https://assets1.tamsnetwork.com/images/EC042017NF/147111s.jpg "Mossy Meadow Classic Stampin' Pad [ 147111 ]")
![Tuxedo Black Memento Ink Pad [ 132708 ]](https://assets1.tamsnetwork.com/images/EC042017NF/132708s.jpg "Tuxedo Black Memento Ink Pad [ 132708 ]")
![Berry Burst Stampin’ Blends Combo Pack [ 161681 ]](https://assets1.tamsnetwork.com/images/EC042017NF/161681s.jpg "Berry Burst Stampin’ Blends Combo Pack [ 161681 ]")
![Blackberry Bliss Stampin' Blends Combo Pack [ 154877 ]](https://assets1.tamsnetwork.com/images/EC042017NF/154877s.jpg "Blackberry Bliss Stampin' Blends Combo Pack [ 154877 ]")
![Old Olive Stampin' Blends Combo Pack [ 154892 ]](https://assets1.tamsnetwork.com/images/EC042017NF/154892s.jpg "Old Olive Stampin' Blends Combo Pack [ 154892 ]")
![Mossy Meadow Stampin' Blends Combo Pack [ 154890 ]](https://assets1.tamsnetwork.com/images/EC042017NF/154890s.jpg "Mossy Meadow Stampin' Blends Combo Pack [ 154890 ]")
![Textured Notes Dies [ 165555 ]](https://assets1.tamsnetwork.com/images/EC042017NF/165555s.jpg "Textured Notes Dies [ 165555 ]")
![Basic White Medium Envelopes [ 159236 ]](https://assets1.tamsnetwork.com/images/EC042017NF/159236s.jpg "Basic White Medium Envelopes [ 159236 ]")


![Take Your Pick [ 144107 ]](https://assets1.tamsnetwork.com/images/EC042017NF/144107s.jpg "Take Your Pick [ 144107 ]")


![Coneflower Celebration Bundle (English) [ 165251 ]](https://assets1.tamsnetwork.com/images/EC042017NF/165251s.jpg "Coneflower Celebration Bundle (English) [ 165251 ]")
![Coneflower Celebrations Photopolymer Stamp Set (English) [ 165247 ]](https://assets1.tamsnetwork.com/images/EC042017NF/165247s.jpg "Coneflower Celebrations Photopolymer Stamp Set (English) [ 165247 ]")
![Coneflower Celebrations Dies [ 165250 ]](https://assets1.tamsnetwork.com/images/EC042017NF/165250s.jpg "Coneflower Celebrations Dies [ 165250 ]")
![Pecan Pie 8 1/2" X 11" Cardstock [ 161717 ]](https://assets1.tamsnetwork.com/images/EC042017NF/161717s.jpg "Pecan Pie 8 1/2\" X 11\" Cardstock [ 161717 ]")
![Pretty In Pink 8 1/2" X 11" Cardstock [ 163793 ]](https://assets1.tamsnetwork.com/images/EC042017NF/163793s.jpg "Pretty In Pink 8 1/2\" X 11\" Cardstock [ 163793 ]")
![Strawberry Slush 8 1/2" X 11" Cardstock [ 165625 ]](https://assets1.tamsnetwork.com/images/EC042017NF/165625s.jpg "Strawberry Slush 8 1/2\" X 11\" Cardstock [ 165625 ]")
![Lemon Lolly Classic Stampin' Pad [ 161666 ]](https://assets1.tamsnetwork.com/images/EC042017NF/161666s.jpg "Lemon Lolly Classic Stampin' Pad [ 161666 ]")
![Azure Afternoon Stampin’ Blends Combo Pack [ 161672 ]](https://assets1.tamsnetwork.com/images/EC042017NF/161672s.jpg "Azure Afternoon Stampin’ Blends Combo Pack [ 161672 ]")
![Granny Apple Green Stampin' Blends Combo Pack [ 154885 ]](https://assets1.tamsnetwork.com/images/EC042017NF/154885s.jpg "Granny Apple Green Stampin' Blends Combo Pack [ 154885 ]")
![Pecan Pie Stampin’ Blends Combo Pack [ 161674 ]](https://assets1.tamsnetwork.com/images/EC042017NF/161674s.jpg "Pecan Pie Stampin’ Blends Combo Pack [ 161674 ]")
![Pretty In Pink Stampin’ Blends Combo Pack [ 163824 ]](https://assets1.tamsnetwork.com/images/EC042017NF/163824s.jpg "Pretty In Pink Stampin’ Blends Combo Pack [ 163824 ]")
![Strawberry Slush & Pretty In Pink Gems [ 165615 ]](https://assets1.tamsnetwork.com/images/EC042017NF/165615s.jpg "Strawberry Slush & Pretty In Pink Gems [ 165615 ]")

![Basic Beige 8 1/2" X 11" Cardstock [ 164511 ]](https://assets1.tamsnetwork.com/images/EC042017NF/164511s.jpg "Basic Beige 8 1/2\" X 11\" Cardstock [ 164511 ]")
![Secret Sea 8 1/2" X 11" Cardstock [ 165624 ]](https://assets1.tamsnetwork.com/images/EC042017NF/165624s.jpg "Secret Sea 8 1/2\" X 11\" Cardstock [ 165624 ]")
![Secret Sea Classic Stampin' Pad [ 165285 ]](https://assets1.tamsnetwork.com/images/EC042017NF/165285s.jpg "Secret Sea Classic Stampin' Pad [ 165285 ]")
![Exposed Brick 3 D Embossing Folder [ 161600 ]](https://assets1.tamsnetwork.com/images/EC042017NF/161600s.jpg "Exposed Brick 3 D Embossing Folder [ 161600 ]")
![2025–2027 In Color™ Flat Pearls [ 165192 ]](https://assets1.tamsnetwork.com/images/EC042017NF/165192s.jpg "2025–2027 In Color™ Flat Pearls [ 165192 ]")

![Year Of Flowers Cling Stamp Set (English) [ 165367 ]](https://assets1.tamsnetwork.com/images/EC042017NF/165367s.jpg "Year Of Flowers Cling Stamp Set (English) [ 165367 ]")
![Petal Pink 8-1/2" X 11" Cardstock [ 146985 ]](https://assets1.tamsnetwork.com/images/EC042017NF/146985s.jpg "Petal Pink 8-1/2\" X 11\" Cardstock [ 146985 ]")
![Timid Tiger 8 1/2" X 11" Cardstock [ 165626 ]](https://assets1.tamsnetwork.com/images/EC042017NF/165626s.jpg "Timid Tiger 8 1/2\" X 11\" Cardstock [ 165626 ]")
![Old Olive 12" X 12" (30.5 X 30.5 Cm) Two Tone Cardstock [ 166683 ]](https://assets1.tamsnetwork.com/images/EC042017NF/166683s.jpg "Old Olive 12\" X 12\" (30.5 X 30.5 Cm) Two Tone Cardstock [ 166683 ]")
![Petal Pink Stampin' Blends Combo Pack [ 154893 ]](https://assets1.tamsnetwork.com/images/EC042017NF/154893s.jpg "Petal Pink Stampin' Blends Combo Pack [ 154893 ]")
![Timid Tiger Stampin’ Blends Combo Pack [ 165291 ]](https://assets1.tamsnetwork.com/images/EC042017NF/165291s.jpg "Timid Tiger Stampin’ Blends Combo Pack [ 165291 ]")
![Versamark Pad [ 102283 ]](https://assets1.tamsnetwork.com/images/EC042017NF/102283s.jpg "Versamark Pad [ 102283 ]")
![Basics Wow! Embossing Powder [ 165679 ]](https://assets1.tamsnetwork.com/images/EC042017NF/165679s.jpg "Basics Wow! Embossing Powder [ 165679 ]")
![Heat Tool (Us And Canada) [ 129053 ]](https://assets1.tamsnetwork.com/images/EC042017NF/129053s.jpg "Heat Tool (Us And Canada) [ 129053 ]")
![Regals Stampin' Write Markers [ 147155 ]](https://assets1.tamsnetwork.com/images/EC042017NF/147155s.jpg "Regals Stampin' Write Markers [ 147155 ]")
![Subtles Stampin' Write Markers [ 147156 ]](https://assets1.tamsnetwork.com/images/EC042017NF/147156s.jpg "Subtles Stampin' Write Markers [ 147156 ]")

![Sentimental Framing Photopolymer Stamp Set (English) [ 165475 ]](https://assets1.tamsnetwork.com/images/EC042017NF/165475s.jpg "Sentimental Framing Photopolymer Stamp Set (English) [ 165475 ]")
![Calypso Coral 8-1/2" X 11" Cardstock [ 122925 ]](https://assets1.tamsnetwork.com/images/EC042017NF/122925s.jpg "Calypso Coral 8-1/2\" X 11\" Cardstock [ 122925 ]")
![Calypso Coral Stampin' Blends Combo Pack [ 154881 ]](https://assets1.tamsnetwork.com/images/EC042017NF/154881s.jpg "Calypso Coral Stampin' Blends Combo Pack [ 154881 ]")
![Pattern Of Friendship Die [ 165384 ]](https://assets1.tamsnetwork.com/images/EC042017NF/165384s.jpg "Pattern Of Friendship Die [ 165384 ]")
![Misty Moonlight & White 1/4" (6.4 Mm) Starter Ribbon Pack [ 165276 ]](https://assets1.tamsnetwork.com/images/EC042017NF/165276s.jpg "Misty Moonlight & White 1/4\" (6.4 Mm) Starter Ribbon Pack [ 165276 ]")
![Rhinestone Basic Jewels [ 144220 ]](https://assets1.tamsnetwork.com/images/EC042017NF/144220s.jpg "Rhinestone Basic Jewels [ 144220 ]")


![Cheers & Sips Bundle (English) [ 165594 ]](https://assets1.tamsnetwork.com/images/EC042017NF/165594s.jpg "Cheers & Sips Bundle (English) [ 165594 ]")
![Cheers & Sips Photopolymer Stamp Set (English) [ 165588 ]](https://assets1.tamsnetwork.com/images/EC042017NF/165588s.jpg "Cheers & Sips Photopolymer Stamp Set (English) [ 165588 ]")
![Cheers & Sips Dies [ 165593 ]](https://assets1.tamsnetwork.com/images/EC042017NF/165593s.jpg "Cheers & Sips Dies [ 165593 ]")
![Painted Stripes Cling Stamp Set [ 165437 ]](https://assets1.tamsnetwork.com/images/EC042017NF/165437s.jpg "Painted Stripes Cling Stamp Set [ 165437 ]")
![Beautiful Butterflies Photopolymer Stamp Set (English) [ 164608 ]](https://assets1.tamsnetwork.com/images/EC042017NF/164608s.jpg "Beautiful Butterflies Photopolymer Stamp Set (English) [ 164608 ]")
![Celebratory Sips 12" X 12" (30.5 X 30.5 Cm) Designer Series Paper [ 165586 ]](https://assets1.tamsnetwork.com/images/EC042017NF/165586s.jpg "Celebratory Sips 12\" X 12\" (30.5 X 30.5 Cm) Designer Series Paper [ 165586 ]")
![Darling Duckling Classic Stampin' Pad [ 165277 ]](https://assets1.tamsnetwork.com/images/EC042017NF/165277s.jpg "Darling Duckling Classic Stampin' Pad [ 165277 ]")
![Strawberry Slush Classic Stampin' Pad [ 165286 ]](https://assets1.tamsnetwork.com/images/EC042017NF/165286s.jpg "Strawberry Slush Classic Stampin' Pad [ 165286 ]")
![Timid Tiger Classic Stampin' Pad [ 165278 ]](https://assets1.tamsnetwork.com/images/EC042017NF/165278s.jpg "Timid Tiger Classic Stampin' Pad [ 165278 ]")
![Blending Brushes [ 153611 ]](https://assets1.tamsnetwork.com/images/EC042017NF/153611s.jpg "Blending Brushes [ 153611 ]")
![Stylish Shapes Dies [ 159183 ]](https://assets1.tamsnetwork.com/images/EC042017NF/159183s.jpg "Stylish Shapes Dies [ 159183 ]")
![Holographic Resin Dots [ 165598 ]](https://assets1.tamsnetwork.com/images/EC042017NF/165598s.jpg "Holographic Resin Dots [ 165598 ]")


![Peach Pie Classic Stampin Pad [ 163810 ]](https://assets1.tamsnetwork.com/images/EC042017NF/163810s.jpg "Peach Pie Classic Stampin Pad [ 163810 ]")
![Peach Pie Stampin’ Blends Combo Pack [ 163827 ]](https://assets1.tamsnetwork.com/images/EC042017NF/163827s.jpg "Peach Pie Stampin’ Blends Combo Pack [ 163827 ]")
![Strawberry Slush Stampin’ Blends Combo Pack [ 165290 ]](https://assets1.tamsnetwork.com/images/EC042017NF/165290s.jpg "Strawberry Slush Stampin’ Blends Combo Pack [ 165290 ]")
![Glass & Gardens Embossing Folders [ 165597 ]](https://assets1.tamsnetwork.com/images/EC042017NF/165597s.jpg "Glass & Gardens Embossing Folders [ 165597 ]")


![Old Olive 8-1/2" X 11" Cardstock [ 100702 ]](https://assets1.tamsnetwork.com/images/EC042017NF/100702s.jpg "Old Olive 8-1/2\" X 11\" Cardstock [ 100702 ]")
![Old Olive Classic Stampin' Pad [ 147090 ]](https://assets1.tamsnetwork.com/images/EC042017NF/147090s.jpg "Old Olive Classic Stampin' Pad [ 147090 ]")
![Petal Pink Classic Stampin' Pad [ 147108 ]](https://assets1.tamsnetwork.com/images/EC042017NF/147108s.jpg "Petal Pink Classic Stampin' Pad [ 147108 ]")
![Sponge Daubers [ 133773 ]](https://assets1.tamsnetwork.com/images/EC042017NF/133773s.jpg "Sponge Daubers [ 133773 ]")


![Sunrise Sailing Bundle (English) [ 165497 ]](https://assets1.tamsnetwork.com/images/EC042017NF/165497s.jpg "Sunrise Sailing Bundle (English) [ 165497 ]")
![Sunrise Sailing Photopolymer Stamp Set (English) [ 165491 ]](https://assets1.tamsnetwork.com/images/EC042017NF/165491s.jpg "Sunrise Sailing Photopolymer Stamp Set (English) [ 165491 ]")
![Sunrise Sailing Hybrid Embossing Folder [ 165496 ]](https://assets1.tamsnetwork.com/images/EC042017NF/165496s.jpg "Sunrise Sailing Hybrid Embossing Folder [ 165496 ]")
![Cloud Cover 8 1/2" X 11" Cardstock [ 165621 ]](https://assets1.tamsnetwork.com/images/EC042017NF/165621s.jpg "Cloud Cover 8 1/2\" X 11\" Cardstock [ 165621 ]")
![Beautiful Gallery 6" X 6" (15.2 X 15.2 Cm) Designer Series Paper [ 165196 ]](https://assets1.tamsnetwork.com/images/EC042017NF/165196s.jpg "Beautiful Gallery 6\" X 6\" (15.2 X 15.2 Cm) Designer Series Paper [ 165196 ]")
![Pecan Pie Classic Stampin' Pad [ 161665 ]](https://assets1.tamsnetwork.com/images/EC042017NF/161665s.jpg "Pecan Pie Classic Stampin' Pad [ 161665 ]")
![Cloud Cover Stampin’ Blends Combo Pack [ 165287 ]](https://assets1.tamsnetwork.com/images/EC042017NF/165287s.jpg "Cloud Cover Stampin’ Blends Combo Pack [ 165287 ]")
![Baker's Twine Essentials Pack [ 155475 ]](https://assets1.tamsnetwork.com/images/EC042017NF/155475s.jpg "Baker's Twine Essentials Pack [ 155475 ]")


![Bee My Valentine Photopolymer Stamp Set (English) [ 162547 ]](https://assets1.tamsnetwork.com/images/EC042017NF/162547s.jpg "Bee My Valentine Photopolymer Stamp Set (English) [ 162547 ]")
![Sweet Blooms Photopolymer Stamp Set (English) [ 165181 ]](https://assets1.tamsnetwork.com/images/EC042017NF/165181s.jpg "Sweet Blooms Photopolymer Stamp Set (English) [ 165181 ]")
![Petunia Pop 8 1/2" X 11" Cardstock [ 163801 ]](https://assets1.tamsnetwork.com/images/EC042017NF/163801s.jpg "Petunia Pop 8 1/2\" X 11\" Cardstock [ 163801 ]")
![Cute As Can Bee 12" X 12" (30.5 X 30.5 Cm) Designer Series Paper [ 166621 ]](https://assets1.tamsnetwork.com/images/EC042017NF/166621s.jpg "Cute As Can Bee 12\" X 12\" (30.5 X 30.5 Cm) Designer Series Paper [ 166621 ]")
![Daffodil Delight Classic Stampin' Pad [ 147094 ]](https://assets1.tamsnetwork.com/images/EC042017NF/147094s.jpg "Daffodil Delight Classic Stampin' Pad [ 147094 ]")
![Pool Party Classic Stampin' Pad [ 147107 ]](https://assets1.tamsnetwork.com/images/EC042017NF/147107s.jpg "Pool Party Classic Stampin' Pad [ 147107 ]")
![Bee Builder Punch [ 162553 ]](https://assets1.tamsnetwork.com/images/EC042017NF/162553s.jpg "Bee Builder Punch [ 162553 ]")
![Shades Of Green Hexagons [ 165233 ]](https://assets1.tamsnetwork.com/images/EC042017NF/165233s.jpg "Shades Of Green Hexagons [ 165233 ]")

