Good Sunday morning stamping friends. How is everyone’s weekend going? Did you know that today is National Son & Daughter’s Day? I am blessed to have a son and daughter. They have always been the apple of my eye from when they were babies and even now when they are all grown up. I am so proud of them both and the beautiful adults they have become.
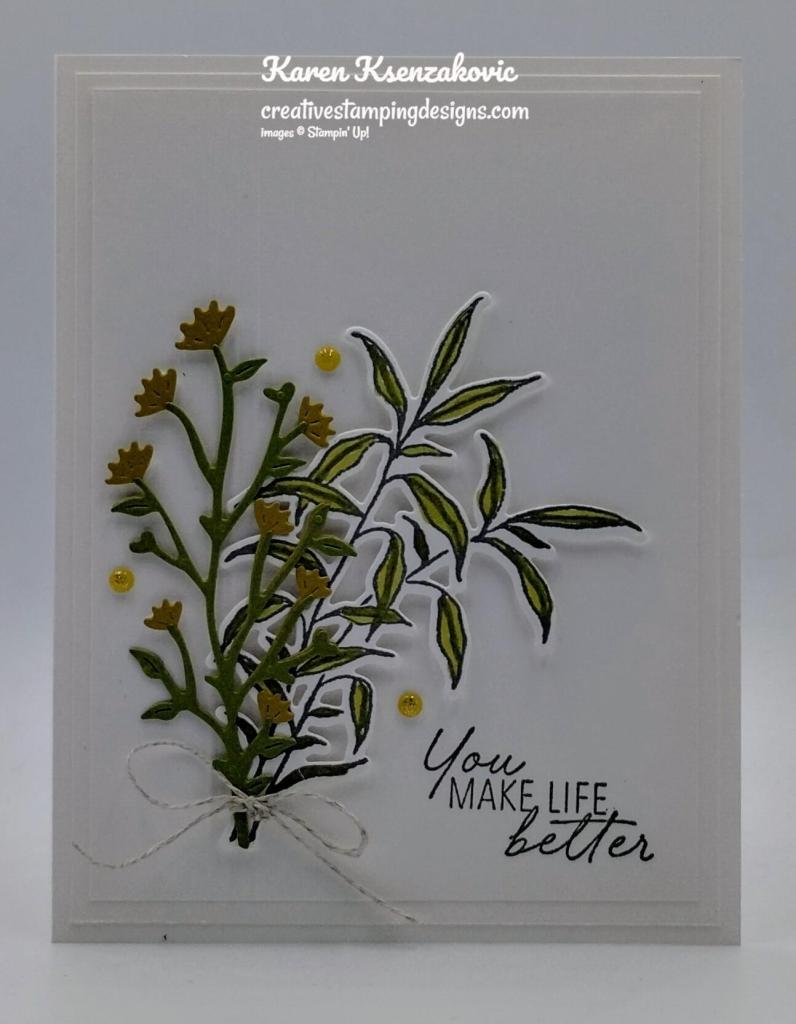
I have another quick card for you today using a bundle from the annual catalog. If you’d like to see a quick video of how I made this card, Click Here to go to my Instagram Reels. Here is my card for today.

I used the Stampin’ Up! thoughtful Wishes Bundle along with the Thoughtful Designs Specialty Designer Series Paper for my card today
Take one of the 3 3/4″ X 5″ panels of Basic White and score the card front at 3/4″, 7/8″ & 1″. Flip the card front over so that the score lines are the mountain facing up.
Stamp the sentiment from the Stampin’ Up! Thoughtful Wishes Cling Stamp Set in Pebbled Path Ink on the bottom of the panel. Adhere the Basic White card front to a Basic White mat using Stampin’ Seal. Adhere the layered panel to a Basic White thick card base using Liquid Glue.

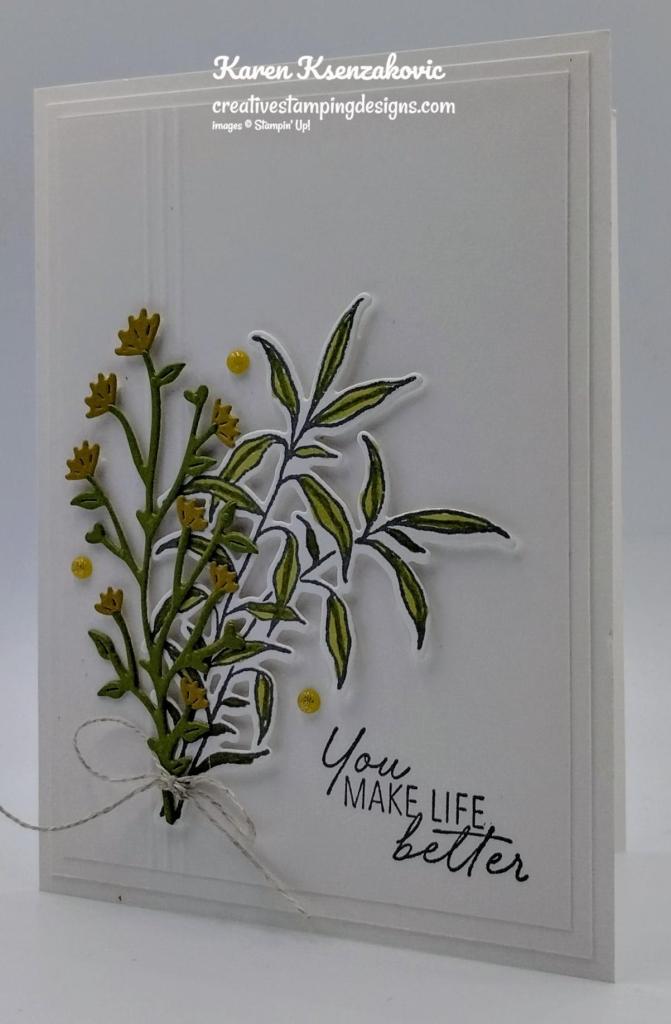
Stamp the large leaf image from the Thoughtful Wishes stamp set in Pebbled Path Ink on a panel of Basic White. Color the image using Old Olive Stampin’ Blends Markers. Cut the image using the Thoughtful Wishes Dies. Using the Thoughtful Wishes Dies, cut a panel of Old Olive using the stem/leaf die and a panel of Wild Wheat using the stem/flower die. Adhere the Old Olive die cut to the top of the Wild Wheat die cut using Liquid Glue. Adhere the die cut pieces to the card front using Stampin’ Dimensionals. Tie a piece of Linen Thread around the stems and tie a bow. Add a few 2023-2025 In-Color Opaque Sparkle Dots to the card front.

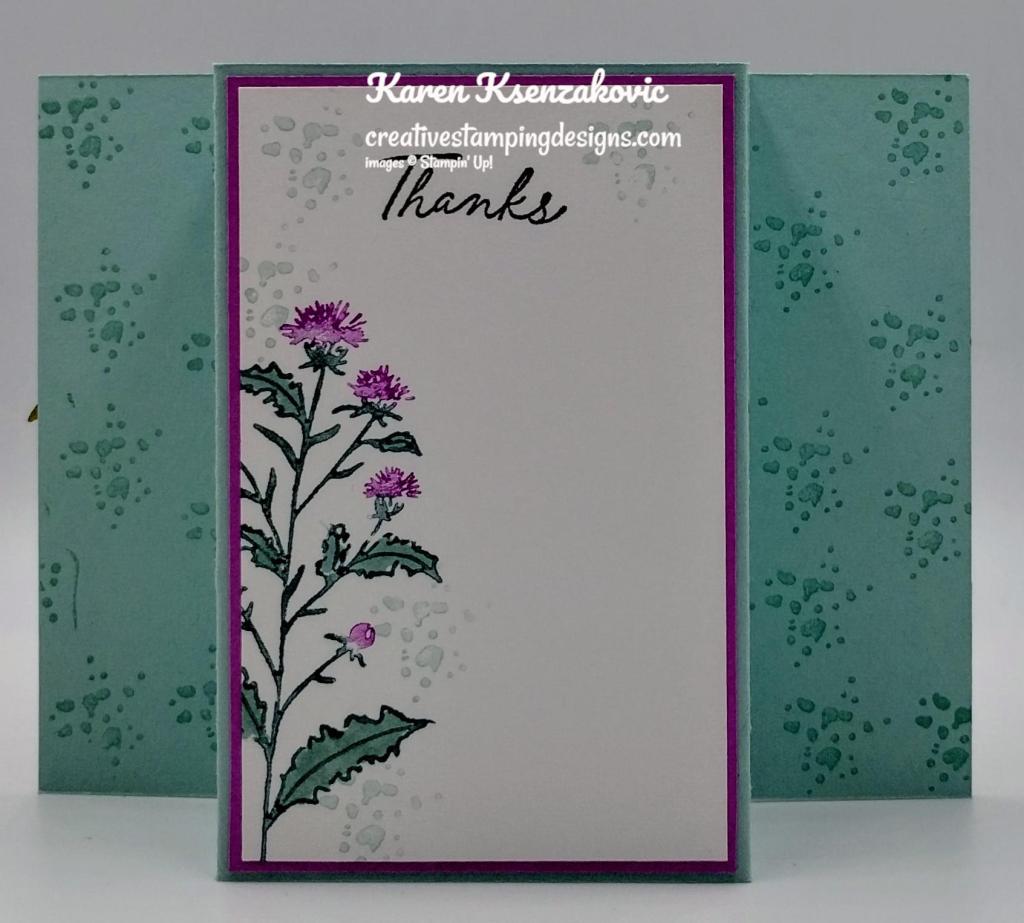
On the inside, stamp the sentiment from Thoughtful Wishes stamp set in Pebbled path Ink on a panel of Basic White. Stamp the large leaf image from the Thoughtful Wishes stamp set in Pebbled Path Ink on the side of the panel. Color the image using Old Olive Stampin’ Blends Markers. Adhere the Basic White panel to a Basic White mat then to the Basic White Thick card base.

Finish the card by decorating a Basic White Medium Envelope. Stamp the large leaf image from the Thoughtful Wishes stamp set in Pebbled path Ink on the envelope front. Color the image using Old Olive Stampin’ Blends Markers. Adhere a panel of Thoughtful Designs DSP to the envelope flap.

Thank you for stopping by my blog today. I hope you like the card and will give it a try. Happy Stamping!!
*********************************************************************************************************
If you need any stamping supplies, I’d love to be your Demonstrator. Just click HERE to go directly to my online store or drop me an email if you have any questions.
MY CURRENT HOST CODE IS: KFUKW3ZY
Use this host code when placing an order with me. When you order $50 or greater you will receive a free gift from me! If your order is over $150, please do not use this code, but you’ll still get the free gift. The free gift is your choice of any 1 item valued up to $10.00 from the 2024-2025Annual Catalog, or from the Online Exclusives! Unfortunately, packs of cardstock are no longer an option for a free gift. Shipping has become too expensive to ship and it’s costing me as much to ship as the cardstock costs. For any orders $50 or more I will also send you my monthly class tutorials. Click HERE or go to my Customer Rewards for more details and to see what this month’s tutorials are.
Please remember to use my current Host Code and make sure that you can see my name on the final checkout page listed as your Demonstrator when you order so that you know that you’re ordering with me, and you’ll get my rewards!
Happy Stamping, Karen
*********************************************************************************************************
Time to Start Redeeming Those Coupons

Redemption Period: August 1-31, 2024
Ordering Deadline: August 31, 2024 at 11:59 p.m. (MT)
- There is no limit to the number of coupon codes you can redeem on an order during the redemption period. If using multiple codes, they must be separated by a space.
- Coupon codes may be redeemed one time only. They cannot be redeemed after the August 31.
- Coupon codes may be redeemed for any product (excluding Starter Kits). They cannot be used on exchanges.
- Bonus Days coupon codes can be applied to month-to-month Paper Pumpkin subscriptions and new prepaid subscriptions.
********************************************************************************************************
Designer Series Papew Sale – 15% off August 6th-31st
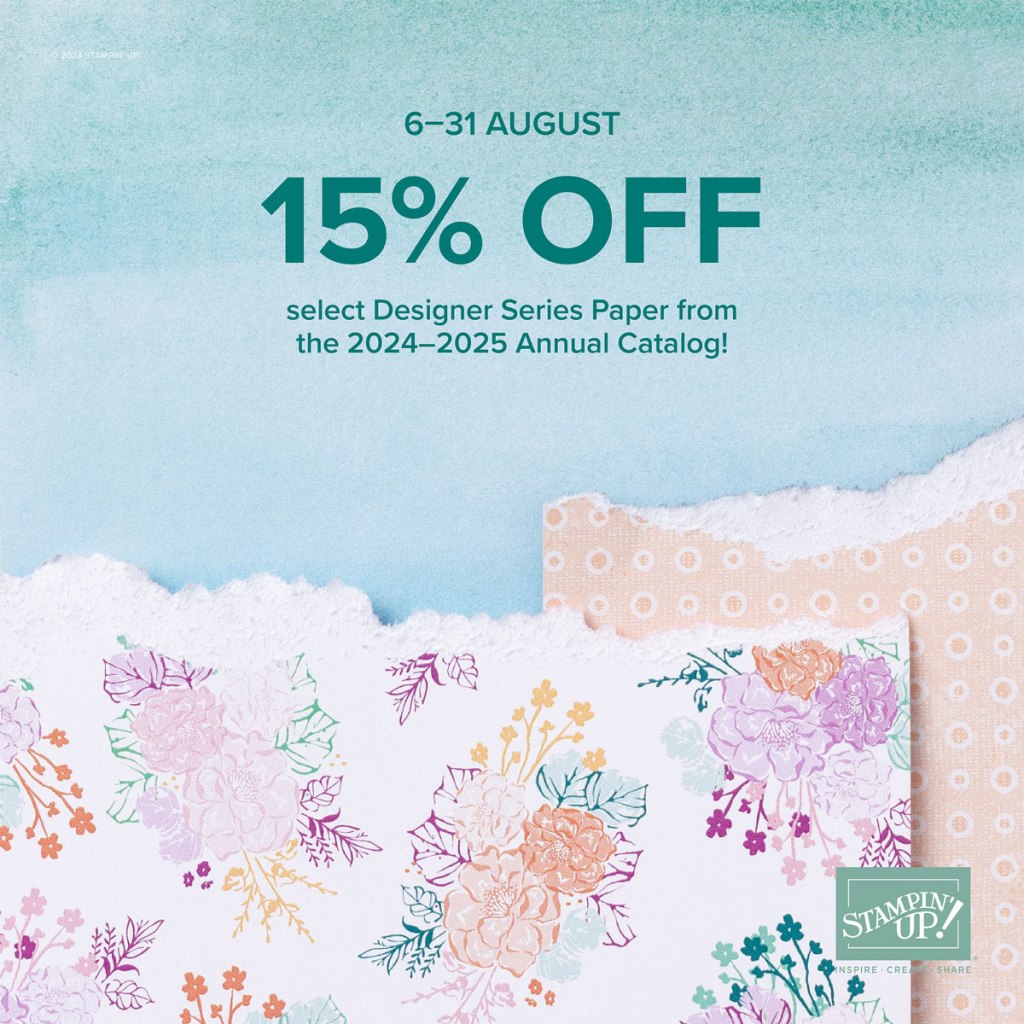
Between August 6-31, you can shop select Designer Series Paper from the 2024–2025 Annual Catalog at 15% off! This is the perfect time to stock up and save on some of your favorite paper.
Designer Series Paper Sale Details:
- Sales Period: August 6-31, 2024
- Ordering Deadlines: August 31 at 11:59 p.m. (MT)
- The fourteen paper packs included in the sale can be found listed in This Flyer
- Only the select packs of papers listed on the flyer are included in the sale.
- You CAN redeem your Bonus Days coupons when you order the sale papers!
- You must open and close the order during the allotted dates to receive the discount.
- There are NO limits on ordering. However, product is only available while supplies last.
- Designer Series Paper purchased with Stampin’ Rewards or as part of a Starter Kit WILL qualify for the discount.
Head over to my Online Store beginning August 6 and get 15% off your favorite packs of paper!!
*********************************************************************************************************
2 New Kits Available

Kits Collection by Stampin’ Up! is all about making crafting fun, accessible, and inclusive! We’re always working hard to design a collection full of different product options to allow you oodles of options when it comes to finding that perfect project or gift.
Haunted Home Kit
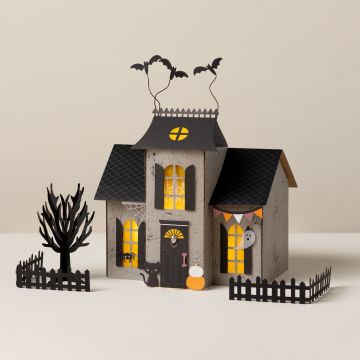
Get your Halloween crafting on with the Haunted Home Kit! This kit comes with all the paper pieces you need to assemble your very own haunted paper house. You’ll start with cardboard walls, precut vellum, and other paper pieces for accessorizing. Assemble the house following the instructions then add your own ghostly touch to it. It’s the perfect paper crafting activity for any gathering with fellow crafters, friends, and family during the spooky season!

Please note that you will need a glue gun to assemble the home.
Kit includes:
*Cardboard Home Pieces
* Predesigned projects
* Step-by-step instructions
* Precut vellum and die cut paper pieces
* Enough adhesive to complete projects
*A 10-1/2″ x 8-1/2″ x 1-1/4″ printed designer box for storage or crafting on the go.
Product colors: Basic Black, Crushed Curry, Gray Granite, Moody Mauve, Pumpkin Pie
#164376 $18.00
+++++++++++++++++++++++++++++++++++++++++++++++++++++++++++++++++++++
Christmas Wishes Kit
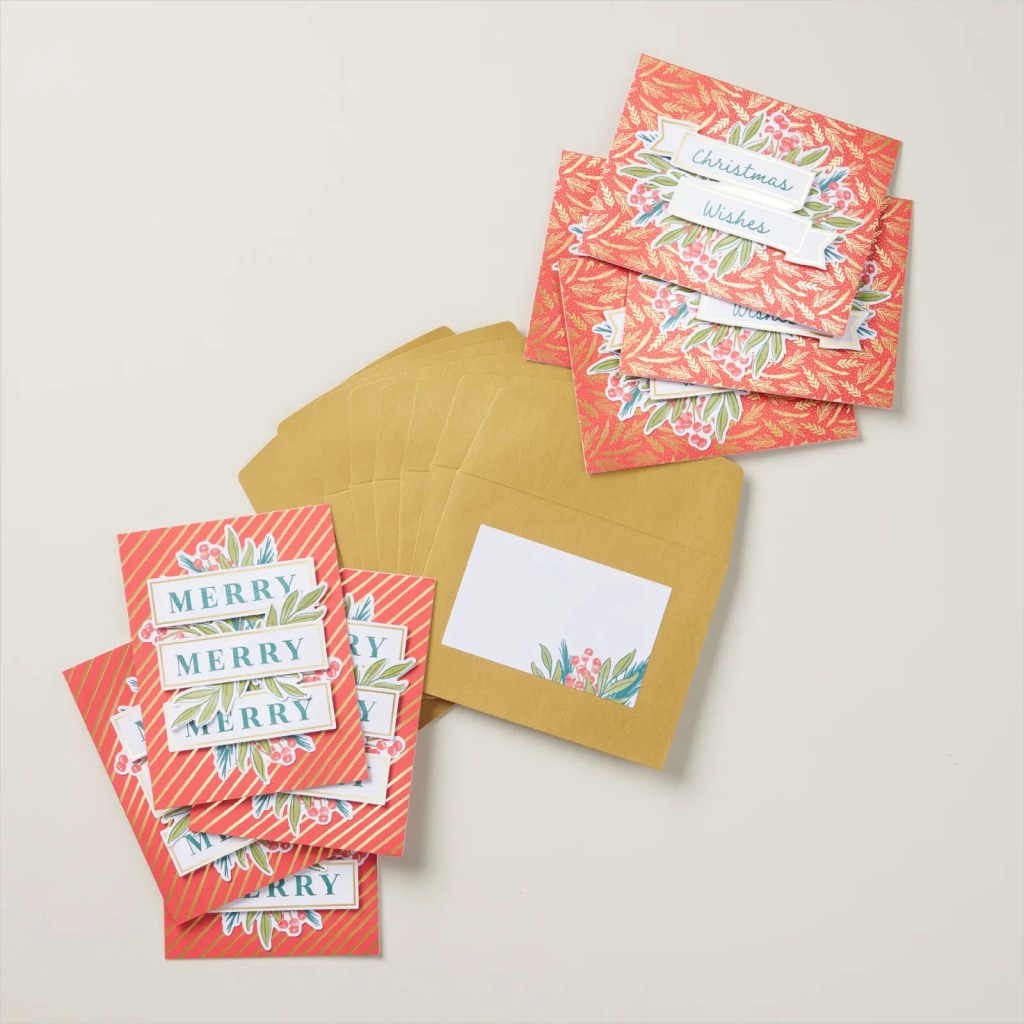
Keep your Christmas card crafting easy AND elegant with the Christmas Wishes Kit! This kit comes with bright red card bases detailed with gold foil and coordinating gold, shimmer envelopes. Create your own Christmas cards using the precut paper pieces, the stamp set, and Stampin’ Spot. Use the included address labels to send your cards to your recipients!


Kit includes:
*Christmas Wishes Photopolymer Stamp Set
*Clear Stamp Block
*Pretty Peacock Stampin’ Spot
*Predesigned projects
*Step-by-step instructions
*Precut pieces (No prep work! Get right to crafting)
*Makes 8 cards: 4 each of 2 designs
*Folded card size: 5-1/2″ x 4-1/4″ (14 x 10.8 cm)
*8 envelopes and 8 address labels
*Enough adhesive to complete projects
*A 9-7/8″ x 6-1/2″ x 2-3/4″ (25.1 x 16.5 x 7 cm) printed designer box for storage or crafting on the go
Product colors: Gold, Old Olive, Pecan Pie, Poppy Parade, Pretty Peacock
#164401 $23.00
*********************************************************************************************************
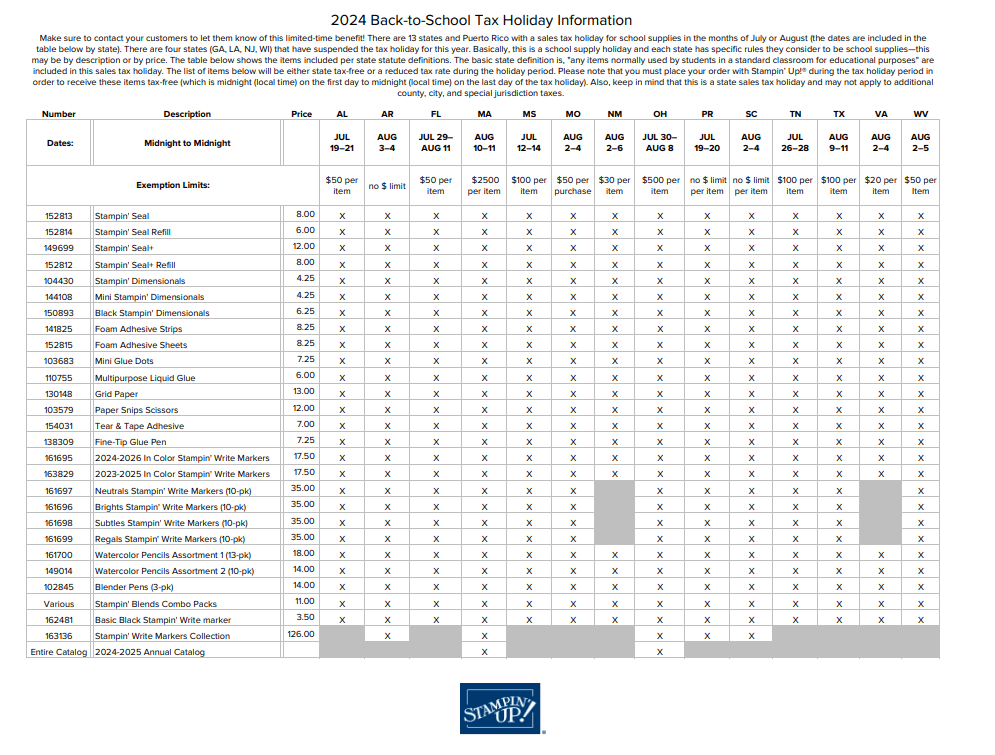
Sales Tax Holiday

Thirteen states and Puerto Rico are having Back-to-School Sales Tax Holidays this year and some Stampin’ Up! items qualify for the tax break in those states!
The states with upcoming tax holidays are: Alabama, Arkansas, Florida, Massachusetts, Mississippi, Missouri, New Mexico, Ohio, South Carolina, Tennessee, Texas, Virginia and West Virginia. So if you live in one of those states or Puerto Rico, take a second to download the spreadsheet below and mark your calendar!
Here is the list of states having sales tax holidays, what the dates are and what supplies will be tax free during the holiday (click on the image to download a full-size printable page):
*********************************************************************************************************
Autumn Abundance
Subscribe August 11 – September 10
Subscribe to Paper Pumpkin for a monthly, all-inclusive crafting kit that’s a fun surprise! Each kit includes a photopolymer stamp set, Classic Stampin’ Spot, and step by step instructions to complete exclusive paper craft projects, including cards, tags, and gift
packaging. And don’t miss the special add-on that coordinates with the next three months!
Share your love for all things autumn with this kit! Don’t miss the whimsical, water colored ephemera pack with this month’s Paper Pumpkin!

• Makes 9 cards, 3 each of 3 designs
• Project includes printed cards and coordinating envelopes
• Laser cut card fronts, ephemera pack, and embellishments
• Coordinating colors: Cajun Craze (Classic Stampin’ Spot), Crushed Curry, Poppy
Parade, Pumpkin Pie, Very Vanilla, Wild Wheat
*********************************************************************************************************
Don’t miss the coordinating
Every Celebration Dies Add-On!

This exclusive add-on (item 164991) coordinates with the three upcoming kits! Paper Pumpkin subscribers can purchase it beginning 11 July. The add-on is available only while supplies last, so it’s best to shop early!
Subscribe to the September Paper Pumpkin Kit between 11 August and 10 September by clicking here!
Note: Supplies may be limited toward the end of the subscription period.
*********************************************************************************************************
Card stock cuts for this project:
- Basic White Cardstock 2 – 3 3/4″ x 5″(card front & inner liner), 2 – 4″ X 5 1/4″(card front & inner liner mats), 3″ x 4″ (leaf image)
- Basic White Thick Cardstock 5 1/2″ X 8 1/2″(card base scored & folded at 4 1/4″)
- Old Olive Cardstock 1 3/4″ X 3 1/4″(stem/leaf die)
- Wild Wheat Cardstock 2 3/4″ X 2 3/4″(flower/stem die)
- Thoughtful Designs Specialty Designer Series Paper 2 1/4″ X 6″(envelope flap)
*********************************************************************************************************
Product List
")
")


 Specialty Designer Series Paper")