
Good Wednesday morning stamping friends. It’s the last Wednesday of June, which I’m having trouble wrapping my head around, in a blink of an eye, it’ll be July. I was supposed to go to an 8th grade graduation today, but because of the heat advisory they moved it inside and there was a limited number of guests allowed. It’s been a brutal couple of days here in NJ, you walk outside, and you can’t breathe. I love the heat, but not when I can’t breathe in it. I believe the heat wave is supposed to break by 8pm tonight.
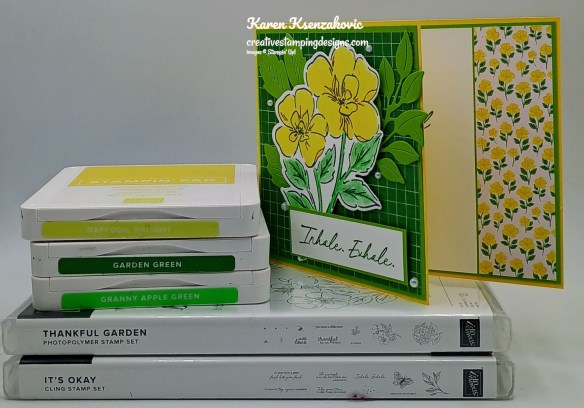
Today’s card is a little sneak peek of a new bundle that will be available starting next Tuesday July 1st, and I made a very simple card with it. If you’d like to see a quick video of how I made this card, Click Here to go to my Instagram Reels. Here’s my card for today.
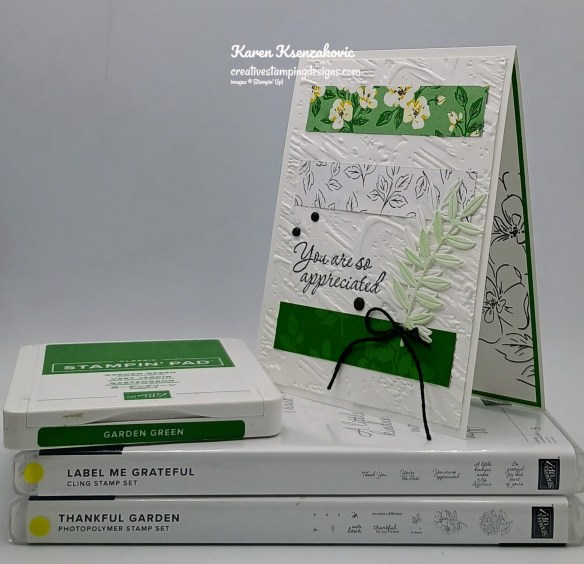
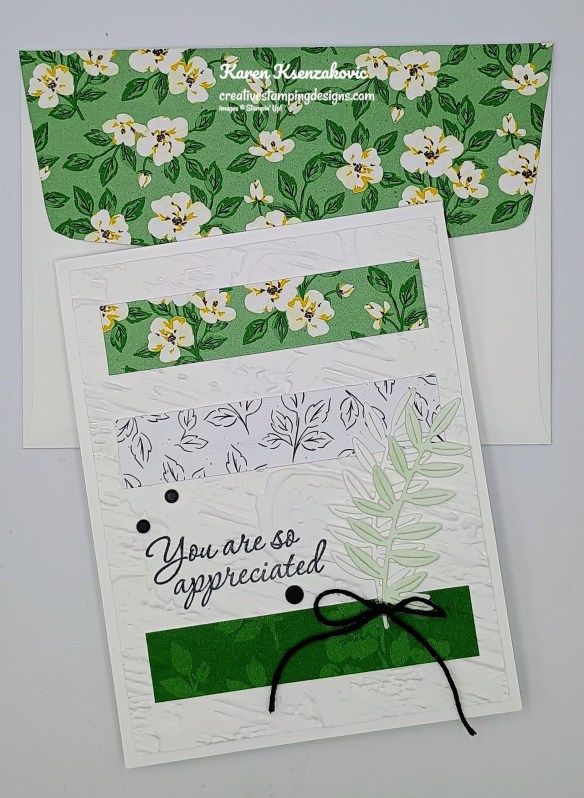
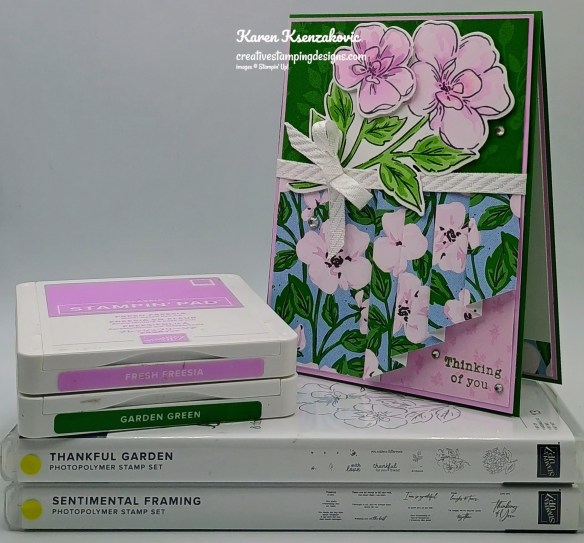
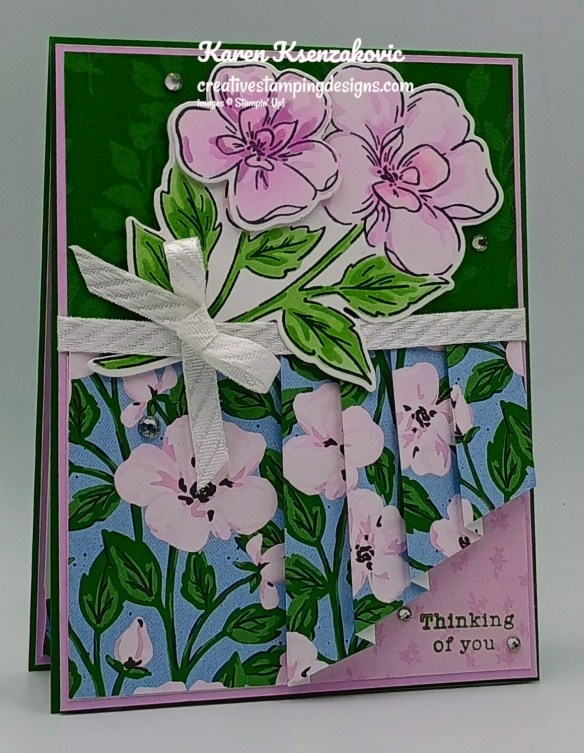
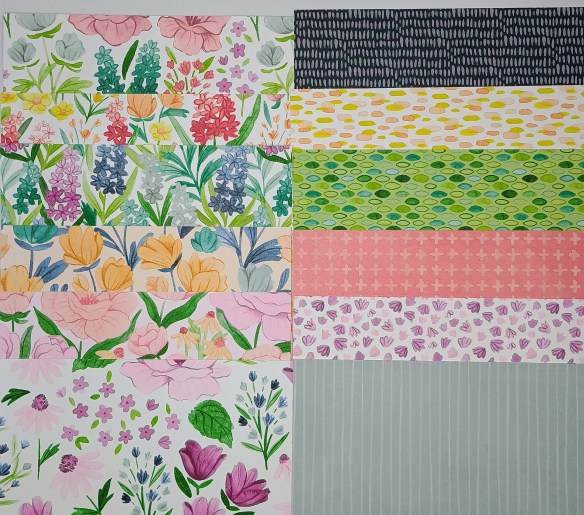
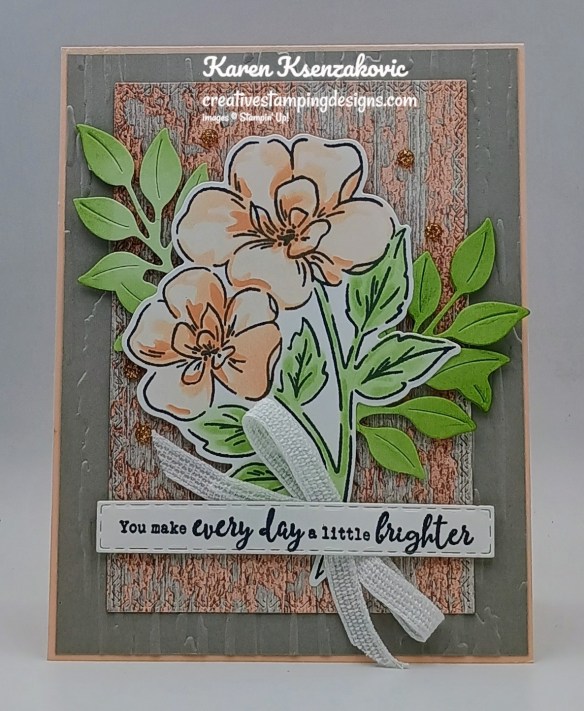
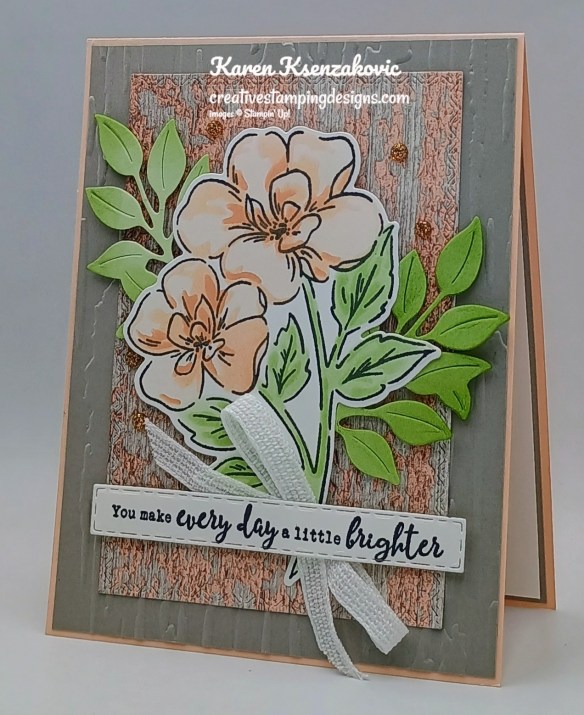
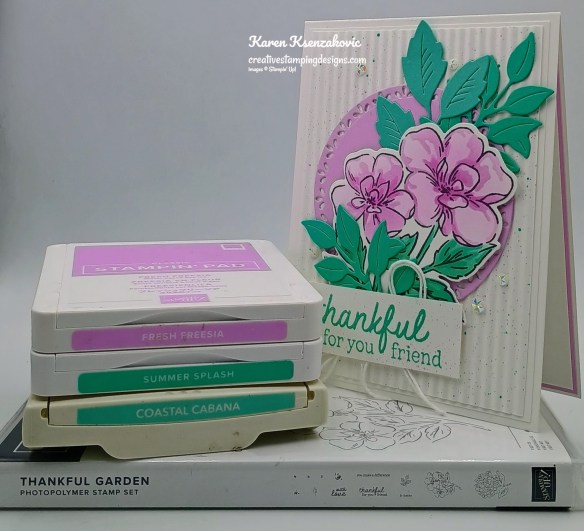
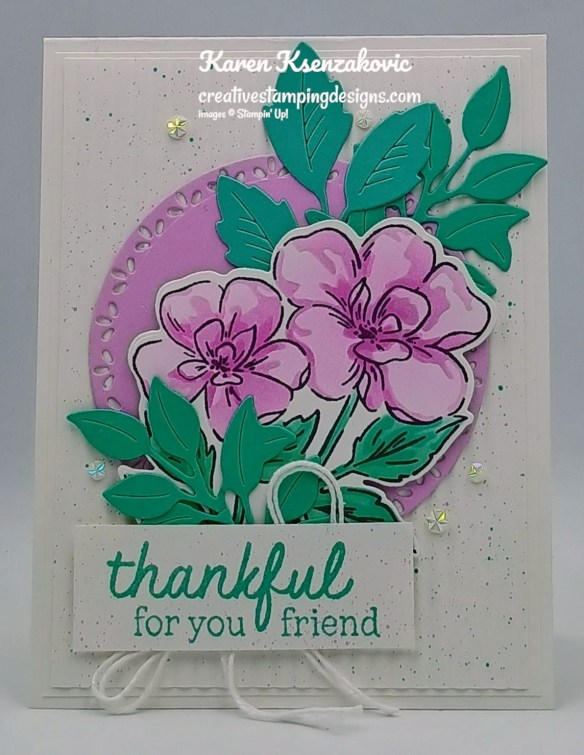
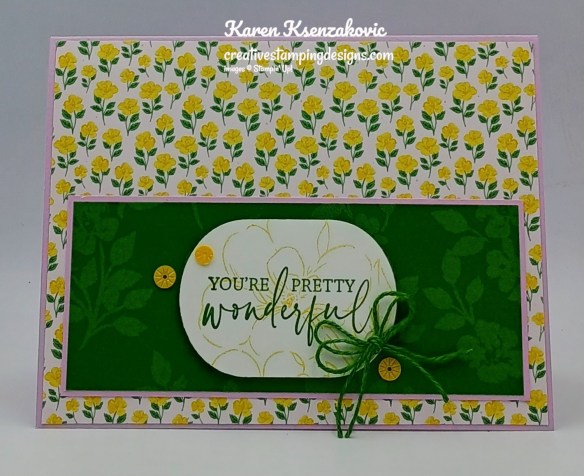
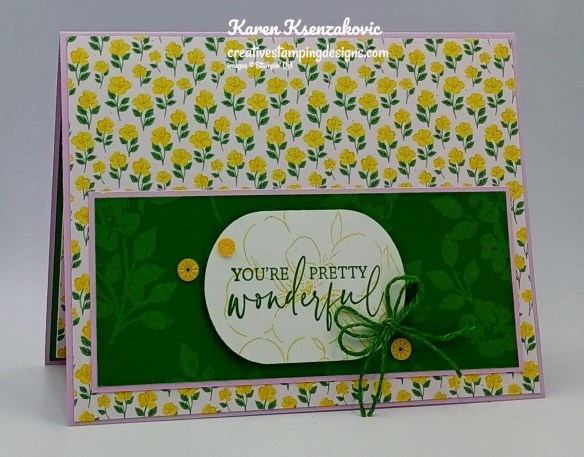
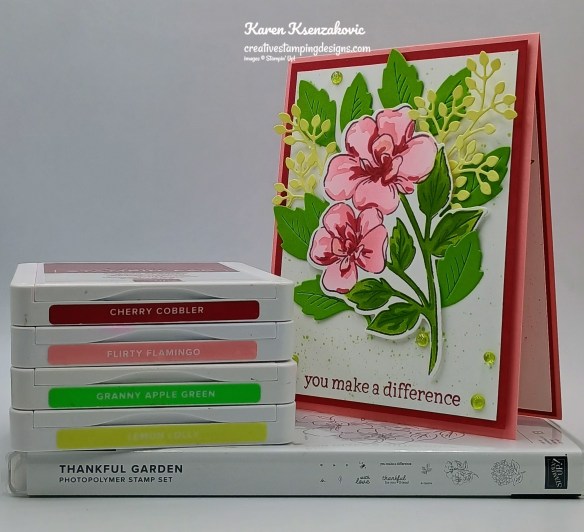
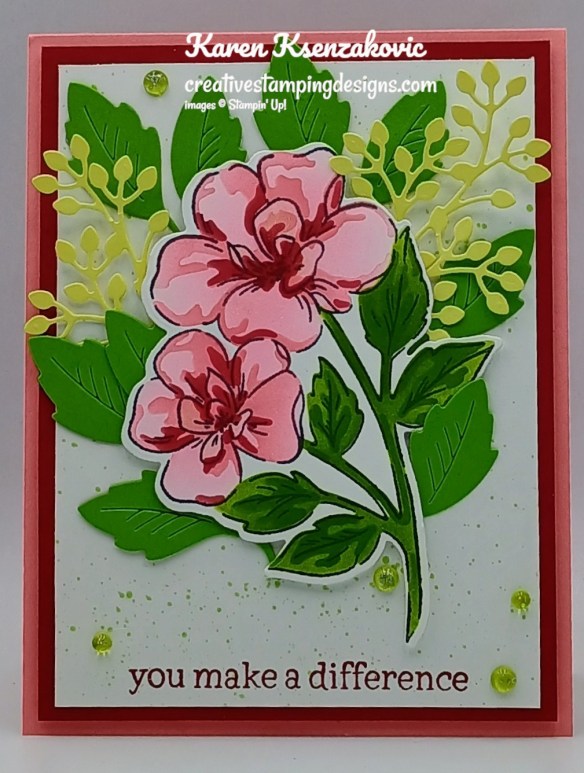
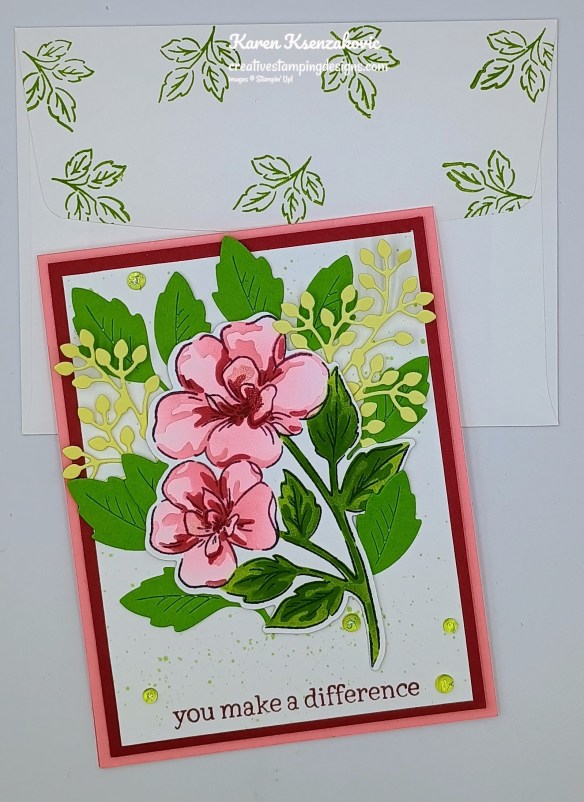
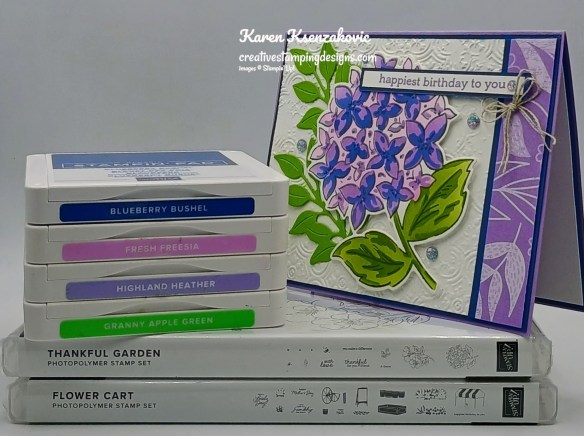
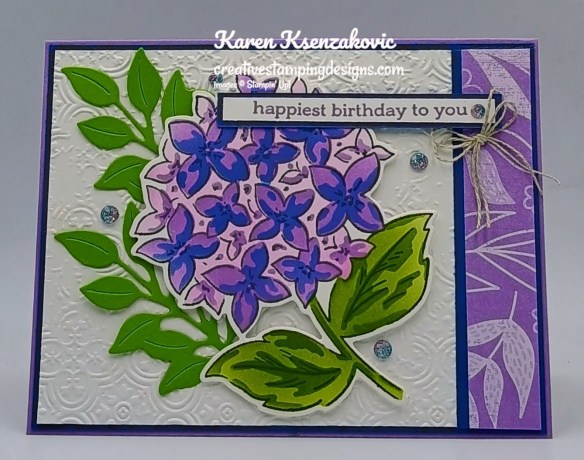
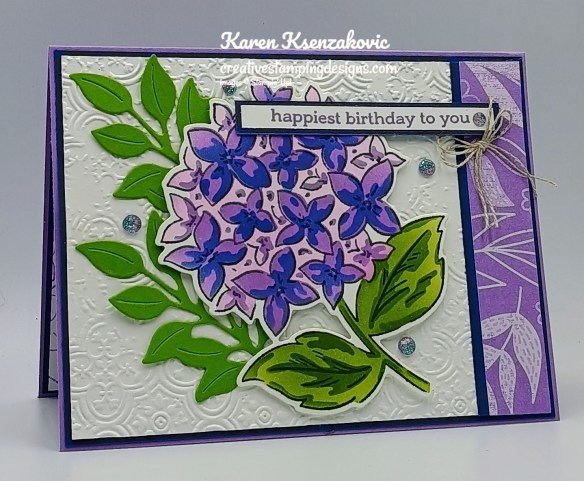
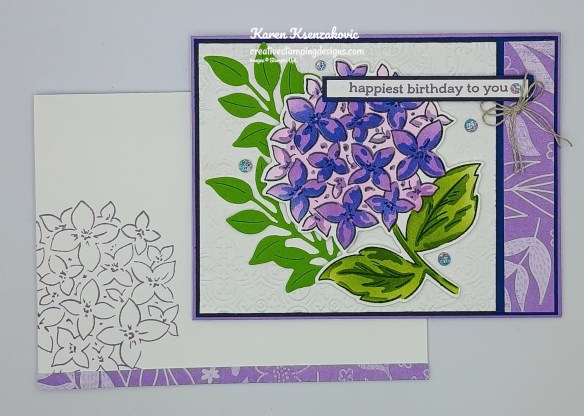
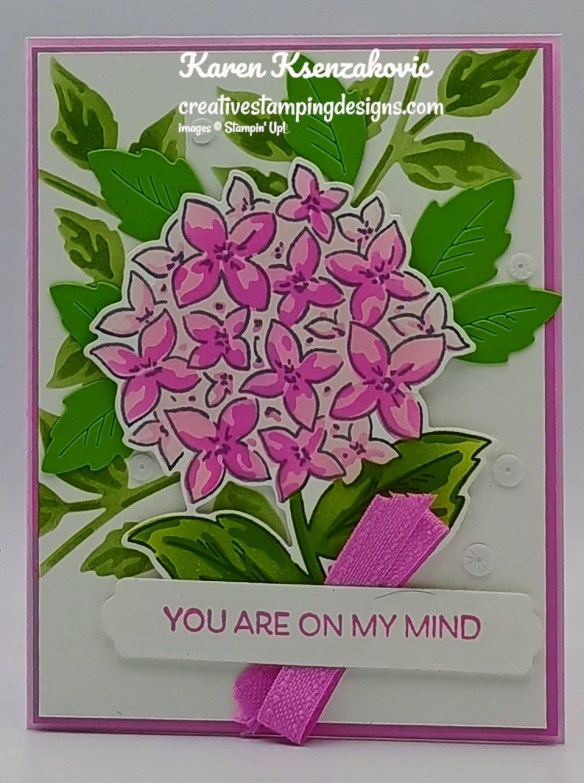
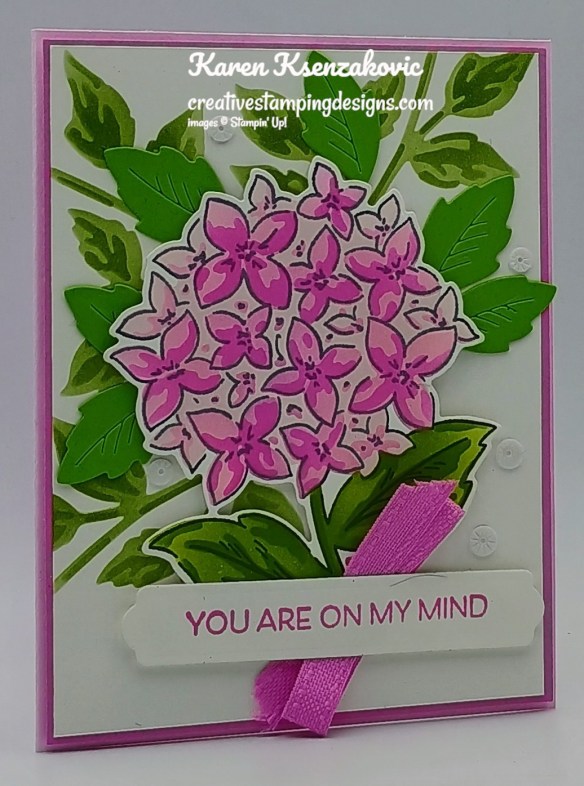
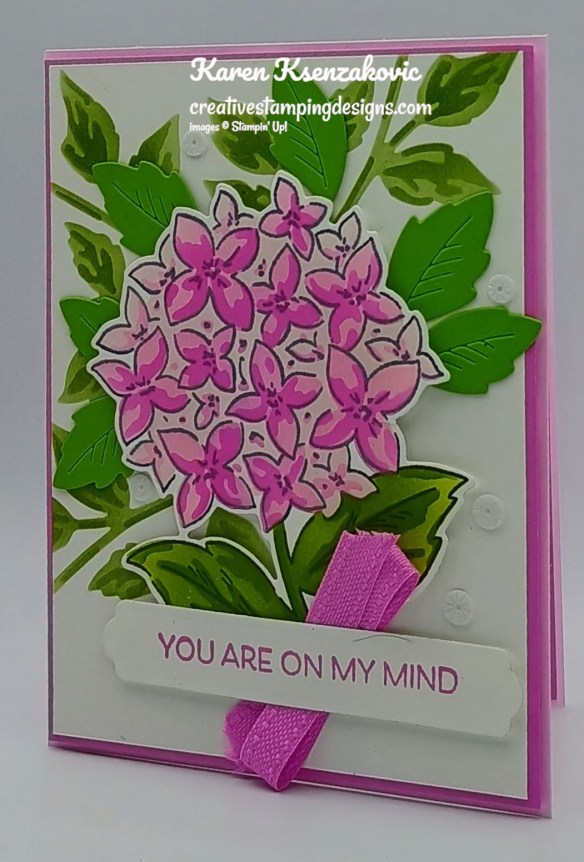
I used the new Stampin’ Up! Label Me Grateful Bundle along with the Lovely Garden Designer Series Paper, Plaster Painting 3D Embossing Folder and the Stampin’ Up! Thankful Garden Photopolymer Stamp Set for my card today.
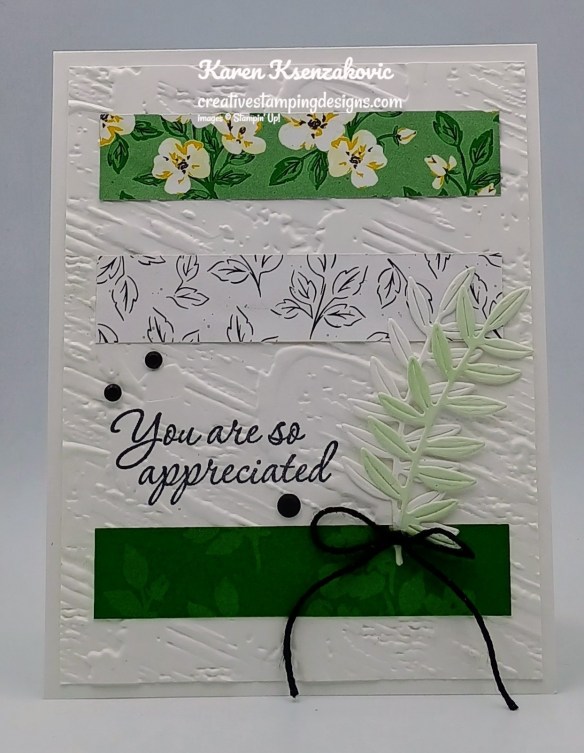
Stamp the sentiment from the Stampin’ Up! Label Me Grateful Cling Stamp Set in Tuxedo Black Ink on a panel of Basic White. Emboss the panel with the Plaster Painting EF.
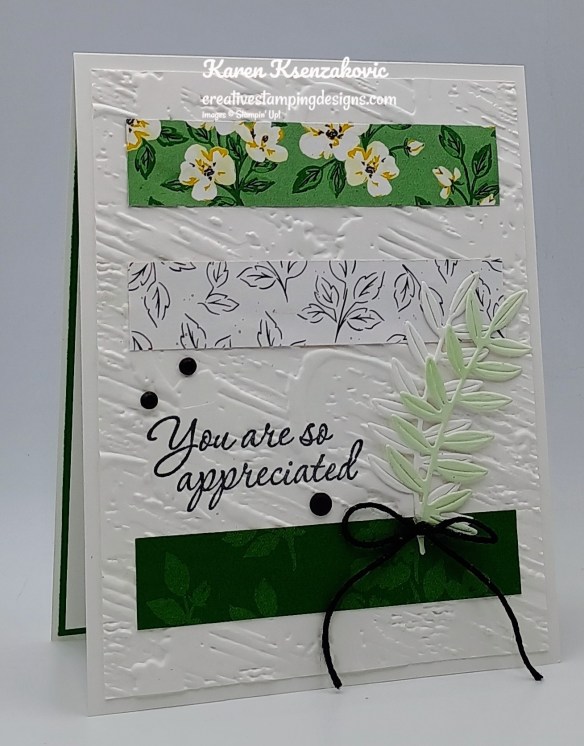
Adhere 3 panels of Lovely Garden DSP to the embossed panel with Liquid Glue. Adhere the embossed panel to a Basic White Thick card base with Liquid Glue.
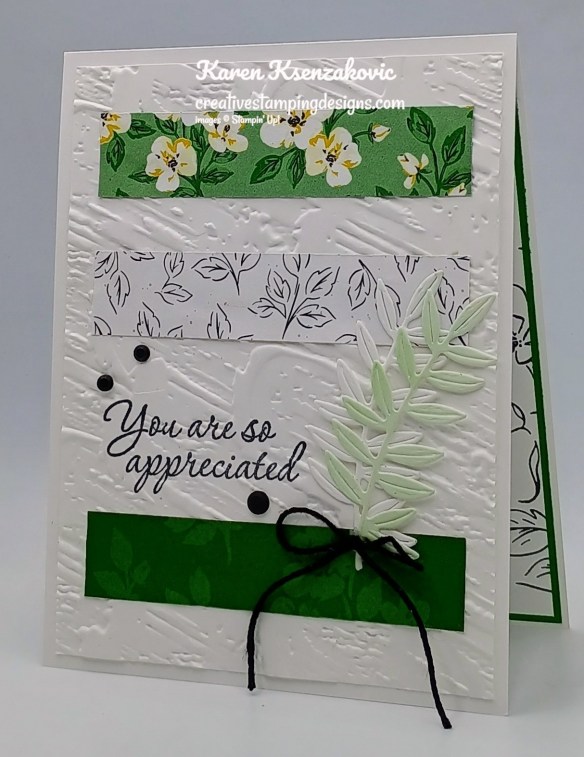
Using the Small Blending Brush, add Garden Green Ink to 1/2 of a Basic White panel. Cut 2 of the leaf die cuts using the Label Me Grateful Dies, one on the Garden Green blended portion and one from the white portion. Adhere the die cut leaves to the card front with Liquid Glue. Tie a small bow using the Black Baker’s Twine and adhere it to the die cut stems with a Glue Dot. Add a few Neutral Matte Dots to the card front.
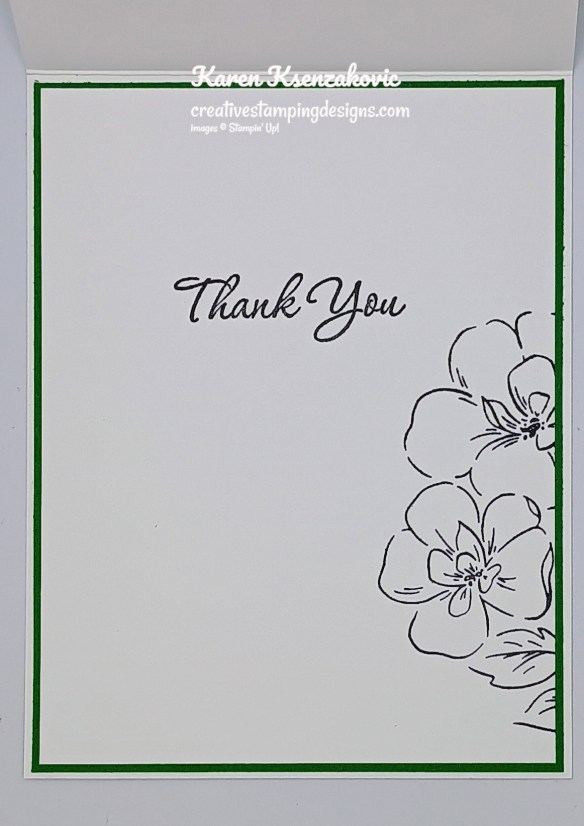
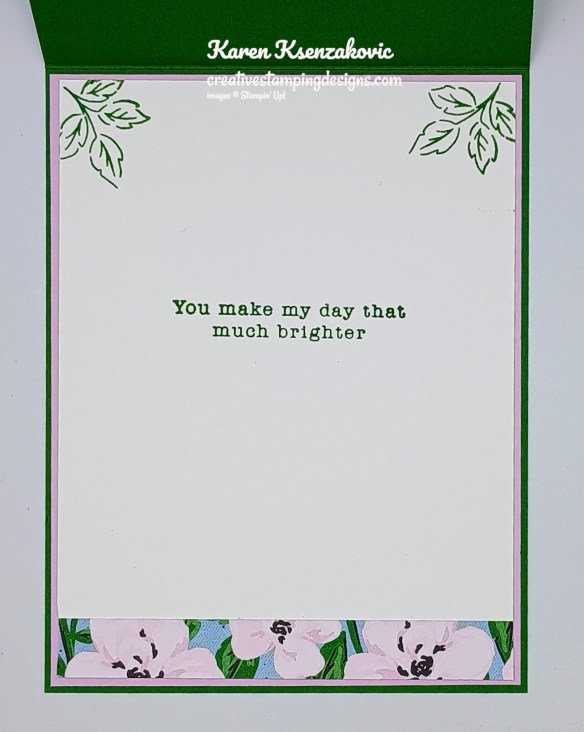
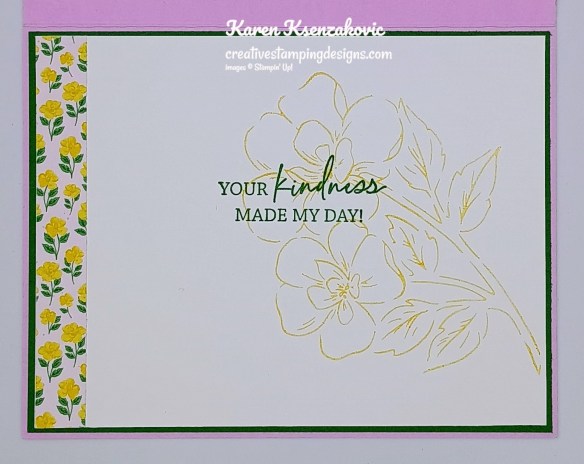
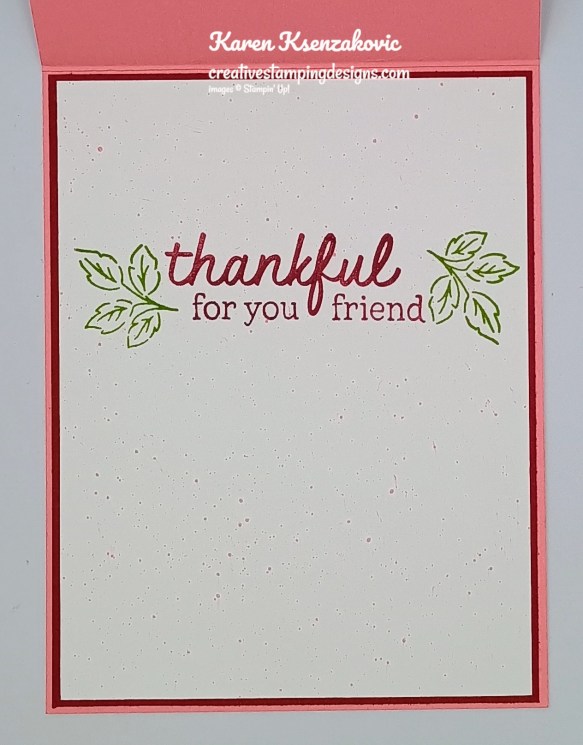
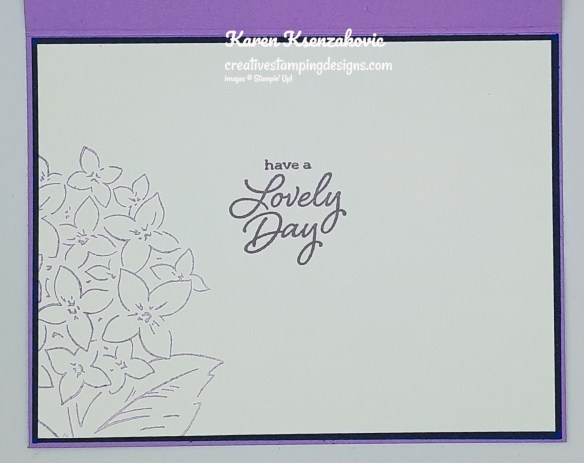
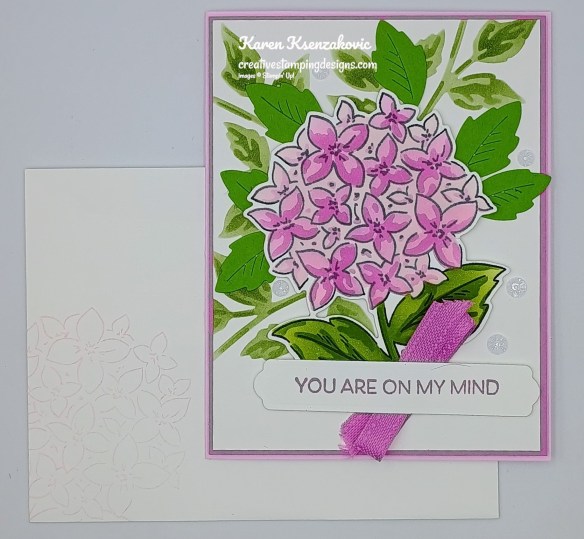
On a panel of Basic White, stamp the sentiment from the Label Me Grateful stamp set in Tuxedo Black Ink. Stamp the flower image from the Thankful Garden stamp set in Tuxedo Black Ink on the side of the panel. Adhere the Basic White panel to a Garden Green mat then to the inside of the Basic White Thick card base.
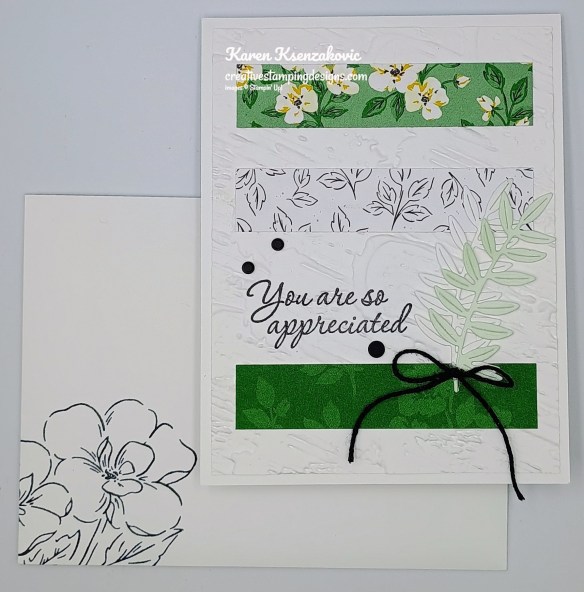
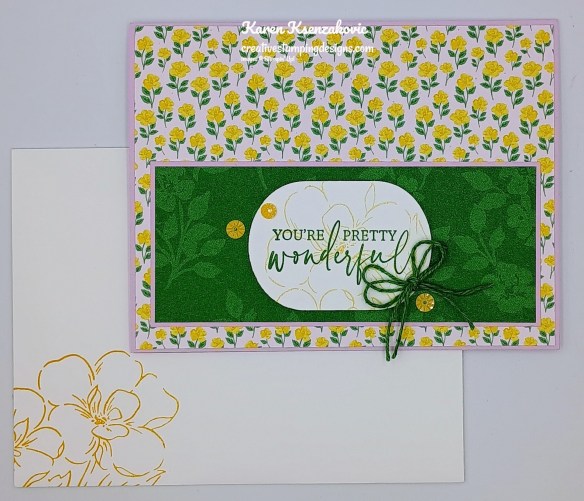
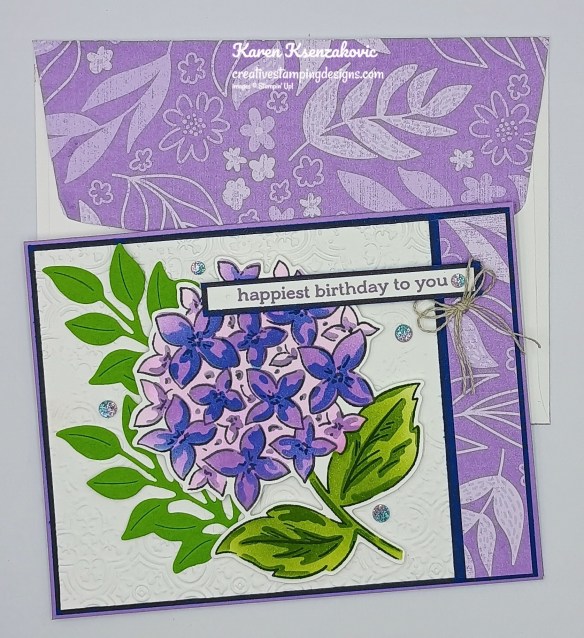
Decorate a Basic White Medium Envelope to finish your card. Stamp the flower image from Thankful Garden stamp set in Tuxedo Black Ink on the envelope front. Adhere a panel of Lovely Garden DSP to the envelope flap.
Thank you for stopping by my blog today. I hope you like the card and will give it a try. Happy Stamping!!
*********************************************************************************************************
If you need any stamping supplies, I’d love to be your Demonstrator. Just click HERE to go directly to my online store or drop me an email if you have any questions.
*********************************************************************************************************
Suite & Bundle Sale – Ends June 30th
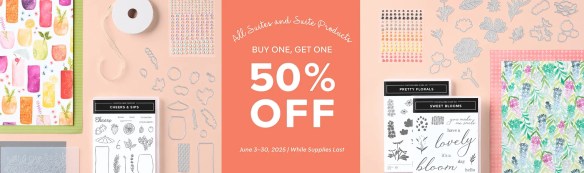
June 3-30, all available suites and suite products from the 2025–2026 Annual Catalog and Online Exclusives are buy one, get one 50% off! If you’ve had your eye on a new suite from the annual catalog or you really like the look of a stamp set from an Online Exclusives suite, you don’t have to choose—you can get both!
Here are the promotion details:
- All available suites and suite products from the 2025–2026 Annual Catalog and Online Exclusives are buy one, get one 50% off.
- When you shop the sale, the 50% off discount will apply to the lower-priced item (for example, if you buy a suite collection and a stamp set from a suite, the suite would be full price, and the stamp set would be 50% off).
- Suite collections are available if all items are in stock; if all items are not in stock, you can still shop the available suite products.
- You don’t have to buy a suite and suite products all from the same suite collection for the discount to apply. You can buy any suite products from any suite.
- The discount will appear in your cart once you’ve added two items within the sale parameters to your cart.
- Products are available only while supplies last.
- See and shop all qualifying suites in the Online Store
- The sale begins June 3, 2025 at 12:01 AM MT.
- The sale ends June 30, 2025 at 11:59 PM MT.
Let me know if you have any questions. YAY for an awesome sale! Get your lists ready and get your orders placed between June 3-30!!
*********************************************************************************************************
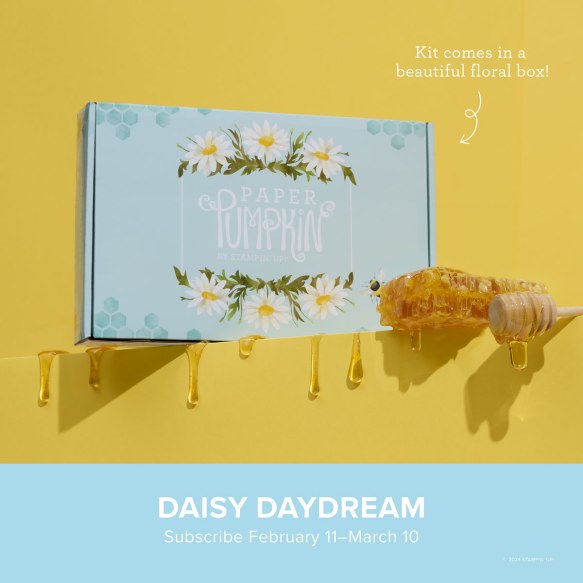
Sweeter With You
Subscribe June 11 – July 10
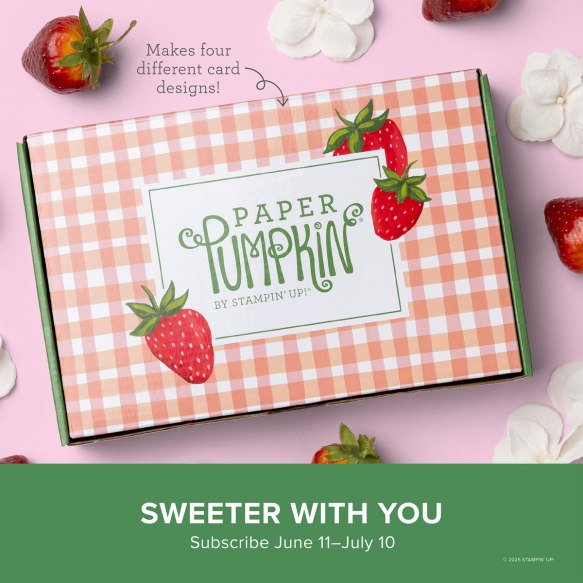
Craft sweet handmade cards featuring sun-kissed strawberries and breezy gingham.
• Makes 8 cards: 2 each of 4 designs with 8 coordinating envelopes
• Precut paper pieces and vellum accents
• Hand-painted card base designs
• Coordinating colors: Garden Green (Classic Stampin’ Spot), Granny Apple Green,
Pool Party, Poppy Parade, Strawberry Slush, Timid Tiger
Subscribe to the June Paper Pumpkin Kit between 11 June and 10 July by clicking here!
*********************************************************************************************************
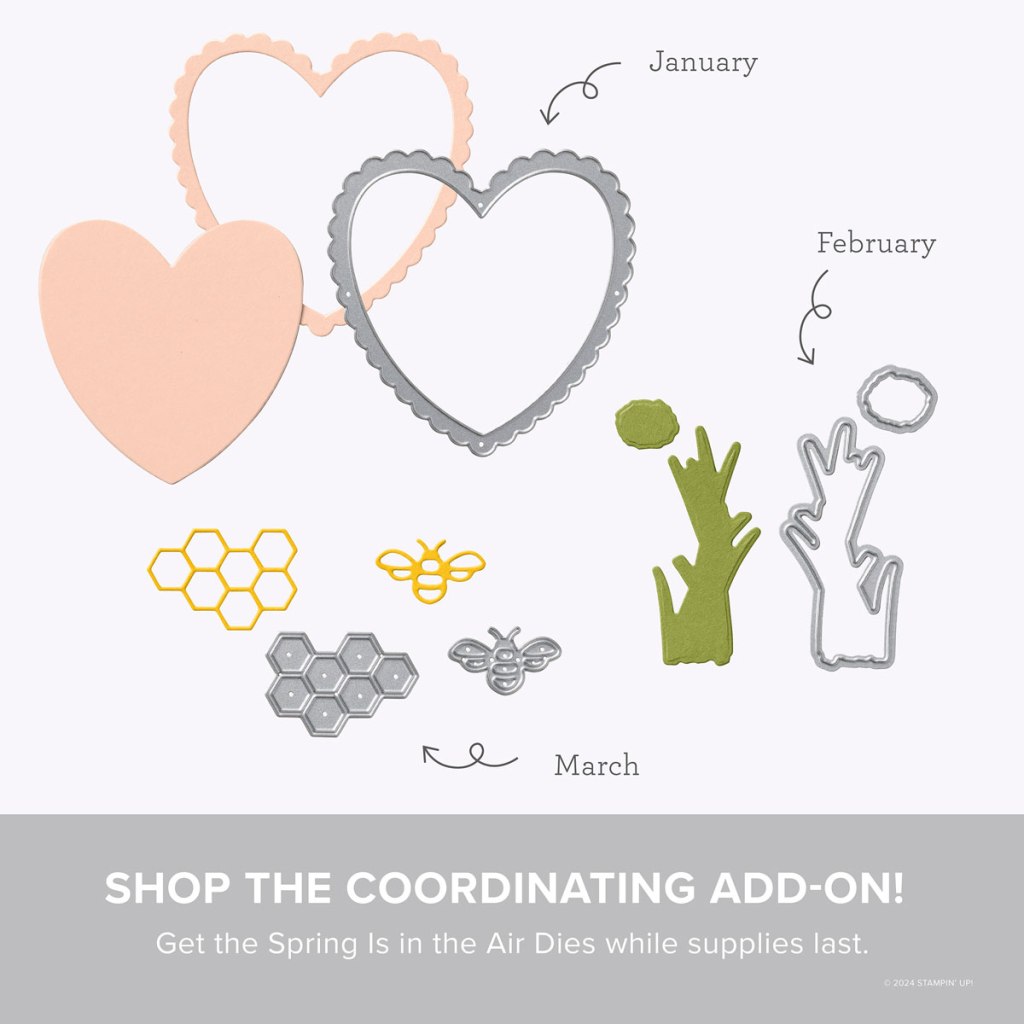
Don’t miss the coordinating
Circle of Seasons Dies Add-On!

Make the most of your Paper Pumpkin kits with the Circle of Seasons Dies add-on! Quickly and cleanly cut out a strawberry with a blossom, a circle, a leaf, or an acorn to elevate your crafting projects. These additional dies are designed to work with THREE Paper Pumpkin Kits: the Sweeter with You Paper Pumpkin Kit, the Farmhouse Florals Paper Pumpkin Kit, and the Fall for Toile Paper Pumpkin Kit. Pair these dies with other Stampin’ Up! products for even more creative options! This exclusive add-on (item 167277) coordinates with the three upcoming kits! Paper Pumpkin subscribers can purchase it beginning June 11. Add-on is available only while supplies last, so it’s best to shop early!
DETAILS
– 4 dies
– Largest die: 2-1/2″ x 1-1/4″ (6.4 x 3.2 cm)
– Use with a Stampin’ Cut & Emboss Machine (sold separately)
You must be a current Paper Pumpkin subscriber to purchase this item. To become a subscriber, visit www.stampinup.com/paperpumpkin.
Note: Supplies may be limited toward the end of the subscription period.
#167277 $12
*********************************************************************************************************
Card stock cuts for this project:
- Basic White Cardstock (2) – 4″ x 5 1/4″(card front & inner liner), 1 1/2″ x 5″(die cuts)
- Basic White Thick Cardstock 4 1/4″ x 11″(card base scored & folded at 5 1/2″)
- Garden Green Cardstock 4 1/8″ x 5 3/8″(inner liner mat)
- Lovely Garden Designer Series Paper (3) – 3/4″ x 3 1/2″(card front panels), 2 1/4″ x 6″(envelope flap)
*********************************************************************************************************
Product List
![Thankful Garden Photopolymer Stamp Set (English) [ 165526 ]](https://assets1.tamsnetwork.com/images/EC042017NF/165526s.jpg "Thankful Garden Photopolymer Stamp Set (English) [ 165526 ]")
![Basic White 8 1/2" X 11" Cardstock [ 166780 ]](https://assets1.tamsnetwork.com/images/EC042017NF/166780s.jpg "Basic White 8 1/2\" X 11\" Cardstock [ 166780 ]")
![Basic White 8 1/2" X 11" Thick Cardstock [ 159229 ]](https://assets1.tamsnetwork.com/images/EC042017NF/159229s.jpg "Basic White 8 1/2\" X 11\" Thick Cardstock [ 159229 ]")
![Garden Green 8-1/2" X 11" Cardstock [ 102584 ]](https://assets1.tamsnetwork.com/images/EC042017NF/102584s.jpg "Garden Green 8-1/2\" X 11\" Cardstock [ 102584 ]")
![Lovely Garden 12" X 12" (30.5 X 30.5 Cm) Designer Series Paper [ 165524 ]](https://assets1.tamsnetwork.com/images/EC042017NF/165524s.jpg "Lovely Garden 12\" X 12\" (30.5 X 30.5 Cm) Designer Series Paper [ 165524 ]")
![Garden Green Classic Stampin' Pad [ 147089 ]](https://assets1.tamsnetwork.com/images/EC042017NF/147089s.jpg "Garden Green Classic Stampin' Pad [ 147089 ]")
![Tuxedo Black Memento Ink Pad [ 132708 ]](https://assets1.tamsnetwork.com/images/EC042017NF/132708s.jpg "Tuxedo Black Memento Ink Pad [ 132708 ]")
![Small Blending Brushes [ 160518 ]](https://assets1.tamsnetwork.com/images/EC042017NF/160518s.jpg "Small Blending Brushes [ 160518 ]")
![Plaster Painting 3 D Embossing Folder [ 164656 ]](https://assets1.tamsnetwork.com/images/EC042017NF/164656s.jpg "Plaster Painting 3 D Embossing Folder [ 164656 ]")
![Baker's Twine Essentials Pack [ 155475 ]](https://assets1.tamsnetwork.com/images/EC042017NF/155475s.jpg "Baker's Twine Essentials Pack [ 155475 ]")
![Neutral Matte Dots [ 165561 ]](https://assets1.tamsnetwork.com/images/EC042017NF/165561s.jpg "Neutral Matte Dots [ 165561 ]")
![Basic White Medium Envelopes [ 159236 ]](https://assets1.tamsnetwork.com/images/EC042017NF/159236s.jpg "Basic White Medium Envelopes [ 159236 ]")


![Take Your Pick [ 144107 ]](https://assets1.tamsnetwork.com/images/EC042017NF/144107s.jpg "Take Your Pick [ 144107 ]")


![Thankful Garden Bundle (English) [ 165534 ]](https://assets1.tamsnetwork.com/images/EC042017NF/165534s.jpg "Thankful Garden Bundle (English) [ 165534 ]")
![Thankful Garden Dies [ 165533 ]](https://assets1.tamsnetwork.com/images/EC042017NF/165533s.jpg "Thankful Garden Dies [ 165533 ]")
![Thankful Garden Decorative Masks [ 165538 ]](https://assets1.tamsnetwork.com/images/EC042017NF/165538s.jpg "Thankful Garden Decorative Masks [ 165538 ]")
![Fresh Freesia 8 1/2" X 11" Cardstock [ 155613 ]](https://assets1.tamsnetwork.com/images/EC042017NF/155613s.jpg "Fresh Freesia 8 1/2\" X 11\" Cardstock [ 155613 ]")
![Fresh Freesia Classic Stampin' Pad [ 155611 ]](https://assets1.tamsnetwork.com/images/EC042017NF/155611s.jpg "Fresh Freesia Classic Stampin' Pad [ 155611 ]")
![Petal Pink & White 1/4" (6.4 Mm) Diagonal Trim Combo Pack [ 163417 ]](https://assets1.tamsnetwork.com/images/EC042017NF/163417s.jpg "Petal Pink & White 1/4\" (6.4 Mm) Diagonal Trim Combo Pack [ 163417 ]")
![Rhinestone Basic Jewels [ 144220 ]](https://assets1.tamsnetwork.com/images/EC042017NF/144220s.jpg "Rhinestone Basic Jewels [ 144220 ]")


")


 Designer Series Paper")


 Ribbon")


")


")


")
")
")


 Woven Ribbon")


")

 Designer Series Paper")


")


 Bordered Ribbon")

