
Good Friday morning stamping friends and welcome to my Fun Fold Friday. We arrived safely yesterday, and our first day was wonderful. It’s a little chilly here in GA, but it’s supposed to get a little warmer each day. We all got set up and started passing out our little gifts and starting on our card swaps. Dinner last night was nothing short of amazing. James really knows how to cook up the best meals. After dinner we all just sat around the table for a few hours talking, laughing, more talking and much, much more laughing. This is such an awesome group of ladies I’m with. I’ll be sharing pictures when I can throughout the weekend.
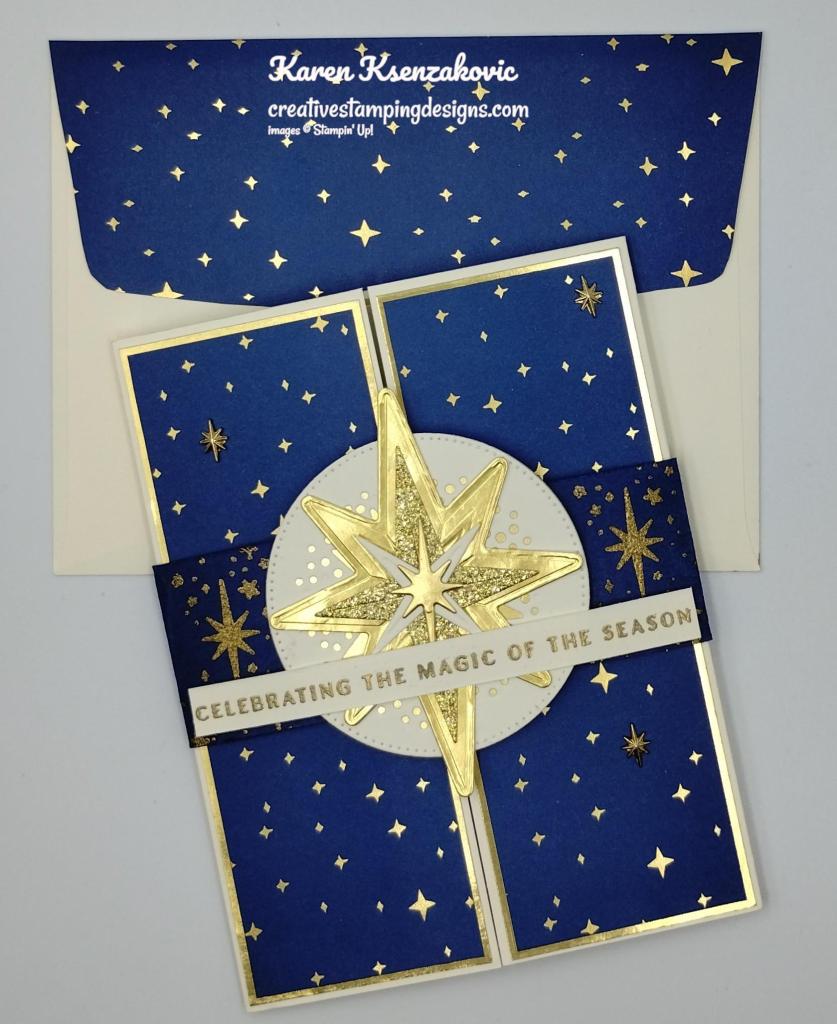
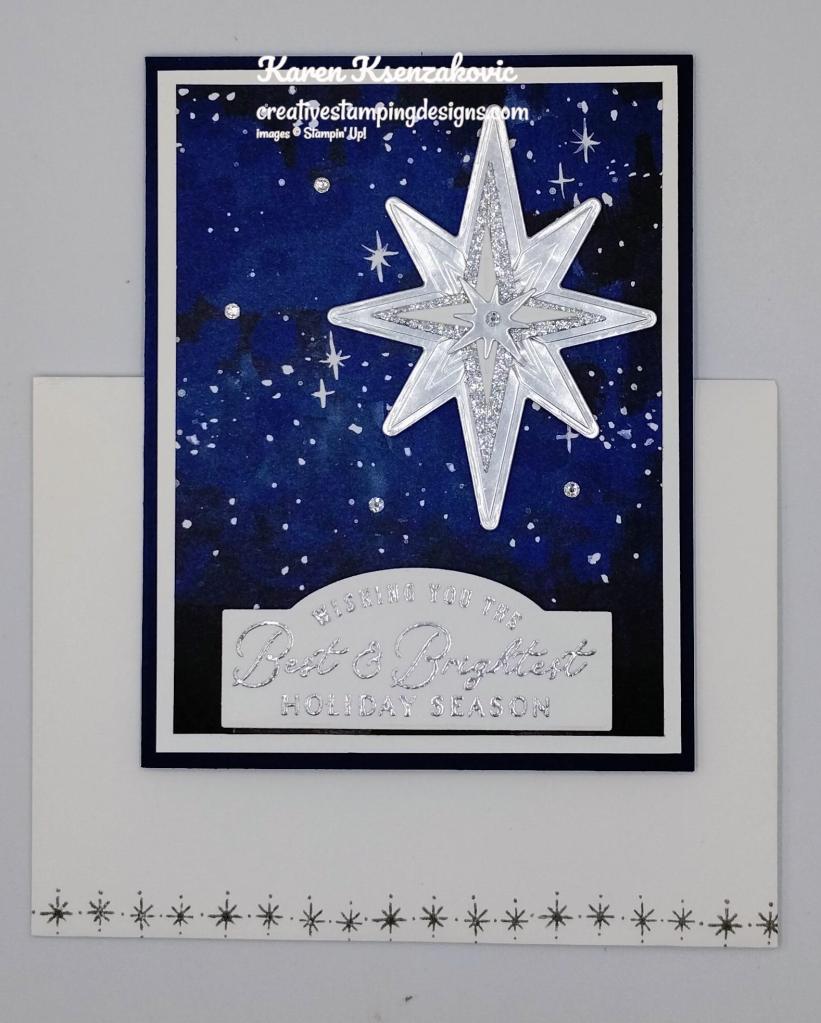
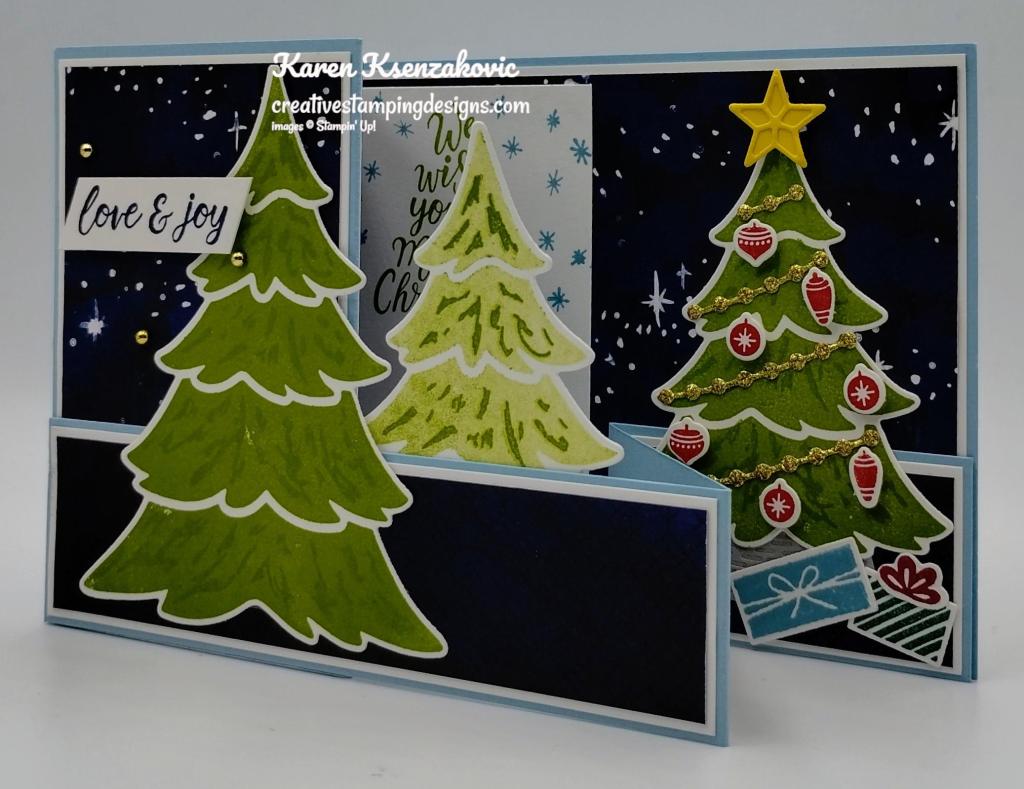
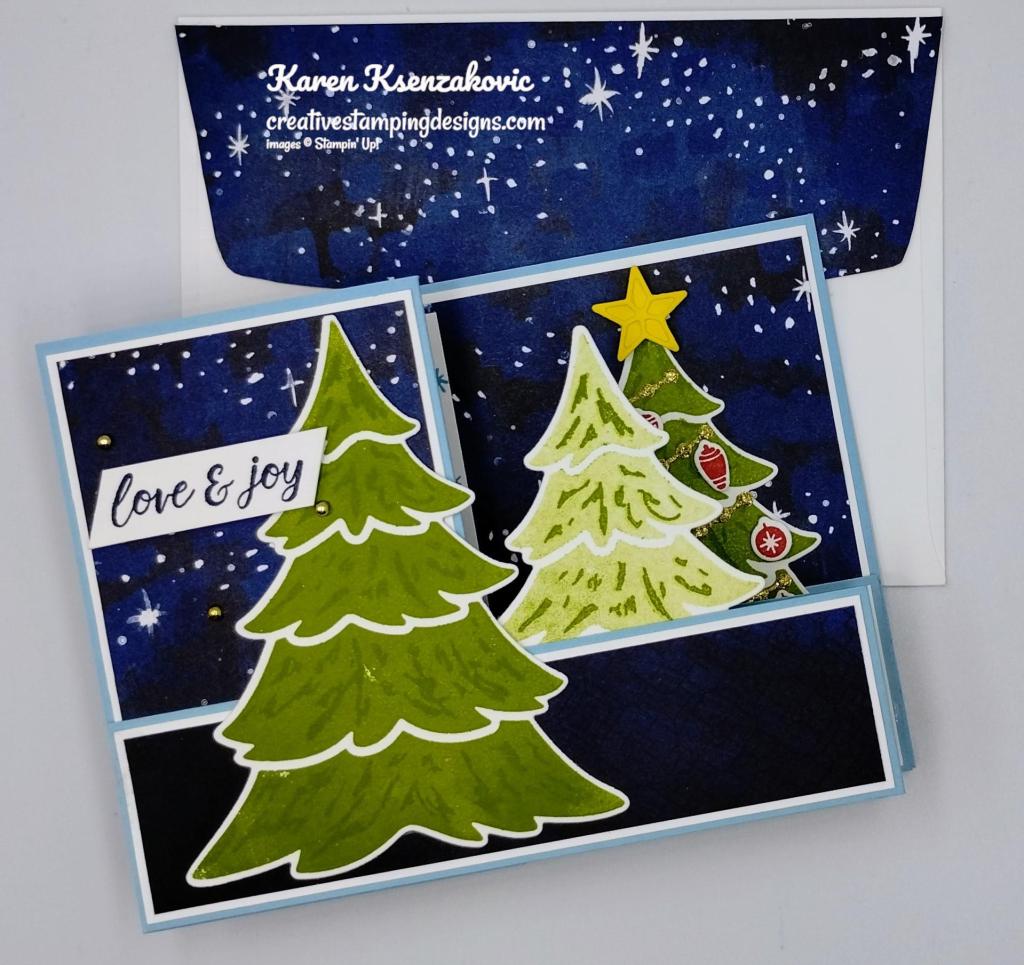
I have a gate fold fun fold card for you today using a gorgeous bundle that I absolutely love. If you’d like to see a quick video of how I made my card, Click Here to go to my Instagram Reels. Here’s my card for today.

I used the Stampin’ Up! Stars At Night Bundle along with the Shining Brightly Specialty Designer Series Paper, Stampin’ Up! Brightest Glow Cling Stamp Set, Gold Foil Paper and Online Exclusive Silver & Gold Adhesive Backed Glimmer Paper for my card today.
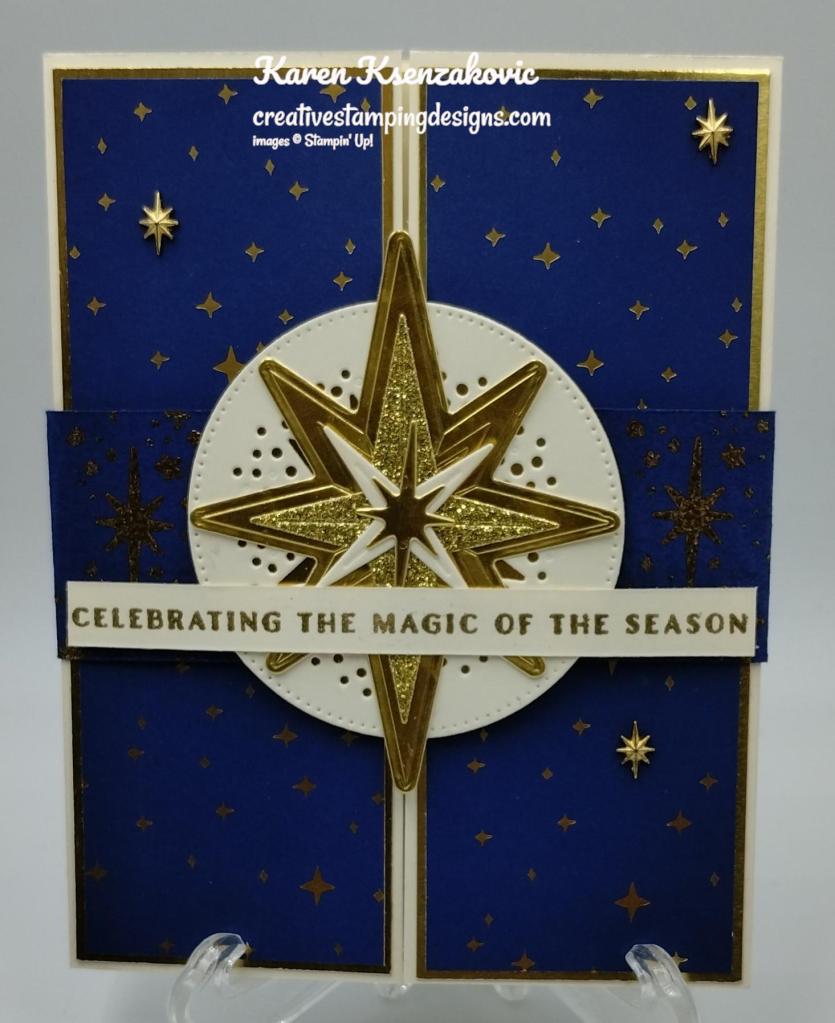
I started by cutting and prepping all the components before actually putting the card together. Using the Stars At Night Hybrid Embossing Folder and Stars At Nigh Dies, I cut the largest and smallest stars from a panel of Gold Foil. I cut the 2nd largest star from a panel of Gold Adhesive Back Glimmer Paper and the 2nd smallest star from a panel of Very Vanilla. Using the Stylish Shapes Dies, I cut the 2nd largest circle from a panel of Very Vanilla and Gold Foil paper. I cut the center of the Very Vanilla circle using the Stars At Night Dies. I adhered the Very Vanilla circle to the Gold Foil circle using Multipurpose Liquid Glue. On a strip of Very Vanilla I stamped the sentiment from the Stampin’ Up! Stars At Night Photopolymer Stamp Set in Versamark Ink. I sprinkled it with Gold Embossing Powder and set it using the Heat Tool.

I adhered 2 panels of Shining Brightly DSP to Gold Foil mats using Stampin’ Seal. I adhered the 2 layered panels to each side of the Very Vanilla Thick card base using Multipurpose Liquid Glue.
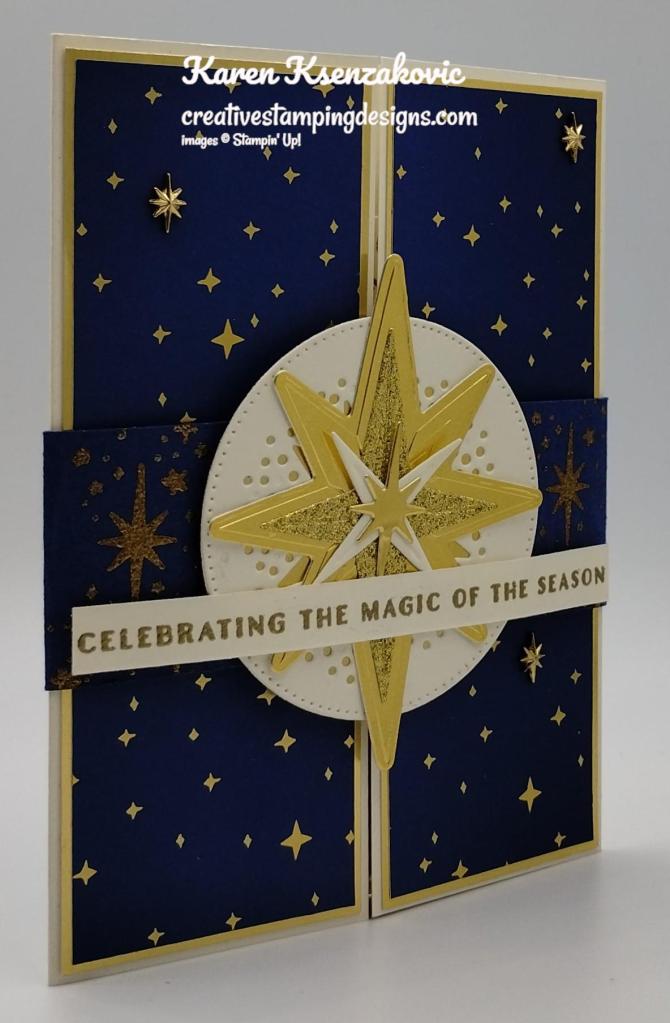
I adhered the Gold Glimmer star to the large Gold Foil star. I adhered the Very Vanilla star to the Gold Glimmer star using a Glue Dot. I adhered the small Gold Foil star to the Very Vanilla star using a Glue Dot. I adhered the layered star to the layered circle die cut using Multipurpose Liquid Glue. I wrapped a Night of Navy belly band around the card and adhered it together using Tear & Tape. I removed the belly band and stamped the multi star image from the Stars At Night stamp set in Versamark Ink on both sides of the belly band. I sprinkled the images with Gold Embossing Powder and set it with the Heat Tool. I put the belly band back on the card and adhered the layered star in the center using Stampin’ Dimensionals. I adhered the sentiment across the star on the belly band using Stampin’ Dimensionals.
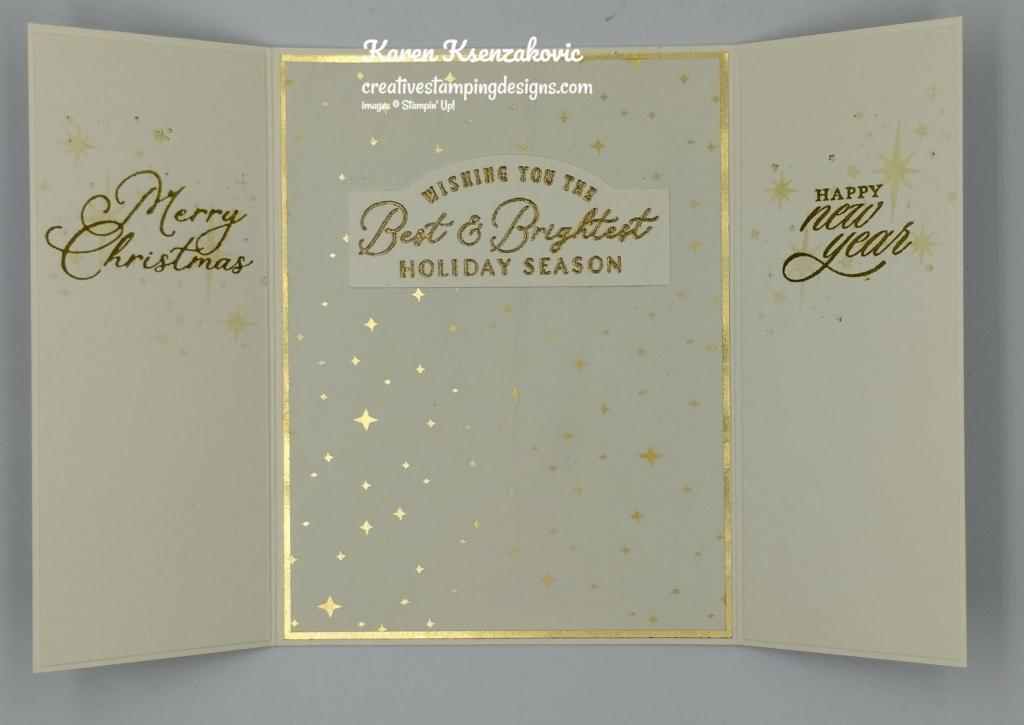
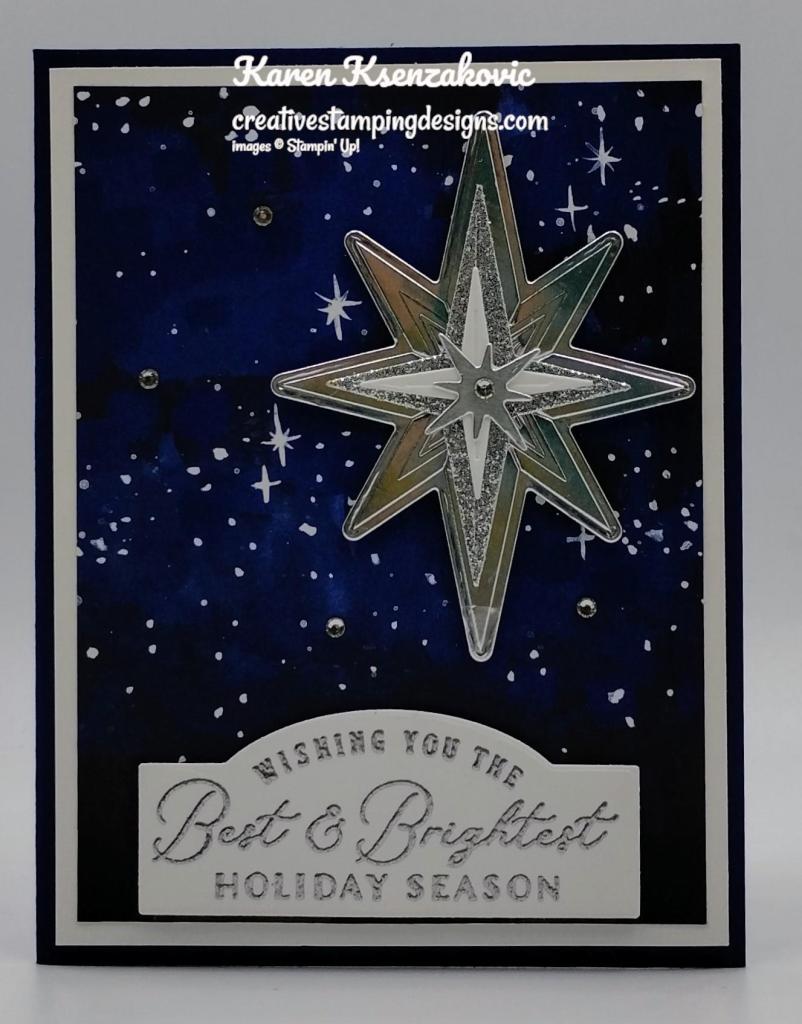
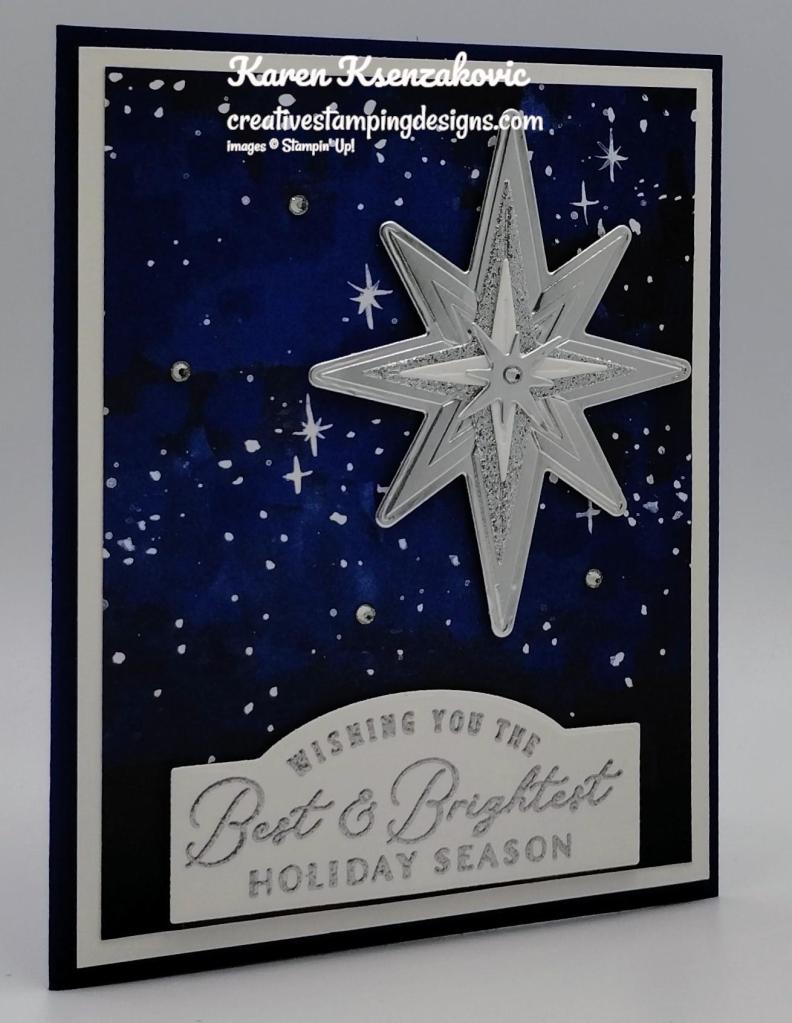
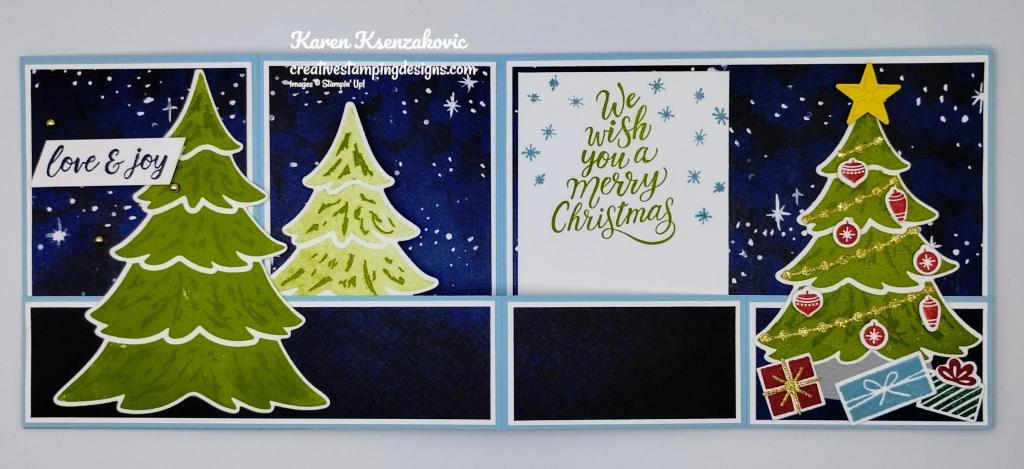
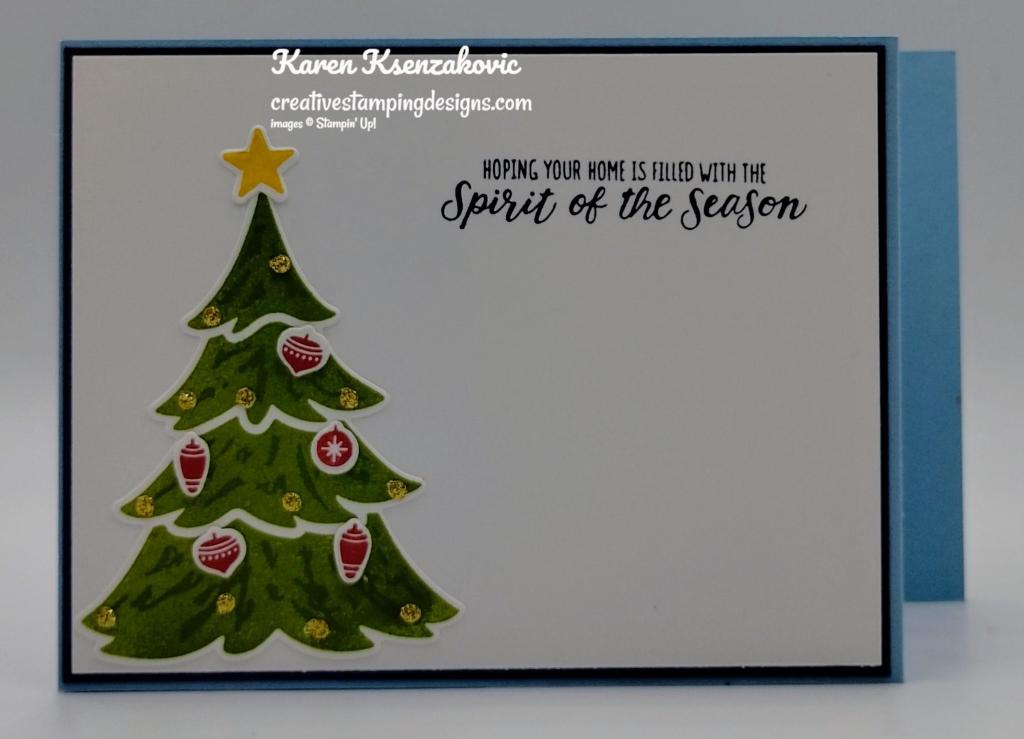
For the inside, I adhered a panel of Shining Brightly DSP to a Gold Foil mat using Stampin’ Seal. I adhered the layered panel to the center of the inside card base using Multipurpose Liquid Glue. On a panel of Very Vanilla, I stamped the sentiment from the Stars At Night stamp set in Versamark Ink. I sprinkled it with Gold Embossing Powder and set it using the Heat Tool. I adhered the sentiment to the center of the DSP using Multipurpose Liquid Glue. On a panel of Very Vanilla, I stamped the sentiment from Stars At Night stamp set in Wild Wheat Ink. On the other panel of Very Vanilla, I stamped the sentiment from the Brightest Glow stamp set in Wild Wheat Ink. I stamped the multi star image from the Stars At Night stamp set in Wild Wheat Ink, stamping off once on scrap paper, on both panels. I adhered the panels to the inside of the card base.
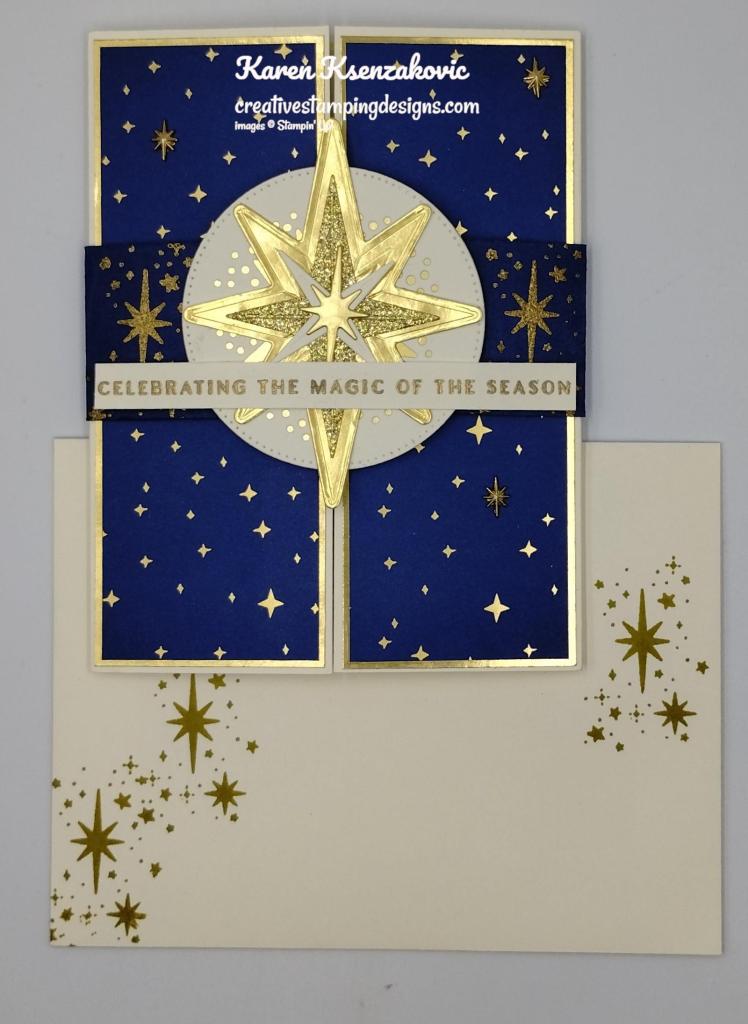
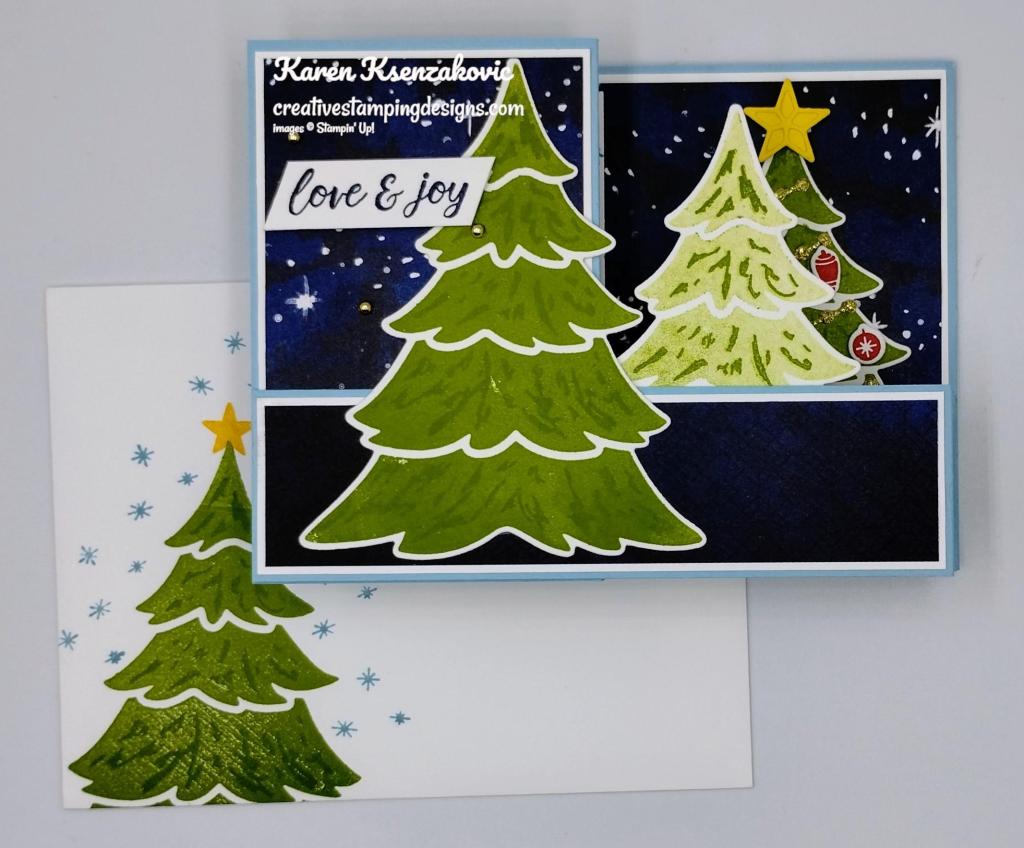
To finish my card, I decorated a Very Vanilla Medium Envelope. I stamped the star image from the Stars At Night stamp set in Wild Wheat Ink on the envelope front. I adhered a panel of Shining Brightly DSP to the envelpe flap.
Thank you for stopping by my blog today. I hope you like the card and will give it a try. Happy Stamping!!
*********************************************************************************************************
If you need any stamping supplies, I’d love to be your Demonstrator. Just click HERE to go directly to my online store or drop me an email if you have any questions.
MY CURRENT HOST CODE IS: BX4UV6HE
Use this host code when placing an order with me. When you order $50 or greater you will receive a free gift from me! If your order is over $150, please do not use this code, but you’ll still get the free gift. The free gift is your choice of any 1 item valued up to $10.00 from the 2023-2024 Annual Catalog! Unfortunately, packs of cardstock are no longer an option for a free gift. Shipping has become too expensive to ship and it’s costing me as much to ship as the cardstock costs. For any orders $50 or more I will also send you my monthly class tutorials. Click HERE or go to my Customer Rewards for more details and to see what this month’s tutorials are.
Please remember to use my current Host Code and make sure that you can see my name on the final checkout page listed as your Demonstrator when you order so that you know that you’re ordering with me, and you’ll get my rewards!
Happy Stamping, Karen
*********************************************************************************************************
In response to changing policies at Stampin’ Up – I’m adjusting my Ordering Gift policy as well. I’m having to get a little more tough on the adding of Host codes when you place your order thru my Online Store.
Not to worry – you’re still going to get that $10 ordering gift for orders of $50 (before shipping & tax) or greater. And the gift is still any 1 SU! product up to that $10 value – which includes some of our fun Host Sets!
But – if you DO NOT use the Host code for your orders of less than $150 (this is the RETAIL total before Shipping & Handling), then you’ll have two options:
- You’ll need to call Stampin’ Up! (1-800-Stamp-Up) and ask them to add it for you. They’re very helpful and will get it done quickly! OR….
- If your order was over the $50 threshold but under $150, then…you’ll forfeit that $10 ordering gift and rewards – this is the Bummer Option – and I REALLY don’t want to do this, SO please remember to add my Current Host Code.
*********************************************************************************************************
The Best Destination Kit Now Available
Plan a crafting getaway today with the all-inclusive The Best Destination Kit! This kit lets you make nine tri-fold cards with a colorful, nostalgic, travel vibe. Resort-hopping was never so easy!


This month’s kit includes:
- Enough supplies to create 9 cards—3 each of 3 designs
- 9 coordinating envelopes
- Best Destination Photopolymer Stamp Set
- One Gorgeous Grape Ink Spot
- Printed card bases, printed die cuts, adhesive, embellishments, and a clear block
- Finished card size: 5-1/2″ x 4-1/4″ (14 x 10.8 cm)
- Coordinating colors: Balmy Blue, Boho Blue, Cajun Craze, Calypso Coral, Coastal Cabana, Crushed Curry, Daffodil Delight, Early Espresso, Flirty Flamingo, Fresh Freesia, Gorgeous Grape, Granny Apple Green, Misty Moonlight, Pecan Pie, Petal Pink, Pretty Peacock, and Shaded Spruce
163186 $20.00 USD
*********************************************************************************************************
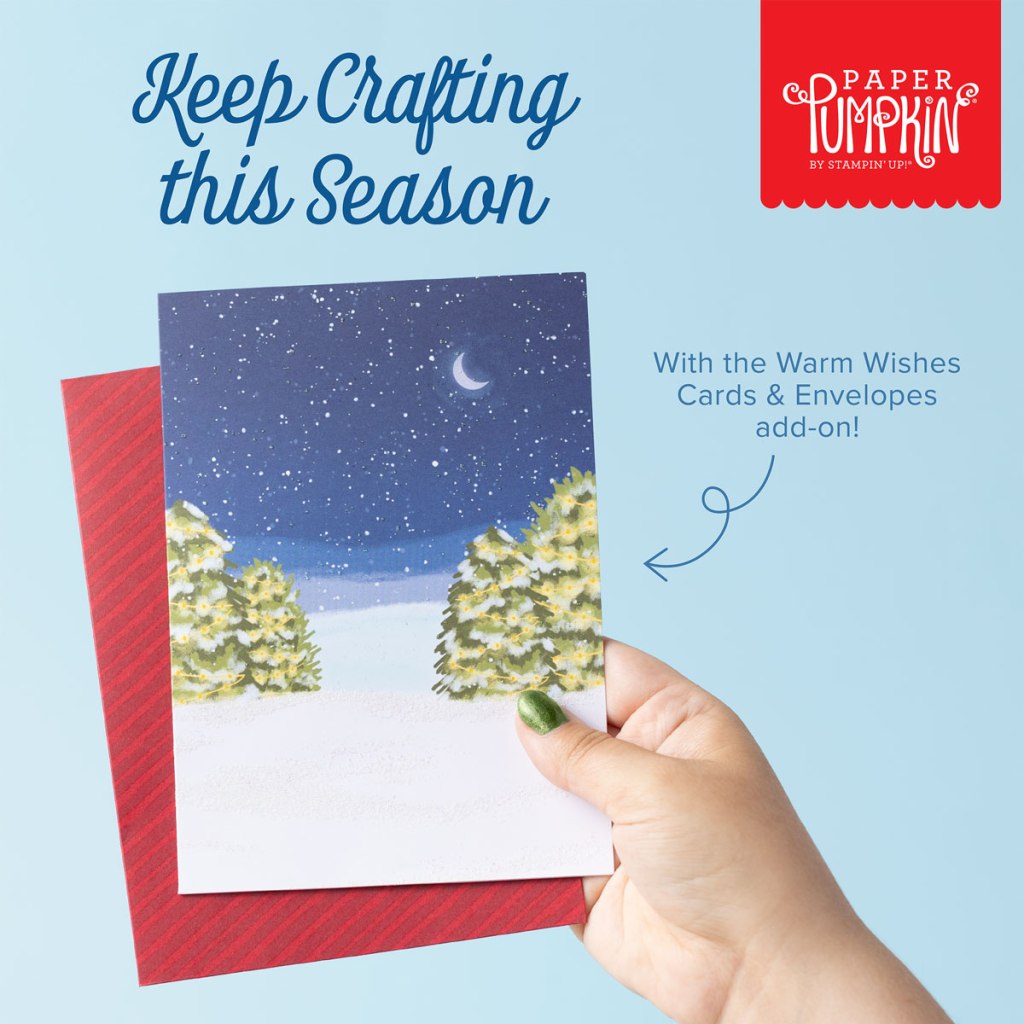
Warm Wishes
Subscribe October 11 – November 10

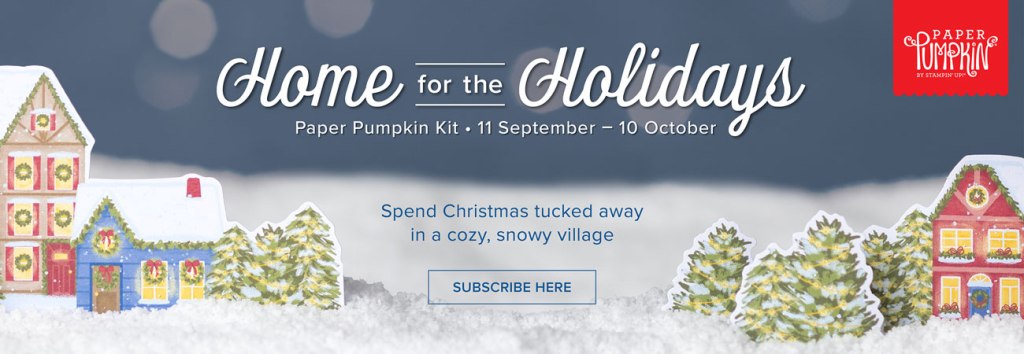
Light up the Christmas season with this month’s Paper Pumpkin kit! With traditional Christmas home designs and warm Christmas wishes, spread the light of Christmas with a gift box. Plus, you can get the Warm Wishes Cards & Envelopes Add-On to take your Christmas crafting even further (available while supplies last). This month’s kit coordinates with the October Home for the Holidays Paper Pumpkin Kit! If you can’t get enough of this traditional Christmas scene and need more cozy crafts, then make sure to check the October Refill’s availability and spend more time crafting this holiday season!
This month’s kit comes with everything you need to make traditional Christmas treat packaging boxes that you can fill up with all sorts of small goodies, treats, gifts, and more. Subscribe today so you can take part in spreading the light of Christmas around you!
This kit includes:
- 8 boxes; 4 each of 2 designs
- 1 Mossy Meadow Stampin’ Spot
- Iridescent glitter accents on paper
- Precut paper pieces
- Linen thread
- Treat bags
- Warm Wishes photopolymer stamp set
- Completed box size: 4-1/4″ x 4-1/2″ x 1-1/2″ (10.8 x 11.4 x 3.8 cm) and 4/1/4″ x 3-3/4″ x 1-1/2″ (10.8 x 9.5 x 3.8 cm)
- Coordinating Stampin’ Up! colors: Balmy Blue, Blueberry Bushel, Cherry Cobbler, Crushed Curry, Daffodil Delight, Lemon Lolly, Mossy Meadow, Night of Navy, Old Olive, Pecan Pie, Real Red
ADD-ON DETAILS
Warm Wishes Cards & Envelopes
Available for purchase starting 11 October; only while supplies last.
Item number: 163985
$14.00 USD
This add-on includes:
• 20 Cards & Envelopes
• Iridescent glitter accents on paper
• Folded card size: 5″ x 7″ (12.7 x 17.8 cm)
Subscribe to the November Paper Pumpkin Kit between 11 October and 10 November by clicking here!
Note: Supplies may be limited toward the end of the subscription period.
*********************************************************************************************************
Card stock cuts for this project:
- Night Of Navy Cardstock 1 1/2″ X 9″ (belly band)
- Very Vanilla Cardstock 1 1/4″ X 1 1/4″(star), 2 3/4″ X 2 3/4″ (circle), 3/8″ x 4 1/8″ (sentiment), 1 3/4″ X 3″ (inside sentiment), 2 – 2″ X 5 3/8″ (inside panels)
- Very Vanilla Thick Cardstock 8 1/2″ X 5 1/2″ (card base scored & folded @ 2 1/8″ & 6 3/8″)
- Shining Brightly specialty Designer Series Paper 2 – 1 7/8″ x 5 1/4″(card front panels), 4″ X 5 1/4″ (inside panel), 2 1/4″ X 6″ (envelope flap)
- Gold Foil Paper 2 – 2″ X 5 3/8″ (card front mats), 2 3/4″ X 2 3/4″ (circle), 3″ X 4″(larger star), 1 3/4″ X 1 1/4″ (small star), 4 1/8″ X 5 3/8″ (inner liner mat)
- Silver & Gold Shimmer Paper 2″ X 2″ (star)
*********************************************************************************************************
Product List
")
")

")


 Specialty Designer Series Paper")

 Adhesive Backed Glimmer Paper")


")


 Designer Series Paper")
 Specialty Pack")


")
")


