
Good Wednesday morning my stamping friends. How is everyone doing today? We’re halfway through the week and on our way to the weekend already. I’ll be starting my baking on Thursday early morning and continue until I’m done, hopefully by Saturday. This year for the first time in quite a few years, my daughter will be able to bake with me. In the past she’s always had finals and would be studying, or when she was in high school, she would have a fencing event. I’m looking forward to having her by my side helping.
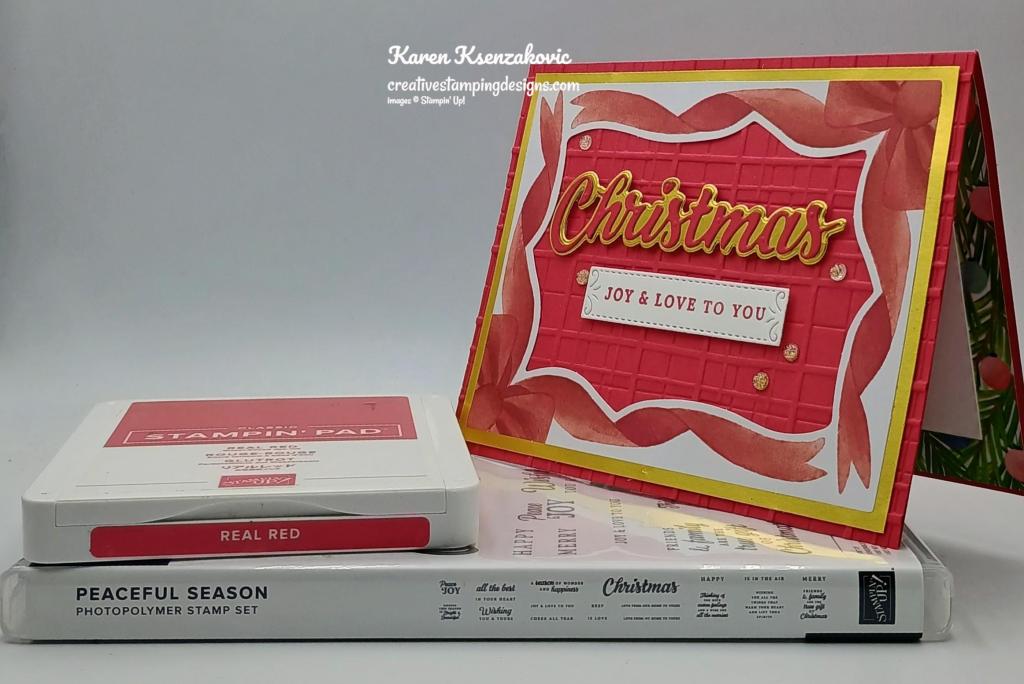
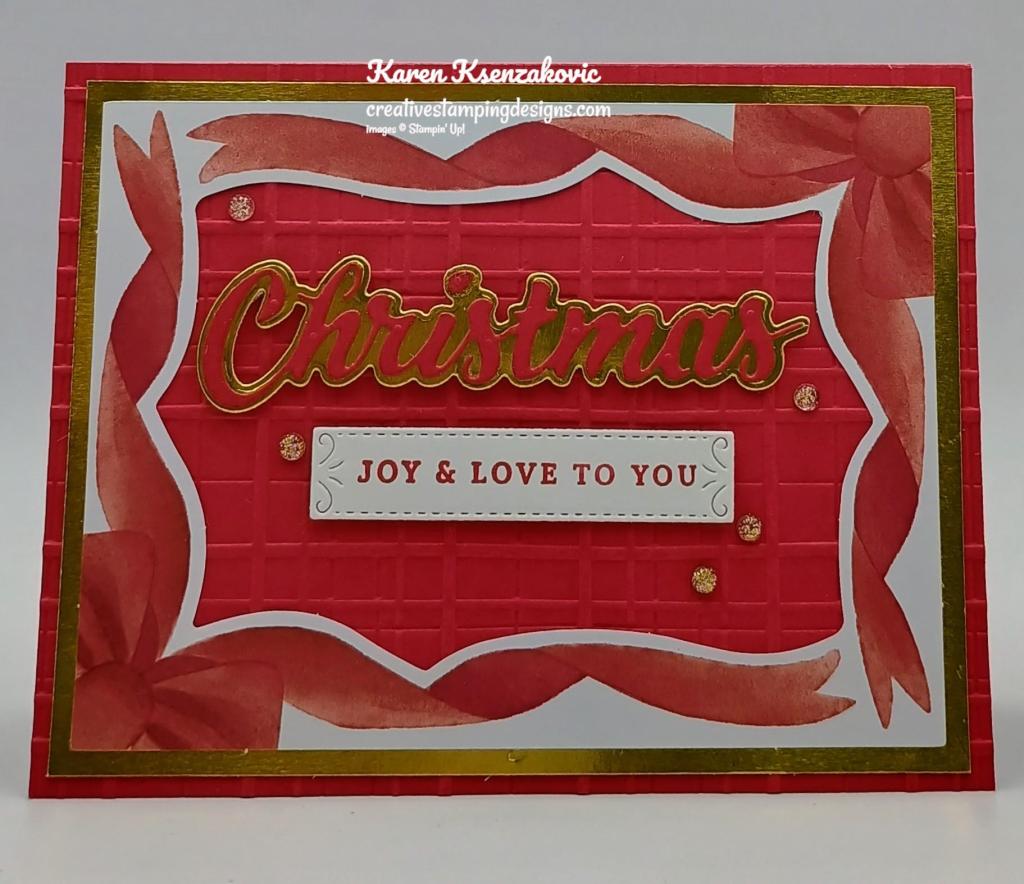
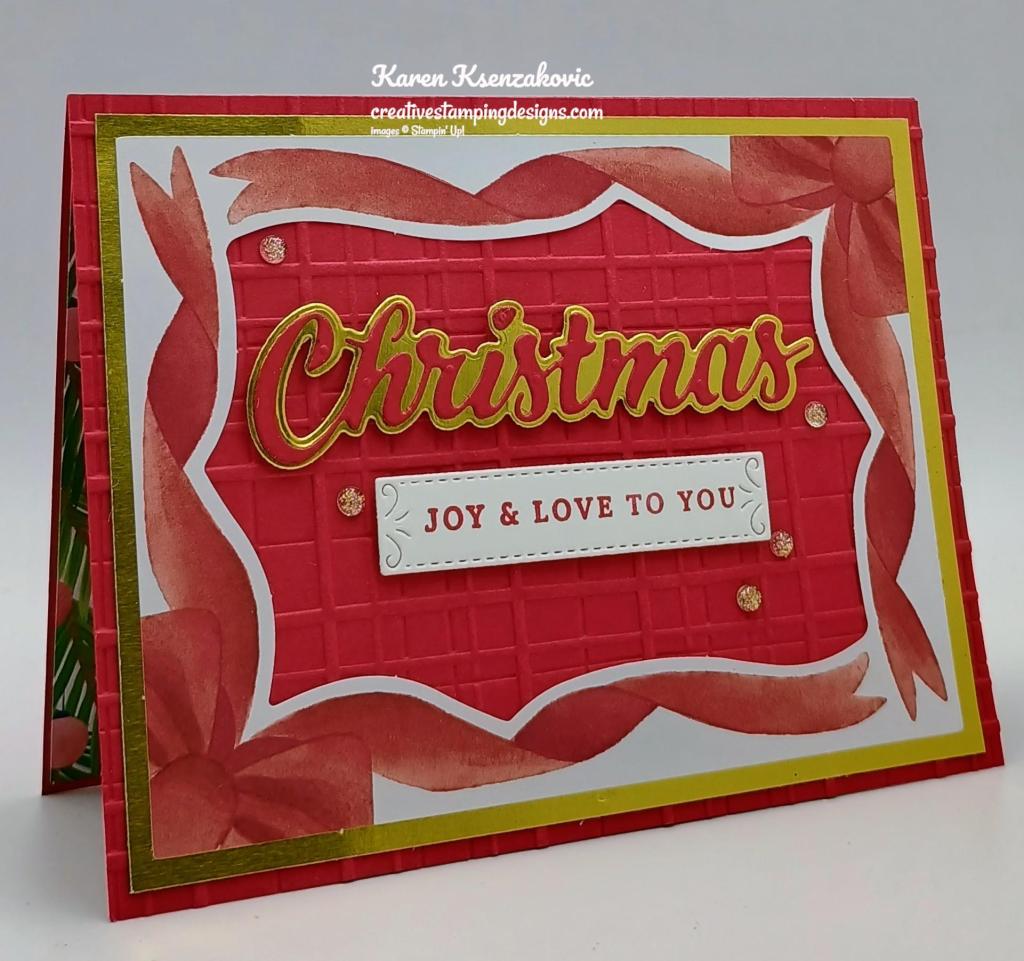
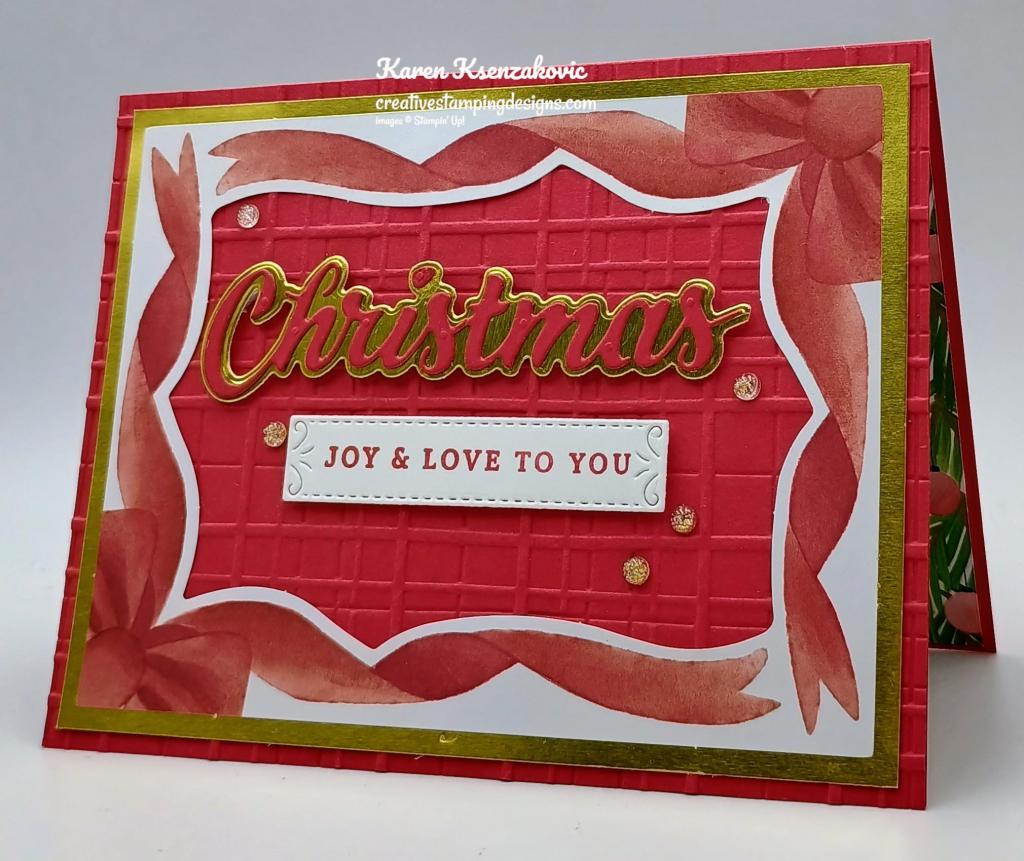
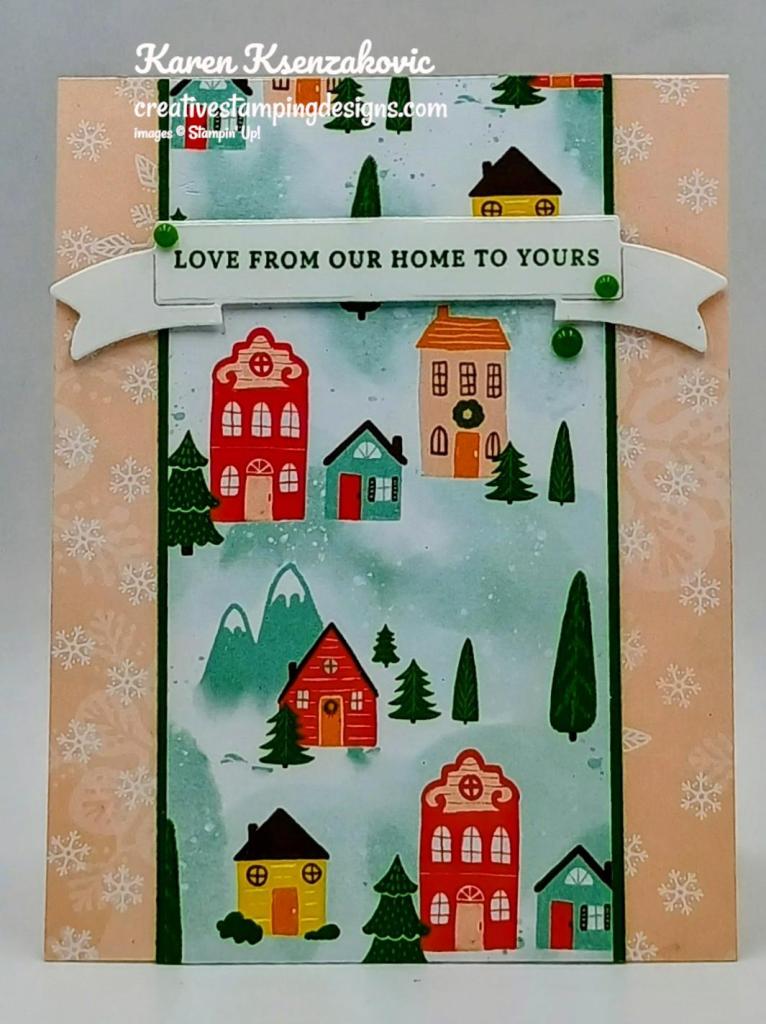
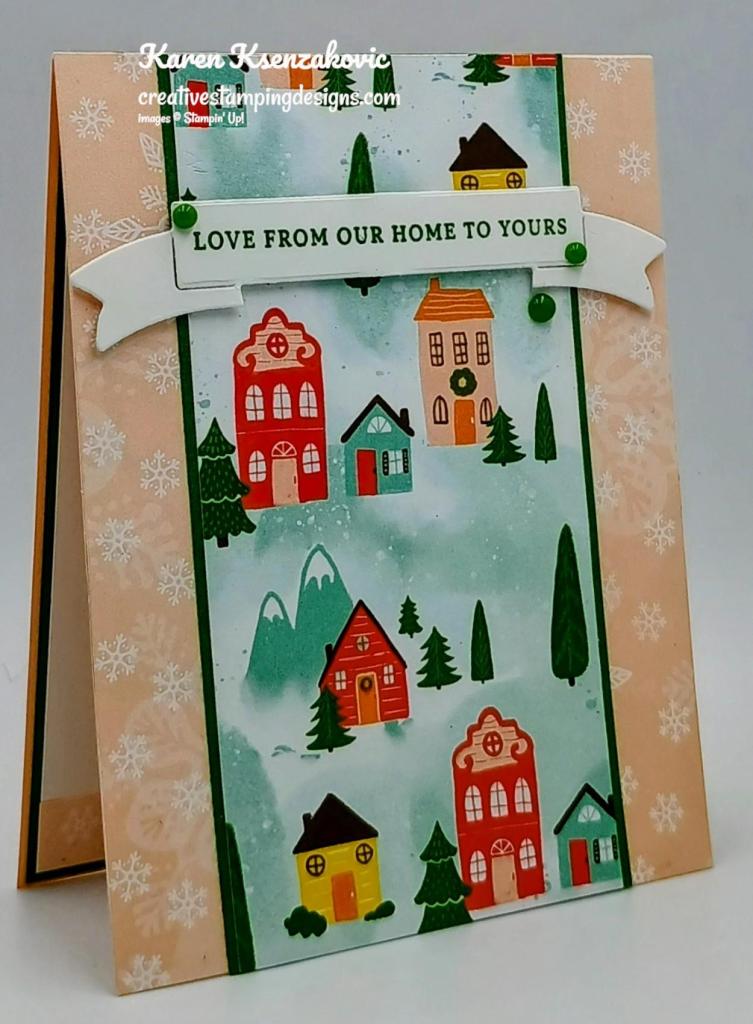
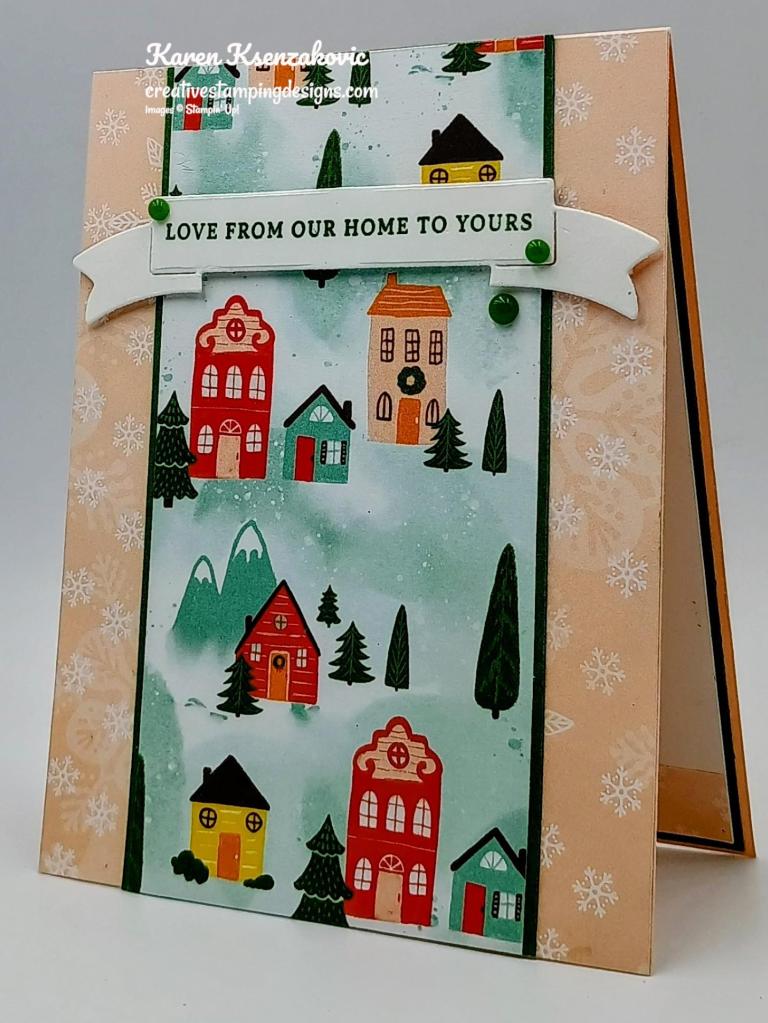
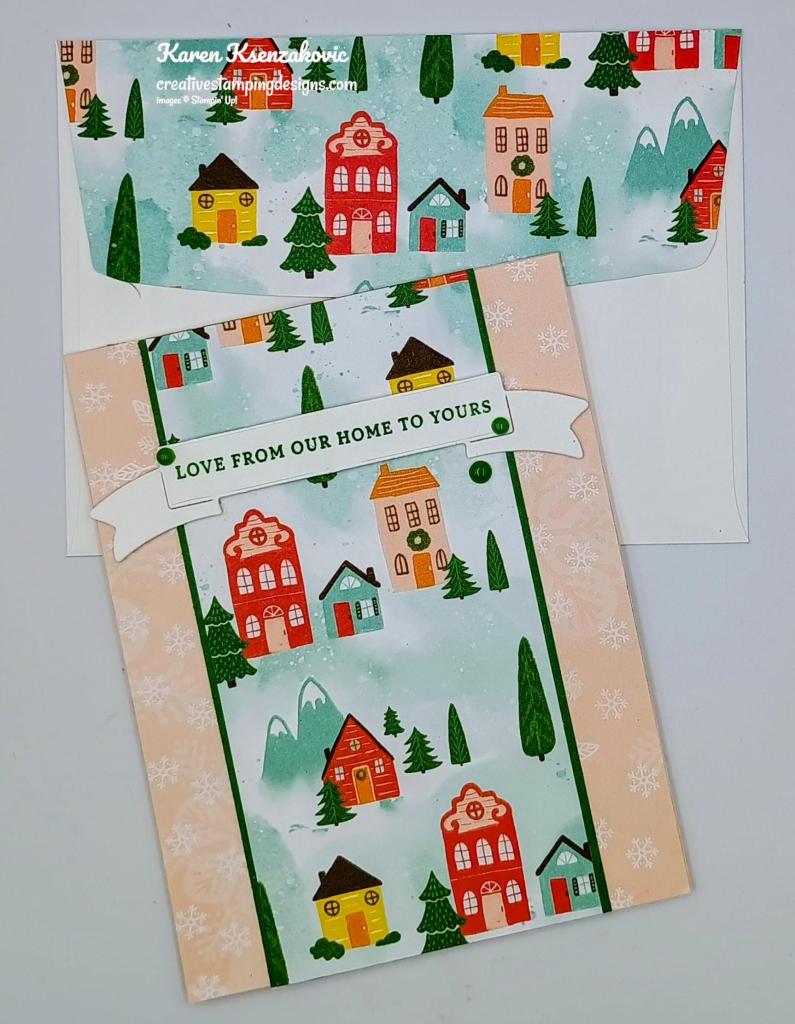
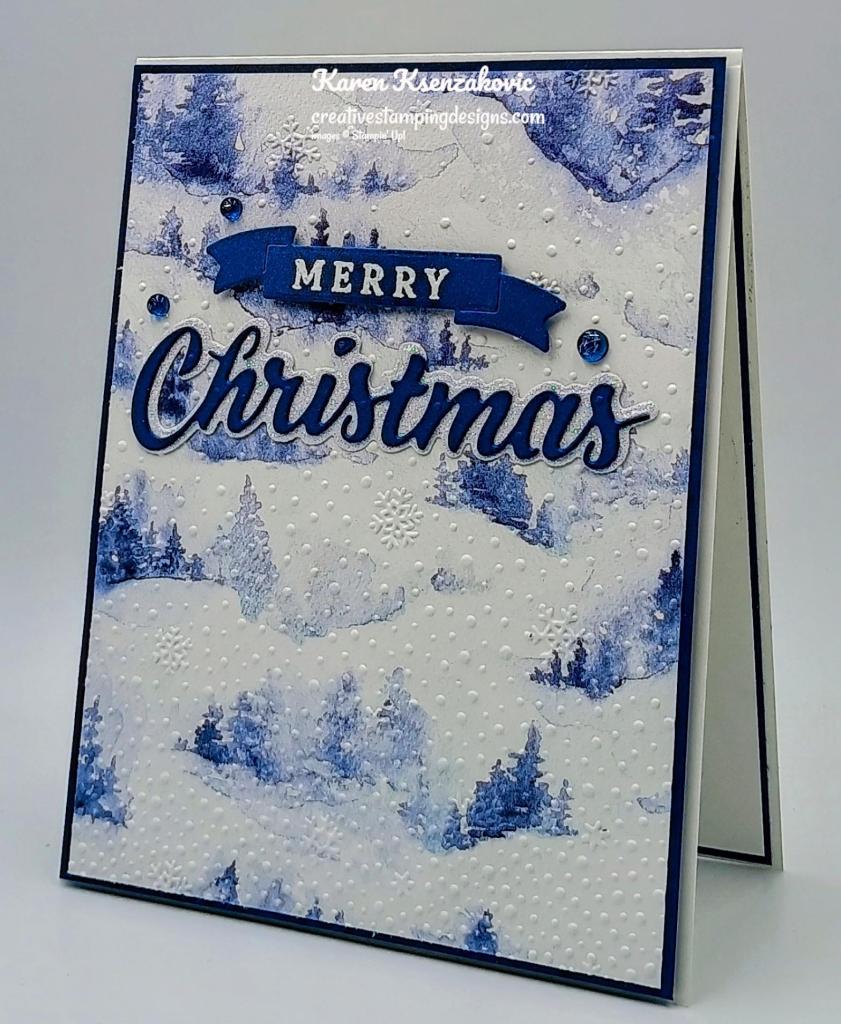
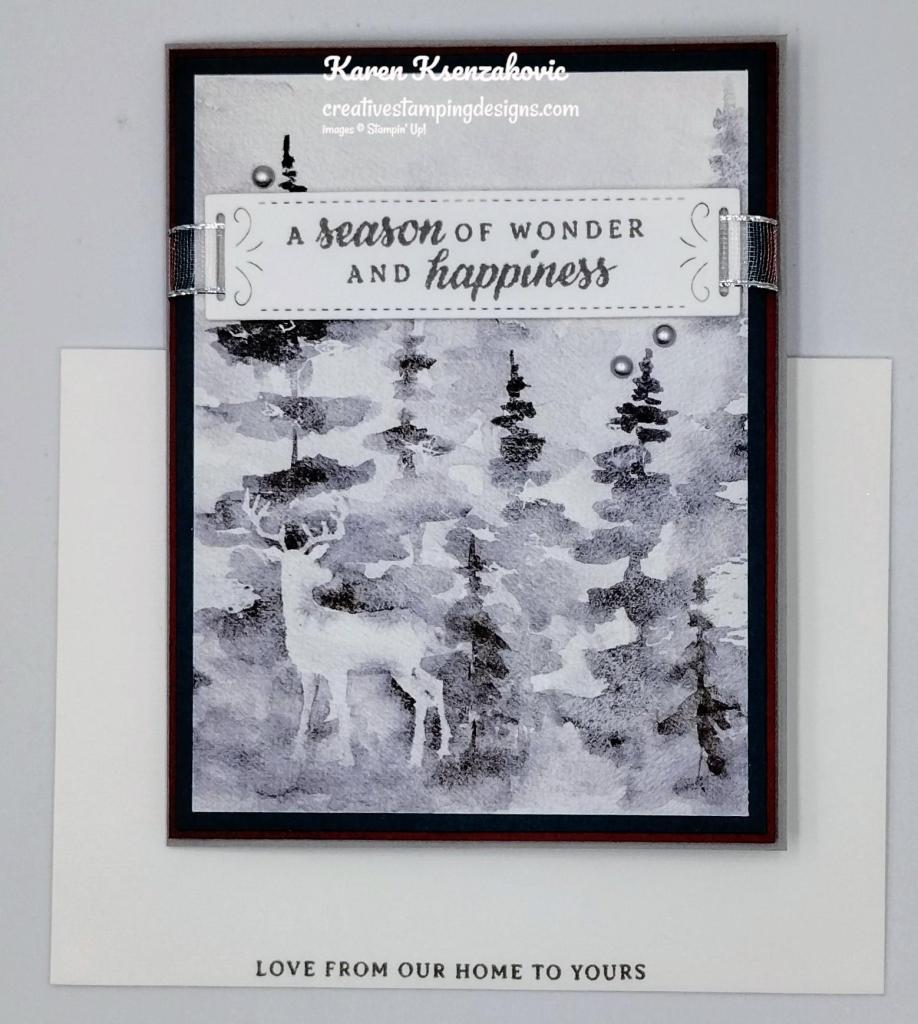
Today’s card is for the inspiration challenge from The Card Concepts. We do a month-long challenge, so you have all month to enter multiple times. The inspiration photo #212 is Christmas Wreath. If you’d like to see a quick video on how I made this card, Click Here for my Instagram Reels. Here is my card that was inspired from the challenge photo.
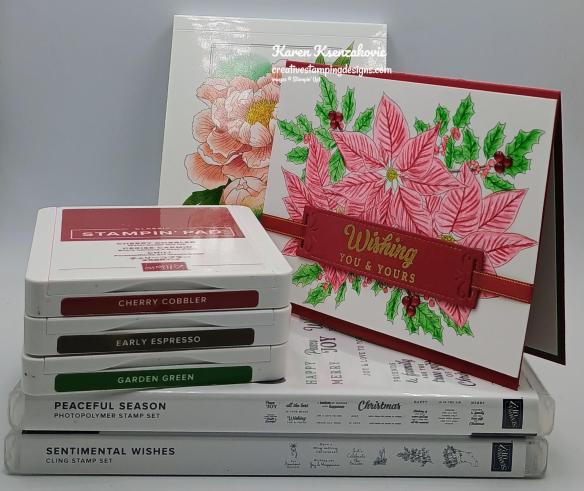
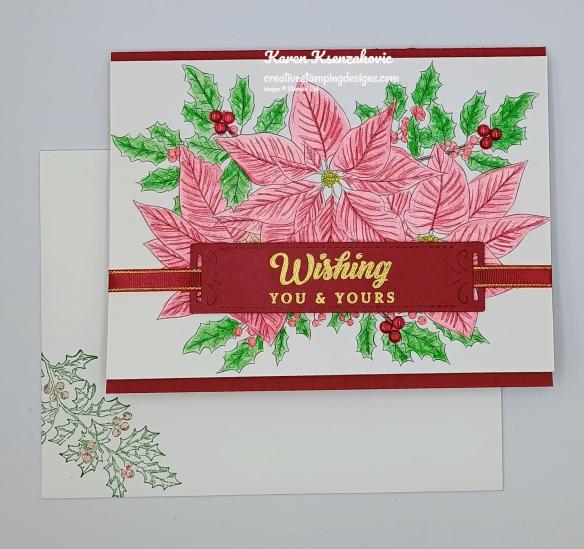
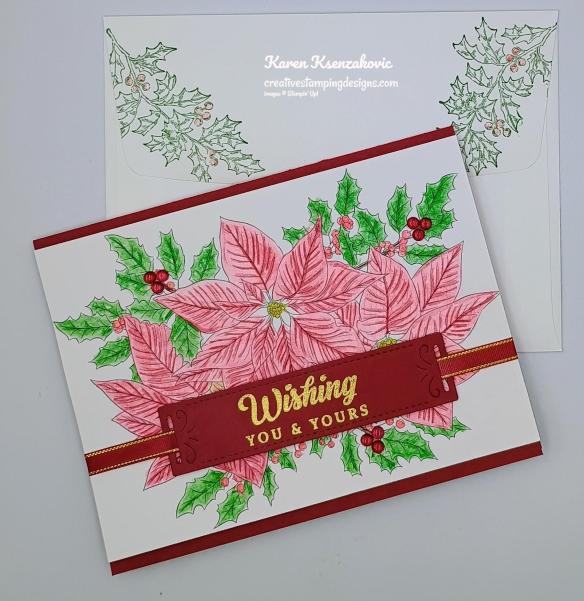
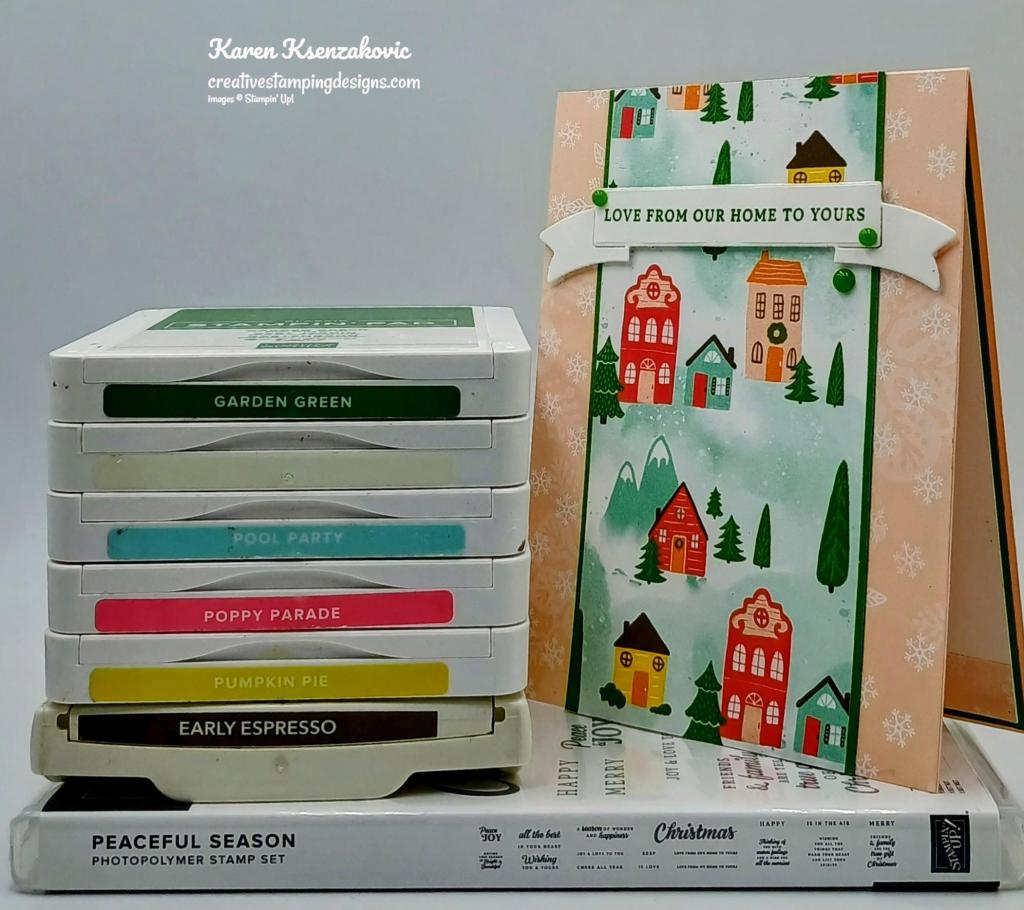
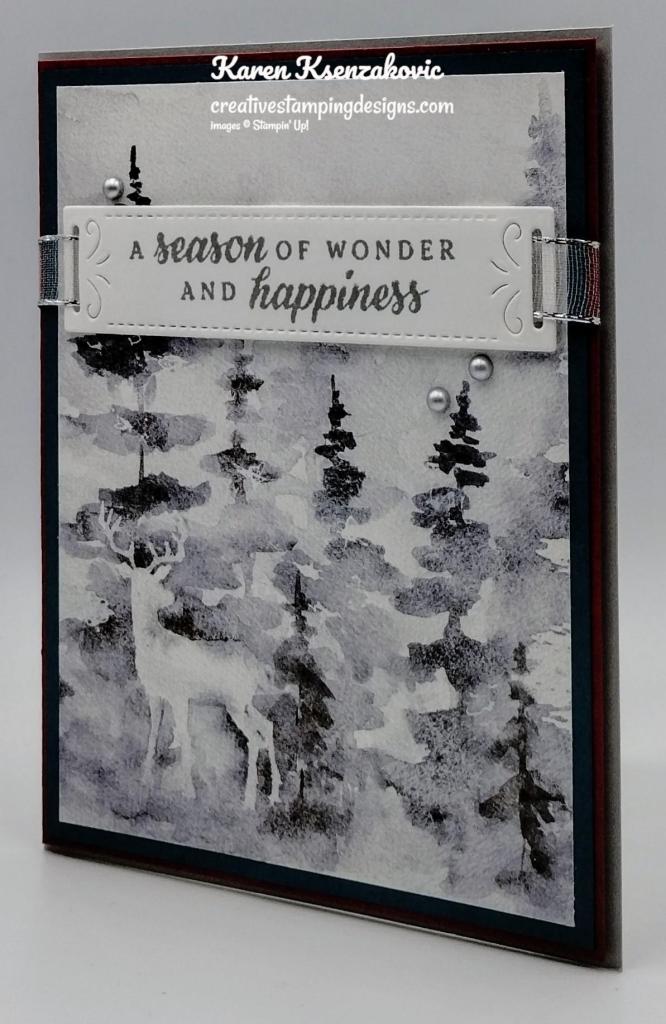
I used the Stampin’ Up! Peaceful Season Bundle, which is a Last Chance item, along with the Nature’s Paintings Kit and the Stampin’ Up! Sentimental Wishes Cling Stamp Set for my Clean & Layered card today.
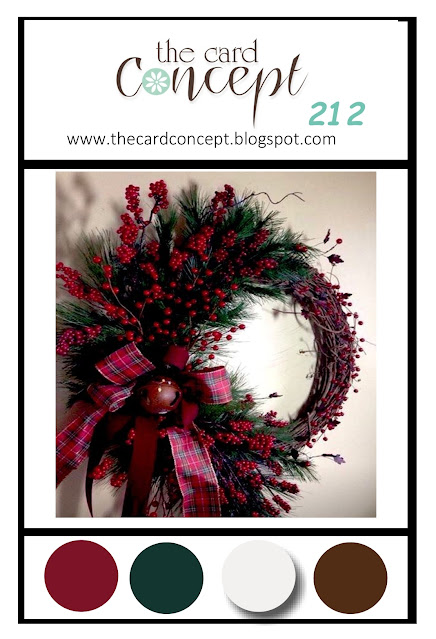
I hope you will take a moment to visit The Card Concepts and join us for our challenge 212. How are you inspired by the photos?
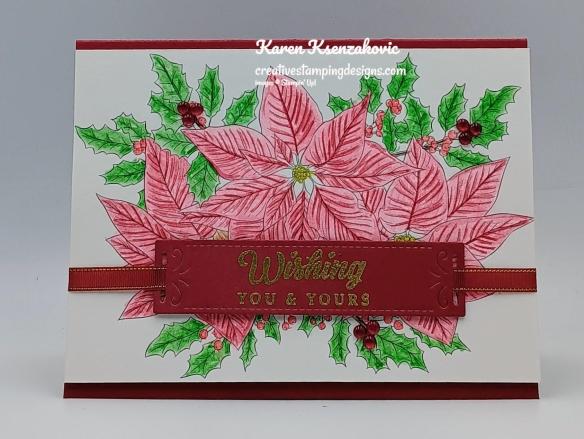
Cut down the panel from the Nature’s Paintings Kit to a 4″ X 5 1/2″ panel. Color the image using the Watercolor Pencils that come in the kit. Use the Water Painter that comes in the kit to blend the color and spread it around.

On a panel of Cherry Cobbler, stamp the sentiment from the Stampin’ Up! Peaceful Season Photopolymer Stamp Set in Versamark Ink. Sprinkle the sentiment with Gold Embossing Powder and set it using the Heat Tool. Cut the sentiment out using the Peaceful Season Dies.
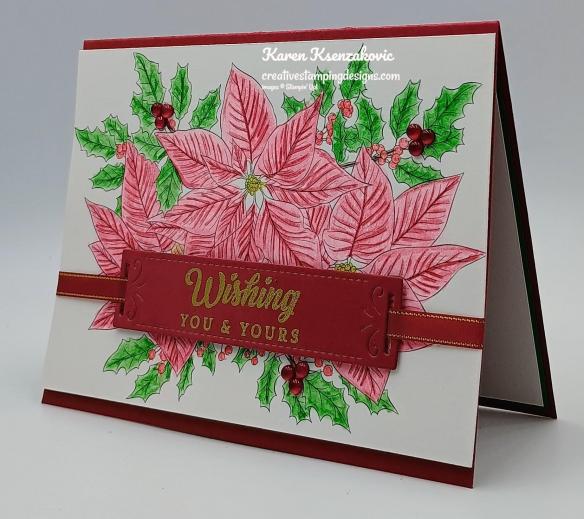
Thread a piece of Cherry Cobbler & Gold 1/4″ Satin Ribbon through the die cut sentiment. Adhere the sentiment to the card front using Stampin’ Dimensionals. Adhere the ribbon to the back of the Nature’s Paintings panel using Stampin’ Seal. Adhere the card front panel to a Cherry Cobbler card base using Stampin’ Dimensionals. Add a few Cherry Cobbler & Pearl Adhesive-Backed Berries to the card front.
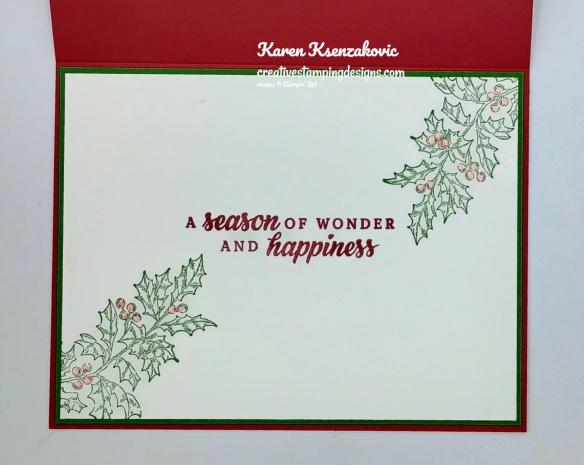
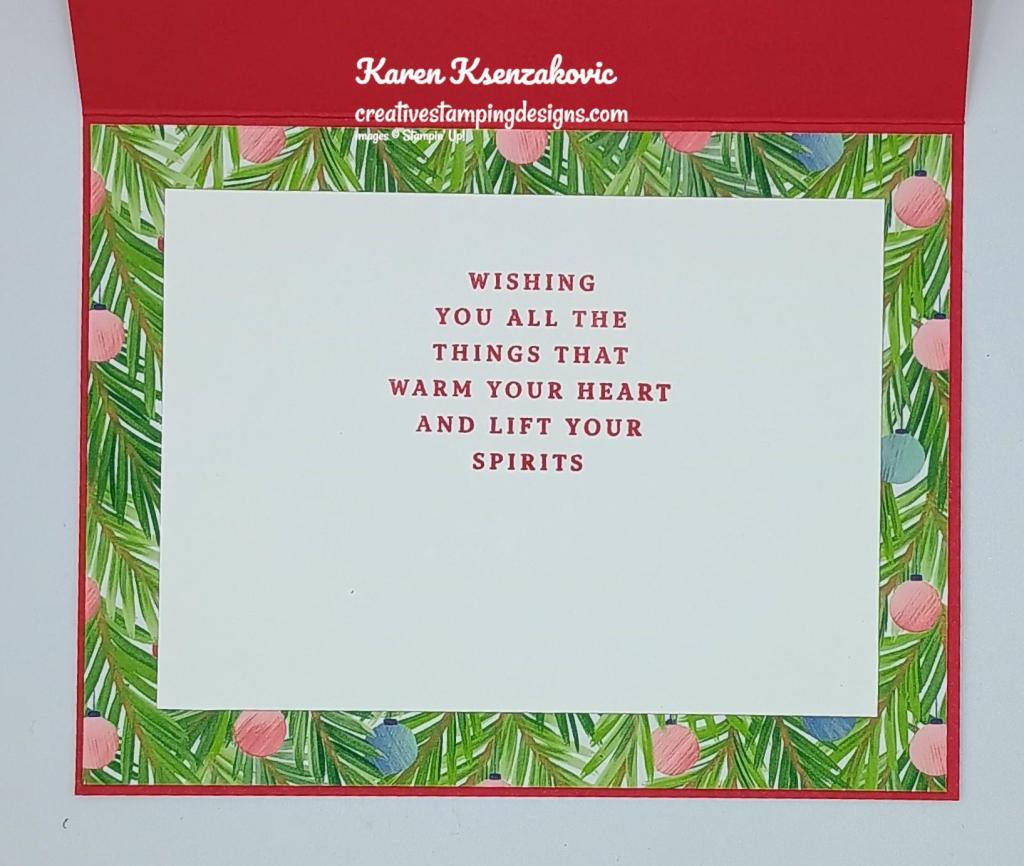
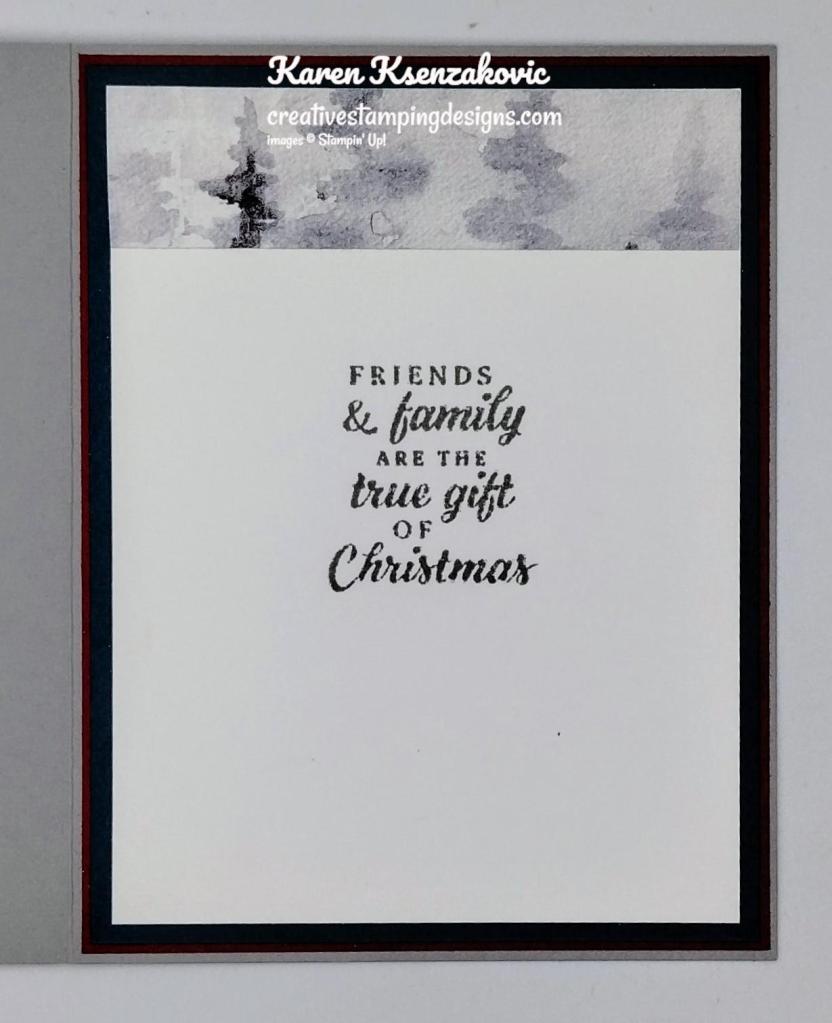
On a panel of Basic White, stamp the sentiment from the Peaceful Season stamp set in Cherry Cobbler Ink. Stamp the holly image from the Sentimental Wishes stamp set in Garden Green Ink in the corners of the panel. Color the berries on the holly using the red watercolor pencil. Adhere the Basic White panel to a Garden Green mat then to the inside of the Cherry Cobbler card base.
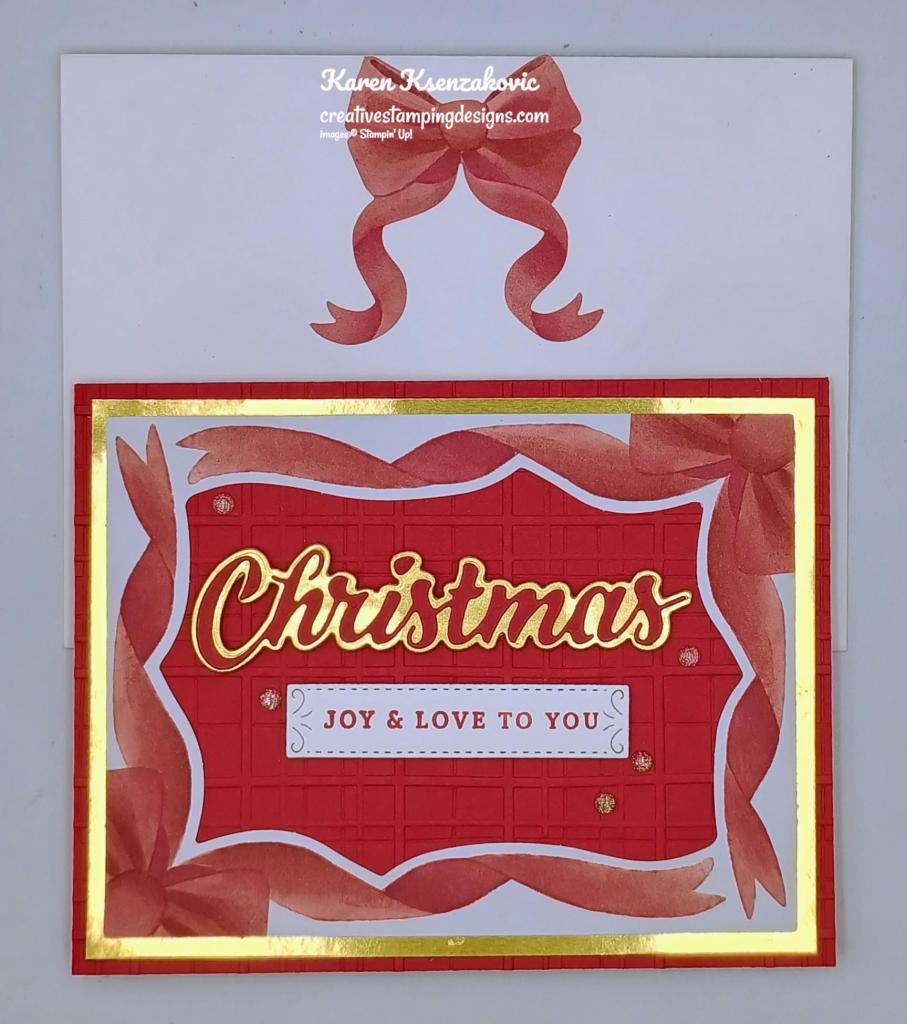
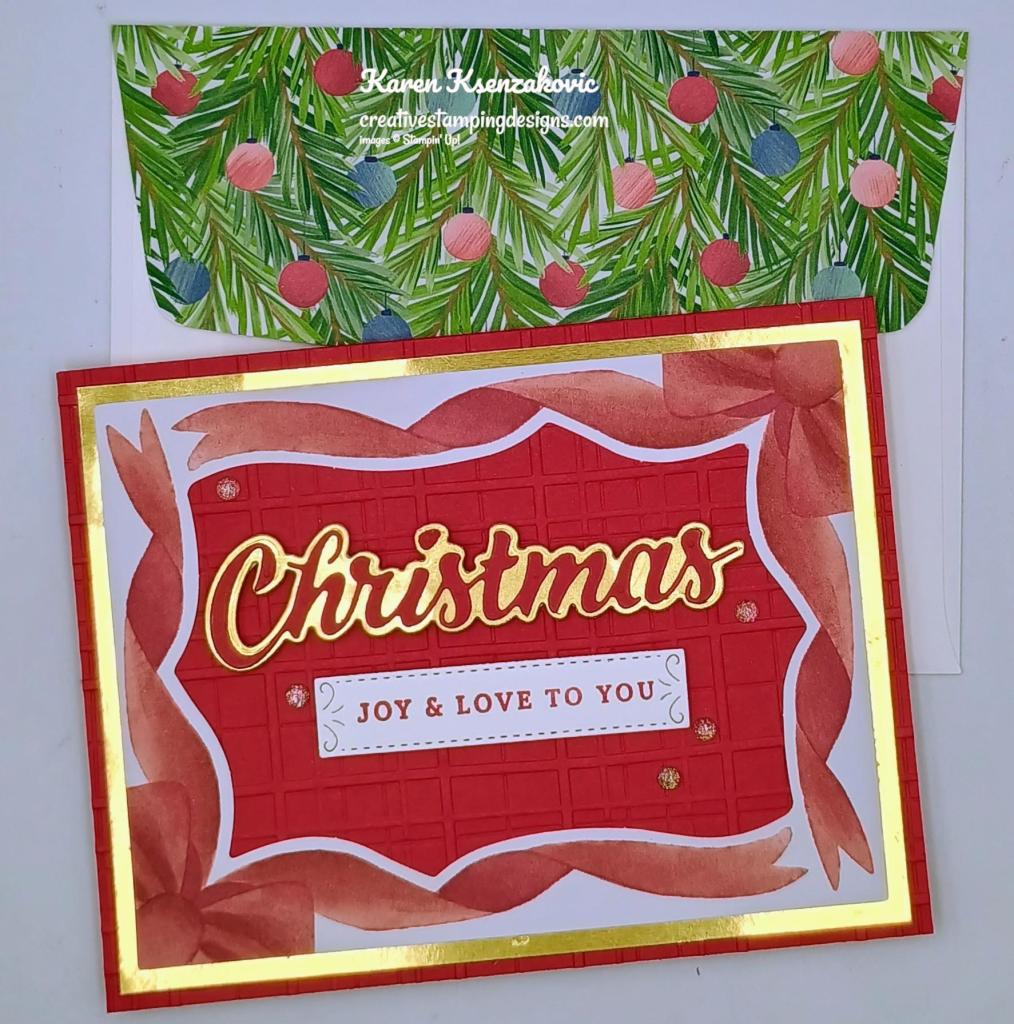
To finish the card, decorate a Basic White Medium Envelope. Stamp the holly image from the Sentimental Wishes stamp set in Garden Green Ink on the envelope front and flap. Color the berries on the image using the red watercolor pencil.
Thank you for stopping by my blog today. I hope you like my card and will give it a try. Happy Stamping!!
*********************************************************************************************************
If you need any stamping supplies, I’d love to be your Demonstrator. Just click HERE to go directly to my online store or drop me an email if you have any questions.
MY CURRENT HOST CODE IS: VNGF49FJ
Use this host code when placing an order with me. When you order $50 or greater you will receive a free gift from me! If your order is over $150, please do not use this code, but you’ll still get the free gift. The free gift is your choice of any 1 item valued up to $10.00 from the 2024 – 2025 Annual Catalog, September – December 2024 Mini Catalog or from the Online Exclusives! For any orders $50 or more I will also send you my monthly class tutorials. Click HERE or go to my Customer Rewards for more details and to see what this month’s tutorials are.
Please remember to use my current Host Code and make sure that you can see my name on the final checkout page listed as your Demonstrator when you order so that you know that you’re ordering with me, and you’ll get my rewards!
Happy Stamping, Karen
*********************************************************************************************************
In response to changing policies at Stampin’ Up – I’m adjusting my Ordering Gift policy as well. I’m having to get a little more tough on the adding of Host codes when you place your order thru my Online Store.
Not to worry – you’re still going to get that $10 ordering gift for orders of $50 (before shipping & tax) or greater. And the gift is still any 1 SU! product up to that $10 value.
But – if you DO NOT use the Host code for your orders of less than $150 (this is the RETAIL total before Shipping & Handling), then you’ll have two options:
- You’ll need to call Stampin’ Up! (1-800-Stamp-Up) and ask them to add it for you. They’re very helpful and will get it done quickly! OR….
- If your order was over the $50 threshold but under $150, then…you’ll forfeit that $10 ordering gift and rewards – this is the Bummer Option – and I REALLY don’t want to do this, SO please remember to add my Current Host Code.
*********************************************************************************************************
My January-April 2025 Mini Catalog and January Online Exclusive Designer Series Paper and Ribbon Shares are open for ordering. You can order just the DSP share, just the ribbon share or you can order both.
I’m offering a Designer Series Paper share from the January-April 2025 Mini Catalog along with the upcoming January Online Exclusives and I’d love to have you join!! I’m placing my share order early on January 7th and I’m going to use the expedited shipping option so I should be able to have the shares cut, bundled and back out to you during the week of January 12th. Wouldn’t you love to have all of the gorgeous new Designer Series Papers in the Stampin’ Up! January-April 2025 Mini Catalog and the upcoming Online Exclusives? What is a Paper Share you ask? It’s a sample of each of the new Designer Series Papers from the January-April 2025 Mini Catalog and the January Online Exclusives. Shares give you a good working sample of all of the papers so that you can decide which ones to order in full packs! If you were to purchase all of the DSP in the new Catalog and Online Exclusives, it would cost you over $130.00 plus shipping and if you were to purchase all the ribbon it would cost you over $38.00.
New Designer Series Paper Share – $21.00 plus $9.00 for Priority Mail Shipping

How my shares work: I order full packs of all of the Designer Series Papers listed below, I cut them into 6″ X 6″ pieces (or 6″ X 12″ pieces for double shares) and give you one panel of each design from each pack on the list. I pack up the paper in a cellophane bag with labels listing the Name, Item # and Colors in the pack and mail it back out to you just as quickly as I can!
New Designer Series Paper Share – $21.00 plus $9.00 for Priority Mail shipping
You will receive one 6X6 sheet of each design from the following DSP packs (the number after the name indicates how many 6×6 sheets of that paper pack you will receive):
- Beautiful Bokeh (6)
- Floral Delight (6)
- Floral Gingham Vellum (3)
- Friends of the Ocean (6)
- Storybook Moments (6)
- Timeless Plaid (12)
- Wildflower Birthday (5)
- Everyday Skies (12) Online Exclusive
- Mixed Media Florals (6) Online Exclusive
- Pastel Ombre Glimmer (3) Online Exclusive
In all, you’ll receive 65 – 6” X 6” sheets of designer or specialty paper!
Double DSP Share – $42.00 + $9.00 Shipping by Priority Mail – if you’d like double shares of the designer paper, I’m offering those too! I’ll cut the 12″ X 12″ designer paper sheets into 6″ X 12″ so that you’ll be able to get 3 full A2 size card fronts from each sheet and you’ll get double sheets of the 6″ X 6″ since they’re already precut.
New Ribbon Share – $11.00 plus $9.00 Priority Mail Shipping

All ribbons will come individually wrapped and labeled with the name and number of the product. Please note that ribbons are being divided differently, you will be getting one fourth of a roll of each of the Ribbons.
One-Fourth of a Roll of each:
- Daffodil Delight 1/8″ Satin Ribbon
- Gold 1 1/2″ Open Weave Trim
- Petal Pink 3/8″ Scalloped Ribbon
- White 1/2″ Woven Ribbon Online Exclusive
Double Ribbon Share – $22.00 + $9.00 Priority Mail Shipping – If you’d like double shares of the Ribbon, you will be getting 1/2 of the roll or each ribbon.
If you would like the Designer Series Paper Share & the Ribbon Share the cost will be:
$32.00 for a single share + $9.00 shipping
$64.00 for a double share + $9.00 shipping.
As a Thank You for joining in with my Shares, I’ll be adding a sampling of the Sale-a-bration Designer Series Paper. I’m not sure which ones you’ll be getting yet, but there are 3 different one’s that will be available. Which one(s) you get will be a surprise.
Anyone is welcome to join in my share (please note, I can only ship to addresses within the US). If you’d like to join, email the following information to creativestampingdesigns@gmail.com
- Your first and last name
- Your mailing address for paper to be shipped to.
- The email address that is connected to your PayPal account or let me know if you’d like to use Zelle. I will accept Zelle or PayPal for payment. ***You do not need to have a PayPal account to pay the invoice, you can choose to pay by credit card without having a PayPal account. If you’d like to use Zelle, email me and I’ll give you the number associated with my account.
Deadline to sign up for my share is Sunday January 5th at 5:00 PM ET.
Let me know if you have any questions. Thanks!
*********************************************************************************************************
Hearts for You
Subscribe December 11 – January 10

Create heartfelt cards for Valentine’s Day, Galentine’s Day, and beyond!
• Makes 9 cards: 3 each of 3 designs with 9 envelopes
• Heart-shaped precut pieces and stickers
• Twine and heart gem embellishments
• Coordinating colors: Flirty Flamingo, Petal Pink, Real Red (Classic Stampin’ Spot)
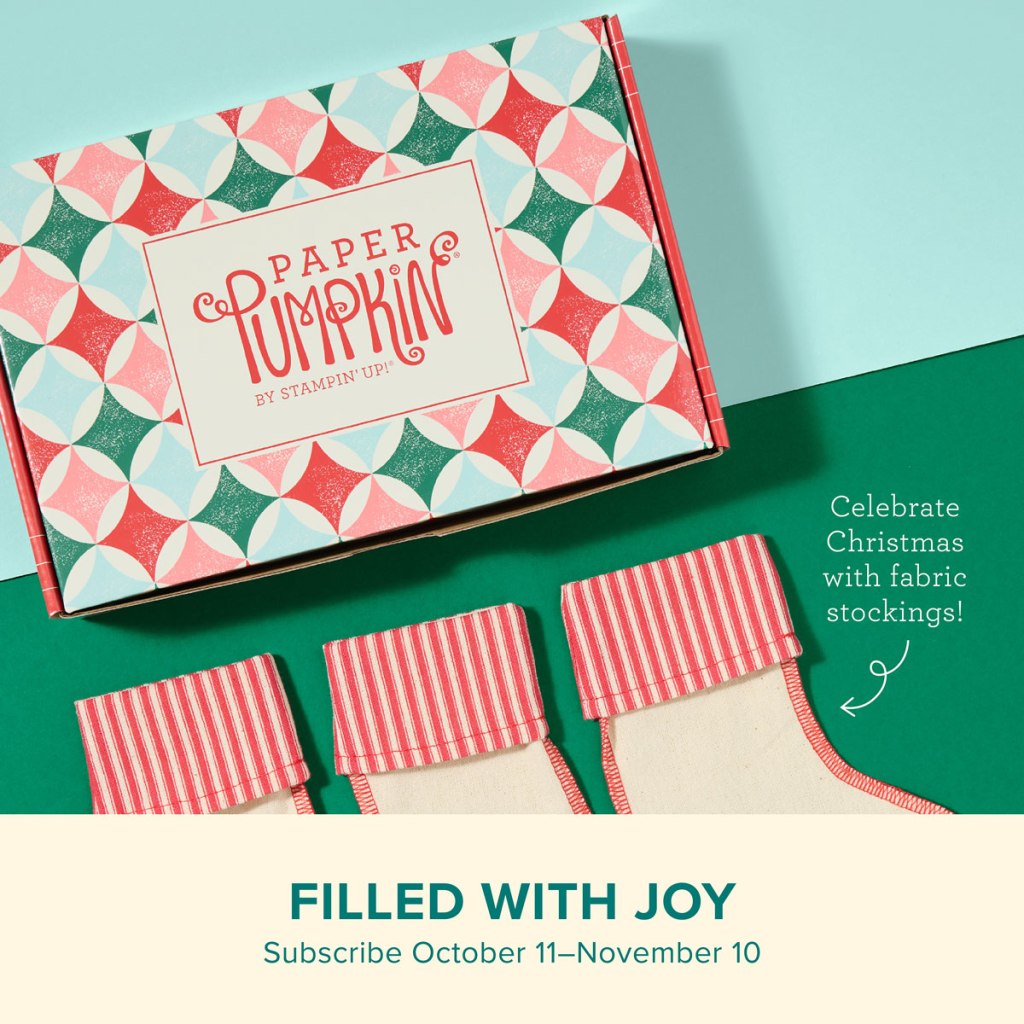
Subscribe to Paper Pumpkin for a monthly, all-inclusive crafting kit that’s a fun surprise! Each kit includes a photopolymer stamp set, Classic Stampin’ Spot, and step by step instructions to complete exclusive paper craft projects, including cards, tags, and gift
packaging. And don’t miss the special add-on that coordinates with the next three months!
Subscribe to the January Paper Pumpkin Kit between 11 December and 10 January by clicking here!
*********************************************************************************************************
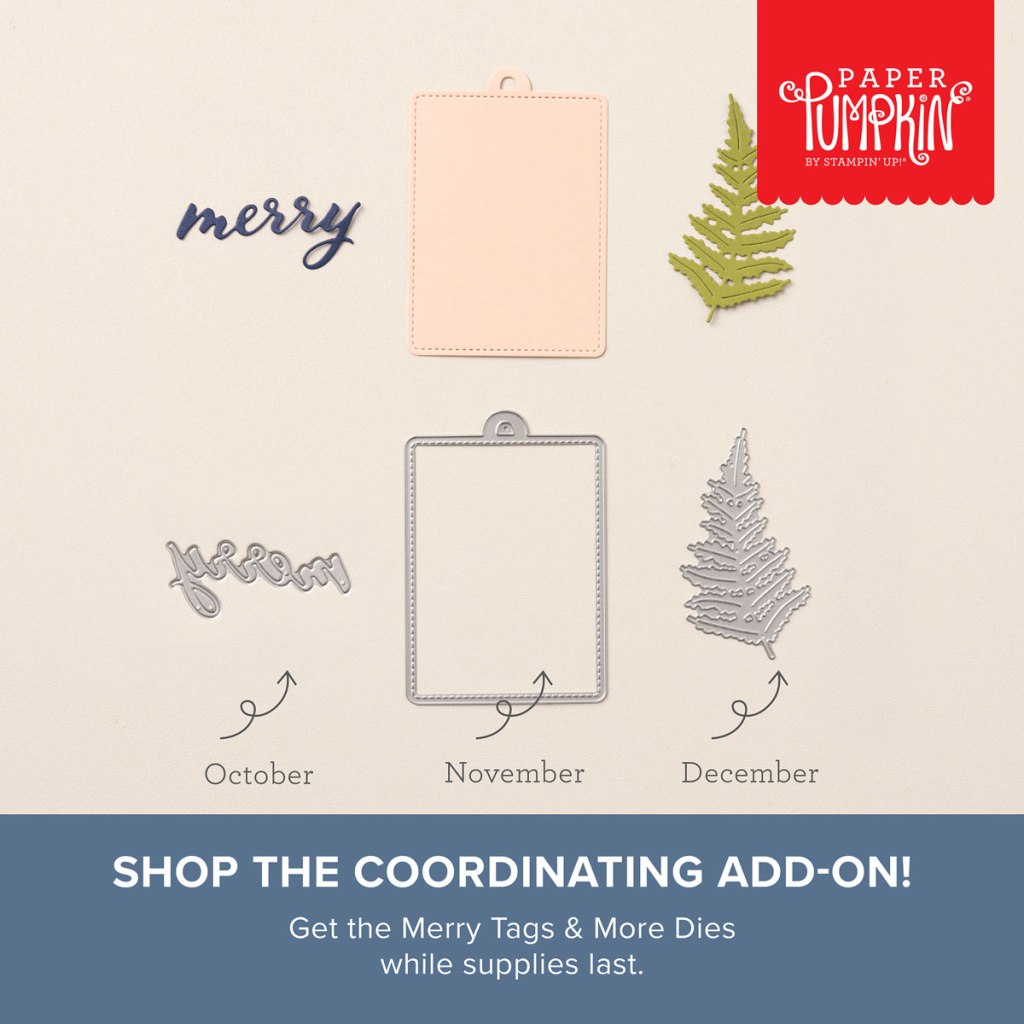
Don’t miss the coordinating
Spring is in The Air Dies Add-On!
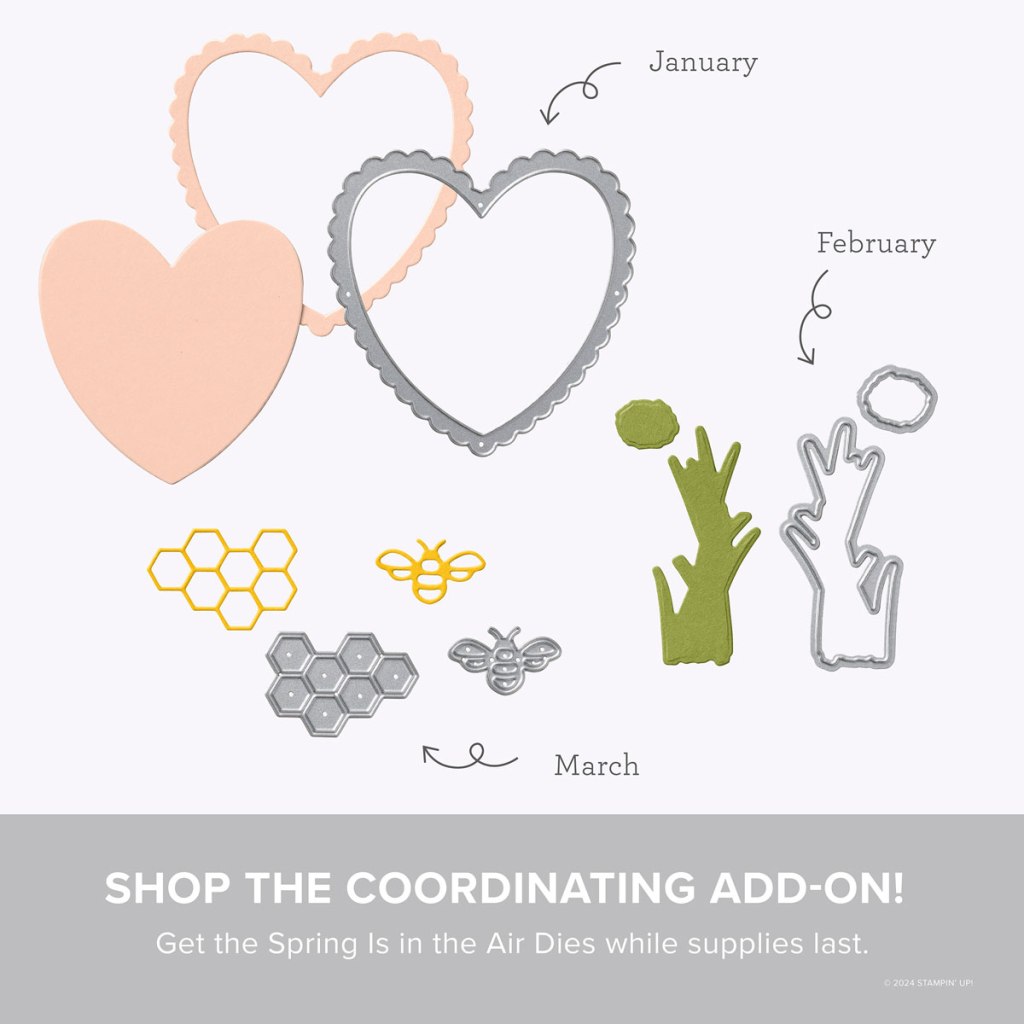
Make the most of your Paper Pumpkin kits with the Spring Is in the Air Dies add-on! Quickly and cleanly cut out a heart frame, flowering chive, honeycomb, or tiny bumblebee to elevate your crafting projects. These additional dies are designed to work with THREE Paper Pumpkin Kits: the Hearts for You Paper Pumpkin Kit, the Spring Is in the Air Paper Pumpkin Kit, and the Daisy Daydream Paper Pumpkin Kit. Pair these dies with other Stampin’ Up! products for even more creative options!
DETAILS
– 5 dies
– Largest die: 3″ x 3″ (7.6 x 7.6 cm)
– Use with a Stampin’ Cut & Emboss Machine (sold separately)
You must be a current Paper Pumpkin subscriber to purchase this item. To become a subscriber, visit paperpumpkin.com.
#166237 $12
Note: Supplies may be limited toward the end of the subscription period.
*********************************************************************************************************
Card stock cuts for this project:
- Basic White Cardstock 4″ X 5 1/4″(inner liner)
- Cherry Cobbler Cardstock 5 1/2″ X 8 1/2″(card base scored & folded at 4 1/4″), 1 1/2″ X 4 1/4″ (sentiment)
- Garden Green Cardstock 4 1/8″ X 5 3/8″(inner liner mat)
*********************************************************************************************************
Product List
")
")
")
")


")
 Satin Ribbon")


 Mix & Match Specialty Designer Series Paper")


 Designer Series Paper & Sticker Sheet (English)")


 Designer Series Paper")
 Glimmer Specialty Paper")


 Sheer Ribbon")


