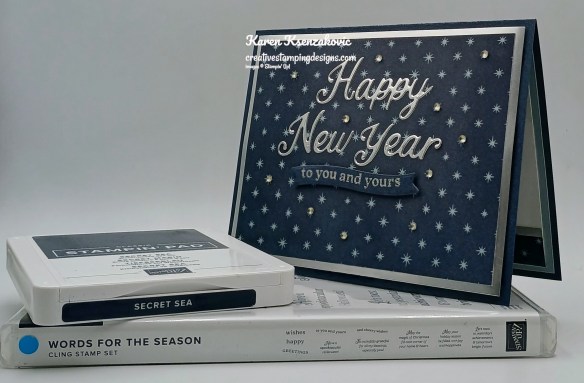
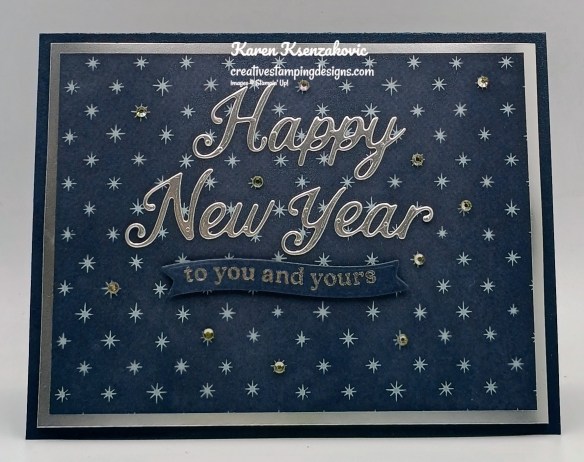
Good Tuesday morning my stamping friends welcome to Amy’s Inkin’ Krew Team Blog Hop. It’s the 2nd Tuesday of the month so that means Blog Hop Day!! If you are starting with me, be sure to hop around to see everyone’s beautiful projects. If you’ve hopped over from Amy’s blog, welcome to my blog and thank you for stopping by. The theme this month is “Celebrate”. If you’d like to see a quick video on how I made this card, Click Here to go to my Instagram Reels. Here’s my card for today.
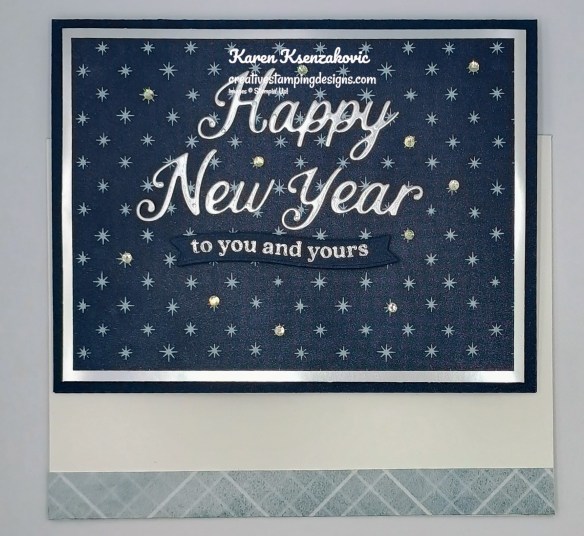
I used the Stampin’ Up! Words For The Season Bundle along with the Peaceful Garden Designer Series Paper and Silver Foil Paper for my card today.
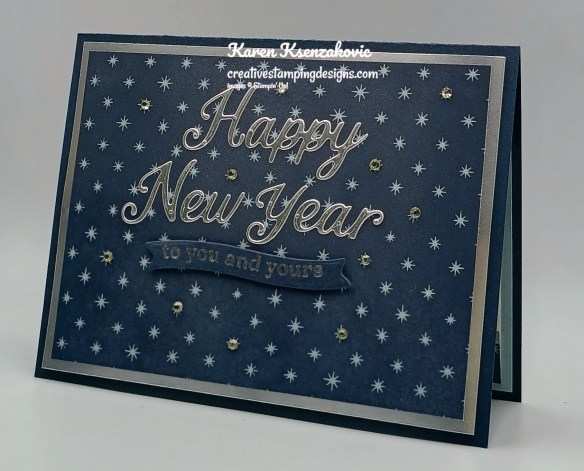
Adhere a panel of Peaceful Garden DSP to a Silver Foil mat. Adhere the layered panel to a Secret Sea card base with Stampin’ Dimensionals.
Cut the sentiments from a panel of Silver Foil using the Words For The Season Dies. Adhere the die cut sentiment to the card front.
On a panel of Secret Sea, stamp the sentiment from Words For The Season stamp set in Versamark Ink. Sprinkle the sentiment with Silver Embossing Powder and set it using the Heat Tool. Cut the sentiment out using the Words For The Season Dies. Adhere the sentiment below the die cut sentiment with Stampin’ Dimensionals. Add Rhinestone Basic Jewels to the card front.
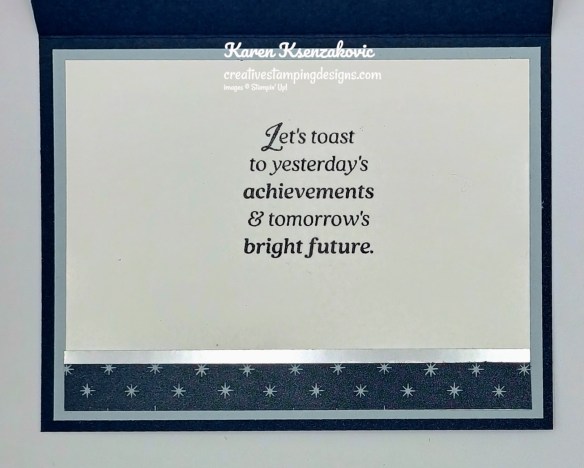
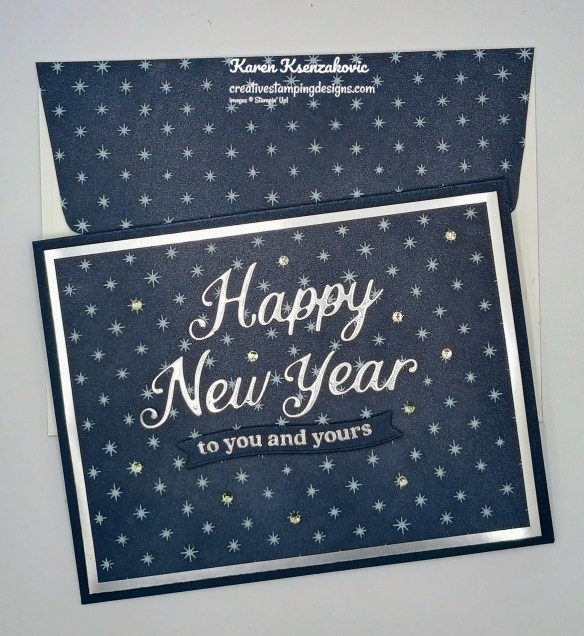
Stamp the sentiment from Words For The Season stamp set in Secret Sea Ink on a panel of Basic White. Adhere a strip of Peaceful Garden DSP & Silver Foil to the bottom of the panel. Adhere the Basic White panel to a Cloud Cover mat then to the inside of the Secret Sea card base.
Decorate a Basic White Medium Envelope to complete your card. Adhere a strip of Peaceful Garden DSP to the envelope front and a panel to the envelope flap.
Thank you for stopping by my blog today. Now that you’ve seen my card, let’s get on with the hop! Click on the Next Blog button to move on to Mary’s project. Happy Hopping.
Just in case you get lost along the way, here is a list of the team members involved in the hop today.
If you need any stamping supplies, I’d love to be your Demonstrator. Just click HERE to go directly to my online store or drop me an email if you have any questions.
Good Saturday morning stamping friends. We are having the best time every here in GA. We’ve been doing a lot of laughing, catching up and eating. There’s always a lot of eating going on when we’re together. Yesterday started with James’ delicious Blueberry French toast and homemade Hash Browns. Lunch was a little lighter with a Baked Potato bar & Salad. We had an amazing Dijon-Crusted Roast Pork Loin with Cranberry & Apple Chutney along with his famous Carrot Souffle (which he really needs to make a double batch of), Roasted Brussels Sprouts and Spinach & Mushroom Risotto.
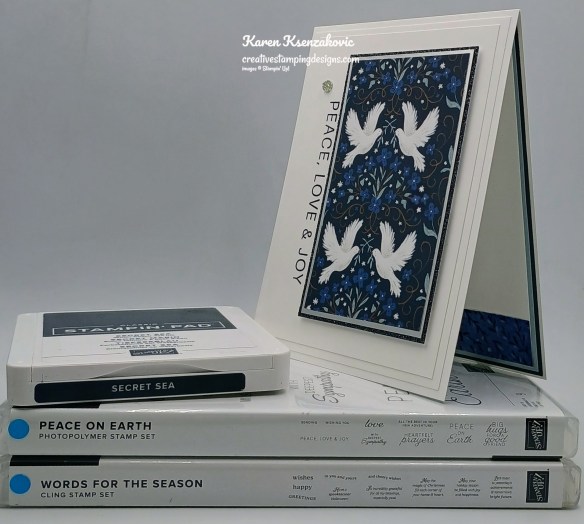
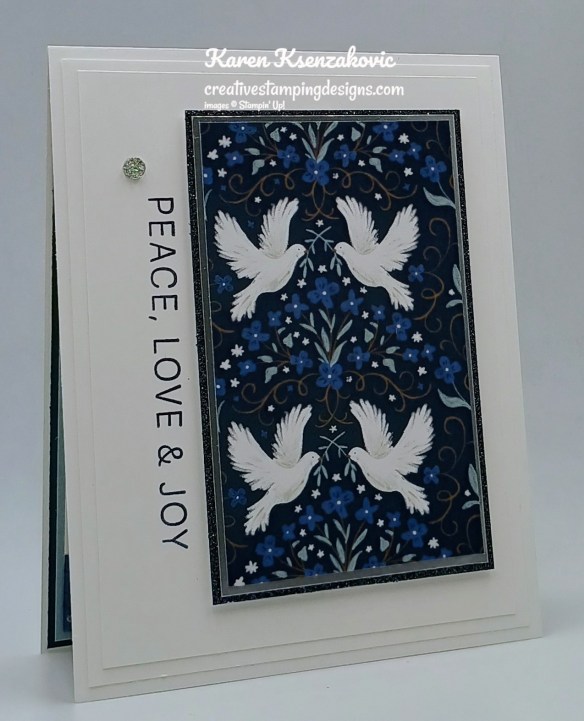
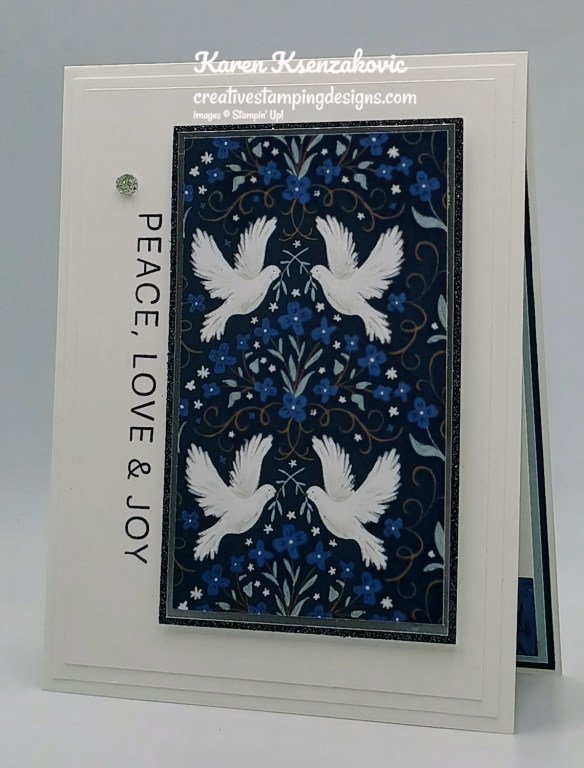
Today’s card is one of the cards I prepared for our shoebox card swap. We all have to bring a card for everyone else to make at the retreat. I used a design I made a few weeks ago and just changed up the DSP. If you’d like to see a quick video of how I made this card, Click Here to go to my Instagram Reels. Here’s my card for today.
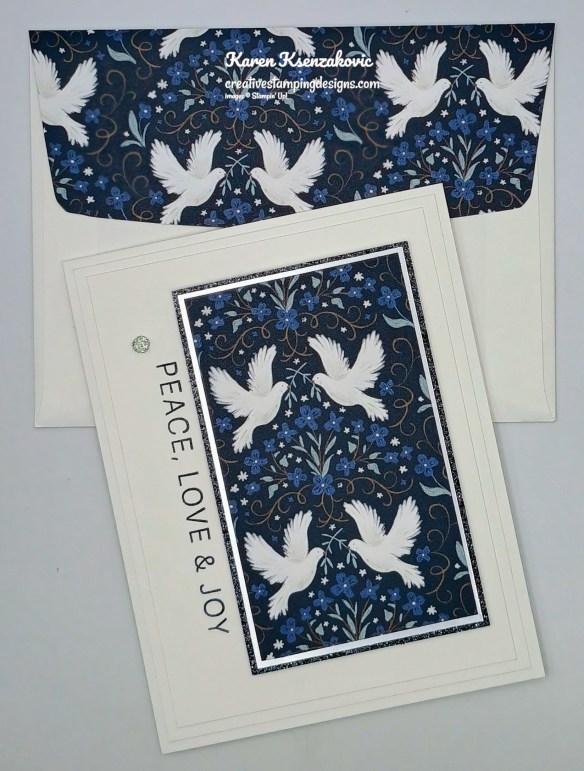
I used the Stampin’ Up! Peace On Earth Photopolymer Stamp Set along with the Peaceful Garden Designer Series Paper, Peaceful Garden Glimmer Paper,Silver Foil Sheets, Stampin’ Up! Words for the Season Cling Stamp Set and Stampin’ Up! Textured Notes Cling Stamp Set for my card today.
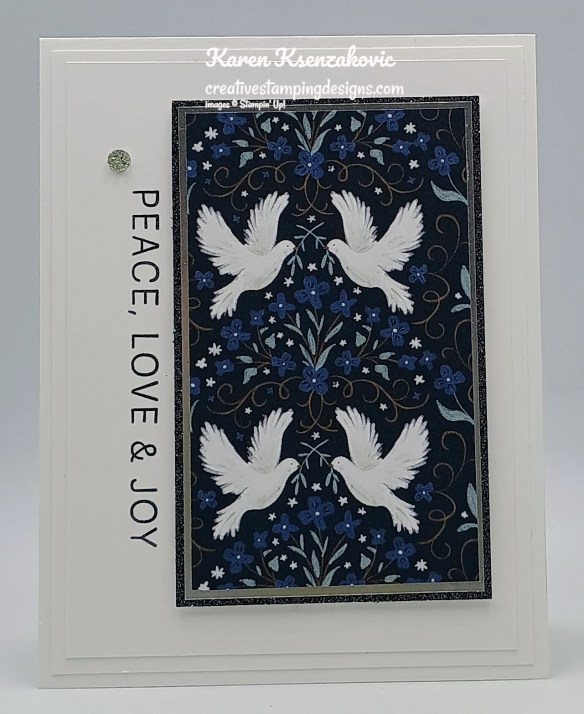
Stamp the sentiment from the Peace on Earth stamp set in Secret Sea Ink on the panel of Basic White.
Adhere the Basic White panel to a Basic White mat. Adhere the layered panel to a Basic White Thick card base.
Adhere the panel of Peaceful Garden DSP to the Silver Foil mat. Adhere the layered panel to a Peaceful Garden Glimmer mat. Adhere the layered panel to the card front with Stampin’ Dimensionals. Add a Drusy Adhesive-Backed Embellishment.
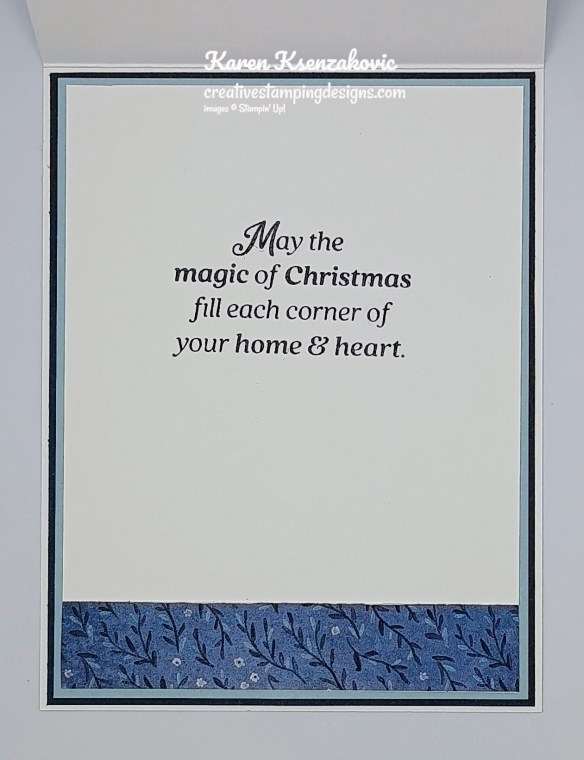
Stamp the sentiment from Words for the Season stamp set in Secret Sea Ink on a panel of Basic White. Adhere a panel of Peaceful Garden DSP to the bottom of the panel. Adhere the Basic White panel to a Cloud Cover mat and a Secret Sea mat then to the inside of the Basic White Thick card base.
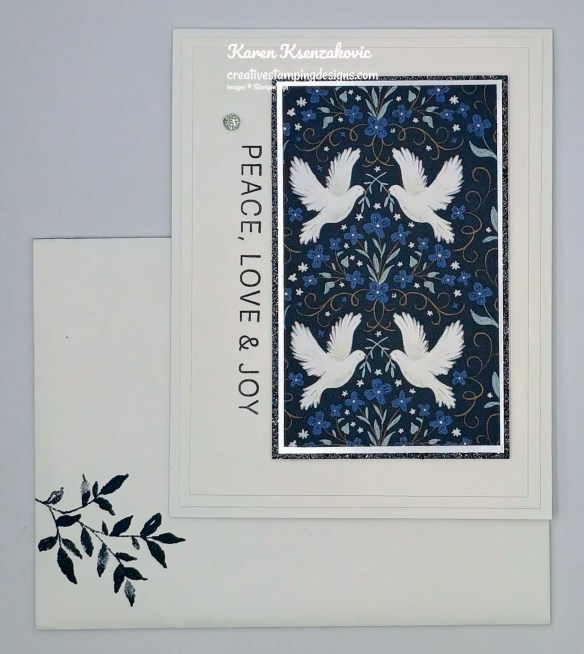
Decorate a Basic White Medium Envelope to finish your card. Stamp the small leaf image from the Textured Notes stamp set on the envelope front in Secret Sea Ink. Adhere a panel of Peaceful Garden DSP to the envelope flap.
Thank you for stopping by my blog today. I hope you like the card and will give it a try. Happy Stamping!!
If you need any stamping supplies, I’d love to be your Demonstrator. Just click HERE to go directly to my online store or drop me an email if you have any questions.
FREE SHIPPING Starts TODAY, October 22 – October 24 on orders of $75 or more
All order types qualify for this promotion.
Free shipping is for three days only. Orders must be opened and closed from October 22–24.
Free shipping automatically applies to your cart after the qualifying amount has been met, which is $75 USD (before tax).
Coupon codes and Stampin’ Rewards will lower your order’s retail amount. Orders must meet the qualifying amount to be eligible for free shipping.
The additional cost for expedited shipping is not covered by this promotion.
Prepaid 3-, 6-, and 12-month Paper Pumpkin subscriptions and month-to-month subscriptions do not qualify for free shipping. Refills, past kits and add-ons do qualify toward free shipping, but you must be a subscriber to purchase. Subscriptions billed and shipped this month will be charged for the normal amount ($27.00 USD shipping included) + tax.
Only 9 Days Left for Stampin’ Up! BEST JOINING SPECIAL EVER – October 1 – 31
What would you say about getting $125 in products of your choice for ONLY $35? Or how about getting $189 in products of your choice for only $99? I don’t know about you, but I’d say YES!!!!! Are you new to stamping or do you know someone that wants to get started but doesn’t know where to start. I’m here to help you. I recommend for someone brand new to stamping to start with our all-inclusive kits. It’s a great place to start and you can add the New Kits along with New preorder Online Exclusive products to your starter kit.
Crafting is even more fun with community, and there’s never been a better time to join. Become a demonstrator and enjoy all the perks that come with that, like a 20–25% product discount, exclusive early access to the latest releases and catalogs, the opportunity to earn a modest supplemental income, the chance to attend incredible training and crafting events, and so much more! Have you ever thought about joining the Stampin’ Up! community? Are you into scrapbooking and have you seen all the new scrapbook products Stampin’ Up! has? Wouldn’t you love to get all these products at a discount? Why not consider joining the Stampin’ Up! community between October 1-31, and save on everything you buy? Are you new to stamping and don’t know where to start, but would like to join to save? Ask me for help, I’m here to help and assist you anyway that I can. OCTOBER is the best time ever to join!! The best part is you can put November Online Exclusive preorder items in the Starter Kit. Contact me and we can talk about signing you up. There’s never an obligation to sell, you can join to enjoy the discount for yourself. Why not give it a try, you have nothing at all to lose!!
From October 1 to 31, anyone who purchases the Starter Kit can choose between two amazing offers. In addition to FREE shipping, FREE business supplies, and a FREE Paper Pumpkin kit, you can either get $125 worth of products for just $35, an amazing first time ever offer, OR $189 worth of products for just $99!
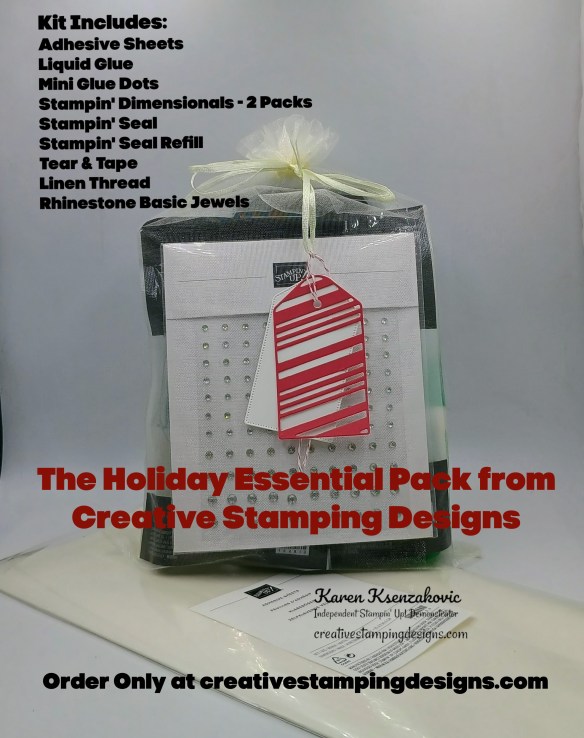
My Holiday Essential Pack is back for ordering October 11 – 31. Everyone seemed to love this essential pack when I offered it in August so I thought I’d offer it again since Holiday card making is approaching fast.
I’m offering a Holiday Essential Pack to get those holiday cards made. Let’s get a head on making those Holiday cards this year. Get all your adhesives ordered now so you don’t run out while you’re in the middle of making those Holiday cards.
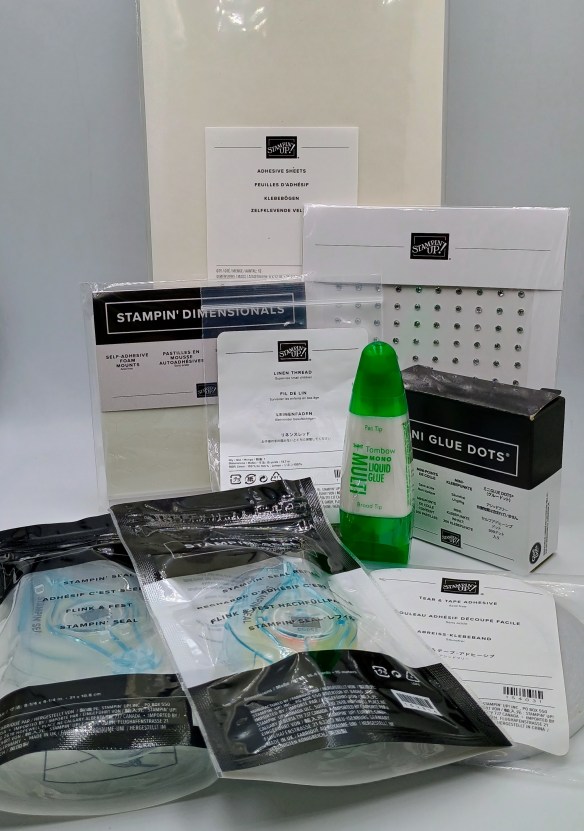
Each Kit will Include Full Packs of:
Adhesive Sheets
Liquid Glue
Mini Glue Dots
Stampin’ Dimensionals – 2 Packs
Stampin’ Seal
Stampin’ Seal Refill
Tear & Tape Adhesive
Linen Thread
Rhinestone Basic Jewels
If you were to order all this separately it would cost $65.25 + shipping. I’m offering it for $56.00 plus $9.00 for Priority Mail Shipping. All orders must be submitted by October 31st. I’ll be placing 2 separate orders, once on October 22 for the first group and a 2nd order on November 1st. Once everything arrives, I’ll package it up in a cut little bag and ship it out to you.
As an EXTRA BONUS I’ll also throw in a pack of Basic White Medium Envelopes
Click Hereto place your order for the Essential Pack Today!!Deadline to order is Friday October 31st
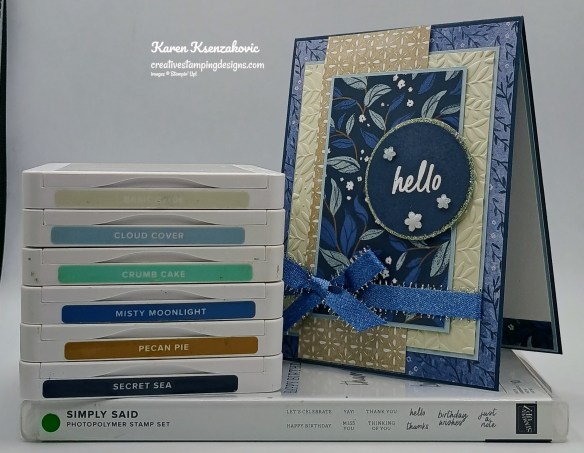
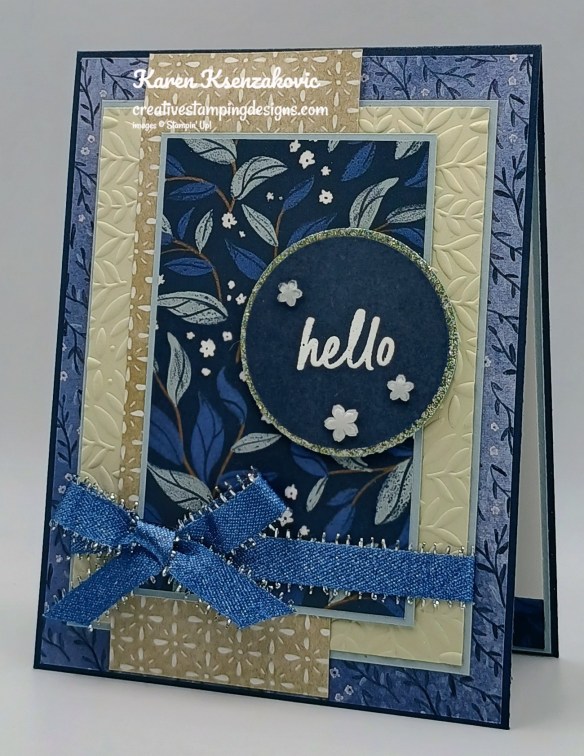
Good Thursday morning stamping friends and welcome to our Happy Inkin’ Thursday Blog Hop. If you are starting with me, thank you. I hope you will stop by everyone’s blog to see what they have created this week. If you are hopping over from Mary’s blog, thank you for stopping by. This week we have Color Challenge. If you’d like to see a quick video on how I made this card, Click Here to go to my Instagram Reels. Here is my card using this week’s colors
I used the Stampin’ Up! simply Said Photopolymer Stamp Set along with the Peaceful Garden Designer Series Paper, Peaceful Garden Glimmer Paper, Peaceful Greenery 3D Embossing Folder, 1 3/4″ & 1 7/8″ Circle Punches for my card today.
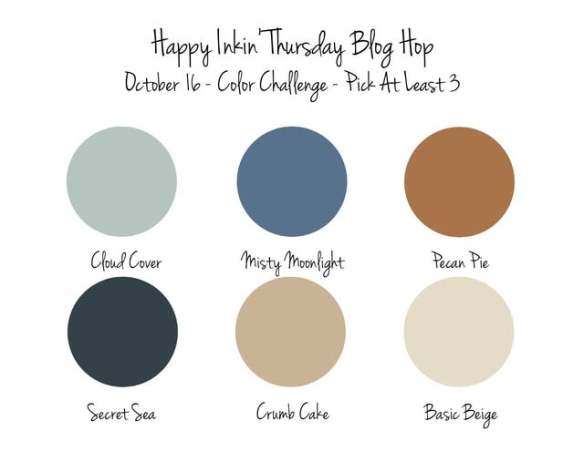
These are out colors for this week
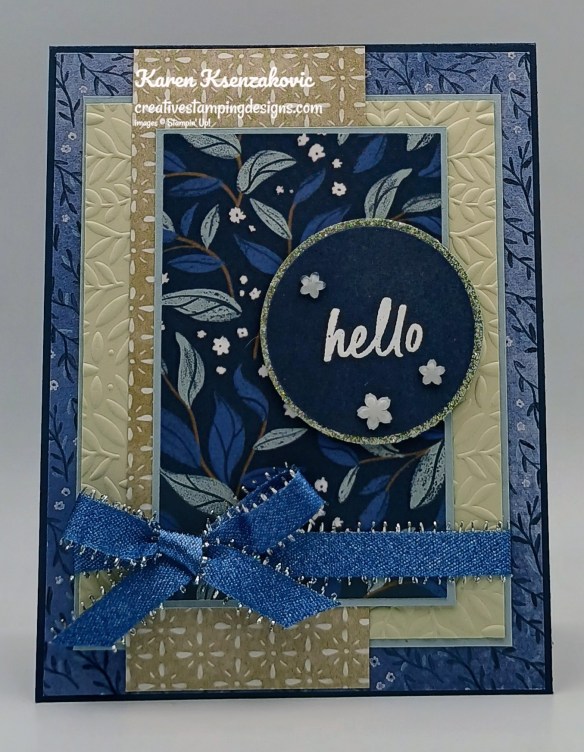
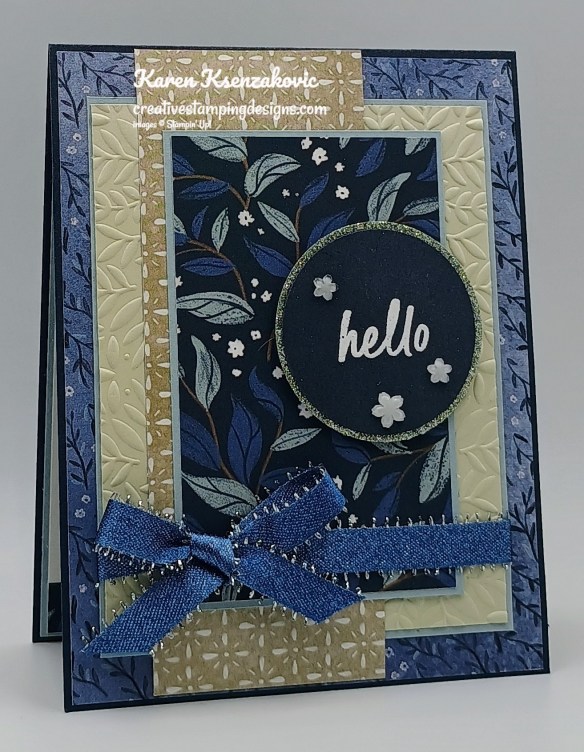
Adhere a panel of Peaceful Garden DSP to a Secret Sea card base. Emboss a panel of Basic Beige using the Peaceful Greenery EF. Adhere the embossed panel to a Cloud Cover mat.
Adhere a panel of Peaceful Garden DSP to the left side of the embossed panel. Adhere a panel of Peaceful Garden DSP to a Cloud Cover mat. Adhere the layered panel to the right of the embossed panel. Wrap a piece of Misty Moonlight Silver Edged 1/2″ Ribbon around the layered panel and tie a bow. Adhere the layered panel to the card front with Stampin’ Dimensionals.
Stamp the sentiment from Simply Said stamp set in Versamark Ink to a panel of Secret Sea. Sprinkle the sentiment with White Embossing Powder and set it with the Heat Tool. Cut the sentiment out with the 1 3/4″ Circle Punch. Cut a panel of Peaceful Garden Glimmer Paper using the 1 7/8″ Circle Punch. Adhere the sentiment to the Glimmer mat. Adhere the layered sentiment to the card front with Stampin’ Dimensionals. Add a few Hues of Blue Flowers to the car front.
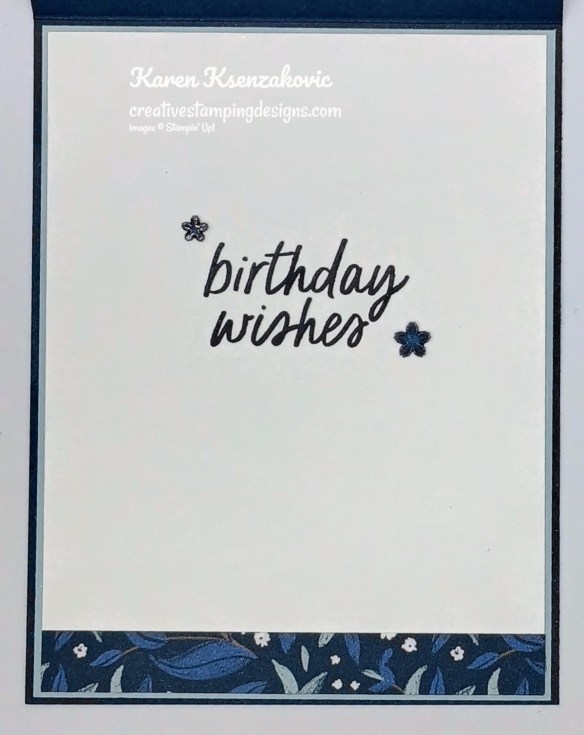
Stamp the sentiment from the Simply Said stamp set in Secret Sea Ink on a panel of Basic White. Adhere a panel of Peaceful Garden DSP to the bottom of the panel. Adhere the Basic White panel to a Cloud Cover mat then to the inside of the Secret Sea card base. Add a couple of the Hues of Blue Flowers by the sentiment.
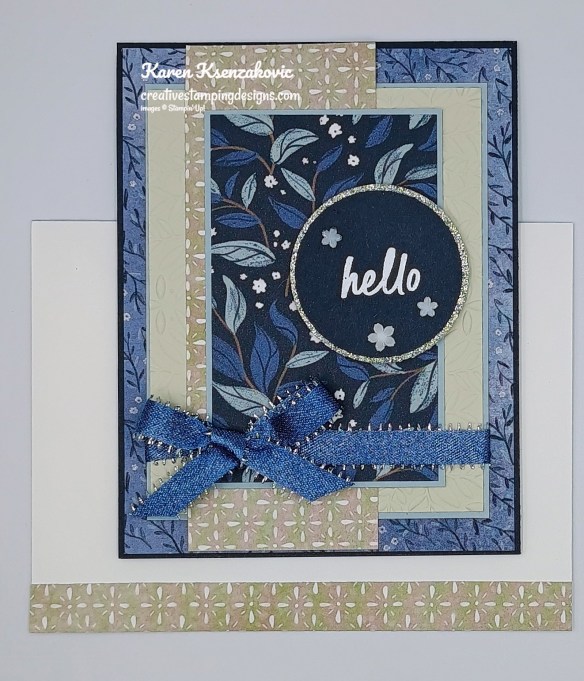
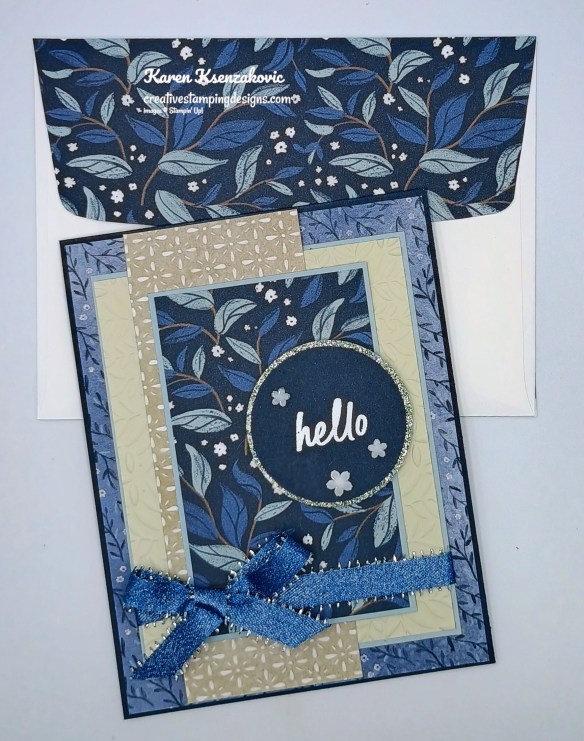
Decorate a Basic White Medium Envelope to complete the card. Adhere a strip of Peaceful Garden DSP to the envelope front and a panel to the envelope flap.
Thank you for stopping by my blog today. Now that you’ve seen my card, let’s get on with the hop! Click the button below to hop over to see what Akiko has created. Happy Hopping!!
Just in case you get lost along the way, here is a list of the team members involved in the hop today.
If you need any stamping supplies, I’d love to be your Demonstrator. Just click HERE to go directly to my online store or drop me an email if you have any questions.
Basic Beige Cardstock 3 1/2″ x 4 1/2″(embossed panel)
Basic White Cardstock 4″ x 5 /4″(inner liner)
Cloud Cover Cardstock 3 5/8″ x 4 5/8″(embossed panel mat), 2 1/2″ x 4″(card front panel mat), 4 1/8″ x 5 3/8″(inner liner mat)
Secret Sea Cardstock 4 1/4″ x 11″(card base scored & folded at 5 1/2″), 2 1/4″ x 2 1/4″(sentiment)
Peaceful Garden Designer Series Paper 4 1/8″ x 5 3/8″(card front), 2″ x 5 3/8″ & 2 3/8″ x 3 7/8″(card front panels), 1/2″ x 4″(inner liner), 1/2″ x 6″ & 2 1/4″ x 6″(envelope)
Peaceful Garden Glimmer Paper 2 1/4″ x 2 1/4″(sentiment mat)


![Words For The Season Bundle (English) [ 165798 ]](https://assets1.tamsnetwork.com/images/EC042017NF/165798s.jpg "Words For The Season Bundle (English) [ 165798 ]")
![Words For The Season Cling Stamp Set (English) [ 165716 ]](https://assets1.tamsnetwork.com/images/EC042017NF/165716s.jpg "Words For The Season Cling Stamp Set (English) [ 165716 ]")
![Words For The Season Dies (English) [ 165797 ]](https://assets1.tamsnetwork.com/images/EC042017NF/165797s.jpg "Words For The Season Dies (English) [ 165797 ]")
![Basic White 8 1/2" X 11" Cardstock [ 166780 ]](https://assets1.tamsnetwork.com/images/EC042017NF/166780s.jpg "Basic White 8 1/2\" X 11\" Cardstock [ 166780 ]")
![Cloud Cover 8 1/2" X 11" Cardstock [ 165621 ]](https://assets1.tamsnetwork.com/images/EC042017NF/165621s.jpg "Cloud Cover 8 1/2\" X 11\" Cardstock [ 165621 ]")
![Secret Sea 8 1/2" X 11" Cardstock [ 165624 ]](https://assets1.tamsnetwork.com/images/EC042017NF/165624s.jpg "Secret Sea 8 1/2\" X 11\" Cardstock [ 165624 ]")
![Peaceful Garden 12" X 12" (30.5 X 30.5 Cm) Designer Series Paper [ 165917 ]](https://assets1.tamsnetwork.com/images/EC042017NF/165917s.jpg "Peaceful Garden 12\" X 12\" (30.5 X 30.5 Cm) Designer Series Paper [ 165917 ]")
![Silver 12" X 12" (30.5 X 30.5 Cm) Foil Sheets [ 163387 ]](https://assets1.tamsnetwork.com/images/EC042017NF/163387s.jpg "Silver 12\" X 12\" (30.5 X 30.5 Cm) Foil Sheets [ 163387 ]")
![Secret Sea Classic Stampin' Pad [ 165285 ]](https://assets1.tamsnetwork.com/images/EC042017NF/165285s.jpg "Secret Sea Classic Stampin' Pad [ 165285 ]")
![Versamark Pad [ 102283 ]](https://assets1.tamsnetwork.com/images/EC042017NF/102283s.jpg "Versamark Pad [ 102283 ]")
![Metallics Wow! Embossing Powder [ 165678 ]](https://assets1.tamsnetwork.com/images/EC042017NF/165678s.jpg "Metallics Wow! Embossing Powder [ 165678 ]")
![Heat Tool (Us And Canada) [ 129053 ]](https://assets1.tamsnetwork.com/images/EC042017NF/129053s.jpg "Heat Tool (Us And Canada) [ 129053 ]")
![Rhinestone Basic Jewels [ 144220 ]](https://assets1.tamsnetwork.com/images/EC042017NF/144220s.jpg "Rhinestone Basic Jewels [ 144220 ]")
![Basic White Medium Envelopes [ 159236 ]](https://assets1.tamsnetwork.com/images/EC042017NF/159236s.jpg "Basic White Medium Envelopes [ 159236 ]")

![Adhesive Sheets [ 152334 ]](https://assets1.tamsnetwork.com/images/EC042017NF/152334s.jpg "Adhesive Sheets [ 152334 ]")


![Take Your Pick [ 144107 ]](https://assets1.tamsnetwork.com/images/EC042017NF/144107s.jpg "Take Your Pick [ 144107 ]")


![Peace On Earth Photopolymer Stamp Set (English) [ 165918 ]](https://assets1.tamsnetwork.com/images/EC042017NF/165918s.jpg "Peace On Earth Photopolymer Stamp Set (English) [ 165918 ]")
![Textured Notes Cling Stamp Set (English) [ 165548 ]](https://assets1.tamsnetwork.com/images/EC042017NF/165548s.jpg "Textured Notes Cling Stamp Set (English) [ 165548 ]")
![Basic White 8 1/2" X 11" Thick Cardstock [ 159229 ]](https://assets1.tamsnetwork.com/images/EC042017NF/159229s.jpg "Basic White 8 1/2\" X 11\" Thick Cardstock [ 159229 ]")
![Peaceful Garden 12" X 12" (30.5 X 30.5 Cm) Glimmer Paper [ 165929 ]](https://assets1.tamsnetwork.com/images/EC042017NF/165929s.jpg "Peaceful Garden 12\" X 12\" (30.5 X 30.5 Cm) Glimmer Paper [ 165929 ]")
![Drusy Adhesive Backed Embellishments [ 164223 ]](https://assets1.tamsnetwork.com/images/EC042017NF/164223s.jpg "Drusy Adhesive Backed Embellishments [ 164223 ]")


![Simply Said Mix & Match Photopolymer Stamp Set (English) [ 163756 ]](https://assets1.tamsnetwork.com/images/EC042017NF/163756s.jpg "Simply Said Mix & Match Photopolymer Stamp Set (English) [ 163756 ]")
![Basic Beige 8 1/2" X 11" Cardstock [ 164511 ]](https://assets1.tamsnetwork.com/images/EC042017NF/164511s.jpg "Basic Beige 8 1/2\" X 11\" Cardstock [ 164511 ]")
![Basics Wow! Embossing Powder [ 165679 ]](https://assets1.tamsnetwork.com/images/EC042017NF/165679s.jpg "Basics Wow! Embossing Powder [ 165679 ]")
![Peaceful Greenery 3 D Embossing Folder [ 165928 ]](https://assets1.tamsnetwork.com/images/EC042017NF/165928s.jpg "Peaceful Greenery 3 D Embossing Folder [ 165928 ]")
![1-3/4" (4.4 Cm) Circle Punch [ 119850 ]](https://assets1.tamsnetwork.com/images/EC042017NF/119850s.jpg "1-3/4\" (4.4 Cm) Circle Punch [ 119850 ]")
![1 7/8" (4.8 Cm) Circle Punch [ 165259 ]](https://assets1.tamsnetwork.com/images/EC042017NF/165259s.jpg "1 7/8\" (4.8 Cm) Circle Punch [ 165259 ]")
![Hues Of Blue Flowers [ 165930 ]](https://assets1.tamsnetwork.com/images/EC042017NF/165930s.jpg "Hues Of Blue Flowers [ 165930 ]")
![Misty Moonlight & Silver Edged 1/2" (1.3 Cm) Ribbon [ 165931 ]](https://assets1.tamsnetwork.com/images/EC042017NF/165931s.jpg "Misty Moonlight & Silver Edged 1/2\" (1.3 Cm) Ribbon [ 165931 ]")

